1
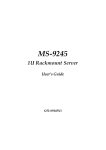
Preliminary MAVIX -1- MAVIX MANAGEMENT SUITE MAVIX System Configurator MAVIEW Player StreamR, Network Video Recording System, MAVIEW Console --- USER MANUAL --(version 6.15.12) Preliminary MAVIX -2- TABLE OF CONTENTS OVERVIEW .................................................................................................................................................... 4 SYSTEM DESCRIPTION ......................................................................................................................... 5 GENERAL GUIDE LINE FOR SETTING UP AND CONFIGURING A SYSTEM. .............................. 7 USING THE SYSTEM CONFIGURATOR ....................................................................................... 8 UNITS: ............................................................................................................................................... 9 ADD\EDIT\REMOVE ............................................................................................ 9 DUPLICATE .....................................................................................................10 REMOVE ALL ...................................................................................................10 CONFIGURE & TEST ..........................................................................................13 UPDATE FIRMWARE - .........................................................................................16 RECORDERS : ................................................................................................................................. 18 ADD\EDIT\REMOVE ...........................................................................................18 SITES: .............................................................................................................................................. 18 ADD\EDIT\REMOVE ...........................................................................................18 USERS: ............................................................................................................................................ 20 ADD\EDIT\REMOVE ...........................................................................................20 MAVIEW PLAYER APPLICATION ................................................................................................ 23 FILE: ................................................................................................................................................ 26 VIEW .............................................................................................................26 SEARCH ..........................................................................................................27 ACTION ........................................................................................................................................... 28 RECORD .........................................................................................................28 SNAPSHOT .......................................................................................................28 CONFIGURATION .......................................................................................................................... 28 REFRESH ........................................................................................................28 CONTROL AREA: ........................................................................................................................... 29 STREAMR RECORDING SYSTEM ................................................................................................ 31 STREAMR HARDWARE ............................................................................................................... 31 STREAMR EXTERNAL INTERFACES .........................................................................31 INSTALLATION & SETUP ......................................................................................33 DELIVERABLES .................................................................................................33 STREAMR RECORDING APPLICATION ..................................................................................... 34 DAYS TO KEEP: .................................................................................................35 VIDEO ROOT DIRECTORY: ...................................................................................35 FILE LENGTH IN MINUTES: ..................................................................................35 Preliminary MAVIX -3- RECORDING ................................................................................................................................... 36 WEEKLY PROGRAM............................................................................................36 CONFIGURATION ..............................................................................................38 REFRESH ........................................................................................................38 MAIN WINDOW............................................................................................................................. 38 MAVIEW CONSOLE ............................................................................................................................... 40 MAP DISPLAY: .............................................................................................................................. 42 ALARM LOG: ................................................................................................................................. 43 CONTROL CENTER AREA: .......................................................................................................... 44 GENERAL COMMANDS: .............................................................................................................. 45 TIME AND ZONE AREA ............................................................................................................... 46 GRAPHIC EDITOR ......................................................................................................................... 46 SITE: .............................................................................................................48 DEVICE: .........................................................................................................48 ALARMS GRAPHIC: ............................................................................................48 JOYSTICK: .......................................................................................................48 MANUAL RECORDING PARAMETERS:......................................................................48 EVENTS SETUP .............................................................................................................................. 49 TROUBLESHOOTING ..................................................................................................................... 53 Preliminary MAVIX -4- Overview This User Manual relates to the diverse components of MAVIX Management Suite Package. MAVIX Management Suite is a set of applications that enables Surveillance Systems operators to easily manage and configure their MediaRacer installations. The applications included are: The System Configurator, for defining designing and testing the system. MAVIEW console, the management application. StreamR networked recording system, which captures and records video directly form the IP network stream. MAVIEW player which allows personnel other than operators to access and view the live video streams, as well as old video files recorded by the StreamR application. Preliminary MAVIX -5- System Description MAVIX, the technology world leader in digital surveillance solutions over IP networks, envisioned and implemented the right architecture for integrated digital solutions over IP infrastructures, the “Virtual Matrix”. The Virtual Matrix is a set of protocols algorithms and mechanisms that allow unlimited number of sources to connect to unlimited number of targets over an IP layer. The sources and targets connect in a peer-to-peer fashion, and any IP entity in the network may act as both a source and a target, thus allowing bi-directional links. In addition the Virtual Matrix includes a complete set of keep-alive & recovery protocols that assure the resilience of the implementation. The Virtual Matrix is the only field proven solution for small, medium and large surveillance installations available in the market today, and it has been successfully implemented in innumerable installations all over the world during the last 5 years. MAVIX has introduced the first truly integrated solution for Surveillance applications. This solution includes the MediaRacer family of multimedia gateways, Preliminary MAVIX -6- Figure 1: MAVIX Management Architecture The System Configurator is the main tool for configuring building and maintaining the system, as well as testing and adjusting the devices (Cameras, monitors, Audio units ...) which it contains. And therefore will serve as the basis for the operation of all entities Without a properly installed System Configurator, all other applications: Maview Player, StreamR and Console will not run. It is therefore recommended that prior to installing any application, you first install and run the Configurator to setup the system. Once the system has been properly configured and tested, you may continue to install other applications. A typical installation consists of one or more Geographical sites, each of which may contain Surveillance components (cameras, intercoms, monitors, PAS, VMS, sensors, relays, etc) and recording units (StreamR). Every operator either using or configuring the system, is assigned a User Login ID and Password which he should use to access all 4 applications . Preliminary MAVIX -7- Every User/Operator, defined by the System Configurator may be granted access rights to one or more sites defined in the installed system. Once a user has an access right to a specific site, he may access ALL devices and recorders defined for that site. A user may access more than one site, and a single site may be accessed by more than one user. General guide line for setting up and configuring a system. Define the devices in your system (Cameras, Monitors, Recorders …) . Specify their IP addresses, types, names, etc… Update their firmware if necessary. Test the units to make sure they are properly configured and installed. And adjust their parameters if needed. Define the sites by giving them unique names (and an optional description) Define the Recorders by giving them unique names, and specifying their location on the network (Path to Video files, and database) Add devices and recorders (defined in step one) to you sites. Define the users in your system by assigning each a unique Login Id and Password in addition to other optional details. Specify the sites each user may access. The System configuration data created in the previous steps, is stored in a Database file Called Config.mdb. All other applications must have access to that file (Network or Local) When they are Launched for the first time, in order to be able to copy that file to their local path. From that point on the three applications: StreamR, Player and Preliminary MAVIX -8console are free to use the local imported copy of the configuration file. In case of changes in the configuration of the installed system, the applications can recopy the Configuration Database file (using the Configuration Refresh Option). All applications store in the system registry the original location of the Config.mdb file (which is also where the Configurator application is located) as well as other details necessary for them to function properly. The Config.mdb file and the system Registry entries should not be directly modified by users. Using the System Configurator In order to start the Configurator application, the application requires a user name and a password. The package is supplied with a default ready-to-use user name ‘Administrator’, and password ‘Admin’ for the Administrators user level. Preliminary MAVIX -9- All four applications in the MAVIX Management Suite, have the same Login Dialog Window in which the user should enter his User ID and Password. The Configurator includes the following menu and sub-menus : UNITS: Add\Edit\Remove Allows the user to define the system units and devices, first select the unit type. A unit may be defined as one of the following types : MR1000/C MR1000/M MR1001/C MR1001/M MR100/CM MR150/CM The devices which may be connected to a unit are: Camera Monitor Sensor\Alarm Source (Digital Input) Digital Output (Relay) RS232 (including RS485) Microphone Speaker For PTZ cameras the User selects the corresponding PTZ Checkbox, PTZ Protocol and related serial port of the station. Preliminary MAVIX - 10 The user should allocate a significant and unique name to the unit, allocate the required IP address and select the type of unit. (listed above). The interface in a graphical, tree like presentation, displays the list of defined entities. The User may add new units, remove or edit defined units by pressing the ADD or REMOVE buttons or by double-clicking an existing unit for editing. (See figure 2). A Ping function allows the user to check or scan for live units in the network. (See figure 3) Duplicate Instead of adding units manually in single steps, any defined station may be automatically duplicated (cloned) along with its devices. The user may mark any station from the units tree (on the left side of the form), and press the duplicate button. A dialog will appear asking the user to select the number of times he would like to duplicate the station. (1 – 50). IP addresses and station names will generated automatically in an incremental order, starting from the values of the original station. After pressing the apply button, all new stations will be added and displayed on the station list. This option should save the user time when adding units to an empty database. Remove All Pressing the Remove-All button on the upper left corner of the window, will delete all defined units from the system. After deletion, an empty system tree will be displayed. (All defined sites containing units, will be deleted too). (See figure 2). Preliminary MAVIX - 11 - Figure 2: Configurator: Add Units. Figure 3: Configurator: Ping dialog. Preliminary MAVIX - 12 - On quitting the Add\Remove dialog , a reminder popup will appear prompting the user to add the newly defined units and devices to a site. Figure 4: Configurator: Update sites reminder. Pressing ‘YES’ will bring the user directly to the Site Configuration dialog (see: SITES: \Add\Edit\Remove:) Preliminary MAVIX - 13 - Configure & Test The Configure & Test process of the system includes the setup of all required parameters for the system components, such as video parameters (resolution, brightness, contrast, etc), audio parameters (volume), recording parameters, serial port connection parameters and network parameters (frame rate, bit rate). As well as the connections between the different units (Camera to Monitor,Microphone to Speaker, Transparent RS232 and I/O connection) The Configure & Test Process should be performed after completion of the System Building Process as described above, and after physically connecting the units to the network. The tabbed window contains four different forms: Video, Audio, RS232, Digital I/O. (See figure 5) 1. VIDEO: The video Configure & Test window allows the user to control the video parameters as follows : Video Standard (PAL\NTSC) Color/BW Resolution (MR1000 type): Full, SIF, QSIF, QQSIF, QQQSIF. Resolution (MR100 type): 2CIF, CIF, QCIF . Resolution (MR 150 type): 4CIF, 2CIF, CIF, QCIF. GOP (Group Of Frames) (0 – 500) (MR 100 and 150 types) Frames per second: NTCS: (Full, 30, 15, 10, 7.5, 6, 5, 3, 2, 1, 1/2, 1/5, 1/10) Frames per second: PAL: (Full, 25, 12.5, 8.3, 6.25, 5, 3.12, 2, 1.5, 1 1/2, 1/4, 1/10. Brightness. Contrast. Saturation. Bit Rate (MR1000 type): 1000 to 9000 bps. Preliminary MAVIX - 14 Bit Rate (MR100 type): 1000 to 2000 bps. Bit Rate (MR150 type): 10 to 4000 bps. Note: These parameters are defined for the selected camera unit ONLY. The user may check the validity of the parameters by either viewing the resulting video picture at the video window (Desktop Player), or by performing a “Connect” command to connect a Camera from list A to a Unit with a monitor on list B. The connection status Connected/Disconnected is displayed at the bottom of the form. 2. AUDIO: The Audio Configure & Test window allows the user to control and adjust the microphone and speakerphone volumes for each unit. It is possible to connect a Microphone from a unit on list A(B) to a Speaker from a unit on List B(A). The connection status Connected/Disconnected is displayed at the bottom of the form. 3. RS232: In the Serial Port window, the user may define the connection parameters for both COM1 (RS-232) and COM2 (RS232/RS485 Jumper selectable) ports. The parameters defined include the BAUD rate, number of data bits, stop bits, parity and flow control. The connection status Connected/Disconnected is displayed at the bottom of the form. Preliminary MAVIX - 15 4. Digital I/O: The Digital I/O Configure & Test window is intended to allow The user to check the reception of alarms and the activation of external devices through the Digital Input\Output ports of the units. Also a transparent connection between a left side and a right side unit may be set and checked pressing the connect button at the bottom of the from. The connection status Connected/Disconnected is displayed at the bottom of the form. Figure 5 Configurator: Units configuration Preliminary MAVIX - 16 - Update Firmware In this form the user may retrieve update or reset the firmware of the selected unit. The user must first make sure the unit is properly connected to the network and then enter its IP Address. In order to retrieve data from the unit, press the GET button and wait for the data to download via the FTP protocol to the local disk, then press the EDIT button to display the data in a text editor Where you can modify data and parameters, and finally press PUT to write your changes back to the unit. Make sure to specify the correct unit type (MediaRacer 100, 1000) before retrieving or writing data to the unit. BIOS may be updated only in MR1000 units, after entering User Name and Password. Codec software may be updated only in MR100\150 units. (See figure 6). File names for MR1000 units: Software: RamCmpr.bin. BIOS: RomCmpr.bin File names for MR100/150 units: Software: VxWorks.bin. BIOS: Codec.out. Unit reset (which lasts 20-30 sec’) will take place following any software update, or modification of Application or Network parameters, via the Taskaman.ini and Status.txt files. The user should wait for the reset process to complete. Preliminary MAVIX - 17 - Figure 6 Configurator: Firmware update. Preliminary MAVIX - 18 - Recorders : Add\Edit\Remove Allows the user to define new recorders (StreamR applications) for the system. Each recorder has a single database file (Video.mdb) into which it writes the details of every AVI file it records (Name, Date\Time, Location , and Camera). The Network path to this file should be specified by the user. In the second field the user must add the Network path to the recorded AVI files themselves .The Recording application is responsible for sharing this path across the network . Finally the user should assign a unique name to the new recorder. An existing recorder may be edited or deleted pressing the EDIT or REMOVE button respectively. SITES: Add\Edit\Remove Allows the user to define new sites. Every site should have a unique name and an optional description. An existing site may be edited or deleted pressing the EDIT or REMOVE buttons respectively.(See figure 7). Under the EDIT option, devices and recorders may be added to the site by selecting the required device\recorder from the devices tree (on the left side of the form) and clicking the ADD button, the added device\recorder will appear on the right tree which represents the devices\recorders of that site. (see figure 8). After defining a new empty site (and pressing ‘OK’ button), this Edit-Site dialog will appear automatically so that the user may add units\devices to the new site, (or quit, and add devices later at any stage using the EDIT option mentioned above). Preliminary MAVIX - 19 - Figure 7: Configurator: Site definition Figure 8: Configurator: Site editing. Preliminary MAVIX - 20 - Pressing the ‘OK’ button on the Edit-Site dialog will save the changes, and close the dialog window. If the edited site has no subscribed users, a popup reminder message will appear, asking the user whether he would like to grant users access to that site, Choosing ‘YES’ will bring the user directly to the Edit-User dialog Figure 9: Configurator: Access rights USERS: Add\Edit\Remove This form should be used to add new users to the system, or edit\delete defined users. Preliminary MAVIX - 21 - Figure 10: Configurator: User Configuration A new user is assigned a unique Login ID, Password and some optional details (phone number, name and Email). After entering the required fields and properly confirming the password, the APPLY button should be pressed to add the new user to the Database, At this stage the new user may be granted access to sites by selecting a site from the list of sites and clicking the ADD button at the bottom of the form. To remove a site from the user’s list of sites, select that site from the list and click the REMOVE button. The new defined user may use any application by entering his Login ID and password and have access only to the sites which appear on his user’s list of sites. If no sites are defined in the system, or the user has no access rights to any site, he will still be able to login into applications but will have no devices to access, and thus will not be able to perform any functions such as recording and viewing live or recorded video. To modify user details or add\remove subscribed Preliminary MAVIX - 22 sites, select ‘EDIT’ from the Users Configuration dialog, and the same ‘Add New User’ dialog will appear displaying the current details of the selected user, along with his subscribed sites. Figure 11: Configurator: User details. Note: Devices recorders, sites and users may be added edited, or deleted later at any Stage, using the System Configurator . The changes will be reflected in other applications by applying the Configuration Refresh function described earlier. Preliminary MAVIX - 23 - MAVIEW Player Application Please refer to Fig#13. The MAVIEW Player is a desktop application that allows users to connect to video cameras and view live video streams, (up to 4 cameras simultaneously) search and display video files from local disk or files recorded by StreamR applications, capture live video into local AVI files or single frame snapshot BMP files. The MAVIEW Player is intended for those users of the system, who are usually outside the Control Room, and do not require the extended capabilities of hardware based decompression and display on Analog monitors, as present in the Control room. In order to start the MAVIEW Player application, a user name and a password are required. The user name and the password shall be one of those defined in the System using the System Configurator application. The current User ID is displayed on the title bar of the main window. The main window of the MAVIEW Player consists of several areas: the display area, the menu area and the control area. Display Area: in this section 1 or 4 video windows are displayed, according to the Display Mode selected in the Control area. When in 4 Windows Mode, any single window may be selected by clicking on it with the Operations initiated by the Operator will be performed on the Selected window, while the other screens will continue with their defined operations. For example, in order to display a live video streaming on window 1, the operator must select window 1 on the display area by using the left mouse button, and then select the required video stream from the Camera List at the control section (See figure 13). Preliminary MAVIX - 24 As shown in the figure bellow, on the upper left side of the main window (Control area) there is a list of all cameras which belong to sites the logged in user has access to, the cameras may belong to one single site or several different sites. By default four live video screens are available for displaying live video stream. When a camera in the list is selected for display (by double clicking it), the video stream from that camera is displayed in the Selected Window. Double clicking a display window will bring it into full screen mode, and all other three display windows will disappear, double clicking that display window again will bring us back to quad mode display, and all four display windows will reappear. A single right click on a display window will cause a popup menu to be displayed with two options: Record and Snapshot. Selecting the first option will open a small dialog with two buttons Start and Stop, (See figure 12) to start recording the live video stream displayed on that window, the user should click the START button, the dialog frame will turn into red, and the caption ‘Recording’ will appear, to stop recording the user should click the STOP button, the caption ‘Recording’ will disappear. The recorded stream is stored on local disk as an AVI file. The name of the created file is a concatenation of the word Manual, the recording time and the suffix AVI (Example: Manual.142843.avi). Clicking the Snapshot option in the popup menu, will create on local disk a single snapshot BMP file of the displayed live video. While displaying live video stream, it is possible to switch between cameras, by simply selecting any one of the four active windows currently displaying live video, and then double clicking any other camera from the camera list (at the control area), the new selected camera will immediately start sending video stream to that window. Preliminary MAVIX - 25 - Figure 12: Player: Recording Video. Preliminary MAVIX - 26 - Figure 13: Player: Main window Menu: The Maview Player includes the following menu and sub-menus : FILE: View Allows the user to browse and display AVI files from local disk, or any remote disk on the Network, double clicking an AVI file on the browse dialog, will display that video file on the currently selected window on the display area. While playing back any video file a progress bar displaying the current progress of the play function will appear with the following functions: Preliminary MAVIX - 27 Play: Plays the recorded file according to the speed selected in the Speed Bar Pause: Pause the playing of the file Stop: Stops the playing of the file Fast Rewind: Fast Forward: Repeat : When this box is selected, the file is continuously replayed. Speed Bar: Sets the Speed of the Play function. Real: When this box is set, the file is played at real time . It is possible to jump to any required point at the recorded file without waiting for the play or FF functions to get there, by dragging the slider to the relative position along the slide bar. Upon Closing the display window (or selecting any other window not displaying a recorded AVI file) the slide bar will disappear. Search Selecting this option will open a dialog for searching the video Databases of StreamR (Recorder) applications. The upper left corner of the dialog window contains a list of all Recorder applications the current user may access, selecting one of the Recorders on that list and clicking the search button, will search the database of that recorder according to the search criteria selected by the user, which are: Date (Year, Day, Month), Time and camera name. The AVI files matching the search criteria (if any), will be listed on the search result window, along with the date and time they were created. The total number of records found will be displayed at the top of the list Preliminary MAVIX - 28 Double clicking an AVI file on that list will display its video stream, and the progress bar will appear. The most recent search results are kept in memory, and will be redisplayed when opening the search dialog again, until the clear button is clicked, or a new search is initiated. Figure 14: Player: Search video Archive ACTION Record (Will perform the same functions described in : Maviewplayer application – Display area). Snapshot (Will perform the same functions described in : Maview player application – Display area). CONFIGURATION Refresh This will recopy the configuration file (Config.mdb) to local application path, and any changes in the configuration relevant to current logged in user will be immediately reflected, (such as addition\removal of cameras and Preliminary MAVIX - 29 recorders). The user is presented with a dialog displaying the current known location of the original configuration file, (as kept in the system registry), the user may browse for a new location, or simply click the OK button to reimport the Config.mdb file from its currently displayed location. CONTROL AREA: The control area contains the list of all available cameras (determined by the system configurator) for displaying live video stream,. Below there are three slide bars for controlling the Brightness Contrast and Saturation of the live Video, as well as radio button controls for selecting the desired local frame rate of the Video stream. (See figure 15). At the bottom of the control area there are two buttons for switching between single (full screen) display mode, and quad display mode. (Double clicking a display window will do the same thing) .During its fixed and normal routine operation, the Maview player does not need any user intervention, other than switching between cameras. At any given time there is a caption displayed on the title bar of every display window, indicating its current operation (and name of file involved, if relevant). In case of an error or a problem an appropriate message is displayed, such as (Wait, busy, retrying ..) The PC platforms hosting a MAVIEW PLAYER application shall have the following minimum requirements: PC Pentium IV Processor Preliminary MAVIX - 30 - 256 MB RAM Windows Operating System, preferably XP PRO (also Windows NT or Win2000 are supported) DirectX 9.1 Windows Media Player CD Drive Figure 15: Player: Control area. Preliminary MAVIX - 31 - StreamR Recording System STREAMR HARDWARE The StreamR recording application is hosted by an industrial PC platform. The PC platforms includes the following components: Pentium III Celeron Processor Board, or better 128 MB RAM 10/100 baseT Network Interface Card 20 GB Hard Disk Drive (Optional 40/80/120 GB Hard Disk Drive) The PC platform hosts a Windows XP Operating System. The StreamR box physical dimensions are: W x D x H = 330mm x 410mm x 175mm Weight= 10 Kg STREAMR EXTERNAL INTERFACES Preliminary MAVIX - 32 - The StreamR box Front Panel includes the following interfaces Power On Switch Reset Switch Power On Led Hard Disk Activity Led Keyboard connector The StreamR box Rear Panel includes the following interfaces : StreamR Rear Panel Preliminary MAVIX - 33 - Processor Board: ◦ PS/2 Keyboard Connector ◦ PS/2 Mouse Connector ◦ COM-1 Port ◦ Video Board: ◦ VGA Connector ◦ NIC Board: ◦ LAN connector ◦ Activity Led ◦ 10-baseT selection Led ◦ 100-baseT selection Led Serial Ports Board: ◦ COMM-2 Port ◦ Parallel Port INSTALLATION & SETUP DELIVERABLES The StreamR box delivered has already been installed with the following applications: ◦ Windows XP Pro Operating System ◦ MAVIX System Configurator Application, which allows the configuration of the system ◦ StreamR Recording Application Preliminary MAVIX - 34 - STREAMR RECORDING APPLICATION The StreamR Recording application is the video recording application that performs the Recorder functionality. The StreamR is factory installed in the StreamR hardware unit. Similar to any other Mavix application, the StreamR depends on the system configuration file, but also has a local database created during the setup process of the unit, as described below. To enter the setup window the user should press the setup button while the slide bar is in progress, skipping that stage will bring the user straight into the main (and only) window of the Stream Application, and the Recorder will start recording right away, provided any cameras are defined for the current user and at least one has been selected for recording, otherwise the application will exit displaying the following message. The setup window (See figure 16) allows the user to perform all necessary setup procedures prior to the actual recording. Once the user enters the main setup dialog window after entering his ID and Password, he will be presented with a list of available cameras. By default all available cameras are selected for recording, unchecking a camera on the list will exclude it from the active recording list (until checked again). Bellow the list of cameras there are additional parameters for the user to specify : Preliminary MAVIX - 35 - Days to keep: (Default – 4), the number of days a recorded AVI file will be kept on disk. The StreamR application will automatically delete files (from disk and video database) older than the specified number of days, those file will no longer be available for display by the Maview Player application. Video Root Directory: (Default – C:\Video), specifies the location of the Video file on disk. The recorder will write the AVI files to that folder, and dynamically created subfolders. While the application is running, Every new day, exactly after midnight, a new subfolder will be created for storing the new video files, recorded on that day. The files are grouped in subdirectories by year, by month, and by day, making it easy and fast to directly recover a file. (See figure 16). File Length in minutes: (Default 1 – Minute), specifies the recorded time length of the video file, the application will automatically switch to a new created file when the time length has reached its specified limit. Specifying a shorter time length will obviously result in more files but with a smaller size. Preliminary MAVIX - 36 - Figure 16: StreamR: Setup Window The StreamR Local setup includes the following menu and sub-menus : RECORDING Weekly Program The user may open the weekly program dialog either by double clicking a camera, or by selecting (highlighting) a camera from the list and selecting the option from the menu.The user is presented with a dialog window which includes a date & time planner for a complete week. Every single (clickable) rectangle which represents 15 minutes of recording time, may Preliminary - 37 be either selected active (red) or inactive (green) . The recorder will automatically start recording video from the currently configured camera, when the time of day reaches a red square. The recorder will be inactive and remain idle for that camera, during a period of time represented by a green (inactive) rectangle. By default all rectangles are selected, and video will be constantly recorded from that camera. It is possible to select (unselect) multiple rectangles, either by clicking each one, or by dragging the mouse along the bar representing the days of the week. Three radio buttons at the bottom of the window enables the user to select (unselect) the whole week, or to restore the previously saved recording plan. The user may also change the default recording frame rate (25 PAL, 30 NTSC) to any other value represented by the radio button controls. Finally before closing the window, the user should click the save button. MAVIX Preliminary MAVIX - 38 Figure 17: StreamR: Recording Schedules Configuration Refresh This will recopy the configuration file (Comfig.mdb) to local application path, and any changes in the configuration relevant to current user, will be immediately reflected, (such as addition \removal of cameras). The user is presented with a dialog displaying the current known location of the configuration file, (as kept in the system registry), the user may browse for a new location, or simply click the OK button to import the Config.mdb file from its current original location. A user who wishes to change the default settings, may repeat the steps described above for any camera on the list. MAIN WINDOW Closing the main setup window, will bring us to the main (and only) recording window, in which every camera is represented by a small square shape label, in this version there are 120 squares indexed from 1 to 120, the color of the square indicates the current status of the camera it represents. RED – currently recording. GREEN – Active, but Idle. YELLOW - Error. At the bottom of the window, the free available disk space is displayed in units of Gigabytes , when the free disk space of the recording drives drops below 500 Megabytes (0.5 Giga), the recorder automatically starts deleting old AVI files to free disk space. Those deleted AVI files will no longer be available for display by the Maview player application. Preliminary MAVIX - 39 - Figure 18: StreamR: Main window. Preliminary MAVIX - 40 - MAVIEW Console The MAVIEW Console application is the main management tool for the System Operator. When clicking the MAVIEW Console icon the following window appears: (The User Name and the Password are those defined in the System Configurator) If the system is not using a dedicated Joystick for PTZ operation, then the following window appears: After pressing OK, the main window of the application appears: Preliminary MAVIX - 41 - Figure 19: Console: Main window. The Operator connects cameras to monitors by selecting the required camera, dragging & dropping it on the required monitor. The connection may be terminated by pressing the “x” button in the corresponding monitor. This mode of operation enables the operator to switch the scenes of the different cameras on the monitor. Double clicking a Camera Icon located in the surveillance area, will popup a window displaying the current video stream captured by the selected camera. User may zoom the live video , and control video parameters such as Brightness Contrast, and Color saturation. (See figure 20). Preliminary MAVIX - 42 - Figure 20: Console: Live video player The main window of the MAVIEW Console includes several areas: Map Display (Center) Alarm Log (Right) Control Center Area (Bottom) General Commands (Bottom Right) Time and Zones display (Upper Left) (See figure 19). MAP DISPLAY: In this part the actual view of the area under surveillance is displayed . The diverse surveillance components are positioned on the map using the setup graphic editor described below. The operator may tour the map, increase and decrease the zoom of the display by using the correspondent commands on the lower side of the display. Preliminary MAVIX - 43 - ALARM LOG: The alarm log presents a list of alarms received by the alarm sensors in the system, and displayed using the alarm names defined in the database. The operator may select a given alarm; view the related recorded event (if defined so in the alarm scenario) by double clicking in the alarm name. He may also perform the following actions (See figure 21). o Move to Archive: the recorded file is moved to an archive by selecting the alarm name and pressing the “Move to Archive” button. o Delete Event: The event is deleted o View Archive: the Operator may review the events in the archive. o Mark: Marks the selected event. Preliminary MAVIX - 44 - Figure 21: Console: Alarm log and general commands CONTROL CENTER AREA: This area includes the surveillance components installed in the control center, and controlled by the Console application. These components are defined using the Setup Graphic Editor described below. This area includes also a PTZ command center, Preliminary MAVIX - 45 which includes defined preset quick buttons. The PTZ command center performs the commands on the selected camera, provided it is defined as a PTZ device by the System Configurator. Figure 22: Console: Control area Figure 22: Console: PTZ control GENERAL COMMANDS: The general commands defined are: Start Recording, Stop Recording, Setup and Change operator o Start Recording: After selecting a camera, the video stream from that camera may be recorded by selected this command. This command sets an event in the alarm log. o Stop Recording: stops the recording. o Change Operator: allows the change of the operator without having to exit the application. When selecting this command, the system prompts for a new user name and password. o Setup: This command opens the Graphic Editor feature, as described below Preliminary MAVIX - 46 - TIME AND ZONE AREA This part includes six press buttons the user may use, to switch between the different Sites. Every site is represented by a graphic geographical map, along with the icon images of the various devices located within its boundaries. GRAPHIC EDITOR The graphic editor allows the Operator to design the look of the display, define and locate surveillance components and alarms on the screen. Preliminary MAVIX - 47 - Figure 23: Console: Graphic editor Preliminary MAVIX - 48 The Graphic Editor Window includes the following areas: Site: Allows the user to select the bitmaps to be used as a background. Device: Allows the user to add surveillance components to the site, allocate an icon to it, and position it on the map by using the “Locate” command and clicking on the required point on the map. (As already mentioned, the components should be defined by the System Configurator, and the console user should have an access right to those components). Camera devices may be positioned only on sites, Monitor devices may be located only in control centers. All other devices (RS232, Microphone, Speaker, Relay) may be positioned on either locations. Alarms Graphic: Allows the user to select alarms, from those defined by the Configurator, and position them on any spot on the site map by selecting the “Line” or “Square” commands, and clicking in the required location. The behavior of the system in response to a triggered alarm is described in the Event Setup section. Joystick: When a Joystick is attached to the workstation, This command allows the user to position a Joystick (if present) by pressing the Locate command., and clicking the required point on the map. Manual Recording Parameters: This box allows the user to define the recording parameters, length and frame rate, and the location of the recorded video clips, when selecting the “Start Recording” command, as described above. Preliminary MAVIX - 49 - EVENTS SETUP Selecting ‘Events’ from the Setup Selection window, will open the Alarm Setup dialog. A list of all defined alarms will be displayed on the left side of this dialog window along with a list of actions to performed in response to the selected alarm. An action may be: Upon checking an action from the list above, a list of relevant options will appear, from which the user will have to select one: The options are: For recording live video: Preliminary MAVIX - 50 - For Video to Analog Monitor: For Video to Computer Screen: For Connecting Audio: Preliminary MAVIX - 51 - For Relay Activation: For Computer Voice Alarm: For Connecting transparent RS232: Preliminary MAVIX - 52 - At the bottom of the window, a list of all alarms, followed by the corresponding action is shown, from which the user may also delete entries. Note: the “Locate” commands do not operate on a “Drag&Drop” basis, but each click on the map area will position the selected device on the click point. Preliminary MAVIX - 53 - TROUBLESHOOTING Most of the problems found in the operation of the MAVIX Management Suite components are related to the IP environment and data-com equipment, and as such require the use of IP related capabilities in order to solve them In case of failure to record video streams, the common tools to be used are: Ping: Use this IP tool to check whether the recording unit “sees” the camera station to be recorded. IP Addressing: Check the IP addresses of the units involved. If the units are connected to the same sub-net, then verify their IP addresses. If the units are connected to different sub-nets, verify that the default gateways addresses in both ends are correct, and by using the Ping tool verify the units at both ends “see” one each other. Sniffer: Check whether the network throughput is reasonable, about 75% for switched environments, and 40% for shared environments. CPU usage: Check that the CPU usage in the StreamR unit is about 50% when recording. Firmware version: Make sure the software version installed in the Mediaracer unit is up to date. If not, use the System Configurator to upload the correct version to the unit. System Configurator: Remember that every user or hardware device must be first defined by the Configurator application, and access rights should be given to users intending to use those devices. Following this step, the other applications must be updated (using the Refresh-Configuration option) so that changes or new definitions will be reflected. Preliminary MAVIX - 54 Network connections: Make sure the various network definitions regarding shared directories, names, access rights etc… between computers running Mavix Applications are properly defined. If necessary please do not hesitate to contact MAVIX support team at: [email protected]