1
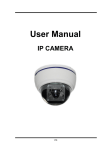
SF2012H-B IP Camera User’s Manual Dec. 2011 WARINGS TO REDUCE THE RISK OF FIRE OR ELECTRIC SHOCK, DO NOT EXPOSE THIS PRODUCT TO RAIN OR MISTURE. DO NOT INSERT ANY METALLIC OBJECT THROUGH VENTILATION GRILLS. CAUTION CAUTION RISK OF ELECTRIC SHOCK DO NOT OPEN CAUTION:TO REDUCE THE RISK OF ELECTRIC SHOCK. DO NOT REMOVE COVER (OR BACK). NO USER-SERVICEABLE PARTS INSIDE. REFER SERVICING TO QUALIFIED SERVICE PERSONNEL. COPYRIGHT © 2011 AVer Information Inc. All rights reserved. No part of this document may be reproduced or transmitted in any form, or by any means without the prior written permission of AVer Information Inc. AVer Information Inc. reserves the rights to modify its models, including their characteristics, specifications, accessories and any other information stated herein without notice. The official printout of any information shall prevail should there be any discrepancy between the information contained herein and the information contained in that printout. WE PROVIDES NO WARRANTY WITH REGARD TO THIS MANUAL, THE SOFTWARE OR OTHER INFORMATION CONTAINED HEREIN AND HEREBY EXPRESSLY DISCLAIMS ANY IMPLIED WARRANTIES OF MERCHANTABILITY OR FITNESS FOR ANY PARTICULAR PURPOSE WITH REGARD TO THIS MANUAL, THE SOFTWARE OR SUCH OTHER INFORMATION. IN NO EVENT SHALL WE BE LIABLE FOR ANY INCIDENTAL, CONSEQUENTIAL OR SPECIAL DAMAGES, WHETHER BASED ON TORT, CONTRACT, OR OTHERWISE, ARISING OUT OF OR IN CONNECTION WITH THIS MANUAL, THE SOFTWARE OR OTHER INFORMATION CONTAINED HEREIN OR THE USE THEREOF. TRADEMARK “AVer” is a trademark owned by AVer Information Inc. Other trademarks used herein for description purpose only belong to each of their companies. Table of Contents I. PREFACE ................................................................................................................................................. 1 II. PRODUCT SPECIFICATIONS .................................................................................................................. 1 III. PRODUCT INSTALLATION ...................................................................................................................... 3 A. MONITOR SETTING .................................................................................................................................. 3 B. HARDWARE INSTALLATION AND I/O PIN ASSIGNMENT ................................................................................. 4 C. IP ASSIGNMENT ...................................................................................................................................... 7 D. INSTALL ACTIVEX CONTROL...................................................................................................................... 9 IV. LIVE VIDEO .............................................................................................................................................11 V. CONFIGURATION .................................................................................................................................. 13 A. SYSTEM................................................................................................................................................ 14 B. NETWORK ............................................................................................................................................. 17 C. A/V SETTING ........................................................................................................................................ 21 D. EVENT LIST ........................................................................................................................................... 26 VI. NETWORK CONFIGURATION ............................................................................................................... 32 VII. FACTORY DEFAULT .............................................................................................................................. 34 VIII. PACKAGE CONTENTS .......................................................................................................................... 34 APPENDIX I ................................................................................................................................................... 35 I. Preface This is a 2M-Pixel CMOS IP camera with the web server built in. User can view real-time video via IE browser. It supports H.264, JPEG and MPEG4 (3GPP only) video compression which provides smooth and high video quality. The video can be stored in the SD card and playback remotely. With user friendly interface, it is an easy-to-use IP camera which is designed for security application. II. Product Specifications Support video out High Definition 30FPS support(720P) IP66 2M-Pixel CMOS Sensor Power over Ethernet available IR LED Built in 20M available Mechanism IR Cut Filter Available H.264/ MJPEG/ MPEG4 (3GPP Only) Compression Format SD Card backup 2-way audio Support Cell phone/PDA/3GPP SDK for Software Integration Free Bundle 36 Channel Recording Software Specifications Hardware CPU ARM 9 ,32 bit RISC RAM 256MB Flash 16MB Image Sensor 1/3” CMOS(2M-Pixel) Support DC IRIS Yes Lens Type Vari-focal 3.6~16mm Lens ICR Mechanism IR cut Filter LED Built-in 35 IR LED IR Distance-20M I/O 1 in/ 1 Relay Out Video Out x1 Audio In x1 Audio Out x1 Power over Ethernet Yes Power Consumption DC 12V Dimensions ∮83mm * H180mm 1 Network Ethernet 10/ 100 Base-T Network Protocol HTTP, TCP/ IP, UDP, SMTP, FTP, PPPoE, DHCP, DDNS, NTP, UPnP, 3GPP System 1600x1200, 1280x1024, 1280x960,1280x720, 800x600,640x480, 320x240, Video Resolution 176x144 Video Adjust Brightness, Contrast, Sharpness, BLC, Night Mode Triple Streaming Yes Image Snapshot Yes Full Screen Monitoring Yes Privacy Mask Yes, 3 different areas Compression Format H.264/ JPEG/ MPEG4 (3GPP only) Video Bitrates Adjust CBR, VBR Motion Detection Yes, 3 different areas Triggered Action Mail, FTP, Save to SD card, Relay Pre/ Post Alarm Yes, configurable Security Password protection Firmware Upgrade HTTP mode, can be upgraded remotely Simultaneous Connection Up to 10 Audio Yes, 2-way SD card management Recording Trigger Motion Detection, IP check, Network break down (wire only),Schedule, Relay Video Format AVI, JPEG Video Playback Yes Delete Files Yes Web browsing requirement OS Windows 2000, XP, Vista, 7 Microsoft IE 6.0 or above Hardware Suggested Intel Dual Core 1.66G,RAM: 1024MB, Graphic card: 128MB Minimum Intel-C 2.8G, RAM: 512MB, Graphic card: 64MB 2 III. Product Installation A. Monitor Setting 1. Right-Click on the desktop. Select “ Properties” 2. Change color quality to highest (32bit). 3 B. 1. Hardware Installation and I/O Pin Assignment Connect a power adapter and IP Camera to PC or local network. 3.5mm Phone Jack (Audio Input, Red) 3.5mm Phone Jack (Audio Output, Green) 2. I/O Control Instruction I/O terminal connector – used in application, for e.g., motion detection, event triggering, alarm notifications. It provides the interface to: 1 Digital Input (GND+Alarm) – An alarm input for connecting devices that can toggle between an open and closed circuit, for example: PIRs, door/window contacts, glass break detectors, etc. When a signal is received the state changes and the input becomes active. Relay output (COM +N.O.) / (COM+N.C.) – An output to Relay switch, for example: LEDs, Sirens, etc Digital Input Alarm Input 1. GND (Ground) : Initial state is LOW 2. Alarm : Max. 50mA, DC 3.3V Relay Output 1. N.C. (Normally Close): Max. 1A, 24VDC or 0.5A, 125VAC 2. COM: (Common) 3. N.O. (Normally Open): Max. 1A, 24VDC or 0.5A, 125VAC ALARM IN RELAY OUT 4 Relay 1. Digital Input connection Door/Window GND Contacts ALARM N.C. COM N.O. 2. Relay Output Connection GND ALARM N.C. COM N.O. OR GND ALARM N.C. COM N.O. 5 3. PoE ( Power Over Ethernet) [Note] 802.3af, 15.4W PoE Switch is recommended Power over Ethernet (PoE) is a technology that integrates power into a standard LAN infrastructure. It enables power to be provided to the network device, such as an IP phone or a network camera, using the same cable as that used for network connection. It eliminates the need for power outlets at the camera locations and enables easier application of uninterruptible power supplies (UPS) to ensure 24 hours a day, 7 days a week operation. PoE IP Camera Ethernet PoE Switch Ethernet Cable Ethernet Cable PoE IP Camera 6 C. IP Assignment 1. 2. 3. 4. 5. Use the software, “IP Installer” to assign the IP address of IP CAMERA. The software is in the attached software CD. IP installer supports two languages IPInstallerCht.exe: Chinese version IPInstallerEng.exe: English version There are 3 kinds of IP configuration. Fixed IP (Public IP or Virtual IP) DHCP (Dynamic IP) Dial-up (PPPoE) Execute IP Installer For Windows XP SP2 user, it may popup the following message box. Please click “Unblock”. IP Installer configuration: 6. 7. IP Installer will search all IP Cameras connected on Lan. The user can click “Search Device” to search again. Click one of the IP Camera listed on the left side. The network configuration of this IP camera will show on the right side. You may change the “name” of the IP Camera to your preference (eg: Office, warehouse). Change the parameter and click “Submit” then click “OK”. It will apply the change and reboot the Device. 7 8. Please make sure the subnet of PC IP address and IP CAM IP address are the same. [Example] The same Subnet: IP CAM IP address: 192.168.1.200 PC IP address: 192.168.1.100 Different Subnets: IP CAM IP address: 192.168.2.200 PC IP address: 192.168.1.100 To Change PC IP address: Control PanelNetwork ConnectionsLocal Area Connection PropertiesInternet Protocol (TCP/IP) Properties Please make sure your IP Camera and PC have the same Subnet. If not, please change IP Camera subnet or PC IP subnet accordingly. 9. A quick way to access remote monitoring is to left-click the mouse twice on a selected IP Camera listed on “Device list” of IP Installer. An IE browser is opened. 8 10. Then, please key in the default user name and password is “admin”. D. Install ActiveX control For the first time to view the camera video via IE, it will ask you to install the ActiveX component. If the installation failed, please check the security setting for the IE browser. 1. IE Tools Internet Options… Security Tab Custom Level… Security Settings Download unsigned ActiveX controls Select “Enable” or Prompt. 2. IE Tools Internet Options… Security Tab Custom Level… Initialize and script ActiveX controls not marked as safe Select “Enable” or Prompt. 1 2 9 3 4 5 When popup the following dialogue box, click “Yes”. 10 IV. Live Video Start a IE browser, type the IP address of the IP camera in the address field. It will show the following dialogue box. Key-in the user name and password. The default user name and password are “admin” and “admin”. When connect to the IP Camera, the following program interface shows. (1) : Get into the administration page. We kindly suggest you to close the IE page once you finished the setup. (2) : Video Snapshot. 11 (3) Show system time, video resolution, and video refreshing rate (4) Select the multiplied value to adjust GUI display on screen. The default value is equal to 1/2. (5) Select video streaming source. [Note] When streaming 2 setting in”Video Setting” is closed, this function will not display. (6) IP Camera supports 2-way audio. Click the “Chatting” check box. Then you can use microphone which connects to the PC to talk to server side, which is IP Camera side (7) Shows how many people connect to this IP camera (8) Control the relay which is connected to this camera. Double-click the video; it will change to full screen mode. Press “Esc” or double-click the video again, it will change back to normal mode. Right-Click the mouse on the video, it will show a pop-up menu. Snapshot: Save a JPEG picture Record Start: Record the video in the local PC. It will ask you where to save the video. To stop recording, right-click the mouse again. Select “Record Stop”. The video format is AVI. Use Microsoft Media Player to play the recorded file. Mute: Turn of the audio. Click again to turn on it. Full Screen: Full-screen mode. ZOOM: Enable zoom-in and zoom-out functions. Select “Enable digital zoom” option first within the pop-up dialogue box and then drag and drop the bar to adjust the zoom factors. 12 V. Configuration Click to get into the administration page. Click to go back to the live video page. 13 A. System System Information a. Server Information: Set up the camera name, select language, and set up the camera time. 1. 2. b. Server Name: This is the Camera name. This name will show on the IP Installer. Select language: There are English, Traditional Chinese, and Simplified Chinese to select. When change, it will show the following dialogue box for the confirmation of changing language. OSD Setting: Select a position where date & time stamp / text showing on screen. Moreover, click Text Edit can entry to adjust the OSD contents which is including Size and Alpha of text. Finally, click Upgrade button to reserve the setting. c. Server time setting: Select options to set up time - “NTP”, “Synchronize with PC’s time”, “Manual”, “The date and time remain the same”. 14 User Management: IP camera supports three different users account -- administrator, general user, and anonymous user. a. Anonymous User Login Yes: Allow anonymous login No: Need user name & password to access this IP camera b. Add user: Type the user name and password, then click “Add/Set”. c. User List: Click “edit” or “delete” to modify the user. 15 System update a. b. c. d. To update the firmware online, click “Browse…” to select the firmware. Then click “Upgrade” to proceed. Reboot system: re-start the IP camera Factory default: delete all the settings in this IP camera. Setting Management: User may download the current setting to PC, or upgrade from previous saved setting. Setting download: Right-click the mouse button on Setting Download Select “Save AS…” to save current IP CAM setting in PC Select saving directory Save Upgrade from previous setting: Browse search previous setting open upgrade Setting update confirm click index.html. to return to main page 16 B. Network IP Setting: IP Camera supports DHCP and static IP. a. b. c. IP Assignment DHCP: Using DHCP, IP Camera will get all the network parameters automatically. Static IP: Please type in IP address, subnet mask, gateway, and DNS manually. Port Assignment: user may need to assign different port to avoid conflict when setting up IP assignment. Port Assignment Web Page Port: setup web page connecting port and video transmitting port (Default: 80) RTSP Port: setup port for RTSP transmitting (Default: 554) RTP Start and End Port: in RTSP mode, you may use TCP and UDP for connecting. TCP connection uses RTSP Port (554). UDP connection uses RTP Start and End Port. UPnP This IP camera supports UPnP, if this service is enabled on your computer, the camera will 17 automatically be detected and a new icon will be added to “My Network Places.” d. [Note] UPnP must be enabled on your PC. Please follow the procedure to activate UPnP. 1. Open the Control Panel from the Start Menu. 2. Select Add/Remove Programs. 3. Select Add/Remove Windows Components and open Networking Services section. 4. Click Details and select UPnP to setup the service. 5. The IP device icon will be added to “My Network Places”. 6. User may double click the IP device icon to access IE browser. Rtsp Setting The Real Time Streaming Protocol (RTSP) is a network control protocol designed for use in entertainment and communications systems to control streaming media servers. e. Multicast Setting (based on the Rtsp Server) User can setup two streaming based on the Rtsp Server. f. ONVIF User can enable ONVIF standard and select the ONVIF version or disable it. PPPoE Select “Enabled” to use PPPoE. Enter the Username and Password for the ADSL connection. Send mail after dialed:When connect to the internet, it will send a mail to a specific mail account. For the mail setting, please refer to “Mail and FTP” settings. 18 DDNS: It supports DDNS (Dynamic DNS) service. DynDNS Enable DDNS function. Enter the Host name, Username, and Password of DynDNS. Set up the IP Schedule update refreshing period. Click “Apply”. [Note] If setting up IP schedule update too frequently, the IP may be blocked. In general, schedule update every day (1440 minutes) is recommended. 19 Camddns service 1. 2. 3. Please enable this service Key-in user name. IP Schedule update is default at 5 minutes Click “Apply”. 4. DDNS Status 1. 2. 3. 4. 5. 6. Updating: Information update Idle: Stop service DDNS registration successful, can now log by http://<username>.ddns.camddns.com: Register successfully. Update Failed, the name is already registered:The user name has already been used. Please change it. Update Failed, please check your internet connection: Network connection failed. Update Failed, please check the account information you provide: The server, user name, and password may be wrong. 20 C. A/V Setting Image Setting For the security purpose, there are three areas can be setup for privacy mask. Click Area button first and pull a area on the above image. Finally, click Save button to reserve the setting. Adjust “Brightness”, “Contrast”, “Hue”, “Saturation” to get clear video. Adjust “Brightness”, “Contrast”, “Hue”, “Saturation” to get clear video. Moreover, IP CAMERA supports “Back Light Compensation”, “Night Mode” and “Video Orientation”. This IP camera belongs to external varifocal lens adjustment camera. Please adjust “ZOOM” first and “FOCUS” in the following to complete the adjustment. 21 Video Setting User may select 2 streaming output simultaneously: Streaming 1 Setting: Basic mode and Advanced mode Streaming 2 Setting: Basic mode, Advanced mode, and 3GPP mode [Note] Max Video Frame Rate for both streaming combined is 30 FPS a. Video System: click the drop down list to select the video system type -- Input Resolution, Video System or TV Output. b. Streaming 1 Setting Basic Mode Resolution: There are 8 resolutions can be chosen -- 1600x 1200, 1280x1024, 1280x960, 1280x720, 800x600, 640x480, 320x240, 176x144. Quality: There are 5 levels to adjust – Best, High, Standard, Medium, and Low. The higher the quality is, the bigger the file size is. Also not good for internet transmitting. 22 Advanced Mode c. Video Frame Rate: The video refreshing rate per second. Video Format: H.264 or JPEG. RTSP Path: RTSP output name. Resolution: There are 8 resolutions can be chosen.1600x 1200, 1280x1024, 1280x960, 1280x720, 800x600, 640x480, 320x240, 176x144. Bitrate Control Mode: There are CBR(Constant Bit Rate) and VBR(Variable Bit Rate) to use. CBR: 32Kbps~4Mbps (the higher the CBR is, the better the video quality is). VBR: 1(Low) ~10(High) – Compression rate, the higher the compression rate, the lower the picture quality is; vise versa. The balance between VBR and network bandwidth will affect picture quality. Please carefully select the VBR rate to avoid picture breaking up or lagging. Video Frame Rate: The video refreshing rate per second. NTSC: Max 30 frames/second. PAL: Max 25 frames/second. GOP Size: It means "Group of Pictures". The higher the GOP is, the better the quality is. Video Format: H.264 or JPEG RTSP Path: RTSP output connecting route Streaming 2 Setting Basic Mode Resolution: There are 8 resolutions can select -- 1600x 1200, 1280x1024, 1280x960, 1280x720, 800x600, 640x480, 320x240, 176x144. Quality: There are 5 levels to adjust – Best, High. Standard, Medium, and Low. The higher the quality is, the bigger the file size is. Also not good for internet transmitting Video Frame Rate: The video refreshing rate per second. Video Format: H.264 or JPEG 23 RTSP Path: RTSP output connecting route Advanced Mode: Resolution: There are 8 resolutions can select -- 1600x 1200, 1280x1024, 1280x960, 1280x720, 800x600, 640x480, 320x240, 176x144. Quality: There are 5 levels to adjust – Best, High. Standard, Medium, and Low. The higher the quality is, the bigger the file size is. Also not good for internet transmitting Video Frame Rate: The video refreshing rate per second. Video Format: MPEG4 or JPEG RTSP Path: RTSP output name d. 3GPP Streaming mode [Note]3GPP mode suggested setting: 176x144 resolution, 5FPS, MPEG4 format. Enable or Disable 3GPP Streaming. 3GPP: 3GPP output name. 24 Audio: IP CAMERA supports 2-way audio. User can send audio from IP Camera Built-in mic to remote PC; User can also send audio from remote PC to IP Camera’s external speaker. Audio from IP camera built-in mic to local PC: select “Enable” to start this function. Audio from local PC to IP Camera: Check “chatting” in the browsing page. [Note] The Audio will not be smooth when enable SD card recording function simultaneously. 25 D. Event List IP Camera provides multiple event settings. Event Setting Motion Detection: IP CAMERA allows 3 areas motion detection. When motion is triggered, it can send the video to some specific mail addresses, transmit the video to remote ftp server, trigger the relay, and save video to local SD card. To set up the motion area, click “Area Setting”. Using mouse to drag and draw the area. The same operation for area 2 and 3. Record File Setting: IP CAMERA allows 3 different types of recording file to change its record size. When motion/alarm is triggered, there are 3 different types of record mode. AVI File (With Record File Setting ) Multi-JPEG (With Record File Setting), only with JPEG compression format. Single JPEG (Single File with Interval Setting) Record Time Setting: Pre Alarm and Post Alarm setups for video start and end time when motion detected, I/O, or other devices got triggered. [Note] Pre/Post Alarm record time is base on record time setting and IP Cam built-in Ram memory. Limited by IP Cam built-in Ram Memory, When information is too much or video quality set too high, it will cause recording frame drop or decrease on post alarm recording time. Network Dis-connected: When the network is down, it will save the video to local SD card. [Note]This function is only enabled in wire connection. Network IP check: When the connection is down, it records the video to SD card. Make sure the video recording is continuous. To use this function, key in the IP address of the PC which has recording software installed. Enable the function of “Save to SD card”, then click “Apply”. [Note] The interval of two video files on SD card is fixed with 30 seconds. 26 Schedule Schedule: After complete the schedule setup, the camera data will be recorded according to the schedule setup. Snapshot: After enable the snapshot function; user can select the storage position of snapshot file, the interval time of snapshot and the reserved file name of snapshot. 27 I/O Setting: IP CAMERA supports 1 input/1 output. When input is triggered, it can send the video to some specific mail addresses, transmit the video to remote ftp server, trigger the relay, and save video to local SD card. CATUTION!! Please connect to propriety relay box to reduce the risk of electric shock & damaged. Alarm Input Setting: Among alarm input setting, the user can setup the connected device which can send the signal to “relay output” when the device is triggered. 3.3V ALARM GND Sensor (1) Non-Triggered Device 3.3V Triggered 0V (2) Triggered ALARM GND Sensor Device 3.3V Relay Output Setting: In relay output setting, the user can setup the output device to perform the related output action. 28 I/O PIN definition, please refer to the following statement ALARM ALARM INPUT Standard Voltage: 3.3V (internal Voltage) GND Connect “ALARM” and “GND” two pins. N.C. RELAY OUTPUT COM N.O. Contact Rating: 30V DC/ 1A, 125V AC/ 0.3A Depends on the devices, the user should connect “N.C.” and “COM” pins or “N.O.” and “COM” pins [Example] RELAY INSTALLATION EXAMPLE 1 Trigger a normal off (Normal Open) alarm siren on when event/motion occur at COM: RELAY INSTALLATION EXAMPLE 2 Trigger the normal on (Normal Close) indoor illumination off when event / motion occur at COM: 29 Server Settings: To send out the video via mail or ftp, please set up the configuration first. Mail Setting: Enter the related data or information and click test button to test. FTP Setting: Enter the FTP information and test. 30 Log List Sort by System Logs, Motion Detection Logs and I/O Logs. In addition, System Logs and I/O Logs won’t lose data due to power failure. SD card(Optional): SD card will be inserted into the SF2012H-B camera before assembled. Please contact with your dealer if you want to replace the SD card. 31 VI. Network Configuration Configuration 1 a. b. c. d. Internet Access:ADSL or Cable Modem IP address:One real IP or one dynamic IP Only IP CAMERA connects to the internet For fixed real IP, set up the IP into IP CAMERA. For dynamic IP, start PPPoE. Configuration 2 a. b. c. d. e. Internet Access:ADSL or Cable Modem IP address:More than one real IP or one dynamic IP IP CAMERA and PC connect to the internet Device needed:Switch Hub For fixed real IP, set up the IP into IP CAMERA and PC. For dynamic IP, start PPPoE. 32 Configuration 3 a. b. c. d. e. Internet Access:ADSL or Cable Modem IP address:one real IP or one dynamic IP IP CAMERA and PC connect to the internet Device needed:IP sharing Use virtual IP, set up port forwarding in IP sharing. 33 VII. Factory Default 1. 2. 3. 4. 5. 6. Removing an Ethernet cable. Plugging “a pink default cable” into “GND”. Plug power cable. When camera starts again, please remove the pink default cable and plug Ethernet cable for new setting. Release the button when camera finishes proceed. Re-login the camera using the default IP (http://192.168.1.200), and user name (admin), password (admin). VIII. Package contents 1. 2. 3. 4. IP CAMERA Network Camera Adaptor Ethernet Cable CD title (User manual, IP installation Utility) 34 Appendix I SD Card Recommended: Vendor Test Vendor Test ADATA 4G passed SiliconPower 128M passed ADATA 512M passed SiliconPower 256M passed Blast 128M passed TEKQ 128M passed GIGATEK 128M passed TEKQ 256M passed Kingmax 256M passed Toshiba 128M passed Kingston 128M passed Toshiba 256M passed Kingston 256M passed Toshiba 4G passed Kingston 512M passed Transcend 128M 80X passed Kingston 1G passed Transcend 256M 80X passed Kingston 32G passed Transcend 1G 80X passed Phast 256M passed Transcend 2G 150X passed Photofast 256M passed Transcend 4G 150X passed PK 128M passed Transcend 512M 80X passed PRETEC 128M passed Transcend 4G passed READY 128M passed Transcend 8G passed SanDisk 128M passed Transcend 16G passed SanDisk 256M passed Transcend 32G passed SanDisk 512M passed TwinMOS 128M passed SanDisk 1G passed TwinMOS 256M passed SanDisk 2G passed UMAX 128M passed SanDisk 4G passed U-TEK 128M passed SanDisk 8G passed SanDisk 16G passed SanDisk 32G passed 35 AVer Information Inc. Taiwan & International Web Site: http://surveillance.aver.com/