1
®
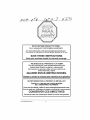
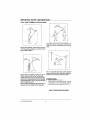
BRANCH WIZARD ®
E L F_
_ _PSR_ _ _._IASLAW
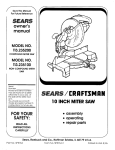
MODEL DPS-1 : '111409-01
erating
this Pole
Saw.
usethis
of Pole
Sawbefore
can cause
severe injury.
IMPORTANT:
Read
andImproper
understand
manual
assembling
or op*
Keep this manual for future reference.
....
_j
"4 _.....
DO NOT RETURN PRODUCT TO STORE.
CALL 1-800-626-2237 FOR TECHNICAL ASSISTANCE
For more information, visit www.remingtonpowertools.com
This manual is your guide to safe and proper operation of the saw.
SAVE THESE INSTRUCTIONS.
Keep your purchase receipt for warranty coverage.
NO DEVUELVA EL PRODUCTO A LA TIENDA
Pars m&s informaci6n, wwworemingtonpowertools.com
PARA AYUDA TECNICA LLAME AL 1-800-626-2237
Este manual es su guia para utilizar esta sierra el_ctrica de
manera adecuada y segura.
GUARDE ESTAS INSTRUCCaONES.
Guarde su recibo de compra para cobe_ura
=
H
= =
de !a garantia.
=
NE RETOURNEZ
FAIT
PAS LE PRODUIT
0
AU DI_TAILLANT
ENIR
Pour plus de d6tails, visitez le www.remingtonpowertools.com.
C'est un guide pour l'utilisation s_curitaire et correcte de la tron(;onneuse
CONSERVER CES DIRECTIVES
Conservez votre re_;u d'achat pour obtenir le service sous garantie.
www remlnglon p_werto_ls corn
2
CONTIENT.._
IMPORTANT SAFETY INFORMATION
............................................................................................
4
Belore Operating Saw ...................................................................................................
4
Whi_e Operating Saw ........................................................................................
4
Kickback .........................................................................................................................
5
Maintenance and Storage o! Chain Saw ......................................................................
POLE SAW TRIMMING
UNPACKING
PRODUCT
CHAIN
PRECAUTIONS
..................................................................................................................
IDENTIFICATION
SAW NAMES
ASSEMBLY
5
........................................................................................................
6
....................................................................................................
6
7
AND TERMS ...................................................................................................................................
7
.......................................................................................................................................................................
8
SAW CHAIN
TENSION
ADJUSTMENT
..........................................................................
9
OPERATING CHAIN SAW ..................................................................................................................
10
Extension Cords .......................................................................................................................
10
Oiling Chain ...........................................................................................................
10
Cutting ,with Pole Saw .............................................................................................
11
Trimming a Tree (Pruning) .............................................................................................
11
CLEANING
AND MAINTENANCE
...................................................................................................................................
12
Care of Guide Bar .........................................................................................................
t2
Sharpening Saw Chain ....................................................................................................
Replacing Saw Chain ...........................................................................................
STORAGE
.........................................................................................................................................................................
14
REPLACEMENT
TECHNICAL
PARTS AND ACCESSORIES
SERVICE
..................................................................................................
14
................................................................................................
REPAIR SERVICE .......................................................................................................................
Warranty Service ...............................................................................................................
Non-Warranty Service ...................................................................................................
WARRANTY
ILLUSTRATED
PARTS
13
t4
INFORMATION
PARTS
CENTRAL
14
14
14
t4
.......................................................................................................................................
15
BREAKDOWN
...............................................................................................................
46
................................................................................................................
47
If you have a question or problem, CALL TOLL FREE 1-800-626-2237
or visit www,,remingtonpowertools corn
3
_v
rom_nglonpowerlc,
ols,com
IMP_OI?JANT
SA FET¥
!NFOR MATION
Before operating F'ole Saw. make certain you read
and understand al! Important Safety h!p_rmation
9
_k WARNING: When using an electric
Pole Saw, basic safety precautions
shouldRiways be followed to reducethe
risk of °re, electric shock, and injury to
persons, includinq the following:
.....
READ ALL INSTRUCTIONS°
Make sure you read and uoderstarjd.all
instructions in /mporcanr _arety mrormaoon,, Improper use of this Pole Saw
PEO
E
P RT
• eye protection such as safety glasses, goggles,
or face screen
tO
It
_an cause severe injury or death from
re, electrical shock, body contact with
_/nQ.vJ!]g_cllain_ or falling wood.
12
13
AWmanual
before
operating Pole Saw
Watch what you are doing Use common sense
Do not operate Pole Saw when you are sired
3 Use Pote Saw forcutting wood only Do notuse
Pole Saw for purpose not intended Do not use
for cutting non-wood items
4. Only well-instructed
adults shouId operate
Pole Saw Never allow children to operate Pole
Saw
5 Use only electrical voltagc noted on model plate
of Pole Saw
6 Use only extension cords marked for outdoor
use See Operating Pole Saw section extension
cord requirements.
7 Do not operate Pole Saw
- white under the in;quence of alcohol_ medication. or drugs
• in rain or in damp or wet a_eas
• where highly flammable liquids or gases are
present
• if Pole Saw is damaged, adjusted wrong, or not
fully and securely assembled
• if _gger does not turn Pole Saw on and off.
Chain must stop moving when you release trigger Have faulty switch replaced by authorized
service center (see Technical .qetvice)
- while in a hwry
" while in tree or on a ladder
2
8
, safety hard bat
• ear mufflers or ear plugs
• hair covering to contain long hair
• face nt dust mask (if working in dusty areas)
Before cutting, alwa)s provide the following:
• clear work area
• secure footing
• planned retreat path from failing limbs
Inspect tree before trimming. Make allowance
for branches to fail freely to the ground
Do not use your Pole Saw to fell saplings
To reduce the risk of electric shock this Pole Saw
has a polarized plug (one blade is wider than the
other) This plug will fit in the polarized outlet of
an extension cord only one way If the plug does
not lit fully in the outlet of your extension cord,
reverse the plug If'it still does not fit, a polarized
extension cord will be necessary If the polarized
plug of the extension cord does not fit fully in
the outlet, reverse the plug If it s0It doesnot fit,
contact a qualified electrician to instal! the proper
outlet Do not change the plug in any way
_NHILE
OPERATING POLE SAW
, ,,
3toy alert Use COlnUlon sense wrote operaun=
2
3
4
5
6
7
8
9.
the unit
Keep work area clean Cluttered areas invite
injuries
Be aware of extension cord while operating Pole
Saw Be careful not to trip over cord Keep cord
away from chain and operator at 'all times
Keep children, animals, and bystanders away
from Pole Saw and extension cord Only Pole
Saw user should be in work area
Do not use the Pole Saw to cut down trees
Do not use near power ]isles Keep at least t0
feet away from etecuical lines.
Grip Pole Saw securely - one hand on the pole,
the other on the handle
Keep linger off trigger until read), tosnake cut.
Before starting Pole Saw, make sure chain is not
touching anything
t0 To guard against electrical shock, avoid body
contact with grounded objects such as pipes,
fences, and metal posts
1t Keep alI parts of body away from chain when
Pote Saw is running
• while on aerial booms buckets or platforms
,' during high wind or storming weather
Wear snug-fitting clothes when operating Pole
Saw Do not wear loose clothing or jewehy. They
can get caught in moving saw chain
www. remington powecools,com
Wear tire following safeity gear when operating
Pole Saw:
o heavy-duty gloves (wear rubber gloves when
working outdoors)
. ,':teel-toed safety footwear with non-skid
soles
4
_PORTANT
SAFETY
INFORMATION
f 2 Do not force Pole Saw while cutting Apply light
pressure It will do the job bette_ and safer at the
rate for t_hich it was intended
KICKBACK
t3 When cutting a limb that is under tension, use
extreme cm, tion Be alert for wood springing
back When wood tension is released, limb could
spring back and strike operator causing severe
injury or death
t4 Cant Pole Saw from one place to another
• with mill unplugged
. by holding pole at balance point (close to saw
end)
• with guide bat and chain m rear
15 Do nut cut small brush and saplings with the Pole
Saw. Slender mauer may catch in the chaita and
be whipped toward you "l!_is could also pull you
off balance
'_ WARNING:Kickback mayoccurwhen
the nose or tip of the guide bar touches
an object, or when the wood closes in
and pinches the saw chain in the cut,
Tip contact in some cases may cause a
lightning fast reverse reaction, kicking the
guide bar up and back towards the operator,,Pinching the saw chain along the top
of the guide bar may push the guide bar
rapidly back towards the operator_ Either
of these reactions may cause you to lose
control of the Pole Saw which could result
in serious injury to user,
Kickback Safety Devices On This Pole
_Pole
Saw has a low-kickback
chain and re-
duced kickback guide bar Both items reduce the
ch_mce of kickback Kickback can still occur with
this Pole Saw
The following steps will reduce the risk of kickback
* Use both hands - one gripping the handle and the
other gripping the pole Use finn grip Thumbs and
fingers must wrap around pole and handle
. Keep all safety items in place on Pole Saw Make
sure they work properly
. Do not overreach or extend arms above shoulder
height
• Keep solid footing and balance at all times
. Never try cutting through two branches at the same
time Only cut one at a time
. Do not bur')' guide bar nose or _, plunge cut {boring
into wood using guide bar nose)
, Watch for shifting of wood or other fbrces that may
pinch chain
• Use extreme caution when _eentering a previous
cut
• Use low-kickback chain and guide bar supplied
with the Pole Saw, Only use replacement parts
listed for the Pole Saw
WARNING:
Some dust created by
power sanding, sawing,
grinding, drilling, and other construction
activities
contains chemicals known (to the state
of California) to cause cancer, birth defects, or other reproductive
harm. Some
examNes of these chemicals are:
• lead from lead-based
paints
• crystalline
silica from bricks and cement and ot.het'masDnrvJoroduc;ts
.
- arsenic anacnromluwr
from cnemlcally-treated
lumber
"/'our risk from these exposures varies,
depending
on how often you do this
type of work° To reduce your exposure
to these chemicals: work in a well ventilated area, and workwRh approved safety
equipment,
such as those dust masks
TI
that are specially designed to lter out
microscopic
particles.
• Never use dull or loose chain
with proper tension
Keep chain sharp
MAINTENANCE AND STORAGE OF
OE
from
power
source
and
fo,ow
maintenance and storage
Cleaning and Maintenance
5
procedures outlined
and ,_lorage
in
www remincJ_onpoweaoais,com
IMPORTANT
SAFETY
INFORMATION
POLE SAW TRIMMING PRECAUTIONS
Keep other persons away from cutting end of
Pole Saw and at a safe distance from work
area._
Never stand directly under the limb you are
trimming..Always position yourself out of the
path of falling debris.
Do not use Pole Saw near cable, electric
power or telephonelines. Maintaina minimum
clearance of 10 feel from all power lines_
Never stand on a ladder or other'type of unstable support while using the Pole Saw°
Always use both hands to operate Pole Saw,
Keep a firm, steady pressure on the Pole Saw
while cutting but do not try to force the Pole
2
Saw through the wood,,
Do not use the Pole Saw to cut limbs larger in
diameter than the length of the guide bar.,
Checkall itemsforanyshippingdamage ffyou find
any dam_e c_rif any pa___are missing, pmmpdy
informdealerwhere you boughtthe Pole Saw
SAVE THESE INSTRUCTIONS
v,"wwremtn_onpruw_noals cc_m
6
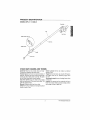
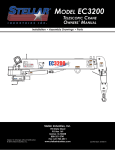
PJ ,ODUP-.TA
N
MODEL DPS-1: 111409-01
Guide
Bat
\ 4,
POSe
\\
\
S_w Chain
Trigger Swilch
CHAIN SAW NAMES AND TERMS
Guide Bar Metal bar that c×tends from saw body
Yhe guide bar supports and guides chain
Kickback Quick backward and upward motion of
guide bar Kickback may occur when tip of guide bar
touches an object while chain is moving "fhe guide
bar wil! kick up and back towards operator
Saw Chain (Chain) [_op of chain having cutting
teeth for curling wood The motor drives chain, The
guide bar suppo_-Lschain
Sprocket Toothed wheel that drives chain
Switch Lockout Device ttlat reduces accidental
starting of saw
Trigger Device that turns saw en and off, Squeezing trigger turns saw on Releasing trigger _nrns
saw off
Trimming (Pruning} Process of cutting limb(s) fiom
a living tree
Undercut An upward cut from underside of leg or
limb This is done while in normal cutting position
and cutting with top of guide bar
Switch Device that completes or inten_upts eleclricaI
circui! to motor of saw
7
www temir_glcm powetl ools._m
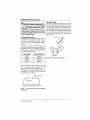
A_EMBLY
1
IMPORTANT: Read and understand this
manual before assembling or operating this Pole Saw° Improper use of Pole
Saw can cause severe injurg, Keep this
manua! forfutur_ r_f_r_nee_
__
Note: Some models are pre-assembied Assembly
is not needed on these models
See &_, Chain Ten_ionAdjustment
/
backwards,
I_backwards_
CAUTION: If chain
Do not is
place
chain on saw
saw [
wi!l vibrate badly and will not cut.
5
Cutting edges on chain
6
Place Belleville washer, sprocket cover, and
guide bar nut onto Pole Saw. IMlaORTANT;
Make sure serrated edge of die Belteville washer
is positioned as shown in Figure 3 The serrated
edge must he in contact with the guide bar
IMPORTANT." Tighten guide bar' nut finger tight
only
Adjust saw chain tension Follow steps under
Saw Chain Ten_ion Adju_mwnt
I
I IMPORTANT:
Do not clamp
vise during assembly.
l,
2
3
4
Pole Saw in [
I
Lay eh,_in out flat.
Loosen and remove guide bar nut, sprocket
cover, and washer (see Figure t)
Inst,'tl! guide bar onto saw body, Place center slot
of guide bar onto guide bar bolt.
Place chain around drive sprocket, then along
top groove of guide bar and around guide bar
nose Note: Make sure cutting edges of chain
are facing the right direction Position chain so
cutting edges on top of guide bar face guide bar
nose (see Figure 2 and indicator on side cover
of Pole Saw)
Figure
Saw Chin
www rem}ngtonpowenoo_s.eom
8
3 * Befleville
Washer
Assernbhy
_!N
TENS!ON
ADJUST_
Gui_B Bar Nul _.._,_.
I p_oow_rAsRoNul
rNcGjUnplug
before
LGhaimtension,
Pole Saw from
adjusting
saw
I_
edges
WARNING:
I are sharp°
Cutting
Use protective
on chain
gloves
when
Lban__
WARNING:
Maintain
proper chain
tension always,, A loose chain will increasethe risk of kickback° A loose chain
may jump out of guide bar groove,, This
may injure operator and damage chain.
A loose chain will cause chain, guide bar,
and _procke3 to V_o
lr_correct TenNon
Figure 6 - Saw Chain Adjustment
After chain lension is correct, tighten guide
bar nut fim}ly ]f no1, guide bar will move and
loosen chain tension ]']}is will increase the risk
of tdckback This can *alsodamage Pole Saw
Note: A new chain will slrelch Check new chain
Note: For pre-assembled
models, the saw chain
tension is properly set at factory A new chain will
stretch Check new chain after first few minutes of
operation Allow chain to cool down Follow steps
below to readjust saw chain tension
1 Before adjusting chain, make sure guide bar nut
is only finger Light(sec Figure 4)
Figure
4 - Loosen
after first few minutesofoperation
Allowchain
to cool down Readjust chain tension,
Guide Bar Nut
Insert a 441Phillips head screwdriver or smaller
into the hole in the middle of the guide bar (see
Figure 5) Using the screwdriver, push the guide
bar away from Pole Saw motor housing to tension the chain Notet There shoutd be no gap
between side links of chain and bottom of guide
bar (see Figure 6)
Guid_
Figure
5 - Chain
Tension
Adjustment
g
www romlnglonpowertoo}scorn
OPERATING
POLE_SAW
,6
_ILI_G
CHAIN
_s l ale Saw requires lubrication only to prevent
The saw chain
provided is pro-lubricated at the factory With each
use of the Pole Saw apply a small amount of lubricating oil directly to the saw chain (see Figure 8) The
oil wil! distribute itself around the chain and guide
bar groove during use-preventing rust We recommend using SAE #30 motor oil for lubrication and
rust prevention
uW
RNING
ors ndthm
rust on,Spole
the guide bar and saw chain
owne
mane dandun
, 'o%op&
tng!
Saw,. Mak_ certain
stand all trnportanr
Improper use
severe injury
cal shock, or
chain or fallin
.vgu.read and underbarery mrormarlon
of this Pole Sa_can cause
or death from
ire, electribody contact with moving
9 wood.
, .........
_sXTENSION CORDS
e proper cxtensmn corck_ with this Pole Saw Use
only extension cords marked for outdoor use, Ihe
cord must be marked with sut'fix W or W-A li_Howing the cord type designation
or SJIW
Example:
Use proper sized cord with this Pole
must be heavy enough to carry current
undersized cord will cause voltage drop
Pole saw wiJ] lose power and oved_eat
size requirements listed below
Cord Length
SJIW-A
Saw Cord
needed_ An
at Pole Saw.
Follow cord
AWGCord
25 feet
16 AWG
50 feet
16 AWG
100 feet
!6 AWG
150 feet
14 AWG
0
Size
Figure
Keep cord away from cutting area Make sure cord
does not catch on branches or lags during cutting,
Inspect cords often,, Replace damaged cords
The extension cord may come undone from the power
cord during use "[o avoid this, make a knot with the
two cords as shown in Figure 7
Chain Saw Power Cord
Figure 7- Tying Extension Cord and Power
Cord in Knot
w,,w_temingtonpowetlc_o_s
corn
10
8 _ Oil Chain
and
Guide Bar
OPERATING
POLE_SAW_
pUJ-I'ING3NIT]-i THE POLE SAW_
r.o|inect
2
t_ole
haw
tO extcnslon
cord
TRIMMING
° Conncc{
A TREE (PRUNIN_G___
extension co_d to power supply
'1_ WARNING:Avoid kickback. Kickback
Use both hands to grip Pole Saw Use only
_t, rt result in severe injury or death. See
designated grip areas when operating Pole Saw
tCKOaCKto avoid risk of kickback.
(see Figure 9, page 12) Use finn grip Thumbs
and fingers must wrap around Pole Saw handle
and pole
WARNING:
Do not operate
Pole
M'&e sure your fbotiug is finla. Keep feet apart,
Saw while
• In a tree
Divide your weight evenly on botla feet,
When ready to make a cut. press in trigger switch
• on a ladder or any other unstable surlock-out and squeeze trigger switch (see Figure
face
1O, page 12) This will turn Poke Saw on Releas. m any awkward position
ing trigger switch will turn Pole Saw off. M_dce
You may lose control of Pole Saw caussure Pole Saw is running at full speed before
ing severe injury.
starting a cut
When starting a cut. place moving chain against
Trimming a tree is the process of cutting limhs frorn
wood, Hold Pole Saw timely in place to avoid
a living tree Make sure your footing is firm Keep
possible bouncing or skaling (sideways movefeet apart Divide your weight evenly on bolh feel
ment) of Pole Saw
Follow directions below to trim a u'ee,
Guide Pole Saw using light pressure Do not force
I Make first cut six inci_es from tree trunk on
Pole Saw. The meier wilf overload and can burn
underside of limb, Use top of guide bar tomake
out It will do the job better and safer at the vale
this cut. Cut 1/3 through diumeler of limb (see
for which it was intended
Figure 11 )
Remove Pole Saw from a cut with Pole Saw
2 Move two to four inches farther out on limb
running at full speed Stop Pole Saw by releasMake second cut from above limb Continue cut
ing trigger Make sure chain has ,_topped before
until you cut limb off
setting Pole Saw down
3 Make fhird cut as close to tree trunk as possible
on underside of limb slob, Use top of guide bar to
m_e this cut Cut 1/3 d_rough diameter of stub
Gnp Area
//J
4 Make fourth cut direclly above third cut Cut
down lo meet tied cut This will remove limb
stub.
Zk
3
4
5
6
7
/
I _
WARNING: Do not extend Pole Saw I
handle above shoulder height.
J
2nd Cut • Pruning Cut (to avoi_ pinching)
Figure 9- Designated
/
Grip Areas
41h Cut - Final Stub Cut
l,y
r
l_I I|i
Trigger Switch
Figure 10 - Pole Saw Handle
Switch
_.,._
i ,dO,de,
I
i@))i
with Trigger
I'/
1_l CUT- Prttning Unae_cut Oo
e_,p,.lo,*.o)
( 13,dc_. s,obU.do,_(_o
a_id
_-
. I splimedng)
Figure 11 - Cutting A Limb
11
WwWrem_nglenpower_oots corn
CLEA___NCE
rnal Guide, Bar Maiotf_nance
L_emove gu_oe par trom vote _aw
2 Remove sawdust fromguide bar groove pedodicaIly Use putty knife or wire (see Figure 13)
3, Clean oil slots after eacb day of use
4. Remove burrs from sides of guide bar Use flat
file to m_e side edges square
Replace guide bar when
• bar is bent or cracked
• inside groove of bar is badly worn
NOTICE: Below are instructions for servicing your Pole Saw,.Any servicing not
mentioned below should be done by an
_UthoriTedsentice _enter
WARNING:
Unplug
Pole
Saw from
power source
before servicing.
Severe
injury or death could occur' from electrical shock or body contact with moving
_hnin,
Note: When replacing guide bar, see Replacemept
Part,_+aud Acce#sorie_ for proper bar
are sharp.
Use protective
gloves
when
IA
WARNING:
Cutting edges
on chain
handling chain,
--
WARNING:
bo
S_W no_lbmerge
When
cleaning
Pole
Pole Saw in any liq-
uids .
• ao not use products
that contain
am-
( chlorine,
or abrasives.
• _loOnioa
use cn|orlnatea
cleaning
sot-
vents, carbon tetrachloride,
or gasoline
kerosene,
Figure
Keep PoleSaw body clean Use a softclothdampened with a mild soap and water mixture Wipe Pole
Saw body to clean,+
_nARE OF
GUIDE
BAR
even bar wear causes most guide bar problems
Incorrect sharpening of chain cutter and depth gauge
settings often cause this When bar wears unevenly,
it widens guide bar groove (see Figure 12). This
causes chain clatter and rivet popping Saw will not
cut straight Replace guide bar if this occurs
Inspect guide bar before sharpening chain A worn
or damaged guide hat' is unsafe A worn or damaged
guide bar will damage chain, It will also make cutting
harder
., G_+__= G,oov.',,
"\
/
'\
/
"\
/
\
Gt_iSa Bnt
t_orn_!
G_lde
U_r
O_lO_ _]at V_lh Ut_vOt* We.at
Figure 12 - Guide Bar Cross Section Shewing
Uneven Bar Wear
www reminglonpowertools.com
12
13 - Guide
Bar Maintenance
r-
AINT_ENANCE
SHARPENING
Depth Gauge (right side
o!or.ha ]t_)_)
SAW CHAIN
t
G,oo
_;,",/
Groove ,, \
power source before servicing° Severe
injury or death could occur from electriWARNING: Unplug Pole Saw from 1
cal shock or body contact with moving
_cbaJtL
R_ghlSid_ or Chain
d_
WARNING:
Cutting
edges
are sharp. Use protective
handling chain.
Figure 15 - Chain Part Locations
on chain
gloves
4
when
Keep chain sharp. Your Pete Saw wil! cut faster and
more safely. A dull chain will cause undue sprocket,
guide bar. chain, and motor wear tf you must force
chain into wood and cutting creates only sawdust
with few large chips, chain is dull
5
6
Items Needed to Sharoen Chain
Purei_ase these liems from yohr local deakir, hard_
ware store, or chain saw suppfies outlet
• 5t32" round file
•
.
•
7
Depth gauge tool
File _ide
Vise
Medium sized tlat file
_haroenina
Hold file guide level Make sure 30 ° mark on
file guide is parallel Io center of guide bar (see
Figure 14). This will insure that you file CUtlers
at 30" angle
File from inside towards outside of cutter until
sharp Only file in this one direction (see Figure
14) Note: Two or three strokes with file should
sharpen cutter
After each cutter is sharpened, move chain forward to sharpen next cutter File alI cutters on
one side of chain
Move to other side of chain and repeal process
J_lilina
Cutter Depth Gauaes
ae ci_er d_pth =auto clearance i_reduced
as cutters
are sharpened After every second or third sha,rpenins. reset cutter depth gauges..
I Place depth gauge tool (025") firmly across top
of two cutters Make sure depth gauge enters slot
in depth gauge tool (see Figure 16)
2 Use medium flat lile File depth gauge level with
depth gauge tool
3 Remove depth gauge tcml With flat file, round
off front comer of cutter depth gauge (see Figure
17)
Cubers
e N_gmde _r 30; t_lmg
1.. Adjust chain for proper tension (see Saw Chain
Tension Adjustment)
2 Clamp guide bar in vise to hokt Pole Saw steady
Note: Do not clamp chain
3. Press 5/32" round file (attached to file guide'l
into groove between top pIate and depth gauge
on chain. Fite guide should rest on both lop plate
and depth gauge (see Figure 14) Note: File at
midpoint of _-,aide bar.
After several hand tilings, have authorized _evvice
center or sharpening service machine shmTJen chain
This will insure even filing
Flal Fil_
<_
Ik N_ingDireclion
_
30° Gu_.deMadt.,
::i;='%f
/ _.,,
Depth Gauge
oo.,.ooooo
.
5/32" Round
Fi_e
"_
Figure
16 - Depth
Deplh Gauge Slot
Gauge
Fronl C.._m_
Toot On Chain
I
_5 mm
025"
Nolo;Thisiliuslrat_onshows
tar sharpening
Figure
Chain
]eguidep_aeementand
i[ngdirection
cu_te_son left side of chain.
14 - File and File GuMe
Placement
On
Figure
Gauge
13
17 * Round
Off Front
Comer
Of Depth
v_vwrem_ngtonpowottools,com
_eEPLACING SAW CHAIN
REPLACEMENT
place cIlam wtaencutters are tooworn to sharpen or
when chain b_'_s Onfy use replacement chain notex.lin
this mmmal Always include new drive sprocket when
replacing chain. 1"his will maintain proper driving of
chain Note: For proper chain mad drive sprocket,
see llhcstrztted Part._ List
_o(rm=/_ot_e
WARNING:
5
6
prevent rust
Wipe a thin coating of oil over surface of guide
bar
Wipe off outside of Pole Saw body, Do this with
soft cloth dampened with a mild soap and water
mixture
Store Pole Saw
In Canada call 1-803-56t-3372
P
R SERV.IC
parts _Ihis ,.viii
protect your warranty coverage for parts replaced
under warranty.
Each Authorized See'ice Center is independently
owned and operated
• in a dry place
- with scabbard over guide bar
SERVICE
u may nave mrmer questions aoout assembling,
operating or maintaining this product If so.. you
can visit our Technical Service web site at www_
_/arranb¢ service
pro_uct'tequtres
nearest Authorized
remingtonpowertools.eom
or contact our Ieehnicat Service Department at 1-800-626-2237 (English
Only) You may atso write to;
DESA Power Tools
PO Box 90004
Bowling Green. KY 42102-9004
AVIN: "l'echnical Service
(Include
copy of receipt
_ton-warranty set:€ice
product reqmros servme, return it to nearest Authorized Service Center, Repairs will be billed to you
at regular repair list prices
For additional Service Center or warranty information, call 1-800-626-2237 or visit our 'I ethnical Ser`.,ice web site at www.remingtonpower/ools_eom.
for
We reserve the right to amend these specifications
at any time without notice Ihe only warranty applicable is our standard written warranty We make
no other warranty expressed or imptied
www remingtonpoworteo}s,c_m
`._arranty service, return it to
Service Center You nrust show
proof of purchase lffautty materials orworkmanship
caused damage, we will repair or replace product
without charge. Note: Normal wear misuse, abuse,
neglect, or accidental damage is not covered under
warranty
When contacting DESA Power rools, have ready
• Your Name
• Your Ad_ess
• Your Phone Nmnber
• Model Number of Product
Date of Purchase
written requests)
replacement
for parts infonnatlon,
l_O_J: _.n!y use ongmal rei_cement
• in a high or locked place, out of children's
reach
•
only
For original replacement parts and accessories, con_
tact your nearest Authorized Dealer or Authorized
Service Center for dais product If they can not supply the part or accessory, contact your nearest Parts
Central listed on page 47 Each Authorized Dealer,
Authorized Service Center, and Parts Central is
independently owned and operated
See page 46 for an Illustrated Parts List
If you need additional referral information, contact
our 'Iechnicat Service Department (see Technical
Service)
_aw for more than 30 days, follow
,ToECHNICAL
Use
parts and accessories
described in this
manual Use of other parts or accessories
could damaqe saw or_injure operator.
steps below
1. Remove and clean guide bar and chain Clean
guide bar and chain by soaking in petroleum
based solvent or mild soap and water mixture
2. Dry guide bar and chain
3 Place chain in container filled with oil, ins witl
4
PARTS AND
ACCESSORIES
14
WARRANTY
REMINGTON
I NF:ORMA.TJON
BRAND ELECTRIC CHAIN SAW
I IMtTFD WA R_A NTIFR .............
NEW-PROBEt&T-S
Standard-Warranty
DESA Power'Tools wamants this _ew product and any parL_ thereof to Ix: fn:e from dereeL'; in malcria]
aI:_dwor|:ffc_qship for a period of oue (1 year from the date of first pur_ba._efrmn an authori:,_:d dealer pmvid:d the product ha._
been reaJn_alned ;rod opcraled in accord;race with DESA Power Tools' warnings;_md instn3ctions
_R"PR_ONE)mONED-PROD
_eT_
E-imi_rranty
DESA Power Tools ",v_m_mts
factory reconditioned producL_and any parts thereor t_ be free from defecL_ in material
and w_ri:n_an_;bipfor 90 days from thedale of first purchasefrom an authorized dmdcr provided the pmd_ct h_._been
installed, maiutained and operated in accordance with DESA Power Tonl_" wamlngs :rodinstructions
_in_
T-ERMS-eO MM 0 N-Tg¢kL-L--WA_t_tkN_
temps;_pp!ytn _dlof the ;tbove_
ES
-
Alway,_ specify model number when contaeting the manufacturer To roal;e a claim under this warranty the bill of
salc or mher proof of ptlmh:_._ernu.,;t b:: pre.,;cnted.
- This w;_uny is exlcndcd mdy to the original retail purcb_mcr when pumlmsed from an authorized dealer
.
tl_is wawanly covers the cost of part(s) required to restore this product to proper operating condition and _Lna|Iowance for labor when provided by a DESA Power "Fools Autht'_rizcd Service Center, Wammty part.,_must be
obl:_ined thmugb anthorlzed dealers of this product untffor DESA Power Tools who will provide original factory
replacement parts Failure to use original factor)' ecpiac:ement part.,;voids this ware:tory
• l'raveL h_md]Jng, transporttttinrt diagnostlc, materlat, tabor and incldened co_t,; a.,_sociutedwhh W;l_mty repzlr,%
unless expressly covered by Ufis warraniy, are not reimbursable under this wammty and are |be responsibility or
the owner
. "Excluded from _his warranty are prt_ducu: or parts th;a fail or become damaged due to misu,_e, aeeidefiL';, h_ck of
proper maintenance. {:_mpeting. or ahen_tions
. Excluded from this warranty are products purcbtu;cdfor commemlaL industrial or rental
ns:|ge
Fhi_ is DESA Power IOa['€ _ cxeIu,_ive warranty, and to the full extent allowed by taw; tiffs express warranty
exeludc_ any and all other wttm,mties, cxpro._ or implicd, written or vcrbaf and limit.,;the duration of any and all
implied warramies, including warranties of mer::hantability and fitnCzs for a particular purpose to one (l) year on
new products and 90 days _m factory rectmdhloned prr_ucts from the dale nf first purclnLse DF_A Power Ttxffs
makes no other w;trrantiez r_zg_rding this product
• DE_SApower _onl._ liabillty is limited to dm p_;_rchaseptice of the product, and DESA Power _-ooL_shall nol be
liable for _myother dan'|ages whatsoever ur_der any cireumstanc,-'_ includiug indirecL incidental or txmsequenthd
damages
* Some statt=_do not ;dlow tlmhafion_ ou lmw long tu_implled wammty h_s_ or the ex clnsion or limitaliou nfineidental
or consequential damages, so tbe abt)ve limitation or exclusion may not apldy to you
• This warrm_ly gives you _pecifie lega] rlghL,;,al_d yo_ m:_tyalso have c_therrights which vary f_m st;_le to stale
For information about Ibis w;uwam
T eo:Rtact:
Model
Date Purchased
Industries of Canada- Inc
POWEg
TOOLS
82 Akron Road
Toronto, On|ado
MSWIT2
416-255-5333
Fax: 416-255-5677
Bowling Green, KY 42102-9004
800-626-2237 (English Only)
www remingtonpowertools corn
www remingtonpoweMoolscorn
15
www reminfftonpownrloots,c_m