1
SAMPLE INSTALLATION AND SIMPLE OPERATION
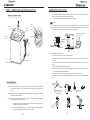
SAMPLE INSTALLATION
Notices:
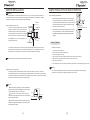
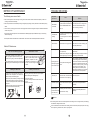
After installation, do not start the washing machine in hurry. First open the tap to let the water press Step 7:
Installation of the Rat Mesh
into the water inlet hose to check whether there is any leakage in the connectors on the both ends. When the 1. Slant the washing machine with angle of 45 in the direction of pressure is too high, please shut the tap a little to avoid water leakage.
the arrows showed in the figure, put the side with the clasper to o
the washing machine and the other side to the ground, insert base Cabinet
Slot
Base cover
cover along the direction of the upper slot of the base from the Step 5:Installation of the drain hose
1. Press the fixing ring with hand to make it loose and Inner hose
Fixing ring back side of the washing machine.
Hole for Self-
tapping screw
engaged on the drain hose and put the drain hose 2. Put the base cover straight to the point and then press the base into the leading skirt of drain hose in the bottom of cover upward till there is a sound of "
Gaba" and then screw in the washing machine to the end at the most (
soak the a self-
tapping screw(
without the self-
tapping screw for plastic head of the drain hose in warm water, it will make cabinet).
the engagement easy), and loose the fixing ring to Drain hose
let it clasp the drain hose.
Leading ring
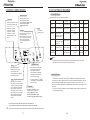
Sample O
peration
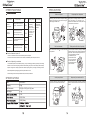
2. It had better put the outlet of the drain hose into the nearby drainage permanently, which can save Preparations before using
:
the trouble that the drain hose has to be connected each time before use. If the drainage is far from the 1. Lay the drain hose at proper place. washing machine, it can be solved by connection of the drain hoses head with end to extend.
2. Connect the water inlet hose and open the tap. 3. Put the power plug into the socket. 4. Take out the coins and other sundries and shake off the mud and sand on the clothes.
Notices: Drain faults will be caused when the drain hose is blocked.
5. Determine water level.
Press "
Water level" button to select the water level.
6. Press "
Power" switch button.
7. Press "
Start/
Pause" button. The washing machine will go into operation by the automatic program of standard.
Notices:
Step 6:
Power source and grounding
The washing machine employs alternative current with the rated voltage and frequency. When the voltage fluctuates between 10% of rated voltage, the washing machine can work normally. A special power socket for the washing machine had better be set beside the washing machine for convenience and safety. The method of connection of the socket is as the figure below:
Notices:
The socket and the grounding wire must be installed by an electrician to prevent incorrect installation or use of the socket, and to guarantee the safety of use of electricity.
The power wire of the washing machine employs Y Grounding wire
connection and the replacement of the power wire should be carried out by professionals.
No connection of the grounding wire with the neutral wire, otherwise the cabinet will be charged, which is likely to cause the danger of electric shock.
Rated voltage  ̄
If you want to set other programs, please see and read "
Full automatic program" and "
Self-
program".
According to your needs, select corresponding programs for your service.