1
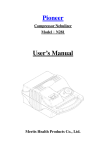
PIONEER
U601 ASPIRATOR USER’S MANUAL
Merits Health Products Co., Ltd.
Read this manual before
operating Aspirator and
save for future reference.
1
TABLE OF CONTENTS
0. IEC Symbols
…………………………………………………………………….3
1. Important Safeguard
…………...……………………………….……………..3
2. Introduction
…………………………………………………………………….5
3. Specifications
……………….……………….…………………..….…………..5
4. Description
5. Operation
………………………………………………………………………7
……………………….…………………….………………….………8
5.1 Grounding Instructions …….. …….………………………………………..8
5.2 Set-Up …………………………………………………………………………9
5.3 Applicable Vacuum for Patients……………………………………………..9
5.4 Operation……………………………………………………………………..9
6.Cleaning ……………………….…………………...…….………………………...10
6.1 Unit Cleaning ……………………….……………………………………….10
6.3 Disinfection ………….……..……………………………………….……….10
6.3 Canister……………………………………………………………………….11
7. Maintenance ………………………………………………………………………11
7.1 Tube and Bacteria Filter Replacement…………………………………….11
7.2 Preventive Maintenance…………………………………………………….12
7.3 Replace Fuses………………………………………………………………..12
8. Troubleshooting…………………………………………………………………...13
9. Warranty
………………………………………………………………………..14
2
0. IEC Symbols
Caution, Attention or Consult accompanying documents.
Alternating Current
Type BF Equipment
Power Off
Power On
1. Important Safeguards
l When using electrical products, especially when children are
present, basic safety precautions should always be followed.
l READ ALL INSTRUCIONS BEFORE USING.
! DANGER
TO REDUCE THE RISK OF ELECTROCUTION:
(1) Always unplug power of this product immediately after using.
(2) Do not use this product in liquid nor place or store where it can fall or be pulled into
liquid.
(3) Do not reach for a product that has fallen into liquid. Unplug power immediately with
appropriate electrical insulation.
3
! WARNING
TO REDUCE THE RISK OF BURNS, ELECTROCUTION, FIRE OR INJURY TO
PERSONS:
(1) A product should be paid attention when plugged in.
(2) Do not touch the surface of this product during or just after using because electrical
products generate heat. Use handle whenever movement is needed.
(3) Keep the power cord away from heated surfaces.
(4) Never operate this product if
(a) It has a damaged cord or plug
(b) It is not work properly.
(c) It has been dropped into liquid or damaged.
Return this product to the dealer for more information to examine or repair.
(5) Use this product in well-ventilated areas. Do not use this product outdoors or in a
closed area where flammable or explosive liquid or vapors may exist.
(6) Do not block the air openings or place it on a soft surface where the openings may be
blocked. Never drop any objects into openings.
(7) Never use while drowsy or sleepy.
(8) Close supervision is needed when this product is used on, near children or invalids.
(9) Use this product only for its intended use as described in the manual.
(10) This product use oil-less technology. Do not use oil or grease on or near this device.
(11) This product is thermally protected when the motor is overheated and can restart
automatically when thermal protector resets as motor temperature gets lower.
(12) Improper vacuum setting for operation may cause irritation or trauma. Please check
the 5.3 Applicable Vacuum for Patients for the details.
! CAUTION
FEDERAL LAW RESTRICTS THIS DEVICE TO SALE BY OR ON THE ORDER OF
A PHYSICAN.
RISK OF ELECTRICAL SHOCK. DO NOT DISASSEMBLE ANY PARTS OF THIS
PRODUCT. IF SERVICING IS NEEDED, CONTACT YOUR DEALER FOR MORE
INFORMATION.
4
2. Introduction
The Merits Pioneer U601 Series Aspirator operates using standard AC Power from a wall
outlet. This device consists of a motor-driven oil-less dual piston pump, vacuum
regulation components and collection system. The product has dual fuses to offer high
quality safety protection when malfunction or incorrect operation.
The unit is to be used to remove bodily fluids from the patients’ airway or respiratory
support system.
3. Specifications
Electrical Requirements
115VAC±10%(126VAC/100VAC),
60Hz
230VAC±10%(207VAC/253VAC),
50Hz
Pump Type
Oil-less Dual Piston
Motor Type
AC Inductive Motor
Rated Current
Fuse
<1.2A
<0.6A
4A /250VAC Φ5mm x 20mm UL/CSA
2A /250VACΦ5mm x 20mm VDE
550mmHg @ Sea Level
Maximum Vacuum
Flow Rate
33LPM Free Flow
30LPM Free Flow
Sound Level
57dB(A) Average
Dimensions (H x W x D)
9.1"x 16.1" x 7.5" (23cm x 41cm x 19cm )
Weight
11.3 lbs (5.1 Kg)
Operation Temperature
50°F (10°C)~104°F(40°C)/RH <95%(non-condensing)
and Humidity
Storage/Transport
Temperature and
-4°F (-20°C)~140°F(60°C) /RH <95%(non-condensing)
Humidity
Hydrostatical Pressure
860hPa~1060hPa
5
(1). The Specifications subject to change without notice.
(2). This product complies with the following standards:
Medical Equipment Electrical Safety: IEC60601-1:1988 including A1:1991and A2:1995
Medical Equipment Electromagnetic Compatibility: IEC 60601-1-2:2001
(3). Classification
Type of protection against electric shock: Class I Equipment
Degree of protection against electric shock: Type BF Equipment
Degree of protection against harmful ingress of water: Ordinary Equipment
ISO 10079 Classification: High vacuum/high flow
Equipment not suitable for use in presence of a FLAMMABLE ANAESTHETIC
MIXTURE WITH AIR OR WITH OXYGEN OR NITROUS OXIDE.
(4). Canister
Recommended canister capacity: 800mL with over flow shut-off protection
6
4. Description
2
3
6
7
1
4
8
5
9
10
1. 4.5” Connection Tube
2. Vacuum Gauge
3. Vacuum Regulator Knob
4. Gauge Seat
5. Bacteria filter
6. 16” Connection Tube
7. Canister
8. 6’ Patient Tube
9. Fuse Holders
10. Power Switch
7
5. Operation
5.1 Grounding Instructions
In order to protect the users, this product should be grounded while in usage. When a
failure of electrical insulation occurs, the grounding wire will provide a short circuit to
reduce the risk of electrical shock. This product is equipped with a cord having a
grounding wire and grounding pin. This pin should be grounded correctly by plugged into
a grounded outlet. Removing the pin will disable the protection and may cause the risk of
electrical shock.
Grounding
Pin
Adapter
Grounded
Outlet
Metal Screw
Ground Tab
for ground
Grounded Outlet Box
Figure
A
Figure B
This product is always equipped with a plug having grounding pin. Refer to figure A ,
make sure the outlet has a grounded hole. Connect the cord plug to the outlet. If a
properly grounded outlet in figure A is not available, the adapter in figure B should be
used. The ground tab extending from the adapter must be connected to a permanent
ground, such as a properly grounded outlet box cover , with a metal screw fixed. The
permanent ground should be checked or installed by a qualified electrician.
! DANGER
IMPROPER USE OF THE GROUNGED PLUG CAN RESULT IN A RISK OF ELECTRICAL
SHOCK. DO NOT CONNECT THE GROUNDING WIRE TO EITHER FLAT BLADE WHEN USING
AN ADAPTER. CONTACT A QUALIFIED ELECTRICIAN IF ANY DOUBT.
8
5.2 Set-Up
(1) Refer to the Description to become familiar with this product.
(2) Connect either end of 4.5” connection tube to connect block then connect the other
end to the bacteria filter.
NOTICE! Follow the direction sign on the lateral of bacteria filter.
Refer to 7.1 Tube and Bacteria Filter Replacement.
(3) Connect 16” connection tube to bacteria filter and canister lid where labeled
<Vacuum>.
(4) The 6’ Patient Tube should be connected to the canister lid where labeled <patient>
(5) Make sure all connections are secure and have no leakage before using.
5.3Applicable Vacuum for Patients
The suggested applicable vacuum for adults is below 200mmHg, 80~100mmHg for
children. The device is not suggested for infants use. Set the proper vaccum before
suction therapy process.
5.4 Operation
! WARNING
PROPER USING THIS PRODUCT IS NECESSARY TO AVOID PHYSICAL HARM.
THIS PRODUCT SHOULD BE USED UNLESS THE OPERATOR HAS BEEN
INSTRUCTED BY A PHYSICIAN OR OTHER QUALIFIED HEALTH CARE
PROFESSIONAL.
(1) Check the power switch. It should be OFF.
(2) You should read the GROUNDING INSTRUCTIONS before connect the power cord.
Plug the power cord into grounded outlet which is in the voltage range of
specification.
(3) Make sure the length of 16” tube from the canister to the bateria filter is dry and clear.
9
(4) Turn ON the power switch.
(5) Use vacuum control knob to adjust the vacuum setting directed by the Physician or
Qualified Health Care Professional. Check the degree of vacuum by blocking the
opening of 6’ patient tube.
(6) The pump now is ready for use.
! CAUTION
IF FLUID HAD BEEN SUCKED INTO THE VACUUM PUMP, SHUT-OFF THE
POWER IMMEDIATELY, SEND THE DEVICE BACK TO THE DEALER FOR
SERVICE. DO NOT ATTEMPT TO USE THE DEVICE.
! CAUTION
IF FLUID IN THE CANISTER REACH A LEVEL TO ACTIVATE THE OVER
FLOW SHUT-OFF VALE, THE PATIENT’S TUBE WILL STOP VACUUM
AUTOMATICALLY. PLEASE STOP OPERATION AND POWER OFF THE
DEVICE. EMPTY AND CLEAN THE CANISTER.(See 6.3 canister)
6. Cleaning
6.1 Unit Cleaning:
(a) Switch off the pump and disconnect it from the external power source.
(b) Wipe the unit with a clean soft dry cloth.
! WARNING
DO NOT SUBMERGE VACUUM PUMP IN LIQUID AS THIS RESULT IN DAMAGE
TO THE VACUUM PUMP.
6.2 Disinfection:
If contamination concerns arise, users may perform the following processes after
cleaning the unit to disinfect the. Clean the cabinet with either a common chemical
disinfectant or a bleach solution* and allow it to air dry. For the bleach solution, wear eye
and skin protection to prevent exposure to the chlorine.
10
Note: *Make the bleach solution a 1:100 dilution of 5~6% sodium hypochlorite. Mix one
part household bleach (e.g... Clorox) with 99 parts cold tap water. To measure the
solution easily, take 1/4 cup of household bleach, and mix it with a gallon of cold tap
water. Allow the mixture to sit on potentially contaminated surfaces for 10 minutes.
6.3 Canister:
EMPTY and CLEANING:
1. Shut off power switch and allow vacuum to decrease.
2. The canister can be moved out of the holder to be emptied.
NOTE– Canister should be emptied after each use.
3. Canister should be thoroughly cleaned after each use by the following methods:
4. Wash in a hot water and rinse with clean, hot tap water. Then wash in one part
vinegar to three parts hot water solution. Rinse with hot tap water and air dry.
7. Maintenance
7.1 Tube and Bacteria Filter Replacement
! CAUTION
THE TUBING SHOULD BE CHANGED AFTER EACH PATIENT USE OR ON A
MONTHLY BASS IF THE SAME PATIENT USES UNIT.
THE HYDROPHOBIC BACTERIA FILTER SHOULD BE CHANGED AFTER EACH
PATIENT USE OR ON A MONTHLY BASIS IF THE SAME PATIENT USES UNIT.
Disconnet the bacteria filter, 4.5” and 16” connection tubes. Use new ones to connect the
tubes as the direction shown on the filter lateral side. ( See figure below)
11
Canister
Gauge Seat
16” Tube
4.5” Tube
Air Flow Direction
7.2 Preventive Maintenance
(1) The preventive maintenance should be performed at least once each year.
(2) Inspect and clean the external surfaces.
(3) Check the vacuum regulator knob. If loose, change the o-ring inside gauge seat.
(4) Verify the vacuum gauge.
(5) Inspect the power cord and plug. Replace a new power cord if worn-out or damaged.
! CAUTION
CHANGING OR REPLACING A NEW COMPONENT SHOULD BE PERFORMED
BY A QUALIFIED PROFESSIONAL. CONTACT THE DEALER IF NECESSARY.
7.3 Replace Fuses
Two fuse holders on the electrical box offer over current protection. If the motor can not
start when the power cord is plugged into outlet, check the fuses. If the fuse had been
broken, replace a new 4 A /250VAC Φ 5mm x 20mm CSA or UL approved fuse for
115VAC/60Hz type and 2A /250VAC Φ 5mm x 20mm VDE approved fuse for
230VAC/50Hz type.
12
8. Troubleshooting
Use the table below to find out the possible solutions if any problems when using this
product before you contact the dealer.
SYMPTOM
PROBABLE CAUSE
SOLUTION
Switch ON but unit does not 1.
operate.
2.
3.
Power Cord does not 1. Plug the power cord into
plugged in an outlet.
an outlet.
No power at outlet.
2. Use a live outlet.
Fuses had burnt out.
3. Replace new fuses.
See ”7.3 Replace Fuses”.
Unit runs but no or low 1. Tubing is not connecting 1. Connect the tubes
vacuum.
tightly.
tightly.
2. Leakage occurs in
2. Replace the crack
canister or tubing.
canister or the leaking
tube.
3. Air flow blocked by
3. Replace a new bacteria
dirty bacteria filter.
filter. See” 7.1 Tube and
Bacteria Filter
Replacement”.
Unit was running but stops 1.
abruptly.
2.
Fuses have burnt out.
Thermally protected
1.
Replace new fuses.
See”7.3 Replace Fuses”.
2. Wait for 5~10min to
restart.
! CAUTION
IF FLUID HAD BEEN SUCKED INTO THE VACUUM PUMP, SHUT-OFF THE
POWER IMMEDIATELY, SEND THE DEVICE BACK TO THE DEALER FOR
SERVICE. DO NOT ATTEMPT TO USE THE DEVICE.
13
9. Warranty
Merits Health Products Co., Ltd. warrants the Pioneer Aspirator to be free from defective
workmanship and materials for a period of 1 year from the date of purchase. Check with
your dealer for more details. This warranty is limited to the original purchaser of the
compressor. Any defective part or assembly will be repaired or replaced, at the sole
discretion and determination of Merits Health Products Co., Ltd., if the unit has been
properly operated during the warranty period. Normal maintenance items and disposable
components are not covered by this warranty. Shipping charges, if any, shall be paid by
the purchaser.
Note: There is no other express warranty. Implied warranties, including those of
merchantability and fitness for a particular purpose, are limited to the duration of the
express limited warranty and to the extent permitted by law and all implied warranties are
excluded. This warranty does not cover providing a loaner pump, compensating for costs
incurred for pump rental, or labor costs incurred in repairing or replacing defective
part(s).
Authorized European Representative:
Roma Medical Limited
Unit 23 Vale Business Park,
Cowbridge, Vale of Glamorgan CF71 7PF
United Kingdom
+44-1446-774519
Manufactured by:
Merits Health Products Co., Ltd.
No.9, Road 36, Taichung Industrial Park,
Taichung, Taiwan,
R.O.C.
(886)-4-23594985
CE Marked For Model
U601 (Europe)
0197
230V~, 50Hz
Rev. 1.
01/16/2007
14