1
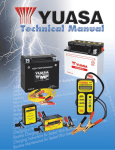
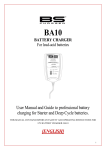
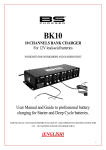
12V 900mA Charger
IMPORTANT SAFETY INSTRUCTIONS: SAVE THESE INSTRUCTIONS
THIS MANUAL CONTAINS IMPORTANT SAFETY AND OPERATING INSTRUCTIONS FOR 12V
BATTERY CHARGER, VM12990‑02. KEEP IT WITH OR NEAR CHARGER AT ALL TIMES.
1.
1.1
1.2
1.3
1.4
1.5
1.6
1.7
1.8
2.
2.1
2.2
2.3
2.4
2.5
WARNING
‑ RISK OF EXPLOSIVE GASES.
WORKING IN VICINITY OF A LEAD‑ACID BATTERY IS
DANGEROUS. EXPLOSIVE GASES DEVELOP DURING
NORMAL BATTERY OPERATION. IT IS IMPORTANT
THAT EACH TIME BEFORE USING YOUR CHARGER,
YOU READ THIS MANUAL AND FOLLOW THE
INSTRUCTIONS EXACTLY.
To reduce risk of battery explosion, follow these
instructions and those published by battery manufacturer
and manufacturer of any equipment you intend to use in
vicinity of battery. Review cautionary marking on these
products and on engine.
Do not expose charger to rain, snow, or liquids.
Use of an attachment not recommended or sold by the
battery charger manufacturer may result in a risk of fire,
electric shock, or injury to persons.
To reduce risk of electric shock, unplug charger from AC
outlet before attempting any maintenance or cleaning.
Turning off controls will not reduce this risk.
An extension cord should not be used unless absolutely
necessary. Use of improper extension cord could result in a
risk of fire and electric shock. If extension cord must be used,
make sure that pins on plug of extension cord are the same
number, size and shape as those of plug on charger and that
the extension cord is properly wired and in good electrical
condition and that the wire size is large enough for AC ampere
rating of charger as specified in the following table:
RECOMMENDED MINIMUM AWG SIZE FOR
EXTENSION CORDS FOR BATTERY CHARGERS
Length of cord (feet): 25 50 100 150
AWG size of cord: 18 18 18 18
If charger is equipped with an input power cord, do not
operate charger with damaged cord or plug ‑ replace the
cord or plug immediately.
Do not operate charger if it has received a sharp blow,
been dropped, or otherwise damaged in any way; take it
to a qualified serviceman.
Do not disassemble charger; take it to a qualified service
center when service or repair is required. Incorrect
reassembly may result in a risk of electric shock or fire.
PERSONAL PRECAUTIONS
Someone should be within range of your voice or close
enough to come to your aid when you work near a lead‑
acid battery. Have plenty of fresh water and soap nearby
in case battery acid contacts skin, clothing or eyes. Wear
complete eye and clothing protection. Avoid touching
eyes while working near battery.
If battery acid contacts skin or clothing, wash immediately
with soap and water. If acid enters eye, immediately flush
eye with running cold water for at least 10 minutes and
get medical attention immediately.
NEVER smoke or allow a spark or flame in vicinity of
battery or engine.
Be extra cautious to reduce risk of dropping a metal tool
onto battery. It might spark or short‑circuit battery or other
electrical part that may cause explosion.
When working with a lead‑acid battery, remove personal
metal items such as rings, bracelets, necklaces, watches,
702-000158
2.6
2.7
3.
3.1
3.2
3.3
3.4
4.
4.1
4.2
4.3
4.4
4.5
5.
5.1
5.2
5.3
6.
6.1 6.2
6.3
etc. A lead‑acid battery can produce a short‑circuit current
high enough to weld a ring or the like to metal, causing a
severe burn.
Use charger for charging a Lead‑Acid Battery only. It
is not intended to supply power to a low voltage electrical
system other than in a starter‑motor application. Do not
use battery charger for charging dry‑cell batteries that are
commonly used with home appliances. These batteries
may burst and cause injury to persons and damage to
property.
NEVER charge a frozen battery.
PREPARING TO CHARGE
If necessary to remove battery from vehicle to charge,
always remove grounded terminal from battery first.
Make sure all accessories in the vehicle are off, so as
not to cause an arc. Be sure area around battery is well
ventilated while battery is being charged. Gas can be
forcefully blown away by using a piece of cardboard or
other non‑metallic material as a fan.
Clean battery terminals. Be careful to keep corrosion from
coming into contact with eyes. Add distilled water in each
cell until battery acid reaches level specified by battery
manufacturer. This helps purge excessive gas from cells.
Do not overfill. For a battery without caps, carefully follow
manufacturer’s recharging instructions.
Study all battery manufacturer’s specific precautions such
as removing or not removing cell caps while charging and
recommended rates of charge.
Determine voltage of battery by contacting battery
manufacturer and make sure it matches output rating of
battery charger.
CHARGER LOCATION
Locate charger as far away from battery as DC cables
permit.
Never place charger directly above battery being charged;
gases from battery will corrode and damage charger.
Never allow battery acid to drip on charger when reading
gravity or filling battery.
Do not operate charger in a closed‑in area or restrict
ventilation in any way.
Do not set a battery on top of charger.
DC CONNECTION PRECAUTIONS
Connect and disconnect DC output terminals only after
removing charger from AC outlet.
Never allow DC output terminals to touch each other.
If problems arise connecting the output leads, solicit
the aid of your Dealer from whom you purchased this
product or the charger manufacturer for finding a suitable
connection device for your application.
FOLLOW THESE STEPS WHEN BATTERY IS INSTALLED
IN VEHICLE. A SPARK NEAR BATTERY MAY CAUSE
BATTERY EXPLOSION. TO REDUCE RISK OF A SPARK
NEAR BATTERY:
Position AC and DC cords to reduce risk of damage by
hood, door or moving engine part.
Stay clear of fan blades, belts, pulleys, and any other
parts that can cause injury to persons.
Check polarity of battery posts POSITIVE (POS.,P,+)
P.1
6.4
6.5
6.6
6.7
6.8
7.
7.1
7.2
7.3
7.4
7.5
7.6
7.7
8.
post usually has larger diameter than NEGATIVE
(NEG,N,-).
Determine which post of battery is grounded (connected)
to chassis. If negative post is grounded (as in most
vehicles), see paragraph 6.5. If positive post is grounded,
see paragraph 6.6.
For negative-grounded vehicle, first connect POSITIVE
(RED) clip from charger to POSITIVE (POS.,P,+)
ungrounded post of battery. Then connect NEGATIVE
(BLACK) terminal to vehicle chassis or engine block away
from battery.
For positive-grounded vehicle, connect NEGATIVE
(BLACK) clip from charger to NEGATIVE (NEG,N,-)
ungrounded post of battery. Connect POSITIVE (RED)
clip to vehicle chassis or engine block away from battery
keeping the battery terminal well-removed therefrom.
Do not connect any charger clips to carburetor, fuel lines,
or sheet-metal body parts. Connect to a heavy gauge
metal part of the frame or engine block.
When disconnecting charger, turn switches (if supplied)
to off, disconnect charger from AC power, remove clip
from vehicle chassis, and then remove clip from battery
terminal. See operating instructions for length of charge
information.
FOLLOW THESE STEPS WHEN BATTERY IS OUTSIDE
VEHICLE. A SPARK NEAR THE BATTERY MAY CAUSE
BATTERY EXPLOSION. TO REDUCE RISK OF A SPARK
NEAR BATTERY:
Check polarity of battery posts. POSITIVE (POS.,P,+)
battery post usually has a larger diameter than NEGATIVE
(NEG.,N,-) post. Some batteries are equipped with ‘Wing- Nut’ terminals allowing for easy placement of the terminals
to these posts.
Attach at least a 24-inch long 18-gauge (AWG) insulated
battery cable to NEGATIVE (NEG,N,-) battery post.
Connect POSITIVE (RED) charger terminal to POSITIVE
(POS.,P,+) post of battery.
Position yourself and free end of cable as far away from
battery as possible - then connect NEGATIVE (BLACK)
terminal to free end of cable.
Do not face battery when making final connection.
When disconnecting charger, always do so in reverse
sequence of connecting procedure and break first
connection while as far away from battery as practical.
A marine (boat) battery must be removed and charged on
shore. To charge it on board requires equipment specially
designed for marine use.
OPERATING INSTRUCTIONS
Once the connection instructions have been followed, the
Red Light Emitting Diode (L.E.D.) lights when AC power
is present. The Yellow L.E.D. lights to indicate ‘Charging
Mode’ and that a proper connection to the battery has
been made. The battery charges to approximately 14.4Vdc
and then transitions into the ‘Float Mode’ where the White
L.E.D. turns GREEN and the regulating voltage reduces
to a lower level. The Float Mode allows the charger to
effectively be left connected to your batteries, over the
course of a season, without overcharging your batteries,
and maintains the full charge on your batteries. A regular,
periodic check on your charging system, if left unattended
and powered, is still recommended (just as you would with
any electrical appliance). The ‘Float Mode’ also contains
a special charging waveform, that pulses power into your
702-000158
9.
9.1
9.2
10.
11.
batteries, and helps to peak the power into your battery.
Also, while in this mode, if the charger senses a load that
has activated, the charger recycles to the ‘Charging Mode’
to start charging again, up to the 14.4Vdc level.
PROTECTION DEVICES AND MEASURES
OVERLOAD PROTECTION
The charger employs the use of a ‘Solid State Circuit
Interrupter’ that opens under severe overload. This
condition may occur if attempting to charge any severely
discharged or heavily sulfated battery. Once the Interrupter
opens, the charger will stop charging for a short period and
then resume charging automatically and the yellow. L.E.D.
will be OFF, until resume charging. Overloading could be
due to an external load, remove the load condition prior to
attempting to recharge the battery.
REVERSE BATTERY / OVERLOAD CONDITION
The charger has reverse battery and short circuit protection.
If a reverse battery condition exists (White L.E.D. will turn
RED, only, while output leads are connected backwards),
simply unplug charger from AC power and properly
remake the connections as described in this manual.
MAINTENANCE
Store in clean, dry place. Occasionally clean the case and
cords with a dry cloth.
WARRANTY
YUASA INC., READING PENNSYLVANIA offers this
limited warranty to the original purchaser. This
warranty is NOT TRANSFERABLE.
THREE YEARS LIMITED WARRANTY
Yuasa Inc. (Yuasa) warrants exclusively to the original
purchaser that this charger will be replaced or repaired,
at Yuasa’s option, if it fails during the first two years after
date of purchase due to defect in material or workmanship.
It is the responsibility of the purchaser to contact Yuasa
Customer Service for warranty consideration.
YUASA BATTERY INC.
1-866-431-4784
www.yuasabatteries.com
A $5.95 handling fee must accompany the battery charger
after 120 days from date of purchase. A copy of the
original bill of sale is required for the limited warranty to
be honored. If a copy of the original bill of sale is lost, a
$12.95 handling fee must accompany the battery charger
for the limited warranty to be honored.
This warranty does not cover failures arising out of
improper use, maintenance or operation of the product.
Repair or replacement as provided under this warranty is
the exclusive remedy of the consumer. Yuasa shall not
be liable for any incidental or consequential damages
for breach of any expressed or implied warranty on this
product. Except to the extent provided by applicable
law, any implied warranty of merchantability or fitness
for a particular purpose on this product is limited to the
duration of this warranty.
Some states do not allow the exclusion or limitation of
incidental or consequential damages, or allow limitations
on-how long an implied warranty lasts, so the above
limitations or exclusion may not apply to you. This limited
warranty gives you specific legal rights, and you may also
have other rights which vary from state to state.
P.2