1
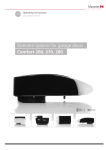
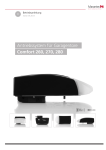
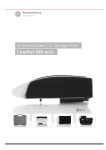
GB Operating instructions Last updated: 07.2012 Operator systems for garage doors Comfort 260, 270, 280 Table of Contents Regarding this document 1. –– Original instruction manual. –– Part of the product. –– Read these instructions carefully before use and keep them in a safe place for future reference. –– Protected by copyright. –– No part of this manual may be reproduced without our prior approval. –– Subject to alterations in the interest of technical progress. –– All dimensions are given in millimetres. –– The drawings are not true to scale. General safety instructions . . . . . . . . . . . . . . . . . . . . . 3 1.1 Intended use. . . . . . . . . . . . . . . . . . . . . . . . . . . . . . . . . 3 1.2 Target group. . . . . . . . . . . . . . . . . . . . . . . . . . . . . . . . . 3 1.3Warranty. . . . . . . . . . . . . . . . . . . . . . . . . . . . . . . . . . . . 3 2. Product overview. . . . . . . . . . . . . . . . . . . . . . . . . . . . . 3 3.Installation. . . . . . . . . . . . . . . . . . . . . . . . . . . . . . . . . . 4 3.1 Preparing for installation. . . . . . . . . . . . . . . . . . . . . . . . 4 3.2 Installing the drive. . . . . . . . . . . . . . . . . . . . . . . . . . . . . 5 3.3 Connection of control elements. . . . . . . . . . . . . . . . . . . 8 3.4 Completing the installation. . . . . . . . . . . . . . . . . . . . . . 9 4. Setting in operation. . . . . . . . . . . . . . . . . . . . . . . . . . 10 4.1 Overview of the controls . . . . . . . . . . . . . . . . . . . . . . . 10 4.2 Status display . . . . . . . . . . . . . . . . . . . . . . . . . . . . . . . 11 4.3 Express programming . . . . . . . . . . . . . . . . . . . . . . . . . 11 4.4 Function test. . . . . . . . . . . . . . . . . . . . . . . . . . . . . . . . 12 4.5 Special programming. . . . . . . . . . . . . . . . . . . . . . . . . . 13 5.Operation. . . . . . . . . . . . . . . . . . . . . . . . . . . . . . . . . . 19 5.1 Hand transmitter. . . . . . . . . . . . . . . . . . . . . . . . . . . . . 19 5.2 Release mechanism. . . . . . . . . . . . . . . . . . . . . . . . . . . 20 6.Maintenance . . . . . . . . . . . . . . . . . . . . . . . . . . . . . . . 21 7.Disassembly . . . . . . . . . . . . . . . . . . . . . . . . . . . . . . . . 21 8.Disposal . . . . . . . . . . . . . . . . . . . . . . . . . . . . . . . . . . . 21 9. Rectifying faults. . . . . . . . . . . . . . . . . . . . . . . . . . . . . 21 10.Appendix . . . . . . . . . . . . . . . . . . . . . . . . . . . . . . . . . . 23 10.1 Technical Data. . . . . . . . . . . . . . . . . . . . . . . . . . . . . . . 23 10.2 Declaration of Incorporation. . . . . . . . . . . . . . . . . . . . . 24 10.3 EC Declaration of Conformity. . . . . . . . . . . . . . . . . . . . 25 Meaning of symbols DANGER! Safety notice indicating a danger that will directly result in death or severe injury. WARNING! Safety notice indicating a danger that could result in death or severe injury. CAUTION! Safety notice indicating a danger that could result in slight or moderate injuries. NOTICE Safety notice indicating a danger that could result in damage to property or in irreparable damage to the product. CHECK Reference to a check that needs to be carried out. REFERENCE Reference to separate documents that must be observed. • Instruction requiring action –– List, itemisation DANGER! Important safety instructions: Attention! It is vitally important for the safety of persons that you follow all the instructions. Keep these instructions in a safe place. ➔➔ Reference to other sections of this document )) Factory settings Important instructions for safe installation: Attention! Serious injuries can be caused if the equipment is not installed correctly – be sure to follow all the installation instructions. 2 Operating instructions, Comfort 260, 270, 280 (#100316 – GB) 1. General safety instructions DANGER! Failure to comply with the documentation could result in life-threatening danger! • Be sure to follow all the safety instructions in this document. 1.1 Intended use –– The operator system is to be used only for opening and closing the following types of door: – Sectional doors – Up-and-over swing-out doors –– Only approved for use in dry rooms. –– The maximum push and pull forces must be observed. –– Never use the garage door to lift persons or objects. 1.3 Warranty –– The warranty with regard to function and safety is only valid if the instructions in this manual are observed. Failure to observe the safety instructions could lead to personal injury and damage to property. The manufacturer is not liable for damage resulting from non-observance of the instructions. –– The product is manufactured in accordance with the guidelines and standards listed in the manufacturer’s declaration and in the declaration of conformity. The product left the factory in perfect order with regard to safety. –– The warranty does not cover batteries, protection devices or light bulbs. 2. Product overview 2 / 1 1.2 Target group –– Installation, connection and setting in operation: qualified, trained specialist personnel. –– Operation, inspection and servicing: the operator of the door system. Requirements to be met by qualified and trained specialist staff: –– Knowledge of the general and specific safety and accident- prevention regulations. –– they have knowledge of the relevant electrical regulation, –– Training in the use and care of appropriate safety equipment. –– Adequate instruction and supervision by qualified electricians. –– The ability to recognise hazards that can be caused by electricity. –– Knowledge of the application of the following standards – EN 12635 (“Doors and gates - Installation and use”), – EN 12453 (“Safety in use of power operated doors Requirements”), – EN 12445 (“Safety in use of power operated doors Test methods”), 2x 2x 2 / 2 2x Requirements to be met by the operator of the door system: –– Knowledge and safekeeping of the instruction manual. –– Knowledge of general safety and accident-prevention regulations. 2x 2 / 3 4x 2x 2x Operating instructions, Comfort 260, 270, 280 (#100316 – GB)3 2 / 4 NOTICE 6x 6x 6x 2 / 5 2 / 6 Material damage resulting from incorrect installation of the operator! To avoid installation errors and damage to the door or operator system, the following installation instructions must be observed at all costs. • Ensure that the door is in good mechanical condition: – The door remains stationary in every position. – The door can be moved easily. – The door opens and closes properly. • When installing the operator system, the door must be in the closed position. • Install all impulse transmitters and control equipment (such as radio code buttons) (e. g. within sight of the door and at a safe distance from the door’s moving parts. The installation height must be at least 1.5 metres from the ground. • Only use fixing materials that are suitable for the foundation material in question. 3.1 Preparing for installation Before commencing installation, the following works must be carried out without fail. Regional deviations are possible. 3. Installation DANGER! Life-threatening danger due to electric shock! • It is vital that you disconnect the operator system from the power supply before commencing cabling work. Take measures to ensure that the power supply remains disconnected for the duration of the work. • Observe the local safety regulations. • It is imperative that you lay power cables separately from control cables. The control voltage is 24 V DC. Supply package • Check that all the parts are present. • Check that all the necessary accessory parts for your installation situation are present (e.g. operator boom). Garage • Check to make sure that your garage has a suitable power connection and a mains disconnection switch. Door system • Remove any components (such as ropes, chains, brackets, etc.) from the door that are no longer needed. • All equipment that will no longer be required after the door operator system has been installed must be taken out of service. For garages without a second entrance: • Fit the garage door with an emergency release mechanism so that you can gain entry to the garage if there is a malfunction. If a release set is used: • Check that the door catches function properly. On no account should the door catches be taken out of service. If no release set is used: • Remove the door catches or take them out of service. REFERENCE When using and installing accessory equipment, observe the corresponding documentation. 4 Operating instructions, Comfort 260, 270, 280 (#100316 – GB) 3.2 Installing the drive 4x 3.2 / 1 2x 3.2 / 2 A NOTICE Possibility of damaging the motor unit! Do not use force, as this could damage the teeth of the gears! • Carefully fix the operator boom to the motor unit. ø 5 – 5,5 3.2 / 3 A 4x 4x B B ø 5 – 5,5 4x Operating instructions, Comfort 260, 270, 280 (#100316 – GB)5 3.2 / 7 3.2 / 4 1x WARNING! Possibility of serious injury due to falling components! • Secure the operator system to prevent if from falling before it is properly fixed in place. 3.2 / 8 NOTICE Possibility of damaging the door leaf! At its highest point during opening, the top edge of the door leaf must be 10 - 50 mm below the bottom edge of the horizontal operator boom. • Fix the lintel joining plate for the operator boom. It must be positioned centrally above the door leaf. 3.2 / 5 ø 10 10 - 50 3.2 / 9 3.2 / 6 2x 3.2 / 10 2x 2x 2x 6 Operating instructions, Comfort 260, 270, 280 (#100316 – GB) 3.2 / 11 3.2 / 15 3.2 / 12 3.2 / 16 1x a ø 10 1x a = 90° b = 9 Nm 5-10 b 3.2 / 13 3.2 / 17 2x 2x 2x 3.2 / 14 3.2 / 18 1/3 2/3 Operating instructions, Comfort 260, 270, 280 (#100316 – GB)7 3.3 Connection of control elements DANGER! Life-threatening danger due to electric shock! • It is vital that you disconnect the operator system from the power supply before commencing cabling work. Take measures to ensure that the power supply remains disconnected for the duration of the work. 3.3.1 Overview of the control element connections 3.3.1 / 1 XB03 XW40 XB72 NOTICE XW81 Danger of material damage resulting from incorrect installation of the operator! If an external voltage is connected to terminal block XB03, the entire electronic system will be irreparably damaged. • Connect only potential-free contacts to terminals 1, 2 and 4 (XB03). XN70 XB03 Connection for –– external control elements –– Photocell ➔➔ „Level 5, Menu 1 - Programmable impulse input (terminal 1/2)“ ➔➔ „3.3.3 Terminal block XB03“ XB72 Connection for modular antenna ➔➔ „3.3.2 Terminal block XB72“ XN70 Connection for battery backup ➔➔ „3.3.4 Connections XN70 and XW81“ XW40 Connection for MS bus expansion module XW81 Connection for expansion inputs / outputs ➔➔ „3.3.4 Connections XN70 and XW81“ 3.3.2 Terminal block XB72 3.3.2 / 1 8 Operating instructions, Comfort 260, 270, 280 (#100316 – GB) 3.3.3 Terminal block XB03 3.3.4 Connections XN70 and XW81 3.3.3 / 1 3.3.4 / 1 3.3.3 / 2 - XB03 3 2 1 4 70 M11E021 1 REFERENCE See the separate documentation for instructions on installing the connected elements. - Sb4 - W1 - W2 71 3.3.4 / 2 - Sb1 2 - W1 1 2 - W2 1 2 - AP27 3.3.3 / 3 2 1 2 1 TX RX 1 GROUND 2 Impulse 3 24 V DC 4 Hold circuit, active after a reset 70 GROUND 71 Photocell AP27 Photocell RX Photocell receiver TX Photocell transmitter Sb1 Impulse button Sb4 Normally closed contact for hold circuit 3.4 Completing the installation 3.4 / 1 • Take the warning signs regarding trapping hazards and affix them permanently at noticeable locations. • After installation is complete, ensure that no door parts extend onto the public footpath or the street. Operating instructions, Comfort 260, 270, 280 (#100316 – GB)9 4. Setting in operation Display Function / Element Ready for operation Before initial operation and at regular intervals of no more than one year, power-operated windows, doors and gates must be inspected by a qualified person (whereby written inspection records must be kept). After setting the system in operation, the operator of the door system, or the operator’s representatives, must be instructed in the operation of the system. Door position: CLOSED Door position: OPEN Fault message / Maintenance indicator in CLOSED door position WARNING! Danger of injury due to uncontrolled movement of the door! • Ensure that children can not play with the door controls or the hand transmitter. • Before setting the door in motion, make sure that no persons or objects are within the danger zone of the door. • Before going through the door opening, make sure that the door is in the OPEN position. • Check all the existing emergency command devices. • Pay attention to potential crushing and shearing zones in the door system. • Never touch a running door, the guide rail or any moving parts. • The regulations of DIN EN 13241-1 (“Doors and gates - Product Standard”) must be observed. Remote control External button 3 Status display (example: 3 = Battery backup connected) ➔➔ „4.2 Status display“ 12 34 5678 5678 90 34 Photocell or closing edge safety device Level indicator (example: Level 2) 12 90 4.1 Overview of the controls Control elements 12 34 5678 90 Drive the door in the CLOSE direction, decrease the value Minute indicator 12 12 Menu and parameter indicator (example: Menu 3, Parameter 8) LED display Drive the door in the OPEN direction, increase the value P 5678 90 5678 90 34 34 Times exceeding one minute are shown in minutes and seconds. Example: 1.2 = 1 minute + 20 seconds = 80 seconds Start programming, confirm and save values Legend The display flashes Display lights up 10 Operating instructions, Comfort 260, 270, 280 (#100316 – GB) 4.2 Status display Display Express programming 1. Programming the “OPEN” door position Function / Element The control system is in operating mode. 3 Battery backup connected (optional) 4 Warning time indicator (only for programmed automatic closing) P P > 3 sec. < 10 sec.: Start express programming. Drive the door to the OPEN position. 4.3 Express programming To set the operator system properly in service and after every reset, the express programming procedure must be carried out. Requirements: –– The door must be in the CLOSED position. –– The carriage must be coupled up. When in programming mode, the controls will revert automatically to operating mode if a period of 120 seconds passes without any buttons being pressed. A corresponding fault number will be displayed. ➔➔ „9. Rectifying faults“” P Save the OPEN position. 2. Programming the “CLOSED” door position Drive the door to the CLOSED position. • Carry out the express programming procedure. CHECK P Save the CLOSED position. A function test must be carried out after express programming. ➔➔ „4.4 Function test“ 3. Programming the remote control Press the hand transmitter button. Release the hand transmitter button. P Save the remote control setting. End express programming. The control system is in operating mode. Operating instructions, Comfort 260, 270, 280 (#100316 – GB)11 4.4 Function test 4.4.1 Programming run for setting the driving power During the first two runs after the door positions have been programmed, the operator system determines the maximum required driving power. • Drive the operator system (with the door coupled up) from the CLOSED door position to the OPEN position and back again, without interruption. • Check the driving power. Check the driving power 1. The control system is in operating mode. 2. The door should open and move to the saved “OPEN” door position. 3. 4. 5. 6. 12 The door should close and move to the saved “CLOSED” door position. The door operator should move the door in the OPEN or CLOSE direction. Richtung ZU bewegen. The operator system should stop. 4.4.2 Checking the automatic cut-out WARNING! Danger of injury due to incorrectly programmed values for the door driving power! • Check the automatic cut-out function in the OPEN and CLOSE directions. Automatic cut-out in the OPEN direction This checking procedure only applies to operator systems that are installed to operate doors that have openings in the door leaf (with openings > 50 mm in diameter): • During travel, apply a load of 20 kg to the door at the mid point of the bottom edge of the door: The door should stop immediately. Automatic cut-out in the CLOSE direction This checking procedure applies to all door systems. • Place an object, 50 mm in height, on the floor. • Drive the door towards the obstacle: The operator system should stop and reverse when it touches the obstacle. The settings for the driving power in the OPEN and CLOSE directions remain saved even if the mains power supply is interrupted. The parameters are returned to the factory settings only after a reset. ➔➔ „Level 1, Menu 8 – RESET“ 4.4.3 Checking the photocell Photocell • Check all the photocells individually by triggering them. • Check all the photocells just before the door reaches the CLOSED position. Special points regarding door-frame photocells –– A door-frame photocell must function above the position at which it is installed. Below the installation position, the function of the photocell is suppressed by the control unit. –– If several photocells are connected, all the photocells function in the same way as a door-frame photocell, if present. The operator system should run in the opposite direction. Operating instructions, Comfort 260, 270, 280 (#100316 – GB) 5. Select the menu required (example Menu 3). 6. Confirm the menu required. Display the programmed parameter value. P Change the parameter value. 8. Save the parameter value. The control system switches to display the levels P 34 5678 34 5678 34 5678 34 5678 12 12 12 5678 90 Select the next level required. Continue programming. 34 90 7. 5678 12 P 34 12 4. Confirm the level required. Display the first menu and the programmed parameter. 5678 12 Select the level required (example: Level 2). 34 90 A function test must be carried out after changes have been made in programming mode. ➔➔ „4.4 Function test“ 3. 5678 90 CHECK P 34 90 If a photocell is connected, it will be automatically detected by the control system as soon as the power supply is connected. The photocell can be reprogrammed later. Photocells that are not required must be disconnected before the power supply is connected; otherwise they will be recognised by the controls. ➔➔ „3.3.3 Terminal block XB03“ 2. P > 10 sec.: Start programming the extended operator functions. Display the levels. 90 Material damage resulting from incorrect programming of the door operator. After a reset, all the parameters are returned to the factory settings. Safety elements that are operational and are connected to the system will be recognised anew after a reset. To ensure that the controls functions properly: • Reprogram all the required functions. • Reprogram the remote control. • Drive the operator system once to the OPEN position and then the CLOSED position. The control system is in operating mode. 90 NOTICE 1. 90 Danger of injury due to incorrect settings for the door driving power! Important factory settings can be changed when programming the special functions. • Check the programmed parameter values. • Check the programmed door driving power values after changes have been made to the automatic cut-out setting. ➔➔ „4.4.2 Checking the automatic cut-out“ • Carry out the necessary measurements to validate the correct force limitation. Programming procedure 12 WARNING! 4.5.1 Programming the special functions 12 4.5 Special programming or 9. P P > 5 sec.: Finish programming. All the altered parameters are saved. The control system is in operating mode. Operating instructions, Comfort 260, 270, 280 (#100316 – GB)13 4.5.2 Overview of the special functions Level 1 Basic functions Menu 3 Intermediate OPEN position 4 Intermediate CLOSE position 7 Relay output 8 RESET 2 Operator settings 1 Driving power required to OPEN 2 Driving power required to CLOSE 3 Automatic cut-out in the OPEN direction 4 Automatic cut-out in the CLOSE direction 3 Automatic closing timer 1 Automatic closing timer 3 Door open duration 4 Warning time 5 Start-up warning 4.5.3 Contents of the special functions Level 1 – Basic functions Menu 3 – Intermediate OPEN position Adjust the setting using the + (OPEN) and – (CLOSE) buttons. The closing function with automatic closing is possible. Only the intermediate position that was programmed last can be used. Menu 4 – Intermediate CLOSE position Adjust the setting using the + (OPEN) and – (CLOSE) buttons. The closing function with automatic closing is not possible. Only the intermediate position that was programmed last can be used. 7 Signal light 4 Remote programming 2 Intermediate OPEN position 3 Intermediate CLOSE position 4 OPEN 1 )) Signal light (present / not present) ➔➔ „Level 3, Menu 7 - Signal light“ 8 Operator lighting ON / OFF 2 Door position: OPEN 1 Programmable impulse input 3 Door position: CLOSED 3 Programmable input 4 Intermediate OPEN position 4 Lighting duration 5 Intermediate CLOSE position 5 Hand-held programming device 6 Operator system starts (wiping impulse, 1 second) 1 OPEN speed 7 Fault 2 Soft run OPEN speed 8 Lighting duration ➔➔ „Level 5, Menu 4 - Lighting duration“ 9 Locking mechanism release (operator system running) 10 Locking mechanism release (operator system inmobile) 11 Release lock (operator system starts / wiping impulse, 3 seconds) 1 Door cycle counter 12 Push-open security device 2 Servicing counter 13 Radio remote control (relay is activated for the duration of the impulse) 14 Test impulse for the closing edge safety device (relay transmits a test impulse and is activated for 300 ms) 5 CLOSE 5 Special functions 6 Variable speed 3 Soft run OPEN position 4 CLOSE speed 5 Smart run CLOSE speed 6 Soft run CLOSE speed 7 Smart run CLOSE position 8 Soft run CLOSE position 7 Maintenance and servicing 3 Servicing interval 8 Reset maintenance and servicing 9 Fault indicator 8 System settings Menu 7 – Relay output (only programmable with optional signal light relay) 1 Photocell 2 Closing edge safety device 3 Automatic cut-out function 4 Operating modes 5 Function of the direction command transmitters 6 Function of the impulse command transmitters 7 Stress relief in the CLOSED door position (back jump) 14 Operating instructions, Comfort 260, 270, 280 (#100316 – GB) Level 1 – Basic functions Menu 8 – RESET 1 )) No reset 2 Reset the controls 3 Reset the remote control (telegrams are deleted) 4 Reset the special function: automatic closing timer ➔➔ „Level 3 - Automatic closing timer“ 5 Reset only the special operator functions (except the OPEN/CLOSED door positions and the remote control impulse) 6 Reset the safety elements (photocell / Hold circuit) 7 Reset bus modules (connected bus modules will be programmed in) Level 2 – Door operator settings Menu 1 – Driving power required to OPEN Sensitivity in on a scale of 1 to 16 (the higher the number, the greater the driving power). )) 8 Level 3 - Automatic closing timer Menu 1 – Automatic closing timer If the automatic closing function is activated, the relay output (Level 1 / Menu 7) can be reprogrammed if required. 1 )) Deactivated 2 Door open duration 15 / Warning time 5 3 Door open duration 30 / Warning time 5 4 Door open duration 60 / Warning time 8 5 Door open duration 15 / Warning time 5 6 Door open duration 30 / Warning time 5 7 Door open duration 60 / Warning time 8 8 Door open duration infinite / Warning time 3 Menu 2 – Driving power required to CLOSE Sensitivity in on a scale of 1 to 16 (the higher the number, the greater the driving power). )) 8 Menu 3 – Automatic cut-out in the OPEN direction Sensitivity on a scale of 1 (OFF) to 16 (the lower the number, the more sensitive the automatic cut-out). 10 The open duration can only be increased via an impulse signal (button or hand transmitter). The door open duration ends after the photocell has been triggered. Door closes after the photocell has been triggered / Closing prevention. Menu 3 – Door open duration 2 – 250 seconds. )) Dependent on Level 3, Menu 1 Menu 4 – Warning time Menu 4 – Automatic cut-out in the CLOSE direction Sensitivity on a scale of 1 (OFF) to 16 (the lower the number, the more sensitive the automatic cut-out). )) 10 1 – 70 seconds. )) Dependent on Level 3, Menu 1 Menu 5 – Start-up warning 0 – 7 seconds. )) 0 Operating instructions, Comfort 260, 270, 280 (#100316 – GB)15 Level 3 - Automatic closing timer Menu 7 – Signal light 1 )) Door movement / Warning: Flashing Door stationary: Off (energy saving) 2 Door movement / Warning: Light on Door stationary: Off (energy saving) 3 Door movement / Warning: Flashing Door stationary: Flashing 4 Level 5 – Special functions Programming of the special functions is dependent on terminal block XB03. ➔➔ „3.3.3 Terminal block XB03“ Menu 1 – Programmable impulse input (terminal 1/2) 1 )) Impulse (normally open contact only) 2 Door movement / Warning: Light on Door stationary: light on Closing prevention device (normally open contact only) 3 5 Door movement / Warning: Flashing Door stationary: Light on Stops and reverses (only in the CLOSE direction – normally closed contact only) 4 6 Door movement / Warning: Light on Door stationary: Flashing Stops and reverses (only in the CLOSE direction – normally open contact only) 5 OPEN impulse (induction loop – normally open contact only) 6 Earlier closing possible by pressing the buttons on the input device or hand transmitter > 2 seconds Level 4 – Remote programming Menu 2 – Intermediate OPEN position Parameter indicator flashes -> Press the hand transmitter button -> Hand transmitter display also flashes > The function has been programmed. Menu 3 – Intermediate CLOSE position Parameter indicator flashes -> Press the hand transmitter button -> Hand transmitter display also flashes > The function has been programmed. Menu 4 – OPEN Parameter indicator flashes -> Press the hand transmitter button -> Hand transmitter display also flashes > The function has been programmed. Menu 3 – Programmable input (XW81) 1 Impulse (normally open contact only) 2 Impulse RC (normally open contact only) 3 Closing prevention device (normally open contact only) 4 Stops and reverses (only in the CLOSE direction – normally closed contact only) 5 Stops and reverses (only in the CLOSE direction – normally open contact only) 6 OPEN impulse (normally open contact only) 7 Stop (normally closed contact only) 8 Earlier closing possible by pressing the buttons on the input device or hand transmitter > 2 seconds 9 Automatic closing timer ON / OFF Menu 4 – Lighting duration Menu 5 – CLOSE Parameter indicator flashes -> Press the hand transmitter button -> Hand transmitter display also flashes > The function has been programmed. Menu 8 – Operator lighting ON / OFF Parameter indicator flashes -> Press the hand transmitter button -> Hand transmitter display also flashes > The function has been programmed. The “Radio remote control” function must not be programmed. ➔➔ „Level 1, Menu 7 - Relay output“ 2 – 250 seconds. )) 3.0 (180 seconds) Menu 5 – Hand-held programming device 1 )) Operation and programming option 2 Operation only Level 6 – Variable speed Menu 1 – OPEN speed On a scale of 5 to 16. )) 16 Menu 2 – Soft run OPEN speed On a scale of 1 to 16. )) 7 16 Operating instructions, Comfort 260, 270, 280 (#100316 – GB) Level 6 – Variable speed Menu 3 – Soft run OPEN position Adjust the setting using the + (OPEN) and – (CLOSE) buttons. Menu 4 – CLOSE speed On a scale of 5 to 16. )) 16 Menu 5 – Smart run CLOSE speed On a scale of 5 to 16. )) 7 Menu 6 – Soft run CLOSE speed On a scale of 1 to 16. )) 7 Menu 7 – Smart run CLOSED position Adjust the setting using the + (OPEN) and – (CLOSE) buttons. Menu 8 – Soft run CLOSE position Adjust the setting using the + (OPEN) and – (CLOSE) buttons. Level 7 – Maintenance and servicing Menu 3 – Servicing interval Adjustment of the number of door operations to be completed before a servicing reminder is displayed. 1 )) OFF 2 100 door operations 3 500 door operations 4 1,000 door operations 5 4,000 door operations 6 5,000 door operations 7 6,000 door operations 8 7,000 door operations 9 8,000 door operations 10 9,000 door operations 11 10,000 door operations 12 15,000 door operations 13 20,000 door operations 14 30,000 door operations 15 40,000 door operations 16 50,000 door operations Menu 8 – Reset maintenance and servicing The fault log for maintenance, diagnostics and servicing work is reset here. 1 )) No reset 2 Reset the fault log Menu 9 – Fault indicator Level 7 – Maintenance and servicing Menu 1 – Door cycle counter Six-figure indicator showing the number of door operations, up to 999999. Figures shown one after the other up to the indicator point, then repeated. Shows the current fault message. (No more than 16 fault messages can be viewed). Display the previous fault / Navigate through the list of faults Navigate through the list of faults Menu 2 – Servicing counter Five-figure indicator showing the number of door operations still to go, up to maintenance indication. Figures shown one after the other up to the indicator point, then repeated. Operating instructions, Comfort 260, 270, 280 (#100316 – GB)17 Level 8 – System settings Door reverses a short distance: The operator system moves the door slightly in the opposite direction in order to release an obstacle. Door reverses over a long distance: The operator system moves the door all the way to the OPEN p osition. Level 8 – System settings Menu 4 – Operating modes 1 Door movement in OPEN direction: Deadman Door movement in CLOSE direction: Deadman 2 Door movement in OPEN direction: Press-and-release Door movement in CLOSE direction: Deadman 3 4 1 )) Operation without photocell Door movement in OPEN direction: Deadman Door movement in CLOSE direction: Press-and-release 2 2-wire photocell (terminal block XB03 - terminal 70/71), Door movement in CLOSE direction: door reverses over a long distance )) Door movement in OPEN direction: Press-and-release Door movement in CLOSE direction: Press-and-release 3 External photocell (terminal block XB03 - terminal 70/71), Door movement in CLOSE direction: door reverses over a long distance Menu 1 – Photocell Menu 5 – Function of the direction command transmitters 1 )) Direction command transmitters not activated: The direction command transmitters trigger a command only when the door is stationary. 2 Direction command transmitters, STOP only: A moving door is stopped by every direction command transmitter. Menu 2 – Closing edge safety device 1 )) Door movement in OPEN direction: door reverses a short distance Door movement in CLOSE direction: door reverses a short distance 2 Door movement in OPEN direction: door reverses a short distance Door movement in CLOSE direction: door reverses over a long distance 3 Door movement in OPEN direction: door reverses over a long distance Door movement in CLOSE direction: door reverses over a long distance 4 Menu 6 – Function of the impulse command transmitters 1 Impulse command transmitters not activated: The impulse command transmitters trigger a command only when the door is stationary. 2 Impulse command transmitters, STOP only, then standard sequence: A moving door is stopped by every impulse command transmitter. A subsequent command will start the operator system moving in the opposite direction. (OPEN - STOP - CLOSE - STOP - OPEN). 3 )) Impulse command transmitters, STOP only, then standard sequence: A moving door is stopped by every impulse command transmitter. A subsequent command will start the operator system moving in the opposite direction (OPEN - STOP - CLOSE - STOP - OPEN). With automatic closing, there is no STOP in the OPEN direction. Door movement in OPEN direction: door reverses over a long distance Door movement in CLOSE direction: door reverses over a long distance Menu 3 – Automatic cut-out function 18 1 )) Door movement in OPEN direction: door stops Door movement in CLOSE direction: door r everses a short distance 2 Door movement in OPEN direction: door reverses a short distance Door movement in CLOSE direction: door reverses a short distance 3 Door movement in OPEN direction: door stops Door movement in CLOSE direction: door reverses a short distance 4 Door movement in OPEN direction: door reverses over a long distance Door movement in CLOSE direction: door reverses over a long distance 5 Door movement in OPEN direction: door reverses a short distance Door movement in CLOSE direction: door reverses over a long distance Menu 7 – Stress relief in the CLOSED door position (back jump) 1 )) Back jump not activated 2 Back jump activated – short 3 Back jump activated – medium 4 Back jump activated – long Operating instructions, Comfort 260, 270, 280 (#100316 – GB) 5. Operation WARNING! Danger of injury due to uncontrolled operation of the door! • Operate the controls or the hand transmitter only when there are no persons or objects in the path of the door. • Ensure that the controls and the hand transmitter are never used by children or unauthorised persons. • Ensure that the hand transmitter cannot be operated by accident (in a trouser pocket, for example). Transmitting the code 1. Connect the hand transmitter to the transmission plug. 2. Press the button on the master transmitter. Keep the button pressed. The LED lights up. 3. Press the button on the hand transmitter which is to be given a new code. The LED flashes. 4. The LED lights up. The coding procedure is completed. 5. Remove the transmission plug. NOTICE Danger of damage to property due to uncontrolled movement of the door! When the door moves, the hand chain can get caught and this could result in damage (in the case of ceiling-mounted supports for example). • Ensure that there are no obstacles blocking the path of the door or the hand chain. 5.1 Hand transmitter The operator works with the supplied hand transmitter on the basis of a pulse sequence control system. Operating the door using the hand transmitter 1. 2. 3. 4. For multi-button transmitters, each button can be programmed with a different function. Changing the code The control system is in operating mode. 1. Plug the transmission plug into the hand transmitter. 1. Impulse: The door opens and moves in the OPEN direction 2. Short-circuit one of the two outer pins with the centre pin adjacent to it (e.g. using a screw driver). 2. Impulse. The operator system stops. 3. Press the desired button on the hand transmitter. The LED flashes. 3. Impulse: The door moves in the opposite direction (CLOSE direction). 4. The LED lights up. The coding procedure is completed. 5. Remove the transmission plug. Operating instructions, Comfort 260, 270, 280 (#100316 – GB)19 After the hand transmitter has been re-coded, the operator system must also be re-programmed to respond to the new code. For multi-channel transmitters, the programming process must be carried out for each button separately. Changing the battery 1 1. Open the hand transmitter. 5.2 Release mechanism CAUTION! Danger of injury due to uncontrolled movement of the door! When the release mechanism is operated, uncontrolled door movements could occur: –– If the door springs are weak or broken. –– If the door is not balanced. • When the mechanism is released, only move the door carefully and at a moderate speed! NOTICE 2. Replace the battery. Danger of damage to property due to uncontrolled movement of the door! When opening the door manually, the carriage could collide with the carriage stop. • When the mechanism is released, only move the door carefully and at a moderate speed! 5.2 / 1 5.2 / 2 20 Operating instructions, Comfort 260, 270, 280 (#100316 – GB) 6. Maintenance To ensure fault-free operation, the door system must be inspected regularly and, if necessary, be repaired. Before starting work on the door system, the operator system must always be disconnected from the power supply. • C heck once a month that the operator system reverses when the door touches an obstacle. To check this, place an obstacle, 50 mm in height, in the path of the door in the direction of travel. • Check the settings of the automatic cut-out in the OPEN and CLOSE directions. • Check all the moving parts of the door system and door operator system. • Check the door system for signs of damage or wear and tear. • Move the door manually to check that the door travels easily and smoothly. Care and cleaning • When cleaning the operator system, never use: direct water jets, high pressure cleaners, acids or alkaline solutions. 7. Disassembly The system must be disassembled by following the instructions in reverse. 8. Disposal Do not dispose of old equipment or batteries with the normal household waste! • Dispose of old devices at a waste collection centre for electronic waste or via your specialist dealer. • Dispose of old batteries in a battery recycling container or via a specialist dealer. • Dispose of the packaging material in the special waste collection containers for paper, cardboard and plastic. 9. Rectifying faults Faults with no fault messages LCD display does not light up or display information. No supply voltage present. • Check that the mains voltage supply is operational. • Check the electrical connection. The thermal overload protection in the mains transformer has been triggered. • Allow the transformer to cool down. Control unit defective. • Have the operator system checked. No reaction after impulse signal. Connection terminals for “impulse” button are bridged, e.g. due to flat terminals or a short circuit in the wiring. • If key switches or interior push buttons are connected, try disconnecting them from the control unit: remove cables from the XB03 terminal block, insert the shorting plug and search for the wiring fault. ➔➔ „3.3.3 Terminal block XB03“ No reaction after an impulse signal has been transmitted by the hand transmitter. Modular antenna is not plugged in. • Connect the modular antenna to the control unit. ➔➔ „3.4 Completing the installation“ Hand transmitter code does not correspond to the receiver code. • Activate the hand transmitter anew. ➔➔ „4.3 Express programming“ The battery in the hand transmitter is empty. • Insert new battery. ➔➔ „5.1 Hand transmitter“ Remote control deactivated (“external button“ symbol flashes). • Reactivate remote control by pressing + (OPEN) or – (CLOSE) button on the operator. The hand transmitter, control electronics or modular antenna are defective. • Have all 3 components checked. The operator system reverses when the door-frame photocell is triggered. The system was not programmed correctly. • Reset the safety devices. ➔➔ „Level 1, Menu 8 – RESET“ • Carry out the express programming procedure again. ➔➔ „4.3 Express programming“ Operating instructions, Comfort 260, 270, 280 (#100316 – GB)21 Faults with fault messages Faults with fault messages The system indicates recognised faults by showing a fault number (example: fault number 7). The control system switches to reporting mode. In operating mode, the last fault number can be shown by pressing the P button. Fault number 28 Fault number 7 Programming mode will end automatically if 120 seconds elapse without a button being pressed. • Start the programming procedure again. Fault number 9 Rotational speed sensor impulse not present, operator system is obstructed. • Have the operator system checked. Fault number 10 The door does not move easily or is obstructed. • Take measures to ensure that the door moves freely and smoothly. The maximum driving power has been set too low. • Have the maximum driving power checked by a specialist dealer. ➔➔ „Level 2, Menu 1 - Driving power required to OPEN“ ➔➔ „Level 2, Menu 2 - Driving power required to CLOSE“ The door does not move easily or smoothly or is obstructed. • Check the door movement and take measures to ensure that the door moves freely and smoothly. Automatic cut-out setting is too sensitive. • Have the automatic cut-out function checked by a specialist dealer. ➔➔ „Level 2, Menu 3 – Automatic cut-out in the OPEN direction“ ➔➔ „Level 2, Menu 4 – Automatic cut-out in the CLOSE direction“ Fault number 30 MS bus fault. • Reset the bus modules. ➔➔ „Level 1, Menu 8 – RESET“ • Have the connected bus modules checked. Fault number 33 Rise in temperature due to overheating. • Allow the motor unit to cool down. Fault number 35 Electronic defect. • Have the operator system checked. Fault number 11 Excess travel stop. • Have the operator system checked. Fault number 15 Photocell triggered or defective. • Remove obstacle or have the photocell checked. Fault number 36 Wire jumper removed but stop button not connected. • Plug in stop button or insert shorting plug. ➔➔ „3.3 Connection of control elements“ Operator system released or closed circuit interrupted. • Engage the operator system. Photocell programmed but not connected. • Deactivate or connect the photocell. Fault number 16 The current sensor for the automatic cut-out is defective. • Have the motor unit checked. Fault number 26 The operator system is overloaded when the driving power is set to 16 (maximum). • Have the external power supply checked. 22 Operating instructions, Comfort 260, 270, 280 (#100316 – GB) Supply package Reference point technology 10. Appendix Soft start / Soft stop Push-open security device 10.1 Technical Data Electrical data Rated voltage, regional deviations are possible Automatic cut-out Obstruction protection Undervoltage protection V 230 / 260 Rated frequency Hz 50 / 60 Current input A 1.1 Power consumption in operation* kW 0.25 Power consumption in standby* W approx. 4 Duty cycle min. short-term 2 Control voltage V DC 24 Protection category of motor unit IP 20 Protection class II * without any additional equipment connected Travel speed Opening time, dependent on door type Electronic travel cut-out Connection for push button, code button and key button Connection for potential-free limit-switch message system Modular antenna Fault signalling Accessories Mounting brackets for sectional doors Release sets for up-and-over doors Adapter arm for retractable up-and-over doors Door fittings for swing doors Mechanical data Max. push and pull force Excess travel stop N Comfort 260: 550 Comfort 270: 750 Comfort 280: 1,000 mm/s 160 s approx. 14 Photocells Release system Relay for flashing signal light for use with automatic closing system Retrofit kit for potential-free limit switches OPEN/CLOSE/LIGHT Push button Key switch Code button Environmental data Dimensions of motor unit mm 190 x 125 x 360 Weight (total) kg Comfort 260: 6.4 Comfort 270: 6.5 Comfort 280: 6.6 dB(A) < 70 °C -20 °C +60 Sound pressure level Temperature range Operating instructions, Comfort 260, 270, 280 (#100316 – GB)23 10.2 Declaration of Incorporation We hereby declare that in its design and construction, and in the form as delivered, the product mentioned below complies with the relevant basic requirements of the EC Machinery Directive (2006/42/EC). This declaration shall no longer be valid if changes are made to the product without our authorisation. Person authorised to compile the relevant technical documentation: Marantec Antriebs- und Steuerungstechnik GmbH & Co. KG Remser Brook 11 · 33428 Marienfeld · Germany Phone: +49 5247 705-0 Product: Garage door operator Comfort 260, 270, 280 Revision status: R01 In addition, the partly completed machinery is in conformity with the EC Construction Products Directive 89/106/EC, the EC Electromagnetic Compatibility Directive 2004/108/EC and the EC Low Voltage Directive 2006/95/EC. –– Machinery Directive 2006/42/EC –– Health and safety requirements applied according to Annex 1: –– General principles No. 1 No. 1.1.2, 1.1.3, 1.1.5, 1.2.1, 1.2.2, 1.2.3, 1.2.6, 1.3.1, 1.3.4, 1.3.7, 1.3.8, 1.3.9, 1.5.1, 1.5.4, 1.5.6, 1.5.8, 1.5.14, 1.7 EN 60204-1:2007 EN ISO 12100-1:2003 EN ISO 13849-1:2008 Cat. 2 / PLC for the functions of power limitation and end position detection –– EN 61508:2001 –– EMC electromagnetic compatibility 2004/108/EC EN 55014-1 EN 61000-3-2:2006 (2008) EN 61000-3-3:2009 EN 61000-6-2:2006 EN 61000-6-3:2007 –– Low voltage directive 2006/95/EC EN 60335-1:2002 EN 60335-2-103:2004 The relevant technical documentation is compiled in accordance with Annex VII(B) of the Machinery Directive 2006/42/EC. We undertake to transmit, in response to a reasoned request by the market surveillance authorities, this information in electronic form within a reasonable term. The machinery is incomplete and must not be put into service until the machinery into which it is to be incorporated has been declared in conformity with the provisions of the Machinery Directive 2006/42/EC. 01.07.2012 ppa. K. Goldstein Management 24 Operating instructions, Comfort 260, 270, 280 (#100316 – GB) 10.3 EC Declaration of Conformity We hereby declare that in its design and construction, and in the form as brought onto the market by us, the product mentioned below complies with the relevant basic requirements of the EC directives mentioned below. This declaration shall no longer be valid if changes are made to the product without our authorisation. Product: Door designation Operator designation Relevant EC directives: –– Construction Products Directive 89/106/EEC –– Machinery Directive 2006/42/EC –– Electromagnetic Compatibility 2004/108/EC –– Low Voltage Directive 2006/95/EC The relevant technical documentation is compiled in accordance with Annex VII(B) of the Machinery Directive 2006/42/EC. We undertake to transmit, in response to a reasoned request by the market surveillance authorities, this information in electronic form within a reasonable term. The machinery is incomplete and must not be put into service until the machinery into which it is to be incorporated has been declared in conformity with the provisions of the Machinery Directive 2006/42/EC. Installer Address, postcode, town/city Date / Signature Operating instructions, Comfort 260, 270, 280 (#100316 – GB)25 Type plate Typ (A) Rev (B) ___________________________________________________________________________________________ Art. No. (C) Prod. No. (D) ___________________________________________________________________________________________ ___________________________________________________________________________________________ ___________________________________________________________________________________________ / B Remser Brook 11 DE - 33428 Marienfeld MADE IN GERMANY 100316 i C D 1 - GB 360347 - M - 0.5 - 1111 A