1
Owner's Manual
_L_E,/__
@
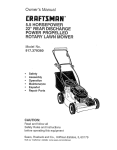
24 VOLT DC
20" Cordless Rechargeabie
REAR DISCHARGE
MULCHING MOWER
Model No.
917.386410
o
o
o
Safety
Assembly
Operation
Maintenance
°
•
Espafiol
Repair Parts
CAUTION:
Read and follow all
Safety Rules and Instructions
before operating this equipment
Sears,
Roebuck
andCo.,
Hoffman
Estates,
IL 60179
Safety Rules
Product Specifications
Maintenance
'2
11
;7
Warranty
Assembly
Operation
Maintenance Schedule
Service and Adjustments
Storage
2
5
6
Troubleshooting
Illustrated Parts List
Palls Ordering
.................
LIMITED
10
12
14
15-16
28-30
Back Cover
,__.....
TWO YEAR WARRANTY
ON CRAFTSMAN
POWER
- ....
± ,i
MOWER
For two years from date of purchase, wllen this Craftsman Lawn Mower is maintained, lubricated, and tuned up according to the operating and maintenance
instructions in the owner's manual, Sears will repair free ol charge any defect in
material or workmanship.
If this Craftsman
Lawn Mower
warranty
for only 90 days from the date of purchase.
applies
is used for commercial
o1 rental purposes,
this
This Warranty does not cover:
o Expendable items which become worn during normal use, such as rotary mower
blades, blade adapters, and belts
o Repairs necessary because of operator abuse or negligence, including bent
crankshafts
and the failure to maintain the equipment according to the instructions contained in the owner's manual.
WARRANTY
SERVICE IS AVAILABLE by returning the Craftsman power mower to
[he nearest Sears Service Center/Department
in the United States. This warranty
applies
only while this product is in use in the United States
This Warranty
gives you specific
legal' rights, and you may also have other rights
which vary from state to state.
Sears,
Roebuck
and Co.,D/817
WA,
Hoffman
Estates,
IL 60179
USA
CAUTION: Do no{ attempt to operate this mower until you have read thoroughly
and understand completely all instructions, safety rules, etc, contained in this
manual Failure to comply can result in accidents involving fire, electric shock, or
serious personal injury, Save Owner's Manual and review frequently for continuing
safe operation and instructing others who may use this mulching mower,
Safety standards require an Operator
Presence Control Bar to minimize the risk
mower without proper instructions
° Keep ttle area of operation ctearof all
persons, especially small children and pets.
of injuPi. Your unit is equipped with such a
•
Use mower only as the manufacturer
Control Bar. Do not attempt to defeat its
intended and as described in this manual,
function under any cilcumstances.
TRAINING:
• Read this operator's manual carefully,
Become familiar with the controls and
know how to operate your mower
properly. Learn how to quicldy slop
mower.
,, Do not allow children to use your
mower. Never allow adults to use
o Do nat operate mower if it has been
dropped or damaged in any manner,
Always have damage repaired before using
your mower.
• Do not use accessory atfachments that are
not recommended by the manufacturer.
Use of such atlachments may be hazardOUS.
2
i
IER143,970002
o The blade rums when the motor is running.
. Avoid accidental starting Do not play with the
switch button and Operator Presence Control
Bar when not in use.
PREPARATION:
o Always thoroughly check the area to be
mowed and clear it of all stones, sticks, wires,
bones, and other foreign objects. These
objects will be thrown by the blade and can
cause severe injury.
o Always wear safety glasses or eye shields
when Stading and while using your mower.
• Dress properly. Do not operate mower when
barefoot orweafing open sandals. Wear
only solid shoes with good traction when
mowing.
o Always make wheel height adjustments
before starting your mower. Never attempt to
do this while the mower is running
o Mow only in daylight or good artificial light
o Do Net insert fuse into mower until it is ready
to be used or charged.
o Protect your lungs. Wear a face or dust mask
if mowing operation is dusty.
° Remove adjusting wrenches. Form habit of
checking to see that adjusting wrenches are
removed from mower before turning it on
OPERATION:
o Keep your eyes and mind on your mower
and the area being cut. Do not let other
interests distract you
° Do not mow wet or slippery grass Never run
while operating your mower Always be sure
of your footing - keep a firm hold on the
handles and walk.
o Do not put hands or feet near or under
rotating parts. Keep clear of the discharge
opening at all times
° Always stop the motor wheneve_ you leave
or are not using your mower, or before
crossing driveways, walks, roads, and any
gravel-covered areas.
• Never direct discharge el material toward
bystanders nor allow anyone near the mower
while you are
operating it
- Before cleaning, inspecting, or re*
pairing your mower, stop the motor
and make absolutely sure the blade
and all moving pads have stopped Then
remove the fuse to prevent accidental
starting_
,, Do not continue to run your mower
if you hit a foreign object. Follow
the procedure outlined above_ then repair
any damage before restarting and operating
3
your mower.
• Do not operate your mower if it
vibrates abnormally. Excessive
vibration is an indication of damage;
stop the motor and safely check for
the cause of vibration. Repair as
required.
• Do not run the motor indoors.
. Never cut grass by pulling the mower
towards you. Mow across the face of
slopes, never up and down or you
might lose your footing Do nol mow
excessively steep slopes Use caution
when operating the mower on uneven
terrain or when changing directions maintain good footing.
o Never operate your mower without
proper guards, plates, grass catcher
or other safety devices in place.
° Don't force the mower. It will do the
job better and safer at the rate of
which it is designed. When mowing
on rough sulfeces or in high grass,
select a higher cutting posilien.
° Don't overreach Keep proper footing
and balance at all time.
o Stay alert Watch what you are doing
and use common sense Do not
operate mower when you are tired
Do not run or rush when mowing.
• Drugs, alcohol, medication Do not
operate mower while under the
inlluence of drugs, alcohol, or any
medication
o Danger: Keep away from blade area
Be aware of the risk of injury Keep
hands and feet away from the blade
DQ NOT attempt to remove cut
material or unclog debris from under
mower deck while blade is moving
If mower stalls, release operator
presence control bar and wait for
blade to stop rotalingo Remove fuse
before attempting Io remove anything
from
under mower deck. Thoroughly inspect and have any damage
repaired before restarting and
operating mower.
MAINTENANCE
AND STORAGE:
° Check the blade and the motor
mounting bolts often to be sure they
are tightened properly
- Check all bolts, nuts and screws at
frequent inlervals for proper tightness
to be sure mower is in safe working
condition.
', Keepallsafetydevicesin placeand
working.
, To reduce fire hazard, keep the mot6[
free of grass, leaves or excessive
grease and oil
• Check grass catcher bag often for
deterioration and wear. Replace worn
bags+ Use only replacement bags that
are recommended by and comply
with specifications of the manufacturer of your mower,
• Always keep the blade on your
mower sharp
. Allow motor to cool before storing in
any enclosure.
• Keep mower dry and clean. Always
use a clean damp cloth when
cleaning Never use brake fluids,
gasoline, petroleumbased
products,
solvents, or water to clean mower.
o Do not mow if switch does not turn it
on and off. Have defective switch
replaced by a qualified sewice
technician at an authorized service
centeddepartment.
• Check damaged parts Before further
use of the mower, a guard or other
pad that is damaged should be
carefully checked to determine that it
will operate propedy and pedorm its
intended function. Check for alignment of moving pads, binding of
moving paris, breakage of pads,
mounting, and any other conditions
that may affect its operation. A guard
or other part that is damaged should
be properly repaired or replaced by a
qualified service technician at an
authorized service center/department.
• When servicing use only identical
Craftsman replacement pads.
Servicing of this mower should be
performed only by a qualified service
technician. For repair service we
suggest you return mower to your
nearest authorized service center/
department for repair.
• When replacing blade, use manufac-
turers recomrnended parts only Use of any
o!her blade may result in serious personal
injury or damage to your mower
• Store mower inside+ When not in use, mower
should be stored indoors in a garage,
basement, etc. Storage area should be a dry,
locked+up place - out of reach of children
° Maintain mower with care Keep blade sharp
and clean for best and safest peffon-nance.
Follow instructions for lubricating and
changing accessories.
CHARGER SAFETY INSTRUCTIONS:
. DOUBLE INSULATION+ The charger for
your mower is double insulated, This means
you are separated from the electrical system
of the chaiger by two complete sets of
electrical insulation. This extra layer of
insulation is intended to protect the user from
electrical sl_eck due to a break in the wiring
insulalion All exposed metal pails are
isolated from rive intemai metal components
with protecting insulation, Double insulated
chargers do not need to be grounded.
Servicing of a charger with double insulation
requires extreme care and knowledge of the
system and should be performed only by a
qualified service technician.
. Before charging battery, read all instructions
and cautionary maridngs in this manual and
on your mower,
. Do not expose mower to rain or snow
• To reduce risk of damage to charger plug,
pull cord by the cord plug rather than cord
when disconnecting from charger port or AC
outtet
o Make sure cord is located so that it will not be
stepped on, tripped over, or otherwise
subjected to damage or stress.
• Do not operate mower if charger has
received a sharp blow, been dropped, or
otherwise damaged in any way; take it to a
qualified serviceman,
• Do not disassemble mower; take it to a
qualified serviceman when service or repair
is required. Incorrect reassembty may result
in a risk of electric shock or fire.
. To reduce risk of electric shock, remove fuse
before attempting any maintenance cleaning,
Turning off control will not reduce this risk.
WARNING:
Always rernove fuse to prevent
accidental starting when setting up, transporting, adjusting or making repairs.
4
These accessories
were available
when
and service
this lawn mower was produced, They are
also available at most Sears retail outlets
centers.
Most Sears
stores can also order repair parts for
you, when you provide the model
number of your lawn mower.
LAWN MOWER PERFORMANCE
I:_AWN MOWER MAINTENANCE
Blades
TO REMOVE
CARTON
9
Wheels
Blade adapters
LAWN MOWER
FROM
• Remove loose parts included with
mower,
. Cut down two end corners of carton and
lay end panel down flat,
• Remove all packing materials except
padding between upper and lower
handle and padding holding operator
presence control bar to upper handle.
o Roll lawn mower out of carton and check
Upper Handle
Operator Presence
Control Bar
Lift Up
carton thoroughly for additional loose
paris,
• DQ NOT insert fuse at this time,
HOW TO SET UP YOUR
MOWER
TO UNFOLD
Mowing
Positian
Lower Handle
LAWN
• DO NOT insert fuse at this time
HANDLE
• Plug switch box cord connector
into motor connector_ Plug is
located on right side of motor_
IMPORTANT:
Unfold handle carefully so as
not to pinch or damage control cables
o Raise handles until lower handie section
locks into place in mowing position,
,' Raise upper handte section into place
on lower handle, remove protective
padding and tighten both handle knobs
• Remove handle padding holding
operator presence control bar to upper
handle_
• Your lawn mower handle can be
Motor Connector
Connector
adjusted for your mowing comfort, Refer
to "Adjust Handle" in the Service and
Adjustment
section of this manual.
5
KNOW YOUR LAWN MOWER
READTHISOWNER'SMANUALANDSAFETYRULESBEFOREOPERATING
YOURLAWNMOWER.Comparethe illustrationswith yourlawnmowertofamiliarizeyourselfwith the locationof vadd_us
controlsand adjustments.Savethis manual
for futurereference°
Thesesymbols may appearon yourlawn moweror in literaturesuppliedwiththe
product,Learnand understandtheir meaning.
WARNING OR
CAUTION
_
AND FEET
DANGER.
KEEPAWAY
HANDS
Operator Presence Control Bar
Start Switch Button
Load Indicator
Handle
Knob
Light
Battery Status
Light
)
Fuse 40 amp
Automotive
Type
Mulcher Plug
Wheel adjuster
(on each wheel)
Charger
MEETS
CPSC
SAFETY
Housing
REQUIREMENTS
Sears rotary walk-behind power lawn mowers conform to the safety standards of
the American National Standards Institute and the US. Consumer Product Safety
Commission. The blade turns when the motor is running,
Operator Presence
Control Bar - must be held down to the handle to start an_J--run the motor, Release to stop the motor.
Battery Status Light - alerts operator when battery capacity is approaching 80%
discharge (approximately
10 to 15 minutes left -- depending on grass conditions),
Load Indicator
Light - informs the operator that the mower is experiencing
a
heavy load,
Mulcher Plug - allows conversion to discharge or bagging operation.
Fuse - must be plugged
in to operate and recharge mower,
6
CHARGING
Thebatteryhasbeenchargedatthefactory
However,itwillbenecessarytorecharge
batteryandmakesureithasa fullcharge
beforeinitialuse.
• Always charge mower indoors in a garage,
carport, etc, where it is dry and protected
from the weather. DO NOT expose to rain or
SNOW,
• Do not charge mower in extreme hot or cold
temperatures.
NOTE: Extreme heat is mere harmful than cold,
especially when storing mower. Charge mower
in a location where the temperature is more
than 50"F (10°C) but less than 100°F (37°C).
o Keep mower away from water, heaters,
stoves, radiators, flames, chemicals,
corrosives, etc.
TO CHARGE
• Mower is disabled while charging. Plugging
the charger into the mower intern.Jpts the
switching circuit.
• The fuse must be plugged in while
charging battery.
• Open charging port door to expose charging
port.
° Plug charger lead into charging port
• Connect charger power cord to power
supply.
Door
Charger Lead
Charging
• Your mower has been designed so
that it is safe to continuously leave it
on charge for extended periods of
time. You can even leave it on
_
harge during lhe off season if
desired
The operation of any lawn
mower can result in foreign objects
thrown into the eyes, which can
result in severe eye damage, Always
wear safety glasses or eye st_ields
while operating your lawn mower or
performing any adjustments or
repairs. We recommend a wise
vision safety mask over the
spectacles or standard safety
glasses
MOTOR
ZONE
CONTROL
CAUTION:
Federal regulations require a motor control to be installed
on this lawn mower in order to
minimize the risk of blade contact
injury. DO NOT under any circumstances attempt to defeat the
function of the operator control. The
blade turns when the motor is
running.
• Your lawn mower is equipped with
• an operator presence control bar
which requires the operator to be
positioned behind the lawn mower
handle to start and operate the lawn
mower.
TO ADJUST CUTTING I'tEIGHT
" Raise wheels for low cut and lower
NOTE: Always plug charger into mower FIRST.
Then into wall receptacle Reversing this
procedure will result in the battery not being fully
charged.
° Make sure power supply is normaJ house
voltage, 120 volts, 60 Hz, AC only
• The red LED light on the charger will turn on,
indicating "on charge" status of mower.
NOTE: If mower does not charge, see troubleshooting chart
• Make sure fuse is plugged in
• When the battery becomes fully charged, the
red light will turn off and the green light wilt
turn on.
• It takes 16 hours to fully recharge a cornpletely discharged battery. Your mower may
be used with a padially charged battery if you
need to finish a job.
wheels for high cut.
, Adjust cutting height to suit your
requirements
Medium position is
best for most lawns.
• To change cutting height, squeeze
adjuster lever toward wheel Move
wheel up or down to suit your
requirements. Be sure all wheels
are in the same setting.
NOTE: Adjuster is properly positioned
when plate tab insells into hole in lever.
Also, 9-position adjusters (if so
equipped) allow lever to be positioned
between the plate tabs
Plate Tab
Lower Wheels for High Cut
--
Raise Wheels for Low Cut
TO ATTACHGRASSCATCHER
" Closethe flip lid. Flip lidrnust be
closedwhileoperatinglawn
mower.
6 Lift the rear dooron the rnower
housingand placethe grass
catcherframeonto the formed
tabs on the reardoorhinge
bracket.
o The grasscatcheris securedto
the lawn mowerhousingwhen the
reardooris loweredonto the
grasscatcherframe.
Rear
7.".._--"
_ door
/
,,1
,,,_'_'_
catcher
Grass
TO INSTALL
ATTACHMENTS
t
Yeur lawn mower was shipped ready to be
used as a mulcher. To convert to bagging
or discharging:
• Open rear door and remove mulcher
plate Store mulcher plate in a safe
place.
• You can now install catcher or optional
clipping deflector
• To return to mulching operation, install
mulcher plate into discharge opening of
mower,
CAUTION;
Do not run _our lawn mower
without rnulcher plate in place or approved
clipping deflector or grass catcher in place
Never attempt to operate the lawn mower
@ith the rear door removed or propped
open.
.,ec.e,
y-Y >:: I
Formed
tabs
TO EMPTY
GRASS
= , :. l
............. I
CATCHER
" To remove grass catcher, release
operator presence control bar to
stop engine,
o Lift up rear door and remove tile
grass catcher by the handle.
* Do not drag the bag when
emptying;
it will cause unnecessary wear
BEFORE
STARTING
MOTOR
° Mower will not run with battery charger
plugged in.
• Unplug charger from outlet, then remove
charger from rnotor
• Close charging port door.
TO START MOWER
° Insert fuse
• Hold operator presence control bar
down to lhe handte and press switch
button to start mower.
• 7o STOP motor, release operator
presence control bar.
8
MOWING
MULCHING
TIPS
MOWING
TIPS
IMPORTANT: For best performance,
keep mower housing free of built-up
grass and trash. See CLEANING in
Maintenance
section of this maeuaJ
• Under certain conditions, such as very
tail grass, it may be necessary to raise
the height of cut to reduce pushing effort
and to keep from overloading the engine
and leaving clumps of grass clippings.
It
may also be necessary to reduce
ground speed and/or run the lawn
mower over the area a second time.
= The special mulching blade will
recut the grass clippings many
times and reduce them in size so
that as they fall onto the lawn they
wilt disperse into the grass and not
be noticed.Also, the mulched
grass will biodegrade quickly to
provide nutrients for the lawn
', Avoid cutting your lawn when it is
wet. Wet grass tends to form
clumps and interferes with the
mulching aclion The best time Io
mow your lawn is the early
afternoon, At this time the grass
has dried and the newly cut area
will not be exposed to the direct
o For extremely heavy cutting, reduce the
width of cut by overlapping previously
cut path and mow slowly.
, When using a rear discharge lawn
mower in moist, heavy grass, clumps of
cut grass may not enter the grass
catcher.
Reduce ground speed (pushing speed) and/or run the lawn mower
over the area a second time
= If a trail of clippings is left on the right
side of a rear discharge mower, mow in
a clockwise direction with a small
overlap to collect the clippings on the
next pass.
o Pores in cloth grass catchers can
become filled with dirt and dust with use
and catchers will collect less grass. To
prevent this, regularly hose catcher off
with water and let dry before using
• Keep top of engine around starter clear
and clean of grass clippings and chaff.
This will help engine air flow and extend
engine life.
sun
° For best results, adjust ti_e lawn
mower' cutting height so that the
lawn mower cuts off only the top
one-third of the grass blades If the
lawn is overgrown it will be
necessary to raise the height of
cut to reduce pushing effort and to
keep from overloading the motor
and leaving clumps of mulched
grass° For extremely heavy
mulching, reduce your width of cut,
mow slowly and raise the rear of
the lawn mower one wheel
adjuster
front.
setting higher than the
,, Certain types of grass and grass
conditions may require that an
area be mulched a second time to
completely hide the clippings.
When doing a second cut, mow
across or perpendicular
to the first
cut path.
° Change your cutting pattern from
week to week. Mow north to south
one week then change to east to
west the next week, This will help
prevent matting and graining of the
lawn_
9
CUSTOMER RESPONSIBILITIES
SERVICE DATES
1 , Replaco
blades
more
olten
when
mowing
in 5_I]d¥
soil
LUBRICATION
GENERAL
RECOMMENDATIONS
CHART
( ) Wheel
Adjusters
o Always observe safety rules when
performing any maintenance..
• "The warranty on this lawn mower
does not cover items that have
been subjected to operator abuse
or negligence. To receive full
value from the warranty, operator
must maintain mower as instructed in this manual.
,, Some adjustments will need to be,
made periodically to properly
maintain your unit
o All adjustments in the Sewice and
Adjustments section of this
manual should be checked at
least once each season.
" Once a year check blade for
@ Spray Lubricant
wear,
o Follow {he maintenance
in this manual
• Before each use:
IMPOR'fANT:
Do not oil or grease
plastic wheel bearings. Viscous
lubricants will attract dust and dirt
and will shorten the life of the self-.
schedule
" Be sure battery is fully charged.
o Check for loose fasteners.
lubricating bearings. If you feel they
must be lubricated, use only a dry,
powered graphite tube lubricant
sparingly.
LUBRICATION
Keep unil well lubricaled (See
"LUBRICATION
CHART")
10
PRODUCT SPECIFICATIONS
MODEL
NUMBER
917o3864!0
POWER
BLADE
24V DC BATTERY
40 AMP FUSE
SPEED
CUTTING
/ 17 AMP-HOUR
3200 RPM
WIDTH
20"
CHARGER
12-16 HOUR RECHARGE
BLADE BOLT TORQUE:
35-40 FT LBS
blade bolt, turning clockwise.
• The recommended
tightening
torque is 35-40 ft. Ibs
TIRES
o Keep tires free of gasoline, oil, or insect
control chemicals which can harm rubber.
,' Avoid stumps, stones, deep ruts, sharp
objects and other hazards that may
cause tire damage.
BLADE
IMPORTANT:
heat treated
NOTE: We do not recommend
sharpening blade, butif you do, be
sure the blade is balanced
CARE
For best results, mower blade must be kept
sharp Replace bent or damaged blades.
TO REMOVE BLADE
TO SHARPEN
mower housing to prevent blade from
turning when removing blade bolt
• Protect your hands with gloves and/or
wrap blade with heavy cloth.
o Remove blade bolt by turning counterclockwise. Use a box or open-end
wrench.
• Remove blade and attaching hardware
(bolt, lock washer and hardened washer)
, Remove the blade adapter and check the
key inside hub of blade adapter
The key
must be in good condition to work
properly. Replace adapter if damaged
TO REPLACE
BLADE
o Position the blade adapter on the
motorshaft. Be sure key in adapter and
motorshaft
keyway are aligned.
• Position blade on the blade adapter
aligning the two (2) holes in the blade
with the raised lugs on the adapter.
• Be sure the trailing edge of blade
(opposite sharp edge) is up toward the
motor.
° Install the blade bolt with the lock washer
Blade Adapter
Blade Key
Bait
/
\f
Bt,=de
Molorshaft
....
'X"
.',
......,.-.. t;;
\I;i%
oor.
t ",qx,
Lockwasher\
.
Hardened
Washer
Keyway
=,ade
_- "i
ral ng
Edge
Adapter
• The blade can be sharpened with a
file or on a grinding wheel. Do not
attempt to sharpen while on the
mower,
• To check blade balance, drive a nail
into a beam or wall. Leave about one
inch of the straight nail exposed,
Place center hole of blade over the
• head of the nail, If blade is balanced,
it should remain in a horizontal
into blade adapter
• Use block of wood between blade and,
lawn mower housing arid tighten the
BLADE
Care should be taken to keep the blade
balanced, An unbalanced blade will
' cause eventual damage to lawn mower
or motor.
o Remove fuse and keep in a safe place
away from mower.
• Use a wood block between blade and
and hardened washer
and motorshaft
Blade bolt is grade 8
position If either end of the blade
, moves downward, sharpen the hea W
end until the blade is balanced
11
GRASS
CATCHER
CLEANING
I
Remove fuse from motor and
o The grass catcher may be hosed v_ith CAUTION:
water, but must be dry when used.,
ptace it in a safe place away from mower
Remove grass catcher from mower
" Turn lawn mower on its side.. Clean the
before cleaning
underside of your lawn mower by scraping to
• Check your grass catcher often for ;
remove build-up of grass and trash
damage or deterioration Through
o Keep finished surfaces and wheels free of all
norrnal use it will wear. If catcher
gasoline, oil, etc,
needs replacing, replace only with a
• DQ NOT use a garden hose to clean lawn
manufacbJrer approved replacement
mower. Use a damp cloth to wipe grass and
catcher Give the lawn mower model
dirt from mower.
number when ordering.
CAUTION:
Before performing any
service or adjustments:
Release operator presence control
bar and stop motor.
• Make sure the blade and all moving
parts have completely stopped.
o Remove fuse from motor and keep
in a safe place away from mower.
REAR
DEFLECTOR
The rear delleqtor; attached between
the rear wheels of your mower, is
provided to minimize the possibility that
objecls wil! be thrown out of the rear of
the mower into the operator mowing
position I[ the deflector becomes
damaged, _ should be replaced.
° Reassemble the controls and the operator
presence control bar to Ihe upper handle.
CAUTION: The operalor presence control bar
must pivot freely to pen'nit switching off the
motor when control baris released. Do not
overtighten the fasteners holding the corrtrols to
the upper handle_
,' To change from medium low to high position
only the upper handle section will have to be
fumed over
°. To change from medium low to low pos_fion,
only the lower handle section will have to be
turned over
Shipping Position
f_'l
TO ADJUST
HANDLE
Your lawn mower handle can be raised
Medium
..,f_
_.!,
or lowered for your mowing comlorL
Four (4) positions are available: high,
medium high, medium low and low.
Handles are shipped mounted in the
medium low position.
• Before making adjustments, remove
fuse. To change from medium low to
medium high position, the upper and
lower handle sections will have to be
turned over.
_ll
High
¥*',
\-t
f'q
• Remove the cen[rols and operator
presence control bar from the upper
handle.
o Remove hairpin cotters.
• Disconnecl the lower handle from the
handle brackets.
° Turn the handle over and reassemble
the hairpin cotlers that have been
removed
. Medium
Low
J_:
'
,_
High
".
Low
'._
BATTERY
The battery in your mower is a rechargeable 24 volt sealed lead acid battery.
TO GET THE MAXIMUM
BATTERY LIFE,
WE RECOMMEND
THE FOLLOWING:
• Fully recharge
12
battery prior to initial use.
Rechargebatteryimmediately
aftereach
- Be sure controller board is secured
use.
propedy.
- Be sure all leads are routed and
o Recharge battery continuously when mower
is not in use.
installed properly.
- Be sure all hardware is lighlened
securely
. Always charge battery indoors in a dry,
protected place.
° DO NOTcharge in extreme hot or cold
temperatures. Charge mower battery in a
location where temperature is more than
50°F (10°C) but less than 100°F (37°C).
BAI'TERY
Top Grille
Indicator
Board
(Under -'-,J
Grille)
_.-.....
REPLACEMENT
if battery replacement becomes necessary,
follow the instructions below. Read these
instructions in their entirety before proceeding
with disassembly.
• Remove fuse and keep in a safe place away
from mower.
° Carefully remove top grille from shroud,. Slad
at side rear corner ot grille by pressing inward
and up to release gnlle from shroud,
• From underside of grille, unplug lead from
indicator board Note the position and routing
of the lead for laler reassembly
o Remove screws securing shroud to battery
support bracket Remove shroud from
mower.
-Rernove
battery terminal leads from battery
(4 places). Note color and position of leads
for later reassembly.
• Before removing the battery support bracket,
note how the front of the bracket secures the
controller board Remove tile screws
securing battery support bracket to motor and
remove the bracket.
• Remove batteries,
° Install new batteries by reversing the above
instructions.
Shroud
Battery
Support
Bracket
Batteries
Nhite
Battery
Terminal
Lead
Controller
Board
Black
Battery
"Terminal
Lead
Red Battery
Terminal Lead
Board
Lead
_"_j_r TO PRESERVE NATURAL RESOURCES, PLEASE RECYCLE OR DISPOSE
__ OF BATTERY PROPERLY THIS PRODUCT CONTAINS SEALED LEADACID
_
BATTERIES MUST BE DISPOSED OF PROPERLY. Local, state, or federal
Pb laws may prohibit disposal of lead-acid batteries in ordinary trash. Consult your
local waste authority for information regarding available recycling and/or disposal options,
Most Sears Automotive Centers accept lead-acid batteries Ior recycling.
WARNING: Upon removal, cover lhe battery's ter[ninals with heavy duty adhesive tape,
Do not attempt to destroy or disassemble battery pact or remove any of its components.
Also, never touch both terminals with metal objects and/or body parts a short circuit may
result. Keep away from children, Failure to comply ,with these warnings could result in fire
and/or serious injury.
13
Lower Handle
Immediatelyprepareyour lawn ,
mowerforslorageat the end of Ihe
seasonor if the unit will not be used
for30 daysor more.
LAWN MOWER
When lawnmowe[is to be storedfor
a periodof time,clean it thoroughly,
removeall dirt,grease,leaves,etc.
Store in a clean,dry area.
o Cleanentirelawn mower(See
"CLEANING"in the Maintenance
sectionof this manual).
Squeeze to
Fold
Hairpin Cotier
Mounting Pin
Operator Presence
Control Bar
.
Lubricate as shown in the Maintenance section of this manual.
,, Be sure that all nuts, bolts, screws,
and pins are securely fastened
Inspect
moving parts for damage,
breakage and wear Replace if
necessary
* Touch up all rusted or chipped
paint surfaces and lightly sand
before painting
Upper Handle
_-..._.
Fold Forward
for Storage
Fold
Backward
Lower
Handle
HANDLE
You can fold your lawn mower handle
for storage
• Unplug the switch plug box cord
from motor before folding handle
(See "To Unfold Handle" in
Assembly section of this manual),
. Squeeze the boltorn ends of the
lower handle toward each other
until the lower handle clears the
handle bracket, then move handle
forward
Mowing Position
• When setting up your handle from the
storage position, the lower handle will
automatically
lock into the mowing
position.
BATTERY
• Recharge the battery to a full charge. Do
not store mower with a discharged
battery. Battery failure will occur in a very
short time if mower is stored without
having a full charge. We recommend that
you charge battery continuously while in
storage and during the off season,
,* Loosen upper handle mounting
bolts enough to allow Upper
handle lo be folded back..
OTHER
IMPORTANT:
When folding the
handle for storage or transportation,
be sure to fold the handle as shown
or you may damage
cables.
the control
"
.
If possible, store your unit indoors and
cover it to give protection from dust and
dirt.
Cover your unil with a suitable protective
cover that does not retain moisture.
Do
not use plastic. Plastic cannot breathe
which allows condensation to form and
will cause your unit to rust.
14
TROUBLESHOOTING
CORRECTION
CAUSE
=ROBLEM
]oes
CHART
not start
o Fuse has been
removed from mower
, Install fuse
o Charger has not been
unplugged from mower
• Remove charger plug from
mower charge pod
charge port
o Battery may need [o be
• Charge
recharged
o Blade does not rotate freely
or mower deck is clogged
battery
° Remove fuse, turn mower
on itssideandcheckblade.
Make sure it is free to
rotate.
Also check {or clogging,
_oor performance
• Grass too high or thick
(Overload light is on 25%
of the time)
• Raise mower cutting height
to cut 1/3 of grass length
. Wall< at a slower pace so
ovedoad light stays off.
. Reduce cutting width if
needed.
. Remove
fuse, check
deck for clogging,
, Low battery voltage (Low
power fight stays on while
mowing)
blade for sharpness
o Reduce cutting load
,, Walk at slower pace
• Reduce cutting width
- Raise cutting height
. Recharge
_OOFCUt--
uneven
balteries
. Worn, ben[ or loose Made
• Remove
. Wheel heights uneven.
• Replace blade, Tighten
blade bolt.
• Set all wheels at same
* Buildup of grass, and trash
leaves, under mower.
;xcess{ve
check
fuse.
height.
, Remove
fuse and cleanun-
derside
of mower housing_:,
- Worn, bent or loose blade
o Remove fuse
o Bent molor motorshalt.
• Replace blade. Tighten
blade bolt,
o Contact an autholized
tibration
service center:
15
PROBLEM
'7lower stops
CORRECTION
-CAUSE
o If high current light stays
on momedtarily after
mower stops, load is too
much for m_wer.
If low power light stays
on, mower slows down,
o Remove fuse and
turn mower all its side.
Make sure blade is free to
rotate. Also check mower
fol clogging.
o Batteries may be low, near
the need of charging.
Recharge
lhen stops.
batteries,
o Grass may be too heaw
for remaining battery
capacity Try the following:
• Walk slower.
,, Reduce cutting width
o Raise mower cutting heigh'
3rass catcher
_ot filling
Hard to push
• Cutting height tO low
Lift on blade worn off.
Ca'tche_ not ve_tir_g air.
• Replace blade.
• Clean grass catcher.
,, Grass is too high or wheel
,, Raise cutting height.
height is leo low.
• Rear of lawn mower
', Raise rear of lawn mower
housing or blade dragging
Stop when
Operator Presence
Control Bar is
Released
housing one (1) setting
in grass.
• Grass catcher' too full,
higher
o Empty grass catcher
• Handle heiglit position not
. Adjust handle height to
suit
right for you,
Mower Does Not
- Raise cutting height
Operator presence control
bar is damaged.
. Start switch button sticks
or damaged.
16
, Replace operator
control bar.
presence
• Replace start switch
button.
CRAFTSMAN
Model
Reglas de Seguridad
Especificaciones del Producto
Mantenimiento
Garantia
Montaje
Qperaci6n
15
23
22
15
18
19
No.
Programa de Mantenimienfo
Servicio y Adjusles
Almacenamiento
Idenlificaci6n de problemas
Partes de repuesto
Orden de Parles
GARANTiA LIMITADA
CRAFTSMAN
DE DOS ANOS
PARA LA SEGADORA
917.386410
22
24
25
26
Vea el manual
ingles del dueRo
Conlratapa
A MOTOR
Per dos (2) ar3os, a partir de la lecha de compra, cuando esta Segadora Craftsman se
mantenga, lubrique y aline segun las instrucciones gala la operaci6n y e! mantenimiento de!
manual del dueSo, Sears reparara gratis todo defecto en e! material y la maoo de obra
Si la Segadora Crallsman se usa papa fines comerciales o de amendo,
aplica por noventa (90) dias a partir de la fecha de compra
esla garanlia
solu su
Esta Garantia no cubre:
• Arliculos que se desgastan durante el uso normal tales corno las cuchillas segadoras
rolatorias, los adaptadores de la cuchilla, y las correas
• Reparaciones necesarias debido al abuso o a I@negligencia del operador, incluyend los
eigi;ef_ales doblados y la falta de mantenimiento del equipo segun las instrucciones que se
incluyen en el Manual del DueSo
EL SERVICIO DE GARANTiA ESTA DISPONIBLE al devolvef la segadora a molor Craftsman
en un centro/departamento de servicio Sears m_is cercano en los estados unidos Esta
garantia se aplica solamenta mientras el produclo este en uso en los eslados uni(Jos
Esta Garantia le otorga derechos legales especificos, y puede que tambien tenga otlos
derechos qua varlen de estado a estado
Sears, Roebuck and Co,,Hoffman Estates, IL 60179 USA
ATENClON:
No inlente operar es'_asegadora hasta que halla leido completamente y
comprenda bien las instrucciones, las leyes de seguridad etc de este manual Si no se
observan las instrueciones siguientes se puede producir accidentes relacionados con el
fuego, electrochoques, o lesiones graves Guarde esle Manual del Duer3o y reviselo de yes en cuando para
seguir manteniendo un uso seguro y inslruyendo a otras personas las cuales vayan a utilizar
la segadora acolchadora
Los estandartes de seguridad exigen la
• No permita que los ni5os usen su
presencia del operador en los conlroles
segadora Nunca permila que los
para reducir a un minimo el riesgo de
adullos operen la segadora sin conlar
lesionarse Su unidad viene equipada con
co[) las instrucciones adecuadas
dichos confroles Por ningun molivo Irate
Manlenga el 6rea de operaci6n des
del eliminar la funci6n de los conlroles
peiada de genie, especialmente de niF_os
que exigen la presencia del operador
pequeSos y de animales dom_slicos
ENTRENAMIENTO:
• Use la segadora solamente para los lines
. Lea este manual del operador
p_opudstos por el fabricante y segun las
cuidadosamente Familiarfcese con los
explicaciones descritas en este manual
controles y aprende a operar su
• No ope_e la segadora si se ha cafdo o daRado
segadora en forma adecuada Aprenda
en cualquiera Iorma Siempre zepare Io_,o
: da_os &/ales _le usarla
a parar su segadora r_pidamente
*1
17
• Nouseaccesorios
quenohayansido
recomendados
porelfabricanle
Elusode
dichos
accesorios
puedeserpe[igros_
• Lacuchifla
viracuando
elmotorestaen
marcha
EvileananqLles
acoidentales
Nojuegue
conelbo!6ndelintemJplor
ylabanede
control
delepresencia
deloperador
cuando
noesteulilizando
lasegadora
PREPARACION:
su segadora, pare el molor y esl _completamente
seguro de qua la cuchilla y cualqL_i£rotra parte
movible se hallan parado Entonces remueva el
alambre de la bujia pare prevenir ananques
accidenlales
No cot !linue haciendo funcionar su segadore si le
pega a un objelo extrario Siga et procedimlento
c!escfito anledormente, y repare cualquier def_o
antes de votver a arrancar o operar su segadora
No opera le segadora si vibra abnormalmente
Demasiado vibraci6n puede ser la indicarle que
,, Siempre revise cuidadosamente el area
halla algun daRo; pare el motor y verifique la
qua se va a segar y desp#.ielade lodes
cause de la vibraci6n Repare cuando sea
las piedras, palos alambres, huesos y
necesado
otros objetos extrar_os Estos objetos
serbn lanzados con la cuchilla y pueden
" No haga tuncionar el motor bajo cualquier recinto
cerrado
producir lesiones graves
• Siempre use anleojos de seguridad o
_ " Nunea corle el c_sped lirando la segadora hacia
usted 8iegue a lrav6s de la cara de las
protec!ores de oios cuando arranque y
pendientes, nunca hacia arfiba o hacia aba_opues
duranle el tiempoque use la segadole]
puede perder el equilibfio No siegue pendienies
• Vistase en Iorma adecuacla No opera la
demasiarlo
empinadas Ter_gacuidado cuando
segadorn ,qinzapnl_)£ o con sandalias
apefe ta segadora en lerreno disparejo o cuendo
al)iedas Use sofarnnnte zapalos sc'Jlid__s
cambie de direccidn - rnnntenga un buen
con buer_aIracci(J¢_
cuando siegue
equilibrio
• Siempre haga los ajusles de alt'drade las
Nunca opera la segadora sin las protecciones
ruedas anles de hacer arrancar su
adecuadas, las planchas el recogedor de c6sped
segadora Nunca Irate de hacer eslo
y otros disposittvos de seguddad en su lugar
mientras que el moto[ est,_funcionando
No tuerza la segadora Funcionara major y rnas
• Siegue siempre durante el alia o con
r_pidarnente al paso del qua rue diserSada+
buena luz adificia]
Cuando este segando en superficies rigurosas o
• No insede el alambre de la bujia en la
sobre hierba ella, selecctone la posicidn de code
segadora haste qua vaya ha utilizar
allo
• ProtEje sus pulmones Utilice mascarillas
No inlenle ir fuera de alcanz6 Guarde ambos
cuando este segando en _reas
pies en el suelo as[ coma siernpre mantenga sl.j
demasiado polvorosas
equilibria a todo momenlo
• Remueva Ilavesajustadoras
Acostumbrase en vefificar que las llaves
" Permanezo_ialerlo Tenga cuidado con Io qua
haga No ulJlicela segadora cuando esle cansado.
ajustadoras est_n removidas de la
No corra o se de prisa cuando esle segando.
segadora antes de t_]izada
No ulilice la segadora despu_s de haber tornado
OPERACION:
alguna droga, alcohol, o cualquler medicaci6n
• Manlenga sus ojos y su menle en la
Peligro: Guardase leios del _rea de la cuchilla
segadora yen el area que se est#,
Tenga cuidado del pelig_ode lesiones graves
corlando No permila qua otros intereses
Guarde las manes y los
Io distraigan
pies lejos de la cuchilla NO intenle en re• No corte cesped mojado o resbaloso
mover cualquier objeto de debajo de la segadora
Nunca corra mienlras esl6 operando su
cuando la cuchilla este en movimJenlo
segadora Siempre asegtJresede
Si la segadora se pare, alivie la barra de control de
rnantener el equilibdo - mantenga el
la preseneia del operado y
mango agarrado firmemente y camine
espere a que la cuehilla se pare compietamente
• No ponga las manos o los pies cerca o
Remueva el alambre de
deba}o de las pades rotatonas
la buj[a antes de intenlar remover coalquier objeto
Mant_ngase atejado de la abedura de
de debajo de la caja de la segadora, Inspeccione
descarga en lcdo momento
con seguridad y asegurese qua cualquler da5o
• Siempre pare el molor cuando abandone
sea reparado antes de volver a empezar y utJlizar
o no este utJlizandota segadora, o cuando
la segadora
este cnJzandoentradas para autos, los
senderos, caminos y _reas cubiedas de
dpio
• Nunca dirija la descarga del material hacia
los espee,tadoresni #ermita a nadie eerca
de la segadora mlentras la est_ operando
• Anles de limpiar, inspeccionar, o reparar
18
MANTENIMIENTO Y ALMACENAMIEN-TO:
• Revlse la cuchilla asi come los pemos de montaje
del motor con [rect.lencia pare asegurarse que
asian bien apretados
, Revise (odes los pemos, tee(cos y tomillos a
late(vales, pare vedficar si as(Anaprelados en
to(me adecuada, y asegurarse qua la segadora se
encuenlre en buenas eondieiones
• Mar_tenga (odes los disposilivos de seguridad eo
su lugar y lie(as pare funcionar
• Pare reducir el peiigro de incendios, manlenga el
motor libra de hierba, hoias o demasiado grasa o
aceite
,, Verifique ]a botsa del recogedor del cesped per
cuaJquier de(adore o desgaste Reemplace los
recogedores desgastados Use solamer'_lelas
balsas de repuesto recornendadas per el
fabdcante o asegurese que complan con Ins
propias especifieaciones
• Siempre manlenga una cuchilla al_ladaeo su
segadora
• Siempre perolila que el motor .'_eenfrie antes de
guarder la segadora en eualquler recinlo corrode
• Siempre guard(_la segadora seca y limpia
Siempre utilice un lrapo limpio cuando este
limpiando ta segadora Nur_cautilice fluidos de los
Irenos, gasoline, eua[quier alto produclo con base
de peLr61eo,solvenles o ague para limpiar la
segadora
• No siegue si el interrupter no pueda set encendido
y apagado Haga hacer el reemplazo de un
interrupter defieienle per un t_cnico cualil]cado en
un centro/departamen!o de servicio aulorizado
,, Inspeccione aquellas patios decades Antes de
que sign segando, un prolector o cualqoier olra
parle la cue! esta daRadadeberA set
inspeccionada para determinar si puede ser
ufilizada Venfique la posici6n de las partes con
movlmiento, aquellas pades las cuales encuenlre
roles, pades del montaje, y cualquier ot_a
condici6n la cual pueda erector la operaci6e de la
segadora Cualquier prolector o arras partes los
cuales encuenlre da5adas deber_Snset correelamenlo reparadas o reemplazadas per un l_,cnico
cualificado en on cenlro/depadamenlo de servicio
autohzado mas cercano
• Cuando haga servicio a su segadora ulillce
solamenle parles Craftsman El servieio de asia
segadora deber_ ser echo solamenle per un
t_cnico de servicio cualificado Para oblener
servicio In sugedmos que se penga en con(acre
con su centro/departarnento de se_cio aulodzado
rn&s cercano
• Cuando vaya a reemplazar la cuehilla, utilice
solamente pades recomendadas per el tabdcante
El use de cualquier otra cuehilla puede producir
lesio.nesgraves o da_:) a su segadora
• Guarde la segadora en el interior de un local
Cuando no la este t_lizando, la segadora deber_
ser a]macenada adenlro de una cache(a, un
s6tano, elc, El _rea que elija come almac_n
deber_ ser un Area seca y fuera del alcance de
19
niiios
o Car,serve la segadora con mocha
euidado Para que pueda oblener meiores
y segUros resultados, maatenga la
cuchilla afilada y limpia Siga tas
instruceiones del labricanla c_Jando vnya
a cambiar los accasados
INSTRUCCIONES
DE SEGURIDAD
PARA El. CARGADOR:
•
AISLAMIENTO DaB( E El cargndol de
su saga(torn esta cempuesto de (Jobte
aislamienlo
Eslo significa qur_ asia
separado del sistema el&:ldct_ del
cargador po_ dos capas de ai_lami(!lllo de
elecllicidad cemplelamente disti_'_las Esta
segunda cap_'_es pare prolege._ el
operador de cheques elecldeos po_ (:ausa
de n IpttJras en el aislamiert!o dot
alambrado T(xJas la pades de melal
expu#,slns e_;l,_naisladns de los
elemn_do_; nolivr_s con el ;;isJ,qllli(_nl_
} de
p_nlecr:ic_n (:nrt);_lJores d_! d_hle
aist_lnfin_flo no (:leben sol do lema d[_
lierra [enga rnt_cho cuidade cuando vaya
ahacer el servicio de] car_l_dor de doble
aislamienlo el conocimienlo del sisll_n'_a
es muy impo_lar;te y debem s_r etect_ade
solamente per on ff÷enico cunIilicado
,, Antes de cougar In baleria, lea !odas los
inst&Jeciones y notes de adverleHcia dr._f
manual de su segadora
• No permita qua su segadora ecolchqdnr,q
entre on tentacle con la Iluvia oia niew._
• Pare reducir el riesgo de daiio al lapr']n del
cargador, eslire el cord6n per el topee
major qua par el cordon cualldo vaya a
desconnectado de la entrada del car(jade(
o del enchufe de la pared
• Asegurese que el cord6n este co!ocado
de mode qua r_oplJeda set pisoteado.
Iropezado. o suieto a cualquier deice
• No utilice la segadota si el cargador hallo
[ecibido Lie luerle golpe, hallo side
de(ramada, a per cualquier R_.6n hallo
side daSado en cualquier mode; Ilevelo a
un l,¢cnieo de servieio cualiticado
•
No desmonte la segadora; II#.vela aun
l_cnico de servicio cualificado cuar_do
neeesite servicio o reparos Puede
p_oducirse el desgo de cheques elecllicoe
o lunge sila segadora esla monlada real
,' Para reducir el riesgo de eleclrochoques,
remueva el lusible antes de inlenLar
cualquier rnanlenimiento de timpieza. No
reducira el riesgo solamente si apaga el
control
ADVERTENCIA:
Rernueva siempre el
fusible para prevenir un arranque
accidenlal duranle el aiusle, el
transporte, el ajuste e cuando esle
hacienda reparos
Estos accesofios estaban disponibtes cuando
se produjo la segadora Tambi_n est&n
disponibles en la mayoria de las tiendas de
Sears y en los centros de servicio La mayoria
de las tiendas Sears tambien pueden mandar a
pedir partes de repuesto para usted, si
los proporciona el numero del modelo de
su segadora Algunos de estos
accesorios ta! vez no se apliquen a su
segadora
RENDIMIENTO DE LA SEGADORA
It
MANTENIMtENTO
Re=erector
DE LA SEGADORA
J
AUaf)l_dor_
Cttr
!_lla_
lie
PARA REMOVER LA SEGADORA
DE LA CAJA DE CARTON
Remueva las parles suellas que se incluyen
con la sogadora
•
Corte
lee (los esquJl_as
de los
extremos
de ta
caja de cad6n y tienda el panel del extremo
piano
Remueva todo el material de empaque,
excoplo la cuSa entre el mango superior y el
, flmior y fa cuba que sujela la barra de
conhol que exige la presencia del operador
junlo con el mango superior
Halle ruder la segadora hacia aluera de la
caja de cadon y revisela c.idadosamenle
pare verilicar si todavia qu*;(Jan partes suelles
acticionales
No insede el alambre de la buJia en esle
momenlo
COMO
PARA
PREPARAR
DESDOBLAR
i!_leliol
segun le acomode pare segar
Refierase a "Ajuste del Mango" en ta
secci6n de Servicio y Ajustes de este
manual
No inselte el alambre de la bujia en
este mornenlo
Enchule la conexi6n de la cuerda de la
Barra de Control
que Exige la
....
Presencia del
operador
S
Mango Superior
•
"" i:
(,:t'i/
: ,.:';_ , _';'Levanta_
!ii!%,
_:!..'/Posicion Para
_Segar
SU SEGADORA
EL MANGO
IMPORTANTE: Desdoble el mango con cuidado
pare rio pincher o dafter los cable de conhol
Levante los mangos haste qHe le secci6n det
ma1_o
r*
ctJ¢1111511
se asegule
en su lugar,
en la
posici6n para segar
• Levante la secci6n del mango superior basle
su lugar er_ el man_Jo irffelior, remoeva la
cur"_aproteclo_a y apriete ambas maniltas del
mango
Remueva la cufla del mango que sujeta la
ba.a de los control que exige Ja presencia de!
operador junto con el rnar_go superior
El mango de la segadora puede ajusfarse
20
Mango Inferior
caja del interruptor en la conexion del
motor El tap6n se encuentra en el
lado derecho del motor
Conexi6n del Motor
/
Conexi6n de la _r_
cuerda de la caja "_'_,
J L
delinterruptor..,_'
*_: I i
FAMILIARICESE
CON SU SEGADORA
LEA ESTE MANUAL DEL DUEI<IO Y LAS REGLAS DE SEGURIDAD ANTES DE OPERAR SU
SEGADORA, Compare lae ilustraciones con su segadora pare farniliarizarse con la ubicad6n de los
diversos controles y aiustes, Guarde eeta manual pare referencia en el fulqro,
Eetos simbolos pueden eparecer
3roducto, Aprenda y comprenda
sabre su segadora
sus significadoe.
._
ATTENCt(3N O
i_)
ADVERTENC'A
BotSn del
Interruptor
arrancador
_
_7'
oen ta literatura
proporcionada
con el
PELIGRO. GUARDE LAS
MANOS Y LOS PIES LEJOS
Barra de Control que Exige
la Presencia del Operador
--._..
Indicador de carga
Manilta
tndicador del
estado de la
batarfa
!
Fusible
40 AMP
Puerta de la
acolchadora
Aiustador de la rueda
(on cada rueda)
Cargador
CUMPLE CON LOS REQUISITOS
DE SEGURIDAD
Caja
DE LA CPSC
Nueslrassegadoras a motor, qua se conducen desde la parta de altO.s,rotatodas, Soars, cumpten
con los estandartas de eeguridad del Amedcan National Standards Institute y de la US, Consumer
Product Safety Commission La cuchilla gira cuanda el motor estA funcionando
Barra de Control qua Exige ta Presencia del Operador - de ser compdmida al mango durante el
arranque y el usa del motor.Afl6jala para parer el motor.
Indicador del Estado de la Bater[a - alerta el operado cuando la capacidad de la batada se acerca
de la descarga de 80°/o(quedan aproximadamenta de 10 a !5 minutos, dependiendo de las
condiciones clef c6eped
Indicador de carga - aleda el operado que ta segadora esta expedmentado un carga demasiada
grande,
Puert_ de fa Acolcbadora- pem_ite la trensfotT'naciSnde una operaci6n de descarga a ensacamiento
Fusible- debe estar enchufado para operar y cargar la segadora,
21
PARACARGAR LA BATERIA
La bateda ha sido cargada en la fabfica. Sin
embrago, ser_ necesado de volver a cargar
la bateda pare asegurar que este
comptetamenle cargada antes de utiflzar la
segadora
• Siernpre cargue la segadora adentro de
un garage, una cochera, etc donde estara
protegido del dima NO la deje al
descubierto donde pueda ponerse en
contacto con la J]uviao la nieve
• No cargue la segadora durante
lemperaturas muy calurosas o muy fdas
AVISO: Demasiado caJores peor que
demasiado #% especialmente cuando vaya
a a]rnacenar la segadora Guarde la
segadora en un sitio donde la temperature
no es mas de 50°F (10°C) pero menos de
100°F(37°C)
• Cuando la bater[a esta completamente cargada,
la luz reja se apagara y la luz verde se
encender&
• Permlta 16 horas para que se cargue
completamente la bateda Podra.utilizer la
segadora con un bateda 50% cargada si
necesita terminar el trabajo
" Su segadora ha sido dissuade pare que pueda
set almacenada en el modo de carga Puede
guardado en e! modo de carga durante el tiempo
de almacenamiento
_
•Guarde la segadora lejos del ague,
calentadores, estufas, radiadores, llamas,
qufmicos, corrosives, etc.
PARA CARGAR
• La segadora esta[_ incapaci[ada durante
la carga. Cuando enchufe ef cargador a
dentro de la segadora interrumpir_ el
circuito
o EI alambre de ta buj[a debe de esta
enchu-fado cuando se este cargando
la bater/a,
• Abra la pueda de entrada pare exporter la
entrada del cargado£
• Enchufe el conducto del cargador en la
entrada.
• Enchule la cuerda del cargador en la _oma
de cordente
Conexion del
puede hacer que salten objetos
extrabos
dentro
sus ojos,
Io que
a operad6n
de de
cualquier
segadora
puede producir daSos graves en _stos.
Siempre use anteojos de seguridad o protecd6n
para los ojos mientras opere su segadora o
cuando haga ajustes o reparaclones.
Recomendamos una mascara de seguridad de
visiSnamplia, pare uso espejuslos o anteojos de
seguddad estandade.
CONTROL. DE LA ZONA DEL MOTOR
PRECAUCION: Las legutaciones federales
exigen que se instale un contro{ para el motor
en esta segadoJa para reducir et riesgo de
lesion debido al contacto con la cuchilla. Por
ningL_n motivo trate de eliminar la funci6n del
control del operador La cuchilla v[ra cuando el
motor esta en marcha.
• su segadora visne equipada con una barra de
controles que exigen la presencia del operador,
lo que requiere que el operador est_ detr&s del
mango de la segadora para hacerla arrancar y
operarla
PARA AJUSTAR LA ALTURA DE CORTE
• Levanle las medas para el code bajo y baje las
ruedas pare el code atto.
o Ajuste ia altura de corte pare que se acomode a
sus requisitos La posici6n del medio es ]a mejor
para la mayoria de los c_spedes
°Para cambiar la altura de code, empuje la
pa]anca del ajustador hacia la rueda..Mueva la
rueda hacia arriba o hacia abajo de modo que se
acomcde a sus requisitos. Asegurese que todas
las ruedas qaeden igualmente ajustadas.
car!
Entrada
cargador
AVISO: Siempre enchufe PRIMERO el
cargador adentro de ta segadora. Entonces
ee el enchule de te pared. Si no page
atenci6n a[ orden de este procedimiento
puede qua la batefia no se cargue
completamente.
ATENCION: El ajustador esta correcta-mente
colocado cuando las orejas de laplaca estAn
insertadas en el agujero del mango. Tambi_n,
los ajustes de 9 posici.-ones (si equipado)
permiten que el mango pueda set movido
entre las orejas de [aplaca.
" AsegQreseque la tome de cordente sea
solamente de 120 voltios, 60 Hz, AC.
• La luz indicadora roja sobre el cargador se
encender,&,indicando el estado de
"marcha" de ta segadora..
AVISO: Si[a bac_erfano se carga, yea le
Table de identificaci6n de Problemas
Para un Code Alto, Baje
las Ruedas
Ore jas de rejas
de la place
Mango
', AsegQresede qtJe el fusible esl_
enchufado.
Para un Corte Bajo, Levante las
Ruedas
22
ANTES DE MONTAR EL MOTOR
PARA MONTAR Y ADJUNTAR EL.
RECOGEDOR DE ClaSPED
• Cierre la tapa soltable. La tapa soltable debe
estar cerrada cuando se esta operando/a
segadora.
• Levante la puerta trasera de la caja de la
segadora y ponga el bastidor del recogedor de
cesped en las orejas fon'nadas an el puntal de
bisagra de _a puerta trasera.
El recogedor de cesped esta asegurado en la
caja de la segadora cuando se baja la puerta
trasera para descansar en el bastidor del
recogedorde c6sped
PRECAUCION: No haga funcionar su segadora
sin el desviador de recortes o sin el recogedor
de c_sped, aprobados, en su lugar. Nunca trate
de oparar la segadora cuando se ha removldo la
puerta trasera o cuando est& un poco abierta
trasera
Puntal de
gisagra
Bastidor del
edor del
c6sped
Ofejas
1ormadas
PARA VACIAR EL. RECOGEDOR DE C_-SPED
• Para remover el recogedor del c_sped suelte
la barra de control del operador para poder
parar el motor.
• Levante la pue,'ta de atras y remova el
recogedor del c_sped por el mango
AVISO: No arrastre la boise cuando la vade; se
producir& on desgaste innecesario.
• La segadora no funcionara con le
cargador de la baterla enchufado
o Desenchufe et cargado del enchufe y
remu_valo dal motor
• Sierrd la puer_a de entrada
PARA ARRANCAR
EL MQTOR
,, Inserte,el alambre de la bujia
• Tenga la barra de control de la
presencia del operado hacia el mango
y empuje el bot6n arrancador de la
segadora
• Para parar el motor, suefle la bar[a de
control que exige la presencia del
operador.
PARA INSTALAR
ACCESORIOS
LOS
Su segadora fue envlada Ilsta para
usarse como una acolchadora de capa
vegetal Para convedirJa da modo que
pueda ensacar o descargar:
• Abra la puerta trasera y remueva la
lapon acolchadora. Guardefa en un
luga[ seguro.
" Ahora puede instalar el recogedor o el
desviador de recortes opcional,
o Para volver a la operaciSn de
acolcharniento con capa vegetal,
instale la tapon acolchadora en la
abertura de descarga de la segadora.
PRECAUClON: No haga funcionar su
segadora sin la tapon acolchadora
aprobada en su _ugar,o sin el desv}ador
de recortes, o sin el recogedor de
c_sped, aprobados, en su I_._gar,Nunca
trate de operar la segadora cuando se ha
removido la puerta trasera o cuando est&
ur_ poco abieda
Tap6n
acolchador
\
23
CONSEJOS PARA SEGAR
CONSEJOS
ACOLCHAR
Bajo cierlas condiciones, lal como
c_sped muy alto, puede set
necesario el elevar la altura del code
pare reducir el esfuerzo necesado
para empujar la segadora y para
evitar sobrecargar el motor, dejando
montones de recortes de c_sped
Puede que sea necesario reducir ]a
velocidad del recorrido y/o haga
flJncionar la segadora sobre el area
por segunda vez
• Para un code muy pesado, reduzca
el ancho del code pasando
parcialmente por encima det lugar
anteriormente cortado y siegue
lenlamente.
• Cuando use una segadora con
descarga trasera en c6sped huraedo
y pesado, los montones del cesped
codado puede que no enlren en el
recogedor de c_sped. Reduzca la
velocidad del recorrido (velocidad de
empuje) y/o haga funcionar la
segadora sobre el Area por segunda
PARASEGAR
Y
IMPORTANTE: Para obtener el mejor
rendimiento mantenga la caja de la de la
segadora sin acumulaciSn de c_sped y basura
Vea "Limpieza" en la seccion de
Responsabilidades del Cliente de este manual
La especial cuchilla acotchadora recortara los
recodes de e6sped vadas races, y los
reducir& en tamafio, de mode qua si se caen
en el c_sped se dispensaran y no se
notrar_tn. Tambi_n, el c6sped aco]chado se
va a deshacer r_pidamenle entregando
substancias autritivas para el c_sped
Siempre acolche con la velocidad del motor
(cuchilla) mb,s alta, pues asi se obtendr& la
mejor acci6n de recorte de las cuchillas.
Evite cortar el c_sped cuando est_ mojado
El c6sped mojado tiende a format montones
e intediere con la acci6n de acolchado La
mejor hora para segar el cesped es temprano
en la tarde. A esa hora 6ste se ha secado y
el _rea recien codada no quedar_ expuesta
al sol directo.
• Para obtener tos mejores resultados, ajuste
la altura del code de la segadora de modo
qua _sta corle solamente el tercio superior
de tas hojas de c_sped, En el caso de qua el
c_sped haya erecido demasiado, puede set
necesario el elevar la altura del corte para
redueir el esfuerzo necesario para empujar la
segadora y para evitar sobrecargar el motor,
dejando montones de recortes de c_sped
Para acolchamiento extensivo, reduzca la
anchura del corte, stegue Ientamente y
mueva el ajustador de rueda de la parle
trasera de la segadora a un nivel mas alto de
la parle de delante de la segadora.
, Ciertos tipos de condiciones de cSsped
pueden exigir qua un area tenga que ser
acolchada pot segunda vez para esconder
completamente !os recortes Cuando se haga
el segundo corte, siegue atravesado o en
forma perpendicular a la pasada del primer
code.
, Camble su patr6n de code de semana a
semana. Siegue de node a sur una semana y
luego cambie de este a oeste la pr6xima
semana Esto evitarA qua et c_sped se
enrede y camble de direcci6n
vez
• Si queda una huella de codes en el
lado derecho de una segadora con
descarga trasera, siegue en la
direcci6n en que gi_an las manillas
del reloj, solapando un poco para
reoaudar los recodes en la prSxima
pasada.
• Los poros en los recogedores de
c_sped de tela pueden I]enarse con
mugre y polvo con el uso y los
racogedores recaudarb,n menos
c6sped Para evitar esto, rode el
recogedor con la manguera de agua
regularmente y d_jelo secarse antes
de usarlo.
,, Mantenga la parte superior del motor,
alrededor del arrancador, despejada
y sin recortes de c6sped y paja. Esto
ayudar& el fiuio del aire de[ motor y
extender#, su duraci6n
Max 1/3
24
RESPONSABILIDADES
DEL CLIENTE
uI'_-,-*-,-
PROGRAMA
DE MANTENIMIENTO
_
LLENE LAS FECHAS A MEO'DA
_/_"_O'
#_%_
_ _"
0_
TEo,,AsoEs ov,c
[
Limpiaflinspecclonar el recogedor de
o_sped (si viene equipado)
Umplar le segadera
6,"
....
Revlsar o/a{ilar/camblar _acuchil]a
6,/1
Tabla de lubdcac{6n
_
Cargar
..... -_
1,,"'
I - Camb_e las cuchillas m_s a mer_udo cuando slegue en letrano arenoso
RECOMENDACIONES
TABLA
GENERALES
DE LUBRICACION
,, Siempre observe las reglas de segurldad
cuando haga el mantenimiento
• La garantia de esta segadora no cubre los
articulos que han estado sujetos a] abuso o a
la negligencia del operador Para recibir todo
el valor de la garant[a, el operador tiene que
mantener la segadora segQn las
instrucciones descritas en este man[Jal
• Hay atgunos ajustes que se tienen que hacer
en forma peri6dEca para poder mantener su
unidad adecuadamente
. Todos los aJustes en la secci6n de Servicio y
Ajustes de este manual tienen que set
revisados por Io menos un vez per cada
temperada.
• Una vez al aSo verifique la cuchilla para
desgaste.
• Siga el programa de mantenimienlo en este
manual.
Aiustador de
. Ruedas
1
,, Antes de Cada Uso
,, Aseg0rese de que la batefia esi_
completamente cargada
• Revise si hay sujetadores sueltos
(_) Rocie el Lubricante
IMPORTANTE: No aceite o engrase los
rodamientos de la rueda de plastico Los
lubricantes viscosos atraeran polvo y
mugre, Io que acedara la duracion de los
rodamientos aulolubricantes. Si cree que
tienen que [ubricarse, use solamente un
lubricante tipo grafito, de polvo seco, en
ferma moderada
LUBRICAClON
Mantenga la unidad bien lubricada
25
ESPECIFlCACiONES
NOMERO DE MODELO
DEL PRODUCTO
917 386410
PODER
24V DC BATERiA/17AMP-PeR
40 AMP FUSIBLE
VELOCIDAD DE LA CUCHILLA
3200 RPM
ANCHURA DEL COR TE
20"
CARGADOR
12-16 HORAS DE RECARGA
"[ORS!ON DEL PERNO
DE LA CUCHILLA;
35-40 FT LBS
LLANTAS
,, Man_engalas Ilanlas sin gasolina, aceite o
subslancias quirnicas para control de
insectos que pueden dafiar la goma
Evite los tocones, las piedras, las gfietas
profundas, Ios objetos affiados y otros
peligros que pueden dafiar las Ilantas
CUIDADO
DE LA CUCHILLA
Para obtener los mejores resultados, las
cuchillas de la segadora tlenen que
mantenerse afiladas Cambie las cuchillas
dobladas o dafiadas
PARA REMOVER LA CUCHILLA
• Rernueva el fusible y p6ngalo en on tugar
seguro lejos de la segadora
,. Use un bloque de madera enlre la cuchiUa
y la saja de la segadora para evitar que la
cuchilla gire cuando se le quite el perno
• Proteja sus manes con guantes y/o
envuelva la cuchilla con una tela grues&
• Remueva el pemo de la cuchilIa gir6ndolo
en el sentido contrario en que giran las
maniUasdel reloj Utilic6 una Itave inglesa
o una Ilave de tuerca
• Remueva la cuchifla y los adiculos de
erretena adjus adores (el pemo, la
aia_dela de seguddad y la arandeta
efiaurecida)
HeRA
• Remueva el adaptador de Is cuchilla y revise el
cube interior de la ranura del adaptador de la
cuehilla. La ranura tiene que estar en buenae
condiciones para que fiJncione en forma
adecuada Cambie el adaptador si est& dafiado
PARA CAMBIAR LA CUCHILLA
• Ponga el adaptador de la cuchilla en el cig0efial
Asegurese que la lave del adaptador y del
cigQefial est_n alineados
• Ponga la cuchi!la en el adaptador de esta
alineando los dos (2) agujeros en la euchilla con
las salientes elevadas en el adaptador
• Asegurese que el borde de salida ( opuesto al
lade afilado) este puesto hacia el motor
• Instale el perno de la cuchilla con la arandela de
seguridad y la arandela endurecida en el
adaptador de la cuchilla y el cigIJefial del
chavetero
• Use un bloque de madera entre la cuchiUay la
caja de la segadora y apriete el pemo de la
euchilla gir_ndolo en el sentido en que giran las
manillas del reloj
• La torsi6n para apretar recomendada es de (35 -40 pies libras)
IMPORTANTE: El perno de la cuchitla es clase 8
tratado a ca!or
AVlSO: No recomendamos el afilar la cuchilla,
pero si Io hace, asegtJrese de que quede
balanceada.
PARA AFILAR LA CUCHILLA
Adaptador de
Se lJeneque tener cuidado de manteneda
Ranura
la cuchilla
balanceada. Una cuchiIla que no est_ balanceada va
a producir eventualmente dafio en la segadora o en
el motor
Chavetero del
Cuchilla
• La cochilla puede afilarse con una lima o en una
:iguefial
rueda rectificadora. No Irate de afilafla mientras se
Pemo
de la
encuentra en la segadora
,, Para revisar el balance de la cuchilla, clave un
cuchilla
dave en una viga o en la pared Deje alrededor de
;.
Jefia!
una pulgada de un ctavo recto expuesto. Ponga el
agujero central de la cuchtlla sobre la cabeza del
'._
. Adaptador
ctavo Si la cuchilla esla batanceada debs
permanecer en la posici6n horizontal. Si
"_ cuohilla
de la
Arandela Arandela X
cualquiera de los extremes de la cuchilla se
de
endureelda Borde de salida
mueve hacia abajo, afile el extreme pesado hasta
seguridad
que _sta quede nivefada.
26
RECOGEDOR
LIMPIEZA
DE C'ESPED
,, El recogedor de c6sped puede set rociado con el
ague de la manguera pete liene queestar seco
cuando se vaya a user
• Revisesurecogedordec_spedamenudopara
verificar si eslA da'nado o detedorado Se va a
desgaslar con e! use non'hal Si se necesila
camblar el reeogedor, c_mbieIo solamanla per
uno que sea aprobado per el labdcante. D_ el
numero del modelo de la segadora cuando Io
o_dene.
PRECAUCION: Antes de dar cualquier
servfcio o de hater aiustes:
• Suelte la barra de controf y pare el motor
• AsegQrese qua la cuchilla y que todas las parles
movibles se hayan delenido completamenla.
• Rernueva el elambre della bujfa del motor y
p6ngala de lade donde no pueda ponerse en
conleeto con la segadora.
DESVIADOR
TRASERO
se proporciona un desviador trasere, adjunto entre
las ruedae traseras de su segadora, para reducir a
un minimo la poelbilidad qua objetos seen lanzados
hacla afuera de la parte trasera de la segadora, en
la posici6n en dende se encuentra el operador Si
se daSa el desviador debe cambiarse
PARA AJUSTAR
ATENClON:
Desconecte
e! alambre
de la bujla de motor y p6ngalo en
donde no pueda entrar en conlacto
con la segador&
• Haga descansar la segadora an su lade
Umpi_ la parte inlerior de su segadora
rasp_ndola para remover la acumulacidn
de c_sped y basura.
,, Mantenga Jassuperficies pulidas y las
ruedas sin gasoline, aceite, etc.
" No utilice una manguera para limpiar la
segadora Utilice un trapo humedo pare
limpiar los recer(es o suciedad de la
segadora
control sea soltada No apriete
demasiado los sL4etadoles que sujetan
a los controles al mango superior.
,, Pare cambiar de la posici6n de mediana
baia a ella selamente se tendr& qua dar
vuelta la secci6n del mango superior
*Para carnbiar de [a poelci6n mediana
baja a baja, solamente se Iendr& que de1
vuelta _asecci6n del mango infedor
Posicion de Envio
Mediana
l' 't
Baja
Medtana
Alia
,I
EL MANGO
Se puede levantar o bajar el mango de su segadora
segOnle quede c6modo. Hay cuatro (4) posiciones
dlsponibles: aJta,mediana ella, mediana baja, baia.
Los mangos se envian montados en la posici6n
mediana baja_
• Antes de hacer ajustes, remueva el elambre de
la bujfa, Para cambiar de la posici6n mediana
baja a mediana alia, lasecd6n supedor y la
inferior del mango lendr&n que darse vuella
, Remuevaloscentrelesylabarradeconlroles
qua exigen la presencia del operador del mango
superior
o Remueva las clavijas de horquilla.
• Desconecte el mango infedor de los pun/des del
mango.
De vuelta el mango y vuelva e menlar las clavijas
de horquilla qua se habian removido.
• Vuelva a reenter los controles y la barra de
controles qua exigan la presencla del operador
en el mango superior.
ATENClON: La barra de control de la
presencia del operado debe poder ser
pivoteada libremente pare permitir que el
motor pueda ser apagado cuando la barra de
27
]" _'
S't
Alia
Baia
,
BATERfA
La baterfa de su segadora es una beteria
sellada con Acido de bateria de 24 voltbs la
cuel puede ser recargada.
RECOMENDAMOS
LO SIGUIENTE
PARA QUE PUEDA OBTENER LA
VIDA MAXIMA DE SU BATERIA:
- Vuelva a cargar la baten'a inmediatamente
despu_s de cada uso
• Vuelva a carga la bateria cada vez que
la segadora no este utilizada,
,, Siempre cargue la bateda adentro en
lugar seco, y protegido.
o NO intente cargar la bateria en clime
muy caluroso o fdo Cargue la bateria
en un silio donde la temperatura no
excede mas de 50°F (10"C) pero
menos de 100"F (37"C).
CAMBIO
• Asegurese de que el tablero controlador
est_ asegurado correctamente.
- Asegerese de que el conductor pase por el
lugar correcto y de que est_ inslalado en
forma correcta
-. Asegurese de qua toda la tornilleda est_
apretada en forma segura
Rejilla superiol
z
DE LA BATERIA
Si es necesario cambiar la bater[a siga
las instrucciones a continuaci(Sn Repase
todas las instrucciones antes de proceder
con esle montaje,
• Rernueva el fusible y p6ngalo en un
lugar seguro y alejado de la segadofa.
• Remueva con cuidado la reiilla
superior de la _apa. Empiece en la
esquina trasera lateral de la reiilla
presionando hacia adentro y hacia
arriba para softar la rejilla de la [apa,
• Desenchufe el conductor del tablero
indicador desde la parle de abajo de la
rejilla. Tome note de la posicl6n del
conductor y de c6mo pasa para
volverlo a montar m_s tarde,
• Remueva Iostornillos que aseguran la
lapa al puntal de sopode de la bateria
Remueva la tapa de la segadora.
,, Remueva el conduc!or de los
terminales de la bateda (4 lugares).
Tome neta del color y de la posici6n
del conductor para volverlo a montar
mb,s tarde
• Antes de remover el puntal de soporte
de la baterla, tome nora de c6mo la
parle delantera del puntal asegura el
tablero controlador Remueva los
tornillos que aseguran el punlal de
sopode de la baleria al motor y
remueva el puntal.
• Remuevalas baterias.
,, Instale las baterfas nuevas invidiendo
tas instrucciones anteriores
"fablero indicator .-J
/
"_"
(Debajo de la
rejilla)
,f
Tapa
Tablero
controlador
./"
Conductor
negro del
terminal de
la bateria
/
/f
for del
_}_;Jablei_ Indicator
Conductor rojo del
terminal de la bateria
4_'_
PARA CONSERVAR LOS RECURSOS NATURALES, HAGA EL FAVOR DE
PRODUCTO
BATERIAS
DE ACIDO
DE PLOMO SELLADAS.
,_
RECICLAR OCONTIENE
DE DESECHAR
LA B,_TERIA
EN FORMAADECUADA.
EL SE
p_, TIENEN QUE DESECHAR EN FORMAADECUADA LA MAYOR[A DE LOS
CENTROS DE LOS CENTROS DE AUTOS ACEPTAN LAS BATERiAS DE LOMO DE ,g,CIDO
PARA RECICLAJE.. Las leyes locales, estatales o federales pueden prohibit desechar las
baterias de _.cido de plomo en el basurero comun. Consulte con sus autoridades encargadas
del desecho para obtener info[maci6n con respecto al reciclamiento dispenible y/o las
opciones de desecho.
ADVERTENClA: Despues de la remoclon, cubra los terminales de la bater[a con cinta
adhesive de tipo pesado. No trate de destruir ni de desmonlar el paquete de la bateria ni de
remover ninguno de sue compdnentes, Ademas no toque nunca ambos terminales con
objetos de metal ni con pades del cuerpo pues se puede produclr un codocircuito.
Mantegalas alejadas de los niR6s, Si no se obedecen estas advertencias se pueden producir
incendtos y/o iestones graves.
28
Mango Inferior
Prepare
susegadora
Inmedialamente
parael
almacenamiento
alfinaldecadatemporada
o si
launldadnosevaa usarpot30diaso mas
Apriete Para
Doublar
SEGADORA
Cuando se va a guardar la segadora pot cierto
periodo de tiempo, Ifmpiala cuidadosamente,
remueva toda la mugre, la grasa, las hojas, etc
Gu_.rdela en un _rea limpia y seca
o Limpi_ toda la segadora (Vea "LIMPIEZA" en
la secci6n de Responsabilidades del Cliente
de este manual)
• Lubriquela sagQn se muestra en la seccion
de Responsabilidades del Cliente de este
manual
• Asegurese de que lodas las tuercas y
clavijas y todos los pernos y tomillos eel6n
apretados en forma segura Inspeccione tas
partes que se rnueven para verificar si estAn
da_adas, quebradas o desgasladas.
C_mbielas si es necesario
• Haga un toque ligero a todas las superficies
oxidadas o aquellas con pinturas raspadas,
pero antes de pinlarlas impelelas un poco
Clavija de
Horquilla
Olavija de
Montaje
Berra de Control que Exige la
Presencia del Operador
Doblar
Hacia
Atras
Mango
Superior,.,
Doblar Hacia _"
Adelanle Para
Almacenar
Poscici6n
Para Segar
MANGO
Puede doblar el mango de su segadora para
almacenarla.
• Desconecte la euerda de la caja del tap_n del
interruptor del motor antes de plegar et
mango (Vea "Para doblar e! Mango" en la
secei6n de Montaie de este manual).
• Aprieie los extremos inferiores del mango
inferior entre st basra que el mango inferior
quede separedo del puntal del mango, luego
mu_valo hacia adelante.
• Suelte los pernos de montaje del mango
superior 1osuficlenle como para permilir que
el mango superior se pueda doblar hacia
arras,
IMPORTANTE:
Cuando doble el mango para
e_atmacenamiento o el transporte, asegurese
que Io doble segun se muestra o puede daSar
los cables de control
Mango
Inferior
BATERIA
Vuelva a cargar la baterfa
completamente No almacene la
segadora con una bateria descargada.
Se puede producir una falta de baterla
an muy poco tiempo si la segadora
esta almacenada sin una baterfa
completamente cargada. Le
recomendamos que eargue la baterfa
continuamente durante el tiempo que
este almacenada y fuera de
temporada.
OTROS
• Cuando prepare sus mangos a partir de la
posici6n de almacenamiento, el mango
inferior autom_ticamenle se asegurar_ en la
posici6n para segar,
• Si es posible, guarde su unidad en un
recinto cerrado y ct)brala para
protegerla contra el polvo y la mugre
,, Cubra su unidad con un forro protector
adecuado que no retenga la humedad.
No use pl_stico El plAstico no puede
respirar, Io que permite la formaci6n de
vaho, Io que productra la oxidaci6n de
su unidad
29
IDENTIFICACION
PROBLEMA
'doarranca
DE PROBLEMAS
CORRECCI(_N
CAUSA
• El alambre de la bujia ha
removido de la segadora
, El cargador no ha sido
desenchufado de la entrada del segadora cargador
• Instale el alambre de la
buj[a
• Remueva el tap6r_ deL
cargador de la entrada
del cargado
• Puede que la bateria
necesite set cargada
• Cargue ia batefia
• La cuchilla no puede moverse libremente o el conjunto
esta atascado.
• Remueva el alambre de la
bujfa, ponga la segadora
sobre su lado y verifique
lacuchilla. Asegurese puede
moverse libremente. Mire si
hay cualquier atasco.
Funciona
mal
" El c6sped esta desmasiado
alto o demasiado grueso
(La luz de sobrecargamiento esta encendida 25%
,, Levante la allura de code
de la segadora a un code
1/&
o Camine mas lentamente
para que la luz de
sob[ecarga permanezca
del fiempo)
apagada..
o Reduzca la anchura de cor[e,
si es necesado.
• Remueva el a/ambre de la
bujia, vedfique pot cualquier
o La tensiSn de la bateria
esta bajo (La luz que
71alcorte disparejo
informa que hay poco
poder se queda encendida
da cuando se esta segando)
• Cuchitla usada, doblada o
suelta.
• Reduzca la carga.
• Camine mas tentamente.
• Reduzca. el anchura del corte
• La altura de las ruedas no
son las m[smas
° Remueva el alambre de la
, Acumulaci6n
de c_sped, y
recortes de hojas, debajo
• Levante la altura de code.
, Vuelva a cargar las baterfas.
buj_'a..
° Cambie la cuchilla. Apriete el
pemo de la cuchilla.
o Ponga todas las ruedas a la
misma altura.
, Remueva el aLambre de la
de la segadora.
• Cuchilla usada, doblada o
sue}ta.
Demaciado
vibracion
atasco, y yea si la cuchilla
esta bien afilada.
,, El cig[Je5al det motor esla
torcido
buj[a y limpi6 la pade de
debajo del conjunto segador.
• Remueva el alarnbre de la
bujia
, Reemplace
la cuchilla.
Apriete a fondo el tomillo de
la cuchilla.
3O
PROBLEMA
CAUSA
CORRECClON
, P6ngase en contacto con un
centrddepartamento de
servido aulorlzade
La segadora
se para
• La luz de corrienle alia se
queda encendida por un poco
despu6s de qua la segadora
se halla parado, el trabaio es
demasiado para la segadora
Si la luz de poder bajo se
enciende, la velocidad de ta
segadora disminuye, y
,, Remueva el alambre de la
bu](a y vierta la segado_a en
su lado. AsegtJrese que la
cuchilla pueda moverse
libremente. Tambi_n verifique
qua la segadora no este
atascad&
Las hater/as pueden estar
bajas, o bien celca de
necesitar set c.a_gadas
Cargue las baler/as
entonces se papa.
El c6sped puede set
demasiade grueso para la
bateria restante Intenle Io
siguiente:
Ande mas lentamente
Cambie la cuchilla.
Umpi_ el recogedor del
Recogedor
de c6sped no
se Ilina
Allura de corte demasiade baja
Levantamiento de la cuchilla
desgastado.
Recogedor sin ventillaci6n de
aire.
,, Eleve la altura de code
. Cambie la cuchilla.
• Umpi6 el _ecogedor del
c_sped
Oilicil de
El c6sped esta demasiado
alto o la altura de la rueda
empuJar
demasiado baj&
Parletrasera de la cajd
cuchilla de la segadora
arrastandase en el cesped
Recogedor de c6sped
demasiado llano.
Posici6n de [a allura del
mando no adecuada para
usled.
Segadora
no
se para
cuando se
3resencia del operador esta
d_ada.
su61tala barra
de control
. L.a barra de control de la
de
" E'_bot6n
arrancado_ se pega o
I
esla da_ado.
la presencia
del opemdo
31
Eleve la altura de cede
, Eleve el con]unto lrasero de la
segadora (1) posici6n mas
alia
Vaci_ il regojedor de] c'esped
Aiuste la allura del mande
_are que acuerde con usted,
Cambie la barra de contiol de
la prese_ia del operado_:
Cambie el bot6n arrancado_
o
t.O
o0
1",..
03
I.,U
rn
z
W
m
o
in
I
I
t_
0
t_
32
×
.
o
al
0C_
b_
_
o_
o
o
_
,_o
>
0
0
00
ID
¢'1
r'-,
,i.#
O;
W
m
xx
_0__0_
Z
_0_
,-I
UJ
t7
0
.i
0
z
x
_
<
"_._
.d
>-
<
f-
0
0
0
X
X
X
0
D.Z
o
33
X
XX
XX
X
MOTOR
ASSEMBLY
MODEL
NUMBER
21 _r_
--2
17
KEY PART
NO. NO.
90000
90001
3
4
5
6
7
8
9
10
11
12
13
14
15
16
17
18
19
2O
21
22
00002
90003
90004
90005'
90006
30200
650737
90007
90008
90009
90010
90011
90012
90014
90015
900t6
90017
650767
90021
90022,
DESCRIPTION
Motor Assembly"
Battery Assembly
(Includes 13, 14, 15)
ContToller Board
Indicator Board
Lead Wire Assembly
Bracket, Battery Suppod
BrackeL Lower
Screw, Shroud
Screw, Bracket
Battery, Box
Charger, Pod Cover
Grill
Screw, Baltery
Wire, Assembly
Clip, Batlery
Shroud
Baltery Charger
Fuse, 40 Amp
Decal
Screw
LED, Lens Cap
Fuse Decal
NOTEr All component dimensions given in US
Inches 1 inch = 25 4 mm
34
143.970002
35
Fortile repairor replacementpmls you need
delivereddirectlyto yourhome
Call7 am - 7 pm, 7 days a week
1-800-366-.PART
(1-800-366-7278)
Para ordenar
piezas con entrega
domicilio
- 1-800-659-7084
a
For in--house
major brand repair service
Call 24 hours a day, 7 days a week
1-800-4-REPAIR
(1-800-473-7274)
Para pedir servicio de reparaci6n
domicilio
- 1-800-676-5811
a
For the location of a Sears Parts and
Repair Center in your area
Call 24 hours a day, 7 days a week
1-800-488-1222
For information on purchasing a Sears
Maintenance
Agreement or to inquire
about an existing Agreement
Call 9 am - 5 pro, Monday-Saturday
1-800-827-6855
When requesting service or ordering
parts, always provide the following
information:
• Product Type
• Model Number
• Palt Number
, Part Description
, EE!AR8
Amenco
156968
07,22.97
Rew
3
VB
s Repair
Specia,'_sts
Plinted
in U,S.A,
-1-