1
Owner's Manual
®
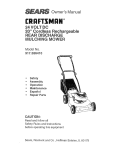
24 VOLT DO
20" Cordness Rechargeable
REAR DISCHARGE
MULCHING MOWER
Model No.
917.386411
°
•
o
Safety
Assembly
Operation
Maintenance
o
o
EspaSol
Repair Parts
.,AUTION.
_ead and follow all
;afety Rules and Instructions
_efore operating this equipment
;ears, Roebuck
and Co., Hoffman
Estates,
IL 60179
Safety Rules
Product Specifications
Maintenance
Warranty
Assembly
Operation
2
10
7
2
5
6
LIMITED
ON CRAFTSMAN
TWO YEAR WARRANTY
Maintenance Schedule
Service and Adjustments
Storage
Troubleshooting
lUustrated Parts List
Parts Ordering
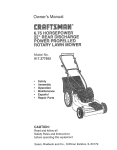
POWER
9
11
12
13-14
28-30
Back Cover
MOWER
For two years from date of purchase, when this Craftsman Lawn Mower is maintained,
lubricated, and tuned up according to the operating and maintenance
instructions in the
owner's manual, Sears will repair free of charge any defect in material or workmanship.
If this Craftsman Lawn Mower is used for commercial
applies for only 90 days from the date of purchase.
or rental purposes,
this warranty
This Warranty does not cover:
o Expendable items which become worn during normal use, such as rotary mower
blades, blade adapters, and belts_
o Repairs necessary because of operator abuse or negligence, including bent crankshafts and the failure to maintain the equipment according to the instructions contained in the owner's manual.
WARRANTY
SERVICE IS AVAILABLE by returning the Craftsman power mower to the
nearest Sears Service Center/Department
in the United States. This warranty applies
only while this product is in use in the United States.
This Warranty gives you specific legal rights, and you may also have other rights which
vary from state to state.
Sears, Roebuck
and Co.,D/817
WA,
Hoffman
Estates,
IL 60179
USA
CAUTION:
Do not attempt to operate this mower until you have read thoroughly and
understand completely all instructions, safety rules, etc. contained in this manual,
Failure to comply can result in accidants involving fire, electric shock, or serious
personal injury, Save Owner's Manual and review frequently for continuing safe operation and instructing others who may use this mulching mower.
Safety standards require an Operator
Presence Control Bar to minimize the risk of
injury. Your unit is equipped with such a
Control Bar, Do not attempt to defeat its
function under any circumstances°
TRAINING:
o Read this operator's manual carefully.
Become familiar with the controls and
know how to operate your mower properly,
Learn how to quicl'Jy stop mower.
o Do not allow children to use your mower.
Never allow adults to use mower without
.
proper instructions.
o Keep the area of operation clear of all
persons, especially small children and pets.
• Use mower only as the manufacturer
intended and as described in this manual.
• Do not operate mower if it has been
dropped or damaged in any manner,
Always have damage repaired before Qsing
your mower.
o Do not use accessory attachments that are
not recommended by the manufacturer.
Use of such attachments may be hazardous.
2
Thebladetumswhenthemotorisrunning.
Avoidaccidental
starting_
Donotplaywith
theswitchbuttonandOperatorPresence
ControlBarwhennotinuse.
_REPARATION:
Alwaysthoroughly
checktheareatobe
mowedandclearitof allstones,sticks,
wires,bones,andotherforeignobjects.
Theseobjectswillbethrownbytheblade
andcancausesevereinjury.
Alwayswearsafetyglassesor eyeshields
whenstartingandwhileusingyourmower.
Dressproperly.Donotoperatemower
whenbarefootorwearingopensandals.
Wearonlysolidshoeswithgoodtraction
whenmowing.
Alwaysmakewheelheightadjustments
beforestartingyourmower.Neverattempt
todothiswhilethe moweris running°
Mowonlyindaylightor goodartificiallight,
DoNotinsertfuseintomoweruntilitis
readytobe usedorcharged_
Protectyourlung&Weara faceordust
maskifmowingOperation
is dusty°
Removeadjusting
wrenches.Formhabitof
checkingtoseethatadjustingwrenchesare
removedfrommowerbeforeturningiton,
)PERATION:
Keepyoureyesandmindonyourmower
andtheareabeingcut.Do notletother
interestsdistractyou,
Donotmowwetor slipperygrass.Never
runwhileoperatingyourmower.Alwaysbe
sureofyourfooting- keepa firmholdon
thehandlesandwalk.
Donotputhandsorfeetnearor under
rotatingparts.Keepclearofthedischarge
openingatalltimes.
Alwaysstopthemotorwheneveryouleave
orarenotusingyourmower,orbefore
crossingdriveways,walks,roads,andany
gravel-covered
areas.
Neverdirectdischargeofmaterialtoward
bystanders
norallowanyonenearthe
mowerwhileyouare
operatingit.
Beforecleaning,inspecting,
or repairingyourmower,stopthemotor
andmakeabsolutely
suretheblade
andallmovingpartshavestopped.Then
removethefusetopreventaccidental
starting.
Donotcontinuetorunyourmower
ifyouhita foreignobject.Follow
theprocedureoutlinedabove,thenrepair
anydamagebeforerestartingandoperating
yourmower_
o Donotoperateyourmowerifitvibrates
abnormally.
Excessive
vibrationis an
indicationofdamage;stopthemotorand
safelycheckforthecauseofvibration.
Repairasrequired°
o Donotrunthemotorindoors.
. Nevercutgrassby pullingthemower
towardsyou.Mowacrossthefaceofslopes,
neverupanddownoryoumightloseyour
footing.Denotmowexcessively
steep
slopes.Usecautionwhenoperating
the
moweronuneventerrainorwhenchanging
directions
- maintaingoodfooting.
• Neveroperateyourmowerwithout
proper
guards,plates,grasscatcherorothersafety
devicesinplace.
• Don'tforcethemower.Itwiltdothejob
betterandsaferattherateofwhichitis
designed.
Whenmowingonroughsurfaces
or inhighgrass,selecta highercutting
position_
o Don'toverreach.Keepproperfootingand
balanceatalltime.
o Stayalert.Watchwhatyouaredoingand
usecommonsense.Donotoperatemower
whenyouaretired.Donotrunor rushwhen
mowing.
o Drugs,alcohol,medication_
Donotoperate
mowerwhileundertheinfluence
ofdrugs,
alcohol,or anymedication.
° Danger.Keepawayfrombladearea.Be
awareoftheriskofinjury°Keephandsand
feetawayfromtheblade°DONOTattempt
to removecutmaterialorunclogdebrisfrom
undermowerdeckwhilebladeis moving.
o Ifmowerstalls,releaseoperatorpresence
controlbarandwaitforbladetostop
rotating.Removefusebeforeattempting
to
removeanythingfrom
undermower
deck.Thoroughlyinspectandhaveany
damagerepairedbeforerestarting
and
operatingmower.
MAINTENANCE
AND STORAGE:
° Check the blade and the motor mounting
bolts often to be sure they are tightened
properly.
o Check all bolts, nuts and screws at frequent
intervals for proper tightness to be sure
mower is in safe working cond_on.
o Keep all safety devices in place and
working.
° To reduce fire hazard, keep the motor free
of grass, leaves or excessive grease and oil.
o Check grass catcher bag often for deterioration and wear. Replace worn bags. Use only
replacement bags that are recommended
_yandcomplywithspecifications
ofthe
r}anufacturer
ofyourmower:
_lwayskeepthe bladeon yourmower
_harp.
\llowmotortocoolbeforestoringinany
._nclosure.
(eepmowerdryandclean.Alwaysusea
-leandampclothwhencleaning.Neveruse
_rakefluids,gasoline,
petroleum-based
_roducts,
solvents,orwatertocleanmower.
3onotmowifswitchdoesnotturnitonand
)ff.Havedefectiveswitchreplacedbya
lUalified
servicetechnician
atan authorized
;ervice center/department
3heck damaged parts. Before further use of
he mower, a guard or other part that is
lamaged should be carefully checked to
letermine that it will operate properly and
_erform its intended function. Check for
llignrnent of moving parts, binding of
noving parts, breakage of parts, mounting,
ind any other conditions that may affect its
9eration. A guard or other part that is
lanlaged shouldbe properly repaired or
_=placedby a qualified service technician at
_nauthorized service center/department.
Vhen servicing use only identical Craftsnan replacement parts. Servicing of this
nower should be performed only by a
tualified service technician. For repair
ervice we suggest you return mower to
our nearest authorized service center/
'epartment for repair.
Vhen replacing blade, use manufacturers
ecommended parts only. Use of any other
)lade may result in serious personal injury
,r damage to your mower.
;tore mower inside. When not in use,
nower should be stored indoors in a
CHARGER
SAFELY INSTRUCTIONS:
o DOUBLE INSULATION. The charger for
your mower is double insulated. This means
you are separated from the electrical system
of the charger by two complete sets of
electrical insulation, This extra layer of
insulation is inteeded to protect the user from
electrical shock due to a break in the wiring
insulation. All exposed metal parts are
isolated from live internal metal components
with protecting insulation. Double insulated
chargers do not need to be grounded,
Servicing of a charger with double insulatian
requires extreme care and knowledge of the
system and should be performed only by a
qualified service technician.
• Before charging battery, read all instructions
and cautionary ma_ngs in this manual and
on your mower.
o Do not expose mower to rain or snow.
o To reduce risk of damage to charger plug,
pull cord by the cord plug rather than cord
when disconnecting from charger port or AC
outlet.
° Make sure cord is located so that it will not be
stepped on, tripped over, or otherwise
subjected to damage or stress.
• Do not operate mower if charger has
received a sharp blow, been dropped, or
otherwise damaged in any way; take it to a
qualified serviceman.
o Do not disassemble mower; take it to a
qualified serviceman when service or repair
is required° Incorrect reassembly may result
in a risk of electric shock or fire.
• To reduce risk of electric shock, remove fuse
before attempting any maintenance cleaning_
, Turning off control will not reduce this risk.
WARNING: Always remove fuse to prevent
larage, basement, etc. Storage area should
)e a dry, locked-up place - out of reach of
:hildreno
accidental starting when setting up, transporting, adjusting or making repairs_
¢lalntain mower with care. Keep blade
_harp and clean for best and safest
)efformance. Follow instructions for
ubricating and changing accessories.
4
These accessories were available when
also order repair parts for you, when you
this lawn mower was produced. They are
provide the model number of your lawn
also available at most Sears retail outlets
mower.
and service centers,, Most Sears stores can
LAWN MOWER PERFORMANCE
FOR
REAR DISCHARGE
GRASS
LAWN CATCHERS
MOWERS
LAWN MOWER MAINTENANCE
9
Blades
rO REMOVE
CARTON
LAWN
MOWER
Blade adapters
FROM
Remove loose parts included with
mower
Cut down two end corners of carton and
lay end panel down flat.
Remove all packing materials except
padding between upper and lower
handle and padding holding operator
presence control bar to upper handle.
Roll lawn mower out of carton and check
carton thoroughly for additional loose
parts.
DQ NOT insert fuse at this time.
"tOW TO SET UP YOUR
VtOWER
ro UNFOLD
Wheels
Upper Handle
Operator Presence
Control Bar
Lift Up
Mowing
Position
Lower Handle
LAWN
• DO NOT insert fuse at this time.
= Plug switch box cord connector
into motor connector. Plug is
located on right side of motor.
HANDLE
MPORTANT:
Unfold handle carefully so as
_ot to pinch or damage control cables.
• Raise handles until lower handle section
locks into place in mowing position.
• Raise upper handle section into place
on lower handle, remove protective
padding and tighten both handle knobs.
Remove handle padding holding
operator presence control bar to upper
handle.
Your lawn mower handle can be
Motor Connector
Switch Box Cor,
Connector
adjusted for your mowing comfort. Refer
to "Adjust Handle" in the Service and
Adjustment section of this manual.
5
KNOW YOUR
LAWN
READ THIS OWNER'S
MOWER
MANUAL
LAWN MOWER. Compare
with the location of various
reference.
AND SAFETY
RULES
BEFORE
OPERATING
YOUR
the illustrations with your lawn mower to familiarize yourself
controls and adjustments,
Save this manual for future
These symbols may appear on your lawn mower or in literature
product. Learn and understand their meaning.
WARNING
CAUTION
OR
_
supplied
with the
E
Operator Presence (
Start Switch Button
Loadlndicator
Handle
Knob
Light
Ba_eryStatus
Light
Fuse 40 amp
Automotive
Type
Mulcher Plug
Wheel adjuster
(on each wheel)
Charger
MEETS
CPSC SAFETY
Housing
REQUIREMENTS
Sears rotary walk-behind power lawn mowers conform to the safety standards of the
American National Standards Institute and the U.S. Consumer Product Safety Commission, The blade turns when the motor is running,
Operator Presence Control Bar - must be held down to the handle to start and run the
motor, Release to stop the motor.
Battery Status Light - alerts operator when battery capacity is approaching 80%
discharge (approximately 10 to 15 minutes left -- depending on grass conditions).
Load Indicator Light - informs the operator that the mower is experiencing a heavy
load.
Mulcher Plug - allows conversion to discharge or bagging operation.
Fuse - must be plugged in to operate and recharge mower.
6
;HARGING
hebatteryhasbeenchargedatthefactory.
Iowever,
itwiltbenecessarytorecharge
arteryandmakesureithasa fullcharge
eforeinitialuse,,
Alwayschargemowerindoorsina garage,
carport,etc.whereitis dryandprotected
fromtheweather.DONOTexposetorain
orsnow.
Donotchargemowerinextremehotorcold
temperatures.
OTE:Extremeheatis moreharmfulthan
]ld,especially
whenstoringmower.Charge
_ower
in a locationwherethetemperature
is
,' Your mower has been designed so that it
is safe to continuously leave it on charge
for extended periods of time. You can even
leave it on charge during the off season if
desired°
lore than 50°F (10°C) but less than 100°F
17°O).
Keep mower away from water, heaters,
stoves, radiators, flames, chemicals,
corrosives, etc.
MOTOR
0 CHARGE
Mower is disabled while charging. Plugging
the charger into the mower interrupts the
switching circuit.
The fuse must be plugged in while
charging battery.
Open charging port door to expose
charging port°
Plug charger lead into charging port.
Connect charger power cord to power
supply,
Door
Charger Lead
Charging
The operation of any lawn mower
can result in foreign objects thrown
into the eyes, which can result in
severe eye damage. Always wear safety
glasses or eye shields while operating your
lawn mower or performing any adjustments or repairs. We recommend a wise
vision safety mask over the spectacles or
standard safety glasses.
ZONE
CONTROL
CAUTION; Federal regulations require a motor control to be installed on
this lawn mower in order to minimize the
risk of blade contact injury. DO NOT
under any circumstances
attempt to
defeat the function of the operator
control. The blade turns when the motor
is running.
o Your lawn mower is equipped with
• an operator presence control barwhich
requires the operator to be positioned
behind the lawn mower handle to start and
operate the lawn mower.
TO ADJUST CUTTING HEIGHT
o Raise wheels for low cut and lower wheels
for high cut,
• Adjust cutting height to suit your requirements, Medium position is best for most
lawn&
= To change cutting height, squeeze adjuster
lever toward wheel Move wheel up or
down to suit your requirements, Be sure all
wheels are in the same setting.
OTE: Always plug charger into mower
RST,, Then into wall receptacle. Reversing
is procedure will result in the battery not
._ingfully charged,,
Make sure power supply is normal house
voltage, 120 volts, 60 Hz, AC only.
The red LED light on the charger will turn
on, indicating "on charge" status of mower.
OTE: If mower does not charge, see
)ubleshooting cha&
Make sure fuse is plugged in.
When the battery becomes fully charged,
the red light will turn off and the green light
will tum on_
It takes 16 hours to fully recharge a
completely discharged battery° Your mower
may be used with a partially charged battery
if you need to finish a job.
NOTE; Adjuster is properly positioned when
plate tab inserts into hole in lever. Also, 9position adjusters (if so equipped) allow lever
to be positioned between the plate tab&
Lower Wheels for High Cut
Raise Wheels for Low Cut
Plate Tab
ATTACH
GRASS
CATCHER
TO INSTALL
;lose the flip lid. Flip lid must be closed
#hile operating lawn mower°
ift the rear door on the mower housing
,nd place the grass catcher frame onto
ne formed tabs on the rear door hinge
_rackeL
Your lawn mower was shipped ready to be
used as a mulchero To convert to bagging
or discharging:
o Open rear door and remove mulcher
plate. Store mulcher plate in a safe
place.
o You can now install catcher' or optional
clipping deflector.
, To return to mulching operation, install
mulcher plate into discharge opening of
mower.
CAUTION:
Do not run your lawn mower
without mulcher plate in place or approved
clipping deflector or grass catcher in place..
Never attempt to operate the lawn mower
with the rear door removed or propped
open.
_he grass catcher is secured to the lawn
nower housing when the rear door is
owered onto the grass catcher frame.
..-__
_
_r'f
/ _
,ingeJ
F_\
Rear
_
door
Grass
catcher
/flame
brack
Formed
tabs
EMPTY GRASS
ATTACHMENTS
CATCHER
Mulcher
-o remove grass catcher, release
_perator presence control bar to stop
;ngine.
_ift up rear door and remove the grass
:atcher by the handleo
)o not drag the bag when emptying;
it
viii cause unnecessary
wear.
BEFORE
STARTING
MOTOR
= Mower will not run with battery charger
plugged in.
= Unplug charger from outlet, then remove
charger from motor.
• Close charging port door..
TO START MOWER
o Insert fuse.
° Hold operator presence control bar
down to the handle and press switch
button to start mower.
= To STOP motor, release
presence control bar.
8
operator
MOWING
TIPS
MULCHING
o Under certain conditions, such as very
tall grass, it may be necessary to raise
the height of cut to reduce pushing effort
and to keep from overloading the engine
and leaving clumps of grass clipping&
It
may also be necessary to reduce
ground speed and/or run the lawn
mower over the area a second time.
MOWING
TIPS
IMPORTANT:
For best performance,
keep
mower housing free of built-up grass and
trash. See CLEANING in Maintenance
section of this manual.
o The special mulching blade will recut the
grass clippings many times and reduce
them in size so that as they fall onto the
lawn they will disperse into the grass
and not be noticed. Also, the mulched
grass will biodegrade quickly to provide
nutrients for the lawn.
,, For extremely heavy cutting, reduce the
width of cut by overlapping previously
cut path and mow slowly.
o When using a rear discharge lawn
mower in moist, heavy grass, clumps of
cut grass may not enter the grass
catcher.
Reduce ground speed (pushing speed) and/or run the lawn mower
over the area a second time..
o Avoid cutting your lawn when it is wet.
Wet grass tends to form clumps and
interferes with the mulching action.. The
best time to mow your lawn is the early
afternoon. At this time the grass has
dried and the newly cut area will not be
exposed to the direct sun.
o For best results, adjust the lawn mower
cutting height so that the lawn mower
cuts off only the top one-third of the
grass blades. If the lawn is overgrown it
will be necessary to raise the height of
cut to reduce pushing effort and to keep
from overloading the motor and leaving
clumps of mulched grass. For extremely
heavy mulching, reduce your width of
cut, mow slowly and raise the rear of the
lawn mower one wheel adjuster setting
higher than the front.
• Certain types of grass and grass
conditions may require that an area be
mulched a second time to completely
hide the clippings. When doing a second
cut, mow across or perpendicular
to the
first cut path.
= Change your cutting pattern from week
to week. Mow north to south one week
o tf a trail of clippings is left on the right
side of a rear discharge mower, mow in
a clockwise direction with a small
overlap to collect the clippings on the
next pass.
= Pores in cloth grass catchers can
become filled with dirt and dust with use
and catchers will collect less grass.. To
prevent this, regularly hose catcher off
with water and let dry before using.
° Keep top of engine around starter clear
and clean of grass clippings and chaff.
This will help engine air flow and extend
engine life.
Max 1/3
then change to east to west the next
week_ This will help prevent matting and
graining of the lawn.
9
CUSTOMER
RESPONSIBULITIES
....
,,r
¥ooCOMPLETE
REGULAR SERVICE
Check for Loose Fasteners
Clean/Inspect Grass Catcher
(If Equipped)
Clean Lawn Mower
RV!CE DATES
I _/
_/'
I
I _/
_
_,/
e/
_,/
Check/Sharpen/Replace Btade
LubricationChart
Recharge
_/' 1
_/'
t_
_/
I
1 - Replace blades more often when mowing in sandy soil
LUBRICATION
GENERAL
CHART
RECOMMENDATIONS
Wheel
• Always observe safety rules when
performing arty maintenance.
= The warranty on this lawn mower does
not cover items that have been subjected to operator abuse or negligence.
To receive full value from the warranty,
operator must maintain mower as
instructed in this manual.
= Some adjustments will need to be made
periodically to properly maintain your
unit.
= All adjustments in the Service and
Adjustments section of this manual
should be checked at least once each
season.
o Once a year check blade for wear.
o Follow the maintenance
schedule in this
manual
• Before each use:
(3:) Spray Lubricant
IMPORTANT: Do not oil or grease plastic
wheel bearings. Viscous lubricants will
attract dust and dirt and will shorten the life
of the self-lubricating bearings. If you feel
they must be lubricated, use only a dry,
powered graphite tube lubricant sparingly.
o Be sure batteryis fully charged.
° Check for loose fasteners.
LUBRICATION
Keep unit well lubricated (See "LUBRICA_
TION CHART").
lO
PRODUCT SPECnF CA33ONS
MODEL
NUMBER
917.386411
POWER
BLADE
24V DC BATTERY
4O AMP FUSE
SPEED
CUTTING
3200 RPM
WIDTH
20"
CHARGER
12-16 HOUR
BLADE
35-40 FT. LBS.
BOLT TORQUE:
TIRES
o Avoid stumps, stones, deep ruts, sharp
objects and other hazards that may
cause tire damage.
IMPORTANT:
treatedr
CARE
,
Remove fuse and keep in a safe place
away from mower.
• Use a wood block between blade and
Blade Adapter
Blade Key
mower housing to prevent blade from
turning when removing blade boll
o Protect your hands with gloves and/or
wrap blade with heavy cloth.
o Remove blade bolt by turning counterclockwise. Use a box or open-end
wrench.
• Position the blade adapter on the
motorshaft.
Be sure key in adapter and
motorshaft
keyway are aligned.
o Position blade on the blade adapter
aligning the two (2) holes in the blade
with the raised lugs on the adapter.
• Be sure the trailing edge of blade
(opposite sharp edge) is up toward the
motor.
o Install the blade bolt with the lock washer
and hardened washer
and motorshafL
Blade bolt is grade 8 heat
NOTE: We do not recommend sharpening blade, but if you do, be sure the blade
is balanced.
For best results, mower blade must be kept
sharp. Replace bent or damaged blades.
TO REMOVE BLADE
• Remove blade and attaching hardware
(bolt, lock washer and hardened washer).
o Remove the blade adapter and check the
key inside hub of blade adapter. The key
must be in good condition to work
properly. Replace adapter if damaged.
TO REPLACE
BLADE
RECHARGE
o Use block of wood between blade and
lawn mower housing and tighten the
blade bolt, turning clockwise.
° The recommended
tightening torque is
35_40 ft.Ibs.
o Keep tires free of gasoline, oil, or insect
control chemicals which can harm rubber.
BLADE
/ 17 AMP-HOUR
_
Motorshaft
zKeyway
Blade
I
-_ ,,
_,
J/-_.
Lockwasher\,
, "_ra',lino
Hardened
Y
Washer
Edge
Blade
Adapter
TO SHARPEN BLADE
Care should be taken to keep the blade
balanced. An unbalanced blade will cause
eventual damage to lawn mower or motor.
• The blade can be sharpened with a file or
on a grinding wheel. Do not attempt to
sharpen while on the mower.
° To check blade balance, drive a nail into a
beam or wall Leave about one inch of the
straight nail exposed. Place center hole of
blade over the head of the nail. If blade is
balanced, it should remain in a horizontal
position.. If either end of the blade moves
downward, sharpen the heavy end until the
blade is balanced.
into blade adapter
11
ASS CATCHER
he grass catcher may be hosed with
ater, but must be dry when used. Remove
rass catcher from mower before cleaning
;beck your grass catcher often for damage
r deterioration. Through r_ormaluse it will
lear. If catcher needs replacing, replace
,nly with a manufacturer approved
_=placement catcher. Give the lawn mower
nodel number when ordering.
UTION: Before performing any service or
_stments:
-3elease operator presence control bar and
;top motor.
,,lake sure the blade and all moving parts
lave completely stopped.
::lemove fuse from motor and keep in a
;ale place away from mower
AR
CLEANING
CAUTION: Remove fuse from motor and
place it in a safe place away from mower:
,, Turn lawn mower on its side. Clean the
underside of your' lawn mower by scraping
to remove buitd-up of grass and trash.
o Keep finished surfaces and wheels free of
all gasoline, oil, etc.
o DO NOT use a garden hose to clean lawn
mower. Use a damp cloth to wipe grass and
dirt from mower.
overtighten the fasteners holding the controls
to the upper handle.
o To change from medium low to high
position only the upper handle section will
have to be turned over:.
o To change from medium low to low position,
only the lower handle section will have to be
turned over°
Shipping Position
DEFLECTOR
rear deflector, attached between the rear
_.elsof your mower, is provided to minimize
possibility that objects will be thrown out of
rear of the mower into the operator
Mng position. If the deflector becomes
,qaged, it should be replaced.
,ADJUST HANDLE
=rlawn mower handle can be raised or
ered for' your mowing comfort. Four (4)
;itions are available: high, medium high,
dium low and low. Handles are shipped
._nted in the medium low position.
_efore making adjustments, remove fuse.
o change from medium low to medium
_igh position, the upper and lower handle
;ections will have to be tumed over.
:remove the controls and operator presence
.ontrol bar from the upper handle.
:lemove hairpin cotters.
)isconnect the lower handle from the
_andle brackets.
;urn the handle over and reassemble the
lairpin cotters that have been removed.
:leaasemble the controls and the operator
)resence control bar to the upper handle.
UTION: The operator presence control bar
=stpivot freely to permit switching off the
tor when control bar is released. Do not
Medium _
Low
Medium
_h
BATTERY
The battery in your mower is a recharge r`
able 24 volt sealed lead acid battery.
TO GET THE MAXIMUM BATTERY LIFE,
WE RECOMMEND
THE FOLLOWING:
o Fully recharge battery prior to initial use.
12
, Recharge
batteryimmediately
aftereach
use.
, Recharge
batterycontinuously
whenmower
is notinuse°
, Alwayschargebatteryindoorsina dry,
protectedplace.
, DONOTchargein extremehotorcold
temperatures°
Chargemowerbatteryina
locationwheretemperature
is morethan
50°F(10°C)butlessthan100°F(37°C).
BATTERYREPLACEMENT
Ifbatteryreplacement
becomesnecessary,
followtheinstructions
below,Readthese
instructions
intheirentiretybeforeproceeding
with disassembly,
, Remove fuse and keep in a safe place
away from mower,
0 Carefully remove top gdlle from shroud,
Start at side rear comer of grille by pressing
inward and up to release grille from shroud,
, From underside of gdlte, unplug lead from
indicator board, Note the position and
routing of the lead for later reassembly,
, Remove screws securing shroud to battery
support bracket, Remove shroud from
mower.,
, Remove battery terminal leads from battery
- Be sure controller board is secured
properly°
- Be sure all leads are routed and
installed properly.
- Be sure all hardware is tightened
securely,
Top Grille
Indicator
_-'f-_
Board
u,,,...._--_.__./jj_
(Under --J
Grille)
Battery
Support
Bracket
Batteries
(4 places). Note color and position of leads
for later reassembly.
, Before removing the battery support
bracket, note how the front of the bracket
secures the controller board. Remove the
screws securing battery support bracket to
motor and remove the bracket,
o Remove batteries.
Battery
Terminal
Lead
Controller
Board
Black
Battery
Terminal
, Install new batteries by reversing the above
instructions.
Lead
Red Battery
Terminal Lead
_,'_,
Shroud
ldicator
Board
Lead
TO PRESERVE NATURAL RESOURCES, PLEASE RECYCLE OR DISPOSE OF
% BATTERY PROPERLY THIS PRODUCT CONTAINS SEALED LEAD ACID BAT-
_TERIE&
MUST BE DISPOSED OF PROPERLY. Local, state, or federal laws may
P_ prohibit disposal of lead-acid batteries in ordinary trash. Consult your local waste
authority for information regarding available recycling and/or disposal options. Most Sears
Automotive Centers accept lead-acid batteries for recycling.
WARNING: Upon removal, cover the battery's terminals with hea W duty adhesive tape. Do not
attempt to destroy or disassemble battery pact or remove any of its components. Also, never
[ouch both terminals with metal objects and/or body parts a short circuit may result. Keep away
from children. Failure to comply with these warnings could result in fire and/or sedeus injury.
13
Lower Handle
Immediately prepare your lawn mower for
storage at the end of the season or if the
unit will not be used for 30 days or more.
LAWN
Squeeze to
Fold
rvIOWER
When lawn mower is to be stored for a
period of time, clean it thoroughly, remove
all dirt, grease, leaves, etc. Store in a
clean, dry area.
o Clean entire lawn mower (See "CLEANING" in the Maintenance
section of this
Hairpin Cotter
manual)+
o Lubricate as shown in the Maintenance
section of this manual.
° Be sure that all nuts, bolts, screws, and
pins are securely fastened. Inspect
moving parts for damage, breakage and
wear. Replace if necessary.
° Touch up all rusted or chipped paint
surfaces and lightly sand before
painting.
Operator Presence
Control Bar
IMPORTANT:
When folding the handle for
storage or transportation,
be sure to fold
the handle as shown or you may damage
the control cables.
o When setting up your handle from the
storage position, the lower handle will
automatically
lock into the mowing
Mowing Position
Upper Handle
Fold Forward
for Storage
Fold
Backward
HANDLE
You can fold your lawn mower handle for
storage.
° Unplug the switch plug box cord from
motor before folding handle (See 'q'o
Unfold Handle" in Assembly section of
this manual).
° Squeeze the bottom ends of the lower
handle toward each other until the lower
handle clears the handle bracket, then
move handle forward.
= Loosen upper handle mounting bolts
enough to allow upper handle to be
folded back.
Mounting Pin
Lower
Handle
BATTERY
= Recharge the battery to a full charge.
Do not store mower with a discharged
battery. Battery failure will occur in a
very short time if mower is stored
without having a full charge. We
recommend that you charge battery
continuously while in storage and during
the off season.
OTHER
= If possible, store your unit indoors and
cover it to give protection from dust and
dirt+
• Cover your unit with a suitable protective
cover that does not retain moisture. Do
not use plastic. Plastic cannot breathe
which allows condensation to form and
will cause your unit to rust.
position.
14
TROUBLESHOOTING
CHART
CORRECTION
_ROBLEM
CAUSE
)oesnotsta_
o Fuse has been
removed from mower
= install fuse
o Charger has net been
unplugged from mower
o Remove
charger plug from
mower charge port
charge port
o Battery may need to be
o Charge
recharged
o Blade does not rotate freely
or mower deck is clogged
o Remove fuse, turn mower
on itssideandcheckblade.
battery
Make sure it is free to
rotate.
Also check for clogging.
_oor performance
• Grass too high or thick
(Overload light is on 25%
of the time)
• Raise mower cutting height
to cut 1/3 of grass length.
• Walk at a slower pace so
overload light stays off.
• Reduce cutting width if
needed.
o Remove fuse, check
• Low battery voltage (Low
power light stays on while
mowing)
deck for clogging, check
blade for sharpness.
• Reduce cutting load
o Walk at slower pace
o Reduce cutting width
o Raise cutting height
o Recharge
_oor cut - uneven
o Worn, bent or loose blade.
batteries
° Remove fuse.
° Replace blade.
blade boll
• Wheel heights uneven°
o Buildup of grass, and trash
leaves, under mower.
Excessive
Tighten
• Set all wheels at same
height.
o Remove fuse and cleanunderside of mower housing.
o Worn, bent or loose blade.
o Remove fuse.
o Bent motor motorshafL
o Replace blade. Tighten
blade bolt.
o Contact an authorized
/ibration
service center.
15
PROBLEM
Mower stops
CAUSE
CORRECTION
o If high current light stays
on momentarily after
mower stops, load is too
much for mower.
o If low power light stays
on, mower slows down,
then stops.
o Remove fuse and
turn mower on its side.
Make sure blade is free to
rotate. Also check mower
for clogging°
= Batteries may be low, near
the need of charging.
Recharge batteries.
• Grass may be too heavy
for remaining battery
capacity. Try the following:
• Walk slower:
• Reduce cutting width
= Raise mower cutting height
Grass catcher
not filling
o Cutting height to low.
o Raise cutting height
= Lift on blade worn off+
° Replace blade.
° Clean grass catcher,
o Catcher
Hard to push
not venting air.
° Grass is too high or wheel
height is too Iow_
= Rear of lawn mower
housing or blade dragging
in grass.
= Grass catcher too full.
o Handle height position not
right for you.
Mower Does Not
Stop when
Operator Presence
Control Bar is
Released
° Operator presence
bar is damaged.
control
° Start switch button sticks
or damaged.
16
= Raise cutting height.
o Raise rear of lawn mower
housing one (1) setting
higher:
o Empty grass catcher
o Adjust handle height to
suit.
° Replace operator
control bar.
presenc_
o Replace start switch
button.
CRAFTSMAN
Meden Noo 917.386411
Reglas de Seguridad
Especificaciones del Producto
Mantenimiento
Garantfa
Montaje
OperaciSn
GARANTiA
LIMITADA
rograma
Servicio y Adjustes
AImacenamiento
ldentificaci6n de problemas
Partes de repuesto
15
23
22
15
18
19
DE DOS ANOS
Orden de Partes
PARA LA SEGADORA
A MOTOR
24
25
26
Vea el manual
ingles del dueSo
Contratapa
CRAFTSMAN
Por dos (2) aSos, a partir de la fecha de compra, cuando esta Segadora Craftsman se mantenga,
lubrique y afine segL_nlas instrucciones para la operaci6n y el mantenimiento del manual del
due£_o,Sears reparar& gratis todo defecto en el material y la mano de obra
Si la Segadora Craftsman ee usa para fines comerciales o de arriendo, esta garantfa s6Io se aplica
por noventa (90) dias a partir de la fecha de compra.
Esta Garantfa no cubre:
o Artfculos que ee desgaetan durante el uso normal tales como las cuchillas segadoras rotatorias,
los adaptadores de la cuchilla, y las correas
• Reparaciones necesarias debido al abuso o a ia negligencia del operador, incluy6nd los
cig0eSales doblados y la falta de mantenimiento del equipo seg_n las instrucciones que se
incluyen en el Manual del DueSo
EL SERVICIO DE GARANTiA ESTA DISPONIBLE al devolver la segadora a motor Craftsman en
un centro/departamento de servicio Sears m&s cercano en los estados unidos. Esta garantia ee
aplica solamente mientras el producto este en uso en los estados unidos.
Esta Garantfa le otorga derechos legales especfficos, y puede que tambi_n tenga otros derechos
que varien de estado a estado
Sears, Roebuck and Coo,Hoffman Estates, IL 60179 USA
ATENClON:
No intente operar esta segadora hasta que halla leido compietamente y comprenda
bien las instrucciones, las leyes de seguddad, etc de este manual Si no se observan las
instrucciones siguientes se puede producir accidentes relacionados con et fuego, electrochoques, o lesiones graves. Guarde este Manual del DueSo y revfselo de ves en cuando para
seguir manteniendo un uso seguro y instruyendo a otras personas las cuales vayan a utilizar
la segadora acolchadora.
Los estandartes de seguridad exigen la
presencia del operador en los controles para
redueir a un minimo el desgo de lesionarse Su
unidad viene equipada con dichos controles
Pot ningun motive trate del eliminar la funciSn
de los controles que exigen la presencia del
operador.
ENTRENAMIENTO:
• Lea este manual del operador cuidadosamente. Familiar[cese con los controles y
aprenda a operar su segadora en forma
adecuada. Aprenda a parar su segadora
r&pidamente
• No permita que los niSos usen su
segadora, Nunca permita que los
adultos operen la segadora sin contar
con las instrucciones adecuadas.
° Mantenga el &rea de operaci6n des
pejada de gente, especialmente de niSos
pequeRos y de animales dom_stico&
o Use la segadora solamente para los fines
propuestos per el fabricante y segun las
explicaciones descritas en este manual.
• No opere la segadora si se ha ca[de o
daSado en cualquiera forma. Siempre repare
los da5os antes de usarlar
17
• No use accesorios que no hayan side
recomendados pot el fabdcante, El uso de
dichos accesorios puede ser peligroso.
o La cuchilla vira cuando el motor' esta en marcha.
. Evite arTanquesaccidentales..No juegue con el
botSn del interruptor y la barra de control de la
presencia del operador cuando no este _lizando
la segadora..
PREPARACION:
.
.
Siempre revise cuidadosamente el &rea que se
va a segar y desp_jela de todas les piedras,
palos, alambres, huesos y otros objetos
extraSos. Estos objetos ser&q lanzados con la
cuchilla y puedan producir lesiones graves_
. Siempre use anteojos de seguridad o protectores
de ojos cuando ananque y durante el Uempo que
use la segadora.
° Vistase en forma adecuada_No opere la
segadora sin zapatos o con sandalias abiertas.
Use solamante zapatos sSlidos con buena
tracdSn cuando siegue.
. Siempre haga los ajustes de altura de las ruedas
antes de hacc " arrancar su segadora Nunca
trate de hacer esto mientras que el motor estA
funcionando.
- Sieguesiempredurante
eldiao con buenaluz
art_cial
o No inserte el alambre de la bujfa en la segadora
hasta que vaya ha _lizar.
Proteje sus pulmones. UUlicemascarillas cuando
este segando en _rees demasiado polvorosas.
o Remueva Ilaves ajustadoras. Acostumbrase en
verificar que las Ilaves ajustadoras est6n
removidas de la segadora antes de utilizada.
OPERAClON:
°
° Mantenga sus ojos y su mente en la segadora y
en el _,reaque se est_ cortando. No permita que
otros intereses Io distraigan.
• No corte c_sped mojado o resbaloso. Nunca
corm rnientras est_ operando su segadera
Siempre aseg_irese de mantener el equilibdo mantenga el mango agarrado firmemente y
camine.
o No ponga las manos o los pies cerca o debajo de
las partes rotatodas_Mant_ngase alejado de la
abertura de descarga en todo momento.
• Siempre pare el motor cuando abandone o no
este utilizando la segadora, o cuando este
cruzando entrades para autos, los senderos,
caminos, y _eas cubiertas de dplo..
° Nunca dirija la descarga dal material hacia los
espectadores ni perrnita a nadie cerca de la
segadora mientTas la est_ operando..
- Antes de limpiar, iospeccionar, o reparar su
segadora, pare el motor y este completarnente
seguro de que la cuchitla y cualquier otra parte
movible se hallan parado. Entonces remueva el
alambre de la buj[a para prevenir arranques
accidentales.
o
•
o
o
•
°
o
•
°
18
No continue haciendo funcionar su segadora si le
pega a un objeto extraSo Siga el procedimiento
descrito anteriormente, y repare cualquier daSo
antes de valver a arrancar o operar su segadora.
No opere le segadora si vibra abnorrnalmente.
Demasiado vibraciSn puede set la indicarle que
halla algt3nda,fio; pate el motor y verifique la
causa de la vibraci6n Repare cuando sea
necesario.
No haga funcionar el motor bajo cualquier recinto
cerrado.
Nunca corte el c_sped tirando ta segadora hacia
usted_Siegue a trav_s de la cara de las
pendientes, nunca hacia arfiba o hacia abajo
pues puede perder el equilibrio_No siegue
pendientes demasiado empinadas. Tenga
cuZdadocuando opere la segadora en terreno
disparejo o cuando cambie de direcciSn mantenga un buen equilibrio.
Nunca opere la segadora sin las protecciones
adecuadas, las pianchas el recogedor de c_sped
y otros dispositivos de seguridad en su lugar.
No fuerza la segadora. Funcionara mejor y m&s
r&pidamenteal paso del que fue diseSada.
Cuando este segando en superficies rigurosas o
sobre hierba alta, seleccione la posiciSn de corte
alto.
No intente ir fuera de alcanzS. Guarde ambos
pies en el suelo asi como siempre mantenga su
equilibdo a todo momento
Permanezca alerto. Tenga cuidado con toque
haga No utilice la segadora cuando este
cansadooNo corra o se de prisa cuando este
segando.
No utilice la segadora despu_s de haber tornado
alguna droga, alcohol, o cualquier medicaci6n.
Peligro: Guardase lejos del Area de la cuchi!la
Tenga cuidado del peligro de lesiones graves.
Guarde las manos y los
pies lejos de la cuchilla. NO intente en remover cualquier objeto de debajo de la segadora
cuando la cuchilla este en movimiento.
Si la segadora se para, alivie ta barra de control
de la presencia del operado y
espere a que la cuchilla se pare cornpletamente.
Remueva el alambre de
la bujia antes de intentar remover'cualquier
objeto de debajo de la caja de la segadora.
Inspeccione con seguridad y asegt_reseque
cualquier daSo sea reparado antes de volver a
empezar y utilizar la segado/a..
deberA ser almacenada adenb'o de una cochera
MANTENIMIENTO Y ALMACENAMIEN-TO:
un s6tano, etc. El Area que elija come almac_n
o Revise la cuchilla as[ come los pemos de
deberA ser un Area seca y fuera dal alcance de
rnentaje del motor con frecuenda pare
niSos.
asegurarse que ast_n bien apretados.
o
Conserve la segadora con touche cuidado Pare
= Revise todos los pemos, tuercas y tomillos a
que puede obtener mejoree y eeguros
intervalos, pare ver_ficarsi est&n apretados en
resultados, mantenge la cuchilla afilada y lirnpia.
forms adecuada, y asegurarse que la segadora
Siga las instrucciones del fabdcante cuando
se encuentre en buenas condiciones
vaya a cambiar bs acoesodos.
o Mantanga redes los dispesitivos de segufidad en
INSTRUCCIONES
DE SEGURIDAD PARA
su lugar y listos pare funcionar
EL CARGADOR:
° Pare reducir el peligro de incendies,mantenga
al motor libre de hierbe, heias o dernasiado
° AtSLAMIENTO DOBLE_El cargador de su
segadora esta cornpuesto de doble alslamiente
grasa o aceite.
o Ve_que la balsa del recogedor del c6sped per
Esto significa que esta separado del sistema
cualquier detefiero o desgaste. Reernplase _os
el6c_co del cargador per dos capes de
recogedores desgastados. Use salamente las
aislamiento de electficidad completamante
balsas de repuesto recornendadas per el
distintas. Esta segunda cape es para proteger e
iabficante o asegurese que comp_ancon las
operador de cheques al6ct_cos per cause de
propias especificadones
rupturas an el alsfamiento del alambrado. Todaz
• Siempre rnantenga una cuchilla afilada en su
la partes de metal expuestas estAn alsladas de
los elementos ac_vos con et als_arnientode
segadora° Siempre permita que al motor se enfde antes de
pretecci6noCargadores de dob}e aislamiento n(
guarder la segadora en cualquier recinto
deben set de toma de tierra..Tenga mucho
cerr_do.
cuidado cuar,do vaya a hacer el se_cio del
o Siernpre guarde la segadora seca y !irnpi&
cargador de doble aislamiento el canocimiento
dal sistema es rnuy importante y deber& ser
Siernpre uQice un trapo lirnpio cuando este
e_ectuado sotamente per un t_cnico cual_cado
_impiandola segadora Nunca _lice fldidos de
. Antes de cargar la bated& lea todas las
los frenos, gasolina_cualquier o_o producto con
base de petr61eo,solventes o ague para timpiar
instrucciones y notas de advertencia dal menus
de su segador&
la segador&
• No siegue si el intenupter no pueda ser
° No permita que su segadora acalchadora entre
en contacto con la Iluvia o la nieve.
encendido y apagado, Haga hacer el reemplazo
de un interrupter de_ciante per un t_cnico
° Para reducir el riesgo de daSo al tap6n del
cualificado en un centro/departamento de
cargador, estke el cord6n per el tap6n meier qu
servicio autorizado,
per el cord6n cuando vaya a desconnectade de
• Inspeccione aquellas partes de,arias, Antes de
la en_'ada del cargador o dal enchufe de la
que siga segando, un protector o cualquier otra
pared.
parle la cual esta da,fada deber& ser
* AsegQrese que el cerd6n este colocado de rncx
inspeccionada para determiner si puecle ser
que no pueda ser pisoteado, tropezado, o sujet,
uQizada, Verifique la posiciOnde las partes con
a cualquier daSo.
movimiento, aquellas partes las cuales
o No utilice la segadora si el cargader halla
encuen_'e rotes, pades del rnentaje, y cualquier
recibido un fuerte galpe, halla side derramade, c
otra condici6n la cual pueda afectar la operad6n
per cuelquier raz6n halle side da_ado an
de la segador& Cualquier protector o otras
cualquier mode; tl_velo aun t6cnico de servicio
cualificado.
partes las cuales encuentre da_adas deberAn
ser correctarnante reparadas o reemplazadas
No desmonte la segadora; n_velaaun t_cnico
de sewicio cualificado cuando necesite servicio
per un t6cnico cualificado an un central
departarnento de sen_cio auterizado rn&s
reparo& Puede prodocirse el riesgo de cheque.,
cercano.
el_c'cicos o fuego si la segadora esta rnontada
mal
o Cuando haga serviclo a su segadora uQice
solamente partes Craftsman. El servicio de esta
o Para reducir el riesgo de electrochoques,
remueva el fusible antes de intentar cualqaler
segadora deberA ser echo solamente per un
t6cnico de servicio cualiflcado. Pare obtaner
rnantanimianto de lirnpieza. No reducirA el
servicio le sugerimos que se ponga en contacto
riesgo solamente si apaga el control
con su centro/departarnento de servicio
ADVERTENCIA:
Remueva siempre el
autodzado mAs cercanoo
fusible para prevenir un arranque accidental
• Cuando vaya a reemplazar la cuchilla, uQice
durante el ajuste, el transports, el ajuste o
solamente partes recomendadas per el
cuando este haciendo reparos.
fabricante. El use de cuaJquierotra cuchilla
puede producir lesiones graves o daSo a su
segadora.
o Guarde la segadora en el intedor de un local
Cuando no la este utJlizendo,le segadora
19
Estos accesorios estaban disponibles cuando
pedir partes de repuesto para usted, si les
se produjo la segadora_ Tarnbi_n est&n
proporciona el nL_merodel modelo de su
disponibles en la mayofia de las tiendas de
segadofao Algunos de estos accesorios tal vez
Sears yen los centros de servicio. La mayofia
no se apliquen a su segadora.
de fas _endas Sears tambi_n puaden mandar a
RENDIMIENTO DE LA SEGADORA
Par_
segadora$
con
MANTENIMIENTO DE LA SEGADORA
,,
Cuchlllas
de cuchllla
PARA REMOVER LA SEGADORA
DE LA CAJA DE CARTON
o Remueva las partes sueltas que se incluyen
con la segadora,.
° Corte las dos esquinas de los extremos de ta
caja de cartSn y tienda el panel del extremo
piano,
= Remueva todo el material de empaque,
excepto la curia entre el mango superior y 51
inferior, y la curia que sujeta la barra de
control qua exige la presencia del operador
junto con el mango superior.
• Haga rodar la segadora hacia afuera de la
caja de cartSn y revisela cuidadosamente
para verificar si todavfa quedan partes sueltas
adicionaleso
• No inserte el alambre de la bujfa en este
momento.
Rued_B
segun le acomode para segar Refi_rase a
"Ajuste del Mango" en la secci6n de Servicio
y Ajustes de este manual.
• No inserte el alambre de la bujia en este
momento,
o Enchufe la conexiSn de la cuerda de ta caja
Barra de Control
qua Exige la
Presencia del
operador
M ngo Superi(
J//
_1 ,_
Levantar___
Levantar
Posici6n Para
) Segar
COMO PREPARARSUSEGADORA
PARA DESDOBLAR
EL MANGO
Mango Inferior
IIVIPORTANTE: Desdoble el mango con cuidad0
para no pinchar o dafiar los cable de control
• Levante los mangos hasta qua la secci6n del
mango inferior se asegure en su lugar, en la
posici6npara segan
° Levante la secci6n del mango superior hasta
su lugar en el mango inferior, remueva la
curia protectora y apriete ambas manillas del
mango.
o Remueva la cuba del mango qua sujeta la
barra de los controlqua exige la presencia del
operador junto con el mango superior°
° El mango de la segadora puede ajustaise
del interruptor en la conexi6n del
motor. El tapSn se encuentra err el
lado derecho del motor,
Conexi6n del Motor
Conexi6n de la
cuerda de la caja
del interruptor _
2O
WiilI
FAMILIARICESE
CON SU SEGADORA
LEA ESTE MANUAL DEL DUENO Y LAS REGLAS DE SEGURIDAD ANTES DE OPERAR SU
SEGADORA. Compare las ilustraciones con su segadora para familiarizarse con la ubicaci6n de los
diversos controles y ajustes. Guarde este manual para referenctaan el futuro.
Estos simbolos pueden aparecer sobre su segadora o en la literatura proporcionada
producto. Aprenda y comprenda sus significados.
,_
ATTENCIC)N
_
ADVERTENCIA
O
PELIGRO,
"_
GUARDE
con el
LAS
MANOSYLOSPIESLEJOS
Barra de Control que Exige
la Presencia del Operador
BotSn del
Interruptor
arranoador
Indicador de carga
Manitia
Indicador del
estado de la
I
baterfa
_.
Fusible
40 AMP
Puerta de la
acolchadora
Ajustador de la rueda
(en cada rueda)
Cargador
CUMPLE CON LOS REQUISITOS
DE SEGURIDAD
Caja
DE LA CPSC
Nuestras segadoras a motor, que se conducen desde la parts de atr&s, rotatorias, Sears, cumplen con los
_=standartesde seguridad del American National Standards Institute y de ta US. Consumer Product Safety
3ommission.La cuchilla gira cuando el motor es_ funcionando.
Barra de Control que Exige la Presencia del Operador- de ser compdmida al mango durante el
_rranque y el uso del motor.AflOjetapara parar el motor.
Indicador del Estado de la Bater{a - alerta el operado cuando la capacidad de la bateria se acerca de la
:]escarga de 80% (quedan aproximadarnente de 10 a 15 minutos, depandiendo de las condiciones del
:_spod
Indicador de carga - alerta el opsrado que la segadora esta experimentaclo un carga demasiada grands,
Puerta de la Acolchadora - permits la b'ansformaci0nde una operaciÜn de descarga a ensacamiento.
Fusible - debe estar enehufado para operar y cargar la segadora.
21
set alrnacenada an el modo de carga_Puede
guardarlo en el medo de carga durante el _ernpo
de almacenamiento.
PARA CARGAR LA BATERIA
La bateria ha sido cargada en la fabrica. Sin
embrago, serA necesado de volver a cargar ta
batefia para asegurar que este completamente
cargada antes de utiUzarla segadora.
o Siempre cargue la segedora adentro de un
garage, una cochera, etc. donde estar& protegido
del clima. NO la deje al descubierto donde pueda
ponerse en contacto con la Iluvia o la nieve.
o No cargue la segadora durante temperaturas
muy ca]urosas o muy flias.
AVISO: Demasiado calor es peor que demasiado
fiio, especialmente cuando vaya a almacenar la
segedora. Guarde la segadora en un sil_odonde la
temperatura no es mas de 50°F (10°C) pero menos
de 100°F (37°C).
= Guarde la segedora lejos del agua, ca_entadores
estufas, radiadores, llamas, qu[micos, corrosivos
etc.
PARA CARGAR
° La segadora estar& incapacitadadurante la
ca_ga_Cuando enchufe el cargador a dentro de
la segadora interrumpirA el circuito.
o El alambre de la bujia debe de esta enchufado cuando se este cargando la baterfa.
o Abra la puertade entrada para exponer la
entrada del cargador.
o Enchufe el conducto del cargador en la ent_ada.
° Enchufe la cuerda del cargador en la toma de
coniente_
Conexion del
ador
Entrada
del
cargador
puede hacer que salten objetos
extraSosdentro
sus ojos,
Io que
La
operaciOnde de
cualquier
segedora
puede producir dar3osgraves en
_stos Siempre use anteojos de segurlded o
protecciSn pata los ojos mientms opere su
segadora o cuando haga ajustes o reparaciones.
Recomendamos una mascarade seguridad de
visi_Snamplia, para uso espejuelos o anteojos de
seguridad estandarteo
CONTROL
DE LA ZONA DEL MOTOR
PRECAUOION:
Las regulaciones federales
exigen que se instale un control para el motor
en esta segadora para reducir el riesgo de
lesion debido al contacto con la cuchilla_ Por
ningLin motivo trate de eliminar la funci6n del
control del operador. La cuchilla vira cuando el
motor esta en marcha.
o Su segado_a viene equipada con una barra de
controles que exigen la presenciadel operador,
Io que requiere que el operador est_ detr&s del
mango de la segadora para hacerla arrancar y
operafla_
PARA AJUSTAR LA ALTURA DE CORTE
° Levantelas ruedaspara el cortebajo y baje las
ruedaspara el corte altoo
• Ajuste la attura de corte para que se acomede a
sus requlsitos.La posici6ndel medioes la mejor
para la mayoriade los c_spedes_
o Para carnbiarla alturade corte,empujela
palancadel ajustadorhacia la rueda_Mueva la
ruedahasia arfiba o hacia abajo de medo que se
acomede a sus requisitos.Asegerese que todas
las ruedasqueden igualmenteajustadas.
ATENCION: El ajustadorestacorrecta-mente
AVISO: Siempre enchufe PRIMERO el cargador
adenl_o de la segedora_Entonces en el enchufe de
la pared. Si no paga atenciOn al orden de este
procedimiento puede que la baterla no se cargue
completarnente.
• Asegi3rese que la torr_ de cordante sea
solamente de 120 volUos,60 Hz, AC.
o La luz indicadora roja sobre el cargedor se
encander&, indicarEIo el estado de "rnarcha" de
la segadora.
AMISO: Si la bacteria no se carga, vea la Tabla de
iden_caci6n de Problarnas.
colocado cuando las orejas de la placa est&n
insertadas en el agujero del mango. Tambi_n,
los ajustes de 9 posici-ones (si equipado)
permiten que el mango pueda ser movido
entre las orejas de la placa.
Para un Corte Alto, Baje
las Ruedas
• AsegCiresede que el fusible est_ enchufado.
° Cuando la batefia esta completamante cargada,
la luz roja se apagara y la luz verde se
encender_
• Pernflta 16 horas para que se cargue
completamante la batarfa. PedrO.utJlizarla
segadora con un bateria 50% cargada si
necesita terminar el _abajo.
o Su segadora ha sido disefada para que pueda
Ore jas de rejas
de la placa
Para un Corte Bajo, Levante las
Ruedas
22
PARA MONTAR Y ADJUNTAR EL
RECOGEDOR DE CESPED
AVlSO: No arrastre la bolsa cuando la vac[e;
se producir& un desgaste innecesario.
• Cierre ta tapa soltable. La tapa soltable debe
estar cerrada cuando se esta operando la
segadora.
Levante la puerta trasera de la caja de la
segadora y ponga el bastidor del recogedor
de c_sped en las orejas formadas en el
puntal de bisagra de la puerta trasera.
= El recogedor de c_sped esta asegurade en la
caja de la segadora cuando se baja la puerta
trasera para descansar en el bastidor del
recogedorde c_sped
PREOAUOION: No haga funcionar su
segadora sin el desviador de recortes o sin el
recogedor de c_sped, aprobados, en su lugar.
Nunca trate de operar la segadora cuando se
ha removido la puerta trasera o cuando est_ un
ANTES DE MONTAR EL MOTOR
trasera
Puntal de
Bastidor del
del
c_sped
gisagra
Orejas
formadas
poco abierta.
PARA VAClAR EL RECOGEDOR DE ClaSPED
• Para remover el recogedor del c_sped suelte
la barra de control del operador para poder
parar el motor.
o Levante la puerta de atras y remova el
recogedor del c_sped por el mango.
La segadora no funeionara con le cargador
de la bateria enehufado.
o Desenehufe el cargado del enehufe y
remu_valo del motor,
o Sierre la puerta de entrada _
PARA ARRANCAR EL MOTOR
• Inserte el alambre de la bujia.
o Tenga la barra de control de la presencia d
operado hacia el mango y empuje el bot6n
arrancador de la segadora.
• Para parar el motor, suelte la barra de cont
que exige la presencia del operador.
PARA INSTALAR
ACCESORIOS
LOS
Su segadora fue enviada lista para usarse co
una acolchadora de capa vegetal. Para
convertirta de modo que pueda ensacar o
descargar:
o Abra la puerta trasera y remuava la tapon
acolchadora.. Gu&rdela en un lugar seguro
° Ahora puede instalar el recogedor o el
desviador de recorles opclonal.
• Para volver a la operaci6n de acolchamienl
con capa vegetal, instale la tapon
acolchadora en la abertura de descarga de
segadora.
PRECAUCION: No haga funcionar su
segadora sin la tapon acolchadora aprobada,
su lugar, o sin el desviador de recortes, o sin,
recogedor de c_sped, aprobados, en su lugar
Nunca trate de operar la segadora cuando se
ha removido la puer_a trasera o cuando est'.
poco abierta.
Tap6n
acolchador
23
CONSEJOSPARASEGAR
= Bajo ciertas condiciones, tal como cAsped
muy alto, puede set necesario el elevar la
altura del corte para reducir el esfuerzo
necesario para empujar la segadora y para
evitar sobrecargar el motor, dejando
montones de recortes de cAsped, Puede
que sea necesario reducir la velocidad del
recorddo y/o haga funcionar la segador'a
sobre el #`rea pot segunda vez.
, Para un corte muy pesado, reduzca el
ancho del corte pasando parcialmente por
encima del lugar anteriormente cortado y
siegue lentamente_
, Cuando use una segadora con descarga
trasera en cAsped ht_medo y pesado, los
montones del cAsped cortada puede que no
entrenen el recogedor de cAsped. Reduzca
la velocidad del recorrido (velocidad de
empuje) y/o haga funcionar la segadora
sobre el #,tea pot segunda vez.
= Si queda una huella de cortes en el lado
derecho de una segadora con descarga
trasera, stegue en la direcciAn en que giran
las manillas del reloj, solapando un poeo
para recaudar los recortes en la prAxima
pasadao
o Los poros en los recogedores de cAsped de
tela pueden ilenarse con mugre y polvo con
el uso y los recogedores recaudarAn menos
cAsped_ Para evitar Asto, rocJ'e el recogedor
con la manguera de agua regularmente y
dAjelo secarse antes de usarlo.
• Mantenga la parte superior del motor,
alrededor del arrancador, despejada y sin
recortes de cAsped y paja_ Esto ayudar#, el
flujo del aire del motor y extender#, su
duraci6n.
Max 1/3
CONSEJOSPARASEGARY
ACOLCHAR
IMPORTANTE: Para obtener el mejor
rendimiento mantenga la caja de la de la
segadora sin acumulaciAn de cAsped y basura.
Vea "Limpieza" en la secciAn de
Responsabilidades del Cliente de este manual.
. La especial cuchilta acolchadora recortara 1o.'
recortes de c_sped varias veces, y los
reducir#, en tamaSo, de modo que si se caen
en el cAsped se dispensaran y no se
notrar#,n. TambiAn, el cAsped acotchado se
va a deshacer r#,pidamente entregando
substancias nutdtivas para el eAsped_
Siempre acolche con la velocidad del motor
(cuchilla) mAs alta, pues asi se obtendr#, la
meior acciAn de recorte de las cuchillas.
o Evite cortar el cAsped cuando estA mojado
El cAsped mojado tiende a formar montones
e interfiere con la acci6n de acolchado La
mejor hora para segar el cAsped es tempranc
en la tarde. A esa hora Aste se ha secado y
el #,rea reciAn cortada no quedar#, expuesta
al sol directo_
= Para obtener los mejores resultados, ajuste
la altura del corte de ta segadora de modo
que Asta corte solamente el tercio supedor
de las hojas de cAsped, En el easo de que el
cAsped haya crecido demasiado, puede ser
necesado et etevar la altura del corte para
reducir et esfuerzo necesado para empujar la
segadora y para evitar sobrecargar el motor,
dejando rnontones de recortes de cAsped.
Para acolchamiento extensivo, reduzca la
anchura del corte, siegue lentamente y
mueva el ajustador de rueda de la parte
trasera de la segadora a un nivel mas alto d_
la parte de delante de la segadora.
= Ciertos tipos de condiciones de cAsped
pueden exigir que un Area tenga que set
acolchada pot segunda vez para esconder
completamente los recortes. Cuando se hag
el segundo corte, siegue atravesado o en
forma perpendicular a ta pasada del primer
corte,
.
24
Cambie su patrAn de corte de semana a
semana_ Siegue de norte a sur una semana
luego cambie de este a oeste la pr6xima
semana. Esto evitar#, que el cAsped se
enrede y cambie de dlrecci6n.
{ESPONSABILIDADES
DEL CLIENTE
PROGRAMADE MANTENIMIENTO
_'_._._.0___
_'_
Revisar si hay sujetadores sue[tos
Umpiar/inspeccionar el recogedor de
c_sped (si viene equipado)
Umpiar la segadora
_ _._
C,._.Y _
_,_
FECHASDE SERVICIO
_
_
_
_
Revisar o/afilar/cambiar la cuchilla
_'
Tabla de lubdcaci_n
6#'
Cargar
1
6/
_/
1 - Cambie las ¢uchilla_ m&s a menudo cuando siegue en terreno a_enoso
_ECOMENDACIONES
GENERALES
TABLA
DE LUBRICACION
Siempre observe las reglas de seguridad
cuando haga el mantenimiento.
La garantfa de esta segadora no cubre los
articulos qua han estado sujetos al abuso o a
la negtigencia del operador. Para recibir todo
el valor de la garantia, el operador tiene qua
mantener la segadora seg0n las
instrucciones descritas en este manual
Hay algunos ajustes que se tienen que hacer
en forma peri6dica para poder mantener su
unidad adecuadamente.
Todos los ajustes en la secciSn de Servicio y
Ajustes de este manual tienen qua ser
revisados par Io menos un vez par cada
temporada.
Una vez al aSo verifique la cuchilla para
desgaste.
Siga el programa de mantenimiento en este
manual,
Ajustador de
Ruedas
Antes de Cada Uso
AsegOrese de que la bater[a est_
completamente cargada.
Revise si hay sujetadores sueltos.
(_
Rocie el Lubricante
IMPORTANTE: No aceite o engrase los
rodamientos de la rueda de plastico. Los
lubricantes viscosos atraeran polvo y mugre, Io
que acortara la duracion de los rodamientos
autolubricantes. Si cree que tienen que
lubricarse, use solamente un lubricante tipo
grafito, de polvo seco, en forma moderad&
UBRICAClON
lantenga la unidad bien lubricadao
25
ESPECJFICACBONES DEL PRODUCTO
ii
u
NOMERO DE MODELO
917386411
PODER
24V DO BATERfA / 17AMP-PeR HeRA
40 AMP FUSIBLE
VELOCIDAD DE LA CUCHILLA
3200 RPM
ANCHURA DEL CORTE
20"
CARGADOR
12-16 HORAS DE RECARGA
TORSION DEL PERNO
DE LA CUCHILLA:
35-40 FT. LBS.
LLANTAS
cube interior de la ranura del adaptador de la
cuchilla_La ranura_ene que estar en buenas
condicionos para que funcione en forma
adecuada. Cambie el adaptador si est_ daSedo.
PARA CAIVIBIAR LA CUCHILLA
o Mantenga las Ilantas sin gasolina, aceita o
substancias quimicas para control de insectos
que pueden daSar la goma.
o Evite los tocones, las piedras, tasgrietas
profundas, los objetos afllados y otros peligros
que pueden daSar las Ilantas.
• Ponga el adaptador de la cuchinaen el cigt3eSaL
Aseg_3reseque la lave del adaptador y del
cig_eF-'_est_n alineados.
° Ponga la cuchilla en el adaptador de dsta
alineando los dos (2) agujeros en la cuchilla con
las salientes elevadas en el adaptader.
o Asegerese que el horde de sa(ida ( opuestoal
lade afilado) este puesto hacia el motor.
° Instale el pemo de la cuchllla con la arandelade
seguridad y la arandela endurecida en el
adaptador de la cuchilla y el cig0eSal del
chavetero.
° Use un bloque de madera entre la cuchilla y la
caja de la segadora y apriete el pemo de la
cuchilla gir_clolo en el sentJdoen que giren las
manillas del reloj.
o La torsi6n para apretar recomeedada es de (35
--40 pies libras).
IMPORTANTE: El pemo de la cuchilla es clase 8
tratado a ca!or.
CUIDADO DE LA CUCHILLA
Para obtenerlos mejores resuitados,las cuchillas
de la segadora tienenque mantenerse afiladas,
Cambie lascuchillas dobladaso dat_adas.
PARA REMOVER LA CUCHILLA
° Remueva el fusible y pSngaloen un lugarseguro
lejos de Jasegadora_
• Use un bloque de madera entre la cuchilla y la
caja de la segadora para evitar que ta cuchilla
gire cuando se le quite el pemo.
o Proteja sus manes con guantes y/o envuelva la
cuchilla con una tela gruesa.
° Remueva el pemo de la cuchilla gir_ndolo en el
sentJdocontmrio en que giran las maninas del
reloj Utl_ric_
una Itave ing[esa 0 una Ilave de
tuerca_
o Remueva la cuchiUay los articulos de ferreteria
adjustadores (el pemo, la arandela de seguridad
y la arandela endurecida).
o Remueva el adaptador de la cuchilla y revise el
Adaptador de
la cuchilla
Ranura
Cuchilla_
Pemo
cuchilla /
AVISO: No recomendamos el afilar la cuchilla
pero si I0 hace, asegL_rese de que quede
balanceadao
PARA AFILAR LA CUCHILLA
Se _ene que tener cu_ado de mantenerla
balanceada. Una cuchilla que no est& balanceada
va a producir eventualmente daSo en la segadora (
en el motor.
° La cuchilla puede afllarse con una lima o en una
rueda rectificadora. No bate do afilada mientras
se encuentra en la segadora.
• Para revisar el baJancede lacuchitla, clave un
clave en una viga o en la pared. Deje aJr_cledor
de una pulgada de un clave rectoexpuesto.
Ponga el agujero central de la cuchilla sobre la
osbeza del clavo. Si la cuehilla est_ balanceada
debe permanecer en la posiciOn horizontal. Si
cuaJquierede los extremos de la cuohilla se
mueve hacia abajo, afile el extremo pesado
hasta que _sta quede nivelada.
...._/
_
_
Chavetero del
_
',tguei_al
_
_==_Ciguefial
k_.
Arandela Arandela
de
endurectda
seguridad
de la
cuchUla
Borde de salida
26
RECOGEDOR
LIMPEZA
DE C'ESPED
El recogedor de c_sped puede ser rociado con el
agua de la manguera pero tiene qua estar seco
cuando se vaya a usar..
o Revise su recogedor de c6sped a menudo para
verificar si est_ da'nado o deteriorado. Se va a
desgastar con el use normal. Si se necesita
cambiar el recogedor, cAmbielo solamente por
uno que sea aprobado por el fabricante. D_ el
numero del modelo de la segadora cuando Io
ordene.
ATENClON:
PRECAUCION: Antes de dar cualquier
servicio o de hacer ajustes:
, Suelte la barra de control y pare el motor°
• Asegerese qua la cuchilla y qua todas las partes
movibles se hayan detenido completamente.
o Remueva el alambre della buj[a del motor y
pSngaJade lado donde no pueda ponerse en
conlacto con la segador&
control sea soltad& No apriete demasiado
los sujetadores que sujetan a los controles ;
mango superior.
° Para cambiar de la posici6n de mediana baja
alta solamente se tendr& qua dar vuelta la
secci6n del mango superior.
• Para cambiar de la posici6n mediana baja a
baja, solamente se tendr& qua dar vuelta la
secci6n del mango inferior.
DESVIADOR
TRASERO
Se proporciona un desviador trasero, adjunto enb'e
las ruedas t]aseras de su segadora, para reducir a
un mfnimo la posibitidad que objetos sean lanzados
hacia afuera de la parte trasera de la segadora, en
la posici6n en deride se encuentra el operador. Si
se daSa el desviador debe cambiarse.
Desconecte
el alambre de la
bujfa de motor y p6ngalo en donde no pue&
entrar en contacto con la segador&
o Haga descansar la segadora en su lado. Umpi
la parte inferior de su segadora rasp_[ndolapar
remover la acumulaci6n de c_sped y basura
Mantenga las superficies pulidas y tas nJedas
sin gasolina, ace_te,etc.
• No ulJliceuna manguera para limpiar la
segadora. Ut_liceun trapo humedo pard limpi_
los recortes o suciedad de la segador&.
Posicfon de Envio
Mediana _,
Baja
_
..
Meoiana
PARA AJUSTAR EL bIANGO
Se puede levantar o bajar el mango de su segadora
segLinle quede c-6modo.Hay cuatTo(4) posidones
disponibles: alta, mediana alta, mediana baja, baja.
Los mangos se envian montados en la posici6n
mediana baja.
* Antes de hacer ajustes, remueva el a_ambrede
la bujf& Para cambiar de la posici6n mediana
baja a mediana affa, la secci6n supedor y la
inferiordel mango tendr_n qua darse vuelta..
= Remueva los controles y la barra de controles
qua exigen la presencia del operador del mango
superior.
, Remueva las clavijas de horquilla.
o Desconecte el mango inferior de los punta]es del
mango.
o De vuelta el mango y vuelva a montar las clavijas
de horquilla qua se hab{an removido.
o Vuelva a montar los controles y la barra de
controles que exigen la presencia del operador
en el mango superior.
ATENCION" La barra de control de la
presencia del operado debe poder set
pivoteada libremente para permitir que el
motor pueda set apagado cuando la barra de
BATERfA
La bateria de su segadora es una bateda sellada
con &cido de baterfa de 24 vo_os la cua_puede s
recargada.
RECOMENDANIOS LO SIGUIENTE PAR.a
QUE PUEDA OBTENER LA VIDA bIAXllVI,
DE SU BATERIA:
o Vuelva a cargar la bateda inmediatamente
despu_s de cada uso_
27
o Vuelva a carga la bateria cada vez que la
segadora no este utilizada.
o Siempre cargue la batefia adentro en lugar
seco, y protegido.
o NO intente cargar la bateda en clima muy
caluroso o fdo. Cargue la bateria en un sitio
donde la temperatura no excede mas de 50°F
(10°C) pero menos de 100°F (37°C).
CAMBIO
lugar correcto y de que est_ instalado en
forma correcta.
- Aseg_3rese de que toda la tomilleria est_
apretada en forma segura.
PARA CONSERVAR LOS RECURSOS
NATURALES, HAGA EL FAVOR DE RECICLAR
O DE DESECHAR LA BATERIA EN FORMA
Rejilla supedor
DE LA BATERIA
Si es necesado cambiar la bateda siga las
instrucciones a continuaci6n, Repase todas las
instrucciones antes de proceder con este
montaje_
° Remueva el fusible y pSngalo en un lugar
seguro y alejado de la segadora.
° Remueva con cuidado la rejilla superior de la
tapa. Empiece en la esquina trasera lateral
de la rejilla presionando hacia adentro y hacia
arriba para soltar la rejilla de la tapa.
° Desenchufe el conductor del tablero
indicador desde la parle de abajo de la rejilla.
Tome nota de la posiciSn del conductor y de
cSmo pasa para volverlo a montar rn&s
tarde.
o Remueva Iostomillos que aseguran la tapa al
puntal de soporte de la bateria. Remueva la
tapa de la segadora.
o Remueva el conductor de los terminaies de la
bater[a (4 lugares). Tome nota del color y de
la posiciSn del conductor para volvedo a
montar m&s tarde_
° Antes de remover el puntal de soporte de la
bateria, tome nota de cSmo la parte delantera
del puntal asegura el tablero controlador.
Remueva los tornillos que aseguran el puntal
de soporte de la bateria al motor' y remueva
el puntal.
, Remueva las baterias,
° tnstale las bater[as nuevas invirtiendo las
instrucciones antedores.
- Aseg_rese de que el tablero controlador
est6 asegurado correctamente.
- Asegt_rese de que el conductor pase pot el
Tablero indicator__
(Debajo de la
rejitla)
Puntal de
suporte de la
bater&_
Bated
V
._
y_. _,
Tapa
Conductor
terminal de
ta bateria
blanco del
as'__
Tablero
controlador
Cond_
i
te_°nie_dre _
_uctor
del
_:_table_ indicator
la bateria
Conductor rojo del
terminal de la bateria
_t
ADECUADA_ EL PRODUCTO CONT ENE BATER AS DE ACIDO DE PLOMO
_ SELLADAS. SE TIENEN QUE DESECHAR EN FORMAADECUADA. LA MAYOR[A DE
%_
LOS CENTROS DE LOS CENTROS DE AUTOS ACEPTAN LAS BATERIAS DE LOMO
e_
DE ,_,CIDO PARA RECICLAJEo. Las leyes locales, estatales o federales pueden prohibir
desechar las baterias de dcido de plomo en el basurero comQn. Consulte con sus autoddades
encargadas del desecho para obtener informaciSn con respecto al reciclamiento dispenible y/o las
opciones de desecho.
ADVERTENCIA: Despues de la remocion, cubra los terminales de la bateria con cinta adhesive de
tipo pesado. No trate de destruir ni de desmontar el paquete de la bateria ni de remover ninguno de
sus componentes. Ademas no toque nunca ambos terminales con objetos de metal ni con partes
del cuerpo pues se puede producir un cortocircuito, Mantegalas alejadas de los ni,fios. Si no se
obedecen estas advertencias se pueden producir incendios y/o lesiones graves.
28
Mango Inferior
repare su segadora inmediatamente para el
lmacenamiento al final de cada temporada o si
unidad no se va a usar per 30 dias o m_s_
Apriete Para
Doublar
;EGADORA
:uando se va a guardar la segadora per cierto
er[odo de tiempo, limpiala cuidadosamente,
._muevatoda la mugre, la grasa, las hojas, etc
iu_.rdela en un &rea limpia y seca,
Limpi_ toda la segadora (Vea "LIMPIEZA" en
la secci6n de Responsabilidades del Cliente
de este manual).
Lubr[quela segQn se muestra en la secci6n
de Responsabilidades del Cliente de este
manual.
AsegQ[ese de que todas las tuercas y clavijas
y todos los pernos y tomillos est_n apretados
en forma segura. Inspeccione las partes que
se mueven para verificar si est&n daSadas,
quebradas o desgastadas.. C&mbielas si es
necesario.
Haga un toque ligero a todas tas superficies
oxidadas o aquellas con pinturas raspadas,
pero antes de pintarlas irnpelelas un poco.
Clavija de
Horquilla
Clavija de
Montaje
Barra de Control que Exige la
Presencia del Operador
Doblar
Hacia
Atras
Mango
Superior_
Doblar Hacia
Adelante Para
Almacenar
\
Poscici6n
Para Segar
/IANGO
'uede doblar el mango de su segadora para
Imacenarla.
Desconecte la cuerda de la caja del tap6n del
interrupter del motor antes de plegar el
mango (Vea "Para doblar el Mango" en la
secci6n de Montaje de este manual)_
Apriete los extremes inferiores del mango
inferior entre s[ hasta que el mango inferior
quede separade del puntal del mango, luego
mu_valo hacia adelante.
Suelte tos pernos de montaje del mango
superior Io suficiente come para permitir que
el mango superior se pueda doblar hacia
atr&s.
_PORTANTE."
Cuando doble el mango para
I almacenamiento o el transporte, aseg_rese
ue Io doble segun se muestra o puede daSar
)s cables de control..
Cuando prepare sus mangos a partir de la
posici6n de almacenamiento, el mango
inferior autom&ticamente se asegurar_, en la
posici6n para segar.
Mango
Inferior
BATERIA
Vuelva a cargar la bateria completamente
No almacene la segadora con una bater[a
descargad& Se puede producir una falta de
bateria en muy poco tiempo si la segadera
esta almacenada sin una bateria
completamente cargada. Le recomendamos
que cargue la bateria continuamente durante
el tiempo que este almacenada y fuera de
temporada.
OTROS
• Si es posible, guarde su unidad en un recinto
cerrado y ct)brala para protegeda contra el
polvo y la mugre.
o Cubra su unidad con un forro protector
adecuado que no retenga la humedad. No
use pl&stico. El pl&stico no puede respirar, Io
que permite la formaci6n de vaho, Io que
productr& la oxidaci6n de su unidado
29
IDENTIFICACION
PROBLEIVtA
No arranca
DE PROBLEMAS
CORRECCION
CAUSA
= El alambre de la bujfa ha
o Instale el alambre de la
removido de la segadora
bujfa
o Remueva el tap6n del
o El cargador no ha side
desenchufado de la entra..
da del segadora cargador
cargader de la entrada
del cargado
• Cargue la baten'a
o Puede que la baterfa
necesite ser cargada
o La cuchilla no puede moverse libremente o el conjunto
esta atascado.
o Remueva el alambre de la
bujfa, ponga la segadora
sobre su lado y verifique
lacuchilla AsegL_rese puede
moverse libremente. Mire si
hay cualquier atasco.
Funciona
mal
• El c_sped esta desmasiado
alto o demasiado grueso
(La luz de sobrecargamiento esta encendida 25%
= Levante la altura de corte
de la segadora a un corte
1/3.
= Camine mas lentamente
para que la luz de
del tiempo)
sobrecarga permanezca
apagada.
= Reduzca la anchura de corte,
si es necesario.
= Remueva el alambre de la
o La tensi6n de la bater[a
esta bajo (La luz que
Mal cortedisparejo
inforrna que hay poco
poder se queda encendida
da cuando se esta segando)
o CuchiUa usada, doblada o
suelta.
o Reduzca la carga.
o Camine mas lentamente.
• La altura de las ruedas no
son las mismas
o Acumulaci6n de c_sped, y
recortes de hojas, debajo
de la segadora.
° Remueva el alambre de la
bujia.
° Cambie la cuchilla.Apriete el
pemo de la cuchilla.
• Pongatodas las ruedas a la
misma altura.
= Remueva el alambre de la
bujfay limpi6la partede
debajodel conjuntosegador,
° Cuchilla usada, doblada o
suelta.
Demaciado
vibracion
bujfa, verifique pot cualquier
atasco, y vea si la cuchilla
esta bien afilad&
• El cigeefial del motor esta
tomido.
3O
o Reduzca el anchura del corte.
o Levante la altura de corte.
= Vuelva a cargar las bater[as.
o Remueva el alambre de la
bujfa.
° Reemplace la cuchUla.
Apriete a fondo el tomillo de
la cuchilla.
PROBLEiVlA
CORRECCION
CAUSA
o P6ngaseen contac_ocon un
cen_o/departarner_ode
servidoautorizade.
La segadora
se para
La luz de corriente alta se
queda encendida por un poco
despu6s de que la segadora
se halla parado, el trabajo es
demasiado para la segadora.
= Si la luz de poder bajo se
enciende, la velocidad de la
segadora disminuye, y
entonces se par&
= Remueva el alambre de la
bujfa y vierta la segadora en
su lade. Aseg6rese que la
cuchilla pueda movem_e
libremente.Tambi_,n verifique
que la segadora no este
atascada.
o Las bateffas pueden estar
bajas,o biencercade
necesitar ser cargadeso
Cargue las baterias.
- El c_sped puede ser
demasiado grueso para la
bateffa mstante. Intente Io
siguiente:
,- Ande ma_ lentamente.
,.Cambie lacuchil_
Umpi_ el recogedor del
cemed
Recogedor
de c_sped no
se llina
Dificil de
empujar
= Altura de corte demasiado baja.
,, Levantamiento de la cuchilla
desgastado.
,, Recogedor sin ventillaci6n de
aire.
El c_sped esta demasiado
alto o la altura de la rueda
demasiado baja.
• Parte trasera de la caja/
cuchilla de la segadora
arrastandose en el c_sped.
o Recogedor de c6sped
demasiado Ileno.
° Posici6n de la aJtura del
mando no adecuada para
usted.
Segadora no
se para
cuando
se
su_ltala barra
de contml de
,, La barra de control de la
presencia del operador esta
dafiad&
,, El bot6n arrancador se pega o
esta dafiadoo
la presencia
del operado
31
Eleve la altura de corte
Cambie la cuchill&
Umpi_ el recogedor del
c sped
Eleve la altura de corte
.° Eleveel conjuntotraserode la
segadom (1)posici6nmas
alta.
Vad6 il regojedordel c'esped.
• Ajuste la alturadel mando
paraque acuerdecon usted.
,, Cambie la barra de control de
la presencia del opemdor.
o Cambie el bot6n arrancador.
ROTARY
LAWN MOWER
MODEL
NUMBER
917.386411
43
35
43
32
57
co
ro
4O
38
43
3g
43
36
40
38
39
ROTARY
Key Part
No. No.
(.o
(.o
1
2
3
5
7
8
9
10
11
12
17
18
19
21
22
23
24
25
26
28
29
31
32
33
34
154830
162061X479
150424
157061X479
131959
66426
51793
87692
161809
74350424
147613
700367X479
150050
54583
700063X479
88652
780363X479
144675X479
140657
1515t2X479
t51511X479
150076
750085X007
146630
128415
LAWN
MOWER
Description
Control Bar
Upper Handle
Mulcher Plug
Lower Handle
Handle Belt
Cable Clip
Hairpin Cotter
Handle Knob
Engine Zone Control Cable
Hex Head Bolt 1/4-20 x 1-1/2
Rear Door Assembly Kit
Back Plate
Self Tapping Screw 10-24 x 5/6
Hex Head Tapping Screw 1/4-20 x 1/2
Rear Baffle
Hinge Screw 1/4-20 x 1-1/4
Side Baffle
Discharge Baffle
Rear Deflector
Handle Bracket Assembly (Left)
Handle Bracket Assembly (Right)
Screw 5/16-18 x 3/4
Wheel Adjusting Bracket
Spacer
Pop Rivet
MODEL
Key
No.
NUMBER
Part
No.
35
35
37
38
39
40
42
43
44
45
46
701037
700331X004
145935X004
62336
142746
151157
83923
77400
85463
150406
161857
47
50
51
751592
700938X479
851084
52
53
54
55
57
58
850263
851074
156716
851514
751663
59
----
88614
161856
154328
154826
917.386411
Description
Selector Knob
Selector Spring
Axle Arm Assembly
BelleviUe Washer
Shoulder Bolt
Wheel and Tire Assembly
Hex Flange Locknut
Hubcap
Danger Decal
Hex Head Thread Rolling Screw 3/8-16 x 1
Lawn Mower Housing (Incl. Key #18, 22, 24,
44, 50)
Locknut 3/8-16
Front Baffle
Hex Head Machine Screw 3/8-24 x 1-3/8
(Grd. 8)
Helical Lockwasher 3/8
Washer
Blade 20"
Blade Adapter
Grass Bag
Motor Electric ( See Breakdown)
Model No.143.980000
Throat Frame
Owner's Manual
Battery Charger 24 Volt
Fuse for Motor
MOTOR
ASSEMBLY
MODEL
NUMBER
17
KEY
NO.
PART
NO.
1
2
90000A
90020
3
4
5
6
7
8
9
10
11
12
13
14
15
16
17
18
19
20
21
22
90002
90003
90004
90031
90006
30200
650737
90007
90008
90009
90010
90011
90012
90014A
90023
90016
90017
650767
90021
90022
DESCRIPTION
Motor Assembly
Battery Assembly
(includes 13, 15)
Controner Board
Indicator Board
Lead Wire Assembly
Bracket, Battery Support
Bracket, Lower
Screw, Shroud
Screw, Bracket
Battery, Box
Charger, Port Cover
Gdll
Screw, Battery
Wire, Assembly
Clip, Battery
Shroud
Battery Charger
Fuse, 40 Amp
Decal
Screw
LED, Lens Cap
Fuse Decal
NOTE: All component dimensions given in U_S.
inches 1 inch = 25.4 mm
34
143.980000
35
the repairor replacement parts you need
ivered directly to your home
17 am - 7 pm, 7 days a week
800=366=PART
B00-366-7278)
ra ordenar piezas con entrega
micilio - 1-800-659-7084
a
r in--house
major brand repair service
tl 24 hours a day, 7 days a week
8OO=4=REPARR
B00-473-7274)
ra pedir servicio de reparaci6n
micilio - 1-800-676-5811
r the location
a
of a Sears Parts and
pair Center in your area
U24 hours a day, 7 days a week
800=488-1222
information on purchasing a Sears
:intenance Agreement or to inquire
)ut an existing Agreement
il 9 am - 5 pm, Monday-Saturday
800=827=6655
len requesting service or ordering
rts, always provide the following
ormation:
'roduct Type
/Iodel Number
= Part Number
• Part Description
Amenca's Repair Specia/ists
/,_1856
11o12.97
VB
Printed in U.S.A.