1
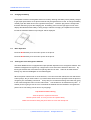
User Manual LOGO Mobile Phone Models: R11C and R12C © 2010 REAL PHONE CORPORATION ALL RIGHTS RESERVED VERSION 2010.1 LOGO Mobile Phone User Manual Welcome to the LOGO Mobile Phone The LOGO Mobile Phone from Real Phone Corporation is the world’s thinnest and lightest mobile phone. It is designed for convenient use in places or during activities where a conventional mobile phone would not be appropriate. The LOGO is also designed to allow a large front area of the handset to display a prominent image or “LOGO”, hence the name. The use of embedded voice recognition software allows the elimination of a traditional alphanumeric keypad. provides an easy and fast way to use the handset. due its completely sealed case. Not only does the lack of a keypad create this space it The LOGO is very durable and highly water resistant The encased lithium-ion battery is not replaceable but can be recharged hundreds of times giving the LOGO the life comparable to most mobile phones. About your Device The LOGO Mobile Phone described in this User Manual is a dual band GSM Handset designed to operate on GSM 900/1800 MHz or 850/ 1900 MHz networks. The LOGO Mobile Phone is generally sold as an “unlocked” device and can be used on any GSM mobile network. Phone requires a SIM Card to operate. Like all GSM devices the LOGO Mobile A SIM Card may have been included with your handset. If one was not included you may buy one from any GSM wireless carrier. To use the phone you must have service from a wireless service provider. device depend on features in the wireless network to function. Some of the features in this These network services may not be available on all networks or specific arrangements with the service provider may be required for the network services to be utilized. Your service provider may need to give you additional instructions for their use and explain what charges may apply. Some networks may have limitations that affect how you can use network services. Please read this User Manual carefully to under all the features and get the most enjoyment from using your new LOGO Mobile Phone. _______________________________________________________________________________________________________ © 2010 Real Phone Corporation. All Rights Reserved. PAGE 2 LOGO Mobile Phone User Manual Section Page 1 Emergency Use and Safety Considerations................................................4 2 What’s in the Box ..........................................................................................5 3 Handset Layout .............................................................................................5 4 Keypad ...........................................................................................................5 5 Display Icons..................................................................................................6 6 Getting Started...............................................................................................6 6.1 Installing a SIM Card..................................................................................6 6.2 Charging the Battery...................................................................................7 6.3 Basic Operation..........................................................................................7 6.4 Training the Voice Recognition software....................................................7 6.5 The Virtual Keypad.....................................................................................8 6.6 Making a Call..............................................................................................8 6.7 Using the Voice Recognition function.........................................................8 6.8 Answering an Incoming Call.......................................................................8 6.9 Turning on the Speaker...............................................................................8 6.10 Adjusting the Volume..................................................................................9 7 Menu Operation..............................................................................................9 7.1 Voice Recognition.......................................................................................9 7.1.1 Name Dialing.........................................................................................9 7.1.2 Digit Dialing............................................................................................9 7.1.3 Voice Training.........................................................................................9 7.1.5 Settings...................................................................................................9 7.2 Messages...................................................................................................10 7.2.1 Message Box........................................................................................10 7.2.3 Voice Mail..............................................................................................11 7.2.2 Compose...............................................................................................11 7.2.4 Message Setup.....................................................................................11 7.2.5 Delete All...............................................................................................11 7.3 Phonebook.................................................................................................11 7.3.1 Browse Voice Tags................................................................................11 7.3.2 Create Entry..........................................................................................11 7.3.3 SIM Phonebook....................................................................................12 7.3.4 Delete All Entries..................................................................................12 7.3.5 Storage Status......................................................................................12 7.4 Call Register...............................................................................................12 7.5 Settings......................................................................................................13 7.5.1 Phone Settings......................................................................................13 7.5.2 Network Settings...................................................................................14 7.5.3 Call Duration.........................................................................................15 7.5.4 Call Settings..........................................................................................15 7.5.5 Keypad Shortcut....................................................................................15 7.5.6 Profiles..................................................................................................15 7.5.7 Language..............................................................................................15 7.6 Tools...........................................................................................................16 8 Product Certification.....................................................................................16 9 Trouble Shooting Guide ...............................................................................17 _______________________________________________________________________________________________________ © 2010 Real Phone Corporation. All Rights Reserved. PAGE 3 LOGO Mobile Phone User Manual 1 Emergency Use and Safety Considerations Any user can make a public emergency call. After powering on the user can start the emergency call directly using the virtual keypad to enter the 911 number. If the phone does not have a SIM card inserted use the SOS left soft key. Note:Depending on the network status, an emergency call has a higher priority with respect to normal calls. Emergency calls should only be made when necessary. Please turn the phone off when in or near hazardous environments. Keep the mobile phone away from small children. The phone should not be used when driving. Follow airline instructions regarding use of the phone on aircraft. Charging should be done in a safe and clean environment with a reliable power source. Please keep the mobile phone away from the magnetic materials. Do not submerse the phone in water or other liquids. Avoid temperatures below -10°C/14°F or above 55°C/131°F. Avoid exposure of the phone to dust, dirt, sand, food, or other destructive materials. Do not dry the phone in a microwave oven. To clean your phone, use only a damp soft cloth. Don’t use alcohol or other cleaning solutions. Additional safety information Operating environment Remember to follow any special regulations in force in any area and always switch off your device when its use is prohibited or when it may cause interference or danger. Use the device only in its normal operating positions. This device meets RF exposure guidelines when used either in the normal use position against the ear or when positioned at least 2.2 centimeters (7/8 inch) away from the body. When a carry case, belt clip or holder is used for body-worn operation, it should not contain metal and should position the device the appropriate distance from your body. Pacemakers Pacemaker manufacturers recommend that a minimum separation of 15.3 centimeters (6 inches) be maintained between a wireless phone and a pacemaker to avoid potential interference with the pacemaker. These recommendations are consistent with the independent research by and recommendations of Wireless Technology Research. Persons with pacemakers should: • Always keep the device more than 15.3 centimeter (6 inches) from a pacemaker when turned on. • Do not carry the device in a breast pocket • Hold the device to the ear on the opposite side of the body from the pacemaker. If you have any reason to suspect that interference is taking place, switch off your device immediately. Vehicles RF signals may affect improperly installed or inadequately shielded electronic systems in motor vehicles such as electronic fuel injection systems, electronic antiskid (antilock) braking systems, electronic speed control systems, or air bag systems. _______________________________________________________________________________________________________ © 2010 Real Phone Corporation. All Rights Reserved. PAGE 4 LOGO Mobile Phone User Manual 2 What’s in the Box Your LOGO Mobile Phone includes the following: o o o Handset with embedded battery Travel battery charger Quick Start Guide It may also include the following optional items o o o 3 4 Ear bud headset Storage pouch SIM Card Handset Layout Keypad Icon Name Left soft Key Right soft Key Description Implements the function displayed in lower left corner of the display Implements the function displayed in lower right corner of the display Confirm or choose a screen selection; also used to access the Virtual OK Key Keypad from the main screen. Up Key From main menu press Up Key to enter Phonebook Browse menu; also used to set volume, browse options, or move the cursor. From main menu press Down Key to enter Phonebook Browse menu; Down Key also used to set volume, browse options, or move the cursor. Initiates an outgoing call, Answers an incoming call, and accesses the Send Key Call Register 1) Press the key for 2 seconds to power on or off. End Key 2) Press the key to terminate a call. 3) Press to return to the main screen. _______________________________________________________________________________________________________ © 2010 Real Phone Corporation. All Rights Reserved. PAGE 5 LOGO Mobile Phone User Manual 5 Display Icons These symbols appear on the display to indicate certain functions of the handset. Icon Name Description Signal Strength Indicates the strength of the wireless signal. Voice Message Indicates of a new coming voice message(s). Message Indicates there are message(s) in your mailbox. Battery Indicates the energy level of battery. Voice Recognition Indicates voice recognition is activated. 6 Getting Started 6.1 Installing a SIM Card Please keep the SIM card out the reach of small children。 Be careful not to bend the SIM Card. Do not let the SIM card come in contact with dust or moisture. To install the SIM card make sure the phone is OFF. Carefully open the rubber boot on the left side of the handset and remove the SIM card tray. Place the SIM card contact side up in the tray and push the tray with the SIM card gently back into the slot on the left side of the phone. Replace the rubber boot securely. _______________________________________________________________________________________________________ © 2010 Real Phone Corporation. All Rights Reserved. PAGE 6 LOGO Mobile Phone User Manual 6.2 Charging the battery The handset contains a rechargeable Lithium-Ion battery. Although the battery will be partially charged to get proper performance a new phone should be fully charged before it is used. To charge the battery carefully open the rubber boot on the right side of the phone. Insert the plug from the charger with the black side facing up into the charging jack. The battery power icon the right upper corner of the display will indicate that the battery is being charged. When the charging is complete the icon will be full and the message “Battery Fully Charged” will be displayed. 6.3 Basic Operation Press the Red End Key for 2 seconds to power on the phone. Press the Red End Key for 2 seconds to power off the phone. 6.4 Training the Voice Recognition Software The LOGO Mobile Phone is equipped with unique speaker dependant voice recognition software. This software is designed to recognize only a single user’s voice and must be trained for that voice. training the software the voice features for placing calls can be used. By Calls can be made without training only with the Call Register or the Virtual Keypad. When the phone is first turned on for the first time, or if it has never been trained, the user will see the screen prompt, “Do you want to train?” If you select YES, follow the voice prompts to train the phone to recognize your voice dialing commands. At any time you can abort the training and restart it by going to the Voice Recognition menu from the main screen. The handset can be retrained at any time. If another person is going to use the voice commands the handset must be retrained to recognize that person voice. The training can be done in any language. Tips for Successful Training Train the phone in a quiet environment. Hold the phone about 12” from your face and speak clearly. Make sure the hand holding the phone does not cover the microphone. _______________________________________________________________________________________________________ © 2010 Real Phone Corporation. All Rights Reserved. PAGE 7 LOGO Mobile Phone User Manual 6.5 Virtual Keypad The LOGO Mobile Phone has no alphanumeric keypad. If conditions, like a very noisy environment, prevent the use of the voice recognition, and the number needing to be called has not been previously recorded in the phone, the LOGO has a virtual keypad that can be used to enter the number. To access the Virtual Keypad press the OK key from the main screen. The screen will change to the Virtual Keypad as an alternative to voice input for entering phone and other number sequences required by various functions. Follow the on screen instructions. Press the Up and Down scroll keys to navigate the keypad. Pressing and holding down a scroll key for about 2 seconds will transition between the upper and lower tables for faster use. The “Delete” soft key will erase the last entry if a mistake is made. When the complete number has been entered, press the “Save” soft key if you want to enter the number in the Phonebook with a voice tag. If you want to dial, simply press the “Send” key to dial the number. 6.6 Making a Call There are 5 ways to originate a call with the LOGO Mobile Phone. 1. Speaking the desired digits 2. Speaking a name recorded as a voice tag in the Phonebook 3. Selecting a number from the Call Register 4. Selecting a number by browsing the entries in the Phonebook. 5. Accessing the Virtual Keypad and entering the desired number. Press the Red END key to end or cancel a call. 6.7 Using the Voice Recognition Function The LOGO Mobile Phone is designed to be easily operated with its embedded voice recognition software. As described above the handset must be trained to recognize the user’s voice. After completing the voice recognition training, a call can be placed by pressing the Green SEND key. handset will respond with “Say a Command”. The In order to place the call by speaking the digits, respond with the Command “Call” and then follow the dialing prompts. To make a call using the Phonebook respond with the Command “Phonebook” and when prompted say the name that has been recorded as a voice tag associated with the desired number. Confirmation of the desired number is done by pressing the OK key or by saying “Yes” (depending on the confirmation setting; see Settings menu). 6.8 Answering an Incoming Call If incoming call number identification service is available from the wireless carrier and the incoming number is stored in the handset’s Phonebook, the incoming number will be displayed on the screen and the voice tag associated with the number in the Phonebook will be announced. To answer the call, press the Green SEND key or left soft key. To reject the call, press the Red END key or right soft key. 6.9 Turning on the Speaker The LOGO is equipped with a small loud speaker to allow use of the phone when holding it in front of your face. The speaker can be turned on by pressing the left soft key “Options” during a call. It can _______________________________________________________________________________________________________ © 2010 Real Phone Corporation. All Rights Reserved. PAGE 8 LOGO Mobile Phone User Manual also be turned on from the Profile screen in the Settings menu. 6.10 Adjusting the Volume During a call you can adjust the receiver or speaker volume with the up and down scroll keys. During a call, you can press left soft key and select Mute in the Call Menu to silence the microphone. To restore the normal call function, select un-mute in the C all Menu. Useful Tip Note that while using menus the phone will display reverse highlighted text to indicate the selection that will be made if the OK key is pressed. 7 Menu Operation From the Home screen press left soft key to access the Main menu sections. The up/down scroll keys are used to access the following menu sections: Voice Recognition Messages Phonebook Call Register Settings Tools To select a menu section, press the OK key or the left soft key “Accept”. 7.1 Voice Recognition 7.1.1 Name Dialing By selecting Name Dialing the phone will prompt, “Say the Name”. If the name spoken matches a voice tag previously recorded in the Phonebook that number will be dialed after confirmation. To confirm press the OK key or the YES left soft key. If the name is incorrect, press the right soft key NO, and the phone will prompt again, “Say the Name” in attempt to find the correct number. 7.1.2 Voice Digit Dialing When selecting Digit Dialing the phone will allow you to speak the number digit by digit. When the number is fully entered, press the “SEND” key to dial. 7.1.3 Voice Training The selection is used to activate the voice recognition training. Press OK to start the training process and follow the voice prompts. See Voice Training above for more information on successful training. 7.1.4 Settings VR On/Off: When selecting “on” the voice recognition features are enabled. When selecting “off”, the voice recognition functions are disabled. Pressing the green SEND key from the main menu will directly access the Call Register if Confirm Number: executed. VR is set to “off.” When selecting “On”, numbers spoken by the user will be repeated digit dialing is When “OFF” is selected, digit dialing will be executed as soon as the last digit is spoken and the SEND key is pressed. Confirm Input Method: When “Press Keypad” is selected voice command confirmation is disabled. When " Voice Command” is selected confirmation by use of Voice Commands is enabled. _______________________________________________________________________________________________________ © 2010 Real Phone Corporation. All Rights Reserved. PAGE 9 LOGO Mobile Phone User Manual 7.2 Messages Selection of the Message menu provides access to the Short Message Service (SMS); the LOGO Phone can receive text messages, send messages using the READY TEXT templates and send numbers. When the message icon displayed on the screen a new message has been received. If SMS alert tone is enabled tone will sound with the receipt of a new message. If the message box is full, you will not receive new messages. The message icon will flash on the screen indicating the box is full. To receive new messages, some of the existing messages stored in the message box must be deleted. 7.2.1 Message Box Inbox This function is used to view received text messages. Press the left soft key “Accept” or the OK key, and the messages will be displayed in the order of receipt. If there are no messages “Inbox Empty” is displayed. If messages are available, press the up and down scroll keys to select the message you want to read. Press the left soft key or OK key to read the message, and press the left soft key or OK key again, to enter the option menu. Text Reply: select Ready Text to reply with one of the 20 pre-set Ready Text templates or Text a Number: to reply with a number created with the Virtual Keypad. Forward: Dial Used to forward the selected message to another person. Back: Used to call the sender of the selected message. Extract number: Used to save the senders number to the phonebook. Delete: Used to delete the selected message. Outbox This function is used to view saved sent text messages. Press left soft key, the messages will display in the list. If there are no messages “Outbox Empty” is be displayed. Press up and down keys to select the message you want to read. Press the left soft key or OK key to read the message, and press the left soft key or OK key again to enter the options menu: Forward: Dial It is used to forward the message to other people. Back: It is used to call the sender. Extract number: It is used to save the number of the message sender into the phonebook Delete: It is used to delete the selected message. Compose This is used to compose and send a text message. Select Ready Text to send one of the 20 pre-set message templates or Text a Number to send a message containing a single number. _______________________________________________________________________________________________________ © 2010 Real Phone Corporation. All Rights Reserved. PAGE 10 LOGO Mobile Phone User Manual 7.2.3 Voice Mail Voice Mail is a feature offered by the wireless carriers. If Voice Mail is offered by the carrier providing the SIM Card in your Phone then refer to their instructions for setting up and using the voice mail service. Listen to Voice Mail: This function allows the handset to directly access the carrier’s voice mail system. Voice Mail Edit: This menu is used to set up the Voice Mail service. The user may enter the Voice Mailbox Number ( this is usually the handset’s own number or a number specified by the carrier) and a Password. 7.2.4 Message Setup Service Center: This function is used to store the SMS Service Center number. be embedded in the SIM Card. This number may If not it must be obtained from the network operator. Status Report: Enables or disables the reporting of message details. Reply Path: Enables or disables the Reply Path function. Storage Status: The total capacity of inbox and outbox is determined by the capacity of SIM card 7.2.4 Delete All This function is used to delete all messages in the inbox or outbox 7.3 Phonebook The LOGO Mobile Phone’s Phonebook can contain up to 50 phone numbers with an associated recorded voice tag for easy identification. The LOGO can also access entries from the SIM Card Phonebook that were created while the SIM Card was in another handset. The Phonebook menu has the following functions: USEFUL TIP – Name Dialing is the fastest way to dial a call from the LOGO Mobile Phone. 7.3.1 Browse Voice Tags Select “Browse Voice Tags” menu to display the numbers and hear voice tags associated with each number as you scroll through the list in the phone book. 7.3.2 Create Entry Entries can be created in the Phonebook in four ways: From Call Register From Voice Dial From SIM Phonebook From Virtual Keypad To create a new Phonebook entry from the Call Register, press “From Call Register” at the Create Entry screen. Select the Call Register entry by using the Up and Down scroll keys and pressing the _______________________________________________________________________________________________________ © 2010 Real Phone Corporation. All Rights Reserved. PAGE 11 LOGO Mobile Phone User Manual OK key. Then press “Save Number” and the Virtual Keypad will appear with the selected number. Press “Accept”. At the prompt “Record Voice Tag” press the left soft key “Start” and record the identifying name for the selected number. After recording the Voice Tag a confirmation request will appear to confirm the name or allow it to be re-recorded. To create a new Phonebook entry by Voice Dial the same procedure is used as in Voice Dialing a number, (see voice Dialing above), to create the number. key and the “Record voice Tag” prompt will appear. After the number is entered press the OK Follow the procedure above to record the voice tag. To create a new Phonebook entry by transferring numbers from a previously populated SIM Card, select SIM Phonebook from the Phonebook menu then browse for the desired name in the SIM Card phonebook by using the UP and Down scroll keys. Select a name and press the OK key. “Create Voice Tag” and follow the voice tag recording prompts. Then select Upon a successful voice tag recording the number with the voice tag will be saved to the LOGO Phonebook. To create a new Phonebook entry from the Virtual Keypad, create the number by scrolling horizontally across the Virtual Keypad with the Up and Down keys (up moves the cursor left and down moves it to the right) and selecting digits by pressing the OK key. A two second press will cause the cursor to move between rows and the right soft key “Delete” will erase the last digit entered. correct press the left soft key “Accept”. 7.3.3 After the number is Then follow the procedure above to record the voice tag. SIM Phonebook Select "SIM Phonebook" to display the SIM Card’s phonebooks records. Numbers in the SIM Card’s phonebook can be captured and transferred to the handset’s phonebook. When accessing the SIM Card Phonebook the names will be displayed. Use the Up and Down scroll keys to search the SIM Phonebook. Use the “Options” ; “Show number” to verify and associated numbers. From the SIM Phonebook menu a call can be made directly or a text message sent to the selected number. 7.3.4 Delete All Entries Press the OK key or the left soft key “Accept” to delete all entries in the handset’s phonebook. 7.3.5 Storage Status This screen reports the number of Phonebook entries used out of the total available on the SIM card or Phonebook (the size of the SIM phonebook varies according to the type of SIM Card). 7.4 Call Register The Call Register contains the last 30 Outgoing / Missed / Incoming calls, displayed with the type indicator, number, date and time. The Call Register is searched by using the Up and Down scroll keys. A call can quickly be made from the Call Register by selecting the number and pressing the Green SEND key. By pressing the left soft key “Options” certain functions can be performed in the Call Register. _______________________________________________________________________________________________________ © 2010 Real Phone Corporation. All Rights Reserved. PAGE 12 LOGO Mobile Phone User Manual 7.5 Settings The Settings menu allows the user to set the parameters for numerous functions and conditions of the handset. By utilizing the settings the users can tailor the handset’s operation in the most convenient way for their particular use. 7.5.1 Phone Settings Display Settings LCD Contrast: Sets the contrast of the display screen, press up and down keys to adjust. Back Light: Sets the duration of the display backlight to 15 or 30 seconds, or “Always On.” In the “Always On” condition the battery drain will be much greater. Wallpaper: Selects one of the two available display backgrounds. Date & Time Display: Set or cancel the display of the date and time on the home s creen. Security Settings Use this menu to select security options to avoid the handset or SIM card from being used if the handset is lost or stolen. Many SIM Cards do not have PINs Power On PIN1: On: If the Power On PIN1 is set to “On”, the PIN1 Code will be required every time the handset is powered on. Off: If the Power On PIN1 Is set to “Off”, no PIN1 Code is necessary for handset operation. To change this setting from “On” to “Off” the PIN1 code will need to be entered. Change PIN1: If you want to change the initial PIN1 code, Select Change PIN1, and input the correct initial PIN1 code. The phone will prompt the new PIN1 code for two times and then prompt whether the change was successful. The PIN1 code can be changed only when the PIN1 code is set to “On”. If it is set to “Off”, this function is disabled. Please note that if a wrong PIN1 code is entered three times in sequence, the SIM card will be locked. A PUK code will then be needed to unlock the SIM card. The PIN1 code and the PUK code may be provided with the SIM card. If not, please contact your network operator. PIN Codes are not generally used with wireless carriers in the United States. Phone Code This function will Lock or Unlock the handset. If set to “On”, “ Verify When Power-On” or “Verify With New SIM” can be selected. The default phone lock code is “0000”. Clock Settings Date & Time Settings: Press the up and down keys to set the time and date. Date Display Format: Used to select the date format. Date Separator: Used to select the date separator format Time Display Format: Used to select a 12 or 24 hour format _______________________________________________________________________________________________________ © 2010 Real Phone Corporation. All Rights Reserved. PAGE 13 LOGO Mobile Phone User Manual Phone Information By selecting this option the following information is displayed: Telephone Number - of the SIM Card currently installed in the handset Serial Number - needed for a warranty claim Model Number - needed for customer service assistance FCC ID - the certification number filed with the FCC IMEI number - necessary for SIM Card activation Keypad Lock Sets the time period for the automatic keypad lock. The default setting is Disabled. Factory Default Return the handset settings to the factory default values. Enter the phone code “0000” 7.5.2 to activate. Network Settings Call Waiting Interrogate reveals the status of the Call Waiting function. Activate enables the Call Waiting function if the feature is provided by the network operator. When Call Waiting is enabled and a call is in progress a new incoming call will cause an alert sound and the screen will display the number of the incoming call. The second call can be answered by pressing the Green SEND key. Deactivate disables the Call Waiting function. Call Forward Incoming calls can be diverted to specified alternate numbers depending on a specific condition. All Calls: All incoming calls are automatically diverted to the specified phone number. Busy: When the handset is in use an incoming call is diverted specified phone number. No Answer: An incoming call not answered will be diverted to the specified number. No Service: If the handset is turned off or outside the network coverage an incoming call will be diverted to the specified phone number. For each of the above conditions the Interrogate, Activate and Deactivate functions are provided as described above. The Forward To number is entered when activating the particular Call Forwarding mode. Call Restriction Calls made from or to the handset can be restricted as follows: Outgoing Calls: Restrict all outgoing calls. International Calls: Restrict dialing international long distance phone numbers Intl Except Home: Restrict dialing international calls to a single home number. Incoming Calls: Restrict all incoming calls. Incoming When Roam: Restrict incoming calls when roaming. For each of the above conditions the Interrogate, Activate and Deactivate functions are provided as described above. The Forward To number is entered when activating the particular Call Forwarding mode. _______________________________________________________________________________________________________ © 2010 Real Phone Corporation. All Rights Reserved. PAGE 14 LOGO Mobile Phone User Manual Network Select Mode Auto: When selected the handset will select the with the greatest signal strength. Manual: Allows the manual section of available networks. 7.5.3 Call Duration Outgoing Duration: Displays the total time of all outgoing calls since the last reset. Incoming Duration: Displays the total time of all incoming calls since the last reset. Last Call Duration: Displays the total time of the last call made or received. Press the left soft key “Reset” to reset the counters. 7.5.4 7.5.5 Call Settings Auto Redial: When Enabled an unanswered call will be automatically redialed up to 10 times Auto Answer: When Enabled an incoming call will be automatically answered after the 2 ring. nd Keypad Shortcut The Up and Down scroll keys can be set to directly access certain menu screens. 7.5.6 Profiles Allows the handset to be tailored to different operating environments and personal preferences such as ringtones and alerts. Standard Silence Speaker Set as default: Press “Accept”, to select the profile. Personalize: Select the item(s) to be changed from the default setting. Reset: Reset to the default profile. Tone Control: 7.5.7 Power Tone: Turns the Power On/Off tone on or off Key Tone: Turns the tone made when a key is pressed on or off. Power Voice: Turns the Power On/Off voice message on or off. Language The LOGO Mobile Phone is equipped with two languages for the display and voice prompts. Select the desired language or “Automatic” to have the handset select the language based on the network operator’s default language. _______________________________________________________________________________________________________ © 2010 Real Phone Corporation. All Rights Reserved. PAGE 15 LOGO Mobile Phone User Manual 7.6 Tools Alarm: 8 Allows setting of up to 3 alarms Calendar: Accesses the monthly calendar Product Certifications The Marks from CE on the handset and the battery charger are shown below: REAL PHONE CORPORATION declares that this product complies with the essential requirements and other relevant provisions of the European Directive (1999/5/EC of the European Council). A copy of the declaration of conformity with Directive 1999/5/EC (R&TTE) can be requested to REAL PHONE CORPORATION REAL PHONE CORPORATION declares that this product has been safety tested in accordance with Rules 22H and 24E of the Federal Communications Commission. FCC ID: XWUR12C. Additional information is available upon request to REAL PHONE CORPORATION _______________________________________________________________________________________________________ © 2010 Real Phone Corporation. All Rights Reserved. PAGE 16 LOGO Mobile Phone User Manual 9 Trouble Shooting Guide PROBLEM POSSIBLE SOLUTION Battery will not charge Make sure the battery charger plug is securely connected to the handset and the charger is plugged into a working power source. Phone will not turn on Make sure the battery cutoff switch under the right rubber boot is in the “on” position (the up position). Cycle the switch to off then back to on to make sure it is in the correct position. Message “Insert SIM Card” appears Make sure the battery is charged. The handset does not have a SIM card or the SIM card is not properly installed. Remove and reinstall the SIM card according to Quick Start Guide or User Manual. Message “Input PIN Code” appears The SIM card being used requires a PIN Code. It should have been provided with the SIM card, if not available contact the wireless carrier. Cannot complete Voice Recognition training Conduct the training in a quiet environment. Speak clearly and hold the handset according to the instructions. Respond to each prompt quickly after each beep tone. Restart the training and repeat as necessary. Cannot voice dial a number Train the voice recognition function of the handset. Cannot complete a call Make sure SIM card is installed correctly and is activated with the wireless carrier. Cannot receive a call Check that SIM Card is properly installed and activated. If using a prepaid SIM check that minutes are available. Cycle phone on then off. Cycle battery cutoff switch off then back on. Cannot receive a text message Be sure that the SIM Card is installed correctly and activated; and that SMS messages are allowed by the service plan you have. Check to see that the SMS Service Center number is correct in the handsets memory (see 7.2.4 Message set-up). Volume is too low Adjust volume with the up and down keys during a call. Check that the speaker is turned on if you are holding the handset away from your ear. Cannot access voice mail Confirm that the wireless carrier offers voicemail for the service you have. Follow the carrier’s instructions for setting up the voice mail box and access procedures. Review the Voice Mail Edit menu in section 7.3.2 _______________________________________________________________________________________________________ © 2010 Real Phone Corporation. All Rights Reserved. PAGE 17