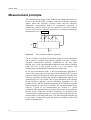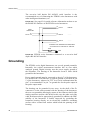
1
PTB220 Series Digital Barometers USER'S GUIDE M210194EN-A AUGUST 2001 _________________________________________________________________________CONTENTS Table of contents CHAPTER 1 GENERAL INFORMATION.............................................................1 Safety ..............................................................................................1 Warranty .........................................................................................2 CHAPTER 2 PRODUCT DESCRIPTION .............................................................3 Introduction ....................................................................................3 BAROCAP® pressure sensor .......................................................4 Measurement principle..................................................................6 Block diagram ................................................................................7 CHAPTER 3 GETTING STARTED .......................................................................9 CHAPTER 4 COMMISSIONING .........................................................................11 Operating modes .........................................................................12 SMODE Selecting the sending mode .......................................12 MMODE Selecting the measurement mode.............................13 PULSE Selecting the PULSE output mode ..............................14 Software settings .........................................................................16 SERI Serial bus settings ...........................................................16 ECHO Setting the serial bus echo on/off..................................17 FORM Defining the output format.............................................17 EFORM Defining the error output format .................................22 DFORM Defining the display format.........................................22 UNIT Setting the pressure and temperature units....................25 HHCP Setting the height of height correction...........................25 AVRG Setting the averaging time.............................................26 INTV Setting the output interval................................................27 ADDR Setting the barometer address (for POLL mode) ..........27 SCOM User specific SEND command .....................................28 PSTAB Setting the pressure stability indicator .........................29 PLARM Setting the pressure alarm levels................................30 PDMAX Setting the pressure difference limit ...........................30 KEYLOCK Setting the keyboard lock on/off .............................32 Hardware settings........................................................................33 CHAPTER 5 INSTALLATION.............................................................................37 Mounting.......................................................................................37 Electrical connections.................................................................38 Grounding.....................................................................................40 Pressure connections .................................................................41 CHAPTER 6 OPERATING..................................................................................43 RUN and STOP modes ................................................................43 R Starting the continuous output ..............................................44 S Stopping the output ...............................................................44 SEND Outputting a single message only .................................45 V Verification message .............................................................45 DNOS Self-diagnostics .............................................................45 VAISALA ___________________________________________________________________________I USER'S GUIDE_______________________________________________________________________ TRACK Setting the pressure tracking mode on/off.................. 46 PLIM Pressure limit listing........................................................ 46 RESET Resetting the barometer ............................................. 47 POLL mode .................................................................................. 48 SEND Outputting one single message .................................... 48 OPEN Setting a barometer from POLL mode to STOP mode. 49 CLOSE Setting a barometer from STOP mode to POLL mode49 SEND mode.................................................................................. 50 PULSE mode................................................................................ 51 Operating the local display and keyboard................................ 51 CHAPTER 7 ADJUSTMENT AND CALIBRATION........................................... 55 Introduction ................................................................................. 55 CORR Listing linear and multipoint corrections ....................... 57 LC Linear corrections ............................................................... 59 MPC Multipoint corrections ...................................................... 60 Offset and gain adjustment........................................................ 61 LCI Entering linear corrections................................................. 61 Multipoint adjustment................................................................. 62 MPCI Entering multipoint corrections ...................................... 62 Calibration ................................................................................... 63 CALD Storing the new date of calibration................................ 64 CHAPTER 8 SELF-TESTING AND PROBLEM HANDLING ............................ 65 Returning the serial communication parameters .................... 65 Diagnostic commands................................................................ 66 ? Basic information on the barometer settings ....................... 66 VERS Software version ........................................................... 67 SNUM Serial number ............................................................... 67 ERRS Error message output .................................................. 67 TEST n Testing transducer operation...................................... 68 C n Listing transducer coefficients ........................................... 69 PTEST Testing pulse output mode .......................................... 69 CHAPTER 9 TECHNICAL SPECIFICATIONS .................................................. 71 Barometric pressure ................................................................... 71 Operating range ....................................................................... 71 Accuracy ...................................................................................... 71 General ......................................................................................... 72 Mechanics.................................................................................... 73 Electromagnetic compatibility................................................... 73 Options......................................................................................... 74 Accessories ................................................................................. 74 APPENDIX A HARDWARE CONFIGURATIONS............................................... 77 APPENDIX B PIN ASSIGNMENTS..................................................................... 79 APPENDIX C RS232C/TTL LEVEL SERIAL INTERFACE ................................ 81 APPENDIX D PULSE OUTPUT MODE............................................................... 83 APPENDIX E ANALOG OUTPUT....................................................................... 87 Pin assignment............................................................................ 90 II _____________________________________________________________________ M210194EN-A _________________________________________________________________________CONTENTS APPENDIX F MULTIPLE PTB220 BAROMETERS ON RS232C.......................91 APPENDIX G OPTIONAL RS485/422 INTERFACE OF PTB220 BAROMETERS93 APPENDIX H SERIAL INTERFACE COMMANDS .............................................97 Commissioning commands........................................................97 Operating commands..................................................................97 Maintenance commands .............................................................98 Diagnostic commands ................................................................98 APPENDIX I CHECKSUM ..................................................................................99 APPENDIX J PRESSURE TENDENCY ............................................................101 APPENDIX K ERROR MESSAGES...................................................................102 APPENDIX L SPECIAL EMULATION MODE ...................................................103 PA11A..........................................................................................103 P Mode....................................................................................103 Automode ...............................................................................104 Setra 470 .....................................................................................105 APPENDIX M PRESSURE CONVERSION CHART ..........................................107 VAISALA __________________________________________________________________________ III CHAPTER 1_______________________________________________________ GENERAL INFORMATION CHAPTER 1 GENERAL INFORMATION Safety Throughout the manual important instructions regarding the safety considerations are focused as follows. WARNING Warning denotes a hazard. It calls attention to a procedure, practice, condition or the like, which, if not correctly performed or adhered to, could result in injury to or death of personnel. CAUTION Caution denotes a hazard. It calls attention to a procedure, practice, condition or the like, which, if not correctly performed or adhered to, could result in damage to or destruction of part or all of the product. NOTE Note highlights important information. It calls attention to an essential procedure, practice, condition or the like. VAISALA __________________________________________________________________________ 1 USER'S GUIDE_______________________________________________________________________ Warranty Vaisala hereby represents and warrants all Products manufactured by Vaisala and sold hereunder to be free from defects in workmanship or material during a period of twelve (12) months from the date of delivery save for products for which a special warranty is given. If any Product proves however to be defective in workmanship or material within the period herein provided Vaisala undertakes to the exclusion of any other remedy to repair or at its own option replace the defective Product or part thereof free of charge and otherwise on the same conditions as for the original Product or part without extension to original warranty time. Defective parts replaced in accordance with this clause shall be placed at the disposal of Vaisala. Vaisala also warrants the quality of all repair and service works performed by its employees to products sold by it. In case the repair or service works should appear inadequate or faulty and should this cause malfunction or nonfunction of the product to which the service was performed Vaisala shall at its free option either repair or have repaired or replace the product in question. The working hours used by employees of Vaisala for such repair or replacement shall be free of charge to the client. This service warranty shall be valid for a period of six (6) months from the date the service measures were completed. This warranty is however subject to following conditions: a) A substantiated written claim as to any alleged defects shall have been received by Vaisala within thirty (30) days after the defect or fault became known or occurred, and b) the allegedly defective Product or part shall, should Vaisala so require, be sent to the works of Vaisala or to such other place as Vaisala may indicate in writing, freight and insurance prepaid and properly packed and labelled, unless Vaisala agrees to inspect and repair the Product or replace it on site. This warranty does not however apply when the defect has been caused through a) normal wear and tear or accident; b) misuse or other unsuitable or unauthorized use of the Product or negligence or error in storing, maintaining or in handling the Product or any equipment thereof; c) wrong installation or assembly or failure to service the Product or otherwise follow Vaisala's service instructions including any repairs or installation or assembly or service made by unauthorized personnel not approved by Vaisala or replacements with parts not manufactured or supplied by Vaisala; d) modifications or changes of the Product as well as any adding to it without Vaisala's prior authorization; e) other factors depending on the Customer or a third party. Notwithstanding the aforesaid Vaisala's liability under this clause shall not apply to any defects arising out of materials, designs or instructions provided by the Customer. This warranty is expressly in lieu of and excludes all other conditions, warranties and liabilities, express or implied, whether under law, statute or otherwise, including without limitation ANY IMPLIED WARRANTIES OF MERCHANTABILITY OR OF FITNESS FOR A PARTICULAR PURPOSE and all other obligations and liabilities of Vaisala or its representatives with respect to any defect or deficiency applicable to or resulting directly or indirectly from the Products supplied hereunder, which obligations and liabilities are hereby expressly cancelled and waived. Vaisala's liability shall under no circumstances exceed the invoice price of any Product for which a warranty claim is made, nor shall Vaisala in any circumstances be liable for lost profits or other consequential loss whether direct or indirect or for special damages. 2 ____________________________________________________________________ M210194EN-A CHAPTER 2___________________________________________________ PRODUCT DESCRIPTION CHAPTER 2 PRODUCT DESCRIPTION Introduction The PTB220 series barometers are fully compensated digital barometers designed to cover a wide range of environmental pressure and temperature. They can be used successfully both in accurate pressure measurement applications at room temperature and in demanding automatic weather station applications. The PTB220 series digital barometers use the BAROCAP® silicon capacitive absolute sensor developed by Vaisala for barometric pressure measurement applications. The measurement principle of the PTB220 series digital barometers is based on an advanced RC oscillator and three reference capacitors against which the capacitive pressure sensor and the capacitive temperature compensation sensor are continuously measured. The microprocessor of the barometer performs compensation for pressure linearity and temperature dependence. The pressure and temperature adjustment in the PTB220 consists of seven temperature levels over the operating temperature range of the barometer and of six to eleven pressure levels over the operating pressure range of the barometer at each temperature level. The calculated individual basic pressure and temperature adjustment coefficients are stored in the EEPROM of each pressure transducer. The user cannot change these basic factory adjustments. The multipoint fine adjustment for pressure and the final pressure calibration of the PTB220 Class A barometers is done using a manual Ruska 2465 dead-weight tester. The multipoint fine adjustment and calibration of the Class B barometers is done automatically using electronic working standards. VAISALA __________________________________________________________________________ 3 USER'S GUIDE_______________________________________________________________________ The PTB220 series digital barometers are available with one, two or three pressure transducers. Although one pressure transducer is usually the most appropriate configuration, some applications may benefit from additional pressure transducers. Two or three pressure transducers provide for a self-diagnostic feature: the user can set an alarm limit within which the pressure transducers must agree for reliable measurement. The PTB220 series barometers can also be configured to measure two separate pressures. A local LCD display on the cover is also available as a configuration option. The display has a backlight, which makes the display easy to read at any light conditions. The display has two rows and it can simultaneously indicate the barometric pressure, the three-hour pressure trend and the WMO pressure tendency code. The user can define various specific application settings, such as serial bus settings, averaging time, output interval, output format, display format, error message field, pressure unit and pressure resolution. It is also possible to select different sending modes for power-up situation such as the free running mode, the stand-by mode and a mode with one automatically sent message. A fast measurement mode with ten measurements per second can also be selected. The factory settings have been chosen so that both a fast settling time and a high resolution are achieved. In applications where fast settling time is not required, longer averaging times are recommended to reduce environmetal pressure noise. As a standard, there are RS 232C full duplex and bidirectional TTL level serial interface in the barometer. In addition the user can select either an RS 485/422 two-wire half duplex serial interface or a pulse output interface with user selectable pulse rate, pressure resolution and pressure offset. The PTB220 series digital barometers are traceable to National Institute of Standards and Technology (NIST) in the USA. BAROCAP® pressure sensor The PTB220 digital barometers use the BAROCAP® silicon capacitive absolute pressure sensor developed by Vaisala for barometric pressure measurement applications. The BAROCAP® sensor has excellent hysteresis and repeatability characteristics, low temperature dependence and a very good long-term stability. The ruggedness of the BAROCAP® sensor is outstanding and the sensor is resistant to mechanical and thermal shocks. 4 ____________________________________________________________________ M210194EN-A CHAPTER 2___________________________________________________ PRODUCT DESCRIPTION Silicon diaphragm Thin film metallization Silicon Glass Silicon Vacuum gap FIGURE 2-1 The BAROCAP® pressure sensor The BAROCAP® pressure sensor consists of two layers of single crystal silicon having a layer of glass between them. The thinner silicon layer is etched on both sides to create an integrated vacuum reference chamber for the absolute pressure sensor and to form a pressure sensitive silicon diaphragm. The thicker silicon layer is the rigid base plate of the sensor and it is clad with a glass dielectric. The thinner piece of silicon is electrostatically bonded to the glass surface to form a strong and hermetic bond. Thin film metallization has been deposited to form a capacitor electrode inside the vacuum reference chamber; the other electrode is the pressure sensitive silicon diaphragm. The coefficients of thermal expansion of silicon and glass materials used in the BAROCAP® pressure sensor are carefully matched together in order to minimize the temperature dependence and to maximize the long-term stability. The BAROCAP® pressure sensor is designed to achieve zero temperature dependence at 1000 hPa and its long-term stability has been maximized by thermal ageing at an elevated temperature. The BAROCAP® capacitive pressure sensor features a wide dynamic range and no self-heating effect. The excellent hysteresis and repeatability characteristics are based on the ideal spring characteristics of single crystal silicon. In the BAROCAP® pressure sensor, the silicon material is exerted to only few percent of its whole elastic range. VAISALA __________________________________________________________________________ 5 USER'S GUIDE_______________________________________________________________________ Measurement principle The measurement principle of the PTB220 series digital barometers is based on an advanced RC oscillator with three reference capacitors against which the capacitive pressure sensor and the capacitive temperature compensation sensor are continuously measured. A multiplexer connects each of the five capacitors to the RC oscillator one at a time and five different frequencies are measured during one measurement cycle (FIGURE 2-2 ) C C 1 C P C 2 T C 3 R Fout FIGURE 2-2 RC-oscillator with five capacitors The RC oscillator is designed to attenuate changes in stray impedance and to achieve excellent measurement stability with time. Vaisala’s electronic measurement principle emphasizes in the first place stability over a wide environmental temperature and relative humidity range and over a long period of time; yet it can achieve fast measurement speed and high resolution at the same time. In the fast measurement mode, a special measurement algorithm is used. In this mode only the frequency from the BAROCAP pressure sensor is measured continuously while the frequencies from the three reference capacitors and from the thermal compensation capacitor are updated only every 30 seconds. This is quite justifiable as the changes in the reference capacitors can be considered negligible over any periods of time, and the internal temperature of the barometer remains stable enough over a few tens of seconds. The fast measurement mode achieves a speed of ten measurements per second at 1 pascal resolution. Each measurement represents the pressure average during the last 100 ms. When the reference frequencies are measured every 30 seconds the outputting stops for a short moment and typically one measurement is lost during this time. The fast measurement mode can be used only in barometers with one pressure transducer and in full duplex communication. 6 ____________________________________________________________________ M210194EN-A CHAPTER 2___________________________________________________ PRODUCT DESCRIPTION Block diagram The PTB220 series digital barometers consist of a CPU board and 1, 2 or 3 pressure transducers (P1, P2 and P3). The number of pressure transducers is order specific and the configuration cannot be changed by the user. Usually the pressure transducers are connected to the same pressure port. However, in case of two pressure transducers, the barometer can have also two pressure ports, one for each transducer. The various hardware configurations are illustrated on page 77. The PTB220 series barometers always have a RS 232C full duplex and a bidirectional TTL level serial interface. In addition, the barometers have either a pulse output interface or an RS 485/422 twowire half duplex serial interface. The RS 485/422 interface is a separate optional module inside the barometer. This interface module is order specified and installed at the factory only. There is also an optional factory set analog output module available. A LCD display with backlight is also a possible configuration option. The block diagram of the PTB220 series barometers is shown in FIGURE 2-3 FIGURE 2-3 Block diagram of the PTB220 barometers VAISALA __________________________________________________________________________ 7 CHAPTER 3___________________________________________________________ GETTING STARTED CHAPTER 3 GETTING STARTED As the PTB220 series digital barometers always have an RS 232C serial interface, the user is requested to use this interface when operating the barometer for the first time. The RS 232C is the most useful and reliable interface for commissioning the barometers with various software settings. The RS 232C serial interface of the PTB220 barometers does not provide handshaking lines (such as DSR, CTS or DTR). If the host system requires handshaking lines, appropriate external connections have to be made in order to enable the communication with a PTB220. See Appendix on page 81 for more details on how to connect the handshaking lines. NOTE 1. The sending of PTB220 is controlled with XON/XOFF (software handshaking) 2. The buffer of the barometer can be cleared with <cr>. The RS 232C serial interface and power supply pin assignment is as follows: 5 43 21 9 8 76 FIGURE 3-1 9-pin female subD-connector PIN 2 3 5 7 9 FIGURE 3-2 SIGNAL TX RX ground for the RS 232C ground for supply voltage supply voltage (10...30 VDC) RS 232C and power supply pins VAISALA __________________________________________________________________________ 9 USER'S GUIDE_______________________________________________________________________ The factory settings of the PTB220 series barometers are the following: TABLE 3-1 Serial interface factory settings Baud rate Parity Data bits Stop bits Duplex 9600 even 7 1 full duplex After having made the electrical connections, switch the power on, and the barometer responds indicating the barometer type and the software version. PTB220 / 2.02 > The barometer is now ready to respond to any command, for example to commands R, S or SEND (see page 43). If there is a LCD display cover, at power-up the display will first show the barometer type and the software version. Then it switches to display the barometric pressure reading as defined with the DFORM command. The keyboard of the display cover can be used to inspect and change the parameters available (see page 51). Should there be any problems please check the jumper settings in connector X15 and the settings in dip switch S1 inside the barometer. The settings should be as indicated in the figures below. RX/RXD RXD TX TXD TXD X15 FIGURE 3-3 ON S1 OFF SW1 SW3 SW5 SW7 SW2 SW4 SW6 SW8 Basic RS 232C jumper and dip switch S1 settings 10 ___________________________________________________________________ M210194EN-A CHAPTER 4_____________________________________________________________ COMMISSIONING CHAPTER 4 COMMISSIONING TABLE 4-1summarizes the commands used to commission the PTB220 series digital barometers. The commands are not case sensitive except for the SCOM command. TABLE 4-1 Commissioning commands Function sending mode measurement mode pulse mode settings serial bus settings echo on / off output format pressure resolution pressure trend pressure tendency error status stability indicator checksum height of height correction error output format display format pressure and temperature units averaging time setting output interval address of the barometer user specific SEND command pressure stability indicator pressure alarm levels (HI and LO) pressure difference limit keyboard locking Command SMODE MMODE PULSE SERI ECHO FORM FORM FORM FORM FORM FORM FORM HHCP EFORM DFORM UNIT AVRG INTV ADDR SCOM PSTAB PLARM PDMAX KEYLOCK The commissioning commands can be divided in two sections: the operating mode commands and the software setting commands. VAISALA _________________________________________________________________________ 11 USER'S GUIDE_______________________________________________________________________ Operating modes The first thing to do is to select the desired sending mode for the barometer. This is done with the command SMODE. There are available the normal or the fast measurement mode or the pulse output mode. These selections are made with MMODE and PULSE commands. SMODE Selecting the sending mode SMODE x <cr> where: x = STOP, RUN, SEND or POLL The SMODE command is used to set or inspect the sending mode of the barometer. The PTB220 series digital barometers have four sending modes: STOP, RUN, SEND and POLL. In STOP mode (see page 43), after power-up the barometer outputs its type and software version and then waits for further commands. In RUN mode (see page 43), continuous outputting starts automatically from power-up. In SEND mode (see page 50) a single message is automatically output after power-up. POLL mode (see page 48) allows the communication with multiple barometers or other digital instruments connected to one serial bus. Echo is automatically off in the POLL mode. Examples: >smode <cr> Serial mode : STOP >smode run <cr> Serial mode : RUN >smode send <cr> Serial mode : SEND >smode poll <cr> Serial mode : POLL >smode stop <cr> Serial mode : STOP >reset<cr> 12 ___________________________________________________________________ M210194EN-A CHAPTER 4_____________________________________________________________ COMMISSIONING NOTE Remember to give the RESET command to initialize the new sending mode. MMODE Selecting the measurement mode MMODE x <cr> where: x = NORMAL or FAST The MMODE command is used to set or inspect the measurement mode of the barometer. In the normal measurement mode, the barometer measures the capacitance of each of the five capacitive components of the pressure transducer (see page 6). This is the standard operating mode of the PTB220 series digital barometers. In the fast measurement mode, the barometer measures mainly the capacitance of the BAROCAP pressure sensor and results in a faster measurement speed (approximately 10 measurements per second). This measurement mode can be used only with the barometers having one pressure transducer and full duplex communication. MMODE selection is protected by switch SW4 (see FIGURE 4-1). The switch SW4 is normally in DISABLE position (OFF). Turn the switch to ENABLE position (ON) to be able to make a new MMODE selection. ON S1 OFF SW1 SW3 SW5 SW7 SW2 SW4 SW6 SW8 FIGURE 4-1 Switch SW4 in ENABLE position (ON) Example of selecting the fast measurement mode: >mmode <cr> Meas mode : NORMAL >mmode fast <cr> Meas mode : FAST >mtim 32 <cr> VAISALA _________________________________________________________________________ 13 USER'S GUIDE_______________________________________________________________________ Mtim : >filt off <cr> Filter : OFF >reset <cr> NOTE 32 Remember to give the RESET command to initialize the new measurement mode. The measurement time (mtim) setting of 32 is recommended in order to achieve the best output stability at the speed of 10 measurements per second. The filter command ensures that no numerical filtering is performed in the fast measurement mode. The MTIM and FILT commands are used only together with the MMODE FAST command. In the NORMAL measurement mode, the AVRG command replaces the MTIM and FILT commands in the PTB220 series digital barometers. NOTE Always remember to return the switch SW4 to write DISABLE position (OFF). PULSE Selecting the PULSE output mode PULSE a s r o <cr> where: a s r o = = = = ON or OFF SLOW or FAST LOW or HIGH pressure offset (activation/deactivation) (speed) (resolution) (hPa/mbar units only) The PULSE command is used to activate or deactivate the pulse ouput mode and to set or inspect the desired parameters. SLOW/FAST selection affects the pulse rate: SLOW speed equals to 5 kHz pulse rate and FAST speed equals to 50 kHz pulse rate. LOW resolution equals to 0.1 hPa/mbar pressure resolution and HIGH resolution equals to 0.01 hPa/mbar pressure resolution. In order to minimize the number of output pulses the user can define an offset pressure so that pulse outputting starts from the selected pressure level. 14 ___________________________________________________________________ M210194EN-A CHAPTER 4_____________________________________________________________ COMMISSIONING NOTE The pulse output mode can be used with hPa/mbar pressure units only! Example of software settings for the pulse output mode: >pulse <cr> OFF SLOW LOW 0.0 >pulse on slow low <cr> ON SLOW LOW 0.0 >pulse on fast high -800 <cr> ON FAST HIGH -800.0 >pulse off <cr> OFF FAST HIGH -800.0 > (note the minus sign) The operation of pulse output mode can be tested through the RS232C serial interface using the PTEST command (see page 69). In addition to the above mentioned software settings, the user must finally set the switch SW3 to position ON (see Hardware settings on page 33) for the barometer to start to wait for an external trigger pulse. See page 83 for quick reference information on how to set and use the pulse output mode of the PTB220 series digital barometers. NOTE In case of an error in a PTB220 series barometer, there will be no pulse output from the barometer despite an external trigger pulse. This error handling technique ensures that a host system cannot receive erroneous pressure readings from a PTB220 series barometer. VAISALA _________________________________________________________________________ 15 USER'S GUIDE_______________________________________________________________________ Software settings SERI Serial bus settings SERI b p d s x <cr> where: b p d s x <cr> (* = factory setting) = = = = = = baud rate (300, 600, 1200, 2400, 4800, 9600*) parity (E = even*, O = odd, N = none) data bits (7* or 8) stop bits (1* or 2) duplex (F = full* or H = half) carriage return is generated by the ENTER or RETURN key of the host computer The SERI command is used to set or inspect the serial bus settings of the barometer. Examples: >seri <cr> 9600 E 7 1 F >seri 1200 N 8 1 H <cr> 1200 N 8 1 H >reset <cr> PTB220 / 2.02 >seri 2400 <cr> 2400 N 8 1 H >seri F <cr> 2400 N 8 1 F >reset <cr> PTB220 / 2.02 > Always give the RESET command after the SERI command to activate the new serial bus settings. The following bus settings do not work with the incorporated Intel 8051 microprocessor. They are modified by the barometer: N 7 1 E 8 2 O 8 2 → → → N 7 2 E 8 1 O 8 1 16 ___________________________________________________________________ M210194EN-A CHAPTER 4_____________________________________________________________ COMMISSIONING The RS485/422 interface of the PTB220 series digital barometers is a non-isolated two-wire half-duplex interface. See page 93 for quick reference information on how to use the RS485/422 interface of the PTB220 series digital barometers. ECHO Setting the serial bus echo on/off ECHO x <cr> where: x = ON or OFF The ECHO command is used to set or inspect the echoing condition of the barometer. In OFF mode the barometer does not output the '>' prompt character. Examples: >echo <cr> Echo >echo off <cr> Echo ... echo on <cr> Echo > : ON : OFF : ON (text invisible) FORM Defining the output format The FORM command is used to set or inspect the output format of the barometer. See the examples in the next page. FORM <cr> The user can define the following fields into the output format: amount of decimals give number of decimals before a quantity. Giving 4.2 before the pressure quantity outputs a reading with the following form: 1013.12 VAISALA _________________________________________________________________________ 17 USER'S GUIDE_______________________________________________________________________ pressure quantities height corrected pressure pressure trend *) pressure tendency temperature quantities *) pressure and temperature units address of the barometer error status stability indicator checksums number fields text fields ASCII characters: CR LF TAB nnn ASCII code P1 (reading of the transducer 1), P2 (transducer 2), P3 (transducer 3), P (average) HCP (see also page 25) TREND (three-hour trend) A (see page 101 for details) T1, T2, T3 UU, UUU, UUUU,UUUUU ADDR (uses two characters) ERR (uses three characters) OK (uses three characters) CS2, CS4 n.m where: n = 0 - 9, m = 0- 9 within “ “ characters #r #n #t # nnn *) The PTB220 barometer cannot output + sign for pressure trend or temperature reading; a space is output instead. 18 ___________________________________________________________________ M210194EN-A CHAPTER 4_____________________________________________________________ COMMISSIONING Examples of different ways of setting the output format: 1. To output the pressure reading. >form <cr> 4.2 P " " UUUU #r #n ? <cr> >send <cr> 1020.30 hPa > 2. To output the transducer values (P1,P2,P3) separately and the average value (P). >form <cr> 4.2 P " " UUUU #r #n ? 4.2 P1 " " P2 " " P3 " " P " " UUU #r #n <cr> >send <cr> 1020.31 1020.32 1020.33 1020.32 hPa > 3. To output pressure reading followed with three-hour trend. >form <cr> 4.2 P " " UUUU #r #n ? 4.2 P " " UUU " " 2.1 TREND " " UUU #r #n <cr> >send <cr> 1020.30 hPa **.* hPa (date not available) >send <cr> 1020.30 hPa -1.2 hPa 4. To output pressure reading followed with three-hour trend and pressure tendency. >form <cr> 4.2 P " " UUUU #r #n ? 4.2 P " " UUU " " 2.1 TREND " " UUU " " A #r #n <cr> >send <cr> 1020.30 hPa **.* hPa * (date not available) >send <cr> 1020.30 hPa -1.2 hPa 7 >send <cr> 1020.30 hPa 1.2 hPa 2 (no + sign) 5. To output the pressure from tranducer P1 followed with temperature reading. >form <cr> 4.2 P " " UUUU #r #n ? 4.2 P1 " " UUU " " 3.1 T1 " " UU #r #n <cr> >send <cr> 1020.30 hPa 23.4 'C (no + sign) > VAISALA _________________________________________________________________________ 19 USER'S GUIDE_______________________________________________________________________ 6. To output the average pressure reading in the units of inHg . >form <cr> 4.2 P " " UUU #r #n ? 2.4 P " " UUUU #r #n <cr> >unit inHg <cr> P unit : inHg >send <cr> 30.1234 inHg > 7. Adding a text field, giving the address and outputting the pressure reading from a identified barometer. >form <cr> 4.2 P " " UUUU #r #n ? "Barometer " ADDR " " 4.2 P " " UUU #r #n <cr> >addr 7 <cr> Address : 7 >send 7 <cr> Barometer 07 1020.30 hPa > 8. To output the average pressure reading and the error status. >form <cr> 4.2 P " " UUUU #r #n ? 4.2 P " " UUU " " ERR #r #n <cr> >send <cr> 1020.30 hPa 0 (no error found) >send <cr> 1020.30 hPa 1 (some error has occurred) > 9. To output the transducer values (P1,P2,P3) separately and the average value (P). Indicates errors if the maximum pressure difference between the transducers is exceeding the defined value. The two-or three-digit error field in the end of the line is expressing the error state of the transducers. Number 1 means error and number 0 normal state. The first digit shows state of transducer 1 (P1), second digit shows state of transducer 2 (P2) and the third digit shows transducer 3 (P3). >form <cr> 4.2 P " " UUUU #r #n ? 4.2 P1 " " P2 " " P " " UUU " " ERR #r #n <cr> >send <cr> 1020.30 1020.32 1020.31 hPa 00 >send <cr> 1020.30 1022.30 1021.30 hPa 11 (Pd max error) > 20 ___________________________________________________________________ M210194EN-A CHAPTER 4_____________________________________________________________ COMMISSIONING >form <cr> 4.2 P " " UUUU #r #n ? 4.2 P1 " " P2 " " P3 " " P " " UUU " " ERR #r #n <cr> >send <cr> 1020.30 1020.31 1020.32 1020.31 hPa 000 >send <cr> 1020.30 1022.31 1020.32 1020.31 hPa 010 (Pd max error) > >form <cr> 4.2 P " " UUUU #r #n ? 4.2 P1 " " P2 " " P3 " " P " " UUU " " ERR #r #n <cr> >send <cr> 1020.30 1020.31 1020.32 1020.31 hPa 000 >send <cr> 1020.30 1022.31 1024.32 1022.31 hPa 111 (Pd max error) > 10. To output the pressure reading and the stability state. >form <cr> 4.2 P " " UUUU #r #n ? 4.2 P " " UUU OK #r #n <cr> >send <cr> 1020.30 hPa OK >send <cr> 1020.30 hPa > (good stability) (poor stability) 11. To output the pressure reading and the checksums. >form <cr> 4.2 P " " UUUU #r #n ? 4.2 P " " UUU " " CS2 #r #n <cr> >send <cr> 1020.30 hPa BB > 12. To output the pressure reading and the height corrected pressure reading. >form 4.2 P HCP #r #n ? 4.2 P " " hcp #r #n >send 1011.12 1012.30 > VAISALA _________________________________________________________________________ 21 USER'S GUIDE_______________________________________________________________________ EFORM Defining the error output format EFORM <cr> The EFORM command is used to define the user specific error output format for the serial interface. In case of an internal error, the barometer outputs the message defined with the EFORM command instead of the normal message defined with the FORM command. If the EFORM command is not defined, the barometer uses the FORM command definition with its optional error status fields. Example of an EFORM definition: >eform <cr> ? "ERROR" #r #n <cr> >P <cr> 1002.93 hPa OK (correct operation) >P <cr> ERROR (incorrect operation) > Any previous EFORM definition may be removed with the following command: >eform * <cr> > DFORM Defining the display format DFORM <cr> The DFORM command is used to define the format for the optional LCD display. The user can define the following fields into the display format: pressure quantities height corrected pressure pressure trend *) pressure tendency temperature quantities *) pressure and temperature units error status stability indicator number fields text fields P1, P2, P3, P (average) HCP (see also page 25) TREND (three-hour trend) A (see page 101 for details) T1, T2, T3 UU, UUU, UUUU,UUUUU ERR (uses three characters) OK (uses three characters) n.m where: n = 0 - 9, m = 0- 9 within “ “ characters 22 ___________________________________________________________________ M210194EN-A CHAPTER 4_____________________________________________________________ COMMISSIONING *) The PTB220 barometer cannot output + sign for pressure trend or temperature reading; a space is output instead. There are two rows containing 16 characters each; the user can define a maximum of 32 characters to be displayed. The field definitions are defined in successive order so that the first 16 characters will be displayed on the first row and the next characters on the second row. The factory setting for the display format includes the pressure reading and the stability indicator: CL ENT Any previous DFORM definition may be removed and the original factory setting restored with the following command: >dform * <cr> > Example of setting the display format to show pressure, stability indicator, pressure trend and pressure tendency: >dform <cr> 4.2 P " " UUUUU OK #r #n ? " " 4.2 P " " UUU OK " trend " 2.1 TREND " " UUU " " A <cr> > In this case, the display will look similar to the following: CL ENT VAISALA _________________________________________________________________________ 23 USER'S GUIDE_______________________________________________________________________ The PTB220 series barometers will show * instead of numeric values for pressure trend and pressure tendency for three hours from powerup. In case of error in the barometer, the relevant error message will automatically appear on the second line of the display. In this case, any other information defined using the DFORM command will be replaced with an error message. By pressing the arrow button on the left, you get a display having a horizontal bar display on the upper row. On the lower row there are three values: the value on the left shows the lower limit of the pressure range, the middle value shows the actual pressure and the value on the right shows the upper limit of the pressure range. 24 ___________________________________________________________________ M210194EN-A CHAPTER 4_____________________________________________________________ COMMISSIONING UNIT Setting the pressure and temperature units UNIT x <cr> where (* = factory setting) x = hPa* kPa Pa mbar inHg mmHg torr mmH2O psia C* F This command is used to set and inspect the pressure and internal temperature compensation unit. The temperature unit is not confirmed by the barometer. Example of changing the pressure and temperature units: >unit <cr> P unit : hPa >unit C <cr> >send <cr> 1035.19 hPa 25.9 'C >unit torr <cr> P unit : torr >unit F <cr> (temperature unit not confirmed) >send <cr> 776.44 torr 78.6 'F > HHCP Setting the height of height correction HHCP x <cr> The HHCP command is used to give the height for height corrected pressure. The value is set in meters and the range, which can be used, is -40...+40 m. Height corrected pressure is calculated according to the following equation. HCP = P + 0.1176 ⋅ h (4-1) VAISALA _________________________________________________________________________ 25 USER'S GUIDE_______________________________________________________________________ where: P= 0.1176 = h= measured pressure constant height Example of setting the height: >hhcp<cr> Height of HCP : ? -30 > AVRG Setting the averaging time AVRG x <cr> where: x = 1 ... 600 (seconds) The AVRG command is used to set and inspect the averaging time during which the individual measurement samples are integrated to get an averaged pressure reading. The averaging time is the total averaging time of the barometer. In case of several integral pressure transducers, the defined averaging time is divided by two or three to get an internal averaging time for each pressure transducer. Note that if the averaging time is defined to be long, the settling time at power-up will be long, too. The output reading is a running average pressure reading. The measurement is updated in normal measurement mode approximately every 1 to 4 seconds, depending on the AVRG setting. A minimum of one-second averaging time is recommended per each pressure transducer. One-second averaging time for a barometer with one, two-second averaging time with two and three-second averaging time with three transducers. These selections are used as the factory setting averaging times. Example of setting the averaging time to 60 seconds (WMO averaging time for barometric pressure measurement): >avrg <cr> Averaging time: >avrg 60 <cr> Averaging time: > 1.0 ?<cr> 60.0 26 ___________________________________________________________________ M210194EN-A CHAPTER 4_____________________________________________________________ COMMISSIONING INTV Setting the output interval INTV x y <cr> where: x = output interval (0...255) y = unit (s, min, h) This command is used to set and inspect the interval output mode. The R command is used to start the outputting. Examples: NOTE >intv <cr> Output intrv. : > 0 s >intv 10 s <cr> Output intrv. : >r <cr> 10 s In case of the half duplex RS 485/422 serial communication, the user is requested to set the interval time to one second or more. This enables an interruption of outputting, if the R command is given by mistake. See page 93 for quick reference information on how to use the RS485/422 interface of the PTB220 series barometers. ADDR Setting the barometer address (for POLL mode) ADDR x <cr> where: x = the address (0 ... 99) This command is used to set and inspect the address of the barometer for the POLL mode (see Chapter POLL mode). The address feature is important when multiple PTB220 series barometers are connected to one RS232C interface (see page 91), or when a PTB220 series barometer is used on an RS485/422 serial interface (see page 93). Example of setting the address to 7: VAISALA _________________________________________________________________________ 27 USER'S GUIDE_______________________________________________________________________ >addr 7 <cr> Address > : 7 A new address replaces the previous one. Always set the address to 0 when no address is needed: >addr 0 <cr> Address > : 0 If the barometer is not closed in the POLL mode, it will respond to any SEND command (regardless of the address). The barometer must be set to POLL mode and then closed with CLOSE command (see Chapter POLL mode). SCOM User specific SEND command SCOM <cr> This command is used to define a user specific SEND command for one message output. The standard SEND command of the barometer will always function normally whatever the SCOM definition may be. The new command must be defined within “ “ signs, then some end characters also can be defined. This allows the user to specify commands without an end character or with an end character of his choice. The SCOM command is very practical when the user wishes to be able to use the same one-message command as previously has been used for some other barometer (e.g. the PA11A). Note that the SCOM command is case sensitive. It is in fact recommended to use the opposite case characters for SCOM definition to avoid any conflict with other commands. Note also that the PTB220 barometer does not react on <eot> at the end of a command. Example of setting a P (note the upper case character in comparison to the rest of the lower case characters) command for one message output: >scom <cr> ? "P" #r <cr> >P <cr> 1020.30 hPa > 28 ___________________________________________________________________ M210194EN-A CHAPTER 4_____________________________________________________________ COMMISSIONING Example of defining a similar command without an end character: >scom <cr> "P" #r ? "P" <cr> >P1020.30 hPa > Any previous SCOM definition may be removed with the following command: >scom * <cr> > PSTAB Setting the pressure stability indicator PSTAB x <cr> where: x = pressure reading (in current unit) The PSTAB command is used to define the pressure stability indicator reflecting maximum allowed pressure difference between two successive averaged pressure measurements. In addition to defining the pressure stability indicator, the user must also define the FORM command to include the "OK" stability indicator field. The factory setting for the stability indicator level is 0.5 hPa. >pstab 0.5 <cr> Stab. level : >form 0.50 hPa ? 4.2 P " " UUU " " OK #r #n >send <cr> 1020.30 hPa OK (good pressure stability) >send <cr> 1020.30 hPa (poor pressure stability) > The pressure stability indicator is useful as it indicates instability in the pressure measurement. The pressure instability may result from different reasons depending on the application. In outdoor barometric pressure measurement high wind speeds can induce notable pressure instability. Building automation systems may also introduce pressure VAISALA _________________________________________________________________________ 29 USER'S GUIDE_______________________________________________________________________ fluctuations, and for example opening the door of a room will often result in temporary pressure instability. PLARM Setting the pressure alarm levels PLARM x y <cr> where: x = the low alarm level (LO ALARM) y = the high alarm level (HI ALARM) The PLARM command is used to set or inspect the low and high pressure alarm levels. The factory settings are 500 hPa for the low alarm level and 1100 hPa for the high alarm level for the barometers with a pressure range 500...1100 hPa. The factory settings for barometers with a pressure range of 50...1100 hPa are 50 hPa (low level) and 1100 hPa (high level) Examples: >plarm <cr> Hi alarm : 1100.00 Lo alarm : 500.00 >plarm 900 1050 <cr> Hi alarm : 1050.00 Lo alarm : 900.00 > hPa hPa hPa hPa The alarm output operates in STOP and RUN sending modes only (see pages 12 and 43). The barometer outputs the alarm immediately when the alarm pressure level is exceeded. The alarm message is output only once with no prompt associated with it. Examples: HI ALARM LO ALARM PDMAX Setting the pressure difference limit PDMAX x <cr> where: 30 ___________________________________________________________________ M210194EN-A CHAPTER 4_____________________________________________________________ COMMISSIONING x = pressure reading (in current unit) This command is used to define the maximum pressure difference between the pressure readings from different pressure transducers (P1/P2 or P1/P2/P3). If the defined value is exceeded, the relevant digits in the ERR field (see FORM command) will change from 0 to 1. It is recommended to use the ERR field as part of the FORM command definition, if there are two or three pressure transducers in a PTB220 series digital barometer. More than one ´1´ in the ERR field indicates that the pressure reading output of the barometer is not reliable. Following basic cases may occur for barometers with two or three pressure transducers (only the differencies found between the readings from the pressure transducers are important): P high P high Two transducers: Pdmax ? Pdmax ? Three transducers: P low P middle Pdmax ? P low For an acceptable measurement crucial conditions are: - two transducers: P high - P low ≤ Pdmax - three transducers: P high - P middle ≤ Pdmax and P middle - P low ≤ Pdmax. The factory setting for Pdmax is 1 hPa. Example of setting the limit to 0.5 hPa: >pdmax <cr> Pd max > : 1.000 ? 0.5 <cr> Examples of exceeding the Pdmax limit in case of two and three pressure transducers: >form <cr> 4.2 P " " UUUU #r #n ? 4.2 P1 " " P2 " " P " " UUU " " ERR #r #n <cr> >send <cr> 1020.30 1020.32 1020.31 hPa 00 >send <cr> 1020.30 1022.30 1021.30 hPa 11 VAISALA _________________________________________________________________________ 31 USER'S GUIDE_______________________________________________________________________ > >form <cr> 4.2 P " " UUUU #r #n ? 4.2 P1 " " P2 " " P3 " " P " " UUU " " ERR #r #n <cr> >send <cr> 1020.30 1020.31 1020.32 1020.31 hPa 000 >send <cr> 1020.30 1022.31 1020.32 1020.31 hPa 010 >send <cr> 1020.30 1022.31 1024.32 1022.31 hPa 111 Note that only the acceptable pressure readings are used to calculate the average output pressure reading. However, if all pressure readings differ too much, the average reading is calculated from all individual readings but all ERR field digits turn to be 1´s as well. Use the ERRS command to analyze problems (see page 67). KEYLOCK Setting the keyboard lock on/off KEYLOCK x <cr> where: x = ON or OFF The KEYLOCK command is used to set or inspect the keyboard lock condition of the display cover keyboard. The PTB220 barometers with display cover are supplied from factory with the keyboard unlocked (KEYLOCK ON) and it is thus not possible to inspect the settings nor change them. If the user wishes to protect the barometer settings so that they can be inspected but not changed using the display cover keyboard, the keyboard lock has to be turned on (KEYLOCK ON). With the keyboard locked the settings can be inspected but not changed. Examples: >keylock <cr> Keylock : OFF >keylock on <cr> Keylock : ON > If anyone tries to change the settings of the barometer using the keyboard with the KEYLOCK ON, the barometer will display NO MODIFICATIONS ALLOWED for a few seconds and then returns to the original display: 32 ___________________________________________________________________ M210194EN-A CHAPTER 4_____________________________________________________________ COMMISSIONING CL ENT Hardware settings Inside the barometer, there is the connector X15 (see FIGURE 4-2) and the dip switch S1 (see FIGURE 4-3). These are used to make the main hardware settings of the PTB220 series digital barometers. With the connector X15, the user can select the RS 232C (RX, TX) or TTL levels for serial communication. With TTL levels, the user also has phase alternatives available for both input (RXD, RXD inverted) and output (TXD, TXD inverted). See page 81 for further information on the waveforms, voltage levels and phases of the RS232C/TTL level serial interface signals. RX/RXD RXD TX TXD TXD X15 FIGURE 4-2 RS 232C/TTL level and phase selections The half duplex two-wire RS485/422 serial interface of the PTB220 series barometers does not require any hardware settings to be made to the barometer. See page 93 for quick reference information on how to use the RS485/422 interface of the PTB220 series digital barometers. Normally, the dip switch S1 settings are all OFF as in FIGURE 4-3 ON S1 OFF SW1 SW3 SW5 SW7 SW2 SW4 SW6 SW8 FIGURE 4-3 Basic dip switch S1 settings VAISALA _________________________________________________________________________ 33 USER'S GUIDE_______________________________________________________________________ An external power control can be used to switch the PTB220 barometer ON/OFF. The control is activated with the switch SW2 in position ON as shown in FIGURE 4-4. The TTL signals are: 0VDC OFF and 5VDC ON. ON S1 OFF SW1 SW3 SW5 SW7 SW2 SW4 SW6 SW8 FIGURE 4-4 External power control ON The pulse output mode is activated and the barometer starts to wait for an external trigger pulse by turning the switch SW3 in position ON as in FIGURE 4-5. See Appendix D for quick reference information on how to set and use the pulse output mode of the PTB220 series digital barometers. ON S1 OFF SW1 SW3 SW5 SW7 SW2 SW4 SW6 SW8 FIGURE 4-5 NOTE Pulse mode ON Switches SW6 and SW7 are usually in position OFF. However, for some specific uses they may be turned ON to emulate other barometers (see page 103 for further details). 34 ___________________________________________________________________ M210194EN-A CHAPTER 4_____________________________________________________________ COMMISSIONING TABLE 4-2 Summarized settings of the dip switch S1. SW1 OFF not used ON SW2 OFF external power control OFF (TTL: 0 VDC) ON external power control ON (TTL: 5 VDC SW3 OFF pulse output mode OFF ON pulse output mode ON ON analog output module**; see page 87 SW4 OFF memory write DISABLE ON memory write ENABLE SW5 OFF not used ON SW6 OFF special emulation mode; see page103 ON SW7 OFF special emulation mode; see page 103 ON SW8 OFF factory settings OFF / user settings ON ON factory settings ON (9600, E, 7, 1, F) ** SW3 has to be ON if the analog output module is installed. NOTE If the analog output module is installed the PULSE output mode is not available VAISALA _________________________________________________________________________ 35 CHAPTER 5_______________________________________________________________ INSTALLATION CHAPTER 5 INSTALLATION Mounting In automatic weather station applications and in other harsh operating environments, the PTB220 series digital barometers have to be installed inside a weather resistant or otherwise protective enclosure. The pressure fitting must also be protected from rain as water may get into the pressure connector and cause errors in the pressure measurement. Please take into a consideration that the pressure fitting supplied with the barometer is not a static pressure head and that the barometer cannot be used successfully as such in turbulent or high speed static wind conditions. NOTE The barometric pressure measurement accuracy quoted for the PTB220 barometers does not include any wind or air conditioning system measurement errors. In benign room conditions, for example in laboratory measurements no further environmental protection is required. In all cases, attention must be paid to proper grounding of the barometer (see page 40). The main dimensions (in mm) and recommended mounting positions of the PTB220 barometers are shown in FIGURE 5-1. VAISALA _________________________________________________________________________ 37 USER'S GUIDE_______________________________________________________________________ 145 133 120 ø6.5 104 65 120 Dimensions and mounting positions of PTB220 barometers FIGURE 5-1 Electrical connections In barometers with RS232C/TTL level serial/pulse interface the pin assignment is as follows: 5 43 21 9 8 76 FIGURE 5-2 9-pin female subD-connector TABLE 5-1 Pin assignment for RS 232C/TTL serial/pulse output PIN 1 2 3 4 5 6 7 8 9 SIGNAL TX with diode TX/TXD/TXD inverted RX/RXD/RXD inverted external power on/off control ground for the RS 232C pulse output (TTL level) ground for supply voltage and TTL level serial interface and pulse output pulse trigger supply voltage (10...30 VDC) In barometers with RS 232C/485/422 serial interface the pin assignment is as follows: 38 ___________________________________________________________________ M210194EN-A CHAPTER 5_______________________________________________________________ INSTALLATION TABLE 5-2 PIN 1 2 3 4 5 6 7 8 9 Pin assignment for RS 232C/485/422 SIGNAL TX with diode TX/TXD/TXD inverted RX/RXD/RXD inverted external power on/off control ground for the RS 232C RS 485/422 LO ground for supply voltage and TTL level serial interface RS 485/422 HI supply voltage (10...30 VDC) In barometers with RS232/analog output, the pin assignment is as follows. PIN 1 2 3 4 5 6 7 8 9 SIGNAL TX with diode TX/TXD/TXD inverted RX/RXD/RXD inverted external power on/off control ground for the RS 232C voltage output (0...5 VDC) / current output (4...20 mA) ground for supply voltage voltage output ground / current output ground supply voltage (10...30 VDC) It is possible to connect multiple PTB220 series barometers to one RS 232C interface by using the terminal ´TX with diode´ of the barometer (see FIGURE 5-3). This feature is useful when several PTB220 series barometers must be fine adjusted and calibrated in one batch. See Appendix F for quick reference information on how to use one RS232C interface for multiple PTB220 series barometers. HOST COMPUTER TX GND RX RX PTB220 # 1 GND TX WITH DIODE RX GND PTB220 # 2 TX WITH DIODE RX GND PTB220 # 3 TX WITH DIODE FIGURE 5-3 Multiple PTB220 barometers on one RS 232C interface VAISALA _________________________________________________________________________ 39 USER'S GUIDE_______________________________________________________________________ The two-wire half duplex RS 485/422 serial interface is the recommended way of connecting the PTB220 series barometers with other intelligent transmitters (see FIGURE 5-4). See page 93 for quick reference information on how to use the RS485/422 interface of the PTB220 series barometers. HOST COMPUTER RX/TX HI LO HI RX/TX LO PTB220 HI RX/TX LO ........... HI RX/TX LO ........... DYNAMIC LINE TERMINATION REQUIRED IF NO DEVICE AT THE END OF THE BUS 120R 33nF PTB220 series barometer connected to a two-wire half duplex RS 485/422 interface FIGURE 5-4 Grounding The PTB220 series digital barometers use several ground potentials. Internally, the critical measurement interface has its own stable analogue ground. Digital circuitry uses the power supply ground of the barometer. The housing of the barometer forms a static shield ground for the barometer. Power supply ground must be connected to the pin 7 of the barometer. For the RS 232C serial interface, a separate ground is provided on pin 5 of the barometer, whereas for TTL level serial communication the pin 7 is recommended. Use pin 7 as ground also for the pulse output in the pulse output mode. The housing can be grounded in two ways. As the shell of the Dconnector is in the same potential with the housing of the barometer, the user can ground the housing by means of the connector shell of the mating connector and the cable braid. In this case, the other end of the cable braid must also be appropriately grounded. In addition, the EMC stability of the barometer is further improved by grounding the barometer housing directly on an electrically conductive mounting surface with a serrated lock washer which breaks the painting of the housing. 40 ___________________________________________________________________ M210194EN-A CHAPTER 5_______________________________________________________________ INSTALLATION The PTB220 series digital barometers comply with the CE norms for electromagnetic compatibility provided that braided cable and proper grounding techniques are used. The use of an unbraided cable may result in digital communication problems and erraneous measurements. Pressure connections The barometer is equipped with a barbed pressure fitting which is ideal for 1/8" internal diameter tubing. If some other pressure fitting need to be used, it is possible to replace the standard barbed fitting. The main pressure connector in the barometer housing has a metric M5 internal thread. It is, however, in practice possible to use pressure fittings with a non-metric 10-32 external thread together with this main pressure connector. Note that the barbed pressure fitting cannot be used in turbulent or high-speed static wind conditions. The barometric pressure measurement accuracy quoted for the PTB220 series digital barometers does not include any wind or air conditioning system induced measurement errors. The pressure fitting must also be protected from rain as water may get into the pressure connector and cause errors in the pressure measurement. The PTB220 barometers are designed to measure the pressure of clean, non-condensing, non-conducting and non-corrosive gases only. VAISALA _________________________________________________________________________ 41 CHAPTER 6________________________________________________________________ OPERATING CHAPTER 6 OPERATING Only a few commands are needed to operate a PTB220 barometer in the RUN, STOP and POLL modes. In the SEND mode and in the PULSE mode no commands are needed. In the RUN or STOP modes the commands R, S and SEND can be used. The user may also use his own SEND command if he has previously specified one using the SCOM command (see Chapter Software settings). In the POLL mode, the barometer responds to a SEND command only if it includes the address of the barometer. OPEN and CLOSE commands are also available for temporary communication with one single barometer. In the SEND mode, no commands are needed. The barometer will automatically output one message at power-up, or when triggering the barometer on using pin 4 of the barometer. In the PULSE mode, the barometer requires a trigger pulse from the host system. In this case, the barometer must be powered-up separately and the pulse trigger signal must be given to the barometer after the settling time has elapsed. RUN and STOP modes TABLE 6-1summarizes the commands that are used in the RUN and STOP modes. In addition, the user may use his own SEND command if he has previously specified one with the SCOM commissioning command. The commands are not case sensitive except for the SCOM command. VAISALA _________________________________________________________________________ 43 USER'S GUIDE_______________________________________________________________________ TABLE 6-1 Commands used in RUN and STOP modes Function starting output stopping output single message output verification message self-diagnostics pressure minimum/maximum tracking pressure limit listing resetting the barometer Command R S SEND V DNOS TRACK PLIM RESET R Starting the continuous output R <cr> This command is used to start continuous outputting in the STOP and RUN modes and in interval output mode (see page 27). Example: >reset <cr> PTB220 / 2.02 >r <cr> 1013.25 hPa 1013.25 hPa 1013.25 hPa ... S Stopping the output S <cr> This command is used to stop the continuous outputting (activated with power-up in RUN mode or using the RUN command). Example: >reset <cr> PTB220 / 2.02 >r <cr> 1013.25 hPa 1013.25 hPa 1013.25 hPa s <cr> > (text invisible) 44 ___________________________________________________________________ M210194EN-A CHAPTER 6________________________________________________________________ OPERATING SEND Outputting a single message only SEND <cr> This command is used to output one message at a time in the STOP and RUN modes. Example: >reset <cr> PTB220 / 2.02 >send <cr> 1013.25 hPa > The user may also use his own previously specified one-message command (see Chapter SCOM command on page 12). V Verification message V <cr> The V command is used to output the verification message of the barometer. The verification message outputs the nominal pressure range of the barometer. >v <cr> VAISALA DIGITAL BAROMETER PTB 220 500.00 to 1100.00 hPa > DNOS Self-diagnostics DNOS <cr> The DNOS command is used to perform a self-diagnostic routine in the barometer. If no errors are found, the barometer outputs a PASS message. In case of error, the barometer outputs an ERR message. Example: >dnos <cr> PASS VAISALA _________________________________________________________________________ 45 USER'S GUIDE_______________________________________________________________________ >dnos <cr> ERR > TRACK Setting the pressure tracking mode on/off TRACK <cr> The TRACK command is used to activate or deactivate the minimum/ maximum pressure tracking mode of the barometer. When activated, the barometer stores in memory the minimum and maximum pressure values measured. At power-up the tracking mode is always deactivated. The serial interface and the local display of the PTB220 series barometers have separate tracking modes. The serial interface TRACK command will not cause pressure tracking limits to be displayed by the local display of the barometer. Activating the display tracking mode will not activate the pressure tracking mode of the serial interface. Example: >track <cr> Min/max track.: >track on <cr> Min/max track.: >track off <cr> Min/max track.: > OFF ON OFF PLIM Pressure limit listing PLIM <cr> The PLIM command is used to list the indicator level of pressure stability, the minimum/maximum pressure tracking levels and the pressure high alarm and low alarm levels. If the minimum/maximum tracking mode is deactivated, only OFF is output instead of the pressure readings. 46 ___________________________________________________________________ M210194EN-A CHAPTER 6________________________________________________________________ OPERATING Example: >track off <cr> Min/max track.: >plim <cr> Stab. level : Max : Min : Hi alarm : Lo alarm : >track on <cr> Min/max track.: >plim <cr> Stab. level : Max : Min : Hi alarm : Lo alarm : > OFF 0.50 hPa OFF OFF 1100.00 hPa 500.00 hPa ON 0.50 1020.31 987.65 1100.00 500.00 hPa hPa hPa hPa hPa If there are two or three pressure transducers in the barometer, the Pdmax setting will also appear in the PLIM listing: >plim <cr> Stab. level Max Min Hi alarm Lo alarm Pd max > : : : : : : 0.50 hPa OFF OFF 1100.00 hPa 500.00 hPa 1.00 hPa RESET Resetting the barometer RESET <cr> The RESET command is used to reset the barometer. All software settings remain in the memory after reset or any power failure. The RESET command must always be given if the serial bus settings, DIP switch settings or the operating mode of the barometer have been changed. Example: >reset <cr> PTB220 / 2.02 > VAISALA _________________________________________________________________________ 47 USER'S GUIDE_______________________________________________________________________ POLL mode TABLE 6-2 summarizes the commands used in the POLL mode. The commands are not case sensitive. TABLE 6-2 Commands used in RUN and STOP modes Function single message output opening a barometer closing a barometer Command SEND a OPEN a CLOSE The POLL mode is used when several PTB220 series barometers are connected to one RS232C serial interface for fine adjustment and calibration in one batch. It is also used when several intelligent transmitters are connected to a half duplex RS 485/422 serial interface. See pages on page 38, on page 91 and on page 93. In the POLL mode the barometer must have a specific address so that the host systems will be able to direct the outputting command to the particular barometer. The addressable SEND a command is used to ask for a single message output from the barometer. The OPEN a command can be used to open a single barometer temporarily to STOP mode. The CLOSE command will restore the POLL mode. SEND Outputting one single message SEND a <cr> where: a = the address of the barometer (0...99) This command is used to output one message from the barometer in the POLL mode (see SMODE command). Example: >addr 7 <cr> Address : >smode poll <cr> Serial mode : POLL >close <cr> line closed send 7 <cr> 1013.25 hPa 7 (text invisible) 48 ___________________________________________________________________ M210194EN-A CHAPTER 6________________________________________________________________ OPERATING OPEN Setting a barometer from POLL mode to STOP mode CLOSE Setting a barometer from STOP mode to POLL mode OPEN a <cr> CLOSE <cr> where: a = the address of the barometer (0 ... 99) These commands are used to set a barometer temporarily to STOP mode and back to POLL mode again. The OPEN command is useful when several barometers are connected to one serial bus and communication with a single barometer is needed using all commands (except for the ? command, see Diagnostic commands on page 66). The CLOSE command is a global command and requires no address. The PTB220 series digital barometers must always be closed after the POLL mode selection. The RESET command and powering-up will close the PTB220 series barometers automatically. Example: >addr 7 <cr> Address : >smode poll <cr> Serial mode : POLL >close <cr> 7 <cr> line closed Example of opening and closing a barometer with address 7: open 7 <cr> PTB (text invisible) 7 line opened for operator commands > Any commands (except for the ? command) can now be used for the barometer with address 7 without affecting other barometers with different addresses connected to the same serial interface. However, if the RESET command is given or the barometer is powered-up, the barometer will automatically return to the POLL mode. VAISALA _________________________________________________________________________ 49 USER'S GUIDE_______________________________________________________________________ Example of closing a barometer: >close <cr> line closed SEND mode In the SEND mode the barometer will automatically output one message at power-up or when triggering the barometer on using pin 4 of the barometer. The trigger signal must be a TTL level signal. TTL HIGH (5 VDC) turns the barometer ON and TTL LOW (0 VDC) turns the barometer OFF. Examples of outputting with the prompt (ECHO ON) and without the prompt (ECHO OFF): >echo <cr> Echo : ON >smode send <cr> Serial mode : SEND >reset <cr> 1013.25 hPa > >echo off <cr> Echo : reset <cr> 1013.25 hPa OFF (text invisible) Example of outputting a minimum amount of (six) characters by excluding the <cr> and <lf> characters, the pressure unit and the decimal point with the FORM command: >form <cr> 4.2 P " " UUUU #r #n ? 6.0 P <cr> >unit Pa P unit : Pa >smode send <cr> Serial mode : SEND >echo off <cr> Echo : OFF reset <cr> 101325 or (power-up) 101325 (text invisible) 50 ___________________________________________________________________ M210194EN-A CHAPTER 6________________________________________________________________ OPERATING PULSE mode In the PULSE output mode, the barometer requires a trigger pulse from the host system. In this case, the barometer must be powered-up separately and the pulse trigger signal must be given to the barometer after the settling time has elapsed. The trigger signal must be a TTL level signal. The pulse output is triggered at the falling edge of the TTL trigger signal from TTL HIGH (5 VDC) to TTL LOW (0 VDC). The pulses are output at TTL level voltages. NOTE See Appendix on page 83 for complete information on how to use the pulse output mode of the PTB220 series barometers. Operating the local display and keyboard The display and keyboard of the PTB220 series barometers is a configuration option. The LCD display has on/off selectable backlight for better readability at any light conditions. The two rows of the display can be defined to indicate different kind of information (see Software settings, DFORM command on page 22). Besides, the measured pressure reading itself, the display can contain e.g. the WMO three-hour pressure trend and pressure tendency code. Error messages will be indicated on the second row, should a problem occur in the barometer. The following basic rules apply to the use of the keyboard: 1. Use ENT key to enter the MENU mode or to acknowledge a new selection. 2. Use CL key to clear a parameter value in order to input a new one or to revert to the original display. 3. Use arrow keys to make a selection between functional alternatives or to enter a new parameter value after clearing the previous one with CL key. 4. Entering a new parameter value may require each character of the value to be entered and acknowledged separately. Any previous value is deleted with the CL key. Scrolling the display with the arrow keys will then cause one of the following characters to appear at a time: space ' ' dash ' - ' decimal point ' . ' number '0 ... 9' VAISALA _________________________________________________________________________ 51 USER'S GUIDE_______________________________________________________________________ 5. Use ENT key to acknowledge a selection. The selected characters then move one step to the left and the next character can be selected. Entering characters is ended by selecting a space ' ' and then by pressing ENT key. Note that modifications made using the keyboard will affect the serial interface settings, too. Only the tracking function is separate for the serial interface and for the display (see Chapter RUN and STOP modes, TRACK command). Only the display contrast can be adjusted if the KEYLOCK is ON. No other modifications are allowed. It is possible to inspect the settings of the barometer using the keyboard although the KEYLOCK has been turned ON. However, the settings cannot be changed and the barometer displays NO MODIFICATIONS ALLOWED message for a few seconds before reverting to the original display. The barometer will automatically return to the original display after a time-out limit of approximately two minutes in case the inspecting is stopped in an uncontrolled way. The MENU mode is entered with the ENT key. Two windows are then available for further selections: Use the arrow keys ↑ and ↓ to scroll the alternatives and the ENT key to acknowledge a selection. Use CL key to revert to the original display. The FIGURE 6-1shows all the available functions and selections of the local display of PTB220 series barometers. 52 ___________________________________________________________________ M210194EN-A CHAPTER 6________________________________________________________________ OPERATING FIGURE 6-1 Available functions and selections of the local display See Chapter Software settings for more information on: - averaging time setting (see AVRG command) - pressure stability indicator setting (see PSTAB command) - pressure difference limit setting (see PDMAX command) - pressure alarm setting (see PLARM command) VAISALA _________________________________________________________________________ 53 USER'S GUIDE_______________________________________________________________________ - serial interface setting (see SERI command) - pressure and temperature unit setting (see UNIT command). See Chapter 3.1 Operating modes for more information on: - measurement setting (see MMODE command). The MTIM setting is automatically selected to be 32 and filter setting FILT OFF when the MMODE FAST is selected using the keyboard. See Chapter 5.1 RUN and STOP modes for more information on: - display pressure tracking (see TRACK command). Note that the serial interface and the display pressure tracking modes are separate functions unaffected by one another. When the display pressure tracking mode is selected using the keyboard, the MIN and MAX pressure readings will appear on the second row of the local display. The MIN pressure reading appears on the left and the MAX pressure reading on the right. Any other information defined using the DFORM command (see Chapter Software settings) for the second row of the display will then be replaced by the display pressure tracking readings. The backlight can be turned on/off only with the keyboard of the PTB220 series barometers. 54 ___________________________________________________________________ M210194EN-A CHAPTER 7__________________________________________________ ADJUSTMENT AND CALIBRATION CHAPTER 7 ADJUSTMENT AND CALIBRATION Introduction The PTB220 series digital barometers can be fine adjusted and calibrated against pressure standards that have high accuracy and stability as well as known traceability to international standards. For Class A barometers, standards with uncertainty of ±70 ppm (±2 standard deviation value) or better should be used. For Class B barometers, electronic working standards with uncertainty of ±150 ppm are recommended. Vaisala includes in these uncertainties the drift of the standard over its calibration interval, for example, electronic working standards must have an initial calibration uncertainty of ± 100 ppm and maximum allowed drift of ± 50 ppm over its calibration interval. The user cannot erase from the memory of barometer the basic pressure and temperature adjustment coefficients entered at the factory. However, the user can make linear and multipoint pressure corrections on the basic adjustment coefficients. The linear and multipoint fine adjustments can be activated, deactivated and changed by the user. The following pressure adjustments are possible for the user: * * * offset adjustment offset/gain adjustment multipoint adjustment at up to eight pressure levels Note that calibration is considered not to involve any adjustments. During calibration, the accuracy of the barometer is verified using a pressure standard and due corrections against the standard are then VAISALA _________________________________________________________________________ 55 USER'S GUIDE_______________________________________________________________________ given in the calibration certificate together with a description of the international pressure traceability chain. In calibration laboratory conditions, the pressure readjustment of a PTB220 series digital barometer is made by first deactivating the linear and multipoint corrections using both the LC OFF and MPC OFF commands. All fine adjustments are then cancelled and the barometer reverts to use the factory set pressure and temperature adjustment coefficients. By pre-calibrating the barometer over the relevant pressure range, the user can define the corrections required for readjustment. The user can select either a simple offset or a twopoint offset/gain readjustment and use the LCI command for this purpose. The MPCI command is used for the more sophisticated multipoint correction capability at up to eight pressure levels. When the new linear and/or multipoint corrections have been entered to the barometer, the corrections are activated with the LC ON and/or MPC ON commands. Finally, the barometer can be calibrated to verify its real accuracy. In field conditions, a minor offset readjustment is usually all that is needed. The user must first check what linear corrections the barometer is currently using before he attempts to readjust the barometer. As the previous linear corrections will disappear when new linear corrections are input, the user has to take into account the previous linear corrections when deciding about the new ones. Calibration at one point at the prevailing pressure level finally verifies that the readjustment has been done correctly. Entering new linear or multipoint corrections will always cancel the previous corrections. It is advisable to write down the previous linear and multipoint corrections so that they will not be lost by mistake. Entering new linear or multipoint corrections or changing their status will also automatically cancel the valid date of calibration of the barometer (see Chapter CALD command). summarizes the adjustment and calibration commands. The commands are not case sensitive. TABLE 7-1 56 ___________________________________________________________________ M210194EN-A CHAPTER 7__________________________________________________ ADJUSTMENT AND CALIBRATION TABLE 7-1 Adjustment and calibration commands (*only with the optional analog output) Function listing corrections linear corrections on/off multipoint corrections on/off entering linear corrections entering multipoint corrections calibration date entering linear corrections * Command CORR LC ON/OFF MPC ON/OFF LCI MPCI CALD DLCI * The linear and multipoint corrections are protected by switch SW4. The switch SW4 is normally in write DISABLE position (OFF) and the user must change it to write ENABLE position (ON) to be able to enter new linear and multipoint corrections to the barometer. ON S1 OFF SW1 SW3 SW5 SW7 SW2 SW4 SW6 SW8 FIGURE 7-1 NOTE Switch SW4 in write ENABLE position (ON) Always remember to return the switch SW4 to write DISABLE position (OFF). CORR Listing linear and multipoint corrections CORR <cr> The CORR command is used to indicate the status of linear and multipoint corrections. In case the status is ON, the corrections and valid date of calibration are listed. The listing varies according to the number of transducers in the barometer. VAISALA _________________________________________________________________________ 57 USER'S GUIDE_______________________________________________________________________ In case of one transducer, the listing looks as follows: >corr <cr> Linear adjustments Multipoint adjustments Reading Correction 499.720 -0.070 599.200 -0.080 698.710 -0.010 801.120 -0.010 900.610 -0.030 947.420 -0.020 1000.100 -0.040 1099.580 -0.040 Calibration date > OFF ON 1997-01-01 In case of two transducers, the listing looks as follows: >corr <cr> Linear adjustments Multipoint adjustments Reading Correction 499.720 -0.070 599.200 -0.080 698.710 -0.010 801.120 -0.010 900.610 -0.030 947.420 -0.020 1000.100 -0.040 1099.580 -0.040 Calibration date > OFF ON Reading Correction 499.710 -0.060 599.170 -0.050 698.670 -0.070 801.090 -0.080 900.570 -0.090 947.380 -0.080 1000.050 -0.090 1099.500 -0.060 1997-01-01 In case of three transducers, the listing looks as follows: >corr <cr> Linear adjustments OFF Multipoint adjustments ON Reading Correction Reading Correction 499.720 -0.070 499.710 -0.060 599.200 -0.080 599.170 -0.050 698.710 -0.010 698.670 -0.070 801.120 -0.010 801.090 -0.080 900.610 -0.030 900.570 -0.090 947.420 -0.020 947.380 -0.080 1000.100 -0.040 1000.050 -0.090 1099.580 -0.040 1099.500 -0.060 Calibration date 1997-01-01 > Reading Correction 499.640 -0.090 599.160 -0.040 698.640 -0.040 801.070 -0.060 900.560 -0.080 947.390 -0.090 1000.060 -0.100 1099.540 -0.100 58 ___________________________________________________________________ M210194EN-A CHAPTER 7__________________________________________________ ADJUSTMENT AND CALIBRATION LC Linear corrections LC x <cr> where: x = ON or OFF The LC command is used to activate or deactivate the linear offset or offset/gain corrections. The linear corrections are protected with switch SW4 (see FIGURE 7-1). The switch SW4 is normally in write DISABLE position (OFF) and the user must change it to write ENABLE position (ON) to be able to turn the linear corrections on or off. NOTE Changing the linear corrections on or off will automatically cancel the valid date of calibration of the barometer (see CALD Storing the new date of calibration command). The listing varies according to the number of transducers in the barometer (see CORR Listing linear and multipoint corrections). Example of linear adjustments performed on a barometer with two transducers: >lc off <cr> Linear adj. : OFF >lc on <cr> Linear adj. : ON Reading Correction 1013.250 -0.100 1013.250 -0.100 > NOTE Reading Correction 800.000 0.050 1000.000 -0.020 Always remember to return the switch SW4 to write DISABLE position (OFF). VAISALA _________________________________________________________________________ 59 USER'S GUIDE_______________________________________________________________________ MPC Multipoint corrections MPC x <cr> where: x = ON or OFF The MPC command is used to activate or deactivate the multipoint corrections. The multipoint corrections are protected with switch SW4 (see FIGURE 7-1). The switch SW4 is normally in write DISABLE position (OFF) and the user must change it to write ENABLE position (ON) to be able to turn the multipoint corrections on or off. NOTE Changing the multipoint corrections on or off will automatically cancel the valid date of calibration of the. The listing varies according to the number of transducers in the barometer (see CORR command). Example of multipoint adjustments performed on a barometer with one transducer: >mpc off <cr> Multipoint adj: OFF >mpc on <cr> Multipoint adjustments Reading Correction 499.720 -0.070 599.200 -0.080 698.710 -0.010 801.120 -0.010 900.610 -0.030 947.420 -0.020 1000.100 -0.040 1099.580 -0.040 > NOTE ON Always remember to return the switch SW4 to write DISABLE position (OFF). 60 ___________________________________________________________________ M210194EN-A CHAPTER 7__________________________________________________ ADJUSTMENT AND CALIBRATION Offset and gain adjustment LCI Entering linear corrections LCI n <cr> where: n = number of the pressure transducer (1, 2 or 3) The LCI command is used to enter new linear offset and offset/gain corrections to the barometer. Note that the user must give the linear corrections to each pressure transducer separately. Entering new linear corrections is protected by switch. The switch SW4 is normally in write DISABLE position (OFF) and the user must change it to write ENABLE position (ON) to be able to enter new linear corrections to the barometer. The previous corrections must first be deactivated using the LC OFF and/or MPC OFF commands. Pre-calibration of the barometer then gives the required new corrections. The new linear corrections will always cancel the previous corrections as well as the valid date of calibration of the barometer (see CALD command). When the new linear corrections have been entered, they must be activated with the LC ON command. Use ESC to abort without executing the command. In the following, an example of performing an offset adjustment for pressure transducer P1 and an offset/gain adjustment for pressure transducer P2 is given. >lc off <cr> Linear adj. : OFF >lci 1 <cr> P1 1. reading ? 1013.25 <cr> correction ? -0.1 <cr> P1 2. reading ? <cr> >lci 2 <cr> 1. reading ? 800.00 <cr> correction ? 0.05 <cr> P2 2. reading ? 1000.00 <cr> correction ? -0.02 <cr> >lc on <cr> Linear adj. : ON Reading Correction Reading Correction 1013.250 -0.100 800.000 0.050 1013.250 -0.100 1000.000 -0.020 > VAISALA _________________________________________________________________________ 61 USER'S GUIDE_______________________________________________________________________ NOTE Always remember to return the switch SW4 to write DISABLE position (OFF). Multipoint adjustment MPCI Entering multipoint corrections MPCI n <cr> where: n = number of the pressure transducer (1, 2 or 3) The MPCI command is used to enter new multipoint corrections to the barometer. Note that the user must give the multipoint corrections to each pressure transducer separately. Entering new multipoint corrections is protected by switch SW4. The switch SW4 is normally in write DISABLE position (OFF) and the user must change it to write ENABLE position (ON) to be able to enter new linear and multipoint corrections to the barometer. The previous corrections must first be deactivated using the LC OFF and/or MPC OFF commands. Precalibration of the barometer then gives the required corrections. The new multipoint corrections will always cancel the previous corrections as well as the valid date of calibration of the barometer (see CALD command). When entering new multipoint corrections, always start at the low end and then go up the pressure range. Use ESC to abort without executing the command. When the new multipoint corrections have been entered, they must be activated with the MPC ON command. In the following, an example of performing a multipoint adjustment for pressure transducer P1 is given. >lc off <cr> Linear adj. : >mpc off <cr> Multipoint adj: >mpci 1 <cr> P1 1. reading correction P1 2. reading OFF OFF ? 499.72 <cr> ? -0.07 <cr> ? 599.20 <cr> 62 ___________________________________________________________________ M210194EN-A CHAPTER 7__________________________________________________ ADJUSTMENT AND CALIBRATION correction ? -0.08 <cr> 3. reading ? 698.71 <cr> correction ? -0.01 <cr> P1 4. reading ? 801.12 <cr> correction ? -0.01 <cr> P1 5. reading ? 900.61 <cr> correction ? -0.03 <cr> P1 6. reading ? 947.42 <cr> correction ? -0.02 <cr> P1 7. reading ? 1000.10 <cr> correction ? -0.04 <cr> P1 8. reading ? 1099.58 <cr> correction ? -0.04 <cr> >mpc on <cr> Multipoint adj: ON Reading Correction 499.720 -0.070 599.200 -0.080 698.710 -0.010 801.120 -0.010 900.610 -0.030 947.420 -0.020 1000.100 -0.040 1099.580 -0.040 > P1 NOTE Always remember to return the switch SW4 to write DISABLE position (OFF). Calibration Calibration is considered not to involve any adjustments. During calibration, the accuracy of the barometer is verified using a suitable pressure standard and due corrections are then given in the calibration certificate together with a description of the international traceability chain. After having completed the calibration, the user should store the new valid date of calibration in the memory of the barometer. This can be done with the CALD command. VAISALA _________________________________________________________________________ 63 USER'S GUIDE_______________________________________________________________________ CALD Storing the new date of calibration CALD yyyy-mm-dd <cr> This command is used to store the new valid date of calibration in the memory of the barometer. Example: >cald <cr> Calibration date >cald 1997-01-01 <cr> Calibration date > ????-??-?? 1997-01-01 Changing the status (ON/OFF) of the linear or multipoint corrections or entering new linear or multipoint corrections will automatically cancel the valid date of calibration. NOTE Always remember to return the switch SW4 to write DISABLE position (OFF). 64 ___________________________________________________________________ M210194EN-A CHAPTER 8____________________________________________ SELF-TESTING AND PROBLEM HANDLING CHAPTER 8 SELF-TESTING AND PROBLEM HANDLING Returning the serial communication parameters As the barometer software and hardware settings may not always be known, it is important that the barometer can be returned to factory settings. To do this, set the dip switch S1 on the CPU board as in FIGURE 8-1. All switches except the SW8 must be OFF. In addition, the serial interface must be set for basic RS 232C operation according to FIGURE 8-2. With these selections, one single barometer can be operated through the RS 232C serial interface using factory serial bus settings as in TABLE 8-1. Returning the SW8 to OFF will restore the original application specific software settings. ON S1 OFF SW1 SW3 SW5 SW7 SW2 SW4 SW6 SW8 FIGURE 8-1 Factory settings for the dip switch S1 RX/RXD RXD TX TXD TXD X15 FIGURE 8-2 Basic RS 232C settings VAISALA _________________________________________________________________________ 65 USER'S GUIDE_______________________________________________________________________ TABLE 8-1 Serial interface factory settings Baud rate Parity Data bits Stop bits Duplex 9600 even 7 1 full duplex Diagnostic commands The PTB220 series digital barometers respond to a set of diagnostic commands, which are useful for analyzing the basic settings and general operation of the barometers. The diagnostic commands are listed in TABLE 8-2 Diagnostic commands Function basic information on settings software version serial number outputting error messages testing transducer operation listing transducer coefficients testing pulse output mode Command ? VERS SNUM CPU ERRS TEST n Cn PTEST ? Basic information on the barometer settings ? <cr> The ? command lists the basic information of the barometer. >? Software version Serial number Configuration Linear adjustments Multipoint adjustments Calibration date Baud Parity Data Stop Dpx Echo Sending mode Measurement mode Pulse mode Address Output interval PTB220 / 2.02 P1234567 1 OFF ON 1997-01-01 9600 E 7 1 F ON STOP NORMAL OFF SLOW LOW 0 0 s 0.0 66 ___________________________________________________________________ M210194EN-A CHAPTER 8____________________________________________ SELF-TESTING AND PROBLEM HANDLING Output format Error output format SCOM format Pressure unit Temperature unit Averaging time > NOTE 4.2 P " " UUUU #r #n hPa 'C 1.0 s This command must be used only for one barometer at a time. Any PTB220 series barometer will always respond to ?-command whatever its settings are, provided that the serial interface settings are correct. Should the serial interface settings not be known see Chapter Returning the barometer to the factory settings on page 65. VERS Software version VERS <cr> The VERS command is used to output the software version of the barometer. >vers <cr> PTB220 / 2.02 > SNUM Serial number SNUM CPU <cr> The SNUM command is used to output the serial number of the barometer. >snum cpu CPU serial no : P1234567 > ERRS Error message output ERRS <cr> The ERRS command is used to print the error messages. The command outputs an error code and an error description: VAISALA _________________________________________________________________________ 67 USER'S GUIDE_______________________________________________________________________ >errs <cr> E00 Nothing special to report > Complete list of error codes: E00 E10 E20 E11 E14 E21 E24 E31 E41 E51 E61 E71 E12 E22 E32 E42 E52 E62 E72 E13 E23 E33 E43 E53 E63 E73 Nothing special to report CPU EEPROM ackn. error CPU EEPROM csum error P1 EEPROM ackn. error DAC EEPROM ackn. error P1 EEPROM csum error DAC EEPROM csum error P1 serial number error P1 f out of range P1 y-value out of range P1 pressure out of range P1 P difference too large P2 EEPROM ackn. error P2 EEPROM csum error P2 serial number error P2 f out of range P2 y-value out of range P2 pressure out of range P2 P difference too large P3 EEPROM ackn. error P3 EEPROM csum error P3 serial number error P3 f out of range P3 y-value out of range P3 pressure out of range P3 P difference too large TEST n Testing transducer operation TEST n <cr> where n = number of the pressure transducer (1, 2 or 3) The TEST n command is used to output various measured quantities and calculated values that characterize the measurement performed by a transducer. For transducer P1, the listing looks as follows: >test 1 <cr> 204736 254733 13.8283 11.1142 0.57134 0.76660 1033.553 1033.313 1033.313 1033.313 > 321328 8.8108 -0.74368 1033.313 -0.010 246633 11.4792 0.04356 1033.313 -0.007 231962 12.2053 26.1 1033.313 0.010 For transducers P2 and P3, the listings can be obtained in a similar way. 68 ___________________________________________________________________ M210194EN-A CHAPTER 8____________________________________________ SELF-TESTING AND PROBLEM HANDLING C n Listing transducer coefficients C n <cr> where n = number of the pressure transducer (1, 2 or 3) The C n command is used to list all internal coefficients of a transducer. These coefficients are for factory use only and they cannot be changed by the user. For transducer P1, the listing looks as follows: >c 1 <cr> Y03 : Yp : Xp : Zp : R : A0 : A1 A2 A3 A4 A5 Offset Gain Zero Yt Xt Zt Rt A0 Offset Gain Low High > : : : : : : : : : : : : : : : : : 6408 18400 929 0 25 32501 -12947 -1538 -147 -18 0 0 0 0 10000 0 4197 4 5104 0 0 500 1100 0 5283 0 0 120 118 -3 120 -96 -3 -1 0 175 58 0 11 0 0 0 0 498 0 32446 5288 0 0 0 For transducers P2 and P3, the listings can be obtained in a similar way. PTEST Testing pulse output mode PTEST <cr> The PTEST command is used to test the operation of pulse output mode. The PTEST command outputs the pressure reading or some other user defined pressure reading in the form of a pulse output. The pulses come out soon after the PTEST command is given to the barometer. VAISALA _________________________________________________________________________ 69 USER'S GUIDE_______________________________________________________________________ The response to the PTEST command in the serial interface consists of the pressure reading, pressure reading corrected with defined offset and the number of pulses to be output. See the PULSE command in Chapter Operating modes for information on how to make the settings of pulse output mode. The switch SW3 may be in position ON or OFF (see Chapter Hardware settings) when the PTEST command is being used. Examples with output of measured pressure: >pulse <cr> ON SLOW LOW 0.0 >ptest <cr> 1013.250 1013.250 10133 >pulse slow low -800 <cr> ON SLOW LOW -800.0 >ptest <ccr> 1013.250 213.250 2133 > Examples with output of pre-defined pressure (e.g. 1000 hPa): >pulse <cr> ON SLOW LOW 0.0 >ptest 1000 <cr> 1000.000 1000.000 10000 >pulse slow low -800 <cr> ON SLOW LOW -800.0 >ptest 1000 <cr> 1000.000 200.000 2000 > In case of an error, there will be no pulse output from the barometer despite an external trigger pulse. This error handling technique ensures that a host system cannot receive erroneous pressure readings from a PTB220 series barometer. 70 ___________________________________________________________________ M210194EN-A CHAPTER 9____________________________________________________ TECHNICAL SPECIFICATIONS CHAPTER 9 TECHNICAL SPECIFICATIONS Barometric pressure Operating range 50...1100 hPa, 500...1100 hPa Pressure ranges Temperature range operating with local display storage with local display Humidity range Accuracy -40 ... +60 ºC 0 ... +60 ºC -60 ... +60 ºC -20 ... +60 °C non-condensing Pressure range: 500...1100 hPa 0.1 % R1 class A 50...1100 hPa class B Linearity* ± 0.05 hPa ± 0.05 hPa ± 0.10 hPa ± 0.20 hPa Hysteresis* ± 0.02 hPa ± 0.03 hPa ± 0.03 hPa ± 0.08 hPa Repeatability* ± 0.02 hPa ± 0.03 hPa ± 0.03 hPa ± 0.08 hPa Calibration uncertainty** ± 70 ppm ± 0.07 hPa ± 0.15 hPa ± 0.20 hPa Accuracy at +20 *C*** ± 0.10 hPa ± 0.20 hPa ± 0.30 hPa ± 0.1 hPa ± 0.1 hPa ± 0.15 hPa ± 0.25 hPa ± 0.1 hPa / year ± 0.30 hPa ± 0.45 hPa 0.20 hPa/year ±100 ppm **** Temperature dependence Total accuracy Long-term stability 1 Accuracy specifications of Class A barometer in the measuring area limited to 800 ... 1100 hPa pressure range and temperature of +20 ºC. * Defined as the ±2 standard deviation limits of end-point nonlinearity, hysteresis error or repeatability error. ** Defined as ±2 standard deviation limits of inaccuracy of the working standard including traceability to NIST. VAISALA _________________________________________________________________________ 71 USER'S GUIDE_______________________________________________________________________ *** Defined as the root sum of the squares (RSS) of end-point nonlinearity, hysteresis error, repeatability error and calibration uncertainty at room temperature. **** Defined as ±2 standard deviation limits of temperature dependence over the operating temperature range. General (* factory setting) Supply voltage Supply voltage sensitivity Current consumption operation mode with local display hardware shutdown mode with analog module with analog module and local display Serial I/O code parity data bits stop bits Pulse output Pressure units 10 ... 30 VDC, reverse polarity protected negligible < 30 mA < 50 mA < 0.1 mA < 50 mA < 75 mA full duplex RS 232C * or bidirectional TTL level or RS 485/422 half duplex (optional) ASCII even*, odd, none 7* or 8 1* or 2 TTL level pulses at 5 kHz or 50 kHz hPa*, kPa, Pa, mbar, inHg, mmHg, torr, mmH2O, psia 300, 600, 1200, 2400, 4800, 600* Baud rates Resolution Class A 0.01 hPa* Class B 0.1 hPa* Settling time at power-up (one sensor) Class A 4 seconds* Class B 3 seconds* Response time (one sensor) Class A 2 seconds* Class B 1 second* fast measurement mode 0.2 seconds* Acceleration sensitivity negligible 72 ___________________________________________________________________ M210194EN-A CHAPTER 9____________________________________________________ TECHNICAL SPECIFICATIONS Mechanics Pressure connector Pressure fitting Maximum pressure limit Minimum pressure limit Electrical connector Housing Weight M5 (10-32) internal thread barbed fitting for 1/8" I.D. tubing 5000 hPa abs. 0 hPa female 9-pin subD-connector epoxy painted aluminium 1 kg Dimensions in mm (inches): 25.6 (1.01) 65 (2.56) 120 (4.72) 145 (5.71) 133 (5.24) FIGURE 9-1 120 (4.72) 139.5 (5.49) 104 (4.09) 6.5 (0.26) Dimensions of the PTB220 barometers Electromagnetic compatibility The PTB220 series barometers are designed to comply with the CE norms for electromagnetic compatibility. The condition for this compliance is the use of braided cables and proper grounding techniques. The PTB220 barometers have successfully passed the following emission and immunity test. VAISALA _________________________________________________________________________ 73 USER'S GUIDE_______________________________________________________________________ EN 61326-1:1997 +Am 1:1998, Electrical equipment for measurement, control and laboratory use - EMC requirements; Generic environment. Test methods: Emission Radiated emissions CISPR16 class B (CISPR22 Class 22) Immunity Electrostatic discharge (ESD) EM field EFT Burst Surge Conducted RF EN/IEC 61000-4-2 EN/IEC 61000-4-3 EN/IEC 61000-4-4 EN/IEC 61000-4-5 EN/IEC 61000-4-6 Options Analog output module Output range Resolution Total accuracy (15...30 °C) Class A Class B * Factory setting 0...5 V *, 4...20 mA 4 Pa ± 0.25 hPa ± 0.30 hPa Load resistance for the voltage output is 10...500 kΩ and for the current output it is 0...500 Ω. (The module provides a secondary barometer output and it is supplied without a calibration certificate.) Accessories With the PTB220CASE, barometers can be converted into portable units to be used as traveling and transfer standards. Please note that the barometer must have the following features: − − − − − 1, 2 or 3 pressure transducers class A accuracy local display RS232/485 serial interface Quick connector 19886 Gasket 74 ___________________________________________________________________ M210194EN-A CHAPTER 9____________________________________________________ TECHNICAL SPECIFICATIONS 25328 Quick coupling 25329 Tube fitting The PTB220CASE kit includes an oak case, a sealed lead acid battery and recharging electronics (order code: PTB220CASE). VAISALA _________________________________________________________________________ 75 APPENDIX A __________________________________________________ HARDWARE CONFIGURATIONS APPENDIX A HARDWARE CONFIGURATIONS FIGURE A-1 FIGURE A-2 Configuration with one pressure transducer Configuration with two pressure transducers VAISALA _________________________________________________________________________ 77 USER'S GUIDE_______________________________________________________________________ FIGURE A-3 Configuration with three pressure transducers FIGURE A-4 Configuration with two pressure transducers and two pressure ports 78 ___________________________________________________________________ M210194EN-A APPENDIX B ___________________________________________________________PIN ASSIGNMENTS APPENDIX B PIN ASSIGNMENTS The pin assignment of the 9-pin female subD-connector of the PTB220 series digital barometers seen from the front: 5 43 21 9 8 76 In barometers with RS232C/TTL level serial/pulse output interface, the pin assignment is as follows: PIN 1 2 3 4 5 6 7 SIGNAL TX with diode TX/TXD/TXD inverted RX/RXD/RXD inverted external power on/off control ground for the RS 232C pulse output (TTL level) ground for supply voltage and TTL level serial interface and pulse output 8 pulse trigger 9 supply voltage (10...30 VDC) In case a common ground is needed for both the power supply and the serial interface, the pin 7 should be used as the common ground. In barometers with RS 232C/485/422 serial interface the pin assignment is as follows: PIN 1 2 3 4 5 6 7 8 9 SIGNAL TX with diode TX/TXD/TXD inverted RX/RXD/RXD inverted external power on/off control ground for the RS 232C RS 485/422 LO ground for supply voltage and TTL level serial interface RS 485/422 HI supply voltage (10...30 VDC) VAISALA _________________________________________________________________________ 79 USER'S GUIDE_______________________________________________________________________ In barometers with RS232/analog output, the pin assignment is as follows. PIN 1 2 3 4 5 6 7 8 9 SIGNAL TX with diode TX/TXD/TXD inverted RX/RXD/RXD inverted external power on/off control ground for the RS 232C voltage output (0...5 VDC) / current output (0...20 mA) ground for supply voltage voltage output ground / current input ground supply voltage (10...30 VDC) 80 ___________________________________________________________________ M210194EN-A APPENDIX C __________________________________________ RS232C/TTL LEVEL SERIAL INTERFACE APPENDIX C RS232C/TTL LEVEL SERIAL INTERFACE The Appendix C shows connection of handshaking lines and the wave forms, voltage levels and phases of the RS232C/TTL level serial interface signals. Handshaking lines (DCD, CTR, DSR, RTS and CTS) may have to be connected at the host system end as illustrated below: 9-pin D connector 25-pin D connecto 1 2 3 4 5 6 7 8 9 1 2 3 4 5 6 7 8 9 ... 20 ... 25 DCD DTR DSR RTS CTS RTS CTS DSR DCD DTR The next picture (below) shows a typical RS232C RX input signal (upper signal) and TTL level serial RXD input signal (lower signal) at baud rate 9600. The vertical scale is 10V/div for upper signal and 2V/div for lower signal. The ground level for each signal is shown with a small arrow at the right. At the left, the signals are at rest. The RXD inverted input signal has opposite phase compared to the RXD signal shown here. VAISALA _________________________________________________________________________ 81 USER'S GUIDE_______________________________________________________________________ The next picture (below) shows a typical RS232C TX output signal (upper signal) and TTL level serial TXD output signal (lower signal) at baud rate 9600. The vertical scale is 5V/div for upper signal and 2V/div for lower signal. The ground level is shown with a small arrow at the right. At the left, the signals are at rest. The next picture (below) shows a typical RS232C TX output signal (upper signal) and TTL level serial TXD inverted output signal (lower signal) at baud rate 9600. The vertical scale is 5V/div for upper signal and 2V/div for lower signal. The ground level is shown with a small arrow at the right. At the left, the signals are at rest. 82 ___________________________________________________________________ M210194EN-A APPENDIX D ____________________________________________________ PULSE OUTPUT MODE APPENDIX D PULSE OUTPUT MODE NOTE The pulse output mode can be used with hPa/mbar pressure units only. The pulse output mode of the PTB220 series barometers is useful when no serial interface is available in the host system. A standard pulse counter interface is all that is needed to count the number of pulses output by the barometer. The host system must create a trigger pulse for the barometer, and reset and open the gate of the counter to be able to receive the pulses. The pulse counter must be capable of measuring pulse rates up to 5 kHz or 50 kHz. The trigger pulse must be a TTL level signal. The pulse output of the PTB220 series barometers is triggered at the falling edge of the trigger pulse. The pulses are then output within 1 to 100 ms depending on the internal status and settings of the barometer. The recommended procedure is to first reset and open the gate of the counter and then to give the trigger pulse to the barometer. The gate-open time must be long enough to allow enough time for all pulses to be output by the barometer. The pulse output and trigger input signal levels are at 5VDC level when the barometer is outputting no pulses. The trigger pulse can be a positive pulse or negative pulse but its duration must be minimum 1 µs. The figure below illustrates the timing principle of pulse output mode: trigger pulse min. 1 us, trigger at falling edge of the pulse pulse output starts within 1...100 ms from trigger output pulses counter gate open VAISALA _________________________________________________________________________ 83 USER'S GUIDE_______________________________________________________________________ The figure below illustrates in practice the falling edge of the trigger pulse (lower signal) and the start of pulse outputting (upper signal). The gate-open time may be calculated in practice using a simple formula: maximum number of output pulses pulse rate (Hz) + 0.5 ... 1 second (D-1) If SLOW pulse rate (appr. 5 kHz) and LOW resolution (0.1 hPa/mbar) and no pressure offset have been defined using the PULSE command then the barometer will output maximum 11.000 pulses at 1100 hPa/mbar pressure. The gate-open time could be 3 seconds. If FAST pulse rate (appr. 50 kHz) and HIGH resolution (0.01 hPa/mbar) and no pressure offset have been defined using the PULSE command, the PTB220 series barometer will output a maximum of 110.000 pulses at 1100 hPa/mbar pressure. The gate-open time could be 3 seconds. If FAST pulse rate (appr. 50 kHz), HIGH resolution (0.01 hPa/mbar) and 900 hPa/mbar pressure offset have been defined using the PULSE command, the PTB220 series barometer will output a maximum of 20.000 pulses at 1100 hPa/mbar pressure. The gate-open time could be 1 second. If FAST pulse rate (appr. 50 kHz) and LOW resolution (0.1 hPa/mbar) and no pressure offset have been defined using the PULSE command, the PTB220 series barometer will output a maximum of 11.000 pulses 84 ___________________________________________________________________ M210194EN-A APPENDIX D ____________________________________________________ PULSE OUTPUT MODE at 1100 hPa/mbar pressure. The gate-open time could be 0.5 ... 1 second. The pulse output mode settings must be made on two levels: - software settings - hardware settings. Example of software settings for the pulse output mode: >pulse <cr> OFF SLOW LOW 0.0 >pulse on slow low <cr> ON SLOW LOW 0.0 >pulse on fast high -800 <cr> ON FAST HIGH >pulse off <cr> OFF FAST HIGH > (note the negative sign of pressure offset) -800.0 -800.0 As a hardware setting the user must set the switch SW3 to the position ON (see Hardware settings) for the barometer to start to wait for an external trigger pulse. ON S1 OFF SW1 SW3 SW5 SW7 SW2 SW4 SW6 SW8 The pulse output mode can be tested through the RS232C serial interface using the PTEST command (see Diagnostic commands). The switch SW3 may be in position ON or OFF (see Hardware settings) when the PTEST command is being used. Examples of pulse output mode testing: >pulse <cr> ON SLOW LOW 0.0 >ptest <cr> 1013.250 1013.250 10133 (outputting prevailing pressure) >pulse slow low -800 <cr> ON SLOW LOW -800.0 >ptest <cr> 1013.250 213.250 2133 VAISALA _________________________________________________________________________ 85 USER'S GUIDE_______________________________________________________________________ >pulse <cr> ON SLOW LOW 0.0 >ptest 1000 <cr> (outputting pre-defined pressure 1000.0 hPa) 1000.000 1000.000 10000 >pulse slow low -800 <cr> ON SLOW LOW -800.0 >ptest 1000 <cr> 1000.000 200.000 2000 > NOTE In case of an error in a PTB220 series barometer, there will be no pulse output from the barometer despite an external trigger pulse. This error handling technique ensures that a host system can not receive erroneous pressure readings from a PTB220 series barometer. NOTE If the analog output module is installed the PULSE output mode cannot be used. 86 ___________________________________________________________________ M210194EN-A APPENDIX E ___________________________________________________________ ANALOG OUTPUT APPENDIX E ANALOG OUTPUT The optional analog output module has two selectable operating modes: current (4...20mA) and voltage (0...5V). There are four additional serial commands in use for operating the barometer having the analog output module. NOTE The lower end of voltage output range is not exactly 0V but ~3mV NOTE The dip switch SW3 has to be ON when there is the analog output module installed in the PTB220 series barometer. AMODE x <cr> where: x = 0 (voltage output mode) or 1 (current output mode) The operating mode can be changed by using the command AMODE. Plain command AMODE without 0/1 shows the operating mode in use. Examples of selecting analog output mode: >amode 1<cr> Analog output : 4 ... 20 mA > >amode 0<cr> Analog output : 0 ... 5 V > ASCL <cr> The ASCL command is used to scale the pressure range of the analog output module. The software requests a lower and an upper pressure limit. The lower pressure limit corresponds to 4mA or 0V and the upper limit to 20mA or 5V. VAISALA _________________________________________________________________________ 87 USER'S GUIDE_______________________________________________________________________ Examples of setting the pressure limits: >ascl<cr> P Low : 500 ? P High : 1100 ? > 800 1100 (0V/4mA = 800 hPa) (5V/20mA = 1100 hPa) ITEST x.xx <cr> where: x = current or voltage value to be checked The operation of the analog output can be tested by forcing the output to given values, which can be measured with a current/voltage meter from the analog output. The output signal is locked during the time ITEST is performed, and is not affected by pressure changes. Plain command ITEST returns the barometer to show pressure. Examples of using ITEST: >itest 3<cr> 3.0000000 0.6000000 32295 > where: 3.0000000 = output value 0.6000000 = ratio of output value and full range 32295 = input value of D/A converter (range 0-65535) >itest<cr> 993.9170530 > DLCI n<cr> where: n = number of the pressure transducers (1, 2 or 3) The DLCI command is used to give offset/gain corrections to the analog output. The analog output has been calibrated at the factory and since it is very stable, the adjustment should be performed only when there is a strong reason to believe that it has changed. NOTE For the adjustment, use an accurate and calibrated current/voltage meter only. 88 ___________________________________________________________________ M210194EN-A APPENDIX E ___________________________________________________________ ANALOG OUTPUT 1. Open the cover of the barometer and set the dip switch SW4 to upward position (ON). 2. Use the serial line to give the command LC OFF, which deactivate the linear correction. 3. Give the command ITEST X1 and measure the output current / voltage. X1 is a value close to the lower end of full range, for example, 0.5 in voltage or 5 in current output mode. 4. Give the command ITEST X2 and measure the output current/voltage. X2 is a value close to the upper end of full range, for example, 4.5 in voltage or 19 in current output mode. 5. Calculate the gain and offset corrections using following equations. The parameters are in milliamperes or volts. Gain = ItesX 2 − ItestX 1 MeasX 2 − MeasX 1 Offset = ItestX 1 − Gain ⋅ MeasX 1 (E-1) (E-2) 6. The corrections are given with the command DLCI. Please note that the programme requests the corrections for both analog modes. Give the calculated factors only and acknowledge the values with enter (<cr>). The parameters not to be changed can be passed with enter (<cr>). Example of calculating and giving the linear an offset/gain corrections: ItestX1 = 0.5 V MeasX1 = 0.502 V ItestX2 = 4.5 V MeasX2 = 4.506 V Offset = -0.001499 Gain = 0.999001 >dlci U offset : ? -0.001499<cr> U gain : ? 0.999001<cr> I offset : ? <cr> I gain : ? <cr> CORRECTIONS SAVED > 7. Activate the linear correction with the command LC ON and reset the barometer. 8. The correction can be checked with command ITEST x, where x is 0...5V or 4...20mA. VAISALA _________________________________________________________________________ 89 USER'S GUIDE_______________________________________________________________________ 9. Remember to restore the dip switch SW4 (OFF). NOTE Entering new linear corrections will always cancel the previous corrections. It is advisable to write down the factory set linear corrections so that they will not be lost by mistake. NOTE When using the analog output, the corrections are performed only if the LC is activated (see LC command on page 59) Pin assignment In barometers with RS232/analog output, the pin assignment is as follow. PIN 1 2 3 4 5 6 7 8 9 SIGNAL TX with diode TX/TXD/TXD inverted RX/RXD/RXD inverted external power on/off control ground for the RS 232C voltage output (0...5 VDC) / current output (4...20 mA) ground for supply voltage voltage output ground / current output ground supply voltage (10...30 VDC) Load resistance for the voltage output is 10...500 kΩ and for the current output it is 0...500 Ω. 90 ___________________________________________________________________ M210194EN-A APPENDIX F _________________________________ MULTIPLE PTB220 BAROMETERS ON RS232C APPENDIX F MULTIPLE PTB220 BAROMETERS ON RS232C It is possible to connect multiple PTB220 series digital barometers on one RS232C interface for example for fine adjustment and calibration of several barometers in one batch. The PTB220 series barometers have a special transmission terminal for this kind of use as pin 1 (TX with diode) has a built-in diode in series with the TX line. The diode protects the output stage of a barometer when some other PTB220 series barometer is speaking on the line. The host computer must have adequate buffering to be able to handle multiple PTB220 series barometers. RX PTB220 # 1 GND TX WITH DIODE HOST COMPUTER TX GND RX RX GND PTB220 # 2 TX WITH DIODE RX GND PTB220 # 3 TX WITH DIODE To be able to use multiple PTB220 series barometers on one RS232C interface the user must first set an address for each barometer and then activate the POLL/CLOSE mode. Then the barometers can be connected to the same RS232C interface and they can be polled by the SEND command or by using the OPEN/POLL commands. See Chapter Operating modes, SMODE command and Chapter POLL mode, SEND and OPEN/CLOSE commands for information on how to set and use the PTB220 series barometers in POLL mode. Example of required software commands: >smode <cr> Serial mode : STOP >addr 7 <cr> Address : >smode poll <cr> Serial mode : POLL >close <cr> line closed send 7 <cr> 1013.25 hPa 7 <cr> (text invisible) VAISALA _________________________________________________________________________ 91 APPENDIX G ______________________OPTIONAL RS485/422 INTERFACE OF PTB220 BAROMETERS APPENDIX G OPTIONAL RS485/422 INTERFACE OF PTB220 BAROMETERS The two-wire non-isolated half duplex RS 485/422 serial interface is the recommended way of connecting the PTB220 series barometers with other intelligent transmitters. HOST COMPUTER RX/TX HI LO HI RX/TX LO PTB220 HI RX/TX LO ........... HI RX/TX LO ........... DYNAMIC LINE TERMINATION REQUIRED IF NO DEVICE AT THE END OF THE BUS 120R 33nF At the ends of the serial bus there must be a PTB220 series barometer, a dynamic line adapter (120 Ω resistor in series with a 33 nF capacitor) or a line master. If a branch line is made with a junction box, the branch should be shorter than 3 meters. To use PTB220 series barometers on RS485/422 interface the user must select half duplex operation, set an address for each barometer and activate the POLL/CLOSE mode. The barometers can then be polled by the SEND command or by using the OPEN/POLL commands (see pages 12 and 48). The time interval setting allows the user to enter a stop (S) command if a continuous outputting (R) command has been given by mistake (see page 27). NOTE 1. The sending of PTB220 is controlled with XON/OFF (software handshaking). 2. The buffer of the barometer can be cleared with <cr>. Example of required software commands: >seri <cr> 9600 E 7 1 F >seri H <cr> 9600 E 7 1 H >intv 1 s <cr> Output intrv. : (select half duplex serial operation) (select at least 1 second outputting interval) 1 s VAISALA _________________________________________________________________________ 93 USER'S GUIDE_______________________________________________________________________ >addr 7 <cr> Address : >smode poll <cr> Serial mode : POLL >reset <cr> send 7 <cr> 1013.25 hPa (select address of the barometer) 7 <cr> (select the POLL mode) (resetting will activate the new settings) (no title will appear after reset in POLL mode) (text invisible) The next picture (below) shows typical RS485/422 differential input signals RS485/422 LO (upper signal) and RS485/422 HI (lower signal) at baud rate 9600. The vertical scale is 2V/div for both signals. The ground level for each signal is shown with a small arrow at the right. At the left, the signals are at rest. The next picture (below) shows typical RS485/422 differential output signals RS485/422 LO (upper signal) and RS485/422 HI (lower signal) at baud rate 9600. The vertical scale is 2V/div for both signals. The ground level for each signal is shown with a small arrow at the right. At the left, the signals are at rest. 94 ___________________________________________________________________ M210194EN-A APPENDIX G ______________________OPTIONAL RS485/422 INTERFACE OF PTB220 BAROMETERS VAISALA _________________________________________________________________________ 95 APPENDIX H _______________________________________________ SERIAL INTERFACE COMMANDS APPENDIX H SERIAL INTERFACE COMMANDS Commissioning commands Function sending mode measurement mode pulse mode settings serial bus settings echo on / off output format pressure resolution pressure trend pressure tendency error status stability indicator checksum error output format display format pressure and temperature units averaging time setting output interval address of the barometer user specific SEND command pressure stability indicator pressure alarm levels (HI and LO) pressure difference limit keyboard locking analog output mode* (0=0...5V, 1=4...20mA) scaling analog output * only with the optional analog output Command SMODE MMODE PULSE SERI ECHO FORM FORM FORM FORM FORM FORM FORM EFORM DFORM UNIT AVRG INTV ADDR SCOM PSTAB PLARM PDMAX KEYLOCK AMODE* ASCL* Operating commands Function starting the output stopping the output single message output verification message self-diagnostics pressure minimum/maximum tracking pressure limit listing control of a barometer in POLL mode resetting Command R S SEND V DNOS TRACK PLIM OPEN,CLOSE RESET VAISALA _________________________________________________________________________ 97 USER'S GUIDE_______________________________________________________________________ Maintenance commands Function listing linear and multipoint corrections linear corrections on/off entering linear corrections multipoint corrections on/off entering multipoint corrections calibration date entering linear corrections of analog output * only with the optional analog output Command CORR LC ON/OFF LCI MPC ON/OFF MPCI CALD DLCI* Diagnostic commands Function basic information on settings software version serial number outputting error messages testing transducer operation listing transducer coefficients testing pulse output mode testing output * only with the optional analog output Command ? VERS SNUM CPU ERRS TEST n Cn PTEST ITEST* 98 ___________________________________________________________________ M210194EN-A APPENDIX I ________________________________________________________________ CHECKSUM APPENDIX I CHECKSUM With a CHECKSUM form the user can check that the data sent by the barometer has not changed in transfer line. The CHECKSUM format can be output with 4 (CS4) or 2 (CS2) hex numbers. The PTB220 calculates the checksum value of all the numbers set before the parameter CS4/CS2. >form<cr> 4.2 P " " CS4 #r#n ? > >send<cr> 994.16 017B > (Please note, there is a space between P and " "-marks) In following there is an example of checksum calculation of number 1010.09. 1 0 1 0 . 0 9 CS4 CS2 31 hex 30 hex 31 hex 30 hex 2E hex 30 hex 39 hex 20 hex (space) 179 hex (sum of hex values) 0179 79 VAISALA _________________________________________________________________________ 99 APPENDIX J ____________________________________________________PRESSURE TENDENCY APPENDIX J PRESSURE TENDENCY The World Meteorological Organization (WMO) publication Manual on Codes Vol. I.1, International Codes, Part A - Alphanumerical Codes, 1995 Edition, WMO - No. 306. Section C, Code Table 0200: a - Characteristic of pressure tendency during the 3 hours preceding the time of observation describes the pressure tendency as follows: Code figure 0 Increasing, then decreasing; atmospheric pressure the same or higher than three hours ago 1 Increasing, then steady; or increasing, then increasing more slowly; atmospheric pressure now higher than three hours ago 2 Increasing (steadily or unsteadily); atmospheric pressure now higher than three hours ago 3 Decreasing or steady, then increasing; or increasing then increasing more rapidly; atmospheric pressure now higher than three hours ago 4 Steady; atmospheric pressure the same as three hours ago 5 Decreasing, then increasing; atmospheric pressure the same or lower than three hours ago 6 Decreasing, then steady; or decreasing, then decreasing more slowly; atmospheric pressure now lower than three hours ago 7 Decreasing (steadily or unsteadily); atmospheric pressure now lower than three hours ago 8 Steady or increasing, then decreasing; or decreasing then decreasing more rapidly; atmospheric pressure now lower than three hours ago In addition to this the PTB220 series barometers output code * when the pressure tendency has not yet been calculated i.e. less than three hours have elapsed since power-up of the barometer. The absence of the pressure trend is indicated in the similar manner, too. VAISALA ________________________________________________________________________ 101 USER'S GUIDE_______________________________________________________________________ APPENDIX K ERROR MESSAGES The error/alarm messages of the PTB220 series digital barometers are: ERR / PASS (see DNOS command) HI ALARM (see PLARM command) LO ALARM (see PLARM command). The HI ALARM or LO ALARM are output by the barometer immediately and only once when the defined limit is exceeded, yet normal outputting is otherwise continued. A pressure out of range error occurs when the measured pressure exceeds the nominal pressure range of the barometer by 10 hPa. See also FORM command on how to use the ERR error status field and EFORM command for additional error output definition. Detailed error code can be obtained with ERRS command. List of error codes: E00 Nothing special to report E10 CPU EEPROM ackn. error E20 CPU EEPROM csum error E11 E21 E31 E41 E51 E61 E71 P1 P1 P1 P1 P1 P1 P1 EEPROM ackn. error EEPROM csum error serial number error f out of range y-value out of range pressure out of range P difference too large E12 E22 E32 E42 E52 E62 E72 P2 P2 P2 P2 P2 P2 P2 EEPROM ackn. error EEPROM csum error serial number error f out of range y-value out of range pressure out of range P difference too large E13 E23 E33 E43 E53 E63 E73 P3 P3 P3 P3 P3 P3 P3 EEPROM ackn. error EEPROM csum error serial number error f out of range y-value out of range pressure out of range P difference too large E14 DAC EEPROM ackn. error E24 DAC EEPROM csum error 102 __________________________________________________________________ M210194EN-A APPENDIX L ____________________________________________________ SPECIAL EMULATION MODE APPENDIX L SPECIAL EMULATION MODE The PTB220 series digital barometers can partially emulate the PA11A and the Setra 470 digital barometers. To activate the desired emulation mode first turn the power off, then make the given switch selections and switch barometer on again. PA11A The PTB220 series digital barometers can partially emulate the PA11A digital barometers. Any serial bus and measurement related software settings must be done before selecting the emulation mode. P Mode The P mode just sets the PTB220 series barometer to output the message type 1 of serial mode 2 of the barometer. Please note the capital letter P in the command. The dip switch settings should be as in FIGURE L-1. FIGURE L-1 PA11A emulation P mode Message 1 format is as follows: <sp>P1P1P1P1P1<sp>P2P2P2P2P2<sp>P3P3P3P3P3<sp>ssssssss<sp> PaPaPaPaPa<sp>ppp<cr> where; P1P1P1P1P1 P2P2P2P2P2 P3P3P3P3P3 ssssssss Pressure transducer 1 (with 5 characters) Pressure transducer 2 (with 5 characters) Pressure transducer 3 (with 5 characters) Average status. 10000000 means OK with all three transducers included. Otherwise, the last three bits of the status will indicate the transducers that are included when calculating the average e.g. status 00000110 means that transducers 2 and 3 are included and 1 ignored. VAISALA ________________________________________________________________________ 103 USER'S GUIDE_______________________________________________________________________ PaPaPaPaPa ppp NOTE Average pressure based on three consequent measurements of each transducer included, e.g. pressure average over approx. one minute. Three hour pressure trend. Replaced with status /// while data is not available, e.g. less than three hours measured. All pressure readings are in 0.1 hPa. The pressure unit selection has no effect. Pressure readings are replaced with error status /////, if the transducer has fault or been set off. Example of outputting: P<cr> 10145 10144 10144 10000000 100144 8 where: pressure is 1014.4 hPa and three-hour trend is +0.8 hPa. Automode The Automode just sets the PTB220 series barometer to automatically output the standard output string of the barometer at 15 seconds interval (see also previous chapter). The dip switch settings should be as in FIGURE L-2 FIGURE L-2 PA11A emulation automode P<cr> 10145 10145 10145 10145 10145 10144 10144 10144 10145 10145 10144 10144 10144 10145 10145 10000000 10000000 10000000 10000000 10000000 100144 100144 100144 100145 100145 8 8 8 8 8 . . . 104 __________________________________________________________________ M210194EN-A APPENDIX L ____________________________________________________ SPECIAL EMULATION MODE Setra 470 A limited subset of commands is available provided that the switch SW7 is set as in FIGURE L-3. ON S1 OFF SW1 SW3 SW5 SW7 SW2 SW4 SW6 SW8 FIGURE L-3 Special emulation mode The serial bus settings are now as follows: TABLE L-1 Serial bus settings in emulation mode Baud rate Parity Data bits Start bits Stop bits Duplex Echo 2400 no parity 8 1 1 full duplex OFF In this mode the PTB220 barometer ignores carriage returns, line feeds and blank spaces. Just type the commands as given here. At power-up the PTB220 barometers will respond: VAISALA DIGITAL BAROMETER PTB 220 BUSY and then after a few seconds: VAISALA DIGITAL BAROMETER PTB 220 11.812 to 35.436 in Hg A The output after the P command is: 30.1074 in Hg A OK The output after the V command is: VAISALA DIGITAL BAROMETER PTB 220 11.812 to 35.436 in Hg A VAISALA ________________________________________________________________________ 105 USER'S GUIDE_______________________________________________________________________ The output after the -7777S command is: REF x.yy where the x.yy is the software version code. The output after the -8888SS test command is: D-NOS BUSY PASS or D-NOS BUSY ERR In order to exit the D-NOS mode, give the command C and the output is: VAISALA DIGITAL BAROMETER PTB 220 BUSY and then after a few seconds: VAISALA DIGITAL BAROMETER PTB 220 11.812 to 35.436 in Hg A 106 __________________________________________________________________ M210194EN-A APPENDIX M ________________________________________________ PRESSURE CONVERSION CHART APPENDIX M PRESSURE CONVERSION CHART Pressure conversion chart Multiplication factors TO Note: conversions for mmHg and inHg are defined at 0°C temperature and for mmH2O and inH2O at 4°C temperature. FROM hPa mbar Pa N/m2 mmHg torr inHg mmH2O inH2O atm at bar psia = psi absolute psi hPa mbar 1 0.01 1.333224 33.86388 0.09806650 2.490889 1013.25 980.665 1000 68.94757 Pa Nm2 100 1 133.3224 3386.388 9.806650 249.0889 101325 98066.5 100000 6894.757 mmHg torr 0.7500617 0.0075006 1 25.40000 0.07355592 1.8683 760 735.559 750.0617 51.71493 inHg 0.02952999 0.00029530 0.03937008 1 0.002895903 0.073556 29.921 28.959 29.52999 2.036021 mmH2O 10.19716 0.1019716 13.59510 345.3155 1 25.40000 10332.3 10000 10197.16 703.0696 inH2O 0.40147 0.0040147 0.53525 13.596 0.039372 1 406.79 393.71 401.463 27.6799 0.00098692 0.000009869 0.00131579 0.033422 0.000096788 0.0024583 1 0.967841 0.98692 0.068046 at 0.0010197 0.00001020 0.034532 0.0001 0.0025399 1.03323 1 1.01972 0.070307 bar 0.001 0.00001 0.001333224 0.03386388 0.00009807 0.0024909 1.01325 0.980665 1 0.06894757 psi 0.01450377 0.00014504 0.01933678 0.001422334 0.036127 14.6962 14.2233 14.50377 1 atm Example 0.0013595 0.4911541 1013.25 hPa/mbar = 1013.25 x 0.02952999 inHg = 29.9213 inHg VAISALA ________________________________________________________________________ 107