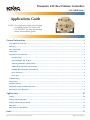
1
Pneumatic VAV Reset Volume Controllers
CSC-3000 Series*
Applications Guide
*NOTE: This Application Guide does not apply
(completely) to the CSC-3014 or the
CSC-3501/3505. See their separate data
sheets and installation guides.
General Information...................................................................................................... 2
CSC-3000 Series Overview............................................................................................................................................. 2
Mounting........................................................................................................................................................................ 2
More Information........................................................................................................................................................... 2
Connections................................................................................................................................................................... 3
Adjustments and Calibration.......................................................................................................................................... 4
Damper Action......................................................................................................................................................... 4
Determining the Type of Reset................................................................................................................................. 4
Adjusting Minimums and Maximums....................................................................................................................... 4
DIRECT Reset Minimum and Maximum................................................................................................................... 4
REVERSE Reset Minimum and Maximum................................................................................................................. 5
Reset Start Point....................................................................................................................................................... 6
Reset Span................................................................................................................................................................ 6
Troubleshooting.............................................................................................................................................................. 7
Maintenance................................................................................................................................................................... 7
Important Notices.......................................................................................................................................................... 7
Magnehelic Gauge to Airflow Rate Chart....................................................................................................................... 8
Replacement Cross-References....................................................................................................................................... 9
Applications................................................................................................................. 10
Cooling......................................................................................................................................................................... 10
Cooling with Heating Valve.......................................................................................................................................... 11
Cooling with Heating P-E Switch.................................................................................................................................. 12
Dual Duct..................................................................................................................................................................... 13
Dual Duct, Constant Volume........................................................................................................................................ 14
Index............................................................................................................................ 15
CSC-3000 Series Pneumatic VAV Reset Volume Controllers
1
Applications Guide, Rev G
General Information
CSC-3000 Series Overview
Mounting
These CSC-3000 series reset volume controllers are
designed for use on heating or cooling systems with
(normally open or normally closed) VAV terminal
units and (direct or reverse acting) thermostats.
The CSC-3000 Series are position sensitive. They
must be mounted and calibrated in either the
horizontal or vertical plane.
1. As near to the flow sensor pickup as is feasible,
connect the mounting bracket to the mounting
surface with two self-threading screws in the two
3/16" (5 mm) mounting holes. Be sure to leave
enough room to make connections.
2. Insert the controller, face down, up, right or left. The controller must be installed and adjusted in
the same plane or readjustment will be necessary.
They are sub-master air velocity controllers. Each is
equipped with separate adjustment knobs for minimum and maximum airflow setpoints. Models are
available with various reset start points. A master
controller, typically a room thermostat, resets the
CSC-3000 between the minimum and maximum
velocity setpoints.
The universal design of the CSC-3000 series is intended for new or replacement applications that call
for direct or reverse acting reset on normally open or
normally closed VAV terminal units.
More Information
For specifications, see the CSC-3000 Series Data
Sheet.
NOTE: These controllers are used on single and
dual duct applications. When working on
dual duct applications, it may be necessary
to work on one duct at a time.
This Application Guide does not apply (completely) to the CSC-3014 (designed to work with CTC2100 Thermostats) or the CSC-3501/3505 (Linear
Volume Reset Controllers). See their separate data
sheets and installation guides.
NOTE: Any sequencing with other controllers,
valves, or pneumatic-electric relays must
be done with the controller’s reset range,
NOT the actuator’s spring range.
All adjustments
are CCW to
increase
For adjusting start point and
span (upper and lower knobs)
review the respective sections
All dimensions are
in inches (mm).
CSC-3000 Series Pneumatic VAV Reset Volume Controllers
2
Applications Guide, Rev G
Connections
For all models of the CSC-3000 series, use 1/4" (5
mm) O.D. “FR” tubing on the following push-on
fittings:
NOTE: You can easily test for leaks with a squeeze
bulb to ensure there are no leaks at the
actuator diaphragm or fittings.
1. Connect the clean, dry, oil-free main air supply to
Port “M” (15 to 30 psi).
2. Connect the damper actuator to Port “B.”
3. Connect the thermostat output to Port “T.”
4. Connect the high (“total”) pressure tap on the
airflow sensor to Port “H.”
5. Connect the low (“static”) pressure tap on the
airflow sensor to Port “L.”
6. Check for proper connections. Make sure all
tubes are snug on their fittings. If loose, trim the
end of the tubing and reconnect it to ensure there
are no leaks.
7. Use a flow hood or “tee” a Magnehelic® (or
equivalent) differential pressure gauge between
the controller and the ∆P pick-up to determine
airflow rates.
CAUTION
To prevent damage to the gauge, do NOT
connect a Magnehelic gauge designed to
measure an air flow sensor’s differential
pressure (e.g., 0–0.5 wc) to the main air
pressure (approximately 20 psi or 554 wc)!
CAUTION
NOTE: Over time, the tube may stretch or develop
microcracks. Trim the end of tube back
to undamaged material and reconnect.
Replace the tubing if it is brittle or
discolored.
Pneumatic devices must be supplied with clean,
dry control air. Any other medium (e.g., oil or
moisture contamination) will cause the device
to fail.
NOTE: These instructions do not apply to the CSC3014 or the CSC-3501/3505.
Magnehelic gauge and 0–30 psi
gauge in illustration added for
checkout and calibration purposes
Typical CSC-3011 Application and Connections
CSC-3000 Series Pneumatic VAV Reset Volume Controllers
3
Applications Guide, Rev G
Adjustments and Calibration
NOTE: Do NOT adjust reset start point and reset
span (upper and lower knobs) without
thoroughly reviewing the relevant sections.
DIRECT Reset Minimum and Maximum
Reset Span (5 psig)
Reset Start Point
• 3 psig: CSC-3021/3026
• 8 psig: CSC-3011/3016/3017/3025
• 10 psig: CSC-3023
Damper Action
The damper action is factory-set at Normally Open
(N.O.). To change to Normally Closed (N.C.), perform the following steps:
Min. Airflow
Thermostat Pressure
For Direct Reset (DA thermostat for cooling or RA
thermostat for heating), perform the following steps:
1a.On the CSC-3000, disconnect the “T” port and
leave it open. Temporarily plug the tubing (but
do NOT plug the port).
1b.Alternately, instead of removing the tubing from the
T port, (temporarily) remove the plug from the CSC3000’s “G” port.
2. Adjust the LO STAT ∆P (center dial) one
adjustment at a time until the desired Minimum
airflow is read at the Magnehelic gauge and is
stable.
NOTE: Adjust the dial no more than about a
half rotation at a time. After making any
adjustment, wait approximately ten seconds
while watching for motion in the damper
shaft. If no motion occurs, make the next
adjustment.
3. Tighten the selection screw. Be sure the
screw is tight (2 to 4 in-lbs. of torque), but if
overtightened, the plastic will strip out.
Determining the Type of Reset
The following table shows when Direct Reset or
Reverse Reset is required. Determine the reset type
based on the temperature of the primary air entering
the VAV box and whether the thermostat in the space
is direct or reverse acting.
Cooling
Heating
Thermostat
Reset Type
DA
Direct Reset
RA
Reverse Reset
DA
Reverse Reset
RA
Direct Reset
NOTE: IF the LO STAT ∆P Limit must be set at
“0” (zero minimum), do not turn the LO
STAT ∆P knob fully clockwise. The knob
will adjust one and one-half turns after a
zero minimum is reached. Turning the LO
STAT ∆P knob fully clockwise will result
in a negative reset condition. This means
that when the controller begins to reset at
the reset start point, it must first overcome
the negative adjustment and will not begin
to reset from “0” until a higher thermostat
reset pressure is reached. This negative
reset will also reduce the effective range
of the controller by reducing the low end
reset, narrowing the reset span. If a zero
minimum is required, adjust the LO STAT
∆P knob until the controller just begins to
crack the damper open, and then back-off
one-quarter turn and verify zero airflow.
(This is typically 2-1/2 knob rotations
counterclockwise from the fully clockwise
position.)
Adjusting Minimums and Maximums
When adjusting the minimum and maximum airflow
settings, the output responds slowly to changes in
the setpoint. Wait for the flow rate to stabilize after
making an adjustment (usually 20 to 30 seconds) before making further adjustments. Also, if the damper
position is all the way closed or open when starting
this step, turn the adjustment one full turn, and then
wait 20 to 30 seconds for a change in the flow reading of the Magnehelic gauge. If no change occurs
after this time, repeat until the flow rate changes.
CSC-3000 Series Pneumatic VAV Reset Volume Controllers
(Cooling w/ DA Thermstat or
Heating w/ RA Thermostat)
NOTE: The direct reset illustration above assumes
no relays are connected between the
thermostat and “T” port.
1. Loosen the damper selection screw.
2. Turn the selection dial clockwise until the “NC”
arrow aligns with the “DAMPER” arrow.
NOTE: Accuracy in the alignment of the arrows is
very important. Make this adjustment as
exact as possible.
Primary Air
Max. Airflow
4
Applications Guide, Rev G
3a.Reconnect the thermostat tubing to the “T” port.
3b.Or reinstall the plug on the CSC-3000’s “G” port.
(See Step 1b.)
4. Adjust thermostat to call for full airflow (15 psi or
more at “T” port).
5. Adjust the HI STAT ∆P (dial on right) one
adjustment (1/4 to 1/2 knob rotation) at a time
until the desired Maximum airflow is read at the
Magnehelic gauge and is stable.
NOTE: Adjust the dial no more than about a
half rotation at a time. After making any
adjustment, wait approximately ten seconds
while watching for motion in the damper
shaft. If no motion occurs, make the next
adjustment.
3a.Reconnect the thermostat tubing to the “T” port.
3b.Or reinstall the plug on the CSC-3000’s “G” port.
(See Step 1b.)
4. Adjust the thermostat to call for minimum
airflow (15 psi or more at “T” port).
5. Adjust the HI STAT ∆P (dial on the right) one
adjustment (1/4 to 1/2 knob rotation) at a time
until the desired Minimum airflow is read at the
Magnehelic gauge and is stable.
NOTE: For more accuracy, temporarily relieve
the pressure before each dial adjustment.
Pull off the plug on the G port (relieving
the thermostat air pressure), make the
estimated amount of dial adjustment,
reinstall the plug, and wait for the damper
position to stabilize before checking the
flow.
NOTE: For more accuracy, temporarily relieve
the pressure before each dial adjustment.
Temporarily pull off the plug from the G
port (relieving the thermostat air pressure),
make the estimated amount of dial
adjustment, reinstall the plug, and wait
for the damper position to stabilize before
checking the flow.
6. Repeat Steps 1 through 5 to verify the settings to
be correct and fine tune if necessary.
NOTE: IF the HI STAT ∆P Limit must be set at
“0” (zero minimum), do not turn the HI
STAT ∆P knob fully clockwise. The knob
will adjust past where a zero minimum is
reached. Turning the HI STAT ∆P knob fully
clockwise will result in a negative reset
condition. This means that the controller
will get to zero before going through the
whole reset span. If a zero minimum is
required, adjust the HI STAT ∆P knob
until the controller just begins to crack the
damper open, then back off slightly and
verify zero airflow.
REVERSE Reset Minimum and Maximum
Max. Airflow
Reset Span (5 psig)
Reset Start Point
• 3 psig: CSC-3021/3026
• 8 psig: CSC-3011/3016/3017/3025
• 10 psig: CSC-3023
(Cooling w/ RA Thermstat or
Heating w/ DA Thermostat)
Min. Airflow
Thermostat Pressure
NOTE: The reverse reset illustration above assumes
no relays are connected between the
thermostat and “T” port.
6. Repeat Steps 1 through 5 to verify the settings to
be correct and fine tune if necessary.
For Reverse Reset (RA thermostat for cooling or DA
thermostat for heating), perform the following steps:
1a.On the CSC-3000, disconnect the “T” port and
leave it open. Temporarily plug the tubing (but
do NOT plug the port).
1b.Alternately, instead of removing the tubing from the
T port, (temporarily) remove the plug from the CSC3000’s “G” port.
2. Adjust the LO STAT ∆P (center dial) one
adjustment at a time until the desired Maximum
airflow is read at the Magnehelic gauge and is
stable.
CSC-3000 Series Pneumatic VAV Reset Volume Controllers
5
Applications Guide, Rev G
Reset Start Point
Reset Span
NOTE: In almost all applications, the reset span
never needs adjusting. Do not change the
default 5 psi unless really necessary.
Old Reset Start
Point (8 psig)
Max. Airflow
New Reset Start
Point (3 psig)
The reset span is the thermostat’s effective reset
range for the controller. A reset span of 5 psi means
that it will take a 5 psi pressure change measured
from the reset start point to reset the flow rate of the
VAV box.
Min. Airflow
3 psig
8 psig
13 psig
Thermostat Pressure
(Reverse) Reset Start Point Adjusted from 8 to 3 psi
Reset Span (5 psig)
The reset start point is the pressure from the
thermostat at which the controller begins to reset
from the LO STAT to the HI STAT setting.
Max. Airflow
Reset Start Point (8 psig)
Models of the CSC-3000 series come with reset
start points factory-set at 3, 8, or 10 psi. (See the
chart on the next page.) These are standard in most
applications and typically do not require adjustment.
Min. Airflow
3 psig
8 psig
13 psig
Thermostat Pressure
If a reset start point is needed other than the default
setting, all models are field adjustable between 0 and
10 psi. (If the reset start point is changed, the reset
span may need to be adjusted as well.) To adjust the
reset start point, carry out the following steps:
NOTE: Reset span is the pressure change at “T”
above the reset start point that causes the
flow setpoint to move from one extreme to
the other. In a direct reset application, the
flow setpoint will change from minimum
to maximum flow above the start point. In
a reverse reset application, the reset will
change from maximum to minimum flow
above the start point.
1. Put the thermostat pressure at the desired start
point pressure (e.g., 3 psi).
2. Remove rubber plug at the “G” port and read
pressure at “G” with a 0–30 psi gauge (requires
5/32" O.D. tubing).
3. With a small flat-blade screwdriver, adjust
(counterclockwise to increase; clockwise to
decrease) the reset start point control (at the top
of the controller) until the pressure read at “G”
port is just beginning to move off zero (0) psi.
The CSC-3000 series are factory set with a reset span
of 5 psi. This is standard in most applications and
does not typically require adjustment. Leaving this
adjustment at the factory setting is recommended.
If necessary, the reset span can be adjusted (between
0 and 10 psi). If the reset span is changed, the
minimum and maximum flows may need to be
readjusted.
NOTE: If the controller does not respond correctly
after all adjustments have been made, it
may be necessary to correct the reset span
adjustment.
To adjust the reset span to another value, perform the
following steps:
1. Adjust the thermostat to a higher pressure,
beyond working range (20 psi is best).
2. Attach a pressure gauge to the “G” port (requires
5/32" O.D. tubing).
3. With a small flat-blade screwdriver, adjust (counterclockwise to increase; clockwise to decrease)
the reset span control (at the bottom of the controller) until pressure at the “G” port equals the
desired reset span pressure.
CSC-3000 Series Pneumatic VAV Reset Volume Controllers
6
Applications Guide, Rev G
• Is the airflow pickup properly placed, and does it
send a good differential pressure to the controller? (See Connections on page 3.) Is the airflow
sensor dirty or defective? (Disconnect the sensor
from the controller before attempting to blow the
sensor clean!)
Troubleshooting
NOTE: The controller should be set according
to the specifications found on the
manufacturer’s label on the VAV box.
NOTE: The CSC-3000 series are position sensitive.
Be sure to mount the controller with
the correct orientation. See Mounting on
page 2. If the controller is calibrated in a
position other than the final mounting
position, the calibration (minimum and
maximum flow limits) will be off.
• Are reset start and reset span set correctly? See
Reset Start Point on page 6 and Reset Span on
page 6.
NOTE: These controllers are typically used on
single-duct applications but may be
found in dual-duct applications. (See, for
example, Dual Duct on page 13 and Dual
Duct, Constant Volume on page 14.) When
working on dual-duct applications it may
be necessary to work on one duct at a time.
Maintenance
No routine maintenance is required. Each component is designed and manufactured for reliability
and performance. Careful installation and use will
ensure long-term dependability.
Troubleshooting issues to consider include:
CAUTION
• Is there an adequate main air (M) supply?
Pneumatic devices must be supplied with clean,
dry control air. Any other medium (e.g., oil
or moisture contamination) will result in the
device’s eventual failure.
• Is there adequate upstream system (duct) air?
• Is the application correct and piped correctly?
See Connections on page 3, Determining the Type
of Reset on page 4, and Applications on page 10.
• Is the damper action (NC/NO) set correctly? Do
the damper’s and controller’s action match? See
Damper Action on page 4.
Important Notices
The KMC logo is a registered trademark of KMC
Controls, Inc. All rights reserved. No part of this
publication may be reproduced, transmitted, transcribed, stored in a retrieval system, or translated
into any language in any form by any means without the written permission of KMC Controls, Inc.
• Is the damper binding? Will the actuator drive
the damper full open to full close? (Sufficient
main air is required to provide the actuator with
enough force to operate the damper/linkage.) Is
the actuator leaking? (Even small leaks can cause
the actuator to not stroke. You can test for leaks
with a squeeze bulb to ensure there are no leaks
at the actuator diaphragm or fittings.)
The material in this document is for information
purposes only. The contents and the product it describes are subject to change without notice. KMC
Controls, Inc. makes no representations or warranties with respect to this document. In no event shall
KMC Controls, Inc. be liable for any damages, direct
or incidental, arising out of or related to the use of
this document.
• Does the thermostat send an adequate signal to
the controller?
• Are LO STAT and HI STAT set correctly for the
thermostat action? When cycled, can the controller repeat the LO STAT and HI STAT settings? If
the LO STAT or HI STAT must be set for “0” wc,
see the notes about zero minimum in DIRECT
Reset Minimum and Maximum on page 4 or REVERSE Reset Minimum and Maximum on page 5.
CSC-3000 Series Pneumatic VAV Reset Volume Controllers
7
Applications Guide, Rev G
Magnehelic Gauge to Airflow Rate Chart
NOTE: This chart is for illustration only! Do not
use this chart to obtain your values. It
is NOT intended for calibration of your
Minimum and Maximum adjustments.
1.0
.90
.80
.70
.60
.50
.40
.30
l
l
inc
hO
va
va
20
inc
hO
hO
l
l
va
va
inc
16
18
nd
hO
inc
inc
12
14
hR
hR
inc
10
nc
8i
ou
ou
nd
ou
nd
hR
ou
hR
nc
hR
nc
6i
.10
.09
.08
.07
.06
.05
5i
nc
hR
.15
ou
ou
nd
nd
.20
nd
.25
4i
Differential Pressure (∆P) in Inches w.c.
This airflow chart is an example of the charts usually
affixed to the VAV box. Each chart is specific for the
type of flow sensor located in the inlet side of the VAV
box. Read the differential pressure of the Magnehelic
gauge, follow the line horizontally until it crosses the
diagonal inlet size of box. Read straight down from
this intersection to determine the flow rate.
.04
.03
.02
30
50
100
150 200
300 400
600
1000 1500 2000 3000 4000 6000 8000
CFM Flow Rate as read by sensor
VAV Airflow Rate by Duct Size
CSC-3000 Series Pneumatic VAV Reset Volume Controllers
8
Applications Guide, Rev G
Replacement Cross-References
KMC CSC Cross-Reference to Universal CSC-3000 Series
“Universal” Replacement KMC Model
Older KMC Model
CSC-3011
CSC-1001
CSC-2001
CSC-2003
CSC-2007
CSC-2011 (Discontinued )
CSC-2013 (Discontinued)
CSC-3014 (Discontinued)*
CSC-3017**
CSC-3501 (Discontinued)***
CSC-3021
CSC-2002
CSC-2004
CSC-2008
CSC-2012 (Discontinued)
CSC-2014 (Discontinued)
CSC-3016
CSC-2009
CSC-2015 (Discontinued)
CSC-2017 (Discontinued)
CSC-3505 (Discontinued)***
CSC-3026
CSC-2010
CSC-2016
CSC-2018
NOTE: All Titus CSC-2000s are the same as KMC CSC-2000s.
*The CSC-3014 also requires a thermostat replacement, with no limits at the thermostat.
**The CSC-3017 is identical to the CSC-3011, but it does not come with mounting bracket or KMC logo.
***No direct replacement if the Linear feature is required.
Competitor Cross-Reference to KMC Universal CSC-3000 Series
KMC
Controls
Invensys/Robertshaw/
Barber-Colman
TAC/Staefa/UPC
Honeywell
Johnson
Controls
Titus
CSC-3011
All Models of:
R77 and R78 Series
PPR-9100 Series
HYUR-2700 Series
VCV2100 Series (all Models)
VCV2200 Series (all Models)
VCV2500-101*
VCV2500-201*
VCV2500-301*
VCV2500-401*
CP980C**
CP980D**
CP980E**
CP980F**
P-3800-1*
P-3800-2*
CSC-3002
CSC-3003
CSC-2000s***
P-3800-1 (on
Trane VAV Units)
P-3800-2 (on
Trane VAV Units)
CSC-3004
CSC-3005
CSC-3025
VCV2500-101 (on Trane VAV Units)
VCV2500-201 (on Trane VAV Units)
VCV2500-301 (on Trane VAV Units)
VCV2500-401 (on Trane VAV Units)
NOTE: After replacing the controller, adjustments and calibration will be necessary.
*On Trane terminal units, use CSC-3025 instead.
**For Honeywell CSP980, the existing velocity pressure flow pickup needs to be replace with KMC SSS-1000 series.
***See KMC CSC Cross-Reference to Universal CSC-3000 Series chart above. All Titus CSC-2000 Series controllers are the same as KMC
CSC-2000 Series.
NOTE: For cross-references to competitive and
OEM products, see the KMC Master CrossReference.
CSC-3000 Series Pneumatic VAV Reset Volume Controllers
9
Applications Guide, Rev G
Applications
Cooling
DA Thermostat (NO or NC Damper)
• LO STAT = Min. Flow
• HI STAT = Max. Flow
• Reset Range = 8 to 13 psi
RA Thermostat (NO or NC Damper)
• LO STAT = Max. Flow
• HI STAT = Min. Flow
• Reset Range = 3 to 8 psi
(These instructions do not apply to the
CSC-3014 or the CSC-3501/3505.)
CSC-3000 Series Pneumatic VAV Reset Volume Controllers
10
Applications Guide, Rev G
Cooling with Heating Valve
DA Thermostat, NO or NC Damper, and NO Hot Water Valve
• Hot Water Valve = NO
• Spring Range = 3 to 8 psi
• LO STAT = Min. Flow
• HI STAT = Max. Flow
• Reset Range = 8 to 13 psi
RA Thermostat, NO or NC Damper, and NC Hot Water Valve
• Hot Water Valve = NC
• Spring Range = 8 to 13 psi
• LO STAT = Max. Flow
• HI STAT = Min. Flow
• Reset Range = 3 to 8 psi
CSC-3000 Series Pneumatic VAV Reset Volume Controllers
11
Applications Guide, Rev G
Cooling with Heating P-E Switch
DA Thermostat, NO or NC Damper, and NC Heating P-E Switch
• Stage 3 On with Decrease
• Stage 2 On with Decrease
• Stage 3 Off with Increase
• Stage 1 On with Decrease
• Stage 2 Off with Increase
• Stage 1 Off with Increase
NC PE
Switches
• LO STAT = Min. Flow
• HI STAT = Max. Flow
• Reset Range = 8 to 13 psi
RA Thermostat, NO or NC Damper, and NO Heating P-E Switch
• Stage 3 On with Decrease
• Stage 2 On with Decrease
• Stage 3 Off with Increase
• Stage 1 On with Decrease
• Stage 2 Off with Increase
• Stage 1 Off with Increase
NO PE
Switches
CSC-3000 Series Pneumatic VAV Reset Volume Controllers
12
• LO STAT = Max. Flow
• HI STAT = Min. Flow
• Reset Range = 3 to 8 psi
Applications Guide, Rev G
Dual Duct
Cold Deck CSC-3011-10
•
•
•
•
Damper = NC
LO STAT = Min. Flow
HI STAT = Max. Flow
Reset = 8 to 13 psi
Hot Deck CSC-3021-10*
•
•
•
•
Damper = NO
LO STAT = Max. Flow
HI STAT = Min. Flow
Reset = 3 to 8 psi
*Or use a CSC-3011-10 and change
the reset from 8 to 3. See Reset
Start Point on page 6.
CSC-3000 Series Pneumatic VAV Reset Volume Controllers
13
Applications Guide, Rev G
Dual Duct, Constant Volume
Cold Deck/Common Discharge CSC-3011-10
• Damper = NC
• LO STAT = Constant Volume Flow
• Reset = 8 to 13 psi
Hot Deck CSC-3011-10
•
•
•
•
Damper = NO
LO STAT = Min. Flow
HI STAT = Max. Flow
Reset = 13 to 8 psi
CSC-3000 Series Pneumatic VAV Reset Volume Controllers
14
Applications Guide, Rev G
Index
A
H
Adjustments 4
Airflow Rate Chart 8
Applications 10
HI STAT 5, 6
Hot Deck 13, 14
I
C
Important Notices 7
Calibration 4
Cold Deck 13, 14
Common Discharge 14
Connections 3
Cooling 10
Cooling with Heating P-E Switch 12
Cooling with Heating Valve 11
Cross-References 9
CSC-3011 9, 13, 14
CSC-3014 2
CSC-3016 9
CSC-3021 9, 13
CSC-3025 9
CSC-3026 9
CSC-3501/3505 2
L
LO STAT 4, 5, 6
M
Magnehelic Gauge 8
Maintenance 7
Minimums and Maximums 4
Mounting 2
O
Overview 2
R
Replacement Cross-References 9
Reset Span 6
Reset Start Point 6
Reset, Types 4
Reverse Reset 5
D
Damper Action 4
Direct Reset 4
Dual Duct 13
Dual Duct, Constant Volume 14
T
G
Troubleshooting 7
G Port 4
KMC Controls, Inc.
19476 Industrial Drive
New Paris, IN 46553
574.831.5250
www.kmccontrols.com
[email protected]
CSC-3000
© 2013 KMC
Series
Controls,
Pneumatic
Inc. VAV
Reset Volume Controllers
15
Applications
AN-1205B-RevG
Guide, Rev G