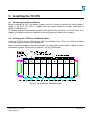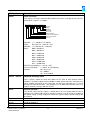
1
Maxiflex T2 CPU’s
M124xA
User’s Manual
DATE
May 2002
June 2002
March 2004
Nov 2009
REVISION
1
2
3
4
COMMENTS
Initial Issue
DIT Table updated, and corrections made
Error on page 50 - Bit 12 used to set subscription block
Reference to M1242 T2E CPU removed
SOFTWARE COPY AVAILABLE
This manual is available in printed form or in Adobe Acrobat pdf format.
The pdf file is named UMM124XAR04.pdf
COPYRIGHT AND PROTECTIVE NOTICES
1. The Copyright of this document and the associated drawings, is the property of Omniflex and
is issued on condition that it is not copied, reprinted or reproduced or transmitted in any form
or by any means, electronically, photocopying, mechanical or otherwise, nor its contents
disclosed, either wholly or in part, without the consent in writing of, or in accordance with the
conditions of a contract with Omniflex.
2. The publication of information in the document does not imply freedom from patent or other
protective rights of Omniflex or others.
3. Although every intention is made to ensure that performance figures and data are accurate the
company reserves the right to alter without notice any product or specification. Performance
figures and data must therefore be specifically confirmed by the company before they become
applicable to any tender, order or contract.
4. In the case of electrical components, enough data is included in the drawings to allow
maintenance of the equipment. However, if component availability or substitution information
is required please consult the factory for assistance, as it is impossible to include data on
every component in this document.
5. This product is sold without liability for consequential loss of any description.
Maxiflex T2 CPU User Manual
UMM124XBR04.pdf
2
-© Omniflex
SCOPE
This User Manual provides information on how to install, configure and use the Maxiflex
T2 CPU. Programming features specific to these products are included in this manual.
This manual does not cover the fundamentals of the EziForth programming language.
This manual covers the following product Models:
Model
Description
M1240B
M1241B
T2 CPU with RS232/485 Serial Port
T2C CPU with RS232/485 Serial Port and Conet/c
Twisted Pair Network Port.
T2M CPU with RS232/485 Serial Port and Conet/m
Radio Network Port.
M1243B
Maxiflex T2 CPU User Manual
UMM124XBR04.pdf
3
-© Omniflex
Introduction
The MAXIFLEX T2 range of CPU’s is designed specifically for industrial telemetry and
remote I/O applications, combining powerful industrial network communications features
with ease of use.
All I/O and configuration data variables are automatically accessible through up to 65000
Data Interchange Registers in a single virtual “Data Interchange Table”, allowing the
implementation of Remote I/O systems “out of the box”.
Conventional remote I/O systems can be implemented without the need for any
programming, although the inclusion of programming capability in the T2 with the powerful
EziForth programming language allows sophisticated local control functions to be
performed.
Following the ISO OSI 7-layer model, this CPU includes a versatile inter-network routing
capability for communicating over multiple networks, in very large geographically spread
installations. This capability allows many dissimilar network types to be linked to create a
seamless factory “intranet”, quite often without the need to lay special network cabling.
Many other features such as a built-in real-time clock, battery backup for temporary
dynamic data, and a MODBUS or Conet/s equipped RS232/485 serial port are standard in
these products.
Powerful features such as automatic I/O module recognition and scanning, remote
programming, and a powerful Remote Data Subscription Service, all contribute to making
the T2 CPU a “plug-and-work” product that dramatically reduces system engineering time.
Maxiflex T2 CPU User Manual
UMM124XBR04.pdf
4
-© Omniflex
Table of Contents
1. GENERAL DESCRIPTION ..........................................................................................................8
1.1
LED Indicators:................................................................................................................ 8
1.2
Serial Port: (applicable to all T2 CPUs).......................................................................... 9
1.3
Programming Port: (applicable to all T2 CPUs) ............................................................. 9
1.4
Conet/c Network Port: (only applicable to M1241B T2C CPU) ..................................... 9
1.5
Conet/m Network Port: (only applicable to M1243B T2M CPU).................................. 10
2. Installing the T2 CPU .................................................................................................................11
2.1
Connecting the Internal Battery .................................................................................... 11
2.2
Installing the T2 CPU on the Maxiflex base ................................................................. 11
2.3
Connecting the Programming port (all models):........................................................... 12
2.4
Connecting the Serial port (all models): ....................................................................... 12
2.5
Connecting the Conet/c network port (M1241B CPU only): ........................................ 12
2.6
Connecting the Conet/m network port (M1243B CPU only): ....................................... 13
2.7
Applying power for the first time ................................................................................... 13
3. T2 CPU’s and the MAXIFLEX Architecture ...............................................................................15
3.1
System Architecture ...................................................................................................... 15
3.2
CPU Functions .............................................................................................................. 15
3.2.1 Real-Time Clock ...............................................................................................................15
3.2.2 I/O Scanning .....................................................................................................................15
3.2.3 I/O Module Management ..................................................................................................15
3.2.4 FORTH User Program ......................................................................................................15
3.2.5 Data Interchange Table (DIT)...........................................................................................17
3.2.6 Subscription Service .........................................................................................................17
3.2.7 Network Routing Service ..................................................................................................17
3.2.8 Communications Status Monitoring..................................................................................17
3.2.9 Serial Port Protocol Selection...........................................................................................17
3.2.10 Remote Programming.....................................................................................................17
4. Configuring a T2 CPU................................................................................................................18
4.1
Using OMNISET or DITview to configure the T2 CPU................................................. 18
4.1.1 OMNISET..........................................................................................................................18
4.1.2 DITview .............................................................................................................................18
4.1.3 Connecting OMNISET with the CPU................................................................................18
4.2
Configuring the Programming Port............................................................................... 19
4.3
Addressing a Module through the Programming Port.................................................. 19
4.3.1 No Address set..................................................................................................................20
Maxiflex T2 CPU User Manual
UMM124XBR04.pdf
5
-© Omniflex
4.3.2 Local CPU .........................................................................................................................20
4.3.3 Intelligent Module in I/O Slot.............................................................................................20
4.3.4 Local Network ID (using Offset)........................................................................................20
4.3.5 Direct/Global Network ID ..................................................................................................20
4.4
Configuring the Real-time Clock ................................................................................... 21
4.5
Configuring the Serial Port............................................................................................ 21
4.5.1 MODBUS Slave Protocol..................................................................................................21
4.5.1.1.
Default MODBUS (ASCII 9600 baud Slave) Mode ........................................... 21
4.5.1.2.
Standard MODBUS Slave Protocol Mode......................................................... 21
4.5.1.3.
Modbus Data Register Mapping ........................................................................ 22
4.5.1.4.
Modbus Compressed DIT Addressing .............................................................. 22
4.5.2 Conet/s (Peer-to-peer) Protocol .......................................................................................23
4.5.2.1.
Default Conet/s Mode (19200 baud) ................................................................. 23
4.5.2.2.
Standard Conet/s Protocol Mode ...................................................................... 23
4.5.3 Custom User Protocol Mode ............................................................................................23
4.6
Configuring the Conet/c Network Port (available on the M1241B T2C CPU only.) .... 24
4.7
Configuring the Conet/m Network Port (available on the M1243B T2M CPU only.)... 24
4.8
Configuring the T2 CPU as a Network Router ............................................................. 24
4.9
Programming the T2 CPU in EziFORTH...................................................................... 25
5. The Data Interchange Table explained .....................................................................................26
5.1
DIT Table Layout........................................................................................................... 26
5.2
CPU Dynamic Data DIT Range .................................................................................... 26
5.3
I/O Slots 1 to 15 DIT Range.......................................................................................... 27
5.4
CPU Static Data DIT Range: ........................................................................................ 27
6. I/O Module Management & Scanning Explained ......................................................................28
6.1
The I/O Module Manifest............................................................................................... 28
6.1.1 Configuring an I/O Manifest using Omniset .....................................................................28
6.1.1.1.
Automatic Manifest Configuration...................................................................... 28
6.1.1.2.
Manual Manifest Configuration .......................................................................... 28
6.1.2 Checking the Status of installed modules ........................................................................29
6.1.3 I/O Status Indication..........................................................................................................29
6.2
Automatic I/O Scanning ................................................................................................ 29
7. The Subscription Service Explained..........................................................................................31
7.1
Introduction to Subscriptions ........................................................................................ 31
7.2
Setting up subscriptions................................................................................................ 31
7.3
Number of subscriptions allowed.................................................................................. 33
7.4
Subscription Application Example ................................................................................ 33
8. Appendix: T2 CPU Detailed DIT Layout:...................................................................................35
8.1
T2 CPU Dynamic Data Area DIT Register Assignment............................................... 35
Maxiflex T2 CPU User Manual
UMM124XBR04.pdf
6
-© Omniflex
8.2
T2 CPU Static Configuration Data Area DIT Register Assignment ............................. 45
Table of Figures
Figure 2.1: Layout of the 7I/O Master Base.................................................................................... 11
Figure 3.1 T2 CPU System Architecture......................................................................................... 16
Figure 6.1 - I/O DIT Address Map for T2 CPU ............................................................................... 30
Figure 7.1 The Magazine Subscription Analogy............................................................................. 31
Table of Tables
Table 1.1 Front Panel LED Indicators............................................................................................... 9
Table 2.1: Pin allocation of DB-9 connector on program cable and FCC-68 socket on M124xA . 12
Table 2.2: Pin allocation of serial port connector on M124xA CPU. .............................................. 12
Table 2.3: Pin allocation of Conet port connector on the M1241B CPU........................................ 13
Table 2.4: Pin allocation of Conet/m port connector on the M1243B CPU.................................... 13
Table 4.1: Serial Port default Address switch settings ................................................................... 22
Table 4.2: Conet Port Address switch settings (M1241B T2C)...................................................... 24
Table 5.1: DIT Address Map of the T2 CPU:.................................................................................. 26
Table 7.1 Subscription Configuration Information .......................................................................... 33
Table 7.2 Subscription Block Data Example................................................................................... 34
Maxiflex T2 CPU User Manual
UMM124XBR04.pdf
7
-© Omniflex
1. GENERAL DESCRIPTION
Serial Port Connector
Conet Port Connector
Serial Port Dipswitch
Conet Port DIP switch
Programming
Connector
Port
Figure 3.1: View of the M1241B T2C CPU
1.1 LED Indicators:
LED Legend
LED Colour
CPU OK
GREEN
I/O OK
GREEN
RUN
GREEN
BATT
RED
SERIAL Rx
Maxiflex T2 CPU User Manual
UMM124XBR04.pdf
YELLOW
Description
ON - CPU is healthy
OFF or Flashing – CPU Faulty or no power
applied
ON - I/O Module status healthy and I/O
Manifest is configured.
FLASHING – I/O Manifest is configured but
disagrees with installed hardware.
OFF – I/O Manifest is not configured.
ON – User application software program is
running.
OFF – No User application software is running
Flashing – Terminal interaction with CPU
ON – Internal battery is LOW or not connected.
OFF – Internal battery is healthy.
ON – data is being received on serial port
OFF – serial port receiver is idle
8
-© Omniflex
SERIAL Tx
NETWORK Rx
(Except M1240B T2 CPU)
NETWORK Tx
(Except M1240B T2 CPU)
RED
YELLOW
RED
NETWORK TOKEN
(M1241B T2C only)
GREEN
NETWORK ACTIVITY
(M1243B T2M only)
GREEN
ON – serial data is being transmitted on serial
port
OFF – serial port transmitter is idle
ON – network data is being received
OFF – network receiver is idle
ON – network data is being transmitted
OFF – network transmitter is idle
ON – network not connected or setup
incorrectly
OFF – network not connected or setup
incorrectly
FLASHING EVENLY – network is connected
(speed of flash indicates token rate)
ON – There is activity on the radio network.
OFF – The radio network is not active.
Table 1.1 Front Panel LED Indicators
1.2 Serial Port: (applicable to all T2 CPUs)
The serial port connects the T2 CPU to other serial devices, depending on the application.
Connection can be either RS232 or RS485.
The serial port can be configured for one of three protocols:
a) Modbus protocol (Slave device) is available on this port allowing easy connection to
other third party products such as DCS systems, SCADA systems and PLC’s.
b) Conet/s protocol (peer-to-peer) is available on this port for integration into Conet
Intranets. Conet/s connection allows seamless network connection between devices
with full network capability such as report-by-exception, time-stamped event streams
and remote programming. The full-duplex nature of the Conet/s protocol makes efficient
use of the serial channel. With the use of modems or other virtual circuits, efficient wide
area networks can be easily constructed.
c) User Protocol. This setting gives full control of the serial port to an application program
running on the T2 CPU. This allows custom protocols to be written in EZIFORTH and
downloaded to the CPU for maximum flexibility. Applications such as creating output for
a local printer, communicating with an operator display panel, or communicating with a
third party device using a proprietary protocol, are possible.
1.3 Programming Port: (applicable to all T2 CPUs)
The programming port is an RS232 port that implements the Conet/s protocol. This port is
used for software configuration, interrogation and program downloads using a Microsoft
Windows compatible PC, Laptop or Handheld computer.
1.4 Conet/c Network Port: (only applicable to M1241B T2C CPU)
This port provides the connection to the Conet network. Conet/c is a true peer-to-peer local
area network (LAN) that allows fast secure data transfer over long distances (up to 10km)
using a conventional twisted pair of wires.
Maxiflex T2 CPU User Manual
UMM124XBR04.pdf
9
-© Omniflex
1.5 Conet/m Network Port: (only applicable to M1243B T2M CPU)
This port provides the connection to the Conet/m radio network. Cone/m is a true peer-topeer Local Area Network (LAN) designed specifically for operation over radio systems.
The CPU incorporates an MSK radio modem and CSMA access protocols to allow a peerto-peer network to be constructed using conventional VHF/UHF radios.
Maxiflex T2 CPU User Manual
UMM124XBR04.pdf
10
-© Omniflex
2. Installing the T2 CPU
2.1 Connecting the Internal Battery
Before installing the CPU, the battery jumper must be inserted to connect the internal battery
supply in the CPU. The CPU is shipped from the factory without the jumper connected to
preserve the battery life.
The battery jumper can be found at the base of the Maxiflex Bus connector at the rear of the CPU
module. Use long nose pliers or tweezers to correctly place the jumper over the posts.
2.2 Installing the T2 CPU on the Maxiflex base
Install the T2 CPUs into the CPU position ONLY of a Maxiflex Base. CPU’s must only be installed
and removed from the base with the power off.
Refer to the Maxiflex bases General Instructions for more detail on base layout, module insertion
and module removal. Please refer to Figure 2.1 for the CPU position.
Figure 2.1: Layout of the 7I/O Master Base
Maxiflex T2 CPU User Manual
UMM124XBR04.pdf
11
-© Omniflex
2.3 Connecting the Programming port (all models):
Connect the T2 CPU to a standard PC compatible serial port using the OMINFLEX supplied
standard programming cable (Part Number M1831A supplied separately).
If another cable is to be used, the following connections will apply:
Signal Name
DB-9
FCC-68 Pin No.
Rx Data from T2
2
4
Tx Data to T2
3
1
Ground Reference
5
2
All other pins are reserved and must not be connected.
Table 2.1: Pin allocation of DB-9 connector on program cable and FCC-68 socket on M124xA
2.4 Connecting the Serial port (all models):
The selection of either RS232 or RS485 is accomplished by specific wiring of the serial port
connector. No internal links need be changed to select between RS232 and RS422/485.
NOTE: The pinout of the T2 CPU differs from the previous models of Maxiflex CPU’s. When
upgrading from a previous model please ensure that the correct serial port wiring is used.
Pin
number
1
2
3
4
5
6
7
8
9
Communication Standard
RS232
RS485
Do not connect
Rx Data + (In)
Rx Data (In)
Rx Data – (In)
Tx Data (Out)
Do not connect
Do not connect
Tx Data+ (Out)
Ground
Ground
Do not connect
Vcc
RTS (Out)
Do not connect
CTS (In)
Do not connect
Do not connect
Tx Data – (Out)
Table 2.2: Pin allocation of serial port connector on M124xA CPU.
NOTE: The RTS and CTS handshaking lines are available for applications that require it. It is not
a requirement of the CPU to use handshaking. In most applications connecting handshaking lines
is not required.
2.5 Connecting the Conet/c network port (M1241B CPU only):
The CPU should be connected to network using the C6169 Conet Termination Board and
interconnecting cable.
Maxiflex T2 CPU User Manual
UMM124XBR04.pdf
12
-© Omniflex
Pin number
2
5
8
1, 3, 4, 6, 7 and 9
Description
Signal +
Cable screen (S)
Signal No connection
Table 2.3: Pin allocation of Conet port connector on the M1241B CPU
2.6 Connecting the Conet/m network port (M1243B CPU only):
OMNIFLEX supplies pre-made interface cables for a number of radios, that greatly
simplifies the installation process of the radio. Consult you OMNIFLEX representative for
availability of a cable to suit the radio of your choice.
Pin number
1
2
3
4
5
6
7
8
9
10
11
12
13
14
15
Description
M (Push-To-Talk input of radio)
M_COM (Push-To-Talk return/ground of radio)
Rx+ (Rx Data + or audio ouput)
Tx+ (Tx Data/Mic Input+
CH_SEL_5 (Channel Select logic inputs must have pullup resistors if used on the radio)
CH_SEL_4
CH_SEL_3
CH_SEL_2
E (Carrier Detect/Squelch Output. The output from the
radio should be an open collector output)
E_COM (Radio Power Supply – typically +12V)
Rx- (Rx Data - or ground if unbalanced)
Tx- (Tx Data/Mic Input Return or Ground if unbalanced)
RESET (Can be used as a channel programming strobe
or as a sixth Channel Select Line)
CH_SEL_COM (Ground)
CH_SEL_1
Table 2.4: Pin allocation of Conet/m port connector on the M1243B CPU
2.7 Applying power for the first time
Once the T2 CPU has been installed into a Maxiflex rack, apply power and the CPU OK LED will
turn ON and remain steady ON until power is removed. If the CPU OK LED remains OFF, then
check the power connections to the PSU module and that the LED indication of the PSU module
is normal. Refer to the Installation Guide of the PSU module to verify it’s correct connection.
The I/O OK LED will only turn ON at first power up if the I/O Modules for this system have been
configured, and the correct I/O modules are installed on the base.
Maxiflex T2 CPU User Manual
UMM124XBR04.pdf
13
-© Omniflex
If the I/O module configuration does not match the actual I/O modules installed, then this LED will
flash.
If no I/O modules are configured for the rack then the I/O OK LED will remain off.
The RUN LED will only turn ON at first power up if the CPU has a user application installed set to
begin operating at startup. When shipped from the factory, there is no user application installed
and the LED will remain OFF.
Note that if the BATT LED is ON at this time then check that the battery jumper has been inserted
correctly (refer to Section 4. Installation). If the jumper appears to be correct and the BATT LED
is still ON, then the battery level is low and the battery needs to be replaced. Please consult your
OMNIFLEX distributor to arrange battery replacement.
Maxiflex T2 CPU User Manual
UMM124XBR04.pdf
14
-© Omniflex
3. T2 CPU’s and the MAXIFLEX Architecture
3.1 System Architecture
A diagram of the MAXIFLEX System Architecture is shown in Figure 3.1
This diagram shows the T2 CPU in a system with a Programmable Network Interface
Module (NIM) and a conventional I/O Module (IOM). NIM’s and IOM’s can be arranged in
any order in the available I/O Module slots of the system.
3.2 CPU Functions
The T2 CPU contains the following functions:
3.2.1 Real-Time Clock
These CPU’s have a real-time clock as a standard function. This clock has the
following features:
♦ Battery-backed to retain real time while power is off.
♦ Resolution to 10 milliseconds
♦ Current Time available in the Data Interchange Table
♦ Last Power up Time available in the Data Interchange Table
♦ Last Power Down Time available in the Data Interchange Table
3.2.2 I/O Scanning
This function is responsible for the scanning of conventional I/O modules installed on
Maxiflex base, sorting the data into convenient tables according to type of I/O
(Analogue or Digital; Input or Output) and reading/writing this data to/from the CPU’s
Data Interchange Table (DIT) for easy access from any of the network ports.
3.2.3 I/O Module Management
This function is responsible for continuously monitoring all slots of the Maxiflex I/O
base, keeping track of the currently installed module types. This function also
maintains a copy of the intelligent I/O module configuration data in the CPU, allowing
I/O modules to be changed without the need to reconfigure them.
3.2.4 FORTH User Program
While not necessary in the majority of applications, due to the rich set of other
features in this CPU, the FORTH programming language can be used to customise
any part of the system to suit the application, from simple data scaling, to complex
custom serial port protocols. The Forth program has access to the following features
in the CPU:
♦ Direct access to all Data Interchange Tables in the system
♦ Direct access to the serial port for custom protocols
♦ 8 independent timers with a resolution of 10 milliseconds
♦ Remotely programmable
Maxiflex T2 CPU User Manual
UMM124XBR04.pdf
15
-© Omniflex
Maxiflex T2 CPU User Manual
UMM124XBR04.pdf
SLOT 0
CPU
SLOT 1
PNIM
APPLICATION LAYER
SLOT 2
I/O
APPLICATION LAYER
USER PROGRAM
USER PROGRAM
PRESENTATION LAYER
PRESENTATION LAYER
0
64000
4000 + 0
4000 + 3000
I/O PROCESSING
PRESENTATION LAYER
8000 + 0
16
Figure 3.1 T2 CPU System Architecture
Dynamic
Static
Dynamic
Static
Dynamic
DIT
DIT
DIT
DIT
DIT
3249
65499
4000 + 2999
4000 + 3999
8000 + 2999
I/O SCANNING
I/O ACCESS AND NETWORK LAYER
CONET
DATA LINK
LAYER
CONET/S
DATA LINK
LAYER
Modbus or
CONET/S
DATA LINK
LAYER
NIM SPECIFIC
DATA LINK
LAYER
PORT 0
CONET PORT
PORT 1
PROG PORT
PORT 2
SERIAL PORT
PORT 0
CONET PORT
TO
OTHER
SLOTS
MAXIFLEX
SYSTEM
ARCHITECTURE
-© Omniflex
3.2.5 Data Interchange Table (DIT)
The Data Interchange Table in the CPU is the crossroads for data. Any exchange of
data between functions in the CPU and with the outside world takes place through the
DIT. The DIT is an array of 16 bit registers accessible from any function or
communications port in the system for the purpose of interchanging data.
The DIT is used to hold Configuration Information for the CPU and Dynamic Data to
be read in real-time.
3.2.6 Subscription Service
Central to many applications involving communications across networks is the need to
replicate data between nodes on the network. This feature provides an easy to use
but powerful data replication service between DIT’s in the system, whether they are
local or remote. This service provides change-of-state detection and error reporting for
optimum performance and reliability.
3.2.7 Network Routing Service
Many systems are constructed of multiple networks to overcome the difficulties of
topology or communication protocol conversion. The Routing service provides a
means to seamlessly interconnect these networks into an integrated intranet so that
any node in the system may be globally addressed from any other with no regard for
its physical location.
The T2 CPU can act as a router in these systems, automatically routing data packets
seamlessly between nodes on different networks.
3.2.8 Communications Status Monitoring
The Data Interchange Table contains a group of communication status registers that
may be used for diagnostic purposes. These registers monitor communications
activity on each port. The local and global addresses for each port may also be
accessed from this group of registers.
3.2.9 Serial Port Protocol Selection
The in-built serial port on the T2 CPU comes equipped with three protocol options as
standard:
1. Modbus Slave can be selected for easy interconnection of Maxiflex I/O to third
party systems such as Distributed Control System’s, SCADA software, or Master
Programmable Logic Controllers.
2. Conet/s protocol can be selected to interconnect Maxiflex systems over wide areas
using the RS232 port. This full duplex protocol provides full peer-to-peer
communications capability to allow multiple local networks systems to be
interconnected into a single intranet. This efficient protocol retains the full
capability of the Conet networking technology including remote programming and
the ability to run data subscriptions in both directions simultaneously
3. Custom protocol implemented in the FORTH programming language
3.2.10 Remote Programming
Every CPU is equipped with a dedicated programming port that is equipped with the
Conet/s protocol. Using the network routing function and convenient table
configuration, it is possible to configure/program every node in a Maxiflex intranet from
a single programming port. This function significantly reduces system downtime and
improves maintenance efficiency and therefore life-cycle costs.
Maxiflex T2 CPU User Manual
UMM124XBR04.pdf
17
-© Omniflex
4. Configuring a T2 CPU
4.1 Using OMNISET or DITview to configure the T2 CPU
Most of the features available on the T2 CPU are easily accessible and can be configured
with the minimum of effort by writing to Registers in the DIT in the CPU.
The best method to manually configure a T2 CPU is to use either the Microsoft
Windows95/98/NT/2000 compatible OMNISET or DITView utilities through the
programming port of the CPU.
It is possible to configure a T2 CPU through any of its communications ports that have
access to the DIT, using any software capable of writing to the DIT of the CPU. The DIT
register is given in section 5.
4.1.1 OMNISET
The OMNISET configuration utility is available free of charge for the purpose of configuring
a wide range of OMNIFLEX products, including this range of CPU’s. A Template File
compatible with the particular model of CPU is required, and is supplied with OMNISET.
Check for the latest available version on the OMNIFLEX Resource Centre CD or web site
(www.omniflex.com)
4.1.2 DITview
The DITview utility is an enhanced version of OMNISET, and allows programming directly
over a Conet/c network, and provides the ability to edit and create custom Template files.
DITview is supplied as part of the CONET EXPLORER SUITE, which is required for
programming of the T2 CPU using EziForth, and must be purchased separately.
Wherever reference to OMNISET is made throughout this text, DITview may be used.
4.1.3 Connecting OMNISET with the CPU
To setup the T2 CPU through the programming port using OMNISET or DITview, follow this
procedure:
1. Plug the programming cable into the programming port of the CPU and into a spare
serial port on your PC.
2. Ensure that the OMNISET software utility is running on your Laptop or PC.
(For more information on the installation and operation of OMNISET, please consult the
Help File shipped with the software.)
3. Ensure the correct COM port is selected in OMNISET. (DITview uses a different method
via the CONET server. See the help for this product for further information.)
4. Open the template file named “011001nn(M124xA).dvx” supplied with OMNISET. (The
nn is replaced with the revision number of the latest available dvx file).
5. Ensure that the Target Address is set to “Local CPU”. This is shown in the centre of the
status bar of OMNISET/DITview.
6. The Product Information Group should now be properly displayed. The Alive Counter
(DIT Register 23) should be counting up to indicate that the CPU is “Alive” and
connected to the PC.
Maxiflex T2 CPU User Manual
UMM124XBR04.pdf
18
-© Omniflex
7. You are now ready to view or change any of the parameters in the T2 CPU, and to view
the internal dynamic data in the Maxiflex System.
4.2 Configuring the Programming Port
This port is dedicated to the Programming and Configuration of the T2 CPU and CONET
systems, and requires no configuration to communicate with the CPU to which it is attached
(or its I/O modules). This port is permanently configured for the Conet/s protocol (operating
at 19,200 baud, 8 data bits, no parity, 1 stop bit.)
The only parameter configurable in the CPU for the Programming Port is its Global
Address.
It is possible to interrogate and program other remote network nodes in the system from this
programming port via any network port in the Maxiflex Base. The Network Routing Table
needs to be properly configured to use this function. See Section 4.7
When addressing remote nodes, the Programming Port’s Global Address is used to ensure
that the reply is returned to the programming port. Being used.
The CPU is shipped with the Programming Port Global Address set to 254. (See the “Setup
Programmers Global Address” Group in OMNISET/DITview.)
This global address must be reassigned if remote programming in the system is to be done
from more than one location at the same time.
If more than one CPU is connected in a network, they would all have the default global
address 254 (unless changed by the user on installation.) In this case, the reply from a
programming transaction would be returned to ALL programming ports set to this Global
Address. This is no problem if programming is only ever done at one CPU at a time.
In order to allow programming to be conducted simultaneously at more than one CPU in a
system at a time, each Programming Port should be assigned a unique Global Address. Set
a unique Global Address of each CPU Programming Port to be used simultaneously in the
system starting at 254 in descending order (254, 253, 252 etc,) These Global Address’s
assigned to the programming ports are then not available for use by other nodes in the
system.
4.3 Addressing a Module through the Programming Port
The first step when starting to configure a module in a Maxiflex System with a T2 CPU is to
select the address of the module. In Omniset, select the module to be addressed as follows:
From the pull-down menu select “Remote”, then “Target Address…”. (Depending upon the
dvx file being used, this menu item may say “File Target Address…” or “Group Target
Address”. These variations are explained in the Omniset Help file, and are not relevant to
the selection of the Target Address as discussed here.)
A Selection Window as shown below will be displayed:
Maxiflex T2 CPU User Manual
UMM124XBR04.pdf
19
-© Omniflex
Select the required Address as described below:
4.3.1 No Address set
Select this option only if you are setting the Group Target Address, and you require
the Group to take its address from the File Address setting. This option is only useful
when setting the Group Target Address.
4.3.2 Local CPU
Select this option to communicate directly with the CPU to which the programming tool
is connected.
4.3.3 Intelligent Module in I/O Slot
Select this option to communicate with an intelligent I/O module (such as a
Programmable Network Interface Module – PNIM) on the same base as the CPU to
which the programming tool is connected. Enter the Slot number in the text box
provided.
4.3.4 Local Network ID (using Offset)
This option uses the network routing facility in the CPU to communicate with remote
nodes through the programming port of the CPU.
Select this option to communicate with another node connected to a network that is
connected to this CPU. Set the Network Address to the local Network ID for the target
node (as set on the Address switch) and set the Network Offset to the Offset as
calculated for that network. The model M1241 T2C (Conet port equipped) CPU is
shipped with a default routing table configured. This allows you to address other
nodes on the Conet Port network immediately using network offset 127.
If Network Routing has been configured in the CPU using the ConetRouterWizard
spreadsheet, then refer to the spreadsheet for the corresponding network offset to be
used, or use the allocated Global Addresses as described below.
4.3.5 Direct/Global Network ID
If the CPU to which you are connected has had its Network Routing Table configured,
then all nodes in the system will have been allocated Global Addresses (in the range
127 to 254). Use this option to select any target node in the system using its Global
Address.
Maxiflex T2 CPU User Manual
UMM124XBR04.pdf
20
-© Omniflex
4.4 Configuring the Real-time Clock
To set real-time clock, write the current time and date to the correct Data Interchange Table
Registers. The clock will run immediately from this time.
4.5 Configuring the Serial Port
The serial port on the T2 CPU comes equipped with a number of protocols. The required
protocol including any address selection is made by the correct selection of the switches on
the Serial Port Switch (the right hand switch inside the front cover of the CPU under the
serial port DB9 connector) combined with the Serial Port register settings in the CPU.
Follow the instructions below to set the required protocol mode:
4.5.1 MODBUS Slave Protocol
4.5.1.1.
Default MODBUS (ASCII 9600 baud Slave) Mode
To select this mode, switch 7 to “OFF” and 8 to “ON” on the serial port
address switch.
This port is then configured as a MODBUS slave port operating in MODBUS
ASCII mode at 9600 baud with 7 data bits, no parity and 2 stop bits.
Switches 1 to 5 of the serial port address switch set the Modbus
communications Slave address used to access the T2 CPU through this
serial port.
The internal software settable parameters for this function have no influence
on the operation of the port when switch 8 is on.
This mode allows foolproof communications to be established quickly and
easily.
4.5.1.2.
Standard MODBUS Slave Protocol Mode
The full range of options for the Modbus Slave protocol is settable through
OMNISET/DITview in the “Setup Serial Port” group, including ASCII and
RTU mode, Baud Rate, Parity, number of Data bits and Stop bits etc.
To select this mode, switch SW7 and SW8 of the serial port address switch
to OFF.
Switches 1 to 5 of the DIP switch set the communications address used to
access the T2 CPU through this serial port.
Maxiflex T2 CPU User Manual
UMM124XBR04.pdf
21
-© Omniflex
Example of Serial Port DIP switch setting
1 2 3 4 5 6 7 8
ON
[ White square indicates position of switch lever ]
Switches 1-5 = ID
This is set as a binary number with Switch 1 the least significant bit, and Switch
5 the Most significant bit.
In this example an address of 2 is selected.
Switch 6 reserved.
(always leave switched off)
Switch 7 Default Conet/s (19200 baud) Protocol Select.
Switch on to set Conet/s default mode of operation
In this example this switch is shown OFF.
Switch 8: Default Modbus ASCII (9600 baud) Protocol Selection
Switch 8 ON = Modbus ASCII slave at 9600 baud
(Data bits: 7;Parity: none; Stop bits: 1)
Switch 8 OFF = Internal protocol configuration
In this example, the Switch 8 is shown in the ON position to set the serial port to
its default configuration of MODBUS Slave Ascii at 9600.baud.
Set as shown, (switches 2 and 7 on) the serial port will operate as a Modbus ASCII
slave port at 9600 baud, and will respond to the slave address of 2.
Table 4.1: Serial Port default Address switch settings
4.5.1.3.
Modbus Data Register Mapping
A facility of the Modbus Protocol provides the ability to map the Modbus
Data types (such as coils and holding Registers) to specific areas of the
CPU’s DIT. See the DIT Layout (see section 5.1) and the dvx Template file
help for more details.
4.5.1.4.
Modbus Compressed DIT Addressing
An additional feature provided for the Modbus Protocol is “Compressed DIT
addressing”.
The standard layout of the Data Interchange Table provides 4000 registers
for each Module Slot on a Maxiflex base (see section 5.1).
Some Modbus Master devices are pre-programmed with a maximum
allowable range of 10,000 holding registers. This makes it impossible to
access the DIT registers in I/O slots from Slot 3 onwards (DIT addresses
12,000 upwards).
This feature allows the user to select a smaller number of registers for
access from Modbus in each slot, allowing the Modbus holding register
addressing to be compressed to fit into the 10,000 holding register limit
imposed.
The CPU slot must always be allocated 4000 registers, and so the I/O
module in Slot 1 must start at address 4000. If the start address for this
Maxiflex T2 CPU User Manual
UMM124XBR04.pdf
22
-© Omniflex
module is set to anything other than 4000, then this compressed DIT
addressing feature is disabled (factory default).
To use this feature, write the value 4000 into the module 1 Start Address parameter
(at DIT address 64,080), and then fill in the table with the subsequent start addresses
required.
For example if the value 4100 is written to the Module 2 Start Address parameter (DIT
address 64081), then only 100 registers from Slot 1 will be accessible through the
Modbus port (from 4000 to 4099), regardless of the number of registers actually used
by the module in this slot.
CAUTION: This compression applies only to the addressing used by the Modbus
Master when accessing the data. DIT registers accessed through other ports are
unaffected by this configuration. This feature should be used with caution because the
register address seen through the Modbus Port will be different from the normal
register address as used by Omniset through the programming port example.
4.5.2 Conet/s (Peer-to-peer) Protocol
4.5.2.1.
Default Conet/s Mode (19200 baud)
To select this mode switch 7 to “ON” and 8 to “OFF” on the serial port
address selection switch.
This port is then configured as a Conet/s port operating at 19200 baud (with
8 data bits, no parity and 1 stop bits.)
Switches 1 to 5 of the address switch set the communications address used
to access the T2 CPU through this serial port.
The internal software settable parameters for this port have no influence on
the operation of the port when switch 7 is on, and switch 8 is off.
This mode allows foolproof Conet/s communications to be established
quickly and easily.
4.5.2.2.
Standard Conet/s Protocol Mode
The baud rate of the Conet/s protocol is settable through OMNISET/DITview
in the “Setup Serial Port” group in this mode.
In this mode, switch 7 and 8 of the serial port address switch must be OFF.
Switches 1 to 5 of the DIP switch set the communications address used to
access the T2 CPU through this serial port.
4.5.3 Custom User Protocol Mode
In order to use this advanced feature of the T2 CPU, the “User” Protocol type must be
configured in the “Setup Serial Port” configuration group of the Template file, and a
custom protocol driver must have been downloaded to the T2 CPU.
Both SW7 and SW8 must be switched off on the serial port configuration switch.
Consult the factory for available protocols, or for assistance in writing your own
protocol in EZIFORTH.
In this mode, the configuration switches 1-5 are unassigned by the T2 CPU, and may
be used by the custom serial protocol software downloaded.
Maxiflex T2 CPU User Manual
UMM124XBR04.pdf
23
-© Omniflex
4.6 Configuring the Conet/c Network Port (available on the M1241B T2C CPU only.)
The Conet/c Port selection switch is located on the left inside the front door of the CPU
(under the Conet DB9 connector). Use this switch to configure the Node address of the
CPU on the Conet network and the desired CONET baud-rate (Normal or Slow).
Communications Protocol
Conet Address switch setting
Conet (Normal mode):
Baud rate: 62,500 baud
Switches 1-7: Conet ID
1 2 3 4 5 6 7 8
ON
(Set in binary
Switch 1 = LSB
Switch 7 = MSB)
Switch 8: Baud Rate
Switch 8 OFF = 62.5 kBaud
[Switch shown set to Address 2, Normal baud rate]
Conet (Slow mode):
Baud rate: 7,800 baud
Switches 1-7: Conet ID
1 2 3 4 5 6 7 8
Switch 8: Baud
ON
Switch 8 ON = 7.8 kBaud
[Switch shown set to Address 2, Slow baud rate]
Table 4.2: Conet Port Address switch settings (M1241B T2C)
Each node on the Conet/c network should be allocated a unique address in sequence,
starting at 1.
Please refer to the Conet Installation Guide and Conet Protocol Datasheet for more
information on the CONET network.
4.7 Configuring the Conet/m Network Port (available on the M1243B T2M CPU only.)
The Conet/m Port selection switch is located on the left inside the front door of the CPU
(under the Conet/m DB15 connector). Use this switch to configure the Node address of the
CPU on the Conet/m network.
Each node on the Conet/m network should be allocated a unique address in sequence,
starting at 1.
This address is set in binary with Switch 1 = Least Significant Bit, and Switch 8 = Most
Significant bit. This allows an address range of 1 to 255.
4.8 Configuring the T2 CPU as a Network Router
Many systems are constructed of multiple networks to overcome the difficulties of topology
or communication protocol conversion. The Network Routing Service in this CPU provides a
means to seamlessly interconnect these networks into an integrated “intranet” so that any
node in the system may be globally addressed from any other with no regard for its physical
location.
The T2 CPU must be configured to act as a router in these systems, automatically routing
data packets seamlessly between nodes on different networks.
Maxiflex T2 CPU User Manual
UMM124XBR04.pdf
24
-© Omniflex
The T2 CPU is configured as a network router by writing the configuration into the Network
Routing Table group of registers in the Data Interchange Table. The values to write are
obtained from the “ConetRouterWizard” Excel spreadsheet.
Enter the network layout into a table in the spreadsheet, and the spreadsheet will then
allocate all Global Addresses for the intranet, as well as calculating the Network Router
Table values to be written to each Router in the system.
The procedure to follow is explained in full in the spreadsheet.
4.9 Programming the T2 CPU in EziFORTH
Please refer to the separate M124xA T2 CPU Programmer’s Guide.
Maxiflex T2 CPU User Manual
UMM124XBR04.pdf
25
-© Omniflex
5. The Data Interchange Table explained
5.1 DIT Table Layout
The Data Interchange Table (or DIT) in the T2 CPU’s provides access to up to 65,500 16-bit
data registers used for reading and writing all configuration and dynamic data in the CPU
and all of its I/O modules. Some of these registers reside in the CPU itself, while the
balance are accessed through the CPU as if they are registers in the CPU. These registers
form part of what is called the “extended” DIT.
The following table shows the address map of the DIT table for an entire MAXIFLEX system
as viewed from the T2 CPU. It is possible to access registers in each of the I/O modules
directly as if they are registers in the CPU using the addressing scheme shown below:
Maxiflex Master Rack
Maxiflex
Slot:
CPU
Dynamic
Data
Space
CPU
Config
Data
Space
I/O
Slot
1
I/O
Slot
2
I/O
Slot
3
I/O
Slot
4
I/O
Slot
5
I/O
Slot
6
I/O
Slot
7
DIT Start
Address:
0
64000
4000
8000
12000
16000
20000
24000
28000
DIT End
Address:
3999
65499
7999
11999
15999
19999
23999
27999
31999
Maxiflex Expansion Rack
Maxiflex
Slot:
DIT Start
Address:
DIT End
Address:
I/O
Slot
8
I/O
Slot
9
I/O
Slot
10
I/O
Slot
11
I/O
Slot
12
I/O
Slot
13
I/O
Slot
14
I/O
Slot
15
32000
36000
40000
44000
48000
52000
56000
60000
35999
39999
43999
47999
51999
55999
59999
63999
Table 5.1: DIT Address Map of the T2 CPU:
5.2 CPU Dynamic Data DIT Range
While the address range allocated to the CPU covers 4000 DIT Registers, the T2 CPU
currently supports only 3250 DIT registers. The remaining DIT registers from 3251 to 3999
are not available and therefore cannot be used for data storage.
These 3250 DIT registers reside in the memory of the CPU module itself and have the
fastest access time of all areas.
This area of the DIT is typically used to store dynamic, real time data.
Maxiflex T2 CPU User Manual
UMM124XBR04.pdf
26
-© Omniflex
5.3 I/O Slots 1 to 15 DIT Range
These DIT register ranges provide direct access to the I/O Modules installed in the
MAXIFLEX rack.
4000 DIT registers are allocated per slot. Typically, I/O modules will use only a small portion
of this allocated space.
The datasheet for each I/O Module defines the DIT registers allocated on each module.
These registers on the I/O module datasheet will be shown numbered from 0.
To access a DIT register in an I/O module, simply add the DIT register number given in the
I/O module datasheet to the DIT Start Address applicable to its I/O Slot (from the table
above).
DO NOT attempt to read data from the unallocated area of the DIT space, because the
results will be indeterminate.
The access time from these areas of the DIT are slower than from the CPU Dynamic Data
Area (DIT addresses 0 – 3999)
An Example:
If an M1581B Modbus NIM module is present in I/O Slot 1 and a M1431A 8VC ISO
module is present in I/O Slot 2 then access their respective DIT data as follows:
M1581B NIM Module:
To read the Alive Counter of the NIM module, which is DIT register 23 in the DIT
layout of the NIM module, add 4000, which is the DIT Start address for any module in
I/O Slot 1.
Therefore, by reading DIT register 4023 of the T2 CPU, you will read the Alive
Counter of the NIM module fitted in I/O Slot 1.
M1431A 8VC ISO Module:
To set the Input Type of Channel 1 on this VC module, you need to write data to DIT
register 17 of the 8VC module. As the module is in I/O Slot 2, you must add 8000 to
any DIT number you wish to access in this module. This means that by writing to DIT
register 8017 of the T2 CPU, you are in fact writing to register 17 of the 8VC module
fitted in I/O Slot 2.
5.4 CPU Static Data DIT Range:
This DIT area is used to store configuration data for the functions supported in the T2 CPU,
such as Serial Port set up and Network Routing Table information etc.
This Configuration area is stored in non-volatile memory in the CPU, and does not utilise
the internal battery. This means that this data will still be valid even when the on-board
battery is LOW or is being changed.
There is a free area available in this section for the User to store application specific
configuration that will remains fixed for the life of the application.
Writing to this area of the DIT is slower than accessing the Dynamic DIT area, and
continuous writing to this area during normal system operation should be avoided.
Maxiflex T2 CPU User Manual
UMM124XBR04.pdf
27
-© Omniflex
6. I/O Module Management & Scanning Explained
The T2 CPU automatically identifies the I/O module types installed in a Maxiflex system.
This information is used for two purposes:
1. Checking of the presence of the correct I/O modules in a system.
2. Automatic scanning of these I/O modules.
6.1 The I/O Module Manifest
You can configure a T2 CPU with the required list of I/O modules for the system. This list is
called the I/O manifest.
Once an I/O manifest has been configured, the CPU will continuously monitor the presence
of the I/O modules against this list, and report any discrepancies.
This information is available in the DIT for monitoring by a remote device, and by indication
on the front panel of the CPU.
6.1.1 Configuring an I/O Manifest using Omniset
There are two ways to configure a T2 CPU with the required manifest:
6.1.1.1.
Automatic Manifest Configuration
To configure the T2 automatically, follow this procedure:
1. Power up the system with the required I/O modules installed in their correct
positions.
2. Select the “Setup I/O Manifest” Group in OMNISETor DITview.
3. The Manifest table as stored in the dvx file will be displayed.
4. Press the “Read Current Group” button to read the CPU’s current status to the
screen.
5. Check the first item in the group – the I/O Manifest Key. Change this key to
“Unlocked” if it is “Locked”.
6. Press the “Write Current Group” button to write the “Unlocked” value to the T2
CPU.
7. Wait for a few seconds for the T2 CPU to update its information and then press
the “Read Current Group” button. Changing the value of this item to “Unlocked”
causes the T2 CPU to automatically adjust the manifest table to reflect the
currently installed I/O modules. Check that the list matches the modules
installed in the system and is the required list of modules.
8. Change the I/O Manifest Key back to “Locked”, and press the “Write Current
Group” button to write this information to the T2 CPU. This then freezes this list
of modules in the manifest table.
6.1.1.2.
Manual Manifest Configuration
To configure the T2 manually follow this procedure:
1. Select the “Setup I/O Manifest” Group in OMNISETor DITview.
2. The Manifest table as stored in the dvx file will be displayed.
Maxiflex T2 CPU User Manual
UMM124XBR04.pdf
28
-© Omniflex
3. Press the “Read Current Group” button to read the CPU’s current status to the
screen.
4. Check the first item in the group – the I/O Manifest Key. Change this key to
“Locked” if it is “Unlocked”.
5. Press the “Write Current Group” button to write the “Locked” value to the T2
CPU.
6. Write the required module type to each item in the I/O list.
7. Press the “Write Current Group” button to write this information to the T2 CPU.
This sets the list of modules in the manifest table.
6.1.2 Checking the Status of installed modules
Once the I/O manifest has been set and “locked”, check the I/O module configuration
by following this procedure:
1. Change to the “I/O Module Status” Group.
2. This list shows the currently installed list of modules, and will change dynamically
as I/O modules are removed and installed. The “I/O Bit Status” register identifies
the mismatches between this list and the I/O manifest just created. Each bit set to
1 indicates a mismatch in the corresponding module position. Bit 16 represents the
summary of all other bits in the word. If all 15 modules match, (showing 0), then bit
16 will be 0. If any of the modules does not match, then this bit will be set to 1.
6.1.3 I/O Status Indication
The I/O OK indicator on the front of the module reports the status of the I/O modules
as follows:
If the manifest is “unlocked”, then the I/O OK indicator will be OFF.
If the manifest is “locked” and the installed modules matches this list, then the I/O OK
light will be ON.
If the manifest is “locked” and the installed modules do NOT match this list, then the
I/O OK light will be flashing.
6.2 Automatic I/O Scanning
Input status information is automatically read from the Input modules and stored in the
CPU’s Dynamic Data area of the DIT Table.
Output status information is automatically read from Dynamic Data area of the DIT Table
and written to the relevant output modules.
By placing the I/O dynamic data into the CPU’s DIT, access to the system I/O from the
network will be optimised. This is because similar types of data are grouped together
reducing the number of network read/write requests, and because the CPU’s dynamic data
area is the fastest area to read/write.
The table below identifies the DIT register locations in the CPU’s Dynamic Data Area of the
DIT where the I/O scanning stores/retrieves its data.
Maxiflex T2 CPU User Manual
UMM124XBR04.pdf
29
-© Omniflex
Master Rack
I/O Slot:
Expansion Rack
1
2
3
4
5
6
7
8
9
10
11
12
13
14
15
Analogue
Outputs
110
126
142
158
174
190
206
222
238
254
270
286
302
318
334
No of
Registers
16
16
16
16
16
16
16
16
16
16
16
16
16
16
16
Analogue
Inputs
350
366
382
398
414
430
446
462
478
494
510
526
542
558
574
No of
Registers
16
16
16
16
16
16
16
16
16
16
16
16
16
16
16
Digital
Outputs
590
592
594
596
598
600
602
604
606
608
610
612
614
616
618
No of
Registers
2
2
2
2
2
2
2
2
2
2
2
2
2
2
2
620
622
624
626
628
630
632
634
636
638
640
642
644
646
648
2
2
2
2
2
2
2
2
2
2
2
2
2
2
2
Digital
Inputs
No of
Registers
Figure 6.1 - I/O DIT Address Map for T2 CPU
Notes:
1. 16 registers are allocated for each analogue I/O Slot. Each analogue value is stored as a 16
bit number. The scale of this value is dependent upon the type of I/O module being read, and
it configuration.
2. Digital I/O is packed into two DIT registers per I/O Slot, with each Digital value representing 1
bit.
3. When a module is installed into the system, it will be detected by the CPU in seconds and
then automatically scanned according to its module type. No special configuration is required
for this to occur.
4. Digital Modules are scanned every 10ms.
5. Analogue Modules are scan rate = (10.n + 10) milliseconds, where n is the number of
analogue modules installed on the Master and Expander Bases. Eg 3 installed analogue
modules will be scanned every 40ms, 15 Ananlogue modules will be scanned every 160ms.
Maxiflex T2 CPU User Manual
UMM124XBR04.pdf
30
-© Omniflex
7. The Subscription Service Explained
7.1 Introduction to Subscriptions
Central to many applications involving communications across networks is the need to
replicate data between nodes on the network.
Examples include a SCADA system acquiring data from remote telemetry units in the field;
or a point-to-point telemetry application, where inputs are transmitted from one location to
outputs at another location.
In all these cases, the traditional method is for a controlling master node to poll the slave
nodes regularly for data in case something has changed. This crude method is an inefficient
use of the limited network bandwidth, and is inherently slow in typical and worst case
update times. It also limits the number of master nodes in the system to one.
The Maxiflex T2 CPU provides a far superior mechanism to accomplish this commonly used
function through its Subscription Service. This Service operates as follows:
The node requiring the data sets up a subscription with the source node, very much like you
would subscribe to a magazine through your newsagent. You establish a magazine
subscription by telling the newsagent which magazine you want, your home address, and
how often you want it, and then the newsagent takes the responsibility on himself to send
you the magazine whenever a new issue becomes available.
Request subscription
Subscriber
August issue
Newsagent
September issue
October issue
etc...
Figure 7.1 The Magazine Subscription Analogy.
In the same way, the T2 CPU’s Subscription Service allows the CPU (acting as a node on
the network) to subscribe to a range of DIT registers on a remote node.
The remote node will then send the data at an agreed time interval, plus, if required, when
the data changes state. The receiving node expects these regular updates, and will flag an
error if the subscribed data is interrupted for any reason.
7.2 Setting up subscriptions
Just like the magazine subscription, the receiving CPU is responsible for setting up and
maintaining subscriptions with other nodes to replicate data across the network. The
advantages of using subscriptions over regular polling mechanisms are as follows:
Maxiflex T2 CPU User Manual
UMM124XBR04.pdf
31
-© Omniflex
1. Only one message is required on the network for a data update as opposed to two in a
Request/Reply polling method. This reduces network overhead allowing more data
throughput on the network.
2. The regular data updates can be much slower than the response time required for the
system by using change-of-state detection. The Source node will send data
immediately there is a change of state, providing the optimum system response,
without the need to have a fast regular update time. This reduces network overhead
allowing more/faster data throughput on the network when something does change.
3. On peer-to-peer networks multiple subscriptions can be configured between nodes in
different directions, each of which would operate independently of any other. This
provides far more flexibility than typical Poll/Response Master/Slave methods.
Subscription
Setup
Registers
Setup Message
Data
Sink
Regular Data updates
The Receiving
Node
Data
Source
The Sending
Node
The node acting as a data “source” (the sending node) requires no user configuration to
participate in a subscription contract with another node. The node acting as data “sink” (the
receiving node) is configured by the user for the required data. The “sink” node then
automatically manages the subscription including sending the requests to the data source,
and managing errors in the process.
Maxiflex T2 CPU User Manual
UMM124XBR04.pdf
32
-© Omniflex
The following table shows the information required to configure a subscription:
ITEM
DESCRIPTION
VALID RANGE
Change-of-State Required
This sets whether the subscription data block will be sent
when any data in the block changes.
Yes/No
Update time
This is the time between regular updates of data that will
be sent whether the data has changed or not.
1 – 120 seconds
Local Port Number
This is the Network Port number on the network module in
the local (receiving) system to which the network
containing the remote (source) node is connected. This
item is only required if a local network ID is specified for
the Source Node Address, otherwise it should be set to 0.
0–3
On the T2 CPU:
0 = CPU network port
2 = CPU Serial Port
Refer to the relevant module
user manual for port numbers
on modules in other I/O slots.
Destination DIT Start Address
This is the DIT register address where the data will start
to be written in this CPU acting as the data sink.
0 – 65535
Source Node Address
This is the network address of the sending or source node
from which the required data originates.
Local network addresses:
1 – 126
This can be expressed as a local network address plus
the local slot and port to which the network is connected,
or it can be expressed as a global network address if
network routing is configured in the CPU.
Global network addresses:
127 – 254
Source DIT Start Address
This is the DIT register address of the first register in the
block of registers to be sent from the source node.
0 – 65535
Data Range
This is the number of 16 bit DIT registers that will be
transferred in the subscription
1 – 120
Table 7.1 Subscription Configuration Information
7.3 Number of subscriptions allowed
There is a limit to the number of subscriptions that a T2 CPU can receive, and a limit to the
number of subscriptions that it can send. The T2 CPU can be configured to receive
subscriptions from a maximum of 32 other nodes and can send subscriptions to a maximum
of 8 other receiving nodes.
In other words each T2 CPU can act as data sink for 32 subscriptions, and data source for
8 subscriptions simultaneously.
7.4 Subscription Application Example
Refer to the diagram of a simple network below:
Inputs
PSU
M124xB
Node Address 5
Outputs
PSU
M124xB
Node Address 2
Node 2 subscribes to
data from Node 5
CONET
Maxiflex T2 CPU User Manual
UMM124XBR04.pdf
33
-© Omniflex
Remote node 5 on the CONET network has digital information in DIT registers 620 to 627.
The Central Node 2 needs to monitor these digital inputs. A regular update time of every
10s is quite satisfactory to determine that the remote system is still connected and
functioning if nothing changes, but the data should be sent immediately if any of the digital
inputs changes state.
Node 2 is the Destination node (it sets up the subscription and receives the data). Node 5 is
the sending node, and requires no user configuration to participate in the subscription
process.
Fill in the following data into one of the eight subscription blocks in the Subscription Table in
the T2 CPU of Node 2 to configure this function:
NAME
VALUE
DESCRIPTION
Change of State Required
Yes
The data will also be sent whenever any bit the
DIT registers in the range 620-627 changes.
Update Time
10
The regular updates can be 10 seconds apart.
Local Port Number
0
The CONET network is Port 0 on the CPU
Destination DIT Start Address
100
This is the DIT Address where we want to start
writing the received data.
Source Node Address
5
The local CONET ID on the Conet network
Source DIT Start Address
620
The Source Data start at DIT address 620
Data Range
8
We require 8 DIT registers to be sent
Table 7.2 Subscription Block Data Example
When configured, Node 2 automatically requests a subscription with the following data from
Node 5 on the Conet network connected to the CPU:
Node 5 undertakes to send the contents of its own DIT registers 620 to 627 over the
network to node 2 whenever any of the registers changes, or every 10s if no change occurs
in that time. The information will be placed in node 2's DIT registers 100 to 107.
Node 2 can monitor the status of the subscription by monitoring the relevant bit in the
Subscription Status DIT register. If this bit is clear then the subscription is operating
successfully. If this bit is set, then the subscription has failed and received data is not valid,
or the subscription has not been correctly set.
Maxiflex T2 CPU User Manual
UMM124XBR04.pdf
34
-© Omniflex
8. Appendix: T2 CPU Detailed DIT Layout:
8.1 T2 CPU Dynamic Data Area DIT Register Assignment
(DIT Registers 0 – 3999)
DIT Number Description
0 – 23
T2 CPU System Information
0
Product Code
Unique Number in BCD format that reflects the type of product as follows:
0110 – M1240B T2 CPU
0111 – M1241B T2C CPU
0113 – M1243B T2M CPU
1
2
3
4-7
8-21
21
DIT Revision Number
Version Number of the DIT Layout supported by the CPU.
Kernel Version Number
Version number of the CPU Kernel. BCD format.
Supported Services Flags
Network related services supported by the Kernel:
Bit 0: DIT service
Bit 1: Subscription service
Bit 2: Queue service
Bit 3: Datagram service
Bit 4: Routing service
Bit 5: Reserved
Bit 6: Programming service
Bit 7: Reserved
Bits 8-15: Reserved
Bits set indicate which service is supported.
Tag Name
User configurable string of DIT registers in ASCII format. The user is able to write
up to 8 ASCII characters into these DIT registers (two characters per register) to
uniquely identify each CPU.
This Tag Name is used by OMNISET to verify that the correct CPU is being
communicated with. This Tag Name must match the Tag Name set in OMNISET
to allow the configuration to be changed.
RESERVED
Maxiflex Slot Number
This register holds the slot in which this module is located. As a CPU is always in
the CPU slot, this number is always 0.
Maxiflex T2 CPU User Manual
UMM124XBR04.pdf
35
-© Omniflex
DIT Number
22
23
24 – 31
24
25
26
27
28
29
30
31
32 – 39
Description
System Register
Indicates the following conditions current in the CPU:
Bit 0: Application program HALTED (0) or RUNNING (1)
Bit 1: CPU Battery HEALTHY (0) or LOW (1)
Bit 2: I/O Manifest HEALTHY (0) or ERROR (1)
Bit 3: I/O Manifest Key UNLOCKED (0) or LOCKED(1)
Bits 4-7 Auto-scanning OFF (0000) or ON (1111)
Bits 8-15: Reserved
Alive Counter
Free running counter in the CPU. Useful for communications diagnostics. While
this register is incrementing, the Operating System is running. If this register is
static, the CPU has halted or communications has failed.
Current Real Time Clock (RTC) Data
The current date and time on the CPU.
RTC Current Year
RTC Current Month
RTC Current Date
RTC Current Day
RTC Current Hour
RTC Current Minute
RTC Current Second
RTC Current Millisecond
Power Down Real Time Clock (RTC) Data
32
The time the CPU was last powered down.
RTC Power Down Year
33
34
35
36
37
38
39
RTC Power Down Month
RTC Power Down Date
RTC Power Down Day
RTC Power Down Hour
RTC Power Down Minute
RTC Power Down Second
RTC Power Down Millisecond
40 – 47
40
41
42
43
44
45
46
47
Power Up Real Time Clock (RTC) Data
The time the CPU was last powered up.
RTC Power Up Year
RTC Power Up Month
RTC Power Up Date
RTC Power Up Day
RTC Power Up Hour
RTC Power Up Minute
RTC Power Up Second
RTC Power Up Millisecond
Maxiflex T2 CPU User Manual
UMM124XBR04.pdf
36
-© Omniflex
DIT Number
Description
48
49
Power Supply Status (applies to M1152 Power Supply only)
Bit 0 – Mains supply DISCONNECTED (0) or CONNECTED (1)
Bit 1 – Temperature Sensor DISCONNECTED (0) or CONNECTED (1)
Bit 2 – Battery Level Alarm HEALTHY (0) or ALARM (1)
When the measured battery level falls below the Alarm level configured in the
Setup M1152 PSU module group, this status goes to ALARM. If the current
battery voltage is above the Alarm level, then the status is HEALTHY.
Bit 3 – Battery Level Critical NOT CRITICAL (0) or CRITICAL (1)
When this status indicates CRITICAL, then the battery voltage has fallen below
the Critical battery level configured in the Setup M1152 PSU group. This condition
means that the battery requires urgent replacement.
Battery Level (when M1152 Power Supplies are used) measured in tenths of a volt
50 – 65
I/O Module Status
50
I/O Manifest Status
This is a bit map of the current I/O module status. The bit structure is as follows:
15 14 13 12 11 10 9 8 7 6 5 4 3 2 1 0
I/O Slot 1
I/O Slot 2
I/O Slot 3
I/O Slot 4
I/O Slot 5
I/O Slot 6
I/O Slot 7
I/O Slot 8
I/O Slot 9
I/O Slot 10
I/O Slot 11
I/O Slot 12
I/O Slot 13
I/O Slot 14
I/O Slot 15
Global I/O Status BIT
If a bit is set for I/O Slot n then the module installed in that I/O Slot does not match
the module configured. Refer to DIT 64051 for configuration of I/O modules.
The Global Status BIT is set if any of the I/O Slot bits are set. It can be used as an
I/O System Integrity flag.
Maxiflex T2 CPU User Manual
UMM124XBR04.pdf
37
-© Omniflex
DIT Number
51
Description
52
Scanned Module ID for I/O Slot 1
Every I/O and NIM module has a unique Module ID code that identifies it on the
Maxiflex Rack. The ID code of the I/O or NIM module for this slot is displayed in
this register.
Scanned Module ID for I/O Slot 2
53
54
Scanned Module ID for I/O Slot 3
Scanned Module ID for I/O Slot 4
55
56
Scanned Module ID for I/O Slot 5
Scanned Module ID for I/O Slot 6
57
58
Scanned Module ID for I/O Slot 7
Scanned Module ID for I/O Slot 8
59
60
Scanned Module ID for I/O Slot 9
Scanned Module ID for I/O Slot 10
61
62
63
64
65
66 – 67
Scanned Module ID for I/O Slot 11
Scanned Module ID for I/O Slot 12
Scanned Module ID for I/O Slot 13
Scanned Module ID for I/O Slot 14
Scanned Module ID for I/O Slot 15
RESERVED
68
69
Subscription Block Status Bits Subscriptions 1-16
Subscription Block Status Bits Subscriptions 17-32
70 – 78
Networking Information
Status Information for the available network ports on the CPU hardware.
70
71
72
73
74
75
Programming Port Inactivity
A seconds counter that is reset to zero every time there is active communications
on the Programming Port. If there is no valid communications, the counter is
incremented every second.
Serial Port Inactivity
A seconds counter that is reset to zero every time there is active communications
on the Serial Port. If there is no valid communications, the counter is incremented
every second.
Network Port Inactivity
A seconds counter that is reset to zero every time there is active communications
on the Network Port. If there is no valid communications, the counter is
incremented every second.
Programming Port ID
This is the ID setting of the Programming Port – fixed at 65400
Serial Port Local ID
The local ID setting for the Serial Port as set on the Serial Port dipswitch, swtiches
1 to 6.
Serial Port Global ID
Maxiflex T2 CPU User Manual
UMM124XBR04.pdf
38
-© Omniflex
DIT Number
Description
Global ID of the CPU on the Serial Port. Only applies if the Network Routing Table
is configured to include this port. Note that as the default Network Routing Table
does not include this port, the default Global ID setting is set to 255 which is an
invalid Global ID.
76
Network Port Local ID
This is the local ID setting on the Network Port Dipswitch, switches 1 to 7.
77
Network Port Global ID
Global ID of the CPU on the Network Port. The default Network Routing Table
includes this port at a Network offset of 127. This the Global ID for the CPU equals
the network offset of 127 + Local ID in the default case.
78
Serial Port dipswitch setting
79
Network Port dipswitch setting
80 - 87
System Timers
CPU count down timers decremented by the Operating System until zero is
reached. Values entered are decremented by 1 every 10 milliseconds.
For example, enter 100 to time for 1 second. The largest timer available is 655350
ms or about 11 minutes.
80
81
82
83
84
85
86
87
88 – 109
110 – 349
System Timer 0
System Timer 1
System Timer 2
System Timer 3
System Timer 4
System Timer 5
System Timer 6
System Timer 7
RESERVED
Raw Analogue Output Data Area
Raw Analogue Output values written to this data area are copied to corresponding
Maxiflex Analogue Output modules automatically by the CPU. Individual analogue
output channels are referenced by I/O Slot and Channel number for easy access.
16 Channels are allocated per I/O Slot. The following formula may be used to
access output channels:
Output DIT = 110 + (channel-1) + (I/O_Slot –1) * 16
Refer to Appendix 3 for the data format required to drive Analogue Output
Modules.
110 - 125
Raw Analogue Output Data for I/O Slot 1, Channels 1-16
110
111
112
113
Raw Analogue Output for I/O Slot 1, Channel
Raw Analogue Output for I/O Slot 1, Channel
Raw Analogue Output for I/O Slot 1, Channel
Raw Analogue Output for I/O Slot 1, Channel
Maxiflex T2 CPU User Manual
UMM124XBR04.pdf
39
1
2
3
4
-© Omniflex
DIT Number
Description
114
115
116
Raw Analogue Output for I/O Slot 1, Channel 5
Raw Analogue Output for I/O Slot 1, Channel 6
Raw Analogue Output for I/O Slot 1, Channel 7
117
118
119
120
121
122
123
124
125
Raw Analogue Output for I/O Slot 1, Channel
Raw Analogue Output for I/O Slot 1, Channel
Raw Analogue Output for I/O Slot 1, Channel
Raw Analogue Output for I/O Slot 1, Channel
Raw Analogue Output for I/O Slot 1, Channel
Raw Analogue Output for I/O Slot 1, Channel
Raw Analogue Output for I/O Slot 1, Channel
Raw Analogue Output for I/O Slot 1, Channel
Raw Analogue Output for I/O Slot 1, Channel
126 – 141
Raw Analogue Output Data for I/O Slot 2, Channels 1-16
142 – 157
Raw Analogue Output Data for I/O Slot 3, Channels 1-16
158 – 173
Raw Analogue Output Data for I/O Slot 4, Channels 1-16
174 – 189
Raw Analogue Output Data for I/O Slot 5, Channels 1-16
190 – 205
Raw Analogue Output Data for I/O Slot 6, Channels 1-16
206 – 221
Raw Analogue Output Data for I/O Slot 7, Channels 1-16
222 – 207
Raw Analogue Output Data for I/O Slot 8, Channels 1-16
238 – 253
Raw Analogue Output Data for I/O Slot 9, Channels 1-16
254 – 269
Raw Analogue Output Data for I/O Slot 10, Channels 1-16
270 – 285
Raw Analogue Output Data for I/O Slot 11, Channels 1-16
286 – 301
Raw Analogue Output Data for I/O Slot 12, Channels 1-16
302 – 317
Raw Analogue Output Data for I/O Slot 13, Channels 1-16
318 – 333
Raw Analogue Output Data for I/O Slot 14, Channels 1-16
334 – 349
Raw Analogue Output Data for I/O Slot 15, Channels 1-16
350 – 589
8
9
10
11
12
13
14
15
16
Raw Analogue Input Data Area
The Raw Analogue Input values of Maxiflex Analogue Input modules can be read
from this data area. Individual analogue input channels are referenced by I/O Slot
and Channel number for easy access. 16 Channels are allocated per I/O Slot. The
following formula may be used to read input channels:
Input DIT = 350 + (channel-1) + (I/O_Slot –1) * 16
Refer to Appendix 3 for the data formats available from Maxiflex Analogue Input
Modules.
NOTE: The Raw data for a given I/O Slot will clear to zero if there is no input
module installed in that I/O Slot.
Maxiflex T2 CPU User Manual
UMM124XBR04.pdf
40
-© Omniflex
DIT Number
Description
350 – 365
Raw Analogue Input Data for I/O Slot 1, Channels 1-16
350
351
352
353
Raw Analogue Input for I/O Slot 1, Channel
Raw Analogue Input for I/O Slot 1, Channel
Raw Analogue Input for I/O Slot 1, Channel
Raw Analogue Input for I/O Slot 1, Channel
1
2
3
4
354
355
356
357
358
359
360
361
362
363
Raw Analogue Input for I/O Slot 1, Channel
Raw Analogue Input for I/O Slot 1, Channel
Raw Analogue Input for I/O Slot 1, Channel
Raw Analogue Input for I/O Slot 1, Channel
Raw Analogue Input for I/O Slot 1, Channel
Raw Analogue Input for I/O Slot 1, Channel
Raw Analogue Input for I/O Slot 1, Channel
Raw Analogue Input for I/O Slot 1, Channel
Raw Analogue Input for I/O Slot 1, Channel
Raw Analogue Input for I/O Slot 1, Channel
5
6
7
8
9
10
11
12
13
14
364
365
Raw Analogue Input for I/O Slot 1, Channel 15
Raw Analogue Input for I/O Slot 1, Channel 16
366 – 381
Raw Analogue Input Data for I/O Slot 2, Channels 1-16
382 – 397
Raw Analogue Input Data for I/O Slot 3, Channels 1-16
398 – 413
Raw Analogue Input Data for I/O Slot 4, Channels 1-16
414 – 429
Raw Analogue Input Data for I/O Slot 5, Channels 1-16
430 – 445
Raw Analogue Input Data for I/O Slot 6, Channels 1-16
446 – 461
Raw Analogue Input Data for I/O Slot 7, Channels 1-16
462 – 477
Raw Analogue Input Data for I/O Slot 8, Channels 1-16
478 – 493
Raw Analogue Input Data for I/O Slot 9, Channels 1-16
494 – 509
Raw Analogue Input Data for I/O Slot 10, Channels 1-16
510 – 525
Raw Analogue Input Data for I/O Slot 11, Channels 1-16
526 – 541
Raw Analogue Input Data for I/O Slot 12, Channels 1-16
542 – 557
Raw Analogue Input Data for I/O Slot 13, Channels 1-16
558 – 573
Raw Analogue Input Data for I/O Slot 14, Channels 1-16
574 – 589
Raw Analogue Input Data for I/O Slot 15, Channels 1-16
590 – 619
Raw Digital Output Data Area
The Raw Digital Output values for Maxiflex Digital Output modules can be written
to this data area for output to the modules. The data is in packed bit form such
that a single DIT register comprises 16 channels of an output module.
32 channels (or 2 DIT registers) are allocated per I/O Slot starting from DIT 590.
Maxiflex T2 CPU User Manual
UMM124XBR04.pdf
41
-© Omniflex
DIT Number
Description
The Bit representation for each channel is provided below.
590 – 591
Raw Digital Output Data for I/O Slot 1
590
Raw Digital Output Data for I/O Slot 1, Channels 1 - 16
Output channels 1 to 16 are packed into this DIT register as shown:
15 14 13 12 11 10 9 8 7 6 5 4 3 2 1 0
Channel 1
Channel 2
Channel 3
Channel 4
Channel 5
Channel 6
Channel 7
Channel 8
Channel 9
Channel 10
Channel 11
Channel 12
Channel 13
Channel 14
Channel 15
Channel 16
If Bit n is 1, then Output channel n is ON
If Bit n is 0, then Output channel n is OFF
591
Raw Digital Output Data for I/O Slot 1, Channels 17 - 32
Output channels 17 to 32 are packed into this DIT register as shown:
15 14 13 12 11 10 9 8 7 6 5 4 3 2 1 0
Channel 17
Channel 18
Channel 19
Channel 20
Channel 21
Channel 22
Channel 23
Channel 24
Channel 25
Channel 26
Channel 27
Channel 28
Channel 29
Channel 30
Channel 31
Channel 32
If Bit n is 1, then Output channel n is ON
If Bit n is 0, then Output channel n is OFF
592-593
Raw Digital Output Data for I/O Slot 2
594-595
Raw Digital Output Data for I/O Slot 3
596-597
Raw Digital Output Data for I/O Slot 4
598-599
Raw Digital Output Data for I/O Slot 5
600-601
Raw Digital Output Data for I/O Slot 6
602-603
Raw Digital Output Data for I/O Slot 7
Maxiflex T2 CPU User Manual
UMM124XBR04.pdf
42
-© Omniflex
DIT Number
Description
604-605
Raw Digital Output Data for I/O Slot 8
606-607
Raw Digital Output Data for I/O Slot 9
608-609
Raw Digital Output Data for I/O Slot 10
610-611
Raw Digital Output Data for I/O Slot 11
612-613
Raw Digital Output Data for I/O Slot 12
614-615
Raw Digital Output Data for I/O Slot 13
616-617
Raw Digital Output Data for I/O Slot 14
618-619
Raw Digital Output Data for I/O Slot 15
620 – 649
Raw Digital Input Data Area
The Raw Digital Input values scanned by Maxiflex Digital Input modules can be
read from this data area. The data is in packed bit form such that a single DIT
register comprises 16 channels of an input module.
32 channels (or 2 DIT registers) are allocated per I/O Slot starting from DIT 620.
The Bit representation for each channel is provided below.
NOTE: The Raw data for a given I/O Slot will clear to zero if there is no input
module installed in that I/O Slot.
620 – 621
Raw Digital Input Data for I/O Slot 1
620
Raw Digital Input Data for I/O Slot 1, Channels 1 - 16
Input channels 1 to 16 are packed into this DIT register as shown:
15 14 13 12 11 10 9 8 7 6 5 4 3 2 1 0
Channel 1
Channel 2
Channel 3
Channel 4
Channel 5
Channel 6
Channel 7
Channel 8
Channel 9
Channel 10
Channel 11
Channel 12
Channel 13
Channel 14
Channel 15
Channel 16
If Bit n is 1, then Input channel n is ON
If Bit n is 0, then Input channel n is OFF
621
Raw Digital Input Data for I/O Slot 1, Channels 17 – 32
Input channels 17 to 32 are packed into this DIT register as shown:
Maxiflex T2 CPU User Manual
UMM124XBR04.pdf
43
-© Omniflex
DIT Number
Description
15 14 13 12 11 10 9 8 7 6 5 4 3 2 1 0
Channel 17
Channel 18
Channel 19
Channel 20
Channel 21
Channel 22
Channel 23
Channel 24
Channel 25
Channel 26
Channel 27
Channel 28
Channel 29
Channel 30
Channel 31
Channel 32
If Bit n is 1, then Input channel n is ON
If Bit n is 0, then Input channel n is OFF
622-623
Raw Digital Input Data for I/O Slot 2
624-625
Raw Digital Input Data for I/O Slot 3
626-627
Raw Digital Input Data for I/O Slot 4
628-629
Raw Digital Input Data for I/O Slot 5
630-631
Raw Digital Input Data for I/O Slot 6
632-633
Raw Digital Input Data for I/O Slot 7
634-635
Raw Digital Input Data for I/O Slot 8
636-637
Raw Digital Input Data for I/O Slot 9
638-639
Raw Digital Input Data for I/O Slot 10
640-641
Raw Digital Input Data for I/O Slot 11
642-643
Raw Digital Input Data for I/O Slot 12
644-645
Raw Digital Input Data for I/O Slot 13
646-647
Raw Digital Input Data for I/O Slot 14
648-649
Raw Digital Input Data for I/O Slot 15
650 – 3249
User Data Area
3250 – 3999
Reserved
Not available on M123xA versions of T2 CPUs.
Maxiflex T2 CPU User Manual
UMM124XBR04.pdf
44
-© Omniflex
8.2 T2 CPU Static Configuration Data Area DIT Register Assignment
(DIT Registers 64000 – 65499)
This DIT area is maintained in the CPU as non-volatile memory. Data content is retained even if the onboard battery is low or being replaced. All configuration of T2 functions is therefore implemented here so
that configuration is not lost during power down. In addition, there are some registers available for the
User to place some configuration parameters for application programs.
DIT Number
Description
64000 - 64014
User’s Application Name
These registers are reserved to allow the user to enter the name of the application
programmed into this CPU. This is a programming aid to the user only and this
information is not used by the CPU
64015
User’s Application Version Number
These registers are reserved to allow the user to enter the Revision of the application
programmed into this CPU. This is a programming aid to the user only and this
information is not used by the CPU
The conventional format for this register is to store the Major Version as two hex
characters, and Minor Version as two hex characters.
Eg: Version 2.12 would be stored in this register as the hex number 0212.
64016 – 64047
64048
RESERVED
Backup Battery Alarm Thresholds (M1152 PSU Only)
The upper byte holds the Battery Voltage “Critical” Threshold (in tenths of a volt)
The lower byte holds the Battery Voltage “Alarm” Threshold (in tenths of a volt)
64049
Battery Test Interval (M1152 PSU Only)
The CPU will perform a battery test at regular intervals if an M1152 PSU is fitted to the
Rack. This item selects the interval time period in tens of seconds.
The default test interval is 10 minutes (default value = 60).
64050 - 64065
I/O Manifest Configuration
The I/O Manifest is the list of I/O modules required for the system.
This is where the particular I/O Manifest for the Maxiflex system is setup. The Module
ID for each module in every slot must be entered here for each slot. The CPU will cross
check this manifest against the modules actually installed in the Maxiflex system and
the I/O OK LED will turn ON if hardware correlates with the manifest otherwise it will
remain OFF. In addition the I/O Manifest Status register will be updated.
64050
64051
I/O Manifest Key
This register locks the I/O Manifest setup according to the I/O Manifest below. The logic
is as follows:
If bit 0 = 0 then the I/O Manifest is not locked and the I/O Manifest is configured with
the current installation of I.O Modules.
If bit 0 = 1, then the I/O Manifest is locked and any deviation between the I/O Manifest
and installed I/O modules is flagged in DIT 50 I/O Manifest Status.
Set the Module ID for the module installed in I/O Slot 1
Maxiflex T2 CPU User Manual
UMM124XBR04.pdf
45
-© Omniflex
DIT Number
Description
64052
64053
64054
Set the Module ID for the module installed in I/O Slot 2
Set the Module ID for the module installed in I/O Slot 3
Set the Module ID for the module installed in I/O Slot 4
64055
64056
64057
64058
64059
64060
64061
64062
64063
64064
64065
Set the Module ID for the module installed in I/O Slot 5
Set the Module ID for the module installed in I/O Slot 6
Set the Module ID for the module installed in I/O Slot 7
Set the Module ID for the module installed in I/O Slot 8
Set the Module ID for the module installed in I/O Slot 9
Set the Module ID for the module installed in I/O Slot 10
Set the Module ID for the module installed in I/O Slot 11
Set the Module ID for the module installed in I/O Slot 12
Set the Module ID for the module installed in I/O Slot 13
Set the Module ID for the module installed in I/O Slot 14
Set the Module ID for the module installed in I/O Slot 15
64072 - 64079
Modbus Data Register Mapping(Modbus Serial Port only)
This function is only applicable when the Serial Port is being used as a Modbus Slave
port. This next set of registers are used to define the ranges of registers assigned as
“Holding Registers”, “Input Registers”, “Coils” and “Input Status” registers as defined in
the Modbus protocol.
64072
64073
64074
64075
64076
64077
64078
64079
This allows the position and number of registers in the DIT assigned to these Modbus
data types.
Holding Register Start DIT
Holding Register End DIT
Input Register Start DIT
Input Register End DIT
Coil Start DIT
Coil End DIT
Input Status Start DIT
Input Status End DIT
64080 - 64094
Modbus Compressed DIT Addressing(Modbus Serial Port only)
This function is only applicable when the Serial Port is being used as a Modbus Slave
port. Some third party Modbus Master devices cannot address the full range of DIT
registers i.e. 1 – 64549 Holding Registers. In most cases the Modbus Master does
require to access all of these registers – in fact it is typically a much smaller amount of
registers required per I/O Slot. It is therefore possible to reduce the normal address
space allocated per I/O Slot from 4000 to a more suitable number. The remaining DIT
registers are then excluded from the address space thus allowing the Modbus Master
to access all required I/O within its limited address range.
This is accomplished by specifying a User start address for each I/O Slot as indicated
below.
64080
User Start Address for I/O Slot 1
I/O Slot 1 will always start from 4000 and cannot be changed.
Maxiflex T2 CPU User Manual
UMM124XBR04.pdf
46
-© Omniflex
DIT Number
Description
64081
64082
64083
64084
64085
64086
64087
64088
64089
64090
64091
64092
64093
Set this register to 4000 to enable the User I/O Slot Address Table.
Set to this register to 0 to disable the User I/O Slot Address Table and revert to the full
addressing scheme.
User Start Address for I/O Slot 2
User Start Address for I/O Slot 3
User Start Address for I/O Slot 4
User Start Address for I/O Slot 5
User Start Address for I/O Slot 6
User Start Address for I/O Slot 7
User Start Address for I/O Slot 8
User Start Address for I/O Slot 9
User Start Address for I/O Slot 10
User Start Address for I/O Slot 11
User Start Address for I/O Slot 12
User Start Address for I/O Slot 13
User Start Address for I/O Slot 14
64094
64095
User Start Address for I/O Slot 15
RESERVED
64096
RESERVED
64097
Programmer’s Global Address
This register sets the Global ID of the programmer PC or Laptop so that it is possible to
remotely program other devices connected to the network port of the local CPU via the
Programming Port. This value is usually set to 254 as a default but may be changed by
the user if desired.
64098
RESERVED
64099 – 64100
Serial Port Configuration
64099
RTS/CTS Timeout
If RTS/CTS handshaking is enabled, then the transmitter will assert RTS when it is
ready to transmit. If CTS is asserted before the timeout period in this register, then
transmission will commence. If CTS is not asserted, then the transmission will be
aborted. Handshaking is enabled by setting bit 12 of register 64100.
Maxiflex T2 CPU User Manual
UMM124XBR04.pdf
47
-© Omniflex
DIT Number
Description
64100
Serial Port Setup
This register sets up the communications parameters for the serial port on the CPU.The
format of this register is as follows:
15 14 13 12 11 10 9 8 7 6 5 4 3 2 1 0
Stop bits
Parity
Data bits
Baud Rate
Not Used
Half/Full Duplex
RTS/CTS Handshaking
Transmission Mode
Protocol
Stop Bits:
Parity:
Data Bits:
Baud:
1 = 1 stop bit, 0 = 2 stop bits
00 = none, 01 = odd, 10 = even
1 = 8 data bits, 0 = 7 data bits
0000 = 300 baud
0001 = 600 baud
0010 = 1200 baud
0011 = 2400 baud
0100 = 4800 baud
0101 = 9600 baud
0110 = 19200 baud
0111 = 38400 baud
RTSCTS Handshaking: 1 = ON, 0 = OFF
Transmission Mode:
1 = ASCII, 0 = RTU(Binary)
Protocol:
00 = Reserved
01 = Modbus
10 = User Protocol
64101 – 64150
Network Routing Table
These registers contain the data that allows the T2 CPU to route packets across
networks e.g. routing a packet from a Modbus network connected to the serial port, to a
Conet network connected to the Conet port. An MS Excel Spreadsheet is used to
generate the data for this table. This spreadsheet is available from Omniflex if the user
requires to route messages with the T2 CPU.
64101
64102
Setup for Network 1
The default setting for this register is 64768 when no User routing table has been
configured. If a routing table has been configured and the User wishes to revert back to
the default setting, he may simply write zero to this register and the default settings will
be invoked
Setup for Network 2
64103
64104
Setup for Network 3
Setup for Network 4
64105
Setup for Network 5
Maxiflex T2 CPU User Manual
UMM124XBR04.pdf
48
-© Omniflex
DIT Number
Description
64106
64107
64108
Setup for Network 6
Setup for Network 7
Setup for Network 8
64109
64110
64111
64112
64113
64114
64115
64116
64117
64118
64119
64120
64121
64122
Setup for Network 9
Setup for Network 10
Setup for Network 11
Setup for Network 12
Setup for Network 13
Setup for Network 14
Setup for Network 15
Setup for Network 16
Setup for Network 17
Setup for Network 18
Setup for Network 19
Setup for Network 20
Setup for Network 21
Setup for Network 22
64123
64124
Setup for Network 23
Setup for Network 24
64125
64126
Setup for Network 25
Setup for Network 26
64127
64128
Setup for Network 27
Setup for Network 28
64129
64130
Setup for Network 29
Setup for Network 30
64131
64132
64133
64134
Setup for Network 31
Setup for Network 32
Setup for Network 33
Setup for Network 34
64135
64136
64137
64138
64139
64140
64141
64142
64143
64144
64145
64146
64147
64148
Setup for Network 35
Setup for Network 36
Setup for Network 37
Setup for Network 38
Setup for Network 39
Setup for Network 40
Setup for Network 41
Setup for Network 42
Setup for Network 43
Setup for Network 44
Setup for Network 45
Setup for Network 46
Setup for Network 47
Setup for Network 48
Maxiflex T2 CPU User Manual
UMM124XBR04.pdf
49
-© Omniflex
DIT Number
Description
64149
64150
64151 – 65199
Setup for Network 49
Setup for Network 50
Reserved
64200 – 64247
Subscription Blocks Table
These registers contain the data that allows the T2 CPU to subscribe to data on
another device on the network.
The subscription mechanism allows this CPU to “subscribe” to a block of data on
another device on the network. That block of data will be written automatically to the
specified location on this CPU on a regular basis as well as on a change of state of the
remote data.
Up to 32 subscriptions may be setup on any T2 CPU as the recipient.
(A CPU acting as a data source node may only be requested for up to 8 subscription
data blocks from other devices on the network. Data source nodes require no user set
up and operate transparently.)
A Status register monitors the performance of subscriptions, and if communication is
lost with the remote node, then an alarm can be generated.
64200-64205
64200
64201
64202
64203
64204
64205
Subscription Block 1
SUBSCRIPTION TYPE AND TIME
Bits 0-6: Sets the update interval for the subscription in seconds
Bit 7: Change of State: (0=Change of State Disabled; 1=Change of State enabled)
Bit 12: Subscription Enable Bit (0= Subscription Disabled; 1=Subscription Enabled)
Local Port Number
Set the Port Number on this CPU System through which the remote node can be found.
Local Start DIT
Set the start address of the destination DIT block in this CPU where you would like the
remote data to be written.
Remote ID
Set the local ID of the remote node from which data is required.
Remote Start DIT
Set the Start Register Number in the remote node where the source data is located.
Range
Set the number of DIT registers to be transferred in the subscription (64 maximum)
64206-64211
Subscription Block 2
64206
64207
64208
64209
64210
64211
Subscription Type and Time
Local Port Number
Local Start DIT
Remote ID
Remote Start DIT
Range
64212-64217
Subscription Block 3
64212
64213
64214
64215
Subscription Type and Time
Local Port Number
Local Start DIT
Remote ID
Maxiflex T2 CPU User Manual
UMM124XBR04.pdf
50
-© Omniflex
DIT Number
Description
64216
64217
Remote Start DIT
Range
64218-64223
Subscription Block 4
64218
64219
64220
64221
64222
64223
Subscription Type and Time
Local Port Number
Local Start DIT
Remote ID
Remote Start DIT
Range
64224-64229
Subscription Block 5
64224
64225
64226
64227
64228
64229
Subscription Type and Time
Local Port Number
Local Start DIT
Remote ID
Remote Start DIT
Range
64230-64235
Subscription Block 6
64230
64231
64232
64233
64234
64235
Subscription Type and Time
Local Port Number
Local Start DIT
Remote ID
Remote Start DIT
Range
64236-64241
64236
64237
64238
64239
64240
64241
Subscription Block 7
Subscription Type and Time
Local Port Number
Local Start DIT
Remote ID
Remote Start DIT
Range
64242-64243
Subscription Block 8
64242
64243
64244
64245
64246
64247
Subscription Type and Time
Local Port Number
Local Start DIT
Remote ID
Remote Start DIT
Range
64248-64253
Subscription Block 9
64248
64249
64250
64251
64252
64253
Subscription Type and Time
Local Port Number
Local Start DIT
Remote ID
Remote Start DIT
Range
64254-64259
Subscription Block 10
64254
64255
64256
Subscription Type and Time
Local Port Number
Local Start DIT
Maxiflex T2 CPU User Manual
UMM124XBR04.pdf
51
-© Omniflex
DIT Number
Description
64257
64258
64259
Remote ID
Remote Start DIT
Range
64260-64265
Subscription Block 11
64260
64261
64262
64263
64264
64265
Subscription Type and Time
Local Port Number
Local Start DIT
Remote ID
Remote Start DIT
Range
64266-64271
Subscription Block 12
64266
64267
64268
64269
64270
64271
Subscription Type and Time
Local Port Number
Local Start DIT
Remote ID
Remote Start DIT
Range
64272-64277
Subscription Block 13
64272
64273
64274
64275
64276
64277
Subscription Type and Time
Local Port Number
Local Start DIT
Remote ID
Remote Start DIT
Range
64278-64283
64278
64279
64280
64281
64282
64283
Subscription Block 14
Subscription Type and Time
Local Port Number
Local Start DIT
Remote ID
Remote Start DIT
Range
64284-64289
Subscription Block 15
64284
64285
64286
64287
64288
64289
Subscription Type and Time
Local Port Number
Local Start DIT
Remote ID
Remote Start DIT
Range
64290-64295
64290
64291
64292
64293
64294
64295
Subscription Block 16
Subscription Type and Time
Local Port Number
Local Start DIT
Remote ID
Remote Start DIT
Range
64296-64301
Subscription Block 17
64296
64297
Subscription Type and Time
Local Port Number
Maxiflex T2 CPU User Manual
UMM124XBR04.pdf
52
-© Omniflex
DIT Number
Description
64298
64299
64300
64301
Local Start DIT
Remote ID
Remote Start DIT
Range
64302-64307
Subscription Block 18
64302
64303
64304
64305
64306
64307
Subscription Type and Time
Local Port Number
Local Start DIT
Remote ID
Remote Start DIT
Range
64308-64313
Subscription Block 19
64308
64309
64310
64311
64312
64313
Subscription Type and Time
Local Port Number
Local Start DIT
Remote ID
Remote Start DIT
Range
64314-64319
Subscription Block 20
64314
64315
64316
64317
64318
64319
Subscription Type and Time
Local Port Number
Local Start DIT
Remote ID
Remote Start DIT
Range
64320-64325
64320
64321
64322
64323
64324
64325
Subscription Block 21
Subscription Type and Time
Local Port Number
Local Start DIT
Remote ID
Remote Start DIT
Range
64326-64331
Subscription Block 22
64326
64327
64328
64329
64330
64331
Subscription Type and Time
Local Port Number
Local Start DIT
Remote ID
Remote Start DIT
Range
64332-64337
64332
64333
64334
64335
64336
64337
Subscription Block 23
Subscription Type and Time
Local Port Number
Local Start DIT
Remote ID
Remote Start DIT
Range
64338-64343
Subscription Block 24
64338
Subscription Type and Time
Maxiflex T2 CPU User Manual
UMM124XBR04.pdf
53
-© Omniflex
DIT Number
Description
64339
64340
64341
64342
64343
Local Port Number
Local Start DIT
Remote ID
Remote Start DIT
Range
64344-64349
Subscription Block 25
64344
64345
64346
64347
64348
64349
Subscription Type and Time
Local Port Number
Local Start DIT
Remote ID
Remote Start DIT
Range
64350-64355
Subscription Block 26
64350
64351
64352
64353
64354
64355
Subscription Type and Time
Local Port Number
Local Start DIT
Remote ID
Remote Start DIT
Range
64356-64361
Subscription Block 27
64356
64357
64358
64359
64360
64361
Subscription Type and Time
Local Port Number
Local Start DIT
Remote ID
Remote Start DIT
Range
64362-64367
64362
64363
64364
64365
64366
64367
Subscription Block 28
Subscription Type and Time
Local Port Number
Local Start DIT
Remote ID
Remote Start DIT
Range
64368-64373
Subscription Block 29
64368
64369
64370
64371
64372
64373
Subscription Type and Time
Local Port Number
Local Start DIT
Remote ID
Remote Start DIT
Range
64374-64379
64374
64375
64376
64377
64378
64379
Subscription Block 30
Subscription Type and Time
Local Port Number
Local Start DIT
Remote ID
Remote Start DIT
Range
64380-64385
Subscription Block 31
Maxiflex T2 CPU User Manual
UMM124XBR04.pdf
54
-© Omniflex
DIT Number
Description
64380
64381
64382
64383
64384
64385
Subscription Type and Time
Local Port Number
Local Start DIT
Remote ID
Remote Start DIT
Range
64386-64391
Subscription Block 32
64386
64387
64388
64389
64390
64391
Subscription Type and Time
Local Port Number
Local Start DIT
Remote ID
Remote Start DIT
Range
65000-65499
User allocated Space
This area of the Static Configuration area of the DIT can be used by EZIFORTH
programs to store static configuration information that the user wishes to retain during
power failures.
Maxiflex T2 CPU User Manual
UMM124XBR04.pdf
55
-© Omniflex