1
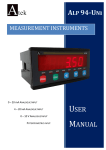
PD690 Universal Process Meter
Instruction Manual
•
Easy Single Button Scaling (SBS)
•
4-20 mA, 0-5 V, or 0-10 V Field Selectable Inputs
•
24 V Transmitter Power Supply Standard
•
Scale Without a Calibrator
•
Calibrate with a Signal Source
•
Steady, Accurate Display to ± 199,990
•
11-Point Linearization for Non-Linear Inputs
•
Square Root Extraction with Low-Flow Cutoff
•
41/2 Digit + Extra Zero
•
NEMA 4X, IP65 Front Panel
•
2 or 4 Relays + 4-20 mA Output Options
•
115 VAC, 230 VAC, or 24 VDC Power Options
•
Lockout Feature
•
Non-Volatile Memory, No Battery Needed
PRECISION DIGITAL CORPORATION
89 October Hill Road • Holliston MA 01746 USA
Tel (800) 343-1001 • Fax (508) 655-8990
www.predig.com
Model PD690 Universal Process Meter
Instruction Manual
INTRODUCTION ......................................................................................4
Typical Applications ..........................................................................4
Ordering Information..........................................................................4
Safety Notice ........................................................................................5
Specifications ......................................................................................6
Basic Meter..........................................................................................6
Options ................................................................................................7
Display Messages and Functions....................................................9
SETUP AND PROGRAMMING ............................................................10
Power, Signal, External Functions & Options Connections..10
Overview ............................................................................................11
Wiring Instructions............................................................................11
AC Powered Units (Power, Signal, External Functions) ................12
DC Powered Units (Power, Signal, External Functions) ................14
Relays & 4-20 mA Output ................................................................15
4-20 mA Output ............................................................................16
Programming ......................................................................................17
Overview............................................................................................17
Single Button Scaling (SBS) ............................................................17
Two-point External Calibration Flow Chart ................................18
Five Basic Digit/Display-setting Instructions ..............................19
Basic Meter Programming ..............................................................19
Overview ........................................................................................19
Select Input Signal ........................................................................20
Initial Calibration with External Source (If Needed) ..................20
Select Calibration Method ............................................................21
Scale or Calibrate the Meter ........................................................21
Select Decimal Point (dE[Pt) ....................................................21
Select Linear Input (L or S) ....................................................21
Select Number Of Calibration Points (no. PtS) ......................21
General Calibration/Scaling Instructions ................................22
Scale Using Internal Calibration (I-[al) ................................22
Calibrate Using an External Calibrator (E-[al) ......................23
Calibration Error (Error) ..........................................................23
Programming Confirmation......................................................23
www.predig.com
2
Model PD690 Universal Process Meter
Instruction Manual
Select Square Root Extraction (L or S) ..................................24
Program Low-Flow Cutoff ([vtoff)..........................................24
Round Horizontal Tank Calibration Table ..................................25
Isolated 4-20 mA Output Option Programming (ovtpvt)........26
Setting 4 mA Output Value........................................................26
Setting 20 mA Output Value......................................................26
Programming Confirmation......................................................26
Alarm Programming ........................................................................27
Overview ........................................................................................27
Setting Alarm Set & Reset Points (Alars) ..................................27
Programming Confirmation ........................................................28
Alarm Operation ............................................................................28
Set Relays for Fail-Safe Operation ..............................................28
Alarm Acknowledgment ..............................................................29
Automatic & Manual Reset Programming ..................................29
Lockout Jumper ................................................................................30
SWITCHING INDUCTIVE LOADS ......................................................30
AC & DC Loads ..............................................................................30
Low Voltage DC Loads ................................................................31
RC Networks Available from Precision Digital ....................31
OPTION CARD INSTALLATION ..........................................................32
MOUNTING DIMENSIONS ..................................................................33
PROGRAMMED PARAMETER SETTINGS ........................................34
OTHER PRECISION DIGITAL PRODUCTS ........................................35
HOW TO CONTACT PRECISION DIGITAL........................................36
3
www.predig.com
Model PD690 Universal Process Meter
Instruction Manual
INTRODUCTION
This meter is a high performance, easy to use, industrial-grade microprocessor-based digital process meter. It accepts all the standard
process signals: 4-20 mA, 1-5V, 0-5V and 0-10V and displays these signals in engineering units on a 41/2 digit display. The display includes
an extra zero, which may be used to handle numbers up to 199,990.
The meter also provides 24 VDC to power the transmitter. Options
include 2 or 4 relays and an Isolated 4-20 mA Transmitter Output.
Typical Applications
Level:
Sump Pump Control
Water Tank Level
Round Horizontal Tank Volume Measurement
Well Draw-down
Lift Station Control
Flow:
Square Root Extraction from a DP Transmitter
Pressure:
Compound Pressure
High Pressure Alarms
Ordering Information
115 VAC
Model
PD690-3-N
PD690-3-14
PD690-3-15
PD690-3-16
230 VAC
Model
PD690-4-N
PD690-4-14
PD690-4-15
PD690-4-16
PD690-3-17
PD690-3-18
PD690-4-17
PD690-4-18
24 VDC
Options Installed
Model
PD690-2-N
No Options
PD690-2-14
2 Relays
PD690-2-15
4-20mA Out
PD690-2-16
2 Relays +
4-20 mA Out
PD690-2-17
4 Relays
PD690-2-18
4 Relays +
4-20 mA Out
Ordering example: PD690-3G-14, process meter powered from
115 VAC (-3) with 2 relays (-14).
*Part numbers for Option Cards when purchased separately
www.predig.com
4
Option
Card*
PD174
PD175
PD176
PD177
PD178
Model PD690 Universal Process Meter
Instruction Manual
Safety Notice
CAUTION: Read complete instructions
prior to installation and operation of
the Meter.
WARNING: Risk of
electric shock.
Observe all safety regulations. Electrical wiring should be
performed in accordance with all applicable national, state
and local codes to prevent damage to the Meter and ensure
personnel safety.
Do not use this meter to directly drive heavy equipment such
as pumps, motors, valves, etc.
It is recommended to use this meter in a fail-safe system
that accommodates the possibility of meter failure or power
failure.
WARNING
Hazardous voltages exist within enclosure. Installation
and service should be performed only by trained service
personnel.
AVERTISSEMENT
Les pièces à l'intérieur du boîtier portent des tensions
dangereuses. Seules des personnes qualifiées et bien
entrainées devraient entreprondre l'ótalonnage et la
maintenance.
DISCLAIMER
The information contained in this document is subject to change without notice. Precision Digital makes no representations or warranties
with respect to the contents hereof, and specifically disclaims any
implied warranties of merchantability or fitness for a particular
purpose.
5
www.predig.com
Model PD690 Universal Process Meter
Instruction Manual
SPECIFICATIONS
Except where noted all specifications apply to operation at +25ºC
Basic Meter
INPUTS
DISPLAY
DECIMAL POINT
CALIBRATION
RANGE
INPUT
IMPEDANCE
LOOP POWER
HOLD READING
ACCURACY
SQUARE ROOT
EXTRACTION
LOW FLOW
CUTOFF
www.predig.com
Field selectable:
4-20 mA, 0-20 mA, 0-5 V, 1-5 V, 0-10 V.
Bright, large, 0.56" (14.2mm) high efficiency
red LEDs. 41/2 digits + extra zero may be
switched on to display +/- 19,999(0). Leading
zeros blanked.
Decimal point may be placed in any of the
following positions. 1.9999, 19.999,199.99,
1999.9, 19999 or 199990 with extra zero.
4 mA (1 V) input may be set anywhere in range
of the meter. 20 mA (5 V) may be set anywhere
in range of the meter above or below 4 mA
input. An Error message will appear if Input 1
signal and Input 2 signal are too close together.
Input
Minimum Difference Between
Range:
Input 1 & Input 2:
0-5 V
0.16 V
0-10 V
0.32 V
4-20 mA
1.60 mA
Voltage ranges, greater than 300 KΩ;
current ranges, 100-120 Ω.
(AC powered meters only), Isolated 24 VDC ± 5%
@ 20 mA regulated. Maximum loop resistance
is 1200 Ω. Available for either signal input or
4-20 mA output, but not both.
Connect terminals H and CM
±0.05% of calibrated span, ±1 count.
±0.1% F.S. ± 1 count from 10-100% of flow.
Any input below the Low-Flow Cutoff point will
result in a display of zero. May be set from 1
count to 100% of full scale, user selectable.
6
Model PD690 Universal Process Meter
11-POINT
LINEARIZATION
Input Range
4-20 mA
0-5 V
0-10 V
Instruction Manual
Minimum Span
Between Inputs
(1.6 mA / (Number of points –1))
(0.16 V / (Number of points -1))
(0.32 V / (Number of points -1))
e.g. Minimum span for an 11-point, 4-20 mA calibration is 0.16 mA between inputs.
ALARM POINTS
ALARM POINT
DEADBAND
ALARM STATUS
INDICATION
LOCKOUT
NON-VOLATILE
MEMORY
NORMAL MODE
REJECTION
POWER
Four, any combination of high or low alarms.
0-100% of full scale, user selectable.
Front panel LED.
Jumper J3 restricts modification of
calibration values.
All programming values are stored in nonvolatile memory for a minimum of ten years if
power is lost. No battery needed.
64 dB at 50/60 Hz
AC power, 115 or 230 VAC ±10%, 50/60 Hz, 10 VA.
DC Power, 18-36 VDC; 6 watts maximum.
ENCLOSURE
1/8 DIN, High Impact plastic, UL 94V-0
FRONT PANEL
Type 4X, NEMA 4X, Panel Gasket provided
ENVIRONMENTAL Operational ambient temperature range: 0 to
+60°C. Storage temperature range: -40 to +85°C.
Relative humidity: 0 to 90% non-condensing.
WEIGHT
19.7 oz (559 g) (including options)
CONNECTIONS
Removable screw terminal blocks (provided)
accept 22 to 12 AWG wire.
WARRANTY
2 years parts & labor.
EXTENDED
1 or 2 years, refer to the Price List for details.
WARRANTY
UL FILE NUMBER E160849; 508 Industrial Control Equipment
Options
Relays
RATING
2 or 4 SPDT (form C); rated 2 Amp @ 30 VDC
or 2 Amp @ 250 VAC resistive load; 1/14 HP @
125 / 250 VAC for inductive loads.
7
www.predig.com
Model PD690 Universal Process Meter
RESET
DEADBAND
HIGH OR LOW
ALARM
FAIL-SAFE
OPERATION
AUTO
INITIALIZATION
Instruction Manual
User Select:
1. Automatically when input passes reset point.
2. Automatically + Manually (via user supplied
switch or front panel ACK button). Manual
reset resets all manually resetable relays.
0-100% of full scale, user selectable.
User may program any alarm for a high or low
trip point.
Relay coils are energized in non-alarm
condition. In case of power failure, relays will
go to alarm state. Fail-Safe operation may be
disabled, by removing jumper J2 located on the
Options Board.
When power is applied to the meter, relays will
always reflect the state of the input to the meter.
Isolated 4-20 mA Transmitter Output
CALIBRATION
RANGE
EQUIPMENT
NEEDED
OUTPUT
LOOP-POWER
ACCURACY
ISOLATION
EXTERNAL LOOPPOWER SUPPLY
OUTPUT LOOP
RESISTANCE
www.predig.com
The transmitter output can be calibrated so that
a 4 mA output is produced for any number
displayed by the meter. The 20 mA output may
correspond to any number that is at least 501
counts greater or smaller than the number
corresponding to 4 mA. (Ex. 4 mA = 0, 20 mA =
501) If the span between 4 and 20 mA is less
than 501 counts, an error message will appear.
The 4-20 mA output is calibrated without
the use of a calibrator. No equipment needed.
(AC powered meters only), Isolated 24 VDC ± 5%
@ 20 mA regulated. Maximum loop resistance
is 1200 Ω. Available for either signal input or
4-20 mA output, but not both.
± 0.1% F.S., ± 0.004 mA.
500 VDC or peak AC, input-to-output or
input/output-to-power line.
35 VDC max.
Power supply
Min. loop
resistance
24 VDC
10 !
35 VDC (external) 600 !
8
Max loop
resistance
600 !
1000 !
Model PD690 Universal Process Meter
Instruction Manual
Display Messages and Functions
The following table describes the various messages displayed by the
meter during programming and operation:
Display
E-[AL
InPt 1
Dspy 1
Inpt 2
Dspy 2
DE[Pt
Parameter
Select External
Calibration
Select Internal
Calibration
Perform External
Calibration
Perform Internal
Calibration
(scaling)
Input 1
Display 1
Input 2
Display 2
Decimal Point
No. PtS
Number of Points
L or S
Linear or Square
[vtoFF
Low-Flow Cutoff
Alars
Alarms
OvtPvt
19999
Output
Overrange
-19999
Underrange
Error
Error
I-[AL
[ALIb
S[ALE
Description/Comments
Set meter for calibration using
an external calibration source.
Set meter for calibration (scaling)
using Internal calibration source.
Calibrate meter using an external
calibration source.
Calibrate meter (scale) using
internal calibration source.
(Signal source not required).
Set Input 1 calibration value.
Set Display 1 calibration value.
Set Input 2 calibration value.
Set Display 2 calibration value.
Set decimal point or light up
extra "0".
Set meter for 2 to 11
calibration points.
Set meter for Linear or Square Root
calibration/scaling.
Set meter to display zero below
programmed cutoff point.
Program alarm/relay set and
reset points.
Set 4-20 mA output values.
Indicates input signal exceeds
full-scale range of meter.
Indicates input signal is below the
negative range of meter.
Indicates calibration was not
successful.
9
www.predig.com
Model PD690 Universal Process Meter
Instruction Manual
SETUP AND PROGRAMMING
Power, Signal, External Functions & Options Connections
Disconnect power to the meter before making any connections.
Do not connect power or earth ground to any unused or CM terminals.
Observe polarity for DC powered Meters. Applying voltage with
reverse polarity may damage the instrument.
Connecting 230 VAC to a meter specified to accept 115 VAC or connecting AC power to a meter specified to accept DC power will result
in damage to the instrument as well as endanger personnel. Keep primary wires separated from signal cables.
Notice:
• Primary voltages must not be accessible to the user.
• Primary wires must be installed in accordance to the applicable
standards.
Terminals Designation
Terminal
L, L
V+, VP+, PS+, SAK
Terminal
H
CM
Description
AC input power
DC input power
24 VDC output
power
Input signal
External relay
acknowledge
www.predig.com
+, 1-6
10
Description
Hold reading
Common (return)
for AK and H
4-20 mA output
Relay 1-4
Model PD690 Universal Process Meter
Instruction Manual
Overview
The following field wiring connections are made to removable screw
terminal blocks supplied with the meter:
Power, Signal Input, Acknowledge and Hold
Options: Relays & 4-20 mA Output
6
5
4 3
2
1
6
5
J3
4 3
2
1
J2
AK H CM S+ S- P - P + L
- +
J1
L
Figure 1: Rear View of Meter (Connectors)
Label
None
None
J1
J2
J3
Main Board (Lower)
Power
Signal, Acknowledge, Hold
Options Board (Upper)
4-20 mA Output
Relays 1 & 2; NC, NO, Common
Relays 3 & 4; NC, NO, Common
Wire Size
12-18
12-22
12-22
12-22
12-22
Wiring Instructions
1. All field connections to be made with either solid or stranded
insulated wire. Strip length = 1/4" (7 mm). Tighten all screw
terminals to 4.5 lb-in (0.5 Nm). Do not pre-treat wire with solder.
2. Terminals connected to line voltage (e.g. L, RELAY 1-4): Use AWG
# 12-18 copper wire, 600 volt, 60°C or 60/75°C. Connect only one
wire to each terminal.
3. Terminals not connected to line voltage (e.g. AK, H, CM, S+, S-, P+,
P-, V+, V-, OUTPUT): Use AWG #12-22 wire. If using AWG #20 or
smaller wire, up to two wires may be connected to each terminal.
If using AWG #18 or larger wire, only one wire
may be connected to each terminal.
11
www.predig.com
Model PD690 Universal Process Meter
Instruction Manual
AC Powered Meters (Power, Signal, External Functions)
4-20 mA
Transmitter
–
+
Signal Input
Lockout Selection
Jumper Array
AC
3 2 1
L L P+ P- S- S+ C H A
O L C
MD K
Figure 2: Transmitter Powered from Meter
Loop
Power Supply
–
AC
4-20 mA
Transmitter
+
+
–
Signal Input
Lockout Selection
Jumper Array
3 2 1
L L P+ P- S- S+ C H A
O L C
MD K
Figure 3: Transmitter Powered from External Power Supply
www.predig.com
12
Model PD690 Universal Process Meter
Instruction Manual
AC Powered Meters (Continued)
3-Wire
Transducer
P+
P- Signal
Signal Input
Lockout Selection
Jumper Array
AC
3 2 1
L L P+ P- S- S+ C H A
O L C
MD K
See page 20
for Input Signal
selection table
Figure 4: Three-Wire Transducer Powered from Meter
Voltage or Current
Input
–
AC
+
Signal Input
Lockout Selection
Jumper Array
3 2 1
L L P+ P- S- S+ C H A
O L C
MD K
See page 20
for Input Signal
selection table
Figure 5: Voltage or Self-Powered 4-20 mA Input
13
www.predig.com
Model PD690 Universal Process Meter
Instruction Manual
DC Powered Meters (Power, Signal, External Functions)
24 VDC
Power Supply
4-20 mA
Transmitter
–+
–
+
Signal Input
Lockout Selection
Jumper Array
3 2 1
S- S+ C H A
O L C
M D K
*For signal/power isolation seperate
power supplies are required.
V- V+
Figure 6: Transmitter and Meter Powered from Same DC
Power Supply
Loop
Power Supply
–
24 VDC
4-20 mA
Transmitter
+
+
–
Signal Input
Lockout Selection
Jumper Array
3 2 1
V- V+
S- S+ C H A
O L C
M D K
Figure 7: Transmitter and Meter Powered from
Separate DC Power Supplies
www.predig.com
14
Model PD690 Universal Process Meter
Instruction Manual
Relays & 4-20 mA Output
Depending on the model number, the Options Board may contain two
or four relays and an Isolated 4-20 mA Transmitter Output. Relay connections are made to removable screw terminal connectors located at
J2 and J3 on the Options Board. Connections for the Isolated 4-20 mA
Transmitter Output are made to J1 on the Options Board.
Pin: Function:
1
Transmitter +
Transmitter 2
J1
J2
J3
PD175
1
2
3
4
5
6
Relay
Relay
Relay
Relay
Relay
Relay
#1
#1
#1
#2
#2
#2
Common
NC
NO
Common
NC
NO
1
2
3
4
5
6
Relay
Relay
Relay
Relay
Relay
Relay
#3
#3
#3
#4
#4
#4
Common
NC
NO
Common
NC
NO
PD176
PD174
PD178
PD177
Figure 8: Option Card Pinouts
Notes:
1. Alarm acknowledgement terminals (ACK and COM) are located on
the meter main board.
2. In the alarm condition, the NC contact is connected to common in
the fail safe mode.
6
5
4 3
2
1
6
5
J3
4 3
2
1
J2
AK H CM S+ S- P - P + L
- +
J1
L
Figure 9: Rear View of Meter (Connectors)
15
www.predig.com
Model PD690 Universal Process Meter
Instruction Manual
4-20 mA Output
The 4-20 mA output from the meter can either be powered from the
meter’s internal transmitter power supply, (if it is not being used to
power the input loop), or by an external power supply as the following diagrams illustrate:
- +
Signal
Input
-
-
+
Meter, Recorder
Controller, etc.
+
A
H CM S+ S- P - P + L
L
Figure 10: Meter Powering 4-20 mA Output Loop
- +
Signal
Input
+
+
-
-
Loop
Power Supply
Meter, Recorder
Controller, etc.
A
H CM S+
S- P - P +
L
L
+
Figure 11: External Power Supply Powering 4-20 mA
Output Loop
If the output loop is powered by an external supply, the loop
power supply must be turned on before the meter is turned
on. Otherwise, the output loop signal may be incorrect.
www.predig.com
16
Model PD690 Universal Process Meter
Instruction Manual
Programming
Overview
The meter is programmed using the ENTER button and three jumper
arrays. The ENTER button controls the meter’s Single Button Scaling
(SBS) feature that allows the meter to be completely programmed
using just one button. The jumper arrays are used for programming
the input signal, lockout, relays acknowledge enable and relays failsafe operation.
Single Button Scaling (SBS)
Single Button Scaling is a technique that allows the meter to be completely programmed using just the ENTER button. The general
method behind (SBS) is to push ENTER when the meter reads the
desired value. This value may be a menu title, the entire display or
just a single digit. If the meter is not reading the desired value wait
and the value will change. When the meter finally reads the desired
display push ENTER to accept it.
When the meter is first powered up, it will read a random number.
Pushing ENTER will cause the meter to scroll through the following
menu titles (if the Lockout Jumper is not installed):
Display scrolls programming routines.
Push ENTER to select desired routine.
Push ENTER
*
Push
ENTER
Push
ENTER
Push
ENTER
Push
ENTER
Push
ENTER
Push
ENTER
2 point
Calibration
Set
Decimal
Point
11 point
Calibration
Linearization
or
Square Root
Program
Alarms
Calibrate
4-20 mA
Output
** Only appears if 4-20 mA output is installed
Figure 12: Menu Scroll (with Lockout Jumper Removed)
17
www.predig.com
Model PD690 Universal Process Meter
Instruction Manual
Figure 13: Two-point External Calibration Flow Chart
Push ENTER
Apply
input 1 signal
(e.g. 4 mA)
Push ENTER
Is
entire flashing
display OK?
YES
Push ENTER
NO
Wait for digit
to scroll
NO
Wait for
digit to flash
Has
input 2 been
calibrated
yet?
YES
Is
the flashing
digit OK?
Calibration
Complete!
YES
Push
ENTER when OK
Push ENTER
Is
entire display
flashing?
YES
www.predig.com
18
NO
NO
Model PD690 Universal Process Meter
Instruction Manual
Five Basic Digit/Display-setting Instructions
Rather than repeat the Single Button Scaling (SBS) technique for
every function it is used in, it will be detailed here and the user can
refer to it when necessary.
The Single Button Scaling technique is used to program all the
meter's functions that require numbers to be entered. For instance,
calibration and scaling values, Low-Flow Cutoff values, alarm set and
reset points, 4 and 20 mA output values are set using (SBS).
1. If the flashing display is OK, push ENTER before it stops flashing
to accept it. (Whenever a new value is to be programmed or Most
Significant Digit has been accepted the entire display flashes, if
this is the desired value, press ENTER before it stops flashing to
accept it.)
2. If the flashing display is not OK, (or if ENTER was not pushed in
time to accept it), wait for Least Significant Digit (LSD) to flash.
3. If a flashing digit is OK, push ENTER before it starts to scroll to
accept it.
4. If a flashing digit is not OK, (or if ENTER was not pushed in time
to accept it), wait for the digit to scroll and push ENTER when OK.
5. Digits will scroll until ENTER is pushed. When a digit is accepted
by pushing ENTER, the next digit to the left flashes.
Basic Meter Programming
Overview
There are four steps for programming the basic meter functions:
1. Select Input
2. Perform Initial Calibration if Needed
3. Select Calibration Method
4. Calibrate or Scale the Meter
Programmed Parameter Values
To simplify programming, the user should write down the desired
programming values prior to attempting to program the meter. The
form located at the back of this manual provides a convenient method
to record the user settings.
19
www.predig.com
Model PD690 Universal Process Meter
Instruction Manual
Select Input Signal
The meter can be programmed to accept current or voltage input
using the Signal Input Selection Array. This jumper array is located at
the rear of the instrument, next to the screw terminal block. Remove
jumper J3 (if installed) to disable Lockout feature.
Input Signal
1-5, 0-5V
0-10 V
4-20,0-20 mA
Jumper J1
OFF
OFF
ON
Jumper J2
OFF
ON
OFF
Table 1: Signal Input Selection Array
Initial Calibration with External Source (If Needed)
Initial calibration is required only when the I-[AL feature is to be
used with an input other than the default input of 4-20 mA. For best
results, allow the meter to warm up for at least 30 minutes.
1. Program the Signal Input Selection Array for desired input per
Table 1 above.
2. Apply power with ENTER and ACK buttons pushed. Release when
display stops flashing.
3. The meter scrolls through the choices 20, 5, and 10. Which
corresponds to input signals of 4-20 mA, 0-5 V or 1-5 V, and 0-10 V.
Push ENTER when desired value appears.
4. The meter flashes InPt 1. Apply low end signal, (4 mA or 0 V)*,
push ENTER.
5. The meter flashes InPt 2. Apply high end signal, (20 mA, 5 V,
10 V), push ENTER.
6. This completes the Initial Calibration and initializes INPUT 1 and
INPUT 2 scaling points to 4.000 & 20.000 mA, 0.000 & 5.000 V, or
0.000 & 10.000 V.
7. Refer to I-[AL scaling below for further instructions.
*For 1-5 V input signals, calibrate the meter with input1=0 V,
input 2=5 V.
www.predig.com
20
Model PD690 Universal Process Meter
Instruction Manual
Select Calibration Method
The meter may be calibrated using an external signal source such as a
calibrator (E-[AL), or scaled using the internal source (I-[AL). With
I-[AL, a 4-20 mA input can be scaled for any display range without
applying a signal. To scale inputs such as 0-5 V, 1-5 V or 0-10 V without
applying a signal, it is necessary to first complete an Initial Calibration,
see Initial Calibration with External Source (If Needed) on page 20.
Scale or Calibrate the Meter
To select a Calibration Method, apply power with ACK button pressed.
1. When display stops flashing, release ACK button. Display
alternates between E-[AL and I-[AL.
2. To calibrate meter with an external source, such as a calibrator,
press ENTER when E-[AL appears.
3. To scale meter with internal source, press ENTER when I-[AL
appears.
Select Decimal Point (dE[Pt)
To program the decimal point or light up the extra "0", push ENTER.
The meter displays S[ALe or [alib, then dE[Pt. Push ENTER when
dE[Pt appears. The meter then reads 199990 with the decimal point
changing locations and the extra "0" illuminating. Push ENTER when
the decimal point is in the desired position; or if the extra "0" is
desired; when the extra "0" is displayed.
Select Linear Input (L or S)
The meter can be programmed to either process the input signal in a
linear fashion (L) or to take the square root of it (S). To program the
meter for a linear input, push ENTER. When (L or S) appears, push
ENTER again. The meter will flash (L or S) alternately. Press ENTER
when (L) is flashing. After (L) is selected the meter will switch to indication mode and is ready to be calibrated.
Select Number of Calibration Points (no. PtS )
The user may input up to 11 calibration points and corresponding
displays to provide custom linearization. To program the number of
calibration points, push ENTER, when (no. PtS) appears, push ENTER
again. The meter displays a number from 2 to 11 that represents the
number of calibration points. Push ENTER when the number equals
the desired number of calibration points. As soon as the number of
points is programmed, the meter flashes InPt 1 (Indicating it is ready
to be calibrated). Refer to Scale Using Internal Calibration (I-[al),
page 22 or Calibrate Using an External Calibrator
(e-[al) on page 23.
21
www.predig.com
Model PD690 Universal Process Meter
Instruction Manual
General Calibration/Scaling Instructions
Calibration is performed from the front panel using the ENTER button. It does not require any tools or disassembly of the meter. A
calibrated signal source is required if external calibration (E-[AL) is
selected.
For best results, allow meter to warm up for at least 30 minutes.
The calibration input signals must be within the range of the meter
and input 2 must be greater than input 1. (However, display for input
2 does not have to be greater than desired display for input 1.)
An Error message will appear if input 1 signal and input 2 signal are
too close together:
Input
Range:
0-5 V
0-10 V
4-20 mA
Minimum Difference
Between Input 1 & Input 2:
0.16 V
0.32 V
1.60 mA
Table 2: Input Range Minimum Spans
Scale Using Internal Calibration (I-[al)
If I-[AL (Internal Calibration) was selected above in Select Calibration
Method, the meter can be scaled without applying an input. Desired
values can be programmed using the Five Basic Digit/Display-setting
Instructions described on page 19. See Figure 13: Two-point External
Calibration Flow Chart on page 18.
1. Push ENTER, when S[ALE appears push ENTER again.
2. InPt 1 flashes. Push ENTER and program desired value for input 1.
3. dSPy 1 flashes. Push ENTER and program desired value for
display 1.
4. InPt 2 flashes. Push ENTER and program desired value for input 2.
5. dSPy 2 flashes. Push ENTER and program desired value for
display 2.
www.predig.com
22
Model PD690 Universal Process Meter
Instruction Manual
Calibrate Using an External Calibrator (E-[al)
If E-[AL (External Calibration) was selected above in Select Calibration
Method, the meter must be calibrated with an external calibrator.
Desired values can be programmed using the Five Basic Digit/Displaysetting Instructions described on page 19. See Figure 13: Two-point
External Calibration Flow Chart on page 18.
1. Push ENTER, when [ALIb appears push ENTER again.
2. InPt 1 flashes. Apply input 1 signal (e.g. 4mA, 1V, etc.) then push
ENTER, Program desired display for input 1.
3. InPt 2 flashes. Apply input 2 signal (e.g. 20 mA, 10 V, etc.) then
push ENTER. Program desired display for input 2.
Calibration Error (Error)
A meter display of Error during calibration indicates that the
calibration process was not successful and the meter needs to be
recalibrated.
1. The Error message will appear if input 1 signal and input 2 signal
are too close together, see Table 2 on page 22.
2. The Error message will appear if input 1 signal is inadvertently
also applied for input 2 calibration, or ENTER is pushed before
applying input 2.
Programming Confirmation
The values that have been programmed can be quickly checked to
make sure they are the desired values. To do this, apply the desired
signal for each point and check the display.
23
www.predig.com
Model PD690 Universal Process Meter
Instruction Manual
Select Square Root Extraction (L or S)
With the square root extraction function activated, the meter takes the
square root of the input signal (the output from a differential pressure
transmitter) and displays flow rate. The square root extraction feature
is calibrated using the same Single Button Scaling technique that is
used for two-point linear calibration. Calibration involves setting only
three points: the zero flow rate (usually zero), the high flow rate and
the Low-Flow Cutoff point.
To program the meter for square root extraction, push ENTER. When
(L or S) appears, push ENTER again. The meter will flash (L or S)
alternately. Push ENTER when (S) is flashing. After (S) has been
selected the meter will switch to indication mode and is ready to be
calibrated.
Program Low-Flow Cutoff ([utoFF)
Low-Flow Cutoff allows the meter to be programmed so that the often
unsteady output from a differential pressure transmitter at Low-Flow
rates always displays zero on the meter.
Example: If Low-Flow Cutoff is set at 12, any rate less than 12 will be
displayed as "0".
To program Low-Flow Cutoff:
1. Push ENTER, when [vtoFF appears push ENTER again.
2. Set Low-Flow Cutoff per Five Basic Digit/Display-setting
Instructions on page 19.
Notes:
1. To disable Low-Flow Cutoff, program cutoff value to zero.
2. Low-Flow Cutoff is only available when using Square Root
Extraction.
www.predig.com
24
Model PD690 Universal Process Meter
Instruction Manual
Round Horizontal Tank Calibration Table
The following tables can be used to calibrate the meter for displaying
volume in a round horizontal tank. The right-most column in each
table gives an example of actual calibration points for a 500-gallon
tank.
Number of Points: 10
Maximum Error: 0.3% Full Scale
Calib.
Point
1
2
3
4
5
6
7
8
9
10
Input
(mA)
4.0
4.8
6.0
7.2
9.2
14.8
16.8
18.0
19.2
20.0
Display:
(% Volume)
0.00
1.80
7.20
14.20
28.10
71.80
85.80
92.80
98.10
100.00
Display: (Example)
(500 Gallon Tank)
0.0
9.0
36.0
71.0
140.5
359.0
429.0
464.0
490.5
500.0
Number of Points: 8
Maximum Error: 0.5% Full Scale
Calib.
Point
1
2
3
4
5
6
7
8
Input
(mA)
4.0
4.8
6.4
8.4
15.6
17.7
19.2
20.0
Display:
(% Volume)
0.00
1.90
9.50
22.40
77.70
90.50
98.10
100.00
Display: (Example)
(500 Gallon Tank)
0.0
9.5
47.5
112.0
388.5
452.5
490.5
500.0
Table 3: Round Horizontal Tank Calibration Points
25
www.predig.com
Model PD690 Universal Process Meter
Instruction Manual
Isolated 4-20 mA Transmitter Output Programming (ovtpvt)
The Isolated 4-20 mA Transmitter Output option can be programmed
without a calibrator. This option can be calibrated so that a 4 mA output is produced for any number displayed by the meter. The 20 mA
output may be programmed to correspond to any number that is at
least 501 counts greater or smaller than the number corresponding to
4 mA. (Ex. 4 mA = 0, 20 mA = 501 or -501) If the span between 4 and
20 mA is less than 501 counts, an error message will appear and the
previously programmed values will be retained in memory until a
new set of values is accepted.
Setting 4 mA Output Value
1. Push ENTER, when ovtPvt appears push ENTER again.
2. All digits flash for 3 seconds, a green LED labeled "4" illuminates
indicating the flashing display is the value at which the meter will
produce a 4 mA output. Program desired value per Five Basic
Digit/Display-setting Instructions on page 19.
Setting 20 mA Output Value
1. When ENTER is pushed to complete the programming for 4 mA
output, the green LED labeled "20" illuminates indicating the
flashing display is the value at which the meter will produce a 20
mA output.
2. Program desired value per Five Basic Digit/Display-setting
Instructions on page 19.
3. An Error message will be displayed if the 4-20 mA output span is
smaller than 501 counts.
Programming Confirmation
The values that have been programmed to produce the 4 & 20 mA
outputs can be quickly checked to make sure they are the desired values. To do this, enter the ovtPvt routine by pushing ENTER and then
pushing ENTER again when ovtPvt appears.
The green "4" LED illuminates indicating the meter is displaying the
value at which it will produce a 4 mA output. Confirm that this is the
desired value. Push ENTER (within 3 seconds) before the entire display stops flashing and the green "20" LED illuminates indicating the
meter is displaying the value at which it will produce a 20 mA output.
Confirm that this is the desired value. Push ENTER (within 3 seconds)
before the entire display stops flashing and the meter returns to indication mode.
www.predig.com
26
Model PD690 Universal Process Meter
Instruction Manual
Alarm Programming
Overview
The meter is equipped with four alarm points as a standard feature.
Each alarm may be programmed for either a high or low alarm and
for 0-100% deadband. Front panel LEDs indicate alarm status.
Options for two or four relays are available.
To program a high alarm, program the set point above the reset point.
To program a low alarm, program the set point below the reset point.
To program the alarm deadband, set the reset point above or below
the set point by an amount equal to the desired deadband value.
Example: Alarm 2 is a high alarm that trips at 1500 and has a deadband of 100. Alarm 2 set point is set at 1500 and its reset point at
1400.
Setting Alarm Set & Reset Points (Alars)
Alarm Set and Reset points are programmed using the Five Basic
Digit/Display-setting Instructions described on page 19.
1. Push ENTER and when ALArS appears, push ENTER again. This
starts a scan of the four alarm set & reset points. The scan
sequence begins with a flashing display of alarm #1 set point. The
"1" LED and "S" LED below the display are illuminated to indicate
the meter is flashing alarm #1 set point value. Program the desired
value for alarm #1 set point using the Five Basic Digit/Displaysetting Instructions described on page 19.
2. After Alarm #1 set point has been programmed, the meter displays
Alarm #1 reset point, as indicated by the "1" LED and "R" LED
below the display. Program the desired value for alarm #1 reset
point using the Five Basic Digit/Display-setting Instructions
described on page 19.
3. Program the remaining alarm set and reset points in a similar
fashion.
4. When alarm programming is complete the meter will display the
process input signal and the front panel LEDs will indicate alarm
status.
27
www.predig.com
Model PD690 Universal Process Meter
Instruction Manual
Programming Confirmation
To verify that the alarm set and reset points have been programmed
as desired, push ENTER, and push ENTER again when ALArS
appears. Before the display stops flashing #1 set point value, push
ENTER again to advance the display to #1 reset point. Continue
skipping through the remaining alarm set and reset points. To alter an
alarm point value, wait for the first digit to flash and program the
desired value using the Five Basic Digit/Display-setting Instructions on
page 19.
Alarm Operation
When the meter detects an alarm, a front panel LED illuminates to
indicate which alarm point has tripped. This LED will stay illuminated
until the meter display passes through the reset point.
Set Relays for Fail-Safe Operation
In the fail-safe mode, the relay coils are energized and the Normally
Open (NO) contacts are connected to the Common (C) contacts under
normal operation. During an alarm condition the relay coils are deenergized and the Normally Closed (NC) contacts are connected to the
Common (C) contacts. During a power failure the relay contacts
reflect an alarm condition.
Removing jumper JP6 disables the fail-safe operation. Jumper JP6 is
located on the Display Board, see Figure 14 on page 29. If fail-safe
mode is disabled, the operation of the relay contacts is opposite to
the one described in the previous paragraph.
www.predig.com
28
Model PD690 Universal Process Meter
Instruction Manual
Alarm Acknowledgment
The ACK button on the front panel resets the optional relays only and
has no effect on the alarm status LEDs.
Automatic & Manual Reset Programming
There are two ways to reset the relays:
1. Automatically when the signal passes through the reset point.
2. Automatically + manually via the front panel ACK button, or a user
supplied momentary Normally Open push-button across terminals
AK and CM at the rear of the instrument. That is, a relay may be
manually reset prior to the signal passing through the reset point
or it will automatically reset when the signal passes through the
reset point.
A manual reset will reset all relays that are programmed for
automatic + manual reset.
1
ACK ENABLE 2
JUMPERS 3
4
FAIL-SAFE
JUMPER
JP6
JP3
SOLDER
PADS
Figure 14: Relay Reset & Fail-Safe Jumpers
An array of jumpers located behind the front panel on the Display
Board is used to program each relay for either automatic or automatic
+ manual reset. Refer to page 32 for front panel removal instructions.
The top jumper is used for relay 1, the next for relay 2, etc. A relay
will automatically reset if no jumper is installed. A relay will automatically reset, plus can be manually reset, if a jumper is installed over its
respective pins.
Example Above: Relay 1 is programmed for automatic reset;
Relays 2, 3, & 4 are programmed for automatic + manual reset.
29
www.predig.com
Model PD690 Universal Process Meter
Instruction Manual
Lockout Jumper
Once the meter has been completely programmed, a lockout jumper
can be installed to restrict further modification to the meter. This
jumper is located at the rear of the instrument and is labeled J3.
When ENTER is pushed with the lockout jumper in place, only ALArS
and ovtPvt routines are displayed. These routines may be entered to
view their settings, but the settings may not be altered.
SWITCHING INDUCTIVE LOADS
The meter has the ability to suppress electrical noise generated by
switching inductive loads. However, installing Resistor Capacitor (RC)
Networks improves this performance and prolongs the life of the
meter's relay contacts. This suppression can be obtained with RC
networks assembled by the user or purchased as a complete assembly.
Refer to the following circuits for RC network assembly and installation:
AC & DC Loads
1
2
+
-
3
L
O
A
D
Figure 15: AC & DC Loads
Choose R and C as follows:
R: 0.5 to 1 ! for each volt across the contacts
C: 0.5 to 1 µF for each 1 A through closed contacts
Notes:
1. Use capacitors rated for 240 VAC.
2. Snubbers may affect load release time of solenoid loads, check to
confirm proper operation.
3. Install the RC network right at the meter's relay screw terminals. An RC
network may also be installed across the load.
www.predig.com
30
Model PD690 Universal Process Meter
Instruction Manual
Low Voltage DC Loads
1
2
+
-
3
L
O
A
D
Figure 16: Low Voltage DC Loads
Use a diode with a reverse breakdown voltage two to three times the
circuit voltage and forward current at least as large as the load current.
RC Networks Available from Precision Digital
RC Networks are available from Precision Digital and should be
applied to each relay contact that switches an inductive load. Part
number PDX6901.
RESET METER TO FACTORY DEFAULTS
To reset the meter to the factory defaults:
1. Remove the snap-off front cover, see page 32.
2. Using a pair of needle-nose pliers, short out the solder pads
located on the top and bottom of the Main Board, to the right of
the ACK button below JP6 (see Figure 14 on page 29), until the
display shows “reset”.
3. Press the ENTER button. The meter starts scrolling the menus.
4. Press the ACK button, at any time, to exit the menu scroll.
31
www.predig.com
Model PD690 Universal Process Meter
Instruction Manual
OPTIONS CARD REMOVAL & INSTALLATION
Meter options are installed at the factory. It is NOT necessary to
remove the circuit boards from the case to disable the relays’ fail-safe
operation. The fail-safe jumper is located on the Display Board, see
Figure 14 on page 29. Refer to the following instructions and
illustrations to remove the snap-off cover and the circuit boards from
the case.
Disconnect power prior to performing
the following operations.
The meter's snap-off cover is held in place by 6 latches that snap into
notches on the snap-off cover. To remove the snap-off cover from the
meter, grasp it firmly on its top and bottom edges and pull it forward.
The latch plate remains around the meter's case.
To remove the circuit boards from the case:
1. Unscrew the retaining screws holding the circuit boards to the case.
2. Remove the screw terminal connectors at the rear of the meter.
3. Push the boards through the case by applying pressure to the
circuit boards at the rear of the meter. Apply pressure evenly to
both boards.
4. Do not apply pressure to the vertical display board.
Latch
Latch Plate
Retaining Screws and Washers
Snap-off Cover
Notch
Figure 17: Front Cover Removal
5. To avoid electric shock, re-install the circuit boards in the case
prior to applying power.
All programming and calibrating can be performed
with the circuit boards installed in the case.
32
Model PD690 Universal Process Meter
Instruction Manual
To re-install the meter in its case:
1. Fold the Options Board over the Main Board, grasp both boards so
the Main Board is on the bottom and the two Boards are separated
by about an inch.
2. Insert the two boards together into the case. Be sure both the
top and bottom boards engage the rails, which hold them in place.
3. Do not press on the Display Board when seating the assembly in
the case.
4. Install washers and retaining screws in 4 corners of meter and
install front cover.
Input Configuration
Jumpers
Screw Terminals (Rear)
Relays
Transformer
Ribbon Cable
J2
Display Board
Not Installed
Options Board
Figure 18: Option Card Installation
MOUNTING DIMENSIONS
4.25 (108)
Panel Thickness
0.125-0.250 (3.2-6.4)
2.30
(59)
4.30 (109) Installed
4.83 (123) Required for Inst.
0.575
(14.6)
6.0 (152) Clearance
Figure 19: Mounting Dimensions
Notes:
1. Panel cutout required: 1.772" X 3.622" (45 mm x 92 mm) 1/8 DIN
2. Panel thickness: 0.125" - 0.250" (3.17 mm - 6.34 mm)
3. Clearance: allow 6 inches (152 mm) behind the panel
33
Model PD690 Universal Process Meter
Instruction Manual
PROGRAMMED PARAMETER SETTINGS
Use the following table to record how your meter is programmed:
Input
! 4-20 mA
!
Linear
or
!
0-5 V
!
Square Root Extraction
!
1-5 V
!
0-10 V
Number of Calibration Points
Low-Flow Cutoff Value
Calibration Point Values
Input 1 set point
Input 2 set point
Input 3 set point
Input 4 set point
Input 5 set point
Input 6 set point
Input 7 set point
Input 8 set point
Input 9 set point
Input 10 set point
Input 11 set point
display 1
display 2
display 3
display 4
display 5
display 6
display 7
display 8
display 9
display 10
display 11
Alarms
Alarm 1 set point
Alarm 2 set point
Alarm 3 set point
Alarm 4 set point
reset point
reset point
reset point
reset point
4-20 mA Output Option
4 mA display value
20 mA display value
Model Number: PD690
www.predig.com
Serial Number:
34
Model PD690 Universal Process Meter
Instruction Manual
OTHER PRECISION DIGITAL PRODUCTS
MODEL
PD118
PD141AFO
PD202-253
PD602
PD644
PD650
PD655
PD656
PD660
PD661
PD673
PD675
PD677
PD685
PD686
PD687
PD691
PD692
PD693
PD696
PD697
PD698
PD740
PD750
PD751-752
DESCRIPTION
MINIMUX® 8 Point Scanner
VIGILANTE® four Point Annunciator with First-Out
Digital Pressure Gauges
Dart Low-Cost 1/8 DIN Process Meter
Javelin D High-Voltage DC Panel Meter
2.3" LED NEMA 4X Large Display Process Meter
1.0" LED NEMA 4X Large Display Process Meter
0.8" LED Exp-Proof Large Display Process Meter
Low-Cost NEMA 4X Loop Powered Meter
Low-Cost Exp-Proof Loop Powered Meter (FM & CSA)
41/2 Digit Loop Powered 1/8 DIN Meter
41/2 Digit Loop Powered NEMA 4X Meter (FM & CSA)
41/2 Digit Loop Powered Exp-Proof Meter
31/2 Digit Loop Powered NEMA 4X Meter (GeneralPurpose)
31/2 Digit Loop Powered NEMA 4X Meter (FM & CSA)
31/2 Digit Loop Powered Exp-Proof Meter (FM & CSA)
1/8 DIN Strain Gauge & mV Input Meter (UL Listed)
1/8 DIN Analog Input Flow Rate/Totalizer (UL Listed)
1/8 DIN Pulse Input Flow Rate/Totalizer (UL Listed)
1/8 DIN Loop Powered Flow Rate/Totalizer
NEMA 4X Loop Powered Flow Rate/Totalizer
Exp-Proof Loop Powered Flow Rate/Totalizer (FM & CSA)
Javelin T TC & RTD Temperature Meter (Low-Cost)
TC & RTD Temperature Meter (UL Listed)
10 Ω Cu & 120 Ω Ni RTD Temperature Meters (UL Listed)
PD755
PD756
PD757
1.0" LED NEMA 4X Large Display Temperature Meter
0.8" LED Exp-Proof Large Display Temperature Meter
2.3" LED NEMA 4X Large Display Temperature Meter
PD765
Trident Process & Temperature Meter (UL Listed)
PD865
Snooper Modbus Serial Input Meter
PD940-981 ConsoliDator® Multi-Channel Controllers
35
Model PD690 Universal Process Meter
Instruction Manual How to Contact Precision Digital
•
For Technical Support please
call: (800) 343-1001 or (508) 655-7300
fax: (508) 655-8990
e-mail: [email protected]
•
For Sales Support or to place an order please
call: (800) 343-1001 or (508) 655-7300
fax: (508) 655-8990
e-mail: [email protected]
•
For an online version of this instruction manual
please visit
www.predig.com
LIM690_G
10//08