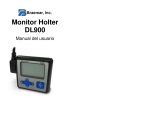
1
DL900 Series
Holter Monitor
Operator Manual
Braemar Limited Warranty
Braemar products are warranted to be free from manufacturing
and material defects for a period of one (1) year from the date of
shipment from Braemar to the original purchaser.
Excluded from this warranty are expendable supply items
including, but not limited to, electrodes, leadwires, patient cables
and batteries. This warranty does not apply to any product, which
Braemar determines has been modified or damaged by the
customer.
Except for the express warranties stated above, Braemar
disclaims all warranties including implied warranties of
merchantability and fitness. The stated express warranties
are in lieu of all obligations of liabilities on the part of
Braemar for damages, including but not limited to, special
indirect or consequential, arising out of or in connection with
the use or performance of Braemar products.
Any action for breach of warranty shall be commenced within one
(1) year of said breach or be forever barred. Any repairs made to
the product that are not covered by the warranty shall be billed to
the customer.
Document Number: 600-0636-00
Revision: E
Date: December 2012
Table of Contents
Description .............................................................................................. 1
Indications for Use ................................................................................. 1
Recent DL900 Changes .......................................................................... 2
DL900 Phison SD Card Service Instructions ....................................... 2
Monitor Components ............................................................................. 3
Precautions ............................................................................................. 4
Electrode Application ............................................................................ 5
3-Channel (7-Lead) Electrode Placement ........................................ 6
3-Channel (5 Lead) Electrode Placement (1st option)...................... 7
3 Channel (5-Lead) Electrode Placement (2nd option)..................... 8
How to Setup and Record .....................................................................10
Monitor Menu Layout and Description ..............................................14
During a recording ................................................................................22
Patient Event Marker and Reporting Symptoms ...........................22
Early-Out and real time ECG during a recording .........................22
Removal of Monitor, Battery and Patient Cable ................................23
Analyzing the ECG Data (two options) ...............................................24
Maintenance and Service ......................................................................26
Cleaning .............................................................................................26
Service Items & Accessories .............................................................27
Troubleshooting.....................................................................................28
Equipment Symbols ..............................................................................31
Specifications .........................................................................................32
Electromagnetic Emissions ...................................................................33
Electromagnetic Immunity ...................................................................33
Recommended Separation Distances ...................................................36
DL900 Holter Monitor
DL900 Holter Monitor
Description
6. Evaluation of patients with pacemakers.
This Operator Manual contains instructions for use for the DL900,
DL900 SD and DL900 SD 7 Day Holter Monitors. These Holter
Monitors are battery operated solid-state monitors. The DL900 and
DL900 SD Holter Monitor is designed for up to 120 hours (5 days)
of continuous recording of ambulatory electrocardiograph (AECG)
data. The DL900 7-Day Holter Monitor is designed for up to 168
hours (7 days) of continuous recording of ambulatory
electrocardiograph (AECG) data. All have the ability to detect and
record pacemaker pulses according to the appropriate criteria for
Association for the Advancement of Medical Instrumentation
(AAMI) pacer detection.
7. Reporting of time and frequency domain heart rate variability.
The DL900 Series Holter Monitors are an AAMI Type I device and
are also part of a conventional AECG recording system where the
ECG is recorded on a memory card that may be removed from the
monitor after the recording is complete. The memory card is then
placed in a card reader that is connected to the Computer Analysis
System. By following the instructions provided with your Computer
Analysis System, the recorded ECG data is downloaded from the
memory card for analysis. Data can also be viewed by
downloading the recorded information via a USB Cable.
The DL900 series Holter monitor is compatible with computers that
comply with EN60950 and have an operating system of Windows
XP or newer that are equipped with properly functioning and
configured hardware, software, and drivers that comply with
Universal Serial Bus Specification rev. 2.0, and the USB Mass
Storage Class specification ver. 1.0.
8. Reporting of QT Interval.
Recent DL900 Changes
Memory card technology changes continue to occur. Effective
January 16, 2012, new Braemar certified SD Memory cards are
available to order for existing DL900 Holter units in the field that
have utilized the MMC memory card and need a replacement
memory card. The replacement SD Memory Cards will include an
instruction sheet. SD Memory Cards will also be used for any RMA
unit that requires memory card replacement.
DL900 Phison SD Card Service Instructions
Your replacement Holter memory card is a different memory type
than the card originally supplied with your monitor. Recent
changes in memory technology from an older style MMC standard
to the current SD memory format have resulted in slightly higher
power consumption while recording. Older MMC card technology
is now unavailable for commercial applications.
Braemar recommends that any recording in excess of 48 hours be
performed with a new lithium battery installed at the time the
recording is started. Our testing has shown typical performance as
shown in the table below. Actual recording lengths can vary based
upon numerous factors including the brand of battery, state of
charge of the battery, age of battery, actual power consumption of
the circuit board, and other factors.
Indications for Use
The DL900 Series Holter Monitors are intended for patients
requiring ambulatory (Holter) monitoring. The following is a listing
of the most frequent indications for use:
1. Evaluation of symptoms suggesting arrhythmia or myocardial
ischemia.
2. Evaluation of ECG documenting therapeutic interventions in
individual patients or groups of patients.
3. Evaluation of patients for ST segment changes.
4. Evaluation of a patient’s response after resuming occupational
or recreational activities (e.g., after M.I. or cardiac surgery.)
Typical Running Length (Hours) with Different Sample Rates
AAA Alkaline LR03
Average running length
in number of hours.1, 2
AAA Lithium L92-FR03
Average running length
in number of hours.1, 2
10 Bit
3 Channel
10 Bit
3 Channel
128
sps
90
128
sps
120
180
sps
180
sps
-
256
sps
81
256
sps
118
512
sps
55
512
sps
82
1024
sps
33
1024
sps
-
1. Based upon testing with an Energizer LR03-AM4 alkaline
battery and an Energizer L92-FR03 lithium battery.
2. 8 bit resolution can be expected to be within 5% of 10 Bit
resolution.
5. Clinical and epidemiological research studies.
1
133
sps
133
sps
-
2
DL900 Holter Monitor
Monitor Components
DL900 Holter Monitor
Precautions
1. Use only a Braemar, Inc. certified memory card for
recording. Verify that you are using the correct memory
card. DL900 SD Holters will have “SD” printed on the device
back label.
2. It is very important that you observe the “Early Out”
procedure. Failure to do so may result in the loss of
recorded ECG (Holter) data. See Page 18.
3. Disconnect patient leads before using a defibrillator.
4. Users must ensure that they configure the DL900 with settings
compatible with their ECG analysis software.
5. False positive and false negative pacer detects may occur
when using Pacer Detect.
Figure 1
Figure 1 – Front view of the monitor
Letter
A
B
C
D
E
F
G
Description
Left button
Down button
Up button
Right button
Enter button
Patient Cable
Screen to display feedback from the monitor
•
False positives – may result from poor electrode
connection to the patient or a large amount of electrical
interference from nearby source.
•
False negatives – may occur with pacers that are bipolar
because of a weak pacer pulse signal at the patient’s skin.
6. When viewing the ECG data, the presence of pacemaker
signals in the ECG trace should not be considered true
representations of the actual pacemaker stimulus amplitude.
7. Use of rechargeable batteries is not recommended.
8. Observe local laws for disposal of alkaline batteries.
9. To avoid the possibility of corrosion damage to the monitor, do
not leave batteries in the device when it is not in use.
10. To receive the best recording results, instruct patients to stay
away from heavy electrical equipment or other sources of
electromagnetic interference. Equipment such as electric
blankets and heating pads are included in this group.
11. A minimum of 180s/s and 10 bit resolution is needed for
patients weighing less than 22 lb. (10 kg.).
12. The DL900 7 Day operates at 40 Hz and is not intended for
use with infants.
3
4
DL900 Holter Monitor
Additional equipment classification information as required in
EN 60601-1
A. EQUIPMENT not suitable for use in the presence of a
FLAMMABLE ANAESTHETIC MIXTURE WITH AIR or
WITH OXYGEN OR NITROUS OXIDE
B. IPX0-Ordinary Equipment (enclosed equipment without
protection against ingress of water)
C. Internally Powered Equipment
D. Mode of Operation – Continuous Operation
DL900 Holter Monitor
3-Channel (7-Lead) Electrode Placement
7 color-coded leadwires are used to create a 3-Channel ECG
recording. This is a typical electrode placement. Refer to your
Analysis System software and the physician for a recommended
position.
Caution: U.S. Federal law restricts this device to sale by
or on the order of a physician
Electrode Application
1. Connect the patient leadwire to the electrode.
2. Remove the protective backing from the electrode.
3. Apply electrode to the patient’s skin.
4. Apply electrodes to match Figures 2 through 4 in this manual
or as instructed by the physician.
NOTES:
•
•
•
•
It is recommended that trained medical personnel handle
the application of electrodes.
Proper preparation of the patient’s skin is essential for
obtaining a good ECG recording. Refer to your electrode
manufacturer for instructions on skin preparation
techniques.
Use only good quality electrodes designed for longer term
recording with a Holter monitor. All the electrodes should
come from the same manufacturer.
Improper connection will cause inaccuracies in the ECG.
5
Figure 2 – 7-Lead Electrode Placement
Channel
11+
2-
Color
White
Red
Black
2+
Brown
33+
Blue
Orange
Green
Location
Right Manubrial border of the Sternum.
th
Left Anterior Axillary line 6 rib.
Left Manubrial border of the Sternum.
Approximately 1 inch right of Xiphoid
Process on the rib.
Center of the Manubrium.
th
Left Mid-Clavicular line 6 rib.
Lower right rib margin over bone.
6
DL900 Holter Monitor
DL900 Holter Monitor
3-Channel (5 Lead) Electrode Placement (1st option)
3 Channel (5-Lead) Electrode Placement (2nd option)
5 color-coded leadwires are used to create a 3-Channel ECG
recording. This is a typical electrode placement. Refer to your
Analysis System software and the physician for a recommended
position.
5 color-coded leadwires are used to create a 3-Channel ECG
recording. This is a typical electrode placement. Refer to your
Analysis System software and the physician for a recommended
position.
Figure 3 – 5-Lead Electrode Placement
#
Channel
Color
1
3-
White
2
3
4
5
1-, 22+, 3+
1+
Red
Black
Brown
Green
Location
Next to the right Manubrium border on
the Clavicle
Centered on the Manubrium
Lower left rib margin over bone.
th
Left Anterior Axillary line on the 6 rib
Lower right rib margin over bone.
7
Figure 4 – 5-Lead Electrode Placement
#
Channel
Color
1
3-
White
2
1-, 2-
Red
3
4
5
2+, 3+
1+
Black
Brown
Green
Placement
Right side below the V1 position, at
the bottom of the rib cage
Center on the Manubrium, the top of
the sternum
Left side at the V5 position, on a rib
Left side at the V3 position, on a rib
Right side opposite V5 position.
8
DL900 Holter Monitor
DL900 Holter Monitor
How to Setup and Record
1. Install the memory card. The card locks into place when fully
inserted. Be sure to observe correct direction and method
when inserting. Reference Figure 5 for information about
memory card orientation.
2. New DL900 SD Holter Kits will contain new Braemar certified
SD Cards. These SD cards are specific to the new DL900
Holter unit. The DL900 Holter unit will display a new Device
Back Label with an “SD” notation to identify this Holter device.
(This page intentionally left blank.)
Back Label of
Monitors Originally
Shipped with SD
Memory Cards
Back Label of
Monitors Originally
Shipped with MMC
Memory Cards
3. New SD cards are specifically typed and compatible with the
new Holter units and are not interchangeable with existing
units in the field
Original
Equipment
MMC Card
9
Service
Replacement
for MMC Card
10
Original
Equipment
SD Card
DL900 Holter Monitor
NOTE: The DL900 SD and DL900 SD 7 Day are only
compatible with Braemar, Inc. certified memory
cards. Refer to Maintenance & Service located in
this manual to order a replacement.
DL900 Holter Monitor
4. Install a fresh AAA battery into the DL900 SD or DL900 SD 7
Day Holter. Be sure to observe the correct battery polarity.
The monitor will display a splash screen: Press any key to
start.
NOTES:
•
The battery should not push on the memory card. If this
condition occurs, finish installing the memory card before
installing the battery.
•
An INSERT CARD message appears at the bottom of the
splash screen if the memory card is not installed or
installed incorrectly.
•
Close door by pushing on the two outside edges of the
battery door following the two step process below (See
Figure 6).
1. Close the door so there is a gap at location A, and the
door overhangs the case as shown in location B.
2. Slide the door closed until the gap at location A is
closed and the overhang at location B no longer
protrudes.
•
Figure 5 - Compartment
Figure 5 – Memory card installation (Bottom View)
Letter
A
B
C
Description
Memory card (Top Label Viewable)
Battery removal ribbon
Door that covers memory and battery area
•
•
•
•
Figure 6 - Two Step Battery Door Closing Process
5. Connect the patient cable to the DL900 SD or DL900 SD 7 Day
Holter. The patient should already be connected to the
electrodes and patient leads.
NOTE: Insert patient cable with the patient cable direction as
shown in Figure 1. The locking clip on the cable
requires a very firm push to lock it in place on the
monitor. However, it only needs to be removed in the
event of damage or for convenience of storage.
11
12
DL900 Holter Monitor
6. With the splash screen shown on the LCD, press any key to
advance into the menu system. The memory card is initialized
(formatted) and the Patient screen appears.
•
The monitor does not advance past the splash screen
unless a patient cable is plugged in. A “No Cable”
message appears to indicate that a patient cable must be
connected to the monitor.
•
The monitor automatically starts recording data 30
minutes after the Patient screen is displayed.
•
If the monitor does not turn on after following the steps
above, refer to the Troubleshooting section.
DL900 Holter Monitor
Monitor Menu Layout and Description
Tab Screen
Patient
Layout / Description
Used to enter the patient information.
Patient ID
First Name
Last Name
Birth Date
Format is controlled in the
Date/Time tab
Clinic ID
CH1, 2, 3
Displays the ECG signal in real time. Pacer
pulse marks and the gain setting are also
displayed. Lead errors and no cable messages
are also displayed when applicable.
Lead Status
Displays the connection status of each lead to
the patient.
Start
Settings
13
Push the
button to start the recording.
Displays patient demographics if they exist.
Displays “Pacer Detection ON” when pacer is
enabled in the settings tab.
The overall settings for the recording
Record Time
1, 6, 12, 24, 48, 72, 96,
120, (144, 196 hours;
applies only to 7-day
monitors)
Pacer detection
ON or OFF
Language
English, Spanish, Russian,
German, French, Italian,
Portuguese, Swedish,
Polish, Dutch, Finnish, and
Danish.
Contrast
20-95%
Sample Rate
128, 133, 180, 256, 512,
1024 s/s
Resolution
8, 10 bit
Save as default
Save the current settings
as the default for the
monitor.
14
DL900 Holter Monitor
DL900 Holter Monitor
7. Enter the Patient ID if desired. (16 numbers maximum)
A. Select Patient ID, then press
Tab Screen
Date/Time
About
Layout / Description
Used to set the Date/Time option.
Month
January – December
Day
1 – 31 (month dependent)
Year
1970 – 2029
Date Format
MM/DD/YYYY,
YYYY/MM/DD,
DD/MM/YYYY,
YYYY/DD/MM
Hour
0 – 23
Minute
0 – 59
Auto DST
ON or OFF, Daylight
savings time uses the USA
convention
Time Format
12 or 24 hr
to edit.
B. Enter the Patient ID number by pressing ◄, ►, ▲, or ▼
then pressing “. Repeat this process until the entire
Patient ID number is entered. If you enter a wrong
number, select [Back] and press
.
C. Select OK and press
to save and exit the Patient ID
screen. To exit without saving, select Cancel and press
.
NOTE: Scroll arrows indicate additional fields that are located
off screen. To access these additional fields, press the
◄, ►, ▲, or ▼. The screen automatically moves to
allow access to these additional fields.
Displays Model Name (i.e.: DL900, DL900 7
Day)
Serial #
Firmware/configuration Version #
Figure 7
NOTE: The user interface for the DL900 SD and DL900 SD 7
Day has tabs across the top and additional settings
inside each tab. Pressing the ◄ or ► buttons moves
from one tab to the next. Press ▲ or ▼ to choose
from the settings within that tab. If you cannot change
from one tab to another, press the
to save your
setting. The ◄ or ► buttons are then available
change from one tab to the next.
15
Figure 7 – Scroll indicator locations
Letter
A
Description
Arrows indicate more information is located off the
edge of the screen.
16
DL900 Holter Monitor
8. Enter the First Name if desired. (16 characters maximum)
A. Select First Name, press
to edit.
DL900 Holter Monitor
NOTES:
•
B. Enter the First Name by pressing ◄, ►, ▲, or ▼ then
pressing
Figure 8 shows what lead loss message looks like for
each channel. When the monitor detects lead loss the
ECG displayed on the screen will not be valid.
. Repeat this process until the First Name is
entered. If you enter a wrong letter, select [Back] and
press
.
C. Select OK and press
to save and exit the First Name
screen. To exit without saving, select Cancel and press
.
Figure 8 -Lead Loss signal
9. Enter the Last Name if desired. (16 characters maximum)
•
•
Follow the same steps as entering the First Name.
10. Enter the Birth Date of the patient if desired.
•
Table 1 – Gain settings
Follow the same steps as entering the Patient ID.
11. Enter the Clinic ID if desired. (16 numbers maximum)
•
Follow the same steps as entering the Patient ID.
12. Check that there is a good connection to the patient. Use
the◄ or ► buttons to change to each screen. Check that each
screen has a good ECG signal.
17
Press the ▲ or ▼ buttons to change the gain of the
monitor. The gain is displayed in the lower right hand
corner of the screen.
Gain on screen
0.5x
1x
millivolt range
+/- 5 peak-to-peak
+/- 2.5 peak-to-peak
2x
+/- 1.25 peak-to-peak
•
The gain setting is the same for all channels and only
affects information displayed on the screen.
•
The recording for all resolutions is always made at the 1x
gain setting, unless the gain is changed to another setting
as in Table 1.
•
If Pace Detect is turned on, pacer pulse marks are
displayed below the trace to indicate the detection of each
pacer pulse.
•
The monitor will “NOT” implement an auto-start recording
in 30 minutes if in total lead loss, the cable is removed or
all 3 channels display lead loss, as in Figure 7, unless the
key is pressed.
18
DL900 Holter Monitor
13. Check the Lead Status tab for loose connections to the
patient.
DL900 Holter Monitor
Note About Recording Length and Card Size:
•
NOTES:
•
indicates a lead has a good patient connection.
•
indicates a lead does not have a good patient
connection.
•
The screen displays Leads OK or Lead Error message in
the lower left corner of the screen to indicate whether a
good patient connection is present.
The monitor only allows you to select settings for a
recording that will fit on the memory card. There is a
relationship between the record time, sample rate, and
resolution. By choosing a higher value for one of these
parameters, you may need to choose a lower value for
another. You should set the lowest variable desired first,
then the second highest, then the highest.
Example of record time, sample rate, resolution:
You have a 512MB memory card.
The monitor is currently set to 24 hr, 180 sps, 10 bit.
14. Check the settings for the monitor. Use the◄ or ► buttons to
change to the Settings screen.
A. To make changes, press the
The settings you want are 72 hr, 512 sps, 10 bit.
The monitor will not let you achieve your final settings with
a 512MB memory card because the recording will not fit
on the card. You must choose which settings are more
important to you. You can decrease the time to 48 hours
and still maintain 512sps and 10bit. You can also
decrease the resolution to 8bit and still maintain 72hr and
512sps.
button.
B. Select the setting you want to change by pressing▲ or ▼.
C. Change the value by pressing ◄ or ►.
D. To save all changes press
. There is not an option to
cancel the changes made. You may also save your current
settings as the default at the bottom of the menu. See Note
on next page for operation.
E. See Note on the next page if you cannot select all of
your desired settings.
19
•
To save your changes as the default values for the
monitor follow these steps:
−
Highlight Save as default at the bottom of the list
and press the
button.
−
Change the setting to Yes, and press the
buttons.
20
DL900 Holter Monitor
Typical Running Length (Hours) with Different Sample Rates
DL900 SD and DL900 7-Day
128
133
180
256
512
AAA Alkaline IECLR3
10 Bit
sps
sps
sps
sps
sps
Average running length
1, 2
in number of hours.
3 Channel
96
96
96
96
721
AAA Lithium L92-FR03
128
133
180
256
512
10 Bit
Average running length
sps
sps
sps
sps
sps
1, 2
in number of hours.
3 Channel
120
120
120
118
72
DL900 Holter Monitor
During a recording
1024
sps
24
1024
sps
24
During recording, the DL900 displays the date, current time, time
remaining for the recording, and any lead errors or cable loss if
they are present.
Patient Event Marker and Reporting Symptoms
1.
2.
3.
4.
72 hours at 8 bit, 48 hours 10 bit
Based on 1250mAH battery.
Note memory card size requirements.
8-Bit Resolution is within 5% of 10-Bit Resolution for
running length unless noted.
5. When recording for 7 days using the DL900 7-day
recorder, a lithium battery must be used, and the sample
rate must be set to 180 or less.
15. Check the Date and Time of the monitor. Use the◄ or ►
buttons to change to the Date/Time screen.
A. To change the Date, press the
button to edit.
B. Select the setting you want to change by pressing▲ or ▼.
C. Change the value by pressing ◄ or ►.
D. To save all changes press the
button. To change
incorrect information that was saved on a previous screen,
you must finish setting the Time screen and re-enter the
Date screen.
E. Repeat steps A through D for the Time screen.
NOTE: Daylight savings time uses the USA convention.
16. To start recording, use the◄ or ► buttons to change to the
Start screen and press the
The DL900 allows an easy way for the patient to record his/her
reason for pressing the
button. This ensures clarity of entries
by providing a list which the patient may choose from.
The medical technician or physician should provide the patient
with an explanation of what is to be marked as an Event. To
indicate an Event, the patient simply presses the
button.
NOTE: Once a manual event has been activated, the patient
must wait one minute to activate another manual
event.
Early-Out and real time ECG during a recording
The DL900 optionally supports an Early-Out feature that allows a
trained individual to stop a recording before the selected recording
time has elapsed. To initiate an Early-Out press the◄ and
buttons simultaneously. If the user chooses to end the recording,
observe the menu tab with the option to do so. Then select Stop
Recording and press the
button.
To view real time ECG from the monitor, press the ◄ or ► buttons
to change to the CH1, 2, or 3 screens. The Lead Status screen
shows the connection status of each lead to the patient. When
viewing the real time ECG, the user can return to the recording
manually, or the DL900 will automatically return after 5 minutes
have elapsed. Real time mode does not interrupt recording.
button.
17. It is recommended that the monitor be inserted in the DL900
holster and be worn on a patient’s belt or placed in the pouch
and worn around the neck. A disposable one-time use pouch
is also available for order.
21
When the session is complete (completed by a trained
medical technician) the ECG data is available for analysis.
22
DL900 Holter Monitor
Removal of Monitor, Battery and Patient Cable
1. Remove the electrodes from the patient.
2. Remove the battery by pulling the battery removal ribbon
straight out; do not pull up. (See Figure 5, B). Properly dispose
of the alkaline battery according to local laws. Lithium battery
is to be removed from the monitor when the monitor is not in
use.
3. Remove the patient cable by squeezing the two side latches
on the head of the patient cable and pulling away from the
monitor.
NOTE: NEVER pull on the cable itself because this can easily
break the wire inside the insulation. Pulling on the
cable also can cause a noisy and intermittent ECG
recording.
DL900 Holter Monitor
Analyzing the ECG Data (two options)
Choose a Computer Analysis System on which the ECG analysis
is to be performed. The Computer Analysis System must have
special download software installed to transfer the ECG data from
the memory card to the Computer Analysis System.
1. The user has two options to analyze the captured ECG data:
A) Memory Card: Remove the memory card from the
monitor by pushing the card in until you hear a small
click and the card ejects. (See Figure 5, A).
Insert the memory card into the card reader of the
Computer Analysis System and transfer the ECG data
according to the manual for the Computer Analysis
System.
B) USB connectivity: The user also has the option to
download the recording on the memory card via USB
without having to remove the card from the monitor.
Start by removing the patient cable, replace it with the
USB cable (P/N 350-0291-00) and confirm that the
card is still in the monitor. Attach the other end of the
USB cable to any available USB port on a computer.
The monitor is now acting as a card reader and can
be accessed similarly as any removable disk drive
would be.
2. Once the data transfer is complete, remove the previous
patient’s name and any other information on the memory card
and erase the ECG data.
NOTE: Reinserting the flash card into the monitor, powering
on the device with patient cable inserted and entering
the setup menu by pressing a button will automatically
erase the data from the previous patient.
3. The memory card is now cleared of the previous data and free to
be used for the next patient.
23
24
DL900 Holter Monitor
DL900 Holter Monitor
Maintenance and Service
Cleaning
Remove the battery before cleaning the monitor. Dampen a soft
cloth with mild detergent and water to clean the monitor,
leadwires, and holster. Reinstall batteries and battery cover when
cleaning is complete.
(This page intentionally left blank.)
For best results, Braemar recommends following the ANSI/AAMI
EC53 guidelines, Section 4.3.1 guidelines for cleaning our devices
and cables: The device, patient leadwires and holster should be
cleaned with the following materials:
• Green soap, green soap tincture (U.S. Pharmacopeia)
or alcohol-free hand soap
• Sodium hypochlorite (bleach) solution 10% in water
• Isopropyl alcohol may also be used on the monitor but
may not be used on the leadwires.
NOTE: Use of other alcohols, acetone, AlkylDimethyl Benzyl
ammonium chlorides or amethyl ammonium chloride
is NOT recommended to clean the monitors. Use of
alcohol or acetone on leadwires could cause the
leadwires to stiffen and the insulating plastic to crack.
Use of amethyl ammonium chloride (commonly found
in many consumer wipes) on the monitor and holster
could cause the plastic to deteriorate.
•
•
•
•
•
25
Do not immerse into cleaning solutions.
When sterilization is required, use hospital-approved
procedure for EtO, not to exceed 50°C/122°F.
Frequent sterilization will reduce the useful life of
cables and leadwires.
Follow cleaning instructions exactly. Failure to follow
instructions or use of other than recommended cleaning
solutions may cause damage to cables, leadwires, and
plastic case of the device.
Store the cables/leads suspended when possible.
Avoid kinking the cables/leads.
26
DL900 Holter Monitor
Service
DL900 Holter Monitor
Troubleshooting
If there is a problem with the monitor, review the Troubleshooting
Section for a listing of problems and solutions. If additional
assistance is required, contact customer support via phone, fax or
e-mail listed in this manual. Call customer support before returning
a monitor to make shipping arrangements.
NOTE: There is no preventative inspection or maintenance
that can be performed by the end user.
Service Items & Accessories
Description
Battery door
Holster
Pouch Disposable one-time use
Patient cable 3 Channel - 5 Lead
Patient cable 3 Channel - 7 Lead
Part Number
100-1775-001
100-1887-001
100-1892-001
350-0290-00
350-0290-01
USB cable
SD Memory Card for units shipped
th
after January 16 , 2012
Operator manual
Kit,Service,DL900,Phison SD Card,
instruction sheet included, units
th
shipped prior to January 16 , 2012
350-0291-00
350-0315-00
Symptom
No display
Splash screen
remains displayed
Low battery
message
Battery does not
last for the selected
number of hours
Monitor does not
run for the selected
number of hours
Noise artifacts on
ECG signal
600-0636-00
800-0439-00
Defective Card
Message
Any Other Errors
Contact Braemar
LEAD ERROR
displayed
NO CABLE
displayed
27
Solution
Check battery direction.
Ensure patient cable is inserted
completely. Then press
.
Install new battery.
Check if the INSERT CARD message is
displayed and reinstall the memory card.
Inspect battery compartment, clean
contacts if necessary.
Install new battery.
Ensure new battery is being used.
Ensure the memory card is Braemar, Inc.
Certified.
Check that Settings screen is set for the
desired number of hours.
Memory card has only enough memory
capacity to run for the number of hours
which are available as valid selections in
the Settings menu.
Ensure all electrodes are securely
attached to the patient.
Ensure patient cable is inserted
completely.
Replace the patient cable.
If multiple cards are defective, call for
service.
Ensure leads are connected to the
electrode and electrodes are attached to
the body.
Ensure cable is connected properly.
28
DL900 Holter Monitor
DL900 Holter Monitor
The DL900 SD and DL900 SD 7 Day monitor perform a power-on
self-test when the battery is installed. If the test finds a problem
with the monitor, it displays an error message on the LCD. The
common error codes and action are as follows:
Error Message
Self Test Error:
Keypad failure
Number
52
Self Test Error:
53
Error:
203-206
Error:
401-410
Any other error
codes:
xxx
Action
Make sure no buttons are pressed
while reinserting the battery. If the
problem persists, contact Braemar
Customer Service for repair.
Repeat firmware/configuration
update with a new battery. If the
problem persists, contact Braemar
Customer Service for repair.
Remove the SD card from the
monitor, delete any .UPG files from
the SD card and repeat the update
process. If the problem persists,
contact Braemar Customer Service
for repair.
SD card error; reformat the Memory
card or replace the card with a new
Braemar certified SD card and
reinsert the battery. If the problem
persists, contact Braemar Customer
Service for repair.
Remove and reinsert the battery. If
the error persists, contact Braemar
Customer Service for assistance
and/or repair.
29
(This page intentionally left blank.)
30
DL900 Holter Monitor
Specifications
Equipment Symbols
Symbol
Description
Type B Applied Part
Consult Manual.
0086
DL900 Holter Monitor
Complies with the Medical Device Directive
of the European Union.
Waste Electrical and Electronic Equipment
(WEEE) It is the responsibility of the end
user to dispose of this equipment at a
designated collection point for recycling.
Year of Manufacture
Functional
Channels
Resolution
Recording
Download interface
Sample rate
Frequency response
Signal verification
Pacemaker Detection
3 channels
8, 10 bits
Full disclosure
USB 2.0
Selectable up to 1024/sec max
0.05 Hz to 60 Hz, @ -3 dB
LCD display
Programmable on/off
Memory
Recording time
Type
Model
Card size
Up to 168 hours (7 days depending on model)
Flash
DL900
512 MB, 1.0 GB Card
Physical
SN
REF
Serial Number
Dimensions
Catalogue Number
Manufacturer
Weight with batteries
Enclosure
Operating position
2.44” x 2.44” x .67”
[61.98 mm x 61.98 mm x 17.02 mm]
< 2 oz [<56 g]
Molded plastic (UL 94V-0)
Any orientation
Electrical
Manufacturer:
Braemar, Inc.
1285 Corporate Center Drive, Suite 150
Eagan, MN 55121 USA
Phone:
Fax:
E-mail:
Web:
800.328.2719
651.286.8620
651.286.8630
[email protected]
http://www.braemarinc.com
Authorized European Rep:
QNET BV
Hommerterweg 286
6436 AM Amstenrade
The Netherlands
31
Gain settings
Connector
Patient cable
0.5X, 1X and 2X
20 pin
5 or 7 Lead
Environmental
Operating temperature
Non-operating temperature
Operating humidity
Non-operating humidity
0°C to +45°C
-20°C to +65°C
10% to 95% (non-condensing)
5% to 95% (non-condensing)
Battery
Type – (1) AAA Alkaline IEC-LR3
Type – (1) AAA Lithium L92-FR03
Warranty
1 (one) year from shipment
32
Life – 96 hours (4 days)
Life – 168 hours (7 days)
DL900 Holter Monitor
DL900 Holter Monitor
Electromagnetic Emissions
Emissions
test
Compliance
Electromagnetic
environment – guidance
RF emissions
CISPR 11
Group 1
The DL900 uses RF energy only for its
internal function. Therefore, its RF
emissions are very low and are not likely
to cause any interference in nearby
electronic equipment.
RF emissions
CISPR 11
Class B
The DL900 is suitable for use in all
establishments, including domestic
establishments and those directly
connected to the public low-voltage
power supply network that supplies
buildings used for domestic purposes.
Electromagnetic Immunity
IEC 60601
test level
Compliance Electromagnetic
level
environment - guidance
Electrostatic
discharge
(ESD)
IEC 61000-4-2
±6 kV
contact
±8 kV air
±6 kV
contact
±8 kV air
Floors should be wood,
concrete or ceramic tile. If
floors are covered with
synthetic material, the
relative humidity should be
at least 30%.
Power
frequency
(50/60 Hz)
magnetic field
IEC 61000-4-8
3 A/m
3 A/m
Power frequency magnetic
fields should be at levels
characteristic of a typical
location in a typical
commercial or hospital
environment.
Immunity test
33
Immunity
Test
IEC 60601
test level
Compliance
level
Electromagnetic
environment - guidance
Portable and mobile RF
communications equipment
should be used no closer to any
part of the unit, including cables,
than the recommended
separation distance calculated
from the equation applicable to
the frequency of the transmitter.
Recommended Separation
Distance:
Conducted RF
IEC 61000-4-6
3 Vrms
150 kHz to
80 MHz
3V
d = 1.2 √ P
Radiated RF
IEC 61000-4-3
3 V/m
80 MHz to
2.5 GHz
3 V/m
d = 1.2 √ P 80 MHz to 800 MHz
d = 2.3 √ P 800 MHz to 2.5 GHz
where P is the maximum output
power rating of the transmitter in
watts (W) according to the
transmitter manufacturer and d is
the recommended separation
distance in meters (m).
Field strengths from fixed RF
transmitters, as determined by
an electromagnetic site surveya,
should be less than the
compliance level in each
frequency rangeb.
Interference may occur in the
vicinity of equipment marked with
the following symbol:
34
DL900 Holter Monitor
Note 1: At 80 MHz and 800 MHz, the higher frequency range applies.
Note 2: These guidelines may not apply in all situations. Electromagnetic
propagation is affected by absorption and reflection from structures,
objects and people.
a Field strengths from fixed transmitters, such as base stations for radio
(cellular/cordless) telephones and land mobile radios, amateur radio, AM and
FM radio broadcast and TV broadcast cannot be predicted theoretically with
accuracy. To assess the electromagnetic environment due to fixed RF
transmitters, an electromagnetic site survey should be considered. If the
measured field strength in the location in which the unit is used exceeds the
applicable RF compliance level above, then the unit should be observed to
verify normal operation. If abnormal performance is observed, additional
measures may be necessary, such as reorienting or relocating the unit.
b Over the frequency range 150 kHz to 80 MHz, field strengths should be less
DL900 Holter Monitor
Recommended Separation Distances
Refer to the following table for recommended separation distances
between the DL900 and portable and mobile RF communications
equipment.
The DL900 is intended for use in an electromagnetic environment
in which radiated RF disturbances are controlled. The user of the
DL900 can help prevent electromagnetic interference by
maintaining a minimum distance between portable and mobile RF
communications equipment (transmitters) and the DL900 as
recommended below, according to the maximum output power of
the communications equipment.
than 3 V/m.
Rated maximum
output power of
transmitter
Separation distance according to
frequency of transmitter
W
150 kHz
to 80 MHz
d = 1.2 √ P
80 MHz
to 800 MHz
d = 1.2 √ P
800 MHz
to 2,5 GHz
d = 2.3 √ P
0.01
0.12
0.12
0.23
0.1
0.38
0.38
0.73
1
1.2
1.2
2.3
10
3.8
3.8
7.3
100
12
12
23
For transmitters rated at a maximum output power not listed
above, the recommended separation distance d in meters (m)
can be estimated using the equation applicable to the frequency
of the transmitter, where P is the maximum output power rating of
the transmitter in watts (W) according to the transmitter
manufacturer.
Note1: At 80 MHz and 800 MHz, the separation distance for the
higher frequency range applies.
Note 2: These guidelines may not apply in all situations.
Electromagnetic propagation is affected by absorption and
reflection from structures, objects and people.
35
36
Braemar Inc.
Phone: 800.328.2719
1285 Corporate Center Drive, Suite 150
Fax: 651.286.8630
Eagan, MN 55121 USA
E-Mail: [email protected]
Copyright 2008, Braemar Inc. All rights reserved