1
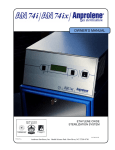
AN74i AN74ix
Study Guide
Thank you for using the Anprolene® sterilization system.
The active ingredient in Anprolene is ethylene oxide (EtO or EO), a chemical that can be hazardous if not
handled properly. To ensure that you fully understand the safe operation of your sterilizer, we strongly
encourage you to take advantage of our Key Operator certification program.
To begin Key Operator training, please read through this study guide thoroughly. If you do not understand any
of the information in the guide, please call Andersen Customer Service for assistance. Once you are familiar
with the study guide, please call us at (800) 523-1276 to schedule a test.
The test will take approximately 20 minutes. The Key Operator test is also an excellent opportunity to ask your
Andersen Representative any questions you may have about the Anprolene system or ethylene oxide.
When you successfully complete the test, you will receive a certificate and a registered key ring. We look
forward to hearing from you.
Key Operator training is free of charge for the lifetime of your sterilizer. Please have all operators of your
Anprolene sterilizer contact us for training before they use the system.
Environmental Considerations
91ºF
68ºF
1 Temperature
Store your Anprolene gas refill kits in a cool, secure area. We recommend storage
below 70°F.
The sterilizer must be used in an area where the temperature is not less than 68ºF
or more than 91ºF . This temperature range must be maintained during the entire
sterilization cycle.
EtO FACTS: At sea level, ethylene oxide is a liquid below 51°F. Above 51°F,
EtO begins to boil and converts into a gas. EtO does not become an effective
sterilant until 68°F. Make sure that the room where your Anprolene sterilizer is
installed remains above 68°F during the entire sterilization cycle. This is
especially important during the winter months!
35%
2 Humidity
Humidity is very important to the Anprolene process. Relative Humidity (RH) must
be at least 35% in the room where item preparation and sterilization take place.
Spores that might be on the instruments may become desiccated and resistant to
Anprolene if the RH is below 35%.
The simplest way to humidify items is to wash them.
It is necessary to humidify items which cannot be washed by enclosing them in a
plastic bag with a damp sponge for four hours prior to sterilization, or you may use an
Andersen Humidichip.
1
Key Operator Study Guide
Preparing the items for sterilization
Four basic steps must always be followed when preparing items for sterilization:
1 Disassemble
Items containing removable parts such as syringes must be taken apart before washing,
drying, and wrapping them to allow the Anprolene an unobstructed path.
WARNING: Instruments which contain batteries should be taken apart and the batteries
removed and wrapped separately to protect against a spark occurring and igniting the
ethylene oxide gas.
2 Wash
Items must be washed surgically clean prior to sterilization. For cleaning, we
recommend using an enzymatic detergent such as Andersen's Sterizyme (AN2281).
3 Dry
Two accepted ways to dry any item prior to sterilization with Anprolene are:
1. Towel drying
2. Drain drying (air drying)
WARNING: Heat or hot air should never be used to dry an item prior to sterilizing
it with Anprolene because it will dehydrate or desiccate bacteria spores making
them more resistant to the ethylene oxide gas.
WARNING: Any water left on items may react with ethylene oxide. Please air dry
instruments thoroughly.
4 Wrap
The following types of wrapping material that are recommended for use with
Anprolene:
1. Andersen Seal and Peel Packaging (which is airtight and waterproof and
greatly extends the shelf life when heat sealed at both ends).
2. Cloth, like CSR wrap, has an estimated sterile shelf life of 30 days.
3. Paper (self-seal pouches) has a shelf life of 30 days.
4. Tyvek-paper pouches.
AN86
HINT: Exposure indicators such as the Andersen AN85 or AN86 will change
color in the presence of EtO, helping to later identify items that have been
sterilized. Seal or label items with exposure indicators such as the AN85 or
AN86. These indicators will change color when exposed to EtO. Exposure
indicators do not prove sterility.
2
Key Operator Study Guide
Sterilization Cycle
Preparing the Sterilization Liner Bag
1 Place prepared items in a new sterilization liner bag.
WARNING: Do not reuse sterilization liner bags. Even a tiny pinhole in a liner
bag can allow gas to escape and cause cycle failure!
WARNING: Do not sterilize liquids, foods or drugs in the Anprolene sterilizer. If
you have any questions about whether an item may be sterilized using Anprolene,
please call Andersen Customer Service.
2 Insert appropriate controls such as a Dosimeter (chemical indicator) or a
Steritest (biological & chemical indicator) into the least accessible part of the
sterilization liner bag. Add a Humidichip to the Humiditube and insert into the
sterilization liner bag.
AN
79
3 Unroll the gas release bag containing the gas ampoule and, without opening it,
gently move the ampoule to the center of the gas release bag if it's not already there.
Place on top of items in the sterilization liner bag where it will be easy to break.
In order to prevent liquid from coming into contact with the skin and prevent gas from
escaping too quickly to achieve sterilization, never open the gas release bag.
ANPR
OLEN
E
AN74ix
WARNING: Reasons why the gas release bag containing the ampoule should
never be opened:
- To prevent the liquid ethylene oxide from coming in contact with the user or the
items to be sterilized.
- To prevent the gas from escaping too quickly to achieve sterilization.
4 Insert the purge probe into the sterilization liner bag with the neck and quick
release fitting at the open end. Place the black Velcro® strap around the sterilization
liner bag and the bobbin of the purge probe, and pull it snug through its loop to
completely close the sterilization liner bag. The strap must secure the sterilization
liner bag tightly around the purge probe in order to keep gas from escaping.
5 Connect the quick release connector to the purge probe, if it is not already
connected.
HINT: The sterilization liner bag may be loaded and sealed away from the
sterilizer cabinet, and connected to the purge probe once you are ready to start a
cycle.
3
Key Operator Study Guide
Starting the Cycle
1 Make sure the AN74i power cord is connected. Press the top part of the power
switch. Wait to see the 'AN74i ANPROLENE STERILIZER' and the 'START'
message to appear on the cabinet display.
AN74 I
ANPROLENE STERILIZER
START
START
2 Push the button to the right of START.
3 Wait for the SELF TEST and number of elapsed PUMP HOURS to appear.
4 Press the button next to the PURGE message on the right of the display and wait
for 1 minute 30 seconds until the display reads '00:00:00'. The sterilization liner bag
should vacuum down as excess air is removed.
5 When the display indicates "BREAK AMPOULE", carefully, so as not to puncture
the sterilization liner bag, grasp the ampoule through the sterilization liner bag and
activate it by snapping off the top.
Selecting Cycle Length
1 Close the door.
2 Lock the sterilizer and remove the key.
AN74
ix
3 SELECT CYCLE LENGTH. (Right button = 12 Hour, Left button = 24 Hour)
WARNING: The usual Anprolene sterilization cycle is 12 hours, plus a 2-hour
purge cycle. When sterilizing lengths of tubing 3 feet or longer, or a full load of
gas absorbent items, it may be necessary to increase the cycle time to 24 hours
with the '24 HOUR CYCLE' button.
4 If an electronic beep sounds, it is an alert that 5 seconds have elapsed and the
AN74i is awaiting a cycle time selection.
5 Log sterilization data if required.
WARNING: Never interrupt a cycle once the gas ampoule has been activated.
An alarm will sound if the door is opened during the cycle.
4
Key Operator Study Guide
Unloading the Sterilizer and Determining Sterility
1 Remove the sterilized items only after the sterilization cycle and 2-hour purge cycle
have been completed and the display indicates UNLOAD STERILIZER. The sterilizer will
continue to aerate items that are not removed immediately. A count-up timer on the display
will indicate the time that has lapsed since the final 2-hour purge cycle ended.
HINT: To unload the sterilization liner bag away from the sterilizer, simply detach the
purge probe hose from the bag using the quick release fitting at the base of the probe.
2
Press EXIT to turn off the AN74i.
3
Unload the liner bag and check the sterility (chemical &/or biological) indicators.
- Steritest provides an immediate indication of the success of the cycle (via the
Dosimeter), and later proves sterility by showing that active spores have been killed.
(Spores will require at least 48 hours of incubation to provide results.)
- The Dosimeter shows whether time, temperature and gas concentration
parameters have been met. It proves an immediate chemical indication that the cycle
was successful. Dosimeters should not be used in place of B.I.s to prove sterility.
- Chemical exposure indicators, such as the AN85 or AN86, do not prove
sterilization. They only change color to show that the items have been exposed to
ethylene oxide.
Aeration
1 The cabinet ventilator should be running during the entire sterilization cycle to
prevent personnel from being exposed to more than the OSHA permitted levels of
ethylene oxide. [1.0 ppm (parts per million) over an 8 hour time weighted average
(TWA)] Do not remove items before the full 2-hour purge cycle. Aeration should take
place in a well-ventilated area that provides at least 10 fresh air exchanges per hour
so that high concentrations of gas will not build up while aerating. The purge cycle is
designed to aerate most products sufficiently to meet the short-term exposure level
(STEL) of 5.0 ppm for the 15 minutes (during unloading of the liner bag).
2
Metal and glass do not require additional aeration.
3 Items made of gas absorbent material must be aerated at a minimum room
temperature of 68° F for at least 24 hours prior to use. If EtO were retained in an
item and came in contact with skin or mucosa, it could cause a chemical contact
burn.
4 The AN74i/ix can be used for extended aeration. After the regular cycle is
finished, the sterilizer will continue to ventilate and purge the liner bag until the door is
opened, the exit button is selected, and the cycle has ended. A count-up timer will
keep track of the time that has passed since the standard cycle was completed.
Extended aeration can also take place outside of the sterilizer after removing
items from the sterilization liner bag. In this case, aeration should take place in a wellventilated area that provides at least 10 fresh air exchanges per hour so that high
concentrations of gas will not build up while aerating.
5
5
Key Operator Study Guide
Safety Precautions
Ethylene Oxide Safety
1 Do not allow open flame or sparks near the sterilizer during the sterilization cycle
because ethylene oxide gas is highly flammable in concentrations above 3.0% (30,000
ppm).
2 If you come in contact with liquid Anprolene, you should wash the effected area
with water thoroughly for at least 15 minutes. Consult MSDS for further reference.
3
Never interrupt a cycle in progress.
4 Sterilization liner bags should never be reused because they may have a puncture
or tear.
5 The 12 and 24-hour sterilization cycles both end with a 2-hour purge cycle, which
flushes fresh air around the products in the sterilization load.
6 Personnel exposure to ethylene oxide can be monitored by using the personal
exposure badges, such as the Andersen AN93 AirScan® Badges. The AN93 AirScan
Kit has both STEL and TWA badges. EtO exposure levels should be checked upon
installation of the sterilizer. We recommend that exposure testing be performed on an
annual basis.
A
B
MONITORING
SYSTEM
7 If an ampoule is accidentally activated outside of the bag, immediately place in
sterilization cabinet and start cycle
Reasons for locking the Anprolene sterilizer:
ix
AN74
- To protect the contents from spark or flame.
- To protect the liner bag from puncture.
- To ensure the Anprolene sterilizer exhausts the ethylene oxide through the
ventilation system to the outside.
Note: No other container or sterilizer can be used with Anprolene sterilizing gas.
6
Reasons why the gas release bag containing the ampoule should never be
opened:
- To prevent the liquid ethylene oxide from coming in contact with the user or the
items to be sterilized.
- To prevent the gas from escaping too quickly to achieve sterilization.
Malfunctions and Power Failures
In the event of a purge pump failure, the vent pump will continue to ventilate the
interior of the cabinet, exhausting gas as it diffuses through the sterilization liner bag.
A PURGE PUMP FAILURE error message will be displayed, and the sterilizer will add
24 hours of aeration before the display indicates that you may remove your products.
(If this happens, please call Customer Service for assistance, (800) 523 -1276).
In the event of a VENT PUMP FAILURE, the cycle will be aborted, and the purge
pump will evacuate the liner bag of any remaining gas. (If this happens, please call
Customer Service for assistance, (800) 523 -1276).
If a power outage occurs during any part of the cycle, the sterilizer is equipped
with a battery back up to the circuit board that will keep track of elapsed cycle time.
When power is restored, the cycle will continue. Do not open the door of the sterilizer
until power is restored and the vent/purge systems have removed any residual gas
from the liner bag.
HINT: In the case of any sterilizer malfunction or power failure, you can
determine whether sterilization was achieved by examining the sterility indicators
(biological indicator, Steritest with Dosimeter) included in the load.
Here is what you should know after reading this study guide:
·
·
·
·
·
·
·
·
·
The minimum temperature needed in the room for the entire sterilization cycle
The length (in time) of the standard cycle
Why the ventilation system is running during the entire cycle
Why the sterilization liner bag is purged
The desired relative humidity in the room where the items are prepared
How to prepare items for sterilization
The types of indicators that are used in the Anprolene system
Ethylene oxide safety and precautions
Basic operation of your Anprolene sterilizer from start to finish
When you feel comfortable with answers to these subjects, please give Andersen Products a call at
1-800-523-1276 and schedule your Key Operator Certification exam. The test will take approximately
20 minutes.
7
Money saving
uses for
Anprolene
Key Operator Study Guide
R
electric
ELECTRICAL DEVICES
Flashlights
Drills
Dremmel drills
Microdrills
scopes
rubber items
disposable items
non-sterile
SURGICAL DEVICES
Scalpels & sharps
Scissors
Clamps & crimpers
Saws
Rulers
Forceps
Biopsy punches
Dermal punches
Dilators
Skin staplers
Specula
Needles
Neuter clips
IV sets
Marking pens
ENDOSCOPES
Endoscopes
Cameras
Fiberoptic scopes
Things that CAN be
sterilized with Anprolene
but that require
additional aeration:
CLOTH ITEMS
Gauze
Gowns
Bandages
Cotton balls
Masks
Drape materials
TUBES
Suction tubes
Liposuction tubes
Catheters
Endotracheal tubes
Feeding tubes
Nasal tubes
IMPLANTS
Pacemakers
Nylon implants
Implants
OTHER ITEMS
Toothbrushes
Rubber bands
Rubber tourniquets
Sponges
Things that CANNOT be sterilized with Anprolene:
Liquids, food, and drugs should not be sterilized in ethylene oxide because it may change
their chemical composition.
Version 091304
Things that CAN be
sterilized with
Anprolene:
8