1
User's Guide (PC Software)
Starting and Closing
Connection and Memory
Card Management
Security Settings
Contents and
Folder Operations
Troubleshooting
When in Trouble
Appendix
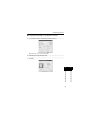
Malfunction? Follow the following
procedures to determine the cause
of problems with this product.
Refer to "Troubleshooting"
Easily find what you're looking for!
Turn to page 4 for the Quick
Index
page 60
Read this document carefully before using
the product.
Store this document in a safe and readily
accessible location after reading.
Introduction
Thank you for purchasing the BROTHER DOCUMENT VIEWER SV-100B.
The SV-Manager is a Windows application that manages the contents of the SV-100B
(herein referred to as the "unit"). (Compatible OS: Windows XP Home/Professional 32bit
SP2-SP3 English and Spanish Edition, Vista Home Premium/Home Basic/Business/
Ultimate 32bit SP1 English and Spanish Edition)
Read this document carefully before using this device to ensure proper operation. Store
this document in a safe and accessible location after reading.
The explanations in this document assume the user can install and execute the general
operations of Windows application software.
Refer to commercially available publications for the general operation of Windows.
• The contents of this document may change without prior notice.
• The contents of this document, in part or in whole, may not be duplicated or reprinted without
prior consent.
• Although this document has been checked for accuracy, contact us if there are any
questionable points or errors.
• This company cannot and will not be liable for any financial loss or damage (data loss, loss of
income, loss of profit, loss due to business interruption, etc.) arising from the faulty,
malfunctioning, or defective operation of the unit, and/or other external factors.
Trademarks
The names of the operating systems have been abbreviated in this document.
The official name of Windows® XP is Microsoft® Windows® XP operating system.
The official name of Windows® Vista is Microsoft® Windows Vista® operating system.
• Microsoft®, Windows®, Excel, Word, Power Point®, and Windows Mobile™ are registered
trademarks of the Microsoft Corporation in the US and other countries.
• Acrobat® and Adobe are registered trademarks or trademarks of Adobe Systems
Incorporated in the US.
• microSD™ is a trademark of SD Association.
• Any other company, product, or service name listed in this document is the registered
trademark or trademark of the respective company.
2
Introduction
Operating Manual Notations
Bookmark
< >
Indicates the key name.
" "
Indicates the item displayed in the screen display panel.
[ ]
Indicates the selection item.
In the case of successive operations, items are listed as "[Edit] J [Bookmark] J
[Delete bookmark]".
1 Click [Edit] from the menu.
2 Point and click [Bookmark].
3 Click [Delete bookmark].
• The [(selected item name)] is noted without the point or click operation in the
abbreviated notation, as in the above, to indicate that the point operation has the
same effect as the click operation, when the cursor is placed on the target item.
However, the click and point operations are clearly noted when their respective
effects differ.
[ ]
Indicates a screen or dialog name.
Indicates useful and convenient information and restrictions.
Indicates operations that may delete user data or important points.
Notation
• "Click" refers to left click.
• "Right click" refers to right click.
3
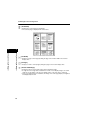
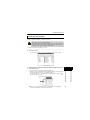
Quick Index
SV-Manager is a Windows application software that manages the contents of the
unit.
The SV-Manager converts the source file, i.e. Word, Excel, PDF, etc., into a format
that can be browsed by the unit and creates a file specific to this unit. The unitspecific files created by this application are registered and managed by this unit and
in the SV-Manager library (specified folder in the computer's hard drive).
The following explains the main functions of the SV-Manager using simple
illustrations. Refer to the corresponding pages.
The unit-specific files can only be managed by SV-Manager.
Create a unit-specific file directly to the unit
Create a unit-specific file directly on the unit by either printing from an application software or by
dragging and dropping the source file.
SV-Manager
doc
Library
¨ "Creating Unit-Specific Files" on page 31
Increased security management
Unit-specific files can be encrypted with a password by using a security folder.
SV-Manager
doc
Library
¨ "Unit Security Setting" on page 26
4
Quick Index
Backup or replace unit-specific files
You can backup and withdraw the unit-specific file when needed by registering the file into the
SV-Manager library. This feature is convenient when using multiple units.
SV-Manager
doc
Library
¨ "Managing Folders/Files" on page 49
Move unit-specific files to other computers
Although unit-specific files can be managed using the SV-Manager alone, the files can be moved
to other computers, i.e. backup, etc. Use the BVD Export function to export files into file formats
that can be copied and moved using the Windows file operation. Exported files can be imported
to SV-Manager using BVD Import.
Other PC or
USB Memory, etc.
Intermediate File Format
BVD File
SV-Manager
doc
Library
¨ "Manage Unit-Specific Files in an Intermediate File Format" on page 57
5
Quick Index
Large Quantity of Mobile Content
By saving unit-specific files to multiple microSD memory cards (herein referred to as memory
cards), a large amount of content becomes portable.
Unit-Specific File
Insert One at a Time
SV-Manager
doc
¨ "Managing multiple units in the memory card" on page 24
The maximum memory card capacity for this unit is 2GB. microSDHC memory cards
are not compatible with this unit.
Do not forcefully remove the memory card while reading or writing data.
Data can be destroyed.
6
Table of Contents
Introduction ..................................................................................... 2
Trademarks...........................................................................................................2
Operating Manual Notations ...............................................................................3
Quick Index...................................................................................... 4
Table of Contents............................................................................ 7
1 Starting and Closing SV-Manager ...................................10
Starting/Closing the SV-Manager ................................................ 11
Starting the SV-Manager ...................................................................................11
Closing the SV-Manager....................................................................................11
SV-Manager Screen Configuration.............................................. 12
Hierarchical Display Area..................................................................................13
File Detail Display Area .....................................................................................15
Preview Display Area.........................................................................................18
2 Connecting the Unit to the PC and Memory Card
Management .........................................................20
Connecting/disconnecting the unit with the PC ........................ 21
Connecting the Unit to the PC ..........................................................................21
Disconnecting the Unit from the PC.................................................................22
Initializing the Memory Card ........................................................ 23
Confirming the Remaining Space of Memory Card Capacity ... 25
3 Unit Security Setting .........................................................26
Setting a Password to the Security Folder................................. 27
Opening/Closing the Security Folder.......................................... 28
Opening the Security Folder .............................................................................28
Changing the Password to the Security Folder ......................... 29
7
Table of Contents
4 Contents and Folder Operations ..................................... 30
Creating Unit-Specific Files ......................................................... 31
Create from the print image of the application software................................ 32
Creating by Drag and Drop ............................................................................... 34
Creating from the SV-Manager [Register data] screen................................... 37
Changing the Print Settings of the Printer Driver ........................................... 39
Displaying Contents/Rotating the Page...................................... 45
Displaying and Confirming the Page ............................................................... 45
Deleting a Page .................................................................................................. 47
Rotate the page 180 degrees and save ............................................................ 47
Changing the Orientation of the Magnified Display Page .............................. 48
Managing Folders/Files ................................................................ 49
Creating Folders................................................................................................. 49
Changing File/Folder Names............................................................................. 49
Moving Files/Folders ......................................................................................... 50
Copying Files/Folders........................................................................................ 51
Deleting Files/Folders........................................................................................ 53
Managing Bookmarks................................................................... 54
Placing Bookmarks............................................................................................ 54
Deleting Bookmarks .......................................................................................... 54
Using Bookmarks............................................................................................... 55
Managing Rating Information ...................................................... 56
Changing Rating Information............................................................................ 56
Manage Unit-Specific Files in an Intermediate File Format ...... 57
Writing Data in an Intermediate File Format.................................................... 57
Reading Intermediate File Format Data ........................................................... 58
8
Table of Contents
5 Troubleshooting ................................................................60
Changing the Operating Environment of the SV-Manager ....... 61
General Settings.................................................................................................61
Message Settings...............................................................................................62
Library Settings..................................................................................................63
Password Invalid State................................................................. 64
Recovering Damaged Files .......................................................... 66
Upgrading the SV-Manager.......................................................... 67
Confirming the Version Information of the SV-Manager ................................67
Confirming the Version Information of the Printer Driver ..............................68
Upgrading ...........................................................................................................68
Uninstalling the SV-Manager ....................................................... 69
When this Message Appears ....................................................... 70
Troubleshooting............................................................................ 73
6 Appendix ............................................................................76
Glossary......................................................................................... 77
Index............................................................................................... 80
9
1
Starting and Closing SV-Manager
Refer to the Quickstart Guide regarding the operating
environment and installation of the SV-Manager.
Starting/Closing the SV-Manager
11
12
Changing the size of the various areas ...................................... 12
Screen Display Format ............................................................... 13
Hierarchical Display Area............................................................. 13
Differences in the screen display according to the connection
status of this unit......................................................................... 15
File Detail Display Area ................................................................ 15
Changing the Item Display Width ............................................... 16
Changing the Item Order ............................................................ 17
Hiding Items................................................................................ 17
Preview Display Area.................................................................... 18
1
Starting and Closing SV-Manager
SV-Manager Screen Configuration
1
Starting and Closing SV-Manager
Starting the SV-Manager .............................................................. 11
Closing the SV-Manager............................................................... 11
10
Starting/Closing the SV-Manager
Starting the SV-Manager
1
Double click the SV-Manager shortcut icon.
• The application can also be started from [All Programs] J [Brother SV-Manager] from the
Windows Start Menu.
¨The SV-Manager starts.
1
1
Starting and Closing SV-Manager
Starting and Closing SV-Manager
Closing the SV-Manager
1
Click the
on title bar.
• The application can also be closed from [File] J [Exit] in the menu.
¨The SV-Manager and the [SV-Manager] screen close.
11
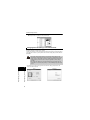
SV-Manager Screen Configuration
The [SV-Manager] screen is divided into 3 areas.
Hierarchical Display Area
• Displays the hierarchy of the folder configuration.
File Detail Display Area
• The File Detail Display Area displays the unit-specific files in
the selected folder in a list. Subfolders are not displayed.
Preview Display Area
• The Preview Display Area displays the contents of the
selected unit-specific file.
Hierarchical
Display Area
File Detail
Display Area
Preview
Display Area
Move the mouse to the outer edges of the area and drag when the
changes into
Starting and Closing SV-Manager
1
1
Starting and Closing SV-Manager
Changing the size of the various areas
1
.
12
SV-Manager Screen Configuration
Screen Display Format
The screen display can be configured to either vertical or horizontal view. Refer to "Changing the
Operating Environment of the SV-Manager" on page 61 to change the display method.
Vertical Type
1
1
Horizontal Type
Starting and Closing SV-Manager
Starting and Closing SV-Manager
Hierarchical Display Area
Displays the folders in the unit and library in a hierarchical display.
The unit is displayed above and the library is displayed in below.
The selected unit or library is displayed with a dark gray title bar.
: Unit top folder
• This is the top folder of the memory card configured by default.
: Main folder
• This is a general folder configured by default. This folder cannot be encrypted.
: Security folder (When open
)
• This is a special folder created by default. The unit-specific file can be encrypted and
stored with a password. Only one folder can be created for each unit.
13
SV-Manager Screen Configuration
: Folder
• This is a folder that can be created by the user.
Although folders in the top, main, and security folders are displayed by the same icon
in the SV-Manager, folders within the security folder are indicated by the
with the security mark when browsing within the unit.
icon
: Library
• This is a folder created on the PC when the SV-Manager is installed. The security folder
cannot be created within the library.
• Refer to "Changing the Operating Environment of the SV-Manager" on page 61 to
change the folder destination on the PC.
: Remove
1
Starting and Closing SV-Manager
The names of the unit's top folder "SV-100B", main folder, security folder, and folder
names can be changed from the right-click menu.
1
Starting and Closing SV-Manager
• Click when removing the unit. This function is similar to the "Safely Remove Hardware"
feature in Windows.
14
SV-Manager Screen Configuration
Differences in the screen display according to the connection status of
this unit
The SV-Manager can manage up to two units simultaneously.
When two units are connected, both units display in the Hierarchical Display Area.
The first unit connected to the PC displays at the top while the unit connected next displays
between the library and the first unit.
When three or more units are connected, units connected after the second unit do not display.
Not Connected to the Unit
1
1
One Unit Connected
Two Units Connected
Starting and Closing SV-Manager
Starting and Closing SV-Manager
File Detail Display Area
Displays a list of unit-specific files.
The files display in order within the File Detail Area when read by this unit.
Each file displays the five items: [Title], [Creation date], [Bookmark], [Ratings], and [Accessed
date]. Click the title line of each item to sort the files by the item's ascending or descending order.
Title
• Refers to the unit-specific file name.
• Files that have been read by this unit display in a standard font, while unread files display in a
bold font.
When a unit-specific file is created from the source file, the unit-specific file name
includes the original extension of the source file. The file name can be changed.
Creation date
• Displays the date and time the unit-specific file was created from the source file.
Bookmark
• Displays the number of "bookmarks" placed in the pages by the SV-Manager or unit. This
column is left blank when "bookmarks" do not exist.
Ratings
• Displays the number of ★ rated by the SV-Manager or the unit. This column is left blank
when a "Ratings" does not exist.
Accessed date
15
• Displays the most recent date that this unit browsed the unit-specific file.
SV-Manager Screen Configuration
Changing the Item Display Width
The item display width can be changed to any length or made to fit the width of the character
string of the longest row.
1
Move the mouse to the right edge of each item's title and drag or double click when
the
changes into
.
in the file list.
• If there are any undisplayed items, drag or double click the edge to display the
undisplayed items.
• Double click to change the item to a minimum width if the entire item column is
empty for all the files in the list.
• The changes are saved even if the SV-Manager is closed.
1
Starting and Closing SV-Manager
¨Double click to automatically change the item width to fit the characters of the longest row
1
Starting and Closing SV-Manager
¨Drag the edge of the item to change the width to any length.
16
SV-Manager Screen Configuration
Changing the Item Order
The item order can be changed.
1
Move the title of the item by dragging and dropping the title to the target location.
¨The item order is changed.
The item order is not saved when closing the SV-Manager.
Hiding Items
1
1
Starting and Closing SV-Manager
Starting and Closing SV-Manager
17
Displayed items can be hidden.
1
Right click the title line.
2
Click the display items and remove the checkmark "
• Right click the title again and replace the checkmark "
click or drag the edge of the undisplayed item.
".
" to display the item or double
SV-Manager Screen Configuration
Preview Display Area
Displays contents page preview of the unit-specific files.
: (Next page)
• Turn to the next page.
Current Page Number/Total Page Number
• Displays the displayed (selected page in thumbnail display) page number and the total
number of pages.
Starting and Closing SV-Manager
• Turn to the Previous Page
1
Starting and Closing SV-Manager
: (Previous page)
1
18
SV-Manager Screen Configuration
: (Thumbnail)
• Displays the contents page as thumbnails.
• The selected page is displayed with a blue frame.
1
1
Starting and Closing SV-Manager
Starting and Closing SV-Manager
19
: (Fit Width)
• Displays a single content page by fitting the page to the window width in the Preview
Display Area.
: (Fit Page)
• Displays an entire content page by fitting the page to the Preview Display Area.
: (Actual size/Enlarge)
• Changes between normal (entire page) and zoom display image.
• A single dot of the image data created in the normal or zoom display image is an actual
single dot on the display of the PC. The display status on the unit can be confirmed.
• If the zoom display image is unavailable, the image of the entire page display is magnified
and displayed by the unit.
2
Connecting the Unit to the PC
and Memory Card Management
When a memory card is inserted into the unit, SV-Manager
recognizes the card as a removable drive, similar to when a memory
card is inserted into a general memory card reader/writer.
Unit-specific files can be managed in the SV-Manager when a
memory card in the memory card reader/writer is initialized with the
SV-Manager. When a card is inserted into the unit, the contents of
the card can be browsed on the unit.
Connecting/disconnecting the unit with the PC
21
Connecting the Unit to the PC ..................................................... 21
Disconnecting the Unit from the PC ........................................... 22
Initializing the Memory Card
23
Confirming the Used Space of Memory Cards........................... 25
Confirming the Specific Used Space of Memory Cards ............. 25
2
Connecting the Unit to the PC and Memory Card Management
Confirming the Remaining Space of Memory Card
Capacity
25
2
Connecting the Unit to the PC and Memory Card Management
Initialization................................................................................. 23
Managing multiple units in the memory card .............................. 24
20
Connecting/disconnecting the unit with the PC
Connect the unit with the PC using the USB cable (included) to manage the unitspecific files in the unit.
Connecting the Unit to the PC
1
Connect the unit with the PC using the USB cable (included).
• Refer to "SV-100B User's Guide (Main Unit)".
• Proper operation cannot be guaranteed when connecting via USB hubs. Connect
directly to the PC's USB port.
• When using a USB cable other than the one included, use a cable that is shorter than
2m.
¨"No connection" in the Hierarchical Display Area changes to the top folder name of the
unit (default name: "SV-100B").
• If a unit is already connected, the second unit displays between the first unit and the
library.
2
2
Connecting the Unit to the PC and Memory Card Management
Connecting the Unit to the PC and Memory Card Management
21
• The SV-Manager can only manage up to 2 units simultaneously. When three or
more units are connected, units connected after the second unit do not display in
the Hierarchical Display Area.
• If the memory card of the connected unit has not been initialized by the SVManager, the unit is not recognized and the Hierarchical Display Area cannot be
refreshed. Refer to "Initializing the Memory Card" on page 23 to initialize the card.
• When the Windows Explorer and automatic refresh screens display simultaneously,
close the screens as required.
Connecting/disconnecting the unit with the PC
Disconnecting the Unit from the PC
Follow the following procedures to safely remove the unit from the PC.
Do not forcefully remove the unit while reading or writing data. Data can be
destroyed. Always carry out the removal procedure explained here. Remove the
USB cable only after ensuring that the unit is released from SV-Manager
management and after confirming that the unit no longer appears in the
Hierarchical Display Area.
1
Click
(Remove) the Hierarchical Display Area.
• The unit can be disconnected from [Tools] J [Remove] in the Menu.
¨The unit is removed from being managed by SV-Manager and disappears from the
Hierarchical Display Area.
• The unit can now be safely disconnected from the PC. This function is similar to the
"Safely Remove Hardware" feature in Windows.
2
2
Connecting the Unit to the PC and Memory Card Management
Connecting the Unit to the PC and Memory Card Management
• When three or more units are connected to the unit, the disconnected unit
disappears and the unit connected in the number three position displays in the
Hierarchical Display Area.
• If a general Windows file is saved on the memory card and the file is being used
by another application, the unit cannot be disconnected.
22
Initializing the Memory Card
Memory cards need to be initialized by the SV-Manager or formatted by the
unit to allow the unit to browse and manage unit-specific files. Unit-specific files
cannot be registered to uninitialized memory cards.
If the password to the security folder is invalid, the unit may require reinitialization
when reaccessing the security folder or when browse becomes unavailable.
2
2
Connecting the Unit to the PC and Memory Card Management
Connecting the Unit to the PC and Memory Card Management
23
• Backup the unit-specific files on the memory card in the Library or intermediate file
format while reinitializing an initialized unit.
• The initialization process of the SV-Manager deletes all the unit-specific files from
the memory card and creates new and empty Top, Main, and Security folders in it.
This process differs from the format command in the unit or Windows as general
Windows folders and files in the card are not deleted.
• If Software that is not compatible with Windows or SD standards is used to format
the card, the card may become incompatible with SD standards and compatibility
may become an issue. Use the unit to format the memory card. The format process
by this unit formats the card with SD compatible standards and creates new Top,
Main, and Security folders in the card, similar to the initialization process of the SVManager.
• If "Show hidden files and folders" within "Hidden files and folders" is applied in the
[View] tab on the [Folder Options] dialog within Explorer, the BRVDOC folder
appears in the root directory after initialization. Unit-specific files are saved to the
BRVDOC folder in a unique format. Note that opening the folders and files in
Windows may render the SV-Manager and unit from being able to browse.
Initialization
1
Click [Tools] J [Initialize] in the Menu and click the drive to initialize.
• The top folder name already displays (default name: "SV-100B") on the initialized drive in
the SV-Manager.
• When multiple removable drives are connected, confirm the target drive using Explorer
when the drive cannot be determined.
¨The [Initialize] dialog displays.
Initializing the Memory Card
2
Click [Yes].
• Click [No] to cancel.
¨After the [Initializing...] dialog displays, a new unit appears in the Hierarchical Display
Area.
• The main (
) and security (
) folders are created in the top folder (
).
Connecting the Unit to the PC and Memory Card Management
When a card is initialized using the SV-Manager, the memory card inserted into the memory card
reader/writer can also be managed as a unit. Even if the unit is unavailable, unit-specific files can
be stored on the memory card.
The contents of unit-specific files can be stored on multiple memory cards to provide portability to
a large quantity of content. Multiple memory cards can be inserted one at a time into a unit to
browse their contents.
This unit can use memory cards with a maximum capacity of 2GB. microSDHC memory cards
are not compatible with this unit.
2
Connecting the Unit to the PC and Memory Card Management
Managing multiple units in the memory card
2
24
Confirming the Remaining Space of Memory Card Capacity
The used space of memory cards can be confirmed by two methods.
Confirming the Used Space of Memory Cards
1
Place the mouse on the title bar of the unit in the Hierarchical Display Area.
¨The used memory space in the memory card displays for several seconds.
Confirming the Specific Used Space of Memory Cards
1
Right click the unit's top folder (
) and click [Properties].
• This information is also available from [File] J [Properties] in the Menu while the unit's
2
top folder (
2
) is selected.
Connecting the Unit to the PC and Memory Card Management
Connecting the Unit to the PC and Memory Card Management
¨The [Properties] dialog displays.
"Available number of pages for registration" in the above dialog is a rough estimate.
This number changes according to the registered contents.
2
Confirm the contents and click [OK].
¨The [Properties] dialog closes.
25
3
Unit Security Setting
The security folder created during SV-Manager initialization can be
used by configuring a password. Unit-specific files are encrypted with
a password when they are registered to the security folder.
Unit-specific files are not encrypted in the main folder.
Setting a Password to the Security Folder
27
Opening/Closing the Security Folder
28
Opening the Security Folder........................................................ 28
Closing the Security Folder ........................................................ 28
Changing the Password to the Security Folder
29
3
3
Unit Security Setting
Unit Security Setting
26
Setting a Password to the Security Folder
A password needs to be configured to use the Security folder.
The password configured in this procedure is used by the unit to open the Security
folder.
Set the password as follows.
1
Click the security folder (
) if the password has not been configured.
• The password can also be configured from [Tools] J [Password setting/change] after
selecting the top (
) or main (
) folder.
¨The [Password setting] dialog displays.
• If the [Password setting] dialog does not display when the security folder is clicked,
the password has already been configured.
• Select the Security folder (
) already configured with a password and select
[Tools] ➞ [Password setting/change] in the Menu to display the [Password change]
dialog. Refer to "Changing the Password to the Security Folder" on page 29.
3
3
Unit Security Setting
Unit Security Setting
2
Enter a four digit password in the "Password" field.
• Configure the password using one-byte numeric characters: 0-9. Alphabet characters or
symbols cannot be used.
3
Enter the password into the "Confirm password" field.
4
Click [OK].
• The Security folder opens and
27
changes to
.
Opening/Closing the Security Folder
Open the security folder configured with a password as follows.
Opening the Security Folder
1
Double click the closed Security folder (
).
• The folder can also be opened from [Tools] J [Open security folder] in the Menu.
¨The [Password authentication] dialog displays.
2
Enter the four digit password as one-byte numeric characters and click [OK].
¨The Security folder opens and
changes to
.
Closing the Security Folder
3
Unit Security Setting
If password authorization fails three times, the [Password authentication] dialog closes
and the password becomes invalid.
Refer to "Password Invalid State" on page 64.
3
Unit Security Setting
• The security folder in the Hierarchical Display Area expands and displays the first level. If
a unit-specific file exists on that level, the file displays in the Detail Display Area.
Close the Security folder as follows.
1
Right click the opened Security folder (
) and click [Close security folder].
• The folder can also be closed from [Tools] J [Close security folder] in the Menu.
¨The Security folder closes and
changes to
.
• The File Detail Display and Preview Areas close.
28
Changing the Password to the Security Folder
The password can be changed even when a unit-specific file is saved to the Security
folder.
Change the password as follows.
1
Open the Security folder.
• Refer to "Opening/Closing the Security Folder" on page 28.
2
Right click the security folder (
) and click [Password setting/change].
• The password can also be changed from [Tools] J [Password setting/change] in the
Menu.
¨The [Password change] dialog displays.
3
3
Unit Security Setting
Unit Security Setting
3
Enter the current four digit password as one-byte numeric characters.
4
Enter a four digit password in the "New Password" field.
• Configure the password using one-byte numeric characters: 0-9. Alphabet characters or
symbols cannot be used.
5
Enter the new password into the "Confirm new password." field.
6
Click [OK].
¨The [Processing password change] dialog displays.
• The unit-specific files in the Security folder are re-encrypted. The change password
process is complete when the re-encryption progress display is 100%.
• When there is a large quantity of user-specified files in the Security folder, this may take
some time.
29
4
Contents and Folder Operations
Creating Unit-Specific Files
31
Registering to the Security folder ............................................... 32
Create from the print image of the application software .......... 32
When [Registration destination] Dialog Displays ........................ 33
Creating by Drag and Drop .......................................................... 34
Dragging and Dropping when SV-Manager is not Started.......... 36
Creating from the SV-Manager [Register data] screen.............. 37
Changing the Print Settings of the Printer Driver...................... 39
Configuring the [Print] Dialog of the Application Software.......... 42
Configuring from the Windows [Start] Menu............................... 43
Adjusting the Settings According to the Content Details ............ 44
Displaying Contents/Rotating the Page
45
Displaying and Confirming the Page .......................................... 45
Switching the Display Size of the Page ...................................... 45
Turning the Page ........................................................................ 46
Specifying a Page Number to Display ........................................ 46
Deleting a Page ............................................................................. 47
Rotate the page 180 degrees and save....................................... 47
Changing the Orientation of the Magnified Display Page ......... 48
Managing Folders/Files
49
54
Placing Bookmarks....................................................................... 54
Deleting Bookmarks ..................................................................... 54
Deleting bookmarks from each page.......................................... 54
Batch Deleting Bookmarks ......................................................... 55
Using Bookmarks ......................................................................... 55
Managing Rating Information
56
Changing Rating Information ...................................................... 56
Manage Unit-Specific Files in an Intermediate File
Format
57
Writing Data in an Intermediate File Format............................... 57
Reading Intermediate File Format Data ...................................... 58
BVD Import by Drag and Drop.................................................... 58
BVD Import from the Menu......................................................... 59
4
Contents and Folder Operations
Managing Bookmarks
4
Contents and Folder Operations
Creating Folders ........................................................................... 49
Changing File/Folder Names ....................................................... 49
Moving Files/Folders .................................................................... 50
Moving by Drag and Drop........................................................... 50
Moving by Cut and Paste............................................................ 51
Copying Files/Folders .................................................................. 51
Copying by Drag and Drop ......................................................... 51
Copying Using the Menu ............................................................ 52
Deleting Files/Folders................................................................... 53
30
Creating Unit-Specific Files
The SV-Manager printer driver converts the content source file, i.e. Word and Excel
for Windows, PDF, etc., into data for the unit and creates unit-specific data.
Unit-specific files are created and registered to the security folder by converting and
encrypting the file into data for the unit.
Unit-specific files can be created according to the following four operating methods.
1. Create from the print image of the application software
• Unit-specific files for the unit can be created by the same operation as printing from
application software, i.e. Word, Excel, etc.
• The registration location is the unit's Main folder. If the unit is not connected, the location
is the Main folder of the Library.
• The print settings of the printer driver can be changed when creating unit-specific files.
2. Drag and drop the file into the [SV-Manager] screen
• Select the file or folder from the Windows Desktop or using Explorer and drag and drop into
the running [SV-Manager] screen to create a unit-specific file.
• Unit-specific files can be registered to any unit or Library folder.
• Unit-specific files are created according to the print settings of the printer driver.
3. Drag and drop the file into the SV-Manager shortcut icon
• Drag and drop the content source file into the SV-Manager shortcut icon and create a
unit-specific file.
• The registration location is the unit's main folder.
• Unit-specific files are created according to the print settings of the printer driver.
4. Create from the SV-Manager [Register data] screen
4
4
Contents and Folder Operations
Contents and Folder Operations
31
• Create unit-specific files from the [Register data] screen opened from the SV-Manager
Menu.
• Unit-specific files can be registered to any unit or Library folder.
• Unit-specific files are created according to the print settings of the printer driver.
• The maximum number of pages that can be registered to a single unit-specific file is
9,999 pages. In the case of content source files of over 10,000 pages, specify the
number of pages, divide among multiple unit-specific files, and register.
• If a unit-specific file is created twice in a folder as the same content source file, two
unit-specific files with the same name will be created. The file is not overwritten.
• The content page of the unit-specific file is displayed as dots or raster data, similar
to bitmaps.
• Refer to "Changing the Print Settings of the Printer Driver" on page 39 regarding
the print settings of the printer driver.
• If you choose the printing method and the viewed image has either too large or too
little print margins, you can adjust the results with the Zoom function located in the
SV-100B printer driver.
Refer to "Zoom" on page 40.
• Use Adobe Reader Version 9 or later.
Creating Unit-Specific Files
Registering to the Security folder
The security folder needs to be opened to register unit-specific files to the Security folder.
The [Password authentication] dialog opens when a closed Security folder is selected. When
password authorization is successful, unit-specific files can be registered to the security folder.
Refer to "Opening/Closing the Security Folder" on page 28.
Create from the print image of the application software
Create unit-specific files from the print screen of application software, i.e. Word, Excel, Adobe
Reader, etc., as follows.
1
Display the [Print] dialog of the application software.
2
Select "Brother SV-100B" from the "Printer" pull-down menu.
• Click [Properties] to change the printer driver settings. Refer to "Changing the Print
Settings of the Printer Driver" on page 39.
3
Click [OK].
¨The progress status of the [Registering files...] dialog displays.
• Click [Cancel] to cancel.
Contents and Folder Operations
¨This message displays when registration is finished.
4
Contents and Folder Operations
• Click [Cancel] to stop creating unit-specific files. Only the created pages are
registered.
• The [Registration destination] dialog appears when multiple units are connected.
Refer to "When [Registration destination] Dialog Displays" on page 33.
4
32
Creating Unit-Specific Files
• The "Registered to SV-100B (top folder name of the unit, if changed)" message displays
at the bottom right of the Windows desktop.
Messages at the bottom right of the Windows Desktop can be stopped by "Changing
the Operating Environment of the SV-Manager" on page 61.
¨Register unit-specific files to the Main folder.
When [Registration destination] Dialog Displays
The [Registration destination] dialog appears when multiple units are connected.
1
4
4
Select the registration location and click [OK].
Contents and Folder Operations
Contents and Folder Operations
• If [OK] is not clicked and a certain amount of time passes, the unit-specific file is
registered to the unit selected in the [Registration destination] dialog.
• Click [Cancel] to stop creating unit-specific files.
Click "Do not display again." to stop the [Registration destination] dialog from appearing
next time. Refer to "Changing the Operating Environment of the SV-Manager"
on page 61 to configure the settings to display the message again.
33
Creating Unit-Specific Files
Creating by Drag and Drop
Convert content source files, create unit-specific files, and register files to any folder without
changing a single file, multiple files, or the level of the folder.
• When the content source file is right clicked, if the "Print" menu does not appear by
the file, the file cannot be dragged and dropped.
• The maximum number of folder levels including the level of the drop location is 16.
If the main folder is the drop location, the maximum number of folders that can be
created is 14, as the top and main folders are two levels.
Create unit-specific files by drag and drop as follows.
1
Select a file or folder.
• Use the Desktop or Explorer to select one or multiple content source files or folder.
• Drag and drop into any folder in the Hierarchical Display Area.
• When a file or folder is dropped into the File Detail Display Area, the selected folder in the
Hierarchical Display Area becomes the registration destination.
• The pointer changes to
when the file can be dropped. The pointer changes to
when the file cannot be dropped.
¨The progress status of the [Registering files...] dialog displays when an application
software associated with the content source file is started.
4
4
Contents and Folder Operations
Drag and drop a file or folder into a folder in the Hierarchical Display Area or in the
File Detail Display Area.
Contents and Folder Operations
2
34
Creating Unit-Specific Files
• When multiple content source files are selected, the message "Registered to SV-100B
(unit's top folder name if changed)" or "Registered to Library" displays at the lower right of
the Windows Desktop each time a unit-specific file is registered.
• Click [Cancel] to stop creating the displayed unit-specific files. Only completed
pages are registered to the specified folder. If multiple content source files are
selected, the creation of the displayed unit-specific file is stopped and the
[Registering files...] dialog for the next unit-specific file appears.
• Messages at the bottom right of the Windows Desktop can be stopped by "Changing
the Operating Environment of the SV-Manager" on page 61.
¨Unit-specific files are registered to the selected folder.
• When a folder with sub-directories is selected, the folder is registered without changing
the folder level.
4
4
Contents and Folder Operations
Contents and Folder Operations
35
Creating Unit-Specific Files
Dragging and Dropping when SV-Manager is not Started
Unit-specific files can be created by dragging and dropping content source files onto the SVManager shortcut icon even when the SV-Manager is not started.
1
Drag and drop content source files onto the SV-Manager shortcut icon.
¨The SV-Manager starts.
• The [Registering files...] dialog displays after starting the SV-Manager.
• The application software of the content source files starts.
Contents and Folder Operations
¨This message displays when registration is finished.
4
Contents and Folder Operations
• The settings can be configured to prevent the SV-Manager from starting. Refer to
"Changing the Operating Environment of the SV-Manager" on page 61.
• Click [Cancel] to stop creating the displayed unit-specific files.Only completed
pages are registered to the specified folder. If multiple content source files are
selected, the creation of the displayed unit-specific file is stopped and the
[Registering files...] dialog for the next unit-specific file appears.
• The [Registration destination] dialog appears when multiple units are connected.
Refer to "When [Registration destination] Dialog Displays" on page 33.
4
36
Creating Unit-Specific Files
• The "Registered to SV-100B (top folder name of the unit, if changed)" message displays
at the bottom right of the Windows desktop.
Messages at the bottom right of the Windows Desktop can be stopped by "Changing
the Operating Environment of the SV-Manager" on page 61.
¨Register unit-specific files to the Main folder.
Creating from the SV-Manager [Register data] screen
Display and create files from the [Register data] screen from [File] J [Register data] in the Menu
and select the registration location folder. Follow the following steps.
1
4
4
Contents and Folder Operations
Contents and Folder Operations
37
Select the registration location folder in the Hierarchical Display Area.
Creating Unit-Specific Files
2
Right click and click [Register data].
• The folder can also be registered from [File] J [Register data] in the Menu.
¨The [Register data] dialog displays.
3
Select a file.
• Multiple files can be selected.
4
Click [Open].
¨The progress status of the [Registering files...] dialog displays when an application
software associated with the content source file is started.
• When multiple content source files are selected, the message "Registered to SV-100B
(unit's top folder name if changed)" or "Registered to Library" displays at the lower right of
the Windows Desktop each time a unit-specific file finishes registering.
4
Contents and Folder Operations
Contents and Folder Operations
• Click [Cancel] to stop creating the displayed unit-specific files. Only completed
pages are registered to the specified folder.
• If multiple content source files are selected, the creation of the displayed unitspecific file is stopped when [Cancel] is clicked and the [Registering files...] dialog
for the next unit-specific file appears.
• Messages at the bottom right of the Windows Desktop can be stopped by
"Changing the Operating Environment of the SV-Manager" on page 61.
4
38
Creating Unit-Specific Files
¨Unit-specific files are registered to the selected folder.
Changing the Print Settings of the Printer Driver
When unit-specific files are created from the content source file, the page magnification,
orientation, and image resolution can be changed.
Configure the settings by opening the [Brother SV-100B Properties] dialog from the [Print] dialog
of the application software or open the [Brother SV-100B Print settings] dialog from the Windows
[Start] Menu.
• The details configured in the [Brother SV-100B Print settings] dialog are the
default values of the [Brother SV-100B Properties] dialog. If the application software
and the created content details are similar, configure the [Brother SV-100B Print
settings] dialog to prevent the need to change the application software settings
each time.
• The settings in the [Brother SV-100B Print settings] dialog are applied when unitspecified files are created by drag and drop or on the SV-Manager's [Register data]
screen.
• The [Brother SV-100B Properties] ([Brother SV-100B Print settings]) dialog includes the
"Basic" and "Advanced" tabs.
4
4
Contents and Folder Operations
Contents and Folder Operations
39
Basic
Advanced
Creating Unit-Specific Files
Tab
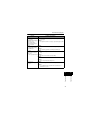
Basic
Item
Zoom
Contents
This setting configures the page display size of the normal display
image.
Increasing the magnification also increases the resolution of the
page, making the document easier to read on the unit.
zFit Width[100%] (Default Settings)
• Creates a content page that matches the number of dots on
the unit's display (1200 x 825).
zEnlarge[120%]
• Creates a content page magnified to 120%. This page is
cropped to the unit's display (1200 x 825 dots) with the page
centered on the display. Margins that do not display on the
unit are trimmed.
zPercent[100-200%]
• Creates a content page magnified to a value between 100
and 200%. This page is cropped to the unit's display
(1200 x 825 dots) with the page centered on the display.
Margins that do not display on the unit are trimmed.
Increasing the zoom beyond 101% will trim the margins
of the page. Higher magnification trims more of the
margins.
Orientation
Configures the page to [Portrait]/[Landscape].
zPortrait
• The paper prints vertically.
zLandscape
4
4
Contents and Folder Operations
As the paper orientation is configured in the [Page
Settings] (or [Print Settings]) in the [File] menu of the
application software, the orientation of the paper
configured in the application software has priority.
Contents and Folder Operations
• The paper prints horizontally.
40
Creating Unit-Specific Files
Tab
Item
Advanced Dithering
Contents
Turns the gradation process ON/OFF.
When a check is placed by this option, this function executes the
gradation conversion process on the contents, especially improving
the quality of the image data.
• A check is placed in the checkbox by default.
• When a check is placed in the checkbox, this may
increase the print time.
• Reduce the print time by removing the check from
the checkbox to prevent the gradation conversion
process from running and to prevent increasing the
image quality.
Smoothing
Turns the anti-aliasing process ON/OFF.
When a check is placed in the checkbox, this function displays the
text content in gray tones. When the image quality of a PDF file
(especially when fonts are embedded) is significantly reduced, antialiasing improves the image quality.
• A check is placed in the checkbox by default.
• When the check is placed in the checkbox,
temporary high resolution image data is created,
reducing free memory space. The print time also
increases.
• Reduce the print time by removing the check from
the checkbox to prevent the gradation conversion
process from running and to prevent increasing the
image quality.
4
4
Contents and Folder Operations
Contents and Folder Operations
41
Create
enlarged
images
Configures the setting to create the Magnified Image that displays
when
on the unit is pressed.
When a check is placed by this option, a magnified image
(1748 x 1200 dots) with an increased resolution of about 145% is
created separately from the normal display image.
• A check is placed in the checkbox by default.
• When the check is removed from the checkbox, data
capacity is reduced as magnified images are not
created. However, when the
on the unit is
pressed, the content image quality is reduced as the
normal sized image is magnified.
• Click [Default] to return the settings of the displayed tab to factory default settings.
• The [Apply] button is in the [Brother SV-100B Print settings] dialog opened from the Windows
[Start] Menu.
Creating Unit-Specific Files
Configuring the [Print] Dialog of the Application Software
1
Select "Brother SV-100B" in the [Print] dialog and click [Properties].
¨The [Brother SV-100B Properties] dialog displays.
2
Switch tabs and configure the various items.
3
Click [OK].
4
4
Contents and Folder Operations
Contents and Folder Operations
42
Creating Unit-Specific Files
Configuring from the Windows [Start] Menu
1
Click [Printer and FAX] from the Windows [Start] Menu.
For Windows Vista, click [Control Panel] from the [Start] Menu and click [Hardware
and Sound] ➞ [Printer].
¨The [Printer and FAX] dialog displays.
2
Point to "Brother SV-100B", right click, and click [Print Settings].
¨The [Brother SV-100B Print settings] dialog displays.
3
4
4
Contents and Folder Operations
Contents and Folder Operations
43
Switch tabs in the [Brother SV-100B Print settings] dialog, configure the various
items, and click [OK].
Creating Unit-Specific Files
Adjusting the Settings According to the Content Details
A unit-specific file that is easier to browse can be created by changing the print settings to match
the content details, i.e. characters, lines, images, etc.
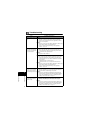
Recommended Settings
Content Source File and
Application
PDF
Word, Excel, etc.
Content Details
Settings
Mix text and images
[Dithering]: ON
[Smoothing]: ON
Mainly text
[Dithering]: OFF
[Smoothing]: ON
Display mix of text and images [Dithering]: ON
and smooth characters
[Smoothing]: ON
Display mainly text and smooth [Dithering]: OFF
characters
[Smoothing]: ON
Display character outline
clearly
[Dithering]: ON
[Smoothing]: OFF
* "ON" indicates a checkmark is placed by the option and "OFF" indicates that the checkmark
has been removed.
4
4
Contents and Folder Operations
Contents and Folder Operations
44
Displaying Contents/Rotating the Page
Displaying and Confirming the Page
The content page of the created unit-specific file can be displayed in the SV-Manager and the
display status on the unit can be confirmed.
1
Click the folder icon in the Hierarchical Display Area to display the files as a list.
¨The list of document files of the folder appears in the File Detail Display Area.
• If the Security folder is closed, the file list does not display when the Security folder is
clicked.
• When the [Password setting] dialog displays, refer to "Setting a Password to the Security
Folder" on page 27.
2
Click [+] by the folder to open the folder.
• The folder can also be opened by double clicking the folder icon.
¨The folder expands one level.
• The [Password authentication] dialog appears when the closed Security folder is double
clicked. Refer to "Opening/Closing the Security Folder" on page 28.
3
A file in the File Detail Display Area is selected.
¨The first page of the file displays in the Preview Display Area.
Switching the Display Size of the Page
Contents and Folder Operations
4
Switching the display size of the page in the Preview Display Area. Follow the following steps.
Contents and Folder Operations
4
1
45
Click
in the Preview Display Area.
• The display can also be switched from [View] J [Zoom] J [Thumbnail]/[Fit Width]/[Fit
Page]/[Actual size]/[Enlarge] in the Menu.
• Right click the Preview Display Area to similarly switch the display as in the Menu.
¨The view switches to the selected display size.
•
The view switches between normal and magnified view each time (Actual size/
Enlarge) is clicked.
• When the thumbnail page is double clicked, the view switches to whole page view.
Displaying Contents/Rotating the Page
Turning the Page
The content page displayed in the Preview Display Area can be turned. Follow the following
steps.
1
Click either
or
in the Preview Display Area.
• The page can also be turned from [View] J [Previous page]/[Next page] in the Menu.
• When the displayed page reaches either the first or last page, the page no longer turns.
¨The page turns one page per click.
• In Thumbnail View, the blue frame indicating a selected page moves.
Specifying a Page Number to Display
The display can jump to a specific page. Follow the following steps.
1
Enter the page number to display in the Page Number box in the Preview Display Area
and press <Enter>.
¨The specified page is displayed.
• In Thumbnail View, the blue frame indicating a selected page moves.
4
4
Contents and Folder Operations
Contents and Folder Operations
46
Displaying Contents/Rotating the Page
Deleting a Page
Unnecessary pages can be deleted.
1
Select the page to delete in the Preview Display Area.
• Multiple pages cannot be selected at the same time.
• In Thumbnail View, the selected page is indicated by a blue frame.
2
Press <Delete>.
• The page can also be deleted by right clicking and pressing [Delete: __ page] or from [Edit] J
[Delete: __ page] in the Menu.
¨The [Delete page] dialog displays.
• The [Delete document] dialog displays when the file only has 1 page.
3
Click [Yes].
• Click [No] to stop deleting.
¨The selected page is deleted.
Rotate the page 180 degrees and save
There are cases when the unit-specific file appears upside down on the unit, i.e. when the
contents of the page is horizontal (landscape mode). In this case, rotate the page 180 degrees.
4
4 1
Contents and Folder Operations
Contents and Folder Operations
Select the page to rotate 180 degrees in the Preview Display Area.
• Multiple pages cannot be selected at the same time.
• In Thumbnail View, the selected page is indicated by a blue frame.
2
Right click and click [Save 180 degrees rotate view].
• The page can also be rotated from [Edit] ➞ [Save 180 degrees rotate view] in the Menu.
¨The [Save 180 degrees rotate view] dialog displays.
3
Click [Yes].
• Click [No] to stop rotating 180 degrees.
¨The selected page rotates 180 degrees and displays.
47
Displaying Contents/Rotating the Page
Changing the Orientation of the Magnified Display Page
There are cases when the unit-specific file appears upside down when the file is magnified on
the unit, i.e. when the contents of the page are horizontal (landscape mode). The document
appears right side up in normal display, however, the file may display upside down in magnified
display. In this case, rotate only the magnified display image by 180 degrees.
• The correct orientation of the magnified display image cannot be confirmed
by the magnified view of the SV-Manager (right click the Preview Display Area
and click [Zoom] J [Enlarge], [View] J [Zoom] J [Enlarge] in the Menu, or
[Icon]). Confirm using the unit.
• Refer to "Rotate the page 180 degrees and save" on page 47 when rotating
the orientation of both the normal and magnified display images 180 degrees.
1
Select the page to change the orientation of the magnified page in the Preview
Display Area.
• Multiple pages cannot be selected at the same time.
• In Thumbnail View, the selected page is indicated by a blue frame.
2
Right click and click [Page orientation] J [Portrait]/[Landscape].
• The page can also be rotated from [Edit] J [Page orientation] J [Portrait]/[Landscape] in
the Menu.
The view of the magnified display image in the Preview Display Area does not
change. As the proper orientation of the magnified display image cannot be
confirmed in the SV-Manager, confirm using the unit.
4
4
Contents and Folder Operations
Contents and Folder Operations
48
Managing Folders/Files
Folders and unit-specific files can be moved and copied between multiple units or
between the unit and library.
Creating Folders
Folders in the top folder and library can be created up to 16 levels.
Folders with identical names can also be created on the same level.
1
Select the parent folder in the Hierarchical Display Area.
2
Right click and click [Add folder].
• Folders can also be created from [File] J [Add folder] in the Menu.
¨A folder is added to the specified location.
• When the name, "New folder", becomes inverted, the name can be changed.
3
Enter the folder name and press <Enter>.
¨The name is affixed to the folder.
Changing File/Folder Names
4
4
Contents and Folder Operations
Contents and Folder Operations
Unit-specific file and folder names displayed by this unit appear with the names displayed in SVManager. When multiple units or memory cards are used, change identical unit-specific file
names to make identifying files more convenient. The unit's top folder name (SV-100B),
configured at startup, can also be changed.
The name of the library, "Library", cannot be changed.
1
Click a folder in the Hierarchical Display Area or a file in the Detail Display Area and
click again.
• The names of folders/files can also be changed by right clicking a folder or file and
clicking [Rename] or clicking the folder or file and selecting [File] J [Rename] in the
Menu.
• Names can be changed when the Security folder is open.
¨When a name becomes highlighted, the name can be changed.
2
49
Enter the name and press <Enter>.
¨The name is affixed to the folder/file.
Managing Folders/Files
Moving Files/Folders
The display order of the folders in this unit appear in the order displayed in the Hierarchical
Display Area. The display order of the unit-specific files appear in the order displayed in the File
Detail Display Area.
• The top folder, Main folder and Security folder cannot be moved to different levels.
The order of the Main folder and Security folder can be changed within the top
folder.
• Unit-specific files can be moved to any location.
Moving by Drag and Drop
1
Drag a folder in the Hierarchical Display Area or a file in the Detail Display Area.
• One folder or multiple files can be selected.
2
Drop the folder or files in the move location.
• The pointer changes from
to
to
when the file can be dropped. The pointer changes
when the file cannot be dropped.
• Drop the files in the Hierarchical Display Area to move to another folder.
• Drop the files in the File Detail Display Area to change the order.
The [Password authentication] dialog appears when a file is dropped into a closed
Security folder. Refer to "Opening/Closing the Security Folder" on page 28.
• Click [Cancel] to stop moving the displayed file. When multiple files are selected,
the files after pressing cancel are not moved.
• When move is canceled, all the pages remain in the source location and a file up to
the completed page is created in the move destination.
4
Contents and Folder Operations
• The moving file name displays.
• Click [Cancel] to cancel.
4
Contents and Folder Operations
¨The [Moving files...] dialog displays.
50
Managing Folders/Files
Moving by Cut and Paste
Files can only be moved to other folders by cutting and pasting. As files cannot be cut
and pasted into the same folder, the sorting order cannot be changed.
1
Select a folder in the Hierarchical Display Area or a file in the Detail Display Area.
2
Right click and click [Cut].
• The file can also be cut from [Edit] J [Cut] in the Menu.
3
Click the folder destination to move.
4
Right click and click [Paste].
• The file can also be pasted from [Edit] J [Paste] in the Menu.
The [Password authentication] dialog appears when the closed Security folder is
selected. Refer to "Opening/Closing the Security Folder" on page 28.
¨The [Moving files...] dialog displays.
• The moving file name displays.
• Click [Cancel] to cancel.
4
4
Contents and Folder Operations
Contents and Folder Operations
• Click [Cancel] to stop moving the displayed file. When multiple files are selected,
the files after pressing cancel are not moved.
• When move is canceled, all the pages remain in the source location and a file up to
the completed page is created in the move destination. However, all the pages are
moved when the move is within the unit.
Copying Files/Folders
Unit-specific files and folders can be copied into the same folder. When the same folder is
specified as the copy destination, multiple unit-specific files and folders are created with the
same name.
Copying by Drag and Drop
1
Select a folder in the Hierarchical Display Area or a file in the Detail Display Area.
• One folder or multiple files can be selected.
51
Managing Folders/Files
2
Drag while pressing <Ctrl> and drop to the copy destination folder or file insert
location.
• The pointer changes from
to
to
when the file can be dropped. The pointer changes
when the file cannot be dropped.
The [Password authentication] dialog appears when a file is dropped into a closed
Security folder. Refer to "Opening/Closing the Security Folder" on page 28.
¨The [Copying files...] dialog displays.
• The copying file name displays.
• Click [Cancel] to cancel.
• Click [Cancel] to stop copying the displayed file. When multiple files are selected,
the files after pressing cancel are not copied.
• When copy is canceled, a file up to the completed page is created in the copy
destination.
Copying Using the Menu
1
Select a folder in the Hierarchical Display Area or a file in the Detail Display Area.
2
Right click and click [Copy].
• The application can also be copied from [Edit] J [Copy] in the Menu.
4
Right click and click [Paste].
The [Password authentication] dialog appears when the closed Security folder is
selected. Refer to "Opening/Closing the Security Folder" on page 28.
¨The [Copying files...] dialog displays.
• The copying file name displays.
• Click [Cancel] to cancel.
• Click [Cancel] to stop copying the displayed file. When multiple files are selected,
the files after pressing cancel are not copied.
• When copy is canceled, a file up to the completed page is created in the copy
destination.
4
4
Contents and Folder Operations
Click the folder location to copy.
Contents and Folder Operations
3
52
Managing Folders/Files
Deleting Files/Folders
1
Select a folder in the Hierarchical Display Area or a file in the Detail Display Area.
• One folder or multiple document files can be selected.
2
Press <Delete>.
• Files/folders can also be deleted by right clicking and pressing [Delete] or from [Edit] J
[Delete] in the Menu.
¨The [Delete document] dialog displays.
3
Click [Yes].
• Click [No] to stop deleting.
¨The [Deleting files...] dialog displays.
• The deleting file name displays. The file is deleted in order from the last page. When
multiple files are selected, the files are deleted in order from the last page of the last file.
• Click [Cancel] to cancel.
• Click [Cancel] to stop deleting the displayed file. When multiple files are selected,
the files after pressing cancel are not deleted.
• When delete is canceled, the undeleted pages remain in the file.
4
4
Contents and Folder Operations
Contents and Folder Operations
53
Managing Bookmarks
Bookmarks can be placed on pages just as post-it notes can be placed on
documents. Browsing with this unit becomes more convenient by placing bookmarks
at the beginning of important content or on important pages.
Placing Bookmarks
Placing bookmarks on pages without bookmarks.
1
Display the page to place a bookmark.
• Click a page without a bookmark in the Preview Display Area when in Thumbnail View.
2
Right click in the Preview Display Area and click [Bookmark] J [Add bookmark].
• A bookmark can also be added from [Edit] J [Bookmark] J [Add bookmark] in the Menu.
¨A bookmark
is placed at the top right of the page.
• The "Bookmark" item in the File Detail Display Area refers to the number of bookmarks
placed in the file.
Deleting bookmarks from each page
Deleting the bookmarks from bookmarked pages.
1
Display a bookmarked page.
Contents and Folder Operations
Bookmarks can be deleted from each page or in a batch.
4
Contents and Folder Operations
Deleting Bookmarks
4
• Click a page with a bookmark in the Preview Display Area when in Thumbnail View.
54
Managing Bookmarks
2
Right click in the Preview Display Area and click [Bookmark] J [Delete bookmark].
• A bookmark can also be deleted from [Edit] J [Bookmark] J [Delete bookmark] in the
Menu.
¨The bookmark
is deleted from the top right of the page.
• The number of bookmarks in the "Bookmark" item in the File Detail Display Area
decreases by one.
Batch Deleting Bookmarks
Batch delete all the bookmarks from the unit-specific files displayed in the Preview Display Area.
1
Right click in the Preview Display Area and click [Bookmark] J [Delete All
bookmarks].
• The bookmarks can also be deleted from [Edit] J [Bookmark] J [Delete All bookmarks]
in the Menu.
¨The bookmarks
from all the pages are deleted from the top right of the page.
• The number of "Bookmark" items no longer display in the File Detail Display Area.
Using Bookmarks
Move quickly to the bookmarked page in the Preview Display Area.
1
4
4
Contents and Folder Operations
Contents and Folder Operations
55
Right click in the Preview Display Area and click [Bookmark] J [Previous bookmark]
or [Next bookmark].
• Move to a bookmark also from [Edit] J [Bookmark] J [Previous bookmark] or [Next
bookmark] in the Menu.
¨This function jumps to the previous or next bookmarked page.
• In Thumbnail View, the blue frame indicating a selected page moves to the bookmarked
page.
• When [Previous bookmark] is clicked while the first bookmarked page is displayed, the
function moves to the final bookmarked page.
• When [Next bookmark] is clicked while the last bookmarked page is displayed, the
function moves to the first bookmarked page.
Managing Rating Information
Changing Rating Information
Each unit-specific file can be rated.
1
Right click the file in the File Detail Display Area and click [Change rating] J [(No. of
★ or "No rating")].
• The rating can be changed from [Edit] J [Change rating] J [(No. of ★ or "No rating")] in
the Menu.
¨The number of 's appears in the "Ratings" column in the File Detail Display Area.
• No asterisks appear in the column when [No rating] is configured.
4
4
Contents and Folder Operations
Contents and Folder Operations
56
Manage Unit-Specific Files in an Intermediate File Format
Unit-specific files can be operated and managed only using SV-Manager. To move
or backup unit-specific files to another PC, files need to be converted to a file format
that Windows file operation can move and copy. BVD Export and BVD Import are
functions for this purpose. BVD Export writes BVD files with a bvd extension.
The BVD file is called an intermediate file format as the file only targets Windows file
operation. The contents cannot be browsed by an application software other than
SV-Manager.
BVD files created by BVD Export can be restored to unit-specific files using BVD
Import.
Writing Data in an Intermediate File Format
1
Select a file or folder using the SV-Manager.
• Multiple unit-specified files or a single folder can be selected.
• The top folder and Library can also be selected.
2
Drag and drop onto the Windows Desktop or folder.
• The application can also be executed from [File] J [BVD Export] in the Menu. Select the
BVD export location and click [OK] when the [BVD Export] dialog appears.
¨The [BVD Export] dialog displays.
• Click [Cancel] to cancel.
4
4
Contents and Folder Operations
Contents and Folder Operations
57
Unit-specific files in a closed Security folder cannot be exported to BVD files. This
process creates a BVD file that includes an empty Security folder.
¨This process creates BVD files
from the selected files and folders.
• Multiple BVD files are created when multiple unit-specific files are selected.
• When a folder is selected, the hierarchical structure under the folder is compressed while
maintaining its structure and a single BVD file is created with the selected folder name.
Manage Unit-Specific Files in an Intermediate File Format
• When a file with the same name already exists in the BVD export location, the
[Confirm File Overwrite] dialog appears.
• When a unit-specific file with a long name is exported to a BVD file, the name is
shortened to 20 characters or less.
• If characters that cannot be used in Windows file names exist in the unit-specific file
or folder name, these characters are deleted and the file name is shortened. If all
the characters are deleted, the file is renamed as a BVD file name, "newfile.bvd".
• If a unit-specified file with a content source file extension (.pdf, .xls, etc.) is exported
to a BVD file, the BVD file is created with a file name ending in .pdf, .xls, etc. When
the checkmark by [Hide extension for known file types] on the "View" tab in
Explorer's [Folder Options] dialog is removed, the correct BVD extension can be
confirmed.
• In the case of Windows Vista, click [Control Panel] J [Folder Options] in the Start
Menu and remove the checkmark from the [Hide extensions for known file types] on
the [View] tab in the [Folder Options] dialog.
Reading Intermediate File Format Data
The BVD Import operation differs between the drag and drop and menu operations.
BVD Import by Drag and Drop
1
Select a BVD file
in Windows.
• Multiple BVD files can be selected and imported.
2
Drag and drop the file into the folder in the SV-Manager's Hierarchical Display Area or
the File Detail Area.
when the file can be dropped. The pointer changes
when the file cannot be dropped.
The [Password authentication] dialog appears when a file is dropped into a closed
Security folder. Refer to "Opening/Closing the Security Folder" on page 28.
¨The [BVD Import] dialog displays.
4
4
Contents and Folder Operations
to
to
Contents and Folder Operations
• The pointer changes from
58
Manage Unit-Specific Files in an Intermediate File Format
• Click [Cancel] to cancel.
• Click [Cancel] to stop the import of the displayed BVD file. If multiple BVD files are
selected, the import of subsequent BVD files is also stopped.
• If the folder level during BVD import exceeds 16 levels, the [Folder creation error.]
dialog appears and the subsequent BVD import process stops.
¨The BVD imported unit-specific file appears in the selected folder.
• The BVD file canceled during BVD import creates a unit-specific file up to the completed
page.
• If a BVD file with multiple unit-specific files is canceled during import, unit-specific files
that finished importing before cancellation and the unit-specific file that was canceled
during the BVD import are created.
• When the file is dropped into the File Detail Display Area, the unit-specific file is created
in the folder selected in the Hierarchical Display Area.
BVD Import from the Menu
1
Select the BVD import folder location in the Hierarchical Display Area.
• Open the folder before importing BVD files into the security folder.
2
Click [File] J [BVD Import] from the Menu.
¨The [BVD Import] dialog displays.
3
4
4
Contents and Folder Operations
Contents and Folder Operations
59
Select the BVD file and click [Open].
• Multiple BVD files can be selected and imported.
¨The [BVD Import] dialog displays.
• Click [Cancel] to cancel.
• Click [Cancel] to stop the BVD import of the displayed BVD file. If multiple BVD files
are selected, the BVD import of subsequent BVD files is also stopped.
• If the folder level during BVD import exceeds 16 levels, the [Folder creation error.]
dialog appears and the subsequent BVD import process stops.
¨The imported unit-specific file appears in the selected folder.
• The BVD file canceled during BVD import creates a unit-specific file up to the completed
page.
• If a BVD file with multiple unit-specific files is canceled during import, unit-specific files
that finished importing before cancellation and the unit-specific file that was canceled
during the import are created.
5
Troubleshooting
Changing the Operating Environment of the SVManager
61
Configuration .............................................................................. 61
General Settings ........................................................................... 61
Window split ............................................................................... 61
Register document when SV-Manager is not running ................ 61
Register help on start-up ............................................................ 62
Message Settings.......................................................................... 62
Registration ................................................................................ 62
Delete Folder/Document/Page ................................................... 63
Save 180 degrees rotate view .................................................... 63
Library Settings............................................................................. 63
Destination to save ..................................................................... 63
Password Invalid State
64
Deleting the Unit's Password Invalid State ................................. 64
Deleting the SV-Manager's Password Invalid State.................... 65
When Both the Unit and SV-Manager is in Password Invalid State ........ 65
Upgrading the SV-Manager
67
Confirming the Version Information of the SV-Manager ........... 67
Confirming the Version Information of the Printer Driver ......... 68
Upgrading ...................................................................................... 68
Uninstalling the SV-Manager
69
When this Message Appears
70
Troubleshooting
73
5
5
Troubleshooting
66
Troubleshooting
Recovering Damaged Files
60
Changing the Operating Environment of the SV-Manager
Change the display style of the screen and configure the error prevention
confirmation dialog of the SV-Manager in the [Settings] dialog.
The dialog includes the tabs, "General", "Messages", and "Library".
Configuration
1
Click [Tools] J [Settings] from the menu.
¨The [Settings] dialog displays.
2
Switch tabs and configure the various items.
• Switch and configure between the "General", "Messages", and "Library" tabs. Refer to
the "General Settings" on page 61, "Message Settings" on page 62, and "Library
Settings" on page 63.
3
Click [OK].
General Settings
5
5
Troubleshooting
Troubleshooting
Window split
z Vertical type/Horizontal type
• Select the area display's layout of the [SV-Manager] screen .
Refer to "Screen Display Format" on page 13.
Register document when SV-Manager is not running
z At SV-Manager start up.
61
• When a check is placed by this option, the SV-Manager starts when the content source file is
dragged and dropped onto the SV-Manager shortcut icon when the SV-Manager is not
started. Refer to "Dragging and Dropping when SV-Manager is not Started" on page 36.
Changing the Operating Environment of the SV-Manager
Register help on start-up
z Display register help on start-up
• When a check is placed by this option, the [Document File Registration Method] dialog
appears when starting the SV-Manager. Refer to "Starting/Closing the SV-Manager"
on page 11.
Message Settings
Registration
z Display registration destination selection screen when multiple devices are
connected.
• When a check is placed by this option, the [Registration destination] dialog appears when creating unit-specific files if multiple units are connected. This unit can be selected as the registration location.
• When the check is removed, the unit that appears in the top level of the Hierarchical Display
Area is automatically selected as the registration location if multiple units are connected.
z Display memory shortage warning message.
• When a check is placed by the option, the [Image File Registration Warning] dialog appears
as the main folder automatically becomes the registration location when unit-specific files are
created by drag and drop and when the content source files are image files associated with
the Windows standard image viewer.
5
Troubleshooting
z Display Caution message when registering image files.
5
Troubleshooting
• When a check is placed by the option, the [Insufficient Space Warning] dialog appears if the
empty space in the registering memory card is less than 10% of the entire capacity when
creating, copying, or moving unit-specific files.
62
Changing the Operating Environment of the SV-Manager
z Display Caution message, when file name is too long.
• When a check is placed by the option, the [Long File Name Warning] dialog appears, as the
main folder automatically becomes the registration location when unit-specific files are created
by drag and drop and when the file names of the content source files exceed 58 single-byte or
29 two-byte characters.
z Display completed data registration message on desktop.
• When a check is placed by the option, the "Registered to (unit's top folder name or Library)"
message appears at the bottom right of the Windows Desktop when the creation of the unitspecific files is complete.
Delete Folder/Document/Page
z Display confirmation message
• When a check is placed by the option, the error prevention confirmation dialog ([Delete folder]/
[Delete document]/[Delete page] dialog) appears when [Delete] is clicked.
Save 180 degrees rotate view
z Display confirmation message
• When a check is placed by the option, the [Save 180 degrees rotate view] error prevention
confirmation dialog appears when [Save 180 degrees rotate view] is clicked.
Library Settings
5
5
Troubleshooting
Troubleshooting
Destination to save
z Save Location Box
• Configures the save location folder of the library. Click [Browse] and select the folder.
63
Password Invalid State
When authorization for the SV-Manager or unit fails three consecutive times, the
[Password authentication] dialog closes and the password for the unit and SVManager becomes invalid.
The password invalid state is separately recorded on the SV-Manager and the unit.
When one of the devices is in a password invalid state, the password invalid state can
be deleted on the other device.
Deleting the Unit's Password Invalid State
1
Connect the unit with the PC using the USB cable (included).
• Refer to "Connecting the Unit to the PC" on page 21.
2
Open the security folder in the SV-Manager.
• Refer to "Opening/Closing the Security Folder" on page 28.
3
Disconnecting the Unit from the PC
• Refer to "Disconnecting the Unit from the PC" on page 22.
4
Turn ON the power to the unit and confirm that the security folder opens in the unit.
• Refer to "SV-100B User's Guide (Main Unit)".
5
5
Troubleshooting
Troubleshooting
64
Password Invalid State
Deleting the SV-Manager's Password Invalid State
1
Disconnect the unit from the PC.
• Refer to "Disconnecting the Unit from the PC" on page 22.
2
Turn ON the power to the unit and select the security folder in the unit.
• Refer to "SV-100B User's Guide (Main Unit)".
3
Enter the correct password into the unit.
4
Connect the unit with the PC using the USB cable (included).
• Refer to "Connecting the Unit to the PC" on page 21.
5
Confirm that the security folder can be opened in the SV-Manager.
• Refer to "Opening/Closing the Security Folder" on page 28.
When Both the Unit and SV-Manager is in Password Invalid State
When authorization for both the unit and SV-Manager fails three consecutive times, the password
for the unit and SV-Manager becomes invalid and the security folder does not open. The memory
card has to be initialized by the SV-Manager. Unit-specific files in the security folder cannot be
retrieved. Refer to "Initializing the Memory Card" on page 23.
Files that are not in the security folder can be exported as BVD files from the top folder. Refer to
"Writing Data in an Intermediate File Format" on page 57.
5
5
Troubleshooting
Troubleshooting
65
Recovering Damaged Files
When a unit-specific file is created, a backup file is created at the same time. If the
backup file is not damaged, the unit-specific file can be recovered by the SVManager.
If a "microSD card access error." message appears when browsing with this unit,
connect the unit or memory card to the PC and recover using the SV-Manager.
1
When a damaged file is detected, the [Corrupted file Recovery] dialog appears.
2
Click [Yes].
¨When the file is properly restored, the normalized unit displays in the Hierarchical Display
Area.
If the file cannot be recovered, [Corrupted file Recovery Error] appears.
5
5
Troubleshooting
Troubleshooting
• Click [Yes], delete the damaged file, and leave only normal files.
• Click [No] to leave the damaged files. Unit-specific files that cannot be displayed or
opened in the Preview Display Area are left without deleting. Every time the unit is
connected to the SV-Manager, the [Corrupted file Recovery] dialog appears.
66
Upgrading the SV-Manager
Confirming the Version Information of the SV-Manager
The version information can be confirmed before and after upgrade.
1
Click [Help] J [Version Info.] from the Menu.
¨The [SV-Manager Version info.] dialog displays.
2
Confirm the version and click [OK].
5
5
Troubleshooting
Troubleshooting
67
Upgrading the SV-Manager
Confirming the Version Information of the Printer Driver
The version information of the printer driver can also be confirmed before and after the upgrade.
1
Open [Brother SV-100B Properties] or [Brother SV-100B Print settings].
• Refer to "Changing the Print Settings of the Printer Driver" on page 39 when opening the
[Brother SV-100B Properties] and [Brother SV-100B Print settings].
• Open the [Brother SV-100B Properties] dialog to confirm using application software, i.e.
Word, etc., and open the [Brother SV-100B Print settings] dialog to confirm from the Start
Menu.
2
Click [Version Info.] in the "Basic" Tab.
¨The [Brother SV-100B] dialog displays.
• Contact Brother Call Center whether the newest version has been released.
Upgrading
Upgrade the SV-Manager by first uninstalling the previous version before installing the new
version of the SV-Manager.
Refer to "Uninstalling the SV-Manager" on page 69 regarding uninstallation.
Refer to the "Quickstart Guide" when reinstalling.
5
5
Troubleshooting
After confirmation, click [OK] and close the dialog.
Troubleshooting
3
68
Uninstalling the SV-Manager
Uninstall the SV-Manager according to the following steps.
Temporarily store important unit-specific files, i.e. library data, etc., in an
intermediate file format created by BVD export before uninstallation.
1
2
Close the SV-Manager if the program is started.
Double click [Control Panel] J [Add or Remove Programs] in the Windows Start
Menu.
In the case of Windows Vista, double click [Control Panel] J [Program and Features].
¨The [Add and Remove Program] dialog displays.
3
Click "Brother SV-Manager x.x) (xx refers to version) and click [Delete].
• The printer driver for "Brother SV-100B" is deleted together with the application for
"Brother SV-Manager x.x".
4
Click [Yes] in the [SV-Manager Uninstallation] dialog.
¨The [Uninstall] dialog displays.
5
Click [Yes] to delete the library data and [No] to leave the data. Follow the directions
in the subsequent Windows messages.
5
Troubleshooting
When other users are logged into the computer at the same time, the program will not
properly be uninstalled.
5
Troubleshooting
• Click [No] to uninstall the SV-Manager and printer driver without deleting the library data.
When the SV-Manager is reinstalled, the library data can be used again. Click [No] when
upgrading or when the SV-Manager needs to be reinstalled due to problems with the SVManager.
69
When this Message Appears
Message
Problems and Solutions
[Registration Error]
Registration error. Out of
free memory space.
Problem:
• There is not enough free space in the registering memory
card.
[Copy file error]
Copy file error.
No available memory.
Solution:
• The maximum memory card capacity for this unit is 2GB.
• If a unit-specific file is being created from contents with a large
file size, divide the content source file and convert the file into
smaller size contents.
• Divide the unit-specific file to copy/move large unit-specific
files. Copy the unit-specific file and create two files in the
library. Divide the unit-specific files into (first and second)
halves by deleting pages and convert the original file into two
smaller files.
• Create/copy/move fewer files when creating multiple content
source files at one time or copying/moving multiple unitspecific files.
• Increase the amount of free space by backing up or deleting
unit-specific files that are not required by the memory card or
non unit-specific files.
[Moving file error]
Moving file error.
No available memory.
[Corrupted file Recovery] Problem:
Detected corrupted file.
• A folder or unit-specific file is damaged.
*Some data may not be
Solution:
recovered.
• Refer to "Recovering Damaged Files" on page 66.
Select Yes to continue.
5
5
Troubleshooting
Troubleshooting
70
[Corrupted file Recovery
Error]
Corrupted file recovery
error.
Backup file may also be
damaged.
Select Yes to delete this
file.
Solution:
• Refer to "Recovering Damaged Files" on page 66.
[Initializing error]
Initializing error.
Problem:
• A non unit-specific BRVDOC folder exists in the memory card.
Problem:
• A folder or the backup of the unit-specific file is damaged.
Solution:
• Delete the non unit-specific BRVDOC folder.
When this Message Appears
Message
[Password error]
Password error.
Cannot access the
security folder.
Problems and Solutions
Problem:
• When password authorization for the SV-Manager fails three
consecutive times, the password for the SV-Manager becomes
invalid.
Solution:
• If the password is still valid for the unit, delete the password
invalid state in the unit. Refer to "Password Invalid State"
on page 64.
[File loading error]
File type not supported.
Problem:
• The selected intermediate file format, BVD file, may not be a
unit-specific file or may be damaged.
Solution:
• Confirm whether the selected file is a unit-specific BVD file.
Problem:
• The application software of the selected content source file
may not be installed on the PC or not associated with the print
operation.
Solution:
• Install the application software of the selected content source
file.
• Open the content source file with the application software and
create unit-specific files from the print process.
[Initializing error]
Unexpected error.
Problem:
• An unknown error has occurred during the initialization of the
unit.
Solution:
• Change unit or memory card and initialize the unit. If
initialization is successful, the unit or memory card is
abnormal.
• If an error occurs with the unit or memory card in the above
procedure, the SV-Manager may be abnormal. Reinstall the
SV-Manager.
5
5
Troubleshooting
Troubleshooting
71
[Start-up Error]
Software configuration
error.
Problem:
• The SV-Manager may be abnormal.
Solution:
• Reinstall SV-Manager.
When this Message Appears
Message
Problems and Solutions
[Maximum Page Warning] Problem:
Cannot register more than
• The maximum number of pages that can be registered is
10,000 pages.
9,999 pages.
Maximum registered page
Solution:
number is 9,999.
• To register more than 10,000 pages, specify the pages to print.
Enter specific page
numbers and/or range of
pages to register.
[Error.]
Failed to register.
Try it again after starting
up SV-Manager
Problem:
• An unknown error has occurred while registering the contents.
Solution:
• Try registering again after restarting the SV-Manager.
[** Error]
Problem:
** error.
• If an SD card adapter is used, the memory card is set to readCannot write to microSD
only.
card or PC.
Solution:
(** is the operation name.)
• Move the notch from the read-only setting.
Problem:
• Files in PC are set to read-only.
Solution:
• Please unlock read-only setting in PC.
Problem:
Cannot access
SV-Manager using a guest
• The SV-Manager cannot be started by a guest user.
account.
Solution:
• Log off Windows and log back in with a standard user or
administrator account.
5
5
Troubleshooting
Troubleshooting
72
Troubleshooting
Issue
Unit-specific files cannot
be created by drag and
drop.
Problems and Solutions
Problem:
• Although unit-specific files can be created by drag and drop
when the content source file is Word, Excel, PowerPoint,
Adobe Reader, and Notepad, there are application software
that are not compatible.
Solution:
• Open the content source file with the application software and
create unit-specific files from the print menu.
Refer to "Create from the print image of the application
software" on page 32.
When a unit-specific file is Problem:
created by drag and drop,
• When a PDF file, with a two byte character in the name, is
the file does not register in
created in Adobe Reader 8 by drag and drop, the file cannot
the specified folder.
be registered to the specified folder.
Solution:
• Upgrade to Adobe Reader 9.
Problem:
• The content source file cannot be registered to the specified
folder in the following. The files register to the main folder.
• When image files are associated to the Windows standard
image viewer
•
When the file name is extremely long
• When the file name is over 259 bytes in Windows Vista
Solution:
• Open the content source file with the application software and
create unit-specific files from the print menu.
Refer to "Create from the print image of the application
software" on page 32.
5
5
Troubleshooting
Troubleshooting
73
The contents do not
Problem:
convert as expected when
• When the gradation process is turned ON in print settings of
creating unit-specific files
the printer driver, residual images may remain.
(residual images remain).
Solution:
• Remove the checkmark from [Dithering] in the [Brother SV100B Properties] or [Brother SV-100B Print settings] dialog to
remove the residual images. Refer to "Changing the Print
Settings of the Printer Driver" on page 39.
The contents do not
Problem:
convert as expected when
• When the anti-aliasing process is turned ON in the print
creating unit-specific files
settings of the printer driver, thin lines become easily cut.
(thin lines fade).
Solution:
• Remove the checkmark from [Smoothing] in the [Brother SV100B Properties] or [Brother SV-100B Print settings] dialog to
give priority to display lines. Refer to "Changing the Print
Settings of the Printer Driver" on page 39.
Troubleshooting
Issue
The file name changes
when
the unit-specific file is
created
Problems and Solutions
Problem:
• When a unit-specific file is created from a Word document file
with single-byte brackets "(" or ")" in the name, the brackets in
the file name change to underscores "_". Therefore, when files
with brackets and underscores in the name are converted to
unit-specific files at the same time, this may cause some
confusion with the files.
Solution:
• When single-byte brackets are used in the file name of the
Word document, change the brackets to another character.
Additional information is provided by Brother Call Center.
5
5
Troubleshooting
Troubleshooting
74
Troubleshooting
5
5
Troubleshooting
Troubleshooting
75
6
Appendix
Glossary
77
Index
80
6
6
Appendix
Appendix
76
Glossary
The following are explanations of terms related to the functions of this unit.
BVD Export
A
This function writes unit-specific files to the
intermediate file format, BVD file.
Anti-Aliasing Process
This process smoothes rough edges on
curved lines (rough edges on characters,
etc.).
BVD File
Application Software
BVD Import
This is software, i.e. Word, Excel, Adobe
Reader, etc., that operates on an operating
system (basic software, Windows XP or Vista
for this unit) and is used by the PC user to
perform specific operations.
The SV-Manager is also an application
software, however, application software in
this document refers to software that is not
the SV-Manager.
This function returns the intermediate file
format, BVD file, into a unit-specific file and
registers the file to the unit or library.
6
Appendix
Appendix
77
C
Contents
B
This is the contents of the unit-specific files or
the source page of the application software
data.
Bitmap
Cut and Paste
This is a format expressed by clusters of dots
in an image. This is also called a raster data
format. This includes JPEG, TIFF, GIF, BMP,
etc. In a more narrow sense, this term refers
to Windows bitmaps with a bmp extension.
On the other hand, the vector data format
expresses curves and straight lines in images
using mathematical formulas. This includes
TrueType fonts, EPS, etc.
This is a series of functions (cut and paste)
used when moving files and folders.
D
Dialog
The bookmark is a mark placed on pages just
as post-its are placed on paper documents.
This is the screen to simplify operations. This
includes selection message screens, i.e.
[Yes]/[No], etc., and print setting screens.
Although this may be similar to a window,
there is no menu, i.e. "File", "Edit", etc., under
the title bar in the dialog.
Browse Date
Drag and Drop
This is the last date that the unit-specific file
was browsed on the unit.
This function refers to the action of selecting
a target on the screen with the left mouse
button, moving the target while holding the
left button down, and releasing the left button
once the target has been moved to the
desired location.
Bookmark
6
This is the intermediate format file that BVD
import reads from and BVD export writes to.
BRVDOC Folder
This folder is specifically created in the unit to
save unit-specific files. The folder is created when
the SV-Manager or the unit is initialized. The
hidden folder attribute is applied to this folder.
Glossary
Invalid Password State
F
Frame
This refers to the case that protects the
substrate of the device and isolates and
protects the user from the internal
components.
G
This state describes when files in the security
folder cannot be opened.
When authorization for the SV-Manager or
unit fails three consecutive times, the
password for the unit and SV-Manager
becomes invalid.
The password invalid state is separately
recorded on the SV-Manager and the unit.
When one of the devices is in a password
invalid state, the password invalid state can
be deleted on the other device.
Gradation Process
This is the error diffusion process used when
creating the image data of the unit-specific
file. The error diffusion process smoothes the
gradation of the image data by processing
the calculation of each dot of the image data
and the surrounding dots.
L
I
M
Initialization
Magnified Image
This is the process that deletes all unitspecific files from the memory card and
creates a new top folder and empty main and
security sub-folders in it. The initialization of
the SV-Manager differs from Windows format
as files other than the unit-specific files are
not deleted from the card.
However, all files including the unit-specific
files are deleted from the card when formatting
the unit, which is similar to Windows format.
The initialization process is similar to the SVManager, thereafter.
This is the content display image created at
an increased resolution of 145% when
creating the unit-specific file. This image is
created separately from the normal display
image.
This is the image of the magnified view on the
unit.
Intermediate File Format
This is a folder created on the PC hard drive
installed with the SV-Manager.
Main Folder
This is the folder immediately under the unit's
top folder. Unit-specific files that can be
browsed without a password are registered to
this folder. The name can be changed in the
SV-Manager.
6
6
Appendix
Appendix
This is the BVD file that BVD Export writes to.
This file can be moved or copied using
Windows file operation. BVD Import returns
the file into a unit-specific file.
Library
78
Glossary
P
T
Password
Thumbnail
This is the 4 digit password configured to the
security folder.
This is a reduced image that is smaller than
the normal image size enabling files to be
better displayed in a list. The thumbnails in
the SV-Manager have been reduced to 25%.
The origin of the term comes from English:
thumb and nail.
Printer Driver
This is a type of device driver that controls
general peripheral devices. The software that
specifically controls the printer is called a
printer driver. The SV-Manager's printer
driver controls the unit-specific virtual printer
within the PC, creating unit-specific files in a
bitmap format.
Pull Down Menu
When the cursor is pointed to a menu item or
the menu item is clicked, the submenu
related to the menu item appears to drop
down. This menu is called a pull down menu.
R
Rating
This is a function that attaches up to 5 stars
(or no rating) to the contents.
S
Security Folder
6
6
Appendix
Appendix
79
This is a special folder created on the
memory card during initialization. By
configuring a password to this folder, the unitspecific file is encrypted and protected in the
folder when the file is registered.
Password authentication is required when
opening the security folder.
SV-Manager
This is the Windows application software that
creates and manages unit-specific files from
content source files.
Top Folder
This is the top folder in the unit configured to
the root directory, created when the memory
card is initialized by the SV-Manager.
U
Unit-Specific File
This is a data file that can be browsed in the
unit.
This content is configured from image data
converted to a raster data format, similar to
bitmaps, and management files. The files are
created from content source files in the SVManager.
Index
A
D
Accessed date .......................................... 15
Delete folder/document/page ................... 63
Actual size ................................................ 19
Deleting a page ........................................ 47
Application software ........................... 31, 32
Deleting files/folders ................................. 53
Area size .................................................. 12
Destination to save ................................... 63
Display size of the page ........................... 45
B
Backup ................................................. 5, 57
Backup file ................................................ 66
Bookmark ................................................. 15
Displaying the page .................................. 45
Dithering ................................................... 41
[Document file registration method] dialog ... 62
Drag and drop ...... 31, 34, 36, 50, 51, 57, 58
Bookmarks
Batch deleting ...................................... 55
Deleting ............................................... 54
Managing ............................................. 54
Placing ................................................. 54
Using ................................................... 55
[Brother SV-100B print settings] dialog ... 43, 39
E
Enlarge ..................................................... 19
Excel ........................................................ 44
F
[Brother SV-100B properties] dialog ... 39, 42
File detail display area ....................... 12, 15
BVD export ........................................... 5, 57
File list ...................................................... 45
BVD file .................................................... 57
Fit page .................................................... 19
BVD import ............................... 5, 57, 58, 59
Fit width .................................................... 19
Folder ....................................................... 14
C
Changing .................................................. 61
Changing file/folder names ...................... 49
Creating ............................................... 49
Open .................................................... 45
Format ...................................................... 23
Closing ..................................................... 11
Completed data registration ..................... 63
G
Connecting ............................................... 21
General .................................................... 61
Connection status of the unit .................... 15
Contents ................................................... 31
Displaying ............................................ 45
Copying .............................................. 51, 52
Copying files/folders ................................. 51
Create enlarged images ........................... 41
H
Hiding items ............................................. 17
Hierarchical display area .................... 12, 13
Horizontal type ................................... 13, 61
I
Cut and paste ........................................... 51
Initialize .................................................... 23
Intermediate file format ...................... 57, 58
Invalid password state ........................ 28, 64
Deleting ............................................... 64
Item display width ..................................... 16
6
6
Appendix
Current page number ............................... 18
Appendix
Creation date ............................................ 15
Item order ................................................. 17
80
Index
L
R
Large quantity of content ............................ 6
Rating information .................................... 56
Library ............................................ 5, 14, 63
Changing ............................................. 56
Ratings ..................................................... 15
M
Main folder ............................................... 13
Memory card ...................................... 24, 25
Specific used space ............................. 25
Used space .......................................... 25
Memory shortage ..................................... 62
Reading data ............................................ 58
Recovering damaged files ........................ 66
[Register data] screen ........................ 31, 37
Register document ................................... 61
Register help ............................................ 62
[Registration destination] dialog ............... 33
Menu ........................................................ 52
Registration destination selection screen .. 62
Message ................................................... 62
Remaining space ..................................... 25
Message on desktop ................................ 63
Remove .............................................. 14, 22
Moving ...................................................... 50
Rotate the page 180 degrees ................... 47
Moving files/folders .................................. 50
Rotating the page ..................................... 45
Multiple devices are connected ................ 62
S
N
Save 180 degrees rotate view .................. 63
Next page ................................................. 18
Screen configuration ................................ 12
Normal display image ............................... 40
Screen display .......................................... 15
Screen display format .............................. 13
O
Operating environment ............................. 61
Orientation ................................................ 40
Security folder .............................. 13, 27, 32
Closing ................................................. 28
Opening ............................................... 28
Settings .................................................... 61
Shortcut icon ................................ 11, 31, 36
P
Password ................................................. 27
Changing ............................................. 29
[Password authentication] dialog ............. 28
Smoothing ................................................ 41
Source file .......................................... 31, 44
Specifying a page number ....................... 46
Start up ..................................................... 61
[Password change] dialog ........................ 29
Starting ..................................................... 11
[Password setting] dialog ......................... 27
SV-Manager ............................................... 4
PDF .......................................................... 44
6
6
Appendix
Appendix
Post-it notes ............................................. 54
T
Preview display area .......................... 12, 18
Thumbnail ................................................ 19
Previous page .......................................... 18
Title .......................................................... 15
[Print] dialog ............................................. 42
Top folder ................................................. 13
Print image ......................................... 31, 32
Total page number ................................... 18
Print settings ............................................ 39
Turning the page ...................................... 46
Printer driver ....................................... 31, 39
[Properties] dialog .................................... 25
81
Index
U
Uninstalling ............................................... 69
Unit-specific files ...................................... 57
Creating ............................................... 31
Upgrading ........................................... 67, 68
V
Version info. ....................................... 67, 68
Vertical type ....................................... 13, 61
W
Warning message .................................... 62
When SV-Manager is not running ............ 61
Window split ............................................. 61
Word ......................................................... 44
Writing data .............................................. 57
Z
Zoom ........................................................ 40
6
6
Appendix
Appendix
82
User's Guide (PC Software)
Starting and Closing
Connection and Memory
Card Management
Security Settings
Contents and
Folder Operations
When in Trouble
Troubleshooting
Refer to "Troubleshooting"
Appendix
page 60
Access the Brother support site
and refer to updated information.
Easily find what you're looking for!
Turn to page 4 for the Quick
Malfunction? Follow the following
procedures to determine the cause
of problems with this product.
Index
Read this document carefully before using
the product.
Store this document in a safe and readily
accessible location after reading.