1
Roland ColorChoice® for PC-12
Ver. 4.2
USER’S MANUAL
Thank you very much for purchasing the Roland printer.
•
To ensure correct and safe usage with a full understanding of this
product’s performance, please be sure to read through this manual
completely and store it in a safe location.
•
Unauthorized copying or transferal, in whole or in part, of this
manual is prohibited.
•
The contents of this operation manual and the specifications of this
product are subject to change without notice.
•
The operation manual and the product have been prepared and
tested as much as possible. If you find any misprint or error, please
inform us.
•
Roland DG Corp. assumes no responsibility for any direct or
indirect loss or damage which may occur through use of this
product, regardless of any failure to perform on the part of this
product.
•
Roland DG Corp. assumes no responsibility for any direct or
indirect loss or damage which may occur with respect to any article
made using this product.
Welcome........................................................................................................................................................5
System Requirements Windows .................................................................................................................................... 5
System Requirements Macintosh .................................................................................................................................. 6
Supported Printers ......................................................................................................................................................... 7
Windows 98/Windows Me Installation ......................................................................................................................... 7
Setting Up the Roland ColorChoice....................................................................................................................................... 7
Installing AdobePS Driver for Windows 98/Me.................................................................................................................... 7
Before using Roland ColorChoice ......................................................................................................................................... 8
Windows 2000 Installation............................................................................................................................................. 8
Setting Up the Roland ColorChoice....................................................................................................................................... 9
Before using Roland ColorChoice ......................................................................................................................................... 9
Uninstalling the Software [Windows 98/Me].............................................................................................................. 10
Uninstalling the Software [Windows 2000] ................................................................................................................ 10
Uninstalling the Software [PC-12 ColorCAMM DRIVER for Windows]............................................................... 10
Macintosh Installation.................................................................................................................................................. 11
Installing AdobePS Driver for a Macintosh......................................................................................................................... 11
Setting Up the Roland ColorChoice..................................................................................................................................... 11
Creating a Desktop Printer................................................................................................................................................... 11
Uninstalling the Software [Macintosh] ....................................................................................................................... 12
Getting Started ...........................................................................................................................................13
[Windows]...................................................................................................................................................................... 13
[Macintosh].................................................................................................................................................................... 13
Using the RIP Software ................................................................................................................................................ 13
Printing a Test File ....................................................................................................................................................... 14
Menus ..........................................................................................................................................................15
File Menu....................................................................................................................................................................... 15
Add Job ................................................................................................................................................................................ 15
Job Properties....................................................................................................................................................................... 15
Send ..................................................................................................................................................................................... 15
Abort .................................................................................................................................................................................... 15
Exit/Quit............................................................................................................................................................................... 15
Edit Menu...................................................................................................................................................................... 15
Select All.............................................................................................................................................................................. 16
Delete ................................................................................................................................................................................... 16
Preferences........................................................................................................................................................................... 16
Tool buttons ......................................................................................................................................................................... 16
Mouse menus ....................................................................................................................................................................... 16
Setup Menu ................................................................................................................................................................... 17
Change Setup ....................................................................................................................................................................... 17
Setup Properties ................................................................................................................................................................... 17
Test Print.............................................................................................................................................................................. 17
Test Cut................................................................................................................................................................................ 17
View Menu..................................................................................................................................................................... 17
View RIP Log ...................................................................................................................................................................... 17
Clear RIP Log ...................................................................................................................................................................... 17
Printing .......................................................................................................................................................18
Adding Jobs to the Print Monitor ............................................................................................................................... 18
Deleting Jobs from the Print Monitor......................................................................................................................... 18
Aborting a Print Job..................................................................................................................................................... 18
Printing Directly from an Application........................................................................................................................ 18
Printing from a Client on your Network .................................................................................................................... 18
Setup Properties .........................................................................................................................................20
The Setup Properties General Tab.............................................................................................................................. 20
Manufacturer........................................................................................................................................................................ 20
Model................................................................................................................................................................................... 20
Setup Name.......................................................................................................................................................................... 20
Media Size ........................................................................................................................................................................... 21
Printable Area ...................................................................................................................................................................... 21
Margin.................................................................................................................................................................................. 21
Ports [only Windows] .......................................................................................................................................................... 21
The Setup Properties Ports Tab [only Macintosh] .................................................................................................... 21
Ports ..................................................................................................................................................................................... 21
The Setup Properties Print Tab .................................................................................................................................. 22
Media ................................................................................................................................................................................... 22
Print Mode ........................................................................................................................................................................... 22
Resolution ............................................................................................................................................................................ 22
Driver Options ..................................................................................................................................................................... 22
Driver Options (ColorCAMM PC-12) ................................................................................................................................. 22
Dither type ........................................................................................................................................................................... 24
Screen................................................................................................................................................................................... 24
Perform Color Correction .................................................................................................................................................... 24
ICC input profile .................................................................................................................................................................. 24
ICC output profile ................................................................................................................................................................ 24
Color Mode .......................................................................................................................................................................... 25
The Setup Properties Cut Tab..................................................................................................................................... 25
Resolution ............................................................................................................................................................................ 25
Passes ................................................................................................................................................................................... 25
Curve Quality....................................................................................................................................................................... 25
Cutter Driver Options (ColorCAMM PC-12) ...................................................................................................................... 25
The Color Tab............................................................................................................................................................... 26
Job Properties.............................................................................................................................................27
Job Properties General Tab......................................................................................................................................... 27
Preview Mode ...................................................................................................................................................................... 27
Media Size ........................................................................................................................................................................... 27
Size ...................................................................................................................................................................................... 27
Copies .................................................................................................................................................................................. 28
Layout .................................................................................................................................................................................. 28
After Output ......................................................................................................................................................................... 28
Send ..................................................................................................................................................................................... 28
Job Properties Print Tab.............................................................................................................................................. 28
The Color Tab............................................................................................................................................................... 28
Advanced Printing Procedures [Windows] .............................................................................................29
CorelDRAW 8 [Windows] ........................................................................................................................................... 29
CorelDRAW 9 [Windows] ........................................................................................................................................... 29
Illustrator 8.0 [Windows]............................................................................................................................................. 30
Illustrator 9.0 [Windows]............................................................................................................................................. 30
PageMaker 6.5 [Windows]........................................................................................................................................... 31
Photoshop 5.0 [Windows]............................................................................................................................................. 32
Contour Cutting and Spot Color Printing [Windows] ...........................................................................33
Illustrator 8.0 [Windows]............................................................................................................................................. 33
Illustrator 9.0 [Windows]............................................................................................................................................. 33
Printing and Cutting Limitations in Illustrator 9.0............................................................................................................... 34
CorelDRAW 8 [Windows] ........................................................................................................................................... 35
CorelDRAW 9 [Windows] ........................................................................................................................................... 35
FreeHand 8 [Windows] ................................................................................................................................................ 36
QuarkXPress 4 [Windows] .......................................................................................................................................... 36
PageMaker 6.5 [Windows]........................................................................................................................................... 37
Advanced Printing Procedures [Macintosh] ...........................................................................................38
Illustrator 8.0 [Macintosh]........................................................................................................................................... 38
Illustrator 9.0 [Macintosh]........................................................................................................................................... 38
PageMaker 6.5 [Macintosh]......................................................................................................................................... 39
Photoshop 5.0 [Macintosh]........................................................................................................................................... 40
QuarkXPress 3.32 [Macintosh] ................................................................................................................................... 41
QuarkXPress 4.04 [Macintosh] ................................................................................................................................... 41
Contour Cutting and Spot Color Printing [Macintosh] .........................................................................43
Illustrator 8.0 [Macintosh]........................................................................................................................................... 43
Illustrator 9.0 [Macintosh]........................................................................................................................................... 43
Printing and Cutting Limitations in Illustrator 9.0............................................................................................................... 44
FreeHand 8 [Macintosh] .............................................................................................................................................. 44
QuarkXPress 4 [Macintosh] ........................................................................................................................................ 44
PageMaker 6.5 [Macintosh]......................................................................................................................................... 45
Supplement .................................................................................................................................................46
Printing and Cutting Limitations and Workarounds in Illustrator 9.0................................................................... 46
The Transparency Feature in Illustrator 9.0 ............................................................................................................. 47
Welcome
Welcome to the User Guide for the Roland ColorChoice RIP Software. We recommend that you read and
understand this document. This document contains instructions for the Macintosh and the Microsoft Windows
98/Me and Windows 2000.
System Requirements Windows
The following table lists the minimum and high volume recommended system setup to run RIP Software.
System requirements vary according to the size of the files to be scanned and printed, the output device used,
and other variables. Your particular setup and intended use of the software determine what hardware and
software setup you need to get the most out of RIP Software. If you are working with relatively small files, the
minimum setup may be sufficient. Similarly, if you are working with large files, you should consider the
recommended setup. Consult your dealer for advice when choosing a system.
Minimum
Recommended
Processor
Pentium II 233MHz
Pentium II 400MHz or faster
RAM
128MB
256MB or more
Install Space
200MB
200MB
Working Disk
Space
2GB
4GB or more for storage
Operating System
Running latest version of: Windows 98 /
Me / 2000
Running latest version of: Windows 98 /
Me / 2000
Video
800 x 600 screen resolution with 16 bit
color
1024 x 768 screen resolution with 16 bit
color
Others
4x CD-ROM Driver
16x CD-ROM Driver
Output Port
USB
USB
5
System Requirements Macintosh
The following table lists the minimum and high volume recommended system setup to run RIP Software.
System requirements vary according to the size of the files to be printed, the output device used, and other
variables. Your particular setup and intended use of the software determine what hardware and software
setup you need to get the most out of RIP Software. If you are working with relatively small files, the minimum
setup may be sufficient. Similarly, if you are working with large files, you should consider the recommended
setup. Consult your dealer for advice when choosing a system.
Minimum
Recommended
Processor
G3 233 MHz
G3 or G4 300 MHz or faster
RAM
128 MB RAM with at least 196 MB of
virtual memory enabled
256 MB RAM with at least 257 MB of
virtual memory enabled
Install Space
200MB
200MB
Working Disk
Space
2GB or more
4GB or more for storage
Operating System
Mac OS 8.5 – 9x with Appearance
Manager and ColorSync installed
Mac OS 8.5 – 9.x with Appearance
Manager and ColorSync installed
Video
800 x 600 screen resolution with 16 bit
colors
1024 x 768 screen resolution with 16 bit
colors
Others
4x CD-ROM Drive
16x CD-ROM Drive
Output Port
USB
USB
6
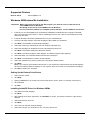
Supported Printers
RCC for PC-12
: ColorCAMM PC-12
Windows 98/Windows Me Installation
Important:
:Before you install and set up the RIP program, you must be sure to install the PC-12
ColorCAMM Driver for Windows.
Run Setup for the PC-12 ColorCAMM Driver for Windows.
For the connection between the computer and the machine, choose USB Port Connection.
1.
Insert the PC-12 ColorCAMM Driver for Windows Installation CD-ROM into the computer's CD-ROM
drive, then follow the instructions in "Part 2 Installing the Driver" of the PC-12 User's Manual to install
and set up the driver.
2.
Insert the Roland ColorChoice Installation CD into your CD-ROM drive.
3.
From the CD Setup window, select the language of the installer you would like.
4.
Click Next. The Software to Install window displays.
5.
Select the product you would like to use from Product drop-down box.
6.
Select the language you would like from the Language drop-down box.
7.
Click Next. The system displays the Welcome window.
8.
Click Next. The select Program Folder displays. The Select Program folder displays.
9.
Select the folder you would like Roland ColorChoice to display in.
10.
Click Next. The Destination Location window displays.
11.
Select the destination by clicking on Browse or except the default location.
12.
Click Next.
Note: If you currently have Roland ColorChoice on your system the Clear Preferences window displays.
Click Yes to delete preference settings on your system. Click not to retain your old preference settings.
13.
Click OK to restart your computer.
Setting Up the Roland ColorChoice
1.
Select a printer model.
2.
Click Next.
3.
Specify USBXXX (PC-12) as the port for the output device. (Here, "XXX" is a number such as 001.)
4.
Click Finished.
5.
Click OK.
Installing AdobePS Driver for Windows 98/Me
1.
The Welcome screen displays.
2.
Click Next.
3.
After reading the License agreement, click ACCEPT to accept. The Printer Connection Type window
displays.
4.
Select the Directory Connect.
5.
Click Next.
6.
The Local Port selection window displays.
7.
Select the port type you would like to use. You may choose LPT.
7
8.
Click Next. The select Printer model window displays.
9.
Select PPD’s. The file is located in the C:\Program Files\RCC for PC-12\PPD folder. Select the PPD
according to the model of your printer.
10.
Click OK.
11.
Click Next. The Printer Information Window displays.
12.
Select No for your default printer.
13.
Select No for Test page.
14.
Click Next. The Setup Information window displays.
15.
Click Install. The Printer Configuration window displays.
16.
Select No.
17.
Click Next.
18.
Click Finish. The Restarting window displays.
19.
Click OK to restart your computer.
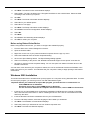
Before using Roland ColorChoice
Before using Roland ColorChoice, you have to configure the AdobePS properly.
1.
From the Start menu, select Settings then Printers.
2.
Open the Printers folder.
3.
Right click on the icon of your printer and select Properties from the pop- up menu.
4.
Select the Details tab from the Printer Properties dialog.
5.
Click on the Spool Settings button. The Spool Settings dialog appears.
6.
Select “Print directly to the printer” and “Disable bi-directional support for this printer” and click OK.
7.
Click OK to close the Printer Properties dialog. You can now print from Adobe PS Printer driver to the
Roland ColorChoice.
You will notice, each time that your computer is started, an icon for the Roland ColorChoice Software in the
lower right corner of your monitor. This indicates that your computer is ready to begin printing to the Roland
ColorChoice.
Windows 2000 Installation
This section describes how to install and set up the program on a computer running Windows 2000. To install
and set up the program, you must log on as a user with administrator rights.
Important: Before you install and set up the RIP program, you must be sure to install the PC-12
ColorCAMM Driver for Windows.
Run Setup for the PC-12 ColorCAMM Driver for Windows.
For the connection between the computer and the machine, choose USB Port Connection.
1.
Insert the PC-12 ColorCAMM Driver for Windows Installation CD-ROM into the computer's CD-ROM
drive, then follow the instructions in "Part 2 Installing the Driver" of the PC-12 User's Manual to install
and set up the driver.
2.
Insert the Roland ColorChoice Installation CD into your CD ROM drive.
3.
From the CD Setup window, select the language of the installer you would like.
4.
Click Next. The Software to Install window displays.
5.
Select the product you would like to use from Product drop-down box.
6.
Click Next. The Welcome Window displays.
8
7.
Click Next. The select Program Folder displays.
8.
Select the folder you would like Roland ColorChoice to display in.
9.
Click Next. The Destination Location window displays.
10.
Select the destination by clicking on Browse or except the default location.
11.
Click Next.
Note: If you currently have Roland ColorChoice on your system the Clear Preferences window displays.
Click Yes to delete preference settings on your system. Click not to retain your old preference settings.
12.
Click OK to restart your computer.
Setting Up the Roland ColorChoice
1.
Select a printer model.
2.
Click Next. The Change Setup window displays.
3.
Specify USBXXX (PC-12) as the port for the output device. (Here, "XXX" is a number such as 001.)
4.
Click Finish.
5.
Click OK.
When using Windows2000, the PostScript Printer driver will be automatically installed.
Before using Roland ColorChoice
Before using Roland ColorChoice, you have to configure the PS Driver property.
1.
Click Start>Settings>Printers and open the Printers folder.
2.
Right click on the icon of your printer and select Properties from the pop- up menu.
3.
Select the advanced tab from the Printer Properties dialog.
4.
Select “Print directly to the printer” and click OK.
5.
Click OK to close the Printer Properties dialog.
6.
You can now print from Adobe PS Printer driver to the Roland ColorChoice.
You will notice, each time that your computer is started, an icon for the Roland ColorChoice Software in the
lower right corner of your monitor. This indicates that your computer is ready to begin printing to the Roland
ColorChoice.
9
Uninstalling the Software [Windows 98/Me]
1.
Exit the RCC for PC-12 Software by right clicking on the Roland ColorChoice icon in the lower right
corner of your monitor and selecting Exit.
2.
Click Start>Settings>Control Panel.
3.
In the Control Panel, double-click the Add/Remove Programs icon.
4.
Remove RCC for PC-12. Click OK when you are finished.
5.
Go into the drive where the RCC for PC-12 Software is located. Its default name should be ‘RCC for PC12’. Delete this directory.
6.
Click Start>Settings>Printers. Right click on the printer icon of the printer you installed, and then select
Delete from the menu.
7.
Click Start>Settings>Control Panel. Double-click on the Add/Remove Programs icon. Uninstall the Hot
Folder 3 program.
8.
Empty your Recycle Bin. You have successfully uninstalled the RCC for PC-12.
Uninstalling the Software [Windows 2000]
1.
Exit the RCC for PC-12 Software by right clicking on the Roland ColorChoice icon in the lower right
corner of your monitor and selecting Exit.
2.
Click Start>Settings>Control Panel.
3.
In the Control Panel, double-click the Add/Remove Programs icon.
4.
Remove RCC for PC-12. Click OK when you are finished.
5.
Go into the drive where the RCC for PC-12 Software is located. Its default name should be ‘RCC for PC12’. Delete this directory.
6.
Click Start>Settings>Printers. Right click on the printer icon of the printer you installed, and then select
Delete from the menu.
7.
Click Start>Settings>Control Panel. Double-click on the Add/Remove Programs icon. Uninstall the Hot
Folder 3 program.
8.
Empty your Recycle Bin. You have successfully uninstalled the RCC for PC-12.
Uninstalling the Software [PC-12 ColorCAMM DRIVER for Windows]
•
In the PC-12 User's Manual, go to "Part 2 Installing the Driver" and refer to "2.2 Reinstalling and Deleting"
to remove the PC-12 ColorCAMM Driver for Windows from the computer.
10
Macintosh Installation
1.
Insert the Roland ColorChoice Installation CD into your CD-ROM drive.
2.
Double-click the Installer icon.
3.
Select the Installer language from the Installer window.
4.
Click OK. The system displays the Installation Options window.
5.
Select the product you would like to use from Product drop-down box.
6.
Select the language you would like from the Language drop-down box.
7.
Click OK.
8.
Accept the default selection of Easy Install and specify the disk where the System Folder is located
(Start up disk) as “Install Location”. Click Install when you are finished.
Note: If you currently have Roland ColorChoice on your system the Clear Preferences window displays.
Click Yes to delete preference settings on your system. Click not to retain your old preference settings.
Please launch Adobe PostScript Driver Installer.
Installing AdobePS Driver for a Macintosh
1.
Locate the AdobePS Installer folder.
2.
Select the language folder you would like to install.
3.
Double-Click on AdobePS Installer icon.
4.
After reading the License agreement click on Accept to continue.
5.
Select the Install location from the Install Location drop-down box.
6.
Click Install.
7.
Click Restart.
8.
Reboot your computer.
Setting Up the Roland ColorChoice
1.
Use a USB cable to connect the Macintosh and the PC-12, then turn on the PC-12.
2.
Double-Click on RCC for PC-12.
3.
Select a printer model.
4.
Click Next.
5.
Make sure that USB is displayed for the [Ports] output device, and that ColorCAMM PC-12 is displayed
as connected to [Printers].
6.
Click OK.
Creating a Desktop Printer
1.
From the Apple menu select Chooser and then highlight AdobePS.
2.
Locate your PostScript printer. It should say ColorCAMM PC-12 RIP@Computer, “Computer” is the
name of your Macintosh.
3.
Click Create. You are prompted to select a PPD (PostScript printer description) named ‘AmPC12.ppd’.
4.
Click OK.
5.
Select Standard Memory.
6.
Click OK.
11
Uninstalling the Software [Macintosh]
1.
Quit the Roland ColorChoice Software.
2.
Drag the RCC for PC-12 Folder into the Trash.
3.
Open the System folder.
4.
From the Preferences folder, drag the files named ‘RCC for PC-12 Preferences’ and ‘RCC for PC-12
Prefs’ into the Trash.
5.
Locate and open the ‘Extensions’ folder. Drag the spooler file named ‘Am_ColorCAMM PC-12’ into the
Trash. If ‘RDG PC-12 USBClassDriver’ file, located within the ‘Extensions’ folder, drag the Driver file
named ‘RDG PC-12 USBClassDriver’ into the Trash. From the ‘Printer Descriptions’ folder, located
within the ‘Extensions’ folder, drag the PPD file named ‘AmPC12.ppd’ into the Trash.
6.
Restart your computer.
7.
Hold down the Option key while you empty the Trash. The software is now uninstalled.
12
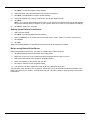
Getting Started
[Windows]
The Roland ColorChoice is automatically launched each time you start your computer. However, you will need
to view the Print Monitor in order to work with it. To view the Print Monitor, double click on the Roland
ColorChoice Software icon located in the lower right corner of your computer’s monitor.
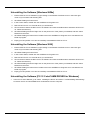
[Macintosh]
The Roland ColorChoice is automatically launched each time you print or you may double-click Roland
ColorChoice Software icon. The Roland ColorChoice is will open the print monitor window.
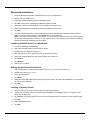
Using the RIP Software
You can control every facet of job management from the Print Monitor. The Print Monitor is essentially a
queue, listing all the files that are waiting to be printed.
Jobs appear in the queue in the order that they were received. For each job, the following information is
displayed:
Job Name—the name of the file, including any extensions.
Status—the current status of the job, either Holding, RIPing (the process of converting images to a
series of minute dots so that they can be printed), or Printing.
Copies—the number of copies to be printed.
13
Media—the media on which the job will be printed.
File Type—the file type of the selected job.
To quit the RIP Software program when you are in Windows, right click on the icon, and then select Quit from
the menu that appears. Once you quit in this fashion, you must either restart your computer or use the ‘Start’
menu in order to restart the RIP Software.
Printing a Test File
To insure that your software is properly installed and that a connection to the printer is established, it is
recommended that you create a test print. When you do this a small test file is sent to the Print Monitor and
then printed. Once you’ve successfully printed a test file, be sure to read the rest of this document to learn
about other features
To Print a Test
From the Setup Menu select Test Print. A small PostScript test file is sent to the Print Monitor and then
printed.
14
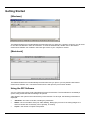
Menus
You may access a number of RIP Software’s functions using the menus at the top of the main window.
File Menu
The File menu allows the user to add a job, save a job as a different format, send, pause, or abort a job or
stop the process by exiting. The following chart defines each of these options:
Add Job
The Add a Job command allows you to add a job directly to the Print Monitor.
To Add a Job
1. From the File menu select Add Job. The Add Job dialog box displays.
2.
From the Add Job dialog select the path of the job you would like to add.
3.
Click Open. The job is added to the printer queue.
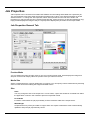
Job Properties
Job Properties can be accessed from within Roland ColorChoice and are settings associated with a particular
job. The Job Properties come from either the Printing Properties set in client, or the Setup Properties set in
RIP Software Server. To change the Job Properties, select Job Properties from the File menu. Within Job
Properties you may preview the job by selecting page preview, layout preview or no preview (Macintosh only).
Page preview displays the image of the job. Layout preview displays the job relative to the output media. (See
the Job Properties General Tab section for additional details).
Send
Once jobs are in the Print Monitor, you can select individual jobs or groups of jobs for printing. When selecting
a group of jobs, they are printed in the order that they appear in the queue.
To Send a Job to Print
1. Click on the job or jobs you would like to print.
2.
From the File Menu select Send to RIP.
Abort
Although a job cannot be paused during the RIP process, the job can be aborted. After aborting a job, all
RIP’ed information is lost and the process must start again.
To Abort a Print Job
1. Click on the job you would like to abort.
2.
From the File Menu select Abort.
Exit/Quit
The Exit/Quit command ends the program and closes the Print Monitor window.
To Exit Program
From the File menu select Exit/Quit.
Edit Menu
The Edit menu allows the user to select all files, delete a file, and change preferences.
15
Select All
The Select All command selects all files in the print queue.
Delete
The Delete command allows deletion of specifically selected files.
Preferences
Preferences allows access to default settings, including what to do with files after printing and to specify the
units of measurement. These preferences, in conjunction with Setup Properties, form the default print settings.
Default print settings are applied to any job(s) that is added using the Add Job command. Settings in
Preferences are overridden when printing from a design application (ex. Adobe Illustrator).
CPSI Scratch Directory [Macintosh Only]
This is the location used to store information during processing. If you have multiple drives, you can use
the Browse button to relocate the Scratch Directory to the drive with the most storage space. Doing this
will allow you to process larger files without generating memory errors.
After Out put
Tells the Print Monitor what to do with the job after it has finished printing, either Hold or Delete.
Units
Select the desired unit of measurement.
Tool buttons
The following buttons, which you can use to make settings in the same way as with the menu items described
earlier, appear in the Print Monitor dialog box.
Add Job
Delete
Send
Abort
Mouse menus
Selecting the queued job in the Print Monitor then holding down the mouse button (Macintosh) or right-clicking
(Windows) displays a menu that you can use to make settings in the same way as with the menu items
described earlier.
[Windows]
[Macintosh]
16
Setup Menu
A setup consists of a device and its associated properties. Items in the Setup menu apply to the selected
setup. Select a setup by clicking on the setup icon in the setup area of the main window.
Change Setup
The Change Setup command allows you to access and follow the same wizard-driven steps contained in the
original installation. Switch back to the original setup using the Change Setup command again.
Setup Properties
Setup Properties displays the default print settings for your printer.
To View Setup Properties
From the Setup menu select Setup Properties The Setup Properties dialog opens with the General tab
selected (See Setup Properties section).
Test Print
The Test Print command allows you to ensure that your software is properly installed and that the connection
to the printer is established.
To Print a Test
From the Setup Menu select Test Print. A small PostScript test file is sent to the Print Monitor and then
printed.
Test Cut
The Test Cut command allows you to ensure that your software is properly installed and that the connection to
the printer is established.
To Cut a Test
From the Setup Menu select Test Cut. A small Cut test file is sent to the Print Monitor and then sent.
View Menu
The View Menu allows the user to show or hide the Toolbar, view a RIP Log or Clear a RIP log.
To Show or Hide the Toolbar (only Windows)
From the View menu Select Toolbar to show the Toolbar select Toolbar again the hide the Toolbar.
View RIP Log
The View RIP log displays a text file containing a record of the RIP processes.
Clear RIP Log
The Clear RIP log purges information from the RIP log.
17
Printing
Adding Jobs to the Print Monitor
The Jobs Management area of RIP Software allows you to add jobs to the Print Monitor.
To Add a Job
1.
From the File menu select Add Job.
2.
Select the job you would like to add then click on Open.
3.
To send a job to the printer, select the job from the Print Monitor’s queue and then choose Print from the
File menu.
Deleting Jobs from the Print Monitor
A job may be deleted from the job list before or after it is cut or printed.
To Delete a Job
1.
Select the job or jobs that you want to delete by selecting them in the Print Monitor’s queue.
2.
From the File menu choose Delete.
Aborting a Print Job
Although a job cannot be paused during the RIP process, the job can be aborted. After aborting a job, all
RIP’ed information is lost and the process must start again.
To Abort a Print Job
1.
Select the job to abort by selecting it in RIP Software’s Print Monitor window.
2.
From the File menu choose Abort or click the icon Abort Job
Printing Directly from an Application
Once you have specified setup properties, you can print directly from your application without adjusting any
values from the Print Monitor menus.
Most applications have Page setup and Print Command options within the File Menu. Make sure you select
the correct printer setup that you have installed. Please consult your DTP application for more details on the
print command.
Printing from a Client on your Network
If you have a network of PCs and have completed the additional setup instructions for network printing, you
can print from any client on your network. When you do this, jobs arrive in the ‘Hot’ folder of the server and are
processed like any other job.
There are two ways to send jobs to the server for processing:
Dragging the file directly into the server’s shared ‘Hot’ folder
OR
Using the design application’s Print to File function and selecting the server’s ‘Hot’ folder as your
destination
18
The ‘Hot’ folder is located as follows :
[Windows] :
C:\Program Files\RCC for PC-12\Jobs\Roland\CCAMM PC12
[Macintosh] :
RCC for PC-12 : Jobs : ColorCAMM PC-12
19
Setup Properties
The Setup Properties window can be accessed from within RIP Software Server and are settings used to
process jobs that do not have properties of their own associated with them. Setup Properties contain settings
for a specific output device. If a job is placed in an output device’s Hot Folder, and it does not contain any
properties, then the settings from the Setup Properties will be applied to the job.
To Access Setup Properties.
From the Setup menu, select Setup Properties. The setup properties window displays.
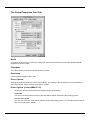
The Setup Properties General Tab
The General tab displays standard Windows printer settings associated with printer port selection and media
size.
Manufacturer
Manufacturer displays the manufacturer of your printer.
Model
Model displays the name and model of your printer.
Setup Name
The setup name displays the name of your printer.
20
Media Size
Select a media size that is currently loaded into your printer. You can specify custom media sizes by selecting
other from the list and then editing the Height and Width values. Media Size displays the size of the media
being used, not the total printable area.
Printable Area
The printable area displays the area that is available for printing. The values in this area may be different from
the values in the media size. The application calculates the printable area by applying margins to the media
size.
Margin
Displays the margins from the edges of the media. Margins are the areas on the edges of the media where
nothing will print.
Ports [only Windows]
Selects the port to which the printer is connected. Only change the Port selection if you physically change the
port to which your printer is connected. Ports may be found on the General within Windows.
USB
Only USB is supported as the output port for this printer.
The Setup Properties Ports Tab [only Macintosh]
Ports
Selects the port to which the printer is connected. Only change the Port selection if you physically change the
port to which your printer is connected. Ports may be found on the Ports tab within Macintosh.
USB
Only USB is supported as the output port for this printer.
21
The Setup Properties Print Tab
Media
This option allows the user to select the media type output will be printed on. ICC profiles will automatically
update to the correct profile.
Print Mode
This option allows you to select the print quality for output.
Resolution
This is fixed at a display of 600 x 600.
Driver Options
Clicking this button launches the Driver Options dialog. The settings in Driver Options will vary depending on
your output device. Some common driver options include:
Driver Options (ColorCAMM PC-12)
Clicking this button launches the Driver Options dialog, shown below.
Print Order
You can set several modes concerning how the ribbons will be used during the printing process.
Process Color Order
Here you can select the order that the ribbons will be used during printing. You can set the print order for
each color mode (CMY, CMYK).
22
Print White Color First
When this option is checked, the white color will be printed first using the white ribbon and then the
process colors and spot colors will be printed.
Mirror Printing Order
When this option is checked, the order of the ribbons will be inverted. This feature should be used to
print in transparent films. Notice that the image itself will not be inverted. To invert the image, you have
to use the Mirror button on Job Properties.
Page Spacing
This specifies a page spacing between 10 and 200 mm.
When the Crop Mark check box is selected, the Page Spacing setting is from 30 to 200 mm.
Pause for Spot Colors
When using spot color ribbons and this option is checked, the printer will pause between each spot color.
The printing can be resumed clicking on correspondent dialog box.
Pre-Feed
To ensure that the required page length is available, this performs feed before printing starts.
Print Crop Mark
Select this to use crop marks.
Note: When at the General tab Send is set to Print & Contour and printing and cutting are carried out at
the same time, no crop marks are printed, regardless of whether this check box is selected or cleared.
Advance After Plot
Moves the media forward and resets the origin after the printing is completed.
Glossy Finisher
When this option is checked, a coating with special ribbon will be done. This option is enabled when wax
ribbons is being used.
Cut Media After Printing
Check this option to cut the media after the output is complete.
Adjustment
This lets you adjust pieces of media individually. For detailed information, go to the PC-12 User's
Manual, and in "Part 5 Many Kinds of Printing and Settings," under "5.2 Driver Settings," refer to
"Adjusting a [Media Type] Item."
Micro Feed
This performs fine adjustment of the line-feed pitch. The amount of adjustment when set at the
maximum value of 10 is approximately 0.1mm(0.004 in.).
Density
This performs fine adjustment of density.
Foil Undercoating
When this option is selected, CMYK colors are printed as an undercoat before foil colors are printed.
This option is selected by default, so do not clear the selection. If a CMYK undercoat is not printed, the
foil colors may fail to be printed.
23
Dither type
This is displayed invariably when Print Mode is set to Angled Screen.
Screen
This becomes settable in an interlocking fashion with the foregoing Dither type item, and displays a dialog box
for defining a native PostScript screen.
Perform Color Correction
Checking this setting activates the color correction settings. If this setting is not checked, incoming jobs are
assumed to already have color correction.
ICC input profile
Input profiles are used to convert the image into a neutral color space. Once the image is in a neutral color
space, then the output profile is used to convert the image into the color space of the output device. To add an
ICC input profile from another source, click the Add button. Three types of ICC input profiles can be specified:
CMYK ICC input profile
The CMYK input profile defines all elements of a job that are in CMYK color mode. If your job is in the
RGB color mode, then you should leave the CMYK input profile set to the Generic setting. If your file
contains images in both the CMYK and the RGB mode, then the CMYK input profile will be applied to the
CMYK images and the RGB input profile will be applied to the RGB images. If your image is in the
CMYK color mode, then your file was previously separated for output to a specific output device.
Whenever possible, use the profile for the device to which the elements were separated, as the CMYK
input profile. If you do not have the profile, try similar profiles or profiles for common ink sets (such as
CMYK SWOP, or High End SWOP). If you are trying to match Pantone colors, it may also be appropriate
to select High End SWOP as your CMYK input profile, because Pantone Process CMYK values were
designed for output to the SWOP ink set.
RGB ICC input profile
The RGB ICC input profile defines the RGB source for all of your RGB files. An RGB input profile can be
for either a monitor or a scanner. If you scanned your file directly to a folder, it is best to select your
scanner calibration as the RGB input profile. If you have done any on- screen color correction, you
should select your monitor as the RGB input profile. If you do not have a monitor profile, it is generally
safe to select the Generic ICC input profile. The Generic profile assumes that you have a Trinitron
monitor with a temperature of D65 and a gamma of 1.8. Selecting the correct RGB source will insure that
the RGB data you see on-screen will be matched to the output printer.
Gray ICC input profile
The Gray ICC input profile defines the Grayscale source for all of your grayscale files. This may refer to
either a grayscale scanner or a grayscale monitor.
ICC output profile
ICC output profile- Output profiles are created for the combination of ink and media, and resolution and dither
type of your output device. When selecting a profile, be sure to select the profile that matches these criteria.
For output devices that print at multiple resolutions, RIP Software provides profiles for each of those
resolutions. Choosing a profile with the wrong resolution will severely effect the output. Profiles with different
dither types will not greatly effect your output; however, they may cause slight shifts in color. To add an ICC
output profile from another source, click the Add button. Click the Info button for information pertaining to the
ICC output profile that has been chosen under Profile.
Bitmap/Vector Rending Intent
Rendering intent- before a file can be RIPed, its ICC profile must be selected so that the RGB color
space of the file can be mapped or translated into to CMYK colorspace. How the colorspace gets
mapped is determined by the color rendering intent that you select. The rendering intent selected in the
Bitmap rendering field will be applied to bitmap images in your job file. The rendering intent selected in
24
the Vector rendering intent field will be applied to vector images in your file. Choose from one of the
following rendering intents:
Perceptual
This intent is best for photographic images. Colors outside of the output device's gamut are either
clipped or compressed to fit the output device’s color space
Relative Colorimetric
This intent is best for images, such as logos, where the original image needs to match the output.
Colors that fall outside of the output device's gamut are clipped. This method may reduce the total
number of colors available. The white point of Relative Colorimetric is always zero.
Saturation
This intent is best for graphic images, such as vector art, where vivid colors are more important
than true color matching. Colors outside of the output device's gamut are mapped to colors at the
extent of the gamut's saturation. Color's that fall within the gamut of the output device are shifted
closer to the gamut's saturation extent. This rendering intent may also be used to boost colors
within a photographic image.
Absolute Colorimetric
This intent is similar to Relative Colorimetric, but has a different white point value. Absolute
Colorimetric represents colors relative to a fixed white point value of D50. For example, the white
of paper A will be simulated when printing on paper B. This intent is best for color proofing.
Spot Color
This intent is was created to supplement the Saturation intent. Spot Color maps colors similarly to
the Saturation rendering intent, but Spot Color rendering intent produces the greatest saturation
possible, and should not be used with photographic images.
Color Mode
If your output device supports multiple color modes, then you can select one of the supported color modes
here.
The Setup Properties Cut Tab
The Cut tab displays cut settings.
Resolution
This display is fixed at 1,016.
Passes
Specify how many times the blade will move over each line.
Curve Quality
Select how smooth you would like the curves to be.
Cutter Driver Options (ColorCAMM PC-12)
Clicking this button launches the Cutter Driver Options dialog box, shown below.
Custom Head Tab
Recommendation Cut
This specifies the cutting conditions.
25
Speed
Set the cutting speed. Usually setting a lower speed will result in longer cut times, but will produce
higher quality results.
Force
This sets the cutting pressure.
For more information about settings for cutting, go to the PC-12 User's Manual, and in "Part 3 Getting
Ready," refer to "3.4 Installing and Adjusting the Blade."
Feed
This adjusts the amount of feed for cutting. The amount of adjustment when set at the maximum value
of 50 is approximately 1.5%.
X-Position
This adjusts the cutting position in the vertical direction. The amount of adjustment when set at the
maximum value of 50 is approximately 3mm(1/8 in.).
Y-Position
This adjusts the cutting position in the vertical direction. The amount of adjustment when set at the
maximum value of 50 is approximately 3mm(1/8 in.).
For more information about Cutting Feed, Cutting X Position, and Cutting Y Position, go to the PC-12
User's Manual, and in "Part 5 Many Kinds of Printing and Settings," under "5.2 Driver Settings," refer to
"Adjusting a [Media Type] Item."
Reset
This restores values to their defaults.
The Color Tab
The Color tab displays settings associated with the color quality of the image. Using the sliders on the tab, you
can adjust the image quality. The sliders that appear vary, depending on which color mode is selected on the
Print tab. In all modes, you can adjust the overall image contrast using the Contrast slider.
26
Job Properties
Job Properties can be accessed from within RIP Software and are settings associated with a particular job.
The Job Properties come from either the Printing Properties set in client, or the Setup Properties set in RIP
Software Server. To change the Job Properties, select Job Properties from the File menu. Within Job
Properties you may preview the job by selecting page preview, layout preview or no preview (Macintosh only).
Page preview displays the image of the job. Layout preview displays the job relative to the output media.
Job Properties General Tab
Preview Mode
You can display the image in Page mode or view it in Layout Preview mode, which displays the image as it
will print on the media. Simply select the preview mode you want from the list.
Media Size
Select a media size that is currently loaded into your printer. You can specify custom media sizes by selecting
other from the list and then editing the Height and Width Values.
Size
Scale
You may change the size of the output here. In most cases, a job’s size should be controlled from within
the application in which it was created to prevent unexpected results.
Fit to Media
Increases or decreases the job proportionally to fit the maximum width of the output device.
Width/Height
Accepts direct entry of the job’s width or height. When one aspect is altered the other is automatically
updated to keep the job proportionally correct.
27
Copies
Number
You may change the number of copies of the job to be output.
Spacing
You may change the spacing between the copies that are output.
Output at origin- Select this option to output the job at the machine’s origin on the edge of the media.
Layout
Output at origin
Select this option to output the job at the machine’s origin on the edge of the media.
Output in center
Select this option to output a job in the center of the media.
Output in the center of media
Select this option to output the job in the center of a sheet of media.
Offset W
Select this option to set an offset distance from the machine’s origin.
Offset H
Select this option to set an offset from the leading edge of the media.
Horizontal Mirror
Click to mirror the job horizontally.
Rotate
Click to rotate the job 90 degrees.
After Output
Choose what to do with the job after it is done processing, either Hold or Delete.
Send
If you have a device which prints and cuts, you can specify to send the print and the contour, the print only, or
the contour only.
Job Properties Print Tab
For more information on Print Tab options, refer to the Print Tab section in Setup Properties section of this
manual.
The Color Tab
For more information on Color Tab options, refer to the Color Tab section in Color Tab section of this manual.
28
Advanced Printing Procedures [Windows]
If your program is not listed, refer to a section on a similar program.
CorelDRAW 8 [Windows]
1.
From the Roland ColorChoice Print Monitor click Setup>Setup Properties. Then click the Print tab.
2.
Make sure the Perform Color Correction checkbox has a check in it.
3.
In the ICC input profile area, select appropriate CMYK and RGB profiles. If you know which profiles your
application is using, select that profile. If you don’t, use the default setting.
4.
For the ICC output profile, select the appropriate ink/media combination. Also select a rendering intent to
use. Click the Info button to see a full description of the selected profile.
5.
Click OK in the Setup Properties dialog box.
6.
In CorelDRAW, select Print Setup. Select your printer from the ‘Name’ field.
7.
Click the Properties button. Choose a page size from the Paper field or select Custom Page for a custom
page size.
8.
If you choose a Custom Page, click on the Custom button and enter the custom size in the paper width
and height fields. The paper size should match the size entered in Corel.
9.
Click OK in the Printer Properties dialog.
10.
Click OK in the Print Setup dialog.
11.
Click File>Print. Then select your printer from the Name menu.
12.
Select the PostScript tab and then select PostScript 3 and uncheck Output Bitmaps in RGB.
13.
Select the Miscellaneous tab and uncheck Use Color Profile.
14.
Click Print.
CorelDRAW 9 [Windows]
1.
From the Roland ColorChoice Print Monitor click Setup>Setup Properties. Then click the Print tab.
2.
Make sure the Perform Color Correction checkbox has a check in it.
3.
In the ICC input profile area, select appropriate CMYK and RGB profiles. If you know which profiles your
application is using, select that profile. If you don’t, use the default setting.
4.
For the ICC output profile, select the appropriate ink/media combination. Also select a rendering intent to
use. Click the Info button to see a full description of the selected profile.
5.
Click OK in the Setup Properties dialog box.
6.
In CorelDRAW, select Print Setup. Select your printer from the ‘Name’ field.
7.
Click the Properties button. Choose a page size from the Paper field or select Custom Page for a custom
page size.
8.
If you choose a Custom Page, click on the Custom button and enter the custom size in the paper width
and height fields. The paper size should match the size entered in Corel.
9.
Click OK in the Printer Properties dialog.
10.
Click OK in the Print Setup dialog.
11.
Click File>Print. Then select your printer from the Name menu.
12.
Select the PostScript tab and then select PostScript 3.
13.
Select the Misc tab and uncheck Use color profile.
For "Output color bitmap as" choose CMYK.
29
14.
Click Print.
Illustrator 8.0 [Windows]
The Kodak Color Management System must be installed to output successfully from Illustrator 8 to Roland
ColorChoice Software.
1.
From the Roland ColorChoice Print Monitor click Setup>Setup Properties. Then click the Print tab.
2.
Make sure the Perform Color Correction check box has a check in it.
3.
Click OK in the Setup Properties dialog.
4.
In Illustrator, go to File>Document Setup.
5.
Select ‘Use printers default screen.’
6.
Select ‘Use Print Setup’.
7.
Click the Print Setup button. Print Setup screen appears.
8.
Select your printer in the Name field.
9.
Click the Properties button.
10.
Choose a paper size from the ‘Paper’ field or select a Custom page for a custom page size.
11.
If you choose a custom page size, you may enter the custom size by clicking the Custom button and
entering the width and height.
12.
If you choose custom page, click OK to Custom Defined Size dialog.
13.
Click OK in the Properties dialog.
14.
Click OK in the Print Setup dialog.
15.
Click OK in the Document Setup dialog.
16.
If you want your monitor to soft-proof CMYK output, go to File>Color Settings and check ‘Simulate print
colors on display’.
17.
Go to File>Print.
18.
If not dimmed, set Output to Composite.
19.
Set PostScript to Level 3.
20.
Check Force Fonts to Download.
21.
Click OK to print.
Illustrator 9.0 [Windows]
The Kodak Color Management System must be installed to output successfully from Illustrator 8 to Roland
ColorChoice Software.
1.
From the Roland ColorChoice Print Monitor click Setup>Setup Properties. Then click the Print tab.
2.
Make sure the Perform Color Correction check box has a check in it. Also, if you're using the
transparency feature of Illustrator 9.0 or the like (described later in this document), we recommend
setting "Bitmap rendering intent" and "Vector rendering intent" to the same value. Color stitching may
occur if the settings are different. (For more information about color stitching, refer to "The Transparency
Feature of Illustrator 9.0" later in this document.)
3.
Click OK in the Setup Properties dialog.
4.
In Illustrator, go to File>Document Setup. From the pop-up menu, choose Transparency.
5.
The Quality/Speed slider should normally be left at the center position. If there problems such as missing
portions of the artwork, move the slider one tick to the left. (If you are performing printing only, move it all
the way to the left.)
30
6.
Next, from the pop-up menu, choose Print & Export.
7.
For Options, select Use Printer's Default Screen.
8.
Set Rasterization Resolution to around 100 to 300 dpi. If you are going to perform enlarged printing with
Roland ColorChoice, set this to an even larger value. Larger values yield correspondingly higher image
quality, but processing time also takes correspondingly longer. Set Mesh to a value that is the same or
about half of this.
9.
Next, from the pop-up menu, choose Artboard.
10.
Select ‘Use Print Setup’.
11.
Click the Print Setup button. Print Setup screen appears.
12.
Select your printer in the Name field.
13.
Click the Properties button.
14.
Choose a paper size from the ‘Paper’ field or select a Custom page for a custom page size.
15.
If you choose a custom page size, you may enter the custom size by clicking the Custom button and
entering the width and height.
16.
If you choose custom page, click OK to Custom Defined Size dialog.
17.
Click OK in the Properties dialog.
18.
Click OK in the Print Setup dialog.
19.
Click OK in the Document Setup dialog.
20.
Go to File>Print.
21.
If not dimmed, set Output to Composite.
22.
Set PostScript to Level 3.
23.
Check Force Fonts to Download.
24.
Click OK to print.
PageMaker 6.5 [Windows]
These directions assume that you have Kodak ICC Color Management installed.
Before starting Adobe PageMaker, copy your printers’ PPD files to PM65\RSRC\USENGLSH\PPD4 directory.
The PPDs can be found on your installation CD in the ‘Ppd’ folder.
1.
From the Roland ColorChoice Print Monitor click Setup>Setup Properties. Then click the Print tab.
2.
Make sure the Perform Color Correction checkbox has a check in it.
3.
In the ICC input profile area, select appropriate CMYK and RGB profiles. If you know which profiles your
application is using, select that profile. If you don’t, use the default settings.
4.
For the ICC output profile, select the appropriate ink/media combination. Also select a rendering intent to
use. Click the Info button to see a full description of the selected profile.
5.
Click OK to Setup Properties.
6.
In PageMaker go to File>Document Setup.
7.
From the Page size field select your paper size or choose Custom for a custom page size.
8.
If you choose Custom page size, enter the custom size in the height and width fields.
9.
Select your printer’s resolution as the Target Output Resolution. If it is not available, select the next
highest value.
10.
Select your printer in the Compose to printer menu. Then click OK.
11.
Go to File>Preferences>General. Click the ‘CMS Setup...’ button.
31
12.
From Color Management select OFF.
13.
Click OK to Color Management System Preferences. Click OK to Preferences.
14.
Go to File>Print.
15.
From the PPD menu, select the PPD for your printer.
16.
Click the Paper button. From the Size menu, select your paper size. Select Custom for a custom size.
Enter the width and height of the custom paper size in the new Custom Paper Size dialog. Your paper
size should match your job size. Click OK.
17.
Click the Options button. From the Send image data menu select Normal.
18.
From download fonts select PostScript and TrueType.
19.
Click the Color button. Select Composite and Color.
20.
From Optimized Screen Select Default.
21.
Click the Features button. Select any other printer specific settings you want.
22.
Click Print.
Photoshop 5.0 [Windows]
1.
From the Roland ColorChoice Print Monitor click Setup>Setup Properties. Then click the Print tab.
2.
Make sure the Perform Color Correction checkbox has a check in it.
3.
In the ICC input profile area, select appropriate CMYK and RGB profiles. If you know which profiles your
application is using, select that profile; if you don’t, use the default settings.
4.
For the ICC output profile, select the appropriate ink/media combination. Also select a rendering intent to
use. Click the Info button to see a full description of the selected profile.
5.
Click OK to Setup Properties.
6.
In PhotoShop go to File>Page Setup.
7.
From the Name field select your printer.
8.
Click the Properties button. Choose a paper size from the Paper field or select a Custom page for a
custom page size.
9.
If you choose a custom page size, you may enter the custom size by clicking the ‘Custom’ button and
entering the width and height. The paper size should match the canvas size created in Photoshop. Click
OK to Custom Page Size.
10.
If you choose a custom page, click OK to Custom Defined Size dialog.
11.
Click OK to Printer Properties.
12.
Click the Screen button.
13.
Check the box for ‘Use Printer’s Default Screens.’
14.
Click OK to Page Setup dialog.
15.
Go to File>Print.
16.
Choose RGB from the ‘RGB Color’ color if your file is an RGB file.
17.
Choose Binary from the Encoding selection.
18.
Uncheck PostScript Color Management.
19.
Click OK to print.
32
Contour Cutting and Spot Color Printing [Windows]
Using a ColorCAMM PC-12 you can print objects and then cut a contour line around them. You can also print
using a Spot Color ribbon. To use such features, you have to install and use special color libraries in your
design application such as Illustrator or QuarkXPress. No special settings or changes are needed on Roland
ColorChoice.
You can create objects using the following Spot colors. All these objects will be printed using a special ribbon.
(only ColorCAMM)
Gold_Resin
Siver_Resin
Red_Resin
Blue_Resin
White_Resin
Gold_Foil
Silver_Foil
Finish
: Gold (Resin)
: Silver (Resin)
: Red (Resin)
: Blue (Resin)
: White (Resin)
: Gold (Wax)
: Silver (Wax)
: Finish (Wax)
Contour cutting lines can also be created using a special color.
CutContour
On your Roland ColorChoice Installation CD, you will find Color Library files for each application. If you are
using PhotoShop, you will not be able to print in Spot Colors and contour cut.
Illustrator 8.0 [Windows]
1.
Copy a file 'ColorCAMM PC-12.ai', located in the ‘SpotColor Library\ColorCAMM PC-12\Illustrator’ folder
of the Installation CD to the Swatch Libraries folder of Illustrator.
2.
Start Illustrator.
3.
Open the file that you want to contour cut, if it’s not already open.
4.
Select 'ColorCAMM PC-12' in the Windows\Swatch Libraries menu to open the library.
All spot and “CutContour” color appear in the library.
5.
Select “CutContour” as the color for the paths that you would like to cut.
6.
To make an object that will be printed using a spot color, just fill it using a Spot Color from the library.
You can change the color of the contour line by changing the Swatch Options. Remember, the color
mode should always be Spot Color.
7.
Print the file as you normally would.
If the swatch library is unavailable for some reason, you can create a new swatch. Be sure to begin the
swatch name with “CutContour” and set the color mode as Spot Color. We recommend that you specify a
color other than the default color to better see the contour line on your display, and that it also be a dashed
line. When defined like this, the line will always be treated as a contour, regardless of its line width.
Illustrator 9.0 [Windows]
1.
Copy a file 'ColorCAMM PC-12.ai', located in the ‘SpotColor Library\ColorCAMM PC-12\Illustrator’ folder
of the Installation CD to the Swatch Libraries folder of Illustrator.
2.
Start Illustrator.
3.
Open the file that you want to contour cut, if it’s not already open.
4.
Select 'ColorCAMM PC-12' in the Windows\Swatch Libraries menu to open the library.
All spot and “CutContour” colors appear in the library.
5.
To make a cutting line, select “CutContour” as the color for the paths that you would like to cut.
Transparency and effects such as Blur or Drop Shadows are not applied at all to cutting lines. The
33
cutting line may be printed. You can easily check which path the effects are applied to by going into
Illustrator 9.0, going to Window, and using Show Appearance to display the Appearance palette.
6.
To make an object that will be printed using a spot color, just fill it using a Spot Color from the library.
You can change the color of the contour line or spot color by changing the Swatch Options. Remember,
the color mode should always be Spot Color.
7.
From File, open Document Setup, then from the pop-up menu, choose Transparency. Make sure the
Quality/Speed slider is at the center or at the second tick from the left. If it is at any other position, the
cutting line is printed.
8.
In Illustrator 9.0, go to File and open Print. If it is set to Print&Contour or to Contour Only, be sure to
select the check box for "Ignore Overprinting in Composite Output."
9.
Print the file as you normally would.
Printing and Cutting Limitations in Illustrator 9.0
If there are objects on the artboard to which Transparency or any effects such as Blur or Drop Shadows are
applied, the cutting line may be printed. When you are performing printing and cutting, you normally do not
use Transparency or effects such as Blur.
Workarounds for this problem and information about effects that are subject to limitations are described in
detail in the supplemental "Printing and Cutting Limitations and Workarounds in Illustrator 9.0" and "The
Transparency Feature of Illustrator 9.0."
34
CorelDRAW 8 [Windows]
Setting up the palette
1. Copy a file 'userinks.cpl', located in the ‘SpotColorLibrary\ColorCAMM PC-12\CorelDraw8’ folder of the
Installation CD to the following folder to overwrite the same file ‘Corel\Graphics8\Custom\Palettes’. Or, if
you want to keep the existing 'User Defined Inks', please add a new color by following the remaining
steps:
2.
Click Tools>Palette Editor.
3.
Open the 'User Defined Inks' palette by exploring following folders:
4.
Corel\Graphics8\Custom\Palettes\userinks.cpl
5.
Create a new color in the color palette with CMYK model, and press the 'Add >>' button. The new color
is named 'unnamed color'. For the Selected Palette Color name, type in the name of a spot color listed in
the ColorCAMM PC-12 spot-color library described earlier. Any other name should not be used.
Using the Palette
1. Select objects that you want to cut.
2.
Go to Tool bar>Outline Tool>Outline Color..
3.
Click the 'Custom Palettes' button in 'Outline Color' dialog.
4.
Select User Defined Inks in the Type list.
5.
Select “CutContour” to apply it to the selected objects.
Using the Palette to make an object that will be printed in Spot Color
1. Select objects that will be printed in spot Color.
2.
Go to Tool bar>Fill Tool>Fill Color.
3.
Click the ‘Custom Palettes’ button in ‘Uniform Fill’ dialog.
4.
Select User Defined Inks in the Type list.
5.
Select a Spot Color to apply it to the selected objects.
CorelDRAW 9 [Windows]
1.
From the Window menu, go to Color Palettes and choose Palette Editor.
The Palette Editor dialog box appears.
2.
Use the shortcut menu in the Palette Editor dialog box to choose User Defined Inks.
3.
Click Add Color.
The Select Color dialog box appears.
4.
Click the Models tab to display it.
5.
For Model, choose CMYK, then specify the color you want.
For the color used to specify the cutting line, it's a good idea to specify a little-used color other than a
Standard Color. Also, for a spot-color ribbon, choose a color that makes the color of the spot-color
ribbon easy to recognize on screen.
6.
Click Add To Palette, then click Close.
The Palette Editor dialog box returns.
7.
At the Palette Editor dialog box, choose the color you added in step 5.
8.
For the Selected Palette Color name, type in the name of a spot color listed in the ColorCAMM PC-12
spot-color library described earlier.
35
9.
Click [OK].
* For CorelDRAW 9, registered color names are stored in Custom Palettes. To specify a spot color to be
set from the next time, use Custom Palettes to make the selection.
* The file userinks.cpl in the SpotColor Library\ColorCAMM PC-12\CorelDraw8 folder on the Roland
ColorChoice Installation CD-ROM is exclusively for CorelDRAW 8. It cannot be used with CorelDRAW 9.
Using the Palette
1. Select objects that you want to cut.
2.
Go to Tool bar>Outline Tool>Outline Color.
3.
Click the 'Custom Palettes' button in 'Outline Color' dialog.
4.
Select User Defined Inks in the Type list.
5.
Select “CutContour” to apply it to the selected objects.
Using the Palette to make an object that will be printed in Spot Color
1. Select objects that will be printed in spot Color.
2.
Go to Tool bar>Fill Tool>Fill Color.
3.
Click the ‘Custom Palettes’ button in ‘Uniform Fill’ dialog.
4.
Select User Defined Inks in the Type list.
5.
Select a Spot Color to apply it to the selected objects.
FreeHand 8 [Windows]
1.
Copy the file ‘ColorCAMM PC-12.bcf’, located in the ‘SpotColorLibrary\ColorCAMM PC-12\FreeHand’
folder to FH8\Usenglsh\Colors folder.
2.
Start FreeHand.
3.
Create a new design file or open an existing file.
4.
Execute Window>Panels>Color List and open the Color List Palette.
5.
Select 'ColorCAMM PC-12' from the 'Options' menu of Color List Palette.“CutContour” will be listed in the
Color Library window.
6.
Click OK. 'Cut Contour' will be added to the Color List Palette.
7.
Use this color to define the cut line.
QuarkXPress 4 [Windows]
1.
Select Edit>Color and click Add from the Default Color dialog.
2.
Execute File>Import and select the file ‘ColorCAMM PC-12 QuarkXPress.qxd’, located in the ‘Spot Color
Library\ Library\ColorCAMM PC-12\QuarkXPress’ folder. (It is best to copy this file to your Hard Disk
before importing it.)
3.
Click "Select All" to move all the items to Use Items and click OK.
4.
Click Save to save the color palette.
5.
Use the added color palette to create the new design.
36
PageMaker 6.5 [Windows]
1.
Copy the file ‘ColorCAMM PC-12.bcf’, located in the ‘Spot Color Library\ColorCAMM PC12\PageMaker6.5’ folder to the Pm6.5\RSRC\Usenglsh\Color folder.
2.
Create a new design or open an existing file.
3.
Click Window>Color and display the Color Palette. Click on the New icon from the Color Palette.
4.
Select ColorCAMM PC-12 from the Color Edit Library pull down menu.
“CutContour” will be displayed in the Color Library window.
5.
Click OK. Color Edit dialog is displayed.
6.
Click OK to close the dialog.
7.
“CutContour” will be added in the Color Palette. Use this palette to define the Cut line.
37
Advanced Printing Procedures [Macintosh]
If your program is not listed, refer to a section on a similar program.
Illustrator 8.0 [Macintosh]
ColorSync 2.x or higher and Kodak Digital Science must be installed when using Illustrator to create CMYK
files.
1.
From the Roland ColorChoice Print Monitor click Printer>Setup Properties. Then click the Print Tab.
2.
Make sure the Perform Color Correction checkbox has a check in it, and that correct output profile and
rendering intent are set.
3.
Click OK to close the Setup Properties dialog box.
4.
Go to Apple menu and select Chooser. Highlight Adobe PS and make sure ColorCAMM PC-12 RIP@...
is selected.
5.
In Illustrator, go to File>Document Setup.
6.
Select Options ‘Use printers default screen’, and then check box for Use Page Setup and click the Page
Setup button.
7.
Choose a standard paper size in the Paper field.
8.
Select Custom Page Default from the pop-up menu if a custom page size is required, and enter your
custom page size. Click the Add button.
9.
Select Page Attribute from the pop-up menu. Select the defined Custom Page in the ‘Paper’ field.
10.
Click OK to AdobePS Page Setting dialog. Click OK to Document Setup dialog.
11.
Go to File>Color Setting and check ‘Simulate print colors on display’ if you want your monitor to softproof CMYK output.
12.
Go to File>Print. Select your printer in the ‘Printer’ field and select the page you want to print, and the
number of copies.
13.
Select Adobe Illustrator 8 from the pop-up menu.
• Set Output to Composite.
• Set PostScript to Level 3.
• Set Data to Binary.
• Check Force Fonts to Download.
14.
Select Printer Specific Options from pop-up menu. If you want the file to be printed automatically select
Print in the After Spooling option. If you want to verify the print mode and profile settings before printing
the file, select Hold. Select Hold in the After Output option, if you want to keep the file in the Print
Monitor.
15.
Click Print to start printing.
Illustrator 9.0 [Macintosh]
ColorSync 2.x or higher and Kodak Digital Science must be installed when using Illustrator to create CMYK
files.
1.
From the Roland ColorChoice Print Monitor click Printer>Setup Properties. Then click the Print Tab.
2.
Make sure the Perform Color Correction checkbox has a check in it. Also, if you're using the
transparency feature of Illustrator 9.0 or the like (described later in this document), we recommend
setting "Bitmap rendering intent" and "Vector rendering intent" to the same value. Color stitching may
occur if the settings are different. (For more information about color stitching, refer to "The Transparency
Feature in Illustrator 9.0" later in this document.)
3.
Click OK to close the Setup Properties dialog box.
38
4.
Go to Apple menu and select Chooser. Highlight Adobe PS and make sure ColorCAMM PC-12 RIP@...
is selected.
5.
In Illustrator, go to File>Document Setup. From the shortcut menu, choose Transparency.
6.
The Quality/Speed slider should normally be left at the center position. If there problems such as missing
portions of the artwork, move the slider one tick to the left. (If you are performing printing only, move it all
the way to the left.)
7.
Next, from the shortcut menu, choose Print & Export.
8.
For Options, select Use Printer's Default Screen.
9.
Set Rasterization Resolution to around 100 to 300 dpi. If you are going to perform enlarged printing with
Roland ColorChoice, set this to an even larger value. Larger values yield correspondingly higher image
quality, but time also takes correspondingly longer. Set Mesh to a value that is the same or about half of
this.
10.
Next, from the shortcut menu, choose Artboard.
11.
Select check box for Use Page Setup and click the Page Setup button.
12.
Choose a standard paper size in the Paper field.
13.
Select Custom Page Default from the pop-up menu if a custom page size is required, and enter your
custom page size. Click the Add button.
14.
Select Page Attributes from the pop-up menu. Select the defined Custom Page in the ‘Paper’ field.
15.
Click OK to AdobePS Page Setting dialog. Click OK to Document Setup dialog.
16.
Go to File>Print. Select your printer in the ‘Printer’ field and select the page you want to print, and the
number of copies.
17.
Select Adobe Illustrator® 9.0 from the pop-up menu.
• Set Output to Composite.
• Set PostScript to Level 3.
• Set Data to Binary.
• Check Force Fonts to Download.
18.
Select Printer Specific Options from pop-up menu. If you want the file to be printed automatically select
Print in the After Spooling option. If you want to verify the print mode and profile settings before printing
the file, select Hold. Select Hold in the After Output option, if you want to keep the file in the Print
Monitor.
19.
Click Print to start printing.
PageMaker 6.5 [Macintosh]
ColorSync 2.x or higher must be installed when using PageMaker to create CMYK files. If, after attempting the
following procedure, you still have difficulty printing, save the file as a PostScript file and add it to the Print
Monitor using the Add Job function.
1.
From the Roland ColorChoice Print Monitor click Printer>Setup Properties. Then click the Print Tab.
2.
Make sure the Perform Color Correction checkbox has a check in it, correct output profiles and rendering
intent are set.
3.
Click OK to close Setup Properties.
4.
Go to Apple menu and select Chooser. Highlight Adobe PS and make sure ColorCAMM PC-12 RIP@...
is selected.
5.
In PageMaker, go to File>Document Setup.
6.
From the Page field select your paper size or choose Custom for a custom page size. If you choose
Custom page size, enter the custom size in the height and width fields.
7.
Select your printer’s resolution as the Target Output Resolution. If it is not available, select the next
highest value. Click OK.
39
8.
Go to File>Preferences>General. Click the ‘CMS Setup...’ button.
9.
From Color Management select OFF.
10.
Click OK to Color Management System Preferences. Click OK to Preferences.
11.
Go to File>Print.
12.
From the PPD menu, select the PPD for your printer.
13.
Click the Paper button. From the Size menu, select your paper size. Select Custom for a custom size.
Enter the width and height of the custom paper size in the new Custom Paper Size dialog. Your paper
size should match your job size. Click OK.
14.
Click the Options button. From the Send image data menu, select Normal.
15.
From Data encoding select ‘Send binary image data.’
16.
From download fonts select PostScript and TrueType.
17.
Click the Color button. Select Composite and Color.
18.
From Optimized screen Select Default.
19.
Click the Features button. Select any other printer specific settings you want.
20.
Click Print.
Photoshop 5.0 [Macintosh]
1.
From the Roland ColorChoice Print Monitor click Printer>Setup Properties. Then click the Print Tab.
2.
Make sure the Perform Color Correction checkbox has a check in it, correct profiles and rendering intent
are set.
3.
Click OK to close Setup Properties.
4.
Go to Apple menu and select Chooser. Highlight Adobe PS and make sure ColorCAMM PC-12 RIP@...
is selected.
5.
In Photoshop go to File>Page Setup. From the ‘Paper’ field select your page size.
6.
Select Custom Page Default from the pop-up menu if a custom page size is required, and enter your
custom page size. Click the Add button.
7.
Select Page Attribute from the pop-up menu. Select the defined Custom Page in the ‘Paper’ field.
8.
Select Adobe Photoshop from the pop-up menu. Click the Screen button.
9.
Check the box for ‘Use Printer’s Default Screen’s. Click OK for Halftone Screen dialog.
10.
Click OK for Adobe Page Setting dialog.
11.
Go to File>Print. Select your printer in the ‘Printer’ field and select the page you want to print, and the
number of copies.
12.
Select Adobe Photoshop from the pop-up menu and set the ‘Encoding’ selection to Binary. Set the
‘Space’ selection to RGB if the file is an RGB file. Also, you must uncheck PostScript Color Management.
13.
Select Printer Specific Options from pop-up menu. If you want the file to be printed automatically, select
Print in the After Spooling option. If you want to verify the print mode and the profile settings before
printing the file, select Hold. Select Hold in the After Output option, if you want to keep the file in the
Print Monitor after the file is printed.
14.
Click Print to start printing.
40
QuarkXPress 3.32 [Macintosh]
1.
QuarkXPress requires a Printer Description File (PDF) to access specific options of the printer. Install
the file ‘Roland ColorCAMM PDF’ from Setup CD>Quark Files to the ‘Quark XPress:PDF’ folder, before
starting QuarkXPress.
2.
From the Roland ColorChoice Print Monitor click Printer>Setup Properties. Then click the Print Tab.
3.
Make sure the Perform Color Correction checkbox has a check in it, correct profiles and rendering intent
are set.
4.
Click OK to close Setup Properties.
5.
Go to Apple menu and select Chooser. Highlight Adobe PS and make sure ColorCAMM PC-12 RIP@...
is selected.
6.
Launch QuarkXPress. If you are using the EFIColor XTension, select Edit>Preferences>EfiColor and
uncheck Use EFI Color.
7.
Go to File>Page Setup.
8.
Choose a standard paper size in the Paper field.
9.
Select Custom Page Default from the pop-up menu if a custom page size is required, and enter your
custom page size. Then enter a Custom Page Name and click the Add button.
10.
Select Page Attributes from the pop-up menu. Select the defined Custom Page in the ‘Paper’ field.
11.
Select QuarkXPress from the pop-up menu. Select Roland ColorCAMM. Do NOT select Roland
ColorCAMM PC-12, or you will not be able to print. Click OK for Adobe PS Page Setting dialog.
12.
Go to File>Print. Select your printer in the ‘Printer’ field and select the page you want to print, and the
number of copies.
13.
Select Printer Specific Options from pop-up menu. If you want the file to be printed automatically, select
Print in the After Spooling option. If you want to verify the print mode and the profile settings before
printing the file, select Hold. Select Hold in the After Output option, if you want to keep the file in the
Print Monitor after the file is printed.
14.
Click Print to start printing.
QuarkXPress 4.04 [Macintosh]
In order to print successfully to QuarkXPress, you will need a special XTension. The name of the XTension is
‘PrintRGB’. This file is available on your Installation CD, in the Quark Files folder. Install the file to the ‘Quark
XPress:XTensions’ folder, before starting QuarkXPress.
1. From the Roland ColorChoice Print Monitor click Setup>Properties. Then click the Print tab.
2.
Make sure the Perform Color Correction checkbox has a check in it, and that correct profiles and
rendering intent are set.
3.
Click Quit to close the Properties dialog.
4.
Go to the Apple menu and select Chooser. Highlight Adobe PS and make sure that ColorCAMM PC-12
RIP@... is selected.
5.
Launch QuarkXPress. Select Edit>Preferences>Color Management and uncheck Color Management
Active.
6.
Click File>Page Setup.
7.
In the Printer Description list, select your Roland printer. Then click the Output tab to display it.
8.
Select Composite color from the Print Colors list and Printer from the Halftoning list. Then click the Page
Setup button.
9.
Choose a standard paper size in the Paper field.
41
10.
Select Custom Page Default from the pop-up menu, if a custom page size is required, and enter your
custom page size. Click the Add button when you are finished, and then click OK. You are returned to
the Output tab of the Print dialog.
11.
Click the Printer button,
12.
Select Color Matching from the menu. Then select Color/Grayscale from the Print Color list.
13.
Select Printer Specific Options from the menu.
14.
Select the appropriate options, and then click Print. You are returned to the Print dialog box.
15.
Click Print to start printing.
42
Contour Cutting and Spot Color Printing [Macintosh]
Using a ColorCAMM PC-12 you can print objects and then cut a contour line around them. You can also print
using a Spot Color ribbon. To use such features, you have to install and use special color libraries in your
design application such as Illustrator or QuarkXpress. No special settings or changes are needed on Roland
ColorChoice.
You can create objects using the following Spot colors. All these objects will be printed using a special ribbon.
(only ColorCAMM)
Gold_Resin
Siver_Resin
Red_Resin
Blue_Resin
White_Resin
Gold_Foil
Silver_Foil
Finish
: Gold (Resin)
: Silver (Resin)
: Red (Resin)
: Blue (Resin)
: White (Resin)
: Gold (Wax)
: Silver (Wax)
: Finish (Wax)
Contour cutting lines can also be created using a special color.
CutContour
On your Roland ColorChoice Installation CD, you will find Color Library files for each application. If you are
using PhotoShop, you will not be able to print in Spot Colors and contour cut.
Illustrator 8.0 [Macintosh]
1.
Copy the file 'ColorCAMM PC-12.ai', located in the ‘SpotColorLibray:ColorCAMM PC-12:Illustrator’ folder
of the Installation CD, to the Swatch Libraries folder of Illustrator.
2.
Start Illustrator.
3.
Open the file that you want to contour cut, if it’s not already open.
4.
Select ‘ColorCAMM PC-12’ in the Window>Swatch Libraries menu to open the library.
All spot and “CutContour” colors appear in the library.
5.
To make a cutting line, select “CutContour” as the color for the paths that you would like to cut.
6.
To make an object that will be printed using a spot color, just fill it using a Spot Color from the library.
You can change the color of the contour line or spot color by changing the Swatch Options. Remember,
the color mode should always be Spot Color.
7.
Print the file as you normally would.
If the ‘ColorCAMM PC-12’ swatch library is unavailable for some reason, you can create a new swatch. Be
sure that the color names are the same as described above and set the color mode as Spot color. We
recommend that you specify a color other than the default color to better see the contour line or spot colors on
your display, and that it also be a dashed line (for contour cut). When defined like this, the line will always be
treated as a contour, regardless of its line width. For spot colors we recommend to select a color that can be
easily identified.
Illustrator 9.0 [Macintosh]
1.
Copy the file 'ColorCAMM PC-12.ai', located in the ‘SpotColorLibray:ColorCAMM PC-12:Illustrator’ folder
of the Installation CD, to the Swatch Libraries folder of Illustrator.
2.
Start Illustrator.
3.
Open the file that you want to contour cut, if it’s not already open.
4.
Select ‘ColorCAMM PC-12’ in the Window>Swatch Libraries menu to open the library.
All spot and “CutContour” colors appear in the library.
43
5.
To make a cutting line, select “CutContour” as the color for the paths that you would like to cut.
Transparency and effects such as Blur or Drop Shadows are not applied at all to cutting lines. The
cutting line may be printed. You can easily check which path the effects are applied to by going into
Illustrator 9.0, going to Window, and using Show Appearance to display the Appearance palette.
6.
To make an object that will be printed using a spot color, just fill it using a Spot Color from the library.
You can change the color of the contour line or spot color by changing the Swatch Options. Remember,
the color mode should always be Spot Color.
7.
From File, open Document Setup, then from the pop-up menu, select Transparency. Make sure the
Quality/Speed slider is at the center or at the second tick from the left. If it is at any other position, the
cutting line is printed.
8.
In Illustrator 9.0, go to File and open Print. If it is set to Print&Contour or to Contour Only, be sure to
select the check box for "Ignore Overprinting in Composite Output."
9.
Print the file as you normally would.
Printing and Cutting Limitations in Illustrator 9.0
If there are objects on the artboard to which Transparency or any effects such as Blur or Drop Shadows are
applied, the cutting line may be printed. When you are performing printing and cutting, you normally do not
use Transparency or effects such as Blur.
Workarounds for this problem and information about effects that are subject to limitations are described in
detail in the supplemental "Printing and Cutting Limitations and Workarounds in Illustrator 9.0" and "The
Transparency Feature of Illustrator 9.0.
FreeHand 8 [Macintosh]
1.
Copy the file ‘ColorCAMM PC-12.bcf’ or, located in the ‘SpotColorLibray:ColorCAMM PC-12:FreeHand’
folder of the Installation CD to FreeHand 8:Colors folder.
2.
Start FreeHand.
3.
Create a new design file or open an existing file.
4.
Execute Window>Panels>Color List and open the color List Palette.
5.
Select ‘ColorCAMM PC-12’ from the ‘Options’ menu of color List Palette. All the Spot Colors and the Cut
Contour color will be listed in the Color Library window. Select all the colors that will be used. You can
select multiple colors pressing the Ctrl key.
6.
Click OK. The Special Colors will be added to the Color List Palette.
7.
To make a cutting line, select “CutContour” as the color for the paths that you would like to cut. To make
an object that will be printed using a spot color, just fill it using a Spot color from the Color List Palette.
QuarkXPress 4 [Macintosh]
1.
Select Edit>Color and click Add from the Default Color dialog.
2.
Execute File>Import and select the file ‘ColorCAMM PC-12 QuarkXPress’ , located in the
‘SpotColorLibray:ColorCAMM PC-12:QuarkXPress’ folder. (It is best to copy this file to your Hard Disk
before importing it.)
3.
Click "Select All" to move all the items to Use Items and click OK.
4.
Click Save to save the color palette.
5.
Use the added color palette to create the new design.
44
PageMaker 6.5 [Macintosh]
1.
Copy the file ‘ColorCAMM PC-12.bcf’, located in the ‘SpotColorLibray:ColorCAMM PC12:PageMaker6.5’ folder to the ‘Pm6.5:RSRC:Usenglsh:Color’ folder.
2.
Create a new design or open an existing file.
3.
Click Window>Color and display the Color Palette. Click on the New icon from the Color Palette.
4.
Select ColorCAMM PC-12 from the Color Edit Library pull down menu. “CutContour” will be displayed in
the Color Library window.
5.
Click OK. Color Edit dialog is displayed.
6.
Click OK to close the dialog.
7.
“CutContour” will be added in the Color Palette. Use this palette to define the Cut line. Use this palette to
define the Cut line and the objects that will be printed using Spot color ribbons.
45
Supplement
Printing and Cutting Limitations and Workarounds in Illustrator 9.0
Printing and cutting are subject to some limitations when you use the transparency feature in Illustrator 9.0.
This section provides details about cases where limitations occur and describes workarounds.
Effects That Limit Cutting (The Illustrator 9.0 Transparency Feature)
The cutting line (CutContour) may be printed if there is even a single object on the Illustrator 9.0 artboard to
which any of the following effects are been applied. This means that printing and cutting cannot be carried out
at the same time as long as any of these effects are used.
•
[Filter] > [Stylize] > [Drop Shadow]
•
[Effect] > [Stylize] > [Blur]
•
[Effect] > [Stylize] > [Drop Shadow]
•
[Effect] > [Stylize] > [Inner Glow]
•
[Effect] > [Stylize] > [Outer Glow]
•
[Object] > [Rasterize] (only when Background is set to Transparent)
•
When mode is other than Normal at the Transparency palette (Window > Show Transparency).
•
When Opacity is other than 100% at the Transparency palette (Window > Show Transparency).
•
When Make Opacity Mask is executed at the Transparency palette (Window > Show Transparency).
When Background is set to Transparent by Effect > Rasterize > Raster Effects Setting, the cutting line may be
printed when any of the following effects are used.
•
[Effect] > [Blur]
•
[Effect] > [Artistic]
•
[Effect] > [Sharpen]
•
[Effect] > [Sketch]
•
[Effect] > [Texture]
•
[Effect] > [Video]
•
[Effect] > [Pixelate]
•
[Effect] > [Brush Strokes]
•
[Effect] > [Stylize]
•
[Effect] > [Distort]
The cutting line is also printed if it is specified using Overprint Stroke or it an object superimposed over the
cutting line is specified using Overprint Stroke or Overprint Fill. However, You can avoid this by going to the
Print dialog box and selecting the check box for "Ignore Overcutting in Composite Output."
Workarounds for Limitations
One method for performing printing and cutting while using the effects with these limitations is first to carry out
only printing without performing a form feed after printing, then to carry out only cutting at the same location.
1.
In Illustrator 9.0, draw the cutting line in a different layer than the objects you want to print. You can
create a new layer by going to the Window menu and using Show Layers to display the Layers palette.
2.
Use the Layers palette to hide the layer where the cutting line is drawn.
3.
In Roland ColorChoice, display Setup Properties. Select the Print tab, then click the Driver Option button.
4.
Clear the Advance After Plot check box.
46
5.
Go to "Advanced Printing Procedures" earlier in this document and follow the procedures under
"Illustrator 9.0" to make other settings.
6.
Perform output with Illustrator 9.0. Carry out only printing, without performing cutting.
After printing, return the page and do not update the origin point.
7.
In Illustrator 9.0, use the Layer palette to hide the printed layer. Then unhide only the layer where the
cutting line is drawn.
8.
Go to "Contour Cutting and Spot Color Printing" earlier in this document and follow the procedures under
"Illustrator 9.0" to make the other settings, but use the same dimensions for the media size in Document
Setup and Page Setup in Illustrator 9.0 as you used when you performed printing.
9.
Perform output again.
Perform cutting over what you printed before.
The Transparency Feature in Illustrator 9.0
When you are using any of the effects described in "Effects That Limit Cutting (The Illustrator 9.0
Transparency Feature)" earlier in this document, drawn artwork is divided into a large number of objects.
Some of these divided objects are converted to raster data (image data or bitmap data). Also, depending on
the settings, spot colors may be converted to process colors, and Contour Line areas may be converted to Fill
areas.
The appearance of this division and conversion is not visible on screen, and there is absolutely no need for
you to be aware of it as you carry out design operations. It only becomes a problem when you output artwork
to the printer.
The CutContour System and the Causes of Cutting Limitations
Roland ColorChoice is designed to recognize a path (contour line) colored with a spot color called
"CutContour" as a cutting line. If Illustrator 9.0 converts this to a process color, a Fill object, or raster data, it
can no longer be recognized as a cutting line.
This conversion does not take place unless you use the transparency feature in Illustrator 9.0, but if there is
even a single object using this feature, there is no way of predicted what shapes may be converted, or when,
or what the effects on CutContour may be.
The Relationship between the Global-method Setting for Objects and CutContour
You can use the following settings to modify, to a certain extent, the objects that are converted. In Illustrator
9.0 go to the File menu and open Document Setup, then from the shortcut menu select Transparency to
display the Quality/Speed slider. When the slider is positioned all the way to the left, all objects are converted
to raster data. When it is all the way to the right or at the second tick from the right, all contour lines are
converted to Fill objects.
This means that cutting lines are not recognized unless the slider is positioned at the center or at the second
tick from the left.
Another Method for Avoiding Problems with the Transparency Feature
Using the following method makes it possible to perform printing and cutting at the same time. There is no
need to divide printing and cutting into two steps as there is with the foregoing method (although other
conditions do apply).
1.
In Illustrator 9.0, create a new layer and draw the cutting line on it.
2.
Save this and keep it as original data. This is because carrying out the following operations makes it a
practical impossibility to edit the artwork again.
3.
Hide the layer where the cutting line is drawn. Select the object on which the transparency feature was
used, as well as all adjacent objects. (If you're not sure which these are, you may safely select all
objects except the cutting line.)
4.
Go to the Object menu and open Flatten Transparency.
47
5.
Set Rasterization Resolution to an appropriate value (around 100 to 300 dpi with actual-size conversion).
You should normally set the slider at the center. If there are problems, try moving it one tick to the left.
6.
Make the layer where the cutting line is drawn visible, then carry out printing and cutting in the usual
way.
Using Flatten Transparency converts all objects using the transparency feature to object that are
compatible with Illustrator 8 and the like, and so the cutting line is not affected. This lets you eliminate
the limitations on printing and cutting.
However, this may displace the clipping mask (especially the mask layer). (At Roland DG Corp. we
consider this an issue with Illustrator 9.0) When you use Flatten Transparency, you need to check
whether the original design is retained completely. It may be necessary to make the setting for the mask
again. For this reason, we recommend that this method be used by persons who are already familiar
with the operation of Illustrator 9.0.
What Color Stitching Is and How to Avoid It
Using the transparency feature in Illustrator 9.0 divides objects and converts some of them to raster data
(image data). Color stitching refers to subtle differences in coloring that occur at the borders of divided objects.
The functioning of Illustrator 9.0 may make it difficult to avoid this problem.
If color stitching is a problem, first go into Roland ColorChoice and try setting "Bitmap rendering intent" and
"Vector rendering intent" to the same value.
If the problem persists, go into Illustrator 9.0, use the File menu to open Document Setup, and from the
shortcut menu, select Transparency. Move the Quality/Speed slider either all the way to the left or to a
position one or two ticks to the right of center. Note that you cannot perform printing and cutting at the same
time while at this setting.
Simulating Overprinting
Illustrator 9.0 lets you view an on-screen preview of overprinting using spot-color ink and the like. You can
also simulate this with a composite printer. These are also kinds of transparency features, and they as well
affect cutting lines. You can turn off simulation with a composite printer by going into Illustrator 9.0, displaying
the Print dialog box, and selecting the check box for "Ignore Overcutting in Composite Output."
48
License Agreement
Carefully read the following terms and conditions before installing the software. This is a legal
agreement between you, the end user (either an individual or an entity), and Roland DG Corporation.
If you do not agree with the following, you should retain the package unopened. (This product is
just one of the included items. Please be aware that any amount of the purchase price will not be
refunded for return of this product as a single item regardless of whether the package is installed
or not.) Use of this program indicates your acceptance of the terms and conditions stated below.
The enclosed computer program ("Software") is licensed, not sold, to you by Roland DG Corporation,
(hereafter referred to as “Roland”), for use only under the following terms, and “Roland”, reserves any
rights not expressly granted to you.
1.
2.
3.
4.
License .This Agreement is governed by the laws of Japan, and the parties shall submit to the
exclusive jurisdiction of the Japanese Court. This license allows you to:
(a) Make one copy of the Software in machine readable form; provided that such a copy of the
original may be used solely for backup purposes. As an express condition of this License, you
must reproduce on each copy the “Roland”, copyright notice and any other proprietary legends
on the original copy supplied by “Roland”.
(b) Transfer the Software and all rights under this License to another party together with a copy of
this License and all written materials accompanying the Software provided you give “Roland”,
written notice of the transfer and the other party reads and agrees to accept the terms and
conditions of this License.
(c) Use this Software on a single computer only, but may transfer it to another computer as long as it
is used on only one computer at a time. "In use" constitutes being loaded onto either temporary
(i.e., RAM) or permanent memory (e.g., hard disk, CD-ROM or other storage device) of a
computer.
Restrictions .You may NOT distribute copies of the Software to others or electronically transfer the
Software from one computer to another over a network. You may not decompile, reverse engineer,
disassemble or otherwise reduce the Software to a human perceivable form. You may not modify,
adapt, transfer, rent, lease, loan, resell for profit, distribute, network or create derivative works based
upon the software or any part thereof.
Termination .“Roland” retains the right to terminate this agreement without notice immediately when
any of the following occurs:
(a) When you violate any article of this Agreement.
(b) When you make any serious breach of faith regarding this Agreement.
Warranty Disclaimer, Limitation of Remedies and Damages. In no event will “Roland”, be liable for
any damages, including lost data, lost profits, cost of cover or other special, incidental, consequential
or indirect damages arising from the use of the program however caused and on any theory of liability.
This limitation will apply even if “Roland”, or an authorized dealer or distributor has been advised of the
possibility of such damage.
“Roland” is not responsible for any typographical errors in the software or in the documentation.
© Copyright 2001 by Scanvec Amiable.
PostScript Software Copyright © 1984 ‐2001 Adobe Systems Incorporated.
ALPS ELECTRIC CO.,LTD. © Copyright 2001
All rights reserved. No part of this publication may be reproduced, stored in a retrieval system or
transmitted, in any form or by any means, electronic, mechanical, photocopy, recording or otherwise,
without the prior written permission of the publisher.
COLORCHOICE® is registered in the U.S. Patent Office.
Windows is a registered trademark of Microsoft Corporation.
Macintosh is a registered trademark of Apple Computer, Inc.
Other brand names are trademarks or registered trademarks of their respective holders.
R1-010808