1
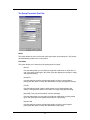
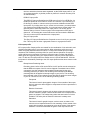
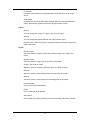
HP DesignJet 500PS
Table of Contents
WELCOME ...................................................................................................................................... 1
SYSTEM REQUIREMENTS MACINTOSH ..................................................................................... 1
SYSTEM REQUIREMENT WINDOWS ........................................................................................... 2
MACINTOSH INSTALLATION........................................................................................................ 3
WINDOWS 95/WINDOWS 98 INSTALLATION .............................................................................. 4
WINDOWS NT INSTALLATION...................................................................................................... 5
WINDOWS 2000 INSTALLATION .................................................................................................. 6
GETTING STARTED ....................................................................................................................... 7
USING THE RIP SOFTWARE............................................................................................................. 7
Printing a Test File.................................................................................................................... 8
Setting up Printer Ports............................................................................................................. 8
Using an ECP Port.................................................................................................................... 8
Using TCP/IP ............................................................................................................................ 8
To add an USB Port to a Windows 98 System......................................................................... 9
To add an USB Port to a Windows 2000 System................................................................... 10
To add an USB Port to a Macintosh ....................................................................................... 10
MENUS .......................................................................................................................................... 11
FILE MENU ................................................................................................................................... 11
Add Job................................................................................................................................... 11
Job Properties......................................................................................................................... 11
Save As................................................................................................................................... 12
Send........................................................................................................................................ 12
Pause...................................................................................................................................... 12
Abort ....................................................................................................................................... 13
Exit/Quit .................................................................................................................................. 13
EDIT MENU................................................................................................................................... 13
Select All ................................................................................................................................. 13
Delete...................................................................................................................................... 13
Preferences ............................................................................................................................ 13
AFTER PRINTING .......................................................................................................................... 13
Units........................................................................................................................................ 13
Simultaneous Ripping and Printing (PC only) ........................................................................ 13
SETUP MENU................................................................................................................................ 14
Change Setup......................................................................................................................... 14
Setup Properties ..................................................................................................................... 14
Test Print................................................................................................................................. 14
VIEW MENU .................................................................................................................................. 14
View RIP Log .......................................................................................................................... 14
Clear RIP Log ......................................................................................................................... 14
PRINTING ...................................................................................................................................... 14
ADDING JOBS TO THE PRINT MONITOR........................................................................................... 14
DELETING JOBS FROM THE PRINT MONITOR ................................................................................... 15
PAUSING AND RESUMING PRINTING ............................................................................................... 15
ABORTING A PRINT JOB ................................................................................................................ 15
PRINTING DIRECTLY FROM AN APPLICATION ................................................................................... 15
PRINTING FROM A CLIENT ON YOUR NETWORK ............................................................................... 16
SETUP PROPERTIES................................................................................................................... 17
THE SETUP PROPERTIES GENERAL TAB ........................................................................................ 17
Manufacturer........................................................................................................................... 17
Model ...................................................................................................................................... 17
Setup Name ............................................................................................................................ 18
Media ...................................................................................................................................... 18
Margin ..................................................................................................................................... 18
PC Ports.................................................................................................................................. 18
File Ports................................................................................................................................. 19
Macintosh Ports ...................................................................................................................... 19
File Ports................................................................................................................................. 19
THE SETUP PROPERTIES PRINT TAB.............................................................................................. 20
Media ...................................................................................................................................... 20
Print Mode............................................................................................................................... 20
Resolution ............................................................................................................................... 21
Driver Options ......................................................................................................................... 21
Perform Color Correction........................................................................................................ 21
ICC input profile ...................................................................................................................... 21
ICC output profile.................................................................................................................... 22
Color Mode ............................................................................................................................. 23
THE COMMUNICATIONS TAB (W INDOWS ONLY) .............................................................................. 23
THE COLOR ADJUST TAB .............................................................................................................. 23
JOB PROPERTIES ....................................................................................................................... 24
JOB PROPERTIES GENERAL TAB.................................................................................................... 24
Media ...................................................................................................................................... 24
Size ......................................................................................................................................... 24
Copies..................................................................................................................................... 25
Layout ..................................................................................................................................... 25
JOB PROPERTIES PRINT TAB ......................................................................................................... 26
THE COLOR TAB ........................................................................................................................... 26
ADVANCED PRINTING PROCEDURES (WINDOWS) ................................................................ 27
ADVANCED PRINTING PROCEDURES (MACINTOSH) ............................................................ 30
Welcome
Welcome to the User Guide for the HP DesignJet 500PS RIP Software. We recommend
that you read and understand this document, and if necessary print it for future reference.
To print this document from Adobe Acrobat Reader, select File>Print from the menu bar.
This User Guide is copied to your computer as part of the installation. If you need to
locate it for future reference, it is stored in the HP DesignJet 500PS directory. This
document contains instructions for the Macintosh and Windows 95/98, Windows 2000
and Windows NT.
System Requirements Macintosh
The following table lists the minimum and recommended system setup to run the RIP
Software. System requirements vary according to the size of the files to be printed, the
output device used, and other variables. Your particular setup and intended use of the
software determine what hardware and software setup you need to get the most out of
the RIP Software. If you are working with relatively small files, the minimum setup may be
sufficient. Similarly, if you are working with large files, you should consider the
recommended setup. Consult your dealer for advice when choosing a system.
Minimum
Recommended
PowerPC 166
G3 or G4 300 MHz or faster
Operating System
Mac OS 8.5.1, 8.6 or 9.x
Mac OS 9.x
RAM
*64 MB RAM
*128 MB RAM or greater
Hard Drive space
available
500 MB Free Disk
Space
1 GB Free Disk Space or larger
Video
800 x 600 screen
resolution with 16 bit
color (thousands of
colors)
800 x 600 screen resolution with
16 bit color (thousands of colors)
Other
CD-ROM Drive
CD-ROM Drive
USB Port for security
device
USB Port for security device
Appearance Manager
and ColorSync installed
Appearance Manager and
ColorSync installed
10 BASE-T
100 BASE-TX
Network
* Requires virtual memory enabled. Set to 196-MB minimum.
1
System Requirement Windows
The following table lists the minimum and recommended system setup to run the RIP
Software. System requirements vary according to the size of the files to be scanned and
printed, the output device used, and other variables. Your particular setup and intended
use of the software determine what hardware and software setup you need to get the
most out of the RIP Software. If you are working with relatively small files, the minimum
setup may be sufficient. Similarly, if you are working with large files, you should consider
the recommended setup. Consult your dealer for advice when choosing a system.
Minimum
Recommended
Processor
200-MHz Pentium II
350-MHz Pentium II or faster
RAM
64-MB (128MB with RIP)
128-MB RAM (196MB with RIP)
or greater
Hard Drive space
available
500 MB Free Disk Space
1 GB Disk Space or larger
System
Windows 95/98 /2000/*NT
Windows 98/2000/*NT
Video
600/800 resolution with 16
bit color
600/800 resolution with 16 bit
color
Other
CD-ROM Drive
CD-ROM Drive
LPT
LPT
10-BASE-T
100 BASE-TX
Network
* Windows NT requires Internet Explorer 4 or greater.
2
Macintosh Installation
This section describes the kind of system setup you need to run the RIP Software and
how to install the RIP software. When you are ready to begin using the RIP Software,
follow the steps in appropriate section, this will enable you to install the RIP Software
properly.
Installing the RIP Software on a Macintosh System
1.
2.
3.
4.
5.
Insert the Installation CD into your CD-ROM drive.
Double-click the Installer icon.
Select the Installer language from the Universal Installer window.
Click OK. The system displays the Installations Options window.
Select the language of the product you would like from the Language dropdown box.
6. Click OK.
7. Accept the default selection of Easy Install and specify the location to which
to install the software. Click Install when you are finished. Please launch
Adobe PostScript Driver Installer.
Installing AdobePS Driver
1.
2.
3.
4.
5.
6.
7.
8.
Locate the Adobe PostScript driver folder.
Select the language folder you would like to install.
Double-Click on AdobePS Installer icon.
After reading the License agreement click on Accept to continue.
Select the Install location from the Install Location drop-down box.
Click Install.
Click Quit.
Reboot your computer.
Setting up the RIP Software
1.
2.
3.
4.
Double-Click on HP DesignJet 500PS.
Select a printer model.
Click Next.
Select the port type you would like to use. You may choose from USB,
AppleTalk or TCP/IP port. AppleTalk and TCIP ports are available if you have
the optional HP JetDirect 610 LAN card installed.
5. Click OK.
Creating a Desktop Printer
1.
2.
3.
4.
Open the Chooser from the Apple menu and highlight AdobePS.
Locate your PostScript printer
Click Create.
Select the HP500PPD. The system gives you the option to select HP
DesignJet 500PS or HP DesignJet 500PS 42.
5. Click OK.
6. Select Standard Memory.
7. Click OK.
Uninstalling the RIP Software from a Macintosh System
1.
2.
3.
4.
Quit the RIP Software, if it is still open.
Drag the RIP Software Folder into the Trash.
Open the System folder
From the Preferences folder, drag the files named ‘the HP DesignJet 500PS
Preferences’ and ‘HP DesignJet 500PS Prefs’ the Trash.
3
5.
6.
7.
8.
Locate and open the ‘Extensions’ folder. Drag the spooler file into the Trash.
The Spooler file is named according to your printer, and appears as
‘Am_<printer name>’, depending on which printer you installed. From the
‘Printer Descriptions’ folder, located within the ‘Extensions’ folder, drag the
PPD files, named according to your output device, into the Trash.
Restart your computer.
Hold down the Option key while you empty the Trash.
The software is now uninstalled.
Windows 95/Windows 98 Installation
1. Insert the Installation CD into your CD-ROM drive.
2. From the CD Setup window, select the language of the installer you would
like.
3. Click Next. The Software to Install window displays.
4. Select the language of the software you would like.
5. Click Next. The system displays the License agreement window.
6. After reading the License agreement, click Yes to accept. The Welcome
window displays.
7. Click Next. The select Program Folder displays.
8. Select the folder you would like HP DesignJet 500PS to display in.
9. Click Next. The Destination Location window displays.
10. Select the destination by clicking on Browse or except the default location.
11. Click Next.
Note: If you currently have HP DesignJet 500PS on your system the Clear
Preferences window displays. Click Yes to delete preference settings on your
system. Click not to retain your old preference settings.
12. Click OK to restart your computer.
Setting up the RIP Software
1. Select a printer model.
2. Click Next.
3. Select the port type you would like to use. You may choose LPT or TCIP if
you have the HP JetDirect 610 network CARD installed.
If you choose TCPIP you will be asked to enter the IP address of the printer.
Find it in the front panel of the machine
4. Click Finished. The system will reboot your computer.
Installing AdobePS Driver
1. After reading the License agreement, click Yes to accept. The AdobePS
Postscript printer driver setup window displays.
2. Click Next. The Install Setup Program displays.
3. Click Next. The Install Printer Window displays.
4. Select Local Printer, then click Next.
4
5. Select PPD’s. PPD’s can be found on your HP DesignJet 500PS installation
CD.
6. Click Next. The Select Port Window displays.
7. Select your Port. The Get Shared Information window displays.
8. Select Not Shared if software is save on your local drive. Select Shared if your
software is running on a network.
9. Click Next.
Windows NT Installation
This section describes how to install the software on computers running Windows NT.
The logon with which the software is installed must have Administrator privileges.
These instruction assume that you have the HP DesignJet 500PS Setup CD in your CDROM drive, and that you have read the recommendations in the Advisor (the series of
screens that appeared when you selected your language).
Installing the RIP Software on a Windows NT System
1. Insert the Installation CD into your CD-ROM drive.
2. From the CD Setup window, select the language of the installer you would
like.
3. Click Next. The Software to Install window displays.
4. Select the language of the software you would like.
5. Click Next. The system displays the License agreement window.
6. After reading the License agreement, Click Yes to accept. The Welcome
window displays.
7. Click Next. The select Program Folder displays.
8. Select the folder you would like HP DesignJet 500PS to display in.
9. Click Next. The Destination Location window displays.
10. Select the destination by clicking on Browse or except the default location.
11. Click Next.
12. Note: If you currently have HP DesignJet 500PS on your system the Clear
Preferences window displays. Click Yes to delete preference settings on your
system. Click not to retain your old preference settings.
13. Click OK to restart your computer.
Setting up the RIP Software
1. Select a printer model.
2. Click Next.
3. Select the port type you would like to use. You may a choose LTP or TCIP if
you have the DesignJet network port option installed.
4. Click Finished. The system will reboot your computer.
5
Installing AdobePS Driver 5.1
1. After reading the License agreement, click Yes to accept. The AdobePS
Postscript printer driver setup window displays.
2. Click Next. The Install Setup Program displays.
3. Click Next. The Install Printer Window displays.
4. Select Local Printer, then click Next.
5. Select PPD’s. PPD’s can be found on your HP DesignJet 500 PS installation
CD.
6. Click Next. The Select Port Window displays. The Get Shared Information
window displays.
7. Select Not Shared if software is save on your local drive. Select Shared if
software is save on a network.
8. Click Next.
9. Select LPT1 for your local port selection.
10. Select Browse to find your printer model. The printer model can be found in
the DJ500PS folder.
11. Click Next. The Printer Name widows displays.
12. Select No for your default printer.
13. Select No to Test page.
14. Click Next.
15. Click Install.
Windows 2000 Installation
1. Insert the Installation CD into your CD-ROM drive.
2. From the CD Setup window, select the language of the installer you would
like.
3. Click Next. The Software to Install window displays.
4. Select the language of the software you would like.
5. Click Next. The system displays the License agreement window.
6. After reading the License agreement, Click Yes to accept. The Welcome
window displays.
7. Click Next. The select Program Folder displays.
8. Select the folder you would like HP DesignJet 500PS to display in.
9. Click Next. The Destination Location window displays.
10. Select the destination by clicking on Browse or except the default location.
11. Click OK. The system will reboot your computer.
Setting up the RIP Software
1. Select a printer model.
2. Select a port.
6
3. Click Next. The Add Setup window displays.
4. Click Finish.
Uninstalling the RIP Software from a Windows System
1. Exit the RIP Software and all programs.
2. From the Start Menu, Select Settings and then click on the Control Panel.
3. Select Add/Remove Programs.
4. Select the RIP Software.
5. Click OK.
Getting Started
Windows
The RIP Software is automatically launched each time you start your computer. However,
you will need to view the Print Monitor in order to work with it. To view the Print Monitor,
double click on the RIP Software icon located in the lower right corner of your computer’s
monitor.
Macintosh
The RIP Software is automatically launched each time you print or you may double-click
the RIP Software icon. The RIP software will open the print monitor window.
Using the RIP Software
You can control every facet of job management from the Print Monitor. The Print Monitor
is essentially a queue, listing all the files that are waiting to be printed.
Jobs appear in the queue in the order that they were received. For each job, the following
information is displayed:
§
Job Name—the name of the file, including any extensions.
§
Status—the current status of the job, either Holding, RIPing (the process of
converting images to a series of minute dots so that they can be printed), or Printing.
7
§
Copies—the number of copies to be printed.
§
Media—the media on which the job will be printed.
§
File Type—the file type of the selected job.
Note: For Windows to quit the RIP Software program, right click on the icon, and then
select Exit from the menu that appears. Once you have quit the software you must restart
your computer to use the RIPsoftware.
Printing a Test File
To insure that your software is properly installed and that a connection to the
printer is established, it is recommended that you make a test print. When you do
this a small test file is sent to the Print Monitor and then printed. Once you’ve
successfully printed a test file, be sure to read the rest of this document to learn
about other features
To Make a Test Print
§
From the Setup Menu select Test Print. A small PostScript test file is sent to
the Print Monitor and then printed.
Setting up Printer Ports
After the Software RIP has been installed and your printer is ready, there
remains one important link—sending the ‘print’ information from the software to
the printer. There are three ways to do this:
§
Using an ECP Port
§
Using TCP/IP
§
Using USB Port
Using an ECP Port
You can output jobs to a printer connected directly to one of your computer’s
parallel ports.
To Use an ECP Port
1. Open the RIP Software Print Monitor by double-clicking on its icon in the
lower right corner of your screen.
2. From the Print menu select Setup Properties.
3. Click on the General tab.
4. In the ‘Port’ list, select a parallel port (usually called LPT1 or LPT2).
5. Click Apply
6. Click OK.
Using TCP/IP
Use TCP/IP Printing protocol to output to a network device. To use TCP/IP you
must have the HP JetDirect 610 network card option installed. For additional
information on the HP JetDirect 610-network card please speak with your service
representative.
8
To Use a TCP/IP Port
1. From the Setup menu select Setup Properties.
2. From the General Tab select TCP/IP as your port. The Communication
window displays.
Note: The IP address can be found in the control panel of your HP DesignJet
500PS printer.
3. Click OK.
To add an USB Port to a Windows 98 System
Adding your new driver is a four-step process, first install the HP DesignJet500
PS software. Next the USB driver software must be installed onto your computer
this can be found on your installation CD. You must then add a generic printer
that will be associated to the USB driver. Finally you will edit preferences to
associate the USB driver to the generic printer you have installed. Please note
Windows NT does not support USB.
To Install HP DesignJet 500PS USB driver Software
1. Insert the Installation CD into your CD-ROM drive.
2. Install the HP DesignJet 500PS software.
3. Plug your USB cable into the back of your PC then plug the USB cable into
your printer. The Add New Hardware Wizard displays.
4. Click Next.
5. Select Search for the best driver for your device (Recommended).
6. Click Next.
7. Select specify a location.
8. Click Browse to find the location of your Windows 98 USB driver. The USB
driver may be found on your Installation disk in the WIN98USB folder.
9. Click OK. The system displays a message stating Windows is now ready to
install the best driver for this device.
10. Click Next. The system displays a message stating Windows has finished
installing the software that your new hardware device requires.
11. Click Finished.
To Add a Generic Printer
1.
2.
3.
4.
5.
6.
7.
8.
9.
10.
11.
12.
13.
From the Start Button select Settings and then Printers.
Click Add Printer. The Add Printer Wizard displays.
Click Next.
Select Local printer.
Click Next. The system will request that you select a manufacturer and a
printer model.
Select Generic as the manufacturer.
Select Generic/Text Only as the Printer model.
Select USB/DesignJet 500PS as the name of your port.
Click Next. The system asks if you would like to use this printer as your
default printer.
Click No.
Click Next. The system asks if you would like to print a test page.
Click No.
Click Finish.
9
Note: If the cab file driver12.cab was not installed during your initial installation of
Windows 98 the system will request that you insert your Windows 98 Installation
CD. This file may be found in the WIN98 directory folder. Locate the cab file and
then click OK.
To associate an USB driver to a Generic Printer.
1.
2.
3.
4.
Open the HP DesignJet 500PS software.
From the Edit menu, select Preferences.
From the Generic Driver field drop-down list, select Generic/Text Only.
Click OK. The USB port is now completely installed.
To select the USB Port
1.
2.
3.
4.
5.
6.
Open the HP DesignJet 500PS software.
From the Setup menu, select Setup Properties.
Select the General tab.
From Ports drop-down list, select USB/DesignJet.
Click Apply.
Click OK.
To add an USB Port to a Windows 2000 System
Adding your new driver is a three-step process, first install the HP DesignJet500
PS software. Next the USB driver software must be installed onto your computer
this can be found on your installation CD. Finally, select the USB/DesignJet port
from Setup. Please note Windows NT does not support USB.
1. Install the HP DesignJet 500PS software.
2. Plug your USB cable into the back of your PC then plug the USB cable into
your printer. The Found New Hardware Wizard displays.
3. Select Display a list of the known drivers for this device so that I can choose
a specific driver.
4. Click Next.
5. Click on the Printers Icon.
6. Click Next. The Add Printer Wizard displays.
7. Select Generic as your manufacture.
8. Select Generic/Text Only as your Printer type.
9. Click Next.
To select the USB Port
1.
2.
3.
4.
5.
6.
Open the HP DesignJet 500PS software.
From the Setup menu, select Setup Properties.
Select the General tab.
From Ports drop-down list, select USB/DesignJet.
Click Apply.
Click OK.
To add an USB Port to a Macintosh
1. Install the HP DesignJet 500PS software.
2. Plug your USB cable into the back of your Macintosh then plug the USB
cable into your printer.
10
To select the USB Port
1.
2.
3.
4.
5.
6.
Open the HP DesignJet 500PS software.
From the Setup menu, select Setup Properties.
Select the General tab.
From Ports drop-down list, select USB/DesignJet.
Click Apply.
Click OK.
Menus
You may access a number of the RIP Software’s functions using the menus at the top of
the main window.
File Menu
The File menu allows the user to add a job, save a job as a different format, send, pause,
or abort a job or stop the process by exiting. The following chart defines each of these
options:
Add Job
The Add a Job command allows you to add a job directly to the Print Monitor.
To Add a Job
1. From the File menu select Add Job. The Add Job dialog box displays.
2. From the Add Job Dialog, select the path of the job you would like to add.
3. Click Open. The job is added to the printer queue.
Job Properties
Job Properties can be accessed from within the RIP Software and are settings
associated with a particular job. The Job Properties come from either the Printing
Properties set in client, or the Setup Properties set in the RIP Software’s Server.
To change the Job Properties, you must select the job in the printing queue and
then select Job Properties from the File menu. Within Job Properties you may
preview the job by selecting page preview, layout preview or no preview
(Macintosh only). Page preview displays the image of the job. Layout preview
displays the job relative to the output media. (See the Job Properties General
Tab section for additional details).
11
Save As
The Save As command allows you to save an image into different file formats.
Once a job has been printed, you may want to save the RIPed file so that you
can reprint it without having to RIP the file again. Saving a file as Native format,
with a .PRT extension, allows you to save RIPed files for reprinting.
To Save a Job into a Different Format
1. Click on the job you would like to save into a different format.
2. From the File Menu select Save As.
3. From the Save as type drop-down box, select the file type you would like to
save the document as.
4. Click Save.
Send
Once jobs are in the Print Monitor, you can select individual jobs or groups of
jobs for printing. When selecting a group of jobs, they are printed in the order that
they appear in the queue.
To Send a Job to Print
1. Click on the job or jobs you would like to print.
2. From the File Menu select Send.
Pause
When printing a job, the software begins RIPing the file. RIP, which stands for
Raster Image Processor, is a process that converts the selected file into a series
of dots that are used to reproduce the file on the selected media. RIPing involves
a complex algorithmic process that requires a significant portion of your
computer’s processing capacity. Larger files, in terms of MB, take longer to RIP
than smaller files. The nature of the RIP process makes it impossible to pause
and restart. For this reason, the Pause button is dimmed to prevent you from
pausing a job during the RIP process. However, once a job is done RIPing and
has begun printing, you can use the Pause button to stop and restart the printing
process as often as desired.
To Pause a Print Job
1. Click on the job you would like to pause.
2. From the File Menu select Pause.
To resume a printing Job
§
Click on the paused print job. Click the Pause button again (Resume) to
resume the printing process.
12
Abort
Although a job cannot be paused during the RIP process, the job can be aborted.
After aborting a job, all RIP’ed information is lost and the process must start
again.
To Abort a Print Job
1. Click on the job you would like to abort.
2. From the File Menu select Abort.
Exit/Quit
The exit command ends the program and closes the Print Monitor window.
To Exit or Quit the Program
§
From the File menu select Exit/Quit.
Edit Menu
The Edit menu allows the user to select all files, delete a file, and change preferences.
Select All
The Select All command selects all files in the print queue.
Delete
The Delete command allows deletion of specifically selected files.
Preferences
Preferences allow access to default settings, including what to do with files after
printing and to specify the units of measurement. These preferences, in
conjunction with Setup Properties, form the default print settings. Default print
settings are applied to any job(s) that is added using the Add Job command.
Settings in Preferences are overridden when printing from a design application
(ex. Adobe Illustrator).
After Printing
Tells the Print Monitor what to do with the job after it has finished printing,
either Hold or Delete.
Units
Select the desired unit of measurement.
Simultaneous Ripping and Printing (PC only)
The system starts printing before ripping is finished.
13
Setup Menu
A setup consists of a device and it’s associated properties. Items in the Setup menu
apply to the selected setup. Select a setup by clicking on the setup icon in the setup area
of the main window.
Change Setup
The Change Setup command allows you to access and follow the same wizarddriven steps contained in the original installation. Switch back to the original
setup using the Change Setup command again.
Setup Properties
Setup Properties displays the default print settings for your printer.
To View Setup Properties
§
From the Setup menu select Setup Properties. The Setup Properties dialog
opens with the General tab selected (See Properties Tabs).
Test Print
The Test Print command allows you to ensure that your software is properly
installed and that the connection to the printer is established.
To Print a Test
§
From the Setup Menu select Test Print. A small PostScript test file is sent to
the Print Monitor and then printed.
View Menu
The View Menu allows the user to show or hide the command iconToolbar, view a RIP
Log or Clear a RIP log.
To Show or Hide the Toolbar
§
From the View menu Select Toolbar to show the Toolbar select Toolbar
again the hide the Toolbar.
View RIP Log
The View RIP log displays a text file containing a record of the RIP processes.
Clear RIP Log
The Clear RIP log purges information from the RIP log.
Printing
Adding Jobs to the Print Monitor
The Jobs Management area of the RIP Software allows you to add jobs to the Print
Monitor.
14
To Add a Job
1. From the File menu select Add Job.
2. Select the job you would like to add then click on Open.
3. To send a job to the printer, select the job from the Print Monitor’s queue and then
choose Print from the File menu.
Deleting Jobs from the Print Monitor
A job may be deleted from the job list before or after it is cut or printed.
To Delete a Job
1. Select the job or jobs that you want to delete by selecting them in the Print Monitor’s
queue.
2. From the File menu choose Delete.
Pausing and Resuming Printing
When printing a job, the software begins RIPing the file. RIP, which stands for Raster
Image Processor, is a process that converts the selected file into a series of dots that are
used to reproduce the file on the selected media. RIPing involves a complex algorithmic
process that requires a significant portion of your computer’s processing capacity. Larger
files, in terms of MB, take longer to RIP than smaller files. The nature of the RIP process
makes it impossible to pause and restart. For this reason, the Pause button is dimmed to
prevent you from pausing a job during the RIP process. However, once a job is done
RIPing and has begun printing, you can use the Pause button to stop and restart the
printing process as often as desired.
To Pause or Resume a Job
1. Select the job to pause by selecting it in the RIP Software’s Print Monitor window.
2. Click the Pause icon.
3. Click the Pause button again (Resume) to resume the printing process.
Aborting a Print Job
Although a job cannot be paused during the RIP process, the job can be aborted. After
aborting a job, all RIP’ed information is lost and the process must start again.
To Abort a Print Job
1. Select the job to abort by selecting it in the RIP Software’s Print Monitor window.
2. From the File menu choose Abort a Job or click the icon Saving a Job
Printing Directly from an Application
Once you have specified setup properties, you can print directly from your application
without adjusting any values from the Print Monitor menus.
15
Most applications have Page setup and Print Command options within the File Menu.
Make sure you select the correct printer setup that you have installed. Please consult
your DTP application for more details on the print command.
To Setup Driver Properties
1. From the File menu select Print.
2. Select HP DesignJet500 PS.
3. Click the Properties button.
4. Select the Advanced tab.
5. Select Printer Features. The system displays the following printer features: After
Spooling, After Output, Bitmap rendering intent, Vector rendering intent, ICC output
profile and Print Quality which may be customized. See The Setup Properties Print
section of this manual for additional information.
Printing from a Client on your Network
If you have a network of PCs and have completed the additional setup instructions for
network printing, you can print from any client on your network. When you do this, jobs
arrive in the ‘Hot’ folder of the server and are processed like any other job.
There are two ways to send jobs to the server for processing:
§
Dragging the file directly into the server’s shared ‘Hot’ folder
OR
§
Using the design application’s Print to File function and selecting the server’s ‘Hot’
folder as your destination
16
Setup Properties
The Setup Properties window can be accessed from within the RIP Software Server and
are settings used to process jobs that do not have properties of their own associated with
them. Setup Properties contain the defaults of the RIP software and printer property
settings. If a job is placed in an output device’s Hot Folder, and it does not contain any
properties, then the settings from the Setup Properties will be applied to the job.
To Access Setup Properties.
§
From the Setup menu, select Setup Properties. The Setup Properties window
displays.
The Setup Properties General Tab
The General tab displays standard Windows printer settings associated with printer port
selection and media size.
Manufacturer
Manufacturer displays the manufacturer of your printer.
Model
Model displays the name and model of your printer.
17
Setup Name
The setup name displays the name of your printer.
Media
Name
Displays the name of the media type.
Width/Height
Accepts direct entry of the job’s width or height. When one aspect is altered the other is
automatically updated to keep the job proportionally correct.
Max Height
Indicates the maximum height that can be printed.
Margin
Displays the margins from the edges of the media. Margins are the areas on the edges of
the media where nothing will print.
PC Ports
Selects the port to which the printer is connected. Only change the Port selection if you
physically change the port to which your printer is connected. Ports may be found on the
General within Windows.
Parallel Ports (LPT ports) (PC Only)
Parallel Ports are probably the most common method of sending data to output
devices. Devices connected to a Parallel Port are connected directly to the RIP
Software Server computer with a Parallel cable. There are several print modes
available to Parallel Ports. The most common Parallel Port modes are Standard
and ECP. The mode defines the method of communication between your
computer and your output device. Typically, you set the communication mode for
the Parallel Port in your computer BIOS. To find out how to access your
computer's BIOS and change the port setting, consult the documentation that
came with your computer.
Note - Sharing the Parallel Port by plugging your output device in behind your
RIP Software Server key may cause slower output. We recommend using
separate Parallel Ports for your RIP Software Server key and your output device.
Standard or Centronics Mode
This is the traditional uni-directional communication. This mode should work with
all output devices, though print speed may be reduced because of its slow
transfer rate.
ECP Mode
(Extended Capability Port) is a fast bi-directional communication mode that is
supported by many newer output devices. ECP offers a fast data transfer rate to
support faster printing and higher DPI printing. To take advantage of ECP
communications you must have an output device that supports ECP mode, and a
Parallel Port on the computer that supports ECP mode.
18
Note - To enable ECP mode you may need to turn off the “Use standard LPT
driver checkbox in the communications tab of the Setup Properties inside of
application.
File Ports
The File Port behaves like a save to file option. Instead of sending data out
through a port on your computer, the File Port option will write the data to a file
and save it to a specified location. Use the File Port to send data to printers that
use their own Hot Folders, to transfer files to another computer, or to
troubleshoot a specific output device.
Macintosh Ports
USB
The system displays a list of printers connected to your USB port.
AppleTalk
The system displays a list of HP DesignJet 500PS printers connected in the
network. This option is available if your printer is installed with the HP JetDirect
610-network card.
TCIP/IP
User must enter an IP address, which maybe obtained from your printer. This
option is available if your printer is installed with the JetDirect 610-network card.
File Ports
The File Port behaves like a save to file option. Instead of sending data out
through a port on your computer, the File Port option will write the data to a file
and save it to a specified location. Use the File Port to send data to printers that
use their own Hot Folders, to transfer files to another computer, or to
troubleshoot a specific output device.
19
The Setup Properties Print Tab
Media
This option allows the user to select the media type output will be printed on. ICC profiles
will automatically update to the correct profile.
Print Mode
This option allows you to select the print quality speed for output.
Best IQ
Use this setting when you are printing to high-cost media such as "white film" or
one of the glossy media types, this option gives the highest print quality for image
and graphics printing.
Normal IQ
Use this setting to produce excellent print quality on plain or special paper,
printing with this option is faster than Best Mode for image and graphics printing.
Fast IQ
Use this setting for draft copies or when speed is more important than print
quality. Printing with this option is the fastest for image and graphics printing.
Best CAD (Text, precise Illustrations, and line drawings)
Use this setting when you are printing to high-cost media such as glossy media
types, this option gives the highest print quality for CAD printing.
Normal CAD
Use this setting to produce excellent print quality on plain or special paper,
printing with this option is faster than Best Mode CAD printing.
20
Fast CAD
Use this setting for draft copies or when speed is more important than print
quality, printing with this option is the fastest for CAD printing.
Resolution
You may choose between maximum and normal resolution provided that the print mode
supports it.
Driver Options
Clicking this button launches the Driver Options dialog.
Printer Color Calibrations
This is feature allows printer to do color calibrations between the RIP software
and the printer.
Apply Color Calibration Data
If this option is checked the system will use the data stored to print. If this
option is not check the system uses default settings. When this option
appears gray the system has no data store, this may occur the first time the
printer is used or if data is deleted by the user.
Get Color Calibration Data
Retrieves the calibration parameters from the printer. If this option appears
gray the port currently being used does not allow for data retrieval.
Status Window
Displays system messages.
Cut Media After Printing
Cuts the media after the print is complete. If a drying time has been set, the
media will be cut after the dry time is finished.
Perform Color Correction
Checking this setting activates the color correction settings. If this setting is not checked,
incoming jobs are assumed to already have color correction.
ICC input profile
Input profiles are used to convert the image into a neutral color space. Once the image is
in a neutral color space, then the output profile is used to convert the image into the color
space of the output device. To add an ICC input profile from another source, click the
Add button. Three types of ICC input profiles can be specified:
CMYK ICC input profile
The CMYK input profile defines all elements of a job that are in CMYK color
mode. If your job is in the RGB color mode, then you should leave the CMYK
input profile set to the Generic setting. If your file contains images in both the
CMYK and the RGB mode, then the CMYK input profile will be applied to the
CMYK images and the RGB input profile will be applied to the RGB images. If
your image is in the CMYK color mode, then your file was previously separated
for output to a specific output device. Whenever possible, use the profile for the
21
device to which the elements were separated, as the CMYK input profile. If you
do not have the profile, try similar profiles or profiles for common ink sets (such
as CMYK SWOP).
RGB ICC input profile
The RGB ICC input profile defines the RGB source for all of your RGB files. An
RGB input profile can be for either a monitor or a scanner. If you scanned your
file directly to a folder, it is best to select your scanner calibration as the RGB
input profile. If you have done any on- screen color correction, you should select
your monitor as the RGB input profile. If you do not have a monitor profile, it is
generally safe to select the Generic ICC input profile. The Generic profile
assumes that you have a Trinitron monitor with a temperature of D65 and a
gamma of 1.8. Selecting the correct RGB source will insure that the RGB data
you see on-screen will be matched to the output printer.
Gray ICC input profile
The Gray ICC input profile defines the Grayscale source for all of your grayscale
files. This may refer to either a grayscale scanner or a grayscale monitor.
ICC output profile
ICC output profile- Output profiles are created for the combination of ink and media, and
resolution and dither type of your output device. When selecting a profile, be sure to
select the profile that matches these criteria. For output devices that print at multiple
resolutions, RIP Software provides profiles for each of those resolutions. Choosing a
profile with the wrong resolution will severely effect the output. Profiles with different
dither types will not greatly effect your output; however, they may cause slight shifts in
color. To add an ICC output profile from another source, click the Add button. Click the
Info button for information pertaining to the ICC output profile that has been chosen under
Profile.
Bitmap/Vector Rendering Intent
Rendering intent- before a file can be RIPed, its ICC profile must be selected so
that the RGB color space of the file can be mapped or translated into to CMYK
colorspace. How the colorspace gets mapped is determined by the color
rendering intent that you select. The rendering intent selected in the Bitmap
rendering field will be applied to bitmap images in your job file. The rendering
intent selected in the Vector rendering intent field will be applied to vector images
in your file. Choose from one of the following rendering intents:
Perceptual
This intent is best for photographic images. Colors outside of the output
device's gamut are either clipped or compressed to fit the output device’s
color space
Relative Colorimetric
This intent is best for images, such as logos, where the original image
needs to match the output. Colors that fall outside of the output device's
gamut are clipped. This method may reduce the total number of colors
available. The white point of Relative Colorimetric is always zero.
Saturation
This intent is best for graphic images, such as vector art, where vivid
colors are more important than true color matching. Colors outside of the
output device's gamut are mapped to colors at the extent of the gamut's
saturation. Color's that fall within the gamut of the output device are
22
shifted closer to the gamut's saturation extent. This rendering intent may
also be used to boost colors within a photographic image.
Absolute Colorimetric
This intent is similar to Relative Colorimetric, but has a different white
point value. Absolute Colorimetric represents colors relative to a fixed
white point value of D50. For example, the white of paper A will be
simulated when printing on paper B. This intent is best for color matching
when printing Pantone colors.
Color Mode
Allows the user to select CMYK Color or Gray scale printing.
The Communications Tab (Windows Only)
The options available in the communications tab will change according to what port you
have selected.
The Color Adjust Tab
The Color tab displays settings associated with the color quality of the image. Using the
sliders on the tab, you can adjust the image quality. The sliders that appear vary,
depending on which color mode is selected on the Print tab. In all modes, you can adjust
the overall image contrast using the Contrast slider.
23
Job Properties
Job Properties can be accessed from within the RIP Software and are settings
associated with a particular job. The Job Properties come from either the Printing
Properties set in client, or the Setup Properties set in RIP Software Server. To change
the Job Properties, select Job Properties from the File menu. Within Job Properties you
may preview the job by selecting page preview, layout preview or no preview (Macintosh
only). Page preview displays the image of the job. Layout preview displays the job
relative to the output media.
Job Properties General Tab
Media
Shows the size of the currently selected media. You may change the size by selecting
another media size from the drop down list.
Size
Scale
You may change the size of the output here. In most cases, a job’s size should
be controlled from within the application in which it was created to prevent
unexpected results.
24
Fit to Media
Increases or decreases the job proportionally to fit the maximum of the output
device.
Width/Height
Accepts direct entry of the job’s width or height. When one aspect is altered the
other is automatically updated to keep the job proportionally correct.
Copies
Number
You may change the number of copies of the job to be output.
Spacing
You may change the spacing between the copies that are output.
Output at origin- Select this option to output the job at the machine’s origin on the
edge of the media.
Layout
Output at origin
Select this option to output the job at the machine’s origin on the edge of the
media.
Output in center
Select this option to output a job in the center of the media.
Output in the center of media
Select this option to output the job in the center of a sheet of media.
Offset W
Select this option to set an offset distance from the machine’s origin.
Offset H
Select this option to set an offset from the leading edge of the media.
Horizontal Mirror
Click to mirror the job horizontally.
Rotate
Click to rotate the job 90 degrees.
After Output
Choose what to do with the job after it is done processing, either Hold or Delete.
25
Job Properties Print Tab
For more information on Print Tab options, refer to the Print Tab section in Setup
Properties section of this manual.
The Color Tab
For more information on Color Tab options, refer to the Color Tab section in the Setup
Properties section of this manual.
26
Advanced Printing Procedures (Windows)
If your program is not listed, refer to a section on a similar program.
CorelDRAW 8
1. From the HP DesignJet 500PS Print Monitor click Setup>Setup Properties. Then
click the Print tab.
2. Make sure the Perform Color Correction checkbox has a check in it.
3. In the ICC input profile area, select appropriate CMYK and RGB profiles. If you know
which profiles your application is using, select that profile. If you don’t, use the default
setting.
4. For the ICC output profile, select the appropriate ink/media combination. Also select
a rendering intent to use. Click the Info button to see a full description of the selected
profile.
5. Click OK in the Setup Properties dialog box.
6. In CorelDRAW, select Print Setup. Select your printer from the ‘Name’ field.
7. Click the Properties button. Choose a page size from the Paper field or select
Custom Page for a custom page size.
8. If you choose a Custom Page, click on the Custom button and enter the custom size
in the paper width and height fields. The paper size should match the size entered in
Corel.
9. Click OK in the Printer Properties dialog.
10. Click OK in the Print Setup dialog.
11. Click File>Print. Then select your printer from the Name menu.
12. Select the PostScript tab and then select PostScript3 and uncheck Output Bitmaps in
RGB.
13. Select the Miscellaneous tab and uncheck Use Color Profile.
14. Click Print.
Illustrator 7
The Kodak Color Management System must be installed to output successfully from
Illustrator 7 to HP DesignJet 500PS Software.
1. From the HP DesignJet 500PS Print Monitor click Setup>Setup Properties. Then
click the Print tab.
2. Make sure the Perform Color Correction check box has a check in it.
3. Click OK in the Setup Properties dialog.
4. In Illustrator, go to File>Document Setup.
5. Select ‘Use printers default screen.’
6. Select ‘Use Print Setup’.
7. Click the Print Setup button. Print Setup screen appears.
8. Select your printer in the Name field.
9. Click the Properties button.
27
10. Choose a paper size from the ‘Paper’ field or select a Custom page for a custom
page size.
11. If you choose a custom page size, you may enter the custom size by clicking the
Custom button and entering the width and height.
12. If you choose custom page, click OK to Custom Defined Size dialog.
13. Click OK in the Properties dialog.
14. Click OK in the Print Setup dialog.
15. Click OK in the Document Setup dialog.
16. If you want your monitor to soft-proof CMYK output, go to File>Color Settings and
check ‘Simulate print colors on display’.
17. Go to File>Print.
18. If not dimmed, set Output to Composite.
19. Set PostScript to Level 2.
20. Check Force Fonts to Download.
21. Click OK to print.
PageMaker 6.5
These directions assume that you have Kodak ICC Color Management installed.
Before starting PageMaker, copy your printers’ PPD files to
PM65\RSRC\USENGLSH\PPD4 directory. The PPDs can be found on your installation
CD in the ‘Ppd’ folder.
1. From the HP DesignJet 500PS Print Monitor click Setup>Setup Properties. Then
click the Print tab.
2. Make sure the Perform Color Correction checkbox has a check in it.
3. In the ICC input profile area, select appropriate CMYK and RGB profiles. If you know
which profiles your application is using, select that profile. If you don’t, use the default
settings.
4. For the ICC output profile, select the appropriate ink/media combination. Also select
a rendering intent to use. Click the Info button to see a full description of the selected
profile.
5. Click OK to Setup Properties.
6. In PageMaker go to File>Document Setup.
7. From the Page size Field, select your paper size or choose Custom for a custom
page size.
8. If you choose Custom page size, enter the custom size in the height and width fields.
9. Select your printer’s resolution as the Target Output Resolution. If it is not available,
select the next highest value.
10. Select your printer in the Compose to printer menu. Then click OK.
11. Go to File>Preferences>General. Click the ‘CMS Setup...’ button.
12. From Color Management select OFF.
13. Click OK to Color Management System Preferences. Click OK to Preferences.
14. Go to File>Print.
15. From the PPD menu, select the PPD for your printer.
28
16. Click the Paper button. From the Size menu, select your paper size. Select Custom
for a custom size. Enter the width and height of the custom paper size in the new
Custom Paper Size dialog. Your paper size should match your job size. Click OK.
17. Click the Options button. From the Send image data menu select Normal.
18. From download fonts select PostScript and TrueType.
19. Click the Color button. Select Composite and Color.
20. From Optimized Screen Select Default.
21. Click the Features button. Select any other printer specific settings you want.
22. Click Print.
Photoshop 5
1. From the HP DesignJet 500PS Print Monitor click Setup>Setup Properties. Then
click the Print tab.
2. Make sure the Perform Color Correction checkbox has a check in it.
3. In the ICC input profile area, select appropriate CMYK and RGB profiles. If you know
which profiles your application is using, select that profile; if you don’t, use the default
settings.
4. For the ICC output profile, select the appropriate ink/media combination. Also select
a rendering intent to use. Click the Info button to see a full description of the selected
profile.
5. Click OK to Setup Properties.
6. In PhotoShop go to File>Page Setup.
7. From the Name field select your printer.
8. Click the Properties button. Choose a paper size from the Paper field or select a
Custom page for a custom page size.
9. If you choose a custom page size, you may enter the custom size by clicking the
‘Custom’ button and entering the width and height. The paper size should match the
canvas size created in PhotoShop. Click OK to Custom Page Size.
10. If you choose a custom page, click OK to Custom Defined Size dialog.
11. Click OK to Printer Properties.
12. Click the Screen button.
13. Check the box for ‘Use Printer’s Default Screens.’
14. Click OK to Page Setup dialog.
15. Go to File>Print.
16. Choose RGB from the ‘RGB Color’ color if your file is an RGB file.
17. Choose Binary from the Encoding selection.
18. Uncheck PostScript Color Management.
19. Click OK to print.
29
Advanced Printing Procedures (Macintosh)
If your program is not listed, refer to a section on a similar program.
Illustrator 7.0
ColorSync 2.x and Kodak Digital Science must be installed when using Illustrator to
create CMYK files.
1. From the HP DesignJet 500PS Print Monitor click Printer>Setup Properties. Then
click the Print Tab.
2. Make sure the Perform Color Correction checkbox has a check in it, and that correct
output profile and rendering intent are set.
3. Click OK to close the Setup Properties dialog box.
4. Go to Apple menu and select Chooser. Highlight Adobe PS and make sure HP
DesignJet 500PS@... is selected.
5. In Illustrator, go to File>Document Setup.
6. Select Options ‘Use printers default screen’, and then check box for Use Page Setup
and click the Page Setup button.
7. Choose a standard paper size in the Paper field.
8. Select Custom Page Default from the pop-up menu if a custom page size is required,
and enter your custom page size. Click the Add button.
9. Select Page Attribute from the pop-up menu. Select the defined Custom Page in the
‘Paper’ field.
10. Click OK to AdobePS Page Setting dialog. Click OK to Document Setup dialog.
11. Go to File>Color Setting and check ‘Simulate print colors on display’ if you want your
monitor to soft-proof CMYK output.
12. Go to File>Print. Select your printer in the ‘Printer’ field and select the page you want
to print, and the number of copies.
13. Select Adobe Illustrator 7 from the pop-up menu.
14. Set Output to Composite.
15. Set PostScript to Level 2.
16. Set Data to Binary.
17. Check Force Fonts to Download.
18. Select Printer Specific Options from pop-up menu. If you want the file to be printed
automatically select Print in the After Spooling option. If you want to verify the print
mode and profile settings before printing the file, select Hold. Select Hold in the After
Printing, if you want to keep the file in the Print Monitor.
19. Click Print to start printing.
PageMaker 6.5
ColorSync 2.x must be installed when using PageMaker to create CMYK files. If, after
attempting the following procedure, you still have difficulty printing, save the file as a
PostScript file and add it to the Print Monitor using the Add Job function.
30
1. From the HP DesignJet 500PS Print Monitor click Printer>Setup Properties. Then
click the Print Tab.
2. Make sure the Perform Color Correction checkbox has a check in it, correct output
profiles and rendering intent are set.
3. Click OK to close Setup Properties.
4. Go to Apple menu and select Chooser. Highlight Adobe PS and make sure HP
DesignJet 500PS@... is selected.
5. In PageMaker, go to File>Document Setup.
6. From the Page field select your paper size or choose Custom for a custom page
size. If you choose Custom page size, enter the custom size in the height and width
fields.
7. Select your printer’s resolution as the Target Output Resolution. If it is not available,
select the next highest value. Click OK.
8. Go to File>Preferences>General. Click the ‘CMS Setup...’ button.
9. From Color Management select OFF.
10. Click OK to Color Management System Preferences. Click OK to Preferences.
11. Go to File>Print.
12. From the PPD menu, select the PPD for your printer.
13. Click the Paper button. From the Size menu, select your paper size. Select Custom
for a custom size. Enter the width and height of the custom paper size in the new
Custom Paper Size dialog. Your paper size should match your job size. Click OK.
14. Click the Options button. From the Send image data menu, select Normal.
15. From Data encoding select ‘Send binary image data.’
16. From download fonts select PostScript and TrueType.
17. Click the Color button. Select Composite and Color.
18. From Optimized screen Select Default.
19. Click the Features button. Select any other printer specific settings you want.
20. Click Print.
Photoshop 5.0
1. From the HP DesignJet 500PS Print Monitor click Printer>Setup Properties. Then
click the Print Tab.
2. Make sure the Perform Color Correction checkbox has a check in it, correct profiles
and rendering intent are set.
3. Click OK to close Setup Properties.
4. Go to Apple menu and select Chooser. Highlight Adobe PS and make sure HP
DesignJet 500PS@ is selected.
5. In Photoshop go to File>Page Setup. From the ‘Paper’ field select your page size.
6. Select Custom Page Default from the pop-up menu if a custom page size is required,
and enter your custom page size. Click the Add button.
7. Select Page Attribute from the pop-up menu. Select the defined Custom Page in the
‘Paper’ field.
8. Select Adobe Photoshop from the pop-up menu. Click the Screen button.
9. Check the box for ‘Use Printer’s Default Screen’s. Click OK for Halftone Screen
dialog.
31
10. Click OK for Adobe Page Setting dialog.
11. Go to File>Print. Select your printer in the ‘Printer’ field and select the page you want
to print, and the number of copies.
12. Select Adobe Photoshop from the pop-up menu and set the ‘Encoding’ selection to
Binary. Set the ‘Space’ selection to RGB if the file is an RGB file. Also, you must
uncheck PostScript Color Management.
13. Select Printer Specific Options from pop-up menu. If you want the file to be printed
automatically, select Print in the After Spooling option. If you want to verify the print
mode and the profile settings before printing the file, select Hold. Select Hold in the
After Printing if you want to keep the file in the Print Monitor after the file is printed.
14. Click Print to start printing.
QuarkXPress 3.32
1. QuarkXPress requires a Printer Description File (PDF) to access specific options of
the printer. Install the file ‘HP DesignJet 500PS from Setup CD>Quark Files to the
‘Quark XPress:PDF’ folder, before starting QuarkXPress.
2. From the HP DesignJet 500PS Print Monitor click Printer>Setup Properties. Then
click the Print Tab.
3. Make sure the Perform Color Correction checkbox has a check in it, correct profiles
and rendering intent are set.
4. Click OK to close Setup Properties.
5. Go to Apple menu and select Chooser. Highlight Adobe PS and make sure HP
DesignJet 500PS@... is selected.
6. Launch QuarkXPress. If you are using the EFIColor XTension, select
Edit>Preferences>EfiColor and uncheck Use EFI Color.
7. Go to File>Page Setup.
8. Choose a standard paper size in the Paper field.
9. Select Custom Page Default from the pop-up menu if a custom page size is required,
and enter your custom page size. Then enter a Custom Page Name and click the
Add button.
10. Select Page Attributes from the pop-up menu. Select the defined Custom Page in the
‘Paper’ field.
11. Select QuarkXPress from the pop-up menu. Select HP DesignJet 500PS from the
‘Printer.
12. Click OK for Adobe PS Page Setting dialog.
13. Go to File>Print. Select your printer in the ‘Printer’ field and select the page you want
to print, and the number of copies.
14. Select Printer Specific Options from pop-up menu. If you want the file to be printed
automatically, select Print in the After Spooling option. If you want to verify the print
mode and the profile settings before printing the file, select Hold. Select Hold in the
After Printing, if you want to keep the file in the Print Monitor after the file is printed.
15. Click Print to start printing.
32
QuarkXPress 4.04
1. In order to print successfully to QuarkXPress, you will need a special XTension. The
name of the XTension is ‘PrintRGB’. This file is available on your Installation CD, in
the Quark Files folder. Install the file to the ‘Quark XPress:XTensions’ folder, before
starting QuarkXPress.
2. From the HP DesignJet 500PS Print Monitor click Setup>Properties. Then click the
Print tab.
3. Make sure the Perform Color Correction checkbox has a check in it, and that correct
profiles and rendering intent are set.
4. Click Quit to close the Properties dialog.
5. Go to the Apple menu and select Chooser. Highlight Adobe PS and make sure that
HP DesignJet 500PS@... is selected.
6. Launch QuarkXPress. Select Edit>Preferences>Color Management and uncheck
Color Management Active.
7. Click File>Page Setup.
8. In the Printer Description list, select your HP printer. Then click the Output tab to
display it.
9. Select Composite color from the Print Colors list and Printer from the Halftoning list.
Then click the Page Setup button.
10. Choose a standard paper size in the Paper field.
11. Select Custom Page Default from the pop-up menu, if a custom page size is
required, and enter your custom page size. Click the Add button when you are
finished, and then click OK. You are returned to the Output tab of the Print dialog.
12. Click the Printer button,
13. Select Color Matching from the menu. Then select Color/Grayscale from the Print
Color list.
14. Select Printer Specific Options from the menu.
15. Select the appropriate options, and then click Print. You are returned to the Print
dialog box.
16. Click Print to start printing.
33