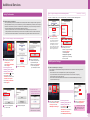
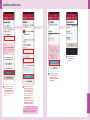
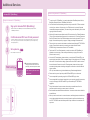
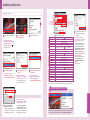
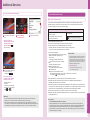
1
 User s Guide
User’s Guide
BlackBerry Internet Service
BlackBerry Internet Service
General Inquiries <docomo Information Center>
9 a.m. to 8 p.m. (open all year round) ・Please double-check the number before dialing.
0120-005-250 (toll free)
• Information available in: English, Portuguese, Chinese,
and Spanish. Can be called from mobile phones
(including non-DOCOMO phones).
●From a DOCOMO mobile phones
(no area code)
1 5 1
● From landline telephones, etc.
0120-800-000
(toll free, in Japnese only)
(toll free, in Japanese only)
• May not be accessible from some IP phones.
• Can not be called from landline phones
● For applications and after service, call above numbers or visit your nearest docomo shop as indicated on our website.
BlackBerry ®
Bold ™ 9900
NTT DOCOMO website
http://www.nttdocomo.co.jp/
FOMA, Xi, i-mode, sp-mode, sp-mode logo, docomo mail and WORLD WING are trademarks or registered trademarks of NTT DOCOMO, INC.
BlackBerry®, RIM®, Research In Motion® and related trademarks, names and logos are the property of Research In Motion Limited and are
registered and/or used in the U.S. and countries around the world. ●miCoach and miCoach logo are trademarks or registered trademarks of
adidas. ●mixi and the mixi logo are registered trademarks of mixi Inc. ●All products or company names shown in this guide are trademarks
or registered trademarks of the respective companies. ●Actual screens may differ from those shown in this guide.
●
●
Mobile phone manners
are important!
Recycled paper
is used
in this guide.
Please be mindful of
issues such as other
s privacy when
people’
you are using mobile
phones with cameras to
take and send pictures.
The contents of this guide are valid as of March 2014.
March 2014
2014
3
March
Use an i-mode email address
with BlackBerry.
Wi-Fi indoors, FOMA*1 outdoors
In moving bullet trains*2
Enjoy watching YouTube*3
Using docomo Wi-Fi
(BlackBerry)
Using FOMA
Bullet trains, stations,
etc.*2
Outdoors
(Illustration)
Easy connection anytime, anywhere.
With docomo Wi-Fi (BlackBerry), you can connect to public wireless LANs in docomo Wi-Fi
areas and docomo Wi-Fi roaming areas such as inside bullet trains*2, stations, hotels, and
cafeterias. In areas where both FOMA and a wireless LAN are available, your device always
selects the wireless LAN to minimize communication charges. You can also enjoy YouTube*3.
You can use an i-mode email address (@docomo.ne.jp) with BlackBerry in conjunction with your
existing ISP email and BlackBerry email. Moreover, if you are switching from an i-mode
compatible handset, you can use your existing i-mode email address.
*1: Separate communication charges are applicable.
*2: Available on the N700 series trains of the Tokaido Shinkansen (Tokyo to Shin-osaka) and the waiting rooms in the concourses of
all 17 stations. Please note that the N700 series trains of the Tokaido Shinkansen do not have the docomo Wi-Fi logo.
Data transfer speed in each car is up to approx. 2 Mbps.
・Requires sp-mode contract. You need to restart the device after completing
the sp-mode contract.
・Requires BlackBerry Internet Service and BlackBerry Dual Service contracts.
sp-mode cannot be used in conjunction with a BlackBerry Enterprise Service contract.
・Only certain sp-mode functions can be used with BlackBerry® Bold™ 9900, BlackBerry®
Bold™ 9780, BlackBerry® Curve™ 9300, BlackBerry® Bold™ 9700 and BlackBerry® Bold™
(software must be updated to version 5.0.0).
・BlackBerry is not compatible with Deco-mail creation and transmission.
・When switching from an i-mode compatible handset, you can use your existing
i-mode email address with BlackBerry only if you cancel the i-mode contract and
make an sp-mode contract at the same time.
・i-mode services are not available.
・Free email service for Family Discount members does not apply to email
sent/received with BlackBerry.
・Mail Tsukai-hodai does not apply to email sent/received with BlackBerry.
・docomo mail cannot be used with BlackBerry devices.
*3: YouTube and other mobile streaming services can only be used with Wi-Fi connections.
sp-mode contract
300
Monthly
¥
(excl.
tax )
Please see P.54 for details on setting up sp-mode email.
01
docomo Wi-Fi (BlackBerry)
Available wherever the mark (left)
is exhibited.
docomo Wi-Fi (BlackBerry) is accessible from
BlackBerry® Bold™ 9900, BlackBerry® Bold™
9780, BlackBerry® Curve™ 9300, BlackBerry®
Bold™ 9700, BlackBerry® Bold™, PCs,
portable gaming consoles, etc.
docomo Wi-Fi
(BlackBerry)
300
Monthly
¥
(excl.
tax )
Please see P.71 for details on setting up docomo Wi-Fi (BlackBerry).
02
Contents
User’s Guide
Setting up email account (setup from a PC)
BlackBerry Internet Service
About BlackBerry Internet Service
About BlackBerry device ・ Be sure to read the following
P.05
・ Basic operation
P.07
・ Notes on using BlackBerry Internet Service
P.05
・ Main menu icons
P.08
・Setting up filters for email accounts
P.43
・Editing ISP email accounts
・Deleting ISP email accounts
P.39
・Switching devices
・Changing language settings
P.48
・Sending service books
P.49
P.40
Setting up the BlackBerry email account
・Setting up the BlackBerry email account
P.41
・Editing the BlackBerry email account
・Deleting the BlackBerry email account
P.43
P.11
Setting up BlackBerry ID
P.12
P.14
Setting up BIS user account (setup from the device)
・Creating a new BIS user account
・Changing the BIS user account password
P.15
P.17
Setting up BIS user account (setup from a PC)
P.50
P.17
P.18
Overview of basic email operations such as viewing, composing and sending email.
Opening email
Composing and sending email
Setting up delivery confirmation
P.51
P.52
P.53
Setting up sp-mode email
Overview of sp-mode usage.
Setting up and using email
Steps to use sp-mode email
Notes on using sp-mode email
To use BlackBerry Internet Service, you must set up an email address for the BlackBerry device.
P.55
P.56
There are two ways to set up an email address: from the BlackBerry device or from a PC.
Setting up email account (setup from the device)
™
Setting up ISP email accounts
・Setting up ISP email accounts
P.21
・Setting up ISP email accounts
P.29
・Editing ISP email accounts
・Deleting ISP email accounts
P.22
・Editing ISP email accounts
・Deleting ISP email accounts
P.31
P.23
P.32
Setting up the BlackBerry email account
・Setting up the BlackBerry email account
P.24
・Setting up the BlackBerry email account
P.32
・Editing the BlackBerry email account
・Deleting the BlackBerry email account
P.25
P.34
P.26
・Editing the BlackBerry email account
・Deleting the BlackBerry email account
・Changing language settings
P.26
・Changing language settings
Additional Services
P.35
・Switching devices
・Sending service books
P.27
・Switching devices
・Sending service books
P.36
Safety Confirmation
SMS Rejection Settings
Billing Details Confirmation
(Japanese only)
imadoco search /imadoco
kantan search (Japanese only)
Directly send a message with
your voice (Japanese only)
docomo ID issue
(Japanese only)
P.35
Other settings
P.28
P.59
P.37
FAQ
P.81
P.65
docomo Wi-Fi (Black Berry)
P.66
・ Steps to use docomo Wi-Fi (BlackBerry)
P.73
P.67
・ Notes on using docomo Wi-Fi (BlackBerry)
P.74
・ Setting up the device
P.75
P.68
・ Connecting to docomo Wi-Fi (BlackBerry)
P.77
P.69
P.70
Access Restriction Service
・ About Access Restriction Service
P.78
・ BlackBerry Web Filter usage instructions
(Japanese only)
P.79
・ BlackBerry Web Filter regulations
(Japanese only)
P.80
■ This document is for use in Japan only.
■ This document describes operating instructions for BlackBerry ® Bold ™ 990 0.
■ The contents of this document may be changed at any time without notice.
Index
P.83
■ The latest version of this document can be viewed at the following URL:
http://www.nttdocomo.co.jp/service/provider/blackberryservice/usage/index.html
Additional Services
Setting up the BlackBerry email account
Other settings
Checking /changing email settings
on BlackBerry (Japanese only)
P.57
Overview of additional services.
For BlackBerry® Bold™ 9780, BlackBerry® Curve™ 9300, BlackBerry® Bold™ 9700 and BlackBerry® Bold™ .
Setting up ISP email accounts
(Japanese only)
Setting up sp-mode email
For devices other than
BlackBerry ® Bold™ 9900
For BlackBerry Bold 9900
®
P.20
Setting up sp-mode email
Setting up and using email
・Confirming your PIN and IMEI numbers
・Creating a new BIS user account
P.47
P.42
Using email service
Overview of various account settings.
・Creating a new BlackBerry ID
・Changing BlackBerry ID
P.39
Setting up accounts
Setting up accounts
・Setting up ISP email accounts
Before using
Please read before setting up BlackBerry Internet Service.
Types of accounts
Other settings
Setting up ISP email accounts
Before using
P.38
■ For more convenient BlackBerry device usage, download configuration software from the following URL:
http://www.nttdocomo.co.jp/support/utilization/application/foma/utility/smart _phone/
03
04
About BlackBerry Internet Service
必ずお
Be
sure
読 みください
to read the following
Notes on using BlackBerry Internet Service
Device notes
The BlackBerry device can only be used in the service area of the FOMA network provided by
NTT DOCOMO and in NTT DOCOMO’s roaming service areas.
Availability of features varies depending on signal conditions. You are required to submit an
application for WORLD WING to use your mobile phone overseas (WORLD WING service is not
available in certain countries and regions).
Only certain sp-mode functions can be used with BlackBerry® Bold™ 9900, BlackBerry® Bold™
9780, BlackBerry® Curve™ 9300, BlackBerry® Bold™ 9700 and BlackBerry® Bold™ (software must
be updated to version 5.0.0).
The BlackBerry device is not compatible with i-mode functions.
Blackberry devices can only be used under a subscription for the BlackBerry Internet Service
optional services for FOMA and Xi service.
If you do not subscribe to BlackBerry Internet Service, you cannot use Blackberry device
communications functions (email, browsing, messenger, etc.) other than those such as voice
service and SMS.
The number of email messages, phone book entries, and other items that can be stored varies
depending on memory space remaining in the BlackBerry device. The device software is
structured so that when the amount of memory space remaining becomes small, saving new
email messages, address book entries, and other items may overwrite email and other user data
starting from the oldest data in order to secure space for that new data.
We recommend that you take memos or otherwise save information registered to the BlackBerry
device. Please note that NTT DOCOMO assumes no responsibility if registered information is lost
in malfunction and repairs or other handling of the BlackBerry device.
05
Before using
For BlackBerry Internet service subscribers who use a DOCOMO UIM Card: After turning
BlackBerry device on, it will periodically access the Research In Motion Limited server in the
background to update information related to email, applications, and other BlackBerry device
functions you have already set, and to maintain a constant connection. Please note that packet
communications charges may be expensive, so we strongly recommend subscribing to a packet
flat-rate service such as Pake-hodai FLAT. Be sure to use Global Pake-hodai in countries and
regions in which it is supported.
Refer to the User’s Guide (International Service) or DOCOMO website for more details about
Global Pake-hodai.
NTT DOCOMO provides Research In Motion Limited with the following information in order to
verify the customer when making initial BlackBerry Internet Service settings.
① Customer’s phone number
② Manufacturer’s serial number of DOCOMO UIM Card
Device data transfer service for BlackBerry is not offered at docomo Shops.
The phone book and other data saved on the BlackBerry device cannot be transferred at a
repair service counter. We recommend that you use the BlackBerry ® Desktop Software
backup function to save data to a PC before visiting a repair service counter. You can also
transfer and store data such as photos and video clips you take with the device, as well as
music data, to a microSD memory card.
Some data may remain if you delete data (address book, etc.) on a DOCOMO UIM Card
registered on other handset. To completely delete all data on the DOCOMO UIM Card,
delete that data with other handset.
Please note that certain third-party applications (such as Documents To Go) do not support
editing or viewing of files in Japanese. NTT DOCOMO does not guarantee operation of all
functions with such applications.
Please direct any questions regarding installed third-party applications to the original
publisher.
Your warranty is void if you disassemble or modify the BlackBerry device.
docomo mail cannot be used with BlackBerry devices.
BlackBerry Internet Service notes
A separate subscription to the email service of an email service provider (POP/IMAP) is
required. However, operation has not been verified with all email services. Please see the
follwing DOCOMO website for information on email services for which operation has been
verified. (Japanese only)
http://www.nttdocomo.co.jp/service/provider/blackberryservice/index.html
Japanese text in email and on websites may be garbled under certain conditions.
Attached files may not be viewable in some cases.
If using an email address exclusively for the BlackBerry device, functions such as “More All”,
“More” and, “Open Attachment” will no longer be available after approximately 30 days have
passed from receiving the email.
It may take as long as 15 minutes to receive email depending on the email service you
subscribe to.
Unlike with BlackBerry Enterprise Solution, Server-to-End message encryption is not
provided.
Unlike BlackBerry Enterprise Solution, administrators of BlackBerry Internet Service cannot
perform remote device locking and initialization. We recommend that you protect your
BlackBerry device with a password, or use BlackBerry Protect® available from Research In
Motion Limited.
Functions may differ from BlackBerry Internet Service provided by carriers in other countries.
You cannot use a device other than your own BlackBerry device to send or receive email
with the email address exclusive to your BlackBerry device.
You will no longer be able to receive email if you change the email password for your ISP
account. Please set the password again in the email account editing screen if you change the
password.
06
About BlackBerry device
Basic operation
Main menu icons
Home screen
Menu screen
Setup screen
Menu key
Before using
For BlackBerry® Bold™ 9900 and BlackBerry® Bold™ 9780
・Open the menu in an application.
・Cancel operation.(“Menu key” →“Close”)
Trackpad
・Align the cursor with the menu item you want to use.
・Press to open the screen for that item.
Escape key
・Exit a screen.
・Cancel an action.
・Go back one page.
Messages
Setup
Email Accounts
View the message list as well
as compose and send email.
Display the settings menu
icons.
Navigation bar
Options
Set up your BlackBerry email
account and additional email
accounts.
Open the tray and display
all icons.
Open the main list of device
options and confirm the
device PIN and IMEI
numbers.
For BlackBerry® Curve™ 9300, BlackBerry® Bold™ 9700 and BlackBerry® Bold™
Home screen
Menu screen
Setup screen
How to use the touch panel | BlackBerry® Bold™ 9900
Tap
Flick
Touch an item such as icon or
menu with your finger lightly and
release it.
Stroke the screen with your finger
lightly and flick up / down / left /
right.
Shrink
Stretch
Messages
Setup
Email Settings
View the message list as well
as compose and send email.
Display the settings menu
icons.
Set up your BlackBerry email
account and additional email
accounts. (This icon appears
automatically under the
“Setup” icon on the Home
screen when you have signed
up for BlackBerry Internet
Service.)
Options
Open the main list of device
options and confirm the
device PIN and IMEI
numbers.
・Please refer to the FAQ page if the Email Settings icon is not
displayed.
Setup Wizard
Place fingers wide apart then close
them.
07
Place fingers close together then
open them.
Display the initial settings
screen. You can set language
for display and input, time, and
fonts, and register owner
information, etc.
08
Memo
● Write down anything, such as account information.
Setting up accounts
Types of accounts
P.11
Setting up BlackBerry ID
・Creating a new BlackBerry ID
・Changing BlackBerry ID
P.12
P.14
Setting up BIS user account (setup from the device)
・Creating a new BIS user account
P.15
・Changing the BIS user account password
P.17
Setting up BIS user account (setup from a PC)
09
・Confirming your PIN and IMEI numbers
P.17
・Creating a new BIS user account
P.18
10
Setting up accounts
Types of accounts
BlackBerry has four types of accounts.
BlackBerry Internet Service user account
Creating a BlackBerry Internet Service user account (described hereafter as “BIS user account” )
allows you to manage your BlackBerry device by entering the user name and password to log in
on a PC.
BlackBerry ID
Please save a copy of the user name and password of each account for your records.
ISP email accounts
BlackBerry Internet Service
user account
Required for BlackBerry ® Bold™ 9900.
If you already have a BlackBerry ID, perform the procedure on P.27.
An ISP email account is needed to create a new BlackBerry ID.
Setting up accounts
Setting up BlackBerry ID
BlackBerry email account
Creating a new BlackBerry ID
BlackBerry ID
This account is for setting up email, using BlackBerry App World™ and more. Input your email address
and password to create a new BlackBerry ID. Refer to P.12 for instructions on how to create a new
account. When creating a BlackBerry ID with BlackBerry® Bold™ 9900, you cannot create a new
BlackBerry Internet Service user account. If you already have a BlackBerry Internet Service user
account, even though you create a BlackBerry ID with BlackBerry® Bold™ 9900, you can continue to
use the BlackBerry Internet Service user account with BlackBerry® Bold™ 9900.
1
Press “All” in the Navigation
bar.
2
Press the “Setup” icon.
4
Press “Create New”.
5
Confirm BlackBerry
membership terms and
conditions and press
“I Agree”.
3
Press “Email Accounts”.
ISP email accounts
The ISP email accounts you use on your PC can also be used on your BlackBerry device. Setup
requires your email address and password.
You can set up a maximum of 10 ISP email addresses.
Email service for which operation verified: Google, OCN, So-net, Plala, @nifty (as of August, 2012).
BlackBerry email account
The BlackBerry email account is exclusively for use with your BlackBerry device. You can set up
this account by entering your user name (the part before @ in your email address) and password.
You can set up one BlackBerry email account per BlackBerry Internet Service subscription.
Email address example:aaaa@docomo.blackberry.com
11
12
Setting up accounts
Changing BlackBerry ID
A
B
C
7
D
1
Press “All” in the Navigation
bar.
2
Press the “Options” icon.
3
Press “Device”.
F
G
H
Setting up accounts
E
The message “You’ve
created a BlackBerry ID!”
appears.Press “Continue”.
A
6
Type in the fields and press “Submit”.
A
First Name/Last Name
Enter your name.
B
Screen Name
Enter the screen name.
C
Username
Enter the valid ISP
email account.
・Username can regist
ISP email account.
D
Password
Enter the password.
E
F
Confirm Password
Enter the same
password that you
entered in D .
G
Password
Recovery Question
Enter question for
sending your
password to your ISP
email account that
you entered in C in
case of forgetting the
password.
H
B
Answer
Enter the answer for
the Password
Recovery Question.
I would like to receive
information on RIM and
BlackBerry products
and services.
Checkmark in the
checkbox to receive
the information.
C
D
E
4
Press “BlackBerry ID”.
F
5
The settings screen for BlackBerry ID account
appears. To change settings, type in the fields.
A
First Name/Last Name
You can change your
name.
B
Screen Name
You can change the
screen name of your
choice.
C
Username
You can change ISP
email account you
registered before.
・Username can regist ISP
email account.
D
8
13
Confirm The BlackBerry
Prosumer Service
Agreement and press
“I Accept”.
9
Enter the “Password” of
your email address.
Press “Continue”.
10 The screen above appears
if setup is successfully
completed.
Press “Close”.
E
Recovery Question
You can change the
question and answer for
sending your password to
your ISP email account in
case of forgetting the
password.
F
I would like to receive
information on RIM and
BlackBerry products
and services.
Checkmark in the
checkbox to receive
the information.
BlackBerry ID Password
You can change the
password you registered
before.
14
Setting up accounts
6
Press “Menu key
press “Save”.
”, then
7
8
The message “Your
BlackBerry ID account has
been updated.” appears.
Press “OK”.
4
Press “Create User Name”.
5
Press “Create Login”.
6
Enter the “User name” and
“Password” of your choice.
Enter the password again in
the “Confirm password”
field. Press “Next”.
7
When you have finished
creating a BlackBerry
Internet Service user name,
the message “You are
almost done! Your
BlackBerry Internet Service
user name was successfully
created.” appears.
Press “Next”.
8
Verify the email address you
set up. Enter the “email
password” of your email
address. Press “Next”.
9
The screen above appears if
verification is successfully
completed. Press “OK”.
Setting up BIS user account | Setup from the device
Setting up accounts
Password input screen
appears. Enter the
“BlackBerry ID Password”
you registered before and
press “OK”.
You cannot create a new BIS user account on BlackBerry ® Bold™ 9900.
Creating a new BIS user account
● Please note that once you set up the BIS user account, you cannot change or delete the user name.
● You will need the password you set up for your email account to create a new BIS user account.
1
Press “All” in the Navigation
bar. Press the “Setup” icon.
◎ For devices other than BlackBerry ® Bold™ 9780
2
Press “Email Accounts”.
• When launching Email Accounts
for the first time, the “End User
Agreement” will be displayed. See 3 to 8 on P. 29.
3
Press “Settings”.
You must complete this
operation to become able to
send/receive emails. If you
have more than one email
account, repeat this step 8
to verify all of them. After
verifying all of your email
accounts, the screen shown
in step 9 appears.
Press the “Menu key ” at
the Home screen.
Select “Setup” → “Email
Settings” to display the
3
screen in step .
15
16
Setting up accounts
Changing the BIS user account password
Follow steps 1 to 3 on P.15
1
7
Press “Change Password”.
5
Enter the “Old password”
(the one currently set).
6
Enter the “New password”.
Enter it again in the “Confirm
password” field, then press
“Save”.
The screen above appears
if your password has been
successfully updated.
Press “OK”.
◎ For devices other than
BlackBerry® BoldTM 9780
Press “Menu key ” at the
Home screen.
4
PIN and IMEI numbers
appear.
2
Press “Options”.
3
Select “Device” and press
“Device and status
information”.
◎ For devices other than
BlackBerry® BoldTM 9780
Press “Status”.
Setting up accounts
4
Press “All” in the Navigation
bar.
● Your PIN and IMEI numbers are inscribed on the side of the box your BlackBerry device came in and on the device itself (behind the battery).
Creating a new BIS user account
Setting up BIS user account | Setup from a PC
If you are using BlackBerry ® Bold ™ 9900 and already have a BlackBerry ID, you cannot
create a new BIS user account on a PC.
Confirming your PIN and IMEI numbers
● PIN number: An identification number for BlackBerry devices.
Every BlackBerry device has a its own unique PIN number.
● IMEI number: A production number for mobile devices.
Every mobile device has a its own unique IMEI number.
17
● If you are setting up an email account for the first time, you will need to set up a user name and password on website for PC.
You will need to insert a DOCOMO UIM Card with a BlackBerry Internet Service subscription into the device
and turn on mobile network.
If you agree to the “End User Agreement” for setting up an email account, you cannot create a new BIS user
account on a PC. Use the BIS user account you set up on the device and log in to the website.
18
Setting up accounts
Setting up and using email
Setting up email account (set up from the device)
12345678
*************
A
B
C
For BlackBerry® Bold™ 9900
1
Access
https://docomo.blackberry.
com/ with your PC’s browser
and click “Create New
Account”.
2
Read the End User
Agreement, check mark the
checkbox and click “I Agree”
if you agree.
3
A
B
Enter the device PIN (half-width
alphanumeric characters) for your
BlackBerry device in “Device PIN”.
Enter the device IMEI number
(half-width alphanumeric
characters) in “Device IMEI”.
・Dots do not need to be entered.
C
Click “Continue”.
◎ Confirming your PIN and
IMEI numbers
P.17
Setting up ISP email accounts
・Setting up ISP email accounts
・Editing ISP email accounts
・Deleting ISP email accounts
・Editing the BlackBerry email account
・Deleting the BlackBerry email account
・Sending service books
*************
B
*************
C
Configure your BIS user
account.
Enter a user name of your
choice in the “User name”
field. (Enter between 4 and
32 half-width alphanumeric
characters.)
A distinction is made between
uppercase and lowercase.
Underscores [_], hyphens [-],
and dots [.] can be used.
19
P.26
P.27
P.28
5
A
B
Enter the email address
you wish to use in the
“Email address ” filed.
Enter the password of
your email address in the
“Email password” field.
Click “Next”.
Setting up ISP email accounts
6
・If you don’t konw your
password, please contact
your email service provider.
・If the user name you specify is already
in use, see [Reference] below.
D
P.26
For BlackBerry ® Bold ™ 9780, BlackBerry ® Curve ™ 9300, BlackBerry ® Bold ™ 9700
and BlackBerry ® Bold ™ .
B
C
C
P.25
For devices other than BlackBerry® Bold™ 9900
A
C
B
P.24
A
D
A
P.23
Other settings
・Switching devices
4
P.22
Setting up the BlackBerry email account
・Setting up the BlackBerry email account
・Changing language settings
○○○○○
P.21
Enter the password of your
choice in the “Choose
password” field. (Enter
between 8 and 16
half-width alphanumeric
characters.)
Re-enter the password in
the “Confirm password”
field.
Click “Next”.
The message “Email Account
Successfully Added” appears
and an email message is sent to
your BlackBerry device,
notifying you that registration is
completed. To quit, click “Finish”.
If automatic authentication
cannot be made with the
email address and
password, please enter the
user name, password, and
POP server address
manually in the “Signature
and Settings”.
・Setting up ISP email accounts
・Editing ISP email accounts
・Deleting ISP email accounts
◎ If the user name you specify is already in use
User name candidates appear.
Select one of the candidates
or enter another user name,
and then click “Next”.
P.31
P.32
Setting up the BlackBerry email account
・Setting up the BlackBerry email account
・Editing the BlackBerry email account
・Deleting the BlackBerry email account
P.32
P.34
P.35
Other settings
・Changing language settings
・Switching devices
・Sending service books
[Reference]
P.29
P.35
P.36
P.37
・Please have ready the ISP email address and password you intend to use.
・Packet communications charges apply when setting up email addresses.
・Please make sure the device is sufficiently charged before setting up from the device.
・You can set up to a maximum of 11 email addresses (up to 10 ISP email addresses
supporting POP or IMAP access and one BlackBerry email address).
20
14
Setting up email account
| Setup from the device
For BlackBe rr y Bold™ 9 9 0 0
®
● Once you apply for BlackBerry Internet Service, the icon for setting up your email account automatically
appears under the “Setup” icon on the Home screen of the BlackBerry device.
Setting up ISP email accounts
7
1
Press “All” in the Navigation
bar.
2
Press the “Setup” icon.
3
Enter the “Password” of
your email address.
Press “Continue”.
8
Depending on your provider,
this page may look different
or the “Continue” page
may be displayed.
Each time you set up an
email account, an icon like
that shown below appears
and you receive an email
message stating that setup
is complete.
Setting up and using email
If automatic authentication
does not occur and an
error appears after pressing
“Continue”, please follow
the displayed directions. Please contact your
email service provider if
further confirmation on
this issue is required.
If you don’ t know your
password, please contact
your email service provider.
Press “Email Accounts” .
The screen above appears
if setup is successfully
completed.
◎ Setting up an additional email account
Press “Set up another email
account”. Repeat steps 5 to 8 .
◎ Setting up the BlackBerry
email account
P.24
4
Press “Set up another
email account”.
5
Select your current provider.
If your current provider does
not appear, select “Other”.
6
Enter the “Email address”
you obtained from your email
service provider.
Editing ISP email accounts
Follow steps 1 to 3 on P. 21
● How to enter characters
・ Entering alphabetical characters in caps → Press and hold the desired letter key.
・ Entering numbers/symbols → Press the “Alt key
” on the lower left corner of
the device then press the desired number/symbol key.
4
21
Select an email account you
wish to edit and press
“Menu key
”.
5
Press “Edit”.
22
Setting up email account
6
| Setup from the device
The setting screen appears. To change settings, type in the fields.
After filling up the fields, press “Save”.
Setting up the BlackBerry email account
Follow steps 1 to 4 on P. 21
Depending on your provider, this page may appear differently or may
not appear at all.
The following services are not available when configuring an sp-mode
email account: “ E Reply to”, “ F Auto BCC” and “ G Deleted items”.
A
B
C
A
Email account name
You can change the name of your
email account.
B
Your name
Enter the name you wish to
appear in the sender field.
C
Signature
Enter the signature you’d like to
show at the end of emails sent
from your BlackBerry device.
D
E
F
E
Reply to
If a reply email address has been
set, replies to your email will be
sent to the reply email address,
not the email address from which
the original message was sent.
F
Auto BCC
A copy of the email will be
automatically sent to the email
address you entered.
G
D
G
Password
Enter the password of your
email address.
5
6
Press “Create New Address”.
Enter the “User name” and
“Password” of your choice.
7
Email addresses cannot be
created with a BlackBerry email
account with the following.
・Consecutive dots (eg., “..” )
・A dot “.” just before @
Deleted items
Check mark the checkbox so that
email deleted from the server in
ISP email will automatically be
deleted on the device, too.
Scroll down and enter the
password again set in step
6 in the “Confirm
password” field.
Setting up and using email
・Synchronization may take time.
● How to enter characters
・ Entering alphabetical characters in caps → Press and hold the desired letter key.
Deleting ISP email accounts
・ Entering numbers/symbols → Press the “Alt key
Follow steps 1 to 3 on P. 21
” on the lower left corner of
the device then press the desired number/symbol key.
4
Select an email account you
wish to delete and press
“Menu key
”.
5 Press “Delete”.
6 Press “Yes”.
The screen shown in step
appears.
4
8
Scroll down further and
select the “Security
question” in case of
forgetting the password.
9
[Reference]
◎ If the user name you specify is already in use
User name candidates appear.
Select one of the candidates
or enter another user name,
and then press “Continue”.
23
Enter the answer in the
“Answer to security
question” field. Press
“Continue”.
・If the user name you specify is
already in use, see [Reference]
below.
10 The screen above appears
if setup is successfully
completed.
Each time you set up an
email account, an icon like
that shown below appears
and you receive an email
message stating that setup
is complete.
◎ Setting up additional ISP
email accounts
P.21
24
Setting up email account
| Setup from the device
Editing the BlackBerry email account
4
5
Select an BlackBerry email
account you wish to edit.
Press “Menu key
”.
6
C
The editing screen appears. To change settings, type in the fields.
After filling up the fields, press “Save”.
Email account name
You can change the name of
your email account.
B
Your name
Enter the name you wish to
appear in the sender field.
C
Signature
Enter the signature you’d like
to show at the end of emails
sent from your BlackBerry
device.
D
D
Password
You can change your email
password by entering a new
password in this field.
E
Security question
You can change your security
question by selecting a new
security question.
F
Answer to security question
You can change your security
qestion by entering the answer
in this fild.
E
F
G
H
I
25
4
Press “Edit”.
A
B
Deleting the BlackBerry email account
G
Reply to
If a reply email address has been
set, replies to your email will be
sent to the reply email address, not
the email address from which the
original message was sent.
H
Auto BCC
A copy of the email will be
automatically sent to the email
address you entered.
I
Auto forward
Copies of all email received will
automatically be forwarded to the
email address you entered. Select
“All messages” or “Only messages
with attachments”.
Select an BlackBerry email
account you wish to delete.
Press “Menu key
”.
5
Press “Delete”.
Follow steps 1 to 3 on P.21
6
Press “Yes”.
The screen shown in step
appears.
4
Changing language settings (English to Japanese) Setting up and using email
A
Follow steps 1 to 3 on P.21
1
Press “All” in the Navigation
bar. Press the “Options”
icon.
2
Press “Typing and
Language”.
3
Press “Language”.
4
Select “Display Language”.
5
Press “日本語”.
6
Press “Menu key
”and
“Save”.
All menues switch to
Japanese.
・Filters will not be applied when automatic forwarding is set, and all email received will be forwarded.
26
Setting up email account
| Setup from the device
Switching devices
S e nding se r vice books
Follow steps 1 to 3 on P. 21
● What are service books?
● What are switching devices ?
Service books are data files containing information about your BlackBerry Internet Service settings.
Send the service books if you have problems such as not being able to receive email correctly on your
BlackBerry device.
If problems aren’t resolved after sending service books, contact docomo Information Center.
This section explains how to transfer BlackBerry Internet Service settings from your old BlackBerry
device to your new BlackBerry device. Execute these steps on your new device. Please note that you
will not be able to send/receive emails using your new device until you complete this operation.
4
5
Press “Continue”.
4
6
Press “Menu key
”.
5
Press “Service Books”.
Enter the password of your
email address.
Press “Activate”.
7
7
8
Confirm that the icon for the
email address you are
setting up appears on the
Home screen.
Press “Send Service
Books”.
If you have more than
one email account, the
service book will be sent
to all of them.
If you have more than one
email account, enter the
appropriate passwords for
each of them.
The screen above appears if
email account has been
successfully activated.
Press “Close” to finish the
procedure.
6
The screen above appears if
Service Books were successfully
sent. Press “OK”.
8
Setting up and using email
Enter the current
“BlackBerry ID Username”
and “BlackBerry ID
Password”. Press “Sign In”.
Follow steps 1 to 3 on P. 21
Confirm on the Home
screen that email from the
Activation Server has been
delivered.
If the icon does not appear,
please follow the
instructions at “Sending
service books” on P.28.
◎ A BIS user account and/or BlackBerry email account on BlackBerry ® Bold ™ 9900 cannot be transferred when changing to BlackBerry ® Bold ™ 9780, BlackBerry ® Bold ™ 9700, BlackBerry ® Curve ™ 9300 or BlackBerry ® Bold ™.
27
28
Setting up email account
| Setup from the device
For devices othe r than BlackBe rr y ® Bold T M 9 9 0 0
● How to enter characters
・Screen captures are based on BlackBerry® Bold™ 9780.
・ Entering alphabetical characters in caps → Press and hold the desired letter key.
・ Entering numbers/symbols → Press the “Alt key
● Once you apply for BlackBerry Internet Service, the icon for setting up your email account automatically
appears under the “Setup” icon on the Home screen of the BlackBerry device.
” on the lower left corner of
the device then press the desired number/symbol key.
Setting up ISP email accounts
7
1
2
Press “Email Accounts”.
3
◎ For devices other than
BlackBerry® BoldTM 9780
Press the “Menu key
” at the
Home screen. Select “Setup”→
“Email Settings” to display the
screen shown in step 3 .
BlackBerry Internet Service
setup site appears.
Press “View End User
Agreement”.
The End User Agreement
appears. Please read and
scroll down to the bottom of
the screen.
Each time you set up an
email account, an icon like
that shown below appears
and you receive an email
message stating that setup
is complete.
◎ Setting up an additional email account
Press “Add Another Account”.
7 .
5
Repeat steps to
Setting up and using email
Press “All” in the Navigation
bar. Press the “Setup” icon.
If setup is successfully
completed, the message
“Success!” appears.
◎ Setting up the BlackBerry
A
email account
P.32
B
4
A
B
Under “I have read and
understand the Legal Terms
and Conditions”, check mark
“Yes” if you understand.
Under “Do you agree to be
bound by the Legal Terms
and Conditions?”, press
“I Agree” if you agree.
Please note that once you
B above, you
complete will not be able to set up from a
PC until you set up the BIS user
account from the device.
• Please see P.15 for creating a
new BIS user account.
29
5
Enter the “Email address”
you obtained from your email
service provider.
6
Enter the “Email password”
of your email address.
Press “Next”.
If automatic authentication
does not occur and an error
appears after pressing
“Next”, please follow the
displayed directions. Please contact your email
service provider if further
confirmation on this issue is
required.
If you don’t know your
password, please contact
your email service provider.
30
Setting up email account
| Setup from the device
Editing ISP email accounts
Deleting ISP email accounts
Follow steps 1 to 2 on P. 29
Follow steps 1 to 2 on P. 29
A
B
C
D
3
Press “Edit” under the email
account you wish to edit.
3
E
F
Press “Delete” under the
email account you wish to
delete.
4
Confirm the email account
to be deleted and press
“Delete”.
5
To continue on and delete
another account, repeat the
procedure from step 3 .
G
4
Setting up the BlackBerry email account
Depending on your provider, this page may appear differently or may not appear
at all.
The following services are not available when configuring an sp-mode email
account: “ B Reply to”, “ F Auto BCC to” and “ G Deleted items”.
A
Email account name
You can change the name of your
email account.
B
Reply to
If a reply address has been set,
replies to your email will be sent to
the reply email address, not the
email address from which the
original message was sent.
C
D
Your name
Enter the name you wish to appear
in the sender field.
Password
Enter the password of your email
address.
E
Signature
Enter the signature you’d like to
show at the end of emails sent
from your BlackBerry device.
F
Auto BCC to
A copy of the email will be
automatically sent to the email
address you entered.
G
Deleted items
Check mark the checkbox so that
email deleted from the server in ISP
email will automatically be deleted
on the device, too.
・Synchronization may take time.
3
Press “Add An Email
Account”.
・ If you don’t have an email account, scroll down to step 4 .
4
Press “Need an Email
Address?”.
Follow steps 1 to 2 on P. 29
5
Setting up and using email
The editing screen appears. To change settings, type in the fields.
After filling up the fields, press “Save”.
Enter the “Email address”
and “Email password” of
your choice.
Email addresses cannot be
created with a BlackBerry email
account with the following.
・Consecutive dots (eg., “..” )
・A dot “.” just before @
● How to enter characters
・ Entering alphabetical characters in caps → Press and hold the desired letter key.
・ Entering numbers/symbols → Press the “Alt key
5
31
Enter the password of your
email address. Press “OK”.
6
To continue on and edit another
account, repeat the procedure
from step 3 .
” on the lower left corner of
the device then press the desired number/symbol key.
32
Setting up email account
| Setup from the device
Editing the BlackBerry email account
Follow steps 1 to 2 on P. 29
A
6
Scroll down and enter the
email password again in the
“Confirm password ” field.
7
Scroll down further and
select the “Security
question” in case forgetting
a passsword.
8
B
Enter the answer to your
security question in the
“Answer to security
question” field.
C
3
D
Press “Edit” under the
BlackBerry email account.
E
F
G
4
9
Press “Finish”.
・If the user name you specify is
already in use, see [Reference]
below.
[Reference]
◎ If the user name you specify is already in use
User name candidates
appear. Select one of the
candidates or enter
another user name, and
then press “Finish”.
◎ Setting up an additional ISP
email account
P.29
33
A
Email account name
You can change the name of
your email account.
B
Reply to
If a reply address has been set,
replies to your email will be
sent to the reply email address,
not the email address from
which the original message
10 If setup is successfully
completed, the message
“Success!” appears.
Press “Finish”.
Each time you set up an
email account, an icon like
that shown below appears
and you receive an email
message stating that setup
is complete.
The editing screen appears. To change settings, type in the fields.
After filling up the fields, press “Save”.
C
D
E
Your name
Enter the name you wish to
appear in the sender field.
Signature
Enter the signature you’d like
to show at the end of emails
sent from your BlackBerry
device.
Auto BCC to
A copy of the email will be
automatically sent to the email
address you entered.
F
Auto forward to
Copies of all email received
will automatically be forwarded
to the email address you
entered. Select “All messages”
or “Only message with
attachments”.
Setting up and using email
H
・Filters will not be applied when automatic forwarding is set, and
all email received will be forwarded.
G
Password
You can change your email
password by pressing
“Change Password” button,
then entering a new password
in this field.
H
Change Security Question
You can change your security
question by pressing this
button, then entering the
question and answer in the
fields.
34
Setting up email account
5
Enter the password of your
email address. Press “OK”.
6
| Setup from the device
6
The screen above appears
if setup is successfully
completed.
The screen above appears
if setup is successfully
completed. Press “OK”.
7
All menus switch to
Japanese.
Switching devices
Deleting the BlackBerry email account
Follow steps 1 to 2 on P. 29
Follow steps 1 to 2 on P. 29
● What are switching devices ?
3
Press “Delete” under the
BlackBerry email account.
4
Press “Delete”.
5
The screen above appears
if email account is
successfully deleted.
3
Changing language settings (English to Japanese) Follow steps 1 to 2 on P.29
Confirm the email account
that you are transferring
from your old device, then
press “Move Email
Accounts”.
Please note that you cannot
send/receive emails on your
new device if you do not
select “Move Email
Accounts”.
4
Enter the password of
your email address.
Press “Validate”.
5
Setting up and using email
This section explains how to transfer BlackBerry Internet Service settings from your old BlackBerry device to
your new BlackBerry device. Execute these steps on your new device. Please note that you will not be able to
send/receive emails using your new device until you complete this operation.
The screen above appears
if your email accounts
have been successfully
moved. Press “OK”.
If you have more than one
email account, repeat the
steps to verify all of them.
If you forget your password,
please contact docomo
Information Center for
BlackBerry email and email
service provider for ISP
email.
◎ A BIS user account and/or BlackBerry email account on BlackBerry ® Bold ™ 9900 cannot be 3
35
Press “Settings”.
4
Press “Language”.
5
Select “日本語” and then
press “Save”.
transferred when changing to BlackBerry ® Bold ™ 9780, BlackBerry ® Bold ™ 9700, BlackBerry ® Curve ™ 9300 or BlackBerry ® Bold ™.
36
Setting up email account
| Setup from the device
Setting up and using email
6
Confirm that the icon for the
email address you are setting
up appears on the Home
screen.
Setting up email account (set up from a PC)
If the icon does not
appear, please next
instructions at “Sending
service books”.
Sending service books
Follow steps 1 to 2 on P. 29
Ac c es f r o m t h e fo ll ow i n g URL
https://docomo.blackberry.com/
● What are service books?
Service books are data files containing information about your BlackBerry Internet Service
settings. Send the service books if you have problems such as not being able to receive email
correctly on your BlackBerry device and not displaying email icon.
If problems aren’t resolved after sending service books, contact docomo Information Center.
Setting up ISP email accounts
・Setting up ISP email accounts
・Editing ISP email accounts
・Deleting ISP email accounts
P.39
P.39
P.40
Setting up the BlackBerry email account
・Setting up the BlackBerry email account
・Editing the BlackBerry email account
・Deleting the BlackBerry email account
P.41
P.42
P43
Other settings
・Setting up filters for email accounts
3
Press “Help”.
4
Press “Send Service
Books”.
If you have more than one
email account, the service
book will be sent to all of
them.
6
37
5
The screen above appears
if Service Books were
successfully sent.
Press “OK”.
・Switching devices
・Changing language settings
・Sending service books
P.43
P.47
P.48
P.49
・Prepare your ISP email ad dres s an d pa s sword.
・Prepare us er name an d pa s sword for BIS us er ac c ount.
Confirm on the Home
screen that email from the
Activation Server has been
delivered.
38
Setting up email account | Setup from a PC
Setting up ISP email accounts
A
Email account name
You can change the name of
your email account.
B
Reply to
If a reply email address has been
set, replies to your email will be
sent to the reply email address,
not the email address from which
the original message was sent.
A
B
C
D
E
A
F
G
B
C
1
Access https://docomo.
blackberry.com/ with your
PC’s browser. Enter the
“User name” and
“Password”. Click “Log In”.
2
After logging in, click “Set
Up Another Email
Account” on the Email
Accounts screen.
3
The setting screen appears.
After filling up the fields,
click “Next”.
A
◎ Creating a new BIS
user account
B
From the device
P.15
C
P.17
The editing screen appears. To
change settings, type in the
fields. After filling up the fields,
press “Save”.
Depending on your provider, this
page may appear differently or
may not appear at all.
The following services are not
available when configuring an
sp-mode email account: “ B
Reply to”, “ F Auto BCC to” and
“ G Synchronize”.
Select “Add an existing
email account”.
Enter the email address
you wish to use in the
“Email address” field.
Enter the password for
that email address in the
“Email password” field.
Your name
Enter the name you wish to
appear in the sender field.
D
Password
Enter the password of your
email address.
Deleting ISP email accounts
44 The message “Email Account
Successfully Added” appears
and an email message is sent
to your BlackBerry device,
notifying you that registration is
complete. To quit, click
“Finish”.
39
F
Auto BCC to
A copy of the email will be
automatically sent to the email
address you entered.
G
Synchronize
Check mark the checkbox so that
email deleted from the server in ISP
email will automatically be deleted
on the device, too.
・ Synchronization may take time.
Follow step 1 on P.39
◎ Setting up an additional email account
2
Click the “Delete” icon displayed to the right of
“Email Accounts”.
4
The screen above appears if
email account is
successfully deleted.
Click “OK”.
Click “Add Another Account”.
Repeat steps 2 to 4 .
Editing ISP email accounts
2
Signature
Enter the signature you’d like to
show at the end of emails sent from
your BlackBerry device.
Setting up and using email
From a PC
3
C
E
3
The confirmation message
appears. Press “OK”.
Follow step 1 shown ab ove
Click the “Edit” icon displayed to the
right of “Email Accounts”. The General
Settings screen appears.
40
Setting up email account | Setup from a PC
Setting up the BlackBerry email account
Editing the BlackBerry email account
Follow step 1 on P.39
Follow step 1 on P.39
A
A
B
B
C
C
2
D
D
Click the “Edit” icon displayed to the right of
“Email Accounts” and the General Settings
screen appears.
E
2
Click “Set Up Another Email
Account”.
I
The setting screen appears. After filling up the fields, click “Finish”.
・If the user name you specify is already in use, see [Reference] below.
A
C
Enter the same email
password in the “Confirm
password” field.
Select “Need an email
account (name@docomo.
blackberry.com)?”.
D
Enter the email address
(single-byte alphanumeric
characters) in the “Email
address” field.
E
Select “Security question”.
F
Enter the answer in the
“Answer to security
question” field.
Enter the password for the
email address in the “Email
password” field.
3
A
Email account name
You can change the name of
your email account.
B
Password
You can change your email
password by entering a new
password in this field.
C
Email addresses cannot be created with a BlackBerry email account
with the following.
・Consecutive dots (eg., “..” ) ・A dot “.” just before @
[Reference]
◎ If the user name you specify is already in use
User name candidates appear.
Select one of the candidates
or enter another user name,
and then click “Finish”.
41
5
The editing screen appears. To change settings, type in the fields.
After filling up the fields, press “Save”.
D
Security question
You can change your security
question by selecting a new
security question and entering
the answer.
Reply to
If a reply email address has been
set, replies to your email will be
sent to the reply email address,
not the email address from which
the original message was sent.
E
Your name
Enter the name you wish to
appear in the sender field.
F
Signature
Enter the signature you’d like to
show at the end of emails sent
from your BlackBerry device.
G
Auto BCC to
A copy of the email will be
automatically sent to the
email address you entered.
H
Auto forward to
Copies of all email received will
automatically be forwarded to
the email address you entered.
I
Auto forward
Copies of all email received
will automatically be forwarded
to the email address you
entered. Select “All messages”
or “Only messages with
attachments”.
Setting up and using email
B
Click “Finish”.
F
G
H
F
3
4
E
・Filters will not be applied when automatic forwarding is set,
and all email received will be forwarded.
The email address that was
set up in “Email Accounts”
appears.
42
Setting up email account | Setup from a PC
Deleting the BlackBerry email account
Not apply filters
Follow step 1 on P.39
Follow step 1 on P. 39
A
B
2
Click the “Delete” icon displayed to the right of
“Email Accounts”.
3
The confirmation message
appears. Click “OK”.
2
Click the “Filters” icon displayed to the right of
“Email Accounts” .
3
When choosing “When no filters apply”.
A
B
Forward messages to device:
Receive messages regardless of
filter settings.
Do not forward messages to device:
Receive only messages as defined by
filter settings.
・The default setting is “Forward messages to device”.
4
4
Click “OK”.
Adding filters
Follow step 1 on P. 39
Setting up filters for email accounts
The following three types of filter settings can be made.
Not apply filters
P.44
You can choose whether your BlackBerry device receives emails, which does not meet filter setting conditions, or not.
2
Click the “Filters” icon displayed to the right of
“Email Accounts”.
3
Setting up and using email
The screen above appears
if email account is
successfully deleted.
Click “OK”.
Click “Add a Filter” to add
a new filter.
Setting up conditions and actions for filters
Adding filters
P.44
You can set up filter settings and choose whether your BlackBerry device receives emails,
which meet filter setting conditions, or not.
A
Editing filters
P.46
Change existing filter settings.
B
◎See the sp-mode User’s Guide for Smartphone (Japanese only) for details on Spam Email Settings with an sp-mode email account.
How to set up spam email prevention
C
docomo ser vice por tal > sp -mode > メール設 定 (Email Set tings)
> 迷 惑メール対 策設 定 (Spam Email Prevention Set tings)
◎Email Virus Check for your sp-mode email account is available free of charge upon completion
of the required application form.
43
6
A Enter “Filter name”. Depending on the
conditions set in B , messages will be received
according to the settings as specified in C .
44
Setting up email account | Setup from a PC
Follow step 1 on P. 39
Editing filters
A
B
A
B
5
Choose conditions for
applying filters.
A
B
Select the conditions for
applying filters from the
menu.
Select actions applied by
filters and click “Add Filters”.
A
Forward messages to
device: BlackBerry device receives only messages as defined by
filter settings.
3
Click the “Edit” icon.
4
The “Filter” editing screen appears.
Select the item to edit and update it.
After editing, click “Save”.
5
The screen above appears
if your filter has been
successfully updated.
Click “OK”.
The screen above appears
if your filter has been
successfully added.
Click “OK”.
・Select one of two options:
“Header only” or “Level 1
notification”.
B Do not forward messages to device:
BlackBerry device does
not receive messages as
defined by filter settings.
◎ Device screen when you select “Header only”
Recipients do not receive the email message.
To check the message, press the “Menu key
select “More”.
45
7
Click the “Filters” icon displayed to the right
of “Email Accounts”.
Setting up and using email
・When “From” field is XXX
(Enter part of email address
in “Contains” field)
・When “Subject” field is XXX
(Enter part of subject in
“Contains” field)
・When “To” field is XXX
(Enter part of email address
in “Contains” field)
・When “CC” field is XXX
(Enter part of email address
in “Contains” field)
6
2
◎ Device screen when you select
“Level 1 notification”
Forwarded email appears in red.
” and
46
Setting up email account | Setup from a PC
Switching devices
Changing language settings(English to Japanese) Follow step 1 on P.39
Follow step 1 on P.39
● What are switching devices?
This section explains how to transfer BlackBerry Internet Service settings from your old BlackBerry device to
your new BlackBerry device. Please note that you will not be able to send/receive emails using your new
device until you complete this operation.
Insert a DOCOMO UIM Card registered for BlackBerry Internet Service into the device you want to switch to,
then turn on the mobile network.
2
Enter “Password” for each
email address and click
“Validate”.
・If you do not want to transfer the
email address and want to delete
it, click “Delete This Address
Instead”.
3
6
Click “Detect New Device”.
After all email addresses are
verified, click “Finish”.
4
7
Click “Language”.
5
The display switches to
Japanese. Click “OK”.
3
Click “日本語”.
4
Click “Save”.
Click “Move”.
Setting up and using email
5
Click “Change Device”.
2
The screen above appears if
your email accounts have
been successfully moved to
your new BlackBerry device.
Click “OK”.
◎ A BIS user account and/or BlackBerry email account on BlackBerry ® Bold ™ 9900 cannot be 47
transferred when changing to BlackBerry ® Bold ™ 9780, BlackBerry ® Bold ™ 9700, BlackBerry ® Curve ™
9300 or BlackBerry ® Bold ™.
48
Setting up email account | Setup from a PC
Sending service books
Follow step 1 on P.39
● What are service books?
Service books are data files containing information about your BlackBerry Internet Service settings.
Send the service books if you have problems such as not being able to receive email correctly on
your BlackBerry device. If problems aren’t resolved after sending service books, contact docomo
Information Center.
Setting up and using email
2
Click “Help”.
3
Click “Send Service
Books” in the Help screen.
If you have more than one
email account, the service
book will be sent to all of
them.
5
49
4
The screen above appears if
Service Books were
successfully sent.
Click “OK”.
Using email service
Opening email
P.51
Composing and sending email
P.52
Setting up delivery confirmation
P.53
Confirm on the Home
screen that email from the
Activation Server has been
delivered.
50
Using email service
Opening email
1
Press your email address
icon.
Composing and sending email
2
Press the message you
wish to open.
3
The message appears.
Follow step 1 on P. 51
2
Press the “Menu key ”
and press “Compose Email”.
3
If you have set up multiple
email accounts, press the
“Send Using” field.
4
Press the email address of
the email account you wish
to use.
5
In the “To” field, enter the
recipient’s email address or
the first letter of the recipient’s
name if registered in the
address book (and choose
the desired candidate).
6
Enter a title in the “Subject”
field.
7
Scroll down to the message
input screen and enter a
message.
Press the “Messages” icon if
you wish to check email
received by all email
accounts at once.
51
Shortcuts
Compose message
新規メール作成
Press C
Forward message
Press F
Reply
Press R
Reply to all
Press L
Move to bottom of message list
Press B
Move to top of message list
Press T
Move to next date
Press N
Move to previous date
Press P
Move to next unopened item
Press U
Search for message
Press S
Add flag to highlighted message
Press W
Move down a screen
Press SPACE
Move up a screen
Press ALT
View received messages
Press ALT
I
View sent messages
Press ALT
O
Mark message as unopened
Press ALT
U
TIPS
SPACE
8
After entering the message,
press the “Menu key
”
and press “Send”. Mail can also be sent by
selecting the icon of the
email account you wish to
send from.
Setting up and using email
TIPS
Easy operation with icon menu!
Display the icon menu by pressing and holding the screen or trackpad
when viewing a list of email or composing email.
・Only with BlackBerry® Bold™ 9900 and BlackBerry® Bold™ 9780.
52
Using email service
Setting up delivery confirmation
Follow step 1 on P. 51
● Each email account has its own settings. If you have multiple email accounts,
please set up for each account.
Setting up sp-mode email
2
Press the “Menu key
Press “Options”.
”
3
Press “Email Preferences”.
◎ For devices other than
BlackBerry® BoldTM 9900 and
BlackBerry® BoldTM 9780
Press “Email Settings”.
4
Press the email account
under “Message Services”.
Confirm Delivery:
Confirm receipt of sent email.
• Requires the recipient’s email server
to be compatible with delivery
confirmation.
Confirm Read:
Confirm if the recipient opened
your email.
5
Press the email account
you wish to set up.
6
Select settings for each
option.
To complete the settings,
press the “Menu key ”.
Press “Save”.
• If the recipient does not send a read
receipt, you will not be able to
confirm.
Steps to use sp-mode email
P.55
Notes on using sp-mode email
P.56
Setting up sp-mode email (Japanese only)
P.57
Checking/changing email settings on
BlackBerry (Japanese only) P.59
・See the Mobile Phone User’s Guide [sp-mode] smartphone version for sp-mode
instructions and regulations.
・Requires sp-mode contract. You need to restart the device af ter completing the
sp-mode contract.
・Compatible models
BlackBerry ® Bold™ 9900, BlackBerry ® Bold™ 9780, BlackBerry ® Cur ve™ 9300,
BlackBerry ® Bold™ 9700 and BlackBerry ® Bold™
(software must be updated to version 5.0.0).
Send Delivery Receipts:
Send delivery receipts after
receiving email.
Send Read Receipts:
Send read receipts after
receiving email.
→Settings: Yes, No, Prompt (always ask first)
53
54
Setting up sp-mode email
Steps to use sp-mode email
Notes on using sp-mode email
●
1
●
Applying for sp-mode
●
・ Requires BlackBerry Internet Service and BlackBerry Dual Service contracts.
sp-mode cannot be used in conjunction with a BlackBerry Enterprise Service contract.
・ See the Mobile Phone User’s Guide [sp-mode] smartphone version for sp-mode
instructions and regulations.
●
●
2
Installing the docomo service portal
●
●
P.57
●
●
●
3
Setting up your email address
and password P.58
●
●
4
Setting up your email account
P.20
or
P.38
●
You can set up your email account from the device (P.20) or a PC (P.38).
●
●
sp-mode Email Comparison Table
Item
BlackBerry
Number of
messages that
Email
can be sent at the
address
same time
Other functions (Japanese only)
Max. 100 messages
●
Checking
●
Suspending
sending/receiving email with BlackBerry
●
Confirming
your email password
●
Changing
●
Changing
●
Deleting
55
P.60
email settings with BlackBerry your email password
P.60
P.61
email storage period at the sp-mode center
P.63
P.62
Max. 50 bytes
Max. 100 two-byte characters
Max. 8 MB
(Body text:
Receiving, up to 32 KB;
Sending, up to 16 KB.)
Max. 10 MB
×
Max. 5,000 two-byte characters
Max. 2 MB total
Max. 90 KB total
○
○ *1
Pictograms
HTML email
P.62
email stored at the sp-mode center
Title
Size per
message
Body text
when
sending/ Attached file
receiving In-line attachments
i-mode
Max. 5 messages
Max. 64 bytes
Displayed address
Checking/changing email settings with BlackBerry
Android / Windows Mobile
Setting up sp-mode email
Start using
Requires sp-mode contract. You need to restart the device after completing the sp-mode contract.
Requires BlackBerry Internet Service and BlackBerry Dual Service contracts.
sp-mode cannot be used in conjunction with a BlackBerry Enterprise Service contract.
Only certain sp-mode functions can be used with BlackBerry® Bold™ 9900, BlackBerry® Bold™ 9780,
BlackBerry® Curve™ 9300, BlackBerry® Bold™ 9700 and BlackBerry® Bold™ (software must be updated to
version 5.0.0).
BlackBerry is not compatible with Deco-mail creation and transmission.
When switching from an i-mode compatible handset, you can use your existing i-mode email address with
BlackBerry only if you cancel the i-mode contract and make an sp-mode contract at the same time.
i-mode services are not available.
Free email service for Family Discount members does not apply to email sent/received with BlackBerry.
Mail Tsukai-hodai does not apply to email sent/received with BlackBerry.
Input languages other than Japanese or English are not supported.
You can only use an sp-mode email address compatible with a DOCOMO UIM Card phone number on
your BlackBerry device.
Addresses containing contiguous dots such as “...” or with a dot immediately preceding the @ mark
cannot be used with BlackBerry. Existing email addresses with dots such as these must be changed
before using BlackBerry.
After changing your email address, you need to configure the new email address according to the
BlackBerry Email Account.
When sending/receiving email with BlackBerry, email stored at the sp-mode center will be kept for 30 days
at the default setting. If email is stored beyond the maximum storage period, you cannot receive further
email. If this happens, go to “BlackBerry利用設定(BlackBerry usage setting)” → “spモードセンターのメール
保存期間変更(Change email storage period in sp-mode center)” to set up an email storage period shorter
than 30 days, or go to “BlackBerry利用設定(BlackBerry usage setting)”→“spモードセンターのメール削除
(Delete emails in sp-mode center)” to delete email stored at the sp-mode center.
docomo mail cannot be used with BlackBerry devices.
BlackBerry devices cannot receive email if docomo mail is enabled. When installing a DOCOMO UIM
Card configured with docomo mail into a BlackBerry device, first disable docomo mail then install the card.
×*2
○
○
Deco-mail
×
○
Attachment type
○ (Some file types cannot be sent or received and will be deleted when received.)
○ (No limit)
*1 Pictograms cannot be used in a signature.
*2 Received HTML email can be displayed. However, some decoration type may not display properly.
56
Setting up sp-mode email
Setting up your email address and password
Setting up sp-mode email (Japanese only)
It may take a few minutes to initialize an application when launching it for the first time.
The following email setting screens will not appear when BlackBerry email sending/receiving is ON.
Installing the docomo service portal
docomo service portal is an application used to setup sp-mode and a docomo ID.
◎ For BlackBerry ® Bold™ 9900
1
1
3
Select “All” in the Navigation
bar. Press the “docomo
service portal” i c on.
2
・When launching the docomo
service portal for the first time, the “End User Agreement” will
be displayed. Please agree to the End User Agreement, then press “Accept”.
Press “Download” and
install the application.
・ You will be charged a packet communication fee to download
the docomo service portal.
Scroll down, then confirm the
“BlackBerry Virtual Preload
Agreement”. To agree, press
“ 同意します (Agree)”
Press “All” in Navigation bar.
Confirm that the “docomo
service portal” icon is
displayed, then press on the
icon to launch.
◎ For devices other than
BlackBerry® Bold™ 9900 and
BlackBerry® Bold™ 9780
Press“Menu Key
” at the
Home screen, then press
“Downloads” icon. Contirm
that the “docomo service
portal” icon is displayed,
then press on the icon to
launch. Continue to step.
◎ For devices other than BlackBerry ® Bold™ 9900
2
3
Press “Yes”.
◎
If you check“Do not ask again”and
press“No”or complete setup for
sp-mode email, the initial setting screen for sp-mode will not appear.
◎ To have it re-appear, press“Menu
key ”at the top screen of the
docomo service portal, then press
“sp-mode Email Settings”
.
・ The initial setting screen will not
Input “sp-mode password”
at the authentication screen.
Press “Submit”.
The default password is
“0000”. If you applied for
sp-mode at the same time
you cancelled i-mode, the
i-mode password is
automatically applied.
appear after you complete setup for sp-mode email.
1
Press “All” in the Navigation
bar. Press the “ドコモブラック
ベリーサイト (docomo site
for BlackBerry)” icon.
Press the “docomo service
portal” banner.
◎ For devices other than BlackBerry® Bold™ 9780
Press “Menu key
” at the
Home screen, press “Internet
Browser” icon, then open “ド
コモブラックベリーサイト
(docomo site for BlackBerry)”.
Press the “docomo service
portal” banner.
・If the docomo Site for BlackBerry does not appear, input the following URL: http://smartphone.
nttdocomo.co.jp/m/
57
2
Press “ ダウンロード
(Download)”.
3
Press “Download” and
install the application.
◎ For devices other than BlackBerry ® Bold ™ 9900
B
・ You will be charged a packet communication fee to download
the docomo service portal.
C
4
Type in the fields and press
“Submit”.
A Email address
Enter the email address of
your choice.
B Email password
Enter the email password
for sending/receiving email
on your BlackBerry device.
C Usage notes
Read the usage notes, then check the check box.
5
The screen above appears if
setup to send/receive email
is successfully completed
with BlackBerry. Write down
and save a copy of your email
address and password. Go
to BlackBerry email account
setting screen to set up the
account. Press “Go to Top”.
◎ Setting up an email account
For BlackBerry ® Bold ™ 9900
P.21
Setting up sp-mode email
A
Press “Run the setting
up an email account
for BlackBerry” on the
confirmation screen. The
screen shown in step 3
or step 5 on P.29 appears.
58
Setting up sp-mode email
Follow steps 1 to 3 on P. 58
Switching sp-mode email and i-mode email addresses
Follow steps 1 to 3 on P. 59
Checking email settings with BlackBerry
4
If you subscribe to both sp-mode and i-mode under the same subscription, the i-mode email address will not be available
in sp-mode. To use the i-mode email address with sp-mode, configure the setting for switching the email address.
● Your email address cannot be switched if:
・ You are using a secret code with i-mode. ・ Email function has been suspended.
● If you are using Meadokaetemo Tensou Service, the service will be cancelled.
A confirmation screen is displayed, allowing you to check
BlackBerry email settings.
BlackBerr yからのメール 送 受 信
(Sending /receiving email with BlackBerr y)
Shows whether or not sending/receiving email with
BlackBerry is enabled.
使 用量(Use d amount)
Shows the amount of space used by email at the sp-mode
center.
保 存メール 通 数(Number of store d email messages)
A
Shows the number of email messages stored at the
sp-mode center.
メール 保 存 期 間(Email storage period)
B
Shows email storage period at the sp-mode center.
Stored email is automatically deleted if the storage
period is exceeded.
C
6
Type in the fields and press
“Submit”.
・Press “Submit”. The screen is step 5 on P.58 appears.
Follow steps 1 to 3 on P. 59
Suspending sending / receiving email with BlackBerry
A Email address
Confirm the switched email
5
4
Press “Switch Email
Addresses”.
address.
B Email password
Enter the email password
for sending/receiving email
on your BlackBerry device.
C Usage notes
Read the usage notes, then check the check box.
Confirm the email addresses
you want to switch, then
press “Submit”.
A
B
C
stored at the sp -mode
center)”
Receive email using a different
smartphone.
Checking / changing email settings on BlackBerry (Japanese only)
7
1
59
Press “All” in the Navigation
bar and launch “docomo
service portal”.
Press “sp-mode” and “メール
設 定 (Email Settings)”.
2
Press “BlackBerry利用設 定
(Setting up the BlackBerry)”
・If you want to change the
email address before configuring BlackBerry usage
settings, press “ 希望アドレス (Select address of your choice)”. See the Mobile Phone User’s Guide [sp-mode] smartphone version for details on Smartphone usage.
3
Input “ sp モードパスワード
( sp-mode password)” at
the authentication screen,
then press “ 決 定 (Enter)”.
The default password is
“0000”. If you applied for
sp-mode at the same time
you cancelled i-mode, the
i-mode password is
automatically applied.
Scroll down, then press
“BlackBerry からのメール 送
受 信停止 (Suspend email
with BalckBerry)”.
8
The “メール送受信停止
(Suspend email)” screen is
displayed.
Select A , B or C and press
“ 決 定 (Enter) ”
When sending/receiving email
with BlackBerry, email at the
sp-mode center will be stored
for 30 days at the default
setting. When switching from
a BlackBerry device to
another Smartphone, delete
unnecessary email.
“sp モードセンターに保 存されてい
るメールを残す (Leave emails
B
指定 期 間より前に受 信したメールを
削 除する (Delete emails
received before a
designated number of days)”
Access email received after a
designated number of days using
a different smartphone.
C
Setting up sp-mode email
A
sp モードセンターに保 存されてい
るメールを全て削 除する (Delete
all emails stored at the
sp -mode center)”.
Do not receive email stored at
the sp-mode center using a
different smartphone.
60
Setting up sp-mode email
A
When selecting “spモードセンターに保存されているメールを残す (Leave emails stored at the sp-mode center)”
Follow steps 1 to 3 on P. 59
Changing your email password
9 Press “決定 (Enter)” to stop
sending/receiving email with
BlackBerry.
B
When selecting “指定期間より前に受信したメールを削除する (Delete emails recieved before a designated number of days)”
9 Input designated period,
then press “ 決 定 (Enter)”.
・ Select from 1 to 30 days.
C
10 When deleting email within the
designated storage period, you
can also confirm how email is
stored at the sp-mode center.
Press “決定 (Enter)”.
7 Scroll down, then press
“ メールパスワード変 更
(Change the password)”.
8 Enter the “メールパスワード
(Email password)” to
send/receive email with
BlackBerry.
Press “決定 (Enter)”.
Passwords must contain
letters and numbers and be
8-20 characters long.
11 Press “決定 (Enter)” to
stop sending/receiving
email with BlackBerry.
9 The email address and
password confirmation
screen will be displayed in
order to send/receive email
with BlackBerry.
Write down and save a
copy of your email address
and password.
◎ Setting up an email account
For BlackBerry ® Bold ™ 9900
P.21
For devices other than BlackBerry ® Bold ™ 9900
When selecting “spモードセンターに保存されているメールを全て削除する (Delete all emails stored at the sp-mode center)”
◎See the sp-mode User’s Guide for Smartphone
P.29
(Japanese only) for details on changing email addresses.
Changing email storage period at the sp-mode center
Follow steps 1 to 3 on P. 59
Confirming your email password
◎ Setting up an email account
For BlackBerry ® Bold ™ 9900
7 Scroll down, then press
“ メールパスワード確 認
(Confirm the password)”.
61
Follow steps 1 to 3 on P. 59
8 The current email address
and password are displayed.
Write down and save a
copy of your email address
and password.
P.21
For devices other than BlackBerry Bold 9900
®
™
7 Scroll down, then press
“ sp モードセンター のメール 保
存 期 間変 更 (Change the
email storage period at
the sp -mode center)”.
8 Input your desired email
storage period in the “メール
保存期間 (Email storage
period)” field.
Press “決定 (Enter)”.
Setting up sp-mode email
9 Press “決定 (Enter)” to stop
sending/receiving email with
BlackBerry.
When using email with a
Smartphone other than
BlackBerry, the email
storage period at the
sp-mode center is 30 days
regardless of this setting.
・ The default setting for email
storage period is 30 days.
・ Select from 1 to 30 days.
P.29
62
Setting up sp-mode email
Follow steps 1 to 3 on P. 59 Deleting email stored at the sp-mode center
Additional Services
A
B
7
A
Scroll down, then press
“spモードセンターのメール削除
(Delete emails stored at
the sp-mode center)”.
8
“メール削除 (Delete emails)”
A or
screen appears. Select B
and
press “決定(Enter)”.
A
“指定期間より前に受信したメー
ルを削除する (Delete emails
received before a
designated number of
days)”
Delete email received
before a designated
period.
B
“spモードセンターに保存されて
いるメールを全て削除する
(Delete all emails stored at
the sp-mode center)”
Delete all email stored at
the sp-mode center.
When selecting “指定期間より前に受信したメールを削除する (Delete emails recieved before a designated number of days)”
Safety Confirmation
P.65
SMS Rejection Settings
P.66
Billing Details Confirmation (Japanese only)
P.67
imadoco search/imadoco kantan search (Japanese only)
P.68
Directly send a message with your voice (Japanese only)
P.69
docomo ID issue (Japanese only)
P.70
・Compatible models for above services
BlackBerry ® Bold™ 9900, BlackBerry ® Bold™ 9780, BlackBerry ® Cur ve™ 9300,
BlackBerry ® Bold™ 9700 and BlackBerry ® Bold™
(software must be updated to version 5.0.0).
docomo Wi-Fi (BlackBerry)
・Steps to use docomo Wi-Fi (BlackBerry)
9
Input desired period,
then press “ 決 定
(Enter)”.
・ Select from 1 to 30 days.
B
11 The deletion
completion screen is
displayed.
When selecting “spモードセンターに保存されているメールを全て削除する (Delete all emails stored at the sp-mode center)”
9
63
10 When deleting email
within the designated
storage period, you
can also confirm how
email is stored at the
sp-mode center.
Press “決定 (Enter)”.
・Notes on using docomo Wi-Fi (BlackBerry)
・Setting up the device
・Connecting to docomo Wi-Fi (BlackBerry)
P.73
P.74
P.75
P.77
Access Restriction Service
・About Access Restriction Service
・BlackBerry Web Filter usage instructions (Japanese only)
・BlackBerry Web Filter regulations (Japanese only)
P.78
P.79
P.80
The confirmation screen
is displayed.
64
Additional Services
Follow steps 1 on P. 65
How to register messages on Disaster Message Board
Safety Confirmation
If you are in a disaster area, you can post details about your situation on Disaster Message Board.
● What is Safety Confirmation ?
This is a public safety service that is available when an earthquake with a seismic intensity of 6-lower or greater, or
other major disaster occurs. If you are in a disaster area, you can post details about your situation, which family and
friends can view via internet, sp-mode or i-mode. Moreover, messages that you post to the Safety Confirmation
can be automatically delivered to email addresses registered in advance.
・Requires sp-mode contract. You must restart the device after completing the sp-mode contract.
・Safety Confirmation can be accessed only when the service is available, and cannot be used at other times.
・Please check the DOCOMO website for more details about using Disaster Status Confirmation Services.
2
How to confirm messages on Disaster Message Board
3
1
Press “All” in the Navigation
bar, then launch “ docomo
service portal”.
Press “Safety Confirmation ”.
Select “English”.
◎ For devices other than
BlackBerry® Bold™ 9900 and
BlackBerry® Bold™ 9780
2
Press “Confirm Msg”.
Press “Register Msg”.
・ For Family Discount users, when posting a message for the first time, a screen is displayed asking whether or not to display your mobile phone number along with the
posted messages to Family Discount group members.
Enter the mobile phone
number of the person who
may be affected by the
disaster then press “Search”.
・Do not enter hyphens for your mobile phone number.
3
Select the check box that
describes your current
situation, input your message
then press “Register”.
The message “Your
message was registered.”
Appears after your message
has been posted.
SMS Rejection Settings
● What are SMS Rejection Settings?
Reject all SMS or unidentified SMS messages. Deactivation and confirmation of the setting service are
also available.
・Please refer to the User’s Guide (Network service) PART 2 regarding SMS.
・As part of DOCOMO's countermeasures against SMS spam mail, the number of outgoing
SMS messages must be under 200 a day.
・Please check the DOCOMO website for details about the International MMS Rejection Settings.
http://www.nttdocomo.co.jp/
Press “Menu Key
” at the
Home screen, press the
“Download” icon then launch
“docomo service portal”.
Press “Safety Confirmation”.
Select “English”.
◎ Screen shown when
Safety Confirmation are not
available. (Japanese only)
4
Press on a message that
you wish to view .
5
Message is displayed.
Registration and confirmation of
disaster status are not available.
65
Press “All” in the Navigation ◎ For devices other than
BlackBerry® Bold™ 9900 and
bar, then launch “docomo
BlackBerry® Bold™ 9780
service portal”. Press
“SMS Rejection Settings”.
Press “Menu key
”at the
Home screen, press
“Download” icon, then launch
“docomo service portal”.
Press “SMS Rejection Settings”.
2
Enter the “NW password”
and press “設定(Select)”.
Please note that the network
password is different from
the sp-mode password.
Additional Services
1
66
Additional Services
3
The top page for SMS Rejection Settings is displayed. Select the
conditions and press “決定 (Select)”.
Setting is completed when the setting completion screen appears.
・ When SMS messages are sent from a phone other than a DOCOMO mobile phone
to a subscriber who has activated SMS Rejection Settings, messages will not be delivered, however communications charges may apply to the sender.
imadoco search/imadoco kantan search (Japanese only)
● What is imadoco search/imadoco kantan search?
imadoco search (Location Search Service) can be always check on the map the whereabouts of the person who
registered in advance. imadoco kantan search (Location Search Service Lite) can easily check the whereabouts
of your friends or other loved ones.
・ Requires sp-mode contract. You must restart the device after completing the sp-mode contract.
・ Requires imadoco search contract (¥210/month including tax).
・ Please check the DOCOMO website for more details about using imadoco search/imadoco kantan search.
imadoco search: http://www.nttdocomo.co.jp/english/service/safety/imadoco/index.html
imadoco kantan search: http://www.nttdocomo.co.jp/english/service/information/imadoco_kantan/index.html
・ Recipients of SMS messages sent from FOMA or Xi handsets way always be
notifed of the Caller ID.
・ Settings to reject SMS can only be configured from your handset.
・ When performing “Register reject numbers” and “Regist accept numbers” procedures using “登録番号編集 (Edit)”, you need to designate phone numbers.
・ The “Register accept numbers” setting enables you to receive SMS messages only from designated phone numbers. However, Int'l MMS messages may not be
received, similar to the “Reject All SMS” and “Reject Intl. SMS” settings.
・ “Reject All SMS” and “Regist accept numbers” cannot be combined with other reject settings.
How to use imadoco search
Billing Details Confirmation (Japanese only)
● What is Billing Details Confirmation?
You can check usage for the current month and billing information (amount billed, billing details, etc.)
for the past three months.
・Requires sp-mode contract. You need to restart the device after completing the sp-mode contract.
1
Press “All” in the Navigation
bar, then launch “docomo
service portal”. Press “Billing
Details Confirmation ”.
◎ For devices other than
BlackBerry® Bold™ 9900 and
BlackBerry® Bold™ 9780
2
Input the “ネットワークパスワー
ド (NW password)”, then
press “決定 (Enter)”.
Press “All” in the Navigation
bar, then launch “docomo
service portal ”. Press
“imadoco search/imadoco
kantan search”.
◎ For devices other than
BlackBerry® Bold™ 9900 and
BlackBerry® Bold™ 9780
Press “Menu key
” at the
Home screen, press
“Download” icon, then launch
“docomo service portal”.
Press “imadoco search /
imadoco kantan search”.
2
Press “イマドコサーチ
(imadoco search)”.
3
Input the “sp-mode
password” and press
“決定 (Enter)”.
Please note that the network
password is different from
the sp-mode password.
△△△△△
◎ How to confirm Scheduled Search, Alarm Search and other 3
Your account charges are
displayed.
◎How to confirm registration email for bills or billing details email
Position the cursor over the URL on the email screen, then press “Menu key ” and “Open docomo service portal.”
imadoco search results delivered by email (Message R)
4
Select the phone number of
the person you want to find
and press “いますぐ検索
(Search now)” to locate the
person.
Press “Menu key ” on the email screen and select “Get Plain Text”.
Position the cursor over the URL on the email screen, then press “Menu
key ” and “Open docomo service portal.”
Additional Services
Press “Menu key
” at the
Home screen, press
“Download” icon, then launch
“docomo service portal”.
Press “Billing Details
Confirmation”.
67
1
68
Additional Services
How to use imadoco kantan search
Follow steps 1 on P. 68
1
2
Press “イマドコかんたんサーチ
(imadoco kantan search)”.
3
Press “実際に使ってみる (Try
out imadoco kantan
search)”.
4
Input the “sp-mode
password” and press “決定
(Enter)”.
Press “All” in the Navigation
bar, then launch “docomo
service portal”. Press
“Directly send a message
with your voice”.
2
Press “受信メッセージ
(Received messages)”.
◎ For devices other than
BlackBerry® Bold™ 9900 and
BlackBerry® Bold™ 9780
3
Press “Menu key ” at the
Home screen, press
“Download” icon, then launch
“docomo service portal”.
Press “Directly send a
message with your voice”.
A list of received messages
is displayed.
Press “再生 (Play)” to listen
to a message.
docomo ID issue (Japanese only)
5
Enter the “phone number”
of the person you want to
find and press “いますぐ検索
(Search now)” to locate the
person.
● What is docomo ID?
A docomo ID is necessary in order to confirm your identity each time you use a docomo service
(My docomo, etc.) from a PC. It is also required for accessing sites that are compatible with
“Login with docomo ID” and “Sending to mobile phones with docomo ID”.
Directly send a message with your voice (Japanese only)
● What is Directly send a message with your voice?
1
Press “All” in the Navigation
bar, then launch “docomo
service portal”. Press
“docomo ID issue”.
◎ For devices other than
BlackBerry® Bold™ 9900 and
BlackBerry® Bold™ 9780
Press “Menu key ” at the
Home screen, press
“Download” icon, then launch
“docomo service portal”.
Press “docomo ID issue”.
69
2
Press “docomo IDを発行する
(Issue docomo ID)”.
Additional Services
Koe-no-Takuhaibin (Directly send a message with your voice) is a service for directly delivering a
message with your voice. You can use the “docomo service portal” to check and listen to messages
received with “Koe-no-Takuhaibin”.
・ Requires sp-mode contract. You must restart the device after completing the sp-mode contract.
・ Please check the DOCOMO website for more details about using Koe-no-Takuhaibin.
http://www.nttdocomo.co.jp/service/communication/koe_no_takuhaibin/ (Japanese only)
70
Additional Services
6
5
3
4
Check “ドコモのメールアドレス
で登録する (Register with a
docomo email address)”
and enter the password in
the “パスワード (Password)”
field. Enter the same
password in the “パスワードの
再入力 (Re-enter the
password)” field and press
“内容を確認する (Confirm the
registration information)”.
It is recommended to enter your alternate
email address in the “予備メールアドレス
(Alternate email address)” field in case
of forgetting your ID and password.
71
Confirm the registration
information and press “上記
の内容で発行する (Issue a
docomo ID with the above
information)”.
Additional Services
Confirm the docomo ID
policy, enter the network
password and press “規約に
同意して進む (Agree to the
policy and go to the next
step)”.
The docomo ID issue
completion screen is
displayed.
72
Additional Services
docomo Wi-Fi (BlackBerry)
Notes on using docomo Wi-Fi (BlackBerry)
●
To use docomo Wi-Fi (BlackBerry), you need a subscription to BlackBerry Internet Service,
BlackBerry Enterprise Service, or BlackBerry Dual Service.
●
YouTube and other mobile streaming services can only be used with Wi-Fi. Please note that
switching from wireless LAN networks to the FOMA network is automatic. Separate
communication charges are applicable. (The network being used is indicated by the icon in the
upper right of the home screen.)
●
• These are indicated on a customer copy of the contract provided when you sign up for the
service. (If you forget your docomo Wi-Fi user ID or password, you can re-aquire them by
accessing My docomo.)
Wireless LAN connections are available on the N700 series trains of the Tokaido Shinkansen
(Tokyo to Shin-osaka) and the waiting rooms in the concourses of all 17 stations. Please note
that the N700 series trains of the Tokaido shinknasen do not have the docomo Wi-Fi logo on
display. Communication speed is up to approx. 2 Mbps per carriage of Senkansen train.
●
Set up device
This service lets you connect to the Internet or send/receive emails through NTT DOCOMO’s
wireless IP communication network by connecting to a wireless LAN with wireless
IEEE802.11a/b/g/n in areas where a docomo Wi-Fi is available.
●
The docomo Wi-Fi user ID and password you need to use docomo Wi-Fi (BlackBerry) is
indicated on a customer copy of the contract provided when you sign up for the service.
(Please be sure to save it.)
●
In docomo Wi-Fi roaming areas, please note that you must input an SSID and WEP key as
required by the local network. There is a separate charge for using the docomo Wi-Fi roaming
area service. For details on these charges, please see the docomo Wi-Fi website or contact
docomo Information Center. In docomo Wi-Fi roaming areas, please note that you might
encounter technical problems including not being able to connect due to the local network's
system condition.
Steps to use docomo Wi-Fi (BlackBerry)
1
2
3
Sign up for docomo Wi-Fi (BlackBerry)
• Requires a subscription to BlackBerry Internet Service, BlackBerry Enterprise Service,
or BlackBerry Dual Service.
Confirm docomo Wi-Fi user ID and password
P.75
Follow the steps on P.75 to set up.
Start using
■ For further details (including details on
changing the docomo Wi-Fi user ID and
password), please visit My docomo website.
http://www.nttdocomo.co.jp/
http://www.mydocomo.com/
web/home/
URL: http://www.nttdocomo.co.jp/service/data/docomo_wifi/area/roaming/index.html
●
Please note that you must input the provided SSID and WEP key to use the service.
●
You are responsible for preventing usage of the SSID and WEP key by others.
●
You are responsible for any charges incurred due to your supervisory oversight, incorrect use,
or use by a third party of the SSID and WEP key, unless caused by NTT DOCOMO’s
negligence.
●
Only a limited number of users can access the service per accessible area. Once the
maximum number is reached, you cannot connect to the service.
●
9
73
When you use the service next to or near a microwave, medical equipment, automatic doors,
or any other mechanical devices that use certain frequencies, radio wave interference may
result. NTT DOCOMO cannot be held responsible for any conditions or inconveniences this
may cause.
Additional Services
●
Each accessible area has different accessible hours. You cannot use the service outside the
accessible hours.
74
Additional Services
Setting up the device
A
B
C
D
E
F
9
G
Press “All” in the Navigation
bar.
1
2
Press the “Manage
Connections” icon.
3
◎ For devices other than
BlackBerry® Bold™ 9900 and
BlackBerry® Bold™ 9780
Press the “Menu key
the Home screen.
8
Check mark the “Wi-Fi”.
◎ Device
A
B
C
” at
Filling up fields as follws.
®
™
BlackBerry Bold 9900
User name
docomo Wi-Fi user ID*1
docomo Wi-Fi password*2
E
CA certification
F
Internal link security
Auto
Save and Connect
◎ Device
D
E
F
BlackBerry Bold 9300
®
™
Security type
Enterprise subtype
Password
CA certification
Internal link security
◎ Device
4
Press “Wi-Fi Network”.
◎ For devices other than
BlackBerry® Bold™ 9900
Press “Set Up Wi-Fi Network”.
5
Press “Other ways to
connect”.
◎ For devices other than
BlackBerry® Bold™ 9900 and
BlackBerry® Bold™ 9780
The Set Up Wi-Fi screen
appears. Press “Next”.
6
Press “Manually Connect
to Network”.
◎ For devices other than
BlackBerry® Bold™ 9900 and
BlackBerry® Bold™ 9780
Press “Manually Add Network”.
B
C
D
E
F
Security type
Enterprise subtype
User name
Password
CA certification
Internal link security
G
VerSign Class 3 Root (SS V4)
EAP-MS-CHAP v2
BlackBerry Bold OS5.0
®
Save
™
BlackBerry Bold OS4.6
®
PEAP
̶
™
docomo Wi-Fi user ID*1
docomo Wi-Fi password*2
VerSign Class 3 Root (SS V4)
VerSign Class 3 Root Version 1 (SS)
EAP-MS-CHAP v2
Save
How to display Manage Connections
◎ For devices other than
BlackBerry® Bold™ 9900 and
BlackBerry® Bold™ 9780
In the “Type the Network
Name (SSID)” field, enter the
“SSID” provided when you
signed up for docomo Wi-Fi
(BlackBerry). Press “Add”.
Enter a profile name of your
choice and save the setting.
If the message “Save this
Wi-Fi Network as a Profile?”
appears, choose “Yes” and
enter a profile name of your
choice in the “Profile Name”
field. Press “Next”.
Set up is complete when the
message “Wi-Fi setup
successfully completed”
appears.
Press “Finish”.
BlackBerry® Bold™ 9900 and BlackBerry® Bold™ 9780 users: Select top
of the screen and press trackpad to launch “Manage Connections”.
Additional Services
75
In the “Network Name
(SSID)” field, enter the
“SSID” provided when you
signed up for docomo Wi-Fi
(BlackBerry). Press “Next”.
™
◎ For devices other than
BlackBerry® Bold™ 9900 and
BlackBerry® Bold™ 9780
*1: Current docomo Wi-Fi User ID when applying for docomo Wi-Fi (BlackBerry)
*2: Current docomo Wi-Fi password when applying for docomo Wi-Fi (BlackBerry)
TIPS
7
BlackBerry Bold 9700
®
PEAP
̶
docomo Wi-Fi user ID*1
docomo Wi-Fi password*2
User name
G
A
VeriSign Class 3 Code
Signing 2009-2 CA
VeriSign Class 3 Public PCA
G
B
™
PEAP
Enterprise subtype
Password
C
®
WPA/WPA2 Enterprise
D
A
BlackBerry Bold 9780
Security type
The above screen appears
if settings are successfully
completed.
76
Additional Services
Connecting to docomo Wi-Fi (BlackBerry)
Access Restriction Service
About Access Restriction Service
Access Restriction Service (BlackBerry Web Filter) is available for users of BlackBerry Internet Service.
BlackBerry Web Filter restricts access to harmful sites to minors, such as dating sites, and allows access
to all sites excluding those in the access restriction category.
BlackBerry Web Filter
1
Press “All” in the Navigation
bar.
2
Press the “Manage
Connections” icon.
3
Check mark the “Wi-Fi”.
◎ For devices other than
BlackBerry® Bold™ 9900 and
BlackBerry® Bold™ 9780
Press the “Menu key
the Home screen.
4
” at
A connection has been made
when the “Wi-Fi” icon
changes from to .
◎ For devices other than
BlackBerry® Bold™ 9900 and
BlackBerry® Bold™ 9780
Confirming the Wi-Fi
connection.
A connection has been made
when the “Wi-Fi” icon changes
from
to
.
Your device automatically switches from FOMA network to a wireless LAN network whenever
possible. (An icon on the Home screen indicates which network you are using.)
When you start up the browser, an icon for the network you are using appears in the upper right
corner. When your device switches from FOMA network to a wireless LAN network, however, the icon
may not display properly. Should this happen, press “Close” in the menu and restart the browser.
77
○ Standard sites
× Sites in access restriction category
● Requires BlackBerry Web Filter contract *3.
● Packet communications charges will apply when accessing online sites.
● Access Restriction Service is offered by BlackBerry Internet Service.
BlackBerry Web Filter only employs the “black list” system for filtering content.
The “white list” system and custom functions are not available.
*1 Access restriction categories
● About EMA
Illegal, aggression/destruction, adult, security, dating,
gamble, communication, grotesque, adult EMA (Content Evaluation and Monitoring Association) is
oriented, occult
a third-party organization that aims to protect young
people and promote healthy growth. It examines and
・SNS, blogs and bulletin boards fall under issues approval of sites, offers educational advice, and
“communication” so access will be restricted.
continually monitors the mobile network for new sites.
*2 EMA
Details on approved sites:
Read more about EMA on the right.
http://www.ema.or.jp/
*3 BlackBerry Web Filter contract
・Packet communications charges will apply
You can apply for this service as follows:
when accessing the website.
● At a docomo shop
● By phone <docomo Information Center>
From DOCOMO mobile phones: 151 (toll free, in Japanese only; no area code)
From landlines: 0120- 005 -250 (toll free)
● Some applications may not work properly when using Access Restriction Service.
● BlackBerry Web Filter restricts sites based on URLs stored in a database provided by NetSTAR Inc.
BlackBerry Web Filter does not check site content.
● Some search sites may override access restriction, depending on how a particular site can be accessed from
the search results. In addition, although a site is a dating site, etc. it may still be accessible even when Access
Restriction Service is enabled, depending on the URL obtained from the NetSTAR Inc. database.
● Canceling access restriction for minors requires a guardian’ s letter of consent and ID.
● BlackBerry Web Filter is provided by DOCOMO Systems, Inc. Our company contracts with customers instead
of DOCOMO Systems, Inc.
● Important
For new BlackBerry Internet Service contracts
With the implementation of the “Act on Establishment of Enhanced Environment for Youth's Safe and
Secure Internet Use” from April 1, 2009, we are required to ask customers to apply for Access Restriction
Service (filtering service) if the device will be used by a minor in conjunction with BlackBerry Internet
Service. Moreover, if the device will be used by a minor without a filtering service, written consent may be
required, depending on municipality.
Additional Services
●Attention
Access websites other than those in an access
restriction category*1.
(Note that EMA-approved*2 sites are not
covered by this restriction.)
78
Additional Services
ブラックベリー Webフィルタご利用規則 (BlackBerry Web Filter usage instructions)
79
それのある行為
(5) サーバへの不正なアクセス等、本サービスの運営を妨げる行為
(6) コンピュータウイルス等の有害なプログラムを、本サービスを
通じて、または本サービスに関連して使用し、もしくは提供する
行為
(7) 特定商取引に関する法律に違反する行為
(8) その他法令または公序良俗に反する行為、またはそのおそれ
のある行為
(9) その他当社が不適切と判断する行為
第 7 条(本サービスの中断)
(1) 当社は、次の場合には、直ちに本サービスの全部または一部の
中断を行うことができるものとします。
①当社の設備またはサービスの障害による場合
②当社の設備の保守上または工事上やむを得ない場合
③接続事業者およびアプリケーション提供元の都合による場合
④その他技術上または当社の業務の遂行上やむを得ない場合
(2) 前項に定める本サービスの全部もしくは一部の中断によって
生じ たお客さまの損害について当社は一切責任を負わない ものとします。
第 8 条(本サービスの利用停止)
(1) 当社は、お客さまが次の各号に該当するときは、直ちに本サー
ビスの利用を停止することがあります。
①本規則第 6 条(禁止事項)の定めに違反したとき
②本サービスご契約時に虚偽の申告をしたとき
③前各号のほか、本規則に反する行為であって、本サービスに
関する当社の業務の遂行に支障を及ぼし、または及ぼすお
それのある行為をしたとき
④その他当社が不適切と判断したとき
(2) 前項に定める本サービスの利用停止によって生じたお客さま
の損害について当社は一切責任を負わないものとします。
第 9 条(本サービスの廃止、変更および追加)
当社は、本サービスについて、その全部または一部の提供廃止、
変更もしくは追加をすることができます。なお、全部の提供廃止の
場合には、お客さまと当社との間の本契約は終了するものとしま
す。当社は、本サービスのその全部または一部の提供廃止、変更
もしくは追加によって生じたお客さまの損害について一切責任を
負わないものとします。
第 10 条(お客さまの申し出による本契約の解約)
お客さまが本契約の解約を希望される場合は、当社指定の方法に
基づき、お客さまからドコモに対し本契約の解約の申し出を行うも
のとします。
第 11 条(名義変更等による本契約の終了)
お客さまが本サービスをご利用いただいている BB 接続機能の廃
止があった場合、本契約は解約となります。
第 12 条(BB 接続機能の承継)
FOMA サービス契約または Xi サービス契約の承継により、本サー
ビスをご利用いただいている BB 接続機能の利用が承継される場
合、本契約も同時に承継されるものとします。
第 13 条(本規則の変更について)
当社は、当社の都合によりお客さまの承諾を得ることなく、本規則
等を変更することができるものとします。この場合には、本サービ
スの提供条件等については、変更後の本規則等が適用されます。
第 14 条(準拠法および合意管轄について)
本サービスおよび本規則の準拠法は、日本法とし、お客さまと当社
の間で本サービスまたは本規則に関連して訴訟の必要が生じた場
合は、東京地方裁判所を第一審の専属的合意管轄裁判所とします。
ブラックベリー Webフィルタご利用細則 (BlackBerry Web Filter regulations)
1. アクセス制限サービスについて
アクセス制限サービスの概要は、以下のとおりです。
(1) サービス概要
①アクセス制限サービスは、本サービスを利用したインターネッ
ト上のサイトの閲覧を制限するサービスです。
②アクセス制限サービスをご利用いただくためには、別途当社
の定めるところに従い、サービス利用の申込みが必要となりま
す。また、アクセス制限サービスの解約についても、別途当社
の定める方法に従うものとします。
<アクセス制限サービス>
アクセス制限サービスは、インターネット上のサイトのうち、下記に
定めるカテゴリに該当すると判断してネットスター株式会社が指定し
たサイト(第三者機関(EMA 等)が閲覧可能と認定したサイトは除
きます)の閲覧を制限するサービスです。また、サイトの閲覧にあた
り、閲覧するサイトの URL が IP アドレス(※1)の場合にも閲覧が
制限されます。なお、アクセス制限サービスは、ネットスター株式会
社により提供された URL データベースに登録されている URL 情
報に基づきサイトの閲覧を制限するものであり、サイトの内容を個
別に確認し、閲覧を制限するものではありませんので、カテゴリに現実
。
に該当する全てのサイトの閲覧が制限されるものではありません(※2)
【閲覧制限の対象となるカテゴリ】
不法(違法と思われる行為、違法と思われる薬物、不適切な薬物
利用)
主張(軍事・テロ・過激派、武器・兵器、告発・中傷、自殺・家出、
主張一般)
アダルト(性行為、ヌード画像、性風俗、アダルト検索・リンク集)
セキュリティ
(ハッキング、不正コード配布、公開プロキシ)
ギャンブル(ギャンブル一般)
出会い(出会い・異性紹介、結婚紹介)
グロテスク(グロテスク)
オカルト(オカルト)
コミュニケーション
(ウェブチャット、
掲示板、
IT 掲示板、SNS・ブログ)
成人嗜好(娯楽誌、喫煙、飲酒、アルコール製品、水着・下着・フェ
チ画像、文章による性的表現、コスプレ)
※1 IP アドレスとは、インターネット上のコンピュータ(サーバ)を特
定する番号で、32 ビットの数字からなるものです。
※2 一般サイトを検索する検索サイトをご利用の場合、検索サイト
の検索結果からサイトへアクセスする仕組みによっては、閲覧制
限の対象とならないことがあります。
(2) ご利用上の注意
①アクセス制限サービスのご利用中は、お客さまがインストール
したアプリケーションが動作しなくなる場合があります。
②50M バイトを超えるサイトの閲覧を制限いたします。
③アクセス制限サービスは、HTTP 通信のみを対象とし、
Secure Sockets Layer 通信は対象外とします。
④アクセス制限サービスは、いかなる場合においても完全な機能
を果たすことを保証するものではありません。
⑤当社は、アクセス制限サービスがお客さまの利用される端末
に影響を及ぼさないことを保証するものではありません。
(3) 未成年者のお客さまによるご利用
①お客さまが未成年者の場合、お客さまご自身のほか、お客
さまの法定代理人によりアクセス制限サービスの申込みお
よび解約の申し出を行っていただくことができます。
②お客さまが未成年者の場合、お客さまご自身によるアクセス
制 限サービスの解約の申し出の際には、お客さまの法定代
理人の同意書を確認させていただく必要があります。
(4) その他
アクセス制限の対象となるカテゴリおよびサイトは、追加、削
除または変更する場合があります。
2.ご利用の際の注意事項
お客さまが本サービスをご利用いただくための端末、OS、アク
セスするサイト、インストールするアプリケーション等は、端末、
OS、アクセスするサイト、インストールするアプリケーション等の
提供元がお客さまに提供するものです。そのため、当社はこれら
の端末、OS、サイト、アプリケーション等につき、お客さまに対し
一切責任を負わないものとします。そのため、端末、OS、アクセ
スするサイト、インストールするアプリケーション等の提供元およ
び動作の状況についてはお客さまにおいて十分にご確認いただ
くとともに、以下の事項にご注意の上、本サービスをご利用くだ
さい。
お客さまが閲覧されるサイトによっては、ご利用されるお客さま
を特定するあるいはお客さまの属性等の情報に応じたサイトを
表示する等のために、以下の情報をお客さまがサイトを閲覧する
際に情報等の提供者等にインターネットを経由して通知される
場合があります。
1) ユーザーエージェント(端末の機種名等)
2) 端末情報(端末の製造番号やドコモ UIM カードの製造番号)
3) アプリケーションに入力された情報
4) 端末内に登録された情報
5) 位置情報
6) Cookie(※1)によりお客さまの端末に保存された情報
7) お客さまがサイトを閲覧する際に、当該お客さまが直前に閲覧
していたサイトの URL に関する Referer 情報(※2)
※1 Cookie とは、サイトを提供する情報等の提供者またはその他
の者が、サイトへの閲覧日時、閲覧回数等、お客さまに関する
情報をお客さまの携帯電話機に送信して、お客さまの携帯電
話機に保存しておく仕組みです。Cookie の設定を「有効」に
した場合、情報等の提供者またはその他の者から Cookie を
利用して送信されお客さまの携帯電話機に保存された情報
が、次回以降当該サイトを閲覧したときに当該サイトの提供
者である情報等の提供者またはその他の者に対して送信さ
れる場合があります。
Cookie の設定を変更されたい場合は、お客さまご自身でお客
さまの端末またはブラウザの設定を変更してください。
※2 Referer 情報とは、お客さまが情報等の提供者またはその他
の者のサイトを閲覧する際に、お客さまが直前に閲覧してい
たサイトの URL に関する情報をいいます。
Additional Services
ドコモ・システムズ株式会社(以下「当社」といいます)がお客さ
まに提供するブラックベリー Web フィルタ(以下「本サービス」と
いいます)は、このブラックベリー Web フィルタご利用規則(以下
「本規則」といいます)、ブラックベリー Web フィルタご利用細則
(以下「ご利用細則」といいます)等で規定する利用上の条件(以
下総称して「ご利用規則等」といいます)に従って提供されます。
お客さまは、ご利用規則等の内容を承諾されない限り、本サービ
スをご利用いただくことはできません。
第 1 条(サービス概要)
本サービスは、株式会社エヌ・ティ・ティ・ドコモ(以下「ドコモ」
といいます)とドコモの FOMA サービス契約約款または Xi サー
ビス契約約款に定めるブラックベリー接続機能(タイプAに係るも
のに限ります。(以下「BB 接続機能」といいます))を利用される
方に対し、当社がアクセス制限機能を提供するサービスです。なお、
サービスの詳細についてはご利用細則に記載のとおりとします。
第 2 条(利用条件)
(1) 本サービスは、BB 接続機能を利用される契約者のみがご利
用できるサービスです。
(2) 本サービスのご利用については、別途当社の定めるところに従
い、サービス利用の申込みが必要となります。
(3) 本サービスのご利用にあたっては、本サービスへの対応端末
(以下「端末」といいます)が必要となります。
第 3 条(申込と承諾)
(1) 本サービスの申込みは、ご利用規則等の内容を承諾いただい
た上、当社指定の方法により、当社の代理権を有するドコモに
対して行う必要があります。
(2) 当社が前項の申込みを承諾したときに、お客さまと当社の間に、
ご利用規則等の定めを内容とする本サービスの利用契約(以
下「本契約」といいます)が成立します。
第 4 条(利用料)
本サービスの利用料は、BB 接続機能の利用料に含まれるもの
とします。
第 5 条(免責事項)
(1) 当社は、本サービスの内容およびお客さまが本サービスの利
用の結果として得る情報等についてその安全性、正確性、確実
性、有用性等についていかなる保証も行わないものとし、お客
さまに損害が発生した場合であっても、一切責任を負わないも
のとします。またお客さまと情報等の提供者との間に紛議等が
発生した場合は、お客さまと情報等の提供者との間で解決する
ものとし、当社に対しては何らの苦情の申立て等を行わないも
のとします。
(2) 当社は、お客さまが本サービスの利用の結果として収集され
た情報等その他のデータの保存、毀損、消失についていかな
る証も行わないものとし、お客さまに損害が発生した場合で
あっても、一切責任を負わないものとします。
(3) 本サービスの提供および遅滞に関連して発生したお客さまの
損害について当社は一切責任を負わないものとします。
第 6 条(禁止事項)
お客さまは本サービスを利用して次の行為を行わないものとします。
(1) 当社もしくは第三者の著作権その他の知的財産権を侵害する
行為または侵害するおそれのある行為
(2) 当社もしくは第三者の財産、プライバシーもしくは肖像権を侵
害する行為または侵害するおそれのある行為
(3) 当社もしくは第三者に不利益もしくは損害を与える行為または
それらのおそれのある行為
(4) 犯罪的行為もしくは犯罪的行為に結びつく行為またはそのお
第 15 条(附則)
本規則は、平成 22 年 12 月 1 日から実施します。
ドコモ・システムズ株式会社
80
FAQ
Please check the FAQ page before contacting us.
4Q -1
4A-1
4Q -2
4A-2
4Q -3
A-3
4Q -4
4A-4
4Q -5
4A-5
81
I forgot my email password.
4Q -6
For BlackBerry email account: 1. Press “Edit” for the BlackBerry email account.
2. Press “Forgot Password?” 3. Enter the answer for your secret question and press “OK”.
Your password will be sent.
For ISP email accounts: Contact your email service provider.
Can spam email prevention be configured for an i-mode email
address (@docomo.ne.jp) with my BlackBerry device?
4A-6
You can set spam mail prevention for sp-mode from the docomo service portal.
Please refer to “How to spam email prevention” on P.43
I cannot send/receive emails after initializing (deleting security)
my BlackBerry device.
I forgot my log in password and user name for my BlackBerry
Internet Service user account.
4Q -7
If you forget your log in password, it will be sent to a PC.
Procedure: 1. Click “Forgot Password?” at the log in screen on a PC.
2. Enter your user name or PIN and click “Request Password”.
3. The information will be transmitted and your password will be sent.
A-7
You must switch the device. Validate your previous email address. Please refer to
“Switching devices” on P.27 for BlackBerry ® Bold ™ 9900 or on P.36 for other
BlackBerry ® devices.
Contact docomo Information Center if you forget your user name.
0120-055-250 (toll free)
◎ From mobile phones:
◎ From DOCOMO mobile phones (no area code): 151 (toll free, in Japanese only) 0120 - 800 - 000 (toll free, in Japanese only) ◎ From landline telephones, etc.:
4Q -8
Can I display Flash images and play back flash videos and
YouTube videos full-screen?
4A-8
No. Flash images and videos cannot be displayed. ・Flash is not compatible.
However, you can watch YouTube videos when using Wi-Fi.
• Some videos cannot be watched.
4Q -9
Is there a setting for not sending "Request a read receipt for
this message"?
4A-9
Yes. Please refer to “Setting up delivery confirmation” on P.53.
I cannot receive email. For BlackBerry Internet Service, the email
account icon is not displayed. How do I display it?
Please try to send service book. Please refer to “Send service books” on P.28 for BlackBerry®
BoldTM 9900 or on P.37 for other BlackBerry® devices.
Can I use an existing i-mode email address (@docomo.ne.jp) in
sp-mode? Can I use an existing sp-mode email address
(@docomo.ne.jp) in i-mode?
4 -10
Q
Yes. When making a contract for sp-mode when canceling i-mode, the existing email
address is automatically enabled.
When making a contract for i-mode when canceling sp-mode, the existing email address is
automatically enabled.
A
4 -10
Yes. You can view and save attached files on the device. Also, you can save to a microSD™
card. Procedure: 1. Open the email screen, press the “Menu key
” and select “Open
attachment”. 2. The list of attached files is displayed. Press the “Menu key
” again.
3. Select “Open attachment” to view. Select “Download attachment” to select a destination
where you want to save the file.
4 -11
Q
The "Email Settings" icon is not displayed.
4 -11
A
Procedure: 1.Press “All” in the Navigation bar.
2. Press “Options” → “Device” → “Advanced System Settings” → “Host Routing Table” .
3. Press “Menu key
” , then press “Register Now” .
4. A message confirming registration will be sent.
I forgot my BlackBerry ID log in password and user name.
If you forget your log in password, it can be reissued.
Procedure: 1. Click “Forgot Password?” at log in screen.
2. Enter your BlackBerry ID user name. 3. Enter the registered answer for your secret
question when creating your BlackBerry ID. Your password will be sent.
・If you forget your user name, it cannot be reissued. You need to create a new BlackBerry ID.
Can I view and save attached document files (PDF, Excel, Word,
PowerPoint, etc.) and music files on the device?
Can I save to a microSD™ card?
82
Index
Expand your world with BlackBerry®
New BlackBerry’
s services.
Function names and terminology are listed in alphabetical order.
A
・Auto BCC
P.23,25,31,34,40,42
P.25,34,42
・Auto Forward
B
P.11,12
・BlackBerry ID
・BlackBerry Internet Ser vice user account
P.11,15
(BIS user account)
P.57
・BlackBerry Virtual Preload Agreement
・BlackBerry email account
P.11,24,32,41
P.84
・BlackBerry ® Messenger
P.13
・BlackBerry membership terms
P.55,58
・BlackBerry usage settings
・Billing Details Confirmation (Japanese only)
P.67
・BlackBerry Web Filter
P.78
・BlackBerry Internet Ser vice contract
P.01,05,12,56,74
・BlackBerry Enterprise Ser vice contract
P.01,56,74
・BlackBerry Dual Ser vice contract
P.01,56,74
C
・Connection management
P.75,76,77
D
・docomo ID issue (Japanese only)
・docomo service portal
P.70
P.55,65
・Directly send a message with your voice
・Deleted items
・Deco-mail
・Delivery confirmation
P.69
P.23,31,40
P.01,56
・Language settings
・Mail Tsukai-hodai
P.08
・Menu key
P.07
N
・Navigation bar
・Network PIN number
P.08
P.66,67
P
・PIN number
・Pictograms
P.17
P.56
R
・Recovery question
・Roaming area
P.14
P.02,74
S
・Safety Confirmation
・SMS Rejection Settings
・sp-mode email
・sp-mode password
・sp-mode contract
・SSID
・Sending ser vice books
P.65
P.66
P.54
P.58
P.01,56
P.74,75
P.28,37,49
・Shortcuts
P.51
P.23,25,31,34,40,42
・Signature
P.02,74
・docomo Wi-Fi (BlackBerry)
P.02,73
・Security question
E
・ EMA
P.78
・Escape key
P.07
・End User Agreement
P.29
F
P.01,56
P.43
H
・Home screen
P.36
P.01,56
P.53
P.84
P.08
With BlackBerry App World™ on your BlackBerry®
smartphone, it is easy to discover apps, themes
and games. You can quickly find apps, filter
searches based on app ratings and even request
apps from friends.
P.26,35,48
・Messages
P.05,06
・Filters
Dedicated application store for
BlackBerry
P.68
M
・Move Email Accounts
・docomo UIM Card
・Family Discount
P.11,21,29,39
・ISP email account
・imadoco search/imadoco kantan search
・docomo Wi-Fi
・docomo BlackBerry Site
P.17
・IMEI number
L
P.84
・ BlackBerry App World ™
(Japanese only)
BlackBerry App World ™
I
P.78
・Access Restriction Service
・Switch devices
P.25,34,42
P.27,36,47
T
・Touch panel
・Trackpad
・WEP key
・Wi-Fi
Communicate with BlackBerry
smartphones in real time
Communicate with BlackBerry smartphones in real
time. BlackBerry® Messenger is a dedicated instant
messenger for BlackBerry smartphones. Even better
than email, it offers communication in real-time.
Share photos and data, including voice recordings
and calendars with group members by using the
group function for BlackBerry® Messenger.
P.07,52
P.07
W
・Website for PC
BlackBerry ® Messenger
P.17,38
P.74
P.02,73
docomo site for BlackBerry
Portal site exclusively for BlackBerry
users (Japanese only)
Display the portal site by pressing the“docomo site
for BlackBerry”icon. It introduces various work and
lifestyle information in addition to BlackBerry
services. This lets you stay abreast of news and
weather forecast on a real-time basis.
URL : http://smartphone.nttdocomo.co.jp/m/
83
・For devices other than BlackBerry® Bold™ 9900 and BlackBerry® Bold™
9780, press the“Internet Browser”icon to display the portal site.
84