1
LINKPOINT 3000
REFERENCE MANUAL
RESTAURANT VERSION
APPLICATION ID LFRST23
LFRST23
V 1.0
LINKPOINT 3000 Reference Manual—Restaurant Version/LFRST23
FDRMS-Omaha
Manual Version Number 1.1
Published May 1999
LinkPoint International, Inc.
5310 Derry Avenue Suites V&W
Agoura Hills, CA 91301
www.linkpt.com
Printed in the United States of America.
© Copyright 1999 LinkPoint International, Inc. All rights reserved.
Under the copyright laws, no part of this publication may be copied, distributed, stored in a retrieval
system, translated into any language, transmitted in any form or by any means, without the prior written
agreement of LinkPoint International, Inc. LinkPoint International reserves the right to make changes to this
document and the products it describes without prior notice. LinkPoint International shall not be liable for
inadvertent technical errors or omissions made herein, nor for incidental or consequential damages
resulting from the performance or use of this product.
LinkPoint 3000, PrintPoint 1000, PrintPoint 3000, and LoadPoint are service marks (SM) of LinkPoint
International, Inc. Printer 250, Printer 900, PrintPak 350, PINpads 101, 1000, 201, 2000, and Zontalk 2000 are
trademarks of VeriFone, Inc. VeriFone is a registered trademark of VeriFone, Inc. Citizen iDP Printers 562
and 3530 are trademarks of CBM, Inc.
Note: This equipment has been tested and found to comply with the limits for a Class A digital device, pursuant to part
15 of the FCC Rules. These limits are designed to provide a reasonable protection against harmful interference when the
equipment is operated in a commercial environment. This equipment generates, uses, and can radiate radio frequency
energy and, if not installed and used in accordance with the instruction manual, may cause harmful interference to radio
communications. Operation of this equipment in a residential area is likely to cause harmful interference in which case
the user will be required to correct the interference at his own expense.
Caution: Danger of explosion if lithium battery is incorrectly replaced. Replace battery only with the same of equivalent
type recommended by the manufacturer. Dispose of used batteries according to the manufacturer's instructions.
TABLE OF CONTENTS
INTRODUCTION....................................................................................................................................... 1
Printers ................................................................................................................................................... 1
PINpad Devices..................................................................................................................................... 1
GETTING STARTED................................................................................................................................. 2
Unpacking.............................................................................................................................................. 2
Installation ............................................................................................................................................. 3
Maintenance .......................................................................................................................................... 4
Returning the Terminal for Service .................................................................................................... 4
TERMINAL FEATURES............................................................................................................................ 5
Software Features.................................................................................................................................. 5
Hardware Features ............................................................................................................................... 7
LinkPoint 3000 Specifications............................................................................................................ 11
BOOT MODE FUNCTIONS................................................................................................................... 12
Boot Mode Passwords ........................................................................................................................ 12
Cold Boot.............................................................................................................................................. 12
Date and Time Setup .......................................................................................................................... 13
Printer Port Setup ............................................................................................................................... 14
RS232 Port Setup................................................................................................................................. 15
PINpad Port Setup.............................................................................................................................. 16
Model Number.................................................................................................................................... 17
Clear Memory...................................................................................................................................... 18
TERMINAL DIAGNOSTICS ................................................................................................................. 19
Display Test —Press [1] ..................................................................................................................... 19
Keyboard Test — Press [2]................................................................................................................. 20
Clock Test — Press [3] ........................................................................................................................ 20
Dialer Test — Press [4] ....................................................................................................................... 20
Line Voltage Test — Press [5]............................................................................................................ 21
Modem Originate Test — Press [6]................................................................................................... 21
Modem Answer Test — Press [7] ..................................................................................................... 22
Cardreader Test — Press [8]............................................................................................................. 23
Serial Port Test — Press [9]................................................................................................................ 24
Memory Analysis — Press [0] ........................................................................................................... 24
DOWNLOAD PROCEDURES ............................................................................................................... 26
Telephone Download (No application loaded) .............................................................................. 26
Telephone Download (Shortcut with Application already loaded)............................................. 27
Direct PC-to-POS Download ............................................................................................................. 28
Direct PC-to-POS Download (Shortcut)........................................................................................... 30
POS-to-POS (Master/Slave) Download........................................................................................... 31
DOWNLOAD PARAMETERS ............................................................................................................... 33
Field Type Codes ................................................................................................................................ 33
Memory Locations .............................................................................................................................. 33
Password Protect Settings................................................................................................................. 36
Telecheck Check Service Information .............................................................................................. 37
Telecheck Check Service Prompt Options ....................................................................................... 37
Equifax Check Service Information .................................................................................................. 38
BASIC OPERATION................................................................................................................................ 40
Transaction Keys................................................................................................................................. 40
Using the Cardreader ......................................................................................................................... 40
Backspace Key ..................................................................................................................................... 40
1999 LinkPoint International, Inc.
i
LFRST23 Reference Manual
TABLE OF CONTENTS
The Calculator ..................................................................................................................................... 41
LOCAL FUNCTIONS............................................................................................................................... 42
Printer Enable/Disable ...................................................................................................................... 42
Dial Prefix (PABX) .............................................................................................................................. 42
Dial Suffix ............................................................................................................................................ 43
Demo Mode Enable/Disable............................................................................................................. 43
Technical Specification Printout ....................................................................................................... 44
Batch Number Setting ........................................................................................................................ 44
View Merchant ID, Device ID, Primary Phone/Change Phone Numbers and Device ID ....... 45
Clear Batch........................................................................................................................................... 46
View Last Response From Host ........................................................................................................ 47
STANDARD KEY OPERATIONS......................................................................................................... 48
DINE IN / BAR TAB & TAKE OUT ................................................................................................ 49
ADDING TIPS (REQUIRED TO CLOSE BATCH) ......................................................................... 55
CLOSING BAR TAB (REQUIRED TO CLOSE BATCH) ............................................................... 58
ADJUST AMOUNT (FOR NEW TOTAL) ....................................................................................... 60
ATM / DEBIT CARD SALE .............................................................................................................. 62
RETURN............................................................................................................................................... 65
ATM / DEBIT CARD RETURN........................................................................................................ 68
AUTHORIZATION ONLY................................................................................................................ 71
TICKET ONLY (OFFLINE)................................................................................................................ 74
VOID..................................................................................................................................................... 78
REVIEW ............................................................................................................................................... 80
REPRINT .............................................................................................................................................. 93
CLOSE BATCH ................................................................................................................................... 95
APPENDIX A—PROMPTS ..................................................................................................................... 97
APPENDIX B—TROUBLESHOOTING GUIDELINES................................................................... 102
GLOSSARY.............................................................................................................................................. 103
INDEX ....................................................................................................................................................... 106
1999 LinkPoint International, Inc.
ii
LFRST23 Reference Manual
INTRODUCTION
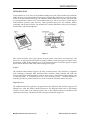
INTRODUCTION
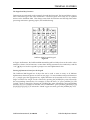
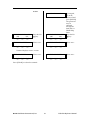
Congratulations on your choice of the LinkPoint 3000 point-of-sale (POS) terminal. The LinkPoint
3000 is ideal for processing restaurant transactions. Scientifically engineered to exceed the quality
found in current terminal technology, the LinkPoint 3000 combines user-friendly operation with
soft programmable functions. The screen-addressable keys and an innovative, backlit display
make terminal operation quick and easy. With expanded serial ports, the LinkPoint 3000 is
compatible with all major printers. The terminal also contains additional serial ports for PINpads,
check readers, and other peripherals.
Figure 1
This manual includes step-by-step guides through specific transactions and operations, and
shows how to keep the terminal in peak operating condition. Words that appear in capital letters
and brackets, [LIKE THIS], stand for keys on the terminal keypad. Words that appear in capital
letters without brackets, LIKE THIS, stand for display messages.
Printers
The LinkPoint 3000 terminal supports all major terminal printers. The terminal is compatible
with: LinkPoint’s PrintPoint 1000, PrintPoint 3000, VeriFone’s P250, PrintPak 350, P900 and
Citizen’s iDP3530 and iDP562 printers. Printers attach easily to the LinkPoint 3000 terminal with
a connecting cable. If a merchant does not use an electronic printer, a manual imprinter is
normally provided to produce transaction records for both the merchant and the customer.
PINpad Devices
The LFRST23 Restaurant application programmed in the LinkPoint 3000 terminal supports VFI
PINpads 101, 1000, 201, 2000 for Debit transactions. The PINpads attach easily to the PINpad
connector on the back of the terminal (please refer to the PINpad manual for installation and
operating instructions). The Master/Session encryption method is supported.
1999 LinkPoint International, Inc.
1
LFRST23 Reference Manual
GETTING STARTED
GETTING STARTED
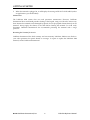
Unpacking
Carefully inspect the shipping carton and its contents for any damage that may have occurred
during shipping. If the terminal is damaged, file a claim immediately with the shipping company
or carrier and notify LinkPoint International.
Do not try to use a damaged terminal!
To unpack the LinkPoint 3000:
1.
With the shipping carton right side up, open the carton’s lid.
2.
Lift the terminal, its AC adapter and line cord with modular plugs up and out of the box.
3.
Remove the terminal from its protective bubble wrap and place the bubble wrap back in the
shipping carton. Remove the AC adapter from its protective box and return the box to the
shipping carton. Close the shipping carton and save the shipping materials so that the unit
can be repacked for shipping or moving in the future.
4.
Place the terminal on a desk or tabletop. When choosing a place for the LinkPoint 3000
terminal, avoid areas with:
♦
Direct sunlight or objects that radiate heat
♦
Excessive dust
♦
Electrical devices that cause excessive voltage variations such as air conditioners, space
heaters, fans, or high-frequency security devices
Shipping Carton Contents
Figure 2
1999 LinkPoint International, Inc.
2
LFRST23 Reference Manual
GETTING STARTED
Installation
Installing the LinkPoint 3000 terminal is simple and requires no tools.
1.
Connect the AC adapter’s triangular end to the power input at the rear of the LinkPoint 3000
terminal (Figure 3).
Figure 3
2.
Plug the adapter into a 120V electrical outlet (Figure 4) or into a quality surge suppressor.
Figure 4
3.
Insert one end of the telephone line cord into one of the modular jacks at the rear of the
terminal. Insert the other end of the line cord into a modular telephone wall jack, just as one
would connect a telephone (See Figure 5). The modular plug may be inserted directly into the
wall jack, or use a 4-prong adapter (not included) for older 4-prong jacks.
Note:
A standard telephone may be connected to the other modular jack at the rear of the
terminal.
Figure 5
4.
If the PrintPoint 1000, PrintPoint 3000, VeriFone P250, P900, PrintPak350, Citizen iDP3530
iDP562 or other compatible printer is used with the LinkPoint 3000 terminal, please refer to
the manual packaged with the printer for installation and operating instructions.
LinkPoint International, Inc. 1999
3
LFRST23 Reference Manual
GETTING STARTED
5.
When the terminal is plugged in, it will display the message APP. NOT AVAILABLE (unless
an application is pre-downloaded).
Maintenance
The LinkPoint 3000 system does not need preventive maintenance. However, LinkPoint
International does recommend periodic cleaning of the keypad, using a soft brush to remove any
dust. Because the terminal can be damaged by liquids, do not spray liquid cleaners directly on the
terminal. Always apply the cleaner to the cloth before cleaning the terminal. To avoid costly
downtime, LinkPoint International also recommends protecting the terminal with a surge
protector.
Returning the Terminal for Service
LinkPoint International has both warranty and non-warranty LinkPoint 3000 services. Refer to
your sales agreement for specific details on coverage. To repair or replace the LinkPoint 3000
terminal, contact LinkPoint International.
1999 LinkPoint International, Inc.
4
LFRST23 Reference Manual
TERMINAL FEATURES
TERMINAL FEATURES
Software Features
The LinkPoint 3000 LFRST23 Restaurant application includes:
♦
A Sale key used for Dine-In, Bar Tab and Take-Out transactions (Bar Tab feature will be
available with the LFRST23 application).
♦
A special adjust key ([+] key) to add tips and close out Bar Tabs.
♦
An option to add tips by Server ID or by item number.
♦
An item review feature for viewing all transaction details, including each transaction’s actual
date and time.
♦
The ability to view the terminal’s totals by card type, or individual transaction details by item
number.
♦
The numbering of all captured transactions for easy review.
♦
A READY message on line 1 of the display that tracks the number of transactions available in
the current batch.
♦
Six custom header lines for receipts and reports, as well as three flexible customer agreement
lines and two trailer message lines.
♦
Easy-to-read descriptions of the transaction details, displayed through item review, detail, or
summary reports.
♦
A missing tip report and the ability to correct a tip amount before closing the batch.
♦
An Open Bar Tab report.
♦
A pre-print function to begin printing after the user slides the card or manually enters the
card number information.
♦
Server Identification (up to four digits).
♦
Individual Server and Server totals reports.
♦
Option to adjust tip using Server ID or Item #.
LinkPoint International, Inc. 1999
5
LFRST23 Reference Manual
TERMINAL FEATURES
♦
The capability of reading both track 1 and track 2 card data to allow printing of the
cardholder’s name under the signature line on credit card receipts. This feature also enables
the terminal to accept ATM/Debit cards.
♦
CASH BACK and tiered TRANSACTION FEE options available with ATM/Debit processing.
♦
The ability to add tip via the PINpad for ATM/Debit sales.
♦
Special instructional reminders on the display and on the receipts.
♦
Compatibility with the new PrintPoint 1000 printer, VeriFone’s P250, P900, PrintPak350, and
Citizen’s iDP3530, and iDP562.
♦
A summary report that prints separate bank card, credit card, ATM/Debit, and check
processing transactions.
♦
A special optional report to separate Dine-In, Bar Tab and Take Out sales.
♦
Fraud control features (i.e., entry of the last four digits).
♦
Calculator functions.
♦
Can now choose whether or not to obtain new authorization when closing Bar Tab.
♦
Ability to add incidentals like dessert or coffee to the original ticket transaction amount
(requires password for access).
♦
Improved Summary Report for credit and debit transactions.
♦
Enhanced Item Detail Report to include all Debit Card transaction details (food/beverage,
tip, cashback, surcharge and total).
♦
PINpad 101/1000 and 201/2000 capability.
♦
Option added to permit tip entry on PINpad or on terminal keypad for Debit Card sales.
♦
Available terminal functions include: dial prefix and suffix entry, ability to both view and
change the merchant number, phone number and device ID.
♦
On non-approvals, the message from the host and the remainder of the receipt will print
above the tear off edge.
♦
Telecheck and Equifax check warranty services.
1999 LinkPoint International, Inc.
6
LFRST23 Reference Manual
TERMINAL FEATURES
♦
Preprint modified to eliminate printing of cardholder’s account number until transaction is
approved.
♦
Ability to retrieve the most recent message from the host.
♦
Double entry requirement to confirm amounts entered for $1,000.00 or greater.
♦
The ability to process up to 500 transactions in one batch.
♦
Special Dial String Codes to enable the terminal to dial out under special circumstances such
as many terminals on one phone line or multiple phone line systems.
Hardware Features
The most important hardware components of the LinkPoint 3000 terminal are the display panel,
the cardreader and the keypad. Their features are detailed below in the description of each
component.
The Display Panel
Each LinkPoint 3000 terminal has a built-in display panel capable of displaying up to 20 letters or
numbers (See Figure 8). The backlit characters and plastic screen enhance readability while
reducing glare. The 20-character, two-line display easily accommodates most display messages.
The LinkPoint 3000 terminal also supports a scrolling feature that allows users to read messages
longer than 20 characters.
Figure 8
The Cardreader
The LinkPoint 3000 terminal comes with a Dual Track magnetic cardreader, so the terminal can
read both track 1 and track 2. The cardreader reads the cardholder’s account number, expiration
date, name (track 1 only) and security data from the magnetic stripe on the back of all major
credit cards and bank cards.
LinkPoint International, Inc. 1999
7
LFRST23 Reference Manual
TERMINAL FEATURES
Figure 9
Note:
When sliding the card (bidirectional), face the magnetic stripe down and away from the
keypad.
1999 LinkPoint International, Inc.
8
LFRST23 Reference Manual
TERMINAL FEATURES
The Keypad and Key Functions
Transactions are performed via the terminal’s keypad (See Figure 10). The keypad allows users to
select transaction types and enter information. The three green arrow keys are an updated
feature on the LinkPoint 3000. This change assists both the merchant and the Help Desk when
processing transactions, printing reports, and troubleshooting.
LinkPoint 3000 Terminal Keypad
Figure 10
As Figure 10 illustrates, the LinkPoint 3000 terminal keypad has 30 keys that can be used to select
numbers or letters, choose functions, or enter data. During transactions, the number keys and the
“soft” [▲] keys are used to respond to prompts or to enter alphanumeric data.
Entering Alphanumeric Data from the Keypad
The LinkPoint 3000 keypad has 30 keys that can be used to enter as many as 47 different
alphanumeric characters (please see chart on next page). To enter numbers and special characters
(i.e., +) simply press the appropriate key. Alpha characters can be entered in one of two modes:
single or locked. The “single” mode is selected by pressing the [ALPHA] key once followed by
the corresponding character key. For example, to enter the letter “A” press [ALPHA] [A]. The
“locked” mode is selected by pressing the [ALPHA] key twice followed by the corresponding
character keys. For example, to enter the word “LINKPOINT” press [ALPHA] [ALPHA] [L] [I]
[N] [K] [P] [O] [I] [N] [T]. To release the “locked” upper case mode, press the [ALPHA] key once.
LinkPoint International, Inc. 1999
9
LFRST23 Reference Manual
TERMINAL FEATURES
LINKPOINT 3000 ALPHA/SYMBOL ASSIGNMENTS
Key Assignment
Symbol displayed when
pressing the
corresponding key
directly
(NO ALPHA KEY)
Void
ALPHA MODE
[ALPHA] is
depressed once or
twice prior to
pressing the
corresponding key
A
Left ▲
Center ▲
Right ▲
Return
Sale
ATM/Debit
Check
Review
Close
1
2
3
÷
4
5
6
✕
7
8
9
−
*
0
#
+
B
C
D
E
F
G
H
I
J
K
L
M
N
O
P
Q
R
S
T
U
V
W
X
Y
Z
- (hyphen)
Space
+
, (comma)
‘ (apostrophe)
“ (quote)
: (colon)
; (semi-colon)
@ (“at”)
1
2
3
(
4
5
6
)
7
8
9
!
* (asterisk)
0
# (pound)
& (ampersand)
1999 LinkPoint International, Inc.
10
. (period)
LFRST23 Reference Manual
TERMINAL FEATURES
LinkPoint 3000 Specifications
Microprocessor
Z180 CPU operating at 12.288 MHz
Memory
128k EPROM and 256k battery-backed RAM (standard);
up to 1 megabyte (optional)
Display
Two-line
20 character
LCD back-lit display
Keypad
30 key alphanumeric keypad
Audio feedback tone (short tone for legal key entry, longer
tone for illegal key entry)
Cardreader
Track 1 and track 2, bidirectional magnetic stripe cardreader
Communications
Internal modem with modular jack
Standard Bell 103/212A series, V.21 and V.22 high-speed dialup modem, 300 and 1200 baud
Peripheral Ports
3x RS232 serial ports for PINpad, roll printers, slip printers,
bar code wands, etc.
Power Connector
Telco Connector
Operating Environment
Power Requirements
Dimensions
Weight
Three-pin male-DIN power connector
Six-position modular jack
32º to 104º F, 0º to 40º C
Humidity: 5% to 90% relative humidity; no condensation
Voltage: 120 volts AC, 60 HZ
Power: 10W
Height: 1.98 in (50.4 mm)
Width: 5.60 in (143.1 mm)
Depth: 6.50 in (165.4 mm)
Shipping Weight: 2.74 lb. (1.24 kg)
LinkPoint International, Inc. 1999
11
LFRST23 Reference Manual
BOOT MODE FUNCTIONS
BOOT MODE FUNCTIONS
The LinkPoint 3000 boot mode allows access to certain Operating System, Hardware, and
Diagnostic functions, including: date and time setup, terminal diagnostics, clear memory
(application and data), port setup, and application download. Application download procedures
are covered in detail beginning on page 26. This section explains how to:
1.
2.
3.
4.
!
Set the correct date and time
Use terminal diagnostics
Setup ports
Erase the RAM
If the LP2000 displays APP. NOT AVAILABLE on line 1 of the display and TIME LOAD
SETUP on line 2, it is already in boot mode. When in boot mode with an application
already loaded, line 1 displays CLEAR TO RESUME, while the display on line 2 is also
TIME LOAD SETUP.
Boot Mode Passwords
•
If an application is already downloaded into the LinkPoint 3000 terminal (i.e. display reads
READY XXX), the procedure to gain access to the boot mode is: hold down [ALPHA], press
[7] [1] [3] [9] and release [ALPHA].
•
While in the boot mode, if the LP2000 terminal prompts for password entry, key in the
password [4] [6] [5] [1] [0] [7] [0] and press [ENTER].
Cold Boot
The cold boot feature can be used to clear the terminal’s memory (RAM). This feature should
always be used under the guidance of a qualified service representative, and should only be done
to clear a corrupted application or to perform download tests. To access this feature, with the
terminal’s power off, hold down the [CLEAR] key and plug in the power cord:
Display Message
Operator Action
Enter password:
[▲]
[▲]
[▲]
CLEAR to cold start
Any other to resume
[▲]
[▲]
[▲]
LP-3000,3.X,MMDDYY
Select Test Number
[▲]
[▲]
[▲]
Key in the default password of [4] [6] [5] [1] [0] [7] [0] or the
password assigned by the bank/ISO or FDMS Help Desk and
press [ENTER].
Press the [CLEAR] key to erase the memory (RAM) or any
other key to reboot the terminal.
Press the [*] key to reset the terminal to the
“App Not Available” display.
1999 LinkPoint International, Inc.
12
LFRST23 Reference Manual
BOOT MODE FUNCTIONS
Date and Time Setup
To set the correct date and time follow the procedures outlined below.
Display Message
Operator Action
READY XXX
JAN-02-00 SUN 10:30P
[▲]
[▲]
[▲]
Hold down the [ALPHA] key and press [7] [1] [3] [9]. Release
the [ALPHA] key to enter the boot mode.
CLEAR_to_resume
Time Load Setup
[▲]
[▲]
[▲]
Press the left [▲] key to select TIME.
_
01/02/00
Date
[▲]
10:30:41
Time
[▲]
[▲]
Enter password:
[▲]
[▲]
[▲]
Press the left [▲] key to select DATE.
Key in the default password of [4] [6] [5] [1] [0] [7] [0] or the
password assigned by the bank/ISO or FDMS Help Desk and
press [ENTER].
Enter_new_date
MM/DD/YY
[▲]
[▲]
[▲]
Key in the correct date and press [ENTER].
01/03/00
Date
[▲]
Press the right [▲] key to select TIME.
10:30:41
Time
[▲]
[▲]
Enter new time
HH:MM
[▲]
[▲]
[▲]
Key in the correct time using 24-hour format
(3:30p.m.=15:30) and press [ENTER].
01/03/00
Date
[▲]
Press [CLEAR] twice to reboot terminal and return to the
Ready prompt.
12:00:01
Time
[▲]
[▲]
LinkPoint International, Inc. 1999
13
LFRST23 Reference Manual
BOOT MODE FUNCTIONS
Printer Port Setup
To change the printer port factory defaults follow the steps outlined below. The default settings
are compatible for use with most LinkPoint, VeriFone, and Citizen printers. There is usually no
need to change these settings. Standard Default: Baud= 9600, Parity= Even.
Display Message
Operator Action
READY XXX
JAN-03-00 MON 12:00P
[▲]
[▲]
[▲]
Hold down the [ALPHA] key and press [7] [1] [3] [9]. Release
the [ALPHA] key to enter the boot mode.
_
CLEAR_to_resume
Time Load Setup
[▲]
[▲]
[▲]
Setup
Ports Model Test
[▲]
[▲]
[▲]
Port_setup
Printer RS232 Pinpad
[▲]
[▲]
[▲]
Printer_setup
Baud
Parity
[▲]
[▲]
[▲]
Current baud: 9600
1200 2400
9600
[▲]
[▲]
[▲]
Printer_setup
Baud
Parity
[▲]
[▲]
[▲]
Current parity: Even
Even None Odd
[▲]
[▲]
[▲]
Press the right [▲] key to select SETUP.
Press the left [▲] key to select PORTS.
Press the left [▲] key to select PRINTER.
Press the left [▲] key to select BAUD to change the
baud rate of the printer port.
Select the correct baud rate. Press the [▲] key below your
choice to select it and press [CLEAR].
Press the right [▲] key to select PARITY.
Select the correct parity. Press the [▲] key below your
choice to select it and press [CLEAR] five times to reboot the
terminal.
1999 LinkPoint International, Inc.
14
LFRST23 Reference Manual
BOOT MODE FUNCTIONS
RS232 Port Setup
To change the RS232 port factory defaults follow the steps outlined below. The default settings
are designed to be used for direct RS232 and Master-Slave (POS-to-POS) downloads. Standard
Default: Baud= 19200, Parity= None. There is usually no need to change these settings.
Display Message
Operator Action
READY XXX
JAN-03-00 _MON _12:00P
[▲]
[▲]
[▲]
Hold down the [ALPHA] key and press [7] [1] [3] [9]. Release
the [ALPHA] key to enter the boot mode.
_
CLEAR_to_resume
Time Load Setup
[▲]
[▲]
[▲]
Setup
Ports Model Test
[▲]
[▲]
[▲]
Port setup
Printer RS232 Pinpad
[▲]
[▲]
[▲]
RS232 setup
Baud
Parity
[▲]
[▲]
[▲]
Current baud: 19200
1200 2400 9600
[▲]
[▲]
[▲]
RS232 setup
Baud
Parity
[▲]
[▲]
[▲]
Current parity: None
Even None Odd
[▲]
[▲]
[▲]
Press the right [▲] key to select SETUP.
Press the left [▲] key to select PORTS.
Press the middle [▲] key to select RS232.
Press the left [▲] key to select BAUD.
Select the correct baud rate (default is 19200). Press the [#]
key to see other options. Press the [▲] key below your choice
to select it and press [CLEAR].
Press the right [▲] key to select PARITY.
Select the correct parity (default is None). Press the [▲] key
below your choice to select it and press [CLEAR] five times
to reboot the terminal.
LinkPoint International, Inc. 1999
15
LFRST23 Reference Manual
BOOT MODE FUNCTIONS
PINpad Port Setup
To change the PINpad port factory defaults follow the steps outlined below. The standard default
settings are: Baud= 1200, Parity= Even.
Display Message
Operator Action
READY XXX
JAN-03-00 MON 12:00P
[▲]
[▲]
[▲]
Hold down the [ALPHA] key and press [7] [1] [3] [9]. Release
the [ALPHA] key to enter the boot mode.
_
CLEAR_to_resume
Time Load Setup
[▲]
[▲]
[▲]
Ports
[▲]
Printer
[▲]
Setup
Model
[▲]
Press the right [▲] key to select SETUP.
Press the left [▲] key to select PORTS.
Test
[▲]
Port setup
RS232 Pinpad
[▲]
[▲]
Pinpad_setup
Baud
Parity
[▲]
[▲]
[▲]
Current baud: 1200
1200
2400
[▲]
[▲]
[▲]
Pinpad setup
Baud
Parity
[▲]
[▲]
[▲]
Current parity: Even
Even None Odd
[▲]
[▲]
[▲]
Press the right [▲] key to select PINPAD.
Press the left [▲] key to select BAUD.
Select the correct baud rate (default is 1200). Press the [▲]
key below your choice to select it and press [CLEAR].
Press the right [▲] key to select PARITY.
Select the correct parity (default is Even). Press the [▲] key
below your choice to select it and press [CLEAR] five times
to reboot the terminal.
1999 LinkPoint International, Inc.
16
LFRST23 Reference Manual
BOOT MODE FUNCTIONS
Model Number
Follow the procedures outlined below to find out the terminal model (version) of the ROM and
RAM.
Display Message
Operator Action
_____READY XXX
JAN-03-00_MON_12:00P
[▲]
[▲]
[▲]
Hold down the [ALPHA] key and press [7] [1] [3] [9]. Release
the [ALPHA] key to enter the boot mode.
__CLEAR_to_resume
_ Time__Load__Setup
[▲]
[▲]
[▲]
Press the right [▲] key to select SETUP.
Ports
[▲]
Setup
Model
[▲]
Press the middle [▲] key to select MODEL.
Test
[▲]
Model 256k
ROM <ver> RAM
[▲]
[▲]
[▲]
ROM Version:
[▲]
[▲]
OS 3.0
RAM Version: V00.00B
[▲]
Terminal displays ROM version. Press [CLEAR].
[▲]
Model 256k
ROM <ver> RAM
[▲]
[▲]
[▲]
[▲]
Press the left [▲] key to select ROM.
Press the left [▲] key to select RAM.
Terminal displays the application (in RAM) version. Press
[CLEAR] four times to reboot the terminal.
[▲]
LinkPoint International, Inc. 1999
17
LFRST23 Reference Manual
BOOT MODE FUNCTIONS
Clear Memory
This irreversible function erases the terminal’s memory (RAM) and should only be accessed with
the assistance of a qualified service representative. Follow the procedures outlined below to erase
the terminal’s RAM.
WARNING: After erasing the RAM, a full download must be performed to restore the
application to the terminal’s memory.
Display Message
Operator Action
READY XXX
JAN-06-97 MON 12:00P
[▲]
[▲]
[▲]
Hold down the [ALPHA] key and press [7] [1] [3] [9]. Release
the [ALPHA] key to enter the boot mode.
__CLEAR_to_resume
_ Time__Load__Setup
[▲]
[▲]
[▲]
Press the right [▲] key to select SETUP.
Ports
[▲]
Setup
Model
[▲]
Test
Mem Clear
[▲]
[▲]
Press the right [▲] key to select TEST.
Test
[▲]
Press the left [▲] key to select MEM CLEAR.
Diags
[▲]
Enter password:
[▲]
[▲]
[▲]
Key in the default password of [4] [6] [5] [1] [0] [7] [0] or the
password assigned by the bank/ISO or FDMS Help Desk and
press [ENTER].
Clear: Are you sure?
Yes
No
[▲]
[▲]
[▲]
Press the left [▲] key to select YES and confirm memory
clear.
__App. not available
Time Load Setup
[▲]
[▲]
[▲]
The memory was successfully cleared.
1999 LinkPoint International, Inc.
18
LFRST23 Reference Manual
TERMINAL DIAGNOSTICS
TERMINAL DIAGNOSTICS
The LinkPoint 3000 diagnostics option tests the different hardware components of the terminal.
Follow the procedures outlined below to initiate the diagnostics menu. Diagnostics are intended
for use primarily by repair depots, technicians, and for POS support service centers.
Display Message
Operator Action
_____READY XXX
JAN-03-00_MON_12:00P
[▲]
[▲]
[▲]
Hold down the [ALPHA] key and press [7] [1] [3] [9]. Release
the [ALPHA] key to enter the boot mode.
__CLEAR_to_resume
_ Time__Load__Setup
[▲]
[▲]
[▲]
Press the right [▲] key to select SETUP.
Ports
[▲]
Setup
Model
[▲]
Test
Mem Clear
[▲]
[▲]
Press the right [▲] key to select TEST.
Test
[▲]
Press the right [▲] key to select DIAGS.
Diags
[▲]
Enter password:
[▲]
[▲]
[▲]
LP-3000,3.0,01/29/99
Select Test Number
[▲]
[▲]
[▲]
Key in the default password of [4] [6] [5] [1] [0] [7] [0] or the
password assigned by the bank/ISO or FDMS Help Desk and
press [ENTER].
At this point, the LinkPoint 3000 terminal prompts the user
to choose from the ten tests it can perform. To select a test
simply press the appropriate number key.
Display Test —Press [1]
Display Message
Operator Action
Display Test
[▲]
[▲]
Please wait...
[▲]
0123456789ABCDEFGHIJ
Please wait...
KLMNOPQRSTUVWXYZ{\}^
[▲]
[▲]
[▲]
###################
##################
[▲]
[▲]
[▲]
At this point this you can press [ENTER] to continue the
diagnostics testing or press [CLEAR] to exit the testing.
LinkPoint International, Inc. 1999
19
LFRST23 Reference Manual
TERMINAL DIAGNOSTICS
Keyboard Test — Press [2]
Display Message
Operator Action
Keyboard Test
Left>Right,
Top>Bot
[▲]
[▲]
[▲]
Press every key starting from the top-left section and
working to the bottom-right.
Keyboard Test
All Keys Are OK!
[▲]
[▲]
[▲]
Exit diags?
Yes
[▲]
[▲]
No
[▲]
Press [CLEAR] to end keyboard test.
Press the right [▲] key to perform another diagnostics test or
press the left [▲] key to exit diags and return to the Boot
Mode main menu.
Clock Test — Press [3]
Display Message
Operator Action
Clock Test
12/31/99
23:59:55
[▲]
[▲]
[▲]
Please wait five seconds as clock changes to 01/01/00.
Clock Test
01/01/00
00:00:00
[▲]
[▲]
[▲]
Press [CLEAR] to end clock test.
Exit diags?
Yes
[▲]
[▲]
Press the right [▲] key to perform another diagnostics test or
press the left [▲] key to exit diags and return to the Boot
Mode main menu.
No
[▲]
Dialer Test — Press [4]
Display Message
Operator Action
Dialer Test
Pulse
Tone
[▲]
[▲]
[▲]
Press the left [▲] key to select PULSE.
Dialer Test
Dialing With Pulse
[▲]
[▲]
[▲]
Please wait while test is performed.
Dialer Test
__Dialing_Complete
[▲]
[▲]
[▲]
Please wait...
1999 LinkPoint International, Inc.
20
LFRST23 Reference Manual
TERMINAL DIAGNOSTICS
Display Message
Operator Action
Dialer Test
Pulse
Tone
[▲]
[▲]
[▲]
Press the right [▲] key to select TONE.
Dialer Test
Dialing With Tone
[▲]
[▲]
[▲]
Please wait while test is performed.
Dialer Test
Dialing Complete
[▲]
[▲]
[▲]
Please wait...
Dialer Test
Pulse
Tone
[▲]
[▲]
[▲]
Press [CLEAR].
Exit diags?
Yes
[▲]
[▲]
No
[▲]
Press the right [▲] key to perform another diagnostics test or
press the left [▲] key to exit diags and return to the Boot
Mode main menu.
Line Voltage Test — Press [5]
Display Message
Operator Action
Line Voltage Test
In Works
[▲]
[▲]
[▲]
Please wait...
Line Voltage Test
Line Free
[▲]
[▲]
[▲]
Test was successful. Press [CLEAR] to end Line Voltage
Testing.
Exit diags?
Yes
[▲]
[▲]
No
[▲]
Press the right [▲] key to perform another diagnostics test or
press the left [▲] key to exit diags and return to the Boot
Mode main menu.
Modem Originate Test — Press [6]
(Diagnostics #6 and #7 are interactive. Test #6 requires a dial up to separate LP 3000 terminal.)
Display Message
Operator Action
Modem Originate Test
Enter Tel # To Dial
[▲]
[▲]
[▲]
Key in telephone number to dial.
Modem Originate Test
Wait for DTD
Please wait...
LinkPoint International, Inc. 1999
21
LFRST23 Reference Manual
TERMINAL DIAGNOSTICS
[▲]
[▲]
[▲]
Display Message
Operator Action
Modem Originate Test
Dialing
[▲]
[▲]
[▲]
Please wait...
Modem Originate Test
Carrier Det
[▲]
[▲]
[▲]
Please wait...
Modem Originate Test
Connect 1200
[▲]
[▲]
[▲]
Please wait...
Modem Originate Test
RS-232 9600, N , 8 , 1
[▲]
[▲]
[▲]
Test was successful. Press [CLEAR] to end Modem Originate
Test.
Exit diags?
Yes
[▲]
[▲]
Press the right [▲] key to perform another diagnostics test or
press the left [▲] key to exit diags and return to the Boot
Mode main menu.
No
[▲]
Modem Answer Test — Press [7]
(Diagnostics #6 and #7 are interactive. Test #7 requires that separate LP3000 terminal dial to
the terminal being used.)
Display Message
Operator Action
Modem Answer Test
Wait for Ring
[▲]
[▲]
[▲]
The modem is waiting for a call.
Modem Answer Test
Connect 1200
[▲]
[▲]
[▲]
When a call is received, the modem tries to connect.
Modem Answer Test
No Carrier
[▲]
[▲]
[▲]
Press [CLEAR] to end Modem Answer Test.
Exit diags?
Yes
[▲]
[▲]
Press the right [▲] key to perform another diagnostics test or
press the left [▲] key to exit diags and return to the Boot
Mode main menu.
No
[▲]
1999 LinkPoint International, Inc.
22
LFRST23 Reference Manual
TERMINAL DIAGNOSTICS
Cardreader Test — Press [8]
Display Message
Operator Action
Clear to Restart
TK1
TK2 TK1&2
[▲]
[▲]
[▲]
Swipe Card
[▲]
_S:00
[▲]
Clear to Restart
TK1
TK2 TK1&2
[▲]
[▲]
[▲]
[▲]
S:00
[▲]
Clear to Restart
TK1
TK2 TK1&2
[▲]
[▲]
[▲]
[▲]
S:00
[▲]
To auto scroll right/left hold down the [#] key and the [*] key
respectively or press [CLEAR] to end cardreader track 1
testing.
Press the middle [▲] key to test the cardreader’s ability to
read track 2 data.
Swipe card.
[▲]
Track 1 absent
S:07
;0227271714569-9612
[▲]
[▲]
[▲]
Swipe Card
Swipe card.
[▲]
%B0227271714569^CARD
Track 2 absent
S:04
[▲]
[▲]
[▲]
Swipe Card
Press the left [▲] key to test the cardreader’s ability to read
track 1 data.
To auto scroll right/left hold down the [#] key and the [*] key
respectively OR press [CLEAR] to end cardreader track 2
testing.
Press the right [▲] key to test the cardreader’s ability to read
both track 1 and track 2 data.
Swipe card.
[▲]
%B0227271714569^CARD
;0227271714569-9612
[▲]
[▲]
[▲]
To auto scroll right/left hold down the [#] key and the [*] key
respectively OR press [CLEAR] to end cardreader track 1 &
2 testing.
Exit diags?
Yes
[▲]
[▲]
Press the right [▲] key to perform another diagnostics test or
press the left [▲] key to exit diags and return to the Boot
Mode main menu.
No
[▲]
LinkPoint International, Inc. 1999
23
LFRST23 Reference Manual
TERMINAL DIAGNOSTICS
Serial Port Test — Press [9]
Display Message
Operator Action
Serial Port Test
PRN
PIN
232
[▲]
[▲]
[▲]
PRN PIN 232
OK! OK! OK!
[▲]
[▲]
[▲]
Exit diags?
Yes
[▲]
[▲]
No
[▲]
Please wait...
Terminal will display status of ports and beep. Press
[CLEAR]
to end test.
Press the right [▲] key to perform another diagnostics test or
press the left [▲] key to exit diags and return to the Boot
Mode main menu.
Memory Analysis — Press [0]
Display Message
Operator Action
Installed Memory
ROM: 128K RAM: 256K
[▲]
[▲]
[▲]
Please wait…
Testing ROM LRC’s
_
[▲]
[▲]
[▲]
ROM:
64
TEST
***
[▲]
[▲]
The terminal begins a ROM (Read Only Memory) analysis.
128
***
[▲]
ROM:
64
128
TEST
OK!
OK!S
[▲]
[▲]
[▲]
Testing RAM CRCs
[▲]
[▲]
(optional)
[▲]
The terminal automatically begins a RAM (Random
Access Memory) analysis. (This analysis is performed
only when there is NO application loaded.)
RAM: LOW HIGH
TESTCOM1/BANKBANK
[▲]
[▲]
[▲]
(optional)
RAM: LOW
HIGH
TEST OK!/OK!
OK!T
[▲]
[▲]
[▲]
1999 LinkPoint International, Inc.
24
LFRST23 Reference Manual
TERMINAL DIAGNOSTICS
(optional)
Display Message
Operator Action
LP-3000,3.3,03/24/99
Select
[▲]
Test
[▲]
Number
[▲]
Press any number key to resume diags testing. Press
[CLEAR]
to exit diags mode.
LinkPoint International, Inc. 1999
25
LFRST23 Reference Manual
DOWNLOAD PROCEDURES
DOWNLOAD PROCEDURES
There are three methods of downloading the application into the LinkPoint 3000: 1) remotely via
telephone, 2) PC-to-POS, and 3) POS-to-POS. Unless an application has been pre-downloaded,
the terminal will initially display the message APP. NOT AVAILABLE. If a full or a partial
download is selected, the terminal will prompt the user to enter any missing fields (i.e.,
application ID) and will automatically return to the first empty field.
Telephone Download (No application loaded)
The telephone download requires the use of a remote PC with the software necessary to accept
incoming download requests (i.e., Zontalk 2000). Follow the procedures outlined below to setup
the LinkPoint 3000 terminal for a modem download. When the terminal displays ‘APP. NOT
AVAILABLE’ on line 1 of the display, a FULL download must be initiated.
__App. not available
_ Time__Load__Setup
[▲]
[▲]
[▲]
Press the middle [▲] key to select LOAD.
Enter password:
If prompted, key in the password and press [ENTER]. The
password may be obtained through the bank/ISO or FDMS
Help Desk.
[▲]
[▲]
(optional)
[▲]
Press the right [▲] key to select SET PORT.
Download
Set_port
[▲]
[▲]
[▲]
Select download port
Modem
RS232
[▲]
[▲]
[▲]
Press the left [▲] key to select MODEM.
Modem settings
Baud/par
Dial Mode
[▲]
[▲]
[▲]
Press right [▲] to select Dial Mode.
Select dial mode
Tone
Pulse
[▲]
[▲]
[▲]
Select the phone line type. Press the left [▲] key to select
TONE (standard) or press the right [▲] key to select PULSE.
Tone dial selected
Tone
Pulse
[▲]
[▲]
[▲]
A “...dial selected” message will display momentarily. Press
[CLEAR] twice to return to DOWNLOAD SET PORT prompt.
Press the left [▲] key to select DOWNLOAD.
Download
Set_port
[▲]
[▲]
[▲]
Enter phone number
Press [ENTER] to accept the current telephone number or key in
1999 LinkPoint International, Inc.
26
LFRST23 Reference Manual
DOWNLOAD PROCEDURES
_
the new telephone number and press [ENTER].
[▲]
[▲]
[▲]
Display Message
Operator Action
Enter Appl. ID.
LFRST23
[▲]
[▲]
Key in the application ID and press [ENTER].
[▲]
Enter Terminal ID.
[▲]
[▲]
[▲]
Modem Download
Full
Partial
[▲]
[▲]
[▲]
DIALING...
[▲]
[▲]
Key in the terminal ID and press [ENTER].
Press the left [▲] key for a “Full” download.
Please wait...
[▲]
CONNECTED 1200
AP-LFRST23 T-SAMPLE
[▲]
[▲]
[▲]
Please wait...
*---------AP-LFRST23 T-SAMPLE
[▲]
[▲]
[▲]
Please wait, the download time is approximately 12-14 minutes.
_____READY XXX
JAN-03-00_MON_12:00P
[▲]
[▲]
[▲]
The terminal is ready for operation when it displays READY
XXX and the date and time.
Telephone Download (Shortcut with Application already loaded)
To perform a Telephone Download using the terminal’s default communication settings, follow
the steps below. This shortcut method can only be performed when an application has been predownloaded into the terminal. This procedure is used to change the application ID, upgrade
to a new revision, and to perform partial downloads to change parameters or features for a
client.
Display Message
Operator Action
_____READY XXX
JAN-03-00_MON_12:00P
[▲]
[▲]
[▲]
Press [ENTER].
LinkPoint International, Inc. 1999
27
LFRST23 Reference Manual
DOWNLOAD PROCEDURES
FUNCTION
[▲]
[▲]
Press [BACKSPACE].
__
[▲]
Enter password:
[▲]
[▲]
(optional)
Enter Appl. ID.
LFRST23
[▲]
[▲]
[▲]
Press [ENTER] to accept the current application ID or type in
the new application ID and press [ENTER].
[▲]
Enter Terminal ID.
[▲]
[▲]
DIALING...
[▲]
Press [ENTER] to accept the current terminal ID or type in
the new terminal ID and press [ENTER].
[▲]
Modem Download
Full
Partial
[▲]
[▲]
[▲]
[▲]
If prompted, key in the password and press [ENTER]. The
password may be obtained through the bank/ISO or FDMS
Help Desk.
Select the type of download. Press the left [▲] key for a “Full”
download or press the right [▲] key for a “Partial” download.
Please wait...
[▲]
CONNECTED 1200
AP-LFRST23 T-SAMPLE
[▲]
[▲]
[▲]
Please wait...
*---------AP-LFRST23 T-SAMPLE
[▲]
[▲]
[▲]
Please wait, the download will last approximately 12-14
minutes. After it is completed, the terminal will configure the
application.
_____READY XXX
JAN-03-00_MON_12:00P
[▲]
[▲]
[▲]
The terminal is ready for operation when it displays READY
XXX and the date and time.
Direct PC-to-POS Download
The direct PC-to-POS download requires the use of a local PC with the software necessary to
perform a local download (i.e., Zontalk 2000). Follow the procedures outlined below to setup
the LinkPoint 3000 terminal for a local download. A serial cable with a DB-9 female to the PC
male connector and 8-pin DIN male connector to the terminal’s RS-232C port, such as VeriFone
cable part #00446-04 REV. E, is required.
1999 LinkPoint International, Inc.
28
LFRST23 Reference Manual
DOWNLOAD PROCEDURES
Display Message
Operator Action
__App. not available
_ Time__Load__Setup
[▲]
[▲]
[▲]
Press the middle [▲] key to select LOAD.
OR if there is already an application loaded…
_____READY XXX
JAN-03-00_MON_12:00P
[▲]
[▲]
[▲]
Hold down the [ALPHA] key while pressing [7] [1] [3] [9] to
enter the boot mode.
__CLEAR_to_resume
_ Time__Load__Setup
[▲]
[▲]
[▲]
Press the middle [▲] key to select LOAD.
Enter password:
If prompted, key in the password and press [ENTER]. The
password may be obtained through the bank/ISO or FDMS
Help Desk.
(optional)
Press the right [▲] key to select SET PORT.
Download
Set_port
[▲]
[▲]
[▲]
Select download port
Modem
RS232
[▲]
[▲]
[▲]
RS232 setup
Baud
Parity
[▲]
[▲]
[▲]
Current baud: 19200
1200
2400
9600
[▲]
[▲]
[▲]
RS232 setup
Baud
Parity
[▲]
[▲]
[▲]
Current parity: None
Even None Odd
[▲]
[▲]
[▲]
Press the right [▲] key to select RS232.
Press the left [▲] key to select BAUD.
Select the correct baud rate, press [CLEAR] to accept the
default of 19200. Press the [▲] key below your choice and
press [CLEAR] OR press the [#] key to see other options.
Press the right [▲] key to select PARITY.
Select the correct parity (default is None). Press the [▲] key
below your choice and press [CLEAR] three times.
Press the left [▲] key to select DOWNLOAD.
Download
Set_port
[▲]
[▲]
[▲]
Display Message
Operator Action
LinkPoint International, Inc. 1999
29
LFRST23 Reference Manual
DOWNLOAD PROCEDURES
Enter Appl. ID.
LFRST23
[▲]
[▲]
Key in the application ID and press [ENTER].
[▲]
Enter Terminal ID.
[▲]
[▲]
Full
[▲]
Partial
[▲]
[▲]
[▲]
WAITING ON ENQ…
[▲]
[▲]
Key in the terminal ID and press [ENTER].
Select the type of download. Press the left [▲] for a “Full”
download or press the right [▲] for a “Partial” download.
Please wait…
[▲]
*---------AP-LFRST23 T-SAMPLE
[▲]
[▲]
[▲]
Please wait...
__CLEAR_to_resume
_ Time__Load__Setup
[▲]
[▲]
[▲]
Press [CLEAR] to allow the program to finish loading.
Direct PC-to-POS Download (Shortcut)
To perform a direct PC-to-POS Download using the terminal’s default settings, follow the steps
below. The shortcut method can only be performed when an application has been predownloaded into the terminal. A serial cable with a DB-9 female to the PC male connector and 8pin DIN male connector to the terminal’s RS-232C port, such as VeriFone cable part #00446-04
REV. E, is required.
Display Message
Operator Action
_____READY XXX
JAN-03-00_MON_12:00P
[▲]
[▲]
[▲]
Press [ENTER].
FUNCTION
Press [BACKSPACE].
[▲]
[▲]
Enter password:
(optional)
Display Message
__
[▲]
If prompted, key in the password and press [ENTER]. The
password may be obtained through the bank/ISO or FDMS
Help Desk.
Operator Action
1999 LinkPoint International, Inc.
30
LFRST23 Reference Manual
DOWNLOAD PROCEDURES
Enter Appl. ID.
LFRST23
[▲]
[▲]
[▲]
Press [ENTER] to accept the current application ID or type in
the new application ID and press [ENTER].
Enter Terminal ID.
Press [ENTER] to accept the current terminal ID or type in
the new terminal ID and press [ENTER].
[▲]
[▲]
[▲]
Direct Download
Full
Partial
[▲]
[▲]
[▲]
WAITING ON ENQ...
[▲]
[▲]
Select the type of download. Press the left [▲] key for a “Full”
download or press the right [▲] key for a “Partial” download.
Please wait...
[▲]
*---------AP-L3FRET1 T-SAMPLE
[▲]
[▲]
[▲]
Please wait...
__CLEAR_to_resume
_ Time__Load__Setup
[▲]
[▲]
[▲]
Press [CLEAR] to allow the program to finish loading.
POS-to-POS (Master/Slave) Download
The POS-to-POS download transfers all application and transaction data from the master
terminal to the slave terminal. Therefore, it is important to ensure the integrity of the master
device. This includes ensuring that: (a) there are no transactions in the master, (b) all parameters
are set to the default settings, (c) the date/time and hardware settings are correct. To perform a
POS-to-POS download connect one end of a standard VeriFone 8-pin DIN back-to-back
download cable (p/n 00490-00 REV C) to the master terminal’s RS232 port and the opposite end
to the RS232 port of the slave terminal. The master terminal must be fitted with an EPROM (OS)
version of 1.4 or higher to perform this type of download. Follow the steps below to setup the
master and slave terminals for a POS-to-POS download.
Master Display
_____READY XXX
JAN-03-00_MON_12:00P
[▲]
[▲]
[▲]
Master Display
Master
Action
Press [*] [6].
Slave Display
Slave Action
_____App. not available
Time
Load Setup
[▲]
[▲]
[▲]
Press [#] [6].
Master
Slave Display
Slave Action
LinkPoint International, Inc. 1999
31
LFRST23 Reference Manual
Action
Enter Password
BEGIN POS SEND MODE?
YES
NO
[▲]
[▲]
[▲]
Press the left
[▲] key.
BEGIN POS RCV MODE?
YES
NO
[▲]
[▲]
[▲]
SEND IN PROGRESS
Please wait...
RECEIVE IN PROGRESS
[▲]
[▲]
[▲]
[▲]
[▲]
If prompted,
key in the
password and
press [ENTER].
The password
may be
obtained
through the
bank/ISO or
FDMS Help
Desk.
Press the left
[▲] key.
Please wait...
[▲]
Terminal displays various screens
SEND COMPLETE
[▲]
[▲]
Please wait...
RECEIVE COMPLETE
[▲]
[▲]
[▲]
Please wait...
[▲]
Press [CLEAR] to reboot the terminal.
1999 LinkPoint International, Inc.
32
LFRST23 Reference Manual
DOWNLOAD PARAMETERS
DOWNLOAD PARAMETERS
Download parameters are used for programming or updating a terminal’s profile. These
parameters may be added or modified through the standard Zontalk Edit Procedures. As
mentioned in the previous section, downloads may be performed by three methods: modem-toterminal in the field, computer-to-terminal, or terminal-to-terminal via the RS232 serial port. The
following list contains the available parameters for the LFRST23 Restaurant application. The list is
organized into four columns containing the memory location, the type of field, maximum field
length, and the description of the field’s contents.
Field Type Codes
N = numeric
Q = question, Y or N
P = phone number field
X = Alphanumeric
B = Binary (0 or 1)
Memory Locations
Parameter
#ARPT
#BMAX
#BTAB
#CBMAX
#CBMIN
#CKMID
#CKPNP
#CKPNS
#CKSVC
#CLOCK
#CSWD
#DATIP
#DAUTH
#DBTIP
#DCBSC
#DEBCB
#DEVID
#DPOSC
#DRCRE
#DRDEB
#DWKEY
#FLEX1
#FLEX2
#FLEX3
#H1
#H2
#H3
Field Type
Q
N
Q
X
X
X
P
P
N
Q
X
N
X
B
X
Q
X
X
Q
Q
X
X
X
X
X
X
X
Field Length
1
3
1
6
6
11
20
20
1
1
8
3
6
1
4
1
4
4
1
1
16
40
40
40
40
40
40
LinkPoint International, Inc. 1999
Description of Field
Auto report at Batch Close: Y or N
Max. # items in batch
Enable bar tab: Y or N
Maximum amount for Debit cash back
Minimum amount for Debit cash back
Check Guarantee Merchant ID
Check Guarantee Primary phone number
Check Guarantee Secondary phone number
Check Service (0=CSI, 1=Equifax, 2=Telecheck)
12 hour format flag: Y or N
Card swipe default: SALE, AUTH or TICKET
Default tip percentage add-on to authorization
Default authorization amount for bar tabs
Tip Entry on Debit Card (0=PIN Device, =Terminal)
Surcharge—Debit cash back (e.g., 50 = .50¢)
Ask for cash back for Debit: Y or N
Device ID
Surcharge—Debit purchase only (e.g., 50 = .50¢)
Disable Credit RETURNS: Y or N
Disable Debit RETURNS: Y or N
Debit working key
Receipt flex prompt line 1 (below signature line)
Receipt flex prompt line 2 (below signature line)
Receipt flex prompt line 3 (below signature line)
Header line 1
Header line 2
Header line 3
33
LFRST23 Reference Manual
DOWNLOAD PARAMETERS
Parameter
#H4
#H5
#H6
#IDLE1
#IDLE2
#IDRC
#INV
#KBCLK
#KBOUT
Field Type
X
X
X
X
X
Q
Q
Q
N
Field Length
40
40
40
20
20
1
1
1
2
#KEYED
#L4DIG
#MIDC
#MKEY
#OPID
#PABX
#PCPNC
#PDS
#PDT
#PP201
#PPNC
#PPTR
#PREPR
#PRLF
#PRREC
#PSRBD
#PSUFF
#PSWD0
#PSWD1
Q
Q
N
N
Q
X
P
N
X
Q
P
Q
Q
N
Q
Q
P
X
B
1
1
16
1
1
10
20
4
1
1
20
1
1
1
1
1
12
6
24
#RETRY
#SACCT
#SCPNC
#SPNC
#T1
#T2
#TAAC
#TABAD
N
Q
P
P
X
X
Q
Q
1
1
20
20
40
40
1
1
#TCMAP
B
12
#TIPAS
Q
1
1999 LinkPoint International, Inc.
Description of Field
Header line 4
Header line 5
Header line 6
Custom Idle Prompt for display line 1
Custom Idle Prompt for display line 2
Print Item Detail Report at Close: Y or N
Invoice number enable flag: Y or N
Keyboard beep: Y or N
Keyboard time out: 0 to 60 seconds (0 = must press
CLEAR and return to the idle prompt; 1 - 60 =
terminal automatically returns to the idle prompt
after the set number of seconds)
Disable manual entry of card: Y or N
Last four digit entry flag: Y or N
Merchant ID
Location of Master key for PINpad
Server ID enable flag: Y or N
Prefix required for dialing
Host Primary Close phone number
Dial speed: 300 or 1200
Tone = T Pulse = P
PinPad 2000/201: Y or N
Host Primary phone number
Print pending transaction report: Y or N
Pre-print receipt: Y or N
Printer line feeds
Printer enable flag: Y or N
Print breakdown report: Y or N
Suffix required for dialing
Manager password
Bit map for protected transactions and functions.
1 for protect, 0 for off
Number of retries to call Host
Show swiped account number on display: Y or N
Host Secondary Close phone number
Host Secondary phone number
Receipt trailer line 1 (below flex lines)
Receipt trailer line 2 (below flex lines)
Ask for total dollar amount at Close: Y or N
Dial for new authorization if tab total does not
match original authorization amount within 20%
Telecheck prompts bitmap (See Telecheck
information)
Editing tip, ask for server: Y or N
34
LFRST23 Reference Manual
DOWNLOAD PARAMETERS
The following table contains certain Default Settings that will be automatically downloaded with
the LFRST23 application. Any of these Default Parameters may be overridden through Zontalk
Edit Procedures.
Parameter
#ARPT
#BMAX
#BTAB
#CBMAX
#CBMIN
#CKMID
#CKPNP
#CKPNS
#CKSVC
#DATIP
#DAUTH
#DBTIP
#DEBCB
#DRCRE
#DRDEB
#DWKEY
#FLEX1
#FLEX2
#FLEX3
#H5
#H6
#IDRC
#INV
#KBCLK
#KBOUT
#KEYED
#L4DIG
#MIDC
#MKEY
#OPID
#PABX
#PCPNC
#PDT
#PORDR
#PPNC
#PPTR
#PREPR
#PRLF
#PRREC
#PSRBD
Default Setting
N
200
Y
Comments
0000000000
00000000000
00000000000
2
20
50.00
0
N
N
Y
Generally, Debit returns are
disabled
0000000000000000
I AGREE TO PAY ABOVE AMOUNT
ACCORDING
TO CARD ISSUER AGREEMENT
(MERCHANT AGREEMENT IF
RETURN)
THANK YOU
N
N
Y
00
N
N
022009001234566
1
Y
N
9501324
T
Y
9501324
Y
Y
7
Y
N
LinkPoint International, Inc. 1999
N = Keyed transactions allowed
FDC Omaha test Merchant ID
Server ID
35
LFRST23 Reference Manual
DOWNLOAD PARAMETERS
#PSWD0
123123
Parameter
#PSWD1
Default Setting
000000000100100000
#RETRY
#SACCT
#SCPNC
#SPNC
#TAAC
#TABAD
5
N
18002289074
18002289074
N
Y
#TCMAP
111000100000
#TIPAS
Y
Comments
Refer to the table below for bit map
details
Y= If the total tab amount
(including tip) exceeds the original
authorization by more than 20%,
the terminal will dial to the host for
a new authorization.
Prompts for amount, DL#, State
Code and Date of Birth are enabled
Password Protect Settings
The password keyword (field name) for Manager’s Password is #PSWRD0. The field name
#PSWRD1 is used to enable a password prompt for the transactions and functions as noted in the
table below. Entry in Zontalk must conform as follows:
#PSWRD1: 000000000100100010 (where 0=NO & 1=YES), the 18 positions correspond to the
following 18 transactions or functions.
Position
1
2
3
4
5
6
7
8
9
10
11
12
13
14
15
16
17
18
1999 LinkPoint International, Inc.
Password Protects
Sale
ATM/Debit
Check
Void
Return
Review
Close (except on Auto Settle)
Auth Only
Ticket Only
Manual Clear Batch
POS to POS Transfer
Technical Specification Printout
Demonstration Mode ON/OFF
Printer ON/OFF
Dial Prefix
Dial Suffix
View Merchant Information
Adjust Tip and Tab
36
LFRST23 Reference Manual
DOWNLOAD PARAMETERS
Telecheck Check Service Information
The following Zontalk parameters (memory locations) are used when establishing Telecheck
using the LinkPoint 3000 LFRST23 Restaurant application:
•
•
•
•
•
#CKSVC- Check Service type: Telecheck is “2”
#CKPNP- Check Guarantee Primary Phone number: Default is 950-5666
#CKPNS- Check Guarantee Secondary Phone number: Default is 1-800-366-8950
#CKMID- Check Guarantee Merchant ID: No default
#TCMAP- Telecheck prompt options (SEE BELOW)
Telecheck Check Service Prompt Options
#TCMAP: 111000100000 (Where 0=NO & 1=YES) The 12 positions correspond to the following 12
Telecheck prompts and are activated when the #CKSVC field is filled with “2 (Telecheck
Service):”
Position
1
2
3
4
5
6
7
8
9
10
11
12
Prompt
Amount of Sale
Driver’s License #
State Code
Micr #
Check #
Check type
Date of Birth
Driver’s License Expiration Date
Driver’s License Zip Code
Cashback Amount
Home Phone #
Work Phone #
A standard part of the Zontalk download files that LinkPoint International provides to any client
will include a “TELECHECK” terminal record in the Edit Terminal pick list. The Zontalk
user/administrator can then invoke the USES utility to add all TELECHECK-related information,
with the exception of the Merchant ID.
LinkPoint International, Inc. 1999
37
LFRST23 Reference Manual
DOWNLOAD PARAMETERS
Equifax Check Service Information
The following Zontalk parameters (memory locations) are used when establishing the Equifax
check service using the LinkPoint 3000 LFRST23 Restaurant application:
•
•
•
•
#CKSVC- Check Service type: Equifax is “1”
#CKPNP- Check Guarantee Primary Phone number: Default is 1-800-628-5637
#CKPNS- Check Guarantee Secondary Phone number: Default is 1-800-237-2626
#CKMID- Check Guarantee Merchant ID: No default –as supplied by Equifax
A standard part of the Zontalk download files that LinkPoint International provides to any client
will include a “EQUIFAX” terminal record in the Edit Terminal pick list. The Zontalk
user/administrator can then invoke the USES utility to add all EQUIFAX-related information,
with the exception of the Merchant ID.
1999 LinkPoint International, Inc.
38
LFRST23 Reference Manual
DOWNLOAD PARAMETERS
DIAL STRING CODES SPECIFIC TO LP3000
The following table contains a list of codes and their uses for special telephone dialing
circumstances. These can be keyed directly into the locations reserved for entering telephone
numbers.
CODE
DESCRIPTION
ENTRY POSITION
Hypen: One (1) second pause
Where the pause is required
,
Comma: Two (2) second pause
Where the pause is required
Y
Additional dial tone required
Where the dial tone is
required
L
Location in dial string to open the dial tone listen
The point at which the
window
terminal needs to check for
tone
M
Indicates the presence of multiple terminals using
Anywhere in dial string
same phone; must be in dial string of each terminal
P
Used only when the ‘M’ code is supplied and there Where the “listening” is to
be enabled
is a dial prefix. When this code is present, the
“listening” of sound energy between tone digits is
suppressed until the position of the ‘P’ code is
reached. This code is used in the multi-terminal
same-line setup where a second dial tone is
produced after a dial prefix. If the ‘P’ code is not
used, then the second dial tone will cause supply
enough energy which may appear as if a different
terminal is dialing.
S
A ‘.2’ second pause
Where the pause is required
T
Listens for energy between dialing each digit. This Anywhere in dial string
is only used with the ‘M’ code.
Anywhere in dial string
U
If this character is NOT supplied anywhere in the
dial string, then a LINE STATUS TEST of ‘line
busy’ will cause a return code of ‘6’ to the
application, and a ‘no-dial-tone” condition will
return a ‘7’ to the application. If the ‘U’ code is
supplied in the dial string, then both “line busy”
and “no-dial-tone” conditions will return a ‘6’ to
the application, and ‘7’ will never be returned to
the application.
V
Suppresses LINE STATUS TEST
Anywhere in dial string
W
Skips dial tone requirement
Anywhere in dial string
X
Slow dial speed: 100 milliseconds on/off
Anywhere in dial string
LinkPoint International, Inc. 1999
39
LFRST23 Reference Manual
BASIC OPERATION
BASIC OPERATION
Transaction Keys
The LinkPoint 3000 Restaurant terminal has eleven (11) transaction keys. Seven of these keys are
located directly below the terminal display and are labeled [VOID], [SALE], [ATM/DEBIT],
[REVIEW], [CLOSE], and [RETURN]. The other three transaction keys are located to the right of
the number keys, [÷] (REPRINT), [X] (AUTH ONLY), and [-] (TKT ONLY). Additionally, the [+]
key adjacent to the [ENTER] key is used to add tips and close out tabs. These eleven keys are
used to perform the various dedicated standard restaurant transactions. Transactions can be
initiated any time the terminal is in the idle state (i.e., displays the READY message).
1.
Check the display for the READY message. If it is not displayed, press [CLEAR] to cancel the
current operation and display the READY message.
2.
Press the desired transaction key to begin the transaction.
3.
Follow the instructions given by the prompts on the display panel to complete the
transaction.
Press [CLEAR] to return to the READY message when the transaction is completed (the terminal
is programmed to return to idle in one minute).
Using the Cardreader
1.
Check the display for the READY message. If it is not displayed, wait until the current
operation has ended and then press [CLEAR] to return to the READY message.
2.
Initiate the correct transaction type (i.e., press [SALE] to initiate a sale).
3.
Insert the credit or debit card into the rear of the cardreader slot with the magnetic stripe
facing down and away from the keypad (see Figure 9 on Page 8).
4.
Slide the card through the slot without stopping. If the terminal beeps, check the position of
the magnetic stripe and slide the card through the slot again. If the beep persists, the card
may be damaged. Type the account number directly on the keypad.
5.
Complete the transaction by following the display messages.
Backspace Key
The Backspace Key has multiple functions.
1.
To delete an incorrectly entered character.
2.
From a menu option (i.e., CARD TYPE, SERVER ID etc.) the [BACKSPACE] key can return
you to the previous menu display.
3.
When the Adjust function [+] key is used to edit a tab or tip, but it’s decided that no entry
need be made, use the [BACKSPACE] key to return to the initial menu.
1999 LinkPoint International, Inc.
40
LFRST23 Reference Manual
BASIC OPERATION
The Calculator
The LinkPoint 3000 includes a built-in calculator capable of performing simple arithmetic
calculations. To access the calculator, from the idle prompt (READY message) press the desired
numeral and associated math symbols and press [ENTER] to obtain the result. For example, to
calculate the result of the sum of two plus two, press [2] [+] [2] [ENTER] and the terminal will
display the sum, in this case “4.” For a decimal point, please press the [*] key.
LinkPoint International, Inc. 1999
41
LFRST23 Reference Manual
LOCAL FUNCTIONS
LOCAL FUNCTIONS
Printer Enable/Disable
To enable or disable the printer follow the instructions outlined below.
Display Message
Operator Action
_____READY XXX
JAN-03-00_MON_12:00P
[▲]
[▲]
[▲]
Press [ENTER].
FUNCTION
Key in [4] [1] and press [ENTER].
[▲]
[▲]
_
[▲]
ENTER PASSWORD _
[▲]
[▲]
[▲]
If prompted, key in the password (the default is 123123) and
press [ENTER].
PRINTER ENABLE?
YES
NO
[▲]
[▲]
[▲]
Press the left [▲] key to enable the printer or press the right
[▲] key to disable the printer.
CHANGE ACCEPTED
Terminal returns to the idle prompt.
(optional)
[▲]
[▲]
[▲]
Dial Prefix (PABX)
To enter, view, or change the current PABX Dial Prefix that the terminal dials before connecting
with the host.
Display Message
Operator Action
_____READY XXX
JAN-03-00_MON_12:00P
[▲]
[▲]
[▲]
Press [ENTER].
FUNCTION
Key in [4] [2] and press [ENTER].
[▲]
[▲]
_
[▲]
ENTER PASSWORD _
[▲]
[▲]
[▲]
If prompted, key in the password (the default is 123123) and
press [ENTER].
(optional)
1999 LinkPoint International, Inc.
42
LFRST23 Reference Manual
LOCAL FUNCTIONS
Display Message
Operator Action
ENTER DIAL PREFIX
Key in the necessary prefix for the terminal to dial out and press
[ENTER].
[▲]
[▲]
[▲]
CHANGE ACCEPTED
[▲]
[▲]
Terminal returns to the idle prompt.
[▲]
Dial Suffix
To enter, view, or change any Dial Suffix. This would be used for situations in which a dial out
password is required, or when post-dial delays are necessary.
Display Message
Operator Action
_____READY XXX
JAN-03-00_MON_12:00P
[▲]
[▲]
[▲]
Press [ENTER].
FUNCTION
Key in [4] [3] and press [ENTER].
[▲]
[▲]
_
[▲]
ENTER PASSWORD _
[▲]
[▲]
[▲]
If prompted, key in the password (the default is 123123) and
press [ENTER].
ENTER DIAL SUFFIX
_
[▲]
[▲]
[▲]
Key in the desired suffix for the terminal to dial and press
[ENTER].
CHANGE ACCEPTED
Terminal returns to the idle prompt.
(optional)
[▲]
[▲]
[▲]
Demo Mode Enable/Disable
To enable/disable the terminal’s demonstration mode follow the procedures outlined below. The
demo mode enables users to experiment with the different LinkPoint 3000 features without
processing credit cards. To continue the demonstration after any message display, simply press
[ENTER].
Display Message
Operator Action
LinkPoint International, Inc. 1999
43
LFRST23 Reference Manual
LOCAL FUNCTIONS
_____READY XXX
JAN-03-00_MON_12:00P
[▲]
[▲]
[▲]
Press [ENTER].
FUNCTION
Key in [4] [5] and press [ENTER].
[▲]
[▲]
_
[▲]
ENTER PASSWORD _
[▲]
[▲]
[▲]
If prompted, key in the password (the default is 123123) and
press [ENTER].
DEMO MODE
YES
[▲]
[▲]
Press the left [▲] key to enable the demo mode or press the
right [▲] key to disable the demo mode.
NO
[▲]
CHANGE ACCEPTED
[▲]
[▲]
Terminal returns to the idle prompt.
[▲]
Technical Specification Printout
This terminal function will print the terminal’s settings. To print the current technical
specifications follow the procedures outlined below.
Display Message
Operator Action
_____READY XXX
JAN-03-00_MON_12:00P
[▲]
[▲]
[▲]
Press [ENTER].
FUNCTION
Key in [4] [6] and press [ENTER].
[▲]
[▲]
__
[▲]
ENTER_PASSWORD__
[▲]
[▲]
[▲]
If prompted, key in the password (the default is 123123) and
press [ENTER].
(optional)
Batch Number Setting
To change the current batch number follow the procedures outlined below. This function should
be used only under proper supervision.
Display Message
Operator Action
1999 LinkPoint International, Inc.
44
LFRST23 Reference Manual
LOCAL FUNCTIONS
_____READY XXX
JAN-03-00_MON_12:00P
[▲]
[▲]
[▲]
Press [ENTER].
FUNCTION
Key in [4] [7] and press [ENTER].
[▲]
__
[▲]
[▲]
ENTER_PASSWORD__
[▲]
[▲]
[▲]
If prompted, key in the password (the default is 123123) and
press [ENTER].
CURRENT BATCH#: 0
Press [ENTER] to clear the batch.
(optional)
[▲]
[▲]
[▲]
NEW BATCH # -_
[▲]
[▲]
Key in the new batch number (one digit, 0-9) and press [ENTER].
[▲]
BATCH # CHANGED_
[▲]
[▲]
Press [CLEAR] to return to the idle prompt.
[▲]
View Merchant ID, Device ID, Primary Phone/Change Phone Numbers and Device ID
To view only the programmed Merchant ID, Device ID and Primary Phone number.
Display Message
Operator Action
_____READY XXX
JAN-03-00_MON_12:00P
[▲]
[▲]
[▲]
Press [ENTER].
FUNCTION
Key in [4] [8] and press [ENTER].
▲]
[▲
▲]
[▲
__
[▲
▲]
Display Message
Operator Action
ENTER_PASSWORD__
[▲]
[▲]
[▲]
(optional)
If prompted, key in the password (the default is 123123) and
press [ENTER].
MERCHANT ID
XXXXXXXXXXXXXX
Press [ENTER] to continue.
LinkPoint International, Inc. 1999
45
LFRST23 Reference Manual
LOCAL FUNCTIONS
[▲]
[▲]
DEVICE ID
XXXX_
[▲]
[▲]
[▲]
Press [ENTER] to continue or to change, key in the new
1-4 digit ID and press [ENTER].
Note: This cannot be changed unless the batch is empty.
[▲]
PRIMARY PHONE #_
XXXXXXX
[▲]
[▲]
[▲]
Press [ENTER] to go to the next field, or to change
this, key-in the new host phone number and press
[ENTER]. This field may be changed even with an open
batch.
SECONDARY PHONE #_
XXXXXXX
[▲]
[▲]
[▲]
Press [ENTER] to go to the next field, or to change
this, key-in the new host phone number and press
[ENTER]. This field may be changed even with an open
batch.
PRIMARY CLOSE #
XXXXXXX
[▲]
[▲]
[▲]
Press [ENTER] to go to the next field, or to change
this, key-in the new host phone number and press
[ENTER]. This field may be changed even with an open
batch.
SECOND CLOSE PHONE #
Press [ENTER] to go to the next field, or to change
this, key-in the new host phone number and press
[ENTER]. This field may be changed even with an open
batch.
[▲]
[▲]
[▲]
Clear Batch
To clear the current batch follow the procedures outlined below.
Display Message
Operator Action
_____READY XXX
JAN-03-00_MON_12:00P
[▲]
[▲]
[▲]
Press [ENTER].
FUNCTION
Key in [4] [9] and press [ENTER].
[▲]
__
[▲]
[▲]
Display Message
Operator Action
ENTER_PASSWORD__
[▲]
[▲]
[▲]
If prompted, key in the password (the default is 123123) and
press [ENTER].
PRESS ENTER_TO
CLEAR_BATCH_
[▲]
[▲]
[▲]
Press [ENTER] to clear the batch.
1999 LinkPoint International, Inc.
46
LFRST23 Reference Manual
LOCAL FUNCTIONS
BATCH_CLEARED_
[▲]
[▲]
Press [CLEAR] to return to the idle prompt.
[▲]
View Last Response From Host
To view the host response (approved, declined, etc.) from the most recent transaction, follow the
procedures below.
Display Message
Operator Action
_____READY XXX
JAN-03-00_MON_12:00P
[▲]
[▲]
[▲]
Press [ENTER].
FUNCTION
Key in [4] [0] and press [ENTER].
[▲]
[▲]
__
[▲]
LAST HOST RESPONSE:
Approved xxxxxx
[▲]
[▲]
[▲]
Press [CLEAR] after reviewing this information.
LinkPoint International, Inc. 1999
47
LFRST23 Reference Manual
STANDARD KEY OPERATIONS
STANDARD KEY OPERATIONS
Terminal transactions are common, unprotected transactions that all personnel can perform.
These transactions include Dine In, Take Out, Bar Tab, ATM/Debit Sale (optional), Return,
Authorization Only, Ticket Only, Void, Review, Close Batch, and Reprint.
The LinkPoint 3000 READY message estimates the number of transactions that can be performed
before the batch is full. For example, READY 30 indicates there is space to store 30 more
transactions in the current batch. Overflowing the terminal with transactions can compromise the
data’s integrity.
When the memory is full, the READY message displays “BATCH FULL-PLS CLOSE” and no
further transactions can be stored until the batch is closed and the memory is cleared from the
terminal. There is a safety feature that advises the merchant to close the batch when the batch is
almost full.
The procedures for each transaction type include most optional prompts. The options are
designated with the note “(optional)” directly below the displayed message. Depending on the
user’s needs, they might be enabled or disabled.
Transaction Name
Explanation
DINE IN/TAKE OUT
& BAR TAB [SALE]
Obtains pre-authorization of the customer’s card for the base amount of the sale, plus a
customizable 20% for a subsequent gratuity.
[ATM/DEBIT]
Obtains ATM/Debit card authorization and captures the transaction for later deposit
(optional service).
[CHECK]
Obtains check authorizations.
[RETURN]
Initiates a return/credit.
[X] [AUTH ONLY]
Used to authorize a transaction without ticket capture.
[-] [TKT ONLY,
OFFLINE]
Captures a previously authorized transaction for deposit.
[VOID]
Voids any captured transaction in an open batch.
[REVIEW]
Used to review or print information about captured transaction details and/or totals prior to
batch close.
[CLOSE]
Closes the terminal batch and initiates the deposit of funds.
[÷] (REPRINT/PRINT)
Prints a duplicate copy of a captured transaction.
ADJUST KEY [+]
Adjusts Tips and finalizes Bar Tabs; after which pre-authorizations obtained via the Sale key
become captured items for deposit to the host.
1999 LinkPoint International, Inc.
48
LFRST23 Reference Manual
STANDARD KEY OPERATIONS
DINE IN / BAR TAB & TAKE OUT
The following procedures are nonmonetary transactions that pre-authorize the customer’s card
for the base amount of the sale, plus a customizable 20% for a subsequent gratuity. Please see
page 55 for adding tip to and finalizing these sales, using the [+] key.
Dine In — Swipe
Display Message
Operator Action
READY XXX
JAN-03-00_MON_12:00P
[▲]
[▲]
[▲]
Slide the card through the cardreader.
ENTER PASSWORD -
If prompted, key in the password (the default is 123123) and
press [ENTER].
(This prompt is optional.)
[▲]
[▲]
(optional)
[▲]
ENTER LAST 4 DIGITS
_
[▲]
[▲]
[▲]
Key in the last four digits of the account number and
press [ENTER].
(This is an optional prompt.)
ENTER SERVER ID
_
[▲]
[▲]
[▲]
Key in the Server ID (up to four alphanumeric
characters) and press [ENTER] OR simply press
[ENTER] to skip this field.
(This is an optional prompt.)
FOOD & BEV AMT?
Key in the amount of the sale without the decimal, then
press [ENTER].
(optional)
(optional)
[▲]
[▲]
$0.00
[▲]
INVOICE NUMBER?
[▲]
[▲]
(optional)
[▲]
PLEASE WAIT...
[▲]
[▲]
Please wait — the terminal is communicating with the
host computer.
[▲]
APPROVED XXXXXX
[▲]
[▲]
Key in the guest check number and press [ENTER].
(This is an optional prompt.)
[▲]
LinkPoint International, Inc. 1999
When the transaction is approved, the printer (if
available) prints a receipt of the transaction. Press
[CLEAR] to return to the idle prompt.
49
LFRST23 Reference Manual
STANDARD KEY OPERATIONS
Open Bar Tab — Swipe
Display Message
Operator Action
READY XXX
JAN-03-00_MON_12:00P
[▲]
[▲]
[▲]
Press the key labeled [SALE].
ENTER PASSWORD -
If prompted, key in the password (the default is 123123)
and press [ENTER].
(This prompt is optional.)
[▲]
DINE
|
[▲]
[▲]
[▲]
(optional)
TAB TAKE-OUT
|
|
[▲]
[▲]
Press the center [▲] key to Select Tab.
BAR TAB
ENTER ACCOUNT #
[▲]
[▲]
[▲]
Slide the card through the cardreader.
ENTER LAST 4 DIGITS
_
[▲]
[▲]
[▲]
(optional)
Key in the last four digits of the account number and
press [ENTER].
(This is an optional prompt.)
ENTER SERVER ID
Key in the Server ID (up to four alphanumeric
characters) and press [ENTER] OR simply press
[ENTER] to skip this field.
(This is an optional prompt.)
[▲]
[▲]
(optional)
_
[▲]
TAB PRE-AUTH AMOUNT
$0.00
[▲]
[▲]
[▲]
Enter the Tab amount without the decimal and press
[ENTER]. It is generally the custom to pre-authorize a
Tab amount equivalent to the number of guests
multiplied by $10.00, (i.e., 5 guests in a party would
equate to a $50.00 Tab estimate). The amount field
contains a predetermined Tab authorization amount
which can be overridden.
INVOICE NUMBER?
Key-in the guest check number and press [ENTER].
(This is an optional prompt.)
[▲]
[▲]
(optional)
_
[▲]
PLEASE WAIT…
[▲]
[▲]
Please wait — the terminal is communicating with the
host computer.
[▲]
1999 LinkPoint International, Inc.
50
LFRST23 Reference Manual
STANDARD KEY OPERATIONS
Display Message
Operator Action
APPROVED XXXXXX
When the transaction is approved, the printer (if
available) prints a receipt of the transaction. Press
[CLEAR] to return to the idle prompt.
[▲]
Note:
[▲]
[▲]
After the receipt prints and the customer is ready to close the Tab, the bartender/server
completes the FOOD/BEV/TAX line and the customer completes the Tip & Total lines
and signs the receipt. The bartender/server then ‘closes’ the Tab. See page 58 in this
manual.
Take-Out Order — Swipe
Display Message
Operator Action
READY XXX
JAN-03-00_MON_12:00P
[▲]
[▲]
[▲]
DINE
TAB TAKE-OUT
|
|
|
[▲]
[▲]
[▲]
Press the key labeled [SALE].
Press the right [▲] key to select TAKE-OUT.
TAKE-OUT
ENTER ACCOUNT#
[▲]
[▲]
[▲]
Slide the card through the cardreader.
ENTER LAST 4 DIGITS
_
[▲]
[▲]
[▲]
Key in the last four digits of the account number
and press [ENTER].
(This is an optional prompt.)
ENTER SERVER ID
Key in the Server ID (up to four alphanumeric
characters) and press [ENTER] OR simply press
[ENTER] to skip this field.
(This is an optional prompt.)
(optional)
_
[▲]
[▲]
[▲]
(optional)
FOOD & BEV AMT?
$0.00
[▲]
[▲]
[▲]
INVOICE NUMBER?
[▲]
[▲]
(optional)
[▲]
Key in the guest check number and press [ENTER].
(This is an optional prompt.)
[▲]
PLEASE WAIT...
[▲]
Key in the amount of the sale without the decimal and
press [ENTER].
Please wait — the terminal is communicating with the
host computer.
[▲]
LinkPoint International, Inc. 1999
51
LFRST23 Reference Manual
STANDARD KEY OPERATIONS
Display Message
Operator Action
APPROVED XXXXXX
When the transaction is approved, the printer (if
available) prints a receipt of the transaction. Press
[CLEAR] to return to the idle prompt.
[▲]
[▲]
[▲]
Dine In / Bar Tab or Take Out — Manual
Display Message
Operator Action
READY XXX
JAN-03-00_MON_12:00P
[▲]
[▲]
[▲]
Press the key labeled [SALE].
DINE TAB TAKE-OUT
|
|
|
[▲]
[▲]
[▲]
Select DINE, TAB or TAKE-OUT.
DINE IN
ENTER ACCOUNT #
[▲]
[▲]
[▲]
Key in the cardholder’s account number and press
[ENTER].
EXPIRY DATE? (MMYY)
MM/YY
[▲]
[▲]
[▲]
Key in the four-digit expiration date using two digits
each for month and year (e.g., 0999 for September
1999), then press [ENTER].
IMPRINT REQUIRED..
IF CARD IS PRESENT!
[▲]
[▲]
[▲]
If the card is present, make an imprint of the card with
a manual imprinter.
ENTER SERVER ID
Key in the Server ID (up to four alphanumeric
characters) and press [ENTER] OR simply press
[ENTER] to skip this field.
(This is an optional prompt.)
[▲]
[▲]
(optional)
_
[▲]
FOOD & BEV AMT?
$0.00
[▲]
[▲]
[▲]
INVOICE NUMBER?
[▲]
[▲]
(optional)
[▲]
Key in the guest check number and press [ENTER].
(This is an optional prompt.)
[▲]
PLEASE WAIT...
[▲]
Key in the amount without the decimal and press
[ENTER]. For Bar Tabs, be sure to estimate the
authorization amount according to restaurant policy.
Please wait as the terminal communicates with the host
computer.
[▲]
1999 LinkPoint International, Inc.
52
LFRST23 Reference Manual
STANDARD KEY OPERATIONS
Display Message
Operator Action
APPROVED XXXXXX
[▲]
[▲]
When the transaction is approved, the printer (if
available) prints a receipt of the transaction. Press
[CLEAR] to return to the idle prompt.
[▲]
The finished Dine In receipt will look like this:
-Transaction type specification
SALE RECEIPT
-Customized header (up to 6 lines)
RESTAURANT
CROSSROADS MEGA-MALL
123 MAIN STREET
ANYWHERE, USA 12345
PHONE: (XXX) XXX-XXXX
FAX: (XXX) XXX-XXXX
Merch ID: XXXXXXXXXXXXXXXX
Terminal ID: XXXX
-Merchant ID
-Terminal ID
Item:001 VISA DINE IN / SWIPED
Acct: XXXXXXXXXXXXXX EXP: 12/00
JOHN DOE
Server ID: XXXX
Invoice #: XXXX
FOOD / BEV / TAX
TIP
$
00.00
$___________
-Item #, card & trans type, entry method
-Card number, expiration date
-Cardholder name (if card is swiped)
-Server ID (optional), Invoice number
(optional)
-Food, beverage and tax
-Tip
TOTAL
$___________
-Total amount
X______________________________________________
JOHN DOE
I AGREE TO PAY THE ABOVE AMOUNT ACCORDING TO
CARD ISSUER AGREEMENT
(MERCHANT AGREEMENT IF RETURN)
-Cardholder’s signature
-Cardholder’s name
-Cardholder agreement
-Custom message
COME AGAIN!
-Date, day, and time of transaction
-Response from host
Date: 01/03/00 Day: Mon Time: 12:00P
Response: APPROVED XXXXXX
TOP COPY-MERCHANT BOTTOM COPY-CUSTOMER
LinkPoint International, Inc. 1999
53
LFRST23 Reference Manual
STANDARD KEY OPERATIONS
The Open Bar Tab receipt will look like this:
-Transaction type specification
OPEN TAB RECEIPT
-Customized header (up to 6 lines)
RESTAURANT
CROSSROADS MEGA-MALL
123 MAIN STREET
ANYWHERE, USA 12345
PHONE: (XXX) XXX-XXXX
FAX: (XXX) XXX-XXXX
Merch ID: XXXXXXXXXX
Terminal ID: XXXX
-Customer ID
-Terminal ID
Item:001 VISA BAR TAB / SWIPED
Acct: XXXXXXXXXXXXXX EXP: 12/00
JOHN DOE
Invoice #: XXXXXXXX Server ID: XXXX
-Item #, card & trans type, entry method
-Card number, expiration date
-Cardholder name
-Invoice ID (optional), Server ID (optional)
Pre-auth amount:
-Pre-authorized amount
50.00
FOOD / BEV / TAX
$ _________
TIP
$___________
-Food, beverage and tax
-Tip
TOTAL
$___________
-Total amount
X______________________________________________
JOHN DOE
I AGREE TO PAY THE ABOVE AMOUNT ACCORDING TO
CARD ISSUER AGREEMENT
(MERCHANT AGREEMENT IF RETURN)
-Cardholder’s signature
-Cardholder’s name
-Cardholder agreement
-Custom message
COME AGAIN!
-Date, day, and time of transaction
-Response from host
Date: 01/03/00 Day: Mon Time: 12:00P
Response: APPROVED XXXXXX
TOP COPY-MERCHANT BOTTOM COPY-CUSTOMER
The finished Take Out receipt will look like this:
1999 LinkPoint International, Inc.
54
LFRST23 Reference Manual
STANDARD KEY OPERATIONS
-Transaction type specification
SALE RECEIPT
-Customized header (up to 6 lines)
RESTAURANT
CROSSROADS MEGA-MALL
123 MAIN STREET
ANYWHERE, USA 12345
PHONE: (XXX) XXX-XXXX
FAX: (XXX) XXX-XXXX
Merch ID: XXXXXXXXXXXXXXXX
Terminal ID: XXXX
-Merchant ID
-Terminal ID
Item:001 VISA TAKE OUT / SWIPED
Acct: XXXXXXXXXXXXXX EXP: 12/00
JOHN DOE
Server ID: XXXX
Invoice #: XXXX
-Item #, card & trans type, entry method
-Card number, expiration date
-Cardholder name (if card is swiped)
-Server ID (optional), Invoice ID (optional)
-Food, beverage and tax
FOOD / BEV / TAX
$
00.00
TIP
$___________
-Tip
TOTAL
$___________
-Total amount
X______________________________________________
JOHN DOE
I AGREE TO PAY THE ABOVE AMOUNT ACCORDING TO
CARD ISSUER AGREEMENT
(MERCHANT AGREEMENT IF RETURN)
-Cardholder’s signature
-Cardholder’s name (if card swiped)
-Cardholder agreement
-Custom message
COME AGAIN!
-Date, day, and time of transaction
-Response from host
Date: 01/03/00 Day: Mon Time: 12:00P
Response: APPROVED XXXXXX
TOP COPY-MERCHANT BOTTOM COPY-CUSTOMER
ADDING TIPS (REQUIRED TO CLOSE BATCH)
LinkPoint International, Inc. 1999
55
LFRST23 Reference Manual
STANDARD KEY OPERATIONS
The Adding Tips function is used to enter and correct tip amounts as necessary for successful
batch closure. Follow the steps below to enter and adjust tips, prior to batch closure.
Display Message
Operator Action
READY XXX
JAN-03-00_MON_12:00P
[▲]
[▲]
[▲]
Press the [+] key.
ENTER PASSWORD _
[▲]
[▲]
[▲]
If prompted, key in the password (the default is 123123)
and press [ENTER].
ADJUST:
Press the center [▲] key to select TIP?
(optional)
[▲]
TIP?
|
[▲]
TAB?
|
[▲]
ENTER SERVER ID
_
[▲]
[▲]
[▲]
Key in the individual’s Server ID (or Item Number if
Server ID not used) printed on the receipt and press
[ENTER].
(This prompt is optional.)
001 DINE
OK?
[▲]
Press the right [▲] key to select ADD TIP? to enter or edit
the tip OR press the left [▲] key to select OK to accept the
amount displayed.
(optional)
$ 0.00
ADD TIP?
[▲]
[▲]
001: ENTER TIP AMT
$0.00
[▲]
[▲]
[▲]
Enter the tip amount and press [ENTER].
001 DINE
OK?
[▲]
$ 0.00
NEW TIP?
[▲]
[▲]
Press the left [▲] key to select OK? if the total including
tip is correct OR press the right [▲] key select NEW TIP?
to change or correct the tip amount.
002 DINE
OK?
[▲]
$ 0.00
ADD TIP?
[▲]
[▲]
Next item for that server is displayed. Repeat the
above procedures to finalize the remaining transactions
for that server.
END OF SERVER 00
[▲]
[▲]
END OF SERVER will display briefly, followed by the
option to print a report.
[▲]
PRINT SVR 00 RPT?
YES
NO
[▲]
[▲]
[▲]
This print option only prompts when the Server ID
function is enabled and only when a printer is used.
Display Message
Operator Action
1999 LinkPoint International, Inc.
56
LFRST23 Reference Manual
STANDARD KEY OPERATIONS
END OF SERVERS/
ENTER SERVER ID
[▲]
[▲]
[▲]
If all the tips have been added, the terminal will display
END OF SERVERS. Otherwise, it will prompt
ENTER SERVER ID for further editing.
The Server ID Tip Report will look like this:
-Transaction type specification
SERVER XXXX REPORT
-Customized header (up to 6 lines)
RESTAURANT
CROSSROADS MEGA-MALL
123 MAIN STREET
ANYWHERE, USA 12345
PHONE: (XXX) XXX-XXXX
FAX: (XXX) XXX-XXXX
Merch ID: XXXXXXXXXX
Terminal ID: XXXX
Date: 01/07/00
Day: FRI
$
ITEM
CARD
001
4-1234
TRAN
SALE
=====
GRAND TOTALS
-Customer ID
-Terminal ID
-Date, day and time
Time: 11:30P
TIP
TOTAL
5.00
====
5.00
25.00
=====
25.00
-Server ID, truncated card #, trans type,
tip amount and total
-Total tip amount for Server
5.00 TIPS RECEIVED BY SERVER XXXX
X___________________________________________
LinkPoint International, Inc. 1999
57
LFRST23 Reference Manual
STANDARD KEY OPERATIONS
CLOSING BAR TAB (REQUIRED TO CLOSE BATCH)
The Adding Tab function is used to adjust the amount of a Bar Tab. Follow the steps below to edit
a Bar Tab, prior to batch closure.
Display Message
Operator Action
READY XXX
JAN-03-00_MON_12:00P
[▲]
[▲]
[▲]
ENTER PASSWORD
[▲]
[▲]
(optional)
If prompted, key in the password (the default is 123123) and
press [ENTER].
[▲]
(This prompt is optional.)
ADJUST:
TIP? TAB?
|
|
[▲]
[▲]
[▲]
ENTER TAB NUMBER
[▲]
[▲]
Press the [+] key labeled ADJUST.
_
[▲]
Press the right [▲] key to select TAB? to adjust the proper
item.
Key in the item number printed on the receipt and press
[ENTER].
TAB #000:
$
0.00
EDIT? VIEW? NEXT?
[▲]
[▲]
[▲]
Press the left [▲] key to select EDIT? to adjust the tab
amount. Press the center [▲] key to select VIEW? to scroll
through the details of the selected Tab. Press the right [▲]
key to select NEXT? to go to the next tab item in the batch.
TAB # FOOD & BEV AMT?
$0.00
[▲]
[▲]
[▲]
Enter the Tab amount and press [ENTER].
ENTER TIP AMOUNT
$0.00
[▲]
[▲]
[▲]
Enter the tip amount and press [ENTER]. The close
tab receipt will now print, or the terminal will redial
for a new tab authorization and print.
ENTER TAB NUMBER
Key in the next tab item to be closed or press [CLEAR] to
return to the idle prompt.
[▲]
[▲]
[▲]
1999 LinkPoint International, Inc.
58
LFRST23 Reference Manual
STANDARD KEY OPERATIONS
The Bar Tab Receipt will look like this:
-Transaction type specification
CLOSE TAB RECEIPT
-Customized header (up to 6 lines)
RESTAURANT
CROSSROADS MEGA-MALL
123 MAIN STREET
ANYWHERE, USA 12345
PHONE: (XXX) XXX-XXXX
FAX: (XXX) XXX-XXXX
Merch ID: XXXXXXXXXX
Terminal ID: XXXX
-Customer ID
-Terminal ID
Item:001 VISA BAR TAB / SWIPED
Acct: XXXXXXXXXXXXXX EXP: 12/00
JOHN DOE
Approval Code: XXXXXX
-Item #, card & trans type, entry method
-Card number, expiration date
-Cardholder name
-Approval Code
FOOD / BEV / TAX
$
00.00
-Food and beverage amount and tax
TIP
$
00.00
-Tip
TOTAL
$
00.00
-Total amount
-Date, day, and time of transaction
-Response from host
Date: 01/03/00 Day: Mon Time: 11:30P
Response: ACCEPTED XXX
TOP COPY-MERCHANT BOTTOM COPY-CUSTOMER
LinkPoint International, Inc. 1999
59
LFRST23 Reference Manual
STANDARD KEY OPERATIONS
ADJUST AMOUNT (FOR NEW TOTAL)
The Adjust Amount feature is a manager function which allows a DINE-IN sale amount to be
changed in the event the guest chooses to add an incidental, such as dessert, after the initial
transaction is completed. The manager password is required to access this function. This must be
used very carefully. Once the amount is modified, a new ‘ADJUSTED’ receipt will print for
customer signature. CAUTION: By adjusting the original amount, there is a risk that the
transaction will no longer qualify for the best possible discount rate and may downgrade. This
may occur due to the deposit amount not matching the original matching authorization amount.
Display Message
Operator Action
READY XXX
JAN-03-00_MON_12:00P
[▲]
[▲]
[▲]
ENTER PASSWORD
[▲]
[▲]
(optional)
[▲]
ADJUST:
TIP? TAB?
|
|
[▲]
[▲]
[▲]
TIP
|
[▲]
TAB
|
[▲]
AMOUNT
|
[▲]
ENTER PASSWORD [▲]
[▲]
[▲]
TAB
|
[▲]
Press the [#] key to the left of the [+] key.
Press the right [▲] key to select AMOUNT and press
[ENTER].
The manager should key in his or her password (usually
123123) and press [ENTER].
Key in the item number on the receipt to be adjusted.
[▲]
NEW FOOD/BEV AMOUNT?
$0.00
[▲]
[▲]
[▲]
TIP
|
[▲]
If prompted, key in the password (the default is 123123) and
press [ENTER].
(This prompt is optional.)
[▲]
ENTER ITEM #
[▲]
Press the [+] key labeled ADJUST.
AMOUNT
|
[▲]
1999 LinkPoint International, Inc.
Enter the new food/beverage amount and press
[ENTER]. The new “adjusted” receipt will print for
customer signature. The first receipt should be stored with
the new one.
Press [CLEAR] to exit or perform another adjustment.
60
LFRST23 Reference Manual
STANDARD KEY OPERATIONS
The finished Adjusted Dine In receipt will look like this:
-Transaction type specification
SALE RECEIPT
-Customized header (up to 6 lines)
RESTAURANT
CROSSROADS MEGA-MALL
123 MAIN STREET
ANYWHERE, USA 12345
PHONE: (XXX) XXX-XXXX
FAX: (XXX) XXX-XXXX
Merch ID: XXXXXXXXXXXXXXXX
Terminal ID: XXXX
-Merchant ID
-Terminal ID
Item:001 VISA DINE IN / SWIPED
Acct: XXXXXXXXXXXXXX EXP: 12/00
-Item #, card & trans type, entry method
-Card number, expiration date
Server ID: XXXX
-Server ID (optional), Invoice number
Invoice #: XXXX
ADJUSTED
FOOD / BEV / TAX
$
-Indicates this is new ‘adjusted’ receipt
-Food, beverage and tax
TIP
$___________
-Tip
TOTAL
$___________
-Total amount
00.00
X______________________________________________
JOHN DOE
I AGREE TO PAY THE ABOVE AMOUNT ACCORDING TO
CARD ISSUER AGREEMENT
(MERCHANT AGREEMENT IF RETURN)
-Cardholder’s signature
-Cardholder’s name
-Cardholder agreement
-Custom message
COME AGAIN!
-Date, day, and time of transaction
-Response from host
Date: 01/03/00 Day: Mon Time: 12:00P
Response: APPROVED XXXXXX
TOP COPY-MERCHANT BOTTOM COPY-CUSTOMER
LinkPoint International, Inc. 1999
61
LFRST23 Reference Manual
STANDARD KEY OPERATIONS
ATM / DEBIT CARD SALE
An ATM/Debit sale is a monetary function that transfers funds from the cardholder’s checking or
savings bank account to the merchant’s account. A PINpad and a printer are required to process
an ATM/Debit card.
Swipe Only (Manual entry of Debit cards is not allowed.)
Display Message
Operator Action
READY XXX
JAN-03-00_MON_12:00P
[▲]
[▲]
[▲]
ENTER PASSWORD
[▲]
[▲]
(optional)
[▲]
Press the key labeled [ATM/DEBIT].
If prompted, key in the password (the default is 123123) and
press [ENTER].
(This prompt is optional.)
ENTER SERVER ID
_
[▲]
[▲]
[▲]
Key in the Server ID (up to four alphanumeric
Characters) and press [ENTER] OR simply press
[ENTER] to skip this field.
(This is an optional prompt.)
ENTER FOOD/BEV AMT
$0.00
[▲]
[▲]
[▲]
Key in the amount of the sale without the decimal and
press [ENTER].
CASH BACK?
YES
[▲]
[▲]
Press the left [▲] key to select YES for a cash back
amount OR select press the right [▲] key to select NO if the
cardholder does not want cash back.
(This is an optional prompt.)
(optional)
(optional)
NO
[▲]
CASHBACK AMOUNT?
$0.00
If YES was selected, key in the cashback amount requested
by the customer and press [ENTER].
CUSTOMER ENTERS TIP
Advise the customer to enter the tip amount on the
PINpad. This message displays if the customer is
prompted to enter the tip on the PINpad.
[▲]
[▲]
[▲]
TIP AMOUNT?
[▲]
[▲]
The terminal prompts this message when the server
is to enter the tip for the customer.
[▲]
1999 LinkPoint International, Inc.
62
LFRST23 Reference Manual
STANDARD KEY OPERATIONS
PINpad Display
With PINpad 101 or 1000
TIP AMT?
Customer enters the tip amount on the PINpad and
presses [ENTER]. This message displays if the
terminal is setup to prompt the PINpad for the tip
amount to be entered by the cardholder.
[▲]
[▲]
[▲]
Display Message
Operator Action
SWIPE CARD
Slide card through the cardreader.
[▲]
[▲]
[▲]
PINpad Display
With PIN pad 101 or 1000
THANK YOU
No operator action as this message flashes.
[▲]
[▲]
[▲]
WAITING FOR PIN
[▲]
[▲]
No operator action required as the terminal displays this
message.
[▲]
PINpad Display
With PIN pad 101 or 1000
TOTAL $0.00
[▲]
[▲]
[▲]
ENTER PIN
[▲]
The customer should then enter his/her PIN on the
PINpad.
[▲]
[▲]
PUSH ∨ENTER∨
[▲]
No operator action required as the PINpad scrolls the
three display messages to the left. The first message is
the total amount of the sale.
[▲]
Completing the instructions on the PINpad, the customer
should press [ENTER].
[▲]
Display Message
Operator Action
INVOICE NUMBER?
Key in the guest check number and press [ENTER].
(This is an optional prompt.)
[▲]
[▲]
(optional)
[▲]
PLEASE WAIT...
[▲]
[▲]
Please wait as the terminal communicates with the host
computer.
[▲]
LinkPoint International, Inc. 1999
63
LFRST23 Reference Manual
STANDARD KEY OPERATIONS
Display Message
Operator Action
AUTH/TKT XXXXXX
When the transaction is approved, the printer prints a
receipt of the transaction. Press [CLEAR] to return to the
idle prompt.
[▲]
[▲]
[▲]
The finished ATM/Debit sales receipt will look like this:
ATM/DEBIT SALE RECEIPT
-Transaction type specification
RESTAURANT
CROSSROADS MEGA-MALL
123 MAIN STREET
ANYWHERE, USA 12345
PHONE: (XXX) XXX-XXXX
FAX: (XXX) XXX-XXXX
-Customized header (up to 6 lines)
Merch ID: XXXXXXXXXXXXXXXX
Terminal ID: XXXX
-Merchant ID
-Terminal ID
Item:999 ATM/DEBIT DINE IN
Acct: XXXXXXXXXXNNNN
EXP: 12/00
-Item #, card & trans type
-Card number, expiration date
Invoice ID: XXXXX
-Server ID (optional), Invoice ID (optional)
FOOD / BEV / TAX
TIP
CASH BACK
TRANS. FEE:
TOTAL:
Server ID: XXXX
$
120.00
$
20.00
$
0.00
$
0.00
============
$
140.00
I AGREE TO PAY THE ABOVE AMOUNT ACCORDING TO
CARD ISSUER AGREEMENT
(MERCHANT AGREEMENT IF RETURN)
-Food, beverage and tax
-Tip amount (entered by customer)
-Cash back amount (optional)
-Transaction fee (optional)
-Total sale amount
-Cardholder agreement
-Custom message
COME AGAIN!
-Date, day, and time of transaction
-Response from host
Date: 01/03/00 Day: Mon Time: 12:00P
Response: AUTH/TKT XXXXXX
TOP COPY-MERCHANT BOTTOM COPY-CUSTOMER
1999 LinkPoint International, Inc.
64
LFRST23 Reference Manual
STANDARD KEY OPERATIONS
RETURN
A Return is a monetary transaction that is used to reverse a previously settled transaction. A
Return initiates a credit to the cardholder’s account. Follow the steps below to capture a credit
return.
Credit Card Return -- Swipe
Display Message
Operator Action
READY XXX
JAN-03-00_MON_12:00P
[▲]
[▲]
[▲]
ENTER PASSWORD [▲]
[▲]
(optional)
[▲]
Press the key labeled [RETURN].
If prompted, key in the password (the default is 123123)
and press [ENTER].
(This prompt is optional.)
RETURN:
ENTER ACCOUNT #
[▲]
[▲]
[▲]
Slide the card through the cardreader.
ENTER LAST 4 DIGITS
_
[▲]
[▲]
[▲]
Key in the last four digits of the account number and
press [ENTER].
(This is an optional prompt.)
ENTER SERVER ID
_
[▲]
[▲]
[▲]
Key in the Server ID (up to four alphanumeric
characters) and press [ENTER] OR simply press
[ENTER] to skip this field.
(This is an optional prompt.)
(optional)
(optional)
RETURN AMOUNT?
$0.00
[▲]
[▲]
Key in the amount of the return without the decimal,
then press [ENTER].
[▲]
INVOICE NUMBER?
_
[▲]
[▲]
[▲]
Key in the guest check number and press [ENTER].
(This is an optional prompt.)
ACCEPTED XXX
When the transaction is accepted, the printer (if
available) prints a receipt of the transaction. Press
[CLEAR] to return to the idle prompt.
(optional)
[▲]
[▲]
[▲]
LinkPoint International, Inc. 1999
65
LFRST23 Reference Manual
STANDARD KEY OPERATIONS
Credit Card Return — Manual
Display Message
Operator Action
READY XXX
JAN-03-00_MON_12:00P
[▲]
[▲]
[▲]
ENTER PASSWORD
[▲]
[▲]
(optional)
[▲]
Press the key labeled [RETURN].
If prompted, key in the password (the default is 123123) and
press [ENTER].
(This prompt is optional.)
RETURN:
ENTER ACCOUNT #
[▲]
[▲]
[▲]
Key in the cardholder’s account number and press
[ENTER].
EXPIRY DATE? (MMYY)
MM/YY
[▲]
[▲]
[▲]
Key in the four-digit expiration date using two digits
each for month and year (e.g., 0999 for September 1999)
then press [ENTER].
IMPRINT REQUIRED..
IF CARD IS PRESENT!
[▲]
[▲]
[▲]
If a card is present, make an imprint of the card with a
manual imprinter.
ENTER SERVER ID
_
[▲]
[▲]
[▲]
(optional)
Key in the Server ID (up to four alphanumeric
characters) and press [ENTER] OR simply press
[ENTER] to skip this field.
(This is an optional prompt.)
RETURN AMOUNT?
Key in the amount of the return without the decimal,
then press [ENTER].
[▲]
[▲]
$0.00
[▲]
INVOICE NUMBER?
[▲]
[▲]
(optional)
[▲]
ACCEPTED XXX
[▲]
[▲]
Key in the guest check number and press [ENTER].
(This is an optional prompt.)
[▲]
1999 LinkPoint International, Inc.
When the transaction is approved, the printer (if
available) prints a receipt of the transaction. Press
[CLEAR] to return to the idle prompt.
66
LFRST23 Reference Manual
STANDARD KEY OPERATIONS
The finished Return receipt will look like this:
-Transaction type specification
RETURN RECEIPT
-Customized header (up to 6 lines)
RESTAURANT
CROSSROADS MEGA-MALL
123 MAIN STREET
ANYWHERE, USA 12345
PHONE: (XXX) XXX-XXXX
FAX: (XXX) XXX-XXXX
Merch ID: XXXXXXXXXXXXXXXX
Terminal ID: XXXX
-Merchant ID
-Terminal ID
Item:003 VISA DINE IN RTRN / SWIPED
Acct: XXXXXXXXXXXXXX EXP: 12/99
JOHN DOE
-Item #, card & trans type, entry method
-Card number, expiration date
-Cardholder name (if card is swiped)
Invoice ID: XXXXXXXX Server ID: XXXX
-Invoice ID (optional), Server ID (optional)
FOOD / BEV / TAX /TIP
$
-Food, beverage, tax and tip
00.00
X____________________________________________
JOHN DOE
I AGREE TO PAY THE ABOVE AMOUNT
ACCORDING TO CARD ISSUER AGREEMENT
(MERCHANT AGREEMENT IF RETURN)
-Cardholder’s signature
-Cardholder’s name
-Cardholder agreement
-Custom message
COME AGAIN!
-Date, day, and time of transaction
-Response from host
Date: 01/03/00 Day: Mon Time: 12:05P
Response: ACCEPTED 003
TOP COPY-MERCHANT BOTTOM COPY-CUSTOMER
LinkPoint International, Inc. 1999
67
LFRST23 Reference Manual
STANDARD KEY OPERATIONS
ATM / DEBIT CARD RETURN
An ATM/Debit Return is a monetary function that transfers funds from the merchant’s bank
account to the cardholder’s account. A PINpad and a printer are required to process an
ATM/Debit card. THIS TRANSACTION IS DISABLED AS THE DEFAULT, DUE TO
RESTRICTIONS PLACED BY MANY REGIONAL POS DEBIT NETWORKS.
Swipe Only (Manual entry of Debit cards is not allowed.)
Display Message
Operator Action
READY XXX
JAN-03-00_MON_12:00P
[▲]
[▲]
[▲]
ENTER PASSWORD [▲]
[▲]
(optional)
RETURN:
CREDIT
[▲]
[▲]
[▲]
Press the key labeled [RETURN].
If prompted, key in the password (the default is 123123) and
press [ENTER].
(This prompt is optional.)
DEBIT
[▲]
Press the right [▲] key for Debit. (This screen displays
only when Debit Card Returns are enabled.)
ENTER SERVER ID
_
[▲]
[▲]
[▲]
Key in the Server ID (up to four alphanumeric
characters) and press [ENTER] OR simply press
[ENTER] to skip this field.
(This is an optional prompt.)
RETURN AMOUNT?
Key in the amount of the sale without the decimal and
press [ENTER].
(optional)
[▲]
[▲]
$0.00
[▲]
Display Message
Operator Action
SWIPE CARD
Slide card through the cardreader.
[▲]
[▲]
[▲]
WAITING FOR PIN
[▲]
[▲]
No operator action required as the terminal displays this
message.
[▲]
PINpad Display
With PIN pad 101 or 1000
TOTAL $0.00
[▲]
[▲]
[▲]
1999 LinkPoint International, Inc.
No operator action required as the PINpad scrolls the
three display messages to the left. The first message is
the total amount of the sale.
68
LFRST23 Reference Manual
STANDARD KEY OPERATIONS
PINpad Display
With PIN pad 101 or 1000
ENTER PIN
The customer should then enter his/her PIN on the
PINpad.
[▲]
[▲]
[▲]
PUSH ∨ENTER∨
[▲]
[▲]
Completing the instructions on the PINpad, the customer
should press [ENTER].
[▲]
INVOICE NUMBER?
[▲]
[▲]
(optional)
[▲]
PLEASE WAIT...
[▲]
[▲]
[▲]
Please wait as the terminal communicates with the host
computer.
[▲]
RETURN XXXXXX
[▲]
Key in the guest check number and press [ENTER].
(This is an optional prompt.)
[▲]
LinkPoint International, Inc. 1999
When the transaction is approved, the printer prints a
receipt of the transaction. Press [CLEAR] to return to
the idle prompt.
69
LFRST23 Reference Manual
STANDARD KEY OPERATIONS
The finished ATM/Debit Return receipt will look like this:
-Transaction type specification
ATM/DEBIT RECEIPT
-Customized header (up to 6 lines)
RESTAURANT
CROSSROADS MEGA-MALL
123 MAIN STREET
ANYWHERE, USA 12345
PHONE: (XXX) XXX-XXXX
FAX: (XXX) XXX-XXXX
Merch ID: XXXXXXXXXXXXXXXX
Terminal ID: XXXX
-Merchant ID
-Terminal ID
Item:999 ATM/DEBIT DINE IN RTRN
Acct: XXXXXXXXXXNNNN
EXP: 12/00
-Item #, card & trans type
-Card number, expiration date
Invoice ID: XXXXX
-Server ID (optional), Invoice ID (optional)
Server ID: XXXX
-Food, beverage, tax and tip total
FOOD / BEV / TAX/TIP
TOTAL:
$
120.00
===========
$
120.00
-Total sale amount
-Cardholder agreement
I AGREE TO PAY THE ABOVE AMOUNT ACCORDING TO
CARD ISSUER AGREEMENT
(MERCHANT AGREEMENT IF RETURN)
COME AGAIN!
-Custom message
-Date, day, and time of transaction
-Response from host
Date: 01/03/00 Day: Mon Time: 12:00P
Response: RETURN XXXXXX
TOP COPY-MERCHANT BOTTOM COPY-CUSTOMER
1999 LinkPoint International, Inc.
70
LFRST23 Reference Manual
STANDARD KEY OPERATIONS
AUTHORIZATION ONLY
An Authorization Only is a nonmonetary function that checks the availability of the cardholder’s
credit. Follow the steps below to authorize a transaction without data capture or deposit.
Auth Only — Card Swipe
Display Message
Operator Action
READY XXX
JAN-03-00_MON_12:00P
[▲]
[▲]
[▲]
ENTER PASSWORD [▲]
[▲]
(optional)
[▲]
Press the [X] key labeled [AUTH ONLY].
If prompted, key in the password (the default is 123123) and
press [ENTER].
(This prompt is optional.)
AUTH ONLY:
ENTER ACCOUNT #
[▲]
[▲]
[▲]
Slide the card through the cardreader.
ENTER LAST 4 DIGITS
_
[▲]
[▲]
[▲]
Key in the last four digits of the account number and
press [ENTER].
(This is an optional prompt.)
FOOD & BEV AMT?
Key in the amount to be authorized without the decimal,
then press [ENTER].
(optional)
[▲]
[▲]
$0.00
[▲]
PLEASE WAIT...
[▲]
[▲]
Please wait as the terminal communicates with the host
computer.
[▲]
APPROVED XXXXXX
[▲]
[▲]
[▲]
LinkPoint International, Inc. 1999
When the authorization is accepted, the printer (if
available) prints a receipt of the transaction. Press
[CLEAR] to return to the idle prompt.
71
LFRST23 Reference Manual
STANDARD KEY OPERATIONS
Auth Only — Manual
Display Message
Operator Action
READY XXX
JAN-03-00_MON_12:00P
[▲]
[▲]
[▲]
ENTER PASSWORD [▲]
[▲]
(optional)
[▲]
Press the [X] key labeled [AUTH ONLY].
If prompted, key in the password (the default is 123123)
and press [ENTER].
(This prompt is optional.)
AUTH ONLY:
ENTER ACCOUNT #
[▲]
[▲]
[▲]
Key in the cardholder’s account number and press
[ENTER].
EXPIRY DATE? (MMYY)
MM/YY
[▲]
[▲]
[▲]
Key in the four-digit expiration date using two digits
each for month and year (e.g., 0999 for September
1999) then press [ENTER].
IMPRINT REQUIRED..
IF CARD IS PRESENT!
[▲]
[▲]
[▲]
If a card is present, make an imprint of the card using a
manual imprinter.
FOOD & BEV AMT?
Key in the amount to be authorized without the decimal,
then press [ENTER].
[▲]
[▲]
$0.00
[▲]
PLEASE WAIT...
[▲]
[▲]
Please wait as the terminal communicates with the host
computer.
[▲]
APPROVED XXXXXX
[▲]
[▲]
[▲]
1999 LinkPoint International, Inc.
When the authorization is approved, the printer (if
available) prints a receipt of the transaction. Press
[CLEAR] to return to the idle prompt.
72
LFRST23 Reference Manual
STANDARD KEY OPERATIONS
The finished Auth Only receipt will look like this:
AUTH ONLY RECEIPT
THIS TRANSACTION IS NOT A COMPLETE SALE
-Transaction type specification
-Customized header (up to 6 lines)
RESTAURANT
CROSSROADS MEGA-MALL
123 MAIN STREET
ANYWHERE, USA 12345
PHONE: (XXX) XXX-XXXX
FAX: (XXX) XXX-XXXX
Merch ID: XXXXXXXXXXXXXXXX
Terminal ID: XXXX
-Merchant ID
-Terminal ID
VISA AUTH ONLY / SWIPED
Acct: XXXXXXXXXXXXXX EXP: 12/00
JOHN DOE
-Card type, trans type, entry method
-Card number, expiration date
-Cardholder’s name (if card is swiped)
TOTAL
$
-Authorized amount
00.00
X_____________________________________________
JOHN DOE
I AGREE TO PAY THE ABOVE AMOUNT ACCORDING TO
CARD ISSUER AGREEMENT
(MERCHANT AGREEMENT IF RETURN)
-Cardholder’s signature
-Cardholder’s name
-Cardholder agreement
-Custom message
COME AGAIN!
-Date, day, and time of transaction
-Response from host
Date: 01/03/00 Day: Mon Time: 12:00P
Response: APPROVED XXXXXX
TOP COPY-MERCHANT BOTTOM COPY-CUSTOMER
LinkPoint International, Inc. 1999
73
LFRST23 Reference Manual
STANDARD KEY OPERATIONS
TICKET ONLY (OFFLINE)
The Ticket Only transaction (also known as OFFLINE) is a monetary function that is used to
capture a transaction that was previously authorized. If an Auth Only was performed or a voice
authorization was received, follow the steps below to complete the transaction.
Ticket Only — Card Swipe
Display Message
Operator Action
READY XXX
JAN-03-00_MON_12:00P
[▲]
[▲]
[▲]
ENTER PASSWORD
[▲]
[▲]
If prompted, key in the password (the default is 123123)
and press [ENTER].
(This prompt is optional.)
[▲]
(optional)
TICKET ONLY
MUST FIRST RECV AUTH
[▲]
[▲]
[▲]
DINE
|
[▲]
TAB
|
[▲]
Press the key labeled [-] [OFFLINE].
TAKE-OUT
|
[▲]
Please wait a few seconds while terminal displays this
reminder message.
Select Dine, Tab or Take-Out.
DINE IN
ENTER ACCOUNT #
[▲]
[▲]
[▲]
Slide the card through the cardreader.
ENTER LAST 4 DIGITS
Key in the last four digits of the account number and
press [ENTER].
(This is an optional prompt.)
[▲]
[▲]
(optional)
_
[▲]
ENTER SERVER ID
_
[▲]
[▲]
[▲]
Key in the Server ID (up to four alphanumeric
characters) and press [ENTER] OR simply press
[ENTER] to skip this field.
(This is an optional prompt.)
(optional)
FOOD & BEV AMT?
$0.00
[▲]
[▲]
Key in the amount of the sale without the decimal, then
press [ENTER].
[▲]
INVOICE NUMBER?
_
[▲]
[▲]
[▲]
Key in the guest check and press [ENTER].
(This is an optional prompt.)
(optional)
1999 LinkPoint International, Inc.
74
LFRST23 Reference Manual
STANDARD KEY OPERATIONS
Display Message
Operator Action
APPROVAL CODE
[▲]
[▲]
_
[▲]
Key in approval code previously obtained via voice
authorization or through an Auth Only transaction and
press [ENTER].
[▲]
When the transaction is accepted, the printer (if
available) prints a receipt of the transaction. Press
[CLEAR] to return to the idle prompt.
ACCEPTED XXX
[▲]
[▲]
Ticket Only -- Manual Entry
Display Message
Operator Action
READY XXX
JAN-03-00_MON_12:00P
[▲]
[▲]
[▲]
ENTER PASSWORD
[▲]
[▲]
(optional)
[▲]
TICKET ONLY
MUST FIRST RECV AUTH
[▲]
[▲]
[▲]
DINE TAB TAKE-OUT
|
|
|
[▲]
[▲]
[▲]
ENTER ACCOUNT #
[▲]
[▲]
Press the [-]key labeled [TKT ONLY].
If prompted, key in the password (the default is 123123)
and press [ENTER].
(This prompt is optional.)
Please wait a few seconds while terminal displays this
reminder message.
Select Dine, Tab or Take-Out.
Key in the cardholder’s account number and press
[ENTER].
[▲]
EXPIRY DATE? (MMYY)
MM/YY
[▲]
[▲]
[▲]
Key in the four-digit expiration date using two digits
each for month and year (e.g., 0999 for September
1999), then press [ENTER].
IMPRINT REQUIRED..
IF CARD IS PRESENT!
[▲]
[▲]
[▲]
If a card is present, make an imprint of the card with a
manual imprinter.
ENTER SERVER ID
_
[▲]
[▲]
[▲]
Key in the Server ID (up to four alphanumeric
characters) and press [ENTER] OR simply press
[ENTER] to skip this field.
(This is an optional prompt.)
(optional)
LinkPoint International, Inc. 1999
75
LFRST23 Reference Manual
STANDARD KEY OPERATIONS
Display Message
Operator Action
FOOD & BEV AMT?
$0.00
[▲]
[▲]
[▲]
INVOICE NUMBER?
[▲]
[▲]
(optional)
Key in the guest check and press [ENTER].
(This is an optional prompt.)
[▲]
APPROVAL CODE
[▲]
[▲]
______
[▲]
Key in approval code previously obtained via voice
authorization or through an Auth Only transaction and
press [ENTER].
[▲]
When the transaction is accepted, the printer (if
available) prints a receipt of the transaction. Press
[CLEAR] to return to the idle prompt.
ACCEPTED XXX
[▲]
[▲]
Key in the amount of the sale without the decimal, then
press [ENTER].
1999 LinkPoint International, Inc.
76
LFRST23 Reference Manual
STANDARD KEY OPERATIONS
The finished Ticket Only receipt will look like this:
-Transaction type specification
TICKET ONLY RECEIPT
-Customized header (up to 6 lines)
RESTAURANT
CROSSROADS MEGA-MALL
123 MAIN STREET
ANYWHERE, USA 12345
PHONE: (XXX) XXX-XXXX
FAX: (XXX) XXX-XXXX
Merch ID: XXXXXXXXXXXXXXXX
Terminal ID: XXXX
-Merchant ID
-Terminal ID
Item:001 VISA DINE IN TKTO/SWIPED
Acct: XXXXXXXXXXXXXX EXP: 12/00
JOHN DOE
Invoice: XXXXXXXX SERVER ID: XXXX
APPROVAL CODE:
XXXXXX
-Item #, card & trans type, entry method
-Card number, expiration date
-Cardholder’s name (if card is swiped)
-Approval code previously received via
Call Center or Auth Only
-Food, beverage and tax
FOOD / BEV / TAX
$
00.00
TIP
$ ____________
-Tip
TOTAL
$____________
-Purchase amount
X_______________________________________________
JOHN DOE
I AGREE TO PAY THE ABOVE AMOUNT ACCORDING TO
CARD ISSUER AGREEMENT
(MERCHANT AGREEMENT IF RETURN)
COME AGAIN!
-Cardholder agreement
-Custom message
Date: 01/03/00 Day: Mon Time: 11:00A
Response: ACCEPTED XXX
TOP COPY-MERCHANT BOTTOM COPY-CUSTOMER
LinkPoint International, Inc. 1999
-Cardholder’s signature
-Cardholder’s name
77
-Date, day, and time of transaction
-Response from host
LFRST23 Reference Manual
STANDARD KEY OPERATIONS
VOID
A Void is a monetary transaction used to cancel a transaction completed in an open batch. Follow
the steps below to void a transaction.
Display Message
Operator Action
_____READY XXX
JAN-03-00_MON_12:00P
[▲]
[▲]
[▲]
Press the key labeled [VOID].
ENTER PASSWORD
If prompted, key in the password (the default is 123123)
and press [ENTER].
(This prompt is optional.)
[▲]
[▲]
(optional)
[▲]
VOID..ENTER ITEM #
_
[▲]
[▲]
[▲]
Key in the item number displayed on the receipt, or
found in the item review and press [ENTER], OR
simply press [ENTER] to select the first item.
000 DINE
$0.00
PREV NEXT NEW
[▲]
[▲]
[▲]
The first line displays the item number, the
transaction type, and the dollar amount.
Press the:
left [▲] key to see the previous item;
middle [▲] key to choose the next item number;
right [▲] key to enter a new item number;
OR press [ENTER] to select the displayed item.
Alternately Displays With
000 DINE
$0.00
To select Push ENTER
[▲]
[▲]
[▲]
000 DINE
VOID
[▲]
$0.00
VIEW
[▲]
[▲]
Press the left [▲] key to initiate the void OR
press the right [▲] key to display additional
information regarding this transaction (i.e., item#,
trans type, total amount, card type, card number, entry
method, approval code, tip amount, transaction time
and date, and server ID).
Void Item 000...Press
ENTER to confirm!
[▲]
[▲]
[▲]
Press [ENTER] to confirm the void.
Item #000 VOIDED!
The transaction is voided and the printer (if available)
prints a receipt of the transaction. Press [CLEAR] to
return to the idle prompt.
[▲]
[▲]
[▲]
1999 LinkPoint International, Inc.
78
LFRST23 Reference Manual
STANDARD KEY OPERATIONS
The finished Void receipt will look like this:
-Transaction type specification
VOID RECEIPT
-Customized header (up to 6 lines)
RESTAURANT
CROSSROADS MEGA-MALL
123 MAIN STREET
ANYWHERE, USA 12345
PHONE: (XXX) XXX-XXXX
FAX: (XXX) XXX-XXXX
Merch ID: XXXXXXXXXXXXXXXX
Terminal ID: XXXX
-Merchant ID
-Terminal ID
Item:001 VISA DINE IN VTKTO/SWIPED
Acct: XXXXXXXXXXXXXX EXP: 12/00
Invoice: XXXXXX SERVER ID: XXXXXXXX
-Item #, card & trans type, entry method
-Card number, expiration date
-Cardholder’s name
-Invoice # and Operator ID (optional)
-Food, beverage and tax
FOOD / BEV / TAX
$
00.00
TIP
$ ______________
TOTAL
$______________
-Tip
-Purchase amount
X______________________________________________
JOHN DOE
I AGREE TO PAY THE ABOVE AMOUNT ACCORDING TO
CARD ISSUER AGREEMENT
(MERCHANT AGREEMENT IF RETURN)
COME AGAIN!
-Cardholder’s signature
-Cardholder’s name
-Cardholder agreement
-Custom message
-Date, day, and time of transaction
-Response from host
Date: 01/03/00 Day: Sat Time: 12:00P
Response: VOID TKTO XXX
TOP COPY-MERCHANT BOTTOM COPY-CUSTOMER
LinkPoint International, Inc. 1999
79
LFRST23 Reference Manual
STANDARD KEY OPERATIONS
REVIEW
The Review function enables the reviewing and printing of transactions currently stored in the
batch. The review function includes a variety of options: Item Review, Totals Review for Card
and Server ID totals (when applicable), Item Detail Report, and Totals Reports for Card and
Server ID totals (when applicable). Reports can be displayed on the LinkPoint 3000 display panel
or, if a printer is available, printed.
VIEW (Without Printing)
Item Review
The procedures outlined below show how to display detailed transaction information.
Display Message
Operator Action
_____READY XXX
JAN-03-00_MON_12:00P
[▲]
[▲]
[▲]
Press the key labeled [REVIEW].
ENTER PASSWORD
If prompted, key in the password (the default is 123123)
and press [ENTER].
(This prompt is optional.)
[▲]
[▲]
(optional)
[▲]
ITEM TOTAL PRINT
|
|
|
[▲]
[▲]
[▲]
VIEW? TIP?
|
|
[▲]
[▲]
TAB?
|
[▲]
ENTER ITEM #
[▲]
[▲]
[▲]
Press the left [▲] key to select ITEM.
Press the left [▲] key to select VIEW.
Key in the item number to review and press
[ENTER] OR press [ENTER] for the first
selection.
001 SALE: $
10.00
PREV NEXT VIEW
[▲]
[▲]
[▲]
Press the left [▲] key to see the previous item, the
middle [▲] key to choose the next item, or press the
right [▲] key to view the selected item.
ITEM NUM: 008
<--[▲]
[▲]
Press the right [▲] key or the left [▲] key to scroll
through the transaction information (i.e., transaction
type, total, card type, card number, entry method,
approval code, tip amount, transaction date and time,
server ID, invoice number & item number).
--->
[▲]
1999 LinkPoint International, Inc.
80
LFRST23 Reference Manual
STANDARD KEY OPERATIONS
Total Review (Card Totals)
The procedures outlined below show how to display card totals information.
Display Message
Operator Action
_____READY XXX
JAN-03-00_MON_12:00P
[▲]
[▲]
[▲]
Press the key labeled [REVIEW].
ENTER PASSWORD
If prompted, key in the password (the default is 123123)
and press [ENTER].
(This prompt is optional.)
[▲]
[▲]
[▲]
(optional)
ITEM TOTAL PRINT
|
|
|
[▲]
[▲]
[▲]
CARDS
|
[▲]
SERVER ID
|
[▲]
[▲]
ENTER CARD TYPE
[▲]
_
[▲]
[▲]
MASTERCARD
[▲]
Press the left [▲] key to select CARDS.
Select card type:
1=MasterCard
2=VISA
3=AMEX
4=Discover/NOVUS
5=Diners Club
6=JCB
7=FDC
8=Debit
and press [ENTER] OR press [ENTER] for all cards.
The terminal displays the totals for the selected card.
$
[▲]
Press the middle [▲] key to select TOTAL.
10.00
[▲]
or
BATCH TTL $
[▲]
[▲]
or
200.00
The terminal displays the grand total for all cards (batch
total). Press [CLEAR] to return to the READY message.
[▲]
LinkPoint International, Inc. 1999
81
LFRST23 Reference Manual
STANDARD KEY OPERATIONS
Total Review (Server Totals)
This is an optional report. If enabled, this report can be reviewed by following the procedures
outlined below.
Display Message
Operator Action
_____READY XXX
JAN-03-00_MON_12:00P
[▲]
[▲]
[▲]
Press the key labeled [REVIEW].
ENTER PASSWORD -
If prompted, key in the password (the default is 123123)
and press [ENTER].
(This prompt is optional.)
[▲]
[▲]
[▲]
(optional)
ITEM TOTAL PRINT
|
|
|
[▲]
[▲]
[▲]
CARDS
|
[▲]
Press the middle [▲] key to select TOTAL.
SERVER ID
|
[▲]
[▲]
Press the right [▲] key to select SERVER ID.
ENTER SERVER ID
[▲]
[▲]
Key in the individual Server’s ID number (up to four
alphanumeric characters) and press [ENTER] OR
press [ENTER] to view the total for all Server IDs.
_
[▲]
SV 0001 $
10.00
PREV ID
NEXT ID
[▲]
[▲]
[▲]
The terminal displays the total for the individual
Server’s ID. Press the right [▲] key to select the next
ID, or press the left [▲] key to select the previous ID.
or
or
SV TOTALS $
10.00
[▲]
[▲]
[▲]
If [ENTER] was pressed, the terminal displays the
grand total for all operators. After reviewing the Server
ID totals, press [CLEAR] to return to the READY message.
1999 LinkPoint International, Inc.
82
LFRST23 Reference Manual
STANDARD KEY OPERATIONS
PRINTING REPORTS
Item Detail Report
Display Message
Operator Action
_____READY XXX
JAN-03-00_MON_12:00P
[▲]
[▲]
[▲]
Press the key labeled [REVIEW].
ENTER PASSWORD
If prompted, key in the password (the default is 123123)
and press [ENTER].
(This prompt is optional.)
[▲]
[▲]
(optional)
[▲]
ITEM TOTAL PRINT
|
|
|
[▲]
[▲]
[▲]
ITEM SERVR SUMMARY
|
|
|
[▲]
[▲]
[▲]
ITEM DETAIL
PRINTING...
[▲]
[▲]
[▲]
LinkPoint International, Inc. 1999
Press the right [▲] key to select PRINT.
Press the left [▲] key to select ITEM.
After printing stops, users can choose to print another
report OR simply press [CLEAR] to return to the
READY message.
83
LFRST23 Reference Manual
STANDARD KEY OPERATIONS
The finished Item Detail Report will look like this:
-Transaction type specification
ITEM DETAIL REPORT
-Customized header (up to 6 lines)
RESTAURANT STORE
CROSSROADS MEGA-MALL
123 MAIN STREET
ANYWHERE, USA 12345
PHONE: (XXX) XXX-XXXX
FAX: (XXX) XXX-XXXX
Merchant ID: XXXXXXXXXXXXX
Terminal ID: XXXX
Date: 01/03/00
Day: Mon
Item: 001
Time: 11:30P
CREDIT TRANSACTIONS
----------------------------------VISA DINE IN SALE/SWIPED
-Merchant ID
-Terminal ID
-Date, day, time of transaction
-Item #, card type, transaction type,
entry method
-Account #, expiration date
-Invoice #, Server ID
-Date of transaction, time of transaction
-Approval code/response
-Amount
Acct: XXXXXXXXXXXX
EXP DATE: 10/99
Invoice: XXXXXXXX
Server ID: XXXX
Date: 01/03/00
Time: 12:40P
RESP: AUTH/TKT XXXXXX
AMOUNT
TIP
TOTAL
$
50.00
$ 5.00
$ 55.00
DEBIT TRANSACTIONS
----------------------------------Item: 999
ATM/DEBIT DINE IN
Acct: XXXXXXXXXXXX
EXP: 10/99
Invoice: XXXXX SERVER ID: XXXX
Date: 01/02/00
Time: 12:30P
RESP: APPROVED XXXXXX
AMOUNT
TIP
CASH
FEE
TOTAL
15.00
1.00
20.00
9.99
45.99
-Item #, card type, transaction type,
-Account number, expiration date
-Invoice #, Server ID
-Date of transaction, time of transaction
-Approval code/response
-Amounts
END OF BATCH
1999 LinkPoint International, Inc.
84
LFRST23 Reference Manual
STANDARD KEY OPERATIONS
Summary Report (Card Totals)
Display Message
Operator Action
_____READY XXX
JAN-03-00_MON_12:00P
[▲]
[▲]
[▲]
Press the key labeled [REVIEW].
ENTER PASSWORD -
If prompted, key in the password (the default is 123123)
and press [ENTER].
(This prompt is optional.)
[▲]
[▲]
(optional)
[▲]
ITEM TOTAL PRINT
|
|
|
[▲]
[▲]
[▲]
ITEM SERVR SUMMARY
|
|
|
[▲]
[▲]
[▲]
TOTALS
[▲]
[▲]
TOTALS
PRINTING...
[▲]
[▲]
OPEN
TABS
[▲]
[▲]
LinkPoint International, Inc. 1999
Press the right [▲] key to select PRINT.
Press the right [▲] key to select SUMMARY.
The report will print immediately if the BAR TAB
feature is not enabled.
Press the left [▲] key to select TOTAL. (If BAR TABS are
enabled)
After printing stops, users can choose to print another
report OR simply press [CLEAR] to return to the
READY message.
85
LFRST23 Reference Manual
STANDARD KEY OPERATIONS
The finished Summary Report will look like this:
-Transaction type specification
BATCH SUMMARY REPORT
-Customized header (up to 6 lines)
RESTAURANT STORE
Merchant ID: XXXXXXXXXXXXXXXX
Terminal ID: XXXX
-Merchant ID
-Terminal ID
Date: 01/03/00 Time: 11:30P
-Date, time of transaction
CARD ITEM
MC
002
MASTERCARD/VISA SUMMARY
TRAN ACCT#
TIP
SALE 5-4444
2.00
MC
VISA
001
TTLS:
SALE 4-6666
VISA TTLS:
10.00
MC/VISA TOTALS:
CARD ITEM
AMEX
DC
DISC
OTHR
MISC CREDIT CARD SUMMARY
TRAN ACCT#
TIP
NO TRANS
NO TRANS
NO TRANS
NO TRANS
MISC CREDIT CARD GRAND TTL
0.00
TOTAL
12.00
=========
$ 14.00
15.00
15.00
=========
$ 29.00
TOTAL
0.00
@@@@@@@@@@@@@@@@@@@@@@@@@@
CREDIT CARD GRAND TTL
$ 29.00 @
@@@@@@@@@@@@@@@@@@@@@@@@@@
SERVER ID
001
TOTALS:
SERVER TOTALS REPORT
TRANS
TIP
003
5.00
===
=======
003
$ 5.00
TOTAL
24.00
========
$ 29.00
DEBIT CARD SUMMARY
ITM ACCT# FOOD/BEV TIP
CASH FEE
TTL
999 XXXXX
15.00
1.00
20.00
9.99 45.99
====== ====== ===== ===== ====
TOTALS:
$15.00
$1.00 $20.00 $9.99 $45.99
1999 LinkPoint International, Inc.
86
-This section contains the card type, item
number, transaction type, truncated
account number (first and last 4 digits), tip
amount (restaurant only), and transaction
total for each MasterCard and Visa
transaction in the batch
-This section contains the card type, item
number, transaction type, truncated
account number (first and last 4 digits),
tip amount (restaurant only), and
transaction total for other cards (i.e.,
AMEX, Discover, etc.) currently in the
batch
-Miscellaneous grand total
-Credit card grand total
-This section contains the Server ID,
transaction number, tip amount and total
-This section will print if ATM/Debit
service is enabled
LFRST23 Reference Manual
STANDARD KEY OPERATIONS
An alternate, optional SPECIAL BREAKDOWN Summary Report will look like this (it breaks out
each the DINE IN, BAR TAB and TAKE OUT transactions in separate groupings):
-Report type specification
BATCH SUMMARY REPORT
-Customized header (up to 6 lines)
RESTAURANT STORE
Merchant ID: XXXXXXXXXXXXXXXX
Terminal ID: XXXX
-Merchant ID
-Terminal ID
Date: 01/03/00 Time: 11:30P
-Date, time of transaction
DINE-IN
CARD ITEM
MC
002
VISA 001
TRAN ACCT#
SALE 5-4444
SALE 4-6666
=====
MC/VISA TTLS:
OTHER TTLS:
=====
TOTAL DINE :
TIP
2.00
10.00
=====
12.00
0.00
=====
TOTAL
12.00
15.00
=====
27.00
0.00
=====
$ 27.00
TAKE OUT ORDERS
CARD ITEM
MC
004
VISA 005
TRAN ACCT#
SALE 5-4444
SALE 4-6666
=====
MC/VISA TTLS:
OTHER TTLS:
=====
TOTAL DINE :
TIP
2.00
10.00
=====
12.00
0.00
=====
TOTAL
12.00
15.00
=====
27.00
0.00
=====
$ 27.00
TIP
2.00
10.00
=====
12.00
0.00
=====
TOTAL
12.00
15.00
=====
27.00
0.00
=====
$ 27.00
BAR TABS
CARD ITEM
MC
003
VISA 006
TRAN ACCT#
SALE 5-4444
SALE 4-6666
=====
MC/VISA TTLS:
OTHER TTLS:
=====
TOTAL DINE :
RETURNS
CARD ITEM
MC
007
VISA 008
TRAN ACCT#
SALE 5-4444
SALE 4-6666
=====
MC/VISA TTLS:
OTHER TTLS:
=====
TOTAL DINE :
TIP
2.00
10.00
=====
12.00
0.00
=====
TOTAL
12.00
15.00
=====
27.00
0.00
=====
$ 27.00
-This section contains the card type, item
number, transaction type, truncated
account number (first and last 4 digits), tip
amount (restaurant only), and transaction
total for Dine In transactions currently in
the batch
-This section contains the card type, item
number, transaction type, truncated
account number (first and last 4 digits), tip
amount (restaurant only), and transaction
total for Take Out Orders currently in the
batch
-This section contains the card type, item
number, transaction type, truncated
account number (first and last 4 digits),
tip amount (restaurant only), and
transaction total for Take Out Orders
currently in the batch
-This section contains the card type, item
number, transaction type, truncated
account number (first and last 4 digits), tip
amount (restaurant only), and transaction
total for credit card RETURNS currently in
the batch
The SPECIAL BREAKDOWN Summary Report is continued below:
LinkPoint International, Inc. 1999
87
LFRST23 Reference Manual
STANDARD KEY OPERATIONS
@@@@@@@@@@@@@@@@@@@@@@@@@@
CREDIT CARD GRAND TTL
$ 000.00@
@@@@@@@@@@@@@@@@@@@@@@@@@@
SERVER ID
001
TOTALS:
SERVER TOTALS REPORT
TRANS
TIP
003
5.00
===
=======
003
5.00
TOTAL
24.00
========
$ 29.00
DEBIT CARD SUMMARY
ITM ACCT# FOOD/BEV TIP
CASH FEE
TTL
999 XXXXX
15.00
1.00
20.00 9.99 45.99
====== ====== ===== ===== ====
TOTALS:
$15.00 $1.00
$20.00 $9.99 $45.99
1999 LinkPoint International, Inc.
88
-Credit card grand total
-This section contains the Server ID,
transaction number, tip amount and
total
-This section will print if ATM/Debit
service is enabled
LFRST23 Reference Manual
STANDARD KEY OPERATIONS
Open Tab Detail Report
This report is available for printing only when the Bar Tab feature is enabled and there exists one
or more unfinalized bar tab.
Display Message
Operator Action
_____READY XXX
JAN-03-00_MON_12:00P
[▲]
[▲]
[▲]
Press the key labeled [REVIEW].
ENTER PASSWORD -
If prompted, key in the password (the default is 123123)
and press [ENTER].
(This prompt is optional.)
[▲]
[▲]
(optional)
[▲]
ITEM TOTAL PRINT
|
|
|
[▲]
[▲]
[▲]
ITEM SERVR SUMMARY
|
|
|
[▲]
[▲]
[▲]
TOTALS
[▲]
[▲]
OPEN
TABS
[▲]
OPEN TAB REPORT
PRINTING...
[▲]
[▲]
[▲]
LinkPoint International, Inc. 1999
Press the right [▲] key to select PRINT.
Press the right [▲] key to select SUMMARY.
Press the right [▲] key to select BAR TABS.
After printing stops, users can choose to print another
report OR simply press [CLEAR] to return to the
READY message.
89
LFRST23 Reference Manual
STANDARD KEY OPERATIONS
The finished Open Tab Detail Report will look like this:
OPEN TAB DETAIL REPORT
-Transaction type specification
RESTAURANT STORE
CROSSROADS MEGA-MALL
123 MAIN STREET
ANYWHERE, USA 12345
PHONE: (XXX) XXX-XXXX
FAX: (XXX) XXX-XXXX
-Customized header (up to 6 lines)
Merchant ID: XXXXXXXXXXXXX
Terminal ID: XXXX
Date: 01/03/00
Day: Mon
TAB# 001 CARD: VISA
Acct: XXXXXXXXXXXX
RESP: APPROVED XXXXXX
Time: 11:30P
-Merchant ID
-Terminal ID
-Date, day, time of transaction
-Tab (item) #, Card type, Server ID
-Account #, expiration date
-Approval code/response, amount
Server ID: XXXX
EXP DATE: 10/99
AMT: $ 50.00
END OF OPEN TABS
1999 LinkPoint International, Inc.
90
LFRST23 Reference Manual
STANDARD KEY OPERATIONS
Summary Report (Server Totals)
Display Message
Operator Action
_____READY XXX
JAN-03-00_MON_12:00P
[▲]
[▲]
[▲]
Press the key labeled [REVIEW].
ENTER PASSWORD [▲]
[▲]
[▲]
If prompted, key in the password (the default is 123123) and
press [ENTER].
(This prompt is optional.)
ITEM TOTAL PRINT
|
|
|
[▲]
[▲]
[▲]
Press the right [▲] key to select PRINT.
ITEM SERVR SUMMARY
|
|
|
[▲]
[▲]
[▲]
Press the middle [▲] key to select SERVR.
SERVER ID?
[▲]
Key in the individual Server’s ID number (up to four
alphanumeric characters) and press [ENTER] OR
press [ENTER] to print the total for all Server IDs.
[▲]
After printing stops, users can choose to print another
report OR press [CLEAR] to return to the READY
message.
_
[▲]
[▲]
SVR ID #0002
PRINTING...
[▲]
[▲]
or
All server totals
PRINTING...
[▲]
[▲]
or
[▲]
LinkPoint International, Inc. 1999
After printing stops, users can choose to print another
report OR press [CLEAR] to return to the READY
message.
91
LFRST23 Reference Manual
STANDARD KEY OPERATIONS
The finished Summary Report for a single Server’s total will look like this:
-Transaction type specification
SERVER XXXX REPORT
-Customized header (up to 6 lines)
RESTAURANT
CROSSROADS MEGA-MALL
123 MAIN STREET
ANYWHERE, USA 12345
PHONE: (XXX) XXX-XXXX
FAX: (XXX) XXX-XXXX
Merch ID: XXXXXXXXXX
Terminal ID: XXXX
Date: 01/08/00
Day: SAT
$
ITEM
CARD
TRAN
001
4-1234
-Customer ID
-Terminal ID
-Date, Day and Time
Time: 01:30P
TIP
DINE
5.00
===== =====
GRAND TOTALS: $ 5.00
TOTAL
-Server ID, truncated card #, trans type,
tip amount and total
25.00
======
$25.00
-Total tip amount for Server
5.00 TIPS RECEIVED BY SERVER 03
The finished Summary Report for all Servers will look like this:
SERVER TOTALS REPORT
-Report type specification
RESTAURANT STORE
CROSSROADS MEGA-MALL
123 MAIN STREET
ANYWHERE, USA 12345
PHONE: (XXX) XXX-XXXX
FAX: (XXX) XXX-XXXX
-Customized header (up to 6 lines)
Merch ID: XXXXXXXXXX
Terminal ID: XXXX
Date: 01/06/00
Day: SAT
SERVER ID
0001
0002
0003
0004
TOTALS:
TRANS
5
3
7
4
======
19
-Customer ID
-Terminal ID
-Date and time
Time: 01:30P
TIP
10.00
15.00
10.00
20.00
=======
55.00
TOTAL
100.00
150.00
200.00
350.00
=======
800.00
-Server ID, number of transactions,
total amount
-Grand total of all servers
END OF SERVERS
1999 LinkPoint International, Inc.
92
LFRST23 Reference Manual
STANDARD KEY OPERATIONS
REPRINT
The reprint function prints a duplicate copy of a captured transaction before the batch is closed.
This feature cannot be used to reprint an Auth Only transaction.
Display Message
Operator Action
_____READY XXX
JAN-03-00_MON_12:00P
[▲]
[▲]
[▲]
Press the [÷] key (REPRINT/PRINT key).
ENTER PASSWORD -
If prompted, key in the password (the default is 123123)
and press [ENTER].
(This prompt is optional.)
[▲]
[▲]
(optional)
[▲]
Reprint...Enter Item #
_
[▲]
[▲]
[▲]
Key in the item number to print a duplicate receipt and
press [ENTER].
001 SALE:
If the item number is found, the printer will print a
duplicate receipt. After printing stops, press [CLEAR]
to return to the READY message.
[▲]
$10.00
[▲]
[▲]
LinkPoint International, Inc. 1999
93
LFRST23 Reference Manual
STANDARD KEY OPERATIONS
A duplicate receipt will look like this:
***DUPLICATE***
VOID RECEIPT
-Transaction type specification
-Customized header (up to 6 lines)
RESTAURANT
-Customer ID
-Terminal ID
-Item #, card type, transaction type,
entry
method
-Card number, expiration date
-Cardholder name (if card is swiped)
Merch ID: XXXXXXXXXXXXXXXX
Terminal ID: XXXX
Item:001 VISA VSALE / SWIPE
Acct: XXXXXXXXXXXXXX EXP: 12/00
JOHN DOE
FOOD / BEV / TAX
$
00.00
-Food, beverage and tax
TIP
$______________
-Tip
TOTAL
$______________
-Purchase amount
X_______________________________________________
I AGREE TO PAY THE ABOVE AMOUNT ACCORDING
TO CARD ISSUER AGREEMENT
(CUSTOMER AGREEMENT IF RETURN)
-Cardholder’s signature
-Customized Cardholder agreement
-Custom message
COME AGAIN!
-Date, day, and time of transaction
-Response from host
Date: 01/03/00 Day: Mon Time: 12:00P
Response: VOID SALE XXX
TOP COPY-MERCHANT BOTTOM COPY-CUSTOMER
1999 LinkPoint International, Inc.
94
LFRST23 Reference Manual
STANDARD KEY OPERATIONS
CLOSE BATCH
The Close Batch procedure is a monetary transaction used to summarize daily sales and ticket
only functions for electronic deposit into the merchant’s bank account. Follow the steps below to
summarize transactions for electronic deposit. Auto Close is not available on the restaurant
application.
Display Message
Operator Action
_____READY XXX
JAN-03-00_MON_12:00P
[▲]
[▲]
[▲]
Press the key labeled [CLOSE].
ENTER PASSWORD -
If prompted, key in the password (the default is 123123)
and press [ENTER].
(This prompt is optional.)
[▲]
[▲]
(optional)
[▲]
OPEN TAB REPORT
PRINTING…
[▲]
[▲]
[▲]
Bar tabs not yet closed will print first. Finalize any
Tabs using the procedure on page 58.
UNTIPPED ITEMS
PRINTING…
[▲]
[▲]
[▲]
Untipped items will then automatically print for review
and finalization. Finalize any untipped items following
the procedure on page 55.
END OF BATCH
No operator action required as this message displays
briefly.
[▲]
[▲]
[▲]
PRINT REPORT?
YES
NO
[▲]
[▲]
[▲]
(optional)
ENTER TOTAL AMOUNT
$ 0.00
[▲]
[▲]
[▲]
(optional)
Terminal displays several
messages
CLOSE
[▲]
000000.00
[▲]
Press the left [▲] key to print a report or the right [▲]
key to skip this step.
(This is an optional prompt.)
Key in the total batch amount and press [ENTER].
Depending on setup, this prompt may or may not
appear.
(This is an optional prompt.)
Please wait while the terminal communicates with the host
computer.
After printing stops, press [CLEAR] to return to the
READY message.
[▲]
LinkPoint International, Inc. 1999
95
LFRST23 Reference Manual
STANDARD KEY OPERATIONS
The completed Batch receipt will look like this:
BATCH CLOSED
MERCH ID: XXXXXXXXXXXXXX
TERMINAL ID: XXXX
-Merchant ID
-Terminal ID
DATE 01/03/00
-Date and time of close
TIME 11:00P
# ITEMS: XXX
RESP: CLOSE 00000.00
1999 LinkPoint International, Inc.
-Total number of items in batch
-Response from host, total dollar
amount of transactions in batch
96
LFRST23 Reference Manual
APPENDIX A—PROMPTS
APPENDIX A—PROMPTS
This appendix explains the meaning of the different terminal prompts.
ADJUST TAB
The ability to change the tab amount that was initially
authorized.
ADJUST TIP
The ability to change a tip amount before closing the batch.
ALREADY VOIDED
The selected item in the batch was already voided.
APPROVAL CODE
This message prompts for the entry of the authorization code
during a Ticket Only transaction.
BAR TAB
An accumulated amount for a customer’s bar purchases.
BATCH SUMMARY
Displays during the printing of a report which includes:
individual bank card transactions and totals, credit card
transactions and totals, and ATM/Debit card totals.
BATCH FULL-PLS CLOSE
This message displays just before the terminal buffer is
completely full to prevent the terminal from locking up;
instructs the user to close the batch before being able to
continue.
CALL CENTER
Contact the voice authorization center and request a verbal
approval.
CASHBACK?
This message prompts after AMOUNT OF SALE during an
ATM/Debit sale.
CASHBACK AMOUNT?
This message prompts after YES is selected at the CASH
BACK? prompt.
CLEAR TO RESUME
This is the main menu display in the boot mode.
CLOSE TAB
To enter the final total for a customer’s bar purchases.
COMM FAILURE
(1) Displays when the terminal attempts to dial out after the
maximum number of allowable times (customizable). (2)
Displays when no telephone line is detected.
CONNECT ERROR
The terminal has detected an error while connecting to the host
computer. Please try the transaction again.
CONNECTED!
This message displays when the terminal connects to the host
computer.
CUSTOMER CANCELED
The cardholder pressed [CLEAR] on the PINpad and canceled
the transaction.
LinkPoint International, Inc. 1999
97
LFRST23 Reference Manual
APPENDIX A—PROMPTS
DECLINED
The card has been declined by the host computer.
DEMONSTRATION ONLY!
NOT AN ACTUAL SALE
Prompts at the beginning of each demo transaction.
DIALING...
This message is displayed when the terminal begins dial out.
DINE IN
The entry method defining a sale where the customer dines
within the establishment.
ENTER APPL. ID
This message prompts during the download request.
ENTER LAST 4 DIGITS
Card fraud protection prompt displayed after a card is swiped.
ENTER PASSWORD
This message prompts when a password is required to access a
function or transaction.
ENTER PHONE NUMBER
This message prompts during the download request.
ENTER TERMINAL ID
This message prompts during the download request.
ERROR!...NO MATCH
The 4 digits entered do not match the last 4 digits encoded on
the magnetic stripe of the card. Attempt to re-enter the last 4
digits. If there is no match again, the terminal will return to the
READY message.
EXPIRED CARD
The expiration date sent with the authorization request
indicates that the card has expired. If the card is not expired,
the terminal may be programmed with the incorrect date.
EXPIRY DATE? (MMYY)
This message prompts after the keyed entry of the cardholder’s
account number.
FOOD AND BEV TOTAL?
The prompt requesting the total amount of the sale without the
decimal point.
IMPRINT REQUIRED IF
CARD PRESENT!
This message prompts for approximately four seconds after the
card number and the expiration date are keyed.
INCORRECT AMOUNT
The terminal allows a maximum amount entry of nine positions
including the decimal point ($123456.78) or a minimum amount
entry of $.01. The amount entered does not fall within these
parameters.
INVALID AMOUNT
This message displays when a zero amount is entered for credit
card transactions.
INVALID CARD NUMBER
The cardholder’s account information transmitted to the host
computer is not valid (i.e., sending incorrect magnetic stripe
data).
1999 LinkPoint International, Inc.
98
LFRST23 Reference Manual
APPENDIX A—PROMPTS
INVALID EXP DATE
The expiration date entered was formatted incorrectly. The
correct date format is MMYY (i.e., for January 1999, 0199
should be entered).
INVALID PIN
The transaction was DECLINED because the customer entered
an incorrect PIN.
INVALID SERVICE
Optional service is not enabled.
INVALID TERM ID
The terminal has been programmed incorrectly.
INVALID TRAN TYPE
The terminal may not be programmed to accept this transaction
(i.e., terminal may not be setup to accept this card type).
INVALID ZIP CODE
The zip code was entered incorrectly. The correct format is a 5or 9-digit zip code.
ITEM NOT FOUND!
The terminal could not locate the particular item number
selected. Try a different item number.
KEY NOT ACTIVE
This message displays when an unavailable key is pressed.
LINE ERROR
There may be a communication problem between the terminal
and the host computer.
MOD-10 CHECK
The account number of the swiped/keyed card is invalid.
MODEM ERROR
The terminal has detected a problem with its modem. Try the
transaction again.
MUST FIRST RECV AUTH
This message prompts for approximately three seconds each
time the [OFFLINE] key is pressed.
MUST PERFORM FULL
DOWNLOAD FIRST
This message prompts when a partial download is requested
but the application is not yet loaded into the terminal.
NO CARRIER
This message displays when a modem/RS232 error occurs.
NO DIAL TONE
This message displays when the phone line is not detected.
NO LINE
The terminal cannot detect a telephone line connection. Make
sure that the telephone cord is securely plugged into the
terminal.
NO PIN PAD
A PINpad is not connected to the terminal or it is not activated.
An ATM/Debit sale cannot be performed without a PINpad.
NO PHONE NUMBER
The message displays when the primary host and/or the
secondary host phone number(s) were not downloaded into the
terminal.
LinkPoint International, Inc. 1999
99
LFRST23 Reference Manual
APPENDIX A—PROMPTS
NO TOTALS FOUND!
No transactions were found for the card type selected.
NOT FOUND!...
The terminal displays this message when it cannot find the
information requested (i.e., there is no item number 99 in the
current batch).
OPEN TAB
This displays at batch closure when a Bar Tab requires
finalization.
PICK UP CARD
The host computer has detected that the card used is no longer
valid or it may be lost or stolen.
PREV NEXT NEW
This message displays on line 2 during a VOID request.
PRINTER DISABLED!
CHECK PRINTER!
User may not have a printer or it may not be installed properly.
Check that the printer is securely connected to the back of the
terminal, that the power is turned on, and that it is enabled via
the terminal setup.
PRINTER REQUIRED FOR
DEBIT CARD SALES
This message prompts when the [ATM/DEBIT] key is pressed
but a printer is not connected/enabled. A printer must be
connected, enabled, and powered on to perform an ATM/Debit
sale.
PROMPTS FILE
Displays during initialization of the terminal after a full or a
partial download.
READY XXX
The line 1 default idle prompt displays the number of
transactions left in the batch.
RECEIVING...
This message displays when the terminal is receiving a
response from the host computer via modem.
SERVER ID
An optional number (1-4 digits) used to define different
servers.
SWIPE ONLY
(1) User attempted to key in an ATM/Debit sale. ATM/Debit
sales must be swiped. (2) User attempted to key in a transaction
when the terminal is downloaded with the KEYED parameter
disabled.
SWIPE CARD AGAIN NOW
The card was swiped incorrectly or another card error
condition exists.
TAKE OUT
The entry method defining a purchase taken out of an
establishment.
TIP AMOUNT?
The prompt requesting the total amount of the tip.
TO SELECT PUSH ENTER
Alternate display with the PREV NEXT NEW message.
1999 LinkPoint International, Inc.
100
LFRST23 Reference Manual
APPENDIX A—PROMPTS
TRANSMITTING...
This message displays when the terminal is sending transaction
data to host via modem.
TRY AGAIN
The card may have been improperly swiped through the
cardreader— attempt to swipe the card again.
UNDEFINED CARD TYPE
The card number does not match the required account range
settings. If the account number is valid, the terminal is not
properly setup to accept that particular card type.
UNREADABLE CARD
The magnetic stripe of the swiped card may be damaged or the
cardreader may be obstructed or otherwise requires cleaning.
VOID
VIEW
This message displays on line 2 when an item is selected to be
voided.
WAITING FOR ANSWER
This message displays when the terminal is waiting to connect
to the host computer or when the phone number programmed
is incorrect and cannot connect to the host.
WAITING FOR PIN
Prompts on the PINpad while it waits for the customer to enter
his/her PIN.
LinkPoint International, Inc. 1999
101
LFRST23 Reference Manual
APPENDIX B—TROUBLESHOOTING GUIDELINES
APPENDIX B—TROUBLESHOOTING GUIDELINES
This appendix identifies some problems that may be encountered and the actions necessary to
correct them.
DISPLAY PANEL
MALFUNCTION
If the LinkPoint 3000 displays incorrect information, such as an
unreadable message or nothing at all, it may have a power
problem or be a defective terminal. The terminal application
may not have been properly loaded.
KEYPAD MALFUNCTION
Check the display panel. If it displays the wrong characters or
nothing at all, refer to the section “Display Panel Malfunction”
above. Press several keys; a “beep” should be heard each time.
If the “beep” works, make sure the correct data is being
entered.
PRINTER MALFUNCTION
Check that the printer paper is properly loaded in the printer.
The printer will not operate unless a roll of paper is correctly
installed. Check the terminal for signs of power failure. Press
the [CLEAR] key and try the operation again; an improper
command may have been used.
1999 LinkPoint International, Inc.
102
LFRST23 Reference Manual
GLOSSARY
GLOSSARY
12 Hour Clock
Downloaded feature which allows the display of time in 12 or
24 hour format.
AC
Alternating Current is used as a primary source of power by
AC adapters and power supplies.
AC Adapter
A device that converts AC electrical current to a different DC
current so that it can be used by a particular device.
Account Number
(1) A unique series or group of digits used to numerically
identify each cardholder. (2) The unique identification
number assigned to the account of a specific party, within a
given institution.
Alphanumeric
Capable of using both alphabetic and numeric characters, as
in a display panel, keypad, or a computer keypad.
Application
A software program designed with special codes, stored in
the memory for a specific purpose or customer.
ATM / Debit
A monetary function that transfers funds
cardholder’s ATM/Debit account.
from
the
Authorization
The process used by card issuers to approve or decline a
transaction request.
Authorization Only
A nonmonetary function that verifies the availability of the
cardholder’s credit and reserves the authorized amount.
Baud
Signaling speed equal to the number of signal events per
second.
Cardreader
The slot on the terminal that automatically reads the magnetic
stripe or bar code on the back of an encoded card (bankcard
or credit card).
Carrier
A frequency signal or tone sent over the telephone or
communication line and modulated by the modem to
transmit/receive data.
Cashback Minimum
Downloaded feature to establish the minimum amount of
cash back allowed by the merchant.
Cashback Maximum
Downloaded feature to establish the maximum amount of
cash back allowed by the merchant.
Close (Host Response)
The batch was successfully closed and the transactions sent to
the host computer.
LinkPoint International, Inc. 1999
103
LFRST23 Reference Manual
GLOSSARY
Close Batch
A monetary transaction used to summarize the day’s
transactions for electronic deposit to the Merchant’s bank
account.
CPU
Central Processing Unit. The brain of the computer or
terminal that controls either directly or indirectly every
function and device associated with the computer/terminal.
Customer ID Number
A number used by merchants to identify themselves to the
host computer at their bank or financial institution.
Data
Information prepared in a particular format for use by the
terminal or host computer for a specific transaction or
operation.
Display
The small screen on the terminal that displays messages to
guide users through different operations and to alert users
when errors or problems occur.
EPROM
Erasable Programmable Read-Only Memory. A type of
memory chip permanently stored in the terminal. Contains
the standard application, operating system, and fixed
prompts.
File
A collection of related data.
Force (Host Response)
There was a discrepancy between the transactions sent to the
host and the transactions stored in the host computer. The
terminal forced closure, the batch was successfully closed,
and the transactions sent to the host computer.
Fraud Control
Measures taken to prevent unauthorized use of a credit or
debit card.
Host Computer
A computer used to process credit card and debit card
transactions.
Invalid (Host Response)
One or more credit card numbers sent to the host computer
were invalid. The terminal forced closure, the batch was
successfully closed, and the information sent to the host
computer.
Keypad
The key panel used for entering data and performing
operations.
Telephone Line Cord
A type of cord with modular plugs for connecting a device to
another device or outlet.
Manual Transaction
Transaction using account information entered from the
keypad rather than automatic reading devices such as the
cardreader.
1999 LinkPoint International, Inc.
104
LFRST23 Reference Manual
GLOSSARY
PIN
Personal Identification Number. A four- to sixteen-digit
confidential code or electronic signature used by the
cardholder to identify themselves to the host computer as the
proper user of a credit or debit card.
PINpad
A Personal Identification Number pad is an encrypted input
device used for entering a private identification code that
validates a transaction.
Reprint
A nonmonetary transaction used to print a duplicate copy of
a captured transaction before the batch is closed.
Return
A monetary transaction used to reverse a previous day’s
transaction. This transaction credits the cardholder’s account.
Review
A nonmonetary function used to review and print individual
items and batch totals as an aid in reconciling a given day’s
transactions.
Sale
A monetary transaction that initiates the transfer of funds. A
Sale can be transacted either by card swipe (magnetic
cardreader) or by manual entry of the information.
Scroll
Serial Port
Swipe
To move text across a display screen.
A connector used to communicate with host computers, other
terminals, and printers.
The action of sliding a card through a terminal’s cardreader.
Terminal
A device used to perform transactions. The transactions are
processed by the terminal itself or by a host computer. These
devices have a display panel, keypad, and cardreader, and
are used to enter transaction information.
Ticket Only
Also known as Force, Post Auth. or off-line. A monetary
transaction used to initiate a deposit in two situations: (1)
following an Authorization Only transaction, and (2) to
complete a transaction initiated by voice authorization.
Track 1 Data
The information stored on track 1 of the card’s magnetic
stripe includes the cardholder’s name, account number,
expiration date, and security data.
Track 2 Data
American Bankers Association information stored on track 2
of the card’s magnetic stripe. Includes the cardholder’s
account number, expiration date and security data.
Void
A monetary transaction used to eliminate a prior “current
batch” Sale. A receipt is generated to be included with that
day’s drafts and tickets.
LinkPoint International, Inc. 1999
105
LFRST23 Reference Manual
GLOSSARY
Index
Dine In / Bar Tab & Take Out
Bar Tab receipt .....................................................54
Dine In receipt................................................52, 61
Take Out receipt ...................................................54
Dine In / Bar Tab or Take Out -- Manual .................52
Display .....................................................................11
definition ............................................................104
Display Panel..............................................................8
DISPLAY PANEL MALFUNCTION ....................102
download parameters ................................................33
Download Procedures...............................................26
Direct PC-to-POS Download ...............................28
Direct PC-to-POS Download (Shortcut) ..............30
POS-to-POS Download (Master/Slave) ...............31
A
AC .......................................................................... 103
AC adapter............................................................ 103
Account Number................................................... 103
Adding Tips.............................................................. 56
Tip Report............................................................ 57
Alphanumeric ....................................................... 103
Alphanumeric Data..................................................... 9
ALREADY VOIDED ............................................. 97
Application............................................................ 103
APPROVAL CODE ............................................... 97
ATM/Debit......................................................... 62, 68
ATM/Debit sales receipt ................................ 64, 70
Auth only.................................................................. 71
Authorization ........................................................ 103
E
EPROM .................................................................104
Error Messages .........................................................97
ERROR!...NO MATCH............................................98
EXPIRED CARD....................................................98
B
Backspace Key ......................................................... 40
Bar Tab (Open) -- Swipe .......................................... 50
Basic Operation........................................................ 40
Transaction Keys ................................................. 40
BATCH SUMMARY ............................................. 97
Baud....................................................................... 103
Boot Mode Functions............................................... 12
Boot Mode Password ............................................... 12
BUFFER FULL-CLOSE ....................................... 97
F
File .........................................................................104
Force (host response) ............................................104
Fraud Control .......................................................104
G
getting started .............................................................3
glossary...................................................................103
C
Calculator ................................................................. 41
CALL CENTER ..................................................... 97
Cardreader ............................................................ 8, 11
definition............................................................ 103
Using.................................................................... 40
Carrier................................................................... 103
CASH BACK ............................................................. 6
CHECK PRINTER! ............................................. 100
Clear Batch......................................................... 45, 46
Clear Memory .......................................................... 18
Close (host response) ............................................ 103
Close Batch .............................................................. 95
receipt .................................................................. 95
Closing Bar Tab ....................................................... 58
Bar Tab Report..................................................... 59
Cold Start ................................................................. 12
COMM FAILURE ................................................. 97
CONNECT ERROR............................................... 97
CUSTOMER CANCELED ...................................... 97
Customer ID Number........................................... 104
H
Hardware ....................................................................8
Host Computer ......................................................104
I
INCORRECT AMOUNT .........................................98
Installation ..................................................................4
Invalid (host response)..........................................104
INVALID AMOUNT..............................................98
INVALID CARD NUMBER..................................98
INVALID EXP DATE ............................................98
INVALID PIN .........................................................98
INVALID SERVICE ..............................................98
INVALID TERM ID...............................................99
INVALID TRAN TYPE .........................................99
INVALID ZIP CODE .............................................99
Item...........................................................................80
ITEM NOT FOUND! .............................................99
D
K
Data ....................................................................... 104
DECLINED............................................................. 97
Dimensions .............................................................. 11
Dine In -- Swipe ....................................................... 49
1999 LinkPoint International, Inc.
Keypad..................................................................9, 11
definition ............................................................104
106
LFRST23 Reference Manual
GLOSSARY
card totals .............................................................81
item.......................................................................80
operator totals.......................................................82
KEYPAD MALFUNCTION.................................. 102
L
Line Cord .............................................................. 104
LINE ERROR......................................................... 99
S
Scroll
definition ............................................................105
Serial Port
definition ............................................................105
Service ........................................................................5
Setup
Date ......................................................................13
PIN pad Port.........................................................16
Printer Port ...........................................................14
RS232 Port ...........................................................15
Time .....................................................................13
Software......................................................................6
specifications ............................................................11
standard key operations ............................................48
Swipe
definition ............................................................105
SWIPE ONLY.......................................................100
M
Maintenance ............................................................... 5
Manual Transaction ............................................. 104
Memory ................................................................... 11
Microprocessor ....................................................... 11
Model Number ......................................................... 17
Modem..................................................................... 11
MODEM ERROR .................................................. 99
N
NO LINE ................................................................. 99
NO PIN PAD........................................................... 99
NO TOTALS FOUND! .......................................... 99
NOT FOUND!......................................................... 99
T
O
Take-Out Order – Swipe...........................................51
Telco Connector ......................................................11
Terminal
definition ............................................................105
Terminal Diagnostics................................................19
Cardreader Test ....................................................23
Clock Test ............................................................20
Dialer Test............................................................20
Display Test..........................................................19
Keyboard Test ......................................................19
Line Voltage Test .................................................21
Memory Analysis .................................................24
Modem Answer Test ............................................22
Modem Originate Test..........................................21
Serial Port Test.....................................................24
Terminal Features .......................................................6
Terminal Functions...................................................42
Clear Batch.....................................................45, 46
Demo Mode Enable/Disable ................................43
Printer Enable/Disable .........................................42
Technical Specification Printout .........................44
Ticket Only...............................................................74
Track 1 Data
definition ............................................................105
Track 2 Data
definition ............................................................105
TRANSACTION FEE ................................................6
troubleshooting.........................................................97
TRY AGAIN .........................................................100
Operating Environment ......................................... 11
P
Password Protect ...................................................... 36
Peripheral Ports...................................................... 11
PICK UP CARD ..................................................... 99
PIN......................................................................... 104
PIN pad ...................................................................... 2
definition............................................................ 104
Power Connector .................................................... 11
Power Requirements .............................................. 11
PRINTER DISABLED! ....................................... 100
PRINTER MALFUNCTION ................................. 102
PRINTER REQUIRED FOR DEBIT CARD
SALES............................................................... 100
Printers ....................................................................... 2
Printing Report
operator total summary receipt....................... 87, 92
Printing Reports
card total sumary receipt ................................ 86, 87
card total summary......................................... 85, 89
item detail ............................................................ 83
item detail receipt........................................... 84, 90
operator total summary....................................... 91
PRINTING REPORTS............................................. 83
R
Reprint...................................................................... 93
receipt .................................................................. 93
Return....................................................................... 65
review....................................................................... 80
Review
1999 LinkPoint International, Inc.
U
UNDEFINED CARD TYPE.................................100
Unpacking...................................................................3
2
LFRST23 Reference Manual
GLOSSARY
warranty......................................................................5
Weight......................................................................11
UNREADABLE CARD ....................................... 100
V
Z
Void ......................................................................... 78
Zontalk..........................................................26, 33, 36
W
WAITING FOR PIN PAD ................................... 101
LinkPoint International, Inc. 1999
3
LFRST23 Reference Manual