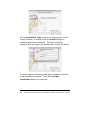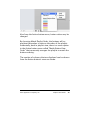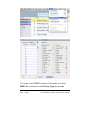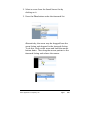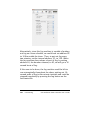
1
Solo Performer
Show Controller®
Version 4
User’s Guide
Copyright ©2009 Alien Apparatus Company, Inc.
2018 Marina Court
San Leandro, CA 94577
All Rights Reserved
http://www.alienapparatus.com
Information is subject to change without notice. No
material may be reproduced or transmitted in any form
or by any means, electronic or mechanical, for any
purpose without the express written permission of Alien
Apparatus Company, Inc.
Solo Performer Show Controller® and Alien Apparatus®
are registered trademarks of Alien Apparatus Company,
Inc.
Microsoft® and Windows® are registered trademarks of
Microsoft Corporation.
Macintosh® is a registered trademark of Apple Computer
Corporation.
QuickTime and the QuickTime logo are trademarks used
under license. The QuickTime logo is registered in the
U.S. and other countries.
Contents
1 INTRODUCTION...........................................................................9
OVERVIEW - HOW SOLO PERFORMER SHOW CONTROLLER WORKS.. 9
NEW FEATURES IN VERSION 4......................................................... 12
2 IMPORTANT SAFETY PRECAUTIONS................................. 15
3 UNPACKING AND REGISTERING..........................................17
UNPACKING.....................................................................................
17
PRODUCT REGISTRATION.................................................................
17
4 QUICK START GUIDE............................................................... 19
5 INSTALLATION ON MACINTOSH..........................................23
SYSTEM REQUIREMENTS.................................................................
23
UPGRADING FROM A PREVIOUS VERSION ........................................
23
SOFTWARE INSTALLATION...............................................................
23
6 INSTALLATION ON WINDOWS.............................................. 31
SYSTEM REQUIREMENTS.................................................................
31
UPGRADING FROM A PREVIOUS VERSION ........................................
31
SOFTWARE INSTALLATION...............................................................
31
FOOT CONTROLLER DRIVER INSTALLATION....................................
43
7 WIRING THE SYSTEM.............................................................. 47
CONNECTING LIGHTS......................................................................
47
LINE TERMINATION.........................................................................
48
5-PIN DMX512 CONNECTORS.........................................................
48
HIGH-PERFORMANCE AUDIO...........................................................
49
MIDI CABLING................................................................................
51
8 OVERVIEW OF THE SOFTWARE........................................... 53
THE PLAYLIST EDITOR WINDOW.....................................................
53
THE LYRICS EDITOR WINDOW........................................................
54
THE LIGHTSHOW EDITOR WINDOW.................................................
55
THE MIDI EFFECTS EDITOR WINDOW.............................................
56
THE HOTKEY EDITOR WINDOW.......................................................
57
THE INFORMATION WINDOW...........................................................
58
9 STARTING THE SOFTWARE................................................... 60
LAUNCHING SOLO PERFORMER SHOW CONTROLLER......................
60
SYSTEM REGISTRATION...................................................................
60
JOINT THE ELIST..............................................................................
63
LOCATE YOUR AUDIO FILES............................................................
64
10 PLAYLISTS AND AUDIO......................................................... 65
PLAYLIST EDITOR SCREEN LAYOUT ................................................
65
PLAYLISTS.......................................................................................
68
SORTING PLAYLISTS........................................................................
69
DEFAULT PLAYLISTS........................................................................
69
MAKING A NEW PLAYLIST...............................................................
70
ADDING AUDIO TO THE PLAYLIST ...................................................
71
SUPPORTED AUDIO FILE FORMATS..................................................
76
MIDI FILE PLAYBACK.....................................................................
77
PLAYLIST SELECTIONS.....................................................................
77
REORDERING PLAYLIST ITEMS.........................................................
78
REMOVING PLAYLIST ITEMS............................................................
79
ENDING OPTIONS.............................................................................
80
VOLUME ADJUSTMENT....................................................................
82
TIME REMAINING IN PLAYLIST ........................................................
83
AUDIO FILE TUNING SETTING.........................................................
83
INFORMATION WINDOW..................................................................
84
SAVING PLAYLISTS..........................................................................
85
PLAYLIST LOCKING.........................................................................
86
OPENING PLAYLISTS........................................................................
86
BUTTON VIEW.................................................................................
87
AUDIO FILE TIPS..............................................................................
91
USING CLICK TRACKS.....................................................................
92
11 MIDI FILE OPTIONS................................................................93
REMOVING INSTRUMENTS FROM A MIDI FILE.................................
93
CHANGING MIDI INSTRUMENTS.....................................................
95
TRANSPOSING MIDI NOTES............................................................
96
12 TUNING....................................................................................... 97
TUNING YOUR INSTRUMENT...........................................................
97
TUNING THE PLAYLIST AUDIO.........................................................
98
ADJUSTING THE GLOBAL TUNING.................................................
100
13 EVENT SEQUENCES OVERVIEW...................................... 103
THE THREE-STEP PROCESS............................................................
103
14 LYRICS......................................................................................105
ADDING LYRIC TEXT DISPLAYS TO A SONG ...................................
105
DELETING A LYRIC TEXT EVENT...................................................
112
THE LOCK BUTTON.......................................................................
113
USING THE CLIPBOARD TO COPY AND PASTE LYRICS....................
113
EXITING THE LYRIC EDITOR..........................................................
118
EMBEDDED TEXT IN KARAOKE & MIDI FILES..............................
118
USING LRC LYRIC FILES...............................................................
120
LYRIC TEXT TIPS...........................................................................
120
15 MIDI........................................................................................... 123
INTRODUCTION..............................................................................
123
MIDI EVENT EDITOR.....................................................................
123
CREATING A MIDI EVENT .............................................................
125
CREATING A MIDI EVENTS SEQUENCE ..........................................
133
EXITING THE MIDI EVENT EDITOR...............................................
137
ADDING MIDI EVENT SEQUENCES TO A PLAYLIST........................
137
REMOVING MIDI EVENT SEQUENCES FROM A PLAYLIST ..............
138
ADDING AN ENDING MIDI EVENT.................................................
139
16 LIGHTS..................................................................................... 141
OVERALL APPROACH ....................................................................
141
OVERVIEW OF LIGHT DEVICE FILES...............................................
142
DEFINING NEW MIDI DEVICES.....................................................
147
USING THE RANGE TOOL ...............................................................
150
EDITING EXISTING DEVICES..........................................................
152
LIGHTSHOW EDITOR OVERVIEW....................................................
153
CONFIGURING THE CHANNELS.......................................................
154
MAKING A LIGHT SCENE ...............................................................
157
SAVING A LIGHT SCENE.................................................................
159
OPENING A LIGHT SCENE...............................................................
160
DELETING A LIGHT SCENE.............................................................
161
ADDING A SCENE TO A LIGHTSHOW...............................................
162
DELETING A SCENE FROM A LIGHTSHOW.......................................
166
PREVIEWING A LIGHTSHOW...........................................................
166
MAKING A LIGHTSHOW USING CHASES.........................................
167
SAVING A LIGHTSHOW ...................................................................
172
OPENING A LIGHTSHOW.................................................................
173
EXITING THE LIGHTSHOW EDITOR.................................................
173
ADDING A LIGHTSHOW TO A PLAYLIST..........................................
174
REMOVING A LIGHTSHOW FROM A PLAYLIST .................................
174
ADDING AN ENDING LIGHT SCENE ................................................
175
LIGHT SCENE TIPS.........................................................................
176
17 EXAMPLE LIGHTING SETUPS...........................................179
INTRODUCTION..............................................................................
179
THE SETUP/TEAR-DOWN MINIMALIST..........................................
179
THE BUDGET SETUP......................................................................
181
THE DIMMER SETUP......................................................................
183
AN ADVANCED SETUP EXAMPLE...................................................
185
18 HOTKEYS.................................................................................189
INTRODUCTION..............................................................................
189
THE HOTKEY EVENT EDITOR.........................................................
189
CREATING A HOTKEY EVENT.........................................................
191
CREATING HOTKEY EVENT SEQUENCES........................................
196
EXITING THE HOTKEY EVENT EDITOR...........................................
200
ADDING HOTKEY EVENT SEQUENCES TO A PLAYLIST ...................
202
REMOVING HOTKEY EVENT SEQUENCES FROM A PLAYLIST..........
203
ENDING HOTKEY EVENTS..............................................................
204
19 RUNNING A SHOW.................................................................205
THE AUDIO TRANSPORT ................................................................
205
SETTING UP THE VIEW...................................................................
206
THE CLOCK WINDOW....................................................................
206
THE NEXT SONG WINDOW............................................................
207
THE FOOT CONTROLLER................................................................
208
THE FOOT CONTROLLER BUTTON STATUS WINDOW.....................
209
STARTING A SHOW.........................................................................
209
STOPPING A SHOW.........................................................................
210
CONTROLLING THE PLAYLIST........................................................
210
CHANGING THE VOLUME...............................................................
211
CHANGING THE COMPUTER SYSTEM VOLUME..............................
212
FULL SCREEN LYRICS....................................................................
212
SECONDARY LYRIC DISPLAY WINDOW..........................................
214
FOG MACHINE CONTROL...............................................................
215
ALTERNATE BUTTON MAPPINGS....................................................
215
RECONNECTING THE FOOT CONTROLLER......................................
217
THE IMPORTANCE OF A FOG MACHINE ..........................................
217
RECOMMENDED PRE-SHOW PREPARATION ....................................
217
20 CUSTOMIZING........................................................................221
OPENING THE PREFERENCES PANEL..............................................
221
SETTING THE GENERAL PREFERENCES..........................................
222
SETTING DEFAULT FILE LOCATIONS..............................................
225
SETTING DEFAULT CONFIGURATION FILE......................................
228
FONT AND COLOR SETTINGS.........................................................
229
MIDI SETTINGS.............................................................................
233
TUNING SETTINGS.........................................................................
235
FOG MACHINE SETTINGS...............................................................
238
BUTTON MAPPING SETTINGS.........................................................
242
21 GLOSSARY............................................................................... 245
22 FREQUENTLY ASKED QUESTIONS.................................. 251
23 GETTING HELP...................................................................... 259
THE USERS MANUAL.....................................................................
259
ONLINE HELP.................................................................................
259
WEBSITE USERS FORUM................................................................
260
CUSTOMER SUPPORT.....................................................................
260
A1 DMX512 LIGHTING INTRODUCTION............................. 261
DMX512 BACKGROUND...............................................................
261
DXM512 AND SOLO PERFORMER SHOW CONTROLLER................
263
REDUCED DMX MODES................................................................
264
A2 SOFTWARE LICENSE AGREEMENT................................265
A3 LIMITED WARRANTY..........................................................273
A4 DECLARATION OF CONFORMITY...................................277
Introduction
1
Overview - How Solo Performer Show
Controller Works
The Solo Performer Show Controller is a system for solo
musicians to control their shows when performing live. It
consists of a software program that manages playlists,
plays the backing music, displays lyrics on screen,
controls light shows, controls MIDI effects units, and is
controllable by a six-button foot pedal for hands-free
operation onstage.
Playlists are defined by adding audio files to the list.
Each playlist item can then be assigned lyrics, MIDI
Alien Apparatus Company, Inc.
Introduction 9
events, hotkey events, and a lightshow. When the playlist
is run, the audio plays item by item through the
computer. This audio can be routed to a PA system for
higher performance. While the audio plays, the lyric
events are displayed on-screen, MIDI events are sent to
effect units through the computer’s MIDI interface, and
lighting events are output to either DMX512 or MIDI
lights to create light scenes in synchronization with the
audio.
The system supports 32 channels of DMX512 or MIDI
lighting control. If you are new to DMX512 lighting, refer
to Appendix A1 for an introduction.
The foot controller’s default functions are as shown
below:
The foot switch functions are as follows, from left to
right:
10 Introduction
Solo Performer Show Controller User’s Guide
Play / Stop
Plays the playlist if it is not running or stops it if it is
running.
Playlist
Changes the currently selected song on the playlist
Volume Down
Lowers the volume of the current playlist item
Volume Up
Raises the volume of the current playlist item
Lyric Window
Toggles the lyric display area from a windowed
view to full-screen
Fog
Toggles the fog machine on and off
Alien Apparatus Company, Inc.
Introduction 11
New Features in Version 4
Version 4 includes several new features that have been
requested by users. New features include:
Improved Window Layout for Better Workflow
One of the most obvious new changes in version 4 is that
the windows are layed out significantly differently. The
Playlist Editor now has three panes - the playlist library,
the playlist, and the lyrics display and a header with
transport controls. The three panes can be resized or
collapsed to show the information that is important when
it is important.
The setup buttons from previous editions of Solo
Performer Show Controller are now removed. Their
functionality is replaced by the Action button that is
under the playlist, and is also accessible by contextual
menus when right-clicking or control-clicking on a
playlist item.
All editor windows, such as the Lightshow Editor and
MIDI Editor all include a waveform view with an event
track underneath. The event track shows markers in
spots where events appear in the timecode listing.
Markers can be dragged to move them to new locations
and can be copied and pasted as well.
Button View for Playing Without Fixed Set
Lists
12 Introduction
Solo Performer Show Controller User’s Guide
If you perform without fixed set lists, you can use button
view to show all of your songs as buttons that fill the
screen. You can choose songs by simply picking a
button. Buttons can be color-coded and moved around
for easy organizing. Button View can be configured for
different button sizes and column layouts as well.
MIDI Editor Supports Note-On and Note-Off
Event
You can now control MIDI effects and devices with MIDI
Note-On and Note-Off events in addition to the Program
Change and Control Message options of the past
releases.
Audio Library Supports Sub-Folders
If you have sub-folders in your audio folder, all items in
all sub-folders are now part of your audio library.
Additionally, a new preference item has been added to
strip leading numbers from the names of audio files.
These two features make it very convenient to work with
your iTunes library folder in Solo Perfomer Show
Controller.
Keyboard Navigation
In previous editions of Solo Performer Show Controller,
you could alway press keys on the keyboard to advance
to songs that start with the letters that you have pressed.
Now, after finding a song, you can press the tab key to
Alien Apparatus Company, Inc.
Introduction 13
go to the next songs that match. This is a very handy
feature to use when you have very long set lists or are
using Button View with your entire library.
Improved Authorization Method
Previously, Solo Performer Show Controller had to be
authorized by connecting the foot controller.
Authorization was maintained by connecting the foot
controller every 45 days. Now, authorization is done
only once by a license key code so you will never be
bothered by this procedure again.
And Much More!
See the "Solo Performer Show Conroller Readme.rtf" file
for a list of all of the new features and fixes in this
release.
14 Introduction
Solo Performer Show Controller User’s Guide
Important Safety
Precautions
2
Warning! To prevent or reduce the risk of electrical
shock or fire, do not expose this unit to rain or moisture.
Caution! There are no user serviceable parts inside
these units. Do not attempt any repairs yourself. Doing
so will void your manufacturers warranty. In the unlikely
event that any of our units require service please contact
your nearest Alien Apparatus customer support
representative. See Appendix A3 for more information.
Warning! Route all cabling away from foot traffic. As a
further precaution, strain-relieve the USB cable near the
computer as shown below to prevent computer damage
due to accidental cable movements.
Do not spill water or other liquids into or on your unit.
Alien Apparatus Company, Inc.
15
Important Safety Precautions
To reduce the risk of electrical shock or fire, do not
expose the unit to rain or moisture.
The unit is intended for indoor use only. The use of this
product outdoors voids all warranties.
Never attempt to operate the unit if it has become
damaged in any way.
Ensure that all cabling in the system is free from frays or
other damage. Do not operate the unit with damaged
cables.
The unit should only be cleaned as recommended by the
manufacturer. It is recommended that cleaning be done
with only a soft cloth. Do not use any solvents.
The unit should be situated away from heat sources such
as radiators, heat registers, stoves, or other appliances
(including amplifiers) that produce heat.
16 Important Safety PrecautionsSolo Performer Show Controller User’s Guide
Unpacking And
Registering
3
Unpacking
Every Solo Performer Show Controller system has been
thoroughly tested and has been shipped in perfect
operating condition. Carefully check the shipping carton
for damage that may have occurred during shipping. If
the carton appears to be damaged, carefully inspect your
units for any damage and be sure all accessories
necessary to operate the system have arrived intact. In
the event that damage has been found or parts are
missing, please contact Alien Apparatus customer
support for further instructions. Please do not return the
system to your dealer without first contacting customer
support.
Product Registration
The Solo Performer Show Controller carries a one year
(365 day) limited warranty. When running the included
software for the first time, a registration screen will
appear. Please fill out the on-screen registration form.
When complete, the form may be submitted by email, or
it may be printed and mailed. Submit the registration to
Alien Apparatus Company, Inc.
Unpacking & Registering
17
validate your purchase and activate your warranty.
Registering also ensures that you will receive all software
updates that you are entitled to receive.
18 Unpacking & Registering Solo Performer Show Controller User’s Guide
Quick Start Guide
4
This section explains in brief the steps that must be
performed to get Solo Performer Show Controller up and
running. Chapter references are given for a more
detailed explanation.
1. Install Software
Macintosh users, refer to Chapter 5
Windows users, refer to Chapter 6
2. Connect the Foot Controller to the USB port
3. Install Foot Pedal Driver (for Windows
users)
Refer to Chapter 6
4. Launch Solo Performer Show Controller
Refer to Chapter 9
Alien Apparatus Company, Inc.
Quick Start Guide
19
5. Fill out and submit registration form
Refer to Chapter 9
6. Specify Location of Audio Files
Refer to Chapter 9
7. Configure the Lights
A. Add an audio file to the playlist
Refer to Chapter 10
B. Press Build Lightshow button
C. Set channel numbers, light devices, and type in
channel names
Refer to Chapter 16
D. Save configuration file
Refer to Chapter 16
8. Set Preferences
A. Set default configuration file and default audio
file folder
20
Refer to Chapter 20
Quick Start Guide Solo Performer Show Controller User’s Guide
The Solo Performer Show Controller system should now
be ready to use! Refer to the rest of this User’s Guide for
more detailed information on specific functions.
Alien Apparatus Company, Inc.
Quick Start Guide
21
22
Installation on Macintosh Solo Performer Show Controller User’s Guide
5
Installation on Macintosh
System Requirements
• System 10.3.9 or later
• 1 GB of RAM Minimum
• 120 Megabytes of Hard Drive Space Minimum
• Apple QuickTime 6.0 or later (Installed with Software)
• G4 1 GHz or Faster Microprocessor
• USB Port
• Audio Output Connector Jack
• 1200x800 Minimum Screen Resolution
Upgrading from a Previous Version
If you are upgrading from a previous version of the
software, follow the installation instructions as if you
were doing a new installation. No document files, such
as playlists, lyrics, lightshows, or light scenes will be
deleted.
Software Installation
Alien Apparatus Company, Inc.
Installation on Macintosh
23
To begin installation, insert the software CD into the CD
drive of the computer. Double-click on the CD icon that
appears on the desktop to view the contents of the CD.
Double-click on the Install SP Show Controller.app icon
to launch the installer.
When the installer launches, a dialog appears asking for
your user password for your computer. Type in your
password and then click the OK button.
24
Installation on Macintosh Solo Performer Show Controller User’s Guide
The Welcome screen appears. Read the text, and then
click the Continue button.
The License Agreement screen appears. Read this
agreement carefully and print a copy for your records by
clicking on the Print button. When you are done reading
the license agreement, click the Install button to go on.
Alien Apparatus Company, Inc.
Installation on Macintosh
25
You will then be asked whether you agree or disagree
with the license agreement. If you agree with the terms
of the agreement, click the Agree button. If you click
Disagree, the installer will quit without installing the
software and you may return the product for a refund.
After agreeing to the terms of the license agreement, the
files will then be copied to your hard disk. When
complete the Installation Complete screen appears.
26
Installation on Macintosh Solo Performer Show Controller User’s Guide
When complete, click the Quit button to exit the software
installer.
Next, the foot controller driver installation begins. After
clicking Quit from the software installer, the foot
controller driver installer launches automatically.
Click the Continue button to install the foot controller
driver. The Read Me screen appears next and shows the
Revision History for the driver. Click Continue to go on.
Alien Apparatus Company, Inc.
Installation on Macintosh
27
At the Installation Type screen, you may choose a new
install location, or simply click the Install button to
continue with the installation. The driver installer
requires that you type your password to install the driver.
A notice appears informing that your computer must be
restarted when complete. Click the Continue
Installation button to continue.
28
Installation on Macintosh Solo Performer Show Controller User’s Guide
The necessary files are now installed
When complete, the following window is presented. Click
the Restart button to restart your computer.
Alien Apparatus Company, Inc.
Installation on Macintosh
29
The application Show Controller.app is now located in
your Applications folder on your hard disk. A folder
called Solo Performer Show Controller has been created
in your Documents folder. This will be where all of your
playlists and sequence files will be saved.
30
Installation on Macintosh Solo Performer Show Controller User’s Guide
6
Installation on Windows
System Requirements
• Windows XP
• 1 GB of RAM Minimum
• 150 Megabytes of Hard Drive Space Minimum
• Apple QuickTime 6.0 or later (Installed with software)
• Pentium III 1 GHz or Faster Microprocessor
• USB Port
• SoundBlaster® compatible Sound Card
• Audio Output Connector Jack
• 1200x800 Minimum Screen Resolution
Upgrading from a Previous Version
If you are upgrading from a previous version of the
software, follow the installation instructions as if you
were doing a new installation. No document files, such
as playlists, lyrics, lightshows, or light scenes will be
deleted.
Software Installation
Alien Apparatus Company, Inc.
Installation on Windows
31
Software installation is a two-part step. First, the
setup.exe installer must be run to install the main
application program and QuickTime. Secondly, the foot
controller driver must be installed.
To begin installation, insert the software CD into the CD
drive of the computer. The installer program is called
setup.exe. This program should launch automatically
when the CD is inserted in the drive. Some computer
systems have this auto-start feature disabled. If the
installation program does not launch after a few
moments, manually launch the installation program by
finding setup.exe on the CD using Windows Explorer.
Note that on some Windows systems, the file name
extensions might be set to be hidden. If this is the case,
setup.exe will appear as merely setup. When you have
located setup.exe, launch it by double-clicking on its
icon.
32
Installation on Windows Solo Performer Show Controller User’s Guide
The Welcome screen appears. Read the text, and then
click the Next button.
The License Agreement screen appears. Read this
agreement carefully. If you agree with the terms of the
agreement, click the button next to I accept the
agreement. Then Next button will then become
activated. Click the Next button to continue with the
installation.
If you leave the button next to I do not accept the
agreement selected, the Next button will stay inactive
and you cannot install the software. If you do not agree
with the terms of the agreement, click on the Cancel
button and the installer will quit without installing the
software. You may return the product for a refund.
Alien Apparatus Company, Inc.
Installation on Windows
33
The Information screen appears. This text explains
what software will be installed and how to do a
customized installation to install only selected
components, if desired. Read the text, and then click the
Next button.
34
Installation on Windows Solo Performer Show Controller User’s Guide
Next, select a destination to install the software by typing
in a path in the edit box or by clicking the Browse
button. In most cases, the default path is appropriate
and simply pressing the Next button is the most
appropriate course of action. Click the Next button to
continue once the destination path is entered.
The Select Start Menu Folder screen appears. Here, you
may choose the folder in which that the installed
software will reside in the Windows Start Menu. In most
cases, the default choice is appropriate, however, if you
wish to place the software in a different location in the
Start Menu, you may do so by either typing in a new
folder name or by clicking the Browse button to find an
existing folder. Click the Next button to continue with
the installation.
Alien Apparatus Company, Inc.
Installation on Windows
35
The opportunity to create a desktop icon for the installed
software now appears. By default, a desktop icon is
created. A desktop icon will allow the software to be
launched very quickly by double-clicking on it. If you do
not wish to have a desktop icon installed, simply uncheck
the checkbox by clicking on it. Click the Next button to
continue.
36
Installation on Windows Solo Performer Show Controller User’s Guide
The Ready to Install screen now appears. Here you will
see a summary of the choices that were made leading up
to this point. If you wish to make changes, simply click
the Back button several times until you are presented
with the opportunity to change the item in question. If
everything is fine, click the Install button to begin
copying files to your computer.
The necessary files will now be copied to your computer.
Alien Apparatus Company, Inc.
Installation on Windows
37
If QuickTime 6.0 or later is not installed on your
computer, QuickTime will be installed. If you already
have QuickTime 6.0 or later, the QuickTime installer will
be skipped.
When the QuickTime installer begins, the following
window appears:
38
Installation on Windows Solo Performer Show Controller User’s Guide
Click Next to continue on with the installation. Apple
Computer’s QuickTime license agreement is displayed.
Read it, and if you agree with the terms, click the Yes
button to continue.
Alien Apparatus Company, Inc.
Installation on Windows
39
The following screen appears where a destination
location for the QuickTime installation can be chosen.
Most people choose the default location. Click Install to
continue.
The QuickTime files are now copied to your hard disk.
40
Installation on Windows Solo Performer Show Controller User’s Guide
When the QuickTime Installer is finished writing its files
to your hard disk, the following window appears where
you can click Finish to exit the installer.
You will next be asked if you would like to upgrade to
QuickTime Pro. This is not necessary so you click the No
Thanks button to continue on.
Alien Apparatus Company, Inc.
Installation on Windows
41
QuickTime is now installed, and the Solo Performer Show
Controller software installation is complete. Click the
Finish button to exit the installer.
42
Installation on Windows Solo Performer Show Controller User’s Guide
Foot Controller Driver Installation
In order for the Solo Performer Show Controller software
to communicate with the foot controller, a driver needs
to be installed. To do this, simply connect the foot
controller to the computer’s USB port using the cable
provided. In a few seconds, Windows will auto-detect
the foot controller and present the following dialog box:
Select the No, not this time then click the Next button to
begin the Found New Hardware Wizard.
The following dialog box will be displayed. Make sure
that Install the software automatically is selected. It
should be selected by default. Click the Next button to
continue.
Alien Apparatus Company, Inc.
Installation on Windows
43
If for some reason the version of Windows that you are
using is not able to locate the driver files, choose the
Install from a list or specific location option and click
Next. Fill in the path “D:\Drivers” in the search box then
click Next.
44
Installation on Windows Solo Performer Show Controller User’s Guide
Depending on the Windows version you are using, the
following screen, or one similar to it, may appear:
Click Continue Anyway to go on.
The foot controller driver files will now be copied to your
hard disk.
Alien Apparatus Company, Inc.
Installation on Windows
45
When finished, the following dialog box will be displayed:
Click Finish to exit the Found New Hardware Wizard.
Note that on some versions of Windows, the foot
controller driver needs an additional component
installed, so the Found New Hardware Wizard may
launch again and you will have to repeat this process one
more time.
Once finished, the necessary software to communicate
with the Solo Performer Show Controller foot controller is
now installed.
46
Installation on Windows Solo Performer Show Controller User’s Guide
Wiring the System
7
The Solo Performer Show Controller system may be wired
in a variety of ways, depending on the complexity and
impact desired. In its simplest configuration, nothing
needs to be wired! Simply run the software and play
backing music on your computer!
To add more functionality to the system, use the 6button foot pedal to control the starting and stopping of
the show with volume control. The foot pedal is wired to
the computer by the included USB cable.
Connecting Lights
To take advantage of the dazzling light show possibilities
of the system, a three-pin XLR cable can be hooked up to
the foot pedal to send DMX512 signals to lighting
fixtures. The Solo Performer Show Controller foot
controller requires a standard 3-pin XLR style male
connector wired to the lights as shown below:
Alien Apparatus Company, Inc.
Wiring the System
47
Note that the ground pin, pin 1, is connected to the
cable's shielding, but never to the connector's housing or
a chassis ground in any way. Doing so could cause
erratic behavior.
DMX512 signal cables must be daisy chained from light
to light and never split without using a specially designed
splitter unit.
Line Termination
All DMX512 chains should be terminated with a 120-ohm
resistor terminator to eliminate data transmission errors
due to signal reflection. DMX512 terminators are small
plug-in devices that connect a 120-ohm resistor
between pins 2 and 3.
5-Pin DMX512 Connectors
Some DMX512 light fixtures use 5 pin XLR connectors.
To use these lights, a 3 pin to 5-pin adapter cable can be
used wired as follows:
3 Pin to 5 Pin XLR Conversion
Function
3-Pin XLR
5-Pin XLR
Ground / Shield
Pin 1
Pin 1
Data – (Cold)
Pin 2
Pin 2
Data + (Hot)
Pin 3
Pin 3
Not Used
Pin 4
Not Used
Pin 5
48
Wiring the System
Solo Performer Show Controller User’s Guide
The Conversion from 3 pin DMX512 signals to 5 pin
signals is done very often in the lighting industry.
Adapter cables can be found for this purpose in most
lighting supply stores.
High-Performance Audio
Most people will not be satisfied with the audio merely
coming through their computer speakers. It is
recommended that a cable be inserted in the computer's
audio-out jack (headphone jack), and be routed to an
amplified system, or to a mixing board. The following
diagram shows such a system:
Alien Apparatus Company, Inc.
Wiring the System
49
50
Wiring the System
Solo Performer Show Controller User’s Guide
The important thing to note in the above diagram is that
all of the audio, both from the computer and the stage
microphones, gets routed to a mixer. The combined
audio signal is then amplified and sent to the PA
speakers. For additional convenience, there are many PA
systems that have the mixer and amplifier combined into
one integrated package.
MIDI Cabling
Solo Performer Show Controller is capable of sending
MIDI files, program changes, and control messages to
external MIDI devices. These MIDI devices connect to
your existing computer’s MIDI interface. If you do not
yet have a MIDI interface, most music stores sell an
adapter that connects to your computer via the USB port
or serial port. Solo Performer Show Controller uses the
computer operating system’s MIDI services to send MIDI
messages, so any MIDI interface that is compatible with
your computer’s operating system as a general MIDI
interface should work.
Since Solo Performer Show Controller sends MIDI
commands, but does not receive them, only one MIDI
cable is required per device. The cable should be
connected to the MIDI interface’s MIDI out port at one
end, and the devices MIDI in port at the other end.
Multiple devices may be strung together by connecting
one device’s “MIDI Thru” port (if it has one) to another
device’s MIDI in port.
It is also important to know which channel your MIDI
device is configured to receive commands on. Refer to
Alien Apparatus Company, Inc.
Wiring the System
51
your specific device’s manual to find out how to do this,
as all devices differ. This channel number is what needs
to be used in the MIDI events that can be programmed in
Solo Performer Show Controller.
52
Wiring the System
Solo Performer Show Controller User’s Guide
8
Overview of the Software
The Playlist Editor Window
The software is primarily composed of five editor
windows. The Playlist Editor is the main window from
which all of the other editors are opened. The Playlist
Editor looks like this:
The playlist is a list of audio files, settings, and
associated event sequences that stream with them,
collectively defining a show. To the left of the playlist is
Alien Apparatus Company, Inc.
Overview of the Software
53
a listing of all saved playlists. The currently active
playlist has an orange arrow icon to the right of its name.
There are four built-in playlists that are represented by
colored rows in the Playlist Library: All Songs in Library,
All Audio in Library, All MIDI in Library, and Top 25 Most
Played.
When performing a show, the Playlist Editor window is
generally in the forefront. Chapter 10 describes the
Playlist Editor in greater detail.
The Lyrics Editor Window
The Lyrics Editor is where the text that displays with song
playback is created. To open the Lyrics Editor, a song
must first be on the playlist and be selected in yellow.
When these conditions are met, clicking on the Edit Lyrics
setup button on the Playlist Editor window opens the
Lyrics Editor. The Lyrics Editor window looks like this:
54
Overview of the Software Solo Performer Show Controller User’s Guide
Chapter 14 describes the Lyrics Editor in greater detail.
The Lightshow Editor Window
The Lightshow Editor is where light sequences are
defined that stream back with the audio. To open the
Lightshow Editor, a song must first be selected on the
playlist. Clicking the Open Lightshow Editor button will
then open the Lightshow Editor. The Lightshow Editor
looks like this:
Alien Apparatus Company, Inc.
Overview of the Software
55
Details on the creation of lightshows using the Lightshow
Editor are given in Chapter 16.
The MIDI Effects Editor Window
Sequences of MIDI effects changes can be created on the
MIDI Editor that will playback in time with the audio on
the playlist. To open the MIDI Editor, first select a song
on the playlist and then click the Open MIDI Editor
button. The MIDI Editor will then open and will look like
this:
56
Overview of the Software Solo Performer Show Controller User’s Guide
Chapter 15 covers the creation of MIDI event sequences.
The Hotkey Editor Window
Sequences of key commands can be put together in order
to send key presses to other running programs. This is
done with the Hotkey Editor. With a song selected on the
playlist, clicking the Open Hotkey setup button will open
the Hotkey Editor. The Hotkey Editor looks like this:
Alien Apparatus Company, Inc.
Overview of the Software
57
Chapter 18 describes how to create hotkey sequences
using the Hotkey Editor.
The Information Window
Another very important window is the information
window. The information window displays details about
a selected song and can be opened by double-clicking on
a playlist row.
58
Overview of the Software Solo Performer Show Controller User’s Guide
Details about the Information Window are given in
Chapter 10.
Alien Apparatus Company, Inc.
Overview of the Software
59
Starting the Software
9
Launching Solo Performer Show Controller
On Macintosh OS X systems, the Solo Performer Show
Controller application may be launched by double
clicking on the Show Controller icon found in the
Applications folder.
On Windows operating systems, the Solo Performer Show
Controller application may be launched by either double
clicking on the Show Controller desktop icon, or by
selecting Show Controller from the Solo Performer
Show Controller group in the Windows Start menu.
When Solo Performer Show Controller is launched for the
first time, you will be asked to do two things – supply a
license key and fill out registration information.
System Registration
The Registration Window is shown below:
60
Starting the Software
Solo Performer Show Controller User’s Guide
Enter the license key supplied with the software and click
the Register the Software button. The license key can
be found on the CD sleeve that came with the software.
After supplying a valid license key, you will be asked to
register the software by supplying some additional
information.
Fill out the information on the form, including the serial
number found on the rear of the foot controller.
Alien Apparatus Company, Inc.
Starting the Software
61
You may submit the registration in one of two ways.
Registration can either be emailed by clicking the Send
Registration by Email button, or it may be printed and
mailed by clicking the Print Registration to Mail button.
To email the form, make sure that you are connected to
the internet, then click the Send Registration by Email
button. A status box will open that will show the
connection status. When sending is complete, you will
see the following dialog box:
To mail the registration, click the Print Registration to
Mail button and your registration information will be
printed, along with an address to send the page to.
62
Starting the Software
Solo Performer Show Controller User’s Guide
If you click the Register Later button, you may continue
on, but bear in mind that you will be asked to register
the program the next time that it is launched.
Joint the eList
When registration is complete, you will be asked if you
would like to join the Solo Performer Show Controller
eList. The eList is a mailing list to help you stay on top
of the current Solo Performer Show Controller news such
as software updates and special offers.
If you would like to join the eList, supply your email
address and then click the Join button.
Alien Apparatus Company, Inc.
Starting the Software
63
Locate Your Audio Files
You will next be asked to locate your audio files.
Click the Choose Folder… button to show Solo
Performer Show Controller what folder you would like to
use as your audio library folder. You may also create a
new folder by choosing the Create Folder… button or
simply go on without specifying a folder by clicking the
Choose Later button. The audio library folder can be set
at any time in the Preferences window.
64
Starting the Software
Solo Performer Show Controller User’s Guide
Playlists And Audio
10
Playlist Editor Screen Layout
The Playlist Editor window can be configured in several
way to suit the needs of the task that is being perfomed.
The playlist itself can be set up to show a varitey of
different infomation. The default settings show the song
number, the song title, the attached sequences, the song
ending, the volume, and the tuning. Clicking the
"Expand Playlist" shows all of the columns of information
that are available in a horizontally scrolling list.
Alien Apparatus Company, Inc.
Playlists And Audio
65
Pressing the same button returns the playlist to its
normal view. Adding or removing columns from the
normal view can be done in the program's Preferences
window as described in Chapter 20.
Button View is a different way of looking at the playlist
and will be discussed in greater detail later. Button View
shows all songs on the playlist as an array of buttons
rather than as a single-column list. Button View can be
turned on by clicking the "Switch to Button View" button
below the playlist:
66
Playlists and Audio
Solo Performer Show Controller User’s Guide
A click on “Switch to Playlist View” returns the view back
to the playlist.
The Playlist Editor is divided into three panes - the
Playlist Library, the Playlist, and the Lyrics Display. Two
splitter bars are located below the panes that allow the
panes to be resized by dragging or collapsed by doubleclicking. Once collapsed, a pane may be expanded again
by another double-click.
Alien Apparatus Company, Inc.
Playlists And Audio
67
Playlists
Playlists are the lists of songs to be played, along with
their associated settings. Settings include song order,
volume setting, tuning setting, lightshow/MIDI/hotkey
associations, and ending conditions. The Playlist Library
is displayed on the left side of the screen, and the playlist
is right next to it, as shown below.
The “active” playlist has an orange arrow icon next to its
title in the Playlist Library as shown below:
68
Playlists and Audio
Solo Performer Show Controller User’s Guide
When Solo Performer Show Controller is first launched,
the last used playlist will open automatically. If the
program has never been used before, the “All Songs in
Library” built-in playlist will be active.
Sorting Playlists
Playlists can be sorted by any column, either ascending
or descending. To sort a playlist, simply click the column
heading of the column that you wish to sort by. To
reverse the sort direction, simply click the heading again.
To revert back to the unsorted playlist, click the heading
of the first column.
Default Playlists
Alien Apparatus Company, Inc.
Playlists And Audio
69
Four default playlists appear in the playlist library: All
Songs in Library, All Audio in Library, All MIDI in Library,
and Top 25 Most Played. These playlists list the
appropriate songs from the folder that is set up as the
“Audio File Folder” in the preferences.
Besides providing quick access to all of the songs in the
library, the default playlists also have another
significance. All settings applied to songs on the default
playlists become the default settings for that song when
creating new playlists. Suppose, for example, that a
song is chosen on the “All Songs in Library” playlist, and
the volume is set to 50, and a lightshow and MIDI event
sequence are added to it. When a new playlist is made,
and this song is added to it, the song will be
automatically setup with the settings from the default
playlist. Note that changing the settings in a default
playlist does not affect previously created playlists.
Making a New Playlist
Clicking the “plus” icon that is located just underneath
the playlist library creates a new playlist. After clicking
the “Create New Playlist” button, a new playlist will
appear in the playlist library and its title will be
highlighted so that it can be renamed. Once an empty
playlist is created, songs can be added to it.
70
Playlists and Audio
Solo Performer Show Controller User’s Guide
Adding Audio to the Playlist
Audio is added to a playlist in one of many way. Audio
may be added by choosing Add to Playlist or Add
Folder Playlist under the Audio menu.
Alien Apparatus Company, Inc.
Playlists And Audio
71
Alternatively, audio may be added by choosing “Add
Song…” under the playlist “Action” menu, right-clicking
or control-clicking the playlist and choosing “Add
Song…” from the menu that pops up, or by dragging and
dropping a song from one playlist to another.
72
Playlists and Audio
Solo Performer Show Controller User’s Guide
A dialog box will appear where the audio file may be
selected for adding to the playlist. The default starting
folder is the audio folder that is set in the Preferences.
See Chapter 20 for details about changing the program
preferences.
Another way to add audio to a playlist is by dragging and
dropping. To do this, first open a playlist that has a song
or group of songs in it that is to be added to the new
playlist. Select those songs on the playlist by clicking on
them, then click the mouse button and hold it down.
While the mouse button is held down, drag the mouse so
that it is on top of the name of the playlist that is to
receive the songs. Let go of the mouse button, and the
songs have been added to the playlist, along with all of
the settings for those songs from the old playlist. To see
what was done, open the new playlist by clicking on the
playlist’s name in the playlist library.
After adding a song file to the playlist, the playlist will
look something like this:
There are several things to note about a row in the
playlist.
First, when a song is added to the list, you will notice a
stop sign icon in the row. This is an indication that after
the song is done being played, no more songs will play
unless the play button is pressed again. This is a “Stop”
Alien Apparatus Company, Inc.
Playlists And Audio
73
ending. If the Stop icon is clicked on, it will turn into a
green arrow. This signifies that after the song is done
being played, the next item on the list will start
immediately without any user intervention. Subsequent
clicking on the ending icon will step through the various
ending options. See the section on Ending Options
further in this chapter.
Secondly, if effects, such as a lightshow, MIDI event
sequence, or a hotkey sequence are associated with the
song, one of several effects icons will appear in the row.
Details of how MIDI event sequences are made and are
set to a playlist follow in Chapter 15. Similarly, details on
lightshows follow in Chapter 16 and hotkey event
sequences follow in Chapter 18.
The screen shot below shows various the ending icons
and the various effects icons:
Note that the song, “Amongst Us” has a Continue arrow
in the ending column. When “Amongst Us” is done
playing, the next song on the list “Little Green Men” will
begin automatically. The Stop icon in the “Little Green
Men” row indicates that the show will stop after “Little
Green Men” is done playing, awaiting the play button to
74
Playlists and Audio
Solo Performer Show Controller User’s Guide
be pressed before resuming with the song “Roswell or
Bust”.
Observe that most songs have an effects icon in the FX
column, indicating that some kind of event will be
streamed along with the audio. The type of icon
indicates what type(s) of events are being streamed with
the playback. The following is a list of effects icon types:
Lightshow Indicator
MIDI Indicator
Hotkey Indicator
MIDI & Lightshow Indicator
Hotkey & Lightshow Indicator
Alien Apparatus Company, Inc.
Playlists And Audio
75
MIDI & Hotkey Indicator
MIDI, Lightshow, and Hotkey Indicator
Supported Audio File Formats
Solo Performer Show Controller is capable of playing a
variety of audio file formats in a playlist. Essentially, the
software supports any audio format supported by the
installed version of QuickTime. Supported audio formats
are shown in the following table:
File Type MP3 M4A Audio Interchange File Format Wave MIDI MIDI Karaoke
File Extension
.mp3
.m4a
.aif, .aiff
.wav
.mid, .midi
.kar
Note that the file extension may or may not be visible on
the audio file, depending on whether or not your
operating system is set up to show or hide file
extensions. Also, on Macintosh systems, file extensions
are not always necessary, so long as the embedded file
76
Playlists and Audio
Solo Performer Show Controller User’s Guide
type is set correctly. Setting the file type is not usually
done by the user, but by the program that created the
file. If the file was not made on a Macintosh, it might not
be recognized as an audio file if it’s file name does not
end in the extension shown on the chart above.
Therefore, using file name extensions is recommended.
MIDI File Playback
While audio files play back on the audio system of the
computer, MIDI files in the playlist can be played either
on the computer’s audio system, or can be streamed to
an external MIDI device. The destination for the MIDI file
playback is set in the preferences. See Chapter 20,
Customizing, for more information on how to choose the
MIDI file playback destination and other MIDI options.
Playlist Selections
The song that will be played next is highlighted in yellow.
This selection may be changed by clicking another row of
the playlist, by using the up and down arrows on the
keyboard, by using the foot controller to scroll the
selection, or by typing a song name on the keyboard.
When a song starts to play, its yellow highlighting will
change to green, and the next line of the playlist will
highlight in yellow. The row that is to be played next
(the yellow row) may be changed while another song is
being played.
Alien Apparatus Company, Inc.
Playlists And Audio
77
In the above example, “Alien Song” is the currently
playing song, while “Roswell or Bust” is the song to be
played next.
Reordering Playlist Items
The order of playlist items can be changed by clicking on
an item and dragging it to a new position. When
dragging a playlist item, a black line will appear between
the rows where the song will be inserted.
78
Playlists and Audio
Solo Performer Show Controller User’s Guide
In the picture above, “Roswell or Bust” is selected (its row
is highlighted in yellow) and is being dragged up the list
between “Alien Song” and “Amongst Us”. Note that the
mouse button is still being held down in this picture.
After the mouse button has been released, “Roswell or
Bust” takes its new position, right after “Alien Song”.
Removing Playlist Items
Audio files may be removed from the playlist by first
selecting the file to be removed by clicking on it, then
selecting the Remove From Playlist item on the Audio
menu. Alternatively, Remove Song may be chosen from
the playlist’s Action button menu.
Alien Apparatus Company, Inc.
Playlists And Audio
79
In this example, the song in the selected row, “Roswell or
Bust”, will be removed from the playlist.
Ending Options
Each song on the playlist has several ending options.
The ending can be set by clicking on the icon in the “End”
column of the playlist. Every time the ending icon is
clicked, it will toggle to the next setting. Here is an
explanation of what each ending type does:
Stop
The song will stop when it gets to the end and wait for
the play button to be pressed before resuming to the
next song on the playlist.
80
Playlists and Audio
Solo Performer Show Controller User’s Guide
Continue
The next song on the playlist will start playing
automatically when the previous one ends.
Full Loop and Continue
The audio will loop continuously. When the stop button
is pressed, the audio will keep going until it reaches the
end of the loop, then the next song will start
automatically.
Partial Loop and Continue
The audio will loop continuously. When the stop button
is pressed, the audio will stop immediately and the next
song will start automatically.
Full Loop and Stop
The audio will loop continuously. When the stop button
is pressed, the audio will keep going until it reaches the
end of the loop and then it will stop and wait for the play
button to be pressed before resuming the next song.
Partial Loop and Stop
Alien Apparatus Company, Inc.
Playlists And Audio
81
The audio will loop continuously. When the stop button
is pressed, the audio will stop immediately and wait for
the play button to be pressed before resuming the next
song.
Volume Adjustment
The playback volume of a playlist item may be set by first
selecting the item on the playlist by clicking on it so that
it is highlighted in yellow, then move the volume slider to
adjust the volume. The volume level is indicated on the
playlist row as a percentage.
In the above example, “Alien Song” is the selected row
and the volume slider has been moved to 75%. Note that
the playlist column “Vol” indicates 75.
82
Playlists and Audio
Solo Performer Show Controller User’s Guide
Time Remaining in Playlist
A display of how much time is remaining in the playlist is
presented immediately below the playlist. This
countdown updates in real-time as the playlist is being
played.
Audio File Tuning Setting
The tuning of an audio file on a playlist may be adjusted
by first selecting the item on the playlist so that it is
highlighted in blue, then move the tuning slider to adjust
the tuning. What happens is that the audio will be played
back slower or quicker, thus changing the pitch. Note
that the synchronization of other playlist events, such as
light events and lyric text, are not affected by the
difference in speed. All of these will happen at a slightly
slower or quicker rate as well. The tuning setting is
shown on the playlist row. A setting of 0 indicates that
there is no adjustment.
Alien Apparatus Company, Inc.
Playlists And Audio
83
See Chapter 12 for more detailed information about how
to use the tuning options available.
Information Window
Double-clicking on a playlist row brings up the
Information Window for that song. The Information
Window is organized into several tabs– General, Events,
Lyrics, and MIDI. All of the settings in the Information
Window apply only to the song that is selected on the
playlist.
The General tab displays information about the song,
such as how long it is and how many times it has been
played. Adjustments to the play count may be made
here. Clicking on the small arrow icons will increment or
decrement the displayed number.
84
Playlists and Audio
Solo Performer Show Controller User’s Guide
The Events tab displays the event sequences that have
been chosen to play along with the song playback. By
using the buttons provided, these settings may be
changed.
Also in the Events tab is a setting for ending events.
These events will display after the song is done being
played. This can be very useful for setting a reverb effect
to the off position, for example, in order to talk to the
audience between songs. Another typical use would be
to set the lights to display a scene that is appropriate for
the time between songs.
The Lyrics tab is used to set the track in a MIDI file to use
to display lyrics and chords. Refer to Chapter 14 for
more details.
The MIDI tab is used to suppress instruments from
playback, substitute instruments, and transpose notes in
a MIDI file. See Chapter 11 for more details.
Saving Playlists
Playlists are saved automatically. You may, however,
make a copy of an existing playlist by choosing Save
Playlist As… from the File menu.
When saving, the default file location for the saved
playlist is the “Playlist Folder” that is chosen in the
Preferences panel. See Chapter 20 for details.
Alien Apparatus Company, Inc.
Playlists And Audio
85
Playlist Locking
Sometimes temporary changes need to be made to a
playlist, but these changes are not to be saved. For
example, while performing a playlist on stage, it may be
desirable to change a song’s volume. To do this without
saving these changes, simply click the “Unlock” icon so
that it toggles to the “Lock” icon. When the “Lock” is
active, no changes to the playlist will be saved.
Opening Playlists
To open an existing playlist, simply click its title in the
playlist library. The playlist will then open and an arrow
icon will appear next to the name that was clicked on.
To open a playlist that is located in a different folder than
the one that is set as the default playlist folder, choose
Open Playlist in the File menu and a dialog box will
open where you can navigate to the playlist.
Recently used playlists may also be opened by choosing
its file name in the Open Recent Playlist sub-menu in
the File menu.
Note that when opening a playlist, the default folder for
opening a playlist is the one that is chosen in the
86
Playlists and Audio
Solo Performer Show Controller User’s Guide
Preferences panel. See Chapter 20 for details about
customizing Solo Performer Show Controller.
Button View
Button view can be used to show all of the songs in the
currently active playlist as an array of buttons. As
mentioned at the beginning of this chapter, button view
may be shown by clicking the “Switch to Button View”
button at the bottom of the playlist window.
Alternatively, the Toggle View menu choice in the File
menu will switch back and forth between the two views.
The hotkey, command-T on a Macintosh or control-T
on Windows, will accomplish the same task.
The buttons in button view can be set up in a variety of
different sizes, column layouts, and colors and can be
moved. It is important to note that the position of the
buttons does not need to correspond to the order on the
playlist. Initially, the buttons will be set up to match the
playlist order, however, the buttons may be moved to
another position without affecting the playlist order. To
move a button, first the button view must be unlocked by
clicking on the lock button:
Once the button view buttons are unlocked, the currently
selected button will have a blue ring around it and it may
be dragged to a new location.
Alien Apparatus Company, Inc.
Playlists And Audio
87
Once dropped, the button will snap to the closest
position on its grid the other buttons will re-order
themselves.
The size of the buttons may be changed by choosing a
new size from the Action button menu.
88
Playlists and Audio
Solo Performer Show Controller User’s Guide
Also from the Action button menu, button colors may be
changed.
By choosing Match Playlist Order, the buttons will reposition themselves to take on the order of the playlist.
Incidentally, back in playlist view, there is a menu option
in the Action button menu called “Match Button View
Order” that conversely arranges the playlist to match the
button ordering.
The number of columns that are displayed can be chosen
from the Action button’s menu as shown:
Alien Apparatus Company, Inc.
Playlists And Audio
89
If the currently selected playlist has so many songs on it
that there is not enough room for all of the buttons, the
remaining buttons will go to another page. The Page Up
and Page Down buttons can be used to flip between the
button view pages.
Button view may be navigated in several ways. Pressing
the arrow keys on the keyboard will move the selection
up, down, right or left. Using the foot controller, button
view selections may be scrolled through as well. See
Chapter 19 regarding the use of the foot controller.
Much like the playlist view, button view also responds to
key presses. By typing the first characters of a song
90
Playlists and Audio
Solo Performer Show Controller User’s Guide
name, button view will jump to the first song having
those characters. Pressing tab will advance to the next
match.
Audio File Tips
Audio files used for backing tracks can be obtained from
a variety of sources. Here are a few examples of how
backing audio may be obtained:
• From a compact disc recording. Note that on Windows
systems, compact disc audio must first be converted to
another format such as .mp3 or .aiff to be used with Solo
Performer Show Controller
• From a multi-track recording with selected tracks
muted
• From MIDI files obtained on the internet (see Chapter
11 for a method to suppress selected tracks)
• From MIDI files constructed with a computer program
that sequences MIDI files
• From internet vendors who transcribe MIDI files from
audio files for a nominal fee
• From a drum machine recording
• From mail order houses and internet web sites that sell
music with only rhythm tracks. This type of music is very
Alien Apparatus Company, Inc.
Playlists And Audio
91
commonly distributed for practicing musicians and
quality can be very good.
Using Click Tracks
Click tracks may be incorporated in a variety of ways.
One way is to mix down the audio files as mono files and
then construct stereo files containing the mono mix on
one channel and a click track on the other. Most
musicians underestimate how a mono audio track sounds
when performing live, but once they realize that stereo
tracks are optimized for listening at one location only, it
may make more sense.
Another way to accomplish a click track is to mix down
the audio files in a surround-sound format such as Dolby
5.1 or 7.1. To accomplish this, an audio interface that
supports multi-channel surround sound playback is
required.
92
Playlists and Audio
Solo Performer Show Controller User’s Guide
MIDI File Options
11
Removing Instruments from a MIDI File
Track suppression is used to remove instruments from a
MIDI file that are unwanted. Suppose that you have a
MIDI file that has 12 tracks, and one of the tracks is a
vocal melody track played by a piano. Suppose further
that another track is a lead guitar track. If you were a
singing guitar player, for example, you would not want
these two tracks to be played back. You would probably
only want the rhythm tracks to be included.
To suppress MIDI instruments from playing back, choose
Remove Instruments from the MIDI menu.
Alien Apparatus Company, Inc.
MIDI File Options
93
A new window will open that displays all of the General
MIDI instruments. All instruments that are checked will
be played back. Simply uncheck every instrument that
you don’t want to have playing. After the instrument
selections and de-selections have been made, click either
the button labeled “Apply to Entire Playlist” or “Apply to
Selected Song”.
Another way to remove unwanted instruments is to
double-click a playlist selection to open up the
Information window. The MIDI tab displays all of the
tracks that appear in the MIDI file, and what instrument is
being played on it. Tracks may be enabled or disabled
94
MIDI File Options
Solo Performer Show Controller User’s Guide
by clicking the check box. Tracks without a check in the
Enabled column will not play back.
Changing MIDI Instruments
The instrument that is played back on a MIDI track can be
changed to any one of the General MIDI instruments.
Double-click on a song on the playlist to bring up the
Information Window. The MIDI tab displays a listing of
all of the tracks and instruments that are being used in
the MIDI file. To choose a different instrument for a
track, simply click the name of the instrument in the
popup menu and choose a different one.
Alien Apparatus Company, Inc.
MIDI File Options
95
Transposing MIDI Notes
There are two ways to transpose notes of a midi file. The
first way is to use the tuner slider on the Playlist Editor
window. Changing the tuning of a song that is a MIDI file
actually transposes it. Transposition can be done up to a
whole octave either up or down this way. Note that this
affects all tracks in the MIDI file.
To change the transposition of only specific tracks,
double-click the playlist selection to bring up the
Information Window. The MIDI tab displays a listing of
all of the tracks in the MIDI file. To the right side of each
row, there is a slider that can be used to adjust the
transposition of the track. Using this slider, notes played
on each track may be adjusted a full octave up or down.
96
MIDI File Options
Solo Performer Show Controller User’s Guide
Tuning
12
Tuning Your Instrument
Pressing the tuner button plays a tone that can be used
for tuning your instrument. The instrument that is
played back for tuning can be chosen from a wide variety
of instruments in the Preferences panel. The note that is
played can also be set in the Preferences panel as well.
See Chapter 20 for details on setting the preferences.
The default tuning note is A 440Hz.
To stop the tuner, simply press the tuner button a
second time. Note that the volume of some instruments
decay over a period of time, while others continually play.
To restart an instrument that has a decaying playback,
press the tuner button to stop the tuner play mode, and
then press it again to start it going again.
Alien Apparatus Company, Inc.
Tuning
97
Tuning the Playlist Audio
Once your instrument is in tune with the tuner, the
tuning of the playlist audio must be set. The tuning level
can be set as described in Chapter 12, however, to assist
in tuning, a tuning loop can be set up. A tuning loop is a
section of the audio file that will be repeated
continuously so that proper tuning can be obtained.
To set up a tuning loop, follow these steps:
1. First identify a clean note in the audio file that you
wish to have repeated indefinitely.
2. Move the playback position to just before the note.
3. Select Set Left Locator from the Tuning button’s
menu. This will change the tuning loop left position
readout to the current position.
98
Tuning
Solo Performer Show Controller User’s Guide
4. Move the playback position so that it is just after the
note.
5. Select Set Right Locator from the Tuning button’s
popup menu. This will change the tuning loop right
position readout to the current position.
6. Select Play Tuning Loop from the Tuning button’s
popup menu to loop-play the audio contained between
the two positions that have been set.
7. Select Stop Tuning Loop from the Tuning button’s
popup menu to stop the loop playback.
8. If you find that the tuning loop was not set accurately
and that the playback starts too soon or too late, simply
move the playback position to a better spot, then select
Set Left Locator from the Tuning button’s menu again.
This will update the starting location of the loop.
Similarly, the ending position may be updated by moving
Alien Apparatus Company, Inc.
Tuning
99
the playback position and selecting Set Right Locator
from the Tuning button’s menu again.
The Go to Left Locator and Go to Right Locator menu
options on the Tuning button’s menu snap the current
playing position to the left of the tuning loop or to the
right, respectively.
With a well-chosen tuning loop, the playback of the loop
may be compared to the playback of your instrument.
Since it has already been established that your
instrument is in tune with the tuner, the proper thing to
do is to adjust the tuning of the audio file by moving the
tuning slider until the tuning loop is in tune with your
instrument.
Adjusting the Global Tuning
100
Tuning
Solo Performer Show Controller User’s Guide
A slider is available to provide “global tuning”. When this
slider is moved, all playlist audio will be tuned up or
down an equivalent amount.
Alien Apparatus Company, Inc.
Tuning
101
102
Event Sequences
Solo Performer Show Controller User’s Guide
13
Event Sequences Overview
The Three-Step Process
To add events to songs, such as lyrics, lightshows, MIDI
effects changes, and hotkeys, three steps must be taken.
First, each individual event needs to be defined.
Secondly, each event needs to be positioned in a timesequence. And thirdly, each sequence must be attached
to the song itself on the playlist.
In this manner, multiple lightshows could, for example,
be created in for a single song by making two or more
lightshow sequences. Then depending on what lighting
is planned for the show, the appropriate lightshow file
could be chosen for that performance and attached to
the playlist item.
Because song lyrics are not apt to change from show to
show, at least for the same audio file, lyric sequences
work slightly differently than the others. For lyric
sequences, only one lyric sequence may be created for
each song. This actually simplifies the process because
the third step of attaching the sequence to a playlist item
does not need to be done - it happens automatically.
In general, the steps are:
Alien Apparatus Company, Inc.
Event Sequences
103
1. Create the individual events
2. Arrange the events into a time-sequence
3. Attach the sequence to the song on the playlist
The first two steps are done in one of the editor
windows, such as the Lyrics Editor, the Lightshow Editor,
the MIDI Editor, or the Hotkeys Editor. This can be done
by selecting a song on the playlist and then choosing
either Edit Lyrics, Build Lightshow, Build MIDI Sequence,
or Build Hotkey Sequence from the Action button's menu
on the Playlist Editor window.
The third step is done in the Playlist Editor by selecting
the song on the playlist and then choosing either Add
Lightshow, Add MIDI Sequence, or Add Hotkey Sequence
from the Action button's menu on the Playlist Editor
window.
The following chapters will examine each of the event
sequence types individually, however, the process for
each is very similar - especially if you keep in mind the
three-step process described above.
104
Event Sequences
Solo Performer Show Controller User’s Guide
Lyrics
14
Adding Lyric Text Displays to a Song
Lyrics may be added to any song on the playlist so that
they appear onscreen at the appropriate time during
song playback. To add lyrics:
1. Select a song on the playlist by clicking it so that it
highlights in yellow.
2. Select the Edit Lyrics item from the Lyrics menu or
select the Action button’s Edit Lyrics menu option as
shown.
3. The Lyrics Editor window opens up with a lyrics display
window and a table to the right.
Alien Apparatus Company, Inc.
Lyrics
105
4. Move the song’s playing position to where a lyric text
display event is to be inserted by clicking into the
waveform display. The playback position, represented by
the green line, will move to the position of the mouse
click.
106
Lyrics
Solo Performer Show Controller User’s Guide
Use the zoom button to help locate the exact point where
the lyric event is to be inserted.
5. Type the lyrics to be displayed at this song position by
clicking in the black rectangle and typing the lyrics. It
may be desirable to add a few blank lines at the
beginning to space the lyrics so that they are centered
vertically.
Alien Apparatus Company, Inc.
Lyrics
107
6. Click the Marker Color button to select a color for the
marker to be used for the new lyric event.
108
Lyrics
Solo Performer Show Controller User’s Guide
7. Press the Add Lyrics to Timecode button to add the
lyrics to the lyric list on the right.
The lyrics will now be inserted in the time code list.
Notice that a row has been added to the timecode list
and that a marker has been added to the event track.
Alien Apparatus Company, Inc.
Lyrics
109
7. Move the song’s playback position to another place
and add additional lyrics. Make sure that the lock icon is
in the unlocked position (See further in this chapter for
information about the lock icon). Note that the black
screen still retains the previous lyrics, so long as the
playback position is ahead of the previous location. The
display will always show the lyrics that will be displayed
on-screen at the proper moment. Pressing the Clear
Lyrics button clears the display so that new lyrics may be
entered.
110
Lyrics
Solo Performer Show Controller User’s Guide
8. The display of the lyric may be tested at any time by
moving the song’s position slider so that the playback
position is before the lyric event, then start the song’s
playback by clicking on the play button. The song will be
heard and the lyric text will appear when the song
reaches the time that was set.
If the lyrics do not appear at the correct time, the time
may be tweaked by dragging the event marker on the
event track to a new location. The position may also be
edited by clicking on the cell in table that contains the
lyric’s timecode. The timecode may then be manually
edited by typing another timecode. Note that whatever is
typed must be in timecode format or it will be rejected.
The format is XX:XX:XX:XXX where the X’s are numbers
indicating hours, minutes, seconds, and milliseconds.
Make sure that colons are used where indicated.
Alien Apparatus Company, Inc.
Lyrics
111
Deleting a Lyric Text Event
Lyrics may be deleted from the playback list by doing the
following:
1. Select the lyric event to be deleted from the timecode
list by clicking it, or by clicking on the marker
2. The song’s playback position jumps to the timecode of
the selected row
3. Select Delete from the Action button’s popup menu.
Alternatively, right-click or control-click on the marker
itself or the timecode entry and choose Delete from the
contextual menu.
4. The lyric is deleted from the table
112
Lyrics
Solo Performer Show Controller User’s Guide
The Lock Button
When the lock button is unlocked, the lyrics display will
update the screen as the song position is moved. When
in the locked position, the lyrics display will not change
automatically with the song. The locked position is very
useful while editing, but the unlocked position is
generally what is used for song playback.
Using the Clipboard to Copy and Paste Lyrics
Lyrics can be copied from another source such as a word
processor or text editor, and pasted into the Lyrics Editor
using Paste from the Edit menu. This can be done one
screen-full of information at a time, or the new Slice
feature can be used.
To Slice button, along with the Lock button, make it easy
to copy and paste an entire song’s lyrics to the Lyric
Editor. Follow these steps to paste complete lyrics into
Solo Performer Show Controller:
1. Copy lyrics from a Word Processor or text editor using
Copy on the text editor’s Edit menu.
2. Return to Show Controller and move the song position
to where the first lyric is to be placed.
Alien Apparatus Company, Inc.
Lyrics
113
3. Choose Paste from the Edit menu. At this point, all
of the lyrics for the entire song should be in the lyrics
display.
4. Click on the Lock button so that when the song
position is moved, the lyrics will not change.
5. Add some blank lines at the top to space the text
down a bit. Then move the text insertion point to the
end of the first lyric event to be saved to the timecode by
clicking the mouse in the lyric text.
114
Lyrics
Solo Performer Show Controller User’s Guide
6. Click the Marker Color button to select a color for the
marker to be used for the new lyric event.
Alien Apparatus Company, Inc.
Lyrics
115
7. Click the Slice button.
All of the lyrics that were before the text insertion point
have been saved to the timecode list at this position and
a new event marker has been added. Additionally, the
first lyrics have been deleted from the current screen full
of text so that the rest of the lyrics can be worked with.
The Lyrics Editor should now look like this:
8. Move the song position to the location of the next
part of the lyrics. Note that the lyric display should not
have changed. If it did, the Lock button is likely not
116
Lyrics
Solo Performer Show Controller User’s Guide
active, and you will have to go back to the word
processor to copy the lyrics again.
9. Move the text insertion point to the end of the next
group of lyrics to save
10. Click the slice button to place the lyrics.
11. Repeat this process until all of the lyrics have been
placed in the timecode list.
12. Click the Lock button to unlock the changing of the
lyrics display.
13. Play back the song from the beginning to verify that
the lyrics are saved correctly.
If the timecode requires a bit of tweaking to get the lyrics
to appear at the right time, simply drag the event marker
on the event track to a new location. It may be helpful to
zoom in first to enlarge the waveform display near the
event marker.
Another way of editing the position of an event is by
clicking on the time in the timecode list and editing the
numbers.
Most of the lyrics will likely require that some formatting
be done to them so that they are centered in the display,
for example. To edit a lyric page, click the timecode of
the page in the timecode list to make the lyric be shown.
Make sure that the lock is in the unlocked position when
this is done. Now, edit the display as much as required.
When finished, simply press the “Put Lyrics in Timecode”
Alien Apparatus Company, Inc.
Lyrics
117
button and the current display will overwrite the previous
one.
Exiting the Lyric Editor
When finished entering lyrics, simply close the window.
This can be done on a Macintosh computer by clicking
the red dot in the title bar.
On Windows Computers, to exit out of the Lyrics Editor,
click the red close box as shown:
When the playlist is run in the Playlist Editor, the lyrics
will now display onscreen.
Embedded Text In Karaoke & MIDI Files
Any text that is embedded in a MIDI file may be used as a
source of lyrics. Karaoke MIDI files, whose filename ends
in “.kar”, work as well. To do this, double-click on the
song in the playlist. This will open the Information
window. On the Lyrics tab, select a track to use for the
lyrics. Another track may optionally be selected to
display the chords of the song as well.
118
Lyrics
Solo Performer Show Controller User’s Guide
After choosing which tracks to use a source of lyrics and
chords, the sample lyric display window shows the result.
Dragging the slider that is under the sample lyrics
display changes the lyrics pages.
Upon leaving the Information window, the lyric display in
the Playlist Editor will be updated to match the
selections.
If using embedded lyrics, and a change or addition is
desired, the lyrics must first be converted to the normal
Solo Performer Show Controller lyrics format. To do this,
simply choose Convert Embedded Lyrics from the
Lyrics menu. After doing this, click on the Edit Lyrics
setup button and the lyrics may be edited as usual.
Alien Apparatus Company, Inc.
Lyrics
119
Using LRC Lyric Files
LRC lyric files are text files that contain lyrics and
associated time code and have a filename that ends with
“.lrc”. LRC files are fairly common and can be found at
various web sites on the internet.
To use an LRC lyric file with Solo Performer Show
Controller, first select a song on the playlist. Then
choose Import LRC File from the Lyrics menu. A dialog
box will appear that prompts for the LRC file. Select the
file that is to be used with the selected song and click
Open. A lyric file for use with Solo Performer Show
Controller will be automatically generated for the song
using the data that is in the LRC lyric file.
Lyric Text Tips
There are a couple of approaches to entering lyrics. In
one approach, each phrase may be entered as an
individual event. Alternatively, a whole verse may be
entered and allowed to stay onscreen for a long period of
time. Either technique may be employed with success.
Another technique that may be done is to insert blank
screens a few seconds after a lyric is displayed. This
works particularly well when a lyric is repeated a few
times in a row. Without the blanking of the screen, one
would not know when the second lyric is to be, because
the appearance of the screen would be the same.
Another technique that may be used is to put non-lyrical
information on the screen that may be helpful during a
performance. For example, when a guitar solo is coming,
120
Lyrics
Solo Performer Show Controller User’s Guide
one could put a lyric display that reads “(Guitar Solo)” so
that the performer knows what needs to be done.
Whatever such informational text needs to be displayed
can be displayed. Use lyric text as your information
billboard.
Alien Apparatus Company, Inc.
Lyrics
121
122
MIDI
Solo Performer Show Controller User’s Guide
MIDI
15
Introduction
Sequences of MIDI program changes and control
messages can be applied to items on the playlist. While
this functionality was initially intended to change presets
and individual settings on effects units automatically as
the show runs, there is enough versatility to allow artists
to be very creative.
MIDI event sequences are composed of one or more MIDI
events, each of which can contain up to six sub-events.
This allows, for example, six different effect parameters
to be changed all in one shot and saved as a MIDI event.
Physical MIDI devices are cabled to your computer
system's MIDI interface. For details on this, see Chapter
7, Wiring the System.
MIDI Event Editor
To begin creating a sequence of MIDI events to add to a
playlist, first select a playlist item, and then select Build
MIDI Sequence from the Action button’s menu.
Alien Apparatus Company, Inc.
MIDI
123
The MIDI events editor now open and looks like this:
The song that was selected in the playlist is now available
for playback, and when it plays, its lyrics, if any have
been defined, will show in the black rectangular lyrics
124
MIDI
Solo Performer Show Controller User’s Guide
display area. To the bottom right of the screen is a
listing of all previously saved MIDI events. Above this list
is a listing of the MIDI sequence that will be built. The
controls under the lyric display area are used to create
new MIDI events. Action buttons under the timecode list
and event library list are used to create and manage the
events.
Creating a MIDI Event
To begin creating a MIDI event, first select the event type
that is desired in the drop down list as shown.
Then choose the MIDI device that will receive the MIDI
messages by clicking on the drop down MIDI Destination
list.
Alien Apparatus Company, Inc.
MIDI
125
In this example, Solo Performer Show Controller found
that there are two MIDI devices connected to the
computer’s MIDI system: a TC Halion VoiceLive effect unit
and a Digitech GNX3 guitar processor. If you don’t see
your MIDI devices showing up, choose the Launch MIDI
Control Panel… menu option on the MIDI pull down
menu. This will open up your computer system’s MIDI
control panel so that you can debug your setup.
Now select the channel that the device will receive the
commands on.
If you are uncertain about which channel number to use,
try using channel 1. Most MIDI devices look for MIDI
126
MIDI
Solo Performer Show Controller User’s Guide
signals on channel 1 unless they are specifically setup to
look at another channel.
Finally, choose the program number to send to the
effects unit in the P1 popup menu. In this example, we
would like to change the guitar to preset number 55
during the chorus of our song.
Program change events do not require a Parameter 2
value, thus the P2 popup menu is inactive. This P2 value
is only needed for Control Message and Note-On events.
We can now test what we have to make sure that it works
by pressing the Send button.
Alien Apparatus Company, Inc.
MIDI
127
After pressing the send button, the Digitech GNX3 unit
changed its preset, but it changed to preset number 56!
Many MIDI effects units display their preset numbers
starting with one, even though they start with zero
internally. This means that on some effects units, in
order to change to a displayed preset number, we would
have to subtract one from the displayed number and use
that as our program number. So, to get preset number
55 to appear on the GNX3 unit in our example, we would
have to use 54 as our program number. Note that there
is a preference item that can be set to make this easier.
The preference item “renumbers” the program changes
so that their starting program number shows up as 1
instead of 0. Setting this preference item in this way will
make the correlation between the software’s display and
the MIDI device compatable.
To continue with our example, suppose further that we
want to change both the guitar sound and the vocal
reverb level during the chorus of a song at the same
time. To do this, we can add a second line of
128
MIDI
Solo Performer Show Controller User’s Guide
instructions to our MIDI event. The second line will be a
program change to the VoiceLive processor to change its
reverb setting to 85.
First, choose the event type Program Change in the drop
down list.
Now choose the device to receive the Control Message
and the channel that the device will be reading from.
Now type in the Control number for the parameter that is
to be controlled followed by the value that that control is
to receive. In our example, we want to change the reverb
level of the VoiceLive unit to 85. The VoiceLive manual
Alien Apparatus Company, Inc.
MIDI
129
tells us that control number 91 sets the effect level and
can accept a value between 0 and 127.
After testing the control message by pressing the Send
button, the group of two MIDI messages can be saved as
a MIDI event by clicking the Plus button located under
the Saved MIDI Events list.
Note that before saving, you may change the color of the
event’s marker by choosing a color from the popup menu
under the Saved MIDI Events list.
130
MIDI
Solo Performer Show Controller User’s Guide
After pressing the Plus, you will be prompted for a file
name for the new MIDI event. By default, the MIDI events
will be saved in the location chosen as the default MIDI
event files location that is set in the Preferences panel.
Most users simply choose the default location. Refer to
Chapter 20 for details on changing this setting.
After saving the MIDI event, it will appear in the MIDI
events list in the lower right of the screen. In this
example, we saved the file as “Chorus & Guitar”
Saved MIDI events may be re-opened to the editing
controls by first selecting the MIDI event in the MIDI
event list and selecting Open Event from the Saved MIDI
Alien Apparatus Company, Inc.
MIDI
131
Events list Action button. This gives the opportunity to
make changes to previously saved MIDI events.
An even easier way to open a saved MIDI event for editing
is to simply double-click it in the Saved MIDI Events list.
MIDI events may be deleted by first selecting the MIDI
event from the MIDI event list and selecting Delete Event
from the Saved MIDI Events list Action button. This
action permanently erases the MIDI event file from your
hard disk, so use this with caution.
132
MIDI
Solo Performer Show Controller User’s Guide
Creating a MIDI Events Sequence
To arrange MIDI events into MIDI event sequences for use
on playlists, follow the following steps:
1. Move the song position indicator approximately to
where the event is to occur in the song by clicking
in the waveform display. Playing back the song a
few times helps to get the position figured out.
Also, use the waveform display and the lyric
display as a guide. Accuracy is not very important
at the moment, as the exact position will be
tweaked later.
2. Select the MIDI event to be inserted by clicking on
it in the Saved MIDI Events list so that it highlights.
Then click the Plus button located under the
timecode list to add the selected event to the
Alien Apparatus Company, Inc.
MIDI
133
timecode list. Be careful to select the correct Plus
button. Refer to the following picture if necessary.
The name of the MIDI event will now appear in the
MIDI sequence listing. Alternatively, MIDI events
may be dragged and dropped from the MIDI event
list to the sequence list. Users will find the drag
and drop method to be quicker.
Tip! You can drag an event straight to the event
track to place a marker at the spot where you let
go of the mouse button.
Tip! Pressing the space bar also inserts the
selected event at the current playback position.
This even works when the song is playing, so you
can play the song and when it gets to where you
want the event to be, simply tap the space bar to
insert the event.
134
MIDI
Solo Performer Show Controller User’s Guide
3. Move the song position indicator to a place before
the newly inserted event. Play the song and the
MIDI event will stream along with the playback.
Tweak the event’s position by dragging its event
marker to a new location. or by editing the time in
the sequence listing by clicking on the time
displayed and typing. All times must be entered in
the following format: XX:XX:XX:XXX where the first
two X’s are the hour, followed by minutes,
seconds, and finally milliseconds. Don’t forget to
use colons as separators. Invalid timecodes will
not be accepted to the sequence listing.
4. Repeat steps 1 through 3 as necessary to build up
a listing of MIDI events that make up a sequence.
5. MIDI events can be removed from the sequence by
selecting the row on the sequence list by clicking it
so that it is highlighted, then click press the Delete
key on the keyboard. Alternatively, selecting
Delete from the Timecode list’s Action button’s
menu will accomplish the same task.
6. Save the MIDI event sequence by choosing Save
MIDI Sequence from the File menu. You will be
prompted to supply a file name and the file will be
saved in the directory indicated in the Preferences
panel. Most users simply choose the default
Alien Apparatus Company, Inc.
MIDI
135
location. See Chapter 20, Customizing, for more
information on setting default file locations.
7. Saved MIDI event sequences may be opened by
choosing Open MIDI Sequence from the File
menu. This allows previously saved sequences to
be edited.
136
MIDI
Solo Performer Show Controller User’s Guide
Exiting the MIDI Event Editor
To exit the MIDI event editor, either close its window
using the window’s close box, or choose Exit MIDI Event
Editor from the File menu. In either case, you will be
prompted to save any MIDI sequence that has not been
saved.
Adding MIDI Event Sequences to a Playlist
Every Item in the playlist may have a MIDI Event Sequence
associated with it. To add a MIDI Event Sequence to a
playlist item, first select the playlist item by clicking on it
so that it is highlighted, and then select Add MIDI
Sequence… from the Action button’s menu located
under the playlist. Alternatively, the Add MIDI Events
menu item on the MIDI menu performs the same action.
After choosing this command, by either menu selection,
you will be prompted to select a MIDI Event Sequence file
to add to the playlist item. After selecting the file, the
selected playlist row will now display an icon that looks
like a MIDI cable plug in the FX column to indicate that
Alien Apparatus Company, Inc.
MIDI
137
that a MIDI events sequence is part of that playlist item.
Because the FX column is used to indicate the presence
of other items such as lightshows and hokey sequences
as well, the icon could be combined with the icon of
other event types. For a complete list of icon types, see
Chapter 10, Playlists and Audio.
When a song on the playlist is played, and it has a MIDI
event sequence associated with it, the MIDI events will
stream, using the timing of the song as a guide.
Removing MIDI Event Sequences from a
Playlist
MIDI event sequences may be removed from playlist
items by first selecting the playlist item that has an
attached MIDI sequence by clicking on it so that it is
highlighted, and then selecting Delete MIDI Sequence…
from either the Action button’s menu under the playlist
or from the MIDI menu on the menu bar.
138
MIDI
Solo Performer Show Controller User’s Guide
Adding an Ending MIDI Event
An “ending MIDI event” may be added to each playlist
item. An ending event is simply a MIDI event from the
MIDI event library that gets sent whenever a song ends.
This could be useful to reset MIDI effects after the end of
a song, for example.
To add an ending MIDI event, double-click a playlist item
to open the Information window. The Events tab shows
what ending MIDI event will be sent. Click Change to
change it or click Remove to remove an existing event.
Alien Apparatus Company, Inc.
MIDI
139
140
Lights
Solo Performer Show Controller User’s Guide
Lights
16
Overall Approach
There are five steps to getting lights up and going with
Solo Perfomer Show Controller - two system
configuration steps and three sequencing steps.
The system configuration steps are:
1. Create light device files for lights that are to be used
that do not already have device files defined for them.
2. Setup the lightboard configuration
The sequencing steps are:
1. Define individual light events
2. Arrange the light events (or scenes) into time
sequences
3. Attach the lightshow sequence to the playlist item
After creating your first lightshow sequence, only the last
two steps are needed to be repeated in order to make
more sequences for other songs, although new light
scenes and new light devices may be added at any time.
Each of these steps is outlined in this chapter.
Alien Apparatus Company, Inc.
Lights
141
Overview of Light Device Files
It is worth mentioning at the outset that light-specific
device files never really NEEDED. They are supplied and
can be created as a convenience to make working with
lights easier. All DMX512 lights may be controlled using
the included “Generic” device file. The “Generic” device
file will make all values from 0 to 255 available for use.
The downside is that the descriptions under the slider on
the Light Editor will be numbers that may be meaningless
without referring to the DMX table in the light’s manual.
Sadly, this is the exact approach that most lighting
controllers on the market take.
Light-specific device files are provided with Solo
Performer Show Controller in order to make working with
lights much easier and more intuitive. For example, if a
light has a channel that can be set in one of 16 different
colors, the light device file for that channel will allow the
channel slider’s value to read “RED” or “GRN” or “BLU”,
etc. rather than a “meaningless” number. All unused or
duplicate values are removed so that the slider has only
16 settings rather than 256. Also, the light channel will
have an icon that looks like a color wheel so that it is
immediately obvious that the channel controls color.
If a light-specific device file is not provided for a light
that is to be used in a lightshow, either the “Generic”
device file may be used or a new one can be easily
created using the following procedure.
142
Lights
Solo Performer Show Controller User’s Guide
Defining New DMX512 Devices
The first step in creating a lightshow is to define your
light devices so that Solo Performer Show Controller
knows what lights you have. Solo Performer Show
Controller treats each DMX512 address as a separate
device, thus if a light requires 3 DMX512 addresses, 3
Solo Performer Show Controller devices will need to be
defined to fully control this one light. For example, a
light accepts lamp control commands on address 1,
speed commands on address 2, and color commands on
address 3. To control this light, a Lamp Control device is
created, as well as a Speed Control device and Color
Control device. This light will then take up three
channels in the lightshow editor window.
New DMX512 devices are created by choosing the menu
item New Device File from the Lights menu. After
choosing this menu, the Device Editor window opens. On
the Device Editor is a DMX Description Table that has two
columns. The first column, with the heading DMX, is
already filled in. This column contains the DMX512
values from 0 to 255. Next to this column is an empty
column with the heading Description. The cells in this
column may be edited by clicking in them and typing.
Alien Apparatus Company, Inc.
Lights
143
To create a new DMX512 device, first make sure that
DMX512 is selected in the Device Type drop down
144
Lights
Solo Performer Show Controller User’s Guide
menu. Next, enter a description next to the DMX512
values. Consult the documentation that was supplied
with your device to find the DMX512 table. Note that all
DMX512 values need not have a description next to
them; only the values that are actually used by the device
will be filled in. The contents of the description that are
typed are not really important. The description needs to
be typed for a couple of reasons. First, it signifies that
the DMX value in that row is important to your device.
All rows without descriptions are not used in the
Lightshow editor. Secondly, the description that is typed
here is the text that shows up under the sliders in the
Lightshow editor screen. It is therefore best to keep the
description short in length, but meaningful. Also, it is
best to keep the number of rows used to a minimum,
because each row will show up as a separate slider
setting. So, for example, when setting up a light that is
Red for all DMX512 values from 20 through 40, just pick
a number in that range and set its description to "Red".
Setting the description in the whole range to "Red" would
create a slider in the Lightshow editor that has many
unnecessary settings for "Red", making it more difficult
to use.
Alien Apparatus Company, Inc.
Lights
145
Before saving the new device file, choose a graphic icon
from the list on the right by clicking the button beside
the icon of your choice. The text descriptions are
present only to serve as a suggested use for the icon.
The text will not appear anywhere, only the icon will.
The icon will show up in the lightshow editor screen
above the slider to represent the type of device that the
slider controls.
When all edits are done to the DMX Description Table,
press the Save Device button and you will be prompted
for a name and location for the new device file. By
default, device files are saved to the "Device Library"
folder. Only device files that are saved here will show up
for use in the Lightshow editor screen.
146
Lights
Solo Performer Show Controller User’s Guide
To abandon the work in the Device Editor, choose the
Cancel button to exit from the Device Editor without
saving a device file.
Defining New MIDI Devices
MIDI light devices are defined using the Device Editor
window, much like DMX512 devices. MIDI light devices
can be configured in several ways:
1. Change settings based on Note-On command
velocities.
2. Change settings based on Poly Aftertouch
command amounts.
3. Change settings based on a Control Message
command’s value.
4. Change settings based on a program change.
In all cases, the value that is sent to the light is what is
defined in the device editor. This can be velocity, poly
after-touch amount, control value, or program number.
The parameter that determines what light will get the
command is not defined here. For example, the note
number or control number could be used to determine
what light is to respond to the command. This is done in
by setting the channel number. Details of how to do this
follow later in Configuring the Channels in this chapter.
Alien Apparatus Company, Inc.
Lights
147
When the device editor opens up by choosing Define
New Device File… from the Lights menu, first choose
the device type from the popup menu. For example, to
make a light device that responds to MIDI Note-On
commands, choose MIDI Note.
Now enter a description for the light values that you want
to use. For example, if using a MIDI dimmer pack that
varies the brightness of the light from 0 being off, to 127
being on, the light device table could be set up like this:
Velocity
0 13
25
38
148
Description
Off
10%
20%
30%
Lights
Solo Performer Show Controller User’s Guide
51
64
76
89
102
114
127
40%
50%
60%
70%
80%
90%
100%
Such a device would then have a Device Editor table that
looks something like this:
Alien Apparatus Company, Inc.
Lights
149
Using the Range Tool
The Range Creator Tool makes it easy to automatically
generate values across a range of DMX or MIDI values.
For example, if a light’s channel controlled the dimming
of the light and it used the full range of values from 0 to
255, you could simplify the device file by only providing
20 setting throughout this range. You could calculate
what each value needs to be in order to have equal
spacing between the numbers... or you can use the
Range Creator Tool. In the Device Editor window, the
Range Creator Tool can be opened by clicking the icon in
the lower left corner:
The Range Creator Tool then opens as a side panel to the
Device Editor Window.
To expand on our example of creating a range of 20
150
Lights
Solo Performer Show Controller User’s Guide
values evenly spaced across the range of 0 to 255, the
Range Creator Tool’s fields would be filled out like this:
After pressing the Generate Range button, DMX table
shown in the following picture is automatically
generated. Scrolling through the list reveals that there
are indeed 20 values present and they appear to be
equally spaced. Note that a prefix of “D” was specified,
thus the descriptions are “D1”, “D2”, “D3”, etc.
There is also a checkbox if having the first number be
zero is preferable to a one. In the case of a dimmer or
any other device that is actually in the off state at the low
end of the range, this may be a good option to consider.
Further, if you would rather see the actual DMX value
appear such as “13” instead of “D2” in this example,
check the “Use values as labels” checkbox.
Alien Apparatus Company, Inc.
Lights
151
Editing Existing Devices
The description table of existing light devices may be
edited by choosing the menu item Edit Existing Device
under the Lights menu. Upon choosing this command, a
dialog is presented in which the existing device file is
chosen to open. After choosing a device file, the Device
Editor window will open, allowing changes to be made to
the description table. After all edits are complete, the
changes may be cancelled by pressing the Cancel button,
or saved by pressing the Save Device button. Pressing
Save Device presents a dialog in which a name may be
entered for the device file. If a new name is chosen for
the device file, a new device file will be created, leaving
the original intact. This is a great way to make many
device files that are similar, using one as a template.
152
Lights
Solo Performer Show Controller User’s Guide
Alternatively, the same name may be entered as the
original device file, and the option to overwrite the
existing file is presented. If the goal is to update the
existing device file, choosing to overwrite the existing
file will accomplish this.
Lightshow Editor Overview
To begin building a lightshow for a playlist item, first
select the playlist item by clicking on it, and then press
the Build Lightshow button.
The lightshow editor window opens up. This is where
lightshows are constructed for the playlist song
selection. To make a lightshow, light scenes need to be
defined. Then, the scenes are arranged in order on the
timecode list.
Alien Apparatus Company, Inc.
Lights
153
Configuring the Channels
There are 32 channels of lighting control available. Each
channel can be set up to control a device that has been
defined in the device editor. To choose the device to be
controlled by a channel, click the device button and a
menu will pop up that will list all of the devices that are
available in your device library. The folder of the device
library is chosen in the preference panel. See Chapter 20
for details on changing user preferences.
154
Lights
Solo Performer Show Controller User’s Guide
After choosing a device for the channel, the device’s icon
will appear in the button.
The address that will be used for the channel is selected
by the popup menu as shown below. If the device used
for this channel is a DMX device, this address must
match the address set on the lighting device. Also, the
address must be in the range of 1 to 32. Refer to your
lighting device’s manual for information on setting up its
address. This is usually accomplished by setting DIP
switches on the device.
If the light device used with this channel is a MIDI device
using Note-On or After-touch commands to control the
lights, the Channel number refers to the MIDI note
number that is assigned to this light. If the light device
uses MIDI control messages to control the lights, the
Alien Apparatus Company, Inc.
Lights
155
channel number should be set to the MIDI control
number that will control the light. If the light device uses
MIDI program changes for control, then the channel
number is unimportant.
A short designation for the light device may be entered in
the name box. This is there for information purposes
only so that the 32 channels of lights may be
differentiated from one another.
When all of your channels are configured, the
configuration can be saved by selecting Save
Configuration from the Lights menu.
156
Lights
Solo Performer Show Controller User’s Guide
Saved configurations may be opened by choosing Open
Configuration from the Lights menu.
The most often used configuration should also be set to
be the default configuration, that is, the one that opens
automatically when you enter the lightshow editor. See
Chapter 20 for details on saving user preferences.
Making a Light Scene
The 32 lower sliders are used to select the values to send
to the light devices. By moving a slider, the description
of the value being sent to the light appears in the box
below the slider. Note that if the text is too big to fit in
the box, the full text will appear if the mouse is held over
the text box for a few seconds.
Alien Apparatus Company, Inc.
Lights
157
The first item in each slider’s list is “Previous”. Using this
setting for a light scene causes this light to merely keep
on doing what it was previously doing in the last light
scene displayed. Using this setting, a scene could be
added where only one light does something and all of the
other lights are set to “Previous”. This would allow this
scene to be inserted into a lightshow in various places to
make the one light change without affecting other lights.
Also note that when the sliders are moved, the
corresponding lighting device will change in response to
the slider movement if it is connected and the light’s
address is set up properly!
The upper 32 sliders are used to set the speed that it
takes for the lower slider to achieve its value. Normally a
value of 0 is used, making the lights instantly change
their DMX value to the value of the lower slider. There
are cases, however, when a fade is desired. Using the
upper sliders, a fade up to 20 seconds long can be
achieved. To clarify, suppose a light channel currently
has a value of 125 and the scene changes so that the
lower slider is 180 and the upper slider is 10. That
means that the light would ramp up its value from 125 to
a final value of 180 over a 10 second period that starts
when the new scene is sent.
158
Lights
Solo Performer Show Controller User’s Guide
Saving a Light Scene
When all channels are set, the slider states may be saved
as a scene. Before saving, select a color for the marker
to be used for this scene by choosing from the color
menu below the Saved Scenes list.
Finally, press the Plus button as shown below:
A dialog box will appear to enter a name for the scene.
After saving, the scene will appear in the scene listing.
Alien Apparatus Company, Inc.
Lights
159
Opening a Light Scene
A saved scene may be opened to the slider controls for
viewing and/or editing by simply double-clicking on the
scene name on the Saved Scenes list or by selecting
Open Scene from the Action button’s menu under the
Saved Scenes list.
160
Lights
Solo Performer Show Controller User’s Guide
Deleting a Light Scene
Scenes may be deleted from the scene listing by selecting
the scene in the listing and clicking the Delete Scene
button as shown below.
Alien Apparatus Company, Inc.
Lights
161
Adding a Scene to a Lightshow
To make a lightshow, scenes are added to the timecode
listing. To do this:
1. Move the playback position to where the scene is
to be placed by clicking in the waveform display.
Use zoom button if necessary to get accurate
placement.
162
Lights
Solo Performer Show Controller User’s Guide
2. Select a scene from the Saved Scenes list by
clicking on it
3. Press the Plus button under the timecode list
Alternatively, the scene may be dragged from the
scene listing and dropped in the timecode listing.
To do this, click on the scene and hold the mouse
button down. Then drag the mouse pointer to the
timecode listing and release the mouse.
Alien Apparatus Company, Inc.
Lights
163
Once a scene is placed in the timecode, a new
marker is added to represent the scene’s
placement on the event track.
Another way to put a selected scene into the
timecode list is to simply press the Enter or Return
key.
Yet another way to put a scene into the timecode
list is to drag the scene from the Saved Scenes list
and drop it onto the event track. When dragging
the scene over the event track, a black line appears
in the waveform display to give a visual reference
of where the scene will be placed.
4. An event marker may be repositioned by dragging
it along the event track to a new position. While
164
Lights
Solo Performer Show Controller User’s Guide
dragging, a black guideline appears in the
waveform display to aid with the positioning.
The timecode may be edited by clicking in a cell in
the timecode column. This is useful for fine
adjustment of the scene’s playback time.
Remember that the format entered must be valid
timecode format or else it will be rejected.
Timecode format is in the form XX:XX:XX:XXX
where the X’s are numbers. The first two X’s are
the hour, the second two are the minute, the next
two are the seconds, and the final three are the
milliseconds. Don’t forget the colon separators!
5. Repeat steps 1 through 4 as necessary to add
many scenes to create a lightshow.
Alien Apparatus Company, Inc.
Lights
165
Deleting a Scene from a Lightshow
To delete a scene from a lightshow, first select the scene
to be deleted from the timecode listing then press the
delete key. Alternative, select Delete from the Timecode
list’s Action button menu as shown below:
Previewing a Lightshow
To preview a lightshow, press the play button. The audio
will play and the sliders will move to create the light
scenes at the appropriate time. If the light devices are
connected properly, the lights will change as well.
166
Lights
Solo Performer Show Controller User’s Guide
Making a Lightshow Using Chases
Making lightshows using chase sequences is a fast way of
making lightshows that appear to react to the beat of the
audio. This entails creating an “ordering” of light scenes
to define a “chase” sequence. The chase sequence has
no time associated with it; it is merely an ordered list of
light scenes. Once the chase sequence is defined, the
audio can be played back, and light scenes are inserted
into the timecode list by tapping the spacebar to the beat
of the music. Every tap of the spacebar puts the next
scene from the chase sequence into the timecode list.
When the chase sequence gets to its end, it will start over
from the beginning.
To define a chase sequence, choose Define Chase from
the Lights menu.
The Chase Editor will open and will look like this:
Alien Apparatus Company, Inc.
Lights
167
All of the saved light scenes from the light Scene Library
appear in a listing on the left. The right-side listing is
empty and will be used to build the Chase List. Scenes
can be added to the right-side Chase List by first
selecting a scene on the left, and then clicking the Add
button.
168
Lights
Solo Performer Show Controller User’s Guide
Alternatively, scenes may also be “dragged” from Scene
Library and “dropped” to the Chase List with the mouse
like this:
Once a sequence of light scenes is defined on the Chase
List, the chase may be saved for future recall by clicking
the Save button.
Saved chases may also be recalled by clicking the Open
button.
Alien Apparatus Company, Inc.
Lights
169
If there are mistakes in the chase sequence, a scene may
be taken out of the list by selecting it, followed by a click
on the Remove button. Clicking on the Clear All button
will reset the entire Chase List.
Clicking Done will exit the Chase Editor.
Note that a chase sequence does not need to be saved to
be used. Simply arranging the scenes on the list then
clicking Done will suffice to put the chase in memory for
use.
Once a chase has been defined, the scenes can be put
into the timecode by tapping the spacebar during the
playback of the song.
170
Lights
Solo Performer Show Controller User’s Guide
In the above example, a chase sequence with three
scenes was used to create a simple lightshow that moves
to the beat of the music. As the spacebar on the
keyboard was tapped, the scenes were inserted into the
timecode list. After the third scene was inserted, the
next spacebar tap caused the first chase scene to be
inserted once again.
The Delete Chase menu option from the Lights menu
removes the chase from memory. The Reset Chase
menu option resets chase so that the next time the
spacebar is pressed, the first light scene on the chase will
be inserted into the timecode list.
The Undo Chase Record menu option reverts the
timecode list back to the state that it was in prior to
playing the audio.
Alien Apparatus Company, Inc.
Lights
171
Saving a Lightshow
A lightshow may be saved by choosing Save Lightshow
from the File menu. Alternatively, the Save As… menu
item may be chosen from the File menu to save a copy of
the lightshow as a different file name.
172
Lights
Solo Performer Show Controller User’s Guide
Opening a Lightshow
A lightshow may be opened by choosing Open
Lightshow from the File menu. By opening a previously
saved lightshow, edits can be made and the lightshow
may be re-saved.
Exiting the Lightshow Editor
When finished in the Lightshow Editor, simply close the
window. This can be done on a Macintosh computer by
clicking the red dot in the title bar.
On Windows Computers, to exit out of the Lightshow
Editor, click the red close box as shown:
Alien Apparatus Company, Inc.
Lights
173
Adding a Lightshow to a Playlist
The lightshow now needs to be added to the selected
playlist item. This is done by first selecting the playlist
item to receive a lightshow, and then selecting Add Light
Sequence… from the Action button’s menu at the
bottom of the playlist. A dialog will appear prompting
for the lightshow to be added.
After adding a lightshow to a playlist item, the playlist
row will have a lightshow indicator icon attached to it to
signify that there is a lightshow associated with the song.
Removing a Lightshow from a Playlist
A lightshow may be removed from a playlist by first
selecting the playlist item, and then selecting Delete
Light Sequence… from the Action button’s menu at the
bottom of the playlist.
174
Lights
Solo Performer Show Controller User’s Guide
Adding an Ending Light Scene
An “ending light scene” may be added to each playlist
item. An ending scene is simply a light scene from the
scene library that gets sent whenever a song ends. This
could be useful to bring up the lights at the end of a
song, for example.
To add an ending light scene, double-click a playlist item
to open the Information Window. The Events tab shows
what ending light scene will be sent. Click Change to
change it or click Remove to remove an existing scene.
Alien Apparatus Company, Inc.
Lights
175
Light Scene Tips
When making a light scene, never change more lights
than are necessary from the value “Previous”. This will
allow the scene to be inserted in other places in the show
without changing the other lights as well.
Consider carefully how lighting will behave at the
beginning and end of each song. If the next song on the
playlist does not have a lightshow, you will have to end
your current lightshow in such a way so as to keep
"appropriate" lighting in place through the song without
a lightshow. Another, perhaps better, way to handle this
is to create a "one-scene" light show to use for every
song that will not have a complex lightshow. In this way,
176
Lights
Solo Performer Show Controller User’s Guide
you can be assured that the previous song's lightshow
will not still be in effect.
Alien Apparatus Company, Inc.
Lights
177
178
Example Lighting SetupsSolo Performer Show Controller User’s Guide
17
Example Lighting Setups
Introduction
The light setups that are possible are limited only by
ones imagination and budget. The following examples
show some minimalist setups for those who want a quick
show assembly and disassembly or are on a tight budget,
and also some advanced setups for those who wish to
give maximum impact to their show.
The Setup/Tear-Down Minimalist
Alien Apparatus Company, Inc.
179
Example Lighting Setups
This setup consists of:
• 1 T-type Light Stand
• 2 DMX512 Color Changing Lights
• 1 Small DMX512 Controlled Fog Machine
The intent of this light setup is to make equipment setup
and tear-down as quick as possible, while still yielding a
high-impact visual show. The two color changing lights
allow for a multitude of different light scenes to be
produced, as each light may, depending on the exact
model of the lights chosen, have 16 or more possible
colors. Most color changer lights even have "automatic
modes", where they change colors either continuously or
via a sound-activated trigger. Usually, these automatic
modes can be set by sending a DMX512 command to the
fixtures.
180
Example Lighting SetupsSolo Performer Show Controller User’s Guide
The Budget Setup
This setup consists of:
•1
•4
•1
•1
•4
T-type Light Stand
Par 38 Lights
Six-Channel DMX512 Relay Switch Box
Fog Machine
Color Gels
Alien Apparatus Company, Inc.
181
Example Lighting Setups
The purpose of this setup is to create a light show
without spending a great deal of money. To accomplish
this, non-DMX512 lights are used. Standard par 38
lighting is used in conjunction with a relay box to turn
the lights on and off when appropriate. The color gels
can be chosen so that each of the lights has its own
color, or so that two lights have one color and two have
another. The second method is probably the better, as it
would give greater color fill at the expense of versatility.
The gels can be changed during set breaks to give more
variety.
This setup can be added to later by including an
inexpensive non-DMX512 moving effects light. The
spare channel of the relay box can be used to turn this
on whenever needed.
Alternatively, a dimmer pack may be used instead of the
relay switch box to control the brightness of each fixture,
rather than only turning the fixtures on and off. The
next example illustrates this.
Another item that may be added is a DMX512
controllable chase controller. A chase controller typically
“listens” to the music and turns lights on and off to the
beat. With the DMX512 control, the chase sequences
may be altered during the show or turned off to display
static light scenes when appropriate.
182
Example Lighting SetupsSolo Performer Show Controller User’s Guide
The Dimmer Setup
This setup consists of:
•2
•8
•2
•1
•8
T-type Light Stands
Par 38 Lights
Four-Channel DMX512 Dimmer Packs
DMX512 Fog Machine
Color Gels
Alien Apparatus Company, Inc.
183
Example Lighting Setups
This setup allows for the light brightness to be
controlled, as well as some scene switching. Note that
the lights used are inexpensive non-DMX512 lights.
184
Example Lighting SetupsSolo Performer Show Controller User’s Guide
An Advanced Setup Example
This setup consists of:
•1
•8
•2
•1
•1
•4
•2
Truss Beam Light Stand
DMX512 Color Changing Lights
DMX512 Gobo Projector Lights
DMX512 Effect Light
Four-Channel DMX512 Relay Switch Box
Non-DMX512 Moonflower Effect Lights
DMX512 Fog Machines
Alien Apparatus Company, Inc.
185
Example Lighting Setups
This setup squeezes a lot of capability out of 21 of the
DMX512 channels of Solo Performer Show Controller as
an example of how to run big lightshows with only 32
channels! In fact, in this example, we still have eleven of
the light channels still available to use for other things!
Notice how the channel sharing is done. The eight color
changers have their addresses shared so that they are
divided into four pairs. Each group of two has its own
set of addresses. Each light fixture within one pair
therefore reacts in synchronization with the other light in
its pair to a DMX512 command. Since each light takes
up one channel, the pairing results in eight lights using
up only four channels.
Similarly, the two gobo projectors share the same
address, so that when a DMX512 command is sent to the
gobo address, both gobos do the same thing. The gobos
projectors chosen here each use six channels, but since
they are paired, only six channels total will be used.
The DMX relay pack that controls the moonflowers
provides four relays and uses up four DMX channels.
186
Example Lighting SetupsSolo Performer Show Controller User’s Guide
A three-channel DMX effect light was chosen, so three
channels will be allocated to this light.
Finally, the fog machines share four common addresses
so that when a fog command is given, more fog is spread
out over the stage by virtue of two fog machines working
in synchronization.
Alien Apparatus Company, Inc.
187
Example Lighting Setups
188
Hotkeys
Solo Performer Show Controller User’s Guide
Hotkeys
18
Introduction
Hotkeys are simulated key presses that can be sent to
other running programs in order to control them from
Solo Performer Show Controller. Hotkeys are sometimes
referred to as keyboard shortcuts. Often, hotkeys are
keys that use a modifier, such as control, alt (on
Windows), or command (on Macintosh) in addition to the
main key.
Within Solo Performer Show Controller, hotkey sequences
may be constructed and applied to playlist items so that
the keys are sent at appropriate times during a show.
The Hotkey Event Editor
To begin creating sequences of hotkey events, first select
an item on the playlist that is to have hotkeys associated
with it. Once the playlist row is selected and highlighted,
click on the Action button under the playlist, then
choose Build Hotkey Sequence. Alternatively, the Build
Hotkey Events menu option on the Hotkeys menu
accomplishes the same task.
Alien Apparatus Company, Inc.
Hotkeys
189
The hotkey event editor will now open and will look like
this:
The song that was selected in the playlist is now available
for playback, and when it plays, its lyrics, if any have
been defined, will show in the black rectangular lyric
display area. To the bottom right of the window is a
listing of all previously saved hotkey events. Above this
list is a listing of the hotkey sequence that will be built.
Immediately under the lyrics display is the waveform
display and the event track. The controls under the event
track are used to create new hotkey events. The buttons
under the two list boxes are used to manage hotkey
190
Hotkeys
Solo Performer Show Controller User’s Guide
events by doing such things as saving and deleting them,
and placing them in the sequence listing.
Creating a Hotkey Event
To begin creating a hotkey event, first enter the keys that
are to be sent in the Hotkey Event to Send box. To
include special non-printable keys, simply type the key
name enclosed in greater-than and less-than signs <like
this>. Here is a table of the special keys that Solo
Performer Show Controller recognizes:
<control> <shift>
<alt>
<command>
<option> <enter>
<return>
<windows>
<esc>
<tab>
<up>
<down>
<left>
<right>
<delete>
<backspace>
<insert>
<clear>
<page up> <page down>
<home>
<end>
<f1>
<f2>
<f3>
<f4>
<f5>
<f6>
<f7>
<f8>
<f9>
<f10>
<f11>
<f12>
<f13>
<f14>
<f15>
Alien Apparatus Company, Inc.
Hotkeys
191
In addition, the command <pause> may be used to
pause the sending of keys for .1 seconds.
As an example, on Windows, to tell Notepad to make a
new document and type the letters “ABC” in it, you would
use the following hotkey event:
<control>n<pause>ABC
The <control>n portion is Notepad’s keyboard shortcut
for making a new document. The <pause> portion helps
to ensure that the new window is open and available
before sending the “ABC” keys.
Similarly, on Macintosh, to tell TextEdit to create a new
document and type “ABC” into it, you would use the
following:
<command>n<pause>ABC
Next, select the application that will receive the hotkey.
Do this by clicking in the Receiving Application field.
A dialog box will open where you can navigate through
your computer system in order to find the application
that will receive the hotkey.
192
Hotkeys
Solo Performer Show Controller User’s Guide
In Windows, it is particularly important to be able to
specify which window is to receive the hotkey because in
Windows, document windows often have their own
menus. Therefore, on the Windows version of Solo
Performer Show Controller, an edit field is provided in
which the name of the receiving window may be
optionally included.
To make Solo Performer Show Controller be the frontmost window again, after sending the hotkey event,
make sure that the check box in the lower left corner is
checked. Otherwise, the receiving application will remain
in the forefront.
To test the hotkey, simply press the Test Hotkey button
and the hotkey event will be sent immediately.
Note that the receiving application must be open in order
for it to receive hotkey events.
Alien Apparatus Company, Inc.
Hotkeys
193
To save the hotkey event, press the Plus button located
under the Saved Hotkeys list.
You will be prompted for a filename for the hotkey event.
After saving, the hotkey will appear in the Saved
Hotkeys listing.
194
Hotkeys
Solo Performer Show Controller User’s Guide
To delete a hotkey event, first select the hotkey event to
be deleted from the listing by clicking on it so that it
highlighted. Then, select Delete from the Action
button’s menu located under the Saved Hotkey list.
Note that this will permanently delete the hotkey event
file from your hard disk, so use this with caution.
Alien Apparatus Company, Inc.
Hotkeys
195
Creating Hotkey Event Sequences
To arrange hotkey events into hotkey event sequences
for use on playlists, follow the following steps:
1. Move the song position indicator approximately to
where the event is to occur in the song by clicking
in the waveform display. Playing back the song a
few times helps to get the position figured out.
Use the waveform display and the lyric display as a
guide. Use the Zoom button if necessary.
Accuracy is not very important at the moment, as
the exact position can be tweaked later.
2. Select the hotkey event to be inserted by clicking
on it in the Saved Hotkeys list so that it
highlights. Then click the Plus button under the
196
Hotkeys
Solo Performer Show Controller User’s Guide
timecode listing. The name of the hotkey event
will now appear in the hotkey sequence listing.
Alternatively, hotkey events may be dragged and
dropped from the Saved Hotkeys list to the
timecode list or straight to the Event Track. Users
will find the drag and drop method to be quicker.
3. Move the song position indicator to a place before
the newly inserted event. Play the song and the
hotkey event will stream along with the playback.
Tweak the event’s time by either dragging the
event marker in the Event Track or byediting the
time in the sequence listing by clicking on the time
displayed and typing. All times must be entered in
the following format: XX:XX:XX:XXX where the first
Alien Apparatus Company, Inc.
Hotkeys
197
two X’s are the hour, followed by minutes,
seconds, and finally milliseconds. Don’t forget to
use colons as separators. Invalid timecodes will
not be accepted to the sequence listing.
4. Repeat steps 1 through 3 as necessary to build up
a listing of hotkey events that make up a sequence.
5. Hotkey events can be removed from the sequence
by selecting the row on the sequence list by
clicking it so that it is highlighted, then hit the
Delete key on the keyboard. Alternatively,
selecting Delete from the Action button’s menu
under the sequence list will accomplish the same
task.
198
Hotkeys
Solo Performer Show Controller User’s Guide
6. Save the hotkey event sequence by choosing Save
Hotkey Sequence from the File menu. You will be
prompted to supply a file name and the file will be
saved in the directory indicated in the Preferences
panel. Most users simply choose the default
location. See Chapter 20, Customizing, for more
information on setting default file locations.
Alien Apparatus Company, Inc.
Hotkeys
199
7. Saved hotkey event sequences may be opened by
choosing Open Hotkey Sequence from the File
menu. This allows previously saved sequences to
be edited.
Exiting the Hotkey Event Editor
When finished in the Hotkey Editor, simply close the
window. This can be done on a Macintosh computer by
clicking the red dot in the title bar.
200
Hotkeys
Solo Performer Show Controller User’s Guide
On Windows Computers, to exit out of the Lightshow
Editor, click the red close box as shown:
Alien Apparatus Company, Inc.
Hotkeys
201
Adding Hotkey Event Sequences to a Playlist
Every Item in the playlist may have a hotkey event
sequence associated with it. To add a hotkey event
sequence to a playlist item, first select the playlist item
by clicking on it so that it is highlighted, and then select
Add Hotkey Sequence… from the Action button menu
under the playlist. Alternatively, the Add Hotkey Events
menu item on the Hotkeys menu performs the same
action.
After choosing this command, by either the button or the
menu selection, you will be prompted to select a hotkey
event sequence file to add to the playlist item. After
selecting the file, the selected playlist row will now
display an icon that looks like a keyboard key in the FX
column to indicate that that a hotkey events sequence is
part of that playlist item. Because the FX column is used
to indicate the presence of other items such as
lightshows and MIDI sequences as well, the icon could be
combined with the icon of other event types. For a
complete list of icon types, see Chapter 10, Playlists and
Audio.
202
Hotkeys
Solo Performer Show Controller User’s Guide
When a song on the playlist is played, and it has a hotkey
event sequence associated with it, the hotkey events will
stream, using the timing of the song as a guide.
Removing Hotkey Event Sequences from a
Playlist
Hotkey event sequences may be removed from playlist
items by first selecting the playlist item by clicking on it
so that it is highlighted, and then select Delete Hotkey
Sequence… from the Action button menu under the
playlist. Alternatively, the Delete Hotkey Events menu
item on the Hotkeys menu performs the same action.
Alien Apparatus Company, Inc.
Hotkeys
203
Ending Hotkey Events
An “ending hotkey event” may be added to each playlist
item. An ending event is simply a hotkey event from the
hotkey event library that gets sent whenever a song ends.
This could be useful to trigger another program after the
end of a song, for example. Another example would be
to automatically make the lyrics display go from full
screen to normal at the completion of a song.
To add an ending hotkey event, double-click a playlist
item to open the Information window. The Events tab
shows what ending hotkey event will be sent. Click
Change to change it or click Remove to remove an
existing event.
204
Hotkeys
Solo Performer Show Controller User’s Guide
Running a Show
19
The Audio Transport
The audio transport is a series of five buttons that are
used to control the playback of the show.
The buttons, from left to right are Rewind All, Rewind,
Play, Stop, and Fast Forward.
Rewind All
Moves the playback position to the
start of the song
Rewind
Moves the playback position
backwards while it is being held down
Play
Starts the playback of the show from
the current position
Stop
Halts a currently playing show
Fast Forward Moves the playback position forward
while it is being held down
Alien Apparatus Company, Inc.
Running a Show
205
Setting Up the View
When performing live onstage, it may be desirable to
arrange the Playlist Editor view a bit differently than the
standard view that is used for editing playlists. For
example, the horizontal splitter bar can be clicked in
order to hide all of the setup buttons at the bottom of
the window. This will give more room to display more
playlist rows.
The Clock Window
One important task for all performers is the management
of time. To aid with this, a clock may be displayed by
selecting Show Clock from the File menu. The clock
window can be resized by dragging its resize handle in
the lower right corner.
206
Running a Show
Solo Performer Show Controller User’s Guide
The Next Song Window
A window may be opened that displays the next song to
be played in large type so that it can be seen from across
the stage. To the right of the displayed song title is the
ending icon of the currently playing song so that you can
clearly see what will happen when the song ends. Like
the clock window, this window may be resized and
repositioned anywhere on the screen.
Alien Apparatus Company, Inc.
Running a Show
207
The Foot Controller
The six-button foot controller is used as an alternative to
the software controls to control the Solo Performer Show
Controller software while performing live.
208
Running a Show
Solo Performer Show Controller User’s Guide
The Foot Controller Button Status Window
A window may be opened to show the status of the foot
controller buttons. This window shows what the current
functions of the foot controller are. This is particularly
important when defining new behaviors for the buttons.
Clicking on the icons on the Foot Controller Button
Status Window will perform the foot controller function.
Starting a Show
A show may be played by pressing the Play/Stop button
on the foot controller or by pressing the Play button in
the software or by pressing the space bar on the
keyboard. The show will start playing at the currently
Alien Apparatus Company, Inc.
Running a Show
209
selected playlist item or, if no row is selected, from the
beginning of the playlist.
Stopping a Show
Pressing the Play/Stop button on the foot controller or
pressing the Stop button in the software or pressing the
space bar on the keyboard will stop the playback of a
running show.
Controlling the Playlist
The playlist row selection may be changed by pressing
the Playlist button on the foot controller. By pressing
this button, the playlist will go to the next row. When at
the end of the playlist, a further press will make the first
playlist item be selected. The up and down arrow keys
on the keyboard also change the playlist selection as
well.
While the show is running, the currently playing song will
be highlighted in green. The song that is highlighted in
yellow is the song that is cued to be played next. This
210
Running a Show
Solo Performer Show Controller User’s Guide
song selection may be changed while the show is
running.
Changing the Volume
The volume of a playlist item may be adjusted while the
show is playing either by moving the volume slider in the
software or by pressing one of the two volume buttons
on the foot controller. Two buttons are provided: one to
decrease the volume and one to increase the volume.
To change the volume by the volume slider in the
software, first click on the volume button under the
playlist and a volume adjustment slider will appear.
Alien Apparatus Company, Inc.
Running a Show
211
Changing the Computer System Volume
For convenience, a slider is provided onscreen to set the
overall volume of the computer system’s sound.
Full Screen Lyrics
The lyric display may be made to occupy the entire space
below the transport header by either clicking on the lyric
display area with the mouse, or by choosing Full Screen
Lyrics from the Lyrics menu, or by pressing the Lyrics
Window button on the foot controller. The full screen
display mode is particularly useful when performing
onstage, as the text is much larger thus enabling the
performer to see the lyrics from a short distance.
212
Running a Show
Solo Performer Show Controller User’s Guide
Alien Apparatus Company, Inc.
Running a Show
213
Secondary Lyric Display Window
Lyrics may also be displayed in their own separate
window. Select Lyric Window from the Lyrics menu to
display the secondary lyrics window.
214
Running a Show
Solo Performer Show Controller User’s Guide
This secondary lyrics display window can be moved to a
second monitor if desired, or even be moved to an
attached projector.
Fog Machine Control
A DMX512 compatible fog machine may be triggered to
send out fog by pressing the Fog button on the foot
controller. To turn off the fog, simply press the Fog
button a second time.
To configure a fog machine to respond to the Fog button
presses, the fog machine address and commands are set
in the preferences panel. See Chapter 20 for details on
setting this up.
Alternate Button Mappings
The foot controller button functions can be changed to
do things other than their default actions. Each button
can be set to do one of thirteen different actions:
1.
2.
3.
4.
5.
6.
7.
8.
9.
10.
Play
Stop
Scroll Down
Scroll Up
Scroll Stop
Volume Down
Volume Up
Lyric Zoom
Fog On
Fog Off
Alien Apparatus Company, Inc.
Running a Show
215
11.
12.
13.
Send MIDI Event
Send Light Scene
Send Hotkey Command
Suppose, for example, that you don’t have a fog
machine, you don’t need to display full screen lyrics, and
the two volume buttons are not used because you did a
good job in setting up the playback volumes of each
song in the playlist ahead of time.
That means that you have four buttons that you don’t
really use. You could re-map these buttons to perform
an alternate function, such as controlling another
program by sending a hotkey, or changing your vocal
reverb sound by sending a MIDI event to your effects
unit.
One example of an alternate use of the buttons is to
control a PowerPoint presentation that displays chord
diagrams by sending hotkeys to change slides.
Another possibility is to re-map all of the switches to
light scenes and just use the system to switch lights.
This is a great alternate use for the system on the days
when you have a full band and don’t need backing
accompaniment. In effect, you would be using the
system as a lighting controller with manually selected
scene changes.
The same concept as in the last example can also be
applied to hotkeys and MIDI events as well. All of the
buttons could be mapped to send hotkeys or MIDI events
and you’ve got yourself a foot controller that will control
external software programs or MIDI devices on the days
216
Running a Show
Solo Performer Show Controller User’s Guide
when you are not performing solo and do not need
backing accompaniment.
To learn more about how to set up alternate button
mappings, refer to Chapter 20.
Reconnecting the Foot Controller
If, during a show, the USB cable becomes unplugged or
the connection with the host computer becomes lost
somehow, reconnect the foot controller USB cable, then
choose Reconnect Foot Controller from the File menu.
The Importance of a Fog Machine
In all cases, it is highly recommended to use a fog
machine - even if it is a small and cheap one. Without
one, your audience will hardly even see the lights. The
difference between having a fog machine and not having
one is amazingly substantial. One light, sufficiently
fogged, can look much better and give more impact to
your show than a set of four color-changing lights with
no fog. Fog in the air will make the colors of the lights
visible as a cone of light between the light fixture and the
floor. Without fog, the audience will not see the colors
"in the air", but will only see the lighting on whatever
surface the lighting strikes, but nothing in between.
Recommended Pre-Show Preparation
Alien Apparatus Company, Inc.
Running a Show
217
There is little that can ruin a live show worse than prerecorded playback of a show that does not behave as
expected. To minimize the threat of such a disaster, it is
highly recommended that the following be done before a
show is performed before an audience:
Run through the entire playlist prior to performing it.
Verify that all MIDI devices are receiving MIDI commands
properly by sending MIDI commands to it by using the
Send button in the MIDI event editor. If you are playing
MIDI files on external devices, play back a MIDI file and
make sure that the correct device is playing it.
Verify that all lighting is functioning properly by opening
a song in a playlist, then choosing Build Lightshow to
open the lightshow editor. From here, the sliders should
control the lights. Check each slider to make sure that
the correct light is responding to the correct channel.
Verify that all applications that are to receive hotkey
events are opened
Verify that all of the required files for the show are in
their correct places by checking that:
Audio plays for every song on the playlist
Lyrics are displayed on screen for every playlist item
that should have them displayed
MIDI events are sent for every song that has MIDI
events
218
Running a Show
Solo Performer Show Controller User’s Guide
Lightshows are present for every song that should
have one
Hotkeys are being sent for every song that has
hotkey events
Selecting each song and playing a few seconds of it will
be enough to verify these issues.
Alien Apparatus Company, Inc.
Running a Show
219
220
Customizing
Solo Performer Show Controller User’s Guide
Customizing
20
Opening the Preferences Panel
The preferences panel may be opened by choosing
Preferences… under the Show Controller menu on a
Macintosh, or by choosing Preferences… under the Edit
menu on a Windows computer.
Alien Apparatus Company, Inc.
Customizing
221
The Preferences Panel is divided into six sections:
General, Files & Folders, Fonts & Colors, MIDI, Tuning
& Fog, and Button Mapping. Clicking on a toolbar item
at the top of the window will change the contents of the
Preferences Panel to give access to the settings indicated
by the toolbar item.
Setting the General Preferences
The General preference pane is the initial view of the
preferences window. It looks like this:
222
Customizing
Solo Performer Show Controller User’s Guide
In the General preferences pane, the option to check the
validity of each song added to the playlist is given. If this
option is checked, each song will be checked to see if it
is a valid audio file before opening it to the playlist. The
down-side of having this option enabled is that it will
take longer to open playlists due to this checking. For
very long set lists on slower computers, it may be
desirable to have this option turned off.
Alien Apparatus Company, Inc.
Customizing
223
The time-remaining indicator can also be enabled or
disabled in this preference pane. Disabling the timeremaining may be desirable if, for example, the software
is being used in a situation where a fixed set list is not
being followed.
The third option in the Playlist group allows for event
sequences to automatically load to the playlist when a
song is added, provided that the event sequence is
named the same as the song. For example, if this option
is checked, and the song “Crazy Alien.mp3” is opened to
the playlist, the lightshow file “Crazy Alien.lsh” will also
be added automatically if such a file exists in the
lightshow directory.
The Strip Leading Numbers From Song Names option
is useful for when your song names contain numbers at
the beginning. Songs ripped from CDs often get named
with leading numbers. Turning this setting on is very
useful if you would like to use your iTunes library as your
audio folder.
The Song Stopping Behavior setting allows for the
playlist to remain on the currently playing song, if it is
stopped while playing. This is sometimes referred to as
“Tape Mode” as it resembles the action of a tape
recorder. If this option is not checked, the stopping of a
song will cause the song that is highlighted in yellow to
become the active song awaiting playback.
The Play List Scroll Speed settings are used to set up
how scrolling through songs using the foot controller
behaves. The Initial Pause Duration is the amount of
time that it takes to go from one song to another at the
224
Customizing
Solo Performer Show Controller User’s Guide
beginning of the scrolling. If the Final Pause Duration
set to a different number, the speed will change as the
scrolling progresses. The Acceleration setting regulates
how fast the “ramp-up” to the final speed is achieved.
The Displayed Columns in Playlist buttons allow the
customization of the playlist. If the slide buttons are
moved to the right, the item indicated next to the button
will be shown on the playlist. Note that the first two
items, Row Number and Song Title must always be
shown.
Setting Default File Locations
The settings available by clicking on the Files And
Folders toolbar item are where the default file locations
are set up. These folders are where Solo Performer Show
Controller looks for the indicated items first when
opening these types of files. When the Add Audio File
to Playlist button is pressed in the playlist window, the
open dialog box that follows shows the files that are in
the folder chosen in the audio files preferences folder.
Similarly, the Playlists and Light Show folders work the
same way.
The Lyrics default folder is where Solo Performer Show
Controller looks for lyric files during playback and it is
also where lyric files are saved when they are created. If
this folder is not set up correctly, no lyrics will be
displayed. Make sure that this folder points to where
your lyric files are located.
Alien Apparatus Company, Inc.
Customizing
225
The MIDI events folder is the default location for saving
and opening MIDI events. It is also the place where Solo
Performer Show Controller looks for MIDI events to set up
the event listing in the MIDI event editor screen. Only
those MIDI event files that are in the folder indicated in
this preference item will show up in the MIDI editor
events list. Similarly, the MIDI sequences folder is the
default location for saving and opening MIDI event
sequences.
226
Customizing
Solo Performer Show Controller User’s Guide
The Device folder and Scene folder are the places that
Solo Performer Show Controller looks in for setting up
the Lightshow Editor window. The Device folder should
be set to where your light device files are located. If this
is not set up correctly, there will be no light devices
showing up in the device menus of the Lightshow Editor
window. Similarly, the Scene folder should be the set to
the folder containing the light scene files that you wish to
use in the Lightshow Editor. Only those scene files that
are in the folder indicated in this preference item will
show up in the Lightshow Editor Saved Light Scenes list.
The Light Show Folder is the default place that light
shows are saved to and opened from. Similarly, the Light
Chases Folder is the default location where light chases
are saved and opened.
The hotkey events folder is the default location for saving
and opening hotkey events. It is also the place where
Solo Performer Show Controller looks for hotkey events
to set up the event listing in the Hotkey Editor window.
Only those hotkey event files that are in the folder
indicated in this preference item will show up in the
Hotkey Editor’s Saved Hotkeys list. Similarly, the hotkey
sequences folder is the default location for saving and
opening hotkey event sequences.
To change a default folder, click the Choose… button to
the right of the item that you wish to change, and a
dialog will appear for the selection of the folder.
Alien Apparatus Company, Inc.
Customizing
227
Setting Default Configuration File
The default configuration file may be set in the Files &
Folders preferences settings.
This file contains the information about how the light
devices are set up in the lightshow editor window and
what addresses are assigned to the 32 channels of light
control during the run of a show. By choosing a default
configuration file, these settings will be the ones that will
be set automatically every time Solo Performer Show
Controller starts up. It is important that the default
configuration file is set to the configuration file that
defines your lighting setup. Note that you could have
multiple configuration files that correspond to the
various light setups that you may want to use. Always
set the default configuration file to match the current
light setup.
228
Customizing
Solo Performer Show Controller User’s Guide
Font And Color Settings
Various colors used in Solo Performer Show Controller
may be set up in this tab of the Preferences window.
Most notably, the lyric display background and default
text color can be set here. If you prefer to use black text
on a white background, you can set that up right here.
Colors may be changed by clicking on the color square
next to the text description.
Alien Apparatus Company, Inc.
Customizing
229
After clicking one of the color squares, a color picker
window will open up allowing a new color to be chosen.
The size of the text on the playlist may be set with the
Play List Font Settings.
Additionally, you may choose to put all song names in
italics if they do not have lyrics entered for them. This
may aid in setup by alerting you as to what songs still
need to be completed.
230
Customizing
Solo Performer Show Controller User’s Guide
The default text font used to display lyrics may be
changed by selecting a font in the pop-up menu.
The font size of the lyrics display may be changed by
selecting a size in the pop-up menu.
Alien Apparatus Company, Inc.
Customizing
231
A scale factor may be chosen for the lyrics display when
Full Screen is chosen from the Lyrics menu.
The default settings for Button View can be set here as
well. The default color, size, and column layout can all
be chosen here. These settings are how Button View will
look when opened for the first time for a playlist. If
changes are made, the changes will take precedence and
will be saved with the playlist.
232
Customizing
Solo Performer Show Controller User’s Guide
MIDI Settings
The MIDI file playback options may be set by clicking on
the MIDI toolbar item in the Preferences window.
By clicking on the arrow next to the label MIDI Playback
Device, the destination for MIDI files may be set.
Note that the first item on the list is QuickTime Audio
on Mac OS X and Microsoft GS WaveTable SW Synth on
Windows computer systems. With this option selected,
the MIDI file will be rendered to audio by the computer
and will be played back much like an audio file.
The various ports of your MIDI system will also show up
in this listing. By selecting one of these options, Solo
Performer Show Controller will stream MIDI files to the
Alien Apparatus Company, Inc.
Customizing
233
chosen device and no audio will be played on the
computer.
The Reset Channels Before Each Song Play option
sends reset commands to all of the controllers on each
channel to ensure that the playing will start from a fresh
start.
By checking the Send MIDI Pre-Events check-box, all
non-note MIDI events in the MIDI file, such as tempo
changes, program changes, and control messages, that
occur before the playback position of the MIDI file will be
sent before the MIDI notes are sent. This is a very useful
option to have checked when starting a MIDI file from a
position other than its beginning. In such a case, without
this option being enabled, the song tempo and
instrument changes would not be set up properly.
The Send Note Off Commands when Stopped is
another useful feature to have enabled. Without this
option enabled, when stopping a MIDI file, all notes that
are being played will continue to be played, as if “stuck”
on. This is because MIDI works by sending note-on and
note-off commands and the playback was stopped
before the note-off commands were issued. By having
the Send Note Off Commands when Stopped option
checked, all notes that are playing will be stopped.
The MIDI program patch starting number may be set in
the MIDI Events group box. MIDI equipment typically
start their program patch numbers from zero internally,
but display the starting number as one. With this option
checked, patch number zero will show up as one in Solo
Performer Show Controller to match the number that the
234
Customizing
Solo Performer Show Controller User’s Guide
MIDI unit displays. This is a bit of a confusing concept,
but typically this option is set.
Under the MIDI Light Control Options group box, a MIDI
device and channel number may be set to receive lighting
command changes. If using MIDI lighting, set up these
two parameters to correspond with the lighting device.
Tuning Settings
The tuning settings may be set by clicking on the Tuning
& Fog toolbar item in the Preferences window.
Alien Apparatus Company, Inc.
Customizing
235
The tuning note playback instrument may be changed by
choosing a different instrument from the Tuner
Instrument pop-up menu.
The pitch of the note that is played back for tuning may
be changed by choosing a different note from the Tuner
Pitch pop-up menu.
236
Customizing
Solo Performer Show Controller User’s Guide
Alien Apparatus Company, Inc.
Customizing
237
Fog Machine Settings
The fog machine settings can be changed by clicking on
the Tuning & Fog toolbar item of the Preferences
window. The first setting, Fog Machine Action Address,
is where the DMX512 address of the on/off action of the
fog machine is set. It is this address that is changed
during the show to start and stop the flow of fog.
The Fog On Value setting is the value that is sent to the
fog machine action address to turn the fog on. Similarly,
the Fog Off Value setting is the value that is sent to the
fog machine action address to turn the fog off.
The three setup addresses and setup values are optional
settings that can be used to send setup commands to the
fog machine when Solo Performer Show Controller first
launches.
Here’s an example of a fog machine setup:
Suppose that we have a fog machine with the following
DMX512 description table:
Channel
1
1
1
2
3
4
238
Function
Off Timer
Manual
DMX Setting
0-50
51-250
251-255
Interval
Duration
Volume
0-255
0-255
0-255
Customizing
Solo Performer Show Controller User’s Guide
Now suppose that we want to control these four items
using addresses 24 through 27 with Solo Performer Show
Controller to put out fog whenever the fog button is
pressed. The first step is to set the DIP switches on the
fog machine to address 24.
We will control the fog machine’s flow of fog by using the
volume channel, which by setting the DIP switches, is
now address 27. When the volume channel’s data value
is set to zero, there is no fog and when it is set to 255,
there is maximum fog output. We will therefore set the
Fog Machine Action Address to 27, the Fog On Value
to 255, and the Fog Off Value to 0.
Notice that we have chosen the volume channel to be the
action channel for the fog machine rather than the power
channel. Simply turning the power on and off could
theoretically control the fog machine. The problem with
this is that most fog machines have a substantial warmup period, making this method less effective.
To get things set up properly, the fog machine must have
its other addresses set up initially. We will set the power
address, 24, to a value of 255 to put the fog machine
into manual mode. The interval address, 25, and the
duration address, 26, are only useful when the fog
machine is set to timer mode rather than manual mode,
so we will just set these channels to 0.
The settings in the Preferences window will then look like
this:
Alien Apparatus Company, Inc.
Customizing
239
Alternatively, since this fog machine is capable of putting
out fog on a time schedule, we could have set address 24
to 128 to enable the timer. Then, to put out fog every
two minutes, set the interval address, 25, to 128. When
the fog machine does release a burst of fog, by setting
address 26, the duration channel, to 85, we will get a 10
second burst of fog.
If this were to be done, the fog machine could be left to
run automatically throughout the show, putting out 10second puffs of fog in two-minute intervals and could be
stopped completely by pressing the fog button on the
foot controller.
240
Customizing
Solo Performer Show Controller User’s Guide
Alien Apparatus Company, Inc.
Customizing
241
Button Mapping Settings
The function performed by each of the foot controller
buttons can be changed by the settings provided on the
Button Mapping toolbar item.
Each of the six buttons can be set to perform one of
thirteen actions:
1. 2.
3.
4.
5.
6.
7.
8.
Play
Stop
Scroll Down
Scroll Up
Scroll Stop
Volume Down
Volume Up
Lyric Zoom
242
Customizing
Solo Performer Show Controller User’s Guide
9.
10.
11.
12.
13.
Fog On
Fog Off
Send MIDI Event
Send Light Scene
Send Hotkey Command
Each button has two states. When a button is pressed
the first time, Action 1 will occur. Pressing the button
again will cause Action 2 to happen. A third press
repeats the cycle by sending Action 1. If no toggling is
wanted for a button, simply use the same setting for
both Action 1 and Action 2.
To choose an action for a button, simply click on the
button next to the action desired. If choosing a hotkey
event, light show, or MIDI command, you will be asked to
choose the event file to use.
If after setting a button to a hotkey event, a light show,
or a MIDI command, the Edit button will be enabled to
allow a change to a new event file, if desired.
Alien Apparatus Company, Inc.
Customizing
243
244
Glossary
Solo Performer Show Controller User’s Guide
Glossary
21
Address The communication designation given to a
DMX512 device. A DMX512 device has one or more
addresses that are usually settable by changing DIP
switches. The DMX512 device then “listens” for
commands sent through the control line, and responds
to commands sent to its addresses.
AIFF Audio Interchange File Format. AIFF is a file format
for computer audio files. Files saved in this format
usually have filenames that end in “.aif” or “.aiff”.
Channel
A communication link to a DMX512 device.
A DMX512 device may have multiple channels, and each
channel is assigned an address.
Chase Controller A device that turns lights on and off in
programmed sequences that may or may not be
synchronized to audio. Some, but no all, chase
controllers are DMX512 controllable.
Chase Sequence An ordered list of light scenes or
patterns.
Device Editor
This is the window in the Solo
Performer Show Controller software where new DMX512
devices may be defined and edited.
Alien Apparatus Company, Inc.
Glossary
245
Dimmer Pack
A light intensity controller. They come
in several varieties. DMX512 controllable dimmer packs
may be used with Solo Performer Show Controller.
DMX512 A lighting industry standard for light control
that was published by the U.S. Institute of Theatre
Technology (USITT). In this light control method, the
control cables for lights are wired by daisy-chaining
them together. Each light has a separate address and
responds only to commands sent to that address over
the control line.
DMX512 Description Table A table showing what a
DMX512 device does when it receives a particular
DMX512 value on its address. For example, a color
changing light might have a DMX512 description table
that says DMX512 value 25 corresponds to the color red,
and 135 corresponds to blue.
DMX512 Device A device, most often a light fixture,
which responds to DMX512 control commands to do
such things as turn on and off, change color, or move.
DMX512 Value This is the number, from 0 to 255,
that is sent, following an address, to a DMX512 device to
make it perform its actions.
Fixture
Another term for a lighting device.
Gobo
A disc that is inside of certain lights that has
geometric shapes cut in it, through which the light is
projected. The result is that the shape that is cut on the
gobo will be projected in the color of the light. Some
246
Glossary
Solo Performer Show Controller User’s Guide
gobos have colored glass to fill in the cutouts. The bat
signal from Batman was very likely a gobo!
Hotkey
Sometimes referred to as a keyboard
shortcut; a hotkey is a key sequence that is typed that
performs an action in a program. Most hotkeys are listed
in the pull-down menus of most programs. Usually
hotkeys have a modifier key with them such as “control”,
“alt” (in Windows), or “command” (in Macintosh).
Hotkey Event
A series of keys to send to another
running application.
Hotkey Event Sequence
A collection of hotkey
events that are arranged into a time sequence.
Hotkey Event Editor
The window in the Solo
Performer Show Controller software where hotkey events
and hotkey event sequences are constructed.
Light Scene
arrangement.
A static “snapshot” of a lighting
Lightshow A collection of light scenes that are
arranged into a time sequence.
Lightshow EditorThe window in the Solo Performer
Show Controller software where lightshows are
constructed by arranging scenes in a time sequence.
MIDI A standard for communicating music and settings
information to synthesizer controllers and effects units.
Alien Apparatus Company, Inc.
Glossary
247
MIDI Control Message A command sent to a MIDI
device to change a setting. For example, a reverb effect
unit might have six different settings to affect how the
reverb sounds. A control message could be sent to
change one of them. Control messages have two parts to
them: the control number and the value that the control
is to receive. Control messages are often abbreviated as
CC numbers in MIDI device manuals.
MIDI Event A collection of up to six MIDI program
changes or control messages.
MIDI Event Sequence A collection of MIDI events that
are arranged into a time sequence.
MIDI Event Editor
The window in the Solo
Performer Show Controller software where MIDI events
and MIDI event sequences are constructed.
MIDI File A file containing note and instrument
information to play back a song. MIDI files come in three
varieties, type 0, 1, and 2. A type 0 MIDI file has all of its
information on one track. A type 1 MIDI file, the most
common, contains one or more simultaneous tracks of
data. A type 2 MIDI file contains one or more
sequentially independent single-track patterns. MIDI
files often have filenames that end with “.mid” or “.midi”.
MIDI Interface A device that connects to your
computer, usually by USB, that has connectors for
connecting MIDI devices such as keyboards and effects
units so that they can be controlled or recorded by you
computer.
248
Glossary
Solo Performer Show Controller User’s Guide
MIDI Program Change A command that is sent to a
MIDI device to change its preset, also called program, to
a different number.
MP3 A compressed audio file format. An MP3 file may
be compressed (or “encoded”) in many ways. Solo
Performer Show Controller works with all mp3 formats
supported by your installed version of QuickTime. MP3
filenames typically end with “.mp3” or “.mpeg”
Playlist
A sequence of audio files with attached
lightshows and lyrics.
QuickTime An audio and video playback engine created
by Apple Computer that runs on Macintosh and Windows
computers. QuickTime is installed when Solo Performer
Show Controller is installed, and needs to be in place for
the audio to play back.
Stop After Option
A playlist row setting. If the
“Stop After” option is enabled, and it is by default, a stop
icon will show up in the playlist row. When running a
show, when the playlist item with the “Stop After” option
is finished being played, the show will stop until the play
button is pressed. If the “Stop After” option is not on, a
green arrow icon will appear in the playlist row. When
this playlist item is completed while running a show, the
next playlist item will start without stopping the show.
Terminator
A small device that is connected to the
last DMX512 device in the chain in order to keep a
proper DMX512 signal. Many people attempt to run their
systems without using a terminator, but this may result
in unreliable lights.
Alien Apparatus Company, Inc.
Glossary
249
XLR Connector A three-pin connector that is used to
connect DMX512 devices. Note that the DMX512
standard calls for using 5-pin connectors. In practice,
only three pins are commonly used, and just about all
lighting device manufacturers have switched to three-pin
connectors. The foot controller used in the Solo
Performer Show Controller uses a three-pin arrangement
that is of the most common configuration and wiring.
Because this is not a true standard, be sure that your
DMX512 devices are wired per the diagram that is
printed on the foot controller next to the connector.
250
Glossary
Solo Performer Show Controller User’s Guide
Frequently Asked
Questions
22
The software is not seeing my foot controller. What
should I look for?
If you’ve installed the software from a web-site
download, and not from the CD, the problem is most
likely that the foot controller driver is not installed. The
driver is not included in the download installer; it is only
on the CD. Put the CD in and follow the instructions in
the installation Chapters 5 and 6 to install the driver.
If you have installed the driver and it is still not working,
look at your device manager in Windows and see if the
driver shows up in the list with a conflict icon next to it.
If there is a driver conflict, delete the driver and reinstall
it.
When I play an audio file, I do not hear any sound.
What can I do?
First, make sure that your computer is set up to play
audio. If you are running the Windows version of Solo
Performer Show Controller, make sure that you have a
sound card installed. Check the computer system sound
Alien Apparatus Company, Inc.
FAQ
251
output volume to make sure that the sound is not turned
off. Verify that QuickTime is installed. If using Windows,
a re-installation of QuickTime may help.
Can I use Solo Performer Show Controller to control
other software programs?
Yes! This can be done through the use of hotkeys.
Hotkeys have been used successfully to control video
programs, slideshows, and PowerPoint presentations, for
example. See Chapter 18 for details.
I have a DMX512 compatible light, but I do not know
its DMX Description Table. What do I do?
The first suggestion would be to try to obtain the table
from the manufacturer. Most manufacturers publish
their manuals on their web site for free downloading.
Also, on the Alien Apparatus Company, Inc. web site,
there is a library section with DMX512 description tables
and device files for lighting equipment from many
lighting manufacturers. See the following web page:
http://www.alienapparatus.com/library.html
If you come up completely empty in getting a table, the
light device can still be used provided that you do some
experimenting to figure out how it works. It is
recommended that you make a test device file using the
Device Editor and fill in the descriptions for lines 1
though 20 with the numbers 1 through 20. So, for
example, DMX value 1 would have a description of “1”,
252
FAQ
Solo Performer Show Controller User’s Guide
and DMX value 20 would have a description of “20”. Save
this device and go to the lightshow editor screen. Set the
device on one of your channels to be your newly created
device. Attach your light fixture and make sure its
address matches the address on Solo Performer Show
Controller’s channel. Now move the slider and record
what the light does for each number.
Having done this, now go back and edit the device so
that it now has the numbers 21 through 40 in the
description column next to the numbers 21 through 40.
Make sure that you delete the previous set of numbers,
from 1 to 20. Now go back to the lightshow editor and
repeat the testing.
This process should be done all the way through to the
last row of the DMX512 description table. When you are
done, you will have a list of what all the DMX512 values
do. Now you can go make a real device file for the light.
Where can I get audio files to use with Solo Performer
Show Controller?
See the audio file tips section of Chapter 10. Also, visit
the user forums at the Alien Apparatus Company, Inc.
web site for more suggestions.
http://www.alienapparatus.com/forum
How can I play audio files that are on a compact disc?
Alien Apparatus Company, Inc.
FAQ
253
Audio files can be played directly from a compact disc on
the Macintosh version of Solo Performer Show Controller.
On Macintosh systems, CD audio files show up as .aiff
files. In Windows operating systems, things are a bit
different. CD audio contents show up as .cda files that
are not audio files at all, but are only very small
“information” files. In Windows operating systems, CD
audio is not currently supported directly in QuickTime,
thus Solo Performer Show Controller cannot read CD
audio directly. The CD audio files must first be converted
to a format that QuickTime can handle, such
as .mp3, .wav, or .aiff. There are lots of utility programs
that can be found on the internet to do this conversion.
How do I suppress an instrument in the audio?
If the audio file is a MIDI file, this can be done. See
Chapter 11, MIDI File Options.
If the file is not a MIDI file, this cannot be done. For
suggestions on how to get appropriate audio files, visit
the user forums at:
http://www.alienapparatus.com/forum
How do I change the instrument that is being played
in a MIDI file? For example, my MIDI file plays back
drums and piano parts, but I want the piano part to
be played as a saxophone.
Double click on the playlist item so that the Information
window shows up. Then click the MIDI tab. Here you can
254
FAQ
Solo Performer Show Controller User’s Guide
choose what instrument will be used for each track in the
song.
I have an expensive high-quality MIDI sound module.
How can I use it with Solo Performer Show Controller?
One of two things can be done. The sound module could
be attached to the MIDI system of your computer, and
you can setup Solo Performer Show Controller to play
MIDI files to it by selecting the sound module as the MIDI
file destination in the MIDI preferences.
Alternatively, if you don’t want to bring your expensive
gear with you on the road, you can play a MIDI file to the
sound module and record its output as an audio file,
using recording software. Then, open the recorded audio
file up in Solo Performer Show Controller.
I want to run a light show, but my lights don't change.
What is wrong?
First, make sure that the light device addresses are set
up correctly following the light manufacturer’s
instructions. Secondly, make sure that the channel that
is controlling the device in Solo Performer Show
Controller is set to the correct address. This can be seen
in the lightshow editor window. Thirdly, make sure that
your cabling is correct and that the wiring on the lighting
device matches the diagram on the foot controller.
Lastly, make sure that you are using a terminator on the
last DMX512 device in the chain.
Alien Apparatus Company, Inc.
FAQ
255
How do I make my lights change in time with the
music?
There are a couple of ways to do this. The easiest way is
to active a “sound activated” setting on your lights, if
your lights have this feature. This can be done by
sending a DMX512 command to the lights. See your
lights’ DMX512 description table to see if your lights
support this.
Another way is to use a DMX512 controllable chase
controller.
Another way is to program the lights scene by scene in
the lightshow editor. The chase feature makes it easy to
create lightshows that are in time with the audio by
inserting scenes every time that the spacebar on the
keyboard is pressed. Simply tap the spacebar in time
with the playing audio.
I made a new device file, but it does not show up in
the popup menu on the lightshow editor window.
How can I make it appear?
Only those devices that are in your device library folder
will show up in the menu, and then only if their filename
ends with “.dmx”. You many change the location of the
device library folder in the preferences pane. See
Chapter 20.
256
FAQ
Solo Performer Show Controller User’s Guide
I saved a light scene from the lightshow editor
window, but it does not show up in my scene list?
How can I make it appear?
Only those scenes that are in your scene library folder
will show up in the menu, and then only if their filename
ends with “.scn”. You many change the location of the
scene library folder in the preferences pane. See Chapter
20.
My fog machine does not initialize correctly. What
should I check?
First, make sure that you have set up the fog machine
correctly following the procedure in Chapter 20,
Customizing. Secondly, make sure that you have set the
DIP switches on the fog machine properly. And finally,
the initialization commands are only sent by Solo
Performer Show Controller when the program is first
launched and when the foot controller is first detected.
Unplug the foot controller and plug it back in. Then
choose Reconnect Foot Pedal from the File menu.
Alien Apparatus Company, Inc.
FAQ
257
258
Getting Help
Solo Performer Show Controller User’s Guide
Getting Help
23
The Users Manual
If you run into problems with the Solo Performer Show
Controller system, we first encourage you to read the
user’s guide section or help section that covers your area
of concern. Also, the Common Problems page contains
many answers to common problems.
Online Help
From within the Solo Performer Show Controller software,
choosing Show Controller Help under the Help menu
brings up the online help system.
Alien Apparatus Company, Inc.
Getting Help
259
The online help may be browsed by clicking on topics to
the left, or may be searched by entering keywords in the
search box.
Website Users Forum
A users forum is available online at:
http://www.alienapparatus.com/forum
Here, messages may be posted and searched through to
find answers to questions that have been posted in the
past.
Customer Support
Customer support is available by sending an email to:
[email protected]
Customer support is also available by telephone at:
888-533-6012.
260
Getting Help
Solo Performer Show Controller User’s Guide
DMX512 Lighting
Introduction
A1
DMX512 Background
DMX512 is a standard of lighting control that was
developed by the US Institute of Theater Technology
(USITT). This standard was originally developed to
control light dimmers, but is currently being used to
control just about every aspect of lighting, from color
changes, to light motion, to fog machines, and even
lasers. DMX512 lights are specially designed to work
with this standard, although most any light can be made
to work by using DMX512 controlled dimmer packs or
relays.
In the DMX512 method, each light has an address and
listens to a control cable for commands that are sent to
its address. Addresses are generally set on the light by a
series of DIP switches. Note that one light may have
multiple addresses. For example, a color changing light
may have one address to set the mode of the lamp (on/
off/sound activated), another address to select the color,
and a third address to set the speed at which it changes
the color. There are, in fact, some lights that have as
many as 32 or more addresses. Lights on this scale are
Alien Apparatus Company, Inc.
DMX512 Lighting Intro
261
generally very complicated and expensive, and beyond
the scope of solo act lighting.
When the address of the light is set by DIP switches, the
first address of the light is being set and the other
addresses of the same light will be offset from the first.
For example, if a light has three addresses and the DIP
switches are set to address 15, the light will be using
addresses 15, 16, and 17.
When a command is sent to its address, the light will
respond to that command. A DMX512 light will have a
DMX description table that describes what every
command does. For example, a value of 0 might turn off
the light, 10 might make it red, and 255 might make it
blue. Note that more than one light may be set to the
same address. If this is the case, when a command is
sent, all of the lights with that address will respond. In
this way, many lights can be controlled in
synchronization using only one DMX512 address.
The DMX512 protocol is capable of controlling up to 512
addresses per “universe”, however most controllers only
provide a subset of this. Each universe represents a
separate control line. Each control line is connected to
the lights in a “daisy-chain” manner, whereby the
controller is connected to the first light, then the second
light is connected to the first, and the third is connected
to the second, etc. The last light in the chain must be
terminated with a small plug-in resistor device to keep
the signal from reflecting from the end and interfering
with the transmitted signal. If it is inconvenient to run
the control line in one straight run, DMX512 splitters
exist. It is important to use these rather than to just
262
DMX512 Lighting Intro Solo Performer Show Controller User’s Guide
make a “Y” cable, as the signal levels will not be correct
and the reliability of the lights will be compromised.
Lights on the DMX512 signal chain can be different types
and from different manufactures, so long as they are
DMX512 compliant. Additionally, the order of light
addresses on the signal chain is unimportant. For
example, a light fixture that is set to address 1 could be
placed at the beginning, middle, or end of the signal
chain. No special ordering of addresses is necessary.
The DMX512 protocol is designed for speed and
simplicity. Therefore, no error checking is done, and as
such, DMX512 is not appropriate for controlling
potentially dangerous equipment such as pyrotechnics.
However, for stage and theater lighting, DMX512 is easy
to use, is fast enough for most applications, and is
capable of producing spectacular large-scale light shows.
DMX512's acceptance by the industry is shown by the
large number of devices that are available that use the
DMX512 protocol.
DXM512 And Solo Performer Show Controller
Solo Performer Show Controller allows for the control of
32 DMX512 addresses. 32 channels of control may not
seem like a lot compared to what is being used for huge
arena events, but for a solo act, 32 channels can take you
far. This is especially true when one considers address
sharing amongst lights.
In Solo Performer Show Controller, “Light Device” files are
created to control DMX512 channels. A light fixture with
Alien Apparatus Company, Inc.
DMX512 Lighting Intro
263
several channels of control would then require several
“Light Device” files to control all of the channels – one
Light Device file for each channel.
Reduced DMX Modes
To maximize the amount of lights that may be controlled
with Solo Performer Show Controller, it may be
worthwhile to consider the use of “reduced DMX” modes
that are available on some light fixtures. Reduced DMX
modes, on lights that support this, are usually enabled by
a DIP switch setting on the light fixture. These reduced
modes simply allow less control of the light in exchange
for using up less DMX512 addresses. So, by giving up
control of some of the light’s parameters that may not be
important to you anyway, you may be able to control
more lights.
264
DMX512 Lighting Intro Solo Performer Show Controller User’s Guide
Software License
Agreement
A2
Alien Apparatus Company, Inc. Software License Agreement
CAREFULLY READ THE FOLLOWING LICENSE
AGREEMENT. BY OPENING THE PACKAGE OR CLICKING
ON THE "AGREE" BUTTON, YOU ARE CONSENTING TO
BE BOUND BY AND ARE BECOMING A PARTY TO THIS
AGREEMENT. IF YOU DO NOT AGREE TO ALL OF THE
TERMS OF THIS AGREEMENT, CLICK THE "DISAGREE"
BUTTON, DO NOT INSTALL OR USE THE SOFTWARE,
AND, IF APPLICABLE, RETURN THIS PRODUCT TO THE
PLACE OF PURCHASE FOR A FULL REFUND.
1. Grant. This SOFTWARE LICENSE AGREEMENT made by and
between Alien Apparatus Company, Inc. (hereinafter "AUTHOR")
and the purchaser of the license (hereinafter "LICENSEE"):
AUTHOR has proprietary software including documentation
identified as SOLO PERFORMER SHOW CONTROLLER™
(hereinafter "LICENSED SOFTWARE");
AUTHOR grants to LICENSEE a royalty-free, non-transferable and
non-exclusive license to copy and use the LICENSED SOFTWARE.
IF YOU DO NOT HAVE A VALIDLY LICENSED COPY OF
THIS SOFTWARE, YOU ARE NOT AUTHORIZED TO
INSTALL, COPY, OR OTHERWISE USE THE COMPONENTS
Alien Apparatus Company, Inc.
Software License Agreement
265
AND YOU HAVE NO RIGHTS UNDER THIS LICENSE
AGREEMENT.
2. Permitted License Uses and Restrictions. This Agreement
allows LICENSEE to install and use one copy of the LICENSED
SOFTWARE on a single computer at a time. This Agreement does
not allow the LICENSED SOFTWARE to exist on more than one
computer at a time, and LICENSEE may not make the LICENSED
SOFTWARE available over a network where it could be used by
multiple computers at the same time. LICENSEE may make one
copy of the LICENSED SOFTWARE in machine-readable form for
backup purposes only; provided that the backup copy must include all
copyright or other proprietary notices contained on the original.
3. Confidentiality. The LICENSED SOFTWARE constitutes
confidential information and contains trade secrets of the AUTHOR.
LICENSEE is not permitted to disclose the LICENSED SOFTWARE
to any third party except in accordance with this License Agreement.
Except as and only to the extent expressly permitted in this
Agreement or by applicable law, LICENSEE may not copy,
decompile, reverse engineer, disassemble, modify, create derivative
works of, or otherwise attempt to discover the source code of the
LICENSED SOFTWARE or any part thereof. The LICENSED
SOFTWARE is protected by United States and International
copyright law. ANY USE OF THE LICENSED SOFTWARE,
EXCEPT AS EXPRESSLY PERMITTED IN THIS LICENSE
AGREEMENT, MAY SUBJECT LICENSEE TO CIVIL DAMAGES
AND LEGAL FEES, AND MAY BE A SERIOUS CRIME.
4. Transfer. LICENSEE may not rent, lease, lend or sublicense the
LICENSED SOFTWARE. LICENSEE may, however, make a onetime permanent transfer of all of your license rights to the
LICENSED SOFTWARE to another party, provided that: (a) the
transfer must include all of the LICENSED SOFTWARE, including
all its component parts, original media, printed materials and this
Agreement; (b) LICENSEE does not retain any copies of the
266
Software License Agreement Solo Performer Show Controller User’s
Guide
LICENSED SOFTWARE, full or partial, including copies stored on a
computer or other storage device; and (c) the party receiving the
LICENSED SOFTWARE reads and agrees to accept the terms and
conditions of this License Agreement.
5. Security. LICENSEE agrees not to disclose, provide, transfer,
sublicense, or otherwise make available the LICENSED SOFTWARE
or any portion whatsoever, including but not limited to flow charts,
logic diagrams, object codes, source codes, and technical
documentation, to any person other than LICENSEE or AUTHOR
personnel without prior written approval of AUTHOR. Furthermore,
LICENSEE agrees that it will not store on any media or otherwise use
said LICENSED SOFTWARE or portions thereof such that any third
party through any data processing network or other means may gain
access to said LICENSED SOFTWARE.
6. Title. No title to or ownership of the LICENSED SOFTWARE or
any parts thereof is transferred to LICENSEE. LICENSEE shall do
nothing inconsistent with AUTHOR's title in the LICENSED
SOFTWARE.
7. Limited Warranty on Media. AUTHOR warrants the media on
which the LICENSED SOFTWARE is recorded and delivered by
AUTHOR to be free from defects in materials and workmanship
under normal use for a period of ninety (90) days from the date of
original retail purchase. LICENSEE's exclusive remedy under this
Section shall be, at AUTHOR's option, a refund of the purchase price
of the product containing the LICENSED SOFTWARE or
replacement of the LICENSED SOFTWARE which is returned to
AUTHOR or an authorized representative of the AUTHOR with a
copy of the receipt. THIS LIMITED WARRANTY AND ANY
IMPLIED WARRANTIES ON THE MEDIA INCLUDING, BUT
NOT LIMITED TO, THE IMPLIED WARRANTIES OF
MERCHANTABILITY, OF SATISFACTORY QUALITY, AND OF
FITNESS FOR A PARTICULAR PURPOSE, ARE LIMITED IN
DURATION TO NINETY (90) DAYS FROM THE DATE OF
ORIGINAL RETAIL PURCHASE. SOME JURISDICTIONS DO
Alien Apparatus Company, Inc.
Software License Agreement
267
NOT ALLOW LIMITATIONS ON HOW LONG AN IMPLIED
WARRANTY LASTS, SO THE ABOVE LIMITATION MAY NOT
APPLY TO LICENSEE. THE LIMITED WARRANTY SET FORTH
HEREIN IS THE ONLY WARRANTY MADE TO LICENSEE AND
IS PROVIDED IN LIEU OF ANY OTHER WARRANTIES (IF
ANY) CREATED BY ANY DOCUMENTATION OR PACKAGING.
THIS LIMITED WARRANTY GIVES LICENSEE SPECIFIC
LEGAL RIGHTS, AND LICENSEE MAY ALSO HAVE OTHER
RIGHTS WHICH VARY BY JURISDICTION.
8. Disclaimer of Warranties. LICENSEE EXPRESSLY
ACKNOWLEDGE AND AGREE THAT USE OF THE LICENSED
SOFTWARE IS AT LICENSEE'S SOLE RISK AND THAT THE
ENTIRE RISK AS TO SATISFACTORY QUALITY,
PERFORMANCE, ACCURACY AND EFFORT IS WITH
LICENSEE. EXCEPT FOR THE LIMITED WARRANTY ON
MEDIA SET FORTH ABOVE AND TO THE MAXIMUM
EXTENT PERMITTED BY APPLICABLE LAW, THE LICENSED
SOFTWARE IS PROVIDED "AS IS", WITH ALL FAULTS AND
WITHOUT WARRANTY OF ANY KIND, AND THE AUTHOR
AND THE AUTHOR'S LICENSORS (COLLECTIVELY
REFERRED TO AS "AUTHOR" FOR THE PURPOSES OF
SECTIONS 8 AND 9) HEREBY DISCLAIM ALL WARRANTIES
AND CONDITIONS WITH RESPECT TO THE LICENSED
SOFTWARE, EITHER EXPRESS, IMPLIED OR STATUTORY,
INCLUDING, BUT NOT LIMITED TO, THE IMPLIED
WARRANTIES AND/OR CONDITIONS OF
MERCHANTABILITY, OF SATISFACTORY QUALITY, OF
FITNESS FOR A PARTICULAR PURPOSE, OF ACCURACY, OF
QUIET ENJOYMENT, AND NON-INFRINGEMENT OF THIRD
PARTY RIGHTS. AUTHOR DOES NOT WARRANT AGAINST
INTERFERENCE WITH LICENSEE'S ENJOYMENT OF THE
LICENSED SOFTWARE, THAT THE FUNCTIONS CONTAINED
IN THE LICENSED SOFTWARE WILL MEET LICENSEE
REQUIREMENTS, THAT THE OPERATION OF THE LICENSED
SOFTWARE WILL BE UNINTERRUPTED OR ERROR-FREE, OR
268
Software License Agreement Solo Performer Show Controller User’s
Guide
THAT DEFECTS IN THE LICENSED SOFTWARE WILL BE
CORRECTED. NO ORAL OR WRITTEN INFORMATION OR
ADVICE GIVEN BY THE AUTHOR OR AN AUTHOR'S
AUTHORIZED REPRESENTATIVE SHALL CREATE A
WARRANTY. SHOULD THE LICENSED SOFTWARE PROVE
DEFECTIVE, LICENSEE ASSUMES THE ENTIRE COST OF
ALL NECESSARY SERVICING, REPAIR OR CORRECTION.
SOME JURISDICTIONS DO NOT ALLOW THE EXCLUSION OF
IMPLIED WARRANTIES OR LIMITATIONS ON APPLICABLE
STATUTORY RIGHTS OF A CONSUMER, SO THE ABOVE
EXCLUSION AND LIMITATIONS MAY NOT APPLY TO
LICENSEE.
9. Limitation of Liability. TO THE EXTENT NOT PROHIBITED
BY LAW, IN NO EVENT SHALL THE AUTHOR BE LIABLE FOR
PERSONAL INJURY, OR ANY INCIDENTAL, SPECIAL,
INDIRECT OR CONSEQUENTIAL DAMAGES WHATSOEVER,
INCLUDING, WITHOUT LIMITATION, DAMAGES FOR LOSS
OF PROFITS, LOSS OF DATA, BUSINESS INTERRUPTION OR
ANY OTHER COMMERCIAL DAMAGES OR LOSSES, ARISING
OUT OF OR RELATED TO LICENSEE'S USE OR INABILITY TO
USE THE LICENSED SOFTWARE, HOWEVER CAUSED,
REGARDLESS OF THE THEORY OF LIABILITY (CONTRACT,
TORT OR OTHERWISE) AND EVEN IF THE AUTHOR HAS
BEEN ADVISED OF THE POSSIBILITY OF SUCH DAMAGES.
SOME JURISDICTIONS DO NOT ALLOW THE LIMITATION OF
LIABILITY FOR PERSONAL INJURY, OR OF INCIDENTAL OR
CONSEQUENTIAL DAMAGES, SO THIS LIMITATION MAY
NOT APPLY TO LICENSEE. In no event shall the AUTHOR's total
liability to LICENSEE for all damages (other than as may be required
by applicable law in cases involving personal injury) exceed the
amount of fifty dollars ($50.00). The foregoing limitations will apply
even if the above stated remedy fails of its essential purpose.
10. Export Law Assurances. LICENSEE may not use or otherwise
export or reexport the LICENSED SOFTWARE except as authorized
by United States law and the laws of the jurisdiction in which the
Alien Apparatus Company, Inc.
Software License Agreement
269
LICENSED SOFTWARE was obtained. In particular, but without
limitation, the LICENSED SOFTWARE may not be exported or reexported (a) into (or to a national or resident of) any U.S. embargoed
countries (currently Cuba, Iran, Iraq, Libya, North Korea, Sudan and
Syria) or (b) to anyone on the U.S. Treasury Department's list of
Specially Designated Nationals or the U.S. Department of Commerce
Denied Person’s List or Entity List. By using the LICENSED
SOFTWARE, LICENSEE represents and warrants that LICENSEE is
not located in, under control of, or a national or resident of any such
country or on any such list.
11. Government End Users. The LICENSED SOFTWARE and
related documentation are "Commercial Items", as that term is
defined at 48 C.F.R. §2.101, consisting of "Commercial Computer
Software" and "Commercial Computer Software Documentation", as
such terms are used in 48 C.F.R. §12.212 or 48 C.F.R. §227.7202, as
applicable. Consistent with 48 C.F.R. §12.212 or 48 C.F.R.
§227.7202-1through 227.7202-4, as applicable, the Commercial
Computer Software and Commercial Computer Software
Documentation are being licensed to U.S. Government end users (a)
only as Commercial Items and (b) with only those rights as are
granted to all other end users pursuant to the terms and conditions
herein. Unpublished-rights reserved under the copyright laws of the
United States.
12. Termination. In the event that LICENSEE neglects or fails to
perform or observe any of its obligations under this Agreement, or if
any assignment shall be made of its business for the benefit of
creditors, of if a receiver, trustee in bankruptcy or similar official
shall be appointed to take charge of all or part of its property, or if it
is adjudged a bankrupt, AUTHOR may immediately terminate this
agreement and all licenses granted hereunder.
If after repeated efforts AUTHOR is unable to make the software
operate as warranted, the LICENSEE may terminate the license(s) of
LICENSED SOFTWARE and receive a refund of the License Fee(s)
270
Software License Agreement Solo Performer Show Controller User’s
Guide
paid.
13. Assignment. This Agreement and the licenses granted hereunder
may not be assigned, sublicensed, or otherwise transferred by the
LICENSEE without prior written consent from AUTHOR.
14. General. This Agreement supersedes all prior agreements
concerning the subject matter herein and may not be changed or
terminated except by a written communication signed by the party
against whom the same is sought to be enforced.
15. Controlling Law and Severability. This Agreement will be
governed by and construed in accordance with the laws of the State of
Pennsylvania, as applied to agreements entered into and to be
performed entirely within Pennsylvania between Pennsylvania
residents. This Agreement shall not be governed by the United
Nations Convention on Contracts for the International Sale of Goods,
the application of which is expressly excluded. If for any reason a
court of competent jurisdiction finds any provision, or portion thereof,
to be unenforceable, the remainder of this Agreement shall continue
in full force and effect.
16. Complete Agreement; Governing Language. This Agreement
constitutes the entire agreement between the parties with respect to
the use of the LICENSED SOFTWARE licensed hereunder and
supersedes all prior or contemporaneous understandings regarding
such subject matter. No amendment to or modification of this
Agreement will be binding unless in writing and signed by the
AUTHOR. Any translation of this Agreement is done for local
requirements and in the event of a dispute between the English and
any non-English versions, the English version of this Agreement shall
govern.
Alien Apparatus Company, Inc.
Software License Agreement
271
272 Declaration of Conformity Solo Performer Show Controller User’s Guide
Limited Warranty
A3
WORLDWIDE LIMITED WARRANTY
AND TECHNICAL SUPPORT
General Terms
EXCEPT AS EXPRESSLY SET FORTH IN THIS LIMITED WARRANTY, ALIEN
APPARATUS COMPANY, INC. MAKES NO OTHER WARRANTIES OR
CONDITIONS, EXPRESS OR IMPLIED, INCLUDING ANY IMPLIED WARRANTIES OF
MERCHANTABILITY AND FITNESS FOR A PARTICULAR PURPOSE. ALIEN
APPARATUS COMPANY EXPRESSLY DISCLAIMS ALL WARRANTIES AND
CONDITIONS NOT STATED IN THIS LIMITED WARRANTY. ANY IMPLIED
WARRANTIES THAT MAY BE IMPOSED BY LAW ARE LIMITED IN DURATION TO
THE LIMITED WARRANTY PERIOD. SOME STATES OR COUNTRIES DO NOT
ALLOW A LIMITATION ON HOW LONG AN IMPLIED WARRANTY LASTS OR THE
EXCLUSION OR LIMITATION OF INCIDENTAL OR CONSEQUENTIAL DAMAGES
FOR CONSUMER PRODUCTS. IN SUCH STATES OR COUNTRIES, SOME
EXCLUSIONS OR LIMITATIONS OF THIS LIMITED WARRANTY MAY NOT APPLY
TO YOU.
This limited warranty applies to the Alien Apparatus Company branded
hardware products sold by or leased from Alien Apparatus Company, Inc., its
worldwide subsidiaries, affiliates, authorized resellers, or country
distributors (collectively referred to in this Limited Warranty as “Alien
Apparatus”) with this Limited Warranty. This Limited Warranty is applicable
in all countries and may be enforced in any country where Alien Apparatus
or its authorized service providers offer warranty service subject to the
terms and conditions set forth in this limited warranty. However, warranty
service availability and response times may vary from country to country and
may also be subject to registration requirements in the country of purchase.
Alien Apparatus warrants that the Alien Apparatus product you have
purchased from Alien Apparatus or from an Alien Apparatus authorized
reseller is free from defects in materials and workmanship under normal use
for a period of one (1) year from the date of purchase. The Limited Warranty
Alien Apparatus Company, Inc.
Limited Warranty
273
period starts on the date of purchase or lease from Alien Apparatus. Your
dated sales or delivery receipt, showing the date of purchase or lease of the
product, is your proof of the purchase or lease date. You may be required
to provide proof of purchase or lease as a condition of receiving warranty
service. You are entitled to warranty service according to the terms and
conditions of this document if a repair to your Alien Apparatus branded
hardware is required within the Limited Warranty period. This Limited
Warranty extends only to the original purchaser or lessee of this Alien
Apparatus branded product and is not transferable to anyone who obtains
ownership of the Alien Apparatus branded product from the original
purchaser or lessee.
Alien Apparatus products are manufactured using new materials or new and
used materials equivalent to new in performance and reliability. Spare parts
may be new or equivalent to new. Spare parts are warranted to be free from
defects in material or workmanship for thirty (30) days or for the remainder
of the Limited Warranty period of the Alien Apparatus hardware product in
which they are installed, whichever is longer.
During the Limited Warranty Period, Alien Apparatus will repair or replace
the defective component parts or the hardware product. All component
parts or hardware products removed under this Limited Warranty become
the property of Alien Apparatus. The replacement part or product takes on
either the Limited Warranty status of the removed part or product or the
thirty (30) day Limited Warranty of the spare part. In the unlikely event that
your Alien Apparatus product has a recurring failure, Alien Apparatus, at its
discretion, may elect to provide you with a replacement unit of Alien
Apparatus’s choosing that is at least equivalent to your Alien Apparatus
branded product in hardware performance. Alien Apparatus reserves the
right to elect, at its sole discretion, to give you a refund of your purchase
price or lease payments (less interest) instead of replacement. This is your
exclusive remedy for defective products.
This is not a service contract, and this warranty does not include
maintenance, cleaning, or periodic check-up.
Alien Apparatus reserves the right to make changes in design and/or
improvements upon its products without any obligation to include these
changes in any products theretofore manufactured.
Alien Apparatus does not warrant that the operation of this product will be
uninterrupted or error-free. Alien Apparatus is not responsible for damage
that occurs as a result of your failure to follow the instructions that came
with the Alien Apparatus branded product.
This Limited Warranty does not apply to any product from which the serial
number has been removed or that has been damaged or rendered defective
274 Declaration of Conformity Solo Performer Show Controller User’s Guide
(a) as a result of accident, misuse, abuse, or other external causes; (b) by
operation outside the usage parameters stated in the user documentation
that shipped with the product; or (c) by modification or service by anyone
other than (i) Alien Apparatus, (ii) an Alien Apparatus authorized service
provider, or (iii) your own installation of end-user replaceable Alien
Apparatus or Alien Apparatus approved parts if available for your product in
the servicing country.
These terms and conditions constitute the complete and exclusive warranty
agreement between you and Alien Apparatus regarding the Alien Apparatus
branded product that you have purchased or leased. These terms and
conditions supersede any prior agreements or representations – including
representations made in Alien Apparatus sales literature or advice given to
you by Alien Apparatus or an agent or employee of Alien Apparatus – that
may have been made in connection with your purchase or lease of the Alien
Apparatus branded product. No change to the conditions of this Limited
Warranty is valid unless it is made in writing and signed by an authorized
representative of Alien Apparatus.
Limitation of Liability
IF YOUR ALIEN APPARATUS BRANDED HARDWARE PRODUCT FAILS TO WORK
AS WARRANTED ABOVE, YOUR SOLE AND EXCLUSIVE REMEDY SHALL BE
REPAIR OR REPLACEMENT. ALIEN APPARATAUS’S MAXIMUM LIABILITY UNDER
THIS LIMITED WARRANTY IS EXPRESSLY LIMITED TO THE LESSER OF THE
PRICE YOU HAVE PAID FOR THE PRODUCT OR THE COST OF REPAIR OR
REPLACEMENT OF ANY HARDWARE COMPONENTS THAT MALFUNCTION IN
CONDITIONS OF NORMAL USE.
ALIEN APPARATUS IS NOT LIABLE FOR ANY DAMAGES CAUSED BY THE
PRODUCT OR THE FAILURE OF THE PRODUCT TO PERFORM, INCLUDING ANY
LOST PROFITS OR SAVINGS OR SPECIAL, INCIDENTAL, OR CONSEQUENTIAL
DAMAGES. ALIEN APPARATUS IS NOT LIABLE FOR ANY CLAIM MADE BY A
THIRD PARTY OR MADE BY YOU FOR A THIRD PARTY.
THIS LIMITATION OF LIABILITY APPLIES WHETHER DAMAGES ARE SOUGHT, OR
A CLAIM MADE, UNDER THIS LIMITED WARRANTY OR AS A TORT CLAIM
(INCLUDING NEGLIGENCE AND STRICT PRODUCT LIABILITY), A CONTRACT
CLAIM, OR ANY OTHER CLAIM. THIS LIMITATION OF LIABILITY CANNOT BE
WAIVED OR AMENDED BY ANY PERSON. THIS LIMITATION OF LIABILITY WILL
BE EFFECTIVE EVEN IF YOU HAVE ADVISED ALIEN APPARATUS OR AN
AUTHORIZED REPRESENTATIVE OF ALIEN APPARATUS OF THE POSSIBILITY OF
ANY SUCH DAMAGES. THIS LIMITATION OF LIABILITY, HOWEVER, WILL NOT
APPLY TO CLAIMS FOR PERSONAL INJURY.
THIS LIMITED WARRANTY GIVES YOU SPECIFIC LEGAL RIGHTS. YOU MAY
ALSO HAVE OTHER RIGHTS THAT MAY VARY FROM STATE TO STATE OR
Alien Apparatus Company, Inc.
Limited Warranty
275
FROM COUNTRY TO COUNTRY. YOU ARE ADVISED TO CONSULT APPLICABLE
STATE OR COUNTRY LAWS FOR A FULL DETERMINATION OF YOUR RIGHTS.
Software
ALIEN APPARATUS DOES NOT WARRANT SOFTWARE PRODUCTS. Alien
Apparatus’s only obligations with respect to software distributed by Alien
Apparatus under the Alien Apparatus brand are set forth in the applicable
end-user license agreement. Non-Alien Apparatus hardware and software
products are provided “AS IS.” However, non-Alien Apparatus
manufacturers, suppliers, or publishers may provide their own warranties
directly to you.
Software Technical Support
Software technical support is defined as assistance with questions and
issues about the software that was included by Alien Apparatus with the
Alien Apparatus branded product at the time of your purchase or lease of
the product. Technical support for software is available for the first ninety
(90) days from the date of product purchase or lease. Your dated sales or
delivery receipt, showing the date of purchase or lease of the product, is
your proof of the purchase or lease date. You may be required to provide
proof of purchase or lease as a condition of receiving software technical
support. After the first ninety (90) days, technical support for software that
was included with the Alien Apparatus branded product at the time of your
purchase or lease of the product is available for a fee.
Requesting Warranty Service
To request warranty service for the product, contact the Alien Apparatus
authorized reseller from which you purchased the product.
Worldwide, warranty service may be requested by emailing
[email protected].
In the United States and Canada, warranty service may also be requested by
calling the Alien Apparatus Toll Free Technical Phone Support Center at
1-888-533-6012.
For warranty service, send the product only to the Alien Apparatus factory.
All shipping charges must be pre-paid. If the requested repairs or service,
including parts replacement, are within the terms of this Limited Warranty,
Alien Apparatus will pay return shipping charges only to a designated point
within the United States. If the entire unit is sent, it must be shipped in its
original packing. No accessories should be shipped with the product. If any
accessories are shipped with the product, Alien Apparatus shall have no
liability whatsoever for the loss or damage to any such accessories, nor for
its safe return thereof.
276 Declaration of Conformity Solo Performer Show Controller User’s Guide
A4
Declaration of Conformity
In accordance with EN 45014:1998
We,
Alien Apparatus Company, Inc.
P.O. Box 761
Horsham, PA 19044
declare that the equipment
Solo Performer Show Controller SC1000
In accordance with the following Directives:
73 / 23 / EEC
89 / 336 / EEC
The Low Voltage Directive and its amending directives;
The Electromagnetic Compatibility Directive and its
amending directives
has been designed and manufactured to the following specifications:
EN
EN
EN
EN
EN
EN
EN
50081-1: 1992
50082-1: 1997
55014-1: 2000, with A1 and A2
55014-2: 2000, with A1
55015: 2000, with A1 and A2
55103-1: 1996
55103-2: 1996
I hereby declare that the equipment named above has been designed to comply
with the relevant sections of the above referenced specifications. The unit
complies with all essential requirements of the Directives.
Ronnie Benditt
President
Alien Apparatus Company, Inc.
On April 8, 2004
Alien Apparatus Company, Inc.
Limited Warranty
277