1
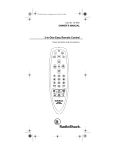
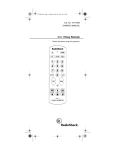
RadioShack
RadioShack 4-1 Family Favorites
Remote
Press this key…
To…
Select the next or previous
channel.
Select the next or previous
chapter on some DVD player
models.
Increase or decrease the sound
level.
Turn the sound off or on.
Switch the TV's, VCR's, SAT’s,
or DVD’s input to view TV or
video programs, or to act as
your cable box's A/B switch.
Recall the last-viewed
channel.
Scan favorite channels (and/or
all channels). See
“Programming Favorite
Channel Scan” and “Using
Channel Scan”.
Directly enter channels (for
example, 09 or 31).
USER GUIDE
INTRODUCTION
Thank you for purchasing a RadioShack 4-1 Family
Favorites Remote. Your remote lets you control up
to four home entertainment devices with one easyto-use, compact unit. You can set up different
groups of family favorite channels—one for Mom,
one for Dad, and one for the kids.
After installing batteries (see next section), you can
immediately use the RadioShack 4-1 Family
Favorites Remote to control an RCA TV, VCR, and
DVD player, and a RCA Satellite receiver. To control
other brands, perform the instructions in
“Programming a Device”. For best results, please
read and perform all the remaining instructions.
Also, keep this guide for future reference.
INSTALLING BATTERIES
Battery Use And Safety
• Use only fresh batteries of the required size and
recommended type.
• Do not mix old and new batteries, different
types of batteries (that is, standard, alkaline, or
rechargeable), or rechargeable batteries of
different capacities.
CAUTION: If you do not plan to use the remote for
an extended period, remove the batteries. They can
leak chemicals that can destroy electronic parts.
WARNING: Dispose of old batteries promptly and
properly. Do not burn or bury them.
To Install Batteries:
1.
Open the battery compartment cover (located
on the back of the remote).
2. Place the AAA batteries in the compartment
and match the + and - polarity symbols
inside.
3. Replace the cover.
NOTE: When the RadioShack 4-1 Family Favorites
Remote stops operating properly, replace the
batteries within 10 minutes to protect the
programming information.
A QUICK LOOK AT THE CONTROLS
To…
Program sequences.
Turn on or off the selected
device or run the macro you
programmed for the Power
button (see “Setting the Power
Macro” for more information).
Select Mom’s, Dad’s, or Kid’s
favorite channels (see “Setting
Family Favorites” for more
information).
Access News, Movies, Sports,
or Family Favorite channels
with these genre keys (up to
three channels per genre key;
see “Setting Family Favorites”
for more information).
Select a device to control.
Display the menu for the
selected device.
Display the program guide for
the selected device.
WSTX
Input channel number entries
on some TV models or make a
selection on a device's menu.
Control your VCR, PVR, DVD
player, or Video On Demand
(VOD) if available on your
cable/satellite service.
Record a video program on a
record-capable device (press
twice).
PROGRAMMING A DEVICE
Your RadioShack 4-1 Family Favorites Remote
requires four AAA batteries (not supplied) for
power.
Press this key…
Enter channels over 100 (for
example, +100, 3, 1 = 131).
For a DVD player, use +100 to
access chapters over 10 (for
example, +100, 3 = 13).
Move the cursor in the
program guide and menu
screens.
Choose options from the
selected device's menu or
guide.
View the current channel and
program information.
Exit the selected device's
menu, guide, or program.
The RadioShack 4-1 Family Favorites Remote
comes pre-programmed to operate an RCA TV,
VCR, DVD player, and Satellite receiver. To control
devices other than those default brands, follow
these steps; otherwise, skip this section.
Before proceeding, find the codes for the devices
you want to program in Manufacturer's Codes and
write them down or highlight them.
NOTE: To program a TV/DVD, TV/VCR/DVD, or
TV/VCR Combo, use the TV key. To program a
Personal Video Recorder (PVR), use the VCR key. To
program a Home-Theater-in-a-Box (HTiB), use the
DVD key. If you have a VCR/DVD combo, you may
need to set up both a VCR and DVD code.
1. Turn on the device (for example, DVD player)
and, if needed, load media (for example, a
DVD).
2. On the remote, press a device key (that is,
VCR, DVD, CBL/SAT, or TV).
3. Press and hold P until the red LED blinks
twice, then release.
4. Enter the first four-digit code for your device.
The LED blinks once as you enter each digit.
If the code is correct, the LED blinks twice.
NOTE: If the LED does not blink twice, repeat steps
2 to 4 and try entering the code again.
5. Aim the remote at the device and press Power
(or PLAY, if it does not have a Power key). The
device should turn off. If it does not, repeat
steps 2 to 5, trying each code for your brand
until you find one that works. If you cannot
find a code that works, see “Searching for
Your Code”.
6. Repeat steps 1 to 5 for each device you want
to control. For future reference, write down
each working device code in a safe place.
SEARCHING FOR YOUR CODE
If your device does not respond to the remote after
trying all codes listed for your brand, or if your
brand is not listed, try searching for your code. For
example, to search for a code for your TV:
1. Press TV once.
2. Press and hold P until the red LED blinks
twice, then release.
3. Enter 9 9 1. The LED blinks twice.
4. Aim the remote at the TV and press Power.
The remote sends IR codes from its library to
the selected device, starting with the most
popular code first.
5. If the TV responds, go to step 6. If the TV
does not respond, press CH+. The remote will
try the next code. Continue until the TV
responds.
NOTE: Press CH- to try the previous code.
6. To lock in the code, press P once. The LED
blinks twice.
7. To search for other device codes, repeat steps
1 to 6, substituting the appropriate device
key.
CHECKING THE CODES
If you have set up the remote using the procedure in
“Searching for Your Code”, you may want to learn
which four-digit code is operating your equipment.
For example, to find out which code is assigned to
your TV:
1. Press TV once.
2. Press and hold P until the red LED blinks
twice, then release.
3. Enter 9 9 0. The LED blinks twice.
4. To view the code for the first digit, press 1.
Count the LED blinks (for example, three
blinks = 3), and write down the number.
NOTE: If a code digit is 0, the LED does not blink.
5. Repeat step 4 for the three remaining digits,
using 2 for the second digit, 3 for the third
digit, and 4 for the fourth digit.
6. To check for other device codes, repeat steps
1 to 5, substituting the appropriate key for
each device you are checking.
REASSIGNING DEVICE KEYS
You can set the remote to control a second TV, DVD
player, or other device (see Manufacturer's Codes).
For example, if you have two DVD players, but no
VCR, and you wish to control both DVD players
with the remote, you can reassign the unused VCR
key to the DVD player:
1. Press and hold P until the red LED blinks
twice, then release.
2. Enter 9 9 2. The LED blinks twice.
3. Press DVD, then VCR. The VCR key is now
ready to be programmed as your second DVD
player. (see Programming A Device).
To reassign other device keys to the VCR key, repeat
steps 1 to 3 above, substituting TV or CBL/SAT for
DVD in step 3. To use another unused device key,
substitute the desired key for the VCR key in step 3.
To clear a reassigned mode and reset it to its
original device type, perform steps 1 and 2 above,
then press the mode to be cleared twice.
PROGRAMMING FAVORITE CHANNEL
SCAN
The remote allows you to store a list of up to 10
favorite channels, in any order, that will be
immediately scanned when you press FAV (Scan).
NOTE: You can only store channels from one device
for Favorite Channel Scan.
1. Press a device key.
2. Press and hold P until the red LED blinks
twice, then release.
3. Enter 9 9 6. The LED blinks twice.
4. Use the keypad to enter a favorite channel
number (for example, 031), then press P (if
less than 5 digits or 4 digits plus Enter key are
entered).
5. Repeat step 4 for each favorite channel you
want to store, up to a total of 10 channels.
NOTE: If you try entering more than 10 channels, or
if more than 10 seconds elapse between key
presses, the remote automatically exits
programming mode.
NOTE: If your device requires you to press Enter
after channel numbers, press Enter after you enter
the channel numbers you want to program.
6. To exit programming with less than 10
channels, press and hold P for three seconds.
The LED blinks twice.
NOTE: If you have entered less than 10 favorite
channels and wish to add more, you will need to reenter all of the channels.
NOTE: If you have programmed 10 favorite
channels, you will need to reset the remote to
program new channels. See “Troubleshooting”.
SETTING THE POWER MACRO
You can use your new RadioShack 4-1 Family
Favorites Remote to simply turn on a particular
device, or you can set up the Power key to perform
several actions. For example, you could program
the Power key to turn on both your TV and cable
box and select a particular channel.
To set the Power macro:
1. Press and hold P until the red LED blinks
twice, then release.
2. Press 9 9 5. The LED will blink twice.
3. Press Power.
4. Enter the series of commands you want the
macro to execute (up to 15 commands).
5. Press and hold P until the red LED blinks
twice, then release.
Now, when you press and hold the Power key for
about 2 seconds, the remote will execute the series
of commands you entered.
To clear the Power macro, repeat steps 1-5 above,
but do not enter a series of commands at step 4.
NOTE: You may not include the user or genre keys in
the Power macro.
CHANGING VOLUME LOCK
The RadioShack 4-1 Family Favorites Remote
comes preset to allow independent volume control
of each selected device (Global Volume Unlock).
However, you may change the Volume Lock setting
to Global Volume Lock so that one device's volume
will control volume in all other modes. After that,
you can perform Individual Volume Unlock on a
selected device to set its volume control for
independent operation.
Locking Volume Control to One Mode (Global
Volume Lock)
1.
2.
Unlocking Volume Control for a Single Device
(Individual Volume Unlock)
1.
2.
3.
4.
SETTING FAMILY FAVORITES
Your new RadioShack 4-1 Family Favorites Remote
includes four genre keys (News, Movies, Sports,
and Family) that can be customized for each of
three users (Mom, Dad, and the kids). This allows
each family member to set up and scan their
favorite channels. You can include up to three
channels for each genre key.
To set up a scan key:
1. Press and hold P until the LED blinks twice,
then release.
2. Press 9 9 5. The LED blinks twice.
3. Press a user key (e.g., Mom’s).
4. Press a genre key (e.g., News).
5. Press the device key that controls your
channels (e.g., TV), followed by the desired
channel number, up to 3 channel digits.
NOTE: If your device requires you to press Enter
after channel numbers, you must press it after
entering your channel number when
programming.
6. Press and hold P for three seconds. The red
LED will blink twice.
7. Repeat for each channel to be included. If you
enter more than three channels, the first
channel will be overwritten.
NOTE: If you have entered less than three channels
and wish to add more, you must re-enter all of the
channels for the selected user and genre.
To clear a genre key, follow steps 1-6 above, but do
not enter a mode or channel at step 5.
USING FAMILY FAVORITES
To access Mom's, Dad's, or Kid's programmed
favorite channels:
1. Press the user key (Mom’s, Dad’s, Kid’s).
2. Press the genre key (e.g., Sports). The remote
will now access the 1st channel programmed
for the selected user and genre.
3. Press the genre key again. Each press of the
genre key will access the next channel
programmed for the selected user.
After performing Global Volume Lock
(above), press and hold P until the red LED
blinks twice, then release.
Press the mode key for the device you want to
have independent volume control.
Enter 9 9 3 and then press VOL-. The LED
blinks four times.
Repeat steps 1 to 3 for any other device that
you want to have independent volume
control.
Unlocking All Volume Control (Restoring Global
Unlock)
1.
2.
USING CHANNEL SCAN
Use FAV (Scan) to start a three-second scan of all
favorite channels (if programmed; see
“Programming Favorite Channel Scan”) or all
channels (if Favorite Channel Scan is not
programmed).
1. Press a device key.
2. Press SCAN once.
• If Favorite Channel Scan has been set up,
the device scans favorite channels, and
then continues to scan all channels for the
device.
• If Favorite Channel Scan has not been set
up, scanning starts with the current
channel.
3. To stop scanning channels at any time, press
any key once.
Press and hold P until the red LED blinks
twice, then release.
Enter 9 9 3 and then press the mode key for
the device you want to control volume (for
example, TV). The LED blinks twice. Now
when you press VOL+, VOL-, or Mute, the
selected device (for example, TV) will control
the volume regardless of the current mode.
Press and hold P until the red LED blinks
twice, then release.
Enter 9 9 3 and then press VOL+. The LED
blinks four times. You can now
independently control volume for all
programmed devices.
TROUBLESHOOTING
PROBLEM: LED does not blink when you press a
key.
SOLUTION: Replace batteries with four (4) new AAA
alkaline batteries.
PROBLEM: LED blinks when you press a key, but
device does not respond.
SOLUTION: Make sure the remote is aimed at your
device and is not more than 15 feet away.
PROBLEM: LED blinks one long blink.
SOLUTION: An entry error has occurred (for
example, wrong key). Try entry sequence again.
PROBLEM: Remote does not control devices or
commands are not working properly.
SOLUTION: Try all listed codes for the device. Make
sure the device operates with an infrared remote
control.
PROBLEM: CH+, CH-, and LAST do not work for your
RCA TV.
SOLUTION: Due to RCA design from 1983 to 1987,
only the original remote control will operate these
functions.
PROBLEM: No volume on a second TV.
SOLUTION: See “Changing Volume Lock”.
PROBLEM: Channels do not change properly.
SOLUTION: If the original remote control required
you to press Enter to change channels, press Enter
on this remote after entering the channel number.
For more help, contact us at [email protected].
MANUFACTURER’S CODES
Paragon
0000
Setup Codes for Satellite Receivers
Prism
0051
Marantz
0035, 0081
Philips
0305, 0317, 0153
AlphaStar
0772
Proscan
0047, 0747, 1922
Marta
0037
Pioneer
0877, 1877, 0144, 0533
Chaparral
0216
Proton
0178, 0052, 0003
Matsushita
0035, 0162, 1162
Pulsar
0000
Crossdigital
1109
Pulsar
0017
MEI
0035
Quasar
0000
DirecTV
0392, 0566, 0639, 1639, 1142, 0247, 0749, 1749, 0724, 0819, 1856,
Quasar
0250, 0051, 1924, 0165, 1919, 0055, 0650
Memorex
0035, 0162, 0037, 0048, 0039, 0047, 0240, 0000, 0104, 0209, 0046,
RadioShack
0797, 0315, 0303, 0883, 0015
RCA
0021
Dish Net. Sys.
1005, 0775, 1170
Realistic
0207
DishPro
1005, 0775
Regal
0279, 0273
Echostar
1005, 0775, 0218, 0269, 1170
Runco
0000
Expressvu
0775
Samsung
0144
1076, 1109, 0099, 1442
GE
Scientific Atlanta
0877, 1877, 0477, 0008, 0017
General Instrument
0869
Signal
0015
GOI
0775
Sony
1006
Hitachi
Sprucer
0021
HTS
0775
Starcom
0003, 0015
Hughes Net. Sys.
1142, 0749, 1749, 1442
Stargate
0797, 0015
JVC
0775, 1170
Starquest
0015
Legend
ABC
0003, 0008, 0014, 0017
Allegro
0153, 0315
Americast
0899
Antronix
0207, 0022
Archer
0153, 0039, 0797, 0022, 0207
Bell & Howell
0014
Bell South
Cabletenna
0899
0022
Cableview
0022
Century
0153
Citizen
0315, 0153
Clearmaster
0883
ClearMax
0883
Coolmax
0883
Director
0476
Emerson
0797
Everquest
0015
Garrard
0153
GC Electronics
0207
Gemini
0797, 0015
General Instrument
0476, 0276, 0003
GoldStar
0144
Goodmind
0797
Hamlin
0009, 0273
Jasco
0315, 0153, 0015
Jerrold
0476, 0276, 0003, 0012, 0014, 0015
Memorex
0000
Motorola
0476, 0276, 1254, 1106, 1376
Multivision
0012
Optimus
0021
Pace
Panasonic
0237
0000, 0107, 0021
0819
0269
Supercable
0276
Magnavox
0724, 0722
Supermax
0883
Memorex
0724, 0269
Tandy
0258
Mitsubishi
0749
Tocom
0012
Motorola
0869
Torx
0003
Next Level
0869
Toshiba
0000
Panasonic
0247, 0701
Tristar
0883
Paysat
0724
Tusa
0015
Philips
1142, 0749, 1749, 0724, 1076, 0722, 0099, 1442
Unika
0207, 0153, 0022
Proscan
Universal
0022, 0207, 0153, 0039
RadioShack
0869
V2
0883
RCA
0392, 0566, 0855, 0143
Viewmaster
0883
Realistic
0052, 0051
Viewstar
0258
Samsung
1276, 1109
Vision
0883
SKY
0856
Vortex View
0883
Sony
0639, 1639
Zenith
0000, 0525, 0899
Star Choice
0869
Setup Codes for DVD Players
Aiwa
0641
Akai
1975
Allegro
0869
AMW
0872
Anam
1913
Apex Digital
0672, 0717, 0755, 0796, 0797, 1100, 0796, 1061, 1937, 0794, 1056,
1915
Audiologic
0736
Audiovox
1072
Axion
1072, 1071
Blaupunkt
0717
Blue Parade
0571
Cinevision
0876, 0869
Classic
1917
Coby
1923, 0778
Curtis Mathes
1087
CyberHome
1019, 0816, 1024, 1023
Daewoo
0784, 0705, 1918, 0833
Denon
0490, 0634
Dual
1085, 1068
DVD2000
0521
Emerson
0591, 0675
Enterprise
0591
Fisher
0670
Funai
0675
GE
0522, 0815, 0717
Go Video
0744, 0783, 0715, 1970
GPX
0769, 0699
Greenhill
0717
Harman/Kardon
0582
Hitachi
0573, 0664
Hiteker
0672
Initial
0717, 1931
Integra
0627, 1924
Jaton
1078
JVC
0558, 0623, 0867, 1940, 1901
jWin
1049
Kenwood
0490, 0534
KLH
0717, 1020, 1939
Koss
0651
Lasonic
0798
Lite-On
Magnavox
1058
0503, 0675, 1976, 1914
Malata
0782
Marantz
0539
Microsoft
0522
Mintek
0839, 0717
0392, 0566
TiVo
1142, 1442
Toshiba
0749, 1749, 0790, 1285
Uniden
0724, 0722, 0052
Zenith
0856, 1856
Setup Codes for TVs
Amark
0003
Abex
0032
Admiral
0093, 0463
Advent
0761, 0783, 0842, 0817, 0815
Adventura
0046
Aiko
0092
Akai
0812, 0702, 0030, 0672
Albatron
0843
Ambassador
0177
America Action
0180
Anam
0180
Anam National
0055
AOC
0030, 0003, 0052
Apex Digital
0748, 0765, 1943, 0767
Archer
0003
Audiovox
0451, 0180, 0710, 0092, 0623, 0003
Axion
1937
Bell & Howell
0154
Bradford
CXC
0180
Daewoo
0451, 1661, 0039, 0623, 1909, 0092, 0672, 1928
Denon
0145
Dumont
0017
Durabrand
0180, 0178, 0003
Electroband
0000
Electrochome
0409
Elektra
0017, 1661
Emerson
0154, 0236, 0463, 0180, 0178, 0171, 1909, 1929, 0282, 1905, 1928,
0280, 0623, 1911, 0039, 1944, 0177
GE
0047, 0051, 0451, 0178, 0747, 1907, 1922, 0027, 0055, 1347, 1919,
0282, 1147, 1917
Harley Davidson
1904
0180
Saba
1977
Havermy
Sampo
0698
Hello Kitty
0451
0180
0093
0490, 0573, 1075, 0820, 1979, 1932
Himitsu
Sanyo
0873, 0670, 1967
Hisense
0748
Sharp
0630, 0752
Hitachi
1145, 0145, 0151, 1904, 0032, 0409
0533, 0839, 1931
Hundai
SonicBlue
1970, 0869
Infinity
0054
Sony
0533, 0864, 1903, 1981, 1033, 1934, 1904
Inteq
0017
Sungale
1074
Janeil
0046
Sylvania
0675
JBL
0054
Symphonic
0675
JCB
0000
Technics
0490
Jensen
0761, 0817, 0185
Theta Digital
0571
JVC
0052
Toshiba
0503, 1988
Kaypani
0180
0849
Tredex
0800, 0799
KEC
0180
TYT
0705
Kenwood
0030
Urban Concepts
0503
KLH
0765, 0767
USLogic
0839
Klass
0046
XBox
0522
KTV
0180, 0030, 0039, 0280
Yamaha
0490, 0539, 0545
LG
0856
Zenith
0503, 1906, 0869
Lloyd’s
1904
Rio
0869
Saba
1977
0060, 1060, 0202
Symphonic
0047, 0054, 0154, 0156, 0178, 0747
Magnasonic
1928, 1913
Magnavox
0054, 0030, 1454, 0706, 1931, 0020, 0186, 1254, 1913, 1904, 0386
Magnin
1907
Marantz
0054, 0030, 0704
Matsushita
0250, 0650
0180, 0171, 1904, 1913
Pulsar
0093
Quarter
0046
0003, 0055
Quartz
0046
Technics
0250, 0051
Quasar
0035, 0162, 1162, 0454
Techwood
0051, 0003
RadioShack
0000, 1037
Teknika
0054, 0180, 0150, 0060, 0039, 0092, 0186
Radix
0037
Telefunken
0702
Randex
0037
Thomas
1904
RCA
0060, 0240, 0042, 0619, 0058, 1060, 0202, 0880
TMK
0035, 0037, 0048, 0047, 0000, 0104, 0066, 0046, 0062
0178, 0177
Realistic
0017
ReplayTV
0616, 0614
Toshiba
0154, 0156, 0060, 1256, 1704, 1936, 0845, 1656, 1935, 0650, 1356,
Runco
0039
0240, 0045
1918, 1945
Samsung
Totevision
0039
Sanky
0048, 0039
TVS
0463
Sansui
0000, 0067, 0209
Universal
0027
Sanyo
0047, 0240, 0104, 0268, 0046
Vector Research
0030
Scott
0184, 0045, 0121, 0043
Victor
0053
Sears
0035, 0037, 0047, 0000, 0042, 0104, 0046, 0066
Vidikron
0054
Sharp
0048, 0062
Vidtech
0178
Shogun
0240
Viewsonic
1755
Sonic Blue
0614, 0616
Viking
0046
Sony
0035, 0032, 0033, 0000, 0636
Wards
0054, 0030, 0178, 0165, 0027, 0080, 0866, 0020
STS
0042
Waycon
0156
Sylvania
0035, 0081, 0000, 0043, 0593
White Westinghouse
0463, 1909, 0623
Symphonic
0000, 0593
Yamaha
0030
Teac
Zenith
0017, 0463, 0178, 1909, 0092, 1904, 1929, 1911
Technics
0035, 0162
Zonda
0003
Teknika
0035, 0037, 0000
Thomas
0000
Tivo
0618, 1503, 0636
TMK
0240
Toshiba
0045, 0043, 1503, 0066
Totevision
0037, 0240
Unitech
0240
Vector
0045
Video Concepts
0045
Videomagic
0037
Videosonic
0240
Villain
0000
Wards
0060, 0035, 0048, 0047, 0081, 0240, 0000, 0042, 0062
White Westinghouse
0209
XR-1000
0035, 0000
Zenith
0039, 0033, 0000, 0209
1919
Setup Codes for DBS/PVR Combinations
Daewoo
1928, 1909
Echostar
Emerson
0236, 1909, 1929, 1905, 1928, 1911
Expressvu
0775
Funai
1904
Hughes Network Systems
1142, 1442
GE
1917, 1907, 1922, 1919
JVC
1170
GoldStar
1926
Phillips
1142, 1442
Harley Davidson
1005, 0775, 1170
1904
Proscan
0392
Hitachi
1904
Sony
0639
Lloyd's
1904
Magnasonic
1928, 1913
Setup Codes for TV/VCR/DVD Combinations
Magnavox
1904, 1931, 1913
Emerson
1944
Magnin
1907
Panasonic
1946
Memorex
1926, 1924, 1920, 1927
Sharp
1917, 0630
MGA
1907
Sylvania
1944
Mitsubishi
1917
Toshiba
1945
Optimus
1927, 1924, 1913
Orion
1905, 1929, 1911
Setup codes for PVRs
Panasonic
1919, 1927, 1924
Panasonic
0616
Penney
1907, 1926, 1919
Phillips
0618
Quasar
1919, 1924
ReplayTV
0616, 0614
Radio Shack
1920, 1904
Sonic Blue
0614, 0616
RCA
1922, 1919, 1917, 1907
Sony
0636
Sansui
1929, 1911, 1904
Tivo
0636, 0618
Sanyo
1907
Sears
1926, 1904
Sony
1925, 1904
Sylvania
1931
Symphonic
1913, 1904
Thomas
1904
Toshiba
1936, 1918
White Westinghouse
1909
Zenith
1904, 1929, 1911
Setup Codes for VCRs
Admiral
0048, 0209
Adventura
0000
Aiwa
0037, 0000, 0307
American High
0035
Asha
0240
Audiovox
0037
Beaumark
0240
Bell & Howell
0104
Broksonic
0184, 0121, 0209
Calix
0037
Canon
0035
Carver
0081
Citizen
0037
Craig
0037, 0047, 0240
Curtis Mathes
0060, 0035, 0162
Cybernex
0240
Daewoo
0045
Denon
0042
Durabrand
0039
Dynatech
0000
0178, 0145, 0003
Electrohome
0150, 0030, 0178, 1907
Electrophonic
0037
0047, 0017, 0051, 0039, 0747, 0032
Emerex
0032
0037, 0184, 0000, 0121, 0043, 0209
0037
0093, 0150, 0178, 1250, 0178, 0836, 1917
Emerson
Monivision
0843
Fisher
0047, 0104, 0066
Motorola
0093, 0055
Fuji
0035, 0033
MTC
0060, 0030
Funai
0000
Multitech
0180
Garrard
0000
NAD
0156, 0178, 0866
GE
0060, 0035, 0240, 0202, 1060
NEC
0030, 1704
Go Video
0432
Nikko
0030, 0178, 0092
GoldStar
0037, 0480
Norcent
0748, 0824
Gradiente
0000
Noshi
0018
Harley Davidson
0000
NTC
0092
Harman/Kardon
0081
Onwa
0180
Headquarter
0046
Optimus
0154, 0250, 0166, 0650, 1927, 1924, 1913
HI-Q
Optonica
0093, 0165
Hitachi
0000, 0042
0236, 0463, 1929, 1911, 1905
Hughes Net. Sys.
0042
Panasonic
0250, 0051, 1924, 1946, 0055, 1919, 1941, 0650, 1927
JVC
0067
Penney
0047, 0156, 0051, 0060, 0030, 0178, 1347, 1926, 0027, 0039, 0747,
KEC
0037
0067
Orion
0000
Curtis Mathes
0154, 0463, 0150, 0178, 1924, 1920, 1927, 1911, 1926
Mitsubishi
0039
TNCi
Memorex
Midland
0062
Tatung
Megatron
MGA
1062, 0162, 0037, 0048, 0104, 0568, 1048, 1262, 0454, 0619, 1162,
0058, 0432, 0593
Tandy
1928
0054
1974, 1913
0240
Proscan
Citizen
1147, 0747, 1919, 0039
Harvard
RCA
Profitronic
0054, 0030, 0171, 1944, 1931, 0020
1929, 1911, 1905
Harman/Kardon
1902
0748, 0768
Sylvania
Broksonic
0623
1914
SVA
0047, 0054, 0154, 0451, 0093, 0060, 0702, 0030, 0145, 0166, 1347,
0823
0539
0081
Curtis Mathes
Rowa
Polk Audio
Polk Audio
0180
Rotel
Pioneer
0000
Audiovox
0178
Philips
0067, 0058
Supreme
0180, 0039
Hallmark
1907, 1990, 1925
0037
Pioneer
Crown
0522, 0571, 0717, 1974, 1913, 0822
0651
Pilot
0046
0180
RCA
Panasonic
0180
Supremacy
American Action
0768
Oritron
Starlite
Setup Codes for TV/VCR Combos
0180
0627, 1924, 1985
0035, 0081, 0618, 0062
0054
Haier
Onkyo
0035
Philips
0180
Grunpy
1976
0042
Philco
0180
Crosley
0522
1923
Pentax
0171
SSS
Craig
0778
Norcent
0003
Squareview
1935
0651
Magnavox
Spectracon
Toshiba
Qwestar
0651
0035, 0037, 0240, 0042
0180
ProVision
1940, 1901
Penney
0180
0017, 0030
1939
0180, 0178, 0179, 0186
Contec
0030, 0178, 0032, 1927, 0409
Koss
Soundesign
Clarion
GoldStar
KLH
1062, 0035, 0162, 0616, 1262, 0454, 1162
1903
Gibralter
JVC
0184, 0209
Panasonic
0171
0539
1931
Orion
0000, 1925, 1904, 0080
Sylvania
0180
1970
0186
Sony
Samsung
1755, 1756
Initial
Simpson
0765
Gateway
Go Video
Optonica
0060, 0030, 0039, 0092, 1928, 0280, 0046, 0186
Futuretech
1918
0093
Citizen
0490, 1925, 1907, 1762, 1990
Daewoo
0093, 1917, 0039, 0386, 0165
Sheng Chia
Changhong
0503, 0539, 0646, 1914
1923
Optimus
Sharp
1948
Philips
Coby
0035
0047, 0054, 0154, 0156, 0178, 0179, 0171, 1904, 0747, 1926
RCA
Panasonic
1937, 1915
0240
Olympus
Sears
0765
0180, 0171, 1904
1917
Noblex
0236, 0180, 0178
Celera
0683, 0853, 0809
Classic
0178
Scott
1935
Funai
Apex Digital
0037
Scotch
1941
Fujitsu
1975
0104, 0067
Nikko
Panasonic
0503, 0627, 1985, 1924
1913
NEC
0154, 1907
Broksonic
0651
0641
0463, 1904, 1929, 1911
Sanyo
0054
Oritron
Anam
Sansui
0000
Onkyo
Akai
0058
Celebrity
0710
Aiwa
0000
NAD
Carver
Flexvision
Setup Codes for HTiBs (Home-Theater-in-aBox)
Multitech
0039
1937
1003, 0872, 1923
Shinsonic
0240, 0000
0060, 0812, 0702, 0030, 0178, 1903, 0766, 1060, 0032, 0814
Samsux
Axion
0030, 0813
Samsung
MTC
Samsung
0030
0154
0869
0035, 0048
0030, 0032, 1755, 0052, 0039
Carnivale
Fisher
Rio
0067, 0043
Motorola
Sampo
1943
0717
Proscan
0042
Mitsubishi
0017, 0030
Apex Digital
Nesa
Polk Audio
Minolta
0154, 0180, 0038, 0178, 0039, 0032, 0165
Runco
Setup Codes for TV/DVD Player Combos
Envision
0525, 0571, 1902
0090, 1047, 1347, 1907, 1922, 0747
Realistic
0236, 0463, 0003, 1905, 1935, 1929, 1911
1521, 0521
1086
0240
0030, 0186, 0046
1082
Polaroid
0240, 0043
MGN Technology
Candle
Monitsu
Pioneer
MGA
0047, 1447, 1247, 1547, 1919, 0018, 0679, 1147, 1953, 1917, 1948,
0180
Mitsubishi
Norcent
0047, 0154, 0180, 0030, 0178, 0747, 0039, 0165, 0409, 1920, 0032,
1904
RCA
Broksonic
LXI
Setup Codes for Cable Boxes (Converters)
0566
RadioShack
0307, 1162, 0299, 1037, 0268, 0454, 1262
0047
Samsung
1932, 1979
1919, 0018, 0032, 1907, 0003
Kenwood
Sanyo
1967
Philco
0054, 0030, 0020
Kodak
0035, 0037
SonicBlue
0869, 1970
Philips
0054, 1954, 0690
Lloyd's
0000
Sony
1904, 1903, 1981, 1934
Pilot
0030, 0039
LXI
0037
Zenith
1906
Pioneer
0166, 0679, 0866
Magnasonic
Portland
0092, 0039
Magnavox
0035, 0039, 0081, 0000, 0593
Prima
0761, 0815, 0783, 0817
Magnin
0240
0593
CARE
• Keep the remote dry. If it gets wet, wipe it dry
immediately.
• Use and store the remote only in normal
temperature environments.
• Handle the remote gently and carefully. Don’t
drop it.
• Wipe the remote with a damp cloth to keep it
looking like new.
Modifying or tampering with the internal parts can
cause damage and invalidate the warranty. If your
remote is not performing as it should, please
contact us at: www.radioshack.com or visit your
local RadioShack store for help.
SPECIFICATIONS
Power ...........................................(4) AAA Batteries
Size (H x W x D) ......................7.67 x 2.44 x 1.42 in.
.................................................. (195 x 62 x 36 mm)
Weight (w/o batteries) ......................4.76 oz (136 g)
Specifications are typical; individual units might
vary. Specifications are subject to change and
improvement without any notice.
FCC NOTICE
This equipment has been tested and found to
comply with the limits for a class B digital device,
pursuant to part 15 of the FCC Rules. These limits
are designed to provide reasonable protection
against harmful interference in a residential
installation. This equipment generates, uses and
can radiate radio frequency energy and if not
installed and used in accordance with the
instructions, may cause harmful interference to
radio communications. However, there is no
guarantee that interference will not occur in a
particular installation. If this equipment does cause
harmful interference to radio or television
reception, which can be determined by turning the
equipment off and on, the user is encouraged to try
to correct the interference by one or more of the
following measures:
• Reorient or relocate the receiving antenna.
• Increase the separation between the equipment
and receiver.
• Connect the equipment into an outlet on a
circuit different from that to which the receiver
is connected.
• Consult the dealer or an experienced radio/TV
technician for help.
This equipment has been verified to comply with
the limits for a class B computing device, pursuant
to FCC Rules. In order to maintain compliance with
FCC regulations, shielded cables must be used with
this equipment. Operation with non-approved
equipment or unshielded cables is likely to result in
interference to radio and TV reception. The user is
cautioned that changes and modifications made to
the equipment without the approval of
manufacturer could void the user's authority to
operate this equipment.
LIMITED 90-DAY WARRANTY
This product is warranted by RadioShack against
manufacturing defects in material and
workmanship under normal use for ninety (90)
days from the date of purchase from RadioShack
company-owned stores and authorized RadioShack
franchisees and dealers.
EXCEPT AS PROVIDED HEREIN, RadioShack
MAKES NO EXPRESS WARRANTIES AND ANY
IMPLIED WARRANTIES, INCLUDING THOSE OF
MERCHANTABILITY AND FITNESS FOR A
PARTICULAR PURPOSE, ARE LIMITED IN
DURATION TO THE DURATION OF THE
WRITTEN LIMITED WARRANTIES CONTAINED
HEREIN. EXCEPT AS PROVIDED HEREIN,
RadioShack SHALL HAVE NO LIABILITY OR
RESPONSIBILITY TO CUSTOMER OR ANY
OTHER PERSON OR ENTITY WITH RESPECT TO
ANY LIABILITY, LOSS OR DAMAGE CAUSED
DIRECTLY OR INDIRECTLY BY USE OR
PERFORMANCE OF THE PRODUCT OR ARISING
OUT OF ANY BREACH OF THIS WARRANTY,
INCLUDING, BUT NOT LIMITED TO, ANY
DAMAGES RESULTING FROM INCONVENIENCE,
LOSS OF TIME, DATA, PROPERTY, REVENUE, OR
PROFIT OR ANY INDIRECT, SPECIAL,
INCIDENTAL, OR CONSEQUENTIAL DAMAGES,
EVEN IF RadioShack HAS BEEN ADVISED OF
THE POSSIBILITY OF SUCH DAMAGES.
Some states do not allow limitations on how long
an implied warranty lasts or the exclusion or
limitation of incidental or consequential damages,
so the above limitations or exclusions may not
apply to you.
In the event of a product defect during the warranty
period, take the product and the RadioShack sales
receipt as proof of purchase date to any RadioShack
store. RadioShack will, at its option, unless
otherwise provided by law: (a) correct the defect by
product repair without charge for parts and labor;
(b) replace the product with one of the same or
similar design; or (c) refund the purchase price. All
replaced parts and products, and products on
which a refund is made, become the property of
RadioShack. New or reconditioned parts and
products may be used in the performance of
warranty service. Repaired or replaced parts and
products are warranted for the remainder of the
original warranty period. You will be charged for
repair or replacement of the product made after the
expiration of the warranty period.
This warranty does not cover: (a) damage or failure
caused by or attributable to acts of God, abuse,
accident, misuse, improper or abnormal usage,
failure to follow instructions, improper installation
or maintenance, alteration, lightning or other
incidence of excess voltage or current; (b) any
repairs other than those provided by a RadioShack
Authorized Service Facility; (c) consumables such
as fuses or batteries; (d) cosmetic damage; (e)
transportation, shipping or insurance costs; or (f)
costs of product removal, installation, set-up
service adjustment or reinstallation.
This warranty gives you specific legal rights, and
you may also have other rights which vary from
state to state.
RadioShack Customer Relations,
200 Taylor Street, 6th Floor,
Fort Worth, TX 76102
Cat. No. 15-2142
Fort Worth, Texas 76102
Cat No. 15-2142
07A02
M6130U
RadioShack
RadioShack Control Remoto Favoritos
de la Familia 4 en 1
Presione…
WSTX
Para…
Mover el cursor en la guía de
programas y en las pantallas
del menú.
Seleccionar las opciones del
menú o de la guía del
dispositivo seleccionado.
Ver el canal actual y la
información del programa.
Salir del menú, guía o
programa del dispositivo
seleccionado.
Seleccionar el siguiente canal
con número más alto (o más
bajo).
Para algunos modelos de
reproductores DVD,
seleccionar el capítulo anterior
o siguiente.
Subir o bajar el nivel del
sonido (volumen).
Apagar o encender el sonido.
GUÍA DEL USUARIO
INTRODUCCIÓN
Muchas gracias por haber comprado el Control Remoto
Favoritos de la Familia 4 en 1 de RadioShack. Su nuevo
control remoto le permitirá controlar hasta cuatro
dispositivos (aparatos) de entretenimiento en el hogar con
una unidad compacta y fácil de usar. Usted también puede
configurar su remoto para que cada miembro de la familia
tenga acceso fácil a sus canales favoritos.
Después de instalar las baterías (vea la sección que sigue),
usted podrá usar de inmediato el Control Remoto
Favoritos de la Familia 4 en 1 de RadioShack para
controlar un televisor, una videograbadora, un
reproductor DVD, y un receptor de satélite, todos de la
marca RCA. Para controlar dispositivos de otras marcas,
lleve a cabo las instrucciones en la Programación de un
Dispositivo. Para obtener los mejores resultados,
asegurese de leer y llevar a cabo el resto de las
instrucciones. Además, conserve esta guía para una
referencia futura.
INSTALACIÓN DE LAS BATERÍAS
Su Control Remoto Favoritos de la Familia 4 en 1 de
RadioShack necesita cuatro baterías AAA (no vienen
incluidas) para funcionar.
La Seguridad y el Uso de las Baterías
• Utilice únicamente baterías frescas del tamaño
requerido y del tipo recomendado.
• No mezcle baterías viejas y nuevas, diferentes tipos de
baterías (por ejemplo, estándar, alcalinas, o
recargables), ni baterías recargables de diferentes
capacidades.
ADVERTENCIA: Si no va a usar el control remoto durante un
largo tiempo, quítele las baterías. Éstas pueden derramar
substancias químicas que pueden destruir los
componentes electrónicos.
ADVERTENCIA: Deseche las baterías viejas rápida y
adecuadamente. No las queme ni las entierre.
Para instalar las baterías:
1.
Presione la lengüeta en la tapa del compartimento
de baterías (ubicado en el respaldo del control
remoto) y levante la tapa.
2.
Coloque las baterías AAA en el compartimento de
igual manera a la indicada por los símbolos de
polaridad + y - en el interior.
3.
Alinee la saliente de la tapa con la abertura del
compartimento y vuelva a colocar la tapa.
NOTA: Cuando el Control Remoto Favoritos de la Familia 4
en 1 de RadioShack deje de funcionar adecuadamente,
reemplace las baterías pero, al hacerlo, no se tarde más de
10 minutos (con el fin de proteger la información sobre la
programación).
UNA MIRADA RÁPIDA A LOS
CONTROLES
Presione…
Para…
Las secuencias de
programación.
Encender o apagar el
dispositivo seleccionado o
ejecutar el macro programado
para la tecla Power (vea
“Configuración del Macro
“Power”” para más
información).
Seleccionar canales favoritos
para papá, mamá, o niños
(vea “Programación de
Favoritos de la Familia” para
más información).
Acceder los canales
programados para las teclas
de género News, Movies,
Sports o Family (Noticias,
Películas, Deportes, Familia)
(hasta tres canales por género;
vea “Programación de
Favoritos de la Familia” para
más información).
Seleccionar el dispositivo que
quiere controlar.
Mostrar el menú del
dispositivo seleccionado.
Mostrar la guía de programas
para el dispositivo
seleccionado.
Cambiar la señal que entra al
televisor y ver programas de
TV o de vídeo, o para que
actúe como el interruptor A/B
de su caja/convertidor de
cablevisión.
Regresar al último canal que
está viendo.
Explorar los canales favoritos
(y/o todos los canales).Vea
“Programación de una
Exploración de Canales
Favoritos” y “Uso de la
Exploración de Canales”.
Introducir directamente los
canales
(por ejemplo, 09 o 31).
Introducir canales superiores
al 100 (por ejemplo,
+100, 3, 1 = 131).
Para un reproductor DVD, use
+100 para acceder los
capítulos superiores a 10 (por
ejemplo, +100, 3 = 13).
Presione Enter (seleccionar)
una vez después de introducir
los números del canal en
algunos modelos de TV o para
hacer una selección en el
menú de un dispositivo.
Controlar su videograbadora
(VCR), su videograbadora
personal digital en disco duro
(PVR), su reproductor DVD, o
su vídeo a petición (VOD) si
están disponibles en su
servicio de cable o de satélite.
Grabar un programa de vídeo
en un dispositivo que pueda
grabar (presione dos veces).
PROGRAMACIÓN DE UN
DISPOSITIVO (APARATO)
El Control Remoto Favoritos de la Familia 4 en 1 de
RadioShack viene preprogramado para operar un
televisor, una videograbadora, un reproductor DVD, y un
receptor de satélite de la marca RCA. Para controlar
dispositivos diferentes a las marcas fijadas en la fábrica,
siga estos pasos; de otra forma puede saltarse esta sección.
Antes de proceder, encuentre los códigos para los
dispositivos que quiere programar en la sección de
Códigos del Fabricante y anótelos o marquelos.
NOTA: Para programar un aparato combinado TV/DVD,
TV/VCR/DVD, o TV/VCR, use la tecla TV. Para programar
una PVR (Videograbadoras Personales Digitales en Disco
Duro), use la tecla VCR. Para programar un HTiB (Sistema
de Cine en Casa Integrado), use la tecla DVD. Si usted tiene
un aparato combinado VCR/DVD, puede que necesite
programar un código tanto para el componente VCR como
para el componente DVD.
1.
Encienda el dispositivo (por ejemplo, el
reproductor DVD) y, si es necesario, introduzca el
medio utilizado (por ejemplo, un DVD).
2.
En el control remoto, presione una tecla de
dispositivo (es decir, VCR, DVD, CBL/SAT, o TV).
3.
Presione y mantenga presionada la P hasta que el
LED rojo parpadee dos veces, y después suelte la P.
4.
Introduzca el primer código de cuatro dígitos de su
dispositivo. El LED parpadea una vez por cada
dígito que se introduce. Si el código es el correcto, el
LED parpadeará dos veces.
NOTA: Si el LED no parpadea dos veces, repita los pasos 2
al 4 y vuelva a intentar la introducción del código.
5.
Apunte el control remoto hacia el dispositivo y
presione Power (o PLAY, si el dispositivo no tiene
una tecla Power). El dispositivo debe apagarse. Si
no lo hace, repita los pasos 2 a 5,probando cada
código para su marca hasta que encuentre uno que
funcione. Si no puede hallar un código que
funcione, vea “Búsqueda de su Código”.
6.
Repita los pasos 1 a 5 por cada dispositivo que
usted quiera controlar. Para una referencia futura,
anote cada código de dispositivo que funcione en
un lugar seguro.
BÚSQUEDA DE SU CÓDIGO
Si su dispositivo no responde al control remoto después de
haber probado todos los códigos listados para su marca, o
si su marca no está listada en lo absoluto, trate de buscar
su código. Por ejemplo, para buscar un código para su TV:
1.
Presione TV una vez.
2.
Presione y mantenga presionada la P hasta que el
LED rojo parpadee dos veces, después suelte la P.
3.
Introduzca 9 9 1. El LED parpadea dos veces.
Apunte el remoto al TV y presione Power. El control
remoto envía códigos hacia el dispositivo
seleccionado, comenzando primero con el código
más popular.
5.
Si el TV responde, continue con el paso 6. Si el TV
no responde, presione CH+. El remoto continuará
buscando códigos. Siga presionando CH+ hasta que
el TV responda.
NOTA: Presione CH- para probar el código anterior.
6.
Para guardar el código, presione P una vez. El LED
parpadea dos veces.
7.
Para buscar los códigos de otros dispositivos, repita
los pasos 1 a 6, sustituyendo la tecla adecuada por
la del dispositivo que está buscando.
4.
VERIFICACIÓN DE LOS CÓDIGOS
Si configuró el remoto usando el procedimiento de
Búsqueda de su Código, tal vez tenga que averiguar cuál es
el código de cuatro dígitos que está operando su equipo.
Por ejemplo, para descubrir cuál código está operando su
televisor:
1.
Presione TV una vez.
2.
Presione y mantenga presionada la P hasta que el
LED rojo parpadee dos veces, y después suelte la P.
3.
Introduzca 9 9 0. El LED parpadea dos veces.
4.
Para ver el primer dígito del código, presione 1.
Cuente los parpadeos del LED (por ejemplo, tres
parpadeos = 3), y anote el número.
NOTA: Si uno de los dígitos del código es 0, el LED no
parpadea.
5.
Repita el paso 4 para los tres dígitos restantes,
usando 2 para el segundo dígito, 3 para el tercer
dígito, y 4 para el cuarto dígito.
6.
Para verificar otros códigos de dispositivos, repita
los pasos 1 al 5, pero sustituya la tecla adecuada por
la de cada dispositivo que esté verificando.
REASIGNACIÓN DE LAS TECLAS DE
DISPOSITIVOS
El control remoto se puede configurar para que controle
una segunda VCR, un reproductor DVD, u otro dispositivo
(vea los Códigos del Fabricante). Por ejemplo, para
controlar una TV, una caja/convertidor de cablevisión, y
dos reproductores de DVDs, lleve a cabo estos pasos para
reasignar la tecla VCR que no se está usando con el fin de
que opere el segundo reproductor DVD.
1.
Presione y mantenga presionada la P hasta que el
LED rojo parpadee dos veces, y después suelte la P.
2.
Introduzca 9 9 2. El LED parpadea dos veces.
3.
Presione DVD y después VCR. La tecla VCR ya está
lista para ser programada como su segundo
reproductor DVD. (Vea “Programación de un
Dispositivo (Aparato)”).
Para reasignar otras teclas de dispositivos a la tecla VCR,
repita los pasos 1 a 3 de arriba, pero, en lugar de la tecla
DVD use la de TV o la de CBL/SAT en el paso 3. Para usar
otra tecla de dispositivo no usado, use la tecla deseada en
lugar de VCR en el paso 3.
Para regresar un modo reasignado a su tipo de dispositivo
original, lleve a cabo los pasos 1 a 2 de arriba, y después
presione el modo que va a despejar dos veces.
PROGRAMACIÓN DE UNA
EXPLORACIÓN DE CANALES
FAVORITOS
El remoto le permite guardar una lista de hasta 10 canales
favoritos, en cualquier orden, que se explorará de
inmediato cuando presione FAV (Scan) [favoritos
(exploración)].
NOTA: Sólo se pueden guardar canales de un solo
dispositivo para la Exploración de Canales Favoritos.
1.
Presione la tecla del dispositivo deseado.
2.
Presione y mantenga presionada la P hasta que el
LED rojo parpadee dos veces, y después suelte la P.
3.
Introduzca 9 9 6. El LED parpadea dos veces.
4.
Use el teclado para introducir el número de un
canal favorito (por ejemplo, 031), y luego presione
P (si introduce menos de 5 o 4 dígitos y la tecla
Enter).
5.
Repita el paso 4 por cada canal favorito que se va a
guardar, hasta un total de 10 canales.
NOTA: Si trata de introducir más de 10 canales o
transcurren más de 10 segundos entre cada presión de
tecla, el remoto se sale automáticamente de la
programación.
NOTA: Si su aparato requiere que presione la tecla Enter
después del número de canal, la necesita presionar
después del número de canal cuando programa los
canales favoritos.
6.
Para salirse de la programación con menos de diez
canales favoritos programados,presione y
mantenga presionada la P durante tres segundos. El
LED parpadea dos veces.
NOTA: Si programa 10 canales y desea cambiar la
programacion de los canales favoritos, tendrá que borrar
los canales programados antes de programar nuevos
canales favoritos.
NOTA: Si ha programado menos de 10 canales favoritos y
quiere agregar más, tendrá que re-programar todos los
canales.
NOTA: Si ha programado 10 canales favoritos, tendrá que
reinicializar el remoto antes de programar canales nuevos.
Vea “Localización de Fallas”.
USO DE LA EXPLORACIÓN DE
CANALES
Use la tecla FAV (Scan) para iniciar una exploración a tres
segundos de todos sus canales favoritos (siempre que ya
esté programada - vea “Programación de una Exploración
de Canales Favoritos” arriba) o de todos los canales (si no
se ha programado la Exploración de Canales Favoritos).
1.
Presione la tecla del dispositivo deseado.
2.
Presione SCAN una vez.
• Si ya se configuró la Exploración de Canales
Favoritos, el dispositivo explora (recorre) los
canales favoritos, y después continúa explorando
todos los canales de su dispositivo.
• Si no se ha configurado la Exploración de
Canales Favoritos, la exploración comienza con
el canal actual.
3.
Para detener la exploración de canales en cualquier
momento, presione cualquier tecla una vez.
PROGRAMACIÓN DE FAVORITOS DE
LA FAMILIA
Su nuevo Control Remoto Favoritos de la Familia 4 en 1 de
RadioShack incluye cuatro teclas de género (News
[noticias], Movies [películas], Sports [deportes], y Family
[familia]) que pueden ser programadas según los gustos
de tres usuarios (mamá, papá, y los niños). Cada miembro
de la familia puede programar y explorar sus canales
favoritos. Es posible incluir hasta tres canales para cada
tecla de género.
Para programar una una tecla de preferencia:
1.
Presione y mantenga presionada la P hasta que el
LED parpadee dos veces, y después suelte la P.
2.
Introduzca 9 9 5. El LED parpadea dos veces.
3.
Presione una tecla de usuario (por ejemplo,
Mom’s).
4.
Presione una tecla de género (por ejemplo, News).
5.
Presione la tecla de modo del dispositivo que
controla sus canales (por ejemplo, TV), y después
presione el número del canal que quiere programar
(hasta 3 dígitos).
NOTA: Si su aparato requiere que presione la tecla Enter
después del número de canal, la necesita presionar
después del número de canal cuando programa los
canales favoritos.
6.
Presione y mantenga presionada la P durante tres
segundos. El LED rojo parpadee dos veces.
7.
Repita los pasos 1 al 6 para cada canal que quiere
incluir. Si programa más de tres canales, el primer
canal se borrará.
NOTA: Si ha programado menos de 3 canales favoritos y
quiere agregar más, tendrá que re-programar todos los
canales para el usuario y género seleccionado.
Para borrar una tecla de género, lleve a cabo los pasos 1 al
6 de arriba, pero no entre un modo ni un canal en el paso
5.
USO DE FAVORITOS DE LA FAMILIA
CÓDIGOS DEL FABRICANTE
Urban Concepts
0503
Kenwood
0030
American High
USLogic
0839
KLH
0765, 0767
Asha
0240
Códigos de Configuración para Cajas de
Cablevisión (Convertidores)
XBox
0522
Klass
0046
Audiovox
0037
Yamaha
0490, 0539, 0545
KTV
0180, 0030, 0039, 0280
Beaumark
0240
Zenith
0503, 1906, 0869
LG
0856
Bell & Howell
0104
ABC
0003, 0008, 0014, 0017
1904
Broksonic
0184, 0121, 0209
0153, 0315
Códigos de Configuración para Dispositivos
HTiB (Home-Theater-in-a-Box) (Sistema de
Cine en Casa Integrado)
Lloyd’s
Allegro
LXI
0047, 0054, 0154, 0156, 0178, 0747
Calix
0037
Magnasonic
1928, 1913
Canon
0035
Magnavox
0054, 0030, 1454, 0706, 1931, 0020, 0186, 1254, 1913, 1904, 0386
Carver
0081
Magnin
1907
Citizen
0037
Marantz
0054, 0030, 0704
Craig
0037, 0047, 0240
Matsushita
0250, 0650
Curtis Mathes
0060, 0035, 0162
Megatron
0178, 0145, 0003
Cybernex
0240
Americast
0899
Antronix
0207, 0022
Archer
0153, 0039, 0797, 0022, 0207
Bell & Howell
0014
Bell South
0899
Cabletenna
0022
Cableview
0022
Century
0153
Citizen
0315, 0153
Clearmaster
0883
ClearMax
0883
Coolmax
Director
0883
0476
Emerson
0797
Everquest
0015
Garrard
0153
Para acceder los canales favoritos de mamá, papá, o los
niños:
1.
Presione una tecla de usuario (por ejemplo, Mom’s,
Dad’s, Kid’s).
2.
Presione una tecla de género (por ejemplo, Sports).
El remoto accederá el primer canal programado
para el usuario y género seleccionado.
3.
Vuelva a presionar la tecla de género. Cada vez que
la presione, accederá el siguiente canal programado
para el usuario y género seleccionado.
GC Electronics
0207
CONFIGURACIÓN DEL MACRO
“POWER”
Usted puede usar su nuevo Control Remoto Favoritos de la
Familia 4 en 1 de RadioShack sólo para encender un
aparato a la vez, o puede configurar la tecla Power para
ejecutar varias funciones a la vez (tipo macro). Por
ejemplo, usted podría programar la tecla Power para que
encienda el televisor y la caja/convertidor de cablevisión, a
la vez que seleccione un canal en particular.
Para programar el macro “Power”:
1.
Presione y mantenga presionada la P hasta que el
LED rojo parpadee dos veces, y después suelte la P.
2.
Introduzca 9 9 5. El LED parpadea dos veces.
3.
Presione Power.
4.
Introduzca una serie de funciones para ejecutar el
macro (hasta 15 funciones)
5.
Presione y mantenga presionada la P hasta que el
LED rojo parpadee dos veces, y después suelte la P.
Ahora, cuando presione y mantenga presionada por 2
segundos la tecla Power, el remoto ejecuta el macro. Para
borrar el macro, lleve a cabo los pasos 1 al 5 de arriba,
pero no introduzca una serie de funciones en el paso 4.
NOTA: No es posible incluir las teclas de usuario o de
género en el macro “Power”.
CAMBIO DEL BLOQUEO DEL
VOLUMEN
El remoto está programado para permitir un control
independiente del volumen en cada dispositivo
seleccionado (Desbloqueo Global del Volumen). Sin
embargo, usted puede cambiar la fijación del Bloqueo del
Volumen a la de Bloqueo Global de Volumen de tal manera
que el volumen de un dispositivo controle el volumen en
todos los otros modos. También, usted puede cambiar la
configuración de un solo dispositivo para que controle el
volumen de manera independiente (Desbloqueo
Individual de Volumen).
Bloqueo del Control de Volumen a Un Modo
(Bloqueo Global de Volumen)
1.
2.
Presione y mantenga presionada la P hasta que el
LED rojo parpadee dos veces, y después suelte la P.
Introduzca 9 9 3 y después presione la tecla de
modo para el dispositivo en el que quiere controlar
el volumen (por ejemplo, TV). El LED parpadea dos
veces.Ahora cuando presione VOL+, VOL-, o Mute
(enmudecer), el dispositivo seleccionado (por
ejemplo, TV) controlará el volumen
independientemente del modo actual.
Desbloqueo del Control de Volumen para un
Solo Dispositivo (Desbloqueo Individual de
Volumen)
1.
2.
3.
4.
Después de llevar a cabo el Bloqueo Global de
Volumen (arriba), presione y mantenga presionada
la P hasta que el LED rojo parpadee dos veces, y
después suelte la P.
Presione la tecla de modo del dispositivo en el que
quiere tener un control independiente del volumen.
Introduzca 9 9 3 y después presione VOL-. El LED
parpadea cuatro veces.
Repita los pasos 1 al 3 para cualquier otro
dispositivo en el que usted quiera tener un control
independiente del volumen.
Desbloqueo de Todos los Controles de Volumen
(Restauración del Desbloqueo Global)
1.
2.
Presione y mantenga presionada la P hasta que el
LED rojo parpadee dos veces, y después suelte la P.
Introduzca 9 9 3 y después presione VOL+. El LED
parpadea cuatro veces. El volumen estará
controlado en forma independiente en todos los
dispositivos programados.
LOCALIZACIÓN DE FALLAS
PROBLEMA: El LED no parpadea cuando se presiona una
tecla.
SOLUCIÓN: Reemplace las baterías por cuatro (4) baterías
alcalinas nuevas tamaño AAA.
PROBLEMA: El LED parpadea cuando se presiona una
tecla, pero el dispositivo no responde.
SOLUCIÓN: Asegurese de que el control remoto este
apuntando hacia su dispositivo y que no se encuentre a
más de 4.58 m (15 pies) de distancia.
PROBLEMA: El LED parpadea con un solo parpadeo largo.
SOLUCIÓN: Ha ocurrido un error de introducción (por
ejemplo, una tecla equivocada).Trate de introducir la
secuencia de nuevo.
PROBLEMA: El control remoto no controla los dispositivos
o los mandos no están trabajando adecuadamente.
SOLUCIÓN: Pruebe todos los códigos listados para el
dispositivo. Asegurese de que el dispositivo funcione con
un control remoto de rayos infrarrojos.
PROBLEMA: Las teclas CH+, CH-, y LAST (último) no
funcionan para su TV marca RCA.
SOLUCIÓN: Debido al diseño RCA de 1983 a 1987, sólo el
control remoto original puede realizar estas funciones.
PROBLEMA: No hay volumen en un segundo televisor.
SOLUCIÓN: Siga los pasos en la sección Cambio del
Bloqueo del Volumen.
PROBLEMA: Los canales no se cambian en la forma
adecuada.
SOLUCIÓN: Si el control remoto original requería que se
presionara Enter para cambiar canales, presione Enter en
este control remoto después de introducir el número del
canal.
Para más ayuda, comuníquese con nosotros a
[email protected].
Gemini
0797, 0015
General Instrument
0476, 0276, 0003
GoldStar
0144
Goodmind
0797
Hamlin
0009, 0273
Jasco
0315, 0153, 0015
Jerrold
0476, 0276, 0003, 0012, 0014, 0015
Memorex
0000
Motorola
0476, 0276, 1254, 1106, 1376
Multivision
0012
Optimus
0021
Pace
0237
Panasonic
0000, 0107, 0021
Paragon
Philips
0000
0305, 0317, 0153
Aiwa
0641
Akai
1975
Anam
1913
Apex Digital
1937, 1915
Classic
1917
Coby
1923
Daewoo
1918
Go Video
1970
Initial
1931
JVC
1940, 1901
KLH
1939
Koss
0651
Magnavox
1976
Norcent
1923
Onkyo
0627, 1924, 1985
Oritron
0651
Panasonic
1907, 1990, 1925
Philips
1914
Pioneer
1902
Polk Audio
0539
RCA
1974, 1913
Rio
0869
Saba
1977
0240
Marta
0037
Matsushita
0035, 0162, 1162
1076, 1109, 0099, 1442
0775
Hitachi
0819
Starquest
0015
HTS
0775
Supercable
0276
Hughes Net. Sys.
1142, 0749, 1749, 1442
Supermax
0883
JVC
0775, 1170
Tandy
0258
Legend
0269
Tocom
0012
Magnavox
0724, 0722
Torx
0003
Memorex
0724, 0269
Mitsubishi
0749
0883
Motorola
0869
Tusa
0015
Next Level
0869
Unika
0207, 0153, 0022
Panasonic
0247, 0701
Universal
0022, 0207, 0153, 0039
Paysat
0724
V2
0883
Philips
1142, 0749, 1749, 0724, 1076, 0722, 0099, 1442
Viewmaster
0883
Proscan
0392, 0566
Viewstar
0258
RadioShack
0869
Vision
0883
RCA
0392, 0566, 0855, 0143
Vortex View
0883
Realistic
0052, 0051
0000, 0525, 0899
Samsung
1276, 1109
Funai
0675
GE
0522, 0815, 0717
Go Video
0744, 0783, 0715, 1970
GPX
0769, 0699
Greenhill
0717
Harman/Kardon
0582
Hitachi
0573, 0664
Hiteker
0672
Initial
0717, 1931
Integra
0627, 1924
Jaton
1078
JVC
0558, 0623, 0867, 1940, 1901
jWin
1049
Kenwood
0490, 0534
KLH
0717, 1020, 1939
Koss
0651
Lasonic
0798
Lite-On
1058
Magnavox
0503, 0675, 1976, 1914
Malata
0782
Marantz
0539
Microsoft
0522
SKY
0856
Sony
0639, 1639
Star Choice
0869
TiVo
1142, 1442
Toshiba
0749, 1749, 0790, 1285
Uniden
0724, 0722, 0052
Zenith
0856, 1856
Códigos de Configuración para Televisores
Amark
0003
Abex
0032
Admiral
0093, 0463
Advent
0761, 0783, 0842, 0817, 0815
Adventura
0046
Aiko
0092
Akai
0812, 0702, 0030, 0672
Albatron
0843
Ambassador
0177
America Action
0180
Anam
0180
Anam National
0055
AOC
0030, 0003, 0052
Apex Digital
0748, 0765, 1943, 0767
Archer
0003
Audiovox
0451, 0180, 0710, 0092, 0623, 0003
Axion
1937
Bell & Howell
Bradford
0154
0236, 0463, 0003, 1905, 1935, 1929, 1911
Candle
0030, 0186, 0046
Carnivale
0030
Carver
0054
Celebrity
0000
Celera
0765
Changhong
Citizen
0765
0060, 0030, 0039, 0092, 1928, 0280, 0046, 0186
Clarion
0180
Contec
0180
Craig
0180
Crosley
0054
Crown
0180, 0039
Curtis Mathes
0047, 0054, 0154, 0451, 0093, 0060, 0702, 0030, 0145, 0166, 1347,
0047, 1447, 1247, 1547, 1919, 0018, 0679, 1147, 1953, 1917, 1948,
Realistic
0154, 0180, 0038, 0178, 0039, 0032, 0165
0090, 1047, 1347, 1907, 1922, 0747
Runco
0017, 0030
Sampo
0030, 0032, 1755, 0052, 0039
Samsung
0060, 0812, 0702, 0030, 0178, 1903, 0766, 1060, 0032, 0814
Samsux
0039
Sansui
0463, 1904, 1929, 1911
Sanyo
0154, 1907
Scotch
0178
Scott
0236, 0180, 0178
Sears
0047, 0054, 0154, 0156, 0178, 0179, 0171, 1904, 0747, 1926
Sharp
0093, 1917, 0039, 0386, 0165
Sheng Chia
0093
Simpson
0186
Sony
0000, 1925, 1904, 0080
MEI
0035
Memorex
0035, 0162, 0037, 0048, 0039, 0047, 0240, 0000, 0104, 0209, 0046,
0307, 1162, 0299, 1037, 0268, 0454, 1262
MGA
0240, 0043
MGN Technology
0240
Minolta
0042
Mitsubishi
0067, 0043
Motorola
0035, 0048
MTC
0240, 0000
Multitech
0000
NAD
0058
NEC
0104, 0067
Nikko
0037
Noblex
0240
Olympus
0035
Optimus
1062, 0162, 0037, 0048, 0104, 0568, 1048, 1262, 0454, 0619, 1162,
Soundesign
0180, 0178, 0179, 0186
Spectracon
0003
Optonica
Squareview
0171
Orion
0184, 0209
SSS
0180
Panasonic
1062, 0035, 0162, 0616, 1262, 0454, 1162
Starlite
0180
Penney
0035, 0037, 0240, 0042
Supremacy
0046
Pentax
0042
Supreme
0000
Philco
0035
SVA
0748, 0768
Philips
0035, 0081, 0618, 0062
Sylvania
0054, 0030, 0171, 1944, 1931, 0020
Pilot
Symphonic
0180, 0171, 1904, 1913
Pioneer
0067, 0058
Tandy
0093
Polk Audio
0081
Tatung
0003, 0055
Profitronic
0240
Technics
0250, 0051
Proscan
0060, 1060, 0202
Techwood
0058, 0432, 0593
0062
0037
0051, 0003
Pulsar
0039
Teknika
0054, 0180, 0150, 0060, 0039, 0092, 0186
Quarter
0046
Telefunken
0702
Quartz
0046
Thomas
1904
Quasar
0035, 0162, 1162, 0454
TMK
0178, 0177
RadioShack
0000, 1037
TNCi
0017
Radix
0037
Toshiba
0154, 0156, 0060, 1256, 1704, 1936, 0845, 1656, 1935, 0650, 1356,
Randex
0037
RCA
0060, 0240, 0042, 0619, 0058, 1060, 0202, 0880
Realistic
0035, 0037, 0048, 0047, 0000, 0104, 0066, 0046, 0062
1918, 1945
Totevision
0039
TVS
0463
Universal
0027
Vector Research
0030
Victor
0053
Vidikron
0054
Vidtech
0178
Viewsonic
1755
Viking
0046
Wards
0054, 0030, 0178, 0165, 0027, 0080, 0866, 0020
Waycon
0156
White Westinghouse
0463, 1909, 0623
Yamaha
0030
Zenith
0017, 0463, 0178, 1909, 0092, 1904, 1929, 1911
Zonda
0003
ReplayTV
0616, 0614
Runco
0039
Samsung
0240, 0045
Sanky
0048, 0039
Sansui
0000, 0067, 0209
Sanyo
0047, 0240, 0104, 0268, 0046
Scott
0184, 0045, 0121, 0043
Sears
0035, 0037, 0047, 0000, 0042, 0104, 0046, 0066
Sharp
0048, 0062
Shogun
0240
Sonic Blue
0614, 0616
Sony
0035, 0032, 0033, 0000, 0636
STS
0042
Sylvania
0035, 0081, 0000, 0043, 0593
Códigos de Configuración para Aparatos
Combinados TV/Reproductor DVD
Symphonic
0000, 0593
Apex Digital
1943
Axion
1937
Thomas
Broksonic
1935
Tivo
0618, 1503, 0636
Panasonic
1941
TMK
0240
RCA
1948
Toshiba
0045, 0043, 1503, 0066
Samsung
1903
Totevision
0037, 0240
Sylvania
0171
Unitech
0240
Toshiba
1935
Vector
0045
Video Concepts
0045
Códigos de Configuración para Aparatos
Combinados DVD/Videograbadora (VCR)
Teac
0000
Technics
0035, 0162
Teknika
0035, 0037, 0000
Videomagic
0000
0037
Videosonic
0240
Villain
0000
Wards
0060, 0035, 0048, 0047, 0081, 0240, 0000, 0042, 0062
White Westinghouse
0209
1147, 0747, 1919, 0039
American Action
0180
CXC
0180
Audiovox
0180
Daewoo
0451, 1661, 0039, 0623, 1909, 0092, 0672, 1928
Broksonic
1929, 1911, 1905
Denon
0145
Citizen
1928
Dumont
0017
Curtis Mathes
1919
Durabrand
0180, 0178, 0003
Daewoo
1928, 1909
Electroband
0000
Emerson
0236, 1909, 1929, 1905, 1928, 1911
Electrochome
0409
Funai
1904
Códigos de Configuración para Aparatos
Combinados DBS/PVR (DVR)
Elektra
0017, 1661
GE
1917, 1907, 1922, 1919
Echostar
0154, 0236, 0463, 0180, 0178, 0171, 1909, 1929, 0282, 1905, 1928,
GoldStar
1926
Expressvu
0775
Harley Davidson
1904
Hughes Network Systems
1142, 1442
Hitachi
1904
JVC
1170
Lloyd's
1904
Phillips
1142, 1442
Magnasonic
1928, 1913
Proscan
0392
Magnavox
1904, 1931, 1913
Sony
0639
0839, 0717
Mitsubishi
1521, 0521
Monitsu
1082
Nesa
0717
Envision
0030, 0813
Norcent
1003, 0872, 1923
Fisher
0154
Onkyo
0503, 0627, 1985, 1924
Flexvision
0710
Oritron
0651
Fujitsu
0683, 0853, 0809
Panasonic
0490, 1925, 1907, 1762, 1990
Funai
0180, 0171, 1904
Philips
0503, 0539, 0646, 1914
Futuretech
0180
Pioneer
0525, 0571, 1902
Gateway
1755, 1756
Polaroid
1086
GE
0047, 0051, 0451, 0178, 0747, 1907, 1922, 0027, 0055, 1347, 1919,
Polk Audio
0539
Proscan
0522
Emerson
0280, 0623, 1911, 0039, 1944, 0177
0282, 1147, 1917
Gibralter
0017, 0030
ProVision
0778
GoldStar
0030, 0178, 0032, 1927, 0409
Qwestar
0651
Grunpy
0180
RCA
0522, 0571, 0717, 1974, 1913, 0822
Haier
0768
Rio
0869
Hallmark
0178
Rotel
0623
Harley Davidson
1904
Rowa
0823
Harman/Kardon
0054
Saba
1977
Harvard
Sampo
0698
Havermy
0093
Samsung
0490, 0573, 1075, 0820, 1979, 1932
Hello Kitty
0451
0873, 0670, 1967
1904
RCA
0180
Broksonic
Mintek
Sanyo
0042
0035, 0081
GOI
0670
0000, 0042
Hughes Net. Sys.
Marantz
0797, 0015
Fisher
Hitachi
Magnin
0003, 0015
0591
1919, 0018, 0032, 1907, 0003
0054, 0030, 0020
0081
0047, 0154, 0180, 0030, 0178, 0747, 0039, 0165, 0409, 1920, 0032,
Stargate
Enterprise
0047
0017
Starcom
0591, 0675
0046
HI-Q
0250, 0051, 1924, 0165, 1919, 0055, 0650
0869
0521
Headquarter
0047, 0156, 0051, 0060, 0030, 0178, 1347, 1926, 0027, 0039, 0747,
RadioShack
General Instrument
Emerson
Harman/Kardon
0250, 0051, 1924, 1946, 0055, 1919, 1941, 0650, 1927
Penney
Quasar
0021
DVD2000
0236, 0463, 1929, 1911, 1905
Panasonic
Pulsar
Sprucer
1085, 1068
Orion
0593
0775
0490, 0634
0000
0035, 0039, 0081, 0000, 0593
0566
Dual
0000
Harley Davidson
Magnavox
GE
Denon
Gradiente
0093, 0165
Magnasonic
Expressvu
0784, 0705, 1918, 0833
0154, 0250, 0166, 0650, 1927, 1924, 1913
Optonica
0178, 0052, 0003
0015
1019, 0816, 1024, 1023
Optimus
0047, 0747, 1922
1006
Daewoo
0037, 0480
Proton
Sony
CyberHome
0432
GoldStar
Proscan
Signal
1087
Go Video
0180
0000
1005, 0775, 0218, 0269, 1170
Curtis Mathes
0092
Onwa
0037
Echostar
1923, 0778
NTC
LXI
0144
1917
0060, 0035, 0240, 0202, 1060
0051
0877, 1877, 0477, 0008, 0017
Coby
GE
Prism
Scientific Atlanta
Classic
0018
0067
Samsung
0876, 0869
0000
Noshi
0035, 0037
1005, 0775
Cinevision
0000
Garrard
Lloyd's
1005, 0775, 1170
0717
0035, 0033
Funai
0748, 0824
Kodak
DishPro
0571
Fuji
0030, 0178, 0092
Norcent
0761, 0815, 0783, 0817
Dish Net. Sys.
1072, 1071
0030, 1704
Nikko
Prima
0279, 0273
Blue Parade
NEC
0037
0000
Blaupunkt
0047, 0104, 0066
Kenwood
Runco
Axion
0037, 0184, 0000, 0121, 0043, 0209
Fisher
0092, 0039
Regal
1072
Emerson
0156, 0178, 0866
Portland
1109
Audiovox
0180
NAD
0067
0392, 0566, 0639, 1639, 1142, 0247, 0749, 1749, 0724, 0819, 1856,
0736
Multitech
KEC
DirecTV
Audiologic
0032
JVC
Crossdigital
1915
Emerex
0166, 0679, 0866
0207
0672, 0717, 0755, 0796, 0797, 1100, 0796, 1061, 1937, 0794, 1056,
0060, 0030
0054, 1954, 0690
0021
Apex Digital
MTC
0030, 0039
Realistic
1913
0037
Pioneer
RCA
0872
Electrophonic
Pilot
0772
Anam
0093, 0055
Philips
0216
AMW
0037
Motorola
1906
Chaparral
1975
0000
Electrohome
1904, 1903, 1981, 1934
AlphaStar
0869
Dynatech
0843
Zenith
0000
Allegro
0093, 0150, 0178, 1250, 0178, 0836, 1917
Monivision
Sony
0797, 0315, 0303, 0883, 0015
Akai
Mitsubishi
Philco
RadioShack
0641
0045
1932, 1979
Quasar
Aiwa
0039
0869, 1970
0877, 1877, 0144, 0533
Códigos de Configuración para Reproductores
DVD
0042
Durabrand
1967
0000
Zenith
Denon
0047, 0017, 0051, 0039, 0747, 0032
SonicBlue
Pulsar
Tristar
Daewoo
0150, 0030, 0178, 1907
Midland
Sanyo
Pioneer
0000
0154, 0463, 0150, 0178, 1924, 1920, 1927, 1911, 1926
MGA
Memorex
Samsung
Códigos de Configuración para Receptores de
Satélite
Toshiba
0035
Himitsu
0180
0180
Sharp
0630, 0752
Hisense
0748
Shinsonic
0533, 0839, 1931
Hitachi
1145, 0145, 0151, 1904, 0032, 0409
SonicBlue
1970, 0869
Hundai
0849
Magnin
1907
Memorex
1926, 1924, 1920, 1927
MGA
1907
Mitsubishi
1917
Optimus
1927, 1924, 1913
Orion
1905, 1929, 1911
Panasonic
1919, 1927, 1924
Penney
1907, 1926, 1919
Quasar
1919, 1924
Radio Shack
1920, 1904
RCA
1922, 1919, 1917, 1907
Sansui
1929, 1911, 1904
Sanyo
1907
Sears
1926, 1904
Sony
1925, 1904
Sylvania
1931
Symphonic
1913, 1904
Thomas
1904
Toshiba
1936, 1918
Sony
0533, 0864, 1903, 1981, 1033, 1934, 1904
Infinity
0054
Sungale
1074
Inteq
0017
Sylvania
0675
Janeil
0046
Symphonic
0675
JBL
0054
Technics
0490
JCB
0000
Theta Digital
0571
Jensen
0761, 0817, 0185
Códigos de Configuración para
Videograbadoras (VCRs)
Toshiba
0503, 1988
JVC
0052
Admiral
0048, 0209
Tredex
0800, 0799
Kaypani
0180
Adventura
0000
TYT
0705
KEC
0180
Aiwa
0037, 0000, 0307
White Westinghouse
1909
Zenith
1904, 1929, 1911
XR-1000
0035, 0000
Zenith
0039, 0033, 0000, 0209
1005, 0775, 1170
Códigos de Configuración para Aparatos
Combinados TV/Videograbadora (VCR)/DVD
Emerson
1944
Panasonic
1946
Sharp
1917, 0630
Sylvania
1944
Toshiba
1945
Códigos de Configuración para PVRs (DVRs)
(Videograbadoras Personales Digitales en
Disco Duro)
Panasonic
0616
Phillips
0618
ReplayTV
0616, 0614
Sonic Blue
0614, 0616
Sony
0636
Tivo
0636, 0618
CUIDADO
• Mantenga seco el control remoto. Si éste se moja,
séquelo con un paño de inmediato.
• Use y guarde el control remoto sólo en ambientes con
temperatura normal.
• Maneje el control remoto delicada y cuidadosamente.
No lo deje caer.
• Limpie el control remoto con un paño húmedo para
conservarlo luciendo como nuevo.
La modificación o alteración de piezas internas puede
causar daños y anular la garantía. Si su remoto no está
funcionando como debe, por favor contáctenos en:
www.radioshack.com o visite la tienda RadioShack de su
localidad para obtener ayuda.
ESPECIFICACIONES
Alimentación ...........................................(4) Baterías AAA
Tamaño (H x A x P)................................. 195 x 62 x 36 mm
Peso (sin las baterías) .................................................136 g
Las especificaciones son típicas; las unidades individuales
podrían variar. Las especificaciones quedan sujetas a
cambios y mejoras sin previo aviso.
INSTRUCCIÓN PARA EL USUARIO
Este equipo fue probado y demostró que cumple con los
límites para los dispositivos digitales de clase B, de
acuerdo con la parte 15 de las Reglas de la FCC. Estos
límites están diseñados para proporcionar una protección
razonable contra interferencias dañinas en una instalación
residencial. Este equipo genera, usa y puede irradiar
energía de radiofrecuencia y si no se le instala y usa de
acuerdo con las instrucciones, podría causar
interferencias dañinas a las comunicaciones por radio. Sin
embargo, no hay garantía de que no ocurrirá una
interferencia en una instalación en particular. Si este
equipo causa interferencias dañinas a la recepción de
radio o televisión, lo cual se puede determinar apagando y
encendiendo el equipo, se anima al usuario a que trate de
corregir la interferencia mediante una o más de las
siguientes medidas:
• Reoriente o reubique la antena receptora.
• Aumente la separación que hay entre el equipo y el
receptor.
• Conecte el equipo a un tomacorriente en un circuito
diferente a donde está conectado el receptor.
• Consulte al distribuidor o a un técnico con experiencia
en radio y televisión para que le asista.
Se verificó que este equipo cumple con los límites de un
dispositivo de computación de clase B, de acuerdo con las
Reglas de la FCC. Para poder mantener el cumplimiento
con los reglamentos de la FCC, tienen que usarse cables
blindados con este equipo. La operación con equipos no
aprobados o con cables no blindados puede resultar en
una interferencia en la recepción de radio y televisión. Se
cauciona al usuario que los cambios y las modificaciones
que se hagan al equipo sin la aprobación del fabricante
podrían nulificar la autoridad del usuario para operar este
equipo.
GARANTÍA LIMITADA DE 90 DÍAS
Este producto está garantizado por RadioShack contra
defectos de fabricación en su material y mano de obra bajo
un uso normal durante noventa (90) días a partir de la
fecha de compra en una tienda propiedad de la compañía
RadioShack o de concesionarios y distribuidores
autorizados RadioShack.
EXCEPTO A LO PROVISTO AQUÍ, RadioShack NO
BRINDA NINGUNA GARANTÍA EXPRESA Y
CUALESQUIERA GARANTÍAS IMPLÍCITAS,
INCLUYENDO LAS DE COMERCIABILIDAD Y
ADECUACIÓN PARA UN PROPÓSITO PARTICULAR,
ESTÁN LIMITADAS EN SU DURACIÓN A LA DURACIÓN
DE LAS GARANTÍAS LIMITADAS ESCRITAS
CONTENIDAS AQUÍ.EXCEPTO A LO PROVISTO AQUÍ,
RadioShack NO SERÁ RESPONSABLE ANTE EL CLIENTE
NI ANTE ALGUNA OTRA PERSONA O ENTIDAD EN LO
TOCANTE A CUALQUIER RESPONSABILIDAD,
PÉRDIDA O DAÑO CAUSADO DIRECTA O
INDIRECTAMENTE POR EL USO O FUNCIONAMIENTO
DEL PRODUCTO O QUE SURJA DE CUALQUIER
INCUMPLIMIENTO DE ESTA GARANTÍA,
INCLUYENDO, PERO SIN LIMITARSE
A,CUALESQUIERA DAÑOS QUE SURJAN DE UNA
INCONVENIENCIA, PÉRDIDA DE TIEMPO, DE DATOS,
DE PROPIEDAD, DE INGRESOS, O DE GANANCIAS O
CUALESQUIERA DAÑOS INDIRECTOS, ESPECIALES,
INCIDENTALES,O EMERGENTES, AUN CUANDO
RadioShack HAYA SIDO NOTIFICADA DE LA
POSIBILIDAD DE TALES DAÑOS.
Algunos estados no permiten limitaciones respecto a
cuánto dura una garantía implícita o a la exclusión o
limitación de daños incidentales o emergentes, de manera
que las limitaciones o exclusiones de arriba podrían no
aplicársele a usted.
En caso de que se presente un defecto en el producto
durante el plazo de garantía, lleve el producto y el recibo
de venta de RadioShack como prueba de la fecha de
compra a cualquier tienda RadioShack. RadioShack, a su
opción, a no ser que la ley prevea otra cosa: (a) corregirá el
defecto mediante la reparación del producto sin cargo por
las piezas ni por la mano de obra; (b) reemplazará el
producto por otro igual o de diseño similar; o (c)
reembolsará el precio de compra. Todas las piezas y
productos reemplazados, y los productos sobre los cuales
se otorgó un reembolso, se convierten en la propiedad de
RadioShack. Las piezas o productos nuevos o
reacondicionados podrían usarse en el desempeño del
servicio de garantía. Las piezas y productos reparados o
reemplazados están garantizados por el resto del plazo de
la garantía original.Usted tendrá que pagar por las
reparaciones o reemplazos del producto que se realicen
después de la fecha de vencimiento del período de
garantía.
Esta garantía no cubre: (a) daño o falla causados por o
atribuibles a fuerza mayor, abuso, accidente, mal uso, uso
inadecuado o anormal, no seguir las instrucciones,
instalación o mantenimiento inadecuados, alteración,
rayos u otros incidentes de exceso de voltaje o corriente;
(b) cualesquiera reparaciones que no sean las
proporcionadas por una Instalación de Servicios
Autorizada RadioShack; (c) fungibles como los fusibles o
las baterías; (d) daño cosmético; (e) costos de transporte,
flete o seguro; o (f) costos de remoción del producto,
instalación, ajuste por servicio de configuración o
reinstalación.
Esta garantía le brinda derechos legales específicos, y
usted podría tener otros derechos que varían de acuerdo
con el estado donde vive.
Departamento RadioShack de Relaciones con el Cliente,
200 Taylor Street, 6th Floor,
Fort Worth,TX 76102
Cat.No. 15-2118 07/02
Fort Worth, Texas 76102
Cat No. 15-2142
07A02
M6130U