1
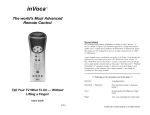
Total Remote v2.2 user guide
Total Remote allows your favorite Pocket PC to function as one master control for all your
remote controlled devices. Total Remote comes with device profiles for thousands of devices
such as TV, VCR, DVD and more. You can easily make your own device profiles by installing
new ones or creating your own. You can sample the commands from your hardware remotes and
create “virtual” remotes that look and function the way you want. The program provides you
with a set of skins that enables you to change the remote control appearance any time you want.
The Total Remote Transmitter Module allows you to control infrared devices nearly 100 feet
away using a typical iPaq. Because it uses your PDA’s audio hardware, its range is up to 3 times
greater than that of your current remotes. Since some Pocket PCs do not have audio hardware of
sufficient quality to use the Total Remote Transmitter Module, Total Remote also supports built
in Infrared ports (IrDA). While range is severely limited compared to the transmitter module, it
is an effective back-up in the event that you misplace or damage the transmitter module. On
iPaqs that have a “CIR port” you can now use this as a transmitter option in Total Remote.
Please save the UPC code that is printed on the Total Remote packaging as “proof of purchase”. If you misplace your transmitter
module and need to purchase another one you will need to send us the UPC code along with your order. Orders for the transmitter
module that are not accompanied by the UPC proof of purchase cannot be processed.
Table of Contents
Remote controls
Using pre-installed device configurations
Creating a new remote control profile
Creating a copy of a remote control profile
Current remote control
Renaming a remote control profile
Assigning actions to hardware buttons
Turning the display off
Changing a remote control’s appearance
Selecting device profiles
Deleting devices from the master list
Setting the infrared output
Setting the screen rotation
Sampling mode
Sampling mode for remote controls
One-shot sampling
Continuous sampling
Silent sampling
Total Remote v2.2 desktop user manual
Page 1
Rotating screen when sampling
Second signal concept
Appearance & Skins
Fullscreen mode
Selecting skins for remote controls
Creating and adding skins
Setting device and skin paths
Advanced functions
Macro functions
How macros work
Start recording a macro
Editing a macro
Macro editing window
Adding an adjustable delay in macro sequences while recording the macro
Cancel recording a macro
iPaq CIR support
Total Remote CCF mode
General CCF mode information
Engaging/disengaging CCF mode
Loading a CCF
Learning infrared signals in CCF mode
Navigating and controlling a CCF
What makes the IR dongle so cool?
Glossary of Total Remote terms
Total Remote pre-installed device list
Total Remote’s built-in device skins and skin examples
Total Remote v2.2 desktop user manual
Page 2
Total Remote – How To
Using pre-installed device configurations
There are hundreds of thousands of device configurations included with Total Remote, covering
the majority of equipment manufacturers. If your original remote is listed in the master device
list you can select it by name, assign it a skin, and you are ready to go. Not all of the possible
infrared commands are implemented on all of the pre-installed devices, so if you find that you
are missing a function you can add it by sampling your original remote control rather than create
a whole new profile from scratch.
Many manufacturers use the same set of infrared commands for many of their products, so even
if you don’t have your particular model listed you may find that similar ones work just as well.
For instance, during the testing of Total Remote we found that almost all of the Sony VCR
profiles work either partially or completely on a Sony VCR we used that was not listed by its
specific model number in our master device list.
Creating a new remote control profile
Total Remote comes with thousands of preset devices
built in, but there may be situations where you have a
device that is not included in the list. Total Remote
allows you to select a configuration based on the type of
device the remote control is created for. By specifying
the device type you can select a skin that closely
matches the functions of your original remote. You can
set up a custom virtual remote and sample all the
commands from your original remote to create your own
personal remote control, either using the standard skins
or your own custom skin.
In this example we will set up a custom Apex DVD
player remote control.
1. Select Device->New. You will get to the adding
device dialog.
Give a name to the new remote control. (Apex AD-500W).
3, Specify the device type. Choose one from the list of devices. (DVD).
4, Select the skin for the remote control appearance. You may select a skin file from the list
of skins available for the chosen device type. (Standard DVD). Click on Finish, and your
new device profile is ready to program.
Total Remote v2.2 desktop user manual
Page 3
Creating a copy of a remote control profile
Sometimes there is no need to create a completely new remote control. Instead, you may wish to
create a remote control based on the current one. The current device settings, such as skin file,
device type, and all command buttons will be inherited by the new device (although you may
change any of them as you like). If a Total Remote preset has most of the controls of your
device, but it’s missing some of the features, you could copy a preset that “mostly” works and
rename it to match your device. You could then sample the missing commands from your
original remote to your Pocket PC. You could also make different configurations of the same
remote with names like Sony DVD #1, Sony DVD #2, Sony DVD #3, and set up different
functions like macro commands, while keeping certain commands like power or volume
available at all times. To create a copy of the current device select Device->Create Copy.
Here’s an example: You have a Sony N51 VCR. You discover that the preconfigured “Sony
VCR #3” works for your particular model, but it only has the basic functionality (transport
controls, channel up/down, power, and little else). You can copy the Sony #3 profile and add
additional controls to it by using learning mode to capture the data from your original remote
control. Add a check in the checkbox for “Sony VCR #3” to add it to your active devices. From
the Device menu (or by clicking on the “next device” button onscreen until you get there) select
the “Sony VCR #3” as the current device, then select Create Copy from the Device menu. This
will create a new device, “Sony VCR #3 (Copy)”. Make this the active device, then go to the
Edit menu and select Rename…and give whatever name you’d like (such as “Sony N51”). Now
you can begin using learning mode to add any additional commands not present in the
preconfigured device profile, such as onscreen guide controls, tape tracking adjustments, input
and output selectors and so on.
Current remote control
There can be many remote controls created on your PDA, but there can be only one currently
“activated” (displayed on-screen). To select another device or switch between several remote
controls, go to the Device menu and select a device you have added to the list. It is also possible
for skins to display the name of the current remote control in a small window, with
forward/backward arrows to select the next/previous device in the Device menu. This makes
Total Remote even more convenient and intuitive for users.
Renaming a remote control profile
You may rename any device profile with a custom name and change it at any time. Make the
device you wish to rename to be the current active device, and rename it using Edit>Rename…
Total Remote v2.2 desktop user manual
Page 4
Assigning actions to hardware buttons
Some remote control actions can be assigned to hardware
buttons as well as to the virtual onscreen ones. To assign
the actions go to Edit->Assign Hardware Buttons...
menu. You will be taken to the hardware button dialog. In
it, choose a hardware button and assign an action from the
drop down menu. You may return to default actions
predefined to each hardware button by tapping the Set
Default Values button.
Assigning actions to hardware buttons is especially useful
because you may use them when the display of your PDA
is turned off. Most used actions (volume+, volume-,
channel+, channel-) are default values for the hardware
buttons, which are sufficient in most cases.
Turning the display off
You may turn off the display of your PDA while using it as a remote control. This saves battery
resources, while still allowing you to use the hardware buttons for control. To turn the display
off select Tools->Turn Display Off. To turn the display back on you should press the Power
button on your Pocket PC.
Changing a remote control’s appearance
You can easily change the appearance of your virtual remote by using different “skins.” A skin is
a set of images representing the functions of your virtual remote control. The skins built into
Total Remote cover many commonly used devices and many commonly used controls on those
devices. You can also make your own skins. For more
information refer to the Appearance & Skins section.
Selecting device profiles
You can create and store literally thousands of remote
controls, but you may wish to show only a few of them
on the Device list of the main menu. To do so, select
Device->Select. You will get to the dialog that enables
selecting or deselecting available remote controls. Click
on the plus/minus symbol next to a device category to
expand/contract the list. To select or deselect an item,
check or uncheck the corresponding check boxes. For
convenience, the devices are grouped by type. Note you
cannot deselect the device you are currently using; you
must switch to another device and then deselect the old
device from the menu.
Total Remote v2.2 desktop user manual
Page 5
Deleting devices from the master list
You can delete any of the user-created devices listed in the Active Devices tree. Simply tap-andhold on the device you wish to delete, and a pop-up menu will display the option to remove that
device from the list. Note that this only works for the user-added devices shown in black in the
device list; the devices marked in red are built-in to the IR database and cannot be deleted.
Setting the infrared output
Total Remote can send IR signals via the IrDA port, the
Total Remote Transmitter Module, or the CIR port on
certain iPaqs. This option is set from Tools>Options…,
under the heading “Send signal via”. If you have any
problems using the Total Remote transmitter, make sure
you have the output set to use it. If you are using the
demo version you will only have the option of using
IrDA (all options enabled in the full version only).
Setting the screen rotation
Because some Pocket PCs have their audio port on the
bottom of the unit, we now include an option to rotate
the onscreen skins 180 degrees. Only the skin (and
device label) are rotated; all menus and such will be
oriented normally. To enable/disable screen rotation go
to Options…and check/uncheck the “Rotate screen” box. Note that you will have to shut down
Total Remote (CTRL-Q from the keyboard) and restart it before the change occurs.
Device database changes for Total Remote v1.0 and v1.01 users
The old database of infrared device commands that was included with previous versions of Total
Remote has been removed from Total Remote v1.1 forward in favor of the new database. Users
upgrading from a previous version of Total Remote will still have the use of the original 371
devices in the old format, and the installer will not remove them. Unless you actually need one
of the devices from the old database we would suggest deleting them as they increase the time
required to load and run Total Remote. The simplest way to delete them is to navigate to the
“DeviceFiles” directory with a file explorer (Pocket PC or desktop computer via Activesync) and
delete them all.
CAUTION! If you have created any device profiles of your own they are also kept in this
directory! Make sure you only delete what you don’t need!
Total Remote v2.2 desktop user manual
Page 6
Total Remote – Sampling mode
Sampling mode for remote controls
Each device profile can 'learn' to send custom IR (InfraRed) signals. The sampling process is
based on the principle of IR signal interception. You must send signals from your original remote
control to your PDA while it is in the sampling mode. Total Remote will read these signals and
link them with certain actions and/or selected buttons. When the sampling process is finished,
your PDA is ready to send corresponding IR signals to your TV, VCR, DVD, etc.
Important. Some standard buttons of your remote controls may not produce infrared signals
because they are “modifiers”. These buttons could include “shift” buttons that select alternate
functions of a given button like holding down the “shift” key on a keyboard. In this case you are
not sampling the individual button presses but instead the command issued by the “shift +
button” combination.
Another very important note is that the standard skins typically have some on-screen buttons that
cannot be programmed because they are control keys for Total Remote. They can include:
•
Shift button. This button switches to the next skin page if the current skin has more than
one page.
•
Next/Previous device panel. This panel includes a text bar with the name of the current
remote control and two arrows that allow switching between the remote controls you
have added to the Device menu.
•
Fullscreen button. This button toggles the fullscreen mode where the skin can occupy the
whole PDA screen or standard mode where you can access the menu bar and the
Windows Start menu.
One-shot sampling
If you need to sample just one virtual button you should select Edit->Start One-Shot Sampling.
The program will be placed into fullscreen mode and you will be asked to perform the following
steps:
•
Tap the desired button of your virtual remote control that you wish to assign a learned
command
•
Align the IR port of your PDA and the IR window of your original remote control (the
application will wait for a valid infrared signal for only about 10 seconds)
•
Press and hold the remote control button for about 0.5 seconds (a NORMAL press, not
too short and not too long)
Total Remote v2.2 desktop user manual
Page 7
Total Remote will read the IR signal, analyze it and assign it to the virtual button you
selected. In case of signal reception failure the program will display an error message
and offer to retry.
•
When the signal has been assigned correctly you’ll be presented with two more buttons –
Second Signal and Finish. Very few remotes require a second signal, but Total Remote
provides the capability for those that do. To provide the second signal, tap the Second
Signal button (follow the same steps for sampling the second signal). For more
information, see Second Signal Concept at the end of this section.
•
Tap Finish to quit the sampling mode
Continuous sampling
If you need to sample a lot of buttons, like copying every function from your original remote to a
custom Total Remote device profile, you should select Edit->Start Continuous Sampling. Total
Remote will enter fullscreen mode and you will be allowed to assign a function to every button
of your virtual remote control.
•
Tap the desired button of your virtual remote control that you wish to assign a learned
command
•
Align the IR port of your PDA and the IR window of your original remote control (the
application will wait for a valid infrared signal for only about 10 seconds)
•
Press and hold the remote control button for about 0.5 seconds (a NORMAL press, not
too short and not too long)
Total Remote will read the IR signal, analyze it and assign it to the virtual button you
selected. In case of signal reception failure the program will display an error message
and offer to retry.
•
When the signal has been assigned correctly you’ll be presented with two more buttons –
Second Signal and Finish. Very few remotes require a second signal, but Total Remote
provides the capability for those that do. To provide the second signal, tap the Second
Signal button (follow the same steps for sampling the second signal). For more
information, see Second Signal Concept at the end of this section.
•
Tap Finish to finish sampling the current button and to start sampling another one.
•
To quit the Sampling mode go to the main menu and select Edit->Stop sampling
Total Remote v2.2 desktop user manual
Page 8
Silent sampling
If you don’t want or need to confirm your learning process, you should select Edit->Start Silent
Sampling. Total Remote will enter fullscreen mode and you will be allowed to assign a function
to a button of your virtual remote control.
•
Tap the desired button of your virtual remote control that you wish to assign a learned
command
•
Align the IR port of your PDA and the IR window of your original remote control (the
application will wait for a valid infrared signal for only about 10 seconds)
•
Press and hold the remote control button for about 0.5 seconds (a NORMAL press, not
too short and not too long)
Total Remote will read the IR signal, analyze it and assign it to the virtual button you
selected. In case of signal reception failure the program will display an error message
and abort.
Note that Silent Sampling does not allow for the use of “second signals”. If you need to use
second-signal capability you must use the other learning modes.
Total Remote v2.2 desktop user manual
Page 9
Rotating screen when sampling
It is often useful to rotate the remote control skin/screen 180 degrees in
sampling mode. This can provide a better way of handling both the devices. For
example, using an iPaq or other PDA that has the IrDA window at the top you
would have to orient at least one device (the PDA or your OEM remote control)
upside down in order to align the IR port and window. Rotating the screen
solves this problem so that you will see all the buttons oriented the same way as
your physical remote control making the process of continuous sampling a lot
easier on the eyes and neck as well as speeding data entry. After you quit the
sampling mode the screen will be rotated back to normal. You can still toggle
fullscreen mode using the fullscreen button on the skin, so that when you have
finished sampling you can access the menu bar and Edit->Stop sampling.
To rotate the skin/screen in sampling mode, go to the Tools menu and make
sure to have the Rotate screen when sampling item selected.
Second signal concept
Some electronic standards require that each button of the remote control send
two IR signals, which alternate each time you press a button. For these types of
equipment you can make each virtual button learn a pair of signals in order to
maintain the same functionality as the original remote. If you program a button
successfully into your Pocket PC and it works once and only once, you need to
sample a second signal.
If you are certain that your remote control does not support two signals for each button, you may
skip the second signal sampling and tap Finish right after sampling the first one.
NOTE: There is virtually no chance of running into a problem if you use “Second signal” in
learning mode, even if your equipment doesn’t need or use a “second signal”. If you are using a
remote that does not use a unique second command signal, then you will simply be learning the
same command twice. When you use it, say to “channel up” on your TV, the first time you press
the button on Total Remote you will send the first copy of the remote signal, and the second time
you press the same button on Total Remote you will send the second (identical and redundant)
copy of the remote signal. The only likely harm is to make learning take twice as long and your
resulting device files be twice as large as necessary.
Total Remote v2.2 desktop user manual
Page 10
Total Remote - Appearance & Skins
Fullscreen mode
You may switch between fullscreen and menubar mode by tapping the fullscreen button in the
bottom left corner of the screen (in menubar mode) or the fullscreen button on the skin. The
fullscreen mode is useful when you use the program as a remote control, while the menubar
mode is useful when you customize preferences or perform the sampling process.
Fullscreen mode icons: the icon to the left is the fullscreen button when
in menubar mode, and the icon to the right is the fullscreen button used
in all of the included standard skins.
Selecting skins for remote controls
Each remote control is supplied with a skin when it is created. You can change the remote
control skin by selecting Edit->Change Skin... from the main
menu. You may select a skin from the list of available skins. You
should choose skins that are specially designed for certain
devices, because they contain different functions. For instance,
you don’t need a record button for a TV, so using the VCR skin
for a TV remote wouldn’t make much sense.You may create and
add your own skins. Put the skin files in the \SkinFiles folder.
They will appear in the list of available skins.
Creating and adding skins
Total Remote provides you with a
rich set of standard skins for most
major device types, as well as some
more specialized skins. However,
you may create your own skins for your remote controls. Each skin
is represented by a PNG image, stored in \SkinFiles folder (by
default \Program Files\Total Remote\SkinFiles\). Full
documentation for creating your own skins is provided on our web
site in the Total Remote area, and is a free download for all Total
Remote users.
The Total Remote web site also features an area where you can
download skins that other Total Remote users have made. In the
future we intend to let users upload their skin creations for others to share.
Total Remote v2.2 desktop user manual
Page 11
Setting device and skin paths
Total Remote’s installation process gives you the choice of installing to either the “Main
Memory” or the “Storage Card”, but it is possible to change the location of the user-created
device files and skin files to a different directory. For example, you may want to have Total
Remote available to you all the time so you instruct the ActiveSync installer to put Total Remote
in main memory, but you may want to keep a lot of user-created device profiles or skin files on
an external storage card. In this way you always have the universal IR database and the ability to
learn new remotes even if you do not have the external storage card installed, and if you do have
the external storage card installed you can select from any of your skins or devices. The only
real reason to do this is because skin files can take up a comparatively large amount of storage
space, and keeping a few dozen skins in main memory would probably fill up your Pocket PC
very quickly!
Let’s say you do a standard installation to main memory, and you intend to keep a LOT of skins
(or very large skins) on your storage card.
Copy the Total Remote DeviceFiles and SkinFiles directories to your storage card
(i.e. Storage Card\Total Remote stuff\DeviceFiles or SkinFiles)
In Total Remote, go to Tools>Options…
Change the “Device files folder” to the new location by
either browsing to it (click on the “…” icon to bring up a
file navigator) or type in the full path name in the text
box.
Do the same for the “Skin files folder” entry
You may need to do a soft-reset before Total Remote
recognizes the change.
Total Remote v2.2 desktop user manual
Page 12
Advanced Functions
How macros work
In Total Remote a “macro” is a sequence of commands that are sent using only one button press.
For example, you have a TV, VCR, DVD player, CD changer and AV receiver in your home
theater. If you want to watch a DVD you have to follow a pretty specific sequence:
Turn on DVD player
Turn on AV receiver
Select the DVD input on the AV receiver
Turn on TV
Select the input from your AV receiver
Additionally, you are required to wait for some equipment to “warm up” before you can use it,
which means you may have to wait 4 seconds before your AV receiver will allow you to switch
to the DVD input (as an example). Let’s see how we could do this with macros:
Press the “Turn everything on and switch to DVD” button
Much easier! Of course, you have to have all of the commands already programmed in Total
Remote, but once they are there you have a lot of flexibility in how you queue them up to create
long command sequences.
Start recording a macro
Once you have a device profile set up the way you want
you can create a command macro and assign it to a
button. Go to Edit>Start recording macro to begin a new
macro. You will see “Press a button” flashing in the
lower left corner; press the Total Remote button you wish
to assign a macro to. You will now see “Rec” flashing in
the corner, indicating that you are actually creating the
macro command sequence; press the onscreen buttons
you wish to add to the macro. Note that certain buttons
do not get recorded in a macro command, such as the
fullscreen mode button or the on-skin “shift” button, but
they retain their normal function. For example, if you are
making a macro and you need to use buttons that are on a
different “page” you can press the “Shift” button to
access the other pages just like normal, or if you need to access buttons that are hidden by the
menubar you can select fullscreen mode to get at them. When you have added all the commands
you wish to include in the macro, go to the menubar and select Edit>Stop Recording Macro to
finish this macro.
Total Remote v2.2 desktop user manual
Page 13
Editing a macro
Macros are great, but they can get very long and complicated for seemingly “simple” functions.
For example, if you want to make a macro that sets your home entertainment system for
watching a DVD you will probably have a minimum of 7
individual commands:
Turn on TV
Wait xxx milliseconds
Switch TV input to the DVD player
Turn on Stereo
Wait xxx milliseconds
Switch Stereo input to the DVD player
Turn on DVD player
Note that the delays are because most devices cannot
respond instantly to an IR command. An example would
be a television, which often needs 2-3 seconds of delay
between the time you turn it on and the time it can
recognize the command to switch inputs, change
channels, etc.
When you go to the menubar and select Edit>Edit Macro…you will be prompted to “Select a
button to edit”. Technically, all buttons are macros; even seemingly single-purpose buttons like
the power button or channel up are actually a “single-command macro”. While the conventional
use of this function is to edit macro sequences we have no doubt that there are lots of interesting
tricks that are possible by editing “normal” buttons. When the prompt is flashing in the lower
left corner, tap any onscreen button to being editing its command list.
Macro editing window
Here we see the primary macro editing window. The
example shown is a very basic macro (it doesn’t
actually do anything useful), just to show how
commands are displayed. The first line shows that the
“power” button was pressed for about ¾ of a second,
the third line shows that the “stop” button was pressed
for a little over a 1/10th of a second, and so on. The
way that the macro editor decides the function of the
button is by comparing it to the standard skin mask
colors; the recommended mask color for “power” is
RGB 160:64:64 as indicated in the documentation for
skin creation, so Total Remote’s macro editor will call
that “power” (this is why all custom skins should be
made using our mask color guidelines, instead of
randomly using any color for any button). Since this
Total Remote v2.2 desktop user manual
Page 14
example uses the standard DVD skin, and the standard skin uses the recommended RGB value
for the “stop” button, the macro editor knows we pushed the “stop” button for 148ms.
On the menubar, from left to right:
Move the currently selected command up (blue up arrow)
Move the currently selected command down (blue down arrow)
Delete the currently selected command (red X)
Add function (blue “plus” symbol)
The “move up/down” function is straightforward; click once on a command to highlight it, then
click on the arrow(s) to move the command in the direction you desire. FYI, commands are
executed sequentially from top to bottom.
The “delete command” function is equally simple; highlight a command, click the red X, and
that command is removed from the list of commands that will be executed. Be careful, as there
is no confirmation step… deleted commands are removed immediately and cannot be “undone”.
The “Add” button has a flyout menu as shown here; Add Delay, Add Infrared Signal and Add
Macro.
• “Add Delay” lets you insert a user-defined delay
period (the default is 1000ms, or 1 second).
• “Add Infrared Signal” puts you directly into
learning mode so you can sample other IR
commands from your original remote and include
them in a macro without them being present in the
device file (RCDEV) for that device.
• “Add Macro” allows you to refer to other macros
you have previously defined for this device
(RCDEV). This can be used to build very
complex functions using a modular approach.
One other thing that you can do from the main macro
editing screen shown here is to change the timing of any
command. Simply click once on the command you wish
to change (“power” shown here) and you can enter a new
value in the “Press for [] ms” box (shown here as 763).
Total Remote v2.2 desktop user manual
Page 15
Adding an adjustable delay in macro sequences while recording the macro
As mentioned before, there are some cases where you have to wait a period of time between
commands in order to allow the device you are controlling to perform one task before proceeding
to the next. When you are creating a macro you can insert an adjustable delay period between
commands to account for this “busy time”. For example, if you want to turn on your TV, wait 3
seconds for it to come on, change to channel 56, wait 0.5 seconds for it to change, and mute the
volume you could do something like this:
Begin recording a macro (Edit>Start Recording Macro);
“Press a button” flashes
Select the button you wish to use for the macro; “Rec”
starts flashing
Press an onscreen button that has an IR signal associated
(such as power, channel up, etc.)
Go to Edit>Add Delay To Macro and enter “3000” (Note:
1000 milliseconds = 1 second) then click “OK” in the
upper right corner
Continue along these lines to add more buttons or delays;
don’t forget to go to Edit>Stop Recording Macro when
you’re finished.
Cancel recording a macro
You may decide that you wish to abandon any work you have done in creating a macro and
simply discard it mid-way through creation. Go to Edit>Cancel Recording Macro, your current
macro will be thrown away, and you will be returned to normal operating mode.
Total Remote v2.2 desktop user manual
Page 16
iPaq CIR support
Some iPaq Pocket PCs are equipped with a special piece of hardware; an extra IR LED
specifically designed for consumer infrared control. Unlike the IrDA port, the “CIR” port is
virtually identical to the infrared emitters in your remote controls and works far better than an
IrDA port for controlling all of your home gear like TVs and stereos.
Not all iPaq have this special piece of integrated hardware, only iPaqs that came with the preloaded “Nevo” remote control application have the necessary CIR port. As of this writing some
examples of CIR-equipped iPaqs would include:
•
•
•
iPaq 3900 series
iPaq 5400 series
iPaq 2200 series
The ability to directly control this CIR port is important for a couple of reasons:
•
Some people find working with Total Remote’s skin and device interface is easier than
Nevo, and only Total Remote can load CCFs
•
You don’t have to be limited to IrDA range, or have to use the Total Remote audio
transmitter, because a “consumer remote control” transmitter is already built in to your
iPaq!
If you are using an iPaq with a CIR port, there will be a new entry in the “Infrared sending
device” dropdown menu, which is accessible on the main menubar under Tools>Options…and
listed as “iPAQ native CIR” in the list.
While it is extremely handy to have control over the iPaq
CIR port it will still generally have quite a bit less range
than the TR audio transmitter, but the tradeoff is that the
CIR port is quite a bit more accurate when transmitting
very sophisticated signals.
Total Remote v2.2 desktop user manual
Page 17
Total Remote CCF mode
General CCF mode information
“CCF” is the file format used by the Philips™ Pronto™ series of home theater remotes. The
Pronto™ can load new graphic layouts, infrared codes, macro sequences and more using CCF
files, much in the same way the Total Remote can be customized with appearance skins and
infrared device libraries.
An in-depth coverage of the CCF format be far beyond the scope of this manual (whole books
have been written on the subject!), so anyone interested in more detail about CCFs would do
well to take a peek at Remotecentral.com online. They have what may be the largest web site
ever dedicated to the sole subject of consumer remote control, with a substantial amount of
information, files, graphic clipart, tips, tricks, user forums, etc. for users of the CCF format.
Engaging/disengaging CCF mode
When in Total Remote’s “native” mode, go to Tools>CCF Mode to enter CCF mode. When in
CCF mode, click on the blue “Menu” button and select “Exit CCF Mode” to return to “native”
mode.
Loading a CCF
From the blue Menu button select Open CCF File…which will bring up a file navigator. Singleclick on a CCF to load it. Another option would be to press the giant blue button in the middle
of the screen that says “Open CCF File”… but that’s just too obvious. ;)
Total Remote v2.2 desktop user manual
Page 18
Learning infrared signals in CCF mode
Generally when you download a CCF it will be specifically configured for the author’s home
entertainment system. Now, unless you happen to own ALL of the components the author does
and have them connected in EXACTLY the same way as the author it is extremely unlikely that
the CCF will do you any good. You can get around this particular problem by “re-learning” the
buttons you need to use; if the author had a Yamaha DVD player but you have a Sony DVD
player then you should use learning mode to overwrite the Yamaha commands with the
equivalent Sony commands.
Using learning mode while in CCF mode is not much different than using learning mode in
“native” Total Remote mode; for additional information about learning please consult the
relevant sections of the manual that discuss normal “native” mode operation.
Navigating and controlling a CCF
There are two main areas of interest; the Home-DeviceMacros tab interface at the top of the screen and the
button labels and Menu at the bottom. When you click
on a tab it comes to the front, and on the right edge of
each tab there is a “flyout menu” button (tiny downpointing triangle) that displays the options available in
the CCF. As shown in this example, the Device tab of
this CCF has several components listed; a DSS receiver, a
TiVO, a television, an audio receiver and a DVD player.
You can click on any device in the list to go to its control
interface directly, or you can cycle through all the devices
in the list by clicking the “next device” and “previous
device” arrows at
the edges of the
Device name.
Bear in mind that
the items listed
are entirely
dependant on the CCF itself; some CCFs have no
additional items listed in any category, some are well
organized and contain clear item lists, and some may
have a bunch of items listed in a way that makes no
sense! This is not a function of Total Remote, but a
predefined function of the CCF file itself. As with CCF
usage in general you will probably find that you will
need to edit any CCF you might download before it
works well with your unique combination of infraredcontrolled equipment.
Total Remote v2.2 desktop user manual
Page 19
The other major navigation tool is the text labels at the
bottom on either side of the Menu button; these text
labels are intended to show what the current function of
the hardware keys is set to in the CCF (also usually
dependant on what screen/device/macro/etc you have
open). In this example you can see the buttons are (from
left to right) “Pag…”, “Up”, “Down” and “Pag…”. In
this case the first and last buttons are actually set as
“Page previous” and “Page next”1 but the word is too
large for the button to display properly. This is another
example of how a CCF may need to be customized for
optimum use with your particular system.
To see what the label says you can tap-and-hold on the
onscreen button and a tooltip will fly out with the whole
label text. Note that the onscreen buttons are active in
addition to the hardware buttons, so when you tap-andhold the onscreen button it will activate if you lift the
stylus off it, so as with other Pocket PC programs that show tooltips you can “tap-and-hold, then
slide off” the button to avoid activating it.
FYI, the hardware buttons may have the following equivalents:
Button 1 = Calendar =
Button 2 = Contacts =
Button 3 =
E-mail
=
Button 4 =
Home
=
Your Pocket PC’s buttons may be ordered differently, or labeled differently, so if you cannot
figure out what button does what function just experiment a little! This button
placement/order/function is valid for the Dell Axim X3, Toshiba e800 and others.
1
Actually we are guessing what the label says since we didn’t load it into a CCF editor and look up the exact label. ;)
Total Remote v2.2 desktop user manual
Page 20
Why is the Transmitter Module so cool?
The Total Remote infrared Transmitter Module is a marvel of clever engineering. When talking
about infrared control there are a few things you need to know:
Infrared signals are usually modulated at about 35KHz-60KHz, which means the digital data is
sent inside a high-frequency tone, similar to the way radio signals work. The apparent problem
is that the audio output of most high-fidelity consumer gear is limited to 20KHz, which is far too
low to create an infrared control signal. The Total Remote transmitter effectively doubles the
“data rate” of an audio port, so it can generate a 38KHz signal out of a 19KHz signal.
Infrared LEDs, like the kind in your original remote or the Total Remote transmitter, require
more power to turn on than an audio port normally delivers. Our transmitter’s design allows it to
effectively double the power output when combined with our software’s particular method of
sending signals.
The IrDA port built in to most handheld computers is entirely the wrong standard for data rate,
wavelength of light, and communications protocol to be used with consumer infrared. The result
is that while it is possible to “hack the port” so that you can transmit remote control data, it
works very poorly compared to the correct standards used in OEM remotes. Most people find
that transmission via IrDA provides only 10-20 feet of range with most devices, and as little as a
few feet for some others! Because the Total Remote transmitter is designed just like the
transmitter on your original remote, it works just as well (or better) than the original. Ironically,
the IrDA port works pretty well for sampling remotes, just not for transmitting that signal.
Coolest of all is the fact that a good audio port can create a signal FAR more powerful than a
standard OEM remote control. Using a Compaq iPaq 3600 series Pocket PC we have been able
to control most devices over a distance of ONE HUNDRED FEET using the Total Remote
transmitter. The average operational range of most “real” remotes is about 40 feet at best, with
some being as low as 20 feet. You may say, “Hey, my living room isn’t 100 feet long, so who
cares?” When we did our distance tests we used the best possible test environment, which
showed the best possible performance of the remotes. Real life isn’t quite so optimized. Your
VCR’s infrared sensor window may be dusty, you may have a habit of waving the remote
around, your dog (or child) may have chewed on it, etc. Whatever the reason, in real life you can
easily reduce a remote’s performance. So using our more powerful transmitter will give you
better signal reliability than a weaker remote.
It also looks really cool.
Total Remote v2.2 desktop user manual
Page 21
Glossary of Total Remote terms
IRDB – InfraRed DataBase, the database of infrared codes for
Learning – The process of using Total Remote to “record” the signals from your original remote
control, so you can then use Total Remote to control your device.
Learning mode – When you use any of the different ways Total Remote offers for learning a
remote, you are said to be in “learning mode”. Specifically in Total Remote, when you select a
sampling option like One-Shot sampling you are in learning mode the moment the skin goes
fullscreen and Total Remote waits for you to press the first button for learning.
RCDEV – The Total Remote device format. The RCDEV file stores information about a
particular device configuration, such as learned IR codes, macros, device-specific options and
more. Total Remote device files all end with the dot-extension “.RCDEV” so they are easy to
find on your Pocket PC.
Sampling – This usually mean the same thing as “learning”, but does have a slightly more
technical accuracy when discussing certain functions like the whole concept of “learning mode”,
where “learning” is a concept and “sampling” is an operation. You may find the terms
interchanged depending on context.
Total Remote v2.2 desktop user manual
Page 22
Total Remote v2.0 infrared database
listed by manufacturer and number of profiles
Cable
Mfg
ABC
Allegro
Archer
Cableview
Citizen
Comtronics
Eagle Comtronics
Electricord
Garrard
GE
General Instrument
Hamilton
Hitachi
Jasco
Kingston
Memorex
Movie Time
NSC
Omega
Paragon
Pioneer
RCA
Regency
Runco
Scientific Atlanta
Signature
Sprucer
Starcom
Starquest
Tandy
Telecaption
Texscan
Tocom
Tusa
United Artists
Universal
Videostar
Number of device profiles
8
5
4
1
2
2
1
1
1
2
16
3
1
2
1
1
4
4
1
1
4
1
1
1
4
1
2
4
1
1
1
2
4
1
1
7
3
Mfg
Antronix
Cabletenna
Century
Comcast
Comtronics Eagle
Eastern
Everquest
GC Electronics
Gemini
Goldstar
Hamlin
Hitex
Jerrold
Macom
Motorola Digital
Novavision
Oak
Panasonic
Philips
Pulsar
Regal
Rembrandt
Samsung
Signal
SL Marx
Standard Compnt
Stargate
Sylvania
Teknika
Teleview
Time Warner
Toshiba
Unika
United Cable
Video Way
Number of device profiles
2
1
1
2
2
1
2
1
4
2
7
1
16
1
2
2
3
4
9
1
7
3
2
2
1
2
2
1
1
1
1
1
3
1
1
DVD
Mfg
JVC
Panasonic
Proscan
Sony
Number of device profiles
1
1
1
1
Total Remote v2.2 desktop user manual
Mfg
Mitsubishi
Pioneer
RCA
Toshiba
Number of device profiles
1
1
1
1
Page 23
SAT (Satellite)
Mfg
DishNet
Hitachi
Mitsubishi
RCA
Number of device profiles
1
1
1
3
Mfg
General Instrument
Hughes
Primestar
Sony
Number of device profiles
1
1
2
2
TV
Mfg
Admiral
Aiko
Akai
Amark
AOC
Audiovox
Bell and Howell
Brokwood
Candle
Carnivale
CCE
Centurion
Citizen
Classic
Concerto
Coronado
Crown
Curtis Mathes
Daewoo
Dumont
Dynatech
Electrohome
Envision
Fortress
Funai
GE
Gibralter
Goldstar TV/VCR Combo
Grunpy
Havard
IMA
Inteq
Janeil
JCB
JVC
Kaypani
Kenwood
Kloss Novabeam
KTV
Lodgenet
Logik
Number of device profiles
6
1
5
1
9
2
4
3
4
1
1
1
11
1
4
2
2
8
10
2
1
4
1
1
3
11
3
1
2
4
1
1
1
1
4
1
3
2
6
1
3
Total Remote v2.2 desktop user manual
Mfg
Adventura
Aiwa
Alleron
Anam National
Archer
Belcor
Bradford
Brooksonic
Capehart
Carver
Celebrity
Cetronic
Clairtone
Colortyme
Contec/Cony
Craig
CTX
CXC
Daytron
Dynasty
Electroband
Emerson
Fisher
Fujitsu
Futuretech
GE Combo
Goldstar
Griswold
Hallmark
Hitachi
Infinity
J.C. Penney
JBL
Jensen
Kawasho
KEC
Kloss
KMC
Linatech
Loewe
Luxman
Number of device profiles
1
1
2
5
1
3
1
4
1
3
1
1
1
3
2
2
1
1
6
1
2
15
2
1
1
1
7
2
5
13
1
14
1
3
4
2
3
1
2
1
4
Page 24
LXI
Magnatron
Majestic
Megatron
Memorex
Midland
Mitsubishi
Motorola
Multitech
NEC
Nikko
Onking
Optimus
Optonica
Panasonic
Philiph CDR
Philips TV/VCR Combo
Pioneer
Prism
Proton
Quasar
Radio Shack TV/VCR Combo
Realistic
Rhapsody
Sampo
Samsung Combo
Scimitsu
Scott
Sharp
Signature 2000
Sonic
Soundesign
SSS
Supre-Macy
Sylvania
Tandy
Technics
Techwood
Tera
TMK
Tosonic
Universal
Victor
Video Tech
Vidtech
Wards
York
Zenith
Zonda
9
1
2
5
9
4
10
6
2
6
4
1
6
2
15
3
1
5
2
7
13
1
7
1
5
2
1
7
7
4
1
6
5
2
12
5
2
6
4
5
1
3
1
3
3
16
1
10
2
Total Remote v2.2 desktop user manual
LXI Combo
Magnavox
Marantz
MEI
MGA
Minutz
Montgomery Ward
MTC
NAD
Nikei
NTC
Onwa
Optimus TV/VCR
Orion
Philco
Philips
Pilot
Portland
Proscan
Pulsar
Radio Shack
RCA
Realistic TV/VCR Combo
Runco
Samsung
Sanyo
Scotch
Sears
Shogun
Simpson
Sony
Spectracon
Starlite
Supreme
Symphonic
Tatung
Technol ACE
Teknika
Thomson
Toshiba
Totevision
Vector Research
Video Concepts
Vidikron
Viking
Yamaha
Yupiteru
Zenith Combo
1
10
6
2
6
1
14
7
5
1
1
1
6
4
8
10
3
5
9
5
10
14
1
2
8
5
3
14
3
3
7
6
3
1
3
4
1
14
2
5
1
2
1
1
1
3
1
1
Page 25
VCR
Mfg
Admiral
Aiko
Akai
American High
Audio Dynamics
Beaumark
Brooksonic
Candle
Capehart
CCE
Colortyme
Consonic
Curtis Mathes
Daewoo
Dynatech
Electrophonic
Emerson
Fuji
Garrard
Go Video
Gradiente
Harman Kardon
Havard
Hi-Q
Instant Replay
J.C. Penney
Jensen
KEC
KLH
Lloyd
LXI
M. Ward
Magnavox
Marantz
Masushita
Memorex
MGN Technology
Mitsubishi
Motorola
Multitech
NEC
Nikon
Olympus
Optimus TV/VCR Combo
Orion
Pentax
Philco
Philips TV/VCR Combo
Pioneer
Protec
Number of device profiles
6
1
7
3
3
1
6
3
1
1
1
1
8
4
2
1
20
5
1
3
1
3
1
1
3
11
3
2
1
4
1
16
6
7
3
13
1
8
3
4
10
1
2
7
13
4
3
1
4
1
Total Remote v2.2 desktop user manual
Mfg
Adventura
Aiwa
Allegro
Asha
Audiovox
Bell and Howell
Calix
Canon
Carver
Citizen
Colt
Craig
Cybernex
DBX
Electrohome
Emerex
Fisher
Funai
GE
Goldstar
Harley Davidson
Harwood
Headquarter
Hitachi
Inteq
JCL
JVC
Kenwood
Kodak
Logik
LXI Combo
Magnasonic
Magnin
Marta
MEI
MGA
Minolta
Montgomery Ward
MTC
NAD
Nikko
Noblex
Optimus
Optonica
Panasonic
Pentex Research
Philips
Pilot
Proscan
Pulsar
Number of device profiles
1
8
1
1
2
4
1
4
1
7
1
5
2
3
3
1
7
5
13
4
1
2
1
11
1
2
8
6
3
1
1
5
1
1
2
3
3
6
3
2
1
1
3
1
14
1
6
1
2
1
Page 26
Quarter
Quasar
Radioshack
Randex
Realistic
Ricoh
Salora
Samsung TV/VCR Combo
Sansui
Scott
Sharp
Shogun
Singer
STS
Symphonic
Tashiko
Teac
Teknika
Toshiba
Unitech
Victor
Videosonic
XR-1000
Zenith
1
7
9
1
9
2
1
2
8
6
3
2
4
3
3
2
3
6
8
1
3
3
5
5
Total Remote v2.2 desktop user manual
Quartz
Radio Shack TV/VCR Combo
Radix
RCA
Realistic TV/VCR Combo
Runco
Samsung
Sanky
Sanyo
Sears
Shintom
Signature 2000
Sony
Sylvania
Tandy
Tatung
Technics
TMK
Totevision
Vector Research
Video Concepts
White Westinghouse
Yamaha
Zenith TV/VCR Combo
1
1
1
18
7
1
6
2
5
14
4
1
8
6
2
3
2
3
2
4
5
1
5
4
Page 27
Total Remote’s built-in device skins
These are the three interface screens for the standard “Audio System” skin
This is the interface screen for the standard “CD” skin
These are the two interface screens for the standard “DVD” skin
Total Remote v2.2 desktop user manual
Page 28
This is the interface screen for the standard “Tuner” skin
These are the two interface screens for the standard “TV” skin
These are the two interface screens for the standard “VCR” skin
Total Remote v2.2 desktop user manual
Page 29
These are the two interface screens for the standard “Satellite/Cable” skin
Just an example of the many different types of skins you could make!
(all images are actual Total Remote skins created by users)
Total Remote v2.2 desktop user manual
Page 30