1
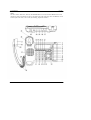
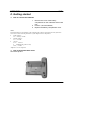
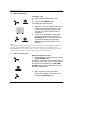
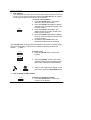
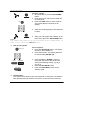
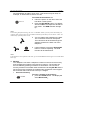
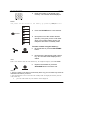
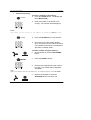
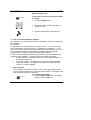
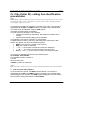
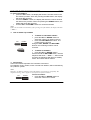
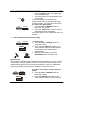
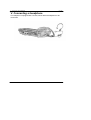
User guide
Please read these instructions
carefully before use and keep
this User Guide for future
reference!
LJ-100
User Guide
LJ-100
Please read these instructions
carefully before use and keep this
User Guide for future reference.
1
Contents
LJ-100
Contents
I. Introduction.........................................................................................
Telephone features...............................................................................
Function button index............................................................................
II. Getting started...................................................................................
How to connect the batteries................................................................
How to mount the stand……………………………………………………
How to connect the handset and telephone line...................................
How to set the dial mode for your type of telephone exchange............
Wall mounting……………………………………………………………….
III. Using the telephone.........................................................................
How to set the display contrast.............................................................
How to set date and time......................................................................
Ringer volume control...........................................................................
How to select ringer melody..................................................................
2-way speaker function.........................................................................
How to make a call...............................................................................
How to receive a call.............................................................................
OUT memory........................................................................................
How to delete the OUT number............................................................
Redial function......................................................................................
Auto-redial function…………………………………………………………
How to enter a pause............................................................................
How to set a pause…………………………………………………………
Hold function.........................................................................................
Memory.......................................................................………………….
Flash function........................................................................................
How to lock telephone numbers............................................................
Alarm function.......................................................................................
“Don’t disturb” function..........................................................................
Calculator..............................................................................................
IV. Clip (Caller ID) – Calling line identification presentation.............
How to review Clip numbers.................................................................
How to delete Clip numbers..................................................................
VIP function..........................................................................................
How to make a call from the Clip memory............................................
How to set the prefix………………………………………………………..
How to set the local area code..............................................................
V. Connecting the headphone…………………………………………….
VI. Help...................................................................................................
Important advice..................................................................................
2
3
3
5
7
7
7
8
8
8
9
9
9
10
10
11
12
12
13
13
14
14
14
15
15
16
19
20
20
22
23
24
24
25
25
26
27
27
29
30
31
I. Introduction
LJ-100
I. Introduction
Important!
Please read these instructions carefully before use and keep this User Guide
for future reference.
Telephone components supplied:
! telephone set (base unit + handset),
! handset cord,
! line cord,
! stand,
! user guide,
! guarantee card.
#
Telephone features
♦
♦
♦
♦
♦
♦
♦
♦
♦
♦
♦
♦
♦
12-digits, green backlit LCD display
10 two-touch number memory
7 one-touch number memory
Calculator
CLIP(Caller ID) – calling line identification
presentation in FSK/DTMF European
system
100 memory locations
telephone number review
date and time display
local area code enter
prefix
call back
VIP function
Alarm-clock
Call timer
Adjustable display contrast
Date and time setting
Handset volume rotary switch
Last number redial
30 redial number memory
Pause
3
I. Introduction
LJ-100
♦
♦
♦
♦
♦
♦
♦
♦
♦
♦
♦
♦
2-way speaker function
2-way speaker volume rotary switch
Pre-dial function
Flash
16 types of ringer sound selectable
(8 melody ringers)
Ringer volume control
„Don’t disturb” function
Music on hold
Tone/pulse dialling
Lock for long distance calls
Headphone socket
Wall mounting
4
I. Introduction
#
LJ-100
Function button index
1.
2.
3.
4.
5.
6.
7.
8.
9.
10.
11.
12.
13.
14.
15.
16.
17.
18.
19.
20.
21.
22.
23.
24.
25.
26.
27.
28.
29.
30.
31.
32.
33.
34.
35.
NEW indicator
M1...M7 buttons
Display
DEL/TIME button
BRT/SLP button
VIP/P button
VOLUME HI/LOW rotary switch
STORE button
RECALL button
FLASH button
SP-PHONE button
RD/ARD button
SET/HOLD button
Keypad
Handset socket
Handset volume rotary switch
Handset loudspeaker
UP/+ button
DOWN/- button
OUT/x button
BACK/÷
÷ button
CAL button
DC 9V socket
RINGER Hi/Low switch
DIAL MODE T/P switch
TEL OUT line socket
TEL IN line socket
Handset hole
Handset microphone
Handset socket
*/. button
Base microphone
#/= button
Wall clip
Hold clip
5
I. Introduction
LJ-100
Note!
The line sockets TEL OUT, TEL IN, the RINGER Hi/Low switch, the DIAL MODE T/P switch,
the DC9V socket, the handset socket are located on the side of the base unit. In addition, on the
bottom of the base unit, is the socket for blocking telephone numbers.
6
II. Getting started
LJ-100
II. Getting started
#
How to connect the batteries
♦
♦
♦
Remove the cover of the battery
compartment on the underside of the base
unit.
Fit three 1,5V AA batteries,
Replace the battery compartment cover.
Note!
Instead of batteries, the adaptor to the DC9V socket, which is placed on the side of the base
unit can be connected. The parameters of the adaptor must be as follows:
!
inside voltage –
UIN = 230V, f =50 Hz
!
outside voltage–
Uout = 9V DC
!
current
Ioutmin = 100 mA
!
standard plug (Φ=2.1 mm)
with „-” inside.
Adaptor is not in complete!
#
How to mount the table stand
See below picture.
7
II. Getting started
#
LJ-100
How to connect the handset and telephone line
!
!
Plug one end of the coiled handset cord into the handset and the
other end into the socket on the side of the telephone.
Insert the base unit’s telephone line plugs into the PTT wall socket and
telephone socket TEL IN as shown on the illustration.
Note!
The telephone is equipped with two line sockets. These sockets are connected in parallel. It does
not matter, where the telephone line and second telephone are connected.
After connecting the telephone, the display shows the date and two clocks.
These symbols will be always displayed in the standby mode.
#
How to set the dial mode for your type of telephone exchange
These are two different modes a telephone can use to communicate with the
local exchange. Modern telephone exchanges accept TONE dialling, but some
older exchanges accept only PULSE dialling. This telephone is capable of
either type of dialling- but if your local telephone exchange is a modern one
that accepts TONE dialling, this is the best type to use, because:
! it gives you much faster connections,
! it allows you to use special functions if they are available in your area.
To set the right dial mode:
move the DIAL MODE T/P switch to T or P
position.
Note!
Special functions are available only if the relevant TP S.A. services have been subscribed to.
If more information is required, please contact the BOK office or your network provider.
#
Wall mounting
The wall mount brackets are located underneath the telephone base unit. The
telephone can be conveniently wall mounted near the PTT line socket.
To mount the base onto the wall:
! drill two holes into the wall in the correct position, a distance of 124mm
apart. Put the screws into the wall, leaving about 5 mm free to hang
the wall mounting bracket,
! set the wall clip in the right position,
! replace the handset on the base unit,
! hang the telephone onto the screws.
YOUR TELEPHONE IS NOW READY FOR USE!!!
8
III. Using the telephone
LJ-100
III. Using the telephone
#
How to set the display contrast
The setting factory is 3.
To set the display contrast:
♦ press the SET/HOLD button, until the
display will show the right setting for you.
BRT/SLP
DEL/TIME
♦
Press the DEL/TIME button to return to
the standby mode.
If the DEL button is not pressed, the telephone will return to standby mode
after several seconds. The setting will be stored.
#
How to set date and time
SET/HOLD
2
ABC
GHI
5
JKL
PQRS
8
TUV
/
0
OPER
1
4
7
3
6
9
DEF
MNO
WXYZ
/=
To set date and time:
♦ press the SET/HOLD button. The display
will show - 0 1 2 3 4 5 6 7 -.
♦ Press the 1 button. The display will show
the symbol 2004 indicating the year. The
one before last digit will be flashing.
♦ Use the keypad to enter the right digits.
For example, if you want to set the year
2005:
! press the 0 button, the last digit will
start to flash,
! then, press the 5 button.
♦ After setting the year, the first digit
indicating the month will start to flash. Use
the keypad to enter the right digits. For
example, if you want to set August:
! press the 0 button, the next digit will
start to flash,
! then, press the 8 button.
♦ After setting the month, the first digit
indicating the day will start to flash. Use
the keypad to enter the right digits. For
th
example, if you want to set the 27 day of
9
III. Using the telephone
2
ABC
GHI
5
JKL
PQRS
8
TUV
/
0
OPER
1
4
7
3
6
9
DEF
MNO
WXYZ
/=
LJ-100
month:
! press the 2 button, the next digit will
start to flash,
! press the 7 button.
♦ After setting the day, the first digit
indicating the hours will start to flash. Use
the keypad to enter the right digits. For
example, if you want to set 16.00:
! press the 1 button, the second digit
will start to flash,
! press the 6 button.
♦ After setting the hour, the first digit
indicating the minutes will start to flash.
Use the keypad to enter the right digits.
th
For example, if you want to set the 59
minute:
! press the 5 button, the last digit will
start to flash,
! press the 9 button.
After entering the minutes, the telephone will
return to standby mode automatically. All
settings will be stored.
Note!
♦ If incorrect buttons are pressed, the settings will not be
confirmed.
♦ During the setting, press the UP/+ or DOWN/- button to move
between the digits (to choose the digit, you want to change).
#
Ringer volume control
The volume at which the base unit will ring for an incoming call can be
adjusted.
To select the volume you prefer:
move the RING Hi/Low switch to:
! Low position– low ringing volume
or
! Hi position– high ringing volume.
# How to select the ringer melody
One ringer melody can be selected from among 16 ringer melodies. The
settings rING 01-08 indicate the normal ringers and settings rING 09-16
indicate the melody ringers.
10
III. Using the telephone
SET/HOLD
2
ABC
GHI
5
JKL
PQRS
8
TUV
/
0
OPER
1
4
7
UP/+
3
DEF
6
9
MNO
WXYZ
/=
DOWN/-
DEL/TIME
LJ-100
To select one ringer melody:
♦ press the SET/HOLD button. The display
will show - 0 1 2 3 4 5 6 7 -.
♦ Press the 7 button. The display will show
an actual setting rING 09. The ringer
melody will be played.
♦ Press the UP/+ or DOWN/- button to
select the right signal (melody).
♦ Press the SET/HOLD button to confirm
the setting. The display will show the
symbol - 0 1 2 3 4 5 6 7 – again.
♦ Press the DEL/TIME button. The
telephone will return to the standby mode.
If the DEL/TIME button is not pressed, the
telephone will return to standby mode after
several seconds. The setting will be stored.
Note!
The melody ringers are available only, when the batteries are
placed in the battery compartment. If there are no batteries,
only the normal ringer will sound.
#
2-way speaker function
The 2-way speakerphone function allows a number to be dialed, or a call to be
made, without the handset needing to be lifted. The party on the other end of
the line will automatically be able to hear and to be heard through the speaker
located in the base unit of the telephone. When using this function, the user
needs to speak within a reasonable distance of the telephone microphone in
order that the microphone may pick-up voice sound. This function may also be
used to make a conference call between several parties in the same office.
Using the SP-PHONE button, the 2-way speakerphone function can be
switched on/off.
After pressing the SP-PHONE button, the
display will show the timer.
SP-PHONE
In addition, the VOLUME HI/LOW rotary
switch can be used to adjust the volume of the
loudspeaker.
HI
VOLUME
W
LO
11
III. Using the telephone
#
LJ-100
How to make a call
SP-PHONE
2
1
4
7
ABC
GHI
5
JKL
PQRS
8
TUV
/
0
OPER
3
6
9
To make a call:
♦ lift the handset from the base unit
or
♦ press the SP-PHONE button.
The display will show the timer.
♦
DEF
MNO
WXYZ
/=
♦
SP-PHONE
When the PTT on-line signal is heard, the
required number should be dialed. The
number will be displayed. After several
seconds, the call time counter will be
switched on.
To end your conversation, replace the
handset on the base unit or press the
SP-PHONE button. The time of your last
call can be displayed by pressing the
OUT/X button (see the chapter: ”OUT
memory”)
Note!
The telephone number in the standby mode can also be entered (before lifting the handset or
pressing the SP-PHONE button).If you wish to delete the last incorrect digit, press the
DEL/TIME button. If you wish to make a call, press the BACK÷ button. The 2-way speaker
function will be switched on and the number will be dialed automatically.
#
How to receive a call
When the telephone rings:
♦ lift the handset from the base unit or press
the SP-PHONE button.
In addition, on the side of the handset there is
the rotary switch, which can be used to adjust
the volume of the handset or the VOLUME
HI/LOW rotary switch to adjust the volume of
the base’s loudspeaker.
SP-PHONE
♦
After completing your conversation,
replace the handset on the base unit or
press the SP-PHONE button.
12
III. Using the telephone
#
LJ-100
OUT memory
Your telephone can store 30 the most recently dialed numbers in the OUT
memory. They can be reviewed by pressing the OUT/X button in standby
mode. Each number may consist of up to 16 digits.
To review OUT numbers:
♦ press the OUT/X button. The display
shows the last number dialed.
♦ Press the OUT/X button again to display
the time of this call and the number of the
memory location.
OUT/x
♦ Press the OUT/X button again. The
display shows the number, stored in the
lower memory location.
♦ Press the OUT/X button again to display
the time of this call and the number of the
memory location.
♦ By pressing the OUT/X button, the
remaining numbers can be reviewed.
If the OUT/X button is not pressed, the telephone will return to standby mode
after several seconds. If the memory is empty, the display will show the
symbol - - - End - - -.
To make a call:
♦ press the OUT/X button to select the
number .
OUT/x
BACK/
SP-PHONE
#
♦
Press the BACK/÷
÷. button. The 2-way
speaker function will be switched on and
the number will be dialed automatically.
♦
After the call, replace the handset on the
base unit or press the SP-PHONE button.
How to delete an OUT number
OUT/x
To delete an individual number:
♦ press the OUT/X button to select the
number, to be deleted.
13
III. Using the telephone
LJ-100
♦
DEL/TIME
Press the DEL/TIME button twice. The
number will be removed.
To delete the all numbers:
♦ Press the OUT/X button.
♦ Press and hold the DEL/TIME button until
- - - End - - - is displayed. After several
seconds, the telephone will return to
standby mode. All numbers will be
removed.
#
Last number redial
Your telephone automatically stores the last number dialed of up to 32
digits long. This function can be used, when the number is busy.
To redial:
♦ lift the handset or press the SP-PHONE
button.
SP-PHONE
♦
Press the RD/ARD button. The last
number will be displayed and dialed.
RD/ARD
#
Autoredial function
The Autoredial function allows the last number to be redialed during the
using the 2-way speaker button. This operation can be repeated many
times, until a connection is made.
RD/ARD
#
To dial the number again:
♦ press the RD/ARD button. The 2-way
speaker function will be switched off
briefly. After an interval, the 2-way
speaker function will be switched on and
the number will be dialed again
automatically.
How to enter a pause
With some switchboards, after dialing the access code you may have to
wait for a moment while the switchboard picks up an outside line. To
compensate for this, you can enter a pause within a phone number.
14
III. Using the telephone
LJ-100
SP-PHONE
VIP/P
2
ABC
GHI
5
JKL
PQRS
8
TUV
/
0
OPER
1
4
7
3
6
9
DEF
To enter a pause:
♦ lift the handset or press the SP-PHONE
button.
♦ Enter the access code for an outside line,
for example 0.
♦ Press the VIP/P button to enter a pause.
The symbol P will be showed on the
display.
MNO
WXYZ
/=
SP-PHONE
♦
Enter the remaining digits of the telephone
number.
♦
After your call, replace the handset on the
base unit or press the SP-PHONE button.
Note!
The number and pause can be also entered in the standby mode. To
make a call, press the BACK/÷
÷ button.
#
How to set a pause
SET/HOLD
2
ABC
GHI
5
JKL
PQRS
8
TUV
/
0
OPER
1
4
7
UP/+
3
6
9
DEF
MNO
WXYZ
/=
♦
DOWN/-
DEL/TIME
#
To set a pause:
♦ press the SET/HOLD button. The display
will show - 0 1 2 3 4 5 6 7 -.
♦ Press the 6 button. The display will show
an actual setting PAUSE 3_6.
♦
♦
Press the UP/+ or DOWN/- button to
select the right time of the pause from
among the following setting: 1_0, 2_0,
3_0, 3_6.
Press the SET/HOLD button.
Press the DEL/TIME to return to the
standby mode.
Hold function
The Hold function allows music to be switched on during the conversation.
After pressing the HOLD button, the person on the other end of the line
15
III. Using the telephone
LJ-100
will automatically be able to hear music. This function may be used, for
example, in offices while a client is on hold.
SET/HOLD
To switch the hold music on:
♦ inform the person on the other end of the
line about a music pause.
♦ Press the SET/HOLD button. The display
will show Hold. The telephone will start to
play music. The NEW indicator will light
up.
Note!
In activating this function using the UP/+ or DOWN/- button, you may select the melody you
wish the caller to hear. There are 8 melodies available, from which you can choose. These are
indicated by symbols from 01 to 08.
SP-PHONE
♦
You can replace the handset on the base.
The connection will not be interrupted.
The hold music will be heard through the
speaker located in the base unit of the
telephone.
♦
Lift the handset or press the SP-PHONE
button to continue speaking. The Hold
function will be switched off.
Note!
If the handset is not replaced on the base, press the SET/HOLD button again to switch the hold
music off.
#
Memory
Your telephone can store 7 telephone numbers in the one-touch memory
and 10 telephone numbers in the two-touch memory. The number can
then be dialed by pressing one button or two buttons. The one-touch
memory locations are located under the buttons indicating M1-M7 and the
two-touch memory locations are located under the buttons of the keypad.
Each number that is stored can have up to 16 digits.
! One-touch memory
To store a number in the memory:
♦ press the STORE button. The display will
STORE
show INPUt CodE_.
16
III. Using the telephone
2
ABC
GHI
5
JKL
PQRS
8
TUV
/
0
OPER
1
4
7
3
6
9
LJ-100
♦
DEF
MNO
Enter the number, to be stored in the
memory. The number will be displayed.
WXYZ
/=
Note!
The pause can be stored in the memory by pressing VIP/P button.
M1
M2
♦
Press the STORE button a second time.
♦
Now press one of the number buttons
(M1-M7). This gives you the code under
which your number will be stored. The
telephone will return to standby mode.
M3
STORE
M4
M5
M6
M7
SP-PHONE
To dial a number using the memory :
♦ lift the handset or press the SP-PHONE
button.
♦
Next press the appropriate code number
key. The number will be displayed and
dialed.
Note!
If there is no number under the code number key, the telephone displays symbol NO COdE.
♦
Replace the handset or press the
SP-PHONE button to end the call.
SP-PHONE
Note!
1. Storing a number in the memory automatically deletes any previous number kept under the
individual code number you choose.
2. The stored numbers can be reviewed in the standby mode. To display the number from the
code number key:
!
press the code number key. The number will be displayed.
17
III. Using the telephone
!
LJ-100
Two-touch memory
STORE
2
ABC
GHI
5
JKL
PQRS
8
TUV
/
0
OPER
1
4
7
3
6
9
To store a number in the memory:
♦ press the STORE button. The display will
show INPUt CodE_.
♦
DEF
MNO
Enter the number, to be stored in the
memory. The number will be displayed.
WXYZ
/=
Note!
The pause can be stored in the memory by pressing VIP/P button.
2
ABC
GHI
5
JKL
PQRS
8
TUV
/
0
OPER
1
4
7
STORE
♦
Press the STORE button a second time.
3
♦
Now press one of the number buttons
(0-9). This gives you the code under which
your number will be stored. The telephone
will return to standby mode.
6
9
DEF
MNO
WXYZ
/=
SP-PHONE
RECALL
2
ABC
GHI
5
JKL
PQRS
8
TUV
/
0
OPER
1
4
7
3
6
9
To dial a number using the memory :
♦ lift the handset or press the SP-PHONE
button.
♦
Press the RECALL button.
♦
Next press the appropriate code number
key (0-9). The number will be displayed
and dialed.
DEF
MNO
WXYZ
/=
Note!
If there is no number under the code number key, the telephone displays symbol NO COdE.
♦
Replace the handset or press the
SP-PHONE button to end the call.
SP-PHONE
18
III. Using the telephone
LJ-100
Note!
1. Storing a number in the memory automatically deletes any previous number kept under the
individual code number you choose.
2. The stored numbers can be reviewed in the standby mode. To display the number from the
code number key:
!
press the RECALL button,
!
press the code number key. The number will be displayed.
!
How to delete a number from one-touch and two-touch memory
DEL/TIME
#
During the review:
♦ Press the DEL/TIME button twice. The
number will be removed. The telephone
will return to standby mode.
Flash function
This allows various switchboard facilities such as call transfer and
conference calls to be used. Contact your communications manager or the
person responsible for maintaining your switchboard to find out what
facilities are available.
The telephone allows the following values to be set: 90ms, 120ms, 180ms,
300ms, 600ms and 1000ms
SET/HOLD
2
ABC
GHI
5
JKL
PQRS
8
TUV
/
0
OPER
1
4
7
UP/+
3
6
9
DEF
To set the right Flash value:
♦ press the SET/HOLD button. The display
will show - 0 1 2 3 4 5 6 7 -.
♦
MNO
WXYZ
/=
DOWN/-
♦
♦
Press the 2 button. The display will show
an actual setting. The factory setting is
600ms.
Press the UP/+ or DOWN/- button to
select the right value.
Press the SET/HOLD button to confirm
the setting.
♦
DEL/TIME
Press the DEL/TIME button. The
telephone will return to standby mode.
If the DEL/TIME button is not pressed, the
telephone will return to standby mode after
several seconds. The setting will be stored.
19
III. Using the telephone
LJ-100
How to transfer a call.
FLASH
2
ABC
GHI
5
JKL
PQRS
8
TUV
/
0
OPER
1
4
7
3
6
9
To transfer a call from one internal number
to another:
♦ press the FLASH button.
DEF
MNO
WXYZ
♦
Enter the number, to which you want to
transfer the call.
♦
Replace the handset on the base unit.
/=
#
How to lock the telephone numbers.
The telephone can be blocked so that it is impossible to make a call beginning
with the digit „0”,
for example:
a Long Distance or International call, a Party Line call, or, in the case of an
office switchboard, where the number „0” facilitates an outside line , it can
block an extension number from being used by an unauthorized person. This
is an invaluable feature in the prevention of unauthorized calls and the
safeguarding of a telephone bill from unauthorized expense.
In order to use this feature the key must be placed in the lock located on the
underside of the telephone, and then turned to the required position:
! “red dot” position - the telephone can be used to dial all numbers on
the keypad including „0”.
! “green dot” position – the telephone can used to block all numbers.
! “yellow dot” position - the telephone has the lock activated and the
number „0” cannot be dialed.
#
Alarm function
Your telephone may be used as alarm clock. Up to three different times
may be stored simultaneously, using the alarm function. The telephone will
emit the alarm signal for 40 seconds.
To programme the alarm:
1. press the SET/HOLD button. The display
SET/HOLD
will show - 0 1 2 3 4 5 6 7 -.
20
III. Using the telephone
2
ABC
GHI
5
JKL
PQRS
8
TUV
/
0
OPER
1
4
7
3
6
9
DEF
MNO
WXYZ
/=
SET/HOLD
DEL/TIME
LJ-100
2. Press the 5 button. The display will show
AL 123.
3. Press the 1 button to set the first alarm.
The display will show symbol AL 1OFF.
Alarm is off.
4. Press the */. button to switch alarm on.
The display will show AL 1 12-00. The
first digit of the clock will flash.
5. Using the keypad, enter the hour and
minute. For example, if you wish to set
15:37, press the following digits 1537.
6. Press the SET/HOLD button. The display
will show AL
123.
7. Press the 2 button. The display will show
symbol AL 2OFF.
8. Repeat steps 4 and 5 to set the second
alarm.
9. Press the SET/HOLD button. The display
will show AL
123.
10. Press the 3 button, if you wish to set the
third alarm. The display will show
AL 3OFF.
11. Repeat steps 4 and 5 to set the third
alarm.
12. Press the SET/HOLD button. The display
will show AL
123.
13. Press the SET/HOLD button once more to
confirm the setting. The display will show
– 0 1 2 3 4 5 6 7 -.
14. Press the DEL/TIME button. The
telephone will return to the standby mode.
If the DEL/TIME button is not pressed, the
telephone will return to standby mode after
several seconds. The setting will be stored.
Note!
You do not have to set three alarms . After displaying symbol AL 123, select the alarm, you
wish to set.
The alarm signal will be played every day. The alarm can be switched off by
pressing the DEL/TIME button.
21
III. Using the telephone
Note!
!
!
LJ-100
The alarm will only function when the batteries are located in the battery
compartment or the base unit is connected to a power supply.
To switch the alarm off, set the AL 1OFF symbol by pressing the */. button.
#
„Don’t disturb” function.
Your telephone allows the ringer to be switched off.
The telephone will not then ring, with the exception of the VIP numbers
(see chapter :„VIP function” ).
BRT/SLP
UP/+
DOWN/-
To switch the ringer off:
♦ press and hold the BRT/SLP button, until
SLEEP 0-30 is displayed. The ringer is
then switched off for 30 minutes. This is a
factory setting.
♦ To change the time, press the UP/+ or
DOWN/- button. Each time this button is
pressed, the setting is changed by about
30 minutes. The maximum time that the
ringer may be switched off is 23 hours and
30 minutes.
Note!
If the UP/+ or DOWN/- button is not pressed within 5 seconds, the setting will be confirmed as
the minimum time (30 minutes).
SET/HOLD
DEL/TIME
♦
Press the SET/HOLD button to confirm
the setting.
♦
Press the DEL/TIME button. The
telephone returns to the standby mode
and the display shows SLEEP and clock.
Note!
a) If no further buttons are pressed, the telephone will return to standby mode after several
seconds. The settings will be stored.
b) If you have an activated CLIP service, all numbers will be stored in the memory.
c) Remember, that the flashing display also informs of incoming calls.
SP-PHONE
To switch the „Don’t disturb” function off
♦ lift the handset or press the SP-PHONE
button briefly. The telephone will return to
the standby mode.
22
III. Using the telephone
LJ-100
#
Calculator
Your telephone may be used as calculator. To switch the calculator on/off
press the CAL button. After pressing this button, the display will show the digit
0.
Below is a description of all button functions:
♦ the OUT/x button– multiplication,
♦ the BACK/÷
÷ button- division,
♦ the UP/+ button- addition,
♦ the DOWN/- button- subtraction,
♦ the DEL/TIME button– clearing of data,
♦ the BRT/SLP button- addition and subtraction,
♦ the */. button– adding a decimal point,
♦ the #/= button- result/total.
23
IV. Clip (Caller ID)- Calling line identification presentation
LJ-100
IV. Clip (Caller ID)- calling line identification
presentation
Note!
CLIP function is only available if you have subscribed to the relevant TP S.A. services or those
of another Provider. If more information is required, please contact the BOK (Customer
Service Office) office in your area..
Your telephone displays and stores the number of the caller. The number is
displayed until the UP/+ or DOWN/- button is pressed or the handset lifted.
The number can be identified using the FSK system
In Poland, the FSK system is obligatory.
The FSK system is the best to use, because:
! it allows the sending of statements, which define the status of the
number,
! it allows the automatic setting of time and date.
The telephone can store a maximum of 100 numbers.
Together with the number, date, time and statements (symbols) are also
stored. The display can show the following symbols:
! NEW- a new number is stored in the memory,
! REP- the number is repeated,
! - - - P - - -- the number is private and cannot be displayed,
! - - - O - - - - the number is unknown and cannot be shown,
! Error (- - - E- - - )- an error has occurred in sending the number.
The number is identified and stored in the following form:
for example- 0 42 1234567,
The identified number consists of:
0- prefix,
42- local area code,
1234567- number of subscriber.
Note!
If the clip memory is full, storing a new number automatically deletes the first stored number.
#
How to review Clip numbers
If new numbers are stored, the NEW indicator flashes. The number is
displayed until the UP/+ or DOWN/- button is pressed or the handset lifted.
After displaying new numbers, the NEW symbol disappears from the display.
New numbers change their status to old numbers.
24
IV. Clip (Caller ID)- Calling line identification presentation
LJ-100
To review all numbers:
! press the UP/+ button, the display will show the number stored in the
first memory location. After next pressing the UP/+ button, the display
will show date and time.
! Press the DOWN/- button, the display will show the number stored in
the last memory location. After next pressing the DOWN/+ button, the
display will show date and time.
! Use the UP/+ and DOWN/- buttons to review all numbers
Note!
If there are no numbers in the memory, after pressing one of the buttons, the display will show - - End - - -.
#
How to delete Clip numbers
♦
!
UP/+
DOWN/-
DEL/TIME
To delete an individual number:
press the UP/+ or DOWN/- button to
select the number you want to remove.
! Press the DEL/TIME button twice. The
number will be removed.
Using the UP/+, DOWN/- and DEL/TIME
buttons the remaining numbers can be
removed.
♦ To delete all numbers:
! press the UP/+ or DOWN/- button.
Press and hold the DEL/TIME button, until the
telephone will show - - - End - - -. After several
seconds, the telephone will return to standby
mode. All numbers will be deleted.
#
VIP function
VIP function allows important CLIP numbers to be saved
from deletion. Every number, which is saved from deletion, will be indicated by
the “padlock” symbol.
Note!
When the „No-disturb” function is used, VIP numbers are treated very specifically. The
telephone will ring, when a signal is received from one of these numbers.
UP/+
DOWN/-
To save a number:
! press the UP/+ or DOWN/- button to
select the number to be saved.
25
IV. Clip (Caller ID)- Calling line identification presentation
LJ-100
Press the VIP/P button. The display will
show the VIP symbol.
! The above steps can be repeated for the
next number.
If no further buttons are pressed, the
telephone will return to standby mode after
several seconds. The settings will be stored.
To remove the VIP symbol :
! press the UP/+ or DOWN/- button to
select the VIP number.
! Press the VIP/P button. The VIP symbol
will disappear from the display.
The above steps can be repeated for the next
number.
!
VIP/P
UP/+
#
DOWN/-
How to make a call from Clip memory
UP/+
DOWN/-
BACK/
To make a call:
♦ press the UP/+ or DOWN/- button to
select the number.
♦ Now, press the BACK/÷
÷. button. The
2-way speaker function will be switched
on and the number will be dialed
automatically.
♦ Replace the handset or press the
SP-PHONE button to end the call.
SP-PHONE
Special case!
It may happen, that the number identified was stored without a prefix, which is
necessary to make long distance calls. Your telephone allows a prefix to be
added at the beginning of the number automatically. A prefix is added after
pressing the BACK÷ button twice. In Poland, the prefix used is 0.
UP/+
DOWN/-
BACK/
To make a call using a number without a
prefix:
♦ press the UP/+ or DOWN/- button to
select the number.
♦ Press the BACK/÷
÷ button twice. The
2-way speaker function will be switched
26
IV. Clip (Caller ID)- Calling line identification presentation
SP-PHONE
#
♦
LJ-100
on, the prefix will be added and the
number will be dialed automatically.
Replace the handset or press the
SP-PHONE button to end the call.
How to set the prefix
SET/HOLD
2
ABC
GHI
5
JKL
PQRS
8
TUV
/
0
OPER
1
4
7
3
6
9
DEF
MNO
WXYZ
/=
To enter the prefix:
♦ press the SET/HOLD button. The display
will show - 0 1 2 3 4 5 6 7 -.
♦ Press the 3 button. The display will show
CodE - 12 -.
♦ Press the 2 button. The display will show
0CodE - -.
♦ Using the keypad, enter the prefix.
♦ Press the SET/HOLD button to confirm
the setting. The display will show
CodE - 12 -.
♦ Press the DEL/TIME button. The
telephone will return to standby mode.
If no further buttons are pressed, the
telephone will return to standby mode after
several seconds. The settings will be stored.
DEL/TIME
To delete the prefix:
♦ press the SET/HOLD button. The display
will show - 0 1 2 3 4 5 6 7 -.
♦ Press the 3 button. The display will show
CodE - 12 -.
♦ Press the 2 button. The display will show
an actual setting.
♦ Press the */. button. The display will show
symbol 0CodE - -.
♦ Press the DEL/TIME button. The
telephone will return to the standby mode.
# How to set the local area code
At present, a local area code does not need to be entered to make local calls.
This function can only be used to specify local numbers. Entering a local area
code in the memory removes it from all numbers, which belong to the same
area.
27
IV. Clip (Caller ID)- Calling line identification presentation
SET/HOLD
2
ABC
GHI
5
JKL
PQRS
8
TUV
/
0
OPER
1
4
7
3
6
9
DEF
MNO
WXYZ
/=
DEL/TIME
LJ-100
To enter the local area code:
♦ press the SET/HOLD button. The display
will show - 0 1 2 3 4 5 6 7 -.
♦ Press the 4 button. The display will show
ArEA - - - - -.
♦ Using the keypad, enter the local area
code.
♦ Press the SET/HOLD button to confirm
the setting.
♦ Press the DEL/TIME button. The
telephone will return to standby mode.
If no further buttons are pressed, the
telephone will return to standby mode after
several seconds. The settings will be stored.
To delete the local area code:
♦ press the SET/HOLD button. The display
will show - 0 1 2 3 4 5 6 7 -.
♦ Press the 4 button. The display will show
an actual setting.
♦ Press the */. button. The display will show
symbol ArEA - - - - -.
♦ Press the DEL/TIME button. The
telephone will return to the standby mode.
28
V. Connecting the headphone
LJ-100
V. Connecting a headphone
The telephone is equipped with a socket, which allows a headphone to be
connected.
29
VI. Help
LJ-100
VI. Help
Please read this Troubleshooting Guide in case of difficulty.
♦ No signal in the the handset:
! check that the telephone is connected to
the telephone line.
♦
!
!
♦
!
!
No dial tone:
check that the telephone is connected to
the telephone line,
check that the DIAL MODE T/P switch is
in the correct position.
In standby mode (when the handset is
on the base unit), the display shows
nothing:
check that batteries are correctly inserted
into the battery compartment,
the batteries may be dead.
♦
!
The telephone rings quietly:
check that the RINGER Hi/Low switch is
in the correct position.
♦
Unable to switch on the 2-way
speakerphone function:
the batteries are dead,
no batteries in the battery compartment.
!
♦
!
No CLIP:
Clip function is not activated by your
Provider.
♦
!
Alarm function does not work:
check that there are batteries are in the
battery compartment,
the batteries may be dead.
!
30
VI. Help
#
LJ-100
Important advice
♦
♦
♦
♦
♦
♦
Never use your telephone during a
thunderstorm. Unplug it from the
telephone line and the mains socket when
there are storms in your area
The telephone should not be installed near
a sink, bath or shower. Electrical
appliances can cause serious injury if the
user is wet or standing in water.
The telephone should be cleaned only
when disconnected from the telephone
PTT line.
Please clean the telephone with a soft
cloth to prevent scratching.
Do not use chemical sprays or aerosols to
clean the telephone.
Do not put the telephone in a wet, damp
place or, in bright sunlight or where it
could be damaged.
31
Declaration of Conformity (CE)
LJ-100
DECLARATION OF CONFORMITY
MANUFACTURER'S NAME:
Przedsiębiorstwo “DARTEL”
ADDRESS:
29-100 Włoszczowa, Podlipie 26
TYPE OF PRODUCT:
Corded phone
PRODUCT NAME:
LJ-100
We inform, our products conform to the requirements of
the following Directives and Norms:
1) Radio & Telecom Terminal Equipment Directive 99/5/EEC,
2) Low Voltage Directive 73/23EEC,
norm PN-EN 60950 -1,
3) Electromagnetic Compatibility Directive (EMC) 89/336/EEC,
norm PN-EN 55022,
norm PN-EN 55024,
norms PN-EN 61000-4/-2/-3/-4/-5/-6/-8/-9/-11/.
In additional, our products fulfill the requirements contained in:
1) norm PN -T - 83001,
2) enclosure no. 18, Communication Minister's decree
from 04.09.1997.
Date:
May 2005
32