1
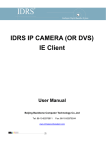
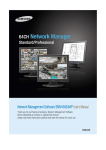
NVR Client & IE Client
IDRS-6000S-HE Series
User Manual
Beijing Backbone Computer Technology Co.,Ltd
Tel: 86-10-62975811
Fax: 86-10-62979244
www.chinasecuritysystem.com
IDRS-6000S-HE Series NVR Client User Manual
Content
CHAPTER 1
SOFTWARE INSTALLATION................................................................................. 4
CHAPTER 2
MAIN INTERFACE ................................................................................................... 5
2.1 FUNCTION BUTTON INTRODUCTION ................................................................................................. 5
2.1.1 Display division mode ......................................................................................................... 5
2.1.2 Manual record switch .......................................................................................................... 6
2.1.3 Image capture button .......................................................................................................... 6
2.1.4 Information display window ................................................................................................ 6
2.1.5 Local setup button ............................................................................................................... 6
2.1.6 Local search button ............................................................................................................. 6
2.1.7 Remote setup button ........................................................................................................... 6
2.1.8 Remote search button......................................................................................................... 6
2.1.9 Local Log button .................................................................................................................. 7
2.1.10 Remote log search ............................................................................................................ 8
2.1.11 Remote char ....................................................................................................................... 9
2.1.12 System lock ........................................................................................................................ 9
2.1.13 Minimize button.................................................................................................................. 9
2.1.14 Exit program ....................................................................................................................... 9
2.2 INTERFACE FUNCTION BUTTON ...................................................................................................... 10
2.2.1 Connection group .............................................................................................................. 10
2.2.2 Connection equipment list ................................................................................................ 11
2.2.3 PTZ control panel .............................................................................................................. 12
2.2.4 Color/Audio adjustment .................................................................................................... 15
2.2.5 DI/DO control...................................................................................................................... 16
CHAPTER 3
LOCAL SETUP ....................................................................................................... 18
3.1 SYSTEM SETUP .............................................................................................................................. 18
3.1.1 System setup...................................................................................................................... 18
3.1.2 Add / Modify server............................................................................................................ 21
3.4 GROUP SETUP ................................................................................................................................ 22
3.5 RECORDING SETUP ........................................................................................................................ 25
3.6 USER AND RIGHT SETUP ................................................................................................................ 26
3.6.1 User setup .......................................................................................................................... 26
3.6.2 User right setup.................................................................................................................. 27
CHAPTER 4
LOCAL SEARCH ................................................................................................... 28
4.1 PARTITION MODE ........................................................................................................................... 28
4.2 SELECT PLAYBACK CHANNEL ........................................................................................................ 28
4.2.1 Select date .......................................................................................................................... 28
4.2.2 Select camera .................................................................................................................... 29
4.2.3Select file ............................................................................................................................. 29
4.3 PLAY FILE AND RELATED OPERATIONS............................................................................................ 30
Page 0
IDRS-6000S-HE Series NVR Client User Manual
4.4 RECORD DATA DISPLAY .................................................................................................................. 30
4.5 CAPTURE PICTURES ....................................................................................................................... 31
4.6 CREATE CLIP FILE .......................................................................................................................... 31
4.6.1 Create file clip .................................................................................................................... 31
4.6.2 Backup by Time ................................................................................................................. 33
4.6.3 View backup file ................................................................................................................. 34
4.7 SEARCH CAPTURED PICTURES ........................................................................................................ 38
4.8 OPEN/CLOSE ALL WINDOWS ........................................................................................................... 39
4.9 RETURN ......................................................................................................................................... 39
CHAPTER 5
REMOTE SETUP ................................................................................................... 40
5.1 FUNCTIONAL BUTTONS .................................................................................................................. 41
5.2 SERVER SETUP ............................................................................................................................... 42
5.3 CHANNEL SETUP ............................................................................................................................ 43
5.4 PTZ CONTROL ............................................................................................................................... 45
5.5 SENSOR SETUP ............................................................................................................................... 47
5.6 ALARM SETUP................................................................................................................................ 49
CHAPTER 6
IE CLIENT FOR PC BASED DVR ....................................................................... 51
6.1 FUNCTIONS OF IE CLIENT .............................................................................................................. 51
6.2 MAIN INTERFACE ........................................................................................................................... 51
6.2.1 Connection/Record status ................................................................................................ 52
6.2.2 Partition mode .................................................................................................................... 52
6.2.3 Connection operations ...................................................................................................... 52
6.2.4 PTZ Control ........................................................................................................................ 52
6.2.5 Local & Remote search .................................................................................................... 52
6.2.6 Quit program ...................................................................................................................... 52
6.3 LOCAL SEARCH .............................................................................................................................. 52
6.4 REMOTE SEARCH ........................................................................................................................... 54
CHAPTER 7
IE CLIENT FOR IP CAMERA ............................................................................... 56
7.1 IP CAMERA ADDRESS SEARCH AND SETUP ..................................................................................... 56
7.2 USING IE BROWSER CONNECTED NETWORK CAMERA .................................................................... 57
7.3 MAIN INTERFACE ........................................................................................................................... 59
7.3.1 Image Enlargement & Smallness .................................................................................... 60
7.3.2 Functional buttons ............................................................................................................. 60
7.3.3 Color and Audio adjustment ............................................................................................. 61
7.3.4 PTZ Control panel ............................................................................................................. 62
7.4 REMOTE SETUP ............................................................................................................................. 63
7.4.1 Functional buttons ............................................................................................................. 63
7.4.2 Server setup ....................................................................................................................... 64
7.4.3 Channel setup .................................................................................................................... 65
7.4.4 PTZ settings ....................................................................................................................... 69
7.4.5 Sensor setup ...................................................................................................................... 72
7.4.6 Alarm Setup ........................................................................................................................ 73
Page 1
IDRS-6000S-HE Series NVR Client User Manual
7.5 LOCAL PLAYBACK ......................................................................................................................... 75
7.6 REMOTE PLAYBACK ....................................................................................................................... 76
Page 2
IDRS-6000S-HE Series NVR Client User Manual
Introduction:
Thank you for purchasing IDRS NVR client system.
This IDRS NVR client system can connect PC-DVR (IDRS-6000S PV Based DVR, IRRS
Standalone DVR, Network Camera and DVS.)
IDRS NVR Client Software, is standalone software, it support all of equipment of IDRS
(Include: PC Based DVR, embedded DVR, DVS, and Network camera). It can set them
and search their recording data remotely. In addition ,it can see server’s log (only for
PC-DVR) from long-distance, supporting IE browser connect DVR client. It has so many
functions with simple operation and it is usually used to connect remote equipment and in
conditions of less channels.
Main function: Remote real time monitor, remote PTZ control and color adjustment,
system log, user administrator, local and remote playback and recording clips
Please set the screen area as 1024*768 pixels before using this system.
Note:
If the products you bought is IDRS PC Based DVR, Please read carefully from chapter 1
to chapter 6 of USER’S GUIDE.
If the products you bought is IDRS Standalone DVR or DVS, Please read carefully from
chapter 1 to chapter 4 of USER’S GUIDE.
If the products you bought is IDRS Network Camera, Please read carefully from chapter 1
to chapter 5 and chapter 7 of USER’S GUIDE.
Page 3
IDRS-6000S-HE Series NVR Client User Manual
Chapter 1 Software installation
Find the files of IDRS Serials DVR/DVS Client, and open it and double click the
SETUP.EXE. Like the following picture:
You can choose the position of the software installation here, and then click the “NEXT”
after you have chosen one.
Confirm the installation information, then click “NEXT”, after the installation process
completed, Click “FINISH”. If it is successful, the desk will popup automatically an button
, please double click this icon, you can start to use this software.
Page 4
IDRS-6000S-HE Series NVR Client User Manual
Chapter 2 Main interface
Note:
1. Show tips: When the mouse moves closely or stops over a button, the button function
text tips show immediately.
2. Full screen mode: Double-click mouse of right mouse will change display mode to full
screen mode, click again to turn back. At the most 36 pictures can be shown on the main
window at the same time.
2.1 Function button introduction
2.1.1 Display division mode
Press
button to set camera display mode: popup
the types of divisions automatically after clicking. Like the right picture,
including 1, 4, 9, 16, 25 partition, you can choose the suitable division
according to your need.
Page 5
IDRS-6000S-HE Series NVR Client User Manual
2.1.2 Manual record switch
Press
button to record manually to any camera: It is used to manually
control recording for the channel without recording. Click it and if it is become orange, it is
recording status, vice versa. If it is not closed manually, it will record forever.
2.1.3 Image capture button
Press
button to save a still image of a selected camera in live view that
is selected by user onto hard disk, and then review and print the image.
2.1.4 Information display window
Show current date, time, the current selected camera in video display windows.
2.1.5 Local setup button
Press
button to enter Local setup submenu. In this menu, you can set
system and related parameters.
2.1.6 Local search button
Press
button to enter Local search submenu. In this menu, you can
playback and search for recorded video/audio from local host.
2.1.7 Remote setup button
Press
button to enter Remote setup submenu. In this menu, you can
set the server’s parameters remotely.
2.1.8 Remote search button
Press
button to enter Remote search submenu. In this menu, you can
playback and search for recorded video/audio remotely.
Page 6
IDRS-6000S-HE Series NVR Client User Manual
Select one server from dropdown list (the server in dropdown list is that have been
registered in the client), click “OK” and enter the playback interface.
Remote search includes search for PC-DVR and EM-DVR. Remote search for PC-DVR is
almost same with Local search, only different feature is that remote playback added
download feature. When you select a file and click download button, system will save
video of current channel you selected, and after finishing one file, it will popup prompt
refer to the position of saving.
NOTE:
Remote search only availability for PC-DVR and EM-DVR.DVS can’t storage record data
for itself, so remote search useless for it.
2.1.9 Local Log button
Press
button to view all actions of recording as well as operations.
Page 7
IDRS-6000S-HE Series NVR Client User Manual
System log keeps a record of system events such as program startup and shutdown,
changing camera setup and all Operator or System daily activities according to time and
date. System parameter includes operations, system prompts, alarms and other activities.
You can choose the log’s date and also can choose different kinds of logs according to
different rules, still can store the log you interest by word types.
2.1.10 Remote log search
Press
button to search log from a long distance server that you are
being connected. It’s good that no one is on duty in server end. You can see information of
the server and you needn’t get to the server site. After clicking, you firstly choose which
log you want to look, and then press to confirm. The interface of that is same as the local
search ones
NOTE:
Page 8
IDRS-6000S-HE Series NVR Client User Manual
Remote log is only available to PC-DVR.
2.1.11 Remote char
Press
button to make a voice chatting. Voice over IP, Initiates dialog to
connect to a remote client or Server for purposes of live chat. Click it to have remote chat
with the connected server. Sound card with Mic input should be used. If there is no sound
card on both sides, the chat will not be carried on.
Figure2-1
Select a server from dropdown list to make remote chat (Figure2-). If connect successfully,
there will have an icon tip to show it (figure2-2).
.
Figure2-2
2.1.12 System lock
Press
button to lock system——only the software start the function of
management, Locks keyboard and mouse can prevent unauthorized user to operate IDRS
NVR Client system. Click this button to acquire the operation rights by entering the user
and password, default user ID is “admin”, no password.
2.1.13 Minimize button
Press
button to minimize the main window (or press WIN + Z on keyboard).
2.1.14 Exit program
Press
button to exit program.
Page 9
IDRS-6000S-HE Series NVR Client User Manual
After clicking this button, a dialog will display.
Click “OK” to quit DVR system.
2.2 Interface function button
2.2.1 Connection group
Press
to enter connection group setup.
You can set different tasks into different channels, each group at
most set up 18 channels. For example, you have 70 channels’
pictures and need to set them into 3 groups, here, you can
choose the group you want to look.
Page 10
IDRS-6000S-HE Series NVR Client User Manual
36 buttons control 36 windows; you can click the button number
to get the access to relevant window, click again, turn off the
picture. If the button is grey, it means the channel did not
connect the picture, if the button is black, it means the channel
connected the picture without recording, if the button is green, it
means both activities are doing done.
Press this button, the cruise display of all channels is stopped
and the picture will be the current image.
2.2.2 Connection equipment list
Press
button to show all the equipments you have added in this
client.
Connection equipment list: the catalog includes the lists of all of
equipments. You can check the name of the equipment and the
numbers of channels of each one. Choosing a window on the
software main interface, then double click one camera on this
list, in that the image of this channel can connect the window
you choose. You also can choose another window with the
same operation, and then get the same result.
Page 11
IDRS-6000S-HE Series NVR Client User Manual
2.2.3 PTZ control panel
Press
button to control PTZ.
2.2.3.1 Common PTZ control
[Relay] (On/Off): Control the PTZ cameras internal
relay (relay1) or the decoder’s relay (relay 1). Used to turn on a light or
control an access gate.
[Wiper
(On/Off):
If
using
the
PTZ
cameras
corresponding wiper control relay, this toggles the relay/wiper on and
off.
[Zoom + / Zoom –]: Control the zoom function of
the PTZ camera.
[Focus + / Focus –]: Overrides the auto-focus
setting of the PTZ camera, adjust focus the image.
[Iris + / Iris –]: Overrides the PTZ cameras auto-iris and brighten or
darken the image.
By pressing and holding these buttons, the PTZ camera
is moved up, down, right and left as well as other
directions.
Pressing this button initiates the connected PTZ camera
to do an automatic tour of 360°.
2.2.3.2 Speed Demo control
Click this button, there will popup a menu, including
.
The premise of setup is the front-end PTZ and decoder supporting preset and shift
speed functions.
Adjust the platform and lens at some position you want, then mark this position (when
setup the preset and add the preset, the same), so that, can make the platform shift to the
Page 12
IDRS-6000S-HE Series NVR Client User Manual
marked position quickly according to requirement.
(1) Preset setup
Here to adjust the speed of platform
Preset setup: firstly, put the name you want
to call in Preset Name. Secondly, you can
select the No in Preset No. Call Mode will
make you select the order for preset “call” or
to add this present,
“setup”. Then click
then, this position can be displayed on the
bellowed list. If you want to delete some
presets, first select it then click
. If you
want to alter exist preset order, firstly, select it
on the list then change it, at last click
save.
to
Here to set up
one time, if you do not operate it within this
time, the software will auto shift to the
position
you
setup
on
.If you select
“Disable” on the time function, that means
you will not use this function.
Preset tour: Firstly, from
to choose one group, then from
to choose one position, from
to
choose the stayed time of that position, finally, click
to add the plan on the list.
After that, click “save” to save everything you set.
Take the above picture as example: group 1, tour between 001, 002, 003 position, but
the PTZ will stay 10 Sec at 001, stay 5 sec at 002, and stay 12 sec at 003.
Page 13
IDRS-6000S-HE Series NVR Client User Manual
(2) Preset call: Let the mouse suspend on this area, there will auto popup the list of
presets, then click the No. of preset needed to call on the list.
(3) Preset tour: Let the mouse suspend on this area, there will auto popup the list of tour
plan, and then click the No. of tour plan on the list.
Page 14
IDRS-6000S-HE Series NVR Client User Manual
2.2.4 Color/Audio adjustment
Press
button to enter Color/Audio Adjust Panel —— Slider
adjustments for the video image and recording volume of the selected tile. This also
affects the live view of the video images.
① P ress the first button and drag to adjust the
brightness of the image that you selected, and you can
Increase
Increase
resume its default value by pressing.
②P ress the second button and drag it to adjust the
contrast of the image that you selected and you can
resume its default value by pressing
③P ress the third button and drag it to adjust the hue of
the image that you selected, and you can resume its
default value by pressing.
④P ress the fourth button and drag it to adjust the
saturation of the image that you selected, and you can
resume its default value by pressing.
①②③④⑤
⑤P ress the fifth button to sw itch sound of the audio
that related to the image you selected and drag the
slider bar to adjust the volume.
Page 15
IDRS-6000S-HE Series NVR Client User Manual
2.2.5 DI/DO control
Note:
The channel of DI and DO is determined by the connected server
2.2.5.1 DI control
The DI number will show the alarm status of the corresponding server indicated by the
shades of the icon:
Channel 3 has no sensor alarm input.
Channel 1 has a sensor alarm input.
When there has no alarm yet, user can press number button to check sensor forcibly.
Press the button again to stop to check all time, then system check sensor according to
Sensor setup. When there has an alarm, the corresponding button will show the alarm
with green.
2.2.5.2 DO control
Press number to open/close alarm device relay switch manually. The status of DO have
two types:
Output channel 2 is close.
Page 16
IDRS-6000S-HE Series NVR Client User Manual
Output channel 1 is open.
When there has no alarms triggered out, user can press the number button to output
alarm forcibly and the button will show it with green, press it again the output will be
closed.
Page 17
IDRS-6000S-HE Series NVR Client User Manual
Chapter 3 Local setup
3.1 System setup
Click
button to enter this window (Figure 3—1):
Figure 3—1
3.1.1 System setup
[Save Record mode]Choose how to handle the situation if the record data make full
of the space of Disk. One is automatically deleting the recording of the earliest day
and another is stopping the recording and gives the information.
Auto: the system will cover the record data automatically when HDD full.
Manual: stop recording when HDD full before you delete it manually.
[Save Begin Disk]Select the district on which the video will save first, and the record data
can be stored from this one to last one until the last one is full of materials.
[Beep While Alarm]Enable: If there has alarm in DVR server end, system will beep.
[Web Listen port]The IE client connects port. (Restart IDRS NVR Client software after
this item is setup).
Page 18
IDRS-6000S-HE Series NVR Client User Manual
[Alarm connect server]Enable: if there has alarm in DVR server end, the client end will
connect the DVR server forwardly.
[Alarm send port]It must be the same as those in the setup window of server alarm auto
input.
[Alarm Write log]Select whether system writes alarm information log or not.
[Matrix card work mode]Setting the use of the matrix and decode card. If use matrix and
decode card, select work mode from D1 decode mode or CIF decode mode and set it.
Note:
Each IDRS-6002MD card can decode 2 channels D1 or 4channels CIF.
Each IDRS-6004MD card can decode 4 channels D1 or 8 channels CIF.
Decoder will send out corresponding number channels from the first window in sequence.
User can set each output port individually.
[TV output port] Select decoder card output port.
[TV output View Mode] Set the split mode for selected port.
[Window index of TV port] Select the index for each split window.
Page 19
IDRS-6000S-HE Series NVR Client User Manual
For example:
This icon has four windows: window1, window2, window3, window4.
[Decode channel Index in window] Select window index
for the selected window. Each window can only select one decode channel. The number
of decode channel will be showed automatically according to the channels of the decode
card. For example, if there is one IDRS-6004MD card, there will show the 8 decode
channel, if there are two IDRS-6004MD cards, there will show the 16 decode channel, if
one IDRS-6002MD card, there are 4 decode channel only.
Show the have
been selected
decode channel
of the each
output port
Decode output port
split mode
Figure 3—2
This figure (Figure 3—2) shows the decode channel have been selected, in order that
user can’t select the decoder repeatedly.
Note:
If use “CIF decode mode”, and there isn’t preview video appear in the IDRS NVR client
main interface. The reason for this is that the resolution setup too high in DVR Server end.
For example: D1. (Please restart IDRS NVR Client software after this item setup).
[Bandwidth Auto Adjust]Select whether system adjust the bandwidth automatically
when the window is hide and corresponding camera has no record plan, the program will
stop to connect corresponding camera with foreside server to reduce CPU usage.
[Software Start Auto Connect]Select the group set in Group setup to be connected
when the program start. When you select “Disable”, Client will not connect the camera
automatically.
[Auto Reconnect interval]Select whether the client to reconnect when the connection is
interrupted and the interval time. If you select “Disable”, when the connection is
interrupted, program will not reconnect it.
Page 20
IDRS-6000S-HE Series NVR Client User Manual
3.1.2 Add / Modify server
Has already added the equipment list
3.1.2.1 Add connect server
Press
button to add a new server in this system.
When user adds a new server, if there are some problems, e.g. network problem or not
run this Server, user will add this server failure.
[Server Name]The name of connected server host (Include PC-DVR, Network camera,
DVS and EM-DVR), Input a name that is easy to identify. (Such as the “chain store” or
“shanghai”)
[Device Type] Select the right device you want to connect. This client system can connect
IDRS serials PC-DVRs, Network camera, DVS and EM-DVR.
Page 21
IDRS-6000S-HE Series NVR Client User Manual
[IP Address]Set IP address of the server host.
[Connect Port] Set the port through which to connect to DVR Server. Please don’t
change it unless some unexpected conditions.
[Login user ID]& [Login Pass] when the client want to visit server and the server has
used the function of rights management, login user ID and password will be checked. If
the user has no right to visit that camera, the connection will be cut down automatically. If
the function is not used, the ID and password will not be checked.
[If use DNS to get IP]Select whether use DNS to get IP or not, if the server end is the
dynamic IP address, users need use DNS to get the server’s IP.
[DNS Server IP]Set IP address of DNS server host.
[DNS Server Port]DNS server host’s ort, which is used to set up the port through which
connects to DNS server host.
3.1.2.2 Modify server
Press
button to modify server information, its interface is same as Add
Connected Server.
3.1.2.3 Delete connected server
Press
button to delete connected server.
3.1.2.4 Get camera information
Press
button to get the latest camera information of Server end when it
changes its setups such as number of channel, camera name etc.
Note:
When you have finished every setup you should save your change by pressing “save”
button to store the setup successfully before you exit setup.
3.4 Group setup
Click
button to enter the following window (Figure 3—3):
Page 22
IDRS-6000S-HE Series NVR Client User Manual
Figure 3—3
Choose a group from drop-list behind [Select Setup Group] first. There are 16 groups. In
every group, you can set 36 connections. Also, you can select the partition for every group
from the drop-list behind [Partition Mode]”. Then you can set group as follows:
[Window] display the channel of window on the interface.
[IP Address Alias]Select the server in which the camera will be selected to show If it has
no severs in the drop-list, you need to add server in the “Server IP” page (Figure 3—1).
[Camera]Select the camera of the server set in [IP Address Alias] to be connected. In
one window, you can set one or more camera’s connection (Figure 3—4), if more than
one camera show in one window, you can set cycle interval time. You can switch them by
pressing button
and
in Main interface.
Double click the blank or the button,
will pop the right picture.
Page 23
IDRS-6000S-HE Series NVR Client User Manual
Figure 3—4
[Frame Rate]There are three selections: Realtime, Auto and 1fps.
①R ealtim e: If it’s selected, server will send all compacted information to client. When the
client gets this information, it will play it. The continuality is good in this way but it
consumes too much CPU space. If there is no information losing when compacting and
sending, the playing will be real-time.
②A uto: Its difference from Realtime is that when the client gets the information, he will cut
some information and then play it. It consumes less CPU space. But if you click any
camera, system will adjust frame rate to Realtime automatically.
③1fps: It means to break down the information in server. Only one frame of important
information is sent to the client every second. It consumes little CPU space and network.
And if you click any camera, system will adjust frame rate to Realtime automatically when
there is enough network space. (NOTE: This selection is only effective on PC-DVR).
[Record Mode]There are two options: Record all along and Record by plan. When users
select “Record all along”, the
button has no effects. Record by plan will be
detailed in Recording setup.
① Recording by planning. Once the windows is connected, recording by the table
time preset in the computer.
② R ecording forever: O nce the w indow connects, localrecording is going, unless the
manual cancel.
Page 24
IDRS-6000S-HE Series NVR Client User Manual
Note:
After finish them, When you have finished setup you should save your change by pressing
“save” button to store the setup successfully before for other set.
3.5 Recording setup
Click
to enter the record setup interface (Figure 3—5)
Figure 3—5
[Select Window]Select the window you want to set.
Figure 3—6
[Record type]Set the type of record, including “Normal record”, “Sensor record”, “Motion
record” and “not record”. You can set record type as follows:
Firstly, press the type button that you want to set.
Then select the record time by press the grid (delegate half an hour in a day) or
left-click mouse and drag for an area.
If you want to set same record status every half hour every day, you may double-click
the left up of the chart (The place circled in red of Figure 3—6)
Page 25
IDRS-6000S-HE Series NVR Client User Manual
When you finished the setup, the grid will display the corresponding color of the
record type.
•
•
•
•
Green: Normal Record.
Red: Sensor Record.
Blue: Motion Record.
Gray: Not Record.
[Copy record plan to]Copy one setup
to any other windows or all windows.
3.6 User and Right setup
Click
button to set user right:
3.6.1 User setup
[Add User/Del User]Click
/
icons to add /delete user for the
Client, after that you can edit the information for the user to be added.
[Select User ID]Select a user that has existed in the system to be modified from
drop-down list.
[Use Password management] select a solution to determine if enable user password
validation. When you select enable, when user login, password is needed.
[User ID]Input new User ID in this box when add a new user to system. When you select
admin in [Select User ID] this selection is unavailable.
Page 26
IDRS-6000S-HE Series NVR Client User Manual
[Password]Set new user and selected user’s password.
[Auth. Level]Select user type. When you select admin in [Select User ID] this selection is
unavailable.
[Confirm password]Confirm password again.
3.6.2 User right setup
You can set user management in this window after you input user name and password
and you will have corresponding rights with your name.
Choose a user and distribute corresponding right.
After your set, you should click the button
to save the information.
Page 27
IDRS-6000S-HE Series NVR Client User Manual
Chapter 4 Local search
Click
button in main window to enter local search window (Figure4— 1).
Figure4— 1
4.1 Partition mode
Press
button to select partition mode, there are 1, 4, 9 and 16 partition mode. In
the server end user can only connect 16 channels simultaneously, when the connected
channels exceed the limit, system will popup information to indicate it.
4.2 Select playback channel
4.2.1 Select date
Select one window (the 1st one in default), and then click
button to show the date
(Figure 4—2).
The blue dates contain recorded data. The green date is the current date. The gray dates
Page 28
IDRS-6000S-HE Series NVR Client User Manual
signify no data. Only those blue ones can be selected and when they are selected the
camera window will appear automatically to show which cameras has record data.
Click
or
to change month and year of search data.
Figure 4—2
Figure 4—3
Figure 4—4
4.2.2 Select camera
After selecting date system will show the camera state of corresponding day, or click
button directly to show the cameras state of current day (Figure 4—3). The number
button with navy blue means this channel has record data. By pressing it directly on the
numerical panel (Figure 4—3), DVR system will play back recorded data from the first file.
Note:
Right-click the picture to perform image zoom function.
4.2.3Select file
After selecting the camera to play, user can click
button to show all the files of this
camera (Figure 4—4).
In default, system will play back video file from the first one. In this screen you can change
the file you want to play by clicking it directly.
Page 29
IDRS-6000S-HE Series NVR Client User Manual
4.3 Play file and related operations
Click this button to synchronize all playback channels time.
Last frame, Start, Pause, Stop and Next frame
First frame of that day, previous minute, next minute and last frame of
that day
Image zooms out: Press this button, single click the left mouse button on an image,
quarter of the image will be enlarge. By thereafter, single click right mouse button on the
image, it will resume the normal.
Adjust the voice; click the button to clear the voice.
Adjust playing speed; click the button to resume normal playing
speed.
Note:
It is not suggested that multi-channel (more than 10 channels) record and playback
coinstantaneous unless your PC has a wonderful configuration, because the data
throughput of HDD is huge. Multi-channel search in client and server are the same except
their paths. In client, there are local and LAN search. In LAN search, it searches among
the record data in the local network of server.
4.4 Record data display
The above line refer to 24 hours, the bellow line refer to 60 minute, you can select different
record type according to the different color
Page 30
IDRS-6000S-HE Series NVR Client User Manual
4.5 Capture pictures
Click capture button
to capture a display picture. When one is captured, there will
display a dialog interface and you can change the file name. After you press confirmation,
system will save the picture in default path: System volume\Grab\search.
Note:
The size of the image is that of the playing window.
4.6 Create clip file
Click button
, there are follow three items to select.
4.6.1 Create file clip
Press
to create file clip (Figure4—5).
Figure 4—5
(1)Select channel and path
Select channel and path of the backup file on the top of interface (Figure4—5)
Page 31
IDRS-6000S-HE Series NVR Client User Manual
(2)File list and attribute
Select a file and double-click it (Figure4—6) to play and its attribute will display below the
list (Figure4—7), including begin time, end time, file size, resolution, frame rate etc.
Figure4—6
Figure4—7
(3)Play file and related operations
(a) Play control
button to
Press and drag slider on
control the player time.
(b) Play button
The start of the record, previous frame, Start/Pause,
Next frame and the end of the record
(c) voice control
Click
to control voice, press it to clear voice.
(d) Beginning and stop time setup
to set the beginning time and end time of the file, the file
Press
attribute on the left will show the size of the file.
(e) Save file
Press
to ensure the beginning and end of the file, click it to save the file.
Page 32
IDRS-6000S-HE Series NVR Client User Manual
4.6.2 Backup by Time
Press
to backup by time (Figure4—8)
Figure4—8
[Save Path] Select path for the backup file, User can backup record file to CD.
[Backup Camera] Select the backup camera. User can select more than one camera.
[Select begin time] & [Select end time] Select the backup files’ begin time and end time.
[Unite File] Select unite file enable or disable. If select disable, the record files will not
unite. If select enable, all record files will be united. And you can set the maximum value of
the united file.
[Backup File Max Value] Set maximum value of the united file. If the file’s value bigger
than this value, it will be spitted. You can check the file’s value use button
to
show its value.
[Backup Data Size] Show the size of the backup file. If user backups record file to CD
directly, the data size should not more than 650M.
NOTE:
If user backup record files to CD directly, the system disk volume’s(C volume in general)
Page 33
IDRS-6000S-HE Series NVR Client User Manual
free space should not less than twice of the backup data size. Because system volume will
be used buffer area when burn CD. For example, if the backup data size is 450M, so, the
system volume’s free space should more than 900M.
The process of burning CD (Figure 4—9):
1) Select CD-ROM as the backup path, and select the camera and time;
2) Check the backup file value;
3) Backup the file to the temporary file in the last volume if there have enough
free space, otherwise, write backup file to the last second volume;
4) Write back up file to buffer.
5) Write CD.
Figure 4—9
6) Delete buffer and temporary file.
4.6.3 View backup file
Press
to view backup file (Figure 4—10)
Page 34
IDRS-6000S-HE Series NVR Client User Manual
Figure 4—10
1. Select channel and path
Select channel and path of the backup file in local disk on the top of interface (Figure
4—10)
2. Play file and related operations
(a) Play control
button to
Press and drag slider on
control the player time.
(b) Play button
The start of the record, previous frame, Start/Pause, Next
frame and the end of the record
(c) Capture picture
Press
button to capture a picture.
(d) Burn CD
Page 35
IDRS-6000S-HE Series NVR Client User Manual
Press
button to burn CD
① Zone: The directory tree added which prepares to record the documents.
② Zone: The display area for added the detailed list of documents and files.
Here to choose the equipment
needed to burn.
Here to put in the Volume Label of
this Disk.
Add the document needed to be recorded. Click this button, there
popup the window for you to choose the file, as follows:
Page 36
IDRS-6000S-HE Series NVR Client User Manual
Here, can choose documents or files to add, and then click “Open”, after that, the
document or files you choose will be listed on the directory tree.
Delete the added files. Select some document listed on the directory tree, then click this
button, this file will be deleted clearly, including the inside folder and subfolder.
Erase CD. If the driver and disc are rewritable, Can delete the original
data or information of the Disc through this button
This button for opening CD
This button for closing CD
Begin to Burn CD
Page 37
IDRS-6000S-HE Series NVR Client User Manual
4.7 Search captured pictures
Click
to enter the search window:
1. Select pictures from directory and file list
You can select a captured picture from directory list (Figure 4—11) and file list (Figure 4—
12) in local disk. By default, the directory is: System volume\Grab\Search. After you select
the path the file name will show in the top of the window (Figure 4—13).
Figure 4—11
Figure 4—12
Page 38
IDRS-6000S-HE Series NVR Client User Manual
Figure 4—13
Note:
Figure 4—13 show name and path of current picture. If you want to save the reworked
picture in another file you can change its name and path here, with bmp and jpg as suffix.
Then click the button
.
2. Related operations
After you edit the picture you can save the picture in a save path as you
1)
like.
2)
Function buttons of picture disposal.
3)
When the result of disposal is not good click it to the default.
4)
Print picture, when the image is wider than 400 pixels, it will be printed
smaller. On the other hand, it will be printed bigger.
5)
When it’s bright, with the mouse moving, part of the picture will be
enlarged.
6)
Delete current file.
7)
Delete all files.
4.8 Open/close all windows
Press
button to open all playback windows in turns according to the order of the
cameras.
Press
button to close all playback windows.
4.9 Return
Click
button return to main interface.
Page 39
IDRS-6000S-HE Series NVR Client User Manual
Chapter 5 Remote setup
Click
button to enter remote setup.
Figure 5—1
Select one server to search from the server list (Figure 5—1).
Remote setup for PC-DVR is mostly same as Local setup in IDRS PC Based DVRs
server manual.
Remote setup for DVS and EM-DVR as follows (Figure 5—2):
Page 40
IDRS-6000S-HE Series NVR Client User Manual
Figure 5—2
5.1 Functional buttons
There are 5 the same buttons in each page. They are Upgrade, Restart, Time adjustment,
Save and Exit.
【Upgrade】The system can upgrade to the server remote. Click this button,
and select the right file.
【Restart】Some setting will only come into effect after device reboots.
【Time Adjust】Adjust date and time of DVS or EMDVR. The new date and
time will accordant with IDRS NVR client computer.
【Save】After setup is finished, click this button to save the setup.
【Exit】Exit setup.
Remote setup for DVS including Server, Channel, PTZ, Sensor and Alarm
Page 41
IDRS-6000S-HE Series NVR Client User Manual
5.2 Server setup
Press
button to set server parameters remotely:
In the server window, some blanks’ background are gray. Those parameters are read
from foreside server, you can’t modify them. Other blanks whose background is white, you
can set them remotely.
Enter the name description for easy identification. This
name delegates the foreside server. If use DNS to get IP, this name will be used.
IP configuration and related: These are network
configuration; you can set LAN or Internet IP according
to your need.
Connection configuration and related parameter: If
system uses PPPOE to connect with web, please
select it and input the PPPOE login ID and password.
[User Pass]Set the user password of DVS remotely, after that operation you should
change the Login Pass to corresponding value in Add / Modify server. Otherwise, you
Page 42
IDRS-6000S-HE Series NVR Client User Manual
can’t connect the DVS correctly.
[DNS Server IP]If use DNS, input the DNS host IP address.
Remote manage: Set the IP address and port of host
server who will receive the message upload from
foreside server
5.3 Channel setup
Press
button to set channel parameters.
This section contains the parameters to designate a name for every camera connected, to
enable or disable show LOGO and OSD, and to set display type of OSD & LOGO as well
as record resolution, record type, record quality and frame rate, etc.
[Camera]Select the camera to be set from the drop- list.
[Camera Name]Enter a name description for easy identification.
[Frame Rate]Select the record rate of camera from drop-list.
[Resolution]Set the resolution at which the video files will be recorded. Choices are DCIF,
CIF, QCIF, 2CIF and 4CIF. The higher resolution, the more disk space
[Stream Type]Select video and audio or only video record.
[Image]Set the quality of the image to be recorded. Select from worst, worse, normal,
Page 43
IDRS-6000S-HE Series NVR Client User Manual
good and best.
[Bit Rate Type]Select bit rate type from Variable Bit Rate (VBR) and Fixed Bit Rate (FBR)
record:
VBR range= Poorest, Poor, Medium, Good, Best.
FBR range = 45 Megabytes/Hour to 400 Megabytes/Hour.
[Max Bit Rate]Select the maximum bit rate for Variable Bit Rate (VBR) record.
[Show LOGO/ OSD/ Week]If you check those boxes, system will show corresponding
information on screen.
[Position]Set the position of OSD or Logo by entering the X and Y coordinate directly.
[OSD]Set the display attribute of the OSD & LOGO. There are four types display modes:
Clarity-Glitter, Clarity-Not Glitter, Not Clarity-Glitter and Not Clarity-Not Glitter.
[OSD Type]Select the type of OSD for the Week.
[Privacy Mask]You can check this box to set the privacy mask on the below image
directly, and you can clear some privacy masks by pressing
button.
[Record schedule]You can set record schedule in following chart (Figure 5—3).
Page 44
IDRS-6000S-HE Series NVR Client User Manual
Figure 5—3
Note:
This record schedule is only available to EM-DVR. There are 4 time segments every day.
Every segment has start time, end time and record type. The time segment is set in
sequence; every segment can’t be overlapped, included or skipped with any other.
[Copy to]After finishing one channel, if you want to set any other channels’ configuration
as the same as this camera, you can select channel number from drop-list, and press
button.
5.4 PTZ control
Press
button to set PTZ
Page 45
IDRS-6000S-HE Series NVR Client User Manual
In this screen, you can define the PTZ protocol and set the Preset Position as well as the
plan to execute them automatically.
[Camera]Select the camera to be set from the drop- list.
[Baud rate]Set baud rate according to PTZ protocol from the drop- list.
[PTZ Protocol]Select the communication protocol for the PTZ camera from drop-list.
[PTZ Address]Set the address of the decoder, which must be matched with the value of
dipswitch in the PTZ.
[Preset position & schedule setup]Define preset position and set time to call preset
position automatically. System can add and delete plan time.
Page 46
IDRS-6000S-HE Series NVR Client User Manual
[Copy to]After finishing one channel, if you want to set any other channels’ configuration
as the same as this camera, you can select channel number from drop-list, and press
button.
5.5 Sensor setup
Press
button to set sensor parameters.
Page 47
IDRS-6000S-HE Series NVR Client User Manual
[Sensor NO]Select one sensor to be set.
[Sensor Name]Enter the name description of the sensor.
[Type]Select alarm type (sensor type) from “NO”(Normally Open) or “NC”(Normally
Close).
[Policy]Selecting “Sensor Alarm Handling” firstly, handling policies will be available as
follows:
On screen warning—Display the alarm information on the monitor.
Audio warning—Indicate the alarm with voice.
Upload to center—Update the alarm information to center.
Trigger alarm out—Trigger alarm box to output the alarm.
[Trigger record camera]Set cameras to record triggered by the alarm. You can select
one or more channels. When there is alarm input, the cameras will be triggered to record
(the record type of the channel is Alarm Record), and the monitor will switch to preview the
cameras (warning on monitor is enable).
[Preset]Set camera that will move to its one preset position when the alarm happened.
[Schedule]Set alarm input precaution time firstly, then set time segment according to the
sequence. The time of each segment should not overlap the others and no skips are
allowed. After the precaution time of a certain day is set, you can copy the parameter to
other dates by select a day and press copy button.
Page 48
IDRS-6000S-HE Series NVR Client User Manual
[Copy to]After finishing one channel, if you want to set any other channels’ configuration
as the same as this camera, you can select channel number from drop-list, and press
button.
5.6 Alarm setup
Press
button to set alarm parameters.
[Camera]Select a camera to be set from the drop-list and you can copy the configuration
to the other cameras by clicking copy button.
Page 49
IDRS-6000S-HE Series NVR Client User Manual
[Alarm Type]Select alarm type: Motion detects Tempering alarm and Video Loss.
[Level] Select sensibility levels from 0 (the lowest level) to 5 (the highest level) for the
alarm
[Set motion detection areas]Left-click mouse and drag it on the screen to select motion
detect area, you can select the whole area or many areas. Also, you can clear one or
whole area by press the button clear and test the effect by clicking test button.
[Policy]Selecting “Handling current alarm” firstly, handling policies will be available as
follows:
On screen warning—Display the alarm information on the monitor.
Audio warning—Indicate the alarm with voice.
Upload to center—Update the alarm information to center.
Trigger alarm out—Trigger alarm box to output the alarm.
[Trigger record camera]Set cameras to record triggered by the alarm. You can select
one or more channels. When there is alarm input, the cameras will be triggered to record
(the record type of the channel is Alarm Record), and the monitor will switch to preview the
cameras (warning on monitor is enable).
[Schedule]Set alarm input precaution time. Select date firstly, then set time segment
according to the sequence. The time of each segment should not overlap the others and
no skips are allowed. After the precaution time of a certain day is set, you can copy the
parameter to other dates by select a day and press copy button.
[Copy to]After finishing one channel, if you want to set any other channels’ configuration
as the same as this camera, you can select channel number from drop-list, and press
button.
Page 50
IDRS-6000S-HE Series NVR Client User Manual
Chapter 6 IE client for PC based DVR
The client user can look through video of DVR Client by Internet Explorer, The default web
server port is 80; if change other port, user should add the port number after IP address of
DVR Client. E.g.: http://192.168.0.119:1180.
6.1 Functions of IE Client
1. Video display and video storage.
2. Audio input.
3. Searching and playback video image locally or remotely.
4. Control PTZ and speed demo remotely;
6.2 Main interface
Figure 6—1
When you connect DVR Client successfully, you should input valid User ID and password
in right up of the interface (Figure 6—1) to acquire rights to play video and other
operations.
Page 51
IDRS-6000S-HE Series NVR Client User Manual
6.2.1 Connection/Record status
Figure 6—2
This icon (Figure 6—2) indicates the current connection and their record status:
Gray: Not connected.
Navy blue: Connected with no record.
Green: Connected with record.
You can change the record status by pressing corresponding number button or change
status of all connections at the same time by pressing
button.
6.2.2 Partition mode
You can set the partition mode from the drop-list file on the right up of main interface
(Figure 6—1). It has follow partition mode: 1, 4, 6, 9, 10, and 16 partition mode.
6.2.3 Connection operations
You can connect single or all cameras by pressing
single or all cameras by pressing
; and you can disconnect
.
6.2.4 PTZ Control
Most functions of PTZ control are same as Client in PTZ Control panel.
6.2.5 Local & Remote search
It will describe in Local search and Remote search in detail.
6.2.6 Quit program
Press
button to shut down the IE Client.
6.3 Local search
Press
button to enter local search (Figure 6—3):
Page 52
IDRS-6000S-HE Series NVR Client User Manual
Playing operation area
Display setup and data information
Figure 6—3
Display setup and data information
In this area, you can select display partition mode, date, video channel and its video file
named according to time.
Playing operation area
In this area, you can operate video playing
Video-playing time adjustment
Press and drag slider bar to adjust video-playing time
Page 53
IDRS-6000S-HE Series NVR Client User Manual
Playing-control buttons
Play
Pause
Stop
Single frame play
Previous frame
Next frame
Playing speed control
Slowly play
Fleetly play
6.4 Remote search
Most functions and operations of Remote search are same as Local search; different
feature is that re mote search added download feature
Page 54
IDRS-6000S-HE Series NVR Client User Manual
When you playback, you click down
, system will save video of
current channel you selected, and after save finish one file, it will popup prompt to indicate
its working.
Select one camera that has record data, open file list panel, select one record data
package, and click
button, the selected data package will download
fast.
NOTE:
When user use IE client to visit DVR Client, If connect successfully, there will appear four
partition blue window. If connect unsuccessfully, the reasons possibly are:
(1) The Web server port has been used by other programs.
(2) Your computer didn’t download the player plug normally. The reason may be the
jurisdiction of your computer is too high, or your computer has plug filter.
Page 55
IDRS-6000S-HE Series NVR Client User Manual
Chapter 7 IE client for IP Camera
7.1 IP Camera address search and setup
In the network camera software packages, there is a "search software SADP of IP
Camera" folder, including SADP software. SADP software is used to identify and
configure all the cameras’ IP address and mask address in the LAN (must be in an open
state). SADP software uses unique search activated equipment technology, when the
user does not know or has forgotten network camera's IP address, can find it via SADP
software. This software can be run in Windows2000/XP system, and needed the support
from the operation of Wincap; users need to install software Wincap Package, The
packages include "WinPcap_3_1_beta_3" software.
SADP is not needed to be installed, can be run directly, the software will automatically
search IP cameras in the LAN after running, then displayed the cameras in the table form,
as below:
Display the IP address; connect port and
Hardware series number of equipments
searched out
Here you can change the current equipment’s IP address and mask address, then
input the one you want, after that, click
.
Note:
Page 56
IDRS-6000S-HE Series NVR Client User Manual
The new IP address will take effect after restarting this equipment.
7.2 Using IE browser connected network camera
When you want to connect to the network camera, only need to input the network
camera's IP address in the IE Address bar, then click the "link" or the "Enter" button on the
keyboard.
If it is your first time to access to the network cameras through the IE browser, the
operating system will prompt you to install a plug-in, as the following picture: (Take
Windows XP-as the example, basically similar to other operating systems.)
Click
to install this Active X. You need to wait different time according to
different net speed. (Usually between 20-120 sec)
After installation, the page will automatically enter into the user interface to verify the users,
as the following picture:
Inputs the corresponding connects port, the user name and password, and select the
Page 57
IDRS-6000S-HE Series NVR Client User Manual
suitable stream type (Master Stream, Sub Stream. See more information: 4.3.1), after all
this, click OK, and then enter the main browser interface, as below:
Default admin name:Admin
Default admin password:12345
Default connect port:8000
Note:
If no window displayed or no respond after clicking on the installation button, check
whether there is third-party software (such as firewalls, YAHOO assistant, 3721, and other
software) to restrict the installation, if there are restrictions from third-party software,
please remove the restrictions, or temporarily close the third-party software or firewall.
In addition, please make the following adjustments in the "IE security settings" of "Internet
Options":
1)
Click the [customer level], then click [ok].As below:
2) Access to security settings of pages, use the settings circled in the bellowed picture.
(This picture shows Windows XP-option, Windows2000 similar to this).
Page 58
IDRS-6000S-HE Series NVR Client User Manual
7.3 Main interface
The images will be displayed automatically after entering into IE main interface. As below:
Page 59
IDRS-6000S-HE Series NVR Client User Manual
7.3.1 Image Enlargement & Smallness
You can enlarge or small the image by double-clicking left-key of the mouse.
Using the right-key of the mouse to click the image will make image size be1024 * 768.
(When the display resolution set is 1024 * 768, the image will be full of the screen, not
show IE windows and display software borders, etc.)
7.3.2 Functional buttons
Press the button to connect the image, press it again to stop the
connection. Access to the IE successfully, the image can be connected and displayed on
the window automatically.
Press the button to enter Local Playback submenu to search local
video/audio data recorded. More information: Local playback
Press the button to enter Remote Playback submenu to search local
video/audio data recorded via IE by SD memory card. More information: Remote playback
Press the button to enter Remote Setup submenu to set IP camera
remotely. More information: Remote setup
Press the button to connect a remote Server for a live chatting via IP
address, but first, you should be sure you have installed audio card and Microphone in
each PC.
Press the button to record the IP Camera in local machine, press it
again to stop recording. Record default storage channel: C:\_RecordFile_\
Press the button to exit IP Camera.
Page 60
IDRS-6000S-HE Series NVR Client User Manual
7.3.3 Color and Audio adjustment
① ② ③ ④ ⑤
① Press the first button and drag to adjust the brightness of the
image that you selected.
② Press the second button and drag it to adjust the contrast of
the image that you selected value.
③ Press the third button and drag it to adjust the HUE of the
image that you selected.
④ Press the fourth button and drag it to adjust the saturation of
the image that you selected.
⑤ Press the fifth button to switch sound of the audio that related
to the image you selected and drag the bar to adjust the volume.
Click these little icons; you can resume the default value of brightness,
contrast, HUE, saturation, audio.
Page 61
IDRS-6000S-HE Series NVR Client User Manual
7.3.4 PTZ Control panel
Note:
PTZ control function only is suitable for the following situation:
1) network high speed Dome
2) network camera work with PTZ
This function will be available after setting up related protocol and Baud
rate. More information: PTZ setup
Press this button to call the preset. It is used before
the preset positions are set. More information: Set up the preset
Press this button to control the lights’ on and off (need the support from
equipped PTZ decoder, the network high speed dome do not have this function)
Press this button to control the wipers’ on and off (need the support from
equipped PTZ decoder, the network high speed dome do not have this function)
[Zoom + / Zoom –] Adjust zoom of Electrical zoom lens.
[Focus + / Focus –] Adjust focus of Electrical zoom lens.
[Iris + / Iris –]Adjust Aperture of Electrical zoom lens.
By pressing and holding these buttons, the PTZ camera is moved
up, down, right and left.
Pressing this button initiates the connected PTZ camera to do an
automatic tour of 360°.
Page 62
IDRS-6000S-HE Series NVR Client User Manual
7.4 Remote Setup
Note:
All of setup will take effect after be saved and restarted.
Press
button to Remote Setup
7.4.1 Functional buttons
[Upgrade] User can upgrade IP Camera remotely. Click this button, and select the right
file
[Restart] Some settings will only take effect after device reboots
[Format Disk] Format SD card in IP camera
[Time Adjust] Adjust date and time of IP Camera. The new date and time will be
accordant with current computer
[Save] After setup is finished, click this button to save the setup
[Exit] Exit setup
Page 63
IDRS-6000S-HE Series NVR Client User Manual
7.4.2 Server setup
[Server Name] Name the network cameras.
[Server IP] Setup (change) the IP address of network cameras
[Port] Setup the network camera connected port.
[Subnet Mask] Setup the network camera subnet mask.
[Net Gate] Setup the network camera net gate.
[Net Cable Type] Set up net cable type.
[use PPPOE] (√) tick means working. Use PPPOE to dial-up access to the internet (such
as ADSL dial-up).
[PPPOE Login Name] The user name for setting PPPOE dial-up
[PPPOE Login Pass] The Login password for setting PPPOE dial-up
[PPPOE IP] Display the IP address after PPPOE dial-up successful, the IP address is
unchangeable.
[User name] Display the user name for administers, the name is unchangeable.
[User password] Change the login password for administers.
Note:
Be careful for this setting. (Please remember the new password for administers)
[DNS Server IP] If use DNS, input the DNS host IP address.
[Remote manage IP] Set up IP address of remote management main computer.
[Remote manage port] Set up the port for login remote management main computer.
[Physical address] Display the Physical address of IP Camera.
[Software Version] Display the Version of software, unchangeable.
[DSP software Version] Display the Version of DSP software, unchangeable.
[Hardware Version] Display the Version of hardware of network camera, unchangeable.
[Serial No] Display the serial number of IP camera, unchangeable.
Page 64
IDRS-6000S-HE Series NVR Client User Manual
7.4.3 Channel setup
7.4.3.1 Basic settings.
Master Stream and Secondary Stream can
set two different network streams (including image quality, frame, resolution, etc),
therefore, according to different situations, you can select the suitable stream type.
[Frame Rate] Set up the Frame Rate for Network cameras. ALL(real-time) ,
1/16(1/16fps) , 1/8(1/8fps) , 1/4(1/4fps) , 1/2(1/2fps) , 1(1fps) , 2(2fps) , 4(4fps) , 6(6fps) ,
8(8fps) , 10(10fps) , 12(12fps) , 16(16fps) , 20(20fps) selectable, the higher frame rate, the
more network bandwidth needed, you can select the suitable frame rate according to
network.
[Image] Setting up the picture quality transmitted by network cameras: The best, better,
good, average, bad, the worst image quality. The better image quality, the more network
bandwidth needed by transmission occupation.
[Resolution] Set up the resolution for camera image transmit and storage. The selectable
resolution can be PAL: 4CIF (704*576), 2CIF(704*288),DCIF(528*384),CIF(352*288) ,
QCIF(176*144);NTSC: 4CIF (704*480), 2CIF(704*240),DCIF(528*320),CIF(352*240) ,
QCIF(176*120) , The higher resolution, the more clear if the bigger dimension the image,
but the more hard disk space will be occupied by storage and the more bandwidth needed
by transmission.
Page 65
IDRS-6000S-HE Series NVR Client User Manual
[Bit Rate Type] Setup the network cameras’ rate type which is divided into the fixed rate
and variable rate. When it is variable bit rate, the transmission rates will automatically
changes with different intensity of the screen. More Image activities, more increased rate,
vice versa. Fixed Rate will not be impacted by image activities and will be maintained at a
relative stable value. If it is variable rate, network bandwidth occupation will change with
the complexity of the image changes. Therefore, fixed rate will not influence the stability of
network bandwidth occupation. The range of fixed rate: 45 Megabytes/Hour ~ 400
Megabytes/Hour
[Stream Type] Select video and audio or only video record.
[Max Bit Rate] Select the maximum bit rate for Variable Bit Rate (VBR) record. The
selectable Max Bit Rate: 32kbps, 48kbps , 64kbps, 80kbps, 96kbps, 128kbps, 160kbps,
192kbps, 224kbps, 256kbps, 320 kbps, 384kbps, 448kbps, 512kbps, 640kbps, 768kbps,
896kbps, 1024kbps, 1280kbps, 1536kbps, 1792kbps, 2048kbps, unlimited.
7.4.3.2 OSD setup
[Show OSD] & [OSD Position] & [OSD Type] Set the position of OSD by entering the X
and Y coordinate directly and Set up the date (year, month, and day).
Set the display attribute of the OSD & LOGO.
There are four types display modes: Clarity-Glitter, Clarity-Not Glitter, Not Clarity-Glitter
and Not Clarity-Not Glitter.
[Show Logo] & [Logo Position] set the position of Logo by entering the X and Y
coordinate directly.
[Camera name] Set up textual descriptions for network cameras. You can use the
location for installation or easy identification number or the representation of text to
explain the network cameras. The descriptions can be overlapped on the video screen.
7.4.3.3 Privacy Mask
You can click this button to set the privacy mask on the below image
directly, and you can clear some privacy masks by pressing
button.
Page 66
IDRS-6000S-HE Series NVR Client User Manual
7.4.3.4 Record schedule
Recording Type:
▪
Specified Time: Real time recording within specific time without conditions
▪
Motion: Automatically record when it detects the moving object in the monitored
images no moving objects, no recording.
▪
Alarm: Automatically record when it receives the alarm signal, no get alarm
signal, no recording.
▪
Motion | Alarm: Automatically record when it detects the moving object or
receives the alarm signal.
▪
Motion & Alarm: Automatically record when it detects the moving object and
receives the alarm signal at the same time.
Page 67
IDRS-6000S-HE Series NVR Client User Manual
▪
Command: Not developed.
▪
Manual: Not developed.
[Enable Rec] Choose whether to record or not
Set up the recording plan
according to 24-hour recording
style, only use one recording
type 24 hours, the types of
recording can be selectable, but
recording at different periods of
time is not available.
[Rec Day] Select recording dates
You can record at different
periods of time; there are 4
periods of time. Each period of
time has selectable recording
types, and you can not make the
4 periods of time same.
Copy one day’s recording plan to other date.
When the recording type is Motion or Sensor Alarm, it also can
record during some certain time after the alarm disabled. These certain time can be set: 5
sec, 10 sec, 15 sec, 20 sec, 25 sec, 30 sec or unlimited.
When the recording type is Motion or Sensor Alarm, it also
can record during some certain time before the alarm triggered. These certain time can be
set: 5 sec, 10 sec, 15 sec, 20 sec, 25 sec, 30 sec or unlimited.
Note:
This recording schedule is used for the front network cameras. It only can be used after
the SD card is inserted into the network camera and formatted. If you need to record at the
IE client, please click
of monitoring main interface directly.
Page 68
IDRS-6000S-HE Series NVR Client User Manual
7.4.4 PTZ settings
7.4.4.1 Basic settings
[Baud rate] Set baud rate according to PTZ protocol from the drop- list, selectable baud
rate can be 2400, 4800 or 9600High speed dome default baud rate is 2400.
[PTZ Address] Set the address of the decoder, which must be matched with the value of
dipswitch in the PTZ. Address 0-255 is selectable.
[PTZ Protocol] Select the communication protocol for the PTZ camera from drop-list. This
network camera supports over 70 protocols.
High speed dome default protocol is PELCO-D (H).
Note:
You can test the PTZ and lens after set up the decoder’s parameters as above figure 4-2
Page 69
IDRS-6000S-HE Series NVR Client User Manual
7.4.4.2 Set up the preset
1) Set up the preset: Adjust the PTZ and lens at the right place, then choose one preset
number, then click “setup”. The preset number is up to 32.
2) Call the preset: Chose one preset, and then click the “call” button. It is used for
checking the preset positions.
3) Delete the preset: Chose one preset, then click the “delete” button.
7.4.4.3 Preset Schedule
Figure 4-3
Choose the Schedule Number
Choose the preset Number
Set up the specific time to call this preset.
Copy the schedule time on other dates, firstly choose date then
click
button.
Page 70
IDRS-6000S-HE Series NVR Client User Manual
Save the schedule.
Click this button to delete any item in the schedule
The method to call presets time schedule
Firstly, choose the number of this presets schedule, Secondly, choose the preset you want
to call. Thirdly, choose fixed time to call the preset. Finally, click
the above image( Figure4-3 )
Preset 1 on 14:30 Monday
button. Take
as example: The PTZ will turn to Preset 2 on 8:30 AM and
7.4.4.4 Setup cruise schedule
Choose the cruise schedule number
Choose the preset number
Choose the interval time in cruise schedule
Choose the speed of PTZ and zoom for different presets during cruise.
For example:
Take the above image as sample: Cruise between Number 1 and 2 presets. The interval
time is 20 Sec when cruise at the Number 1 preset, the interval time is 20 sec, when
cruise at the Number 2 preset. The speed parameter of cruise Number 1 to 2 presets is 5,
and the speed of cruise Number 2 to 3 presets is 8.
Page 71
IDRS-6000S-HE Series NVR Client User Manual
7.4.5 Sensor setup
[Sensor Name] Enter the name description of the sensor.
[Type] Select alarm type (sensor type) from “NO” (Normally Open) or “NC” (Normally
Close)
[Policy] Selecting “Sensor Alarm Handling” firstly, handling policies will be available as
follows:
Upon receiving the warning signal by alarm
detector, network cameras process the
alarm and image, including: monitors alarm,
sound alarm, upload alarm information and
images to the central management system
(requires Center Management Software
Support), and triggering alarm output.
Setup whether use the presets after
receiving warning signals, if use, the high
speed dome will automatically switch to the
preset position.
Page 72
IDRS-6000S-HE Series NVR Client User Manual
Set up DI time schedule. When front
equipment and other alarm devices were
triggered, equipment or were triggered, the
network camera will automatically decide
whether it is within the DI time period. If is, the
network camera will deal with the alarm signal
of detector in accordance with the preset
protocol; if not, the network camera will not
deal with that. You can copy the DI schedule
to other dates.
7.4.6 Alarm Setup
7.4.6.1 Alarm Type
[Alarm Type] Select alarm type: Motion detect, Video loss and Cover Alarm
1) Motion:
Motion Alarm needs to circle one or more areas on the image. If there are the moving
objects within the circled ranges, alarm will be triggered. The bigger number the sensitivity,
the more sensible the motion detects. After set up, you can click "test", if the screen of the
designated area turns red and flash, which represents alarm triggered within this area.
Page 73
IDRS-6000S-HE Series NVR Client User Manual
2) Cover Alarm:
When the cameras are covered on illegal purposes, the detector will send the alarm
signal.
The cover range can be set, but only can be one. The sensitivity also can be set and
tested after that.
3) Signal Lost:
Whatever any reason, the warning signal will be sent only if the video signal is not
connected.
The bigger number, the more sensible the motion detects.
[Policy] check “Handling current alarm” first, handling policies will be available as
follows:
On screen warning—Display the alarm information on the monitor
Audible warning—Indicate the alarm with voice.
Upload to DVR server—Update the alarm information to center.
Trigger alarm out—Trigger alarm box to output the alarm.
Trigger alarm record —Set cameras to record triggered by the alarm. You can select one
or more channels. When there is alarm input, the cameras will be triggered to record (the
record type of the channel is Alarm Record), and the monitor will switch to preview the
cameras (warning on monitor is enable).
7.4.6.2 DI Time schedule
Set up DI time schedule. When front equipment and other
alarm devices were triggered, the network camera will
automatically decide whether it is within the DI time
period. If is, the network camera will deal with the alarm
signal of detector in accordance with the preset protocol;
if not, the network camera will not deal with that. You can
copy the DI schedule to other dates.
Page 74
IDRS-6000S-HE Series NVR Client User Manual
7.5 Local Playback
Figure5-1
Choose the date of recording material to playback, after this, it will
automatically list the dates of the video information, like the above chart (Figure 5-1).After
the left mouse button’s double-click on the selected time, it can playback the
corresponding video information.
Display current window name, camera name
and record data information
Progress bar
Playing-control buttons: Play, Pause,
Stop, Previous frame, Next frame, slowly play, fleetly play.
Press it button to exit playback
Page 75
IDRS-6000S-HE Series NVR Client User Manual
7.6 Remote playback
Figure 6-1
Choose the date of recording material to playback, after this, it will
automatically list the dates of the video information, like the above chart (Figure 6-1).After
the left mouse button’s double-click on the selected time, it can playback the
corresponding video information.
Display current window name, camera name
and record data information
Progress bar
Playing-control buttons: Play, Pause,
Stop, Previous frame, Next frame, slowly play, fleetly play.
Press it button to exit playback
Page 76
IDRS-6000S-HE Series NVR Client User Manual
Select one camera that has record data, open file list panel, select
one record data package, and click
button, the selected data
package will download fast.
Click this button to save the Audio and Video recording material which is play
backing; press it again to stop the save.
Note:
This function will be available only the SD card is inserted and recording plan is set up.
Page 77