1
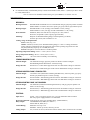
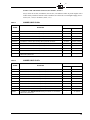
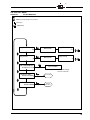
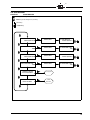
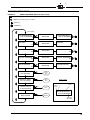
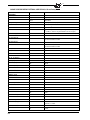
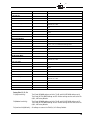
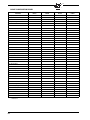
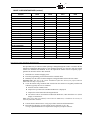
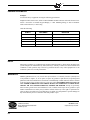
INSIGHT II CONFIGURATION RECORD (continued) Parameter FILE A FILE B FILE C FILE D Man. Config FR2 Menu: R2-SENSOR SLECT R2-FFRT R2-ON THRESHLD R2-OFF THRESHLD R2-On Time Dely FR2 IR Settings Menu: R2 IR-BAND (Freq) R2 IR-USER GAIN R2 IR-FEG LRNED R2 IR-MIN FEG R2 IR-MAX FEG FR2 UV Settings Menu: R2 UV-BAND (Freq) R2 UV-USER GAIN R2 UV-FEG LRNED R2 UV-MIN FEG R2 UV-MAX FEG INSIGHT II REPLACEMENT PROCEDURE This procedure may be followed when replacing a damaged InSight II scanner. It assumes that the InSight II Configuration Record (above) was completed and kept as a reference when the original scanner was installed and calibrated. If not, the replacement scanner must be completely reprogrammed as describes earlier in this document. 1. Install the new scanner and apply power. Enter the programming password and enter the CONFIG menu. Manually enter the values from the InSight II Configuration Record into the new scanner. Important Note: After Step 3, the scanner should detect flame ON, but may not properly indicate flame OFF until Step 4 is performed. 4. Create the burner firing conditions that existed when the scanner was originally installed and calibrated, typically the low-fire condition. a. Enter the AUTO CONFIG menu. 2. 3. b. Depress the Up button until “START LEARN ON” is displayed. c. Depress the Select button then the Program button. d. The scanner will set its internal Front End Gain Reference, count down from 16 to 0, then display “Learn Passed”. Note: If the proper data was manually entered into the EDIT menu, it should not be necessary to learn the flame OFF condition. 5. 6. Turn the burner OFF and ON to verify proper flame detection and discrimination. Repeat Steps 2 through 5 for each scanner memory file used (A, B, C, D) or Copy “Upload/Download” saved parameters using Fireye Explorer software 61