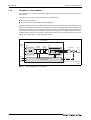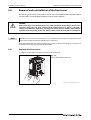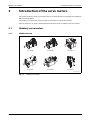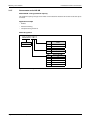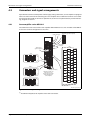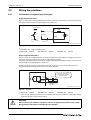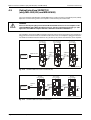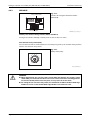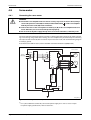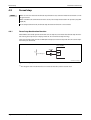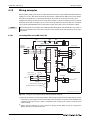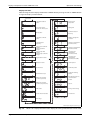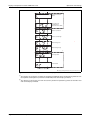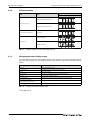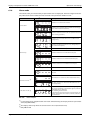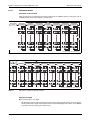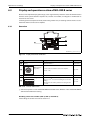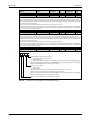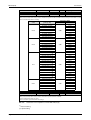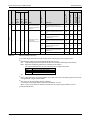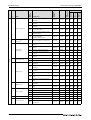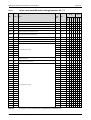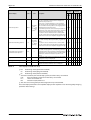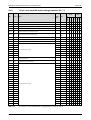
1
MITSUBISHI ELECTRIC
MELSERVO
Servo Amplifiers and Motors
Beginners Manual
MR-J4-A(-RJ)/A4(-RJ)
MR-J4-B(-RJ)/B4(-RJ)
MR-J4W-B
Art. No.: 280214
20 10 2014
Version A
MITSUBISHI ELECTRIC
INDUSTRIAL AUTOMATION
Version check
About This Manual
The texts, illustration, diagrams and examples in this manual are provided for
information purposes only. They are intended as aids to help explain the installation,
operation, programming and use of the servo drives and amplifiers of the
series MELSERVO J4-A, MELSERVO J4-B and MELSERVO J4W-B.
If you have any questions about the installation and operation of any of the
products described in this manual please contact your local sales office
or distributor (see back cover). You can find the latest information
and answers to frequently asked questions on our website at
www.mitsubishi-automation.com.
MITSUBISHI ELECTRIC EUROPE BV reserves the right to make changes
to this manual or the technical specifications of its products at any time without notice.
©2005
MITSUBISHI ELECTRIC EUROPE B.V.
Beginners manual for servo amplifiers
series MR-J4-A, MR-J4-B and MR-J4W-B
Art. no.: 280214
A
Version
10/2014 pdp - rw
Revisions/Additions/Corrections
—
Safety Guidelines
Safety Guidelines
General safety information and precautions
For use by qualified staff only
This manual is only intended for use by properly trained and qualified electrical technicians who are
fully acquainted with the relevant automation technology safety standards. All work with the hardware described, including system design, installation, configuration, maintenance, service and testing of the equipment, may only be performed by trained electrical technicians with approved qualifications who are fully acquainted with all the applicable automation technology safety standards
and regulations. Any operations or modifications to the hardware and/or software of our products not
specifically described in this manual may only be performed by authorised MITSUBISHI ELECTRIC
staff.
Proper use of the products
The amplifiers of the MELSERVO J4 series are only intended for the specific applications explicitly
described in this manual. All parameters and settings specified in this manual must be observed. The
products described have all been designed, manufactured, tested and documented in strict compliance with the relevant safety standards. Unqualified modification of the hardware or software or failure to observe the warnings on the products and in this manual may result in serious personal injury
and/or damage to property. Only peripherals and expansion equipment specifically recommended
and approved by MITSUBISHI ELECTRIC may be used in combination with amplifiers of the MELSERVO
J4 series.
All and any other uses or application of the products shall be deemed to be improper.
Relevant safety regulations
All safety and accident prevention regulations relevant to your specific application must be observed
in the system design, installation, configuration, maintenance, servicing and testing of these products. The regulations listed below are particularly important in this regard.
This list does not claim to be complete, however; you are responsible for being familiar with and conforming to the regulations applicable to you in your location.
● VDE Standards
– VDE 0100
Regulations for the erection of power installations with rated voltages below 1000 V
– VDE 0105
Operation of power installations
– VDE 0113
Electrical installations with electronic equipment
– VDE 0160
Electronic equipment for use in power installations
– VDE 0550/0551
Regulations for transformers
– VDE 0700
Safety of electrical appliances for household use and similar applications
– VDE 0860
Safety regulations for mains-powered electronic appliances and their accessories for household use and similar applications.
Beginners Manual Servo Amplifiers MELSERVO J4
I
Safety Guidelines
● Fire safety regulations
● Accident prevention regulations
– VBG Nr.4
Electrical systems and equipment
Safety warnings in this manual
In this manual warnings that are relevant for safety are identified as follows:
m
DANGER:
b
WARNING:
Failure to observe the safety warnings identified with this symbol can result in health and injury
hazards for the user.
Failure to observe the safety warnings identified with this symbol can result in damage to the
equipment or other property.
Failure to observe notes can result in serious consequences too. To prevent injury of persons all safety
and accident prevention regulations must be observed.
NOTES
means that incorrect handling can result in misoperation of servo amplifier and motor.
However failure to observe notes does not result in health and injury hazards for the user or damage to the equipment or other property.
Note also indicates a different setting of parameters, a different function or a different use or
provides information about the use of peripherals and expansion equipment respectively
II
Safety Guidelines
Compliance with EC directives
EU directives exist to facilitate free trade within the EU. They lay down "fundamental protective regulations" to ensure the removal of technical barriers to trade between the EU member states. In the
member states of the EU basic safety requirements and the qualifications for bearing the CE mark are
regulated by the Machinery Directive (in force since January 1995), the EMC Directive (in force since
January 1996) and the Low Voltage Directive (in force since January 1997).
Conformity with the EU directives is demonstrated with a declaration of conformity and displaying
the CE mark on the product, its packaging or its operating manual.
The directives listed above apply to appliances, machinery and systems but not to individual components, unless the components perform a direct function for the end user. Since a servo amplifier
must be installed together with a servo motor, a control device and other mechanical parts to perform
a useful function for the end user, servo amplifiers cannot be said to perform such a direct function.
This means that they can be declared as complex components for which a declaration of conformity
and the CE mark are not required. This opinion is also upheld by CEMEP, the European Committee of
Manufacturers of Electrical Machines and Power Electronics.
However, the servo amplifiers do fulfil the requirements for the CE mark for the machines or accessories in which the servo amplifiers are deployed, in accordance with the Low Voltage Directive. In
order to help users ensure conformity with the EMC Directive Mitsubishi Electric has published a manual titled EMC Installation Guidelines (Art. no. 103944), which describes the proper installation of the
servo amplifiers, construction of the switchgear cabinet and other important installation tasks. Please
contact your dealer for this publication.
Beginners Manual Servo Amplifiers MELSERVO J4
III
Safety Guidelines
Specific safety information and precautions
The following safety precautions are intended as a general guideline for using PLC systems together
with other equipment. These precautions must always be observed in the design, installation and
operation of all control systems.
m
DANGER:
● Observe all safety and accident prevention regulations applicable to your specific application. Always disconnect all power supplies before performing installation and wiring work or
opening any of the assemblies, components and devices.
● Before installation, wiring and opening of modules, components and devices, switch power
off and wait for more than 15 minutes. Then, confirm the voltage is safe with a voltage tester.
Otherwise, you may get an electric shock.
● Take safety measures, e.g. provide covers, to prevent accidental contact of hands and parts
(cables, etc.) with the servo amplifier heat sink, regenerative resistor, servo motor, etc. since
they may be hot while power is on or for some time after power-off. Their temperatures may
be high and you may get burnt or a parts may damaged.
● Assemblies, components and devices must always be installed in a shockproof housing fitted
with a proper cover and fuses or circuit breakers.
● Devices with a permanent connection to the mains power supply must be integrated in the
building installations with an all-pole disconnection switch and a suitable fuse.
● Ground the servo amplifier and servo motor securely.
● Check power cables and lines connected to the equipment regularly for breaks and insulation
damage. If cable damage is found immediately disconnect the equipment and the cables
from the power supply and replace the defective cabling.
● Before using the equipment for the first time check that the power supply rating matches that
of the local mains power.
● EMERGENCY OFF facilities conforming to EN 60204/IEC 204 and VDE 0113 must remain fully
operative at all times and in all PLC operating modes. The EMERGENCY OFF facility reset
function must be designed so that it cannot ever cause an uncontrolled or undefined restart.
● Configure the electromagnetic brake circuit so that it is activated by the EMERGENCY OFF
facility.
● Residual current protective devices pursuant to DIN VDE Standard 0641 Parts 1-3 are not
adequate on their own as protection against indirect contact for installations with PLC
systems. Additional and/or other protection facilities are essential for such installations.
● If your application requires by installation standards an RCD (residual current device) as up
stream protection please select the type B according to DIN VDE 0100-530.
● During power-on or operation, do not open the front cover of the servo amplifier. You may
get an electric shock.
● Do not operate the servo amplifier with the front cover removed. High-voltage terminals and
charging area are exposed and you may get an electric shock.
● Except for wiring or periodic inspection, do not remove the front cover even of the servo
amplifier if the power is off. The servo amplifier is charged and you may get an electric shock.
● To avoid an electric shock, insulate the connections of the power supply terminals.
IV
Safety Guidelines
Specific safety precautions
b
WARNING:
● Install the servo equipment with full consideration of heat generation during operation.
Leave specified clearances between the servo amplifier and control box inside walls or other
equipment. Take measures to prevent the internal temperature of the control box from
exceeding the environmental conditions.
● Do not install the servo amplifier, servo motor and regenerative resistor on or near combustibles. Otherwise a fire may cause.
● When using servo drives always ensure that all electrical and mechanical specifications and
requirements are observed exactly.
● Always connect a magnetic contactor between the power supply and the main circuit power
supply (L1, L2, and L3) of the servo amplifier, in order to configure a circuit that shuts down
the power supply on the side of the servo amplifier’s power supply. If a magnetic contactor
is not connected, continuous flow of a large current may cause a fire when the servo amplifier
malfunctions.
● When the servo amplifier, the servo motor or the regenerative option has become faulty,
switch off the main servo amplifier power side. Continuous flow of a large current may cause
a fire.
● Provide an external emergency stop circuit to ensure that operation can be stopped and
power switched off immediately.
Beginners Manual Servo Amplifiers MELSERVO J4
V
Safety Guidelines
Structure
No-fuse
breaker
Magnetic
contactor
Servo
motor
Servo
amplifier
S001260E
Environment
Operate the servo amplifier at or above the contamination level 2 set forth in IEC60664-1. For this purpose, install the servo amplifier in a control box which is protected against water, oil, carbon, dust, dirt,
etc. (IP54).
Grounding
To prevent an electric shock, always connect the protective earth (PE) terminals of the servo amplifier
to the protective earth (PE) of the control box. Do not connect two or more ground cables to the same
protective earth (PE) terminal. Always connect the cables to the terminals one-to-one.
PE terminals
PE terminals
S001261E
VI
Typographic Conventions
Typographic Conventions
Use of notes
Notes containing important information are clearly identified as follows:
NOTE
Note text
Use of examples
Examples containing important information are clearly identified as follows:
Example 쑴
Example text
쑶
Numbering in figures and illustrations
Reference numbers in figures and illustrations are shown with white numbers in a black circle and the
corresponding explanations shown beneath the illustrations are identified with the same numbers,
like this:
Procedures
In some cases the setup, operation, maintenance and other instructions are explained with numbered
procedures. The individual steps of these procedures are numbered in ascending order with black
numbers in a white circle, and they must be performed in the exact order shown:
Text.
Text.
Text.
Footnotes in tables
Footnote characters in tables are printed in superscript and the corresponding footnotes shown
beneath the table are identified by the same characters, also in superscript.
If a table contains more than one footnote, they are all listed below the table and numbered in ascending order with black numbers in a white circle, like this:
Text
Text
Text
Writing conventions and guidance notes
Keys or key-combinations are indicated in square brackets, such as [Enter], [Shift] or [Ctrl]. Menu
names of the menu bar, of the drop-down menus, options of a dialogue screen and buttons are indicated in italic bold letters, such as the drop down menu New in the Project menu.
Beginners Manual Servo Amplifiers MELSERVO J4
VII
Typographic Conventions
VIII
Table of Contents
Table of Contents
1
Introduction
1.1
What is a servo amplifier?. . . . . . . . . . . . . . . . . . . . . . . . . . . . . . . . . . . . . . . . . . . . . . . . . . . . . . . . . . . . . . . 1-1
1.1.1
1.1.2
1.1.3
1.1.4
The servo amplifier in the motion control system . . . . . . . . . . . . . . . . . . . . . . . . . . . . . . . 1-1
Function of a servo amplifier. . . . . . . . . . . . . . . . . . . . . . . . . . . . . . . . . . . . . . . . . . . . . . . . . . . 1-2
Servo motors. . . . . . . . . . . . . . . . . . . . . . . . . . . . . . . . . . . . . . . . . . . . . . . . . . . . . . . . . . . . . . . . . . 1-3
Features of servo amplifiers and motors of the MELSERVO J4 series . . . . . . . . . . . . . 1-4
1.2
Environmental conditions . . . . . . . . . . . . . . . . . . . . . . . . . . . . . . . . . . . . . . . . . . . . . . . . . . . . . . . . . . . . . . 1-5
1.3
Terminology . . . . . . . . . . . . . . . . . . . . . . . . . . . . . . . . . . . . . . . . . . . . . . . . . . . . . . . . . . . . . . . . . . . . . . . . . . . 1-6
2
Introduction of the devices
2.1
Servo amplifier series MR-J4-A(-RJ). . . . . . . . . . . . . . . . . . . . . . . . . . . . . . . . . . . . . . . . . . . . . . . . . . . . . . 2-1
2.2
Servo amplifier series MR-J4-B(-RJ) . . . . . . . . . . . . . . . . . . . . . . . . . . . . . . . . . . . . . . . . . . . . . . . . . . . . . . 2-2
2.3
Servo amplifier series MR-J4W-B . . . . . . . . . . . . . . . . . . . . . . . . . . . . . . . . . . . . . . . . . . . . . . . . . . . . . . . . 2-3
2.4
Model designation and output power . . . . . . . . . . . . . . . . . . . . . . . . . . . . . . . . . . . . . . . . . . . . . . . . . . 2-4
2.5
Combinations of servo amplifiers and servo motors . . . . . . . . . . . . . . . . . . . . . . . . . . . . . . . . . . . . . 2-5
2.5.1
2.5.2
2.6
Removal and reinstallation of the front cover. . . . . . . . . . . . . . . . . . . . . . . . . . . . . . . . . . . . . . . . . . . . 2-8
2.6.1
2.6.2
2.7
200 V class . . . . . . . . . . . . . . . . . . . . . . . . . . . . . . . . . . . . . . . . . . . . . . . . . . . . . . . . . . . . . . . . . . . . 2-5
400 V class . . . . . . . . . . . . . . . . . . . . . . . . . . . . . . . . . . . . . . . . . . . . . . . . . . . . . . . . . . . . . . . . . . . . 2-7
Removal of the front cover. . . . . . . . . . . . . . . . . . . . . . . . . . . . . . . . . . . . . . . . . . . . . . . . . . . . . 2-8
Reinstallation of the front cover. . . . . . . . . . . . . . . . . . . . . . . . . . . . . . . . . . . . . . . . . . . . . . . 2-10
Rating plate. . . . . . . . . . . . . . . . . . . . . . . . . . . . . . . . . . . . . . . . . . . . . . . . . . . . . . . . . . . . . . . . . . . . . . . . . . . 2-12
2.7.1
2.7.2
MR-J4-A(-RJ) and MR-J4-B(-RJ) . . . . . . . . . . . . . . . . . . . . . . . . . . . . . . . . . . . . . . . . . . . . . . . . 2-12
MR-J4W-B . . . . . . . . . . . . . . . . . . . . . . . . . . . . . . . . . . . . . . . . . . . . . . . . . . . . . . . . . . . . . . . . . . . . 2-12
3
Introduction of the servo motors
3.1
Rotatory servo motors. . . . . . . . . . . . . . . . . . . . . . . . . . . . . . . . . . . . . . . . . . . . . . . . . . . . . . . . . . . . . . . . . . 3-1
3.1.1
3.1.2
3.1.3
3.1.4
3.1.5
3.1.6
3.1.7
3.2
Model overview . . . . . . . . . . . . . . . . . . . . . . . . . . . . . . . . . . . . . . . . . . . . . . . . . . . . . . . . . . . . . . . 3-1
Rating plate . . . . . . . . . . . . . . . . . . . . . . . . . . . . . . . . . . . . . . . . . . . . . . . . . . . . . . . . . . . . . . . . . . . 3-2
Servo motor series HG-MR and HG-KR. . . . . . . . . . . . . . . . . . . . . . . . . . . . . . . . . . . . . . . . . . 3-3
Servo motor series HG-SR. . . . . . . . . . . . . . . . . . . . . . . . . . . . . . . . . . . . . . . . . . . . . . . . . . . . . . 3-5
Servo motor series HG-JR . . . . . . . . . . . . . . . . . . . . . . . . . . . . . . . . . . . . . . . . . . . . . . . . . . . . . . 3-7
Servo motor series HG-RR. . . . . . . . . . . . . . . . . . . . . . . . . . . . . . . . . . . . . . . . . . . . . . . . . . . . . . 3-9
Servo motor series HG-UR . . . . . . . . . . . . . . . . . . . . . . . . . . . . . . . . . . . . . . . . . . . . . . . . . . . . 3-11
Linear servo motors . . . . . . . . . . . . . . . . . . . . . . . . . . . . . . . . . . . . . . . . . . . . . . . . . . . . . . . . . . . . . . . . . . . 3-13
3.2.1
3.2.2
3.2.3
3.2.4
3.2.5
3.2.6
Model overview . . . . . . . . . . . . . . . . . . . . . . . . . . . . . . . . . . . . . . . . . . . . . . . . . . . . . . . . . . . . . . 3-13
Rating plate (primary side – coil) . . . . . . . . . . . . . . . . . . . . . . . . . . . . . . . . . . . . . . . . . . . . . . 3-13
Servo motor series LM-H3 . . . . . . . . . . . . . . . . . . . . . . . . . . . . . . . . . . . . . . . . . . . . . . . . . . . . 3-14
Servo motor series LM-U2 . . . . . . . . . . . . . . . . . . . . . . . . . . . . . . . . . . . . . . . . . . . . . . . . . . . . 3-15
Servo motor series LM-F . . . . . . . . . . . . . . . . . . . . . . . . . . . . . . . . . . . . . . . . . . . . . . . . . . . . . . 3-17
Servo motor series LM-K2. . . . . . . . . . . . . . . . . . . . . . . . . . . . . . . . . . . . . . . . . . . . . . . . . . . . . 3-18
Beginners Manual Servo Amplifiers MELSERVO J4
1
Table of Contents
3.3
Direct drive servo motors. . . . . . . . . . . . . . . . . . . . . . . . . . . . . . . . . . . . . . . . . . . . . . . . . . . . . . . . . . . . . . 3-19
3.3.1
3.3.2
3.3.3
4
Installation and wiring
4.1
Wiring of power supply, motor and PE terminal . . . . . . . . . . . . . . . . . . . . . . . . . . . . . . . . . . . . . . . . . 4-1
4.2
Connectors and signal arrangements . . . . . . . . . . . . . . . . . . . . . . . . . . . . . . . . . . . . . . . . . . . . . . . . . . . 4-5
4.2.1
4.2.2
4.2.3
4.3
4.4
Servo amplifier series MR-J4-A . . . . . . . . . . . . . . . . . . . . . . . . . . . . . . . . . . . . . . . . . . . . . . . . . 4-5
Servo amplifier series MR-J4-B . . . . . . . . . . . . . . . . . . . . . . . . . . . . . . . . . . . . . . . . . . . . . . . . 4-12
Servo amplifier series MR-J4W-B . . . . . . . . . . . . . . . . . . . . . . . . . . . . . . . . . . . . . . . . . . . . . . 4-15
Wiring the interfaces . . . . . . . . . . . . . . . . . . . . . . . . . . . . . . . . . . . . . . . . . . . . . . . . . . . . . . . . . . . . . . . . . . 4-18
4.3.1
4.3.2
4.3.3
I/O interfaces in negative logic (sink type) . . . . . . . . . . . . . . . . . . . . . . . . . . . . . . . . . . . . . 4-18
I/O interfaces in positive logic (source type) . . . . . . . . . . . . . . . . . . . . . . . . . . . . . . . . . . . 4-19
Analog interfaces. . . . . . . . . . . . . . . . . . . . . . . . . . . . . . . . . . . . . . . . . . . . . . . . . . . . . . . . . . . . . 4-20
Communication function . . . . . . . . . . . . . . . . . . . . . . . . . . . . . . . . . . . . . . . . . . . . . . . . . . . . . . . . . . . . . . 4-21
4.4.1
4.4.2
Serial interface RS-422 (only MR-J4-A(-RJ)). . . . . . . . . . . . . . . . . . . . . . . . . . . . . . . . . . . . . 4-21
USB interface. . . . . . . . . . . . . . . . . . . . . . . . . . . . . . . . . . . . . . . . . . . . . . . . . . . . . . . . . . . . . . . . . 4-22
4.5
Optical interface SSCNET III (only MR-J4-B(-RJ) and MR-J4W-B) . . . . . . . . . . . . . . . . . . . . . . . . . . 4-23
4.6
Setting the control axis number (only MR-J4-B(-RJ) and MR-J4W-B) . . . . . . . . . . . . . . . . . . . . . 4-25
4.6.1
4.6.2
MR-J4-B(-RJ). . . . . . . . . . . . . . . . . . . . . . . . . . . . . . . . . . . . . . . . . . . . . . . . . . . . . . . . . . . . . . . . . . 4-25
MR-J4W-B . . . . . . . . . . . . . . . . . . . . . . . . . . . . . . . . . . . . . . . . . . . . . . . . . . . . . . . . . . . . . . . . . . . . 4-27
4.7
Disabling of control axes (only MR-J4W-B). . . . . . . . . . . . . . . . . . . . . . . . . . . . . . . . . . . . . . . . . . . . . . 4-30
4.8
Servo motor . . . . . . . . . . . . . . . . . . . . . . . . . . . . . . . . . . . . . . . . . . . . . . . . . . . . . . . . . . . . . . . . . . . . . . . . . . 4-31
4.8.1
4.8.2
4.9
4.10
Forced stop deceleration function . . . . . . . . . . . . . . . . . . . . . . . . . . . . . . . . . . . . . . . . . . . . 4-35
Wiring examples . . . . . . . . . . . . . . . . . . . . . . . . . . . . . . . . . . . . . . . . . . . . . . . . . . . . . . . . . . . . . . . . . . . . . . 4-36
4.10.1
4.10.2
4.10.3
4.11
Connecting the servo motor . . . . . . . . . . . . . . . . . . . . . . . . . . . . . . . . . . . . . . . . . . . . . . . . . . 4-31
Servo motor with electromagnetic brake . . . . . . . . . . . . . . . . . . . . . . . . . . . . . . . . . . . . . . 4-33
Forced stop . . . . . . . . . . . . . . . . . . . . . . . . . . . . . . . . . . . . . . . . . . . . . . . . . . . . . . . . . . . . . . . . . . . . . . . . . . . 4-35
4.9.1
Servo amplifier series MR-J4-A(-RJ) . . . . . . . . . . . . . . . . . . . . . . . . . . . . . . . . . . . . . . . . . . . . 4-36
Servo amplifier series MR-J4-B(-RJ) . . . . . . . . . . . . . . . . . . . . . . . . . . . . . . . . . . . . . . . . . . . . 4-39
Multi axes servo amplifier series MR-J4W-B . . . . . . . . . . . . . . . . . . . . . . . . . . . . . . . . . . . . 4-41
EM-Compatible Installation. . . . . . . . . . . . . . . . . . . . . . . . . . . . . . . . . . . . . . . . . . . . . . . . . . . . . . . . . . . . 4-43
4.11.1
4.11.2
4.11.3
EM-compatible switchgear cabinet installation . . . . . . . . . . . . . . . . . . . . . . . . . . . . . . . . 4-43
Wiring . . . . . . . . . . . . . . . . . . . . . . . . . . . . . . . . . . . . . . . . . . . . . . . . . . . . . . . . . . . . . . . . . . . . . . . 4-44
Optional EMC filters . . . . . . . . . . . . . . . . . . . . . . . . . . . . . . . . . . . . . . . . . . . . . . . . . . . . . . . . . . 4-45
5
Startup
5.1
Preparations . . . . . . . . . . . . . . . . . . . . . . . . . . . . . . . . . . . . . . . . . . . . . . . . . . . . . . . . . . . . . . . . . . . . . . . . . . . 5-1
5.2
Startup of servo amplifier series MR-J4-A(-RJ) . . . . . . . . . . . . . . . . . . . . . . . . . . . . . . . . . . . . . . . . . . . 5-2
5.2.1
5.2.2
5.2.3
5.2.4
5.2.5
2
Model overview . . . . . . . . . . . . . . . . . . . . . . . . . . . . . . . . . . . . . . . . . . . . . . . . . . . . . . . . . . . . . . 3-19
Rating plate (primary side – coil) . . . . . . . . . . . . . . . . . . . . . . . . . . . . . . . . . . . . . . . . . . . . . . 3-19
Servo motor series TF-RFM. . . . . . . . . . . . . . . . . . . . . . . . . . . . . . . . . . . . . . . . . . . . . . . . . . . . 3-20
Power on and off the servo amplifier . . . . . . . . . . . . . . . . . . . . . . . . . . . . . . . . . . . . . . . . . . . 5-2
Stop of operation. . . . . . . . . . . . . . . . . . . . . . . . . . . . . . . . . . . . . . . . . . . . . . . . . . . . . . . . . . . . . . 5-3
Test operation. . . . . . . . . . . . . . . . . . . . . . . . . . . . . . . . . . . . . . . . . . . . . . . . . . . . . . . . . . . . . . . . . 5-4
Parameter setting . . . . . . . . . . . . . . . . . . . . . . . . . . . . . . . . . . . . . . . . . . . . . . . . . . . . . . . . . . . . . 5-5
Actual operation . . . . . . . . . . . . . . . . . . . . . . . . . . . . . . . . . . . . . . . . . . . . . . . . . . . . . . . . . . . . . . 5-5
Table of Contents
5.3
Startup of servo amplifier series MR-J4-B(-RJ) and MR-J4W-B . . . . . . . . . . . . . . . . . . . . . . . . . . . . . 5-6
5.3.1
5.3.2
5.3.3
6
Operation and Settings
6.1
Display and operation section of MR-J4-A series . . . . . . . . . . . . . . . . . . . . . . . . . . . . . . . . . . . . . . . . . 6-1
6.1.1
6.1.2
6.1.3
6.1.4
6.1.5
6.1.6
6.1.7
6.1.8
6.1.9
6.1.10
6.2
6.3
Overview. . . . . . . . . . . . . . . . . . . . . . . . . . . . . . . . . . . . . . . . . . . . . . . . . . . . . . . . . . . . . . . . . . . . . . 6-1
Display flowchart MR-J4-A . . . . . . . . . . . . . . . . . . . . . . . . . . . . . . . . . . . . . . . . . . . . . . . . . . . . . 6-2
Status display mode MR-J4-A . . . . . . . . . . . . . . . . . . . . . . . . . . . . . . . . . . . . . . . . . . . . . . . . . . 6-3
Display flowchart MR-J4-A-RJ . . . . . . . . . . . . . . . . . . . . . . . . . . . . . . . . . . . . . . . . . . . . . . . . . . 6-6
Status display mode MR-J4-A-RJ . . . . . . . . . . . . . . . . . . . . . . . . . . . . . . . . . . . . . . . . . . . . . . . 6-7
Display examples. . . . . . . . . . . . . . . . . . . . . . . . . . . . . . . . . . . . . . . . . . . . . . . . . . . . . . . . . . . . . 6-11
Changing the status display screen . . . . . . . . . . . . . . . . . . . . . . . . . . . . . . . . . . . . . . . . . . . 6-11
Alarm mode. . . . . . . . . . . . . . . . . . . . . . . . . . . . . . . . . . . . . . . . . . . . . . . . . . . . . . . . . . . . . . . . . . 6-12
Parameter mode . . . . . . . . . . . . . . . . . . . . . . . . . . . . . . . . . . . . . . . . . . . . . . . . . . . . . . . . . . . . . 6-14
Test operation mode . . . . . . . . . . . . . . . . . . . . . . . . . . . . . . . . . . . . . . . . . . . . . . . . . . . . . . . . . 6-16
Display and operation section of MR-J4-B(-RJ) series. . . . . . . . . . . . . . . . . . . . . . . . . . . . . . . . . . . . 6-21
6.2.1
6.2.2
6.2.3
6.2.4
6.2.5
Overview. . . . . . . . . . . . . . . . . . . . . . . . . . . . . . . . . . . . . . . . . . . . . . . . . . . . . . . . . . . . . . . . . . . . . 6-21
Scrolling display. . . . . . . . . . . . . . . . . . . . . . . . . . . . . . . . . . . . . . . . . . . . . . . . . . . . . . . . . . . . . . 6-22
Display sequence. . . . . . . . . . . . . . . . . . . . . . . . . . . . . . . . . . . . . . . . . . . . . . . . . . . . . . . . . . . . . 6-23
Test operation. . . . . . . . . . . . . . . . . . . . . . . . . . . . . . . . . . . . . . . . . . . . . . . . . . . . . . . . . . . . . . . . 6-24
Motor-less operation in controller. . . . . . . . . . . . . . . . . . . . . . . . . . . . . . . . . . . . . . . . . . . . . 6-27
Display and operation section of MR-J4W-B series . . . . . . . . . . . . . . . . . . . . . . . . . . . . . . . . . . . . . . 6-29
6.3.1
6.3.2
6.3.3
6.3.4
6.3.5
Overview. . . . . . . . . . . . . . . . . . . . . . . . . . . . . . . . . . . . . . . . . . . . . . . . . . . . . . . . . . . . . . . . . . . . . 6-29
Scrolling display. . . . . . . . . . . . . . . . . . . . . . . . . . . . . . . . . . . . . . . . . . . . . . . . . . . . . . . . . . . . . . 6-30
Display sequence. . . . . . . . . . . . . . . . . . . . . . . . . . . . . . . . . . . . . . . . . . . . . . . . . . . . . . . . . . . . . 6-31
Test operation. . . . . . . . . . . . . . . . . . . . . . . . . . . . . . . . . . . . . . . . . . . . . . . . . . . . . . . . . . . . . . . . 6-32
Motor-less operation in controller. . . . . . . . . . . . . . . . . . . . . . . . . . . . . . . . . . . . . . . . . . . . . 6-35
7
Parameters
7.1
MR-J4-A . . . . . . . . . . . . . . . . . . . . . . . . . . . . . . . . . . . . . . . . . . . . . . . . . . . . . . . . . . . . . . . . . . . . . . . . . . . . . . . 7-1
7.1.1
7.2
7.3
Basic setting parameters. . . . . . . . . . . . . . . . . . . . . . . . . . . . . . . . . . . . . . . . . . . . . . . . . . . . . . 7-28
MR-J4W-B. . . . . . . . . . . . . . . . . . . . . . . . . . . . . . . . . . . . . . . . . . . . . . . . . . . . . . . . . . . . . . . . . . . . . . . . . . . . . 7-39
7.4.1
7.5
Basic setting parameters. . . . . . . . . . . . . . . . . . . . . . . . . . . . . . . . . . . . . . . . . . . . . . . . . . . . . . 7-14
MR-J4-B(-RJ) . . . . . . . . . . . . . . . . . . . . . . . . . . . . . . . . . . . . . . . . . . . . . . . . . . . . . . . . . . . . . . . . . . . . . . . . . . 7-28
7.3.1
7.4
Basic setting parameters. . . . . . . . . . . . . . . . . . . . . . . . . . . . . . . . . . . . . . . . . . . . . . . . . . . . . . . 7-1
MR-J4-A-RJ. . . . . . . . . . . . . . . . . . . . . . . . . . . . . . . . . . . . . . . . . . . . . . . . . . . . . . . . . . . . . . . . . . . . . . . . . . . . 7-14
7.2.1
3
Power on and off the servo amplifier . . . . . . . . . . . . . . . . . . . . . . . . . . . . . . . . . . . . . . . . . . . 5-6
Stop of operation. . . . . . . . . . . . . . . . . . . . . . . . . . . . . . . . . . . . . . . . . . . . . . . . . . . . . . . . . . . . . . 5-7
Test operation. . . . . . . . . . . . . . . . . . . . . . . . . . . . . . . . . . . . . . . . . . . . . . . . . . . . . . . . . . . . . . . . . 5-8
Basic setting parameters. . . . . . . . . . . . . . . . . . . . . . . . . . . . . . . . . . . . . . . . . . . . . . . . . . . . . . 7-39
Other parameters . . . . . . . . . . . . . . . . . . . . . . . . . . . . . . . . . . . . . . . . . . . . . . . . . . . . . . . . . . . . . . . . . . . . . 7-50
Table of Contents
8
Troubleshooting
8.1
Alarm and warning list MR-J4-A(-RJ) . . . . . . . . . . . . . . . . . . . . . . . . . . . . . . . . . . . . . . . . . . . . . . . . . . . . 8-1
8.2
Alarm and warning list MR-J4-B(-RJ). . . . . . . . . . . . . . . . . . . . . . . . . . . . . . . . . . . . . . . . . . . . . . . . . . . . 8-10
8.3
Alarm and warning list MR-J4W-B . . . . . . . . . . . . . . . . . . . . . . . . . . . . . . . . . . . . . . . . . . . . . . . . . . . . . . 8-18
8.4
Remedies for alarms. . . . . . . . . . . . . . . . . . . . . . . . . . . . . . . . . . . . . . . . . . . . . . . . . . . . . . . . . . . . . . . . . . . 8-27
8.5
Remedies for warnings . . . . . . . . . . . . . . . . . . . . . . . . . . . . . . . . . . . . . . . . . . . . . . . . . . . . . . . . . . . . . . . . 8-28
8.6
Trouble which does not trigger alarm/warning . . . . . . . . . . . . . . . . . . . . . . . . . . . . . . . . . . . . . . . . . 8-28
A
Appendix
A.1
Additional information about the series MR-J4-A . . . . . . . . . . . . . . . . . . . . . . . . . . . . . . . . . . . . . . . . A-1
A.1.1
A.1.2
A.1.3
A.1.4
A.1.5
A.1.6
A.1.7
A.1.8
A.2
Additional information about the series MR-J4-A-RJ . . . . . . . . . . . . . . . . . . . . . . . . . . . . . . . . . . . .A-17
A.2.1
A.2.2
A.2.3
A.2.4
A.2.5
A.2.6
A.2.7
A.2.8
A.2.9
A.2.10
A.3
Status display . . . . . . . . . . . . . . . . . . . . . . . . . . . . . . . . . . . . . . . . . . . . . . . . . . . . . . . . . . . . . . . .A-38
Basic setting parameters (PA) . . . . . . . . . . . . . . . . . . . . . . . . . . . . . . . . . . . . . . . . . . . . .A-39
Gain/filter setting parameters (PB) . . . . . . . . . . . . . . . . . . . . . . . . . . . . . . . . . . . . . . . .A-40
Extension setting parameters (PC) . . . . . . . . . . . . . . . . . . . . . . . . . . . . . . . . . . . . . . . .A-42
I/O setting parameters (PD) . . . . . . . . . . . . . . . . . . . . . . . . . . . . . . . . . . . . . . . . . . . . . . .A-44
Extension setting 2 parameters (PE) . . . . . . . . . . . . . . . . . . . . . . . . . . . . . . . . . . . . . . .A-46
Extension setting 3 parameters (PF) . . . . . . . . . . . . . . . . . . . . . . . . . . . . . . . . . . . . . . .A-48
Linear servo motor/DD motor setting parameters (PL) . . . . . . . . . . . . . . . . . . . . .A-50
Additional information about the series MR-J4W-B . . . . . . . . . . . . . . . . . . . . . . . . . . . . . . . . . . . . .A-52
A.4.1
A.4.2
A.4.3
A.4.4
A.4.5
A.4.6
A.4.7
A.4.8
4
Status Display . . . . . . . . . . . . . . . . . . . . . . . . . . . . . . . . . . . . . . . . . . . . . . . . . . . . . . . . . . . . . . . .A-17
Basic setting parameters (PA) . . . . . . . . . . . . . . . . . . . . . . . . . . . . . . . . . . . . . . . . . . . . .A-21
Gain/filter setting parameters (PB) . . . . . . . . . . . . . . . . . . . . . . . . . . . . . . . . . . . . . . . .A-22
Extension setting parameters (PC) . . . . . . . . . . . . . . . . . . . . . . . . . . . . . . . . . . . . . . . .A-24
I/O setting parameters (PD) . . . . . . . . . . . . . . . . . . . . . . . . . . . . . . . . . . . . . . . . . . . . . . .A-27
Extension setting 2 parameters (PE) . . . . . . . . . . . . . . . . . . . . . . . . . . . . . . . . . . . . . . .A-29
Extension setting 3 parameters (PF) . . . . . . . . . . . . . . . . . . . . . . . . . . . . . . . . . . . . . . .A-31
Linear servo motor/DD motor setting parameters (PL) . . . . . . . . . . . . . . . . . . . . .A-33
Option setting parameters (Po) . . . . . . . . . . . . . . . . . . . . . . . . . . . . . . . . . . . . . . . . . . .A-35
Positioning control parameters (PT) . . . . . . . . . . . . . . . . . . . . . . . . . . . . . . . . . . . . . . .A-36
Additional information about the series MR-J4-B(-RJ) . . . . . . . . . . . . . . . . . . . . . . . . . . . . . . . . . . .A-38
A.3.1
A.3.2
A.3.3
A.3.4
A.3.5
A.3.6
A.3.7
A.3.8
A.4
Status Display . . . . . . . . . . . . . . . . . . . . . . . . . . . . . . . . . . . . . . . . . . . . . . . . . . . . . . . . . . . . . . . . . A-1
Basic setting parameters (PA) . . . . . . . . . . . . . . . . . . . . . . . . . . . . . . . . . . . . . . . . . . . . . . A-3
Gain/filter setting parameters (PB) . . . . . . . . . . . . . . . . . . . . . . . . . . . . . . . . . . . . . . . . . A-4
Extension setting parameters (PC) . . . . . . . . . . . . . . . . . . . . . . . . . . . . . . . . . . . . . . . . . A-6
I/O setting parameters (PD) . . . . . . . . . . . . . . . . . . . . . . . . . . . . . . . . . . . . . . . . . . . . . . . . A-9
Extension setting 2 parameters (PE) . . . . . . . . . . . . . . . . . . . . . . . . . . . . . . . . . . . . . . .A-11
Extension setting 3 parameters (PF) . . . . . . . . . . . . . . . . . . . . . . . . . . . . . . . . . . . . . . .A-13
Linear servo motor/DD motor setting parameters (PL) . . . . . . . . . . . . . . . . . . . . .A-15
Status display . . . . . . . . . . . . . . . . . . . . . . . . . . . . . . . . . . . . . . . . . . . . . . . . . . . . . . . . . . . . . . . .A-52
Basic setting parameters (PA) . . . . . . . . . . . . . . . . . . . . . . . . . . . . . . . . . . . . . . . . . . . . .A-53
Gain/filter setting parameters (PB) . . . . . . . . . . . . . . . . . . . . . . . . . . . . . . . . . . . . . . . .A-54
Extension setting parameters (PC) . . . . . . . . . . . . . . . . . . . . . . . . . . . . . . . . . . . . . . . .A-56
I/O setting parameters (PD) . . . . . . . . . . . . . . . . . . . . . . . . . . . . . . . . . . . . . . . . . . . . . . .A-58
Extension setting 2 parameters (PE) . . . . . . . . . . . . . . . . . . . . . . . . . . . . . . . . . . . . . . .A-60
Extension setting 3 parameters (PF) . . . . . . . . . . . . . . . . . . . . . . . . . . . . . . . . . . . . . . .A-62
Linear servo motor/DD motor setting parameters (PL) . . . . . . . . . . . . . . . . . . . . .A-64
What is a servo amplifier?
1
Introduction
Introduction
This english document is the original instruction.
1.1
What is a servo amplifier?
1.1.1
The servo amplifier in the motion control system
Servo amplifiers are components of a so-called motion control system. This concept represents different types of motion control such as single-axis positioning in micro-installations but also for the
solution of sophisticated tasks like multiple-axis positioning in large-scale installations. With a motion
control system you are able to solve different positioning applications from positioning with one axis
in small production lines up to multi axis positioning in large-scale systems.
The Motion CPU controls different more or less complex motion sequences via the connected servo
amplifiers and motors.
Typical applications of a motion control systems are:
● Plastics and textile processing,
● Packaging,
● Printing and paper converting,
● Forming,
● Wood and glass working,
● Production of semiconductors
The following diagram shows the components of a motion control system with CPUs, modules, servo
amplifiers and motors.
Common
memory
PLC CPU
I/O
module
Intelligent
module
Communication
module
Motion CPU
Motion
system
module
I/O
module
Servo
amplifier
Servo
amplifier
Servo
amplifier
Motor
Motor
Motor
qmc0001e
Fig. 1-1:
Block diagram of a motion control system
The bus system for control depends on the used servo amplifier series MR-J4-A, MR-J4-B or
MR-J4W-B.
Beginners Manual Servo Amplifiers MELSERVO J4
1-1
Introduction
1.1.2
What is a servo amplifier?
Function of a servo amplifier
Servo amplifiers are specially designed frequency inverters for driving servo motors for dynamic
movements.
The block diagram in fig. 1-2 shows the two main components:
● the power rail (top) and
● the electronics for control and monitoring (bottom).
The power supply loads the capacitor C of the current source via the rectifier with a DC voltage Uz. The
power inverter generates from this DC voltage Uz a 3-phase AC voltage with variable frequency to
drive the servo motor. In the case, the drive works as a brake, the brake chopper inside the current
source limits the voltage Uz and dissipates the braking energy via the resistor R by heat. If there is
needed a higher dissipation of braking energy or if the brake events are more frequent, an external
resistor R is used to remove a higher quantity of heat.
Servo amplifier
Rectifier
Power
supply
L1
SR1
Current source
Energy
storage
Power inverter
Brake
chopper
R
L2
Uz
C
V
L3
Bus:
Data:
Setpoints
SR2
V1
V4
Control electronics
Control/interface/monitoring
Communication
V3
V6
+
V5
Servo motor
U1
V1
W1
M
Load
LG
V2
–
Feedback
LG = Position sensor = Encoder
s001851e
Fig. 1-2:
1-2
Block diagram of a servo amplifier
What is a servo amplifier?
1.1.3
Introduction
Servo motors
Today servo motors are generally used to execute high dynamic movements. The motors work on the
principle of a synchronous machine, which is permanently magnetic excited (rotary servo motor).
The motors provide the torque or the power directly and are extremely effective in doing so. Driven
by servo amplifiers they work at variable, process-optimizing speed and do precise positioning without delay for the machine. An encoder (position sensor) on the motor shaft reports the position of the
rotor back to the servo amplifier. To fix the reached position even in the event of power failure, the
motors are equipped with an optional electromagnetic brake. This ensures an perfect adaptation to
every needed application (e.g. hanging loads).
The cabling of the power supply of the motor and of the encoder is done by pre-assembled cables.
Most of the connections are done with connectors so that the cabling is easy, quick and safe.
Among the rotary servo motors the MR-J4 series servo amplifier is additionally able to operate linear
servo motors and direct drive servo motors as standard.
Linear servo motor
A linear servo motor is an AC asynchronous linear motor that works by the same general principles as
other induction motors but is designed to directly produce motion in a straight line. Instead of producing a torque (by rotation) it produces a force by a moving linear magnetic field acting on conductors in the field. The most common mode of operation is as a Lorentz-type actuator, in which the
applied force is linearly proportional to the current and the magnetic field.
Direct drive servo motor
If a high torque is needed in a special application by using a conventional motor, this requirement can
only be solved by using a gear or belt reduction system. Such mechanical reduction systems increase
torque but accuracy and repeatability will be reduced by backlash and friction.
The direct drive servo motor is gearless so it eliminates friction from its power transmission. They are
suitable for low-speed and high-torque operation. Since the absolute position encoder is coupled
directly to the load, system accuracy and repeatability are greatly increased and backlash is
eliminated.
Beginners Manual Servo Amplifiers MELSERVO J4
1-3
Introduction
1.1.4
What is a servo amplifier?
Features of servo amplifiers and motors of the MELSERVO J4 series
The motion CPU controls the connected servo amplifiers which drive the servo motors for movement
and position. The servo motor is tuned to a certain shaft position, direction of rotation, speed or a certain torque.
All servo motors from the MELSERVO J4 series are equipped by default with a single-turn absolute
position encoder. Due to the high encoder resolution of up to 4,194,304 pulses per revolution (22 bit),
accurate positioning and high speed stability are possible. The encoder is rigidly coupled to the motor
shaft of the servo motor and gives the motor shaft position via the encoder cable back to the servo
amplifier (actual position value). The servo amplifier controls position deviations by comparing the
actual position value and the position setpoint (command value of the motion CPU). This position
deviation or error is also called droop pulse.
By connecting a buffer battery to the servo amplifier, the reference position of the servo motor, also
called zero position or home position, can be stored. By supplying the memory with the battery voltage the data of the reference position are kept in the servo amplifier even if the power supply to the
servo amplifier fails, is switched off or in case of an alarm. This function is called absolute position
detection system.
You can connect the servo amplifier to a PC for configuration. For this purpose Mitsubishi offers the
setup software "MR Configurator2". The connection between servo amplifier and PC is done by the
built-in USB interface (MR-J4-A, MR-J4-B and MR-J4W-B) and additionally by RS-422 interface (only
MR-J4-A).
The MR-J4-A servo amplifiers were developed for multiple applications and are equipped with inputs
for analog and pulse signals. MR-J4-B and MR-J4W-B servo amplifiers with SSCNET III/H bus network
are designed for operation with Mitsubishi motion controllers of MELSEC System Q.
The MR-J4-A-RJ servo amplifier has a built-in positioning function (point table and program methods,
and indexer positioning operation). A simple positioning system can be configured without a controller such as positioning module.
The SSCNET III/H bus system is an optical communication system with serial data exchange via optical
fibre optics based on light. This optical bus system offers high transmission speed and cannot be influenced by electromagnetic interfering signals from other products.
Servo amplifiers of the MR-J4 series are available with an output power range from 100 W up to 22 kW.
Depending on the model they are suitable for one-phase power supply (output power of 700 W or
less) and three-phase power supply of 200–230 V AC or for three-phase power supply of 380–480 V
AC.
The MR-J4W2-B servo is designed to drive two servo motors, the MR-J4W3-B to drive three servo
motors. Both servo amplifier models are SSCNET III/H compatible enabling energy-conservative operation, less-wiring, compact machine design at lower cost.
1-4
Environmental conditions
1.2
Introduction
Environmental conditions
Store and use the servo amplifier and servo motor in the following environmental conditions.
Conditions
Environment
Servo amplifier
Servo motor
Ambient
temperature
Operation
0 to +55 C (non-freezing)
0 to +40 C (non-freezing)
Storage
−20 to +65 C (non-freezing)
−15 to +70 C (non-freezing)
Ambient
humidity
Operation
Storage
max. 90 % (non-condensing)
max. 80 % (non-condensing)
max. 90 % (With no dew condensation)
Atmosphere
Indoors (no direct sunlight), free from corrosive gas, flammable gas, oil mist, dust, and
dirt
Altitude
max. 1000 m
HG-MR
IP65 HG-KR
IP65 HG-SR
IP67 HG-JR53(4) to 903(4)
HG-JR11K1M(4) to 15K1M(4) IP67
Protective structure
IP20
HG-JR22K1M(4)
IP44 HG-RR
IP65 HG-UR
IP65 LM-F
IP00
LM-U2
IP00
LM-H3
IP00
LM-K2
IP00
TM-RFM
IP42 HG-MR
X, Y: 49 m/s²
HG-KR
X, Y: 49 m/s²
HG-SR51 to 81
HG-SR52(4) to 152(4)
X, Y: 24.5 m/s²
HG-SR121 to 201
HG-SR202(4) to 352(4)
X: 24.5 m/s², Y: 49 m/s²
HG-SR301 to 421
HG-SR502(4) to 702(4)
X: 24.5 m/s², Y: 29.4 m/s²
HG-JR53(4) to 503(4)
X, Y: 24.5 m/s²
HG-JR11K1M(4) to 22K1M(4)
Vibration
Tab. 1-1:
max. 5.9 m/s²
X: 24.5 m/s², Y: 29.4 m/s²
HG-RR
X, Y: 24.5 m/s²
HG-UR72 to 152
X, Y: 24.5 m/s²
HG-UR202 to 502
X: 24.5 m/s², Y: 49 m/s²
LM-F
X, Y: 49 m/s²
LM-U2
X, Y: 49 m/s²
LM-H3
X, Y: 49 m/s²
LM-K2
X, Y: 49 m/s²
TM-RFM
X, Y: 49 m/s² Environmental conditions
For some models the terminal block is excluded.
The shaft-through portion is excluded.
HG-JR703(4) to903(4)
The shaft-through portion is excluded. For geared servo motor, IP rating of the reducer portion is
equivalent to IP44.
Connectors and gap between rotor and stator are excluded.
TM-RFM040J10, TM-RFM120J10, TM-RFM240J10:
Beginners Manual Servo Amplifiers MELSERVO J4
X, Y: 24.5 m/s²
1-5
Introduction
1.3
Terminology
Terminology
The terms and abbreviations below are important for servo amplifiers and are used frequently in this
guide.
Direction of rotation of electric motors
The direction (or sense) of rotation of electric motors is defined looking at the end of the motor shaft.
If the motor has two shaft ends the direction is defined looking at the main drive shaft end, which is
defined as the shaft end away from the end where the cooling fan or the brake are installed.
● Forward
Counterclockwise (CCW)/ Left
● Reverse
Clockwise (CW)/ Right
Safety Function
The servo amplifier series MR-J4 supports the Safe Torque Off (STO) function described in IEC/EN
61800-5-2. STO is a stop function used to shut down energy to motors which exert torque. The servo
amplifier electronically cuts off the power output from the servo amplifier to the servo motor.
The purpose for this safety function is as follows.
– Uncontrolled stop according to stop category 0 of IEC 60204-1
– Designed to prevent unexpected start-up
Operating modes of the servo amplifier
The MR-J4-A servo amplifier can be set to different operating modes by parameter setting.
● Position control mode
An up to 4 Mpps high-speed pulse train is used to control the speed and direction of a motor and
execute precision positioning of 4,194,304 pulses/rev (22 bits) resolution.
A torque limit is imposed on the servo amplifier by the clamp circuit to protect the power transistor
in the main circuit from overcurrent due to sudden acceleration/deceleration or overload. This
torque limit value can be changed to any value with an external analog input or the parameter.
● Speed control mode
An external analog speed command (0–±10 V DC) or parameter-driven internal speed command
(max. 7 speeds) is used to control the speed and direction of a servo motor smoothly. There are
also the acceleration/deceleration time constant setting in response to speed command, the
servo lock function at a stop time, and automatic offset adjustment function in response to
external analog speed command.
● Torque control mode
An external analog torque command (0–±8 V DC) or parameter-driven internal torque command
is used to control the torque output by the servo motor.
To protect misoperation under no load, the speed limit function (external or internal setting) is
also available for application to tension control, etc.
● Positioning mode (only RJ type)
Automatic and manual positioning modes are supported by point table, program and indexer for
normal operation as well as for home position return. Home position return can be done by
different methods like dog type, count type, data set type, stopper type etc.
1-6
Terminology
Introduction
Fully closed loop system
The MR-J4-B(-RJ)/A(-RJ) servo amplifier is compatible with fully closed loop control system. A load side
encoder can be used for reading a position feedback signal in order to realise full closed position feedback. By parameter setting different control modes can be selected.
Control mode
Description
Semi closed loop control
Position is controlled according to the servo motor-side data.
Dual feedback control
Position is controlled according to the servo motor-side data and load-side data.
Fully closed loop control
Position is controlled according to the load-side data.
Tab. 1-2:
Control modes of the closed loop system
Beginners Manual Servo Amplifiers MELSERVO J4
1-7
Introduction
1-8
Terminology
Servo amplifier series MR-J4-A(-RJ)
Introduction of the devices
2
Introduction of the devices
2.1
Servo amplifier series MR-J4-A(-RJ)
MR-J4-200A(-RJ) or less
MR-J4-200A4(-RJ) or less
MR-J4-350A(-RJ)
MR-J4-350A4(-RJ)
MR-J4-500A(-RJ)
MR-J4-500A4(-RJ)
MR-J4-700A(4)(-RJ)
MR-J4-11KA(4)(-RJ)/15KA(4)(-RJ)
MR-J4-22KA(4)(-RJ)
Geräteansicht MR-J4-A(4).eps
Fig. 2-1:
NOTE
Model overview of the servo amplifiers MR-J4-A(-RJ)
The MR-J4-A(4)-RJ servo amplifier has the CN2L connector.
Beginners Manual Servo Amplifiers MELSERVO J4
2-1
Introduction of the devices
2.2
Servo amplifier series MR-J4-B(-RJ)
Servo amplifier series MR-J4-B(-RJ)
MR-J4-200B(-RJ) or less
MR-J4-200B4(-RJ) or less
MR-J4-350B(-RJ)
MR-J4-350B4(-RJ)
MR-J4-500B(-RJ)
MR-J4-500B4(-RJ)
MR-J4-700B(4)(-RJ)
MR-J4-11KB(4)(-RJ)/15KB(4)(-RJ)
MR-J4-22KB(4)(-RJ)
Geräteansicht MR-J4-B(4).eps
Fig. 2-2:
NOTES
Model overview of the servo amplifiers MR-J4-B(-RJ)
The number “4” in the model designation of the servo amplifier indicates the version for 400 V. If
the number 4 is inside brackets, the model is also available in the version 200 V.
The MR-J4-B(4)-RJ servo amplifier has the CN2L connector.
2-2
Servo amplifier series MR-J4W-B
2.3
Introduction of the devices
Servo amplifier series MR-J4W-B
MR-J4W2-B
MR-J4W3-B
Geräteansicht MR-J4W.eps
Fig. 2-3:
Model overview of the servo amplifiers MR-J4W-B
Beginners Manual Servo Amplifiers MELSERVO J4
2-3
Introduction of the devices
2.4
Model designation and output power
Model designation and output power
MR-J4- A - MR-J4- B - None
-RJ
Standard
Fully closed loop control four-wire type/load-side encoder A/B/Z-phase input
compatible
Indicates a servo amplifier of 11 kW to 22 kW that does not use a regenerative resistor
as standard accessory.
Indicates a servo amplifier MR-J4-A-RJ or MR-J4-B-RJ of 11 kW to 22 kW that
does not use a regenerative resistor as standard accessory.
Series
-PX
-RZ
Code
Power supply
—
200–240 V AC,
1-phase or 3-phase 4
380–480 V AC, 3-phase
A: General purpose interface
B: SSCNET III/H compatible
Fig. 2-4:
Code
Rated
output
[kW]
Code
Rated
output
[kW]
Code
Rated
output
[kW]
10
0.1
100
1
11K
11
20
0.2
200
2
15K
15
40
0.4
350
3.5
22K
22
60
0.6
500
5
70
0.75
700
7
Model designation and rated output of the servo amplifiers for one axis
Servo amplifiers up to MR-J4-70A or MR-J4-70B (included), can be connected 1-phase.
MR-J4W - B - None
-ED
Series
B: SSCNET III/H compatible
Code
22
Fig. 2-5:
2-4
Standard
Without a dynamic brake
Rated output
[kW]
Rated output
[kW]
Code
A-axis
B-axis
A-axis
B-axis
C-axis
0.2
0.2
222
0.2
0.2
0.2
444
0.4
0.4
0.4
44
0.4
0.4
77
0.75
0.75
1010
1
1
Code
Number of axes
W2
2
W3
3
Model designation and rated output of the servo amplifiers for two or three axes
Combinations of servo amplifiers and servo motors
2.5
Introduction of the devices
Combinations of servo amplifiers and servo motors
The following tables show the possible combinations between the servo amplifier series MR-J4-A(-RJ),
MR-J4-B(-RJ) and MR-J4W-B and the rotary motor, linear motors and direct drive motors.
2.5.1
200 V class
Servo amplifier
Rotary motor
Linear motor (primary side) Direct drive motor
MR-J4-10A(-RJ)
MR-J4-10B(-RJ)
HG-KR053,
HG-KR13,
HG-MR053,
HG-MR13
—
—
MR-J4-20A(-RJ)
MR-J4-20B(-RJ)
HG-KR23,
HG-MR23
LM-U2PAB-05M-0SS0,
LM-U2PBB-07M-1SS0
TM-RFM002C20
MR-J4-40A(-RJ)
MR-J4-40B(-RJ)
HG-KR43,
HG-MR43
LM-H3P2A-07P-BSS0,
LM-H3P3A-12P-CSS0,
LM-K2P1A-01M-2SS1,
LM-U2PAD-10M-0SS0,
LM-U2PAF-15M-0SS0
TM-RFM004C20
MR-J4-60A(-RJ)
MR-J4-60B(-RJ)
HG-SR51,
HG-SR52,
HG-JR53
LM-U2PBD-15M-1SS0
TM-RFM006C20,
TM-RFM006E20
MR-J4-70A(-RJ)
MR-J4-70B(-RJ)
HG-KR73,
HG-MR73,
HG-UR72,
HG-JR73
LM-H3P3B-24P-CSS0,
LM-H3P3C-36P-CSS0,
LM-H3P7A-24P-ASS0,
LM-K2P2A-02M-1SS1,
LM-U2PBF-22M-1SS0
TM-RFM012E20,
TM-RFM012G20,
TM-RFM040J10
MR-J4-100A(-RJ)
MR-J4-100B(-RJ)
HG-SR81,
HG-SR102,
HG-JR103,
HG-JR53 —
TM-RFM018E20
MR-J4-200A(-RJ)
MR-J4-200B(-RJ)
HG-SR121,
HG-SR201,
HG-SR152,
HG-SR202,
HG-UR152,
HG-RR103,
HG-RR153,
HG-JR153,
HG-JR203,
HG-JR73 ,
HG-JR103 LM-H3P3D-48P-CSS0,
LM-H3P7B-48P-ASS0,
LM-H3P7C-72P-ASS0,
LM-FP2B-06M-1SS0,
LM-K2P1C-03M-2SS1,
LM-U2P2B-40M-2SS0
—
MR-J4-350A(-RJ)
MR-J4-350B(-RJ)
HG-SR301,
HG-SR352,
HG-UR202,
HG-RR203,
HG-JR353,
HG-JR153 ,
HG-JR203 LM-H3P7D-96P-ASS0,
LM-K2P2C-07M-1SS1,
LM-K2P3C-14M-1SS1,
LM-U2P2C-60M-2SS0
TM-RFM048G20,
TM-RFM072G20,
TM-RFM120J10
MR-J4-500A(-RJ)
MR-J4-500B(-RJ)
HG-SR421,
HG-SR502,
HG-UR352,
HG-UR502,
HG-RR353,
HG-RR503,
HG-JR503,
HG-JR353
LM-FP2D-12M-1SS0,
LM-FP4B-12M-1SS0,
LM-K2P2E-12M-1SS1,
LM-K2P3E-24M-1SS1,
LM-U2P2D-80M-2SS0
TM-RFM240J10
MR-J4-700A(-RJ)
MR-J4-700B(-RJ)
HG-SR702,
HG-JR703,
HG-JR503 LM-FP2F-18M-1SS0,
LM-FP4D-24M-1SS0
—
MR-J4-11KA(-RJ)
MR-J4-11KB(-RJ)
HG-JR903,
HG-JR11K1M
LM-FP4F-36M-1SS0
—
Tab. 2-1:
Servo amplifier and motor combination for 200 V class (1)
When the maximum torque is 400 %
Beginners Manual Servo Amplifiers MELSERVO J4
2-5
Introduction of the devices
Servo amplifier
Rotary motor
Linear motor (primary side) Direct drive motor
MR-J4-15KA(-RJ)
MR-J4-15KB(-RJ)
HG-JR15K1M
LM-FP4H-48M-1SS0
—
MR-J4-22KA(-RJ)
MR-J4-22KB(-RJ)
HG-JR22K1M
—
—
MR-J4W2-22B
MR-J4W3-222B
HG-KR053,
HG-KR13,
HG-KR23,
HG-MR053,
HG-MR13,
HG-MR23
LM-U2PAB-05M-0SS0,
LM-U2PBB-07M-1SS0
TM-RFM002C20
MR-J4W2-44B
MR-J4W3-444B
HG-KR053,
HG-KR13,
HG-KR23,
HG-KR43,
HG-MR053,
HG-MR13,
HG-MR23,
HG-MR43
LM-H3P2A-07P-BSS0,
LM-H3P3A-12P-CSS0,
LM-K2P1A-01M-2SS1,
LM-U2PAB-05M-0SS0,
LM-U2PAD-10M-0SS0,
LM-U2PAF-15M-0SS0,
LM-U2PBB-07M-1SS0
TM-RFM002C20,
TM-RFM004C20
MR-J4W2-77B
HG-KR43,
HG-KR73,
HG-MR43,
HG-MR73,
HG-SR51,
HG-SR52,
HG-UR72,
HG-JR53,
HG-JR73
LM-H3P2A-07P-BSS0,
LM-H3P3A-12P-CSS0,
LM-H3P3B-24P-CSS0,
LM-H3P3C-36P-CSS0,
LM-H3P7A-24P-ASS0,
LM-K2P1A-01M-2SS1,
LM-K2P2A-02M-1SS1,
LM-U2PAD-10M-0SS0,
LM-U2PAF-15M-0SS0,
LM-U2PBD-15M-1SS0,
LM-U2PBF-22M-1SS0
TM-RFM004C20,
TM-RFM006C20,
TM-RFM006E20,
TM-RFM012E20,
TM-RFM012G20,
TM-RFM040J10
MR-J4W2-1010B
HG-KR43,
HG-KR73,
HG-MR43,
HG-MR73,
HG-SR51,
HG-SR52,
HG-SR81,
HG-SR102,
HG-UR72,
HG-JR73,
HG-JR103,
HG-JR53 LM-H3P2A-07P-BSS0,
LM-H3P3A-12P-CSS0,
LM-H3P3B-24P-CSS0,
LM-H3P3C-36P-CSS0,
LM-H3P7A-24P-ASS0,
LM-K2P1A-01M-2SS1,
LM-K2P2A-02M-1SS1,
LM-U2PAD-10M-0SS0,
LM-U2PAF-15M-0SS0,
LM-U2PBD-15M-1SS0,
LM-U2PBF-22M-1SS0
TM-RFM004C20,
TM-RFM006C20,
TM-RFM006E20,
TM-RFM012E20,
TM-RFM018E20,
TM-RFM012G20,
TM-RFM040J10
Tab. 2-1:
2-6
Combinations of servo amplifiers and servo motors
Servo amplifier and motor combination for 200 V class (2)
When the maximum torque is 400 %
Combinations of servo amplifiers and servo motors
2.5.2
Introduction of the devices
400 V class
Servo amplifier
Rotary motor
Linear motor (primary side) Direct drive motor
MR-J4-60A4(-RJ)
MR-J4-60B4(-RJ)
HG-SR524,
HG-JR534
—
—
MR-J4-100A4(-RJ)
MR-J4-100B4(-RJ)
HG-SR1024,
HG-JR734,
HG-JR1034,
HG-JR534 —
—
MR-J4-200A4(-RJ)
MR-J4-200B4(-RJ)
HG-SR1524,
HG-SR2024,
HG-JR1534,
HG-JR2034,
HG-JR734 ,
HG-JR1034 —
—
MR-J4-350A4(-RJ)
MR-J4-350B4(-RJ)
HG-SR3524,
HG-JR3534,
HG-JR-1534 ,
HG-JR-2034 —
—
MR-J4-500A4(-RJ)
MR-J4-500B4(-RJ)
HG-SR5024,
HG-JR5034,
HG-JR3534 —
—
MR-J4-700A4(-RJ)
MR-J4-700B4(-RJ)
HG-SR7024,
HG-JR7034,
HG-JR5034 —
—
MR-J4-11KA4(-RJ)
MR-J4-11KB4(-RJ)
HG-JR9034,
HG-JR11K1M4
—
—
MR-J4-15KA4(-RJ)
MR-J4-15KB4(-RJ)
HG-JR15K1M4
—
—
MR-J4-22KA4(-RJ)
MR-J4-22KB4(-RJ)
HG-JR22K1M4
LM-FP5H-60M-1SS0
—
Tab. 2-2:
Servo amplifier and motor combination for 400 V class
When the maximum torque is 400 %
Beginners Manual Servo Amplifiers MELSERVO J4
2-7
Introduction of the devices
2.6
Removal and reinstallation of the front cover
Removal and reinstallation of the front cover
The following shows how to remove and reinstall the front cover of MR-J4-700A(-RJ)/B(-RJ) to MR-J422KA(-RJ)/B(-RJ) and MR-J4-500A(-RJ)/B4(-RJ) to MR-J4-22KA(-RJ)/B4(-RJ) .
m
NOTE
DANGER:
Before removing or reinstalling the front cover, make sure that the charge lamp is off more than
15 minutes after power off. Then, confirm that the voltage between P+ and N- is safe with a
voltage tester and others. Otherwise, you may get an electric shock. In addition, when confirming whether the charge lamp is off or not, always confirm it from the front of the servo amplifier.
The MR-J4-A series will be used hereinafter as an example for the removal and attachment of the
front cover. The procedure for the MR-J4-B series is identical.
The figures below show the steps for removing (fig. 2-6 to fig. 2-8) and reinstalling (fig. 2-9 to fig. 2-11)
of the front cover for the servo amplifier MR-J4-700A.
2.6.1
Removal of the front cover
Hold the ends of lower side of the front cover with both hands.
Fig. 2-6:
Step : Removing the front cover
MR-J4-700A_Frontabdeckung entfernen_1.eps
2-8
Removal and reinstallation of the front cover
Introduction of the devices
Pull up the cover, supporting at point .
Fig. 2-7:
Step : Removing the front cover
MR-J4-700A_Frontabdeckung entfernen_2.eps
Pull out the front cover to remove. Hold the ends of lower side of the front cover with both hands.
Fig. 2-8:
Step : Removing the front cover
MR-J4-700A_Frontabdeckung entfernen_3.eps
Beginners Manual Servo Amplifiers MELSERVO J4
2-9
Introduction of the devices
2.6.2
Removal and reinstallation of the front cover
Reinstallation of the front cover
Insert the front cover setting tabs into the sockets of the servo amplifier (2 places).
Fig. 2-9:
Step : Reinstalling the front cover
Front cover
setting tab
MR-J4-700A_Frontabdeckung anbringen_1.eps
Push down the cover, supporting at point .
Fig. 2-10:
Step : Reinstalling the front cover
MR-J4-700A_Frontabdeckung anbringen_2.eps
2 - 10
Removal and reinstallation of the front cover
Introduction of the devices
Press the cover against the terminal box until the setting tabs click.
Fig. 2-11:
Step : Reinstalling the front cover
Setting tab
NOTE
MR-J4-700A_Frontabdeckung anbringen_3.eps
The multi-axis servo amplifier MR-J4W-B has no front cover.
Beginners Manual Servo Amplifiers MELSERVO J4
2 - 11
Introduction of the devices
2.7
Rating plate
Rating plate
The following shows two examples of the rating plate for explanation of each item.
NOTE
2.7.1
Production year and month of the servo motor are indicated in a serial number on the rating plate.
The year and month are indicated by the last two digits of the year and one digit of the month
[1 to 9, X(10), Y(11), and Z(12)].
For January 2012, the Serial No. is like, "SER. _ _ _ _ _ _ _ _ _ 121"
MR-J4-A(-RJ) and MR-J4-B(-RJ)
AC SERVO
SER.S21001001
POWER : 100W
INPUT : 3AC/AC200-240V 0.9A/1.5A 50/60Hz
OUTPUT: 3PH170V 0-360Hz 1.1A
STD.: IEC/EN61800-5-1 MAN.: IB(NA)0300175
Max. Surrounding Air Temp.: 55°C
IP20
Serial number
Model
Capacity
Applicable power supply
Rated output current
Standard, Manual number
Ambient temperature
IP rating
TOKYO 100-8310, JAPAN
KC certification number, the year and
month of manufacture
MODEL MR-J4-10A
MADE IN JAPAN
Country of origin
Typenschild MR-J4-10A.eps
Fig. 2-12: Rating plate MR-J4-10A
2.7.2
MR-J4W-B
AC SERVO
SER.S21001001
POWER : 200W×3 (A, B, C)
INPUT : 3AC/AC200-240V 4.3A/7.5A 50/60Hz
OUTPUT: 3PH170V 0-360Hz 1.5A×3 (A, B, C)
STD.: IEC/EN61800-5-1 MAN.: IB(NA)0300176
Max. Surrounding Air Temp.: 55°C
IP20 (Except for fan finger guard)
Serial number
Model
Capacity
Applicable power supply
Rated output current
Standard, Manual number
Ambient temperature
IP rating
TOKYO 100-8310, JAPAN
KC certification number, the year and
month of manufacture
MODEL MR-J4W3-222B
MADE IN JAPAN
Country of origin
Typenschild MR-J4W3-222B.eps
Fig. 2-13: Rating plate MR-J4W3-222B
2 - 12
Rotatory servo motors
3
Introduction of the servo motors
Introduction of the servo motors
This chapter shows the various servo motors that are available for the servo amplifier series MR-J4-A,
MR-J4-B and MR-J4W-B.
The motors are classified into rotatory motors, linear motors and direct drive motors.
Refer to section 2.5. to get the recommended combinations of servo amplifiers and servo motors.
3.1
Rotatory servo motors
3.1.1
Model overview
Series HG-MR
Series HG-KR
Series HG-SR
Series HG-JR
Series HG-RR
Series HG-UR
Ansicht HG- .eps
Fig. 3-1:
Rotatory servo motors
Beginners Manual Servo Amplifiers MELSERVO J4
3-1
Introduction of the servo motors
3.1.2
Rotatory servo motors
Rating plate
The rating plate of the servo motor HG-JR153 is shown below.
This rating plate is representative of all other servo motor models.
MITSUBISHI
Model
Input power and insulation class
Rated output and mass
Rated speed
Serial number AC SERVO MOTOR
HG-JR153
INPUT 3AC 102V 11A CI. F
OUTPUT 1.5kW 5.9kg
3000r/min (200Hz)
QR code
SER. TI0001234 12X
Country of origin
MITSUBISHI ELECTRIC
MADE IN JAPAN
Typenschild HG-JR153.eps
Fig. 3-2:
NOTE
3-2
Rating plate HG-JR153
Production year and month of the servo motor are indicated in a serial number on the rating
plate.
The year and month are indicated by the last two digits of the year and one digit of the month
[1 to 9, X(10), Y(11), and Z(12)].
For January 2012, the Serial No. is like, "SER. _ _ _ _ _ _ _ _ _ 121".
Products approved by Certification Bodies are marked. The marks depends on the Certification
Bodies.
All rotary servo motors meet the standards CE, UL and CSA.
Rotatory servo motors
3.1.3
Introduction of the servo motors
Servo motor series HG-MR and HG-KR
● Model HG-MR – Ultra-low inertia/small capacity
Small motor inertia moment makes this unit well suited for high-dynamic positioning operations
with extra small cycle times.
Application example
– Inserters, mounters, bonders
– Printed board hole openers
– In-circuit testers
– Label printers
– Knitting and embroidery machinery
– Ultra-small robots and robot tips
● Model HG-KR – Low inertia/small capacity
Larger motor inertia moment makes this unit well suited for machines with fluctuating load inertia
moment or machines with low rigidity such as conveyors.
Application example
– Conveyors
– Food preparation machinery
– Printers
– Small loaders and unloaders
– Small robots and component assembly devices
– Small X-Y tables
– Small press feeders
Beginners Manual Servo Amplifiers MELSERVO J4
3-3
Introduction of the servo motors
Rotatory servo motors
Model designation
HG-MR 3 Fig. 3-3:
Code
Electromagnetic
brake
—
—
B
✔
Code
Rated speed [1/min]
3
3000
Code
Rated output [W]
05
50
1
100
2
200
4
400
7
750
Series name
Feature
HG-MR
Ultra-Low inertia/Small capacity
HG-KR
Low inertia/Small capacity
Model designation of the servo motor series HG-MR and HG-KR
Encoder connector
Brake connector
Power connector
Zeichnung HG-MR_KR23B.eps
Fig. 3-4:
NOTE
3-4
Servo motor series HG-MR and HG-KR
Servo motors without electromagnetic brake have no brake connector.
Rotatory servo motors
3.1.4
Introduction of the servo motors
Servo motor series HG-SR
Model HG-SR – Medium inertia/medium capacity
Stable control is performed from low to high speeds, enabling this unit to handle a wide range of
applications (e.g. direct connection to ball screw components).
Application example
– Conveyor machinery
– Specialised machinery
– Robots
– Loaders and unloaders
– Winders and tension devices
– Turrets
– X-Y tables
– Test devices
Model designation
HG-SR Series name
Code
Electromagnetic
brake
HG-SR
—
—
B
✔
Fig. 3-5:
Code
Voltage [V]
—
200–240 V AC, 3-phase
4
380–480 V AC, 3-phase
Code
Rated speed [1/min]
1
1000
2
2000
Code
Rated output [W]
1000
[1/min]
2000
[1/min]
5
500
✔
✔
8
850
✔
—
10
1000
—
✔
12
1200
✔
—
15
1500
—
✔
20
2000
✔
✔
—
30
3000
✔
35
3500
—
✔
42
4200
✔
—
50
5000
—
✔
70
7000
—
✔
Model designation of servo motors series HG-SR
Beginners Manual Servo Amplifiers MELSERVO J4
3-5
Introduction of the servo motors
Encoder connector
Rotatory servo motors
Brake connector
Power connector
Zeichnung HG-SR502B.eps
Fig. 3-6:
NOTE
3-6
Servo motor series HG-SR
Servo motors without electromagnetic brake have no brake connector.
Rotatory servo motors
3.1.5
Introduction of the servo motors
Servo motor series HG-JR
Model HG-JR – Low inertia/medium capacity
This medium/large capacity, low inertia servo motor is suitable for high-throughput and high-acceleration/deceleration operations.
Application example
– Packaging machines
– Printing machines
– Palletizing machines
– Press machines
– Injection moulding machines
Model designation
HG-JR Series name
Code
Electromagnetic
brake
HG-JR
—
—
B
✔
Code
Voltage [V]
—
200–240 V AC, 3-phase
4
380–480 V AC, 3-phase
Code
Rated speed [1/min]
1M
1500
3
3000
Code
Rated output [W]
5
500
Fig. 3-7:
7
750
10
1000
15
1500
20
2000
35
3500
50
5000
70
7000
90
9000
11K
11000
15K
15000
22K
22000
Model designation of servo motors series HG-JR
Beginners Manual Servo Amplifiers MELSERVO J4
3-7
Introduction of the servo motors
Encoder connector
Rotatory servo motors
Brake connector
Power connector
Zeichnung HG-JR153B.eps
Fig. 3-8:
NOTE
3-8
Servo motor series HG-JR
Servo motors without electromagnetic brake have no brake connector.
Rotatory servo motors
3.1.6
Introduction of the servo motors
Servo motor series HG-RR
Model HG-RR – Ultra-low inertia/medium capacity
This medium capacity, ultra-low inertia servo motor is perfect for high-throughput operations.
Application example
– Ultra-high-throughput machines
– Cutter
– high-frequency conveyor machines
Model designation
HG-RR 3 Series name
Code
Electromagnetic
brake
HG-RR
—
—
B
✔
Code
Rated speed [1/min]
3
3000
Code
Rated output [W]
10
1000
15
1500
20
2000
35
3500
50
5000
Fig. 3-9:
Model designation of servo motors series HG-RR
Beginners Manual Servo Amplifiers MELSERVO J4
3-9
Introduction of the servo motors
Rotatory servo motors
Encoder connector
Power connector Zeichnung HG-RR153B.eps
Fig. 3-10: Servo motor series HG-RR
NOTE
3 - 10
The brake connector is combined with the power connector.
Servo motors without electromagnetic brake have no brake connector.
Rotatory servo motors
3.1.7
Introduction of the servo motors
Servo motor series HG-UR
Model HG-UR – Flat type/medium capacity
This medium capacity, flat type servo motor is well suited for situations where the installation space
is limited.
Application example
– Robots
– Material handling
– Food processing machines
Model designation
HG-UR 2 Series name
Code
Electromagnetic
brake
HG-UR
—
—
B
✔
Code
Rated speed [1/min]
2
2000
Code
Rated output [W]
7
750
15
1500
20
2000
35
3500
50
5000
Fig. 3-11: Model designation of servo motors series HG-UR
Beginners Manual Servo Amplifiers MELSERVO J4
3 - 11
Introduction of the servo motors
Encoder connector
Rotatory servo motors
Brake connector
Power connector
Zeichnung HG-UR352B.eps
Fig. 3-12: Servo motor series HG-UR
NOTE
3 - 12
Servo motors without electromagnetic brake have no brake connector.
Linear servo motors
Introduction of the servo motors
3.2
Linear servo motors
3.2.1
Model overview
Series LM-H3
Series LM-U2
Series LM-F
Series LM-K2
Ansicht LM- .eps
Fig. 3-13: Linear servo motors
3.2.2
Rating plate (primary side – coil)
The rating plate of the linear servo motor LM-H3P3A-12P-CSS0 is shown below.
This rating plate is representative of all other linear motor models.
MITSUBISHI
ELECTRIC
LINEAR SERVO MOTOR
LM-H3P3A-12P-CSS0
120N
3.0 m/s
INPUT 3AC 170V
SER. A12345001 121
Model, insulation class
Continuous thrust, maximum speed,
frequency
Serial number Two dimensional code
F class
0-63Hz
(230V)
1.7A
MADE IN JAPAN
Over Voltage Cat. (Supply Power System TN-C TN-S)
MITSUBISHI ELECTRIC CORPORATION
Typenschild LM-H3P3A-12P-CSS0.eps
Fig. 3-14: Rating plate LM-H3P3A-12P-CSS0
NOTE
Production year and month of the primary side of linear servo motor are indicated in a serial
number on the rating plate.
The year and month are indicated by the last two digits of the year and one digit of the month
[1 to 9, X(10), Y(11), and Z(12)].
For January 2012, the Serial No. is like, "SER. _ _ _ _ _ _ _ _ _ 121".
All linear servo motors meet the standards CE, UL and CSA.
Beginners Manual Servo Amplifiers MELSERVO J4
3 - 13
Introduction of the servo motors
3.2.3
Linear servo motors
Servo motor series LM-H3
The core type linear servo motor LM-H3 is suitable for space-saving, high speed and high acceleration/ deceleration.
Application example
– Mounting systems
– Material handlings
– High speed linear transportation systems
Model designation
LM-H3P - P - Series name
Code
Linear servo motor model
LM-H3
BSS0
LM-H3P2A-07P
LM-H3P3A-12P
Code
Side
P
Primary side (coil)
Code
Width [mm]
(nominal dimensions)
2
50
LM-H3P3B-24P
CSS0
LM-H3P3C-36P
LM-H3P3D-48P
LM-H3P7A-24P
LM-H3P7B-48P
ASS0
3
65
LM-H3P7C-72P
7
100
LM-H3P7D-96P
Code
Length [mm]
(nominal dimensions)
A
128
B
Code
Maximum speed [m/s]
P
3.0
224
Code
Continuous thrust [N]
C
320
07
70
D
416
12
120
24
240
36
360
48
480
72
720
96
960
Fig. 3-15: Model designation of servo motors series LM-H3 (Primary side – coil)
Power lead wire
Thermistor lead wire
Zeichnung LM-H3P3B-24P-CSS0.eps
Fig. 3-16: Servo motor series LM-H3 (Primary side – coil)
3 - 14
Linear servo motors
3.2.4
Introduction of the servo motors
Servo motor series LM-U2
The characteristics of the linear servo motor LM-U2 are no cogging and a small speed fluctuation. Due
to the missing magnetic attraction force the life time of the linear guides is longer.
Application example
– Material handlings
– Inspection systems
– Scanning exposure systems
– Screen printing systems
Model designation
LM-U2P - M - Series name
Code
Linear servo motor model
0SS0
LM-U2PAD-10M
LM-U2
LM-U2PAB-05M
Code
Side
LM-U2PAF-15M
P
Primary side (coil)
LM-U2PBB-07M
Code
Width [mm]
(nominal dimensions)
A
66.5
B
86.5
Code
B
1SS0
LM-U2PBD-15M
LM-U2PBF-22M
Code
Maximum speed [m/s]
M
2.0
Length [mm]
(nominal dimensions)
Code
Continuous thrust [N]
130
05
50
250
07
75
370
10
100
15
150
22
225
D
F
Fig. 3-17: Model designation of servo motors series LM-U2 (Primary side – coil)
Medium thrust series
LM-U2P2 - M - 2SS0
Series name
LM-U2
Code
Side
Code
Maximum speed [m/s]
P
Primary side (coil)
M
2.0
Code
Length [mm]
(nominal dimensions)
Code
Continuous thrust [N]
40
400
B
286
60
600
C
406
80
800
D
526
Fig. 3-18: Model designation of servo motors series LM-U2 (Primary side – coil)
Large thrust series
Beginners Manual Servo Amplifiers MELSERVO J4
3 - 15
Introduction of the servo motors
Linear servo motors
Thermistor lead wire
Power lead wire
Zeichnung LM-U2P2B-40M-2SS0.eps
Fig. 3-19: Servo motor series LM-U2 (Primary side – coil)
3 - 16
Linear servo motors
3.2.5
Introduction of the servo motors
Servo motor series LM-F
The linear servo motor LM-F has a compact core and the integrated liquid-cooling system doubles the
continuous thrust.
Application example
– NC machine tools
– Material handlings
– Press feeders
Model designation
LM-F P - M - 1SS0
Series name
LM-F
Code
Side
Code
Maximum speed [m/s]
P
Primary side (coil)
M
2.0
Code
Width [mm]
(nominal dimensions)
Code
2
120
Natural
cooling
4
200
06
300
600
12
600
1200
18
900
1800
24
1200
2400
36
1800
3600
48
2400
4800
60
3000
6000
Code
Length [mm]
(nominal dimensions)
B
290
D
530
F
770
H
1010
Continuous thrust [N]
Liquid
cooling
Fig. 3-20: Model designation of servo motors series LM-F (Primary side – coil)
Thermistor lead wire
Power lead wire
Zeichnung LM-FP2D-12M-1SS0.eps
Fig. 3-21: Servo motor series LM-F (Primary side – coil)
Beginners Manual Servo Amplifiers MELSERVO J4
3 - 17
Introduction of the servo motors
3.2.6
Linear servo motors
Servo motor series LM-K2
Due to the magnetic attraction counter-force structure the servo motor LM-K2 has a longer life of the
linear guides. During operation the audible noise is low.
Application example
– Mounting systems
– Assembly systems
Model designation
LM-K2 P - M - Series name
Code
LM-K2
Side
P
Primary side (coil)
Code
Height [mm]
(nominal dimensions)
1
54
2
74.5
3
114.5
Code
A
E
LM-K2P1A-01M
2SS1
Code
C
Linear servo motor model
LM-K2P1C-03M
LM-K2P2A-02M
LM-K2P2C-07M
1SS1
LM-K2P2E-12M
LM-K2P3C-14M
LM-K2P3E-24M
Code
Maximum speed [m/s]
M
2.0
Length [mm]
(nominal dimensions)
Code
Continuous thrust [N]
138
01
120
330
02
240
522
03
360
07
720
12
1200
14
1440
24
2400
Fig. 3-22: Model designation of servo motors series LM-K2 (Primary side – coil)
Power lead wire
PVC
Thermistor lead wire
Zeichnung LM-K2P1C-03M-2SS1.eps
Fig. 3-23: Servo motor series LM-K2 (Primary side – coil)
3 - 18
Direct drive servo motors
Introduction of the servo motors
3.3
Direct drive servo motors
3.3.1
Model overview
Series TF-RFM
Ansicht TF-RFM.eps
Fig. 3-24: Direct drive servo motor
3.3.2
Rating plate (primary side – coil)
The rating plate of the direct drive servo motor TM-RFM002C20 is shown below.
This rating plate is representative of all other direct drive motor models.
AC DIRECT DRIVE MOTOR
TM-RFM002C20
INPUT 3AC 45.7V 1.2A
TORQUE 2Nm
200r/min IP42CI.F 5.2kg
SER.No. 000000 121
Model
Input power
Rated output
Rated speed, IP rating, insulation class
and mass
Serial number Typenschild TM-RFM002C20.eps
Fig. 3-25: Rating plate TM-RFM002C20
NOTE
Production year and month of the direct drive motor are indicated in a serial number on the rating plate.
The year and month are indicated by the last two digits of the year and one digit of the month
[1 to 9, X(10), Y(11), and Z(12)].
For January 2012, the Serial No. is like, "SER. _ _ _ _ _ _ _ _ _ 121".
All direct drive servo motors meet the standard CE.
Beginners Manual Servo Amplifiers MELSERVO J4
3 - 19
Introduction of the servo motors
3.3.3
Direct drive servo motors
Servo motor series TF-RFM
The magnetic design and winding technology of the servo motor TF-RFM enables high torque density. In addition, extremely smooth rotation is achieved by minimizing the torque ripple. The motor is
suitable for low-speed and high-torque operations. High-accuracy positioning is achieved because
the motor is directly connected to the driving part. The servo motor is equipped with a 20-bit high-resolution absolute position encoder (1 048 576 pulses/rev) as standard.
Application example
– Index table for machine tools
– Rotary axis for material handling robots
– Painting and vapour deposition systems
– LCD/semiconductor spin-type cleaning systems
– LCD/semiconductor testing systems (XY-tables)
– Rotary axis for polishing systems
Model designation
TM-RFM Series name
TM-RFM
Code
Rated torque [Nm]
Code
Rated speed [1/min]
002
2
10
100
004
4
20
200
006
6
012
12
Code
Motor OD (Frame OD)
Dimensions [mm]
018
18
040
40
C
Ø 130
048
48
E
Ø 180
072
72
G
Ø 230
120
120
J
Ø 330
240
240
Fig. 3-26: Model designation of servo motors series TM-RFM
Encoder connector
Power supply connector
Zeichnung TM-RFM006C20.eps
Fig. 3-27: Servo motor series TM-RFM
3 - 20
Wiring of power supply, motor and PE terminal
4
m
4.1
Installation and wiring
Installation and wiring
DANGER:
Before starting wiring, switch power off, then wait for more than 15 minutes, and after the charge
lamp has gone off, make sure that the voltage is safe with a tester or like. Otherwise, you may
get an electric shock.
Wiring of power supply, motor and PE terminal
The power supply of some models of the servo amplifier series MR-J4 can either be 1-phase or 3-phase
AC voltage (200 V class), while others can only be powered by 3-phase power supply (200 V/400 V
class).
Power supply of MR-J4-10A(-RJ)/B(-RJ) to MR-J4-70A(-RJ)/B(-RJ)
Item
Main circuit power supply
Control circuit power supply
1-phase
3-phase
L1, L3
L1, L2, L3
L11, L21 Voltage
200–240 V AC
Permissible voltage fluctuation
170–264 V AC
Frequency
50 Hz/60 Hz ±5%
Power supply of MR-J4-100A(-RJ)/B(-RJ) to MR-J4-22KA(-RJ)/B(-RJ)
Item
Main circuit power supply
Control circuit power supply
Voltage
Permissible voltage fluctuation
Frequency
3-phase L1, L2, L3
L11, L21 200–240 V AC
170–264 V AC
50 Hz/60 Hz ±5 %
Power supply of MR-J4-60A4(-RJ)/B4(-RJ), MR-J4-100A4(-RJ)/B4(-RJ) to MR-J4-22KA4(-RJ)/B4(-RJ)
Item
Main circuit power supply
Control circuit power supply
3-phase L1, L2, L3
L11, L21 Voltage
380–480 V AC
Permissible voltage fluctuation
323–528 V AC
Frequency
50 Hz/60 Hz ±5 %
The power supply of the control circuit is connected to L11 and L21. For 3-phase connection of
the main circuit power supply L11 should be in phase with L1 and L21 in phase with L2, for 1phase connection L11 should be in phase with L1 and L21 in phase with L3.
It is not possible, to connect these models only to one phase.
Beginners Manual Servo Amplifiers MELSERVO J4
4-1
Installation and wiring
Wiring of power supply, motor and PE terminal
Power supply of MR-J4W2-22B to MR-J4W2-77B, MR-J4W3-222B and MR-J4W3-444B
Item
Main circuit power supply
1-phase
3-phase
L1, L3
Control circuit power supply
Voltage
Permissible voltage fluctuation
Frequency
L1, L2, L3
L11, L21 200–240 V AC
170–264 V AC
50 Hz/60 Hz ±5%
Power supply of MR-J4W2-1010B
Item
Main circuit power supply
Control circuit power supply
3-phase L1, L2, L3
L11, L21 Voltage
200–240 V AC
Permissible voltage fluctuation
170–264 V AC
Frequency
50 Hz/60 Hz ±5 %
The power supply of the control circuit is connected to L11 and L21. For 3-phase connection of
the main circuit power supply L11 should be in phase with L1 and L21 in phase with L2, for 1phase connection L11 should be in phase with L1 and L21 in phase with L3.
It is not possible, to connect these models only to one phase.
The power supply with 1-phase is connected to the terminals L1 and L3, with 3-phase to terminals L1,
L2 and L3.
The motor is connected to terminals U, V and W.
Additionally the servo amplifier must be grounded via the PE terminal (Protective Earth).
NOTE
b
Even if the servo amplifiers is supplied with an 1-phase AC voltage of 200 to 240 V the servo motor
is connected in the same way to the output of the servo amplifier as with a 3-phase power supply.
The power supply from the servo amplifier to the servo motor is always 3 phase.
WARNING:
● Do not connect AC power supply directly to the output terminals U, V and W of the servo
amplifier. Permanent damage of the servo amplifier as well as an immediate danger to the
operator would be the consequence.
● Connect the 1-phase 200 V AC to 240 V AC power supply to L1 and L3. One of the connecting
destinations is different from MR-J3 Series Servo Amplifier's. When using MR-J4 as a replacement for MR-J3, be careful not to connect the power to L2.
4-2
Wiring of power supply, motor and PE terminal
Installation and wiring
Servo amplifier
1-phase
power
supply
MCCB MC CNP1
L1
L2
CNP3
U
Servo motor
U
L3
V
V
N-
W
W
M
P3
P4
CNP2
P+
C
D
L11
CN2
Encoder
L21
MR-J4 Spannungsversorgung 1-phasig.eps
Fig. 4-1:
Wiring of the power inputs and outputs of the servo amplifier (1-phase power supply)
Servo amplifier
3-phase
power
supply
MCCB MC CNP1
L1
L2
CNP3
U
Servo motor
U
L3
V
V
N-
W
W
M
P3
P4
CNP2
P+
C
D
CN2
Encoder
L11
L21
MR-J4 Spannungsversorgung 3-phasig.eps
Fig. 4-2:
Wiring of the power inputs and outputs of the servo amplifier (3-phase power supply)
MCCB = Molded-case circuit breaker
MC = Magnetic contactor
The MR-J4 2-axis servo amplifier (MR-J4W2-B) has two motor outputs (CNP3A, CNP3B) and two
encoder inputs (CN2A, CN2B). The MR-J4 3-axis servo amplifier (MR-J4W3-B) has three motor outputs (CNP3A, CNP3B, CNP3C) and three encoder inputs (CN2A, CN2B, CN2C).
Beginners Manual Servo Amplifiers MELSERVO J4
4-3
Installation and wiring
Wiring of power supply, motor and PE terminal
Abbreviation
Terminals
L1, L3
Main circuit power supply
(1-phase)
L1, L2, L3
Main circuit power supply
(3-phase)
U, V, W
Servo motor power output
L11, L21
Control circuit power supply
P+, C, D
Regenerative option
Terminals P+ and –D are wired by default. When using
regenerative option, disconnect the P+ and D terminals
and connect the regenerative option to P+ terminal and C
terminal.
P3, P4
Power factor improving DC reactor
When not using the power factor improving DC reactor,
connect P3 and P4. (factory-wired). When using the power
factor improving DC reactor, disconnect P3 and P4, and
connect the power factor improving DC reactor to P3 and
P4.
N–
Power regeneration converter
Power regeneration common
converter
Brake unit
This terminal is used for a power regeneration converter,
power regeneration common converter and brake unit.
Protective earth (PE)
Connect it to the grounding terminal of the servo motor
and to the protective earth (PE) of the cabinet for
grounding.
Tab. 4-1:
NOTE
4-4
Description
Power supply of the servo amplifier (main circuit)
Voltage output of the servo amplifier
Power supply of the control circuit
Power terminals of the servo amplifier
Please refer to the respective instruction manual of the servo amplifier series MR-J4-A, MR-J4-B
MR-J4W2-B and MR-J4W3-B for details about different terminal designations of specific servo
amplifier models.
Connectors and signal arrangements
4.2
Installation and wiring
Connectors and signal arrangements
Apart from the terminals of the power unit for supply voltage and motor, a servo amplifier is equipped
with even more terminals for controlling the servo amplifier. These additional terminals are used for
the safety function (STO), to connect an optional PC, to connect an optional battery and for monitoring, diagnosis and so on.
4.2.1
Servo amplifier series MR-J4-A
The shown front view is that of the servo amplifier MR-J4-20A-RJ or less. For all models of the MR-J4A series the terminal configuration is the same.
CN5
(USB connector)
CN6 (Analog monitor outputs)
3
MO1
2
MO2
1
LG
CN3 (RS-422
connector)
CN1
CN8 (STO I/O
signal connector)
1
2
26
27
3
4
CN2
2
LG
6
4
THM2
MRR
1
P5
5
10
6
9
8
8
THM1
7
MX
30
31
7
MXR
5
3
MR
28
29
BAT
32
33
9
10
34
35
11
12
36
37
13
CN2L 2
LG
6
9
3
7
MR2
MX2
BAT
(for using serial encoder)
CN2L PBR
PAR
1
P5
10
6
4
3
PA
The frames of the CN1
connectors are connected to the protective
earth terminal in the
servo amplifier.
8
PSEL
15
40
41
17
18
42
43
19
20
44
45
21
22
46
47
23
24
48
49
25
PZR
5
PB
38
39
16
MXR2
5
2
LG
CN4
(Battery connector)
10
8
4
MRR2
1
P5
14
50
9
7
PZ
(for using A/B/Z-phase pulse encoder)
MR-J4-A Signalstecker.eps
Fig. 4-3:
MR-J4-A signal arrangement
The MR-J4-A(4)-RJ servo amplifiers have CN2L connectors.
Beginners Manual Servo Amplifiers MELSERVO J4
4-5
Installation and wiring
Connectors and signal arrangements
Signal assignment
Connector
CN1
Name
Description
I/O devices
Control interface (see tab. 4-3)
CN2
Connector for the servo motor encoder
Encoder connector
CN2L CN3
Communication (RS-422)
Connector for a personal computer (PC)
CN4
Battery terminal
For connecting the battery (MR-BAT6V1SET) to store the
data of the absolute position detection (observe the following note).
When you want to connect the battery, disconnect the
power supply of the main circuit and wait for more than
15 minutes, after the charge lamp has gone off. When
replacing the battery, leave the power supply of the control circuit on and disconnect only the supply voltage of
the main circuit. Otherwise, the absolute position data will
be lost.
CN5
Communication (USB)
Connector for a personal computer (PC)
CN6
Analog monitor outputs
This is used to output data selected by parameters as an
analog voltage for measuring instruments or the like.
CN8
STO connector
Connector for safety function (Safe Torque Off )
Tab. 4-2:
NOTE
Connector for external encoder
(Serial encoder or A/B/Z-phase pulse encoder)
Description of CN1, CN2, CN2L, CN3, CN4, CN5, CN6 and CN8
The MR-J4-A(4)-RJ servo amplifiers have CN2L connectors.
The MR-BAT6V1BJ battery for junction battery cable is only for the HG series servo motors. It cannot be used with direct drive motors. Do not use the MR-BAT6V1BJ battery for junction battery
cable in the fully closed loop system.
The device assignment of the CN1 connector pins changes depending on the control mode. For the
pins which are given parameters in the related parameter column, their devices will be changed using
those parameters.
Signal
I/O P
P/S
S
S/T
T
T/P
1
—
P15R
P15R
P15R
P15R
P15R
P15R
—
Pr.
2
I
—
—/VC
VC
VC/VLA
VLA
VLA/—
—
3
—
LG
LG
LG
LG
LG
LG
—
4
O
LA
LA
LA
LA
LA
LA
—
5
O
LAR
LAR
LAR
LAR
LAR
LAR
—
6
O
LB
LB
LB
LB
LB
LB
—
7
O
LBR
LBR
LBR
LBR
LBR
LBR
—
8
O
LZ
LZ
LZ
LZ
LZ
LZ
—
9
O
LZR
LZR
LZR
LZR
LZR
LZR
—
10
I
PP
PP/—
—
—
—
—/PP
—
11
I
PG
PG/—
—
—
—
—/PG
—
12
—
OPC
OPC/—
—
—
—
—/OPC
—
13
—
—
—
—
—
—
—
—
14
—
—
—
—
—
—
—
—
15
I
SON
SON
SON
SON
SON
SON
PD03/PD04
16
I
—
—/SP2
SP2
SP2/SP2
SP2
SP2/—
PD05/PD06
Tab. 4-3:
4-6
I/O signals in control modes Pin
No.
Signal arrangement of CN1 in MR-J4-A (1)
Connectors and signal arrangements
I/O signals in control modes Pin
No.
Signal
I/O P
P/S
S
S/T
T
T/P
17
I
PC
PC/ST1
ST1
ST1/RS2
RS2
RS2/PC
Pr.
PD07/PD08
18
I
TL
TL/ST2
ST2
ST2/RS1
RS1
RS1/TL
PD09/PD10
19
I
RES
RES
RES
RES
RES
RES
PD11/PD12
20
—
DICOM
DICOM
DICOM
DICOM
DICOM
DICOM
—
21
—
DICOM
DICOM
DICOM
DICOM
DICOM
DICOM
—
22
O
INP
INP/SA
SA
SA/—
—
—/INP
PD23
23
O
ZSP
ZSP
ZSP
ZSP
ZSP
ZSP
PD24
24
O
INP
INP/SA
SA
SA/—
—
—/INP
PD25
25
O
TLC
TLC
TLC
TLC/VLC
VLC
VLC/TLC
PD26
26
—
—
—
—
—
—
—
—
27
I
TLA
TLA TLA TLA/TC TC
TC/TLA
—
28
—
LG
LG
LG
LG
LG
LG
—
29
—
—
—
—
—
—
—
—
30
—
LG
LG
LG
LG
LG
LG
—
31
—
—
—
—
—
—
—
—
32
—
—
—
—
—
—
—
—
33
O
OP
OP
OP
OP
OP
OP
—
34
—
LG
LG
LG
LG
LG
LG
—
35
I
NP
NP/—
—
—
—
—/NP
—
36
I
NG
NG/—
—
—
—
—/NG
—
37
—
—
—
—
—
—
—
—
38
—
—
—
—
—
—
—
—
39
—
—
—
—
—
—
—
—
40
—
—
—
—
—
—
—
—
41
I
CR
CR/SP1
SP1
SP1/SP1
SP1
SP1/CR
PD13/PD14
42
I
EM2
EM2
EM2
EM2
EM2
EM2
—
43
I
LSP
LSP
LSP
LSP/—
—
—/LSP
PD17/PD18
44
I
LSN
LSN
LSN
LSN/—
—
—/LSN
PD19/PD20
45
I
LOP
LOP
LOP
LOP
LOP
LOP
PD21/PD22
46
—
DOCOM
DOCOM
DOCOM
DOCOM
DOCOM
DOCOM
—
47
—
DOCOM
DOCOM
DOCOM
DOCOM
DOCOM
DOCOM
—
48
O
ALM
ALM
ALM
ALM
ALM
ALM
—
49
O
RD
RD
RD
RD
RD
RD
PD28
50
—
—
—
—
—
—
—
—
Tab. 4-3:
Installation and wiring
Signal arrangement of CN1 in MR-J4-A (2)
I: Input signal, O: Output signal
P: Position control mode, S: Speed control mode, T: Torque control mode, P/S: Position/speed
control change mode, S/T: Speed/torque control change mode, T/P: Torque/position control
change mode
TLA will be available when TL (External torque limit selection) is enabled with parameters PD03
to PD22.
Beginners Manual Servo Amplifiers MELSERVO J4
4-7
Installation and wiring
I/O signals in control modes Pin
No.
Signal
I/O CP
CL
PS
1
—
P15R
P15R
P15R
—
2
I
VC
VC
VC
—
3
—
LG
LG
LG
—
4
O
LA
LA
LA
—
5
O
LAR
LAR
LAR
—
6
O
LB
LB
LB
—
7
O
LBR
LBR
LBR
—
8
O
LZ
LZ
LZ
—
9
O
LZR
LZR
LZR
—
10
I
DI2
DI2
DI2
PD44
Pr.
11
I
PG
PG
PG
—
12
—
OPC
OPC
OPC
—
13
O
PD47
14
O
PD47
15
I
SON
SON
SON
PD04
16
I
MD0
MD0
MD0
PD06
17
I
ST1
ST1
ST1
PD08
18
I
ST2
ST2
MD1 PD10
19
I
DI0
DI0
DI0
PD12
20
—
DICOM
DICOM
DICOM
—
21
—
DICOM
DICOM
DICOM
—
22
O
CPO CPO CPO PD23
23
O
ZP ZP ZP PD24
24
O
INP
INP
INP
PD25
25
O
MEND MEND MEND PD26
26
—
—
—
—
—
27
I
28
—
TLA
LG
TLA
LG
TLA
LG
—
—
29
—
—
—
—
—
30
—
LG
LG
LG
—
31
—
—
—
—
—
32
—
—
—
—
—
33
O
OP
OP
OP
—
34
—
LG
LG
LG
—
35
I
DI3
DI3
DI3
PD46
36
I
NG
NG
NG
—
37
—
—
—
—
—
38
—
—
—
—
—
39
—
—
—
—
—
40
—
—
—
—
—
41
I
DI1
DI1
DI1
PD14
42
I
EM2
EM2
EM2
—
43
I
LSP
LSP
LSP
PD18
44
I
LSN
LSN
LSN
PD20
45
I
DOG
DOG
SIG
PD22
46
—
DOCOM
DOCOM
DOCOM
—
Tab. 4-4:
4-8
Connectors and signal arrangements
Signal arrangement of CN1 in MR-J4-A-RJ (1)
Connectors and signal arrangements
I/O signals in control modes Pin
No.
Signal
I/O CP
CL
PS
47
—
DOCOM
DOCOM
DOCOM
48
O
ALM
ALM
ALM
—
49
O
RD
RD
RD
PD28
50
—
—
—
—
—
Tab. 4-4:
Installation and wiring
Pr.
Signal arrangement of CN1 in MR-J4-A-RJ (2)
I: input signal, O: output signal
CP:
CL:
PS:
Positioning mode (point table method)
Positioning mode (program method)
Positioning mode (indexer method)
TLA will be available when TL (External torque limit selection) is enabled with parameters PD04,
PD06, PD08, PD10, PD12, PD14, PD18, PD20, PD22, PD44, and PD46.
Assign any device with Parameter PD47.
Assign MD1 with Parameter PD10.
—
Assign the following output devices to CN1-22, CN1-23, and CN1-25 pins with parameters PD23,
PD24, and PD26.
CN1-22: CPO (Rough match)
CN1-23: ZP (Home position return completion)
CN1-25: MEND (Travel completion)
Beginners Manual Servo Amplifiers MELSERVO J4
4-9
Installation and wiring
Connectors and signal arrangements
Meaning of the symbols
The most important signals are explained in the table below. You will find detailed information about
all signals in the instruction manual of the respective servo amplifier.
Signal outputs
Control terminals
Signal inputs
Signal
Symbol
Name
Description
RES
Reset
Turn RES on for more than 50 ms to reset the alarm.
LSP
Forward rotation
stroke end
LSN
Reverse rotation
stroke end
To start the Servo motor in both directions of rotation both inputs
must be switched on. Turn it off to bring the motor to a sudden stop
and make it servo-locked. If one input switches off because the limit
switch has been reached, rotary movement is possible only in the
opposite direction of the activated limit switch.
SON
Servo-on
Turn SON on to power on the main circuit and make the servo amplifier ready to operate (servo-on).
ST1
Forward rotation start
If terminal ST1 is switched on, the motor
turns in counter-clockwise rotation.
ST2
Reverse rotation start
If terminal ST2 is switched on, the motor
turns in clockwise rotation.
EM2
Forced stop 2
Turn off EM2 (open between commons) to decelerate the servo
motor to a stop with commands.
Turn EM2 on (short between commons) in the forced stop state to
reset that state.
MD0 Operation mode
selection 1
Point table method/program method
Turning on MD0 will be automatic operation mode, off will be
manual operation mode. Changing an operation mode during
operation will clear the command remaining distance and the
motor will decelerate to stop. MD1 cannot be used.
MD1 Operation mode
selection 2
Indexer method
Select an operation mode with combinations of MD0 and MD1
(refer to the instruction manual). Changing an operation mode
during operation will clear the command remaining distance and
the motor will decelerate to stop.
DOG Proximity dog
Turning off DOG will detect a proximity dog. The polarity for dog
detection can be changed with Parameter PT29.
ALM
Alarm
When an alarm occurs, ALM will turn off. When an alarm does not
occur, ALM will turn on after 2.5 s to 3.5 s after power-on.
RD
Ready
RD turns on when the servo is switched on and the servo amplifier is
ready to operate.
INP
In position
INP turns on when the number of droop pulses is in the preset inposition range. INP turns on when servo-on turns on.
WNG
Warning
When warning has occurred, WNG turns on. When a warning is not
occurring, turning on the power will turn off WNG after 2.5 s to 3.5 s.
ACD0
ACD1
ACD2
Alarm code
The alarm code is output as a 3-Bit signal depending on the alarm
that occurs. The output of the alarm code has to be activated by
parameter PD34.
Travel completion
When the droop pulses are within the in-position output range set
with Parameter PA10 and the command remaining distance is “0”,
MEND will be on.
MEND Tab. 4-5:
4 - 10
If both ST1 and ST2 are
switched on or off during operation, the
servo motor will be
decelerated to a stop
(servo-lock).
Selection of the most important input and output signals of CN1 (1)
Connectors and signal arrangements
Signal
Symbol
Name
Description
Analog torque
command
Used to control torque in the full servo motor output torque range.
Apply 0 to ±8 V DC across TC–LG. Maximum torque is generated at
±8 V. The speed at ±8 V can be changed with Parameter PC13.
Analog speed
command Apply 0 to ±10 V DC across VC–LG. Speed set in parameter PC12 is
provided at ±10 V.
Analog override The signal controls the servo motor setting speed by applying –10 V
to +10V to between VC and LG. The percentage will be 0% with –10 V,
100% with 0 V, and 200% with +10 V to the setting speed of the servo
motor. Resolution: 14 bits or equivalent
VLA
Analog speed limit
Setting of speed limit in torque control mode by applying 0 to +10 V.
The maximum speed set in parameter PC12 is output at +10 V.
MO1
Analog monitor 1
Used to output the data set in parameter
PC14 to across MO1–LG in terms of voltage.
Analog monitor 2
Used to output the data set in parameter No.
PC15 to across MO2–LG in terms of voltage.
Command inputs
Common
Power supply
Analog output
Analog terminals
TC VC
MO2
Resolution: 10 bits or
equivalent
For sink interface, connect + of 24 V DC external power supply.
DICOM
Input 24 V DC (± 10 %,
500 mA) to I/O interface
DOCOM
Common terminal of
For sink interface, connect – of 24 V DC external power supply.
input signal such as EM2
of the servo amplifier.
This is separated from LG. For source interface, connect + of 24 V DC external power supply.
LG
P15R
SD
Tab. 4-5:
Installation and wiring
For source interface, connect – of 24 V DC external power supply.
This is a common terminal for TLA, TC, VC, VLA, FPA, FPB, OP, MO1, MO2, and P15R
This outputs 15 V DC to between P15R and LG. This is available as power for TC, TLA, VC, or VLA.
Permissible current: 30 mA
Shielding, housing
Selection of the most important input and output signals of CN1 (2)
Only for MR-J4-A
Only for MR-J4-A-RJ
Beginners Manual Servo Amplifiers MELSERVO J4
4 - 11
Installation and wiring
4.2.2
Connectors and signal arrangements
Servo amplifier series MR-J4-B
The shown front view is that of servo amplifier MR-J4-20B-RJ or less. The terminal configuration is the
same for all models of the MR-J4-B series.
CN5
(USB connector)
CN3
1
2
CN8 (STO I/O
signal connector)
DI1
4
MO1
CN1A
Connector for SSCNET III
cable for previous servo
amplifier axis
CN2
2
LG
6
4
THM2
MRR
1
P5
10
8
5
3
MR
CN1B
Connector for SSCNET III
cable for next servo
amplifier axis
MXR
THM1
9
7
MX
BAT
CN2L 1
P5
6
8
MXR2
5
7
MX2
2
LG
6
4
PAR
9
3
MR2
8
LZ
10
DICOM
DOCOM
5
DICOM
7
LB
9
INP
DI2
14
MO2
16
LAR
18
LZR
20
LG
13
MBR
15
ALM
17
LBR
19
DI3
EM2
CN2L 10
4
MRR2
LA
3
11
12
CN4
(Battery connector)
The frames of the CN2 and CN3
connectors are connected to
the protective earth terminal in
the servo amplifier.
2
LG
6
LG
BAT
(for using serial encoder)
1
P5
PBR
10
8
PSEL
PZR
5
3 PB 7
PZ
PA
9
(for using A/B/Z-phase pulse encoder)
MR-J4-B Signalstecker.eps
Fig. 4-4:
4 - 12
MR-J4-B signal arrangement
The MR-J4-B(4)-RJ servo amplifiers have CN2L connectors.
Connectors and signal arrangements
Installation and wiring
Signal assignment
Connector
Name
Description
CN1A
Connector for SSCNET III cable for previous servo amplifier axis
Used for connection with the controller or the servo
amplifier of the previous axis.
CN1B
Connector for SSCNET III cable for next
servo amplifier axis
Used for connection with the servo amplifier of the next
axis. Put a cap on the CN1B connector of the final axis.
CN2
Connector for the servo motor encoder
Encoder connector
Connector for external encoder
(Serial encoder or A/B/Z-phase pulse encoder)
I/O devices
Control interface (see tab. 4-7)
CN4
Battery terminal
For connecting the battery (MR-BAT6V1SET) to store the
data of the absolute position detection (observe the following note).
When you want to connect the battery, disconnect the
power supply of the main circuit and wait for more than
15 minutes, after the charge lamp has gone off. When
replacing the battery, leave the power supply of the control circuit on and disconnect only the supply voltage of
the main circuit. Otherwise, the absolute position data will
be lost.
CN5
Communication (USB)
Connector for a personal computer (PC)
CN8
STO connector
Connector for safety function (Safe Torque Off )
CN2L CN3
Tab. 4-6:
NOTE
Description of CN1A, CN1B, CN2, CN2L, CN3, CN4, CN5 and CN8
The MR-J4-B(4)-RJ servo amplifiers have CN2L connectors.
The MR-BAT6V1BJ battery for junction battery cable is only for the HG series servo motors. It cannot be used with direct drive motors. Do not use the MR-BAT6V1BJ battery for junction battery
cable in the fully closed loop system and scale measurement function.
Signal arrangement of CN3
Pin No.
Signal I/O
Symbol of
I/O signal
Pin No.
Signal I/O
Symbol of
I/O signal
1
—
LG
11
—
LG
2
I
DI1
12
I
DI2
Assignment with
parameter PD07 3
—
DOCOM
13
O
4
—
MO1
14
—
MO2
O
Assignment with
parameter PD09 5
—
DICOM
6
—
LA
16
—
LAR
7
—
LB
17
—
LBR
8
—
LZ
18
—
LZR
9
O
Assignment with
parameter PD08 19
I
DI3
10
—
DICOM
20
I
EM2
Tab. 4-7:
15
Signal arrangement of CN3 in MR-J4-B
Assignable symbols:
RD
TLC
ABSV
Beginners Manual Servo Amplifiers MELSERVO J4
ALM
WNG
SA
INP
BWNG
VLC
MBR
ZSP
MTTR
DB
CDPS
CLDS
4 - 13
Installation and wiring
Connectors and signal arrangements
Meaning of symbols
The most important signals are explained in the table below. You will find detailed information about
all signals in the instruction manual of the respective servo amplifier.
Signal
Symbol
Name
Description
—
Devices can be assigned for these signals with controller setting. For
devices that can be assigned, refer to the controller instruction
manual.
The following devices can be assigned for MR-J4 compatible controller (Q172DSCPU, Q173DSCPU, and QD77MS).
Forced stop 2
Turn off EM2 (open between commons) to decelerate the servo
motor to a stop with commands.
Turn EM2 on (short between commons) in the forced stop state to
reset that state.
ALM
Alarm
When the protective circuit is activated to
shut off the base circuit, ALM will turn off.
When an alarm does not occur, ALM will
turn on after 2.5 s to 3.5 s after power-on.
RD
Ready
RD turns on when the servo is switched on
and the servo amplifier is ready to operate.
INP
In position
Signal inputs
DI1
DI2
DI3
Signal outputs
Analog output
Common
Power supply
Analog terminals
Control terminals
EM2
WNG
Warning
When warning has occurred, WNG turns on.
When a warning is not occurring, turning on
the power will turn off WNG after 2.5 s to 3.5 s.
MO1
Analog monitor 1
Used to output the data set in parameter
PC09 to across MO1–LG in terms of voltage.
MO2
Used to output the data set in parameter
PC10 to across MO2–LG in terms of voltage.
For sink interface, connect + of 24 V DC external power supply.
Input 24 V DC (± 10%,
300 mA) to I/O interface
DOCOM
Common terminal of
For sink interface, connect – of 24 V DC external power supply.
input signal such as EM2
of the servo amplifier.
This is separated from LG. For source interface, connect + of 24 V DC external power supply.
SD
4 - 14
Analog monitor 2
Resolution: 10 bits or
equivalent
DICOM
LG
Tab. 4-8:
The signal must first be
assigned to a certain
output terminal of
INP turns on when the number of droop
pulses is in the preset in-position range. The plug CN3 via paramedevice cannot be used in the speed control ter setting
mode, torque control mode, and for contin- PD07–PD09.
uous operation to torque control mode.
For source interface, connect – of 24 V DC external power supply.
Common terminal of MO1 and MO2
Shielding, housing
Selection of the most important input and output signals of CN3
Connectors and signal arrangements
4.2.3
Installation and wiring
Servo amplifier series MR-J4W-B
The shown front view is that of the MR-J4 3-axis servo amplifier (MR-J4W3-B). For the MR-J4 2-axis
servo amplifier (MR-J4W2-B) connector CN2C is missing.
CN5
(USB connector)
CN3
1
2
DI2-C
CN2A
2
LG
6
4
THM2
MRR
1
P5
10
LB-A
8
MXR
5
3
MR
4
THM1
CN8 (STO I/O
signal connector)
9
7
MX
BAT
CN1A
Connector for
SSCNET III cable for
previous servo
amplifier axis
CN2B
2
LG
6
4
THM2
MRR
1
P5
10
8
CN1B
Connector for
SSCNET III cable for
next servo amplifier
axis
MXR
5
3
MR
THM1
9
7
MX
BAT
CN2C 6
LB-B
8
DI2-A
10
EM2
12
MBR-A
DI1-C
3
LA-A
5
LA-B
7
DI1-A
9
DI3-A
11
CALM
13
MBR-C
2
LG
6
4
THM2
MRR
1
P5
DI3-C
17
LBR-A
19
LBR-B
21
DI2-B
23
DICOM
25
MBR-B
LG
16
LAR-A
18
LAR-B
20
DI1-B
22
DI3-B
24
CINP
26
DOCOM
10
8
MXR
5
3
MR
14
15
THM1
9
7
MX
CN4
(Battery connector)
BAT
The frames of the CN2A, CN2B, CN2C and CN3
connectors are connected to the protective
earth terminal in the servo amplifier.
MR-J4W3-B Signalstecker.eps
Fig. 4-5:
MR-J4W-B signal arrangement
For the MR-J4 3-axis servo amplifier (MR-J4W3-B)
Beginners Manual Servo Amplifiers MELSERVO J4
4 - 15
Installation and wiring
Connectors and signal arrangements
Signal assignment
Connector
Name
Description
CN1A
Connector for SSCNET III cable for previous servo amplifier axis
Used for connection with the controller or the servo
amplifier of the previous axis.
CN1B
Connector for SSCNET III cable for next
servo amplifier axis
Used for connection with the servo amplifier of the next
axis. Put a cap on the CN1B connector of the final axis.
CN2A
Connector for the servo motor encoder (axis A)
CN2B
Encoder connector
Connector for the servo motor encoder (axis B)
I/O devices
Control interface (see tab. 4-10)
CN4
Battery terminal
For connecting the battery (the battery unit consists of the
MR-BT6VCASE battery case and five MR-BAT6V1 batteries)
to store the data of the absolute position detection
(observe the following note).
When you want to connect the battery, disconnect the
power supply of the main circuit and wait for more than
15 minutes, after the charge lamp has gone off. When
replacing the battery, leave the power supply of the control circuit on and disconnect only the supply voltage of
the main circuit. Otherwise, the absolute position data will
be lost.
CN5
Communication (USB)
Connector for a personal computer (PC)
CN8
STO connector
Connector for safety function (Safe Torque Off )
CN2C
CN3
Tab. 4-9:
Connector for the servo motor encoder (axis C)
Description of CN1A, CN1B, CN2A, CN2B, CN2C, CN3, CN4, CN5 and CN8
For the MR-J4 3-axis servo amplifier (MR-J4W3-B)
Signal arrangement of CN3
Pin No.
Signal I/O
Symbol of
I/O signal
Pin No.
Signal I/O
Symbol of
I/O signal
1
I
DI1-C
14
—
LG
2
I
DI2-C
15
I
DI3-C
3
—
LA-A
16
—
LAR-A
4
—
LB-A
17
—
LBR-A
5
—
LA-B
18
—
LAR-B
6
—
LB-B
19
—
LBR-B
7
I
DI1-A
20
I
DI1-B
8
I
DI2-A
21
I
DI2-B
9
I
DI3-A
22
I
DI3-B
10
I
EM2
23
—
DICOM
11
O
CALM 24
O
CINP 12
O
MBR-A 25
O
MBR-B O
MBR-C 26
—
DOCOM
13
Tab. 4-10: Signal arrangement of CN3 in MR-J4W-B
Initial device for A-axis, assignment with parameter PD07
Initial device for B-axis, assignment with parameter PD07
4 - 16
Initial device for C-axis, assignment with parameter PD07
The pin is not used for MR-J4 2-axis servo amplifiers.
Initial device for A, B and C-axis, assignment with parameter PD08
Initial device for A, B and C-axis, assignment with parameter PD09
Connectors and signal arrangements
Installation and wiring
Meaning of symbols
The most important signals are explained in the table below. You will find detailed information about
all signals in the instruction manual of the respective servo amplifier.
Signal
Symbol Name
Description
—
Devices can be assigned for these signals with controller setting. For
devices that can be assigned, refer to the controller instruction
manual.
The following devices can be assigned for MR-J4 compatible controller (Q172DSCPU, Q173DSCPU, and QD77MS).
DI1-A: FLS for A-axis (Upper stroke limit)
DI2-A: RLS for A-axis (Lower stroke limit)
DI3-A: DOG for A-axis (Proximity dog)
DI1-B: FLS for B-axis (Upper stroke limit)
DI2-B: RLS for B-axis (Lower stroke limit)
DI3-B: DOG for B-axis (Proximity dog)
DI1-C: FLS for C-axis (Upper stroke limit)
DI2-C: RLS for C-axis (Lower stroke limit)
DI3-C: DOG for C-axis (Proximity dog)
Forced stop 2
Turn off EM2 (open between commons) to decelerate the servo
motor to a stop with commands.
Turn EM2 on (short between commons) in the forced stop state to
reset that state.
Alarm
When the protective circuit is activated to shut off the base circuit,
ALM will turn off. When an alarm does not occur, ALM will turn on
about 3 s after power-on.
Ready
Enabling servo-on to make the servo amplifier ready to operate will
turn on RD.
In position
When the number of droop pulses is in the preset in-position range,
INP will turn on. The device cannot be used in the speed control
mode, torque control mode, and for continuous operation to torque
control mode.
Warning
When warning has occurred, WNG turns on. When a warning is not
occurring, turning on the power will turn off WNG after about 3 s.
DI1-A
DI1-B
DI1-C
Signal inputs
DI2-A
DI2-B
DI2-C
DI3-A
DI3-B
Control terminals
DI3-C
EM2
ALM-A
ALM-B
ALM-C
Signal outputs
RD-A
RD-B
RD-C
INP-A
INP-B
INP-C
WNG-A
WNG-B
Common
Power supply
WNG-C
DICOM
Input 24 V DC (± 10%,
For sink interface, connect + of 24 V DC external power supply.
MR-J4W2-B: 350 mA,
MR-J4W3-B: 450 mA) to
For source interface, connect – of 24 V DC external power supply.
I/O interface
DOCOM
Common terminal of
For sink interface, connect – of 24 V DC external power supply.
input signal such as EM2
of the servo amplifier.
This is separated from LG. For source interface, connect + of 24 V DC external power supply.
LG
SD
Control common
This is for encoder output pulses (differential line driver).
Shielding, housing
Tab. 4-11: Selection of the most important input and output signals of CN3
The last letter with hyphen in device symbols means the target axis.
( differs depending on devices)
-A:
-B:
-C:
Device for A-axis
Device for B-axis
Device for C-axis
This device is not used for MR-J4 2-axis servo amplifiers.
Beginners Manual Servo Amplifiers MELSERVO J4
4 - 17
Installation and wiring
Wiring the interfaces
4.3
Wiring the interfaces
4.3.1
I/O interfaces in negative logic (sink type)
Digital input interface DI-1
This is an input circuit whose photocoupler cathode side is the input terminal. Transmit signals from
sink (open-collector) type transistor output, relay switch, etc.
Servo amplifier
Approx.
For transistor
EM2
etc.
Approx.
5 mA
6.2 kΩ Switch
TR
DICOM
VCES 1.0 V
ICEO 100 μA
24 V DC 10 %,
500 mA Digitaleingang DI-1 negativ.eps
Fig. 4-6:
Example
MR-J4W-B:
MR-J4-B:
Approximately 5.6 kΩ
300 mA,
MR-J4W2-B:
350 mA,
MR-J4W3-B:
450 mA
Digital output interface DO-1
This is a circuit of collector output terminal of the output transistor. When the output transistor is
turned on, collector terminal current will be applied for the output.
A lamp, relay or photocoupler can be driven. Install a diode (D) for an inductive load, or install an inrush
current suppressing resistor (R) for a lamp load.
(Rated current: 40 mA or less, maximum current: 50 mA or less, inrush current: 100 mA or less)
A maximum of 2.6 V voltage drop occurs in the servo amplifier.
Servo amplifier
ALM,
etc.
Load
If polarity of diode is
reversed, servo amplifier
will malfunction.
DOCOM
24 V DC 10 %,
500 mA Digitalausgang DO-1 negativ.eps
Fig. 4-7:
b
4 - 18
Example
MR-J4-B: 300 mA,
MR-J4W2-B: 350 mA,
MR-J4W3-B: 450 mA
If the voltage drop (maximum of 2.6 V) interferes with the relay operation, apply high voltage
(maximum of 26.4 V) from external source.
WARNING:
When connecting an inductive load, please observe the right polarity of the recovery diode.
Wrong polarity of the diode can damage the servo amplifier.
Wiring the interfaces
4.3.2
Installation and wiring
I/O interfaces in positive logic (source type)
In this servo amplifier, source type I/O interfaces can be used.
Digital input interface DI-1
This is an input circuit whose photocoupler anode side is the input terminal. Transmit signals using
source (open-collector) type transistor output, relay switch, etc.
Servo amplifier
Approx.
For transistor
EM2
etc.
6.2 kΩ Switch
TR
DICOM
Approx.
5 mA
VCES 1.0 V
ICEO 100 μA
24 V DC 10 %,
500 mA Digitaleingang DI-1 positiv.eps
Fig. 4-8:
Example
MR-J4W-B:
MR-J4-B(-RJ): 300 mA,
Approximately 5.6 kΩ
MR-J4W2-B:
350 mA,
MR-J4W3-B:
450 mA
Digital output interface DO-1
This is a circuit in which the emitter side of the output transistor is the output terminal. When the output transistor is turned on, the current flows from the output terminal to a load.
A maximum of 2.6 V voltage drop occurs in the servo amplifier.
Servo amplifier
ALM,
etc.
Load
If polarity of diode is
reversed, servo amplifier
will malfunction.
DOCOM
24 V DC 10 %,
500 mA Digitalausgang DO-1 positiv.eps
Fig. 4-9:
b
Example
MR-J4-B(-RJ): 300 mA,
MR-J4W2-B: 350 mA,
MR-J4W3-B: 450 mA
If the voltage drop (maximum of 2.6 V) interferes with the relay operation, apply high voltage
(maximum of 26.4 V) from external source.
WARNING:
When connecting an inductive load, please observe the right polarity of the recovery diode.
Wrong polarity of the diode can damage the servo amplifier.
Beginners Manual Servo Amplifiers MELSERVO J4
4 - 19
Installation and wiring
4.3.3
Wiring the interfaces
Analog interfaces
Analog input (only MR-J4-A(-RJ))
Input impedance
10–12 kΩ
Servo amplifier
+15 V DC
P15R
2 kΩ
Upper limit setting
2 kΩ
VC, etc.
LG
Approx.
10 kΩ
SD
Analogeingang.eps
Fig. 4-10: Example
Analog output (only MR-J4-A(-RJ) and MR-J4-B(-RJ))
Servo amplifier
MO1
(MO2)
LG
Output voltage: ±10 V Maximum output current: 1 mA
Resolution: 10 bits or equivalent
Analogausgang.eps
Fig. 4-11: Example
4 - 20
Output voltage range varies depending on the monitored signal.
Communication function
4.4
NOTE
4.4.1
Installation and wiring
Communication function
The USB communication function (CN5 connector) and the RS-422 communication function (CN3
connector) are mutually exclusive functions. They cannot be used together.
Serial interface RS-422 (only MR-J4-A(-RJ))
You can operate servo driving, parameter change, monitor function, etc. using RS-422 serial communication function with the servo amplifier.
● Single axis
Operate the single-axis servo amplifier. It is recommended to use the following cable.
Personal computer
Servo amplifier
max. 10 m
CN3
To RS-232C
connector
RS-422/232C conversion cable
DSV-CABV (Diatrend)
RS422-Kommunikation eine Achse.eps
Fig. 4-12: System configuration with the RS-422 interface for operation with one axis
● Multi-drop connection
Up to 32 axes of servo amplifiers from stations 0 to 31 can be operated on the same bus.
Servo amplifier
Servo amplifier
CN3
Servo amplifier
CN3
CN3
Personal computer
To RS-232C
connector
RS-422/232C conversion cable
DSV-CABV (Diatrend)
RS422-Kommunikation mehrere Achsen.eps
Fig. 4-13: System configuration with the RS-422 interface for operation with multiple axes
The BMJ-8 (Hachiko Electric) is recommended as the branch connector.
The final axis must be terminated between RDP (pin No. 3) and RDN (pin No. 6) on the receiving side (servo amplifier) with a 150 Ω resistor.
Beginners Manual Servo Amplifiers MELSERVO J4
4 - 21
Installation and wiring
4.4.2
Communication function
USB interface
The servo amplifiers of the MR-J4 series have an USB communication interface. Therefore, you can
connect the servo amplifier to the personal computer with MR Configurator2 installed to perform the
parameter setting, test operation, gain adjustment, and others.
Personal computer
Servo amplifier
To USB
connector
CN5
USB cable
MR-J3USBCBL3M (Option)
USB-Kommunikation.eps
Fig. 4-14: Connection for USB communication
Note that using the USB communication function (CN5 connector) prevents the RS-422 communication function (CN3 connector) from being used, and vice versa. They cannot be used together.
4 - 22
Optical interface SSCNET III (only MR-J4-B(-RJ) and MR-J4W-B)
4.5
Installation and wiring
Optical interface SSCNET III
(only MR-J4-B(-RJ) and MR-J4W-B)
The servo amplifiers MR-J4-B(-RJ) and MR-J4W-B have an optical interface SSCNET III (CN1A, CN1B).
Operation and monitoring of the servo amplifier can be done by the motion CPU.
b
WARNING:
Do not see directly the light generated from CN1A and CN1B connector of servo amplifier or the
end of SSCNET III cable. When the light gets into eye, may feel something is wrong for eye. (The
light source of SSCNET III complies with class1 defined in JIS C6802 or IEC60825-1.)
The SSCNET III cable of the HOST controller (motion CPU) or of the preceding servo amplifier is
plugged into connector CN1A. The SSCNET III cable to the next servo amplifier is plugged into terminal CN1B. For CN1B connector of the final axis, put the cap on, which came with the servo amplifier.
The first axis
servo amplifier
SSCNET III
cable
SSCNET III cable
Controller
The second axis
servo amplifier
The last axis
servo amplifier
SSCNET III
cable
CN1A
CN1A
CN1A
CN1B
CN1B
Cap
CN1B
SSCNET III Verbindung MR-J4-B.eps
Fig. 4-15: SSCNET III cable connection for MR-J4-B(-RJ)
The first
servo amplifier
SSCNET III
cable
Controller
The second
servo amplifier
The last
servo amplifier
SSCNET III
cable
CN1A
SSCNET III
cable
CN1A
CN1A
CN1B
CN1B
CN1B
Cap
SSCNET III Verbindung MR-J4W-B.eps
Fig. 4-16: SSCNET III cable connection for MR-J4W-B
Beginners Manual Servo Amplifiers MELSERVO J4
4 - 23
Installation and wiring
NOTES
Optical interface SSCNET III (only MR-J4-B(-RJ) and MR-J4W-B)
Put a cap on CN1A and CN1B connector to protect the light device inside the connector from dust.
For this reason, do not remove a cap until just before mounting the SSCNET III cable. Then, when
removing SSCNET III cable, make sure to put a cap on.
Keep the cap for CN1A and CN1B connector and the tube for protecting the end of SSCNET III
cable in a plastic bag with a zipper to prevent them from becoming dirty.
When asking repair of servo amplifier for some troubles, make sure to put a cap on CN1A and
CN1B connector. When the connector is not protected by a cap, the light device may be damaged
at the transit. In this case, exchange and repair of light device is required.
SSCNET III cable with open ends (e.g. after disassembly of a defective servo amplifier) should be
covered immediately with the protective tube to prevent damage.
4 - 24
Setting the control axis number (only MR-J4-B(-RJ) and MR-J4W-B)
4.6
Installation and wiring
Setting the control axis number
(only MR-J4-B(-RJ) and MR-J4W-B)
You can set the control axis number between 1 and 64 by using auxiliary axis number setting switches
with the axis selection rotary switch. If the same numbers are set to different control axes in a single
communication system, the system will not operate properly. The control axes may be set independently of the SSCNET III cable connection sequence. The following shows the description of each
switch.
4.6.1
MR-J4-B(-RJ)
Rotary switch (SW1)
Fig. 4-17:
Switches for setting the control axis number
(MR-J4-B(-RJ))
ON
1
2
3
4
DIP switch (SW2)
MR-J4-B_Front_controls.eps
Auxiliary axis number setting switches (SW2-3 and SW2-4)
Turning these switches “ON (up)” enables you to set the axis No. 17 or more.
Axis selection rotary switch (SW1)
You can set the control axis number between 1 and 64 by using auxiliary axis number setting switches
with the axis selection rotary switch.
Fig. 4-18:
Rotary switch (SW1)
7 8 9
2
B C DE
3 4 5 6
A
F 0 1
Rotary switch SW1.eps
b
WARNING:
● When switching the axis selection rotary switch (SW1) and auxiliary axis number setting
switch (SW2), use insulated screw driver. Do not use a metal screw driver. Touching patterns
on electronic boards, lead of electronic parts, etc. may cause an electric shock.
● For setting the axis selection rotary switch, use a flat-blade screwdriver with the blade edge
width of 2.1 mm to 2.3 mm and the blade edge thickness of 0.6 mm to 0.7 mm.
Beginners Manual Servo Amplifiers MELSERVO J4
4 - 25
Installation and wiring
Setting the control axis number (only MR-J4-B(-RJ) and MR-J4W-B)
Switch combination list for the control axis No. setting
The following lists show the setting combinations of the auxiliary axis number setting switches and
the axis selection rotary switch.
Auxiliary axis number Axis selection
setting switch
rotary switch
ON
1 2 3 4
1 2 3 4
Auxiliary axis number Axis selection
setting switch
rotary switch
Control axis
number
0
1
0
17
1
2
1
18
2
3
2
19
3
4
3
20
4
5
4
21
5
6
5
22
6
7
6
23
7
8
7
24
ON
8
9
8
25
9
10
9
26
A
11
A
27
B
12
B
28
1 2 3 4
C
13
C
29
D
14
D
30
E
15
E
31
F
16
F
32
Auxiliary axis number Axis selection
setting switch
rotary switch
ON
Control axis
number
Control axis
number
Auxiliary axis number Axis selection
setting switch
rotary switch
Control axis
number
0
33
0
49
1
34
1
50
2
35
2
51
3
36
3
52
4
37
4
53
5
38
5
54
6
39
6
55
7
56
8
57
7
40
8
41
ON
1 2 3 4
9
42
9
58
A
43
A
59
B
44
B
60
C
45
C
61
D
46
D
62
E
47
E
63
F
48
F
64
Tab. 4-12: Switch combinations for setting the control axis numbers from 1 to 64 (MR-J4-B)
4 - 26
Setting the control axis number (only MR-J4-B(-RJ) and MR-J4W-B)
4.6.2
Installation and wiring
MR-J4W-B
Rotary switch (SW1)
Fig. 4-19:
Switches for setting the control axis number
(MR-J4W-B)
ON
1 2 3 4 5 6
DIP switch (SW2)
MR-J4W-B_Front_controls.eps
Auxiliary axis number setting switches (SW2-5 and SW2-6)
Turning these switches “ON (up)” enables you to set the axis No. 17 or more.
Axis selection rotary switch (SW1)
You can set the control axis number between 1 and 64 by using auxiliary axis number setting switches
with the axis selection rotary switch.
Fig. 4-20:
Rotary switch (SW1)
7 8 9
2
B C DE
3 4 5 6
A
F 0 1
Rotary switch SW1.eps
b
WARNING:
● When switching the axis selection rotary switch (SW1) and auxiliary axis number setting
switch (SW2), use insulated screw driver. Do not use a metal screw driver. Touching patterns
on electronic boards, lead of electronic parts, etc. may cause an electric shock.
● For setting the axis selection rotary switch, use a flat-blade screwdriver with the blade edge
width of 2.1 mm to 2.3 mm and the blade edge thickness of 0.6 mm to 0.7 mm.
Beginners Manual Servo Amplifiers MELSERVO J4
4 - 27
Installation and wiring
Setting the control axis number (only MR-J4-B(-RJ) and MR-J4W-B)
Switch combination list for the control axis No. setting
The following lists show the setting combinations of the auxiliary axis number setting switches and
the axis selection rotary switch.
● MR-J4 2-axis servo amplifier
The control axis number of A-axis is set as 1 to 63 and B-axis is set as 2 to 64.
Auxiliary axis
number setting
switch
ON
1 2 3 4 5 6
Auxiliary axis
number setting
switch
ON
1 2 3 4 5 6
Axis
selection
rotary
switch
Control axis number
A-axes
B-axes
0
1
2
1
2
3
2
3
3
4
4
5
Auxiliary axis
number setting
switch
Axis
selection
rotary
switch
Control axis number
A-axes
B-axes
0
17
18
1
18
19
4
2
19
20
5
3
20
21
5
6
4
21
22
6
7
5
22
23
6
7
8
6
23
24
7
8
9
7
24
25
8
9
10
8
25
26
9
10
11
9
26
27
ON
1 2 3 4 5 6
A
11
12
A
27
28
B
12
13
B
28
29
C
13
14
C
29
30
D
14
15
D
30
31
E
15
16
E
31
32
F
16
17
F
32
33
Axis
selection
rotary
switch
Control axis number
A-axes
B-axes
0
33
34
1
34
35
2
35
3
36
4
5
Auxiliary axis
number setting
switch
Axis
selection
rotary
switch
Control axis number
A-axes
B-axes
0
49
50
1
50
51
36
2
51
52
37
3
52
53
37
38
4
53
54
38
39
5
54
55
6
39
40
6
55
56
7
40
41
7
56
57
8
41
42
8
57
58
9
42
43
9
58
59
ON
1 2 3 4 5 6
A
43
44
A
59
60
B
44
45
B
60
61
C
45
46
C
61
62
D
46
47
D
62
63
E
47
48
E
63
F
48
49
F
64
Tab. 4-13: Switch combinations for setting the control axis numbers for axes A and B (MR-J4W2-B)
4 - 28
When B-axis is set as disabled-axis, A-axis is used as 64 axes. When B-axis is not set as disabledaxis, AL. 11 “Switch setting error” occurs.
Setting the control axis number (only MR-J4-B(-RJ) and MR-J4W-B)
Installation and wiring
● MR-J4 3-axis servo amplifier
The control axis number of A-axis is set as 1 to 62, B-axis is set as 2 to 63, and C-axis is set as 3 to 64.
Auxiliary axis
number setting
switch
ON
1 2 3 4 5 6
Auxiliary axis
number setting
switch
ON
1 2 3 4 5 6
Axis
selection
rotary
switch
Control axis number
Aaxes
Baxes
Caxes
0
1
2
3
1
2
3
2
3
4
3
4
4
5
5
6
Auxiliary axis
number setting
switch
Axis
selection
rotary
switch
Control axis number
Aaxes
Baxes
Caxes
0
17
18
19
4
1
18
19
20
5
2
19
20
21
5
6
3
20
21
22
6
7
4
21
22
23
6
7
8
5
22
23
24
7
8
9
6
23
24
25
7
24
25
26
8
25
26
27
7
8
9
10
8
9
10
11
ON
1 2 3 4 5 6
9
10
11
12
9
26
27
28
A
11
12
13
A
27
28
29
B
12
13
14
B
28
29
30
C
13
14
15
C
29
30
31
D
14
15
16
D
30
31
32
E
15
16
17
E
31
32
33
F
16
17
18
F
32
33
34
Axis
selection
rotary
switch
Control axis number
Aaxes
Baxes
Caxes
0
33
34
35
1
34
35
2
35
36
3
36
4
37
5
6
Auxiliary axis
number setting
switch
Axis
selection
rotary
switch
Control axis number
Aaxes
Baxes
Caxes
0
49
50
51
36
1
50
51
52
37
2
51
52
53
37
38
3
52
53
54
38
39
4
53
54
55
38
39
40
5
54
55
56
39
40
41
6
55
56
57
7
56
57
58
8
57
58
59
7
40
41
42
8
41
42
43
ON
1 2 3 4 5 6
9
42
43
44
9
58
59
60
A
43
44
45
A
59
60
61
B
44
45
46
B
60
61
62
C
45
46
47
C
61
62
63
D
46
47
48
D
62
63
64
E
47
48
49
E
F
48
49
50
F
Tab. 4-14: Switch combinations for setting the control axis numbers for axes A, B and C (MR-J4W3-B)
When C-axis is set as disabled-axis, A-axis is used as 63 axes and B-axis is used as 64 axes. When Caxis is not set as disabled-axis, AL. 11 “Switch setting error” occurs.
When B-axis and C-axis are set as disabled-axes, A-axis is used as 64 axes. When B-axis and C-axis
are not set as disabled-axes, AL. 11 “Switch setting error” occurs.
Beginners Manual Servo Amplifiers MELSERVO J4
4 - 29
Installation and wiring
4.7
Disabling of control axes (only MR-J4W-B)
Disabling of control axes (only MR-J4W-B)
Turning “ON (up)” a disabling control axis switch disables the corresponding servo motor. The servo
motor will be disabled-axis status and will not be recognized by the controller. The following shows
the disabling control axis switches for each axis.
MR-J4 2-axis servo amplifier
MR-J4 3-axis servo amplifier
ON
ON
1 2 3 4 5 6
1 2 3 4 5 6
For manufacturer setting
Disabling control axis switch for B-axis
Disabling control axis switch for A-axis
Disabling control axis switch for C-axis
Disabling control axis switch for B-axis
Disabling control axis switch for A-axis
MR-J4W-B_DIP switch SW2.eps
Fig. 4-21: Switches SW2-2, SW2-3, and SW2-4 for disabling control axes
Disable the axis that you do not use. Set them from the last axis to the first axis in order. When only the
first axis is disabled, AL. 11 “Switch setting error” occurs. The following lists show the enabled axes that
the controller recognizes and the disabled axes that the controller do not recognize.
MR-J4 2-axis servo amplifier
Disabling control
axis switch
A-axis
B-axis
✔
✔
ON
1 2 3 4 5 6
MR-J4 3-axis servo amplifier
Disabling control
axis switch
ON
A-axis
B-axis
C-axis
✔
✔
✔
1 2 3 4 5 6
ON
✔
ON
—
1 2 3 4 5 6
Disabling control
axis switch
A-axis
B-axis
C-axis
ON
1 2 3 4 5 6
✔
✔
ON
—
1 2 3 4 5 6
1 2 3 4 5 6
Al. 11 occurs
ON
ON
1 2 3 4 5 6
✔
ON
—
—
1 2 3 4 5 6
1 2 3 4 5 6
Al. 11 occurs
ON
ON
ON
Al. 11 occurs
1 2 3 4 5 6
Tab. 4-15:
1 2 3 4 5 6
Enabling and disabling of axes for MR-J4W2-B and MR-J4W3-B
✔:
—:
b
4 - 30
1 2 3 4 5 6
Enabled
Disabled
WARNING:
When switching the axis selection rotary switch (SW1) and auxiliary axis number setting switch
(SW2), use insulated screw driver. Do not use a metal screw driver. Touching patterns on electronic boards, lead of electronic parts, etc. may cause an electric shock.
Servo motor
Installation and wiring
4.8
Servo motor
4.8.1
Connecting the servo motor
b
WARNING:
● Ground the servo amplifier and servo motor securely. To prevent an electric shock, always
connect the protective earth (PE) terminal (terminal marked with
) of the servo amplifier
with the protective earth (PE) of the control box.
● Connect the wires to the correct phase terminals (U, V, W) of the servo amplifier and servo
motor. Otherwise, the servo motor will operate improperly.
● Do not connect AC power supply directly to the servo motor. Otherwise, a fault may occur.
The servo amplifier switches the power transistor on-off to supply power to the servo motor. Depending on the wiring and ground cable routing, the servo amplifier may be affected by the switching
noise (due to di/dt and dv/dt) of the transistor. To prevent such a fault, refer to the following diagram
and always ground.
To conform to the EMC Directive, refer to the EMC Installation Guidelines (IB(NA)67310).
Cabinet
MCCB
Power
supply Line filter
Servo amplifier
Servo motor
CN2
MC
L1
Encoder
L2
L3
L11
L21
U
U
V
V
W
W
M
Servo system
controller
CN1
Outer
box
Protective earth (PE)
Erdung MR-J4.eps
Fig. 4-22: Grounding of the servo amplifier MR-J4-A or MR-J4-B
For 1-phase 200 V AC to 240 V AC, connect the power supply to L1 and L3. Leave L2 open.
For power supply specifications, refer to section 4.1.
Beginners Manual Servo Amplifiers MELSERVO J4
4 - 31
Installation and wiring
Servo motor
Cabinet
Servo amplifier
CNP1
MCCB
Line filter
L1
Encoder
L2
CNP3A
U
CNP2
V
L11
W
L21
L3
Servo system
controller
Power
supply MC
A-axis servo motor
CN2A
U
V
W
M
B-axis servo motor
CN2B
Encoder
CNP3B
U
V
W
U
V
W
M
C-axis servo motor CN2C
Encoder
CNP3C
U
V
W
U
V
W
M
Protective earth (PE)
Outer box
Erdung MR-J4W.eps
Fig. 4-23: Grounding of the servo amplifier MR-J4W2-B or MR-J4W3-B
For power supply specifications, refer to section 4.1.
For the MR-J4 3-axis servo amplifier (MR-J4W3-B)
4 - 32
Be sure to connect it to
of CNP3A, CNP3B, and CNP3C. Do not connect the wire directly to
the protective earth of the cabinet.
Servo motor
4.8.2
Installation and wiring
Servo motor with electromagnetic brake
b
WARNING:
● Configure an electromagnetic brake circuit so that it is activated also by an external EMG
stop switch.
● The electromagnetic brake is provided for holding purpose and must not be used for ordinary braking.
● Before operating the servo motor, be sure to confirm that the electromagnetic brake operates properly.
● Do not use the 24 V DC interface power supply for the electromagnetic brake. Always use the
power supply designed exclusively for the electromagnetic brake. Otherwise, it may cause a
malfunction.
Note the following when the servo motor with an electromagnetic brake is used.
The brake will operate when the power (24 V DC) turns off.
The status is base circuit shut-off during RES (Reset) on. When you use the motor in vertical axis
system, use MBR (Electromagnetic brake interlock).
Turn off SON (Servo-on) after the servo motor stopped.
Connection diagram
Servo amplifier
MBR
RA1
24 V DC DOCOM
MBR
24 V DC
RA1
ALM
(Malfunction)
Servo motor
B1
B
U
B2
MR-J4-A_B Verschaltung Haltebremse.eps
Fig. 4-24: Wiring of the electromagnetic brake for MR-J4-A(-RJ) and MR-J4-B(-RJ)
Create the circuit in order to shut off by interlocking with the emergency stop switch.
Do not use the 24 V DC interface power supply for the electromagnetic brake.
Beginners Manual Servo Amplifiers MELSERVO J4
4 - 33
Installation and wiring
Servo motor
A-axis servo motor
RA5 CALM
RA1
MBR-A
RA2
24 V DC for electromagnetic brake
B1
B
U
B2
Servo amplifier
EM2
24 V DC DOCOM
DICOM
CALM
RA1
MBR-A
RA2
MBR-B
RA3
MBR-C
RA4
24 V DC B-axis servo motor
MBR-B
RA3
EM2
B1
B
U
B2
C-axis servo motor
MBR-C
RA4
B1
B
U
B2
MR-J4W-B Verschaltung Haltebremse.eps
Fig. 4-25: Wiring of the electromagnetic brake for MR-J4W-B
Do not use the 24 V DC interface power supply for the electromagnetic brake.
Create the circuit in order to shut off by interlocking with the emergency stop switch.
This connection is for the MR-J4 3-axis servo amplifier.
4 - 34
The illustration of the 24 V DC power supply is divided between input signal and output signal
for convenience. However, they can be configured by one.
Forced stop
4.9
NOTES
Installation and wiring
Forced stop
When alarms not related to the forced stop function occur, control of motor deceleration can not
be guaranteed.
When SSCNET III/H communication brake occurs, forced stop deceleration will operate (only MRJ4(W)-B).
In the torque control mode, the forced stop deceleration function is not available.
4.9.1
Forced stop deceleration function
When EM2 is turned off, dynamic brake will start to stop the servo motor after forced stop deceleration. During this sequence, the display shows AL. E6 “Servo forced stop warning”.
During normal operation, do not use EM2 (Forced stop 2) to alternate stop and drive. The servo amplifier life may be shortened.
Servo amplifier
24 V DC
DICOM
Forced stop 2
EM2
NOT-AUS Verschaltung.eps
Fig. 4-26: Emergency switch
This diagram is for sink I/O interface. For source I/O interface, refer to section 4.3.2.
Beginners Manual Servo Amplifiers MELSERVO J4
4 - 35
Installation and wiring
4.10
Wiring examples
Wiring examples
Wire the power supply/main circuit as shown below. Connect the 1-phase 200 V AC to 240 V AC power
supply to L1 and L3. One of the connecting destinations is different from MR-J3 Series Servo Amplifier's. When using MR-J4 as a replacement for MR-J3, be careful not to connect the power to L2.
Configure the wirings so that the main circuit power supply is shut off and SON (Servo-on) is turned
off after deceleration to a stop due to an alarm occurring, enabled servo forced stop, etc. A moldedcase circuit breaker (MCCB) must be used with the input cables of the main circuit power supply.
4.10.1
One model of the servo amplifier series MR-J4-A(-RJ), MR-J4-B(-RJ) and MR-J4W-B is only shown in
the wiring examples. Please refer to the respective user manual for the wiring of other servo amplifier models.
Servo amplifier series MR-J4-A(-RJ)
Malfunction
RA1
OFF
ON
EMG stop switch
3-phase
200 V AC to
240 V AC
MC
NOTE
SK
MC
Servo amplifier
MC MCCB
CNP1
L1
L2
Servo motor
CNP3
U
U
L3
V
V
N-
W
W
Motor
M
P3
P4
CNP2
P+
C
D
CN2
L11
Encoder
cable Encoder
L21
Forced
stop 2 Servo-on 24 V DC
CN1
EM2
CN1
SON
DOCOM
DICOM
ALM
24 V DC RA1
Main circuit
power supply Malfunction CN8
Short-circuit connector (Packed with the servo amplifier)
MR-J4-A_Anschluss_3 phasig_1.eps
Fig. 4-27: Wiring of servo amplifier MR-J4-10A(-RJ) to MR-J4-350A(-RJ)
4 - 36
Between P3 and P4 is connected by default. When using the power factor improving DC reactor,
remove the short bar between P3 and P4. Refer to the instruction manual for details. Additionally,
a power factor improving DC reactor and power factor improving AC reactor cannot be used
simultaneously.
Always connect between P+ and D terminals (factory-wired). When using the regenerative
option, refer to the instruction manual.
Wiring examples
Installation and wiring
For the encoder cable, use of the option cable is recommended. For selecting cables, refer to
“Servo Motor Instruction Manual (Vol. 3)”.
This diagram shows sink I/O interface. For source I/O interface, refer to section 4.3.2.
For connecting servo motor power wires, refer to “Servo Motor Instruction Manual (Vol. 3)”
Use a magnetic contactor with an operation delay time (interval between current being applied
to the coil until closure of contacts) of 80 ms or less. Depending on the main circuit voltage and
operation pattern, bus voltage decreases, and that may cause the forced stop deceleration to
shift to the dynamic brake deceleration. When dynamic brake deceleration is not required, slow
the time to turn off the magnetic contactor.
Configure a circuit to turn off EM2 when the main circuit power is turned off to prevent an unexpected restart of the servo amplifier.
When not using the STO function, attach the short-circuit connector came with a servo amplifier.
When wires used for L11 and L21 are thinner than wires used for L1, L2, and L3, use a moldedcase circuit breaker. (Refer to the instruction manual.)
Connecting a servo motor of the wrong axis to U, V, W, or CN2 of the servo amplifier may cause a
malfunction.
The illustration of the 24 V DC power supply is divided between input signal and output signal
for convenience. However, they can be configured by one.
Beginners Manual Servo Amplifiers MELSERVO J4
4 - 37
Installation and wiring
Wiring examples
Power
supply Molded-case
circuit breaker
(MCCB)
MR
Configurator2
CN5
Magnetic
contactor
(MC) CN6
Personal
computer
Analog monitor
CN3
Personal computer and other
To safety relay or
MR-J3-D05 safety
logic unit
CN8
CN1
U
L1
L2
L3
Power factor
improving
DC reactor
(FR-HEL)
Regenerative
option
Junction terminal block
V
W
CN2
P3
P4
CN2L
P+
CN4
Battery
C
L11
L21
Servo motor
MR-J4-A_Systemkonfiguration_3 phasig_1.eps
Fig. 4-28: System configuration for MR-J4-20A-RJ
4 - 38
The power factor improving AC reactor can also be used. In this case, the power factor improving
DC reactor cannot be used. When not using the power factor improving DC reactor, short P3 and
P4.
A 1-phase 200 V AC to 240 V AC power supply may be used with the servo amplifier of MR-J470A(-RJ) or less. For 1-phase 200 V AC to 240 V AC, connect the power supply to L1 and L3. Leave
L2 open. For the power supply specifications, refer to section 4.1.
Depending on the main circuit voltage and operation pattern, bus voltage decreases, and that
may cause the forced stop deceleration to shift to the dynamic brake deceleration. When
dynamic brake deceleration is not required, slow the time to turn off the magnetic contactor.
This is for the MR-J4-A-RJ servo amplifier. The MR-J4-A servo amplifier does not have the
CN2L connector. When using an MR-J4-A-RJ servo amplifier in the linear servo system or in the
fully closed loop system, connect an external encoder to this connector. Refer to the “Linear
Encoder Instruction Manual” for the compatible external encoders.
Wiring examples
Servo amplifier series MR-J4-B(-RJ)
Malfunction RA1
OFF
ON
EMG stop switch
3-phase
200 V AC to
240 V AC
MC
4.10.2
Installation and wiring
SK
MC
Servo amplifier
MC MCCB
CNP1
L1
L2
Servo motor
CNP3
U
U
L3
V
V
N-
W
W
Motor
M
P3
P4
CNP2
P+
C
D
CN2
L11
Encoder
cable Encoder
L21
Forced
stop 2 CN3
EM2
DOCOM
DICOM
ALM
24 V DC Short-circuit connector (Packed with the servo amplifier)
CN3
24 V DC RA1
Main circuit
power supply Malfunction , CN8
MR-J4-A_Anschluss_3 phasig_1.eps
Fig. 4-29: Wiring of servo amplifier MR-J4-10B(-RJ) to MR-J4-350B(-RJ)
Between P3 and P4 is connected by default. When using the power factor improving DC reactor,
remove the short bar between P3 and P4. Refer to the instruction manual for details. Additionally,
a power factor improving DC reactor and power factor improving AC reactor cannot be used
simultaneously.
Always connect between P+ and D terminals. (factory-wired) When using the regenerative
option, refer to the instruction manual.
For the encoder cable, use of the option cable is recommended. For selecting cables, refer to
“Servo Motor Instruction Manual (Vol. 3)”.
If disabling ALM (Malfunction) output with the parameter, configure up the power supply circuit
which switches off the magnetic contactor after detection of alarm occurrence on the controller
side.
This diagram is for sink I/O interface. For source I/O interface, refer to section 4.3.2.
For connecting servo motor power wires, refer to “Servo Motor Instruction Manual (Vol. 3)”.
Use a magnetic contactor with an operation delay time (interval between current being applied
to the coil until closure of contacts) of 80 ms or less. Depending on the main circuit voltage and
operation pattern, bus voltage decreases, and that may cause the forced stop deceleration to
shift to the dynamic brake deceleration. When dynamic brake deceleration is not required, slow
the time to turn off the magnetic contactor.
Configure a circuit to turn off EM2 when the main circuit power is turned off to prevent an unexpected restart of the servo amplifier.
When not using the STO function, attach the short-circuit connector came with a servo amplifier.
Beginners Manual Servo Amplifiers MELSERVO J4
4 - 39
Installation and wiring
Wiring examples
When wires used for L11 and L21 are thinner than wires used for L1, L2, and L3, use a moldedcase circuit breaker. (Refer to the instruction manual.)
Connecting a servo motor of the wrong axis to U, V, W, or CN2 of the servo amplifier may cause a
malfunction.
The illustration of the 24 V DC power supply is divided between input signal and output signal
for convenience. However, they can be configured by one.
Power
supply Molded-case
circuit breaker
(MCCB)
MR
Configurator2
CN5
Personal
computer
Magnetic
contactor
(MC) Junction
terminal
block
CN3
CN8
To safety relay or MR-J3D05 safety logic unit
Servo system controller
or previous servo
amplifier CN1B
CN1A
U
L1
L2
L3
Power factor
improving
DC reactor
(FR-HEL)
Regenerative
option
V
Next servo amplifier
CN1A or cap
CN1B
W
P3
CN2
P4
CN2L
P+
CN4
Servo motor
Battery
C
L11
L21
MR-J4-B_Systemkonfiguration_3 phasig_1.eps
Fig. 4-30: System configuration for MR-J4-20B-RJ
4 - 40
The power factor improving AC reactor can also be used. In this case, the power factor improving
DC reactor cannot be used. When not using the power factor improving DC reactor, short P3 and
P4.
A 1-phase 200 V AC to 240 V AC power supply may be used with the servo amplifier of MR-J470B(-RJ) or less. For 1-phase 200 V AC to 240 V AC, connect the power supply to L1 and L3. Leave
L2 open. Refer to section 4.1 for the power supply specifications.
Depending on the main circuit voltage and operation pattern, bus voltage decreases, and that
may cause the forced stop deceleration to shift to the dynamic brake deceleration. When
dynamic brake deceleration is not required, slow the time to turn off the magnetic contactor.
This is for MR-J4-B-RJ servo amplifier. MR-J4-B servo amplifier does not have CN2L connector.
When using MR-J4-B-RJ servo amplifier in the linear servo system or in the fully closed loop system, connect an external encoder to this connector. Refer to the “Linear Encoder Instruction
Manual” for the compatible external encoders.
Wiring examples
Multi axes servo amplifier series MR-J4W-B
AND malfunction RA1
OFF
ON
EMG stop switch
3-phase
200 V AC to
240 V AC MC
4.10.3
Installation and wiring
MC
SK
Servo amplifier
MC MCCB
CNP1
L1
L2
L3
CNP2
P+
C
A-axis servo motor
CNP3A
U
U
V
V
W
W
CN2A
D
Encoder
cable Motor
M
Encoder
L11
L21
PE( )
B-axis servo motor
N
Short-circuit connector (Packed with the servo amplifier)
CN8
CNP3B
U
U
V
V
W
W
CN2B
Encoder
cable Motor
M
Encoder
C-axis servo motor CNP3C
U
V
W
W
DICOM
24 V DC CN3
Encoder
cable Motor
M
Encoder
24 V DC DOCOM
CALM
RA1
CN3
EM2
U
V
CN2C
Main circuit
Forced
power supply stop 2 AND malfunction , MR-J4W-B_Anschluss_3 phasig_1.eps
Fig. 4-31: Wiring of servo amplifier MR-J4W-B
Between P+ and D is connected by default. When using the regenerative option, refer to the
instruction manual.
For the encoder cable, use of the option cable is recommended. For selecting cables, refer to
“Servo Motor Instruction Manual (Vol. 3)”.
This circuit is an example of stopping all axes when an alarm occurs. If disabling CALM (AND malfunction) output with the parameter, configure up the power supply circuit which switches off
the magnetic contactor after detection of alarm occurrence on the controller side.
This diagram is for sink I/O interface. For source I/O interface, refer to section 4.3.2.
Beginners Manual Servo Amplifiers MELSERVO J4
4 - 41
Installation and wiring
4 - 42
Wiring examples
For connecting servo motor power wires, refer to “Servo Motor Instruction Manual (Vol. 3)”.
Use a magnetic contactor with an operation delay time (interval between current being applied
to the coil until closure of contacts) of 80 ms or less. Depending on the main circuit voltage and
operation pattern, bus voltage decreases, and that may cause the forced stop deceleration to
shift to the dynamic brake deceleration. When dynamic brake deceleration is not required, slow
the time to turn off the magnetic contactor.
For 1-phase 200 V AC to 240 V AC, connect the power supply to L1 and L3. Leave L2 open. Refer to
section 4.1 for the power supply specifications.
Configure up a circuit to turn off EM2 when the main circuit power is turned off to prevent an
unexpected restart of the servo amplifier.
When not using the STO function, attach a short-circuit connector supplied with a servo
amplifier.
When wires used for L11 and L21 are thinner than wires used for L1, L2, and L3, use a moldedcase circuit breaker (refer to the instruction manual).
For the MR-J4 3-axis servo amplifier
Connecting a servo motor for different axis to the CNP3A, CNP3B, or CN3C connector may cause
a malfunction.
The illustration of the 24 V DC power supply is divided between input signal and output signal
for convenience. However, they can be configured by one.
EM-Compatible Installation
4.11
Installation and wiring
EM-Compatible Installation
Fast switching of electrical currents and voltages, which naturally also occurs when servo amplifiers
are used, generates radio frequency interference (RF noise) that can be propagated both along cables
and through the air. The power and signal cables of the servo amplifier can act as noise transmission
antennas. Because of this the cabling work needs to be performed with the utmost care. The cables
connecting the servo amplifier and the motor are a particularly powerful source of potential
interference.
In the European Union several EMC (electromagnetic compatibility) directives have been passed with
regulations for the limitation of interference generated by variable-speed drive systems. To conform
to these regulations you must observe some basic guidelines when you are planning, installing and
wiring your systems:
● To reduce noise radiation install the equipment in a closed and properly earthed switchgear
cabinet made of metal.
● Ensure that everything is properly earthed.
● Use shielded cables.
● Install sensitive equipment as far away as possible from interference sources or install the interference sources in a separate switchgear cabinet.
● Keep signal and power cables separate. Avoid routing interference-suppressed cables (e.g. power
supply cables) and interference-prone cables (e.g. shielded motor cables) together for more than
short distances.
4.11.1
EM-compatible switchgear cabinet installation
The design of the switchgear cabinet is critical for compliance with the EMC directives. Please follow
the following guidelines:
● Use an earthed cabinet made of metal.
● Use conductive seals between the cabinet door and chassis and connect the door and the chassis
with a thick, braided earth cable.
● If an EMC filter is installed make sure that it has a good electrically conductive connection to the
installation panel (remove paint etc). Ensure that the base on which the equipment is installed is
also properly connected to the switchgear cabinet earth.
● All cabinet plates should be welded or screwed together not more than 10 cm apart to limit
transparency to RF noise. The diameters of any openings and cable glands in the cabinet should
not exceed 10 cm and there should not be any unearthed components anywhere in the cabinet.
If larger openings are required they must be covered with wire mesh. Always remove paint etc.
between all metal-on-metal contacts to ensure good conductivity for example between the wire
mesh covers and the cabinet.
● If servo amplifiers and controllers must be installed in the same cabinet they should be kept as
far away from one another as possible. It is better to use separate cabinets if possible. If you must
install everything in a single cabinet you can separate the servo amplifiers and controllers with a
metal panel.
● Earth the installed equipment with short, thick earth conductors or suitable earthing strips.
Earthing strips with a large surface area are better for earthing RFI signals than equipotential
bonding conductors with large cross-sections.
Beginners Manual Servo Amplifiers MELSERVO J4
4 - 43
Installation and wiring
4.11.2
EM-Compatible Installation
Wiring
All analog and digital signal cables should be shielded or routed in metal cable conduits.
At the entrance point to the chassis run the cable through a metal cable gland or fasten it with a P or
U type cable clamp, connecting the shielding to the earth either with the gland or the clamp (see illustration below). If you use a cable clamp install it as near as possible to the cable entry point to keep the
distance to the earthing point as short as possible. To keep the unshielded portion of the cable (RFI
transmission antenna!) as short as possible ensure that the end of the motor cable shielding is as close
as possible to the connection terminal without causing a risk of earth faults or short circuits.
When using a P or U clamp make sure that the clamp is installed cleanly and that it does not pinch the
cable more than necessary.
Good installation
Poor installation
Cable shielding
P-clamp
The shielding
should not be
twisted like this.
U-clamp
Abschirmklemmen P-U.eps
Route control signal cables at least 30 cm away from all power cables. Do not route the power supply
cables or the cables connecting the servo amplifier and the motor in parallel to control signal cables,
telephone cables or data cables.
If possible, all control signal cables to and from the servo amplifier should only be routed inside the
earthed switchgear cabinet. If routing control signal cables outside the cabinet is not possible always
use shielded cables, as signal cables can also function as antennas. The shielding of the cables must
always be earthed. To prevent corruption of sensitive analog signals (e.g. the 0–5 V analog frequency
setting signal) by currents circulating in the earthing system it may be necessary to earth only one end
of the cable shielding. In such cases always earth the shielding at the servo amplifier end of the cable.
Installation of standard ferrite cores on the signal cables can further improve RFI suppression. The
cable should be wound around the core several times and the core should be installed as close to the
servo amplifier as possible.
Motor connection cables should always be as short as possible. Long cables can sometimes trigger
earth fault protection mechanisms. Avoid unnecessarily long cables and always use the shortest possible route for the cables.
It should go without saying that the motor itself should also be properly earthed.
4 - 44
EM-Compatible Installation
4.11.3
Installation and wiring
Optional EMC filters
EMC filters (mains RFI suppression filters) significantly reduce interference. They are installed between
the mains power supply and the servo amplifier of the MR-J4 series.
Wiring 1-phase
Input terminals
of the filter
L
N
Output terminals
of the filter
PE
PE L1
Power terminals of
the servo amplifier
L2 L11 L21
L1 L2 L3
L11 L21
U
V
W
PE
Power supply
(1-phase)
Motor
EMC-Filteranschluss_1-Phase.eps
Fig. 4-32: Wiring of the EMC filter with the servo amplifier for one phase power supply
Wiring 3-phase
Input terminals
of the filter
L1 L2 L3 PE
Output terminals
of the filter
PE L1’ L2’ L3’
Power terminals of
the servo amplifier
L1 L2 L3
L11 L21
U
V
W
PE
Power supply
(3-phase)
Motor
EMC-Filteranschluss_3-Phase.eps
Fig. 4-33: Wiring of the EMC filter with the servo amplifier for three phase power supply
b
WARNING:
● These filters are NOT designed for use in power networks (IT type). When the noise filters are
operated leakage currents are discharged to earth. This can trigger upstream protective
devices (as RCDs), particularly when there are unbalanced mains voltages, mains phase
failures or switching activities on the input side of the filter.
For further information please refer to the Mitsubishi manual for servo amplifiers and the
EMC Installation Guidelines which contain detailed information about EM-compatible
installation.
● Connect the 1-phase 200 V AC to 240 V AC power supply to the terminals L1 and L3 of the
servo amplifier. One of the connecting destinations is different from MR-J3 Series Servo
Amplifier's. When using MR-J4 as a replacement for MR-J3, be careful not to connect the
power to L2.
Beginners Manual Servo Amplifiers MELSERVO J4
4 - 45
Installation and wiring
4 - 46
EM-Compatible Installation
Preparations
Startup
5
Startup
5.1
Preparations
Before switching on the servo amplifier for the first time
Check all the following points carefully before switching on a servo amplifier for the first time:
● Has all the wiring been performed correctly? Check the power supply connections particularly
carefully: Single-phase to L1 and L3, 3-phase to L1, L2 and L3.
● Double-check for damaged cables and insufficiently insulated terminals to eliminate any possibility of short circuits.
● Is the servo amplifier properly earthed? Double-check for possible earth faults and short circuits
in the output circuit.
● Check that all screws, connection terminals and other cable connections are connected correctly
and firmly.
Cable routing
● The wiring cables are free from excessive force.
● The encoder cable should not be used in excess of its flex life.
● The connector part of the servo motor should not be strained.
Environment
Check the following point before initial startup:
● Signal cables and power cables are not shorted by wire offcuts, metallic dust or the like.
Parameters
Check the setting of parameters by the display of the controller or setup software.
m
DANGER:
● Before starting operation, check the parameters. Improper settings may cause some
machines to operate unexpectedly.
● The servo amplifier heat sink, regenerative resistor, servo motor, etc. may be hot while power
is on or for some time after power-off. Take safety measures, e.g. provide covers, to prevent
accidental contact of hands and parts (cables, etc.) with them.
● During operation, never touch the rotor of the servo motor. Otherwise, it may cause injury.
b
WARNING:
Incorrect parameter settings can damage or (in extreme cases) even destroy the connected
motor. Take great care when you are setting the parameters and double check the electrical and
mechanical specifications of the motor, your entire drive system and the connected machine
before proceeding.
Beginners Manual Servo Amplifiers MELSERVO J4
5-1
Startup
Startup of servo amplifier series MR-J4-A(-RJ)
5.2
Startup of servo amplifier series MR-J4-A(-RJ)
5.2.1
Power on and off the servo amplifier
Procedure in position control mode.
Power on
Switch power on in the following procedure. Always follow this procedure at power-on.
Switch off SON (Servo-on).
Make sure that a command pulse train is not input.
Switch on the main circuit power supply and control circuit power supply.
When main circuit power/control circuit power is switched on, the display shows “C” (Cumulativefeedback pulses), and in 2 s later, shows data.
Power off
Make sure that a command pulse train is not input.
Switch off SON (Servo-on).
Switch off the main circuit power supply and control circuit power supply.
NOTES
The power on and off procedure for the operating modes speed control and torque control are not
described here. For details about this please refer to the respective instruction manuals of the
servo amplifier series.
In the absolute position detection system, first power-on results in AL. 25 (Absolute position
erased) and the servo system cannot be switched on. The alarm can be deactivated by then
switching power off once and on again.
Also, if power is switched on at the servo motor speed of 3000 1/min or higher, position mismatch
may occur due to external force or the like. Power must therefore be switched on when the servo
motor is at a stop.
5-2
Startup of servo amplifier series MR-J4-A(-RJ)
5.2.2
Startup
Stop of operation
If any of the following situations occurs, the servo amplifier suspends the running of the servo motor
and brings it to a stop. Refer to the instruction manual for the servo motor with an electromagnetic
brake.
Operation/command
Stopping condition
Switch off SON (Servo-on)
The main circuit is shut off and the servo motor coasts.
Alarm occurrence
The servo motor decelerates to a stop with the command. With some
alarms, however, the dynamic brake operates to bring the servo motor
to a stop. (See note)
EM2 (Forced stop 2) off
The servo motor decelerates to a stop with the command. AL. E6 (Servo
forced stop warning) occurs. EM2 has the same function as EM1 in the
torque control mode. Refer to the instruction manual for EM1.
STO (STO1, STO2) off
The main circuit is shut off and the dynamic brake operates to bring the
servo motor to a stop.
LSP (Forward rotation stroke end) of LSN (Reverse It will bring the motor to a sudden stop and make it servo-locked. It can
rotation stroke end) off
be run in the opposite direction.
Tab. 5-1:
NOTE
Stop of operation by the servo amplifier
Refer to “MELSERVO J4 Servo Amplifier Instruction Manual (Troubleshooting)” for details of alarms
and warnings.
Beginners Manual Servo Amplifiers MELSERVO J4
5-3
Startup
5.2.3
Startup of servo amplifier series MR-J4-A(-RJ)
Test operation
Before starting actual operation, perform test operation to make sure that the machine operates normally. Refer to section 5.2.1 for the power on and off methods of the servo amplifier.
Test operation of the servo motor
alone in JOG operation of test
operation mode
Test operation of the servo motor
alone by commands
In this step, confirm that the servo amplifier and servo motor operate normally.
With the servo motor disconnected from the machine, use the test
operation mode and check whether the servo motor correctly
rotates at the slowest speed.
In this step, confirm that the servo motor correctly rotates at the
slowest speed under the commands from the controller.
Make sure that the servo motor rotates in the following procedure.
Switch on EM2 (Forced stop 2) and SON (Servo-on). When the
servo amplifier is put in a servo-on status, RD (Ready) switches
on.
Switch on LSP (Forward rotation stroke end) and LSN (Reverse
rotation stroke end).
When a pulse train is input from the controller, the servo motor
starts rotating. Give a low speed command at first and check the
rotation direction, etc. of the servo motor. If the machine does
not operate in the intended direction, check the input signal.
Test operation with the servo motor
and machine connected
In this step, connect the servo motor with the machine and confirm that the machine operates normally under the commands
from the controller.
Make sure that the servo motor rotates in the following procedure.
Switch on EM2 (Forced stop 2) and SON (Servo-on). When the
servo amplifier is put in a servo-on status, RD (Ready) switches
on.
Switch on LSP (Forward rotation stroke end) and LSN (Reverse
rotation stroke end).
When a pulse train is input from the controller, the servo motor
starts rotating. Give a low speed command at first and check the
operation direction, etc. of the machine. If the machine does not
operate in the intended direction, check the input signal. In the
status display, check for any problems of the servo motor speed,
command pulse frequency, load ratio, etc.
Then, check automatic operation with the program of the
controller.
Tab. 5-2:
5-4
Test operation of the servo amplifier MR-J4-A at position control
Startup of servo amplifier series MR-J4-A(-RJ)
5.2.4
b
Startup
Parameter setting
WARNING:
Change settings and parameters only in small steps and make afterwards at first sure whether
the desired effect occurs before doing any more changes. Excessive adjustment or change of
parameter setting must not be made as it will make operation instable.
In the position control mode, the servo amplifier can be used by merely changing the basic setting
parameters (PA) mainly.
As necessary, set other parameters:
● Gain/filter setting parameters (PB)
● Extension setting parameters (PC)
● I/O setting parameters (PD)
● Extension setting 2 parameters (PE)
● Extension setting 3 parameters (PF)
● Linear servo motor/DD motor setting parameters (PL)
● Option setting parameters (Po) ● Position control parameters (PT) 5.2.5
Only MR-J4-A-RJ
Actual operation
Start actual operation after confirmation of normal operation by test operation and completion of the
corresponding parameter settings. Perform a home position return as necessary.
NOTE
If there are any problems during startup, refer to the chapter “troubleshooting” in section 8.1 and
in the instruction manual of the respective servo amplifier.
Beginners Manual Servo Amplifiers MELSERVO J4
5-5
Startup
Startup of servo amplifier series MR-J4-B(-RJ) and MR-J4W-B
5.3
Startup of servo amplifier series MR-J4-B(-RJ) and MR-J4W-B
5.3.1
Power on and off the servo amplifier
Power on
When the main and control circuit power supplies are turned on, “b01” (for the first axis) appears on
the servo amplifier display.
Parameter setting
Set the parameters according to the structure and specifications of the machine. Refer to chapter 7
and the instruction manual for details.
After setting the above parameters, turn power off as necessary. Then switch power on again to enable the parameter values.
Servo-on
Enable the servo-on with the following procedure.
Switch on main circuit power supply and control circuit power supply.
Transmit the servo-on command with the controller.
When the servo-on status is enabled, the servo amplifier is ready to operate and the servo motor is
locked.
Home position return
Always perform home position return before starting positioning operation.
NOTES
When the absolute position detection system is used in a rotary servo motor, first power-on results
in AL. 25 (Absolute position erased) and the servo system cannot be switched on. The alarm can be
deactivated by then switching power off once and on again.
Also, if power is switched on at the servo motor speed of 3000 1/min or higher, position mismatch
may occur due to external force or the like. Power must therefore be switched on when the servo
motor is at a stop.
5-6
Startup of servo amplifier series MR-J4-B(-RJ) and MR-J4W-B
5.3.2
Startup
Stop of operation
If any of the following situations occurs, the servo amplifier suspends the running of the servo motor
and brings it to a stop.
Refer to the instruction manual for the servo motor with an electromagnetic brake.
Triggered by
Servo system controller
Servo amplifier
Tab. 5-3:
NOTE
Operation/command
Stopping condition
Servo-off command
The main circuit is shut off and the servo motor
coasts.
Ready-off command
The base circuit is shut off and the dynamic brake
operates to bring the servo motor to a stop.
Forced stop command
The servo motor decelerates to a stop with the command. AL. E7 (Controller forced stop warning) occurs.
Alarm occurrence
The servo motor decelerates to a stop with the command. With some alarms, however, the dynamic brake
operates to bring the servo motor to a stop. (See note)
EM2 (Forced stop 2) off
The servo motor decelerates to a stop with the command. AL. E6 (Servo forced stop warning) occurs. EM2
has the same function as EM1 in the torque control
mode. Refer to the instruction manual for EM1.
STO (STO1, STO2) off
The main circuit is shut off and the dynamic brake
operates to bring the servo motor to a stop.
Stop of operation by servo system controller or servo amplifier
Refer to “MELSERVO J4 Servo Amplifier Instruction Manual (Troubleshooting)” for details of alarms
and warnings.
Beginners Manual Servo Amplifiers MELSERVO J4
5-7
Startup
5.3.3
Startup of servo amplifier series MR-J4-B(-RJ) and MR-J4W-B
Test operation
Before starting actual operation, perform test operation to make sure that the machine operates normally. Refer to section 5.3.1 for the power on and off methods of the servo amplifier.
NOTE
If necessary, verify controller program by using motor-less operation. Refer to section 6.2.5 for the
motor-less operation
Test operation of the servo motor
alone in JOG operation of test
operation mode
Test operation of the servo motor
alone by commands
Test operation with the servo motor
and machine connected
Tab. 5-4:
NOTE
5-8
In this step, confirm that the servo amplifier and servo motor operate normally.
With the servo motor disconnected from the machine, use the test
operation mode and check whether the servo motor correctly
rotates at the slowest speed.
In this step, confirm that the servo motor correctly rotates at the
slowest speed under the commands from the controller.
Give a low speed command at first and check the rotation direction, etc. of the servo motor. If the machine does not operate in the
intended direction, check the input signal.
In this step, connect the servo motor with the machine and confirm that the machine operates normally under the commands
from the controller.
Give a low speed command at first and check the operation direction, etc. of the machine. If the machine does not operate in the
intended direction, check the input signal.
Check any problems with the servo motor speed, load ratio, and
other status display items with MR Configurator2.
Then, check automatic operation with the program of the controller.
Test operation of the servo amplifier MR-J4-B
If there are any problems during startup, refer to the chapter “troubleshooting” in section 8.2, 8.3
and in the instruction manual of the respective servo amplifier.
Display and operation section of MR-J4-A series
Operation and Settings
6
Operation and Settings
6.1
Display and operation section of MR-J4-A series
The MR-J4-A(-RJ) servo amplifier has the display section (5-digit, 7-segment LED) and operation section (4 push buttons) for servo amplifier status display, alarm display, parameter setting, etc. Also,
press the “MODE” and “SET” buttons at the same time for 3 s or more to switch to the one-touch tuning
mode.
6.1.1
Overview
The operation section and display data are described below.
5-digit, 7-segment LED
Displays data
MODE
UP
DOWN
SET
Decimal LED Displays the decimal points, alarm
presence/absence, etc.
MODE Display mode change
Low/High switching
Push this button together
with the “SET” button for 3 s
or more to switch to the onetouch tuning mode.
UP
Display/data scrolling
DOWN Display/data scrolling
SET
Display/data determination
Data clear
Push this button together
with the “MODE” button for
3 s or more to switch to the
one-touch tuning mode.
Lit to indicate the decimal point.
Decimal
Lit to indicate a negative when “-”
(negative) cannot be displayed.
Flickers to indicate alarm occurrence.
Flickers to indicate the test operation
mode.
MR-J4-A Anzeige_Bedienelemente.eps
Fig. 6-1:
Display and push buttons of MR-J4-A
Beginners Manual Servo Amplifiers MELSERVO J4
6-1
Operation and Settings
6.1.2
Display and operation section of MR-J4-A series
Display flowchart MR-J4-A
Press the “MODE” button once to shift to the next display mode. Refer to section 6.1.3 and later for the
description of the corresponding display mode.
To refer to and set the gain/filter parameters, extension setting parameters and I/O setting parameters, enable them with parameter PA19 (Parameter writing inhibit).
Display mode transition
Status display
One-touch tuning
Diagnosis
Alarms
Button
Basic setting
parameters
MODE
Gain/filter
parameters
Tab. 6-1:
6-2
Initial screen
Function
Refer to
Servo status display.
appears at
power-on. Section 6.1.3
One-touch tuning
Instruction
Select this when performing the manual
one-touch tuning.
Sequence display, external signal
display, output signal (DO) forced
output, test operation, software verInstruction
sion display, VC automatic offset,
servo motor series ID display, servo manual
motor type ID display, servo motor
encoder ID display, drive recorder
enabled/disabled display.
Current alarm display, alarm history display, parameter error
Section 6.1.8
number display.
Display and setting of basic setting parameters.
Display and setting of gain/filter parameters.
Extension setting
parameters
Display and setting of extension setting parameters.
I/O setting
parameters
Display and setting of I/O setting parameters.
Extension setting 2
parameters
Display and setting of extension setting 2 parameters.
Extension setting 3
parameters
Display and setting of extension setting 3 parameters.
Linear/DD motor
setting parameters
Display and setting of linear/DD
motor setting parameters.
Section 6.1.9
MR-J4-A – Display sequence via activation of the MODE button
When the axis name is set to the servo amplifier using MR Configurator2, the axis name is displayed and the servo status is then displayed.
Display and operation section of MR-J4-A series
6.1.3
Operation and Settings
Status display mode MR-J4-A
The servo status during operation is shown on the 5-digit, 7-segment LED display. Press the “UP” or
“DOWN” button to change display data as desired. When the required data is selected, the corresponding symbol is displayed. Press the “SET” button to display that data. At only power-on, however,
data appears after the symbol of the status display selected in Parameter PC36 (initial setting: C
(Cumulative feedback pulses)) has been shown for 2 s.
Display transition
After selecting the status display mode with the “MODE” button, pressing the “UP” or “DOWN” button
changes the display as shown below.
Unit total power consumption 2
(increment of 100 kWh)
Cumulative feedback
pulses
Within one-revolution
position (1000 pulse unit)
Servo motor speed/
Linear servo motor speed
ABS counter
Droop pulses
Load to motor inertia ratio
Cumulative command
pulses
Bus voltage
Command pulse
frequency
Encoder inside
temperature
Analog speed command
voltage
Analog speed limit
UP
voltage
Settling time
Analog torque limit
voltage
Analog torque command
voltage
DOWN
Oscillation detection
frequency
Regenerative load ratio
Number of tough drive
operations
Effective load ratio
Unit power consumption 1
(increment of 1 W)
Peak load ratio
Unit power consumption 2
(increment of 1 kW)
Instantaneous torque
Unit total power
consumption 1
(increment of 1 Wh)
Within one-revolution
position (1 pulse unit)
Unit total power
consumption 2
(increment of 100 kWh)
Cumulative feedback pulses
MR-J4-A_Flussdiagramm Statusanzeige.eps
Fig. 6-2:
MR-J4-A – Display transition of status display (standard control mode)
Beginners Manual Servo Amplifiers MELSERVO J4
6-3
Operation and Settings
6-4
Display and operation section of MR-J4-A series
Display and operation section of MR-J4-A series
Operation and Settings
Load-side encoder information 2
Cumulative feedback
pulses
Unit total power
consumption 2
(increment of 100 kWh)
Load-side encoder cumulative
feedback pulses
Load-side encoder droop pulses
Load-side encoder information 1
(1 pulse unit)
Load-side encoder information 1
(100 pulses unit)
Load-side encoder information 2
Cumulative feedback pulses
MR-J4-A_Flussdiagramm Statusanzeige doppelte Rückführung.eps
Fig. 6-3:
MR-J4-A – Display transition of status display (fully closed loop control mode)
The displays in the frames are the standard control modes in one cycle with some displays
omitted.
Beginners Manual Servo Amplifiers MELSERVO J4
6-5
Operation and Settings
Display and operation section of MR-J4-A series
Load-side encoder information 2
Cumulative feedback
pulses
Unit total power
consumption 2
(increment of 100 kWh)
Z-phase counter low
Z-phase counter high
Electrical angle low
Electrical angle high
Cumulative feedback pulses
MR-J4-A_Flussdiagramm Statusanzeige linear direct-drive.eps
Fig. 6-4:
6-6
MR-J4-A – Display transition of status display
(Linear servo motor control mode/Direct drive motor control mode)
The displays in the frames are the standard control modes in one cycle with some displays
omitted.
Display and operation section of MR-J4-A series
6.1.4
Operation and Settings
Display flowchart MR-J4-A-RJ
Press the “MODE” button once to shift to the next display mode. Refer to section 6.1.5 and later for the
description of the corresponding display mode.
Display mode transition
Initial screen
Function
Refer to
Servo status display.
For the point table and program
is displayed at
Status display
Section 6.1.5
power-on.
For indexer,
will
be displayed. One-touch tuning
One-touch tuning
Instruction
Select this when performing the manual
one-touch tuning.
Diagnosis
Sequence display, drive recorder
enabled/disabled display, external
I/O signal display, output signal
(DO) forced output, test operation,
Instruction
software version display, VC automanual
matic offset, servo motor series ID
display, servo motor type ID display,
servo motor encoder ID display,
teaching function
Alarms
Button
MODE
Current alarm display, alarm history display, parameter error
Section 6.1.8
number display.
Point table setting
Display and setting of point
table data. The screen is displayed only in the point table
method, and is not displayed in
other control mode.
Basic setting
parameters
Display and setting of basic setting parameters.
Gain/filter
parameters
Display and setting of gain/filter parameters.
Extension setting
parameters
Display and setting of extension setting parameters.
I/O setting
parameters
Display and setting of I/O setting parameters.
Extension setting 2
parameters
Display and setting of extension setting 2 parameters.
Extension setting 3
parameters
Display and setting of extension setting 3 parameters.
Linear/DD motor
setting parameters
Display and setting of linear/DD
motor setting parameters.
Instruction
manual
Section 6.1.9
From/to next table
Tab. 6-2:
MR-J4-A-RJ – Display sequence via activation of the MODE button (1)
Beginners Manual Servo Amplifiers MELSERVO J4
6-7
Operation and Settings
Display and operation section of MR-J4-A series
Display mode transition
Initial screen
Function
Refer to
To/from previous table
Option setting
parameters
Display and setting of option
setting parameters.
Section 6.1.9
Positioning setting
parameters
Tab. 6-2:
6.1.5
Display and setting of positioning control parameters.
MR-J4-A-RJ – Display sequence via activation of the MODE button (2)
When the axis name is set to the servo amplifier using MR Configurator2, the axis name is displayed and the servo status is then displayed.
Status display mode MR-J4-A-RJ
The servo status during operation is shown on the 5-digit, 7-segment LED display. Press the “UP” or
“DOWN” button to change display data as desired. When the required data is selected, the corresponding symbol is displayed. Press the “SET” button to display that data. At only power-on, however,
data appears after the symbol of the status display selected in Parameter PC36 has been shown for 2 s.
6-8
Display and operation section of MR-J4-A series
Operation and Settings
Display transition
After selecting the status display mode with the “MODE” button, pressing the “UP” or “DOWN” button
changes the display as shown below.
Override level
Cumulative feedback
pulses
Encoder inside
temperature
Servo motor speed/
Linear servo motor speed
Settling time
Droop pulses
Oscillation detection
frequency
Cumulative command
pulses
Number of tough drive
operations
Command pulse
frequency
Unit power consumption 1
(increment of 1 W)
Analog speed command
voltage
Analog speed limit
voltage
Unit power consumption 2
(increment of 1 kW)
Analog torque limit
voltage
Analog torque command
voltage
Unit total power
consumption 1
(increment of 1 Wh)
Regenerative load ratio
Unit total power
consumption 2
(increment of 100 kWh)
UP
Effective load ratio
DOWN
Current position
Peak load ratio
Command position
Instantaneous torque
Command remaining
distance
Within one-revolution
position (1 pulse unit)
Point table/program No./
command station
position
Within one-revolution
position (1000 pulse unit)
Step No.
ABS counter
Analog override voltage
Load to motor inertia ratio
Override level
Bus voltage
Cumulative feedback pulses
MR-J4-A/RJ_Flussdiagramm Statusanzeige.eps
Fig. 6-5:
MR-J4-A-RJ – Display transition of status display (Positioning mode/DD motor control mode)
Beginners Manual Servo Amplifiers MELSERVO J4
6-9
Operation and Settings
Display and operation section of MR-J4-A series
Override level
Cumulative feedback
pulses
Unit total power
consumption 2
(increment of 100 kWh)
Load-side encoder cumulative
feedback pulses
Load-side encoder droop pulses
Load-side encoder information 1
(1 pulse unit)
Load-side encoder information 1
(100000 pulses unit)
Load-side encoder information 2
Current position
Override level
Cumulative feedback pulses
MR-J4-A-RJ_Flussdiagramm Statusanzeige doppelte Rückführung.eps
Fig. 6-6:
6 - 10
MR-J4-A-RJ – Display transition of status display (fully closed loop control mode)
The displays in the frames are from the cumulative feedback pulses of positioning mode to unit
total power consumption 2 (increment of 100 kWh) with some displays omitted.
The displays in the frames are from the current position of positioning mode to override level
with some displays omitted.
Display and operation section of MR-J4-A series
Operation and Settings
Override level
Cumulative feedback
pulses
Unit total power
consumption 2
(increment of 100 kWh)
Z-phase counter low
Z-phase counter high
Electrical angle low
Electrical angle high
Current position
Override level
Cumulative feedback pulses
MR-J4-A_RJ_Flussdiagramm Statusanzeige linear direct-drive.eps
Fig. 6-7:
MR-J4-A-RJ – Display transition of status display (Linear servo motor control mode)
The displays in the frames are from the cumulative feedback pulses of positioning mode to unit
total power consumption 2 (increment of 100 kWh) with some displays omitted.
The displays in the frames are from the current position of positioning mode to override level
with some displays omitted.
Beginners Manual Servo Amplifiers MELSERVO J4
6 - 11
Operation and Settings
6.1.6
Display and operation section of MR-J4-A series
Display examples
Displayed data
Item
State
Servo amplifier display
Forward rotation at 2500 min–1
Servo motor speed
Reverse rotation at 3000 min–1
Reverse rotation is indicated by “–”.
Load to motor inertia ratio
7.00 times
11252 revolutions
ABS counter
-12566 revolutions
Lit
Tab. 6-3:
6.1.7
Display examples of status display MR-J4-A(-RJ)
Changing the status display screen
The status display item of the servo amplifier display shown at power-on can be changed by changing
Parameter PC36 settings. The item displayed in the initial status changes with the control mode as
follows.
Control mode
Status display
Position
Cumulative feedback pulses
Position/speed
Cumulative feedback pulses/servo motor speed
Speed
Servo motor speed
Speed/torque
Servo motor speed/analog torque command voltage
Torque
Analog torque command voltage
Torque/position
Analog torque command voltage/cumulative feedback pulses
Positioning (point table
method/program method) Current position
Positioning (indexer method) Cumulative feedback pulses
Tab. 6-4:
6 - 12
Display of initial status MR-J4-A(-RJ)
Only MR-J4-A-RJ
Display and operation section of MR-J4-A series
6.1.8
Operation and Settings
Alarm mode
The current alarm, past alarm history and parameter error are displayed. The lower 2 digits on the display indicate the alarm number that has occurred or the parameter number in error.
Display Name
Description
Indicates no occurrence of an alarm.
Current alarm
Indicates the occurrence of AL. 33.1 (Main circuit voltage
error). Flickers at alarm occurrence.
Indicates that the last alarm is AL. 50.1 (Thermal overload
error 1 during operation).
Indicates the second last alarm is AL. 33.1 (Main circuit
voltage error).
Alarm history
----
----
Indicates the third last alarm is AL. 10.1 (Voltage drop in
the control circuit power).
Indicates that there is no tenth alarm in the past.
Indicates that there is no eleventh alarm in the past.
----
----
Indicates that there is no twelfth alarm in the past.
Indicates that there is no sixteenth alarm in
the past.
This indicates no occurrence of AL. 37 (Parameter error).
Parameter error No. The data content error of Parameter PA12 (Reverse rotation torque limit).
Point table error No. Tab. 6-5:
The value of the point table is over the setting range.
The error point table No. (intermediate digit “2”) and item
(lower digit “d”) are displayed.
The following shows the items.
P: position data, d: motor speed, A: acceleration time constant, b: deceleration time constant, n: dwell, H: sub function, M: M code
Alarm examples
If a parameter error and point table error occur simultaneously, the display shows the parameter
error (only MR-J4-A-RJ).
The display shows only when the current alarm is AL. 37 (Parameter error).
Only MR-J4-A-RJ
Beginners Manual Servo Amplifiers MELSERVO J4
6 - 13
Operation and Settings
NOTES
Display and operation section of MR-J4-A series
Any mode screen displays the current alarm.
Even during alarm occurrence, the other screen can be viewed by pressing the button in the operation area. At this time, the decimal point in the fourth digit remains flickering.
For any alarm, remove its cause and clear it in any of the following methods.
– Switch power off, then on.
– Push the “SET” button on the current alarm screen.
– Turn on RES (Reset).
Use Parameter PC18 to clear the alarm history.
Push “UP” or “DOWN” to move to the next history.
6 - 14
Display and operation section of MR-J4-A series
6.1.9
Operation and Settings
Parameter mode
Parameter mode transition
After selecting the corresponding parameter mode with the “MODE” button, pushing the “UP” or
“DOWN” button changes the display as shown below.
To status display mode
From an alarm
mode
Extension setting
parameters
MODE
I/O setting
parameters
Extension setting
parameters 3
Extension setting
parameters 2
Linear/DD motor
parameters
Basic setting
parameters
Gain/filter
parameters
Parameter PA01
Parameter PB01
Parameter PC01
Parameter PD01
Parameter PE01
Parameter PF01
Parameter PL01
Parameter PA02
Parameter PB02
Parameter PC02
Parameter PD02
Parameter PE02
Parameter PF02
Parameter PL02
UP
DOWN
Parameter PA31
Parameter PB63
Parameter PC79
Parameter PD47
Parameter PE63
Parameter PF47
Parameter PL47
Parameter PA32
Parameter PB64
Parameter PC80
Parameter PD48
Parameter PE64
Parameter PF48
Parameter PL48
MR-J4-A_Ablaufdiagramm Parameteranzeige.eps
Fig. 6-8:
MR-J4-A – Parameter display selection
From an alarm
mode
To status display
mode
Basic setting
parameters
Gain/filter
parameters
Parameter PA01
Parameter PB01
Parameter PC01
Parameter PD01
Parameter PE01
Parameter PF01
Parameter PL01
Parameter Po01
Parameter PT01
Parameter PA02
Parameter PB02
Parameter PC02
Parameter PD02
Parameter PE02
Parameter PF02
Parameter PL02
Parameter Po02
Parameter PT02
Extension setting
parameters
MODE
I/O setting
parameters
Extension setting
parameters 2
Extension setting
parameters 3
Linear/DD motor
parameters
Option setting
parameters
Positioning setting parameters
UP
DOWN
Parameter PA31
Parameter PB63
Parameter PC79
Parameter PD47
Parameter PE63
Parameter PF47
Parameter PL47
Parameter Po31
Parameter PT47
Parameter PA32
Parameter PB64
Parameter PC80
Parameter PD48
Parameter PE64
Parameter PF48
Parameter PL48
Parameter Po32
Parameter PT48
MR-J4-A-RJ_Ablaufdiagramm Parameteranzeige.eps
Fig. 6-9:
MR-J4-A-RJ – Parameter display selection
Operation example
● Parameters of 5 or less digits
The following example shows the operation procedure performed after power-on to change the
control mode to the speed control mode with Parameter PA01 (Operation mode). Press “MODE”
to switch to the basic setting parameter screen.
Beginners Manual Servo Amplifiers MELSERVO J4
6 - 15
Operation and Settings
Display and operation section of MR-J4-A series
…… The parameter number is displayed.
Press “UP” or “DOWN” to change the number.
Press “SET” twice.
…… The set value of the specified parameter number flickers.
Press “UP” twice.
During flickering, the set value can be changed.
…… Use “UP” or “DOWN”.
(2: Speed control mode)
Press “SET” to enter.
MR-J4-A_Parametereinstellung 5 Stellen.eps
Fig. 6-10: Changing PA01 from “Position control mode” to “Speed control mode”
To shift to the next parameter, press the “UP” or “DOWN” button.
When changing the Parameter PA01 setting, change its set value, then switch power off once and
switch it on again to enable the new value.
● Parameters of 6 or more digits
The following example gives the operation procedure to change the electronic gear numerator
to “123456” with Parameter PA06 (Electronic gear numerator).
Press “MODE” to switch to the basic setting parameter screen.
Press “UP” or “DOWN” to select Parameter PA06.
Press “SET” once.
Setting of upper 1 digit
Setting of lower 4 digits
Press “MODE” once.
Press “SET” once.
…… The screen flickers ……
Press “UP” or “DOWN” to
change the setting.
Press “SET” once.
……
Enter the setting.
…
Press “MODE” once.
MR-J4-A_Parametereinstellung 6 Stellen.eps
Fig. 6-11: Changing the setting of PA06 to “123456”
6 - 16
Display and operation section of MR-J4-A series
6.1.10
b
NOTES
Operation and Settings
Test operation mode
WARNING:
● The test operation mode is designed for checking servo operation. Do not use it for actual
operation.
● If the servo motor operates unexpectedly, use EM2 (Forced stop 2) to stop it.
The test operation mode cannot be used in the absolute position detection system by DIO.
MR Configurator2 is required to perform positioning operation.
Test operation cannot be performed if SON (Servo-on) is not turned off.
Mode switching
Call the display screen shown after power-on. Select JOG operation or motor-less operation in the following procedure. Using the “MODE” button, show the diagnostic screen.
Press “UP” four times.
Press “SET” for longer than 2 s.
…… When this screen appears, JOG
operation can be performed.
Flickers in the test operation mode.
MR-J4-A_Mode switching Test operation.eps
Fig. 6-12: Mode switching for JOG operation or motor-less operation
Beginners Manual Servo Amplifiers MELSERVO J4
6 - 17
Operation and Settings
Display and operation section of MR-J4-A series
JOG operation
NOTE
When performing JOG operation, turn on EM2, LSP and LSN. LSP and LSN can be set to automatic
on by setting Parameter PD01 to “ C ”.
JOG operation can be performed when there is no command from the controller.
● Operation
The servo motor rotates while holding down the “UP” or the “DOWN” button. The servo motor
stops rotating by releasing the button. The operation condition can be changed using
MR Configurator2. The initial operation condition and setting range for operation are listed below.
Item
Initial setting
Setting range
Speed [1/min]
200
0 to instantaneous permissible speed
Acceleration/deceleration
time constant [ms]
1000
0 to 50000
Tab. 6-6:
Initial settings for operation
The following table shows how to use the buttons.
Button
Description
“UP”
Press to start CCW rotation.
Release to stop.
“DOWN”
Press to start CW rotation.
Release to stop.
Tab. 6-7:
Use of the buttons
If the USB cable is disconnected during JOG operation using the MR Configurator2, the servo
motor decelerates to a stop.
● Status display
Press the “MODE” button in the JOG operation-ready status to call the status display screen. When
the JOG operation is performed using the “UP” or “DOWN” button, the servo status is displayed
during the JOG operation. Every time the “MODE” button is pushed, the next status display screen
appears. When one cycle of the screen display is complete, it returns to the jog operation-ready
status screen. Refer to section 6.1.3 for details of status display. Note that the status display screen
cannot be changed by the “UP” or “DOWN” button during the JOG operation.
● Termination of JOG operation
To end the JOG operation, shut the power off once, or press the “MODE” button to switch to the
next screen, and then hold down the “SET” button for 2 s or longer.
6 - 18
Display and operation section of MR-J4-A series
Operation and Settings
Positioning operation
NOTES
MR Configurator2 is required to perform positioning operation.
Turn on EM2 (forced stop 2) when performing positioning operation.
For positioning operation of the servo amplifier MR-J4-A-RJ in positioning mode with the point
table method, program method, indexer method refer to the instruction manual.
Positioning operation can be performed when there is no command from a controller.
● Operation
!
Einstellmenü Positionierung.tif
Fig. 6-13: Setting menu of setup software for positioning
Motor speed [1/min]
Enter the servo motor speed into the “Motor speed” input field.
Acceleration/deceleration time constant [ms]
Enter the acceleration/deceleration time constant into the “Accel/decel time” input field.
Travel distance [pulse]
Enter the travel distance into the “Travel distance” input field.
LSP/LSN are automatically turned on
When setting the external stroke signal to automatic on, click the check box to enable it. When
it is not selected, turn on LSP and LSN externally.
Move till Z-phase signal
Travel is made until the travel distance is reached and the first Z-phase signal in the travelling
direction turns on.
Travel distance unit selection
Select with the option buttons whether the travel distance set in is in the command pulse
unit or in the encoder pulse unit.
When the command input pulse unit is selected, the value, which is the set travel distance
multiplied by the electronic gear, will be the command value. When the encoder pulse unit is
selected, the travel distance is not multiplied by the electronic gear.
Beginners Manual Servo Amplifiers MELSERVO J4
6 - 19
Operation and Settings
Display and operation section of MR-J4-A series
! Enable repeat operation
To perform repeat operation, click the check. The initial setting and setting range for the repeat
operation are listed in the following table.
Item
Initial setting
Setting range
Repeat pattern
Fwd. rot. (CCW) to rev. rot. (CW)
Fwd. rot. (CCW) to rev. rot. (CW)
Fwd. rot. (CCW) to fwd. rot. (CCW)
Rev. rot. (CW) to fwd. rot. (CCW)
Rev. rot. (CW) to rev. rot. (CW)
Dwell time [s]
2.0
0.1 to 50.0
Number of operations [times]
1
1 to 9999
Tab. 6-8:Initial settings for repeat operation
To perform continuous operation with the repeat pattern and dwell time settings, which are
set by referring to the above table, click the check box of “Make the aging function enabled”.
Forward/reverse the servo motor
Click the “Forward” button to rotate the servo motor in the forward rotation direction.
Click the “Reverse” button to rotate the servo motor in the reverse rotation direction.
Pause the servo motor
Click the “Pause“ button during servo motor rotation to temporarily stop the servo motor. This
button is enabled during servo motor rotation.
Stop the servo motor
Click the “Stop” button during servo motor rotation to stop the servo motor.
Forced stop
Click the “Forced stop” button during servo motor rotation to make a sudden stop. This button
is enabled during servo motor rotation.
Operation status
The operation status during the repeat operation, and the number of operations are displayed.
Axis No.
Axis No. in operation is displayed.
Termination of positioning operation window
Click the close button to cancel the positioning operation mode and close the window.
● Status display
The status display can be monitored during positioning operation.
6 - 20
Display and operation section of MR-J4-A series
Operation and Settings
Motor-less operation
Without connecting the servo motor, output signals or status display can be provided in response to
the input device as if the servo motor is actually running. This operation can be used to check the
sequence of a controller or the like.
● Start of motor-less operation
After setting “1” in Parameter PC60, cycle the power. After that, perform external operation
as in ordinary operation.
● Termination of motor-less operation
To terminate the motor-less operation, set Parameter PC60 to “0” and then turn the power
off.
Program operation
Positioning operation can be performed in two or more operation patterns combined, without using
a controller. Use this operation with the forced stop reset. This operation may be used independently
of whether servo-on or servo-off and whether a controller is connected or not.
Exercise control on the program operation screen of MR Configurator2. For full information, refer to
the MR Configurator2 Installation Guide
Operation
Screen control
Start
Click the “Operation start” button.
Stop
Click the “Stop” button.
Forced stop
Click the “Forced stop” button.
Tab. 6-9:
Buttons for program operation
Output signal (DO) forced output
Output signals can be switched on/off forcibly independently of the servo status. This function is used
for output signal wiring check, etc. Exercise control on the DO forced output screen of
MR Configurator2.
Beginners Manual Servo Amplifiers MELSERVO J4
6 - 21
Operation and Settings
6.2
Display and operation section of MR-J4-B(-RJ) series
Display and operation section of MR-J4-B(-RJ) series
On the servo amplifier display (three-digit, seven-segment LED), check the status of communication
with the servo system controller at power-on, and the axis number, and diagnose a malfunction at
occurrence of an alarm.
Switching to the test operation mode, deactivating control axes, and setting control axis No. are enabled with switches on the servo amplifier.
6.2.1
Overview
ON
1 2 3 4
MR-J4-B Anzeige_Bedienelemente.eps
Fig. 6-14: Display and controls of MR-J4-B(-RJ)
No.
Name
Description
Refer to
Display
The 3-digit, seven-segment LED shows the servo status
and alarm number
section 6.2.2
section 6.2.3
Used to set the axis number of the servo amplifier.
(Axis No. 1–16)
page 4-26
SW2-1 is used to perform the test operation mode.
SW2-2 is used for disabling the control axis.
SW2-3 and 2-4 are auxiliary switches for setting the axis
No. 17–64
page 6-27
page 4-26
7 8 9
2
B C DE
3 4 5 6
A
SW1:
Rotary axis setting switch
F 0 1
SW2: Control axis setting switch
ON
1 2 3 4
Tab. 6-10: Controls and function
Disabling control axis switch (SW2-2)
Turning “ON (up)” the disabling control axis switch disables the corresponding servo motor. The servo
motor will be disabled-axis status and will not be recognized by the controller.
Fig. 6-15:
ON
SW2-2 is switched ON
1 2 3 4
Control axis deactivation switch
6 - 22
MR-J4-B DIP 0100.eps
Display and operation section of MR-J4-B(-RJ) series
6.2.2
Operation and Settings
Scrolling display
Normal display
When there is no alarm, the axis No. and blank are displayed in rotation.
After 1.6 s
Status
Blank
After 0.2 s
Status
(1 digit)
Axis No.
(2 digits)
“b”: Indicates ready-off and servo-off status.
“C”: Indicates ready-on and servo-off status.
“d”: Indicates ready-on and servo-on status.
MR-J4-B Anzeigewechsel Normalbetrieb.eps
Fig. 6-16: Alternating display in normal operation
Alarm display
When an alarm occurs, the alarm number (two digits) and the alarm detail (one digit) are displayed following the status display. For example, the following shows when AL. 32 (Overcurrent) is occurring.
After 0.8 s
Status
After 0.8 s
Alarm No.
Blank
After 0.2 s
Status
(1 digit)
Axis No.
(2 digits)
Alarm No. Alarm detail
(2 digits)
(1 digit)
“n”: Indicates that an alarm is occurring.
MR-J4-B Anzeigewechsel Alarm.eps
Fig. 6-17: Alternating display when alarm occurs
Beginners Manual Servo Amplifiers MELSERVO J4
6 - 23
Operation and Settings
6.2.3
Display and operation section of MR-J4-B(-RJ) series
Display sequence
Servo amplifier power ON
System check in progress
Waiting for servo system controller power to switch ON
(SSCNET III communication)
Servo system controller power on
(SSCNET III/H communication begins)
Initial data communication with the servo system controller
(initialization communication)
When an alarm No. or warning No. is displayed
Ready-off and servo-off
Example:
When AL. 50 (Overload 1)
occurs at axis No. 1
Flickering
Ready-on
After 0.8 s
Flickering
Ready-on and servo-off
When alarm occurs,
its alarm code
appears.
After 0.8 s
Blank
Servo-on
Example:
Ready-on and servo-on
When AL. E1 (Overload
warning 1) occurs at axis No. 1
Flickering
After 0.8 s
Ordinary operation
Flickering
After 0.8 s
Servo system controller power off
Blank
During a non servo-off causing warning, the
decimal point on the third digit LED shows
the servo-on status.
Alarm reset or warning cleared
Servo system controller power on
MR-J4-B Flussdiagramm Anzeige.eps
Fig. 6-18: Status display of an axis
The segment of the last 2 digits shows the axis number.
Axis
No. 1
6 - 24
Axis
No. 2
Axis
No. 64
Display and operation section of MR-J4-B(-RJ) series
6.2.4
b
Operation and Settings
Test operation
WARNING:
● The test operation mode is designed for checking servo operation. It is not for checking
machine operation. Do not use this mode with the machine. Always use the servo motor
alone.
● If the servo motor operates abnormally, use EM2 (Forced stop 2) to stop it.
By using a personal computer and MR Configurator2, you can execute jog operation, positioning
operation, DO forced output program operation without connecting the servo system controller.
NOTES
The content described in this section indicates that the servo amplifier and a personal computer
are directly connected.
For full information, refer to the MR Configurator2 Installation Guide.
Test operation mode in MR Configurator2
NOTE
When the test operation mode is selected with the test operation select switch (SW2-1), the
SSCNET III/H communication for the servo amplifier in the test operation mode and the following
servo amplifiers is blocked.
● JOG operation
JOG operation can be performed without using the servo system controller. Use this operation
with the forced stop reset. This operation may be used independently of whether the servo is on
or off and whether the servo system controller is connected or not.
Exercise control on the jog operation screen of MR Configurator2.
Item
Initial setting
Setting range
Speed [1/min]
200
0 to max. speed
Acceleration/deceleration
time constant [ms]
1000
0 to 50000
Tab. 6-11: Operation pattern for jog operation
Operation method
Operation
Screen control
Forward rotation start
Keep pressing the “Forward”
button.
Reverse rotation start
Keep pressing the “Reverse”
button.
Stop
Release the “Forward” or
“Reverse” button.
Forced stop
Click the “Forced stop” button.
Beginners Manual Servo Amplifiers MELSERVO J4
Tab. 6-12:
When the check box of “Rotation only while the
CCW or CW button is being pushed.” is checked.
6 - 25
Operation and Settings
Display and operation section of MR-J4-B(-RJ) series
Operation
Screen control
Forward rotation start
Click the “Forward” button.
Reverse rotation start
Click the “Reverse” button.
Stop
Click the “Stop” button.
Forced stop
Click the “Forced stop” button.
Tab. 6-13:
When the check box of “Rotation only while the
CCW or CW button is being pushed.” is not checked.
● Positioning operation
Positioning operation can be performed without using the servo system controller. Use this
operation with the forced stop reset. This operation may be used independently of whether the
servo is on or off and whether the servo system controller is connected or not.
Exercise control on the positioning operation screen of MR Configurator2.
Item
Initial setting
Setting range
Travel distance [pulse]
4000
0 to 99999999
Speed [1/min]
200
0 to max. speed
Acceleration/deceleration time constant [ms]
1000
0 to 50000
Repeat pattern
Fwd. rot. (CCW) to rev. rot. (CW)
Fwd. rot. (CCW) to rev. rot. (CW)
Fwd. rot. (CCW) to fwd. rot. (CCW)
Rev. rot. (CW) to fwd. rot. (CCW)
Rev. rot. (CW) to rev. rot. (CW)
Dwell time [s]
2.0
0.1 to 50.0
Number of operations [times]
1
1 to 9999
Tab. 6-14: Operation pattern for positioning operation
Operation
Screen control
Forward rotation start
Click the “Forward” button.
Reverse rotation start
Click the “Reverse” button.
Stop
Click the “Stop” button.
Forced stop
Click the “Forced stop” button.
Tab. 6-15:
Operation method for positioning operation
● Program operation
Positioning operation can be performed in two or more operation patterns combined, without
using the servo system controller. Use this operation with the forced stop reset. This operation
may be used independently of whether the servo is on or off and whether the servo system
controller is connected or not.
Exercise control on the program operation screen of MR Configurator2.
6 - 26
Operation
Screen control
Start
Click the “Start” button.
Pause
Click the “Pause” button.
Stop
Click the “Stop” button.
Forced stop
Click the “Forced stop” button.
Tab. 6-16:
Operation method for program operation
Display and operation section of MR-J4-B(-RJ) series
Operation and Settings
● Output signal (DO) forced output
Output signals can be switched on/off forcibly independently of the servo status. Use this function
for output signal wiring check, etc. Exercise control on the DO forced output screen of
MR Configurator2.
Operation procedure
Turn off the power.
Turn “ON (up)” SW2-1.
ON
Set SW2-1 to “ON (up)”.
1 2 3 4
ON
1 2 3 4
MR-J4-B SW2-Einstellung.eps/MR-J4-B DIP 1000.eps
Fig. 6-19: Setting of SW2-1 for test operation
Turning “ON (up)” SW2-1 during power-on will not start the test operation mode.
Turn on the servo amplifier.
When initialization is completed, the decimal point on the first digit will flicker.
After 1.6 s
Flickering
After 0.2 s
When an alarm or warning also occurs during the test operation, the decimal point on the first
digit will flicker as follows.
After 0.8 s
After 0.8 s
Flickering
Flickering
After 0.2 s
Start operation with the personal computer.
Beginners Manual Servo Amplifiers MELSERVO J4
6 - 27
Operation and Settings
6.2.5
NOTES
Display and operation section of MR-J4-B(-RJ) series
Motor-less operation in controller
Use motor-less operation which is available by making the servo system controller parameter
setting.
Connect the servo system controller to the servo amplifier before the motor-less operation.
The motor-less operation using a controller is available with rotary servo motors only. It will be
available with linear servo motors and direct drive motors in the future.
Motor-less operation
Without connecting the servo motor to the servo amplifier, output signals or status displays can be
provided in response to the servo system controller commands as if the servo motor is actually running. This operation may be used to check the servo system controller sequence. Use this operation
with the forced stop reset. Use this operation with the servo amplifier connected to the servo system
controller.
To stop the motor-less operation, set the motor-less operation selection to “Disable” in the servo
parameter setting of the servo system controller. When the power supply is turned on next time,
motorless operation will be disabled.
Tab. 6-17:
Load conditions for motor-less operation
Load item
Condition
Load torque
0
Load to motor inertia
ratio
Same as the moment of inertia
of the servo motor
The following alarms and warning do not occur. However, the other alarms and warnings occur as
when the servo motor is connected.
Rotary servo
motor
Linear servo
motor
Direct drive
servo motor
Rotary servo
motor in fully
closed loop
system AL. 16 (Encoder initial communication error 1)
✔
✔
✔
✔
AL. 1E (Encoder initial communication error 2)
✔
✔
✔
✔
AL. 1F (Encoder initial communication error 3)
✔
✔
✔
✔
AL. 20 (Encoder normal communication error 1)
✔
✔
✔
✔
AL. 21 (Encoder normal communication error 2)
✔
✔
✔
✔
AL. 25 (Absolute position erased)
✔
—
✔
✔
AL. 28 (Linear encoder error 2)
—
✔
—
✔
AL. 2A (Linear encoder error 1)
—
✔
—
✔
AL. 2B (Encoder counter error)
—
—
✔
—
AL. 92 (Battery cable disconnection warning)
✔
—
✔
✔
AL. 9F (Battery warning)
✔
—
✔
✔
AL. 70 (Load-side encoder error 1)
—
—
—
✔
AL. 71 (Load-side encoder error 2)
—
—
—
✔
Alarm and warning
Tab. 6-18: Alarms and warnings during motor-less operation
6 - 28
The fully closed loop system is available for the MR-J4-B(-RJ) servo amplifiers of which software version is A3 or above. Check the software version using MR Configurator2.
Display and operation section of MR-J4-B(-RJ) series
Operation and Settings
Operation procedure
Set the servo amplifier to the servo-off status.
Set Parameter PC05 to “1”, turn “OFF (down: normal condition side)” the test operation mode
switch (SW2-1), and then turn on the power supply.
ON
Set SW2-1 to “OFF (down)”.
1 2 3 4
ON
1 2 3 4
MR-J4-B SW2-Einstellung.eps/MR-J4-B DIP 0000.eps
Fig. 6-20: Setting of SW2-1 for motor-less operation
Start the motor-less operation with the servo system controller.
The display shows the following screen.
The decimal point flickers.
Beginners Manual Servo Amplifiers MELSERVO J4
6 - 29
Operation and Settings
6.3
Display and operation section of MR-J4W-B series
Display and operation section of MR-J4W-B series
On the servo amplifier display (three-digit, seven-segment LED), check the status of communication
with the servo system controller at power-on, and the axis number, and diagnose a malfunction at
occurrence of an alarm.
Switching to the test operation mode, deactivating control axes, and setting control axis No. are enabled with switches on the servo amplifier.
6.3.1
Overview
ON
1 2 3 4 5 6
MR-J4W-B Anzeige_Bedienelemente.eps
Fig. 6-21: Display and controls of MR-J4-B
No.
Name
Description
Refer to
Display
The 3-digit, seven-segment LED shows the servo status
and alarm number
section 6.2.2
section 6.2.3
Used to set the axis number of the servo amplifier.
(Axis No. 1–16)
page 4-27
USB connector (CN5)
Connect with PC for communication
section 4.4.2
SW2: Control axis setting switch
SW2-1 is used to perform the test operation mode.
7 8 9
2
B C DE
3 4 5 6
A
SW1:
Rotary axis setting switch
F 0 1
ON
1 2 3 4 5 6
SW2-2, 2-3, 2-4 are used for disabling the control axes
A/B/C .
SW2-5 and 2-6 are auxiliary switches for setting the axis
No. 17–64
page 6-35
page 4-27
Tab. 6-19: Controls and function
SW2-4 is only for the 3-axes model MR-J4W3-B to disable axis C. With the 2-axes model MR-J4W2-B
SW2-4 is for manufacturer setting.
Disabling control axis switches (SW2-2, SW2-3, and SW2-4)
For disabling the control axes refer to section 4.7.
6 - 30
Display and operation section of MR-J4W-B series
6.3.2
Operation and Settings
Scrolling display
Displaying the status of each axis in rotation enables you to check the status of all axes.
Normal display
When there is no alarm, the status of all axes are displayed in rotation.
After 0.2 s
After 1.6 s
MR-J4
2-axis
servo
amplifier
A-axis status
Blank
After 1.6 s
B-axis status
After 0.2 s
Blank
After 1.6 s
A-axis status
After 0.2 s
Blank
After 1.6 s
B-axis status
Blank
After 0.2 s
After
1.6 s
MR-J4
3-axis
servo
amplifier
A-axis status
After 0.2 s
Blank
After 1.6 s
B-axis status
After 0.2 s
Blank
After 1.6 s
C-axis status
After 0.2 s
After 1.6 s
Blank
Blank
After 0.2 s
Status
(1 digit)
Axis No.
(2 digits)
“b”: Indicates ready-off and servo-off status.
“C”: Indicates ready-on and servo-off status.
“d”: Indicates ready-on and servo-on status.
MR-J4W-B Anzeigewechsel Normalbetrieb.eps
Fig. 6-22:
Alternating display in normal operation
Alarm display
When an alarm occurs, the alarm number (two digits) and the alarm detail (one digit) are displayed following the status display. For example, the following shows when AL. 16 (Encoder initial communication error 1 is occurring at the A-axis, and AL. 32 (Overcurrent) is occurring at the B-axis
simultaneously.
After
0.8 s
After 0.8 s
After 0.2 s
After
0.8 s
After
0.8 s
MR-J4 2-axis
servo amplifier
A-axis status
A-axis
alarm No.
Blank
B-axis
status
B-axis alarm
No.
Blank
After 0.2 s
Status
(1 digit)
Axis No.
(2 digits)
Alarm No.
(2 digits)
Alarm detail
(1 digit)
“n”: Indicates that an alarm is occurring.
MR-J4W-B Anzeigewechsel Alarm.eps
Fig. 6-23: Alternating display when alarm occurs
Beginners Manual Servo Amplifiers MELSERVO J4
6 - 31
Operation and Settings
6.3.3
Display and operation section of MR-J4W-B series
Display sequence
Servo amplifier power ON
System check in progress
Waiting for servo system controller power to switch ON
(SSCNET III communication)
Servo system controller power on
(SSCNET III/H communication begins)
Initial data communication with the servo system controller
(initialization communication)
When an alarm No. or warning No. is displayed
Ready-off and servo-off
Example:
When AL. 50 (Overload 1)
occurs at axis No. 1
Flickering
Ready-on
After 0.8 s
Flickering
Ready-on and servo-off
When alarm occurs,
its alarm code
appears.
After 0.8 s
Blank
Servo-on
Example:
Ready-on and servo-on
When AL. E1 (Overload
warning 1) occurs at axis No. 1
Flickering
After 0.8 s
Ordinary operation
Flickering
After 0.8 s
Servo system controller power off
Blank
During a non servo-off causing warning, the
decimal point on the third digit LED shows
the servo-on status.
Alarm reset or warning cleared
Servo system controller power on
MR-J4-B Flussdiagramm Anzeige.eps
Fig. 6-24: Status display of an axis
The segment of the last 2 digits shows the axis number.
Axis
No. 1
6 - 32
Axis
No. 2
Axis
No. 64
Display and operation section of MR-J4W-B series
6.3.4
b
Operation and Settings
Test operation
WARNING:
● The test operation mode is designed for checking servo operation. It is not for checking
machine operation. Do not use this mode with the machine. Always use the servo motor
alone.
● If the servo motor operates abnormally, use EM2 (Forced stop 2) to stop it.
By using a personal computer and MR Configurator2, you can execute jog operation, positioning
operation, DO forced output program operation without connecting the servo system controller.
NOTES
The content described in this section indicates that the servo amplifier and a personal computer
are directly connected.
For full information, refer to the MR Configurator2 Installation Guide.
Test operation mode in MR Configurator2
NOTES
All axes will be in the test operation mode for the multi-axis servo amplifier. Although only one
axis is active in the mode.
When the test operation mode is selected with the test operation select switch (SW2-1), the
SSCNET III/H communication for the servo amplifier in the test operation mode and the following
servo amplifiers is blocked.
● JOG operation
JOG operation can be performed without using the servo system controller. Use this operation
with the forced stop reset. This operation may be used independently of whether the servo is on
or off and whether the servo system controller is connected or not.
Exercise control on the jog operation screen of MR Configurator2.
Item
Initial setting
Setting range
Speed [1/min]
200
0 to max. speed
Acceleration/deceleration
time constant [ms]
1000
0 to 50000
Tab. 6-20: Operation pattern for jog operation
Operation method
Operation
Screen control
Forward rotation start
Keep pressing the “Forward”
button.
Reverse rotation start
Keep pressing the “Reverse”
button.
Stop
Release the “Forward” or
“Reverse” button.
Forced stop
Click the “Forced stop” button.
Beginners Manual Servo Amplifiers MELSERVO J4
Tab. 6-21:
When the check box of “Rotation only while the
CCW or CW button is being pushed.” is checked.
6 - 33
Operation and Settings
Display and operation section of MR-J4W-B series
Operation
Screen control
Forward rotation start
Click the “Forward” button.
Reverse rotation start
Click the “Reverse” button.
Stop
Click the “Stop” button.
Forced stop
Click the “Forced stop” button.
Tab. 6-22:
When the check box of “Rotation only while the
CCW or CW button is being pushed.” is not checked.
● Positioning operation
Positioning operation can be performed without using the servo system controller. Use this
operation with the forced stop reset. This operation may be used independently of whether the
servo is on or off and whether the servo system controller is connected or not.
Exercise control on the positioning operation screen of MR Configurator2.
Item
Initial setting
Setting range
Travel distance [pulse]
4000
0 to 99999999
Speed [1/min]
200
0 to max. speed
Acceleration/deceleration time constant [ms]
1000
0 to 50000
Repeat pattern
Fwd. rot. (CCW) to rev. rot. (CW)
Fwd. rot. (CCW) to rev. rot. (CW)
Fwd. rot. (CCW) to fwd. rot. (CCW)
Rev. rot. (CW) to fwd. rot. (CCW)
Rev. rot. (CW) to rev. rot. (CW)
Dwell time [s]
2.0
0.1 to 50.0
Number of operations [times]
1
1 to 9999
Tab. 6-23: Operation pattern for positioning operation
Operation
Screen control
Forward rotation start
Click the “Forward” button.
Reverse rotation start
Click the “Reverse” button.
Stop
Click the “Stop” button.
Forced stop
Click the “Forced stop” button.
Tab. 6-24:
Operation method for positioning operation
● Program operation
Positioning operation can be performed in two or more operation patterns combined, without
using the servo system controller. Use this operation with the forced stop reset. This operation
may be used independently of whether the servo is on or off and whether the servo system
controller is connected or not.
Exercise control on the program operation screen of MR Configurator2.
6 - 34
Operation
Screen control
Start
Click the “Start” button.
Pause
Click the “Pause” button.
Stop
Click the “Stop” button.
Forced stop
Click the “Forced stop” button.
Tab. 6-25:
Operation method for positioning operation
Display and operation section of MR-J4W-B series
Operation and Settings
● Output signal (DO) forced output
Output signals can be switched on/off forcibly independently of the servo status. Use this function
for output signal wiring check, etc. Exercise control on the DO forced output screen of
MR Configurator2.
Operation procedure
Turn off the power.
Turn “ON (up)” SW2-1.
ON
Set SW2-1 to “ON (up)”.
1 2 3 4 5 6
ON
1 2 3 4 5 6
MR-J4W-B SW2-Einstellung.eps/MR-J4W-B DIP 100000.eps
Fig. 6-25: Setting of SW2-1 for test operation
Turning “ON (up)” SW2-1 during power-on will not start the test operation mode.
Turn on the servo amplifier.
When initialization is completed, the decimal point on the first digit will flicker.
After 1.6 s
After 0.2 s
After 1.6 s
Flickering
Flickering
After 0.2 s
When an alarm or warning also occurs during the test operation, the decimal point on the first
digit will flicker as follows.
After 0.8 s
After 0.8 s
Flickering
Flickering
After 0.2 s
Start operation with the personal computer.
Beginners Manual Servo Amplifiers MELSERVO J4
6 - 35
Operation and Settings
6.3.5
NOTES
Display and operation section of MR-J4W-B series
Motor-less operation in controller
Use motor-less operation which is available by making the servo system controller parameter
setting
Connect the servo system controller to the servo amplifier before the motor-less operation.
The motor-less operation using a controller is available with rotary servo motors only. It will be
available with linear servo motors and direct drive motors in the future.
Motor-less operation
Without connecting the servo motor to the servo amplifier, output signals or status displays can be
provided in response to the servo system controller commands as if the servo motor is actually running. This operation may be used to check the servo system controller sequence. Use this operation
with the forced stop reset. Use this operation with the servo amplifier connected to the servo system
controller.
To stop the motor-less operation, set the motor-less operation selection to “Disable” in the servo
parameter setting of the servo system controller. When the power supply is turned on next time,
motorless operation will be disabled.
Tab. 6-26:
Load conditions for motor-less operation
Load item
Condition
Load torque
0
Load to motor inertia
ratio
Same as the moment of inertia
of the servo motor
The following alarms and warning do not occur. However, the other alarms and warnings occur as
when the servo motor is connected.
Rotary servo
motor
Linear servo
motor
Direct drive
servo motor
Rotary servo
motor in fully
closed loop
system AL. 16 (Encoder initial communication error 1)
✔
✔
✔
✔
AL. 1E (Encoder initial communication error 2)
✔
✔
✔
✔
AL. 1F (Encoder initial communication error 3)
✔
✔
✔
✔
AL. 20 (Encoder normal communication error 1)
✔
✔
✔
✔
AL. 21 (Encoder normal communication error 2)
✔
✔
✔
✔
AL. 25 (Absolute position erased)
✔
—
✔
✔
AL. 28 (Linear encoder error 2)
—
✔
—
✔
AL. 2A (Linear encoder error 1)
—
✔
—
✔
AL. 2B (Encoder counter error)
—
—
✔
—
AL. 92 (Battery cable disconnection warning)
✔
—
✔
✔
AL. 9F (Battery warning)
✔
—
✔
✔
AL. 70 (Load-side encoder error 1)
—
—
—
✔
AL. 71 (Load-side encoder error 2)
—
—
—
✔
Alarm and warning
Tab. 6-27: Alarms and warnings during motor-less operation
6 - 36
The fully closed loop system is available for the MR-J4W2-B servo amplifiers of which software
version is A3 or above. Check the software version using MR Configurator2.
Display and operation section of MR-J4W-B series
Operation and Settings
Operation procedure
Set the servo amplifier to the servo-off status.
Set parameter PC05 to “1”, turn “OFF (down: normal condition side)” the test operation
mode switch (SW2-1), and then turn on the power supply.
ON
Set SW2-1 to “OFF (down)”.
1 2 3 4 5 6
ON
1 2 3 4 5 6
MR-J4W-B SW2-Einstellung.eps/MR-J4W-B DIP 000000.eps
Fig. 6-26: Setting of SW2-1 for motor-less operation
Start the motor-less operation with the servo system controller.
The display shows the following screen.
The decimal point flickers.
Beginners Manual Servo Amplifiers MELSERVO J4
6 - 37
Operation and Settings
6 - 38
Display and operation section of MR-J4W-B series
MR-J4-A
7
Parameters
Parameters
b
WARNING:
● Never make a drastic adjustment or change to the parameter values as doing so will make
the operation unstable.
● If fixed values are written in the digits of a parameter, do not change these values.
● Do not change parameters for manufacturer setting.
● Do not set a value other than the described values to each parameter.
7.1
MR-J4-A
7.1.1
Basic setting parameters
NOTES
To enable a parameter whose symbol is preceded by *, cycle the power after setting it.
Abbreviations of operation modes indicate the followings.
– Standard:
Standard (semi closed loop system) use of the rotary servo motor
– Full.:
Fully closed loop system use of the rotary servo motor
– Lin.:
Linear servo motor use
– DD:
Direct drive (DD) motor use
The symbols in the control mode column mean as follows.
– P:
Position control mode
– S:
Speed control mode
– T:
Torque control mode
Beginners Manual Servo Amplifiers MELSERVO J4
7-1
Parameters
MR-J4-A
Parameters PA
Control
mode
Operation mode
1000H
—
✔ ✔ ✔ ✔ ✔ ✔ ✔
T
*STY
S
PA01
P
Unit
DD
Initial
value
Lin.
Symbol Name
Full.
No.
Standard
Operation
mode
PA02
*REG
Regenerative option
0000H
—
✔ ✔ ✔ ✔ ✔ ✔ ✔
PA03
*ABS
Absolute position detection system
0000H
—
✔ ✔ ✔ ✔ ✔ — —
PA04
*AOP1
Function selection A-1
2000H
—
✔ ✔ ✔ ✔ ✔ ✔ —
PA05
*FBP
Number of command input pulses per revolution
10000
—
✔ ✔ ✔ ✔ ✔ — —
PA06
CMX
Electronic gear numerator (command pulse multiplication numerator)
1
—
✔ ✔ ✔ ✔ ✔ — —
CDV
Electronic gear denominator
(command pulse multiplication denominator)
1
—
✔ ✔ ✔ ✔ ✔ — —
PA07
PA08
ATU
Auto tuning mode
0001H
—
✔ ✔ ✔ ✔ ✔ ✔ —
PA09
RSP
Auto tuning response
16
—
✔ ✔ ✔ ✔ ✔ ✔ —
PA10
INP
In-position range
100
pulse
✔ ✔ ✔ ✔ ✔ — —
PA11
TLP
Forward rotation torque limit/positive direction thrust limit
100.0
%
✔ ✔ ✔ ✔ ✔ ✔ ✔
PA12
TLN
Reverse rotation torque limit/negative direction thrust limit
100.0
%
✔ ✔ ✔ ✔ ✔ ✔ ✔
PA13
*PLSS
Command pulse input form
0100H
—
✔ ✔ ✔ ✔ ✔ — —
PA14
*POL
Rotation direction selection/travel direction selection
0
—
✔ ✔ ✔ ✔ ✔ — —
PA15
*ENR
Encoder output pulses
4000
pulse/rev
✔ ✔ ✔ ✔ ✔ ✔ ✔
PA16
*ENR2
Encoder output pulses 2
1
—
✔ ✔ ✔ ✔ ✔ ✔ ✔
PA17
*MSR
Servo motor series setting
0000H
—
— — ✔ — ✔ ✔ ✔
PA18
*MTY
Servo motor type setting
0000H
—
— — ✔ — ✔ ✔ ✔
PA19
*BLK
Parameter writing inhibit
00AAH
—
✔ ✔ ✔ ✔ ✔ ✔ ✔
PA20
*TDS
Tough drive setting
0000H
—
✔ ✔ ✔ ✔ ✔ ✔ ✔
PA21
*AOP3
Function selection A-3
0001H
—
✔ ✔ ✔ ✔ ✔ ✔ —
PA22
—
For manufacturer setting
0000H
—
— — — — — — —
PA23
DRAT
Drive recorder arbitrary alarm trigger setting
0000H
—
✔ ✔ ✔ ✔ ✔ ✔ ✔
PA24
AOP4
Function selection A-4
0000H
—
✔ ✔ ✔ ✔ ✔ ✔ —
PA25
OTHOV
One-touch tuning – Overshoot permissible level
0
%
✔ ✔ ✔ ✔ ✔ ✔ —
PA26
*AOP5
Function selection A-5
0000H
—
✔ ✔ ✔ ✔ ✔ ✔ —
PA27
—
0000H
—
— — — — — — —
PA28
—
0000H
—
— — — — — — —
PA29
—
0000H
—
— — — — — — —
PA30
—
0000H
—
— — — — — — —
PA31
—
0000H
—
— — — — — — —
PA32
—
0000H
—
— — — — — — —
Tab. 7-1:
7-2
For manufacturer setting
List of basic setting parameters for MR-J4-A
MR-J4-A
Parameters
Description of basic setting parameters
Number
Symbol
Initial value
PA01
*STY
1000H
Unit
Setting range
Control
mode
Refer to text
PST
Operation mode
1 0
Control mode selection
0: Position control
1: Position and speed control
2: Speed control
3: Speed and torque control
4: Torque control
5: Torque and position control
Operation mode selection
0: Standard control mode
1: Fully closed loop control mode
4: Linear servo motor control mode
6: DD motor control mode (except 400 V class servo amplifiers)
Setting other than above will trigger AL. 37 (Parameter error). The linear servo system, direct drive
servo system and fully closed loop system are available for the MR-J4-A(-RJ) servo amplifiers of
which software version is A5 or later.
For manufacturer setting
10: Manufacturer setting
PA02
*REG
0000H
Refer to text
PST
Regenerative option
0 0
Select the regenerative option.
00: Regenerative option is not used.
- For the servo amplifier of 100 W, a regenerative resistor is not used.
- For the servo amplifier of 0.2 kW to 7 kW, the built-in regenerative resistor is used.
- The supplied regenerative resistor or a regenerative option is used with the servo amplifier of
11 kW to 22 kW.
01: FR-RC-(H)/FR-CV-(H)/FR-BU2-(H)
When you use FR-RC-(H), FR-CV-(H) or FR-BU2-(H), select “Mode 2 (1)” in parameter PC27
(Undervoltage alarm detection mode selection).
02: MR-RB032
03: MR-RB12
04: MR-RB32
05: MR-RB30
06: MR-RB50 (Cooling fan is required.)
08: MR-RB31
09: MR-RB51 (Cooling fan is required.)
0B: MR-RB3N
0C: MR-RB5N (Cooling fan is required.)
80: MR-RB1H-4
81: MR-RB3M-4 (Cooling fan is required.)
82: MR-RB3G-4 (Cooling fan is required.)
83: MR-RB5G-4 (Cooling fan is required.)
84: MR-RB34-4 (Cooling fan is required.)
85: MR-RB54-4 (Cooling fan is required.)
91: MR-RB3U-4 (Cooling fan is required.)
92: MR-RB5U-4 (Cooling fan is required.)
FA: When the supplied regenerative resistor or a regenerative option used with the servo amplifier
of 11 kW to 22 kW is cooled by a cooling fan to increase regenerative ability.
For manufacturer setting
00: Manufacturer setting
Incorrect setting may cause the regenerative option to burn.
If a selected regenerative option is not for use with the servo amplifier, AL. 37 (Parameter error) occurs.
Tab. 7-2:
Detailed overview of parameters PA for MR-J4-A (1)
Beginners Manual Servo Amplifiers MELSERVO J4
7-3
Parameters
MR-J4-A
Number
Symbol
Initial value
PA03
*ABS
0000H
Unit
Setting range
Control
mode
Refer to text
P
Absolute position detection system
0 0 0
Absolute position detection system selection
0: Disabled (incremental system)
1: Enabled (absolute position detection system by DIO)
2: Enabled (absolute position detection system by communication)
(available for the software version A3 or later)
For manufacturer setting
000: Manufacturer setting
Set this parameter when using the absolute position detection system in the position control mode.
PA04
*AOP1
2000H
Refer to text
PS
Function selection A-1
0 0 0
For manufacturer setting
000: Manufacturer setting
Forced stop deceleration function selection
0: Forced stop deceleration function disabled (with EM1)
2: Forced stop deceleration function enabled (with EM2)
Refer to the following table for details.
PA05
Setting value
EM2/EM1
0
EM1
2
EM2
*FBP
Deceleration method
EM2 or EM1 is off
Alarm occurred
MBR (Electromagnetic brake
MBR (Electromagnetic brake
interlock) turns off without the interlock) turns off without the
forced stop deceleration.
forced stop deceleration.
MBR (Electromagnetic brake
interlock) turns off after the
forced stop deceleration.
10000
MBR (Electromagnetic brake
interlock) turns off after the
forced stop deceleration.
1000–1000000
P
Number of command input pulses per revolution
The servo motor rotates based on set command input pulses.
To enable the parameter value, set “Electronic gear selection” to “Number of command input pulses per revolution
(1)” in parameter PA21. “1” cannot be set in parameter PA21 in the linear control mode.
Tab. 7-2:
7-4
Detailed overview of parameters PA for MR-J4-A (2)
MR-J4-A
Parameters
Number
Symbol
Initial value
PA06
CMX
1
Unit
Setting range
Control
mode
1–16777215
P
Electronic gear numerator (command pulse multiplication numerator)
Set the numerator of the electronic gear.
To enable the parameter, set “Electronic gear selection” to “Electronic gear (0)” or “J3A electronic gear setting value
compatibility mode (2)” in parameter PA21.
The following shows a standard of the setting range of the electronic gear.
1
<
10
CMX
CDV
< 4000
If the set value is outside this range, noise may be generated during acceleration/deceleration or operation may not be performed at the preset speed and/or acceleration/deceleration time constants.
Number of command input pulses per revolution (Parameter PA05: “1000” to “1000000”)
Electronic gear
(Parameter PA06/PA07)
Electronic gear selection
(x) (Parameter PA21)
CMX
CDV
“0” (initial value)
[pulse/rev]
Servo motor
Command
pulse train
Pt
FBP
“1”
“2”
+
-
Deviation
counter
M
CMX
CDV
X16
Encoder
Pt (servo motor resolution): 4194304 pulses/rev
Always set the electronic gear with servo-off state to prevent unexpected operation due to improper setting.
PA07
CDV
1
1–16777215
P
Electronic gear denominator (command pulse multiplication denominator)
Set the denominator of the electronic gear.
To enable the parameter, set “Electronic gear selection” to “Electronic gear (0)” or “J3A electronic gear setting value
compatibility mode (2)” in parameter PA21.
Tab. 7-2:
Detailed overview of parameters PA for MR-J4-A (3)
Beginners Manual Servo Amplifiers MELSERVO J4
7-5
Parameters
MR-J4-A
Number
Symbol
Initial value
PA08
ATU
0001H
Unit
Setting range
Control
mode
Refer to text
PS
Auto tuning mode
Gain adjustment mode selection
0 0 0
Select the gain adjustment mode.
0: 2 gain adjustment mode 1 (interpolation mode)
1: Auto tuning mode 1
2: Auto tuning mode 2
3: Manual mode
4: 2 gain adjustment mode 2
Refer to the following table for details.
For manufacturer setting
000: Manufacturer setting
Setting value Gain adjustment mode
2 gain adjustment mode 1
(interpolation mode)
PB06
PB08
PB09
PB10
(Load to motor inertia ratio)
(Position loop gain)
(Speed loop gain)
(Speed integral compensation)
1
Auto tuning mode 1
PB06
PB07
PB08
PB09
PB10
(Load to motor inertia ratio)
(Model loop gain)
(Position loop gain)
(Speed loop gain)
(Speed integral compensation)
2
Auto tuning mode 2
PB07
PB08
PB09
PB10
(Model loop gain)
(Position loop gain)
(Speed loop gain)
(Speed integral compensation)
3
Manual mode
—
4
2 gain adjustment mode 2
PB08 (Position loop gain)
PB09 (Speed loop gain)
PB10 (Speed integral compensation)
0
Tab. 7-2:
7-6
Automatically adjusted parameter
Detailed overview of parameters PA for MR-J4-A (4)
MR-J4-A
Parameters
Number
Symbol
Initial value
PA09
RSP
16
Unit
Setting range
Control
mode
1–40
PS
Auto tuning response
Set a response of the auto tuning.
Machine characteristic
Setting value
1
2
3
4
5
6
7
8
9
10
11
12
13
14
15
16
17
18
19
20
PA10
Response
Guideline for
machine
resonance
frequency [Hz]
low
Machine characteristic
Setting value
2.7
3.6
4.9
6.6
10.0
11.3
12.7
14.3
16.1
18.1
20.4
23.0
25.9
29.2
32.9
37.0
41.7
47.0
52.9
59.6
middle
INP
Response
21
22
23
24
25
26
27
28
29
30
31
32
33
34
35
36
37
38
39
40
100
Guideline for
machine
resonance
frequency [Hz]
middle
67.1
75.6
85.2
95.9
108.0
121.7
137.1
154.4
173.9
195.9
220.6
248.5
279.9
315.3
355.1
400.0
446.6
501.2
571.5
642.7
high
pulse
0–65535
P
%
0.0–100.0
PST
In-position range
Set an in-position range per command pulse.
To change it to the servo motor encoder pulse unit, set parameter PC24.
PA11
TLP
100.0
Forward rotation torque limit/positive direction thrust limit
You can limit the torque or thrust generated by the servo motor. Set the parameter referring to the instruction manual.
When you output torque or thrust as analog monitor output, the larger value of parameter PA11 (Forward rotation torque
limit/positive direction thrust limit value) or PA12 (Reverse rotation torque limit/negative direction thrust limit value) will be
the maximum output voltage (8 V).
Set the parameter on the assumption that the maximum torque or thrust is 100.0 [%].
The parameter is for limiting the torque of the servo motor in the CCW power running or CW regeneration, or limiting the
thrust of the linear servo motor in the positive direction power running or negative direction regeneration. Set this parameter to “0.0” to generate no torque or thrust.
PA12
TLN
100.0
%
0.0–100.0
PST
Reverse rotation torque limit/negative direction thrust limit
You can limit the torque or thrust generated by the servo motor.
When you output torque or thrust with analog monitor output, the larger value of parameter PA11 (Forward rotation torque
limit/positive direction thrust limit value) or PA12 (Reverse rotation torque limit/negative direction thrust limit value) will be
the maximum output voltage (8 V).
Set the parameter on the assumption that the maximum torque or thrust is 100.0 [%].
The parameter is for limiting the torque of the servo motor in the CCW power running or CW regeneration, or limiting the
thrust of the linear servo motor in the positive direction power running or negative direction regeneration. Set this parameter to “0.0” to generate no torque or thrust.
Tab. 7-2:
Detailed overview of parameters PA for MR-J4-A (5)
Beginners Manual Servo Amplifiers MELSERVO J4
7-7
Parameters
MR-J4-A
Number
Symbol
Initial value
PA13
*PLSS
0100H
Unit
Setting range
Control
mode
Refer to text
P
Command pulse input form
0
Command input pulse train form selection
0: Forward/reverse rotation pulse train
1: Signed pulse train
2: A-phase/B-phase pulse train (The servo amplifier imports input pulses after multiplying by four.)
Refer to the following table for settings.
Pulse train logic selection
0: Positive logic
1: Negative logic
Refer to the following table for settings.
Command input pulse train filter selection
Selecting proper filter enables to enhance noise immunity.
0: Command input pulse train is 4 Mpulses/s or less.
1: Command input pulse train is 1 Mpulse/s or less.
2: Command input pulse train is 500 kpulses/s or less.
3: Command input pulse train is 200 kpulses/s or less (available for the software version A5 or later)
1 Mpulse/s or lower commands are supported by “1”. When inputting commands over 1 Mpulse/s
and 4 Mpulses/s or lower, set “0”.
Incorrect setting may cause the following malfunctions.
– Setting a value higher than actual command will lower noise immunity.
– Setting a value lower than actual command will cause a position mismatch.
For manufacturer setting
0: Manufacturer setting
Setting value Pulse train form
11H
Negative logic
10H
Forward rotation pulse
train (positive direction
pulse train)
Reverse rotation pulse
train (negative direction
pulse train)
02H
Positive logic
01H
PP
NP
Pulse train + sign
NP
B-phase pulse train
00H
Reverse rotation
(negative direction)
command
PP
A-phase pulse train
12H
Forward rotation
(positive direction)
command
Forward rotation pulse
train (positive direction
pulse train)
Reverse rotation pulse
train (negative direction
pulse train)
L
H
H
L
PP
NP
PP
NP
PP
Pulse train + sign
NP
A-phase pulse train
B-phase pulse train
PP
NP
Arrows in the table indicate the timing of importing pulse trains. A-phase and B-phase pulse trains are imported after they
have been multiplied by 4.
Tab. 7-2:
7-8
Detailed overview of parameters PA for MR-J4-A (6)
MR-J4-A
Parameters
Number
Symbol
Initial value
PA14
*POL
0
Unit
Setting range
Control
mode
0, 1
P
Rotation direction selection/travel direction selection
Select the servo motor rotation direction or linear servo motor travel direction for the input pulse train.
Servo motor rotation direction/
linear servo motor travel direction
Servo motor rotation direction
Setting
value
Forward rotation (CCW)
Reverse rotation (CW)
When forward rotation When reverse rotation
pulse is input
pulse is input
0
CCW or positive
direction
CW or negative
direction
1
CW or negative
direction
CCW or positive
direction
The positive/negative directions of the linear servo motor are as follows.
Negative direction
Negative direction Secondary side
Secondary side
Positive direction
Positive direction
ble
Ta
Primary side
Primary side
Secondary side
Positive direction
Primary side
Negative direction
LM-H3/LM-F series
PA15
LM-U2 series
*ENR
4000
LM-K2 series
pulse/rev
1–4194304
PST
Encoder output pulses
Set the encoder output pulses from the servo amplifier by using the number of output pulses per revolution, dividing ratio,
or electronic gear ratio (after multiplication by 4).
To set a numerator of the electronic gear, select “A-phase/B-phase pulse electronic gear setting (3)” of “Encoder output pulse setting selection” in parameter PC19.
The maximum output frequency is 4.6 Mpulses/s. Set the parameter within this range.
PA16
*ENR2
1
1–4194304
PST
Encoder output pulses 2
Set a denominator of the electronic gear for the A/B-phase pulse output.
To set a denominator of the electronic gear, select “A-phase/B-phase pulse electronic gear setting (3)” of “Encoder
output pulse setting selection” in parameter PC19.
Tab. 7-2:
Detailed overview of parameters PA for MR-J4-A (7)
Beginners Manual Servo Amplifiers MELSERVO J4
7-9
Parameters
MR-J4-A
Number
Symbol
Initial value
PA17
*MSR
0000H
Unit
Setting range
Control
mode
Refer to text
PST
Servo motor series setting
When you use a linear servo motor, select its model from parameters PA17 and PA18. Set this and parameter PA18 at a time.
Refer to the following table for settings.
Linear servo motor
series
LM-H3P2A-07P-BSS0
LM-H3P3A-12P-CSS0
LM-H3P3B-24P-CSS0
LM-H3P3C-36P-CSS0
LM-H3P3D-48P-CSS0
LM-H3P7A-24P-ASS0
LM-H3P7B-48P-ASS0
LM-H3P7C-72P-ASS0
LM-H3P7D-96P-ASS0
LM-U2PAB-05M-0SS0
LM-U2PAD-10M-0SS0
LM-U2PAF-15M-0SS0
LM-U2PBB-07M-1SS0
LM-U2PBD-15M-1SS0
LM-U2PBF-22M-1SS0
LM-U2P2B-40M-2SS0
LM-U2P2C-60M-2SS0
LM-U2P2D-80M-2SS0
LM-FP2B-06M-1SS0 LM-FP2D-12M-1SS0 LM-FP2F-18M-1SS0 LM-FP4B-12M-1SS0 LM-FP4D-24M-1SS0 LM-FP4F-36M-1SS0 LM-FP4H-48M-1SS0 LM-FP5H-60M-1SS0 LM-FP2B-06M-1SS0 LM-FP2D-12M-1SS0 LM-FP2F-18M-1SS0 LM-FP4B-12M-1SS0 LM-FP4D-24M-1SS0 LM-FP4F-36M-1SS0 LM-FP4H-48M-1SS0 LM-FP5H-60M-1SS0 LM-K2P1A-01M-2SS1
LM-K2P1C-03M-2SS1
LM-K2P2A-02M-1SS1
LM-K2P2C-07M-1SS1
LM-K2P2E-12M-1SS1
LM-K2P3C-14M-1SS1
LM-K2P3E-24M-1SS1
LM-H3
LM-U2
LM-F
LM-K2
PA18
Servo motor model
(primary side)
*MTY
Parameter setting
PA17
00BBH
00B4H
00B2H
00B8H
0000H
Servo motor type setting
When you use a linear servo motor, select its model from parameter PA17 and PA18.
Set this and parameter PA17 at a time.
Refer to the table of parameter PA17 for settings.
Tab. 7-2:
7 - 10
Detailed overview of parameters PA for MR-J4-A (8)
Natural cooling
Liquid cooling
PA18
2101H
3101H
3201H
3301H
3401H
7101H
7201H
7301H
7401H
A201H
A401H
A601H
B201H
B401H
2601H
2201H
2301H
2401H
2201H
2401H
2601H
4201H
4401H
4601H
4801H
5801H
2202H
2402H
2602H
4202H
4402H
4602H
4802H
5802H
1101H
1301H
2101H
2301H
2501H
3301H
3501H
Refer to text
PST
MR-J4-A
Parameters
Number
Symbol
Initial value
PA19
*BLK
00AAH
Unit
Setting range
Control
mode
Refer to text
PST
Parameter writing inhibit
Select a reference range and writing range of the parameter.
Refer to the following table for settings.
PA19
Setting
operation
Other than
below
Reading
Writing
PA
PB
PC
PD
PE
PF
PL
—
—
—
—
—
—
—
—
—
—
—
—
—
—
—
—
—
—
—
—
—
—
—
—
Reading
Writing
Reading
Writing
Reading
✔
✔
Only
19
Only
19
✔
✔
✔
✔
✔
✔
✔
✔
✔
✔
✔
✔
✔
✔
✔
—
—
✔
✔
✔
—
—
—
—
✔
—
—
—
—
✔
—
—
—
—
—
Writing
✔
✔
✔
✔
✔
✔
—
Reading
Writing
Reading
✔
✔
✔
Only
19
✔
Only
19
✔
Only
19
✔
Only
19
✔
✔
—
✔
✔
—
✔
✔
—
✔
✔
—
✔
✔
—
✔
✔
—
—
—
—
—
—
—
✔
✔
✔
—
—
—
—
—
—
—
—
—
✔
✔
✔
✔
✔
—
—
—
—
—
—
—
✔
✔
✔
✔
✔
✔
—
—
—
—
—
—
Reading
000AH
Writing
000BH
000CH
00AAH
(initial
value)
00ABH
100BH
Writing
Reading
100CH
Writing
Reading
10AAH
Writing
Reading
10ABH
PA20
*TDS
Writing
0000H
Refer to text
PST
Tough drive setting
Alarms may not be avoided with the tough drive function depending on the situations of the power supply and load
fluctuation.
You can assign MTTR (During tough drive) to the pins CN1-22 to CN1-25 and CN1-49 with parameters PD23 to PD26 and
PD28.
0
0
For manufacturer setting
00: Manufacturer setting
Vibration tough drive selection
0: Disabled
1: Enabled
Selecting “1” enables to suppress vibrations by automatically changing setting values of parameters
PB13 (Machine resonance suppression filter 1) and PB15 (Machine resonance suppression filter 2) in
case that the vibration exceed the value of the oscillation level set in parameter PF23.
To output the oscillation detection alarm as a warning, set parameter PF24 (Vibration tough drive
function selection).
Refer to the instruction manual for details.
SEMI-F47 function selection
0: Disabled
1: Enabled
Selecting “1” enables to avoid occurring AL. 10 (Undervoltage) using the electrical energy charged
in the capacitor in case that an instantaneous power failure occurs during operation. In parameter
PF25 (SEMI-F47 function - Instantaneous power failure detection time), set the time period until the
occurrence of AL. 10.1 (Voltage drop in the control circuit power).
Tab. 7-2:
Detailed overview of parameters PA for MR-J4-A (9)
Beginners Manual Servo Amplifiers MELSERVO J4
7 - 11
Parameters
MR-J4-A
Number
Symbol
Initial value
PA21
*AOP3
0001H
Unit
Setting range
Control
mode
Refer to text
P (S)
Function selection A-3
0 0
One-touch tuning function selection
0: Disabled
1: Enabled
When the digit is “0”, the one-touch tuning is not available.
For manufacturer setting
00: Manufacturer setting
Electronic gear selection (only position control mode)
0: Electronic gear (Parameters PA06 and PA07)
1: Number of command input pulses per revolution (Parameter PA05)
2: J3A electronic gear setting value compatibility mode (Electronic gear (PA06 and PA07 × 16))
Setting the parameter enables the electronic gear value set in MR-J3-A.
PA23
DRAT
0000H
Refer to text
PST
Drive recorder arbitrary alarm trigger setting
Alarm detail No. setting
Set the digits when you execute the trigger with arbitrary alarm detail No. for the drive recorder
function.
When these digits are “0 0”, only the arbitrary alarm No. setting will be enabled.
Alarm No. setting
Set the digits when you execute the trigger with arbitrary alarm No. for the drive recorder function.
When “0 0” are set, arbitrary alarm trigger of the drive recorder will be disabled.
Setting example:
To activate the drive recorder when AL. 50 (Overload 1) occurs, set “5 0 0 0”.
To activate the drive recorder when AL. 50.3 (Thermal overload error 4 during operation) occurs, set “5 0 0 3”.
PA24
AOP4
0000H
Refer to text
PS
Function selection A-4
0 0 0
Vibration suppression mode selection
0: Standard mode
1: 3 inertia mode
2: Low response mode
When you select the standard mode or low response mode, “Vibration suppression control 2” is not
available.
When you select the 3 inertia mode, the feed forward gain is not available.
Before changing the control mode during the 3 inertia mode or low response mode, stop the motor.
For manufacturer setting
000: Manufacturer setting
PA25
OTHOV
0
%
Refer to text
One-touch tuning -Overshoot permissible level
Set a permissible value of overshoot amount for one-touch tuning as a percentage of the in-position range.
Setting “0” will be 50 %.
Tab. 7-2:
7 - 12
Detailed overview of parameters PA for MR-J4-A (10)
PS
MR-J4-A
Parameters
Number
Symbol
Initial value
PA26
*AOP5
0000H
Unit
Setting range
Control
mode
Refer to text
PS
Function selection A-5
0 0 0
Torque limit function selection at instantaneous power failure (instantaneous power failure tough
drive selection)
0: Disabled
1: Enabled
When an instantaneous power failure occurs during operation, the torque at acceleration is limited
to save electric energy charged in the capacitor in the servo amplifier and the time until AL. 10.2
(Voltage drop in the main circuit power) occurs is extended with the instantaneous power failure
tough drive function. Consequently, you can set a longer time in parameter PF25 (SEMI-F47 function
- Instantaneous power failure detection time). The torque limit function at instantaneous power
failure is enabled when “SEMI-F47 function selection” in parameter PA20 is “Enabled (1)”.
This parameter setting is used with servo amplifier with software version A6 or later.
For manufacturer setting
000: Manufacturer setting
Tab. 7-2:
Detailed overview of parameters PA for MR-J4-A (11)
Beginners Manual Servo Amplifiers MELSERVO J4
7 - 13
Parameters
MR-J4-A-RJ
7.2
MR-J4-A-RJ
7.2.1
Basic setting parameters
NOTES
To enable a parameter whose symbol is preceded by *, cycle the power after setting it.
Abbreviations of operation modes indicate the followings.
– Standard:
Standard (semi closed loop system) use of the rotary servo motor
– Full.:
Fully closed loop system use of the rotary servo motor
– Lin.:
Linear servo motor use
– DD:
Direct drive (DD) motor use
The symbols in the control mode column mean as follows.
7 - 14
– CP:
Positioning mode (point table method)
– CL:
Positioning mode (program method)
– PS:
Positioning mode (indexer method)
MR-J4-A-RJ
Parameters
Parameters PA
Control
mode
Operation mode
1000H
—
✔ ✔ ✔ ✔ ✔ ✔ ✔
PA02
*REG
Regenerative option
0000H
—
✔ ✔ ✔ ✔ ✔ ✔ ✔
PA03
*ABS
Absolute position detection system
0000H
—
✔ ✔ ✔ ✔ ✔ ✔ ✔
PA04
*AOP1
Function selection A-1
2000H
—
✔ ✔ ✔ ✔ ✔ ✔ ✔
PA05
*FBP
Number of command input pulses per revolution
10000
—
— — — — — — —
PA06
*CMX
PA07
*CDV
PA08
ATU
PA09
RSP
PS
*STY
CL
PA01
CP
Unit
DD
Initial
value
Lin.
Symbol Name
Full.
No.
Standard
Operation
mode
Electronic gear numerator (command pulse multiplication numerator)
1
—
✔ ✔ ✔ ✔ ✔ ✔ —
Number of gear teeth on machine side
1
—
✔ — — ✔ — — ✔
Electronic gear denominator
(command pulse multiplication denominator)
1
—
✔ ✔ ✔ ✔ ✔ ✔ —
Number of gear teeth on servo motor side
1
—
✔ — — ✔ — — ✔
Auto tuning mode
0001H
—
✔ ✔ ✔ ✔ ✔ ✔ ✔
Auto tuning response
16
—
✔ ✔ ✔ ✔ ✔ ✔ ✔
PA10
INP
In-position range
100
μm
10-4 inch
✔ ✔ ✔ ✔ ✔ ✔ ✔
10-3 degree
pulse
PA11
TLP
Forward rotation torque limit/positive direction thrust limit
100.0
%
✔ ✔ ✔ ✔ ✔ ✔ ✔
PA12
TLN
Reverse rotation torque limit/negative direction thrust limit
100.0
%
✔ ✔ ✔ ✔ ✔ ✔ ✔
PA13
*PLSS
Command pulse input form
0100H
—
✔ ✔ ✔ ✔ ✔ ✔ ✔
PA14
*POL
Rotation direction selection/travel direction selection
0
—
✔ ✔ ✔ ✔ ✔ ✔ ✔
PA15
*ENR
Encoder output pulses
4000
pulse/rev
✔ ✔ ✔ ✔ ✔ ✔ ✔
PA16
*ENR2
Encoder output pulses 2
1
—
✔ ✔ ✔ ✔ ✔ ✔ ✔
PA17
*MSR
Servo motor series setting
0000H
—
— — ✔ — ✔ ✔ ✔
PA18
*MTY
Servo motor type setting
0000H
—
— — ✔ — ✔ ✔ ✔
PA19
*BLK
Parameter writing inhibit
00AAH
—
✔ ✔ ✔ ✔ ✔ ✔ ✔
PA20
*TDS
Tough drive setting
0000H
—
✔ ✔ ✔ ✔ ✔ ✔ ✔
PA21
*AOP3
Function selection A-3
0001H
—
✔ ✔ ✔ ✔ ✔ ✔ —
PA22
—
For manufacturer setting
0000H
—
— — — — — — —
PA23
DRAT
Drive recorder arbitrary alarm trigger setting
0000H
—
✔ ✔ ✔ ✔ ✔ ✔ ✔
PA24
AOP4
Function selection A-4
0000H
—
✔ ✔ ✔ ✔ ✔ ✔ ✔
PA25
OTHOV
One-touch tuning - Overshoot permissible level
0
%
✔ ✔ ✔ ✔ ✔ ✔ ✔
Function selection A-5
PA26
*AOP5
0000H
—
✔ ✔ ✔ ✔ ✔ ✔ ✔
PA27
—
0000H
—
— — — — — — —
PA28
—
0000H
—
— — — — — — —
PA29
—
0000H
—
— — — — — — —
PA30
—
0000H
—
— — — — — — —
PA31
—
0000H
—
— — — — — — —
PA32
—
0000H
—
— — — — — — —
Tab. 7-3:
For manufacturer setting
List of basic setting parameters for MR-J4-A-RJ
Beginners Manual Servo Amplifiers MELSERVO J4
7 - 15
Parameters
MR-J4-A-RJ
Description of basic setting parameters
Number
Symbol
Initial value
PA01
*STY
1000H
Unit
Setting range
Control
mode
Refer to text
CP CL PS
Operation mode
1 0
Control mode selection
0 to
5: Not used for positioning mode.
6: Positioning mode (point table method)
7: Positioning mode (program method)
8: Positioning mode (indexer method)
Operation mode selection
0: Standard control mode
1: Fully closed loop control mode
4: Linear servo motor control mode
6: DD motor control mode (except 400 V class servo amplifiers)
The following settings will trigger AL. 37 (Parameter error).
- A value is set other than “0”, “1”, “4”, and “6” to this digit.
- “1” or “4” is set to this digit with the indexer method.
- “1” or “4” is set to this digit when “Position data unit” is set to [degree] in Parameter PT01.
For manufacturer setting
10: Manufacturer setting
PA02
*REG
0000H
Refer to text
CP CL PS
Regenerative option
0 0
Select the regenerative option.
00: Regenerative option is not used.
- For the servo amplifier of 100 W, a regenerative resistor is not used.
- For the servo amplifier of 0.2 kW to 7 kW, the built-in regenerative resistor is used.
- The supplied regenerative resistor or a regenerative option is used with the servo amplifier of
11 kW to 22 kW.
01: FR-RC-(H)/FR-CV-(H)/FR-BU2-(H)
When you use FR-RC-(H), FR-CV-(H) or FR-BU2-(H), select “Mode 2 (1)” in parameter PC27
(Undervoltage alarm detection mode selection).
02: MR-RB032
03: MR-RB12
04: MR-RB32
05: MR-RB30
06: MR-RB50 (Cooling fan is required.)
08: MR-RB31
09: MR-RB51 (Cooling fan is required.)
0B: MR-RB3N
0C: MR-RB5N (Cooling fan is required.)
80: MR-RB1H-4
81: MR-RB3M-4 (Cooling fan is required.)
82: MR-RB3G-4 (Cooling fan is required.)
83: MR-RB5G-4 (Cooling fan is required.)
84: MR-RB34-4 (Cooling fan is required.)
85: MR-RB54-4 (Cooling fan is required.)
91: MR-RB3U-4 (Cooling fan is required.)
92: MR-RB5U-4 (Cooling fan is required.)
FA: When the supplied regenerative resistor or a regenerative option used with the servo amplifier
of 11 kW to 22 kW is cooled by a cooling fan to increase regenerative ability.
For manufacturer setting
00: Manufacturer setting
Incorrect setting may cause the regenerative option to burn.
If a selected regenerative option is not for use with the servo amplifier, AL. 37 (Parameter error) occurs.
Tab. 7-4:
7 - 16
Detailed overview of parameters PA for MR-J4-A-RJ (1)
MR-J4-A-RJ
Parameters
Number
Symbol
Initial value
PA03
*ABS
0000H
Unit
Setting range
Control
mode
Refer to text
CP CL PS
Refer to text
CP CL PS
Absolute position detection system
0 0 0
Absolute position detection system selection
0: Disabled (incremental system)
1: Enabled (absolute position detection system)
2: Not used for positioning mode.
For manufacturer setting
000: Manufacturer setting
Setting a value other than “0” and “1” will trigger AL. 37 (Parameter error).
PA04
*AOP1
2000H
Function selection A-1
0 0 0
For manufacturer setting
000: Manufacturer setting
Forced stop deceleration function selection
0: Forced stop deceleration function disabled (with EM1)
2: Forced stop deceleration function enabled (with EM2)
Refer to the following table for details.
PA05
Setting value
EM2/EM1
0
EM1
2
EM2
*FBP
Deceleration method
EM2 or EM1 is off
Alarm occurred
MBR (Electromagnetic brake
MBR (Electromagnetic brake
interlock) turns off without the interlock) turns off without the
forced stop deceleration.
forced stop deceleration.
MBR (Electromagnetic brake
interlock) turns off after the
forced stop deceleration.
10000
MBR (Electromagnetic brake
interlock) turns off after the
forced stop deceleration.
1000–1000000
P
Number of command input pulses per revolution
The servo motor rotates based on set command input pulses.
To enable the parameter value, set “Electronic gear selection” to “Number of command input pulses per revolution
(1)” in parameter PA21. “1” cannot be set in parameter PA21 in the linear control mode.
Tab. 7-4:
Detailed overview of parameters PA for MR-J4-A-RJ (2)
Beginners Manual Servo Amplifiers MELSERVO J4
7 - 17
Parameters
MR-J4-A-RJ
Number
Symbol
Initial value
PA06
*CMX
1
Unit
Setting range
Control
mode
1–16777215
CP CL
Electronic gear numerator (command pulse multiplication numerator)
Set an electronic gear numerator. (Refer to the instruction manual.)
To enable the parameter values in the positioning mode, cycle the power after setting.
To enable the parameter, select “Electronic gear (0)”, “J3 electronic gear setting value compatibility mode (2)”, or
“J2S electronic gear setting value compatibility mode (3)” of “Electronic gear selection” in parameter PA21.
Set the electronic gear within the following range. Setting out of the range will trigger AL. 37 (Parameter error).
Parameter PA21
Electronic gear setting range
0
(1/865) < (CMX/CDV) < 271471
2
(1/13825) < (CMX/CDV) < 16967
3
(1/27649) < (CMX/CDV) < 8484
PA06
*CMX
1
1–16777215
PS
Number of gear teeth on machine side
Set the number of gear teeth on machine side. (Refer to the instruction manual.)
To enable the parameter values in the positioning mode, cycle the power after setting.
Set the electronic gear within the following range.
1 CMX 16384, 1 CDV 16384
1
CMX
9999
9999
CDV
CDV x STN 32767 (STN: Number of stations per rotation (parameter PT28))
CMX x CDV 100000
Setting out of the range will trigger AL. 37 (Parameter error).
When a small value is set to the electronic gear ratio with the manual operation mode, the servo motor may not drive at the
set servo motor speed.
Travel distance of 1 station = Pt (servo motor resolution) x
PA07
*CDV
1
STN
x
CMX
CDV
1
1–16777215
CP CL
Electronic gear denominator (command pulse multiplication denominator)
Set an electronic gear denominator. (Refer to the instruction manual.)
To enable the parameter values in the positioning mode, cycle the power after setting.
To enable the parameter, select “Electronic gear (0)”, “J3 electronic gear setting value compatibility mode (2)”, or
“J2S electronic gear setting value compatibility mode (3))” of “Electronic gear selection” in parameter PA21.
Set the electronic gear within the range of parameter PA06. Setting out of the range will trigger AL. 37 (Parameter error).
PA07
*CDV
1
1–16777215
PS
Number of gear teeth on servo motor side
Set the number of gear teeth on servo motor side. (Refer to the instruction manual.)
To enable the parameter values in the positioning mode, cycle the power after setting.
Set the electronic gear within the range of parameter PA06. Setting out of the range will trigger AL. 37 (Parameter error).
Tab. 7-4:
7 - 18
Detailed overview of parameters PA for MR-J4-A-RJ (3)
MR-J4-A-RJ
Parameters
Number
Symbol
Initial value
PA08
ATU
0001H
Unit
Setting range
Control
mode
Refer to text
CP CL PS
Auto tuning mode
Gain adjustment mode selection
0 0 0
Select the gain adjustment mode.
0: 2 gain adjustment mode 1 (interpolation mode)
1: Auto tuning mode 1
2: Auto tuning mode 2
3: Manual mode
4: 2 gain adjustment mode 2
Refer to the following table for details.
For manufacturer setting
000: Manufacturer setting
Setting value Gain adjustment mode
2 gain adjustment mode 1
(interpolation mode)
PB06
PB08
PB09
PB10
(Load to motor inertia ratio)
(Position loop gain)
(Speed loop gain)
(Speed integral compensation)
1
Auto tuning mode 1
PB06
PB07
PB08
PB09
PB10
(Load to motor inertia ratio)
(Model loop gain)
(Position loop gain)
(Speed loop gain)
(Speed integral compensation)
2
Auto tuning mode 2
PB07
PB08
PB09
PB10
(Model loop gain)
(Position loop gain)
(Speed loop gain)
(Speed integral compensation)
3
Manual mode
—
2 gain adjustment mode 2
PB08 (Position loop gain)
PB09 (Speed loop gain)
PB10 (Speed integral compensation)
0
4
Tab. 7-4:
Automatically adjusted parameter
Detailed overview of parameters PA for MR-J4-A-RJ (4)
Beginners Manual Servo Amplifiers MELSERVO J4
7 - 19
Parameters
MR-J4-A-RJ
Number
Symbol
Initial value
PA09
RSP
16
Unit
Setting range
Control
mode
1–40
CP CL PS
Auto tuning response
Set a response of the auto tuning.
Machine characteristic
Setting value
1
2
3
4
5
6
7
8
9
10
11
12
13
14
15
16
17
18
19
20
PA10
Guideline for
machine
resonance
frequency [Hz]
Response
low
Machine characteristic
Setting value
2.7
3.6
4.9
6.6
10.0
11.3
12.7
14.3
16.1
18.1
20.4
23.0
25.9
29.2
32.9
37.0
41.7
47.0
52.9
59.6
middle
INP
21
22
23
24
25
26
27
28
29
30
31
32
33
34
35
36
37
38
39
40
100
Response
Guideline for
machine
resonance
frequency [Hz]
middle
67.1
75.6
85.2
95.9
108.0
121.7
137.1
154.4
173.9
195.9
220.6
248.5
279.9
315.3
355.1
400.0
446.6
501.2
571.5
642.7
high
Refer to
text
0–65535
CP CL PS
In-position range
Set an in-position range per command.
To change it to the servo motor encoder pulse unit, set parameter PC24.
Parameter PA01
In-position setting range
6 (positioning mode (point table method))
The range where MEND (Travel
completion), PED (Position end) and
INP (In-position) are input.
7 (Positioning mode (program method))
8 (Positioning mode (indexer method))
The range where MEND (Travel
completion) and INP (In-position) are
input.
The unit will be as follows depending on the positioning mode.
Point table method or program method
Select from [μm], 10-4 [inch], 10-3 [degree], or [pulse] with parameter PT01.
Indexer method
Command unit [pulse] (a load-side rotation expressed by the number of encoder resolution pulses)
For example, when making an in-position range “± 1 degree” for the rotation angle on the load side, set 4194304 x (1/360) =
11650 pulses.
Tab. 7-4:
7 - 20
Detailed overview of parameters PA for MR-J4-A-RJ (5)
MR-J4-A-RJ
Parameters
Number
Symbol
Initial value
Unit
Setting range
Control
mode
PA11
TLP
100.0
%
0.0–100.0
CP CL PS
Forward rotation torque limit/positive direction thrust limit
You can limit the torque or thrust generated by the servo motor. Set the parameter referring to the instruction manual.
When you output torque or thrust as analog monitor output, the larger value of parameter PA11 (Forward rotation torque
limit/positive direction thrust limit value) or PA12 (Reverse rotation torque limit/negative direction thrust limit value) will be
the maximum output voltage (8 V).
Set the parameter on the assumption that the maximum torque or thrust is 100.0 [%].
The parameter is for limiting the torque of the servo motor in the CCW power running or CW regeneration, or limiting the
thrust of the linear servo motor in the positive direction power running or negative direction regeneration. Set this parameter to “0.0” to generate no torque or thrust.
PA12
TLN
100.0
%
0.0–100.0
CP CL PS
Reverse rotation torque limit/negative direction thrust limit
You can limit the torque or thrust generated by the servo motor. Set the parameter referring to the instruction manual.
When you output torque or thrust with analog monitor output, the larger value of parameter PA11 (Forward rotation torque
limit/positive direction thrust limit value) or PA12 (Reverse rotation torque limit/negative direction thrust limit value) will be
the maximum output voltage (8 V).
Set the parameter on the assumption that the maximum torque or thrust is 100.0 [%].
The parameter is for limiting the torque of the servo motor in the CW power running or CCW regeneration, or limiting the
thrust of the linear servo motor in the positive direction power running or negative direction regeneration. Set this parameter to “0.0” to generate no torque or thrust.
PA13
*PLSS
0100H
Refer to text
CP CL
Command pulse input form
0
Command input pulse train form selection
0: Forward/reverse rotation pulse train
1: Signed pulse train
2: A-phase/B-phase pulse train (The servo amplifier imports input pulses after multiplying by four.)
When connecting the manual pulse generator MR-HDP01 in the positioning mode, set “2” to this digit.
Refer to the following table on the next page for settings.
Pulse train logic selection
0: Positive logic
1: Negative logic
Select the same one as logic of command pulse train from controller to connect.
Refer to the instruction manual for logic of Q series/L series/F series.
When connecting the manual pulse generator MR-HDP01 in the positioning mode, set “0” to this digit.
Refer to the following table on the next page for settings.
Refer to the following page for the setting of these digits.
Tab. 7-4:
Detailed overview of parameters PA for MR-J4-A-RJ (6)
Beginners Manual Servo Amplifiers MELSERVO J4
7 - 21
Parameters
MR-J4-A-RJ
Number
Symbol
Initial value
PA13
*PLSS
0100H
Unit
Setting range
Control
mode
Refer to text
CP CL
Command pulse input form
0
Refer to the previous page for the setting of these digits.
Command input pulse train filter selection
Selecting proper filter enables to enhance noise immunity.
0: Command input pulse train is 4 Mpulses/s or less.
1: Command input pulse train is 1 Mpulse/s or less.
2: Command input pulse train is 500 kpulses/s or less.
3: Command input pulse train is 200 kpulses/s or less (available for the software version A5 or later)
1 Mpulse/s or lower commands are supported by “1”. When inputting commands over 1 Mpulse/s
and 4 Mpulses/s or lower, set “0”.
When connecting the manual pulse generator MR-HDP01 in the positioning mode, set “2” or “3” to
this digit.
Incorrect setting may cause the following malfunctions.
– Setting a value higher than actual command will lower noise immunity.
– Setting a value lower than actual command will cause a position mismatch.
For manufacturer setting
0: Manufacturer setting
Setting value Pulse train form
11H
Negative logic
10H
Forward rotation pulse
train (positive direction
pulse train)
Reverse rotation pulse
train (negative direction
pulse train)
02H
Positive logic
01H
PP
NP
Pulse train + sign
NP
B-phase pulse train
00H
Reverse rotation
(negative direction)
command
PP
A-phase pulse train
12H
Forward rotation
(positive direction)
command
Forward rotation pulse
train (positive direction
pulse train)
Reverse rotation pulse
train (negative direction
pulse train)
L
H
H
L
PP
NP
PP
NP
PP
Pulse train + sign
NP
A-phase pulse train
B-phase pulse train
PP
NP
Arrows in the table indicate the timing of importing pulse trains. A-phase and B-phase pulse trains are imported after they
have been multiplied by 4.
When connecting the manual pulse generator MR-HDP01 in the positioning mode, set “02H”.
Tab. 7-4:
7 - 22
Detailed overview of parameters PA for MR-J4-A-RJ (7)
MR-J4-A-RJ
Parameters
Number
Symbol
Initial value
PA14
*POL
0
Unit
Setting range
Control
mode
0, 1
CP CL PS
Rotation direction selection/travel direction selection
Select a rotation direction of the servo motor or travel direction of the linear servo motor for when turning on ST1 (Forward
rotation start) or ST2 (Reverse rotation start).
Servo motor rotation direction/
linear servo motor travel direction
Servo motor rotation direction
Setting
value
Forward rotation (CCW)
Reverse rotation (CW)
When positioning
address increases
When positioning
address decreases
0
CCW or positive
direction
CW or negative
direction
1
CW or negative
direction
CCW or positive
direction
The positive/negative directions of the linear servo motor are as follows.
Negative direction
Negative direction Secondary side
Secondary side
Positive direction
Positive direction
ble
Ta
Primary side
Primary side
Secondary side
Positive direction
Primary side
Negative direction
LM-H3/LM-F series
PA15
LM-U2 series
*ENR
4000
LM-K2 series
pulse/rev
1–4194304
CP CL PS
Encoder output pulses
Set the encoder output pulses from the servo amplifier by using the number of output pulses per revolution, dividing ratio,
or electronic gear ratio (after multiplication by 4).
To set a numerator of the electronic gear, select “A-phase/B-phase pulse electronic gear setting (3)” of “Encoder output pulse setting selection” in parameter PC19.
The maximum output frequency is 4.6 Mpulses/s. Set the parameter within this range.
PA16
*ENR2
1
1–4194304
CP CL PS
Encoder output pulses 2
Set a denominator of the electronic gear for the A/B-phase pulse output.
To set a denominator of the electronic gear, select “A-phase/B-phase pulse electronic gear setting (3)” of “Encoder
output pulse setting selection” in parameter PC19.
Tab. 7-4:
Detailed overview of parameters PA for MR-J4-A-RJ (8)
Beginners Manual Servo Amplifiers MELSERVO J4
7 - 23
Parameters
MR-J4-A-RJ
Number
Symbol
Initial value
PA17
*MSR
0000H
Unit
Setting range
Control
mode
Refer to text
CP CL
Servo motor series setting
When you use a linear servo motor, select its model from parameters PA17 and PA18. Set this and parameter PA18 at a time.
Refer to the following table for settings.
Linear servo motor
series
LM-H3P2A-07P-BSS0
LM-H3P3A-12P-CSS0
LM-H3P3B-24P-CSS0
LM-H3P3C-36P-CSS0
LM-H3P3D-48P-CSS0
LM-H3P7A-24P-ASS0
LM-H3P7B-48P-ASS0
LM-H3P7C-72P-ASS0
LM-H3P7D-96P-ASS0
LM-U2PAB-05M-0SS0
LM-U2PAD-10M-0SS0
LM-U2PAF-15M-0SS0
LM-U2PBB-07M-1SS0
LM-U2PBD-15M-1SS0
LM-U2PBF-22M-1SS0
LM-U2P2B-40M-2SS0
LM-U2P2C-60M-2SS0
LM-U2P2D-80M-2SS0
LM-FP2B-06M-1SS0 LM-FP2D-12M-1SS0 LM-FP2F-18M-1SS0 LM-FP4B-12M-1SS0 LM-FP4D-24M-1SS0 LM-FP4F-36M-1SS0 LM-FP4H-48M-1SS0 LM-FP5H-60M-1SS0 LM-FP2B-06M-1SS0 LM-FP2D-12M-1SS0 LM-FP2F-18M-1SS0 LM-FP4B-12M-1SS0 LM-FP4D-24M-1SS0 LM-FP4F-36M-1SS0 LM-FP4H-48M-1SS0 LM-FP5H-60M-1SS0 LM-K2P1A-01M-2SS1
LM-K2P1C-03M-2SS1
LM-K2P2A-02M-1SS1
LM-K2P2C-07M-1SS1
LM-K2P2E-12M-1SS1
LM-K2P3C-14M-1SS1
LM-K2P3E-24M-1SS1
LM-H3
LM-U2
LM-F
LM-K2
PA18
*MTY
Parameter setting
Servo motor model
(primary side)
PA17
00BBH
00B4H
00B2H
00B8H
0000H
Servo motor type setting
When you use a linear servo motor, select its model from parameter PA17 and PA18.
Set this and parameter PA17 at a time.
Refer to the table of parameter PA17 for settings.
Tab. 7-4:
7 - 24
Detailed overview of parameters PA for MR-J4-A-RJ (9)
Natural cooling
Liquid cooling
PA18
2101H
3101H
3201H
3301H
3401H
7101H
7201H
7301H
7401H
A201H
A401H
A601H
B201H
B401H
2601H
2201H
2301H
2401H
2201H
2401H
2601H
4201H
4401H
4601H
4801H
5801H
2202H
2402H
2602H
4202H
4402H
4602H
4802H
5802H
1101H
1301H
2101H
2301H
2501H
3301H
3501H
Refer to text
CP CL
MR-J4-A-RJ
Parameters
Number
Symbol
Initial value
PA19
*BLK
00AAH
Unit
Setting range
Control
mode
Refer to text
CP CL PS
Parameter writing inhibit
Select a reference range and writing range of the parameter.
Refer to the following table for settings.
PA19
Setting
operation
Other than
below
Reading
Writing
PA
PB
PC
PD
PE
PF
PL
Po
PT
—
—
—
—
—
—
—
—
—
—
—
—
—
—
—
—
—
—
—
—
—
—
—
—
—
—
—
—
—
—
—
—
Reading
Writing
Reading
Writing
Reading
✔
✔
Only
19
Only
19
✔
✔
✔
✔
✔
✔
✔
✔
✔
✔
✔
✔
✔
✔
✔
—
—
✔
✔
✔
—
—
—
—
✔
—
—
—
—
✔
—
—
—
—
—
—
—
—
—
—
—
—
—
—
—
Writing
✔
✔
✔
✔
✔
✔
—
—
—
Reading
Writing
Reading
✔
✔
✔
Only
19
✔
Only
19
✔
Only
19
✔
Only
19
✔
✔
—
✔
✔
—
✔
✔
—
✔
✔
—
✔
✔
—
✔
✔
—
✔
✔
—
✔
✔
—
—
—
—
—
—
—
—
—
✔
✔
✔
—
—
—
—
—
—
—
—
—
—
—
—
—
✔
✔
✔
✔
✔
—
—
—
—
—
—
—
—
—
—
—
✔
✔
✔
✔
✔
✔
✔
✔
—
—
—
—
—
—
—
—
Reading
000AH
Writing
000BH
000CH
00AAH
(initial
value)
00ABH
100BH
Writing
Reading
100CH
Writing
Reading
10AAH
Writing
Reading
10ABH
PA20
Writing
*TDS
0000H
Refer to text
CP CL PS
Tough drive setting
Alarms may not be avoided with the tough drive function depending on the situations of the power supply and load
fluctuation.
You can assign MTTR (During tough drive) to the pins CN1-13, CN1-14, CN1-22 to CN1-25, and CN1-49 with parameters
PD23 to PD26, PD28, and PD47.
0
0
For manufacturer setting
00: Manufacturer setting
Vibration tough drive selection
0: Disabled
1: Enabled
Selecting “1” enables to suppress vibrations by automatically changing setting values of parameters
PB13 (Machine resonance suppression filter 1) and PB15 (Machine resonance suppression filter 2) in
case that the vibration exceed the value of the oscillation level set in parameter PF23.
To output the oscillation detection alarm as a warning, set parameter PF24 (Vibration tough drive
function selection).
Refer to the instruction manual for details.
SEMI-F47 function selection
0: Disabled
1: Enabled
Selecting “1” enables to avoid occurring AL. 10 (Undervoltage) using the electrical energy charged
in the capacitor in case that an instantaneous power failure occurs during operation. In parameter
PF25 (SEMI-F47 function - Instantaneous power failure detection time), set the time period until the
occurrence of AL. 10.1 (Voltage drop in the control circuit power).
Tab. 7-4:
Detailed overview of parameters PA for MR-J4-A-RJ (10)
Beginners Manual Servo Amplifiers MELSERVO J4
7 - 25
Parameters
MR-J4-A-RJ
Number
Symbol
Initial value
PA21
*AOP3
0001H
Unit
Setting range
Control
mode
Refer to text
CP CL PS
Function selection A-3
0 0
One-touch tuning function selection
0: Disabled
1: Enabled
When the digit is “0”, the one-touch tuning is not available.
For manufacturer setting
00: Manufacturer setting
Electronic gear selection
When this digit is changed, the home position will be changed. Execute the home position return
again.
0: Electronic gear (parameters PA06 and PA07)
1: Not used for positioning mode. Setting this will trigger AL. 37 (Parameter error).
2: J3 electronic gear setting value compatibility mode
(Electronic gear (PA06 and PA07 × 16))
The electronic gear setting value can be used set with MR-J3.
3: J2S electronic gear setting value compatibility mode
(Electronic gear (PA06 and PA07 × 32)
The electronic gear setting value can be used set with MR-J2S.
PA23
DRAT
0000H
Refer to text
CP CL PS
Drive recorder arbitrary alarm trigger setting
Alarm detail No. setting
Set the digits when you execute the trigger with arbitrary alarm detail No. for the drive recorder
function.
When these digits are “0 0”, only the arbitrary alarm No. setting will be enabled.
Alarm No. setting
Set the digits when you execute the trigger with arbitrary alarm No. for the drive recorder function.
When “0 0” are set, arbitrary alarm trigger of the drive recorder will be disabled.
Setting example:
To activate the drive recorder when AL. 50 (Overload 1) occurs, set “5 0 0 0”.
To activate the drive recorder when AL. 50.3 (Thermal overload error 4 during operation) occurs, set “5 0 0 3”.
PA24
AOP4
0000H
Refer to text
CP CL PS
Function selection A-4
0 0 0
Vibration suppression mode selection
0: Standard mode
1: 3 inertia mode
2: Low response mode
When you select the standard mode or low response mode, “Vibration suppression control 2” is not
available.
When you select the 3 inertia mode, the feed forward gain is not available.
Before changing the control mode during the 3 inertia mode or low response mode, stop the motor.
For manufacturer setting
000: Manufacturer setting
PA25
OTHOV
0
%
Refer to text
One-touch tuning -Overshoot permissible level
Set a permissible value of overshoot amount for one-touch tuning as a percentage of the in-position range.
Setting “0” will be 50 %.
Tab. 7-4:
7 - 26
Detailed overview of parameters PA for MR-J4-A-RJ (11)
CP CL PS
MR-J4-A-RJ
Parameters
Number
Symbol
Initial value
PA26
*AOP5
0000H
Unit
Setting range
Control
mode
Refer to text
CP CL PS
Function selection A-5
0 0 0
Torque limit function selection at instantaneous power failure (instantaneous power failure tough
drive selection)
0: Disabled
1: Enabled
When an instantaneous power failure occurs during operation, the torque at acceleration is limited
to save electric energy charged in the capacitor in the servo amplifier and the time until AL. 10.2
(Voltage drop in the main circuit power) occurs is extended with the instantaneous power failure
tough drive function. Consequently, you can set a longer time in parameter PF25 (SEMI-F47 function
- Instantaneous power failure detection time). The torque limit function at instantaneous power
failure is enabled when “SEMI-F47 function selection” in parameter PA20 is “Enabled (1)”.
For manufacturer setting
000: Manufacturer setting
Tab. 7-4:
Detailed overview of parameters PA for MR-J4-A-RJ (12)
Beginners Manual Servo Amplifiers MELSERVO J4
7 - 27
Parameters
7.3
NOTES
MR-J4-B(-RJ)
MR-J4-B(-RJ)
When you connect the amplifier to a servo system controller, servo parameter values of the servo
system controller will be written to each parameter.
Setting may not be made to some parameters and their ranges depending on the servo system
controller model, servo amplifier software version, and MR Configurator2 software version. For
details, refer to the servo system controller user's manual.
7.3.1
NOTES
Basic setting parameters
The parameter whose symbol is preceded by * is enabled with the following conditions:
– *:
After setting the parameter, cycle the power or reset the controller.
– **:
After setting the parameter, cycle the power.
Abbreviations of operation modes indicate the followings.
7 - 28
– Standard:
Standard (semi closed loop system) use of the rotary servo motor
– Full.:
Fully closed loop system use of the rotary servo motor
– Lin.:
Linear servo motor use
– DD:
Direct drive (DD) motor use
MR-J4-B(-RJ)
Parameters
Parameters PA
Unit
PA01
**STY
Operation mode
1000H
—
✔ ✔ ✔ ✔
DD
Initial
value
Lin.
Symbol Name
Full.
No.
Standard
Operation
mode
PA02
**REG
Regenerative option
0000H
—
✔ ✔ ✔ ✔
PA03
*ABS
Absolute position detection system
0000H
—
✔ ✔ ✔ ✔
PA04
*AOP1
Function selection A-1
2000H
—
✔ ✔ ✔ ✔
PA05
—
10000
—
— — — —
PA06
—
1
—
— — — —
PA07
—
1
—
— — — —
For manufacturer setting
PA08
ATU
Auto tuning mode
0001H
—
✔ ✔ ✔ ✔
PA09
RSP
Auto tuning response
16
—
✔ ✔ ✔ ✔
PA10
INP
In-position range
PA11
—
PA12
—
PA13
—
PA14
*POL
PA15
*ENR
1600
pulse
✔ ✔ ✔ ✔
1000.0
—
— — — —
1000.0
—
— — — —
0000H
—
— — — —
Rotation direction selection/travel direction selection
0
—
✔ ✔ ✔ ✔
Encoder output pulses
4000
pulse/rev
✔ ✔ ✔ ✔
For manufacturer setting
PA16
*ENR2
Encoder output pulses 2
1
—
✔ ✔ ✔ ✔
PA17
**MSR
Servo motor series setting
0000H
—
— — ✔ —
PA18
**MTY
Servo motor type setting
0000H
—
— — ✔ —
PA19
*BLK
Parameter writing inhibit
00ABH
—
✔ ✔ ✔ ✔
PA20
*TDS
Tough drive setting
0000H
—
✔ ✔ ✔ ✔
PA21
*AOP3
Function selection A-3
0001H
—
✔ ✔ ✔ ✔
PA22
**PCS
Position control composition selection
0000H
—
✔ — — —
PA23
DRAT
Drive recorder arbitrary alarm trigger setting
0000H
—
✔ ✔ ✔ ✔
PA24
AOP4
Function selection A-4
0000H
—
✔ ✔ ✔ ✔
PA25
OTHOV
One-touch tuning – Overshoot permissible level
0
%
✔ ✔ ✔ ✔
Function selection A-5
PA26
*AOP5
0000H
—
✔ ✔ ✔ ✔
PA27
—
0000H
—
— — — —
PA28
—
0000H
—
— — — —
PA29
—
0000H
—
— — — —
PA30
—
0000H
—
— — — —
PA31
—
0000H
—
— — — —
PA32
—
0000H
—
— — — —
Tab. 7-5:
For manufacturer setting
List of basic setting parameters for MR-J4-B(-RJ)
Beginners Manual Servo Amplifiers MELSERVO J4
7 - 29
Parameters
MR-J4-B(-RJ)
Description of basic setting parameters
Number
Symbol
Initial value
PA01
**STY
1000H
Unit
Setting range
Refer to text
Operation mode
0
0
For manufacturer setting
00: Manufacturer setting
Operation mode selection
0: Standard control mode
1: Fully closed loop control mode
4. Linear servo motor control mode
6: DD motor control mode (Except 400 V class servo amplifiers)
Setting other than above will result in AL. 37 (Parameter error). The fully closed loop system is available
for the MR-J4-B(-RJ) servo amplifiers of which software version is A3 or above.
Operation mode selection
0: J3 compatibility mode
1: J4 mode
To change this digit, use an application software “MR-J4(W)-B mode selection”. When you change it
without the application, AL.3E (Operation mode error) will occur.
PA02
**REG
0000H
Refer to text
Regenerative option
0 0
Select the regenerative option.
00: Regenerative option is not used.
- For the servo amplifier of 100 W, a regenerative resistor is not used.
- For the servo amplifier of 0.2 kW to 7 kW, the built-in regenerative resistor is used.
- The supplied regenerative resistor or a regenerative option is used with the servo amplifier of
11 kW to 22 kW.
01: FR-RC-(H)/FR-CV-(H)/FR-BU2-(H)
When you use FR-RC-(H), FR-CV-(H) or FR-BU2-(H), select “Mode 2 (1)” in parameter PC20
(Undervoltage alarm detection mode selection).
02: MR-RB032
03: MR-RB12
04: MR-RB32
05: MR-RB30
06: MR-RB50 (Cooling fan is required.)
08: MR-RB31
09: MR-RB51 (Cooling fan is required.)
0B: MR-RB3N
0C: MR-RB5N (Cooling fan is required.)
80: MR-RB1H-4
81: MR-RB3M-4 (Cooling fan is required.)
82: MR-RB3G-4 (Cooling fan is required.)
83: MR-RB5G-4 (Cooling fan is required.)
84: MR-RB34-4 (Cooling fan is required.)
85: MR-RB54-4 (Cooling fan is required.)
91: MR-RB3U-4 (Cooling fan is required.)
92: MR-RB5U-4 (Cooling fan is required.)
FA: When the supplied regenerative resistor or a regenerative option used with the servo amplifier
of 11 kW to 22 kW is cooled by a cooling fan to increase regenerative ability.
For manufacturer setting
00: Manufacturer setting
Incorrect setting may cause the regenerative option to burn.
If a selected regenerative option is not for use with the servo amplifier, AL. 37 (Parameter error) occurs.
Tab. 7-6:
7 - 30
Detailed overview of parameters PA for MR-J4-B(-RJ) (1)
MR-J4-B(-RJ)
Parameters
Number
Symbol
Initial value
PA03
*ABS
0000H
Unit
Setting range
Refer to text
Absolute position detection system
0 0 0
Absolute position detection system selection
0: Disabled (used in incremental system)
1: Enabled (used in absolute position detection system)
For manufacturer setting
000: Manufacturer setting
Set this parameter when using the absolute position detection system. The parameter is not available in the speed control
mode and torque control mode.
PA04
*AOP1
2000H
Refer to text
Function selection A-1
This is used to select the forced stop input and forced stop deceleration function.
0 0
For manufacturer setting
00: Manufacturer setting
Servo forced stop selection
0: Enabled (The forced stop input EM2 or EM1 is used.)
1: Disabled (The forced stop input EM2 and EM1 are not used.)
Refer to the following table for details.
Forced stop deceleration function selection
0: Forced stop deceleration function disabled (with EM1)
2: Forced stop deceleration function enabled (with EM2)
Refer to the following table for details.
Setting value
Tab. 7-6:
EM2/EM1
Deceleration method
EM2 or EM1 is off
Alarm occurred
MBR (Electromagnetic brake
MBR (Electromagnetic brake
interlock) turns off without the interlock) turns off without the
forced stop deceleration.
forced stop deceleration.
00
EM1
20
EM2
MBR (Electromagnetic brake
interlock) turns off after the
forced stop deceleration.
MBR (Electromagnetic brake
interlock) turns off after the
forced stop deceleration.
01
Not using
EM2 or EM1
—
MBR (Electromagnetic brake
interlock) turns off without the
forced stop deceleration.
21
Not using
EM2 or EM1
—
MBR (Electromagnetic brake
interlock) turns off after the
forced stop deceleration.
Detailed overview of parameters PA for MR-J4-B(-RJ) (2)
Beginners Manual Servo Amplifiers MELSERVO J4
7 - 31
Parameters
MR-J4-B(-RJ)
Number
Symbol
Initial value
PA08
ATU
0001H
Unit
Setting range
Refer to text
Auto tuning mode
Gain adjustment mode selection
0 0 0
Select the gain adjustment mode.
0: 2 gain adjustment mode 1 (interpolation mode)
1: Auto tuning mode 1
2: Auto tuning mode 2
3: Manual mode
4: 2 gain adjustment mode 2
Refer to the following table for details.
For manufacturer setting
000: Manufacturer setting
Setting value Gain adjustment mode
2 gain adjustment mode 1
(interpolation mode)
PB06 (Load to motor inertia ratio/load to motor
mass ratio)
PB08 (Position loop gain)
PB09 (Speed loop gain)
PB10 (Speed integral compensation)
1
Auto tuning mode 1
PB06 (Load to motor inertia ratio/load to motor
mass ratio)
PB07 (Model loop gain)
PB08 (Position loop gain)
PB09 (Speed loop gain)
PB10 (Speed integral compensation)
2
Auto tuning mode 2
PB07
PB08
PB09
PB10
3
Manual mode
—
4
2 gain adjustment mode 2
PB08 (Position loop gain)
PB09 (Speed loop gain)
PB10 (Speed integral compensation)
0
Tab. 7-6:
7 - 32
Automatically adjusted parameter
(Model loop gain)
(Position loop gain)
(Speed loop gain)
(Speed integral compensation)
Detailed overview of parameters PA for MR-J4-B(-RJ) (3)
MR-J4-B(-RJ)
Parameters
Number
Symbol
Initial value
PA09
RSP
16
Unit
Setting range
1–40
Auto tuning response
Set a response of the auto tuning.
Machine characteristic
Setting value
1
2
3
4
5
6
7
8
9
10
11
12
13
14
15
16
17
18
19
20
PA10
Response
Guideline for
machine
resonance
frequency [Hz]
low
Machine characteristic
Setting value
2.7
3.6
4.9
6.6
10.0
11.3
12.7
14.3
16.1
18.1
20.4
23.0
25.9
29.2
32.9
37.0
41.7
47.0
52.9
59.6
middle
INP
Response
21
22
23
24
25
26
27
28
29
30
31
32
33
34
35
36
37
38
39
40
1600
Guideline for
machine
resonance
frequency [Hz]
middle
67.1
75.6
85.2
95.9
108.0
121.7
137.1
154.4
173.9
195.9
220.6
248.5
279.9
315.3
355.1
400.0
446.6
501.2
571.5
642.7
high
pulse
0–65535
In-position range
Set an in-position range per command pulse.
Tab. 7-6:
Detailed overview of parameters PA for MR-J4-B(-RJ) (4)
Beginners Manual Servo Amplifiers MELSERVO J4
7 - 33
Parameters
MR-J4-B(-RJ)
Number
Symbol
Initial value
PA14
*POL
0
Unit
Setting range
0, 1
Rotation direction selection/travel direction selection
This is used to select a rotation direction or travel direction.
For the setting for the master-slave operation function, refer to the instruction manual.
Servo motor rotation direction/
linear servo motor travel direction
Servo motor rotation direction
Setting
value
Forward rotation (CCW)
Reverse rotation (CW)
Positioning address
increase
Positioning address
decrease
0
CCW or positive
direction
CW or negative
direction
1
CW or negative
direction
CCW or positive
direction
The positive/negative directions of the linear servo motor are as follows.
Negative direction
Negative direction Secondary side
Secondary side
Positive direction
Positive direction
ble
Ta
Primary side
Primary side
Secondary side
Positive direction
Primary side
Negative direction
LM-H3/LM-F series
PA15
LM-U2 series
*ENR
4000
LM-K2 series
pulse/rev
1–65535
Encoder output pulses
Set the encoder output pulses from the servo amplifier by using the number of output pulses per revolution, dividing ratio,
or electronic gear ratio (after multiplication by 4).
To set a numerator of the electronic gear, select “A-phase/B-phase pulse electronic gear setting (3)” of “Encoder output pulse setting selection” in parameter PC03.
The maximum output frequency is 4.6 Mpulses/s. Set the parameter within this range.
PA16
*ENR2
1
1–65535
Encoder output pulses 2
Set a denominator of the electronic gear for the A/B-phase pulse output.
To set a denominator of the electronic gear, select “A-phase/B-phase pulse electronic gear setting (3)” of “Encoder
output pulse setting selection” in parameter PC03.
Tab. 7-6:
7 - 34
Detailed overview of parameters PA for MR-J4-B(-RJ) (5)
MR-J4-B(-RJ)
Parameters
Number
Symbol
Initial value
PA17
**MSR
0000H
Unit
Setting range
Refer to text
Servo motor series setting
When you use a linear servo motor, select its model from parameters PA17 and PA18. Set this and parameter PA18 at a time.
Refer to the following table for settings.
Linear servo motor
series
LM-H3P2A-07P-BSS0
LM-H3P3A-12P-CSS0
LM-H3P3B-24P-CSS0
LM-H3P3C-36P-CSS0
LM-H3P3D-48P-CSS0
LM-H3P7A-24P-ASS0
LM-H3P7B-48P-ASS0
LM-H3P7C-72P-ASS0
LM-H3P7D-96P-ASS0
LM-U2PAB-05M-0SS0
LM-U2PAD-10M-0SS0
LM-U2PAF-15M-0SS0
LM-U2PBB-07M-1SS0
LM-U2PBD-15M-1SS0
LM-U2PBF-22M-1SS0
LM-U2P2B-40M-2SS0
LM-U2P2C-60M-2SS0
LM-U2P2D-80M-2SS0
LM-FP2B-06M-1SS0 LM-FP2D-12M-1SS0 LM-FP2F-18M-1SS0 LM-FP4B-12M-1SS0 LM-FP4D-24M-1SS0 LM-FP4F-36M-1SS0 LM-FP4H-48M-1SS0 LM-FP5H-60M-1SS0 LM-FP2B-06M-1SS0 LM-FP2D-12M-1SS0 LM-FP2F-18M-1SS0 LM-FP4B-12M-1SS0 LM-FP4D-24M-1SS0 LM-FP4F-36M-1SS0 LM-FP4H-48M-1SS0 LM-FP5H-60M-1SS0 LM-K2P1A-01M-2SS1
LM-K2P1C-03M-2SS1
LM-K2P2A-02M-1SS1
LM-K2P2C-07M-1SS1
LM-K2P2E-12M-1SS1
LM-K2P3C-14M-1SS1
LM-K2P3E-24M-1SS1
LM-H3
LM-U2
LM-F
LM-K2
PA18
Servo motor model
(primary side)
**MTY
Parameter setting
PA17
00BBH
00B4H
00B2H
00B8H
0000H
PA18
2101H
3101H
3201H
3301H
3401H
7101H
7201H
7301H
7401H
A201H
A401H
A601H
B201H
B401H
2601H
2201H
2301H
2401H
2201H
2401H
2601H
4201H
4401H
4601H
4801H
5801H
2202H
2402H
2602H
4202H
4402H
4602H
4802H
5802H
1101H
1301H
2101H
2301H
2501H
3301H
3501H
Refer to text
Servo motor type setting
When you use a linear servo motor, select its model from parameter PA17 and PA18.
Set this and parameter PA17 at a time.
Refer to the table of parameter PA17 for settings.
Tab. 7-6:
Detailed overview of parameters PA for MR-J4-B(-RJ) (6)
Natural cooling
Liquid cooling
Beginners Manual Servo Amplifiers MELSERVO J4
7 - 35
Parameters
MR-J4-B(-RJ)
Number
Symbol
Initial value
PA19
*BLK
00ABH
Unit
Setting range
Refer to text
Parameter writing inhibit
Select a reference range and writing range of the parameter.
Refer to the following table for settings.
PA19
Setting
operation
Other than
below
Reading
Writing
Reading
000AH
Writing
000BH
000CH
000FH
00AAH
00ABH
(initial
value)
100BH
Reading
Writing
Reading
Writing
Reading
Writing
Reading
Writing
Reading
Tab. 7-6:
7 - 36
PE
PF
PL
✔
✔
Only
19
Only
19
✔
✔
✔
✔
✔
✔
✔
✔
✔
—
—
—
—
—
—
—
—
—
—
—
—
—
—
—
—
—
—
—
—
—
—
—
—
✔
✔
✔
✔
✔
✔
✔
✔
✔
✔
✔
✔
✔
✔
✔
✔
✔
✔
—
—
✔
✔
✔
✔
✔
✔
✔
—
—
—
—
✔
✔
✔
✔
✔
—
—
—
—
—
—
✔
✔
✔
—
—
—
—
✔
✔
—
—
✔
✔
✔
✔
✔
✔
✔
✔
—
—
—
—
—
—
—
—
—
—
—
—
✔
✔
✔
—
—
—
—
—
—
—
—
—
✔
✔
✔
✔
—
✔
—
—
—
—
—
—
✔
✔
✔
✔
✔
—
—
—
—
—
—
—
✔
✔
✔
✔
✔
✔
—
—
—
—
—
—
Writing
Writing
Writing
Writing
Reading
10ABH
PD
✔
Only
19
✔
Only
19
✔
Only
19
✔
Only
19
✔
Only
19
Reading
10AAH
PC
Writing
Reading
100FH
PB
Reading
Reading
100CH
PA
Writing
Detailed overview of parameters PA for MR-J4-B(-RJ) (7)
MR-J4-B(-RJ)
Parameters
Number
Symbol
Initial value
PA20
*TDS
0000H
Unit
Setting range
Refer to text
Tough drive setting
Alarms may not be avoided with the tough drive function depending on the situations of the power supply and load
fluctuation.
You can assign MTTR (During tough drive) to the pins CN3-9, CN3-13 and CN3-15 with parameters PD07 to PD09.
0
0
For manufacturer setting
00: Manufacturer setting
Vibration tough drive selection
0: Disabled
1: Enabled
Selecting “1” enables to suppress vibrations by automatically changing setting values of parameters
PB13 (Machine resonance suppression filter 1) and PB15 (Machine resonance suppression filter 2) in
case that the vibration exceed the value of the oscillation level set in parameter PF23.
To output the oscillation detection alarm as a warning, set parameter PF24 (Vibration tough drive
function selection).
Refer to the instruction manual for details.
SEMI-F47 function selection
0: Disabled
1: Enabled
Selecting “1” enables to avoid occurring AL. 10 (Undervoltage) using the electrical energy charged
in the capacitor in case that an instantaneous power failure occurs during operation. In parameter
PF25 (SEMI-F47 function - Instantaneous power failure detection time), set the time period until the
occurrence of AL. 10.1 (Voltage drop in the control circuit power).
PA21
*AOP3
0001H
Refer to text
Function selection A-3
0 0 0
One-touch tuning function selection
0: Disabled
1: Enabled
When the digit is “0”, the one-touch tuning with MR Configurator2 will be disabled.
For manufacturer setting
000: Manufacturer setting
PA22
**PCS
0000H
Refer to text
Position control composition selection
0 0 0
For manufacturer setting
000: Manufacturer setting
Scale measurement mode selection
0: Disabled
1: Used in absolute position detection system
2: Used in incremental system
The absolute position detection system cannot be used while an incremental type encoder is used.
Enabling absolute position detection system will trigger AL. 37 (Parameter error).
Additionally, the setting is enabled only in the standard control mode. Setting other than “0” in other
operation modes triggers AL. 37 (Parameter error).
Tab. 7-6:
Detailed overview of parameters PA for MR-J4-B(-RJ) (8)
Beginners Manual Servo Amplifiers MELSERVO J4
7 - 37
Parameters
MR-J4-B(-RJ)
Number
Symbol
Initial value
PA23
DRAT
0000H
Unit
Setting range
Refer to text
Drive recorder arbitrary alarm trigger setting
Alarm detail No. setting
Set the digits when you execute the trigger with arbitrary alarm detail No. for the drive recorder
function.
When these digits are “0 0”, only the arbitrary alarm No. setting will be enabled.
Alarm No. setting
Set the digits when you execute the trigger with arbitrary alarm No. for the drive recorder function.
When “0 0” are set, arbitrary alarm trigger of the drive recorder will be disabled.
Setting example:
To activate the drive recorder when AL. 50 (Overload 1) occurs, set “5 0 0 0”.
To activate the drive recorder when AL. 50.3 (Thermal overload error 4 during operation) occurs, set “5 0 0 3”.
PA24
AOP4
0000H
Refer to text
Function selection A-4
0 0 0
Vibration suppression mode selection
0: Standard mode
1: 3 inertia mode
2: Low response mode
When two low resonance frequencies are generated, select “3 inertia mode (1)”. When the load
to motor inertia ratio exceeds the recommended load to motor inertia ratio, select “Low response
mode (2)”.
When you select the standard mode or low response mode, “Vibration suppression control 2” is not
available.
When you select the 3 inertia mode, the feed forward gain is not available.
Before changing the control mode with the controller during the 3 inertia mode or low response
mode, stop the motor.
For manufacturer setting
000: Manufacturer setting
PA25
OTHOV
0
%
0–100
One-touch tuning -Overshoot permissible level
Set a permissible value of overshoot amount for one-touch tuning as a percentage of the in-position range.
Setting “0” will be 50 %.
PA26
*AOP5
0000H
Refer to text
Function selection A-5
0 0 0
Torque limit function selection at instantaneous power failure (instantaneous power failure tough
drive selection)
0: Disabled
1: Enabled
When an instantaneous power failure occurs during operation, the torque at acceleration is limited
to save electric energy charged in the capacitor in the servo amplifier and the time until AL. 10.2
(Voltage drop in the main circuit power) occurs is extended with the instantaneous power failure
tough drive function. Consequently, you can set a longer time in parameter PF25 (SEMI-F47 function
- Instantaneous power failure detection time). The torque limit function at instantaneous power
failure is enabled when “SEMI-F47 function selection” in parameter PA20 is “Enabled (1)”.
This parameter setting is used with servo amplifier with software version A6 or later.
For manufacturer setting
000: Manufacturer setting
Tab. 7-6:
7 - 38
Detailed overview of parameters PA for MR-J4-B(-RJ) (9)
MR-J4W-B
7.4
NOTES
Parameters
MR-J4W-B
When you connect the amplifier to a servo system controller, servo parameter values of the servo
system controller will be written to each parameter.
Setting may not be made to some parameters and their ranges depending on the servo system
controller model, servo amplifier software version, and MR Configurator2 software version. For
details, refer to the servo system controller user's manual.
7.4.1
NOTES
Basic setting parameters
The parameter whose symbol is preceded by * is enabled with the following conditions:
– *:
After setting the parameter, cycle the power or reset the controller.
– **:
After setting the parameter, cycle the power.
How to set parameters:
– Each:
Set parameters for each axis of A, B, and C.
– Common:
Set parameters for common axis of A, B, and C. Be sure to set the same value to all
axes.
The same values are set as default for all axes.
Abbreviations of operation modes indicate the followings.
– Standard:
Standard (semi closed loop system) use of the rotary servo motor
– Full.:
Fully closed loop system use of the rotary servo motor
– Lin.:
Linear servo motor use
– DD:
Direct drive (DD) motor use
Beginners Manual Servo Amplifiers MELSERVO J4
7 - 39
Parameters
MR-J4W-B
Parameters PA
Unit
Each/
Common
PA01
**STY
Operation mode
1000H
—
Each
✔ ✔ ✔ ✔
PA02
**REG
Regenerative option
0000H
—
Common
✔ ✔ ✔ ✔
PA03
*ABS
Absolute position detection system
0000H
—
Each
✔ ✔ ✔ ✔
PA04
*AOP1
Function selection A-1
PA05
—
PA06
—
PA07
—
For manufacturer setting
DD
Initial
value
Lin.
Symbol Name
Full.
No.
Standard
Operation
mode
2000H
—
Common
✔ ✔ ✔ ✔
10000
—
—
— — — —
1
—
—
— — — —
1
—
—
— — — —
PA08
ATU
Auto tuning mode
0001H
—
Each
✔ ✔ ✔ ✔
PA09
RSP
Auto tuning response
16
—
Each
✔ ✔ ✔ ✔
PA10
INP
In-position range
1600
pulse
Each
✔ ✔ ✔ ✔
PA11
—
1000.0
—
—
— — — —
PA12
—
PA13
—
PA14
*POL
Rotation direction selection/travel direction selection
0
PA15
*ENR
Encoder output pulses
4000
PA16
*ENR2
Encoder output pulses 2
1
—
Each
✔ ✔ ✔ ✔
PA17
**MSR
Servo motor series setting
0000H
—
Each
— — ✔ —
For manufacturer setting
1000.0
—
—
— — — —
0000H
—
—
— — — —
—
Each
✔ ✔ ✔ ✔
pulse/rev
Each
✔ ✔ ✔ ✔
PA18
**MTY
Servo motor type setting
0000H
—
Each
— — ✔ —
PA19
*BLK
Parameter writing inhibit
00ABH
—
Each
✔ ✔ ✔ ✔
PA20
*TDS
Tough drive setting
0000H
—
Each
✔ ✔ ✔ ✔
PA21
*AOP3
Function selection A-3
0001H
—
Each
✔ ✔ ✔ ✔
PA22
**PCS
Position control composition selection
0000H
—
Each
✔ — — —
PA23
DRAT
Drive recorder arbitrary alarm trigger setting
0000H
—
Each
✔ ✔ ✔ ✔
PA24
AOP4
Function selection A-4
0000H
—
Each
✔ ✔ ✔ ✔
PA25
OTHOV
One-touch tuning – Overshoot permissible level
0
%
Each
✔ ✔ ✔ ✔
PA26
—
0000H
—
—
— — — —
PA27
—
0000H
—
—
— — — —
PA28
—
0000H
—
—
— — — —
PA29
—
0000H
—
—
— — — —
PA30
—
0000H
—
—
— — — —
PA31
—
0000H
—
—
— — — —
PA32
—
0000H
—
—
— — — —
Tab. 7-7:
7 - 40
For manufacturer setting
List of basic setting parameters for MR-J4W-B
MR-J4W-B
Parameters
Description of basic setting parameters
Number
Symbol
Initial value
PA01
**STY
1000H
Unit
Setting range
Each/
Common
Refer to text
Each
Operation mode
0
0
For manufacturer setting
00: Manufacturer setting
Operation mode selection
0: Standard control mode
1: Fully closed loop control mode
4. Linear servo motor control mode
6: DD motor control mode (Except 400 V class servo amplifiers)
Setting other than above will result in AL. 37 (Parameter error). The fully closed loop system is available
for the MRJ4W2-B servo amplifiers of which software version is A3 or above. It will not be available
with MR-J4W3-B servo amplifiers.
Operation mode selection
0: J3 compatibility mode
1: J4 mode
To change this digit, use an application software “MR-J4(W)-B mode selection”. When you change it
without the application, AL. 3E (Operation mode error) will occur.
Set the digit as common setting.
PA02
**REG
0000H
Refer to text
Common
Regenerative option
0 0
Select the regenerative option.
00: Regenerative option is not used. (Built-in regenerative resistor is used.)
0B: MR-RB3N
0D: MR-RB14
0E: MR-RB34
For manufacturer setting
00: Manufacturer setting
Incorrect setting may cause the regenerative option to burn.
If a selected regenerative option is not for use with the servo amplifier, AL. 37 (Parameter error) occurs.
Tab. 7-8:
Detailed overview of parameters PA for MR-J4W-B (1)
Beginners Manual Servo Amplifiers MELSERVO J4
7 - 41
Parameters
MR-J4W-B
Number
Symbol
Initial value
PA03
*ABS
0000H
Unit
Setting range
Each/
Common
Refer to text
Each
Absolute position detection system
0 0 0
Absolute position detection system selection
0: Disabled (used in incremental system)
1: Enabled (used in absolute position detection system)
For manufacturer setting
000: Manufacturer setting
Set this parameter when using the absolute position detection system. The parameter is not available in the speed control
mode and torque control mode.
PA04
*AOP1
2000H
Refer to text
Function selection A-1
This is used to select the forced stop input and forced stop deceleration function.
0 0
For manufacturer setting
00: Manufacturer setting
Servo forced stop selection
0: Enabled (The forced stop input EM2 or EM1 is used.)
1: Disabled (The forced stop input EM2 and EM1 are not used.)
Refer to the following table for details.
Forced stop deceleration function selection
0: Forced stop deceleration function disabled (with EM1)
2: Forced stop deceleration function enabled (with EM2)
Refer to the following table for details.
Setting value
Tab. 7-8:
7 - 42
EM2/EM1
Deceleration method
EM2 or EM1 is off
Alarm occurred
MBR (Electromagnetic brake
MBR (Electromagnetic brake
interlock) turns off without the interlock) turns off without the
forced stop deceleration.
forced stop deceleration.
00
EM1
20
EM2
MBR (Electromagnetic brake
interlock) turns off after the
forced stop deceleration.
MBR (Electromagnetic brake
interlock) turns off after the
forced stop deceleration.
01
Not using
EM2 or EM1
—
MBR (Electromagnetic brake
interlock) turns off without the
forced stop deceleration.
21
Not using
EM2 or EM1
—
MBR (Electromagnetic brake
interlock) turns off after the
forced stop deceleration.
Detailed overview of parameters PA for MR-J4W-B (2)
Common
MR-J4W-B
Parameters
Number
Symbol
Initial value
PA08
ATU
0001H
Unit
Setting range
Each/
Common
Refer to text
Each
Auto tuning mode
Gain adjustment mode selection
0 0 0
Select the gain adjustment mode.
0: 2 gain adjustment mode 1 (interpolation mode)
1: Auto tuning mode 1
2: Auto tuning mode 2
3: Manual mode
4: 2 gain adjustment mode 2
Refer to the following table for details.
For manufacturer setting
000: Manufacturer setting
Setting value Gain adjustment mode
2 gain adjustment mode 1
(interpolation mode)
PB06 (Load to motor inertia ratio/load to motor
mass ratio)
PB08 (Position loop gain)
PB09 (Speed loop gain)
PB10 (Speed integral compensation)
Auto tuning mode 1
PB06 (Load to motor inertia ratio/load to motor
mass ratio)
PB07 (Model loop gain)
PB08 (Position loop gain)
PB09 (Speed loop gain)
PB10 (Speed integral compensation)
2
Auto tuning mode 2
PB07
PB08
PB09
PB10
3
Manual mode
—
4
2 gain adjustment mode 2
PB08 (Position loop gain)
PB09 (Speed loop gain)
PB10 (Speed integral compensation)
0
1
Tab. 7-8:
Automatically adjusted parameter
(Model loop gain)
(Position loop gain)
(Speed loop gain)
(Speed integral compensation)
Detailed overview of parameters PA for MR-J4W-B (3)
Beginners Manual Servo Amplifiers MELSERVO J4
7 - 43
Parameters
MR-J4W-B
Number
Symbol
Initial value
PA09
RSP
16
Unit
Setting range
Each/
Common
1–40
Each
Auto tuning response
Set a response of the auto tuning.
Machine characteristic
Setting value
1
2
3
4
5
6
7
8
9
10
11
12
13
14
15
16
17
18
19
20
PA10
Response
Guideline for
machine
resonance
frequency [Hz]
low
Machine characteristic
Setting value
2.7
3.6
4.9
6.6
10.0
11.3
12.7
14.3
16.1
18.1
20.4
23.0
25.9
29.2
32.9
37.0
41.7
47.0
52.9
59.6
middle
INP
21
22
23
24
25
26
27
28
29
30
31
32
33
34
35
36
37
38
39
40
1600
In-position range
Set an in-position range per command pulse.
Tab. 7-8:
7 - 44
Detailed overview of parameters PA for MR-J4W-B (4)
Response
Guideline for
machine
resonance
frequency [Hz]
middle
67.1
75.6
85.2
95.9
108.0
121.7
137.1
154.4
173.9
195.9
220.6
248.5
279.9
315.3
355.1
400.0
446.6
501.2
571.5
642.7
high
pulse
0–65535
Each
MR-J4W-B
Parameters
Number
Symbol
Initial value
PA14
*POL
0
Unit
Setting range
Each/
Common
0, 1
Each
Rotation direction selection/travel direction selection
This is used to select a rotation direction or travel direction.
For the setting for the master-slave operation function, refer to the instruction manual.
Servo motor rotation direction/
linear servo motor travel direction
Servo motor rotation direction
Setting
value
Forward rotation (CCW)
Reverse rotation (CW)
Positioning address
increase
Positioning address
decrease
0
CCW or positive
direction
CW or negative
direction
1
CW or negative
direction
CCW or positive
direction
The positive/negative directions of the linear servo motor are as follows.
Negative direction
Negative direction Secondary side
Secondary side
Positive direction
Positive direction
ble
Ta
Primary side
Primary side
Secondary side
Positive direction
Primary side
Negative direction
LM-H3/LM-F series
PA15
LM-U2 series
*ENR
4000
LM-K2 series
pulse/rev
1–65535
Each
Encoder output pulses
Set the encoder output pulses from the servo amplifier by using the number of output pulses per revolution, dividing ratio,
or electronic gear ratio (after multiplication by 4).
To set a numerator of the electronic gear, select “A-phase/B-phase pulse electronic gear setting (3)” of “Encoder output pulse setting selection” in parameter PC03.
The maximum output frequency is 4.6 Mpulses/s. Set the parameter within this range.
PA16
*ENR2
1
1–65535
Each
Encoder output pulses 2
Set a denominator of the electronic gear for the A/B-phase pulse output.
To set a denominator of the electronic gear, select “A-phase/B-phase pulse electronic gear setting (3)” of “Encoder
output pulse setting selection” in parameter PC03.
Tab. 7-8:
Detailed overview of parameters PA for MR-J4W-B (5)
Beginners Manual Servo Amplifiers MELSERVO J4
7 - 45
Parameters
MR-J4W-B
Number
Symbol
Initial value
PA17
**MSR
0000H
Unit
Setting range
Each/
Common
Refer to text
Each
Servo motor series setting
When you use a linear servo motor, select its model from parameters PA17 and PA18. Set this and parameter PA18 at a time.
Refer to the following table for settings.
Linear servo motor
series
LM-H3P2A-07P-BSS0
LM-H3P3A-12P-CSS0
LM-H3P3B-24P-CSS0
LM-H3P3C-36P-CSS0
LM-H3P3D-48P-CSS0
LM-H3P7A-24P-ASS0
LM-H3P7B-48P-ASS0
LM-H3P7C-72P-ASS0
LM-H3P7D-96P-ASS0
LM-U2PAB-05M-0SS0
LM-U2PAD-10M-0SS0
LM-U2PAF-15M-0SS0
LM-U2PBB-07M-1SS0
LM-U2PBD-15M-1SS0
LM-U2PBF-22M-1SS0
LM-U2P2B-40M-2SS0
LM-U2P2C-60M-2SS0
LM-U2P2D-80M-2SS0
LM-K2P1A-01M-2SS1
LM-K2P1C-03M-2SS1
LM-K2P2A-02M-1SS1
LM-K2P2C-07M-1SS1
LM-K2P2E-12M-1SS1
LM-K2P3C-14M-1SS1
LM-K2P3E-24M-1SS1
LM-H3
LM-U2
LM-K2
PA18
Servo motor model
(primary side)
**MTY
Parameter setting
PA17
00BBH
00B4H
00B8H
0000H
Servo motor type setting
When you use a linear servo motor, select its model from parameter PA17 and PA18.
Set this and parameter PA17 at a time.
Refer to the table of parameter PA17 for settings.
Tab. 7-8:
7 - 46
Detailed overview of parameters PA for MR-J4W-B (6)
PA18
2101H
3101H
3201H
3301H
3401H
7101H
7201H
7301H
7401H
A201H
A401H
A601H
B201H
B401H
2601H
2201H
2301H
2401H
1101H
1301H
2101H
2301H
2501H
3301H
3501H
Refer to text
Each
MR-J4W-B
Parameters
Number
Symbol
Initial value
PA19
*BLK
00ABH
Unit
Setting range
Each/
Common
Refer to text
Each
Parameter writing inhibit
Select a reference range and writing range of the parameter.
Refer to the following table for settings.
PA19
Setting
operation
Other than
below
Reading
Writing
Reading
000AH
Writing
000BH
000CH
000FH
00AAH
00ABH
(initial
value)
100BH
Reading
Writing
Reading
Writing
Reading
Writing
Reading
Writing
Reading
Tab. 7-8:
PE
PF
PL
✔
✔
Only
19
Only
19
✔
✔
✔
✔
✔
✔
✔
✔
✔
—
—
—
—
—
—
—
—
—
—
—
—
—
—
—
—
—
—
—
—
—
—
—
—
✔
✔
✔
✔
✔
✔
✔
✔
✔
✔
✔
✔
✔
✔
✔
✔
✔
✔
—
—
✔
✔
✔
✔
✔
✔
✔
—
—
—
—
✔
✔
✔
✔
✔
—
—
—
—
—
—
✔
✔
✔
—
—
—
—
✔
✔
—
—
✔
✔
✔
✔
✔
✔
✔
✔
—
—
—
—
—
—
—
—
—
—
—
—
✔
✔
✔
—
—
—
—
—
—
—
—
—
✔
✔
✔
✔
—
✔
—
—
—
—
—
—
✔
✔
✔
✔
✔
—
—
—
—
—
—
—
✔
✔
✔
✔
✔
✔
—
—
—
—
—
—
Writing
Writing
Writing
Writing
Reading
10ABH
PD
✔
Only
19
✔
Only
19
✔
Only
19
✔
Only
19
✔
Only
19
Reading
10AAH
PC
Writing
Reading
100FH
PB
Reading
Reading
100CH
PA
Writing
Detailed overview of parameters PA for MR-J4W-B (7)
Beginners Manual Servo Amplifiers MELSERVO J4
7 - 47
Parameters
MR-J4W-B
Number
Symbol
Initial value
PA20
*TDS
0000H
Unit
Setting range
Each/
Common
Refer to text
Each
Tough drive setting
Alarms may not be avoided with the tough drive function depending on the situations of the power supply and load
fluctuation.
You can assign MTTR (During tough drive) to the pins CN3-11 to CN3-13, CN3-24, and CN3-25with parameters PD07 to
PD09.
0
0
For manufacturer setting
00: Manufacturer setting
Vibration tough drive selection
0: Disabled
1: Enabled
Selecting “1” enables to suppress vibrations by automatically changing setting values of parameters
PB13 (Machine resonance suppression filter 1) and PB15 (Machine resonance suppression filter 2) in
case that the vibration exceed the value of the oscillation level set in parameter PF23.
Refer to the instruction manual for details.
SEMI-F47 function selection
0: Disabled
1: Enabled
Selecting “1” enables to avoid occurring AL. 10 (Undervoltage) using the electrical energy charged
in the capacitor in case that an instantaneous power failure occurs during operation. In parameter
PF25 (SEMI-F47 function - Instantaneous power failure detection time), set the time period until the
occurrence of AL. 10.1 (Voltage drop in the control circuit power).
A specified axis cannot be enabled for the instantaneous power failure tough drive function.
PA21
*AOP3
0001H
Refer to text
Each
Function selection A-3
0 0 0
One-touch tuning function selection
0: Disabled
1: Enabled
When the digit is “0”, the one-touch tuning with MR Configurator2 will be disabled.
For manufacturer setting
000: Manufacturer setting
PA22
**PCS
0000H
Refer to text
Each
Position control composition selection
0 0 0
For manufacturer setting
000: Manufacturer setting
Scale measurement mode selection
0: Disabled
1: Used in absolute position detection system
2: Used in incremental system
The setting of this digit is enabled with software version A8 or later.
The absolute position detection system cannot be used while an incremental type encoder is used.
Enabling absolute position detection system will trigger AL. 37 (Parameter error).
Additionally, the setting is enabled only in the standard control mode. Setting other than “0” in other
operation modes triggers AL. 37 (Parameter error).
Tab. 7-8:
7 - 48
Detailed overview of parameters PA for MR-J4W-B (8)
MR-J4W-B
Parameters
Number
Symbol
Initial value
PA23
DRAT
0000H
Unit
Setting range
Each/
Common
Refer to text
Each
Drive recorder arbitrary alarm trigger setting
Alarm detail No. setting
Set the digits when you execute the trigger with arbitrary alarm detail No. for the drive recorder
function.
When these digits are “0 0”, the drive recorder will operate with any alarm No. regardless of detail
numbers.
Alarm No. setting
Set the digits when you execute the trigger with arbitrary alarm No. for the drive recorder function.
When “0 0” are set, arbitrary alarm trigger of the drive recorder will be disabled.
Setting example:
To activate the drive recorder when AL. 50 (Overload 1) occurs, set “5 0 0 0”.
To activate the drive recorder when AL. 50.3 (Thermal overload error 4 during operation) occurs, set “5 0 0 3”.
PA24
AOP4
0000H
Refer to text
Each
Function selection A-4
0 0 0
Vibration suppression mode selection
0: Standard mode
1: 3 inertia mode
2: Low response mode
When two low resonance frequencies are generated, select “3 inertia mode (1)”. When the load
to motor inertia ratio exceeds the recommended load to motor inertia ratio, select “Low response
mode (2)”.
When you select the standard mode or low response mode, “Vibration suppression control 2” is not
available.
When you select the 3 inertia mode, the feed forward gain is not available.
Before changing the control mode with the controller during the 3 inertia mode or low response
mode, stop the motor.
For manufacturer setting
000: Manufacturer setting
PA25
OTHOV
0
%
0–100
Each
One-touch tuning -Overshoot permissible level
Set a permissible value of overshoot amount for one-touch tuning as a percentage of the in-position range.
Setting “0” will be 50 %.
Tab. 7-8:
Detailed overview of parameters PA for MR-J4W-B (9)
Beginners Manual Servo Amplifiers MELSERVO J4
7 - 49
Parameters
7.5
Other parameters
Other parameters
Only the basic setting parameters PA are described in this manual for beginners.
The Appendix shows more tables about
● Gain/filter parameters PB
(Section A.1.3, section A.2.3, section A.3.3 or section A.4.3)
● Extension setting parameters PC
(Section A.1.4, section A.2.4, section A.3.4 or section A.4.4)
● I/O setting parameters PD
(Section A.1.5, section A.2.5, section A.3.5 or section A.4.5)
● Extension 2 setting parameters PE
(Section A.1.6, section A.2.6, section A.3.6 or section A.4.6)
● Extension 3 setting parameters PF
(Section A.1.7, section A.2.7, section A.3.7 or section A.4.7)
● Linear servo motor/DD motor setting parameters PL
(Section A.1.8, section A.2.8, section A.3.8 or section A.4.8)
● Option setting parameters Po
(Section A.2.9)
● Positioning control parameters PT
(Section A.2.10)
Please refer to the respective instruction manual of the servo amplifier series MR-J4-A, MR-J4-A-RJ,
MR-J4-B and MR-J4W-B for more detailed settings and descriptions of these parameters.
7 - 50
Alarm and warning list MR-J4-A(-RJ)
Troubleshooting
8
Troubleshooting
8.1
Alarm and warning list MR-J4-A(-RJ)
NOTES
Refer to “MELSERVO J4 Servo Amplifier Instruction Manual (Troubleshooting)” for details of alarms
and warnings.
As soon as an alarm occurs, turn SON (Servo-on) off and interrupt the power.
AL. 37 (Parameter error) and warnings (except AL. F0 (Tough drive warning)) are not recorded in
the alarm history.
When an error occurs during operation, the corresponding alarm and warning are displayed. When
the alarm or the warning occurs, refer to “MELSERVO J4 Servo Amplifier Instruction Manual (Troubleshooting)” to remove the failure. When an alarm occurs, ALM will turn off.
To output alarm codes, set parameter PD34 to “1”. Alarm codes are outputted by on/off of bit 0
to bit 2.
Warnings (AL. 91 to AL. F3) do not have alarm codes. The alarm codes in the following table will be output when they occur. The alarm codes will not be output in normal condition.
After its cause has been removed, the alarm can be deactivated in any of the methods marked ✔ in
the alarm deactivation column. Warnings are automatically cancelled after the cause of occurrence is
removed. Alarms are deactivated with alarm reset or cycling the power.
Alarm deactivation
Explanation
1. Turning on RES (Reset) with input device
2. Pushing the “SET” button while the display of the servo amplifier is the current alarm display
status
Alarm reset
3. Pushing the “Occurring Alarm Reset” button in the “Alarm Display” window of MR
Configurator2
Cycling the power
Tab. 8-1:
Turning off the power and on again
Methods of alarm deactivation
For the alarms and warnings in which “SD” is written in the stop method column, the axis stops with
the dynamic brake after forced stop deceleration. For the alarms and warnings in which “DB” or “EDB”
is written in the stop method column, the servo motor stops with the dynamic brake without forced
stop deceleration.
Beginners Manual Servo Amplifiers MELSERVO J4
8-1
Troubleshooting
Alarm and warning list MR-J4-A(-RJ)
Alarm
14
15
0
0
0
0
0
0
0
0
0
10.1
Voltage drop in the control circuit
power
EDB
✔
✔
✔
10.2
Voltage drop in the main circuit
power
SD
✔
✔
✔
12.1
RAM error 1
DB
—
—
✔
12.2
RAM error 2
DB
—
—
✔
12.4
RAM error 4
DB
—
—
✔
12.5
RAM error 5
DB
—
—
✔
13.1
Clock error 1
DB
—
—
✔
13.2
Clock error 2
DB
—
—
✔
14.1
Control process error 1
DB
—
—
✔
14.2
Control process error 2
DB
—
—
✔
14.3
Control process error 3
DB
—
—
✔
14.4
Control process error 4
DB
—
—
✔
14.5
Control process error 5
DB
—
—
✔
14.6
Control process error 6
DB
—
—
✔
14.7
Control process error 7
DB
—
—
✔
14.8
Control process error 8
DB
—
—
✔
Tab. 8-2:
1
1
0
Detail name
Undervoltage
Memory error 1 (RAM)
Clock error
Control process error
Memory error 2
(EEP-ROM)
14.9
Control process error 9
DB
—
—
✔
14.A
Control process error 10
DB
—
—
✔
15.1
EEP-ROM error at power on
DB
—
—
✔
EEP-ROM error during operation
DB
—
—
✔
Home position information read error
DB
—
—
✔
16.1
Encoder initial communication Receive data error 1
DB
—
—
✔
16.2
Encoder initial communication Receive data error 2
DB
—
—
✔
16.3
Encoder initial communication Receive data error 3
DB
—
—
✔
16.5
Encoder initial communication Transmission data error 1
DB
—
—
✔
16.6
Encoder initial communication Transmission data error 2
DB
—
—
✔
16.7
Encoder initial communication Transmission data error 3
DB
—
—
✔
16.A
Encoder initial communication Process error 1
DB
—
—
✔
16.B
Encoder initial communication Process error 2
DB
—
—
✔
16.C
Encoder initial communication Process error 3
DB
—
—
✔
16.D
Encoder initial communication Process error 4
DB
—
—
✔
16.E
Encoder initial communication Process error 5
DB
—
—
✔
16.F
Encoder initial communication Process error 6
DB
—
—
✔
15.2
15.4
16
8-2
0
0
0
Power off to on
13
0
1
Press the “SET”
button on the current
alarm screen.
12
0
Alarm reset (RES)
10
CN1- CN1- CN122
23
24
(Bit 2) (Bit 1) (Bit 0) Name
Detail number
No.
Alarm deactivation
Stop method , Alarm code
Encoder initial
communication
error 1
Alarm list of MR-J4-A(-RJ) (1)
Alarm and warning list MR-J4-A(-RJ)
Troubleshooting
1A
1E
Alarm
1F
20
21
24
25
Tab. 8-2:
1
1
1
1
1
1
1
0
1
1
1
1
1
0
1
0
0
0
0
0
0
0
0
0
Board error
Memory error 3
(FLASH-ROM)
Power off to on
0
0
Press the “SET”
button on the current
alarm screen.
19
0
Detail name
Alarm reset (RES)
17
CN1- CN1- CN122
23
24
(Bit 2) (Bit 1) (Bit 0) Name
Stop method , No.
Alarm deactivation
Detail number
Alarm code
17.1
Board error 1
DB
—
—
✔
17.3
Board error 2
DB
—
—
✔
17.4
Board error 3
DB
—
—
✔
19.1
FLASH-ROM error 1
DB
—
—
✔
19.2
FLASH-ROM error 2
DB
—
—
✔
1A.1
Servo motor combination error (1)
DB
—
—
✔
1A.2
Servo motor control mode
combination error
DB
—
—
✔
1.A.4 Servo motor combination error 2
DB
—
—
✔
Encoder initial communication error 2
1E.1
Encoder malfunction
DB
—
—
✔
1E.2
Load-side encoder malfunction
DB
—
—
✔
Encoder initial communication error 3
1F.1
Incompatible encoder
DB
—
—
✔
1F.2
Incompatible load-side encoder
DB
—
—
✔
20.1
Encoder normal communication Receive data error 1
EDB
—
—
✔
20.2
Encoder normal communication Receive data error 2
EDB
—
—
✔
20.3
Encoder normal communication Receive data error 3
EDB
—
—
✔
20.5
Encoder normal communication Transmission data error 1
EDB
—
—
✔
20.6
Encoder normal communication Transmission data error 2
EDB
—
—
✔
20.7
Encoder normal communication Transmission data error 3
EDB
—
—
✔
20.9
Encoder normal communication Receive data error 4
EDB
—
—
✔
20.A
Encoder normal communication Receive data error 5
EDB
—
—
✔
Servo motor
combination error
Encoder normal communication error 1
21.1
Encoder data error 1
EDB
—
—
✔
21.2
Encoder data update error
EDB
—
—
✔
21.3
Encoder data waveform error
EDB
—
—
✔
Encoder non-signal error
EDB
—
—
✔
Encoder hardware error 1
EDB
—
—
✔
21.6
Encoder hardware error 2
EDB
—
—
✔
21.9
Encoder data error 2
EDB
—
—
✔
24.1
Ground fault detected by hardware
detection circuit
DB
—
—
✔
24.2
Ground fault detected by software
detection function
DB
✔
✔
✔
25.1
Servo motor encoder - Absolute
position erased
DB
—
—
✔
Encoder normal com21.4
munication error 2
21.5
Main circuit error
Absolute position
erased
Alarm list of MR-J4-A(-RJ) (2)
Beginners Manual Servo Amplifiers MELSERVO J4
8-3
Troubleshooting
Alarm and warning list MR-J4-A(-RJ)
2B
1
1
1
1
1
0
0
0
0
Initial magnetic pole
detection error
Power off to on
Alarm
2A
1
1
Press the “SET”
button on the current
alarm screen.
28
1
Alarm reset (RES)
27
CN1- CN1- CN122
23
24
(Bit 2) (Bit 1) (Bit 0) Name
27.1
Initial magnetic pole detection Abnormal termination
DB
✔
✔
✔
27.2
Initial magnetic pole detection - Time
out error
DB
✔
✔
✔
27.3
Initial magnetic pole detection - Limit
switch error
DB
✔
✔
✔
27.4
Initial magnetic pole detection Estimated error
DB
✔
✔
✔
27.5
Initial magnetic pole detection Position deviation error
DB
✔
✔
✔
27.6
Initial magnetic pole detection Speed deviation error
DB
✔
✔
✔
27.7
Initial magnetic pole detection Current error
DB
✔
✔
✔
Linear encoder - Environment error
EDB
—
—
✔
2A.1
Linear encoder error 1-1
EDB
—
—
✔
2A.2
Linear encoder error 1-2
EDB
—
—
✔
2A.3
Linear encoder error 1-3
EDB
—
—
✔
2A.4
Linear encoder error 1-4
EDB
—
—
✔
2A.5
Linear encoder error 1-5
EDB
—
—
✔
2A.6
Linear encoder error 1-6
EDB
—
—
✔
2A.7
Linear encoder error 1-7
EDB
—
—
✔
2A.8
Linear encoder error 1-8
EDB
—
—
✔
2B.1
Encoder counter error 1
EDB
—
—
✔
2B.2
Encoder counter error 2
EDB
—
—
✔
Detail number
No.
Alarm deactivation
Stop method , Alarm code
Linear encoder error 2 28.1
Linear encoder error 1
Encoder counter error
30.1
30
31
32
33
1
1
0
0
0
0
0
1
1
0
Regenerative error Overspeed
✔
✔
✔
30.2
Regeneration signal error
DB
30.3
Regeneration feedback signal error
DB
✔
✔
✔
31.1
Abnormal motor speed
SD
✔
✔
✔
32.1
Overcurrent detected at hardware
detection circuit (during operation)
DB
—
—
✔
32.2
Overcurrent detected at software
detection function
(during operation)
DB
✔
✔
✔
32.3
Overcurrent detected at hardware
detection circuit (during a stop)
DB
—
—
✔
32.4
Overcurrent detected at software
detection function (during a stop)
DB
✔
✔
✔
33.1
Main circuit voltage error
EDB
✔
✔
✔
35.1
Command frequency error
DB
✔
✔
✔
37.1
Parameter setting range error
DB
—
—
✔
37.2
Parameter combination error
DB
—
—
✔
37.3 Point table setting error
DB
—
—
✔
3A.1
Inrush current suppression circuit
error
EDB
—
—
✔
0
1
37
0
0
0
Parameter error
Tab. 8-2:
✔
DB
Overvoltage
1
0
✔
1
35
0
Regeneration heat error
✔
Overcurrent
Command frequency
error
3A
8-4
0
Detail name
0
Inrush current suppression circuit error
Alarm list of MR-J4-A(-RJ) (3)
Alarm and warning list MR-J4-A(-RJ)
Troubleshooting
Power off to on
1
Press the “SET”
button on the current
alarm screen.
1
Alarm reset (RES)
CN1- CN1- CN122
23
24
(Bit 2) (Bit 1) (Bit 0) Name
Servo control error
(for linear servo
motor and direct
drive motor)
42
42.1
Servo control error by position
deviation
EDB
✔
✔
✔
42.2
Servo control error by speed
deviation
EDB
✔
✔
✔
42.3
Servo control error by torque/thrust
deviation
EDB
✔
✔
✔
42.8
Fully closed loop control error by
position deviation
EDB
✔
✔
✔
Fully closed loop control error by
speed deviation
EDB
✔
✔
✔
42.A
Fully closed loop control error by
position deviation during command
stop
EDB
✔
✔
✔
45.1
Main circuit device overheat error (1)
SD
✔
✔
✔
SD
✔
✔
✔
Detail number
No.
Alarm deactivation
Stop method , Alarm code
0
Fully closed loop con42.9
trol error (for fully
closed loop control)
45
Alarm
46
47
50
51
52
54
56
Tab. 8-2:
0
0
0
0
0
1
0
1
1
1
1
1
1
0
1
1
1
1
1
1
1
1
1
0
Main circuit device
overheat Servo motor
overheat Cooling fan error
Overload 1
45.2 Main circuit device overheat error 2
46.1
Abnormal temperature of servo
motor 1
SD
✔
✔
✔
46.2
Abnormal temperature of servo
motor 2
SD
✔
✔
✔
46.3
Thermistor disconnected error
SD
✔
✔
✔
46.5
Abnormal temperature of servo
motor 3
DB
✔
✔
✔
46.6
Abnormal temperature of servo
motor 4
DB
✔
✔
✔
47.1
Cooling fan stop error
SD
—
—
✔
47.2
Cooling fan speed reduction error
SD
—
—
✔
50.1
Thermal overload error 1 during
operation
SD
✔
✔
✔
50.2
Thermal overload error 2 during
operation
SD
✔
✔
✔
50.3
Thermal overload error 4 during
operation
SD
✔
✔
✔
50.4
Thermal overload error 1 during a
stop
SD
✔
✔
✔
50.5
Thermal overload error 2 during a
stop
SD
✔
✔
✔
50.6
Thermal overload error 4 during a
stop
SD
✔
✔
✔
51.1
Thermal overload error 3 during
operation
DB
✔
✔
✔
51.2
Thermal overload error 3 during a
stop
DB
✔
✔
✔
52.1
Excess droop pulse 1
SD
✔
✔
✔
52.3
Excess droop pulse 2
SD
✔
✔
✔
52.4
Error excessive during 0 torque limit
SD
✔
✔
✔
52.5
Excess droop pulse 3
EDB
✔
✔
✔
Overload 2 Error excessive
Oscillation detection
Forced stop error
Detail name
54.1
Oscillation detection error
EDB
✔
✔
✔
56.2
Over speed during forced stop
EDB
✔
✔
✔
56.3
Estimated distance over during
forced stop
EDB
✔
✔
✔
Alarm list of MR-J4-A(-RJ) (4)
Beginners Manual Servo Amplifiers MELSERVO J4
8-5
Troubleshooting
Alarm and warning list MR-J4-A(-RJ)
0
1
Operation error
63
1
1
0
STO timing error
1
1
0
71
72
Tab. 8-2:
8-6
1
1
1
1
0
0
61.1 Point table setting range error
DB
✔
✔
✔
63.1
STO1 off
DB
✔
✔
✔
63.2
STO2 off
DB
✔
✔
✔
70.1
Load-side encoder initial communication - Receive data error 1
DB
—
—
✔
70.2
Load-side encoder initial communication - Receive data error 2
DB
—
—
✔
70.3
Load-side encoder initial communication - Receive data error 3
DB
—
—
✔
70.5
Load-side encoder initial communication - Transmission data error 1
DB
—
—
✔
70.6
Load-side encoder initial communication - Transmission data error 2
DB
—
—
✔
Load-side encoder initial communication - Transmission data error 3
DB
—
—
✔
Load-side encoder initial communication - Process error 1
DB
—
—
✔
70.B
Load-side encoder initial communication - Process error 2
DB
—
—
✔
70.C
Load-side encoder initial communication - Process error 3
DB
—
—
✔
70.D
Load-side encoder initial communication - Process error 4
DB
—
—
✔
70.E
Load-side encoder initial communication - Process error 5
DB
—
—
✔
70.F
Load-side encoder initial communication - Process error 6
DB
—
—
✔
71.1
Load-side encoder communication Receive data error 1
EDB
—
—
✔
71.2
Load-side encoder communication Receive data error 2
EDB
—
—
✔
71.3
Load-side encoder communication Receive data error 3
EDB
—
—
✔
71.5
Load-side encoder communication Transmission data error 1
EDB
—
—
✔
71.6
Load-side encoder communication Transmission data error 2
EDB
—
—
✔
71.7
Load-side encoder communication Transmission data error 3
EDB
—
—
✔
71.9
Load-side encoder communication Transmission data error 4
EDB
—
—
✔
71.A
Load-side encoder communication Transmission data error 5
EDB
—
—
✔
72.1
Load-side encoder data error 1
EDB
—
—
✔
72.2
Load-side encoder data update error
EDB
—
—
✔
72.3
Load-side encoder data waveform
error
EDB
—
—
✔
72.4
Load-side encoder non-signal error
EDB
—
—
✔
72.5
Load-side encoder hardware error 1
EDB
—
—
✔
72.6
Load-side encoder hardware error 2
EDB
—
—
✔
72.9
Load-side encoder data error 2
EDB
—
—
✔
70.7
Load-side encoder
initial communication
error 1
70.A
Alarm
70
Power off to on
1
Press the “SET”
button on the current
alarm screen.
61
Alarm reset (RES)
CN1- CN1- CN122
23
24
(Bit 2) (Bit 1) (Bit 0) Name
Detail number
No.
Alarm deactivation
Stop method , Alarm code
Load-side encoder
normal
communication
error 1
Load-side encoder
normal
communication
error 2
Alarm list of MR-J4-A(-RJ) (5)
Detail name
Alarm and warning list MR-J4-A(-RJ)
Troubleshooting
0
8E
88888
Tab. 8-2:
0
0
—
—
0
—
Power off to on
0
Press the “SET”
button on the current
alarm screen.
0
Alarm reset (RES)
CN1- CN1- CN122
23
24
(Bit 2) (Bit 1) (Bit 0) Name
Alarm
8A
USB communication time-out
error/serial communication time-out
error
SD
✔
✔
✔
8E.1
USB communication receive
error/serial communication receive
error
SD
✔
✔
✔
8E.2
USB communication checksum
error/serial communication
checksum error
SD
✔
✔
✔
8E.3
USB communication character
error/serial communication character
error
SD
✔
✔
✔
8E.4
USB communication command
error/serial communication
command error
SD
✔
✔
✔
8E.5
USB communication data number
error/serial communication data
number error
SD
✔
✔
✔
SD
—
—
✔
Detail number
No.
Alarm deactivation
Stop method , Alarm code
USB communication
time-out error/serial
8A.1
communication timeout error
USB communication
error/serial
communication error
Watchdog
Detail name
8888._ Watchdog
Alarm list of MR-J4-A(-RJ) (6)
Leave for about 30 minutes of cooling time after removing the cause of occurrence.
The following shows three stop methods of DB, EDB, and SD.
DB: Stops with dynamic brake. (Coasts for the servo amplifier without dynamic brake.)
EDB: Refer to the following table for the specified servo motors.
The stop method for other than the specified servo motors will be DB.
Series
HG-KR
HG-MR
HG-SR
SD:
Servo Motor
HG-KR053, HG-KR13, HG-KR23, HG-KR43
HG-MR053, HG-MR13, HG-MR23, HG-MR43
HG-SR51, HG-SR52
Forced stop deceleration
This is applicable when parameter PA04 is set to the initial value. The stop system of SD can be
changed to DB using parameter PA04.
The alarm can be canceled by setting as follows:
For the fully closed loop control: set parameter PE03 to “1”.
When a linear servo motor or direct drive motor is used: set parameter PL04 to “1”.
Only for MR-J4-A-RJ
Beginners Manual Servo Amplifiers MELSERVO J4
8-7
No.
Name
90.1
90
Home position return incomplete
warning
91
Servo amplifier overheat warning 92
Battery cable disconnection warning
93
ABS data transfer warning
95
STO warning
96
97
98
Home position setting warning
Program operation disabled/next
station position warning
Software limit warning
Warning
Stroke limit warning
9F
Battery warning
E0
Excessive regeneration warning
E1
E2
E3
Servo motor overheat warning
Absolute position counter warning
Home position return incomplete
—
—
90.5 Z-phase unpassed
—
91.1
Main circuit device overheat warning
—
92.1
Encoder battery cable disconnection warning
—
92.3
Battery degradation
—
93.1
ABS data transfer requirement warning during
magnetic pole detection
—
95.1
STO1 off detection
DB
95.2
STO2 off detection
DB
96.1
In-position warning at home positioning
—
96.2
Command input warning at home positioning
—
96.3
Servo off warning at home positioning
—
96.4
Home positioning warning during magnetic pole
detection
—
97.1 Program operation disabled warning
—
97.2 Next station position warning
—
98.1 Forward rotation-side software stroke limit reached
—
Reverse rotation-side software stroke limit reached
—
99.1
Forward rotation stroke end off
99.2
Reverse rotation stroke end off
9F.1
Low battery
—
9F.2
Battery degradation warning
—
E0.1
Excessive regeneration warning
—
E1.1
Thermal overload warning 1 during operation
—
E1.2
Thermal overload warning 2 during operation
—
E1.3
Thermal overload warning 3 during operation
—
E1.4
Thermal overload warning 4 during operation
—
E1.5
Thermal overload error 1 during a stop
—
E1.6
Thermal overload error 2 during a stop
—
E1.7
Thermal overload error 3 during a stop
—
E1.8
Thermal overload error 4 during a stop
—
E2.1
Servo motor temperature warning
—
E3.1
Multi-revolution counter travel distance excess
warning
—
E3.2
Absolute position counter warning
—
Absolute positioning counter EEP-ROM writing
E3.4 frequency warning
—
E3.5
Encoder absolute positioning counter warning
—
E5.1
Time-out during ABS data transfer
—
ABSM off during ABS data transfer
—
E5
ABS time-out warning
E5.2
E5.3
SON off during ABS data transfer
—
E6
Servo forced stop warning
E6.1
Forced stop warning
SD
E8
Cooling fan speed reduction
warning
E8.1
Decreased cooling fan speed warning
—
E8.2
Cooling fan stop
—
E9.1
Servo-on signal on during main circuit off
DB
E9.2
Bus voltage drop during low speed operation
DB
E9
Tab. 8-3:
8-8
Overload warning 1
Detail name
90.2 Home position return abnormal termination
98.2
99
Stop
method , Alarm and warning list MR-J4-A(-RJ)
Detail
number
Troubleshooting
Main circuit off warning
Warning list of MR-J4-A(-RJ) (1)
Warning
Name
Detail name
EA
ABS servo-on warning
EA.1
ABS servo-on warning
Stop
method , No.
—
EC
Overload warning 2
EC.1
Overload warning 2
—
ED
Output watt excess warning
ED.1
Output watt excess warning
—
F0
Tough drive warning
F0.1
Instantaneous power failure tough drive warning
—
F2
Drive recorder - Miswriting warning
F3
Oscillation detection warning
Tab. 8-3:
Troubleshooting
Detail
number
Alarm and warning list MR-J4-A(-RJ)
F0.3
Vibration tough drive warning
—
F2.1
Drive recorder - Area writing time-out warning
—
F2.2
Drive recorder - Data miswriting warning
—
F3.1
Oscillation detection warning
—
Warning list of MR-J4-A(-RJ) (2)
Leave for about 30 minutes of cooling time after removing the cause of occurrence.
The following shows two stop methods of DB and SD.
DB: Stops with dynamic brake. (Coasts for the servo amplifier without dynamic brake.)
SD: Forced stop deceleration
This is applicable when parameter PA04 is set to the initial value. The stop system of SD can be
changed to DB using parameter PA04.
Quick stop or slow stop can be selected using parameter PD30.
Only for MR-J4-A-RJ
Beginners Manual Servo Amplifiers MELSERVO J4
8-9
Troubleshooting
8.2
NOTES
Alarm and warning list MR-J4-B(-RJ)
Alarm and warning list MR-J4-B(-RJ)
Refer to “MELSERVO J4 Servo Amplifier Instruction Manual (Troubleshooting)” for details of alarms
and warnings.
As soon as an alarm occurs, turn SON (Servo-on) off and interrupt the power.
AL. 37 (Parameter error) and warnings are not recorded in the alarm history.
When an error occurs during operation, the corresponding alarm and warning are displayed. When
the alarm or the warning occurs, refer to “MELSERVO J4 Servo Amplifier Instruction Manual (Troubleshooting)” to remove the failure. When an alarm occurs, ALM will turn off.
After its cause has been removed, the alarm can be deactivated in any of the methods marked ✔ in
the alarm deactivation column. Warnings are automatically cancelled after the cause of occurrence is
removed.
12
Clock error
Alarm
13
Memory error 1 (RAM)
14
15
Tab. 8-4:
8 - 10
Control process error
Memory error 2
(EEP-ROM)
Power
off to on
Undervoltage
CPU reset
10
Alarm deactivation
Error reset
Name
10.1
Voltage drop in the control circuit
power
EDB
✔
✔
✔
10.2
Voltage drop in the main circuit power
SD
✔
✔
✔
✔
Detail
number
No.
Stop
method , For the alarms and warnings in which “SD” is written in the stop method column, the axis stops with
the dynamic brake after forced stop deceleration. For the alarms and warnings in which “DB” or “EDB”
is written in the stop method column, the servo motor stops with the dynamic brake without forced
stop deceleration.
Detail name
12.1
RAM error 1
DB
—
—
12.2
RAM error 2
DB
—
—
✔
12.3
RAM error 3
DB
—
—
✔
12.4
RAM error 4
DB
—
—
✔
12.5
RAM error 5
DB
—
—
✔
13.1
Clock error 1
DB
—
—
✔
13.2
Clock error 2
DB
—
—
✔
14.1
Control process error 1
DB
—
—
✔
14.2
Control process error 2
DB
—
—
✔
14.3
Control process error 3
DB
—
—
✔
14.4
Control process error 4
DB
—
—
✔
14.5
Control process error 5
DB
—
—
✔
14.6
Control process error 6
DB
—
—
✔
14.7
Control process error 7
DB
—
—
✔
14.8
Control process error 8
DB
—
—
✔
14.9
Control process error 9
DB
—
—
✔
14.A
Control process error 10
DB
—
—
✔
15.1
EEP-ROM error at power on
DB
—
—
✔
15.2
EEP-ROM error during operation
DB
—
—
✔
Alarm list of MR-J4-B(-RJ) (1)
Memory error 3
(FLASH-ROM)
Power
off to on
19
Board error
CPU reset
17
Alarm deactivation
Error reset
Encoder initial
communication error 1
Alarm
16
Name
16.1
Encoder initial communication - Receive
data error 1
DB
—
—
✔
16.2
Encoder initial communication - Receive
data error 2
DB
—
—
✔
16.3
Encoder initial communication - Receive
data error 3
DB
—
—
✔
16.5
Encoder initial communication - Transmission data error 1
DB
—
—
✔
16.6
Encoder initial communication - Transmission data error 2
DB
—
—
✔
16.7
Encoder initial communication - Transmission data error 3
DB
—
—
✔
16.A
Encoder initial communication - Process
error 1
DB
—
—
✔
16.B
Encoder initial communication - Process
error 2
DB
—
—
✔
16.C
Encoder initial communication - Process
error 3
DB
—
—
✔
16.D
Encoder initial communication - Process
error 4
DB
—
—
✔
16.E
Encoder initial communication - Process
error 5
DB
—
—
✔
16.F
Encoder initial communication - Process
error 6
DB
—
—
✔
17.1
Board error 1
DB
—
—
✔
17.3
Board error 2
DB
—
—
✔
17.4
Board error 3
DB
—
—
✔
17.5
Board error 4
DB
—
—
✔
17.6
Board error 5
DB
—
—
✔
17.8
Board error 6 EDB
—
—
✔
19.1
Flash-ROM error 1
DB
—
—
✔
19.2
Flash-ROM error 2
DB
—
—
✔
1A.1
Servo motor combination error
DB
—
—
✔
1A.2
Servo motor control mode combination
error
DB
—
—
✔
DB
—
—
✔
✔
Detail
number
No.
Troubleshooting
Stop
method , Alarm and warning list MR-J4-B(-RJ)
Detail name
1A
Servo motor
combination error
1E
Encoder initial
communication error 2
1E.1
Encoder malfunction
1E.2
Load-side encoder malfunction
DB
—
—
1F
Encoder initial
communication error 3
1F.1
Incompatible encoder
DB
—
—
✔
1F.2
Incompatible load-side encoder
DB
—
—
✔
Tab. 8-4:
Alarm list of MR-J4-B(-RJ) (2)
Beginners Manual Servo Amplifiers MELSERVO J4
8 - 11
Alarm and warning list MR-J4-B(-RJ)
Encoder normal
communication error 2
Alarm
21
24
25
27
28
Tab. 8-4:
8 - 12
CPU reset
Power
off to on
Encoder normal
communication error 1
20.1
Encoder normal communication Receive data error 1
EDB
—
—
✔
20.2
Encoder normal communication Receive data error 2
EDB
—
—
✔
20.3
Encoder normal communication Receive data error 3
EDB
—
—
✔
20.5
Encoder normal communication Transmission data error 1
EDB
—
—
✔
20.6
Encoder normal communication Transmission data error 2
EDB
—
—
✔
20.7
Encoder normal communication Transmission data error 3
EDB
—
—
✔
20.9
Encoder normal communication Receive data error 4
EDB
—
—
✔
20.A
Encoder normal communication Receive data error 5
EDB
—
—
✔
Initial magnetic pole
detection error
Linear encoder error 2
Detail name
21.1
Encoder data error 1
EDB
—
—
✔
21.2
Encoder data update error
EDB
—
—
✔
21.3
Encoder data waveform error
EDB
—
—
✔
21.4
Encoder non-signal error
EDB
—
—
✔
21.5
Encoder hardware error 1
EDB
—
—
✔
21.6
Encoder hardware error 2
EDB
—
—
✔
21.9
Encoder data error 2
EDB
—
—
✔
24.1
Ground fault detected by hardware
detection circuit
DB
—
—
✔
24.2
Ground fault detected by software
detection function
DB
✔
✔
✔
25.1
Servo motor encoder - Absolute
position erased
DB
—
—
✔
25.2
Scale measurement encoder - Absolute
position erased
DB
—
—
✔
27.1
Initial magnetic pole detection Abnormal termination
DB
—
—
✔
27.2
Initial magnetic pole detection - Time
out error
DB
—
—
✔
27.3
Initial magnetic pole detection - Limit
switch error
DB
—
—
✔
27.4
Initial magnetic pole detection Estimated error
DB
—
—
✔
27.5
Initial magnetic pole detection Position deviation error
DB
—
—
✔
27.6
Initial magnetic pole detection - Speed
deviation error
DB
—
—
✔
27.7
Initial magnetic pole detection - Current
error
DB
—
—
✔
28.1
Linear encoder - Environment error
EDB
—
—
✔
Main circuit error
Absolute position
erased
Alarm deactivation
Error reset
20
Name
Detail
number
No.
Stop
method , Troubleshooting
Alarm list of MR-J4-B(-RJ) (3)
Alarm and warning list MR-J4-B(-RJ)
31
32
Alarm
33
34
Overspeed
Power
off to on
Regenerative error CPU reset
30
Encoder counter error
Error reset
2B
Linear encoder error 1
Detail name
Stop
method , 2A
Name
2A.1
Linear encoder error 1-1
EDB
—
—
✔
2A.2
Linear encoder error 1-2
EDB
—
—
✔
2A.3
Linear encoder error 1-3
EDB
—
—
✔
2A.4
Linear encoder error 1-4
EDB
—
—
✔
2A.5
Linear encoder error 1-5
EDB
—
—
✔
2A.6
Linear encoder error 1-6
EDB
—
—
✔
2A.7
Linear encoder error 1-7
EDB
—
—
✔
2A.8
Linear encoder error 1-8
EDB
—
—
✔
2B.1
Encoder counter error 1
EDB
—
—
✔
2B.2
Encoder counter error 2
EDB
—
—
✔
30.1
Regeneration heat error
DB
✔
✔
✔
30.2
Regeneration signal error
DB
✔
✔
✔
✔
SSCNET receive error 1
✔
✔
30.3
Regeneration feedback signal error
DB
31.1
Abnormal motor speed
SD
✔
✔
✔
32.1
Overcurrent detected at hardware
detection circuit (during operation)
DB
—
—
✔
32.2
Overcurrent detected at software
detection function (during operation)
DB
✔
✔
✔
32.3
Overcurrent detected at hardware
detection circuit (during a stop)
DB
—
—
✔
32.4
Overcurrent detected at software
detection function (during a stop)
DB
✔
✔
✔
Overcurrent
Overvoltage
Alarm deactivation
Detail
number
No.
Troubleshooting
33.1
Main circuit voltage error
EDB
✔
✔
✔
34.1
SSCNET receive data error
SD
✔
✔
✔
34.2
SSCNET connector connection error
SD
✔
✔
✔
34.3
SSCNET communication data error
SD
✔
✔
✔
34.4
Hardware error signal detection
SD
✔
✔
✔
SD
✔
✔
✔
35
Command frequency
error
35.1
Command frequency error
36
SSCNET receive error 2
36.1
Continuous communication data error
SD
✔
✔
✔
37.1
Parameter setting range error
DB
—
✔
✔
37.2
37
Parameter error
Parameter combination error
DB
—
✔
✔
3A
Inrush current suppres3A.1
sion circuit error
Inrush current suppression circuit error
EDB
—
—
✔
3D.1
Parameter combination error for driver
communication on slave
DB
—
—
✔
3D
Parameter setting error
for driver communication
3D.2
Parameter combination error for driver
communication on master
DB
—
—
✔
Operation mode error
3E.1
Operation mode error
DB
—
—
✔
42.1
Servo control error by position
deviation
EDB
✔
✔
✔
42.2
Servo control error by speed deviation
EDB
✔
✔
✔
42.3
Servo control error by torque/thrust
deviation
EDB
✔
✔
✔
42.8
Fully closed loop control error by position deviation
EDB
✔
✔
✔
42.9
Fully closed loop control error by position deviation
EDB
✔
✔
✔
42.A
Fully closed loop control error by position deviation during command stop
EDB
✔
✔
✔
3E
Servo control error (for
linear servo motor and
direct drive motor)
42
Fully closed loop control error (for fully
closed loop control)
Tab. 8-4:
Alarm list of MR-J4-B(-RJ) (4)
Beginners Manual Servo Amplifiers MELSERVO J4
8 - 13
Main circuit device
overheat 46
Servo motor
overheat Power
off to on
45
Detail name
CPU reset
Name
45.1
Main circuit device overheat error
SD
✔
✔
✔
46.1
Abnormal temperature of servo motor 1
SD
✔
✔
✔
✔
46.2
Abnormal temperature of servo motor 2
SD
✔
46.3
Thermistor disconnected error
SD
✔
✔
✔
DB
✔
✔
✔
✔
46.5
47
Overload 1 Alarm
50
Cooling fan error
51
52
54
Error excessive
Oscillation detection
56
Forced stop error
63
STO timing error
Tab. 8-4:
8 - 14
Overload 2 Alarm deactivation
Error reset
No.
Stop
method , Alarm and warning list MR-J4-B(-RJ)
Detail
number
Troubleshooting
Abnormal temperature of servo motor 3
✔
✔
46.6
Abnormal temperature of servo motor 4
DB
✔
47.1
Cooling fan stop error
SD
—
—
✔
47.2
Cooling fan speed reduction error
SD
—
—
✔
50.1
Thermal overload error 1 during
operation
SD
✔
✔
✔
50.2
Thermal overload error 2 during
operation
SD
✔
✔
✔
50.3
Thermal overload error 4 during
operation
SD
✔
✔
✔
50.4
Thermal overload error 1 during a stop
SD
✔
✔
✔
✔
50.5
Thermal overload error 2 during a stop
SD
✔
✔
50.6
Thermal overload error 4 during a stop
SD
✔
✔
✔
51.1
Thermal overload error 3 during operation
DB
✔
✔
✔
51.2
Thermal overload error 3 during a stop
DB
✔
✔
✔
52.1
Excess droop pulse 1
SD
✔
✔
✔
52.3
Excess droop pulse 2
SD
✔
✔
✔
52.4
Error excessive during 0 torque limit
SD
✔
✔
✔
52.5
Excess droop pulse 3
EDB
✔
✔
✔
54.1
Oscillation detection error
EDB
✔
✔
✔
56.2
Over speed during forced stop
EDB
✔
✔
✔
56.3
Estimated distance over during forced
stop
EDB
✔
✔
✔
63.1
STO1 off
DB
✔
✔
✔
63.2
STO2 off
DB
✔
✔
✔
Alarm list of MR-J4-B(-RJ) (5)
CPU reset
Power
off to on
71
Alarm deactivation
Error reset
Load-side encoder
initial communication
error 1
Alarm
70
Name
70.1
Load-side encoder initial communication - Receive data error 1
DB
—
—
✔
70.2
Load-side encoder initial communication - Receive data error 2
DB
—
—
✔
70.3
Load-side encoder initial communication - Receive data error 3
DB
—
—
✔
70.5
Load-side encoder initial communication - Transmission data error 1
DB
—
—
✔
70.6
Load-side encoder initial communication - Transmission data error 2
DB
—
—
✔
70.7
Load-side encoder initial communication - Transmission data error 3
DB
—
—
✔
70.A
Load-side encoder initial communication - Process error 1
DB
—
—
✔
70.B
Load-side encoder initial communication - Process error 2
DB
—
—
✔
70.C
Load-side encoder initial communication - Process error 3
DB
—
—
✔
70.D
Load-side encoder initial communication - Process error 4
DB
—
—
✔
70.E
Load-side encoder initial communication - Process error 5
DB
—
—
✔
70.F
Load-side encoder initial communication - Process error 6
DB
—
—
✔
71.1
Load-side encoder communication Receive data error 1
EDB
—
—
✔
71.2
Load-side encoder communication Receive data error 2
EDB
—
—
✔
71.3
Load-side encoder communication Receive data error 3
EDB
—
—
✔
Load-side encoder communication Transmission data error 1
EDB
—
—
✔
Load-side encoder communication Transmission data error 2
EDB
—
—
✔
71.7
Load-side encoder communication Transmission data error 3
EDB
—
—
✔
71.9
Load-side encoder communication Transmission data error 4
EDB
—
—
✔
71.A
Load-side encoder communication Transmission data error 5
EDB
—
—
✔
72.1
Load-side encoder data error 1
EDB
—
—
✔
72.2
Load-side encoder data update error
EDB
—
—
✔
Detail
number
No.
Troubleshooting
Stop
method , Alarm and warning list MR-J4-B(-RJ)
71.5
Load-side encoder
normal communication
error 1
71.6
Detail name
72.3
Load-side encoder
normal communication 72.4
error 2
72.5
Load-side encoder data waveform error
EDB
—
—
✔
Load-side encoder non-signal error
EDB
—
—
✔
Load-side encoder hardware error 1
EDB
—
—
✔
72.6
Load-side encoder hardware error 2
EDB
—
—
✔
72.9
Load-side encoder data error 2
EDB
—
—
✔
82
Master-slave operation
error 1
82.1
Master-slave operation error 1
EDB
✔
✔
✔
8A
USB communication
timeout error
8A.1
USB communication time-out error
SD
✔
✔
✔
72
Tab. 8-4:
Alarm list of MR-J4-B(-RJ) (6)
Beginners Manual Servo Amplifiers MELSERVO J4
8 - 15
Tab. 8-4:
Watchdog
8E.1
USB communication receive error
SD
✔
✔
✔
8E.2
USB communication checksum error
SD
✔
✔
✔
8E.3
USB communication character error
SD
✔
✔
✔
8E.4
USB communication command error
SD
✔
✔
✔
8E.5
USB communication data number error
SD
✔
✔
✔
88._
Watchdog
DB
—
—
✔
Alarm list of MR-J4-B(-RJ) (7)
Leave for about 30 minutes of cooling time after removing the cause of occurrence.
In some controller communication status, the alarm factor may not be removed.
The alarm can be cancelled by setting as follows:
– For the fully closed loop control: set parameter PE03 to “1”.
– When a linear servo motor or a direct drive motor is used: set parameter PL04 to “1”.
The following shows three stop methods of DB, EDB, and SD.
DB: Stops with dynamic brake. (Coasts for the servo amplifier without dynamic brake.)
EDB: Refer to the following table for the specified servo motors.
The stop method for other than the specified servo motors will be DB.
Series
HG-KR
HG-MR
HG-SR
SD:
8 - 16
Power
off to on
888
USB communication
error
Detail name
CPU reset
8E
Name
Alarm deactivation
Error reset
Alarm
No.
Stop
method , Alarm and warning list MR-J4-B(-RJ)
Detail
number
Troubleshooting
Servo Motor
HG-KR053, HG-KR13, HG-KR23, HG-KR43
HG-MR053, HG-MR13, HG-MR23, HG-MR43
HG-SR51, HG-SR52
Forced stop deceleration
This is applicable when parameter PA04 is set to the initial value. The stop system of SD can be
changed to DB using parameter PA04.
This alarm will occur only in the J3 compatibility mode.
Name
91
Servo amplifier overheat warning 92
95
STO warning
96
Home position setting warning
9F
Battery warning
E0
Excessive regeneration warning Warning
E1
Overload warning 1 E2
Servo motor overheat warning
E3
Absolute position counter warning
E4
91.1
Main circuit device overheat warning
—
92.1
Encoder battery cable disconnection warning
—
92.3
Battery degradation
—
95.1
STO1 off detection
DB
95.2
STO2 off detection
DB
96.1
In-position warning at home positioning
—
96.2
Command input warning at home positioning
—
9F.1
Low battery
—
9F.2
Battery degradation warning
—
E0.1
Excessive regeneration warning
—
E1.1
Thermal overload warning 1 during operation
—
E1.2
Thermal overload warning 2 during operation
—
E1.3
Thermal overload warning 3 during operation
—
E1.4
Thermal overload warning 4 during operation
—
E1.5
Thermal overload error 1 during a stop
—
E1.6
Thermal overload error 2 during a stop
—
E1.7
Thermal overload error 3 during a stop
—
E1.8
Thermal overload error 4 during a stop
—
E2.1
Servo motor temperature warning
—
E3.2
Absolute position counter warning
—
E3.5
Encoder absolute positioning counter warning
—
Parameter warning
E4.1
Parameter setting range error warning
—
E6
Servo forced stop warning
E6.1
Forced stop warning
SD
E7
Controller forced stop warning
E7.1
Controller forced stop warning
SD
E8
Cooling fan speed reduction
warning
E8.1
Decreased cooling fan speed warning
—
E8.2
Cooling fan stop
—
E9.1
Servo-on signal on during main circuit off
DB
E9.2
Bus voltage drop during low speed operation
DB
E9
Main circuit off warning
E9.3
Ready-on signal on during main circuit off
DB
EC
Overload warning 2 EC.1
Overload warning 2
—
ED
Output watt excess warning
ED.1
Output watt excess warning
—
F0.1
Instantaneous power failure tough drive warning
—
F0.3
Vibration tough drive warning
—
F2.1
Drive recorder - Area writing time-out warning
—
F2.2
Drive recorder - Data miswriting warning
—
F3.1
Oscillation detection warning
—
F0
Tough drive warning
F2
Drive recorder - Miswriting warning
F3
Oscillation detection warning
Tab. 8-5:
Battery cable disconnection warning
Detail name
Stop
method , No.
Troubleshooting
Detail
number
Alarm and warning list MR-J4-B(-RJ)
Warning list of MR-J4-B(-RJ)
Leave for about 30 minutes of cooling time after removing the cause of occurrence.
The following shows two stop methods of DB and SD.
DB: Stops with dynamic brake. (Coasts for the servo amplifier without dynamic brake.)
SD: Forced stop deceleration
This is applicable when parameter PA04 is set to the initial value. The stop system of SD can be
changed to DB using parameter PA04.
Beginners Manual Servo Amplifiers MELSERVO J4
8 - 17
Troubleshooting
8.3
Alarm and warning list MR-J4W-B
Alarm and warning list MR-J4W-B
NOTES
Refer to “MELSERVO J4 Servo Amplifier Instruction Manual (Troubleshooting)” for details of alarms
and warnings.
If an alarm which indicates each axis in the stop method column occurs, the axis without the alarm
operates the servo motor as per normal.
As soon as an alarm occurs, turn SON (Servo-on) off and interrupt the power.
AL. 37 (Parameter error) and warnings are not recorded in the alarm history.
When an error occurs during operation, the corresponding alarm and warning are displayed. When
the alarm or the warning occurs, refer to “MELSERVO J4 Servo Amplifier Instruction Manual (Troubleshooting)” to remove the failure. When an alarm occurs, ALM (Malfunction for -axis) will turn off.
After its cause has been removed, the alarm can be deactivated in any of the methods marked ✔ in
the alarm deactivation column. Warnings are automatically cancelled after the cause of occurrence is
removed.
For the alarms and warnings in which “SD” is written in the stop method column, the axis stops with
the dynamic brake after forced stop deceleration. For the alarms and warnings in which “DB” or “EDB”
is written in the stop method column, the servo motor stops with the dynamic brake without forced
stop deceleration.
Tab. 8-6:
8 - 18
CPU reset
Power
off to on
14
Error reset
13
Stop
method , Alarm
12
Stop system
11
Processing
system 10
10.1
Voltage drop in the control circuit
power
Common
All axes
EDB
✔
✔
✔
10.2
Voltage drop in the main circuit
power
Common
All axes
SD
✔
✔
✔
11.1
Axis number setting error
Common
All axes
DB
—
—
✔
11.2
Disabling control axis setting error
Common
All axes
DB
—
—
✔
12.1
RAM error 1
Common
All axes
DB
—
—
✔
12.2
RAM error 2
Common
All axes
DB
—
—
✔
12.3
RAM error 3
Common
All axes
DB
—
—
✔
12.4
RAM error 4
Common
All axes
DB
—
—
✔
12.5
RAM error 5
Common
All axes
DB
—
—
✔
13.1
Clock error 1
Common
All axes
DB
—
—
✔
13.2
Clock error 2
Common
All axes
DB
—
—
✔
14.1
Control process error 1
Common
All axes
DB
—
—
✔
14.2
Control process error 2
Common
All axes
DB
—
—
✔
14.3
Control process error 3
Common
All axes
DB
—
—
✔
14.4
Control process error 4
Common
All axes
DB
—
—
✔
14.5
Control process error 5
Common
All axes
DB
—
—
✔
14.6
Control process error 6
Common
All axes
DB
—
—
✔
14.7
Control process error 7
Common
All axes
DB
—
—
✔
14.8
Control process error 8
Common
All axes
DB
—
—
✔
14.9
Control process error 9
Common
All axes
DB
—
—
✔
14.A
Control process error 10
Common
All axes
DB
—
—
✔
Detail
number
No.
Name
Undervoltage
Switch setting error
Memory error 1 (RAM)
Clock error
Control process error
Alarm deactivation
Detail name
Alarm list of MR-J4W-B (1)
17
19
Board error
Memory error 3
(FLASH-ROM)
Stop system
Error reset
CPU reset
Power
off to on
Encoder initial
communication error 1
Alarm
16
Memory error 2
(EEP-ROM)
Detail name
Processing
system 15
Name
Alarm deactivation
Detail
number
No.
Troubleshooting
Stop
method , Alarm and warning list MR-J4W-B
15.1
EEP-ROM error at power on
Common
All axes
DB
—
—
✔
15.2
EEP-ROM error during operation
Common
All axes
DB
—
—
✔
16.1
Encoder initial communication Receive data error 1
Each axis
Each axis
DB
—
—
✔
16.2
Encoder initial communication Receive data error 2
Each axis
Each axis
DB
—
—
✔
16.3
Encoder initial communication Receive data error 3
Each axis
Each axis
DB
—
—
✔
16.5
Encoder initial communication Transmission data error 1
Each axis
Each axis
DB
—
—
✔
16.6
Encoder initial communication Transmission data error 2
Each axis
Each axis
DB
—
—
✔
16.7
Encoder initial communication Transmission data error 3
Each axis
Each axis
DB
—
—
✔
16.A
Encoder initial communication Process error 1
Each axis
Each axis
DB
—
—
✔
16.B
Encoder initial communication Process error 2
Each axis
Each axis
DB
—
—
✔
16.C
Encoder initial communication Process error 3
Each axis
Each axis
DB
—
—
✔
16.D
Encoder initial communication Process error 4
Each axis
Each axis
DB
—
—
✔
16.E
Encoder initial communication Process error 5
Each axis
Each axis
DB
—
—
✔
16.F
Encoder initial communication Process error 6
Each axis
Each axis
DB
—
—
✔
17.1
Board error 1
Common
All axes
DB
—
—
✔
17.3
Board error 2
Common
All axes
DB
—
—
✔
17.4
Board error 3
Common
All axes
DB
—
—
✔
17.5
Board error 4
Common
All axes
DB
—
—
✔
17.6
Board error 5
Common
All axes
DB
—
—
✔
Common
All axes
EDB
—
—
✔
DB
—
—
✔
17.8
Board error 6
19.1
Flash-ROM error 1
Common
All axes
19.2
Flash-ROM error 2
Common
All axes
DB
—
—
✔
1A.1
Servo motor combination error
Each axis
Each axis
DB
—
—
✔
1A.2
Servo motor control mode combination error
Each axis
Each axis
DB
—
—
✔
Encoder malfunction
Each axis
Each axis
DB
—
—
✔
1A
Servo motor
combination error
1E
Encoder initial
communication error 2
1E.1
1E.2
Load-side encoder malfunction
Each axis
Each axis
DB
—
—
✔
Encoder initial
communication error 3
1F.1
Incompatible encoder
Each axis
Each axis
DB
—
—
✔
1F.2
Incompatible load-side encoder
Each axis
Each axis
DB
—
—
✔
1F
Tab. 8-6:
Alarm list of MR-J4W-B (2)
Beginners Manual Servo Amplifiers MELSERVO J4
8 - 19
24
25
27
28
Tab. 8-6:
8 - 20
Stop
method , Error reset
CPU reset
Power
off to on
Encoder normal
communication error 1
Encoder normal
communication error 2
Alarm
21
Stop system
20
Name
Encoder normal communication Receive data error 1
Each axis
Each axis
EDB
—
—
✔
20.2
Encoder normal communication Receive data error 2
Each axis
Each axis
EDB
—
—
✔
20.3
Encoder normal communication Receive data error 3
Each axis
Each axis
EDB
—
—
✔
20.5
Encoder normal communication Transmission data error 1
Each axis
Each axis
EDB
—
—
✔
20.6
Encoder normal communication Transmission data error 2
Each axis
Each axis
EDB
—
—
✔
20.7
Encoder normal communication Transmission data error 3
Each axis
Each axis
EDB
—
—
✔
20.9
Encoder normal communication Receive data error 4
Each axis
Each axis
EDB
—
—
✔
20.A
Encoder normal communication Receive data error 5
Each axis
Each axis
EDB
—
—
✔
21.1
Encoder data error 1
Each axis
Each axis
EDB
—
—
✔
21.2
Encoder data update error
Each axis
Each axis
EDB
—
—
✔
21.3
Encoder data waveform error
Each axis
Each axis
EDB
—
—
✔
Initial magnetic pole
detection error
Linear encoder error 2
Detail name
21.4
Encoder non-signal error
Each axis
Each axis
EDB
—
—
✔
21.5
Encoder hardware error 1
Each axis
Each axis
EDB
—
—
✔
21.6
Encoder hardware error 2
Each axis
Each axis
EDB
—
—
✔
21.9
Encoder data error 2
Each axis
Each axis
EDB
—
—
✔
24.1
Ground fault detected by hardware
detection circuit
Each axis
Each axis
DB
—
—
✔
24.2
Ground fault detected by software
detection function
Each axis
Each axis
DB
✔
✔
✔
25.1
Servo motor encoder - Absolute
position erased
Each axis
Each axis
DB
—
—
✔
25.2
Scale measurement encoder - Absolute position erased
Each axis
Each axis
DB
—
—
✔
27.1
Initial magnetic pole detection Abnormal termination
Each axis
Each axis
DB
—
—
✔
27.2
Initial magnetic pole detection - Time
Each axis
out error
Each axis
DB
—
—
✔
27.3
Initial magnetic pole detection - Limit
Each axis
switch error
Each axis
DB
—
—
✔
27.4
Initial magnetic pole detection Estimated error
Each axis
Each axis
DB
—
—
✔
27.5
Initial magnetic pole detection Position deviation error
Each axis
Each axis
DB
—
—
✔
27.6
Initial magnetic pole detection Speed deviation error
Each axis
Each axis
DB
—
—
✔
27.7
Initial magnetic pole detection Current error
Each axis
Each axis
DB
—
—
✔
28.1
Linear encoder - Environment error
Each axis
Each axis
EDB
—
—
✔
Main circuit error
Absolute position
erased
Alarm deactivation
20.1
Detail
number
No.
Alarm and warning list MR-J4W-B
Processing
system Troubleshooting
Alarm list of MR-J4W-B (3)
33
Power
off to on
32
Overspeed
CPU reset
Alarm
31
Regenerative error Error reset
30
Encoder counter error
Stop
method , 2B
Linear encoder error 1
Detail name
Stop system
2A
Name
2A.1
Linear encoder error 1-1
Each axis
Each axis
EDB
—
—
✔
2A.2
Linear encoder error 1-2
Each axis
Each axis
EDB
—
—
✔
2A.3
Linear encoder error 1-3
Each axis
Each axis
EDB
—
—
✔
2A.4
Linear encoder error 1-4
Each axis
Each axis
EDB
—
—
✔
2A.5
Linear encoder error 1-5
Each axis
Each axis
EDB
—
—
✔
2A.6
Linear encoder error 1-6
Each axis
Each axis
EDB
—
—
✔
2A.7
Linear encoder error 1-7
Each axis
Each axis
EDB
—
—
✔
2A.8
Linear encoder error 1-8
Each axis
Each axis
EDB
—
—
✔
2B.1
Encoder counter error 1
Each axis
Each axis
EDB
—
—
✔
2B.2
Encoder counter error 2
Each axis
Each axis
EDB
—
—
✔
30.1
Regeneration heat error
Common
All axes
DB
✔
✔
✔
30.2
Regeneration signal error
Common
All axes
DB
✔
✔
✔
30.3
Regeneration feedback signal error
Common
All axes
DB
✔
✔
✔
31.1
Abnormal motor speed
Each axis
Each axis
SD
✔
✔
✔
32.1
Overcurrent detected at hardware
detection circuit (during operation)
Each axis
All axes
DB
—
—
✔
32.2
Overcurrent detected at software
detection function
(during operation)
Each axis
All axes
DB
✔
✔
✔
32.3
Overcurrent detected at hardware
detection circuit (during a stop)
Each axis
All axes
DB
—
—
✔
32.4
Overcurrent detected at software
detection function (during a stop)
Each axis
All axes
DB
✔
✔
✔
Overcurrent
Overvoltage
Alarm deactivation
Processing
system No.
Troubleshooting
Detail
number
Alarm and warning list MR-J4W-B
33.1
Main circuit voltage error
Common
All axes
EDB
✔
✔
✔
34.1
SSCNET receive data error
Common
All axes
SD
✔
✔
✔
34.2
SSCNET connector connection error
Common
All axes
SD
✔
✔
✔
34.3
SSCNET communication data error
Each axis
Each axis
SD
✔
✔
✔
34
SSCNET receive error 1
34.4
Hardware error signal detection
Common
All axes
SD
✔
✔
✔
35
Command frequency
error
35.1
Command frequency error
Each axis
Each axis
SD
✔
✔
✔
36
SSCNET receive error 2
36.1
Continuous communication data
error
Each axis
Each axis
SD
✔
✔
✔
37
Parameter error
37.1
Parameter setting range error
Each axis
Each axis
DB
—
✔
✔
37.2
Parameter combination error
Each axis
Each axis
DB
—
✔
✔
3A
Inrush current suppres3A.1
sion circuit error
Inrush current suppression circuit
error
Common
All axes
DB
—
—
✔
3E
Operation mode error
Operation mode error
Common
All axes
DB
—
—
✔
Tab. 8-6:
3E.1
Alarm list of MR-J4W-B (4)
Beginners Manual Servo Amplifiers MELSERVO J4
8 - 21
51
Servo control error
Main circuit device
overheat Servo motor
overheat Cooling fan error
Each axis
Each axis
EDB
✔
✔
✔
42.2
Servo control error by speed
deviation
Each axis
Each axis
EDB
✔
✔
✔
42.3
Servo control error by torque/thrust
deviation
Each axis
Each axis
EDB
✔
✔
✔
42.8
Fully closed loop control error by
position deviation
Each axis
Each axis
EDB
✔
✔
✔
42.9
Fully closed loop control error by
speed deviation
Each axis
Each axis
EDB
✔
✔
✔
42.A
Fully closed loop control error by
position deviation
(during command stop)
Each axis
Each axis
EDB
✔
✔
✔
45.1
Main circuit device overheat error
Common
All axes
SD
✔
✔
✔
46.1
Abnormal temperature of servo
motor 1
Each axis
Each axis
SD
✔
✔
✔
46.2
Abnormal temperature of servo
motor 2
Each axis
Each axis
SD
✔
✔
✔
46.3
Thermistor disconnected error
Each axis
Each axis
SD
✔
✔
✔
46.5
Abnormal temperature of servo
motor 3
Each axis
Each axis
DB
✔
✔
✔
46.6
Abnormal temperature of servo
motor 4
Each axis
Each axis
DB
✔
✔
✔
47.1
Cooling fan stop error
Common
All axes
SD
—
—
✔
47.2
Cooling fan speed reduction error
Common
All axes
SD
—
—
✔
50.1
Thermal overload error 1 during
operation
Each axis
Each axis
SD
✔
✔
✔
50.2
Thermal overload error 2 during
operation
Each axis
Each axis
SD
✔
✔
✔
50.3
Thermal overload error 4 during
operation
Each axis
Each axis
SD
✔
✔
✔
50.4
Thermal overload error 1 during a
stop
Each axis
Each axis
SD
✔
✔
✔
50.5
Thermal overload error 2 during a
stop
Each axis
Each axis
SD
✔
✔
✔
50.6
Thermal overload error 4 during a
stop
Each axis
Each axis
SD
✔
✔
✔
51.1
Thermal overload error 3 during
operation
Each axis
Each axis
DB
✔
✔
✔
Overload 2
51.2
Thermal overload error 3 during a
stop
Each axis
Each axis
DB
✔
✔
✔
52.1
Excess droop pulse 1
Each axis
Each axis
SD
✔
✔
✔
52.3
Excess droop pulse 2
Each axis
Each axis
SD
✔
✔
✔
52.4
Error excessive during 0 torque limit
Each axis
Each axis
SD
✔
✔
✔
Error excessive
54
Oscillation detection
56
Forced stop error
8 - 22
Servo control error by position
deviation
Overload 1 52
Tab. 8-6:
Power
off to on
50
CPU reset
47
Error reset
Alarm
46
Stop
method , 45
Stop system
42
Name
Alarm deactivation
42.1
Detail
number
No.
Alarm and warning list MR-J4W-B
Processing
system Troubleshooting
Detail name
52.5
Excess droop pulse 3
Each axis
Each axis
DB
✔
✔
✔
54.1
Oscillation detection error
Each axis
Each axis
DB
✔
✔
✔
56.2
Over speed during forced stop
Each axis
Each axis
DB
✔
✔
✔
56.3
Estimated distance over during
forced stop
Each axis
Each axis
DB
✔
✔
✔
Alarm list of MR-J4W-B (5)
72
Tab. 8-6:
Error reset
CPU reset
Power
off to on
71
Load-side encoder
initial communication
error 1
Stop system
Alarm
70
STO timing error
Detail name
Processing
system 63
Name
Alarm deactivation
Detail
number
No.
Troubleshooting
Stop
method , Alarm and warning list MR-J4W-B
63.1
STO1 off
Common
All axes
DB
✔
✔
✔
63.2
STO2 off
Common
All axes
DB
✔
✔
✔
70.1
Load-side encoder initial communication - Receive data error 1
Each axis
Each axis
DB
—
—
✔
70.2
Load-side encoder initial communication - Receive data error 2
Each axis
Each axis
DB
—
—
✔
70.3
Load-side encoder initial communication - Receive data error 3
Each axis
Each axis
DB
—
—
✔
70.5
Load-side encoder initial communication - Transmission data error 1
Each axis
Each axis
DB
—
—
✔
70.6
Load-side encoder initial communication - Transmission data error 2
Each axis
Each axis
DB
—
—
✔
70.7
Load-side encoder initial communication - Transmission data error 3
Each axis
Each axis
DB
—
—
✔
70.A
Load-side encoder initial communication - Process error 1
Each axis
Each axis
DB
—
—
✔
70.B
Load-side encoder initial communication - Process error 2
Each axis
Each axis
DB
—
—
✔
70.C
Load-side encoder initial communication - Process error 3
Each axis
Each axis
DB
—
—
✔
70.D
Load-side encoder initial communication - Process error 4
Each axis
Each axis
DB
—
—
✔
70.E
Load-side encoder initial communication - Process error 5
Each axis
Each axis
DB
—
—
✔
70.F
Load-side encoder initial communication - Process error 6
Each axis
Each axis
DB
—
—
✔
71.1
Load-side encoder communication Receive data error 1
Each axis
Each axis
DB
—
—
✔
71.2
Load-side encoder communication Receive data error 2
Each axis
Each axis
DB
—
—
✔
71.3
Load-side encoder communication Receive data error 3
Each axis
Each axis
DB
—
—
✔
Load-side encoder communication Transmission data error 1
Each axis
Each axis
DB
—
—
✔
Load-side encoder communication Transmission data error 2
Each axis
Each axis
DB
—
—
✔
71.7
Load-side encoder communication Transmission data error 3
Each axis
Each axis
DB
—
—
✔
71.9
Load-side encoder communication Transmission data error 4
Each axis
Each axis
DB
—
—
✔
71.A
Load-side encoder communication Transmission data error 5
Each axis
Each axis
DB
—
—
✔
72.1
Load-side encoder data error 1
Each axis
Each axis
DB
—
—
✔
72.2
Load-side encoder data update error
Each axis
Each axis
DB
—
—
✔
Load-side encoder data waveform
error
Each axis
Each axis
DB
—
—
✔
71.5
Load-side encoder
normal communication
error 1
71.6
72.3
Load-side encoder
normal communication
72.4
error 2
72.5
Load-side encoder non-signal error
Each axis
Each axis
DB
—
—
✔
Load-side encoder hardware error 1
Each axis
Each axis
DB
—
—
✔
72.6
Load-side encoder hardware error 2
Each axis
Each axis
DB
—
—
✔
72.9
Load-side encoder data error 2
Each axis
Each axis
DB
—
—
✔
Alarm list of MR-J4W-B (6)
Beginners Manual Servo Amplifiers MELSERVO J4
8 - 23
8E
888
Tab. 8-6:
USB communication
error
Watchdog
Common
All axes
8E.1
USB communication receive error
Common
8E.2
USB communication checksum error
Common
Power
off to on
USB communication time-out error
SD
✔
✔
✔
All axes
SD
✔
✔
✔
All axes
SD
✔
✔
✔
8E.3
USB communication character error
Common
All axes
SD
✔
✔
✔
8E.4
USB communication command error
Common
All axes
SD
✔
✔
✔
8E.5
USB communication data number
error
Common
All axes
SD
✔
✔
✔
88._
Watchdog
Common
All axes
DB
—
—
✔
Alarm list of MR-J4W-B (7)
Leave for about 30 minutes of cooling time after removing the cause of occurrence.
In some controller communication status, the alarm factor may not be removed.
The alarm can be cancelled by setting as follows:
When a linear servo motor or a direct drive motor is used: set parameter PL04 to “1”.
The following shows three stop methods of DB, EDB, and SD.
DB: Stops with dynamic brake. (Coasts for the servo amplifier without dynamic brake.)
EDB: Refer to the following table for the specified servo motors.
The stop method for other than the specified servo motors will be DB.
Series
HG-KR
HG-MR
HG-SR
SD:
8 - 24
8A.1
Alarm deactivation
CPU reset
USB communication
timeout error
Stop
method , 8A
Detail name
Stop system
Name
Processing
system No.
Detail
number
Alarm and warning list MR-J4W-B
Error reset
Alarm
Troubleshooting
Servo Motor
HG-KR053, HG-KR13, HG-KR23, HG-KR43
HG-MR053, HG-MR13, HG-MR23, HG-MR43
HG-SR51, HG-SR52
Forced stop deceleration
This is applicable when parameter PA04 is set to the initial value. The stop system of SD can be
changed to DB using parameter PA04.
Processing system indicates as follows:
Each axis:
an alarm is detected for each axis.
Common:
an alarm is detected for the entire servo amplifier.
This alarm will occur only in the J3 compatibility mode.
92
Battery cable
disconnection warning
95
STO warning
96
Home position setting
warning
9F
Battery warning
E0
Excessive regeneration
warning Warning
E1
Overload warning 1 E2
Servo motor overheat
warning
E3
Absolute position
counter warning
Stop
method , 91
Detail name
Stop
system
Name
Servo amplifier
overheat warning Processing
system No.
Troubleshooting
Detail
number
Alarm and warning list MR-J4W-B
91.1
Main circuit device overheat warning
Common
—
—
92.1
Encoder battery cable disconnection
warning
Each axis
—
—
92.3
Battery degradation
Each axis
—
—
95.1
STO1 off detection
Common
All axes
DB
95.2
STO2 off detection
Common
All axes
DB
96.1
In-position warning at home positioning Each axis
—
—
96.2
Command input warning at home
positioning
Each axis
—
—
9F.1
Low battery
Each axis
—
—
9F.2
Battery degradation warning
Each axis
—
—
E0.1
Excessive regeneration warning
Common
—
—
E1.1
Thermal overload warning 1 during
operation
Each axis
—
—
E1.2
Thermal overload warning 2 during
operation
Each axis
—
—
E1.3
Thermal overload warning 3 during
operation
Each axis
—
—
E1.4
Thermal overload warning 4 during
operation
Each axis
—
—
E1.5
Thermal overload error 1 during a stop
Each axis
—
—
E1.6
Thermal overload error 2 during a stop
Each axis
—
—
E1.7
Thermal overload error 3 during a stop
Each axis
—
—
E1.8
Thermal overload error 4 during a stop
Each axis
—
—
E2.1
Servo motor temperature warning
Each axis
—
—
E3.2
Absolute position counter warning
Each axis
—
—
E3.5
Encoder absolute positioning counter
warning
Each axis
—
—
E4
Parameter warning
E4.1
Parameter setting range error warning
Each axis
—
—
E6
Servo forced stop
warning
E6.1
Forced stop warning
Common
All axes
SD
E7
Controller forced stop
warning
E7.1
Controller forced stop warning
Common
All axes
SD
E8
Cooling fan speed
reduction warning
E8.1
Decreased cooling fan speed warning
Common
—
—
E8.2
Cooling fan stop
Common
—
—
E9.1
Servo-on signal on during main circuit
off
Common
All axes
DB
Bus voltage drop during low speed
operation
Common
All axes
DB
E9.3
Ready-on signal on during main circuit
off
Common
All axes
DB
E9
Main circuit off warning E9.2
EB
The other axis error
warning
EB.1
The other axis error warning
Each axis
All axes DB
EC
Overload warning 2 EC.1
Overload warning 2
Each axis
—
—
ED
Output watt excess
warning
ED.1
Output watt excess warning
Each axis
—
—
Tab. 8-7:
Warning list of MR-J4W-B (1)
Beginners Manual Servo Amplifiers MELSERVO J4
8 - 25
Warning
F0
F2
F3
Tab. 8-7:
8 - 26
Tough drive warning
Drive recorder Miswriting warning
Oscillation detection
warning
Detail name
Stop
method , Name
Stop
system
No.
Processing
system Alarm and warning list MR-J4W-B
Detail
number
Troubleshooting
F0.1
Instantaneous power failure tough drive
Each axis
warning
—
—
F0.3
Vibration tough drive warning
Each axis
—
—
F2.1
Drive recorder - Area writing time-out
warning
Common
—
—
F2.2
Drive recorder - Data miswriting
warning
Common
—
—
F3.1
Oscillation detection warning
Each axis
—
—
Warning list of MR-J4W-B (2)
Leave for about 30 minutes of cooling time after removing the cause of occurrence.
The following shows two stop methods of DB and SD.
DB: Stops with dynamic brake. (Coasts for the servo amplifier without dynamic brake.)
SD: Forced stop deceleration
This is applicable when parameter PA04 is set to the initial value. The stop system of SD can be
changed to DB using parameter PA04.
Stopping all axes or each axis can be selected using parameter PF02.
Processing system indicates as follows:
Each axis:
an alarm is detected for each axis.
Common:
an alarm is detected for the entire servo amplifier
Remedies for alarms
8.4
b
Troubleshooting
Remedies for alarms
WARNING:
● When any alarm has occurred, eliminate its cause, ensure safety, and deactivate the alarm
before restarting operation. Otherwise, it may cause injury.
● If AL. 25 (Absolute position erased) occurs, always make home position setting again. Otherwise, it may cause an unexpected operation.
● As soon as an alarm occurs, make the Servo-off status and interrupt the main circuit power.
NOTES
When any of the following alarms has occurred, do not cycle the power repeatedly to restart.
Doing so will cause a malfunction of the servo amplifier and the servo motor. Remove its cause
and allow about 30 minutes for cooling before resuming the operation.
– AL. 30 (Regenerative error)
– AL. 45 (Main circuit device overheat
– AL. 46 (Servo motor overheat)
– AL. 50 (Overload 1)
– AL. 51 (Overload 2)
AL. 37 (Parameter error) is not recorded in the alarm history.
Remove the cause of the alarm in accordance with this chapter. Use MR Configurator2 to refer to a factor of alarm occurrence.
Beginners Manual Servo Amplifiers MELSERVO J4
8 - 27
Troubleshooting
8.5
b
NOTES
Remedies for warnings
Remedies for warnings
WARNING:
If AL. E3 (Absolute position counter warning) occurs, always make home position setting again.
Otherwise, it may cause an unexpected operation.
When any of the following warnings has occurred, do not cycle the power of the servo amplifier
repeatedly to restart. Doing so will cause a malfunction of the servo amplifier and the servo motor.
If the power of the servo amplifier is switched off/on during the alarms, allow more than 30 minutes for cooling before resuming operation.
– AL. 91 (Servo amplifier overheat warning)
– AL. E0 (Excessive regeneration warning)
– AL. E1 (Overload warning 1)
– AL. E2 (Servo motor overheat warning)
– AL. EC (Overload warning 2)
Warnings are not recorded in the alarm history.
If AL. E6, AL. E7, AL. E9, AL. EA, or AL. EB occurs, the servo-off status is established. If any other warning
occurs, operation can be continued but an alarm may take place or proper operation may not be
performed.
Remove the cause of warning according to this chapter. Use MR Configurator2 to refer to a factor of
warning occurrence.
8.6
Trouble which does not trigger alarm/warning
For possible causes which do not trigger alarm or warning refer to “MELSERVO J4 Servo Amplifier
Instruction Manual (Troubleshooting)”.
Remove each cause referring to the respective sections of the manuals.
8 - 28
Additional information about the series MR-J4-A
A
Appendix
A.1
Additional information about the series MR-J4-A
A.1.1
Status Display
Status display
Symbol
Unit
Description
Appendix
Cumulative feedback pulses
C
pulse
Feedback pulses from the servo motor encoder are counted and displayed.
The values in excess of ±99999 can be counted. However, the counter shows only the
lower five digits of the actual value since the servo amplifier display is five digits.
Press the “SET” button to reset the display value to zero.
The value of minus is indicated by the lit decimal points in the upper four digits.
Servo motor speed/ Linear
servo motor speed
r
1/min
mm/s
The servo motor speed or Linear servo motor speed is displayed.
It is displayed rounding off 0.1 1/min (0.1 mm/s) unit.
pulse
The number of droop pulses in the deviation counter are displayed.
The decimal points in the upper four digits are lit for reverse rotation pulses.
The values in excess of ±99999 can be counted. However, the counter shows only the
lower five digits of the actual value since the servo amplifier display is five digits.
The number of pulses displayed is in the encoder pulse unit.
Position command input pulses are counted and displayed.
As the value displayed is not yet multiplied by the electronic gear (CMX/CDV), it may
not match the indication of the cumulative feedback pulses.
The values in excess of ±99999 can be counted. However, the counter shows only the
lower five digits of the actual value since the servo amplifier display is five digits.
Press the “SET” button to reset the display value to zero.
When the servo motor is rotating in the reverse direction, the decimal points in the
upper four digits are lit.
Droop pulses
E
Cumulative command pulses
P
pulse
Command pulse frequency
n
kpulse/s
Analog speed command
voltage
Analog speed limit voltage
F
V
The frequency of position command input pulses is counted and displayed.
The value displayed is not multiplied by the electronic gear (CMX/CDV).
1) Torque control mode
Input voltage of VLA (Analog speed limit) voltage is displayed.
2) Speed control mode
Input voltage of VC (Analog speed command) voltage is displayed
1) Position control mode and speed control mode
Voltage of TLA (Analog torque limit) voltage is displayed.
Analog torque command
voltage
Analog torque limit voltage
U
V
Regenerative load ratio
L
%
The ratio of regenerative power to permissible regenerative power is displayed in %.
Effective load ratio
J
%
The continuous effective load current is displayed.
The effective value in the past 15 s is displayed relative to the rated current of 100 %.
Peak load ratio
b
%
The maximum occurrence torque is displayed.
The highest value in the past 15 s is displayed relative to the rated current of 100 %.
Instantaneous torque
T
%
The instantaneous occurrence torque is displayed.
The value of torque being occurred is displayed in real time considering a rated
torque as 100 %.
2) Torque control mode
Voltage of TC (Analog torque command) voltage is displayed.
Within one-revolution position
(1 pulse unit)
Cy1
pulse
Position within one revolution is displayed in encoder pulses.
The values in excess of ±99999 can be counted. However, the counter shows only the
lower five digits of the actual value since the servo amplifier display is five digits.
When the servo motor rotates in the CCW direction, the value is added.
Within one-revolution position
(1000 pulse unit)
Cy2
1000
pulses
The within one-revolution position is displayed in 1000 pulse increments of the
encoder.
When the servo motor rotates in the CCW direction, the value is added.
ABS counter
LS
rev
Load to motor inertia ratio
dC
Multiplier
Tab. A-1:
The travel distance from the home position is displayed as multi-revolution counter
value of the absolution position encoder in the absolution position detection system.
The estimated ratio of the load inertia moment to the servo motor shaft inertia
moment is displayed.
Status display list of MR-J4-A (1)
Beginners Manual Servo Amplifiers MELSERVO J4
A-1
Appendix
Additional information about the series MR-J4-A
Status display
Symbol
Unit
Description
Bus voltage
Pn
V
Encoder inside temperature
ETh
°C
The voltage of main circuit converter (between P+ and N–) is displayed.
Inside temperature of encoder detected by the encoder is displayed.
Settling time
ST
ms
Settling time is displayed. When it exceeds 1000 ms, “1000” will be displayed.
Oscillation detection frequency
oF
Hz
Frequency at the time of oscillation detection is displayed.
Number of tough drive
operations
Td
times
The number of tough drive functions activated is displayed.
Unit power consumption 1
(increment of 1 W)
PC1
W
Unit power consumption is displayed by increment of 1 W. Positive value indicate
power running, and negative value indicate regeneration. The values in excess of
±99999 can be counted. However, the counter shows only the lower five digits of the
actual value since the servo amplifier display is five digits.
Unit power consumption 2
(increment of 1 kW)
PC2
kW
Unit power consumption is displayed by increment of 1 kW. Positive value indicate
power running, and negative value indicate regeneration.
Unit total power consumption 1
(increment of 1 Wh)
TPC1
Wh
Unit total power consumption is displayed by increment of 1 Wh. Positive value is
cumulated during power running and negative value during regeneration. The values
in excess of ±99999 can be counted. However, the counter shows only the lower five
digits of the actual value since the servo amplifier display is five digits.
Unit total power consumption 2
(increment of 100 kWh)
TPC2
100 kWh
Unit total power consumption is displayed by increment of 100 kWh. Positive value is
cumulated during power running and negative value during regeneration.
pulse
Feedback pulses from the load-side encoder are counted and displayed.
The values in excess of ±99999 can be counted. However, the counter shows only the
lower five digits of the actual value since the servo amplifier display is five digits.
Press the “SET” button to reset the display value to zero.
The value of minus is indicated by the lit decimal points in the upper four digits.
pulse
Droop pulses of the deviation counter between a load-side encoder and a command
are displayed. When the count exceeds ±99999, it starts from 0.
Negative value is indicated by the lit decimal points in the upper four digits.
The display shows the average droop pulses of 128 samplings at the rate of 444 [μs].
pulse
The Z-phase counter of a load-side encoder is displayed in the encoder pulse unit.
For an incremental linear encoder, the Z-phase counter is displayed. The value is
counted up from 0 based on the home position (reference mark). For an absolute
position linear encoder, the encoder absolute position is displayed.
When the count exceeds 99999, it starts from 0.
Load-side encoder Cumulative
feedback pulses
Load-side encoder Droop pulses
Load-side encoder
information 1
(1 pulse unit)
FC
FE
FCY1
Load-side encoder
information 1
(100 pulses unit)
FCY2
Load-side encoder
information 2
FL5
Z-phase counter low
FCY1
The Z-phase counter of a load-side encoder is displayed by increments of 100 pulses.
For an incremental linear encoder, the Z-phase counter is displayed. The value is
100 pulses counted up from 0 based on the home position (reference mark). For an absolute
position linear encoder, the encoder absolute position is displayed.
When the count exceeds 99999, it starts from 0.
rev
pulse
The Z-phase counter is displayed in the encoder pulse unit.
For an incremental linear encoder, the Z-phase counter is displayed. The value is
counted up from 0 based on the home position (reference mark). For an absolute
position linear encoder, the encoder absolute position is displayed.
When the count exceeds 99999, it starts from 0.
The Z-phase counter is displayed by increments of 100000 pulses.
For an incremental linear encoder, the Z-phase counter is displayed. The value is
counted up from 0 based on the home position (reference mark). For an absolute
position linear encoder, the encoder absolute position is displayed.
When the count exceeds 99999, it starts from 0.
Z-phase counter high
FCY2
100000
pulses
Electrical angle low
ECY1
pulse
Electrical angle high
ECY2
100000
pulses
Tab. A-1:
When an incremental linear encoder is used as the load-side encoder, the display
shows 0.
When an absolute position linear encoder is used as the load-side encoder, the display shows 0.
When a rotary encoder is used as the load-side encoder, the display shows the value
of the multi-revolution counter.
The servo motor electrical angle is displayed.
The servo motor electrical angle is displayed by increments of 100000 pulses.
Status display list of MR-J4-A (2)
The status display item of the servo amplifier display shown at power-on can be changed by changing
parameter PC36 settings.
A-2
Additional information about the series MR-J4-A
Basic setting parameters (PA)
Control
mode
✔ ✔ ✔ ✔ ✔ ✔ ✔
—
✔ ✔ ✔ ✔ ✔ ✔ ✔
*REG
T
—
*STY
PA02
S
1000H
0000H
PA01
DD
Operation mode
Regenerative option
Symbol Name
Lin.
Unit
No.
Full.
Initial
value
Standard
Operation
mode
P
A.1.2
Appendix
PA03
*ABS
Absolute position detection system
0000H
—
✔ ✔ ✔ ✔ ✔ — —
PA04
*AOP1
Function selection A-1
2000H
—
✔ ✔ ✔ ✔ ✔ ✔ —
PA05
*FBP
Number of command input pulses per revolution
10000
—
✔ ✔ ✔ ✔ ✔ — —
PA06
CMX
Electronic gear numerator (command pulse multiplication numerator)
1
—
✔ ✔ ✔ ✔ ✔ — —
PA07
CDV
Electronic gear denominator
(command pulse multiplication denominator)
1
—
✔ ✔ ✔ ✔ ✔ — —
PA08
ATU
Auto tuning mode
0001H
—
✔ ✔ ✔ ✔ ✔ ✔ —
PA09
RSP
Auto tuning response
16
—
✔ ✔ ✔ ✔ ✔ ✔ —
PA10
INP
In-position range
100
pulse
✔ ✔ ✔ ✔ ✔ — —
PA11
TLP
Forward rotation torque limit/positive direction thrust limit
100.0
%
✔ ✔ ✔ ✔ ✔ ✔ ✔
PA12
TLN
Reverse rotation torque limit/negative direction thrust limit
100.0
%
✔ ✔ ✔ ✔ ✔ ✔ ✔
PA13
*PLSS
Command pulse input form
0100H
—
✔ ✔ ✔ ✔ ✔ — —
PA14
*POL
Rotation direction selection/travel direction selection
0
—
✔ ✔ ✔ ✔ ✔ — —
PA15
*ENR
Encoder output pulses
4000
pulse/rev
✔ ✔ ✔ ✔ ✔ ✔ ✔
PA16
*ENR2
Encoder output pulses 2
1
—
✔ ✔ ✔ ✔ ✔ ✔ ✔
PA17
*MSR
Servo motor series setting
0000H
—
— — ✔ — ✔ ✔ ✔
PA18
*MTY
Servo motor type setting
0000H
—
— — ✔ — ✔ ✔ ✔
PA19
*BLK
Parameter writing inhibit
00AAH
—
✔ ✔ ✔ ✔ ✔ ✔ ✔
PA20
*TDS
Tough drive setting
0000H
—
✔ ✔ ✔ ✔ ✔ ✔ ✔
PA21
*AOP3
Function selection A-3
0001H
—
✔ ✔ ✔ ✔ ✔ ✔ —
PA22
—
For manufacturer setting
0000H
—
— — — — — — —
PA23
DRAT
Drive recorder arbitrary alarm trigger setting
0000H
—
✔ ✔ ✔ ✔ ✔ ✔ ✔
PA24
AOP4
Function selection A-4
0000H
—
✔ ✔ ✔ ✔ ✔ ✔ —
PA25
OTHOV
One-touch tuning – Overshoot permissible level
0
%
✔ ✔ ✔ ✔ ✔ ✔ —
PA26
*AOP5
Function selection A-5
0000H
—
✔ ✔ ✔ ✔ ✔ ✔ —
PA27
—
0000H
—
— — — — — — —
PA28
—
0000H
—
— — — — — — —
PA29
—
0000H
—
— — — — — — —
PA30
—
0000H
—
— — — — — — —
PA31
—
0000H
—
— — — — — — —
PA32
—
0000H
—
— — — — — — —
Tab. A-2:
For manufacturer setting
List of basic setting parameters for MR-J4-A
Beginners Manual Servo Amplifiers MELSERVO J4
A-3
Appendix
A.1.3
Additional information about the series MR-J4-A
Gain/filter setting parameters (PB)
Control
mode
Adaptive tuning mode (adaptive filter II)
0000H
—
✔ ✔ ✔ ✔ ✔ ✔ ✔
PB02
VRFT
Vibration suppression control tuning mode (advanced vibration suppression control II)
0000H
—
✔ ✔ ✔ ✔ ✔ — —
PB03
PST
Position command acceleration/deceleration time constant (position
smoothing)
0
ms
✔ ✔ ✔ ✔ ✔ — —
T
FILT
S
PB01
P
Unit
DD
Initial
value
Lin.
Symbol Name
Full.
No.
Standard
Operation
mode
PB04
FFC
Feed forward gain
0
%
✔ ✔ ✔ ✔ ✔ — —
PB05
—
For manufacturer setting
500
—
— — — — — — —
PB06
GD2
Load to motor inertia ratio/load to motor mass ratio
7.00
Multiplier
✔ ✔ ✔ ✔ ✔ ✔ —
PB07
PG1
Model loop gain
15.0
rad/s
✔ ✔ ✔ ✔ ✔ ✔ —
PB08
PG2
Position loop gain
37.0
rad/s
✔ ✔ ✔ ✔ ✔ — —
PB09
VG2
Speed loop gain
823
rad/s
✔ ✔ ✔ ✔ ✔ ✔ —
PB10
VIC
Speed integral compensation
33.7
ms
✔ ✔ ✔ ✔ ✔ ✔ —
PB11
VDC
Speed differential compensation
980
—
✔ ✔ ✔ ✔ ✔ ✔ —
PB12
OVA
Overshoot amount compensation
0
%
✔ ✔ ✔ ✔ ✔ — —
PB13
NH1
Machine resonance suppression filter 1
4500
Hz
✔ ✔ ✔ ✔ ✔ ✔ ✔
PB14
NHQ1
Notch shape selection 1
0000H
—
✔ ✔ ✔ ✔ ✔ ✔ ✔
PB15
NH2
Machine resonance suppression filter 2
0000H
Hz
✔ ✔ ✔ ✔ ✔ ✔ ✔
PB16
NHQ2
Notch shape selection 2
0000H
—
✔ ✔ ✔ ✔ ✔ ✔ ✔
PB17
NHF
Shaft resonance suppression filter
0000H
—
✔ ✔ ✔ ✔ ✔ ✔ ✔
PB18
LPF
Low-pass filter setting
3141
rad/s
✔ ✔ ✔ ✔ ✔ ✔ —
PB19
VRF11
Vibration suppression control 1 - Vibration frequency
100.0
Hz
✔ ✔ ✔ ✔ ✔ — —
PB20
VRF12
Vibration suppression control 1 - Resonance frequency
100.0
Hz
✔ ✔ ✔ ✔ ✔ — —
PB21
VRF13
Vibration suppression control 1 - Vibration frequency damping
0.00
—
✔ ✔ ✔ ✔ ✔ — —
PB22
VRF14
Vibration suppression control 1 - Resonance frequency damping
0.00
—
✔ ✔ ✔ ✔ ✔ — —
PB23
VFBF
Low-pass filter selection
0000H
—
✔ ✔ ✔ ✔ ✔ ✔ ✔
PB24
*MVS
Slight vibration suppression control
0000H
—
✔ ✔ ✔ ✔ ✔ — —
PB25
*BOP1
Function selection B-1
0000H
—
✔ ✔ ✔ ✔ ✔ — —
PB26
*CDP
Gain switching function
0000H
—
✔ ✔ ✔ ✔ ✔ ✔ —
✔ ✔ ✔ ✔ ✔ ✔ —
✔ ✔ ✔ ✔ ✔ ✔ —
PB27
CDL
Gain switching condition
10
kpulse/s
pulse
1/min
PB28
CDT
Gain switching time constant
1
ms
PB29
GD2B
Load to motor inertia ratio/load to motor mass ratio after gain switching 7.00
Multiplier
✔ ✔ ✔ ✔ ✔ ✔ —
PB30
PG2B
Position loop gain after gain switching
0.0
rad/s
✔ ✔ ✔ ✔ ✔ — —
PB31
VG2B
Speed loop gain after gain switching
0
rad/s
✔ ✔ ✔ ✔ ✔ ✔ —
PB32
VICB
Speed integral compensation after gain switching
0.0
ms
✔ ✔ ✔ ✔ ✔ ✔ —
PB33
VRF1B
Vibration suppression control 1 - Vibration frequency after gain switching
0.0
Hz
✔ ✔ ✔ ✔ ✔ — —
PB34
VRF2B
Vibration suppression control 1 - Resonance frequency after gain
switching
0.0
Hz
✔ ✔ ✔ ✔ ✔ — —
PB35
VRF3B
Vibration suppression control 1 - Vibration frequency damping after
gain switching
0.00
—
✔ ✔ ✔ ✔ ✔ — —
PB36
VRF4B
Vibration suppression control 1 - Resonance frequency damping after
gain switching
0.00
—
✔ ✔ ✔ ✔ ✔ — —
Tab. A-3:
A-4
List of gain/filter setting parameters for MR-J4-A (1)
Additional information about the series MR-J4-A
Appendix
Control
mode
1600
—
— — — — — — —
PB38
—
0.00
—
— — — — — — —
PB39
—
0.00
—
— — — — — — —
PB40
—
0.00
—
— — — — — — —
PB41
—
0000H
—
— — — — — — —
PB42
—
0000H
—
— — — — — — —
PB43
—
0000H
—
— — — — — — —
PB44
—
PB45
CNHF
PB46
PB47
For manufacturer setting
T
—
S
PB37
P
Unit
DD
Initial
value
Lin.
Symbol Name
Full.
No.
Standard
Operation
mode
0.00
—
— — — — — — —
Command notch filter
0000H
—
✔ ✔ ✔ ✔ ✔ — —
NH3
Machine resonance suppression filter 3
0000H
Hz
✔ ✔ ✔ ✔ ✔ ✔ ✔
NHQ3
Notch shape selection 3
0000H
—
✔ ✔ ✔ ✔ ✔ ✔ ✔
PB48
NH4
Machine resonance suppression filter 4
0000H
Hz
✔ ✔ ✔ ✔ ✔ ✔ ✔
PB49
NHQ4
Notch shape selection 4
0000h
—
✔ ✔ ✔ ✔ ✔ ✔ ✔
PB50
NH5
Machine resonance suppression filter 5
4500
Hz
✔ ✔ ✔ ✔ ✔ ✔ ✔
PB51
NHQ5
Notch shape selection 5
0000H
—
✔ ✔ ✔ ✔ ✔ ✔ ✔
PB52
VRF21
Vibration suppression control 2 - Vibration frequency
0000H
Hz
✔ ✔ ✔ ✔ ✔ — —
PB53
VRF22
Vibration suppression control 2 - Resonance frequency
100.0
Hz
✔ ✔ ✔ ✔ ✔ — —
PB54
VRF23
Vibration suppression control 2 - Vibration frequencydamping
0.00
—
✔ ✔ ✔ ✔ ✔ — —
PB55
VRF24
Vibration suppression control 2 - Resonance frequency damping
0.00
—
✔ ✔ ✔ ✔ ✔ — —
PB56
VRF21B
Vibration suppression control 2 - Vibration frequency after gain switching
0.0
Hz
✔ ✔ ✔ ✔ ✔ — —
PB57
VRF22B
Vibration suppression control 2 - Resonance frequency after gain
switching
0.0
Hz
✔ ✔ ✔ ✔ ✔ — —
PB58
VRF23B
Vibration suppression control 2 - Vibration frequency damping after
gain switching
0.00
—
✔ ✔ ✔ ✔ ✔ — —
PB59
VRF24B
Vibration suppression control 2 - Resonance frequency damping after
gain switching
0.00
—
✔ ✔ ✔ ✔ ✔ — —
PB60
PG1B
Model loop gain after gain switching
0.0
rad/s
✔ ✔ ✔ ✔ ✔ ✔ —
PB61
—
0.0
—
— — — — — — —
PB62
—
0000H
—
— — — — — — —
PB63
—
0000H
—
— — — — — — —
PB64
—
0000H
—
— — — — — — —
Tab. A-3:
For manufacturer setting
List of gain/filter setting parameters for MR-J4-A (2)
Beginners Manual Servo Amplifiers MELSERVO J4
A-5
Appendix
Extension setting parameters (PC)
T
Control
mode
S
Unit
DD
Initial
value
Lin.
Symbol Name
Full.
No.
Standard
Operation
mode
P
A.1.4
Additional information about the series MR-J4-A
PC01
STA
Acceleration time constant
0
ms
✔ — ✔ ✔ — ✔ ✔
PC02
STB
Deceleration time constant
0
ms
✔ — ✔ ✔ — ✔ ✔
PC03
STC
S-pattern acceleration/deceleration time constant
0
ms
✔ — ✔ ✔ — ✔ ✔
PC04
TQC
Torque command time constant/thrust command time constant
0
ms
✔ — ✔ ✔ — — ✔
PC05
SC1
100
r/min
mm/s
✔ — ✔ ✔ — — ✔
PC06
SC2
500
r/min
mm/s
✔ — ✔ ✔ — — ✔
PC07
SC3
1000
r/min
mm/s
✔ — ✔ ✔ — — ✔
PC08
SC4
200
r/min
mm/s
✔ — ✔ ✔ — — ✔
PC09
SC5
300
r/min
mm/s
PC10
SC6
500
r/min
mm/s
✔ — ✔ ✔ — — ✔
PC11
SC7
800
r/min
mm/s
✔ — ✔ ✔ — — ✔
PC12
VCM
0
r/min
mm/s
✔ — ✔ ✔ — — ✔
Internal speed command 1
Internal speed limit 1
Internal speed command 2
Internal speed limit 2
Internal speed command 3
Internal speed limit 3
Internal speed command 4
Internal speed limit 4
Internal speed command 5
Internal speed limit 5
Internal speed command 6
Internal speed limit 6
Internal speed command 7
Internal speed limit 7
Analog speed command - Maximum speed
Analog speed limit - Maximum speed
✔ — ✔ ✔ — ✔ —
✔ — ✔ ✔ — ✔ —
✔ — ✔ ✔ — ✔ —
✔ — ✔ ✔ — ✔ —
✔ — ✔ ✔ — ✔ —
✔ — ✔ ✔ — — ✔
✔ — ✔ ✔ — ✔ —
✔ — ✔ ✔ — ✔ —
✔ — ✔ ✔ — ✔ —
PC13
TLC
Analog torque/thrust command maximum output
100.0
%
✔ — ✔ ✔ — — ✔
PC14
MOD1
Analog monitor 1 output
0000H
—
✔ ✔ ✔ ✔ ✔ ✔ ✔
PC15
MOD2
Analog monitor 2 output
0001H
—
✔ ✔ ✔ ✔ ✔ ✔ ✔
PC16
MBR
Electromagnetic brake sequence output
0
ms
✔ ✔ ✔ ✔ ✔ ✔ ✔
PC17
ZSP
Zero speed
50
r/min
mm/s
✔ ✔ ✔ ✔ ✔ ✔ ✔
PC18
*BPS
Alarm history clear
0000H
—
✔ ✔ ✔ ✔ ✔ ✔ ✔
PC19
*ENRS
Encoder output pulse selection
0000H
—
✔ ✔ ✔ ✔ ✔ ✔ ✔
PC20
*SNO
Station No. setting
0
station
✔ ✔ ✔ ✔ ✔ ✔ ✔
PC21
*SOP
RS-422 communication function selection
0000H
—
✔ ✔ ✔ ✔ ✔ ✔ ✔
PC22
*COP1
Function selection C-1
0000H
—
✔ ✔ ✔ ✔ ✔ ✔ ✔
PC23
*COP2
Function selection C-2
0000H
—
✔ — ✔ ✔ — ✔ ✔
PC24
*COP3
Function selection C-3
0000H
—
✔ ✔ ✔ ✔ ✔ — —
PC25
—
For manufacturer setting
0000H
—
— — — — — — —
PC26
—
Function selection C-5
0000H
—
✔ ✔ ✔ ✔ ✔ ✔ —
PC27
*COP6
Function selection C-6
0000H
—
✔ ✔ ✔ ✔ ✔ ✔ ✔
PC28
—
0000H
—
— — — — — — —
PC29
—
0000H
—
— — — — — — —
PC30
STA2
Acceleration time constant 2
0
ms
✔ — ✔ ✔ — ✔ ✔
For manufacturer setting
PC31
STB2
Deceleration time constant 2
0
ms
✔ — ✔ ✔ — ✔ ✔
PC32
CMX2
Command input pulse multiplication numerator 2
1
—
✔ ✔ ✔ ✔ ✔ — —
PC33
CMX3
Command input pulse multiplication numerator 3
1
—
✔ ✔ ✔ ✔ ✔ — —
PC34
CMX4
Command input pulse multiplication numerator 4
1
—
✔ ✔ ✔ ✔ ✔ — —
Tab. A-4:
A-6
List of extension setting parameters for MR-J4-A (1)
Additional information about the series MR-J4-A
Appendix
Control
mode
Internal torque limit 2/internal thrust limit 2
100.0
%
✔ ✔ ✔ ✔ ✔ ✔ ✔
PC36
*DMD
Status display selection
0000H
—
✔ ✔ ✔ ✔ ✔ ✔ ✔
0
mV
PC37
VCO
PC38
TPO
PC39
MO1
PC40
MO2
PC41
—
PC42
—
Analog speed command offset
Analog speed limit offset
Analog torque command offset
T
TL2
S
PC35
P
Unit
DD
Initial
value
Lin.
Symbol Name
Full.
No.
Standard
Operation
mode
✔ — ✔ ✔ — ✔ —
✔ — ✔ ✔ — — ✔
✔ — ✔ ✔ — — ✔
0
mV
Analog monitor 1 offset
0
mV
Analog monitor 2 offset
0
mV
✔ ✔ ✔ ✔ ✔ ✔ ✔
0
—
— — — — — — —
0
—
— — — — — — —
✔ ✔ ✔ ✔ ✔ — —
Analog torque limit offset
For manufacturer setting
✔ — ✔ ✔ — ✔ —
✔ ✔ ✔ ✔ ✔ ✔ ✔
PC43
ERZ
Error excessive alarm detection level
0
rev
mm
PC44
*COP9
Function selection C-9
0000H
—
— ✔ — — ✔ — —
PC45
*COPA
Function selection C-A
0000H
—
— ✔ ✔ — ✔ ✔ ✔
PC46
—
0
—
— — — — — — —
PC47
—
0
—
— — — — — — —
PC48
—
0
—
— — — — — — —
PC49
—
0
—
— — — — — — —
PC50
—
0000H
—
— — — — — — —
PC51
RSBR
PC52
—
PC53
—
For manufacturer setting
Forced stop deceleration time constant
For manufacturer setting
Vertical axis freefall prevention compensation amount
100
ms
✔ ✔ ✔ ✔ ✔ ✔ —
0
—
— — — — — — —
0
—
— — — — — — —
0
0.0001rev
0.01mm
✔ ✔ ✔ ✔ ✔ — —
PC54
RSUP1
PC55
—
0
—
— — — — — — —
PC56
—
100
—
— — — — — — —
PC57
—
0000H
—
— — — — — — —
PC58
—
0
—
— — — — — — —
For manufacturer setting
0000H
—
— — — — — — —
0000H
—
✔ — — — ✔ ✔ ✔
—
0000H
—
— — — — — — —
—
0000H
—
— — — — — — —
PC63
—
0000H
—
— — — — — — —
PC64
—
0000H
—
— — — — — — —
PC65
—
0000H
—
— — — — — — —
PC66
—
0000H
—
— — — — — — —
PC67
—
0000H
—
— — — — — — —
PC68
—
0000H
—
— — — — — — —
PC69
—
0000H
—
— — — — — — —
PC70
—
0000H
—
— — — — — — —
PC71
—
0000H
—
— — — — — — —
PC72
—
0000H
—
— — — — — — —
PC73
—
0000H
—
— — — — — — —
PC74
—
0000H
—
— — — — — — —
PC59
—
PC60
*COPD
PC61
PC62
Tab. A-4:
Function selection C-D
For manufacturer setting
List of extension setting parameters for MR-J4-A (2)
Beginners Manual Servo Amplifiers MELSERVO J4
A-7
Appendix
Additional information about the series MR-J4-A
Control
mode
0000H
—
— — — — — — —
PC76
—
0000H
—
— — — — — — —
PC77
—
0000H
—
— — — — — — —
PC78
—
0000H
—
— — — — — — —
PC79
—
0000H
—
— — — — — — —
PC80
—
0000H
—
— — — — — — —
Tab. A-4:
A-8
For manufacturer setting
List of extension setting parameters for MR-J4-A (3)
T
—
S
PC75
P
Unit
DD
Initial
value
Lin.
Symbol Name
Full.
No.
Standard
Operation
mode
Additional information about the series MR-J4-A
A.1.5
Appendix
I/O setting parameters (PD)
Operation
mode
Control
mode
0000H
—
✔ ✔ ✔ ✔ ✔ ✔ ✔
For manufacturer setting
0000H
—
— — — — — — —
T
Input signal automatic on selection 1
—
S
*DIA1
PD02
P
PD01
DD
Unit
Lin.
Initial
value
Full.
Symbol Name
Standard
No.
PD03
*DI1L
Input device selection 1L
0202H
—
✔ ✔ ✔ ✔ ✔ ✔ —
PD04
*DI1H
Input device selection 1H
0002H
—
✔ — ✔ ✔ — — ✔
PD05
*DI2L
Input device selection 2L
2100H
—
✔ ✔ ✔ ✔ ✔ ✔ —
PD06
*DI2H
Input device selection 2H
0021H
—
✔ — ✔ ✔ — — ✔
PD07
*DI3L
Input device selection 3L
0704H
—
✔ ✔ ✔ ✔ ✔ ✔ —
PD08
*DI3H
Input device selection 3H
0007H
—
✔ — ✔ ✔ — — ✔
PD09
*DI4L
Input device selection 4L
0805H
—
✔ ✔ ✔ ✔ ✔ ✔ —
PD10
*DI4H
Input device selection 4H
0008H
—
✔ — ✔ ✔ — — ✔
PD11
*DI5L
Input device selection 5L
0303H
—
✔ ✔ ✔ ✔ ✔ ✔ —
PD12
*DI5H
Input device selection 5H
0003H
—
✔ — ✔ ✔ — — ✔
PD13
*DI6L
Input device selection 6L
2006H
—
✔ ✔ ✔ ✔ ✔ ✔ —
PD14
*DI6H
Input device selection 6H
0020H
—
✔ — ✔ ✔ — — ✔
0000H
—
— — — — — — —
0000H
—
— — — — — — —
PD15
—
PD16
—
For manufacturer setting
PD17
*DI8L
Input device selection 8L
0A0AH
—
✔ ✔ ✔ ✔ ✔ ✔ —
PD18
*DI8H
Input device selection 8H
0000H
—
✔ — ✔ ✔ — — ✔
PD19
*DI9L
Input device selection 9L
0B0BH
—
✔ ✔ ✔ ✔ ✔ ✔ —
PD20
*DI9H
Input device selection 9H
0000H
—
✔ — ✔ ✔ — — ✔
PD21
*DI10L
Input device selection 10L
2323H
—
✔ ✔ ✔ ✔ ✔ ✔ —
PD22
*DI10H
Input device selection 10H
0023H
—
✔ — ✔ ✔ — — ✔
PD23
*DO1
Output device selection 1
0004H
—
✔ ✔ ✔ ✔ ✔ ✔ ✔
PD24
*DO2
Output device selection 2
000CH
—
✔ ✔ ✔ ✔ ✔ ✔ ✔
PD25
*DO3
Output device selection 3
0004H
—
✔ ✔ ✔ ✔ ✔ ✔ ✔
PD26
*DO4
Output device selection 4
0007H
—
✔ ✔ ✔ ✔ ✔ ✔ ✔
PD27
—
For manufacturer setting
0003H
—
— — — — — — —
PD28
*DO6
Output device selection 6
0002H
—
✔ ✔ ✔ ✔ ✔ ✔ ✔
PD29
*DIF
Input filter setting
0004H
—
✔ ✔ ✔ ✔ ✔ ✔ ✔
PD30
*DOP1
Function selection D-1
0000H
—
✔ ✔ ✔ ✔ ✔ ✔ ✔
PD31
—
For manufacturer setting
0000H
—
— — — — — — —
PD32
*DOP3
Function selection D-3
0000H
—
✔ ✔ ✔ ✔ ✔ — —
PD33
—
For manufacturer setting
0000H
—
— — — — — — —
PD34
DOP5
Function selection D-5
0000H
—
✔ ✔ ✔ ✔ ✔ ✔ ✔
PD35
—
0000H
—
— — — — — — —
PD36
—
0000H
—
— — — — — — —
PD37
—
0000H
—
— — — — — — —
PD38
—
0
—
— — — — — — —
PD39
—
0
—
— — — — — — —
PD40
—
0
—
— — — — — — —
PD41
—
0000H
—
— — — — — — —
PD42
—
0000H
—
— — — — — — —
Tab. A-5:
For manufacturer setting
List of I/O setting parameters for MR-J4-A (1)
Beginners Manual Servo Amplifiers MELSERVO J4
A-9
Appendix
Additional information about the series MR-J4-A
Control
mode
0000H
—
— — — — — — —
PD44
—
0000H
—
— — — — — — —
PD45
—
0000H
—
— — — — — — —
PD46
—
0000H
—
— — — — — — —
PD47
—
0000H
—
— — — — — — —
PD48
—
0000H
—
— — — — — — —
Tab. A-5:
A - 10
For manufacturer setting
List of I/O setting parameters for MR-J4-A (2)
T
—
S
PD43
P
Unit
DD
Initial
value
Lin.
Symbol Name
Full.
No.
Standard
Operation
mode
Additional information about the series MR-J4-A
A.1.6
Appendix
Extension setting 2 parameters (PE)
Control
mode
0000H
—
— ✔ — — ✔ — —
For manufacturer setting
0000H
—
— — — — — — —
PE03
*FCT2
Fully closed loop function selection 2
0003H
—
— ✔ — — ✔ — —
PE04
*FBN
Fully closed loop control - Feedback pulse electronic gear 1 - Numerator 1
—
— ✔ — — ✔ — —
PE05
*FBD
Fully closed loop control - Feedback pulse electronic gear 1 Denominator
—
— ✔ — — ✔ — —
PE06
BC1
Fully closed loop control - Speed deviation error detection level
400
1/min
— ✔ — — ✔ — —
PE07
BC2
Fully closed loop control - Position deviation error detection level
100
kpulse
— ✔ — — ✔ — —
1
T
Fully closed loop function selection 1
—
S
*FCT1
PE02
P
PE01
DD
Unit
Lin.
Initial
value
No.
Full.
Symbol Name
Standard
Operation
mode
PE08
DUF
Fully closed loop dual feedback filter
10
rad/s
— ✔ — — ✔ — —
PE09
—
For manufacturer setting
0000H
—
— — — — — — —
PE10
FCT3
Fully closed loop function selection 3
0000H
—
— ✔ — — ✔ — —
PE11
—
0000H
—
— — — — — — —
PE12
—
0000H
—
— — — — — — —
PE13
—
0000H
—
— — — — — — —
PE14
—
0111H
—
— — — — — — —
PE15
—
20
—
— — — — — — —
PE16
—
0000H
—
— — — — — — —
PE17
—
0000H
—
— — — — — — —
PE18
—
0000H
—
— — — — — — —
PE19
—
0000H
—
— — — — — — —
PE20
—
0000H
—
— — — — — — —
PE21
—
0000H
—
— — — — — — —
PE22
—
0000H
—
— — — — — — —
PE23
—
0000H
—
— — — — — — —
PE24
—
0000H
—
— — — — — — —
PE25
—
0000H
—
— — — — — — —
PE26
—
0000H
—
— — — — — — —
PE27
—
0000H
—
— — — — — — —
PE28
—
0000H
—
— — — — — — —
PE29
—
0000H
—
— — — — — — —
PE30
—
0000H
—
— — — — — — —
PE31
—
0000H
—
— — — — — — —
PE32
—
0000H
—
— — — — — — —
PE33
—
0000H
—
— — — — — — —
PE34
*FBN2
Fully closed loop control - Feedback pulse electronic gear 2 - Numerator 1
—
— ✔ — — ✔ — —
PE35
*FBD2
Fully closed loop control - Feedback pulse electronic gear 2 Denominator
1
—
— ✔ — — ✔ — —
PE36
—
0.0
—
— — — — — — —
PE37
—
0.00
—
— — — — — — —
PE38
—
PE39
—
PE40
—
PE41
EOP3
Tab. A-6:
For manufacturer setting
For manufacturer setting
Function selection E-3
0.00
—
— — — — — — —
20
—
— — — — — — —
0000H
—
— — — — — — —
0000H
—
✔ ✔ ✔ ✔ ✔ ✔ ✔
List of extension setting 2 parameters for MR-J4-A (1)
Beginners Manual Servo Amplifiers MELSERVO J4
A - 11
Appendix
Additional information about the series MR-J4-A
Control
mode
0
—
— — — — — — —
PE43
—
0.0
—
— — — — — — —
PE44
—
0000H
—
— — — — — — —
PE45
—
0000H
—
— — — — — — —
PE46
—
0000H
—
— — — — — — —
PE47
—
0000H
—
— — — — — — —
PE48
—
0000H
—
— — — — — — —
PE49
—
0000H
—
— — — — — — —
PE50
—
0000H
—
— — — — — — —
PE51
—
0000H
—
— — — — — — —
PE52
—
0000H
—
— — — — — — —
PE53
—
0000H
—
— — — — — — —
PE54
—
0000H
—
— — — — — — —
PE55
—
0000H
—
— — — — — — —
PE56
—
0000H
—
— — — — — — —
PE57
—
0000H
—
— — — — — — —
PE58
—
0000H
—
— — — — — — —
PE59
—
0000H
—
— — — — — — —
PE60
—
0000H
—
— — — — — — —
PE61
—
0.00
—
— — — — — — —
PE62
—
0.00
—
— — — — — — —
PE63
—
0.00
—
— — — — — — —
PE64
—
0.00
—
— — — — — — —
Tab. A-6:
A - 12
For manufacturer setting
List of extension setting 2 parameters for MR-J4-A (2)
T
—
S
PE42
P
Unit
DD
Initial
value
Lin.
Symbol Name
Full.
No.
Standard
Operation
mode
Additional information about the series MR-J4-A
A.1.7
Appendix
Extension setting 3 parameters (PF)
Control
mode
0000H
—
— — — — — — —
—
0000H
—
— — — — — — —
PF03
—
0000H
—
— — — — — — —
PF04
—
0
—
— — — — — — —
PF05
—
0
—
— — — — — — —
PF06
—
0000H
—
— — — — — — —
PF07
—
1
—
— — — — — — —
PF08
—
1
—
— — — — — — —
PF09
*FOP5
0000H
—
✔ ✔ — — ✔ ✔ ✔
PF10
—
0000H
—
— — — — — — —
PF11
—
PF12
—
PF13
PF14
PF15
DBT
PF16
—
PF17
—
PF18
—
PF19
PF20
PF21
DRT
Drive recorder switching time setting
0
s
✔ ✔ ✔ ✔ ✔ ✔ ✔
PF22
—
For manufacturer setting
200
—
— — — — — — —
For manufacturer setting
Function selection F-5
T
—
PF02
S
PF01
P
Unit
DD
Initial
value
Lin.
Symbol Name
Full.
No.
Standard
Operation
mode
0000H
—
— — — — — — —
10000
—
— — — — — — —
—
100
—
— — — — — — —
—
100
—
— — — — — — —
For manufacturer setting
2000
ms
✔ ✔ — — ✔ ✔ ✔
0000H
—
— — — — — — —
10
—
— — — — — — —
0000H
—
— — — — — — —
—
0000H
—
— — — — — — —
—
0000H
—
— — — — — — —
Electronic dynamic brake operating time
For manufacturer setting
PF23
OSCL1
Vibration tough drive - Oscillation detection level
50
%
✔ ✔ ✔ ✔ ✔ ✔ —
PF24
*OSCL2
Vibration tough drive function selection
0000H
—
✔ ✔ ✔ ✔ ✔ ✔ —
PF25
CVAT
SEMI-F47 function - Instantaneous power failure detection time
PF26
—
PF27
—
PF28
—
PF29
PF30
PF31
FRIC
PF32
PF33
200
ms
✔ ✔ ✔ ✔ ✔ ✔ ✔
0
—
— — — — — — —
0
—
— — — — — — —
0
—
— — — — — — —
—
0000H
—
— — — — — — —
—
0
—
— — — — — — —
0
1/min
mm/s
✔ ✔ ✔ ✔ ✔ ✔ ✔
—
50
—
— — — — — — —
—
0000H
—
— — — — — — —
PF34
—
0000H
—
— — — — — — —
PF35
—
0000H
—
— — — — — — —
PF36
—
0000H
—
— — — — — — —
PF37
—
0000H
—
— — — — — — —
PF38
—
0000H
—
— — — — — — —
PF39
—
0000H
—
— — — — — — —
PF40
—
0000H
—
— — — — — — —
PF41
—
0000H
—
— — — — — — —
PF42
—
0000H
—
— — — — — — —
Tab. A-7:
For manufacturer setting
Machine diagnosis function - Friction judgement speed
For manufacturer setting
List of extension setting 3 parameters for MR-J4-A (1)
Beginners Manual Servo Amplifiers MELSERVO J4
A - 13
Appendix
Additional information about the series MR-J4-A
Control
mode
0000H
—
— — — — — — —
PF44
—
0000H
—
— — — — — — —
PF45
—
0000H
—
— — — — — — —
PF46
—
0000H
—
— — — — — — —
PF47
—
0000H
—
— — — — — — —
PF48
—
0000H
—
— — — — — — —
Tab. A-7:
A - 14
For manufacturer setting
List of extension setting 3 parameters for MR-J4-A (2)
T
—
S
PF43
P
Unit
DD
Initial
value
Lin.
Symbol Name
Full.
No.
Standard
Operation
mode
Additional information about the series MR-J4-A
Linear servo motor/DD motor setting parameters (PL)
T
Control
mode
S
Unit
DD
Initial
value
Lin.
Symbol Name
Full.
No.
Standard
Operation
mode
P
A.1.8
Appendix
PL01
*LIT1
Linear servo motor/DD motor function selection 1
0301H
—
— — ✔ ✔ ✔ ✔ ✔
PL02
*LIM
Linear encoder resolution - Numerator
1000
μm
— — ✔ — ✔ ✔ ✔
PL03
*LID
Linear encoder resolution - Denominator
1000
μm
— — ✔ — ✔ ✔ ✔
PL04
*LIT2
Linear servo motor/DD motor function selection 2
0003H
—
— — ✔ ✔ ✔ ✔ ✔
PL05
LB1
Position deviation error detection level
0
mm
0.01 rev
— — ✔ ✔ ✔ — —
PL06
LB2
Speed deviation error detection level
0
1/min
mm/s
— — ✔ ✔ ✔ ✔ —
PL07
LB3
Torque/thrust deviation error detection level
100
%
— — ✔ ✔ ✔ ✔ ✔
PL08
*LIT3
Linear servo motor/DD motor function selection 3
0010H
—
— — ✔ ✔ ✔ ✔ ✔
PL09
LPWM
Magnetic pole detection voltage level
30
%
— — ✔ ✔ ✔ ✔ ✔
PL10
—
5
—
— — — — — — —
PL11
—
100
—
— — — — — — —
PL12
—
500
—
— — — — — — —
PL13
—
0000H
—
— — — — — — —
PL14
—
0000H
—
— — — — — — —
PL15
—
20
—
— — — — — — —
PL16
—
For manufacturer setting
0
—
— — — — — — —
0000H
—
— — ✔ ✔ ✔ ✔ ✔
0
%
— — ✔ ✔ ✔ ✔ ✔
PL17
LTSTS
Magnetic pole detection - Minute position detection method Function selection
PL18
IDLV
Magnetic pole detection - Minute position detection method Identification signal amplitude
PL19
—
0
—
— — — — — — —
PL20
—
0
—
— — — — — — —
PL21
—
0
—
— — — — — — —
PL22
—
0
—
— — — — — — —
PL23
—
0000H
—
— — — — — — —
PL24
—
0
—
— — — — — — —
PL25
—
0000H
—
— — — — — — —
PL26
—
0000H
—
— — — — — — —
PL27
—
0000H
—
— — — — — — —
PL28
—
0000H
—
— — — — — — —
PL29
—
0000H
—
— — — — — — —
PL30
—
0000H
—
— — — — — — —
PL31
—
0000H
—
— — — — — — —
PL32
—
0000H
—
— — — — — — —
PL33
—
0000H
—
— — — — — — —
PL34
—
0000H
—
— — — — — — —
PL35
—
0000H
—
— — — — — — —
PL36
—
0000H
—
— — — — — — —
PL37
—
0000H
—
— — — — — — —
PL38
—
0000H
—
— — — — — — —
PL39
—
0000H
—
— — — — — — —
PL40
—
0000H
—
— — — — — — —
Tab. A-8:
For manufacturer setting
List of linear servo motor/DD motor setting parameters for MR-J4-A (1)
Beginners Manual Servo Amplifiers MELSERVO J4
A - 15
Appendix
Additional information about the series MR-J4-A
Control
mode
0000H
—
— — — — — — —
PL42
—
0000H
—
— — — — — — —
PL43
—
0000H
—
— — — — — — —
PL44
—
0000H
—
— — — — — — —
PL45
—
0000H
—
— — — — — — —
PL46
—
0000H
—
— — — — — — —
PL47
—
0000H
—
— — — — — — —
PL48
—
0000H
—
— — — — — — —
Tab. A-8:
NOTES
For manufacturer setting
List of linear servo motor/DD motor setting parameters for MR-J4-A (2)
To enable a parameter whose symbol is preceded by *, cycle the power after setting it.
Abbreviations of operation modes indicate the followings.
– Standard:
Standard (semi closed loop system) use of the rotary servo motor
– Full.:
Fully closed loop system use of the rotary servo motor
– Lin.:
Linear servo motor use
– DD:
Direct drive (DD) motor use
The symbols in the control mode column mean as follows.
A - 16
– P:
Position control mode
– S:
Speed control mode
– T:
Torque control mode
T
—
S
PL41
P
Unit
DD
Initial
value
Lin.
Symbol Name
Full.
No.
Standard
Operation
mode
Additional information about the series MR-J4-A-RJ
Appendix
A.2
Additional information about the series MR-J4-A-RJ
A.2.1
Status Display
DD
Lin.
Full.
Description
PS
Unit
Operation
mode Standard
Symbol
CP
Status display
CL
Control
mode Cumulative feedback pulses
C
pulse
Feedback pulses from the servo motor encoder are
counted and displayed.
The values in excess of ±99999 can be counted. However, the counter shows only the lower five digits of the
actual value since the servo amplifier display is five dig- ✔ ✔ ✔ ✔ ✔ ✔ ✔
its.
Press the “SET” button to reset the display value to zero.
The value of minus is indicated by the lit decimal points
in the upper four digits.
Servo motor speed/
Linear servo motor speed
r
1/min
mm/s
The servo motor speed or Linear servo motor speed is
displayed.
It is displayed rounding off 0.1 1/min (0.1 mm/s) unit.
✔ ✔ ✔ ✔ ✔ ✔ ✔
Droop pulses
E
pulse
The number of droop pulses in the deviation counter
are displayed.
The decimal points in the upper four digits are lit for
reverse rotation pulses.
The values in excess of ±99999 can be counted. How✔ ✔ ✔ ✔ ✔ ✔ ✔
ever, the counter shows only the lower five digits of the
actual value since the servo amplifier display is five digits.
The number of pulses displayed is in the encoder pulse
unit.
Cumulative command pulses
P
pulse
Not used with the positioning mode. “0” is always displayed.
— — — — — — —
Command pulse frequency
n
kpulse/s
Not used with the positioning mode. “0” is always displayed.
— — — — — — —
Analog speed command
voltage
Analog speed limit voltage
F
V
Not used with the positioning mode. An applied voltage to the CN1 connector is displayed.
— — — — — — —
Not used with the positioning mode. An applied voltage to the CN1 connector is displayed.
— — — — — — —
Voltage of TC (Analog torque command) voltage is displayed.
✔ ✔ ✔ ✔ ✔ ✔ ✔
Analog torque command
voltage
U
V
Analog torque limit voltage
Regenerative load ratio
L
%
The ratio of regenerative power to permissible regener✔ ✔ ✔ ✔ ✔ ✔ ✔
ative power is displayed in %.
Effective load ratio
J
%
The continuous effective load current is displayed.
The effective value in the past 15 s is displayed relative
to the rated current of 100 %.
✔ ✔ ✔ ✔ ✔ ✔ ✔
Peak load ratio
b
%
The maximum occurrence torque is displayed.
The highest value in the past 15 s is displayed relative to
the rated current of 100 %.
✔ ✔ ✔ ✔ ✔ ✔ ✔
Instantaneous torque
T
%
The instantaneous occurrence torque is displayed.
The value of torque being occurred is displayed in real
time considering a rated torque as 100 %.
✔ ✔ ✔ ✔ ✔ ✔ ✔
Position within one-revolution
(1 pulse unit)
Tab. A-9:
Cy1
pulse
Position within one revolution is displayed in encoder
pulses.
The values in excess of ±99999 can be counted. However, the counter shows only the lower five digits of the
✔ ✔ ✔ ✔ ✔ ✔ ✔
actual value since the servo amplifier display is five digits.
When the servo motor rotates in the CCW direction, the
value is added.
Status display list of MR-J4-A-RJ (1)
Beginners Manual Servo Amplifiers MELSERVO J4
A - 17
Additional information about the series MR-J4-A-RJ
Position within one-revolution
(1000 pulse unit)
ABS counter
LS
rev
DD
1000
pulses
Lin.
Cy2
Description
CL
Unit
PS
Symbol
CP
Status display
Operation
mode Full.
Control
mode Standard
Appendix
The within one-revolution position is displayed in 1000
pulse increments of the encoder.
When the servo motor rotates in the CCW direction, the
value is added.
✔ ✔ ✔ ✔ ✔ ✔ ✔
The travel distance from the home position is displayed
as multi-revolution counter value of the absolution
position encoder in the absolution position detection
system.
✔ ✔ — ✔ ✔ ✔ ✔
The travel distance from the home position is displayed
as load side multi-revolution counter value in the abso- — — ✔ ✔ ✔ ✔ ✔
lution position detection system
Load to motor inertia ratio
dC
Multiplier
The estimated ratio of the load inertia moment to the
servo motor shaft inertia moment is displayed.
✔ ✔ ✔ ✔ ✔ ✔ ✔
Bus voltage
Pn
V
The voltage of main circuit converter (between P+ and
N–) is displayed.
✔ ✔ ✔ ✔ ✔ ✔ ✔
Encoder inside temperature
ETh
°C
Inside temperature of encoder detected by the encoder
is displayed.
✔ ✔ ✔ ✔ ✔ — ✔
Settling time
ST
ms
Settling time is displayed. When it exceeds 1000 ms,
“1000” will be displayed.
✔ ✔ ✔ ✔ ✔ ✔ ✔
Oscillation detection frequency
oF
Hz
Frequency at the time of oscillation detection is displayed.
✔ ✔ ✔ ✔ ✔ ✔ ✔
Number of tough drive
operations
Td
times
The number of tough drive functions activated is displayed.
✔ ✔ ✔ ✔ ✔ ✔ ✔
✔ ✔ ✔ ✔ ✔ ✔ ✔
✔ ✔ ✔ ✔ ✔ ✔ ✔
Unit power consumption 1
(increment of 1 W)
PC1
W
Unit power consumption is displayed by increment of 1
W. Positive value indicate power running, and negative
value indicate regeneration. The values in excess of
±99999 can be counted. However, the counter shows
only the lower five digits of the actual value since the
servo amplifier display is five digits.
Unit power consumption 2
(increment of 1 kW)
PC2
kW
Unit power consumption is displayed by increment of 1
kW. Positive value indicate power running, and negative value indicate regeneration.
Wh
Unit total power consumption is displayed by increment of 1 Wh. Positive value is cumulated during power
running and negative value during regeneration. The
values in excess of ±99999 can be counted. However,
✔ ✔ ✔ ✔ ✔ ✔ ✔
the counter shows only the lower five digits of the
actual value since the servo amplifier display is five digits.
Unit total power consumption 1
(increment of 1 Wh)
Unit total power consumption 2
(increment of 100 kWh)
Load-side encoder Cumulative
feedback pulses
Load-side encoder Droop pulses
Tab. A-9:
A - 18
TPC1
TPC2
FC
FE
100 Wh
Unit total power consumption is displayed by increment of 100 kWh. Positive value is cumulated during
power running and negative value during regeneration.
✔ ✔ ✔ ✔ ✔ ✔ ✔
pulse
Feedback pulses from the load-side encoder are
counted and displayed.
The values in excess of ±99999 can be counted. However, the counter shows only the lower five digits of the
actual value since the servo amplifier display is five dig- ✔ ✔ — — ✔ — —
its.
Press the “SET” button to reset the display value to zero.
The value of minus is indicated by the lit decimal points
in the upper four digits.
pulse
Droop pulses of the deviation counter between a loadside encoder and a command are displayed. When the
count exceeds ±99999, it starts from 0.
Negative value is indicated by the lit decimal points in
the upper four digits.
The display shows the average droop pulses of 128
samplings at the rate of 444 [μs].
Status display list of MR-J4-A-RJ (2)
✔ ✔ — — ✔ — —
Additional information about the series MR-J4-A-RJ
Appendix
Load-side encoder
information 1
(1 pulse unit)
FCY1
100000
pulses
The Z-phase counter of a load-side encoder is displayed
by increments of 100 pulses.
For an incremental linear encoder, the Z-phase counter
is displayed. The value is counted up from 0 based on
the home position (reference mark). For an absolute
position linear encoder, the encoder absolute position
is displayed.
When the count exceeds 99999, it starts from 0.
Load-side encoder
information 1
(100000 pulses unit)
FCY2
✔ ✔ — — ✔ — —
rev
When an incremental linear encoder is used as the
load-side encoder, the display shows 0.
When an absolute position linear encoder is used as the
load-side encoder, the display shows 0.
When a rotary encoder is used as the load-side encoder,
the display shows the value of the multi-revolution
counter.
Load-side encoder
information 2
FL5
✔ ✔ — — ✔ — —
pulse
The Z-phase counter is displayed in the encoder pulse
unit.
For an incremental linear encoder, the Z-phase counter
is displayed. The value is counted up from 0 based on
the home position (reference mark). For an absolute
position linear encoder, the encoder absolute position
is displayed.
When the count exceeds 99999, it starts from 0.
Z-phase counter low
FCY1
✔ ✔ ✔ — — ✔ —
100000
pulses
The Z-phase counter is displayed by increments of
100000 pulses.
For an incremental linear encoder, the Z-phase counter
is displayed. The value is counted up from 0 based on
the home position (reference mark). For an absolute
position linear encoder, the encoder absolute position
is displayed.
When the count exceeds 99999, it starts from 0.
✔ ✔ ✔ — — ✔ —
The servo motor electrical angle is displayed.
✔ ✔ — — — ✔ —
The servo motor electrical angle is displayed by increments of 100000 pulses.
✔ ✔ — — — ✔ —
Z-phase counter high
FCY2
Electrical angle low
ECY1
pulse
ECY2
100000
pulses
Electrical angle high
Current position
Tab. A-9:
PoS
DD
✔ ✔ — — ✔ — —
Lin.
pulse
The Z-phase counter of a load-side encoder is displayed
in the encoder pulse unit.
For an incremental linear encoder, the Z-phase counter
is displayed. The value is counted up from 0 based on
the home position (reference mark). For an absolute
position linear encoder, the encoder absolute position
is displayed.
When the count exceeds 99999, it starts from 0.
Full.
Description
PS
Unit
CL
Symbol
CP
Status display
Operation
mode Standard
Control
mode When “0” (positioning display) is set in parameter
PT26, the current position is displayed as machine
home position is 0.
10STMμm When “1” (roll feed display) is set in parameter
10(STM-4) inch PT26, the actual current position is displayed as start
✔ ✔ — ✔ ✔ ✔ ✔
10-3 degree position is 0.
pulse
The values in excess of ±99999 can be counted. However, the counter shows only the lower five digits of the
actual value since the servo amplifier display is five digits.
Status display list of MR-J4-A-RJ (3)
Beginners Manual Servo Amplifiers MELSERVO J4
A - 19
Additional information about the series MR-J4-A-RJ
Command position
DD
Lin.
Description
CL
Unit
PS
Symbol
CP
Status display
Operation
mode Full.
Control
mode Standard
Appendix
CPoS
When “0” (positioning display) is set in parameter
PT26, the command current position is displayed as
machine home position is 0.
When “1” (roll feed display) is set in parameter
PT26, turning on the start signal starts counting from 0
10STMμm and a command current position to the target position
10(STM-4) inch is displayed in the automatic mode.
✔ ✔ — ✔ ✔ ✔ ✔
10-3 degree The command positions of the selected point table are
displayed at a stop. At the manual mode, the command
pulse
positions of the selected point table are displayed.
The values in excess of ±99999 can be counted. However, the counter shows only the lower five digits of the
actual value since the servo amplifier display is five digits.
rn
Indicates the remaining distance to the command position of the currently selected point table, program and
station.
(STM-4)
10
inch
✔ ✔ ✔ ✔ ✔ ✔ ✔
10-3 degree The values in excess of ±99999 can be counted. However, the counter shows only the lower five digits of the
pulse
actual value since the servo amplifier display is five digits.
10STMμm
Command remaining distance
Point table No./program No./
command station position
Pno
—
For the point table method and program method, the
point table and program No. currently being executed
are displayed. The selected number is displayed during
a temporary stop or manual operation. For the indexer
method, the command next station position is displayed.
Step No.
Sno
—
The step No. of the program currently being executed is
— ✔ — ✔ ✔ ✔ ✔
displayed. At a stop, 0 is displayed.
Analog override voltage
oru
V
The analog override voltage is displayed.
✔ ✔ — ✔ ✔ ✔ ✔
%
The setting value of the override is displayed.
When the override is disabled, 100% is displayed.
✔ ✔ ✔ ✔ ✔ ✔ ✔
Override level
Tab. A-9:
or
✔ ✔ ✔ ✔ ✔ ✔ ✔
Status display list of MR-J4-A-RJ (4)
CP:
CL:
PS:
Positioning mode (point table method)
Positioning mode (program method)
Positioning mode (indexer method)
Standard: Standard (semi closed loop system) use of the rotary servo motor
Full.:
Fully closed loop system use of the rotary servo motor
Lin.:
Linear servo motor use
DD:
Direct drive (DD) motor use
The unit can be changed to μm/Inch/Degree/PLS in parameter PT01.
The status display item of the servo amplifier display shown at power-on can be changed by changing
parameter PC36 settings.
A - 20
Additional information about the series MR-J4-A-RJ
Basic setting parameters (PA)
Control
mode
✔ ✔ ✔ ✔ ✔ ✔ ✔
—
✔ ✔ ✔ ✔ ✔ ✔ ✔
*REG
PS
—
*STY
PA02
CL
1000H
0000H
PA01
DD
Operation mode
Regenerative option
Symbol Name
Lin.
Unit
No.
Full.
Initial
value
Standard
Operation
mode
CP
A.2.2
Appendix
PA03
*ABS
Absolute position detection system
0000H
—
✔ ✔ ✔ ✔ ✔ ✔ ✔
PA04
*AOP1
Function selection A-1
2000H
—
✔ ✔ ✔ ✔ ✔ ✔ ✔
PA05
*FBP
PA06
PA07
*CMX
*CDV
Number of command input pulses per revolution
10000
—
— — — — — — —
Electronic gear numerator (command pulse multiplication numerator)
1
—
✔ ✔ ✔ ✔ ✔ ✔ —
Number of gear teeth on machine side
1
—
✔ — — ✔ — — ✔
Electronic gear denominator
(command pulse multiplication denominator)
1
—
✔ ✔ ✔ ✔ ✔ ✔ —
Number of gear teeth on servo motor side
1
—
✔ — — ✔ — — ✔
PA08
ATU
Auto tuning mode
0001H
—
✔ ✔ ✔ ✔ ✔ ✔ ✔
PA09
RSP
Auto tuning response
16
—
✔ ✔ ✔ ✔ ✔ ✔ ✔
100
μm
10-4 inch
✔ ✔ ✔ ✔ ✔ ✔ ✔
10-3 degree
pulse
PA10
INP
In-position range
PA11
TLP
Forward rotation torque limit/positive direction thrust limit
100.0
%
✔ ✔ ✔ ✔ ✔ ✔ ✔
PA12
TLN
Reverse rotation torque limit/negative direction thrust limit
100.0
%
✔ ✔ ✔ ✔ ✔ ✔ ✔
PA13
*PLSS
Command pulse input form
0100H
—
✔ ✔ ✔ ✔ ✔ ✔ ✔
PA14
*POL
Rotation direction selection/travel direction selection
0
—
✔ ✔ ✔ ✔ ✔ ✔ ✔
PA15
*ENR
Encoder output pulses
4000
pulse/rev
✔ ✔ ✔ ✔ ✔ ✔ ✔
PA16
*ENR2
Encoder output pulses 2
1
—
✔ ✔ ✔ ✔ ✔ ✔ ✔
PA17
*MSR
Servo motor series setting
0000H
—
— — ✔ — ✔ ✔ ✔
PA18
*MTY
Servo motor type setting
0000H
—
— — ✔ — ✔ ✔ ✔
PA19
*BLK
Parameter writing inhibit
00AAH
—
✔ ✔ ✔ ✔ ✔ ✔ ✔
PA20
*TDS
Tough drive setting
0000H
—
✔ ✔ ✔ ✔ ✔ ✔ ✔
PA21
*AOP3
Function selection A-3
0001H
—
✔ ✔ ✔ ✔ ✔ ✔ —
PA22
—
For manufacturer setting
0000H
—
— — — — — — —
PA23
DRAT
Drive recorder arbitrary alarm trigger setting
0000H
—
✔ ✔ ✔ ✔ ✔ ✔ ✔
PA24
AOP4
Function selection A-4
0000H
—
✔ ✔ ✔ ✔ ✔ ✔ ✔
PA25
OTHOV
One-touch tuning - Overshoot permissible level
0
%
✔ ✔ ✔ ✔ ✔ ✔ ✔
PA26
*AOP5
Function selection A-5
0000H
—
✔ ✔ ✔ ✔ ✔ ✔ ✔
PA27
—
0000H
—
— — — — — — —
PA28
—
0000H
—
— — — — — — —
PA29
—
0000H
—
— — — — — — —
PA30
—
0000H
—
— — — — — — —
PA31
—
0000H
—
— — — — — — —
PA32
—
0000H
—
— — — — — — —
Tab. A-10:
For manufacturer setting
List of basic setting parameters for MR-J4-A-RJ
Beginners Manual Servo Amplifiers MELSERVO J4
A - 21
Appendix
NOTES
Additional information about the series MR-J4-A-RJ
To enable the following parameters in a positioning mode, cycle the power after setting.
– PA06 (Electronic gear numerator (command pulse multiplication numerator)/Number of gear
teeth on machine side)
– PA07 (Electronic gear denominator (command pulse multiplication denominator)/Number of
gear teeth on servo motor side)
The following parameter cannot be used in the positioning mode.
– PA05 (Number of command input pulses per revolution)
A.2.3
Gain/filter setting parameters (PB)
Control
mode
Adaptive tuning mode (adaptive filter II)
0000H
—
✔ ✔ ✔ ✔ ✔ ✔ ✔
PB02
VRFT
Vibration suppression control tuning mode
(advanced vibration suppression control II)
0000H
—
✔ ✔ ✔ ✔ ✔ ✔ ✔
PB03
PST
Position command acceleration/deceleration time constant
(position smoothing)
0
ms
✔ ✔ ✔ ✔ ✔ ✔ ✔
PS
FILT
CL
PB01
CP
Unit
DD
Initial
value
Lin.
Symbol Name
Full.
No.
Standard
Operation
mode
PB04
FFC
Feed forward gain
0
%
✔ ✔ ✔ ✔ ✔ ✔ ✔
PB05
—
For manufacturer setting
500
—
— — — — — — —
PB06
GD2
Load to motor inertia ratio/load to motor mass ratio
7.00
Multiplier
✔ ✔ ✔ ✔ ✔ ✔ ✔
PB07
PG1
Model loop gain
15.0
rad/s
✔ ✔ ✔ ✔ ✔ ✔ ✔
PB08
PG2
Position loop gain
37.0
rad/s
✔ ✔ ✔ ✔ ✔ ✔ ✔
PB09
VG2
Speed loop gain
823
rad/s
✔ ✔ ✔ ✔ ✔ ✔ ✔
PB10
VIC
Speed integral compensation
33.7
ms
✔ ✔ ✔ ✔ ✔ ✔ ✔
PB11
VDC
Speed differential compensation
980
—
✔ ✔ ✔ ✔ ✔ ✔ ✔
PB12
OVA
Overshoot amount compensation
0
%
✔ ✔ ✔ ✔ ✔ ✔ ✔
PB13
NH1
Machine resonance suppression filter 1
4500
Hz
✔ ✔ ✔ ✔ ✔ ✔ ✔
PB14
NHQ1
Notch shape selection 1
0000H
—
✔ ✔ ✔ ✔ ✔ ✔ ✔
PB15
NH2
Machine resonance suppression filter 2
4500
Hz
✔ ✔ ✔ ✔ ✔ ✔ ✔
PB16
NHQ2
Notch shape selection 2
0000H
—
✔ ✔ ✔ ✔ ✔ ✔ ✔
PB17
NHF
Shaft resonance suppression filter
0000H
—
✔ ✔ ✔ ✔ ✔ ✔ ✔
PB18
LPF
Low-pass filter setting
3141
rad/s
✔ ✔ ✔ ✔ ✔ ✔ ✔
PB19
VRF11
Vibration suppression control 1 - Vibration frequency
100.0
Hz
✔ ✔ ✔ ✔ ✔ ✔ ✔
PB20
VRF12
Vibration suppression control 1 - Resonance frequency
100.0
Hz
✔ ✔ ✔ ✔ ✔ ✔ ✔
PB21
VRF13
Vibration suppression control 1 - Vibration frequency damping
0.00
—
✔ ✔ ✔ ✔ ✔ ✔ ✔
PB22
VRF14
Vibration suppression control 1 - Resonance frequency damping
0.00
—
✔ ✔ ✔ ✔ ✔ ✔ ✔
PB23
VFBF
Low-pass filter selection
0000H
—
✔ ✔ ✔ ✔ ✔ ✔ ✔
PB24
*MVS
Slight vibration suppression control
0000H
—
✔ ✔ ✔ ✔ ✔ ✔ ✔
PB25
*BOP1
Function selection B-1
0000H
—
✔ ✔ ✔ ✔ ✔ ✔ ✔
PB26
*CDP
Gain switching function
0000H
—
✔ ✔ ✔ ✔ ✔ ✔ ✔
✔ ✔ ✔ ✔ ✔ ✔ ✔
✔ ✔ ✔ ✔ ✔ ✔ ✔
PB27
CDL
Gain switching condition
10
kpulse/s
pulse
1/min
PB28
CDT
Gain switching time constant
1
ms
Tab. A-11:
A - 22
List of gain/filter setting parameters for MR-J4-A-RJ (1)
Additional information about the series MR-J4-A-RJ
Appendix
Operation
mode
0.0
rad/s
✔ ✔ ✔ ✔ ✔ ✔ ✔
Speed loop gain after gain switching
0
rad/s
✔ ✔ ✔ ✔ ✔ ✔ ✔
VICB
Speed integral compensation after gain switching
0.0
ms
✔ ✔ ✔ ✔ ✔ ✔ ✔
PB33
VRF1B
Vibration suppression control 1 Vibration frequency after gain switching
0.0
Hz
✔ ✔ ✔ ✔ ✔ ✔ ✔
PB34
VRF2B
Vibration suppression control 1 Resonance frequency after gain switching
0.0
Hz
✔ ✔ ✔ ✔ ✔ ✔ ✔
PB35
VRF3B
Vibration suppression control 1 Vibration frequency damping after gain switching
0.00
—
✔ ✔ ✔ ✔ ✔ ✔ ✔
PB36
VRF4B
Vibration suppression control 1 Resonance frequency damping after gain switching
0.00
—
✔ ✔ ✔ ✔ ✔ ✔ ✔
PB37
—
1600
—
— — — — — — —
PB38
—
0.00
—
— — — — — — —
PB39
—
0.00
—
— — — — — — —
PB40
—
PB41
—
PB42
PB43
PB44
—
PB45
CNHF
PB31
PB32
PS
Position loop gain after gain switching
VG2B
PB30
CL
PG2B
GD2B
CP
✔ ✔ ✔ ✔ ✔ ✔ ✔
PB29
DD
Multiplier
Symbol Name
Lin.
Load to motor inertia ratio/load to motor mass ratio after gain switching 7.00
No.
Full.
Unit
Standard
Initial
value
Control
mode
0.00
—
— — — — — — —
0000H
—
— — — — — — —
—
0000H
—
— — — — — — —
—
0000H
—
— — — — — — —
For manufacturer setting
0.00
—
— — — — — — —
Command notch filter
0000H
—
✔ ✔ ✔ ✔ ✔ ✔ ✔
PB46
NH3
Machine resonance suppression filter 3
4500
Hz
✔ ✔ ✔ ✔ ✔ ✔ ✔
PB47
NHQ3
Notch shape selection 3
0000H
—
✔ ✔ ✔ ✔ ✔ ✔ ✔
PB48
NH4
Machine resonance suppression filter 4
4500
Hz
✔ ✔ ✔ ✔ ✔ ✔ ✔
PB49
NHQ4
Notch shape selection 4
0000H
—
✔ ✔ ✔ ✔ ✔ ✔ ✔
PB50
NH5
Machine resonance suppression filter 5
4500
Hz
✔ ✔ ✔ ✔ ✔ ✔ ✔
PB51
NHQ5
Notch shape selection 5
0000H
—
✔ ✔ ✔ ✔ ✔ ✔ ✔
PB52
VRF21
Vibration suppression control 2 - Vibration frequency
100.0
Hz
✔ ✔ ✔ ✔ ✔ ✔ ✔
PB53
VRF22
Vibration suppression control 2 - Resonance frequency
100.0
Hz
✔ ✔ ✔ ✔ ✔ ✔ ✔
PB54
VRF23
Vibration suppression control 2 - Vibration frequency damping
0.00
—
✔ ✔ ✔ ✔ ✔ ✔ ✔
PB55
VRF24
Vibration suppression control 2 - Resonance frequency damping
0.00
—
✔ ✔ ✔ ✔ ✔ ✔ ✔
PB56
VRF21B
Vibration suppression control 2 - Vibration frequency after gain
switching
0.0
Hz
✔ ✔ ✔ ✔ ✔ ✔ ✔
PB57
VRF22B
Vibration suppression control 2 - Resonance frequency after gain
switching
0.0
Hz
✔ ✔ ✔ ✔ ✔ ✔ ✔
PB58
VRF23B
Vibration suppression control 2 - Vibration frequency damping after
gain switching
0.00
—
✔ ✔ ✔ ✔ ✔ ✔ ✔
PB59
VRF24B
Vibration suppression control 2 - Resonance frequency damping after
gain switching
0.00
—
✔ ✔ ✔ ✔ ✔ ✔ ✔
PB60
PG1B
Model loop gain after gain switching
0.0
rad/s
✔ ✔ ✔ ✔ ✔ ✔ ✔
PB61
—
0.0
—
— — — — — — —
PB62
—
PB63
—
PB64
—
Tab. A-11:
For manufacturer setting
0000H
—
— — — — — — —
0000H
—
— — — — — — —
0000H
—
— — — — — — —
List of gain/filter setting parameters for MR-J4-A-RJ (2)
Beginners Manual Servo Amplifiers MELSERVO J4
A - 23
Appendix
A.2.4
Additional information about the series MR-J4-A-RJ
Extension setting parameters (PC)
Initial
value
Unit
0
ms
0
ms
Standard
Operation
mode
Control
mode
PC03
*STC
S-pattern acceleration/deceleration time constant
0
ms
✔ — ✔ ✔ ✔ ✔ —
PC04
TQC
Torque command time constant/thrust command time constant
0
—
— — — — — — —
JOG operation deceleration time constant
Deceleration time constant 1
PS
STB
CL
PC02
JOG operation acceleration time constant
Acceleration time constant 1
CP
STA
DD
PC01
Lin.
Symbol Name
Full.
No.
✔ ✔ ✔ ✔ — ✔ —
✔ — — ✔ — — ✔
✔ ✔ ✔ ✔ — ✔ —
✔ — — ✔ — — ✔
PC05
SC1
Automatic operation speed 1
100
1/min
✔ — — ✔ — — ✔
PC06
SC2
Automatic operation speed 2
500
1/min
✔ — — ✔ — — ✔
PC07
SC3
Manual operation speed 1
1000
1/min
✔ — — ✔ — — ✔
200
1/min
mm/s
— — — — — — —
300
1/min
mm/s
500
1/min
mm/s
800
1/min
mm/s
0
1/min
mm/s
— — — — — — —
PC08
PC09
PC10
PC11
SC4
SC5
SC6
SC7
Internal speed command 4
Internal speed limit 4
Internal speed command 5
Internal speed limit 5
Internal speed command 6
Internal speed limit 6
Internal speed command 7
Internal speed limit 7
Analog speed command - Maximum speed
— — — — — — —
— — — — — — —
— — — — — — —
— — — — — — —
— — — — — — —
— — — — — — —
— — — — — — —
PC12
VCM
PC13
TLC
Analog torque/thrust command maximum output
100.0
%
— — — — — — —
PC14
MOD1
Analog monitor 1 output
0000H
—
✔ ✔ ✔ ✔ ✔ ✔ ✔
PC15
MOD2
Analog monitor 2 output
0001H
—
✔ ✔ ✔ ✔ ✔ ✔ ✔
PC16
MBR
Electromagnetic brake sequence output
0
ms
✔ ✔ ✔ ✔ ✔ ✔ ✔
50
1/min
mm/s
✔ ✔ ✔ ✔ ✔ ✔ ✔
PC17
ZSP
Analog speed limit - Maximum speed
Zero speed
— — — — — — —
PC18
*BPS
Alarm history clear
0000H
—
✔ ✔ ✔ ✔ ✔ ✔ ✔
PC19
*ENRS
Encoder output pulse selection
0000H
—
✔ ✔ ✔ ✔ ✔ ✔ ✔
PC20
*SNO
Station No. setting
0
station
✔ ✔ ✔ ✔ ✔ ✔ ✔
PC21
*SOP
RS-422 communication function selection
0000H
—
✔ ✔ ✔ ✔ ✔ ✔ ✔
PC22
*COP1
Function selection C-1
0000H
—
✔ ✔ ✔ ✔ ✔ ✔ ✔
PC23
*COP2
Function selection C-2
0000H
—
— — — — — — —
PC24
*COP3
Function selection C-3
0000H
—
✔ ✔ ✔ ✔ ✔ ✔ ✔
PC25
—
For manufacturer setting
0000H
—
— — — — — — —
PC26
*COP5
Function selection C-5
0000H
—
✔ ✔ ✔ ✔ ✔ ✔ ✔
PC27
*COP6
Function selection C-6
0000H
—
✔ ✔ ✔ ✔ ✔ ✔ ✔
PC28
—
PC29
—
PC30
STA2
PC31
STB2
PC32
CMX2
PC33
CMX3
Tab. A-12:
A - 24
0000H
—
— — — — — — —
0000H
—
— — — — — — —
0
ms
0
ms
Command input pulse multiplication numerator 2
1
—
— — — — — — —
Command input pulse multiplication numerator 3
1
—
— — — — — — —
For manufacturer setting
Home position return acceleration time constant
Acceleration time constant 2
Home position return deceleration time constant
Deceleration time constant 2
List of extension setting parameters for MR-J4-A-RJ (1)
✔ — ✔ ✔ — ✔ —
✔ — — ✔ — — ✔
✔ — ✔ ✔ — ✔ —
✔ — — ✔ — — ✔
Additional information about the series MR-J4-A-RJ
Appendix
Control
mode
Command input pulse multiplication numerator 4
1
—
— — — — — — —
PC35
TL2
Internal torque limit 2/internal thrust limit 2
100.0
%
✔ ✔ ✔ ✔ ✔ ✔ ✔
PC36
*DMD
Status display selection
0000H
—
✔ ✔ ✔ ✔ ✔ ✔ ✔
PS
CMX4
CL
PC34
CP
Unit
DD
Initial
value
Lin.
Symbol Name
Full.
No.
Standard
Operation
mode
PC37
VCO
Analog override offset
0
mV
✔ ✔ ✔ ✔ ✔ ✔ —
PC38
TPO
Analog torque limit offset
0
mV
✔ ✔ ✔ ✔ ✔ ✔ ✔
PC39
MO1
Analog monitor 1 offset
0
mV
✔ ✔ ✔ ✔ ✔ ✔ ✔
PC40
MO2
Analog monitor 2 offset
0
mV
✔ ✔ ✔ ✔ ✔ ✔ ✔
PC41
—
0
—
— — — — — — —
PC42
—
0
—
— — — — — — —
PC43
ERZ
Error excessive alarm detection level
0
rev
mm
✔ ✔ ✔ ✔ ✔ ✔ ✔
PC44
*COP9
Function selection C-9
0000H
—
— ✔ — — ✔ ✔ —
PC45
*COPA
Function selection C-A
0000H
—
— ✔ ✔ — ✔ ✔ —
PC46
—
0
—
— — — — — — —
PC47
—
0
—
— — — — — — —
PC48
—
0
—
— — — — — — —
PC49
—
0
—
— — — — — — —
0000H
—
— — — — — — —
100
ms
✔ ✔ ✔ ✔ ✔ ✔ ✔
0
—
— — — — — — —
0
—
— — — — — — —
0
0.0001rev
0.01mm
✔ ✔ ✔ ✔ ✔ ✔ ✔
0
—
— — — — — — —
100
—
— — — — — — —
0000H
—
— — — — — — —
For manufacturer setting
For manufacturer setting
PC50
—
PC51
RSBR
PC52
—
PC53
—
PC54
RSUP1
PC55
—
PC56
—
PC57
—
PC58
—
0
—
— — — — — — —
PC59
—
0000H
—
— — — — — — —
Forced stop deceleration time constant
For manufacturer setting
Vertical axis freefall prevention compensation amount
For manufacturer setting
PC60
*COPD
0000H
—
✔ — — — ✔ ✔ —
PC61
—
0000H
—
— — — — — — —
PC62
—
0000H
—
— — — — — — —
PC63
—
0000H
—
— — — — — — —
PC64
—
0000H
—
— — — — — — —
PC65
—
0000H
—
— — — — — — —
PC66
—
0000H
—
— — — — — — —
PC67
—
0000H
—
— — — — — — —
PC68
—
0000H
—
— — — — — — —
PC69
—
0000H
—
— — — — — — —
PC70
—
0000H
—
— — — — — — —
PC71
—
0000H
—
— — — — — — —
PC72
—
0000H
—
— — — — — — —
PC73
—
0000H
—
— — — — — — —
PC74
—
0000H
—
— — — — — — —
PC75
—
0000H
—
— — — — — — —
Tab. A-12:
Function selection C-D
For manufacturer setting
List of extension setting parameters for MR-J4-A-RJ (2)
Beginners Manual Servo Amplifiers MELSERVO J4
A - 25
Appendix
Additional information about the series MR-J4-A-RJ
Control
mode
0000H
—
— — — — — — —
PC77
—
0000H
—
— — — — — — —
PC78
—
0000H
—
— — — — — — —
PC79
—
0000H
—
— — — — — — —
PC80
—
0000H
—
— — — — — — —
Tab. A-12:
NOTES
For manufacturer setting
List of extension setting parameters for MR-J4-A-RJ (3)
To enable the following parameters in a positioning mode, cycle the power after setting.
– PC03 (S-pattern acceleration/deceleration time constant)
The following parameter cannot be used in the positioning mode.
– PC04 (Torque command time constant/thrust command time constant)
– PC08 (Internal speed command 4/internal speed limit 4)
– PC09 (Internal speed command 5/internal speed limit 5)
– PC10 (Internal speed command 6/internal speed limit 6)
– PC11 (Internal speed command 7/internal speed limit 7)
– PC12 (Analog speed command - Maximum speed/Analog speed limit - Maximum speed)
– PC13 (Analog torque/thrust command maximum output)
– PC23 (Function selection C-2)
– PC32 (Command input pulse multiplication numerator 2)
– PC33 (Command input pulse multiplication numerator 3)
– PC34 (Command input pulse multiplication numerator 4)
A - 26
PS
—
CL
PC76
CP
Unit
DD
Initial
value
Lin.
Symbol Name
Full.
No.
Standard
Operation
mode
Additional information about the series MR-J4-A-RJ
A.2.5
Appendix
I/O setting parameters (PD)
Operation
mode
Control
mode
0000H
—
✔ ✔ ✔ ✔ ✔ ✔ ✔
For manufacturer setting
0000H
—
— — — — — — —
PD03
*DI1L
Input device selection 1L
0202H
—
— — — — — — —
PD04
*DI1H
Input device selection 1H
0202H
—
✔ ✔ ✔ ✔ ✔ ✔ ✔
PD05
*DI2L
Input device selection 2L
2100H
—
— — — — — — —
PD06
*DI2H
Input device selection 2H
2021H
—
✔ ✔ ✔ ✔ ✔ ✔ ✔
PD07
*DI3L
Input device selection 3L
0704H
—
— — — — — — —
PD08
*DI3H
Input device selection 3H
0707H
—
✔ ✔ ✔ ✔ ✔ ✔ ✔
PD09
*DI4L
Input device selection 4L
0805H
—
— — — — — — —
PD10
*DI4H
Input device selection 4H
0808H
—
✔ ✔ ✔ ✔ ✔ ✔ ✔
PD11
*DI5L
Input device selection 5L
0303H
—
— — — — — — —
PD12
*DI5H
Input device selection 5H
3803H
—
✔ ✔ ✔ ✔ ✔ ✔ ✔
PD13
*DI6L
Input device selection 6L
2006H
—
— — — — — — —
PD14
*DI6H
Input device selection 6H
3920H
—
✔ ✔ ✔ ✔ ✔ ✔ ✔
PD15
—
0000H
—
— — — — — — —
PD16
—
0000H
—
— — — — — — —
PD17
*DI8L
Input device selection 8L
0A0AH
—
— — — — — — —
PD18
*DI8H
Input device selection 8H
0A00H
—
✔ ✔ ✔ ✔ ✔ ✔ ✔
PD19
*DI9L
Input device selection 9L
0B0BH
—
— — — — — — —
PD20
*DI9H
Input device selection 9H
0B00H
—
✔ ✔ ✔ ✔ ✔ ✔ ✔
PD21
*DI10L
Input device selection 10L
2323H
—
— — — — — — —
PD22
*DI10H
Input device selection 10H
2B23H
—
✔ ✔ ✔ ✔ ✔ ✔ ✔
PD23
*DO1
Output device selection 1
0004H
—
✔ ✔ ✔ ✔ ✔ ✔ ✔
PD24
*DO2
Output device selection 2
000CH
—
✔ ✔ ✔ ✔ ✔ ✔ ✔
PD25
*DO3
Output device selection 3
0004H
—
✔ ✔ ✔ ✔ ✔ ✔ ✔
PD26
*DO4
Output device selection 4
0007H
—
✔ ✔ ✔ ✔ ✔ ✔ ✔
PD27
—
For manufacturer setting
0003H
—
— — — — — — —
PD28
*DO6
Output device selection 6
0002H
—
✔ ✔ ✔ ✔ ✔ ✔ ✔
PD29
*DIF
Input filter setting
0004H
—
✔ ✔ ✔ ✔ ✔ ✔ ✔
PD30
*DOP1
Function selection D-1
0000H
—
✔ ✔ ✔ ✔ ✔ ✔ ✔
For manufacturer setting
PS
Input signal automatic on selection 1
—
CL
*DIA1
PD02
CP
PD01
DD
Unit
Lin.
Initial
value
Full.
Symbol Name
Standard
No.
PD31
*DOP2
Function selection D-2
0000H
—
✔ ✔ ✔ ✔ ✔ ✔ —
PD32
*DOP3
Function selection D-3
0000H
—
✔ ✔ ✔ ✔ ✔ ✔ ✔
PD33
*DOP4
Function selection D-4
0000H
—
✔ ✔ ✔ ✔ ✔ ✔ ✔
PD34
DOP5
Function selection D-5
0000H
—
✔ ✔ ✔ ✔ ✔ ✔ ✔
PD35
—
0000H
—
— — — — — — —
PD36
—
0000H
—
— — — — — — —
PD37
—
0000H
—
— — — — — — —
PD38
—
0
—
— — — — — — —
PD39
—
0
—
— — — — — — —
PD40
—
0
—
— — — — — — —
PD41
*DIA3
Input signal automatic on selection 3
0000H
—
✔ ✔ ✔ ✔ ✔ ✔ ✔
PD42
*DIA4
Input signal automatic on selection 4
0000H
—
✔ ✔ ✔ ✔ ✔ ✔ ✔
Tab. A-13:
For manufacturer setting
List of I/O setting parameters for MR-J4-A-RJ (1)
Beginners Manual Servo Amplifiers MELSERVO J4
A - 27
Appendix
Additional information about the series MR-J4-A-RJ
Control
mode
Input device selection 11L
0000H
—
— — — — — — —
PD44
*DI11H
Input device selection 11H
3A00H
—
✔ ✔ ✔ ✔ ✔ ✔ ✔
PD45
*DI12L
Input device selection 12L
0000H
—
— — — — — — —
PD46
*DI12H
Input device selection 12H
3B00H
—
✔ ✔ ✔ ✔ ✔ ✔ ✔
PD47
*DO7
Output device selection 7
0000H
—
✔ ✔ ✔ ✔ ✔ ✔ ✔
PD48
—
For manufacturer setting
0000H
—
— — — — — — —
Tab. A-13:
NOTE
List of I/O setting parameters for MR-J4-A-RJ (2)
The following parameter cannot be used in the positioning mode.
– PD03 (Input device selection 1L)
– PD05 (Input device selection 2L)
– PD07 (Input device selection 3L)
– PD09 (Input device selection 4L)
– PD11 (Input device selection 5L)
– PD13 (Input device selection 6L)
– PD17 (Input device selection 8L)
– PD19 (Input device selection 9L)
– PD21 (Input device selection 10L)
– PD43 (Input device selection 11L)
– PD45 (Input device selection 12L)
A - 28
PS
*DI11L
CL
PD43
CP
Unit
DD
Initial
value
Lin.
Symbol Name
Full.
No.
Standard
Operation
mode
Additional information about the series MR-J4-A-RJ
A.2.6
Appendix
Extension setting 2 parameters (PE)
Control
mode
0000H
—
— — — — — — —
For manufacturer setting
0000H
—
— — — — — — —
PE03
*FCT2
Fully closed loop function selection 2
0003H
—
— ✔ — — ✔ ✔ —
PE04
*FBN
Fully closed loop control - Feedback pulse electronic gear 1 - Numerator 1
—
— ✔ — — ✔ ✔ —
PE05
*FBD
Fully closed loop control - Feedback pulse electronic gear 1 Denominator
—
— ✔ — — ✔ ✔ —
PE06
BC1
Fully closed loop control - Speed deviation error detection level
400
1/min
— ✔ — — ✔ ✔ —
PE07
BC2
Fully closed loop control - Position deviation error detection level
100
kpulse
— ✔ — — ✔ ✔ —
1
PS
Fully closed loop function selection 1
—
CL
*FCT1
PE02
CP
PE01
DD
Unit
Lin.
Initial
value
No.
Full.
Symbol Name
Standard
Operation
mode
PE08
DUF
Fully closed loop dual feedback filter
10
rad/s
— ✔ — — ✔ ✔ —
PE09
—
For manufacturer setting
0000H
—
— ✔ — — ✔ ✔ —
PE10
FCT3
Fully closed loop function selection 3
0000H
—
— ✔ — — ✔ ✔ —
PE11
—
0000H
—
— — — — — — —
PE12
—
0000H
—
— — — — — — —
PE13
—
0000H
—
— — — — — — —
PE14
—
0111H
—
— — — — — — —
PE15
—
20
—
— — — — — — —
PE16
—
0000H
—
— — — — — — —
PE17
—
0000H
—
— — — — — — —
PE18
—
0000H
—
— — — — — — —
PE19
—
0000H
—
— — — — — — —
PE20
—
0000H
—
— — — — — — —
PE21
—
0000H
—
— — — — — — —
PE22
—
0000H
—
— — — — — — —
PE23
—
0000H
—
— — — — — — —
PE24
—
0000H
—
— — — — — — —
PE25
—
0000H
—
— — — — — — —
PE26
—
0000H
—
— — — — — — —
PE27
—
0000H
—
— — — — — — —
PE28
—
0000H
—
— — — — — — —
PE29
—
0000H
—
— — — — — — —
PE30
—
0000H
—
— — — — — — —
PE31
—
0000H
—
— — — — — — —
PE32
—
0000H
—
— — — — — — —
PE33
—
0000H
—
— — — — — — —
PE34
*FBN2
Fully closed loop control - Feedback pulse electronic gear 2 - Numerator 1
—
— ✔ — — ✔ ✔ —
PE35
*FBD2
Fully closed loop control - Feedback pulse electronic gear 2 Denominator
1
—
— ✔ — — ✔ ✔ —
PE36
—
0.0
—
— — — — — — —
PE37
—
0.00
—
— — — — — — —
PE38
—
PE39
—
PE40
—
PE41
EOP3
Tab. A-14:
For manufacturer setting
For manufacturer setting
Function selection E-3
0.00
—
— — — — — — —
20
—
— — — — — — —
0000H
—
— — — — — — —
0000H
—
✔ ✔ ✔ ✔ ✔ ✔ ✔
List of extension setting 2 parameters for MR-J4-A-RJ (1)
Beginners Manual Servo Amplifiers MELSERVO J4
A - 29
Appendix
Additional information about the series MR-J4-A-RJ
Control
mode
0
—
— — — — — — —
PE43
—
0.0
—
— — — — — — —
PE44
—
0000H
—
— — — — — — —
PE45
—
0000H
—
— — — — — — —
PE46
—
0000H
—
— — — — — — —
PE47
—
0000H
—
— — — — — — —
PE48
—
0000H
—
— — — — — — —
PE49
—
0000H
—
— — — — — — —
PE50
—
0000H
—
— — — — — — —
PE51
—
0000H
—
— — — — — — —
PE52
—
0000H
—
— — — — — — —
PE53
—
0000H
—
— — — — — — —
PE54
—
0000H
—
— — — — — — —
PE55
—
0000H
—
— — — — — — —
PE56
—
0000H
—
— — — — — — —
PE57
—
0000H
—
— — — — — — —
PE58
—
0000H
—
— — — — — — —
PE59
—
0000H
—
— — — — — — —
PE60
—
0000H
—
— — — — — — —
PE61
—
0.00
—
— — — — — — —
PE62
—
0.00
—
— — — — — — —
PE63
—
0.00
—
— — — — — — —
PE64
—
0.00
—
— — — — — — —
Tab. A-14:
NOTE
For manufacturer setting
List of extension setting 2 parameters for MR-J4-A-RJ (2)
The following parameter cannot be used in the positioning mode.
– PE01 (Fully closed loop function selection 1)
A - 30
PS
—
CL
PE42
CP
Unit
DD
Initial
value
Lin.
Symbol Name
Full.
No.
Standard
Operation
mode
Additional information about the series MR-J4-A-RJ
A.2.7
Appendix
Extension setting 3 parameters (PF)
Control
mode
0000H
—
— — — — — — —
—
0000H
—
— — — — — — —
PF03
—
0000H
—
— — — — — — —
PF04
—
0
—
— — — — — — —
PF05
—
0
—
— — — — — — —
PF06
—
0000H
—
— — — — — — —
PF07
—
1
—
— — — — — — —
PF08
—
1
—
— — — — — — —
PF09
*FOP5
0000H
—
✔ ✔ — — ✔ ✔ ✔
PF10
—
0000H
—
— — — — — — —
PF11
—
PF12
—
PF13
PF14
PF15
DBT
PF16
—
For manufacturer setting
Function selection F-5
PS
—
PF02
CL
PF01
CP
Unit
DD
Initial
value
Lin.
Symbol Name
Full.
No.
Standard
Operation
mode
0000H
—
— — — — — — —
10000
—
— — — — — — —
—
100
—
— — — — — — —
—
100
—
— — — — — — —
For manufacturer setting
Electronic dynamic brake operating time
2000
ms
✔ ✔ — — ✔ ✔ ✔
0000H
—
— — — — — — —
10
—
— — — — — — —
0000H
—
— — — — — — —
PF17
—
PF1
—
PF19
—
0000H
—
— — — — — — —
PF20
—
0000H
—
— — — — — — —
PF21
DRT
Drive recorder switching time setting
0
s
✔ ✔ ✔ ✔ ✔ ✔ ✔
PF22
—
For manufacturer setting
200
—
— — — — — — —
For manufacturer setting
PF23
OSCL1
Vibration tough drive - Oscillation detection level
50
%
✔ ✔ ✔ ✔ ✔ ✔ ✔
PF24
*OSCL2
Vibration tough drive function selection
0000H
—
✔ ✔ ✔ ✔ ✔ ✔ ✔
PF25
CVAT
SEMI-F47 function - Instantaneous power failure detection time
PF26
—
PF27
—
PF28
—
PF29
PF30
PF31
FRIC
PF32
—
PF33
—
PF34
*SOP3
PF35
—
PF36
—
PF37
—
PF38
—
PF39
—
PF40
PF41
200
ms
✔ ✔ ✔ ✔ ✔ ✔ ✔
0
—
— — — — — — —
0
—
— — — — — — —
0
—
— — — — — — —
—
0000H
—
— — — — — — —
—
0
—
— — — — — — —
0
1/min
mm/s
✔ ✔ ✔ ✔ ✔ ✔ ✔
50
—
— — — — — — —
0000H
—
— — — — — — —
0000H
—
✔ ✔ ✔ ✔ ✔ ✔ ✔
0000H
—
— — — — — — —
0000H
—
— — — — — — —
0000H
—
— — — — — — —
0000H
—
— — — — — — —
0000H
—
— — — — — — —
—
0
—
— — — — — — —
—
0
—
— — — — — — —
Tab. A-15:
For manufacturer setting
Machine diagnosis function - Friction judgement speed
For manufacturer setting
RS-422 communication function selection 3
For manufacturer setting
List of extension setting 3 parameters for MR-J4-A-RJ (1)
Beginners Manual Servo Amplifiers MELSERVO J4
A - 31
Appendix
Additional information about the series MR-J4-A-RJ
Control
mode
0
—
— — — — — — —
PF43
—
0
—
— — — — — — —
PF44
—
0000H
—
— — — — — — —
PF45
—
0000H
—
— — — — — — —
PF46
—
0000H
—
— — — — — — —
PF47
—
0000H
—
— — — — — — —
PF48
—
0000H
—
— — — — — — —
Tab. A-15:
A - 32
For manufacturer setting
List of extension setting 3 parameters for MR-J4-A-RJ (2)
PS
—
CL
PF42
CP
Unit
DD
Initial
value
Lin.
Symbol Name
Full.
No.
Standard
Operation
mode
Additional information about the series MR-J4-A-RJ
Linear servo motor/DD motor setting parameters (PL)
PS
Control
mode
CL
Unit
DD
Initial
value
Lin.
Symbol Name
Full.
No.
Standard
Operation
mode
CP
A.2.8
Appendix
PL01
*LIT1
Linear servo motor/DD motor function selection 1
0301H
—
— — ✔ ✔ ✔ ✔ ✔
PL02
*LIM
Linear encoder resolution - Numerator
1000
μm
— — ✔ — ✔ ✔ —
PL03
*LID
Linear encoder resolution - Denominator
1000
μm
— — ✔ — ✔ ✔ —
PL04
*LIT2
Linear servo motor/DD motor function selection 2
0003H
—
— — ✔ ✔ ✔ ✔ ✔
PL05
LB1
Position deviation error detection level
0
mm
0.01 rev
— — ✔ ✔ ✔ ✔ ✔
PL06
LB2
Speed deviation error detection level
0
1/min
mm/s
— — ✔ ✔ ✔ ✔ ✔
PL07
LB3
Torque/thrust deviation error detection level
100
%
— — ✔ ✔ ✔ ✔ ✔
PL08
*LIT3
Linear servo motor/DD motor function selection 3
0010H
—
— — ✔ ✔ ✔ ✔ ✔
PL09
LPWM
Magnetic pole detection voltage level
30
%
— — ✔ ✔ ✔ ✔ ✔
PL10
—
5
—
— — — — — — —
PL11
—
100
—
— — — — — — —
PL12
—
500
—
— — — — — — —
PL13
—
0000H
—
— — — — — — —
PL14
—
0000H
—
— — — — — — —
PL15
—
20
—
— — — — — — —
PL16
—
For manufacturer setting
0
—
— — — — — — —
0000H
—
— — ✔ ✔ ✔ ✔ ✔
0
%
— — ✔ ✔ ✔ ✔ ✔
PL17
LTSTS
Magnetic pole detection - Minute position detection method Function selection
PL18
IDLV
Magnetic pole detection - Minute position detection method Identification signal amplitude
PL19
—
0
—
— — — — — — —
PL20
—
0
—
— — — — — — —
PL21
—
0
—
— — — — — — —
PL22
—
0
—
— — — — — — —
PL23
—
0000H
—
— — — — — — —
PL24
—
0
—
— — — — — — —
PL25
—
0000H
—
— — — — — — —
PL26
—
0000H
—
— — — — — — —
PL27
—
0000H
—
— — — — — — —
PL28
—
0000H
—
— — — — — — —
PL29
—
0000H
—
— — — — — — —
PL30
—
0000H
—
— — — — — — —
PL31
—
0000H
—
— — — — — — —
PL32
—
0000H
—
— — — — — — —
PL33
—
0000H
—
— — — — — — —
PL34
—
0000H
—
— — — — — — —
PL35
—
0000H
—
— — — — — — —
PL36
—
0000H
—
— — — — — — —
PL37
—
0000H
—
— — — — — — —
PL38
—
0000H
—
— — — — — — —
PL39
—
0000H
—
— — — — — — —
Tab. A-16:
For manufacturer setting
List of linear servo motor/DD motor setting parameters for MR-J4-A-RJ (1)
Beginners Manual Servo Amplifiers MELSERVO J4
A - 33
Appendix
Additional information about the series MR-J4-A-RJ
Control
mode
0000H
—
— — — — — — —
PL41
—
0000H
—
— — — — — — —
PL42
—
0000H
—
— — — — — — —
PL43
—
0000H
—
— — — — — — —
PL44
—
0000H
—
— — — — — — —
PL45
—
0000H
—
— — — — — — —
PL46
—
0000H
—
— — — — — — —
PL47
—
0000H
—
— — — — — — —
PL48
—
0000H
—
— — — — — — —
Tab. A-16:
A - 34
For manufacturer setting
List of linear servo motor/DD motor setting parameters for MR-J4-A-RJ (2)
PS
—
CL
PL40
CP
Unit
DD
Initial
value
Lin.
Symbol Name
Full.
No.
Standard
Operation
mode
Additional information about the series MR-J4-A-RJ
A.2.9
Appendix
Option setting parameters (Po)
Control
mode
0000H
—
— — — — — — —
—
0000H
—
— — — — — — —
Po03
—
0000H
—
— — — — — — —
Po04
—
0000H
—
— — — — — — —
Po05
—
0000H
—
— — — — — — —
Po06
—
0000H
—
— — — — — — —
Po07
—
0000H
—
— — — — — — —
Po08
—
0000H
—
— — — — — — —
Po09
—
0000H
—
— — — — — — —
Po10
—
0001H
—
— — — — — — —
0000H
—
— — — — — — —
0000H
—
✔ ✔ ✔ ✔ ✔ — —
For manufacturer setting
PS
—
Po02
CL
Po01
CP
Unit
DD
Initial
value
Lin.
Symbol Name
Full.
No.
Standard
Operation
mode
Po11
—
Po12
*OOP3
Po13
—
0000H
—
— — — — — — —
Po14
—
0000H
—
— — — — — — —
Po15
—
0000H
—
— — — — — — —
Po16
—
0000H
—
— — — — — — —
Po17
—
0000H
—
— — — — — — —
Po18
—
0000H
—
— — — — — — —
Po19
—
0000H
—
— — — — — — —
Po20
—
0000H
—
— — — — — — —
Po21
—
0000H
—
— — — — — — —
Po22
—
0000H
—
— — — — — — —
Po23
—
0000H
—
— — — — — — —
Po24
—
0000H
—
— — — — — — —
Po25
—
0000H
—
— — — — — — —
Po26
—
0000H
—
— — — — — — —
Po27
—
0000H
—
— — — — — — —
Po28
—
0000H
—
— — — — — — —
Po29
—
0000H
—
— — — — — — —
Po30
—
0000H
—
— — — — — — —
Po31
—
0000H
—
— — — — — — —
Po32
—
0000H
—
— — — — — — —
Tab. A-17:
Function selection O-3
For manufacturer setting
List of option setting parameters for MR-J4-A-RJ
Beginners Manual Servo Amplifiers MELSERVO J4
A - 35
Appendix
A.2.10
Additional information about the series MR-J4-A-RJ
Positioning control parameters (PT)
✔ ✔ ✔ ✔ ✔ ✔ ✔
Feeding function selection
0000H
—
✔ ✔ ✔ ✔ ✔ ✔ ✔
Home position return type
0010H
—
✔ ✔ ✔ ✔ ✔ ✔ ✔
ZRF
Home position return speed
100
1/min
mm/s
✔ ✔ ✔ ✔ ✔ ✔ ✔
CRF
Creep speed
10
1/min
mm/s
✔ ✔ ✔ ✔ ✔ ✔ ✔
0
μm
10-4 inch
✔ ✔ ✔ ✔ ✔ ✔ ✔
10-3 degree
pulse
PT03
*FTY
PT04
*ZTY
PT05
PT06
ZST
Home position shift distance
PS
✔ ✔ ✔ ✔ ✔ ✔ ✔
—
CL
—
*TOP1
CP
0000H
0000H
*CTY
PT02
DD
Command mode selection
Function selection T-1
PT01
Lin.
Unit
Symbol Name
Full.
Initial
value
No.
PT07
Control
mode
Standard
Operation
mode
10STM μm
PT08
*ZPS
Home position return position data
0
10-(STM-4) inch
10-3 degree
pulse
✔ ✔ ✔ ✔ ✔ ✔ —
10STM μm
PT09
DCT
Travel distance after proximity dog
1000
10-(STM-4) inch
10-3 degree
pulse
✔ ✔ ✔ ✔ ✔ ✔ —
PT10
ZTM
Stopper type home position return stopper time
100
ms
✔ ✔ ✔ ✔ ✔ ✔ —
PT11
ZTT
Stopper type home position return torque limit value
15.0
%
✔ ✔ ✔ ✔ ✔ ✔ —
10STM μm
10-(STM-4) inch
✔ ✔ ✔ ✔ ✔ ✔ ✔
PT12
CRP
Rough match output range
0
PT13
JOG
JOG operation
100
1/min
mm/s
✔ ✔ ✔ ✔ ✔ ✔ ✔
PT14
*BKC
Backlash compensation
0
pulse
✔ ✔ ✔ ✔ ✔ ✔ ✔
PT15
LMPL
PT16
LMPH
PT17
LMNL
PT18
LMNH
PT19
*LPPL
PT20
*LPPH
PT21
*LNPL
PT22
*LNPH
10-3 degree
pulse
10
Software limit +
0
STM
μm
10-(STM-4) inch
10-3 degree
pulse
✔ ✔ ✔ ✔
✔ ✔ —
✔ ✔ ✔ ✔
✔ ✔ —
✔ ✔ ✔ ✔
✔ ✔ —
✔ ✔ ✔ ✔
✔ ✔ —
10STM μm
Software limit –
0
10-(STM-4) inch
10-3 degree
pulse
10STM μm
Position range output address +
0
10-(STM-4) inch
10-3 degree
pulse
10STM μm
Position range output address –
0
10-(STM-4) inch
10-3 degree
pulse
PT23
OUT1
OUT1 output setting time
0
ms
✔ ✔ ✔ ✔ — ✔ —
PT24
OUT2
OUT2 output setting time
0
ms
✔ ✔ ✔ ✔ — ✔ —
PT25
OUT3
OUT3 output setting time
0
ms
✔ ✔ ✔ ✔ — ✔ —
PT26
*TOP2
Function selection T-2
0000H
—
✔ ✔ ✔ ✔ ✔ ✔ —
Tab. A-18:
A - 36
List of positioning control parameters for MR-J4-A-RJ (1)
Additional information about the series MR-J4-A-RJ
Appendix
Control
mode
0000H
—
✔ — — ✔ — — ✔
PT28
*STN
Number of stations per rotation
8
stations
✔ — — ✔ — — ✔
PT29
*TOP3
Function selection T-3
0000H
—
✔ ✔ ✔ ✔ ✔ ✔ ✔
PT30
—
0
—
— — — — — — —
PT31
—
0
—
— — — — — — —
PT32
—
0000H
—
— — — — — — —
PT33
—
0000H
—
— — — — — — —
0000H
—
✔ ✔ ✔ ✔ ✔ ✔ —
0000H
—
— — — — — — —
Operation mode selection
For manufacturer setting
Point table/program default
PS
*ODM
CL
PT27
CP
Unit
DD
Initial
value
Lin.
Symbol Name
Full.
No.
Standard
Operation
mode
PT34
*PDEF
PT35
—
PT36
—
PT37
—
PT38
*TOP7
PT39
INT
PT40
*SZS
PT41
ORP
PT42
*OVM
Digital override minimum multiplication
0
%
✔ — — ✔ — — ✔
PT43
*OVS
Digital override pitch width
0
%
✔ — — ✔ — — ✔
0000H
—
— — — — — — —
10
—
— — — — — — —
Function selection T-7
0000H
—
✔ — — ✔ — — ✔
Torque limit delay time
100
ms
✔ — — ✔ — — ✔
Station home position shift distance
0
pulse
Home position return inhibit selection
0000H
For manufacturer setting
✔ — — ✔ — — ✔
✔ ✔ ✔ ✔ ✔ ✔ ✔
PT44
—
0000H
—
— — — — — — —
PT45
—
0000H
—
— — — — — — —
PT46
—
0000H
—
— — — — — — —
PT47
—
0000H
—
— — — — — — —
PT48
—
0000H
—
— — — — — — —
Tab. A-18:
NOTES
For manufacturer setting
List of positioning control parameters for MR-J4-A-RJ (2)
To enable a parameter whose symbol is preceded by *, cycle the power after setting it.
Abbreviations of operation modes indicate the followings.
– Standard:
Standard (semi closed loop system) use of the rotary servo motor
– Full.:
Fully closed loop system use of the rotary servo motor
– Lin.:
Linear servo motor use
– DD:
Direct drive (DD) motor use
The symbols in the control mode column mean as follows.
– CP:
Positioning mode (point table method)
– CL:
Positioning mode (program method)
– PS:
Positioning mode (indexer method)
Beginners Manual Servo Amplifiers MELSERVO J4
A - 37
Appendix
Additional information about the series MR-J4-B(-RJ)
A.3
Additional information about the series MR-J4-B(-RJ)
A.3.1
Status display
Display
Status
Description
Initializing
System check in progress
Power of the servo amplifier was switched on at the condition that the
power of the servo system controller is off.
Initializing
A b
The control axis No. set to the auxiliary axis number setting switches
(SW2-3 and SW2-4) and the axis selection rotary switch (SW1) do not
match the one set to the servo system controller.
A servo amplifier malfunctioned, or communication error occurred
with the servo system controller or the previous axis servo amplifier. In
this case, the indication changes as follows:
“Ab”, “AC”, “Ad”, and “Ab”
The servo system controller is malfunctioning.
Initializing
During initial setting for communication specifications
AC
Initializing
Initial setting for communication specifications completed, and then it
synchronized with servo system controller.
A d
Initializing
During initial parameter setting communication with servo system
controller
A E
Initializing
During the servo motor/encoder information and telecommunication
with servo system controller
A F
Initializing
During initial signal data communication with servo system controller
AH
Initializing completion
The process for initial data communication with the servo system controller is completed.
A A
Initializing standby
The power supply of servo system controller is turned off during the
power supply of servo amplifier is on.
Ready-off
The ready-off signal from the servo system controller was received.
Servo-on
The ready-off signal from the servo system controller was received.
Servo-off
The ready-off signal from the servo system controller was received.
Alarm and warning
The alarm No. and the warning No. that occurred is displayed. CPU error
CPU watchdog error has occurred.
Test operation mode Motor-less operation
A b
.
b # #
d # #
C # #
* * *
8 8 8
b # #.
d # #.
C # #.
Tab. A-19: Indication list of MR-J4-B(-RJ)
The meanings of ## are listed below.
~
64
Axis No. 64
** indicates the alarm No. and the warning No.
Requires the MR Configurator2.
A - 38
Description
Axis No. 1
~
##
01
Only a list of alarms and warnings is listed in section 8.2. Refer to “MELSERVO J4 Servo Amplifier
Instruction Manual (Troubleshooting)” for details of alarms and warnings.
Additional information about the series MR-J4-B(-RJ)
A.3.2
Appendix
Basic setting parameters (PA)
Unit
DD
Initial
value
Lin.
Symbol Name
Full.
No.
Standard
Operation
mode
PA01
**STY
Operation mode
1000H
—
✔ ✔ ✔ ✔
PA02
**REG
Regenerative option
0000H
—
✔ ✔ ✔ ✔
PA03
*ABS
Absolute position detection system
0000H
—
✔ ✔ ✔ ✔
PA04
*AOP1
Function selection A-1
2000H
—
✔ ✔ ✔ ✔
PA05
—
PA06
—
PA07
—
PA08
10000
—
— — — —
For manufacturer setting
1
—
— — — —
1
—
— — — —
ATU
Auto tuning mode
0001H
—
✔ ✔ ✔ ✔
PA09
RSP
Auto tuning response
16
—
✔ ✔ ✔ ✔
PA10
INP
In-position range
1600
pulse
✔ ✔ ✔ ✔
PA11
—
PA12
—
PA13
—
PA14
*POL
1000.0
—
— — — —
For manufacturer setting
1000.0
—
— — — —
0000H
—
— — — —
Rotation direction selection/travel direction selection
0
—
✔ ✔ ✔ ✔
PA15
*ENR
Encoder output pulses
4000
pulse/rev
✔ ✔ ✔ ✔
PA16
*ENR2
Encoder output pulses 2
1
—
✔ ✔ ✔ ✔
PA17
**MSR
Servo motor series setting
0000H
—
— — ✔ —
PA18
**MTY
Servo motor type setting
0000H
—
— — ✔ —
PA19
*BLK
Parameter writing inhibit
00ABH
—
✔ ✔ ✔ ✔
PA20
*TDS
Tough drive setting
0000H
—
✔ ✔ ✔ ✔
PA21
*AOP3
Function selection A-3
0001H
—
✔ ✔ ✔ ✔
PA22
**PCS
Position control composition selection
0000H
—
✔ — — —
PA23
DRAT
Drive recorder arbitrary alarm trigger setting
0000H
—
✔ ✔ ✔ ✔
PA24
AOP4
Function selection A-4
0000H
—
✔ ✔ ✔ ✔
PA25
OTHOV
One-touch tuning – Overshoot permissible level
0
%
✔ ✔ ✔ ✔
PA26
*AOP5
Function selection A-5
0000H
—
✔ ✔ ✔ ✔
PA27
—
0000H
—
— — — —
PA28
—
0000H
—
— — — —
PA29
—
0000H
—
— — — —
PA30
—
0000H
—
— — — —
PA31
—
0000H
—
— — — —
PA32
—
0000H
—
— — — —
Tab. A-20:
For manufacturer setting
List of basic setting parameters for MR-J4-B(-RJ)
Beginners Manual Servo Amplifiers MELSERVO J4
A - 39
Appendix
A.3.3
Additional information about the series MR-J4-B(-RJ)
Gain/filter setting parameters (PB)
Unit
PB01
FILT
Adaptive tuning mode (adaptive filter II)
0000H
—
✔ ✔ ✔ ✔
PB02
VRFT
Vibration suppression control tuning mode (advanced vibration suppression
control II)
0000H
—
✔ ✔ ✔ ✔
PB03
TFBGN
Torque feedback loop gain
18000
rad/s
✔ ✔ ✔ ✔
PB04
FFC
Feed forward gain
0
%
✔ ✔ ✔ ✔
DD
Initial
value
Lin.
Symbol Name
Full.
No.
Standard
Operation
mode
PB05
—
For manufacturer setting
500
—
— — — —
PB06
GD2
Load to motor inertia ratio/load to motor mass ratio
7.00
Multiplier
✔ ✔ ✔ ✔
PB07
PG1
Model loop gain
15.0
rad/s
✔ ✔ ✔ ✔
PB08
PG2
Position loop gain
37.0
rad/s
✔ ✔ ✔ ✔
PB09
VG2
Speed loop gain
823
rad/s
✔ ✔ ✔ ✔
PB10
VIC
Speed integral compensation
33.7
ms
✔ ✔ ✔ ✔
PB11
VDC
Speed differential compensation
980
—
✔ ✔ ✔ ✔
PB12
OVA
Overshoot amount compensation
0
%
✔ ✔ ✔ ✔
PB13
NH1
Machine resonance suppression filter 1
4500
Hz
✔ ✔ ✔ ✔
PB14
NHQ1
Notch shape selection 1
0000h
—
✔ ✔ ✔ ✔
PB15
NH2
Machine resonance suppression filter 2
4500
Hz
✔ ✔ ✔ ✔
PB16
NHQ2
Notch shape selection 2
0000H
—
✔ ✔ ✔ ✔
PB17
NHF
Shaft resonance suppression filter
0000H
—
✔ ✔ ✔ ✔
PB18
LPF
Low-pass filter setting
3141
rad/s
✔ ✔ ✔ ✔
PB19
VRF11
Vibration suppression control 1 - Vibration frequency
100.0
Hz
✔ ✔ ✔ ✔
PB20
VRF12
Vibration suppression control 1 - Resonance frequency
100.0
Hz
✔ ✔ ✔ ✔
PB21
VRF13
Vibration suppression control 1 - Vibration frequency damping
0.00
—
✔ ✔ ✔ ✔
PB22
VRF14
Vibration suppression control 1 - Resonance frequency damping
0.00
—
✔ ✔ ✔ ✔
PB23
VFBF
Low-pass filter selection
0000H
—
✔ ✔ ✔ ✔
PB24
*MVS
Slight vibration suppression control
0000H
—
✔ ✔ ✔ ✔
PB25
—
For manufacturer setting
0000H
—
— — — —
PB26
*CDP
Gain switching function
0000H
—
✔ ✔ ✔ ✔
PB27
CDL
Gain switching condition
10
kpulse/s
pulse
1/min
✔ ✔ ✔ ✔
PB28
CDT
Gain switching time constant
1
ms
✔ ✔ ✔ ✔
PB29
GD2B
Load to motor inertia ratio/load to motor mass ratio after gain switching
7.00
Multiplier
✔ ✔ ✔ ✔
PB30
PG2B
Position loop gain after gain switching
0.0
rad/s
✔ ✔ ✔ ✔
PB31
VG2B
Speed loop gain after gain switching
0
rad/s
✔ ✔ ✔ ✔
PB32
VICB
Speed integral compensation after gain switching
0.0
ms
✔ ✔ ✔ ✔
PB33
VRF11B
Vibration suppression control 1 - Vibration frequency after gain switching
0.0
Hz
✔ ✔ ✔ ✔
PB34
VRF12B
Vibration suppression control 1 - Resonance frequency after gain switching
0.0
Hz
✔ ✔ ✔ ✔
PB35
VRF13B
Vibration suppression control 1 - Vibration frequency damping after gain switching
0.00
—
✔ ✔ ✔ ✔
PB36
VRF14B
Vibration suppression control 1 - Resonance frequency damping after gain switching 0.00
PB37
—
PB38
—
PB39
—
PB40
—
Tab. A-21:
A - 40
For manufacturer setting
List of gain/filter setting parameters for MR-J4-B(-RJ) (1)
—
✔ ✔ ✔ ✔
1600
—
— — — —
0.00
—
— — — —
0.00
—
— — — —
0.00
—
— — — —
Additional information about the series MR-J4-B(-RJ)
Appendix
Unit
PB41
—
0
—
— — — —
PB42
—
0
—
— — — —
PB43
—
0000H
—
— — — —
PB44
—
PB45
CNHF
For manufacturer setting
DD
Initial
value
Lin.
Symbol Name
Full.
No.
Standard
Operation
mode
0.00
—
— — — —
Command notch filter
0000H
—
✔ ✔ ✔ ✔
PB46
NH3
Machine resonance suppression filter 3
4500
Hz
✔ ✔ ✔ ✔
PB47
NHQ3
Notch shape selection 3
0000H
—
✔ ✔ ✔ ✔
PB48
NH4
Machine resonance suppression filter 4
4500
Hz
✔ ✔ ✔ ✔
PB49
NHQ4
Notch shape selection 4
0000H
—
✔ ✔ ✔ ✔
PB50
NH5
Machine resonance suppression filter 5
4500
Hz
✔ ✔ ✔ ✔
PB51
NHQ5
Notch shape selection 5
0000H
—
✔ ✔ ✔ ✔
PB52
VRF21
Vibration suppression control 2 - Vibration frequency
100.0
Hz
✔ ✔ ✔ ✔
PB53
VRF22
Vibration suppression control 2 - Resonance frequency
100.0
Hz
✔ ✔ ✔ ✔
PB54
VRF23
Vibration suppression control 2 - Vibration frequency damping
0.00
—
✔ ✔ ✔ ✔
PB55
VRF24
Vibration suppression control 2 - Resonance frequency damping
0.00
—
✔ ✔ ✔ ✔
PB56
VRF21B
Vibration suppression control 2 - Vibration frequency after gain switching
0.0
Hz
✔ ✔ ✔ ✔
PB57
VRF22B
Vibration suppression control 2 - Resonance frequency after gain switching
0.0
Hz
✔ ✔ ✔ ✔
0.00
✔ ✔ ✔ ✔
✔ ✔ ✔ ✔
PB58
VRF23B
Vibration suppression control 2 - Vibration frequency damping after gain switching
PB59
VRF24B
Vibration suppression control 2 - Resonance frequency damping after gain switching 0.00
—
PB60
PG1B
Model loop gain after gain switching
0.0
rad/s
✔ ✔ ✔ ✔
PB61
—
0.0
—
— — — —
PB62
—
PB63
—
PB64
—
Tab. A-21:
For manufacturer setting
0000H
—
— — — —
0000H
—
— — — —
0000H
—
— — — —
List of gain/filter setting parameters for MR-J4-B(-RJ) (2)
Beginners Manual Servo Amplifiers MELSERVO J4
A - 41
Appendix
A.3.4
Additional information about the series MR-J4-B(-RJ)
Extension setting parameters (PC)
Unit
PC01
ERZ
Error excessive alarm level
0
rev
mm
✔ ✔ ✔ ✔
PC02
MBR
Electromagnetic brake sequence output
0
ms
✔ ✔ ✔ ✔
PC03
*ENRS
Encoder output pulse selection
0000H
—
✔ ✔ ✔ ✔
PC04
**COP1
Function selection C-1
0000H
—
✔ ✔ ✔ ✔
PC05
**COP2
Function selection C-2
0000H
—
✔ — — —
PC06
*COP3
Function selection C-3
0000H
—
✔ ✔ ✔ ✔
PC07
ZSP
Zero speed
50
1/min
mm/s
✔ ✔ ✔ ✔
PC08
OSL
Overspeed alarm detection level
0
1/min
mm/s
✔ ✔ ✔ ✔
PC09
MOD1
Analog monitor 1 output
0000H
—
✔ ✔ ✔ ✔
PC10
MOD2
Analog monitor 2 output
0000H
—
✔ ✔ ✔ ✔
PC11
MO1
Analog monitor 1 offset
0
mV
✔ ✔ ✔ ✔
DD
Initial
value
Lin.
Symbol Name
Full.
No.
Standard
Operation
mode
PC12
MO2
Analog monitor 2 offset
0
mV
✔ ✔ ✔ ✔
PC13
MOSDL
Analog monitor - Feedback position output standard data - Low
0
pulse
✔ ✔ ✔ ✔
PC14
MOSDH Analog monitor - Feedback position output standard data - High
0
103 pulses
✔ ✔ ✔ ✔
PC15
—
0
—
— — — —
PC16
—
0000H
—
— — — —
PC17
**COP4
Function selection C-4
0000H
—
✔ ✔ ✔ ✔
PC18
*COP5
Function selection C-5
0000H
—
✔ ✔ ✔ ✔
For manufacturer setting
PC19
—
For manufacturer setting
0000H
—
— — — —
PC20
*COP7
Function selection C-7
0000H
—
✔ ✔ ✔ ✔
PC21
*BPS
Alarm history clear
0000H
—
✔ ✔ ✔ ✔
PC22
—
0
—
— — — —
PC23
—
0000H
—
— — — —
PC24
RSBR
Forced stop deceleration time constant
100
ms
✔ ✔ ✔ ✔
PC25
—
For manufacturer setting
0
—
— — — —
PC26
**COP8
Function selection C-8
0000H
—
PC27
**COP9
Function selection C-9
0000H
—
For manufacturer setting
✔
✔
✔ ✔ ✔
✔ ✔ —
PC28
—
For manufacturer setting
0000H
—
— — — —
PC29
*COPB
Function selection C-B
0000H
—
✔ — ✔ ✔
PC30
—
For manufacturer setting
0
—
— — — —
0
0.0001rev
0.01mm
✔ ✔ ✔ ✔
—
— — — —
PC31
RSUP1
PC32
—
0000H
PC33
—
0
—
— — — —
PC34
—
100
—
— — — —
PC35
—
0000H
—
— — — —
PC36
—
0000H
—
— — — —
PC37
—
0000H
—
— — — —
Tab. A-22:
A - 42
Vertical axis freefall prevention compensation amount
For manufacturer setting
List of extension setting parameters for MR-J4-B(-RJ) (1)
Additional information about the series MR-J4-B(-RJ)
Appendix
Unit
PC38
—
0000H
—
— — — —
PC39
—
0000H
—
— — — —
PC40
—
0000H
—
— — — —
PC41
—
0000H
—
— — — —
PC42
—
0000H
—
— — — —
PC43
—
0000H
—
— — — —
PC44
—
0000H
—
— — — —
PC45
—
0000H
—
— — — —
PC46
—
0000H
—
— — — —
PC47
—
0000H
—
— — — —
PC48
—
0000H
—
— — — —
PC49
—
0000H
—
— — — —
PC50
—
0000H
—
— — — —
PC51
—
0000H
—
— — — —
PC52
—
0000H
—
— — — —
PC53
—
0000H
—
— — — —
PC54
—
0000H
—
— — — —
PC55
—
0000H
—
— — — —
PC56
—
0000H
—
— — — —
PC57
—
0000H
—
— — — —
PC58
—
0000H
—
— — — —
PC59
—
0000H
—
— — — —
PC60
—
0000H
—
— — — —
PC61
—
0000H
—
— — — —
PC62
—
0000H
—
— — — —
PC63
—
0000H
—
— — — —
PC64
—
0000H
—
— — — —
Tab. A-22:
For manufacturer setting
DD
Initial
value
Lin.
Symbol Name
Full.
No.
Standard
Operation
mode
List of extension setting parameters for MR-J4-B(-RJ) (2)
It is available when the scale measurement function is enabled (PA22 is “1” or “2”).
Beginners Manual Servo Amplifiers MELSERVO J4
A - 43
Appendix
A.3.5
Additional information about the series MR-J4-B(-RJ)
I/O setting parameters (PD)
Unit
PD01
—
For manufacturer setting
0000H
—
— — — —
PD02
*DIA2
Input signal automatic on selection 2
0000H
—
✔ ✔ ✔ ✔
DD
Initial
value
Lin.
Symbol Name
Full.
No.
Standard
Operation
mode
PD03
—
0020H
—
— — — —
PD04
—
0021H
—
— — — —
PD05
—
0022H
—
— — — —
PD06
—
0000H
—
— — — —
PD07
*DO1
Output device selection 1
0005H
—
✔ ✔ ✔ ✔
PD08
*DO2
Output device selection 2
0004H
—
✔ ✔ ✔ ✔
For manufacturer setting
PD09
*DO3
Output device selection 3
0003H
—
✔ ✔ ✔ ✔
PD10
—
For manufacturer setting
0000H
—
— — — —
PD11
*DIF
Input filter setting
0004H
ms
✔ ✔ ✔ ✔
PD12
*DOP1
Function selection D-1
0000H
—
✔ ✔ ✔ ✔
PD13
—
For manufacturer setting
0000H
—
— — — —
PD14
*DOP3
Function selection D-3
0000H
—
✔ ✔ ✔ ✔
PD15
*IDCS
Driver communication setting
0000H
—
✔ ✔ — —
PD16
*MD1
Driver communication setting - Master - Transmit data selection 1
0000H
—
✔ ✔ — —
PD17
*MD2
Driver communication setting - Master - Transmit data selection 2
0000H
—
✔ ✔ — —
PD18
—
0000H
—
— — — —
PD19
—
0000H
—
— — — —
PD20
*SLA1
0
—
✔ — — —
PD21
—
0
—
— — — —
PD22
—
0
—
— — — —
PD23
—
0
—
— — — —
PD24
—
0000H
—
— — — —
PD25
—
0000H
—
— — — —
PD26
—
0000H
—
— — — —
PD27
—
0000H
—
— — — —
PD28
—
0000H
—
— — — —
PD29
—
PD30
TLC
PD31
PD32
PD33
PD34
For manufacturer setting
Driver communication setting - Slave - Master axis No. selection 1
For manufacturer setting
0000H
—
— — — —
Master-slave operation - Torque command coefficient on slave
0
—
✔ — — —
VLC
Master-slave operation - Speed limit coefficient on slave
0
—
✔ — — —
VLL
Master-slave operation - Speed limit adjusted value on slave
0
1/min
✔ — — —
—
0000H
—
— — — —
—
0000H
—
— — — —
PD35
—
0000H
—
— — — —
PD36
—
0000H
—
— — — —
PD37
—
0000H
—
— — — —
PD38
—
0000H
—
— — — —
PD39
—
0000H
—
— — — —
PD40
—
0000H
—
— — — —
PD41
—
0000H
—
— — — —
PD42
—
0000H
—
— — — —
Tab. A-23:
A - 44
For manufacturer setting
List of I/O setting parameters for MR-J4-B(-RJ) (1)
Additional information about the series MR-J4-B(-RJ)
Appendix
Unit
PD43
—
0000H
—
— — — —
PD44
—
0000H
—
— — — —
PD45
—
0000H
—
— — — —
PD46
—
0000H
—
— — — —
PD47
—
0000H
—
— — — —
PD48
—
0000H
—
— — — —
Tab. A-23:
For manufacturer setting
DD
Initial
value
Lin.
Symbol Name
Full.
No.
Standard
Operation
mode
List of I/O setting parameters for MR-J4-B(-RJ) (2)
Beginners Manual Servo Amplifiers MELSERVO J4
A - 45
Appendix
A.3.6
Additional information about the series MR-J4-B(-RJ)
Extension setting 2 parameters (PE)
Unit
DD
Initial
value
Lin.
Symbol Name
Full.
No.
Standard
Operation
mode
PE01
**FCT1
Fully closed loop function selection 1
0000H
—
— ✔ — —
PE02
—
For manufacturer setting
0000H
—
— — — —
PE03
*FCT2
Fully closed loop function selection 2
0003H
—
— ✔ — —
PE04
**FBN
Fully closed loop control - Feedback pulse electronic gear 1 - Numerator
1
—
— ✔ — —
PE05
**FBD
Fully closed loop control - Feedback pulse electronic gear 1 - Denominator
1
—
— ✔ — —
PE06
BC1
Fully closed loop control - Speed deviation error detection level
400
1/min
— ✔ — —
PE07
BC2
Fully closed loop control - Position deviation error detection level
100
kpulse
— ✔ — —
PE08
DUF
Fully closed loop dual feedback filter
10
rad/s
— ✔ — —
PE09
—
For manufacturer setting
0000H
—
— — — —
PE10
FCT3
Fully closed loop function selection 3
0000H
—
✔ ✔ — —
PE11
—
0000H
—
— — — —
PE12
—
0000H
—
— — — —
PE13
—
0000H
—
— — — —
PE14
—
0111H
—
— — — —
PE15
—
20
—
— — — —
PE16
—
0000H
—
— — — —
PE17
—
0000H
—
— — — —
PE18
—
0000H
—
— — — —
PE19
—
0000H
—
— — — —
PE20
—
0000H
—
— — — —
PE21
—
0000H
—
— — — —
PE22
—
0000H
—
— — — —
PE23
—
0000H
—
— — — —
PE24
—
0000H
—
— — — —
PE25
—
0000H
—
— — — —
PE26
—
0000H
—
— — — —
PE27
—
0000H
—
— — — —
PE28
—
0000H
—
— — — —
PE29
—
0000H
—
— — — —
PE30
—
0000H
—
— — — —
PE31
—
0000H
—
— — — —
PE32
—
0000H
—
— — — —
For manufacturer setting
PE33
—
0000H
—
— — — —
PE34
**FBN2
Fully closed loop control - Feedback pulse electronic gear 2 - Numerator
1
—
— ✔ — —
PE35
**FBD2
Fully closed loop control - Feedback pulse electronic gear 2 - Denominator
1
—
— ✔ — —
PE36
—
0.0
—
— — — —
PE37
—
0.00
—
— — — —
PE38
—
0.00
—
— — — —
PE39
—
20
—
— — — —
PE40
—
0000H
—
— — — —
For manufacturer setting
PE41
EOP3
Function selection E-3
0000H
—
✔ ✔ ✔ ✔
PE42
—
For manufacturer setting
0
—
— — — —
Tab. A-24:
A - 46
List of Extension setting 2 parameters for MR-J4-B(-RJ) (1)
Additional information about the series MR-J4-B(-RJ)
Appendix
Unit
PE43
—
0.0
—
— — — —
PE44
—
0000H
—
— — — —
PE45
—
0000H
—
— — — —
PE46
—
0000H
—
— — — —
PE47
—
0000H
—
— — — —
PE48
—
0000H
—
— — — —
PE49
—
0000H
—
— — — —
PE50
—
0000H
—
— — — —
PE51
—
0000H
—
— — — —
PE52
—
0000H
—
— — — —
PE53
—
0000H
—
— — — —
PE54
—
0000H
—
— — — —
PE55
—
0000H
—
— — — —
PE56
—
0000H
—
— — — —
PE57
—
0000H
—
— — — —
PE58
—
0000H
—
— — — —
PE59
—
0000H
—
— — — —
PE60
—
0000H
—
— — — —
PE61
—
0.00
—
— — — —
PE62
—
0.00
—
— — — —
PE63
—
0.00
—
— — — —
PE64
—
0.00
—
— — — —
Tab. A-24:
For manufacturer setting
DD
Initial
value
Lin.
Symbol Name
Full.
No.
Standard
Operation
mode
List of Extension setting 2 parameters for MR-J4-B(-RJ) (2)
Beginners Manual Servo Amplifiers MELSERVO J4
A - 47
Appendix
A.3.7
Additional information about the series MR-J4-B(-RJ)
Extension setting 3 parameters (PF)
Unit
DD
Initial
value
Lin.
Symbol Name
Full.
No.
Standard
Operation
mode
PF01
—
0000H
—
— — — —
PF02
—
0000H
—
— — — —
PF03
—
PF04
—
PF05
—
PF06
*FOP5
For manufacturer setting
Function selection F-5
0000H
—
— — — —
0
—
— — — —
0000H
—
— — — —
0000H
—
✔ ✔ ✔ ✔
PF07
—
0000H
—
— — — —
PF08
—
0000H
—
— — — —
PF09
—
0
—
— — — —
PF10
—
0
—
— — — —
0
—
— — — —
2000
ms
✔ ✔ ✔ ✔
PF11
—
PF12
DBT
For manufacturer setting
Electronic dynamic brake operating time
PF13
—
0000H
—
— — — —
PF14
—
10
—
— — — —
PF15
—
0000H
—
— — — —
PF16
—
0000H
—
— — — —
PF17
—
0000H
—
— — — —
PF18
—
0000H
—
— — — —
PF19
—
0000H
—
— — — —
PF20
—
0000H
—
— — — —
PF21
DRT
Drive recorder switching time setting
0
s
✔ ✔ ✔ ✔
PF22
—
For manufacturer setting
200
—
— — — —
PF23
OSCL1
Vibration tough drive - Oscillation detection level
50
%
✔ ✔ ✔ ✔
PF24
*OSCL2
Vibration tough drive function selection
0000H
—
✔ ✔ ✔ ✔
SEMI-F47 function - Instantaneous power failure detection time
PF25
CVAT
PF26
—
PF27
—
PF28
—
For manufacturer setting
For manufacturer setting
200
ms
✔ ✔ ✔ ✔
0
—
— — — —
0
—
— — — —
0
—
— — — —
PF29
—
0000H
—
— — — —
PF30
—
0
—
— — — —
PF31
FRIC
0
1/min
mm/s
✔ ✔ ✔ ✔
PF32
—
50
—
— — — —
Machine diagnosis function - Friction judgement speed
PF33
—
0000H
—
— — — —
PF34
—
0000H
—
— — — —
PF35
—
0000H
—
— — — —
PF36
—
0000H
—
— — — —
PF37
—
0000H
—
— — — —
PF38
—
0000H
—
— — — —
PF39
—
0000H
—
— — — —
PF40
—
0000H
—
— — — —
PF41
—
0000H
—
— — — —
Tab. A-25:
A - 48
For manufacturer setting
List of Extension setting 3 parameters for MR-J4-B(-RJ) (1)
Additional information about the series MR-J4-B(-RJ)
Appendix
Unit
PF42
—
0000H
—
— — — —
PF43
—
0000H
—
— — — —
PF44
—
0000H
—
— — — —
PF45
—
0000H
—
— — — —
PF46
—
0000H
—
— — — —
PF47
—
0000H
—
— — — —
PF48
—
0000H
—
— — — —
Tab. A-25:
For manufacturer setting
DD
Initial
value
Lin.
Symbol Name
Full.
No.
Standard
Operation
mode
List of Extension setting 3 parameters for MR-J4-B(-RJ) (2)
Beginners Manual Servo Amplifiers MELSERVO J4
A - 49
Appendix
A.3.8
Additional information about the series MR-J4-B(-RJ)
Linear servo motor/DD motor setting parameters (PL)
Unit
DD
Initial
value
Lin.
Symbol Name
Full.
No.
Standard
Operation
mode
PL01
**LIT1
Linear servo motor/DD motor function selection 1
0301H
—
— — ✔ ✔
PL02
**LIM
Linear encoder resolution - Numerator
1000
μm
— — ✔ —
PL03
**LID
Linear encoder resolution - Denominator
1000
μm
— — ✔ —
PL04
*LIT2
Linear servo motor/DD motor function selection 2
0003H
—
— — ✔ ✔
PL05
LB1
Position deviation error detection level
0
mm
0.01 rev
— — ✔ ✔
PL06
LB2
Speed deviation error detection level
0
1/min
mm/s
— — ✔ ✔
PL07
LB3
Torque/thrust deviation error detection level
100
%
— — ✔ ✔
PL08
*LIT3
Linear servo motor/DD motor function selection 3
0010H
—
— — ✔ ✔
PL09
LPWM
Magnetic pole detection voltage level
30
%
— — ✔ ✔
PL10
—
5
—
— — — —
PL11
—
100
—
— — — —
PL12
—
500
—
— — — —
PL13
—
0000H
—
— — — —
PL14
—
0
—
— — — —
PL15
—
20
—
— — — —
For manufacturer setting
PL16
—
0
—
— — — —
PL17
LTSTS
Magnetic pole detection - Minute position detection method - Function selection
0000H
—
— — ✔ ✔
PL18
IDLV
Magnetic pole detection - Minute position detection method - Identification signal
amplitude
0
%
— — ✔ ✔
PL19
—
0
—
— — — —
PL20
—
0
—
— — — —
PL21
—
0
—
— — — —
PL22
—
0
—
— — — —
PL23
—
0000H
—
— — — —
PL24
—
0
—
— — — —
PL25
—
0000H
—
— — — —
PL26
—
0000H
—
— — — —
PL27
—
0000H
—
— — — —
PL28
—
0000H
—
— — — —
PL29
—
0000H
—
— — — —
PL30
—
0000H
—
— — — —
PL31
—
0000H
—
— — — —
PL32
—
0000H
—
— — — —
PL33
—
0000H
—
— — — —
PL34
—
0000H
—
— — — —
PL35
—
0000H
—
— — — —
PL36
—
0000H
—
— — — —
PL37
—
0000H
—
— — — —
PL38
—
0000H
—
— — — —
PL39
—
0000H
—
— — — —
PL40
—
0000H
—
— — — —
Tab. A-26:
A - 50
For manufacturer setting
List of linear servo motor/DD motor setting parameters for MR-J4-B(-RJ) (1)
Additional information about the series MR-J4-B(-RJ)
Appendix
Unit
PL41
—
0000H
—
— — — —
PL42
—
0000H
—
— — — —
PL43
—
0000H
—
— — — —
PL44
—
0000H
—
— — — —
PL45
—
0000H
—
— — — —
PL46
—
0000H
—
— — — —
PL47
—
0000H
—
— — — —
PL48
—
0000H
—
— — — —
Tab. A-26:
NOTES
For manufacturer setting
DD
Initial
value
Lin.
Symbol Name
Full.
No.
Standard
Operation
mode
List of linear servo motor/DD motor setting parameters for MR-J4-B(-RJ) (2)
The parameter whose symbol is preceded by * is enabled with the following conditions:
– *:
After setting the parameter, cycle the power or reset the controller.
– **:
After setting the parameter, cycle the power.
Abbreviations of operation modes indicate the followings.
– Standard:
Standard (semi closed loop system) use of the rotary servo motor
– Full.:
Fully closed loop system use of the rotary servo motor
– Lin.:
Linear servo motor use
– DD:
Direct drive (DD) motor use
Beginners Manual Servo Amplifiers MELSERVO J4
A - 51
Appendix
Additional information about the series MR-J4W-B
A.4
Additional information about the series MR-J4W-B
A.4.1
Status display
Display
Status
Description
Initializing
System check in progress
Power of the servo amplifier was switched on at the condition that the
power of the servo system controller is off.
Initializing
A b
The control axis No. set to the auxiliary axis number setting switches
(SW2-5 and SW2-6) and the axis selection rotary switch (SW1) do not
match the one set to the servo system controller.
A servo amplifier malfunctioned, or communication error occurred
with the servo system controller or the previous axis servo amplifier. In
this case, the indication changes as follows:
“Ab”, “AC”, “Ad”, and “Ab”
The servo system controller is malfunctioning.
Initializing
During initial setting for communication specifications
AC
Initializing
Initial setting for communication specifications completed, and then it
synchronized with servo system controller.
A d
Initializing
During initial parameter setting communication with servo system
controller
A E
Initializing
During the servo motor/encoder information and telecommunication
with servo system controller
A F
Initializing
During initial signal data communication with servo system controller
AH
Initializing completion
The process for initial data communication with the servo system controller is completed.
A A
Initializing standby
The power supply of servo system controller is turned off during the
power supply of servo amplifier is on.
Ready-off
The ready-off signal from the servo system controller was received.
Servo-on
The ready-off signal from the servo system controller was received.
Servo-off
The ready-off signal from the servo system controller was received.
Alarm and warning
The alarm No. and the warning No. that occurred is displayed. CPU error
CPU watchdog error has occurred.
Test operation mode Motor-less operation
A b
.
b # #
d # #
C # #
* * *
8 8 8
b # #.
d # #.
C # #.
Tab. A-27: Indication list of MR-J4W-B
The meanings of ## are listed below.
A - 52
~
Description
Axis No. 1
~
##
01
64
Axis No. 64
*** indicates the alarm No. and the warning No. “A” in the third digit indicates the A-axis, “B” indicates the B-axis, and “C” indicates the C-axis.
Only a list of alarms and warnings is listed in section 8.3. Refer to “MELSERVO J4 Servo Amplifier
Instruction Manual (Troubleshooting)” for details of alarms and warnings.
Additional information about the series MR-J4W-B
A.4.2
Appendix
Basic setting parameters (PA)
Unit
Each/
Common
DD
Initial
value
Lin.
Symbol Name
Full.
No.
Standard
Operation
mode
PA01
**STY
Operation mode
1000H
—
Each
✔ ✔ ✔ ✔
PA02
**REG
Regenerative option
0000H
—
Common
✔ ✔ ✔ ✔
PA03
*ABS
Absolute position detection system
0000H
—
Each
✔ ✔ ✔ ✔
PA04
*AOP1
Function selection A-1
2000H
—
Common
✔ ✔ ✔ ✔
PA05
—
PA06
—
PA07
—
PA08
10000
—
—
— — — —
For manufacturer setting
1
—
—
— — — —
1
—
—
— — — —
ATU
Auto tuning mode
0001H
—
Each
✔ ✔ ✔ ✔
PA09
RSP
Auto tuning response
16
—
Each
✔ ✔ ✔ ✔
PA10
INP
In-position range
1600
pulse
Each
✔ ✔ ✔ ✔
PA11
—
PA12
—
PA13
—
PA14
*POL
1000.0
—
—
— — — —
For manufacturer setting
1000.0
—
—
— — — —
0000H
—
—
— — — —
Rotation direction selection/travel direction selection
0
—
Each
✔ ✔ ✔ ✔
PA15
*ENR
Encoder output pulses
4000
pulse/rev
Each
✔ ✔ ✔ ✔
PA16
*ENR2
Encoder output pulses 2
1
—
Each
✔ ✔ ✔ ✔
PA17
**MSR
Servo motor series setting
0000H
—
Each
— — ✔ —
PA18
**MTY
Servo motor type setting
0000H
—
Each
— — ✔ —
PA19
*BLK
Parameter writing inhibit
00ABH
—
Each
✔ ✔ ✔ ✔
PA20
*TDS
Tough drive setting
0000H
—
Each
✔ ✔ ✔ ✔
PA21
*AOP3
Function selection A-3
0001H
—
Each
✔ ✔ ✔ ✔
PA22
**PCS
Position control composition selection
0000H
—
Each
✔ — — —
PA23
DRAT
Drive recorder arbitrary alarm trigger setting
0000H
—
Each
✔ ✔ ✔ ✔
PA24
AOP4
Function selection A-4
0000H
—
Each
✔ ✔ ✔ ✔
One-touch tuning – Overshoot permissible level
PA25
OTHOV
0
%
Each
✔ ✔ ✔ ✔
PA26
—
0000H
—
—
— — — —
PA27
—
0000H
—
—
— — — —
PA28
—
0000H
—
—
— — — —
PA29
—
0000H
—
—
— — — —
PA30
—
0000H
—
—
— — — —
PA31
—
0000H
—
—
— — — —
PA32
—
0000H
—
—
— — — —
Tab. A-28:
For manufacturer setting
List of basic setting parameters for MR-J4W-B
Beginners Manual Servo Amplifiers MELSERVO J4
A - 53
Appendix
A.4.3
Additional information about the series MR-J4W-B
Gain/filter setting parameters (PB)
Unit
Each/
Common
PB01
FILT
Adaptive tuning mode (adaptive filter II)
0000H
—
Each
✔ ✔ ✔ ✔
PB02
VRFT
Vibration suppression control tuning mode (advanced vibration
suppression control II)
0000H
—
Each
✔ ✔ ✔ ✔
PB03
TFBGN
Torque feedback loop gain
18000
rad/s
Each
✔ ✔ ✔ ✔
PB04
FFC
Feed forward gain
0
%
Each
✔ ✔ ✔ ✔
DD
Initial
value
Lin.
Symbol Name
Full.
No.
Standard
Operation
mode
PB05
—
For manufacturer setting
500
—
—
— — — —
PB06
GD2
Load to motor inertia ratio/load to motor mass ratio
7.00
Multiplier
Each
✔ ✔ ✔ ✔
PB07
PG1
Model loop gain
15.0
rad/s
Each
✔ ✔ ✔ ✔
PB08
PG2
Position loop gain
37.0
rad/s
Each
✔ ✔ ✔ ✔
PB09
VG2
Speed loop gain
823
rad/s
Each
✔ ✔ ✔ ✔
PB10
VIC
Speed integral compensation
33.7
ms
Each
✔ ✔ ✔ ✔
PB11
VDC
Speed differential compensation
980
—
Each
✔ ✔ ✔ ✔
PB12
OVA
Overshoot amount compensation
0
%
Each
✔ ✔ ✔ ✔
PB13
NH1
Machine resonance suppression filter 1
4500
Hz
Each
✔ ✔ ✔ ✔
PB14
NHQ1
Notch shape selection 1
0000h
—
Each
✔ ✔ ✔ ✔
PB15
NH2
Machine resonance suppression filter 2
4500
Hz
Each
✔ ✔ ✔ ✔
PB16
NHQ2
Notch shape selection 2
0000H
—
Each
✔ ✔ ✔ ✔
PB17
NHF
Shaft resonance suppression filter
0000H
—
Each
✔ ✔ ✔ ✔
PB18
LPF
Low-pass filter setting
3141
rad/s
Each
✔ ✔ ✔ ✔
PB19
VRF11
Vibration suppression control 1 - Vibration frequency
100.0
Hz
Each
✔ ✔ ✔ ✔
PB20
VRF12
Vibration suppression control 1 - Resonance frequency
100.0
Hz
Each
✔ ✔ ✔ ✔
PB21
VRF13
Vibration suppression control 1 - Vibration frequency damping
0.00
—
Each
✔ ✔ ✔ ✔
PB22
VRF14
Vibration suppression control 1 - Resonance frequency damping
0.00
—
Each
✔ ✔ ✔ ✔
PB23
VFBF
Low-pass filter selection
0000H
—
Each
✔ ✔ ✔ ✔
PB24
*MVS
Slight vibration suppression control
0000H
—
Each
✔ ✔ ✔ ✔
PB25
—
For manufacturer setting
0000H
—
—
— — — —
PB26
*CDP
Gain switching function
0000H
—
Each
✔ ✔ ✔ ✔
PB27
CDL
Gain switching condition
10
kpulse/s
pulse
1/min
Each
✔ ✔ ✔ ✔
PB28
CDT
Gain switching time constant
1
PB29
GD2B
Load to motor inertia ratio/load to motor mass ratio after gain switching 7.00
ms
Each
✔ ✔ ✔ ✔
Multiplier
Each
✔ ✔ ✔ ✔
PB30
PG2B
Position loop gain after gain switching
0.0
rad/s
Each
✔ ✔ ✔ ✔
PB31
VG2B
Speed loop gain after gain switching
0
rad/s
Each
✔ ✔ ✔ ✔
PB32
VICB
Speed integral compensation after gain switching
0.0
ms
Each
✔ ✔ ✔ ✔
PB33
VRF11B
Vibration suppression control 1 - Vibration frequency after gain
switching
0.0
Hz
Each
✔ ✔ ✔ ✔
PB34
VRF12B
Vibration suppression control 1 - Resonance frequency after gain
switching
0.0
Hz
Each
✔ ✔ ✔ ✔
PB35
VRF13B
Vibration suppression control 1 - Vibration frequency damping after
gain switching
0.00
—
Each
✔ ✔ ✔ ✔
PB36
VRF14B
Vibration suppression control 1 - Resonance frequency damping after
gain switching
0.00
—
Each
✔ ✔ ✔ ✔
Tab. A-29:
A - 54
List of gain/filter setting parameters for MR-J4W-B (1)
Additional information about the series MR-J4W-B
Appendix
Unit
Each/
Common
PB37
—
1600
—
—
— — — —
PB38
—
0.00
—
—
— — — —
PB39
—
0.00
—
—
— — — —
PB40
—
PB41
—
PB42
PB43
PB44
—
PB45
CNHF
DD
Initial
value
Lin.
Symbol Name
Full.
No.
Standard
Operation
mode
0.00
—
—
— — — —
0
—
—
— — — —
—
0
—
—
— — — —
—
0000H
—
—
— — — —
For manufacturer setting
0.00
—
—
— — — —
Command notch filter
0000H
—
Each
✔ ✔ ✔ ✔
PB46
NH3
Machine resonance suppression filter 3
4500
Hz
Each
✔ ✔ ✔ ✔
PB47
NHQ3
Notch shape selection 3
0000H
—
Each
✔ ✔ ✔ ✔
PB48
NH4
Machine resonance suppression filter 4
4500
Hz
Each
✔ ✔ ✔ ✔
PB49
NHQ4
Notch shape selection 4
0000H
—
Each
✔ ✔ ✔ ✔
PB50
NH5
Machine resonance suppression filter 5
4500
Hz
Each
✔ ✔ ✔ ✔
PB51
NHQ5
Notch shape selection 5
0000H
—
Each
✔ ✔ ✔ ✔
PB52
VRF21
Vibration suppression control 2 - Vibration frequency
100.0
Hz
Each
✔ ✔ ✔ ✔
PB53
VRF22
Vibration suppression control 2 - Resonance frequency
100.0
Hz
Each
✔ ✔ ✔ ✔
PB54
VRF23
Vibration suppression control 2 - Vibration frequency damping
0.00
—
Each
✔ ✔ ✔ ✔
PB55
VRF24
Vibration suppression control 2 - Resonance frequency damping
0.00
—
Each
✔ ✔ ✔ ✔
PB56
VRF21B
Vibration suppression control 2 - Vibration frequency after gain
switching
0.0
Hz
Each
✔ ✔ ✔ ✔
PB57
VRF22B
Vibration suppression control 2 - Resonance frequency after gain
switching
0.0
Hz
Each
✔ ✔ ✔ ✔
PB58
VRF23B
Vibration suppression control 2 - Vibration frequency damping after
gain switching
0.00
Each
✔ ✔ ✔ ✔
PB59
VRF24B
Vibration suppression control 2 - Resonance frequency damping after
gain switching
0.00
—
Each
✔ ✔ ✔ ✔
Model loop gain after gain switching
0.0
rad/s
Each
✔ ✔ ✔ ✔
0.0
—
—
— — — —
0000H
—
—
— — — —
0000H
—
—
— — — —
0000H
—
—
— — — —
PB60
PG1B
PB61
—
PB62
—
PB63
—
PB64
—
Tab. A-29:
For manufacturer setting
List of gain/filter setting parameters for MR-J4W-B (2)
Beginners Manual Servo Amplifiers MELSERVO J4
A - 55
Appendix
A.4.4
Additional information about the series MR-J4W-B
Extension setting parameters (PC)
Unit
Each/
Common
PC01
ERZ
Error excessive alarm level
0
rev
mm
Each
✔ ✔ ✔ ✔
PC02
MBR
Electromagnetic brake sequence output
0
ms
Each
✔ ✔ ✔ ✔
PC03
*ENRS
Encoder output pulse selection
0000H
—
Each
✔ ✔ ✔ ✔
PC04
**COP1
Function selection C-1
0000H
—
Each
✔ ✔ ✔ ✔
PC05
**COP2
Function selection C-2
0000H
—
Each
✔ — — —
PC06
*COP3
Function selection C-3
0000H
—
Each
✔ ✔ ✔ ✔
PC07
ZSP
Zero speed
50
1/min
mm/s
Each
✔ ✔ ✔ ✔
PC08
OSL
Overspeed alarm detection level
0
1/min
mm/s
Each
✔ ✔ ✔ ✔
PC09
—
0000H
—
—
— — — —
PC10
—
0001H
—
—
— — — —
PC11
—
0
—
—
— — — —
PC12
—
0
—
—
— — — —
PC13
—
0
—
—
— — — —
PC14
—
0
—
—
— — — —
PC15
—
0
—
—
— — — —
For manufacturer setting
PC16
—
PC17
**COP4
Function selection C-4
PC18
*COP5
Function selection C-5
PC19
—
PC20
—
PC21
*BPS
PC22
—
PC23
—
For manufacturer setting
Alarm history clear
For manufacturer setting
Forced stop deceleration time constant
DD
Initial
value
Lin.
Symbol Name
Full.
No.
Standard
Operation
mode
0000H
—
—
— — — —
0000H
—
Each
✔ ✔ ✔ ✔
0000H
—
Common
✔ ✔ ✔ ✔
0000H
—
—
— — — —
0000H
—
—
— — — —
0000H
—
Each
✔ ✔ ✔ ✔
0
—
—
— — — —
0000H
—
—
— — — —
100
ms
Each
✔ ✔ ✔ ✔
0
—
—
— — — —
0000H
—
—
— — — —
PC24
RSBR
PC25
—
PC26
—
PC27
**COP9
Function selection C-9
0000H
—
Each
—
— — — —
For manufacturer setting
✔
✔ ✔ —
PC28
—
For manufacturer setting
0000H
—
PC29
*COPB
Function selection C-B
0000H
—
PC30
—
For manufacturer setting
0
—
—
— — — —
0
0.0001rev
0.01mm
Each
✔ ✔ ✔ ✔
PC31
RSUP1
Vertical axis freefall prevention compensation amount
✔ — ✔ ✔
PC32
—
0000H
—
—
— — — —
PC33
—
0
—
—
— — — —
PC34
—
100
—
—
— — — —
PC35
—
0000H
—
—
— — — —
PC36
—
0000H
—
—
— — — —
PC37
—
0000H
—
—
— — — —
PC38
—
0000H
—
—
— — — —
Tab. A-30:
A - 56
For manufacturer setting
List of extension setting parameters for MR-J4W-B (1)
Additional information about the series MR-J4W-B
Appendix
Unit
Each/
Common
PC39
—
0000H
—
—
— — — —
PC40
—
0000H
—
—
— — — —
PC41
—
0000H
—
—
— — — —
PC42
—
0000H
—
—
— — — —
PC43
—
0000H
—
—
— — — —
PC44
—
0000H
—
—
— — — —
PC45
—
0000H
—
—
— — — —
PC46
—
0000H
—
—
— — — —
PC47
—
0000H
—
—
— — — —
PC48
—
0000H
—
—
— — — —
PC49
—
0000H
—
—
— — — —
PC50
—
0000H
—
—
— — — —
PC51
—
0000H
—
—
— — — —
PC52
—
0000H
—
—
— — — —
PC53
—
0000H
—
—
— — — —
PC54
—
0000H
—
—
— — — —
PC55
—
0000H
—
—
— — — —
PC56
—
0000H
—
—
— — — —
PC57
—
0000H
—
—
— — — —
PC58
—
0000H
—
—
— — — —
PC59
—
0000H
—
—
— — — —
PC60
—
0000H
—
—
— — — —
PC61
—
0000H
—
—
— — — —
PC62
—
0000H
—
—
— — — —
PC63
—
0000H
—
—
— — — —
PC64
—
0000H
—
—
— — — —
Tab. A-30:
For manufacturer setting
DD
Initial
value
Lin.
Symbol Name
Full.
No.
Standard
Operation
mode
List of extension setting parameters for MR-J4W-B (2)
It is available when the scale measurement function is enabled (PA22 is “1” or “2”).
Beginners Manual Servo Amplifiers MELSERVO J4
A - 57
Appendix
A.4.5
Additional information about the series MR-J4W-B
I/O setting parameters (PD)
Each/
Common
PD01
—
For manufacturer setting
0000H
—
—
— — — —
PD02
*DIA2
Input signal automatic on selection 2
0000H
—
Each
✔ ✔ ✔ ✔
DD
Unit
Lin.
Initial
value
No.
Full.
Symbol Name
Standard
Operation
mode
PD03
—
0020H
—
—
— — — —
PD04
—
0021H
—
—
— — — —
PD05
—
0022H
—
—
— — — —
PD06
—
0000H
—
—
— — — —
PD07
*DO1
Output device selection 1
0005H
—
Each
✔ ✔ ✔ ✔
PD08
*DO2
Output device selection 2
0004H
—
Common
✔ ✔ ✔ ✔
For manufacturer setting
PD09
*DO3
Output device selection 3
0003H
—
Common
✔ ✔ ✔ ✔
PD10
—
For manufacturer setting
0000H
—
—
— — — —
PD11
*DIF
Input filter setting
0004H
ms
Common
✔ ✔ ✔ ✔
PD12
*DOP1
Function selection D-1
0000H
—
Each
✔ ✔ ✔ ✔
PD13
—
For manufacturer setting
0000H
—
—
— — — —
PD14
*DOP3
Function selection D-3
0000H
—
Each
✔ ✔ ✔ ✔
PD15
—
0000H
—
—
— — — —
PD16
—
0000H
—
—
— — — —
PD17
—
0000H
—
—
— — — —
PD18
—
0000H
—
—
— — — —
PD19
—
0000H
—
—
— — — —
PD20
—
0
—
—
— — — —
PD21
—
0
—
—
— — — —
PD22
—
0
—
—
— — — —
PD23
—
0
—
—
— — — —
PD24
—
0000H
—
—
— — — —
PD25
—
0000H
—
—
— — — —
PD26
—
0000H
—
—
— — — —
PD27
—
0000H
—
—
— — — —
PD28
—
0000H
—
—
— — — —
PD29
—
0000H
—
—
— — — —
PD30
—
0
—
—
— — — —
PD31
—
0
—
—
— — — —
PD32
—
0
—
—
— — — —
PD33
—
0000H
—
—
— — — —
PD34
—
0000H
—
—
— — — —
PD35
—
0000H
—
—
— — — —
PD36
—
0000H
—
—
— — — —
PD37
—
0000H
—
—
— — — —
PD38
—
0000H
—
—
— — — —
PD39
—
0000H
—
—
— — — —
PD40
—
0000H
—
—
— — — —
PD41
—
0000H
—
—
— — — —
PD42
—
0000H
—
—
— — — —
Tab. A-31:
A - 58
For manufacturer setting
List of I/O setting parameters for MR-J4W-B (1)
Additional information about the series MR-J4W-B
Appendix
Unit
Each/
Common
PD43
—
0000H
—
—
— — — —
PD44
—
0000H
—
—
— — — —
PD45
—
0000H
—
—
— — — —
PD46
—
0000H
—
—
— — — —
PD47
—
0000H
—
—
— — — —
PD48
—
0000H
—
—
— — — —
Tab. A-31:
For manufacturer setting
DD
Initial
value
Lin.
Symbol Name
Full.
No.
Standard
Operation
mode
List of I/O setting parameters for MR-J4W-B (2)
Beginners Manual Servo Amplifiers MELSERVO J4
A - 59
Appendix
A.4.6
Additional information about the series MR-J4W-B
Extension setting 2 parameters (PE)
Initial
value
Unit
PE01
**FCT1
Fully closed loop function selection 1
0000H
PE02
—
For manufacturer setting
0000H
—
Each
— ✔ — —
—
—
— — — —
PE03
*FCT2
Fully closed loop function selection 2
0003H
PE04
**FBN
Fully closed loop control - Feedback pulse electronic gear 1 - Numerator 1
—
Each
— ✔ — —
—
Each
— ✔ — —
PE05
**FBD
Fully closed loop control - Feedback pulse electronic gear 1 Denominator
1
—
Each
— ✔ — —
PE06
BC1
Fully closed loop control - Speed deviation error detection level
400
1/min
Each
— ✔ — —
PE07
BC2
Fully closed loop control - Position deviation error detection level
100
kpulse
Each
— ✔ — —
PE08
DUF
Fully closed loop dual feedback filter
10
rad/s
Each
— ✔ — —
DD
Symbol Name
Lin.
No.
Full.
Each/
Common
Standard
Operation
mode
PE09
—
For manufacturer setting
0000H
—
—
— — — —
PE10
FCT3
Fully closed loop function selection 3
0000H
—
Each
✔ ✔ — —
PE11
—
0000H
—
—
— — — —
PE12
—
0000H
—
—
— — — —
PE13
—
0000H
—
—
— — — —
PE14
—
0111H
—
—
— — — —
PE15
—
20
—
—
— — — —
PE16
—
0000H
—
—
— — — —
PE17
—
0000H
—
—
— — — —
PE18
—
0000H
—
—
— — — —
PE19
—
0000H
—
—
— — — —
PE20
—
0000H
—
—
— — — —
PE21
—
0000H
—
—
— — — —
PE22
—
0000H
—
—
— — — —
PE23
—
0000H
—
—
— — — —
PE24
—
0000H
—
—
— — — —
PE25
—
0000H
—
—
— — — —
PE26
—
0000H
—
—
— — — —
PE27
—
0000H
—
—
— — — —
PE28
—
0000H
—
—
— — — —
PE29
—
0000H
—
—
— — — —
PE30
—
0000H
—
—
— — — —
PE31
—
0000H
—
—
— — — —
PE32
—
0000H
—
—
— — — —
For manufacturer setting
PE33
—
—
—
— — — —
PE34
**FBN2
Fully closed loop control - Feedback pulse electronic gear 2 - Numerator 1
—
Each
— ✔ — —
PE35
**FBD2
Fully closed loop control - Feedback pulse electronic gear 2 Denominator
—
Each
— ✔ — —
PE36
—
0.0
—
—
— — — —
PE37
—
0.00
—
—
— — — —
PE38
—
0.00
—
—
— — — —
PE39
—
20
—
—
— — — —
0000H
—
—
— — — —
0000H
—
Each
✔ ✔ ✔ ✔
PE40
—
PE41
EOP3
Tab. A-32:
A - 60
0000H
For manufacturer setting
Function selection E-3
List of Extension setting 2 parameters for MR-J4W-B (1)
1
Additional information about the series MR-J4W-B
Appendix
Unit
Each/
Common
PE42
—
0
—
—
— — — —
PE43
—
0.0
—
—
— — — —
PE44
—
0000H
—
—
— — — —
PE45
—
0000H
—
—
— — — —
PE46
—
0000H
—
—
— — — —
PE47
—
0000H
—
—
— — — —
PE48
—
0000H
—
—
— — — —
PE49
—
0000H
—
—
— — — —
PE50
—
0000H
—
—
— — — —
PE51
—
0000H
—
—
— — — —
PE52
—
0000H
—
—
— — — —
PE53
—
0000H
—
—
— — — —
PE54
—
0000H
—
—
— — — —
PE55
—
0000H
—
—
— — — —
PE56
—
0000H
—
—
— — — —
PE57
—
0000H
—
—
— — — —
PE58
—
0000H
—
—
— — — —
PE59
—
0000H
—
—
— — — —
PE60
—
0000H
—
—
— — — —
PE61
—
0.00
—
—
— — — —
PE62
—
0.00
—
—
— — — —
PE63
—
0.00
—
—
— — — —
PE64
—
0.00
—
—
— — — —
Tab. A-32:
For manufacturer setting
DD
Initial
value
Lin.
Symbol Name
Full.
No.
Standard
Operation
mode
List of Extension setting 2 parameters for MR-J4W-B (2)
Beginners Manual Servo Amplifiers MELSERVO J4
A - 61
Appendix
A.4.7
Additional information about the series MR-J4W-B
Extension setting 3 parameters (PF)
Unit
Each/
Common
PF01
—
For manufacturer setting
0000H
—
—
— — — —
PF02
*FOP2
Function selection F-2
0000H
—
Common
✔ ✔ ✔ ✔
0000H
—
—
— — — —
For manufacturer setting
0
—
—
— — — —
0000H
—
—
— — — —
Function selection F-5
0000H
—
Each
✔ ✔ ✔ ✔
PF03
—
PF04
—
PF05
—
PF06
*FOP5
DD
Initial
value
Lin.
Symbol Name
Full.
No.
Standard
Operation
mode
PF07
—
0000H
—
—
— — — —
PF08
—
0000H
—
—
— — — —
PF09
—
0
—
—
— — — —
PF10
—
0
—
—
— — — —
0
—
—
— — — —
2000
ms
Each
✔ ✔ ✔ ✔
For manufacturer setting
PF11
—
PF12
DBT
PF13
—
0000H
—
—
— — — —
PF14
—
10
—
—
— — — —
PF15
—
0000H
—
—
— — — —
PF16
—
0000H
—
—
— — — —
PF17
—
0000H
—
—
— — — —
PF18
—
0000H
—
—
— — — —
PF19
—
0000H
—
—
— — — —
PF20
—
0000H
—
—
— — — —
PF21
DRT
Drive recorder switching time setting
0
s
Common
✔ ✔ ✔ ✔
PF22
—
For manufacturer setting
200
—
—
— — — —
Electronic dynamic brake operating time
For manufacturer setting
PF23
OSCL1
Vibration tough drive - Oscillation detection level
50
%
Each
✔ ✔ ✔ ✔
PF24
*OSCL2
Vibration tough drive function selection
0000H
—
Each
✔ ✔ ✔ ✔
SEMI-F47 function - Instantaneous power failure detection time
PF25
CVAT
PF26
—
PF27
—
PF28
—
For manufacturer setting
200
ms
Common
✔ ✔ ✔ ✔
0
—
—
— — — —
0
—
—
— — — —
0
—
—
— — — —
PF29
—
0000H
—
—
— — — —
PF30
—
0
—
—
— — — —
PF31
FRIC
0
1/min
mm/s
Each
✔ ✔ ✔ ✔
PF32
—
50
—
—
— — — —
Machine diagnosis function - Friction judgement speed
PF33
—
0000H
—
—
— — — —
PF34
—
0000H
—
—
— — — —
PF35
—
0000H
—
—
— — — —
PF36
—
0000H
—
—
— — — —
PF37
—
0000H
—
—
— — — —
PF38
—
0000H
—
—
— — — —
PF39
—
0000H
—
—
— — — —
PF40
—
0000H
—
—
— — — —
PF41
—
0000H
—
—
— — — —
Tab. A-33:
A - 62
For manufacturer setting
List of Extension setting 3 parameters for MR-J4W-B (1)
Additional information about the series MR-J4W-B
Appendix
Unit
Each/
Common
PF42
—
0000H
—
—
— — — —
PF43
—
0000H
—
—
— — — —
PF44
—
0000H
—
—
— — — —
PF45
—
0000H
—
—
— — — —
PF46
—
0000H
—
—
— — — —
PF47
—
0000H
—
—
— — — —
PF48
—
0000H
—
—
— — — —
Tab. A-33:
For manufacturer setting
DD
Initial
value
Lin.
Symbol Name
Full.
No.
Standard
Operation
mode
List of Extension setting 3 parameters for MR-J4W-B (2)
Beginners Manual Servo Amplifiers MELSERVO J4
A - 63
Appendix
A.4.8
Additional information about the series MR-J4W-B
Linear servo motor/DD motor setting parameters (PL)
Each/
Common
PL01
**LIT1
Linear servo motor/DD motor function selection 1
0301H
—
Each
— — ✔ ✔
PL02
**LIM
Linear encoder resolution - Numerator
1000
μm
Each
— — ✔ —
DD
Unit
Lin.
Initial
value
No.
Full.
Symbol Name
Standard
Operation
mode
PL03
**LID
Linear encoder resolution - Denominator
1000
μm
Each
— — ✔ —
PL04
*LIT2
Linear servo motor/DD motor function selection 2
0003H
—
Each
— — ✔ ✔
PL05
LB1
Position deviation error detection level
0
mm
0.01rev
Each
— — ✔ ✔
PL06
LB2
Speed deviation error detection level
0
1/min
mm/s
Each
— — ✔ ✔
PL07
LB3
Torque/thrust deviation error detection level
100
%
Each
— — ✔ ✔
PL08
*LIT3
Linear servo motor/DD motor function selection 3
0010H
—
Each
— — ✔ ✔
PL09
LPWM
Magnetic pole detection voltage level
30
%
Each
— — ✔ ✔
PL10
—
5
—
—
— — — —
PL11
—
100
—
—
— — — —
PL12
—
500
—
—
— — — —
PL13
—
0000H
—
—
— — — —
PL14
—
0
—
—
— — — —
PL15
—
20
—
—
— — — —
PL16
—
For manufacturer setting
PL17
LTSTS
Magnetic pole detection - Minute position detection method Function selection
PL18
IDLV
Magnetic pole detection - Minute position detection method Identification signal amplitude
0
—
—
— — — —
0000H
—
Each
— — ✔ ✔
0
%
Each
— — ✔ ✔
PL19
—
0
—
—
— — — —
PL20
—
0
—
—
— — — —
PL21
—
0
—
—
— — — —
PL22
—
0
—
—
— — — —
PL23
—
0000H
—
—
— — — —
PL24
—
0
—
—
— — — —
PL25
—
0000H
—
—
— — — —
PL26
—
0000H
—
—
— — — —
PL27
—
0000H
—
—
— — — —
PL28
—
0000H
—
—
— — — —
PL29
—
0000H
—
—
— — — —
PL30
—
0000H
—
—
— — — —
PL31
—
0000H
—
—
— — — —
PL32
—
0000H
—
—
— — — —
PL33
—
0000H
—
—
— — — —
PL34
—
0000H
—
—
— — — —
PL35
—
0000H
—
—
— — — —
PL36
—
0000H
—
—
— — — —
PL37
—
0000H
—
—
— — — —
PL38
—
0000H
—
—
— — — —
PL39
—
0000H
—
—
— — — —
PL40
—
0000H
—
—
— — — —
Tab. A-34:
A - 64
For manufacturer setting
List of linear servo motor/DD motor setting parameters for MR-J4W-B (1)
Additional information about the series MR-J4W-B
Appendix
Unit
Each/
Common
PL41
—
0000H
—
—
— — — —
PL42
—
0000H
—
—
— — — —
PL43
—
0000H
—
—
— — — —
PL44
—
0000H
—
—
— — — —
PL45
—
0000H
—
—
— — — —
PL46
—
0000H
—
—
— — — —
PL47
—
0000H
—
—
— — — —
PL48
—
0000H
—
—
— — — —
Tab. A-34:
NOTES
For manufacturer setting
DD
Initial
value
Lin.
Symbol Name
Full.
No.
Standard
Operation
mode
List of linear servo motor/DD motor setting parameters for MR-J4W-B (2)
The parameter whose symbol is preceded by * is enabled with the following conditions:
– *:
After setting the parameter, cycle the power or reset the controller.
– **:
After setting the parameter, cycle the power.
How to set parameters
– Each:
Set parameters for each axis of A, B, and C.
– Common:
Set parameters for common axis of A, B, and C. Be sure to set the same value to all
axes.
The same values are set as default for all axes.
Abbreviations of operation modes indicate the followings.
– Standard:
Standard (semi closed loop system) use of the rotary servo motor
– Full.:
Fully closed loop system use of the rotary servo motor
– Lin.:
Linear servo motor use
– DD:
Direct drive (DD) motor use
Beginners Manual Servo Amplifiers MELSERVO J4
A - 65
Appendix
A - 66
Additional information about the series MR-J4W-B
Index
Index
A
Alarm list
E
Electromagnetic brake
MR-J4-A . . . . . . . . . . . . . . . . . . . . . . . . . . . . . . . . . . . . . .8-2
configuration and wiring . . . . . . . . . . . . . . . . . . . .4-33
MR-J4-B . . . . . . . . . . . . . . . . . . . . . . . . . . . . . . . . . . . . 8-10
EMC . . . . . . . . . . . . . . . . . . . . . . . . . . . . . . . . . . . . . . . . . . . . .4-43
MR-J4W-B . . . . . . . . . . . . . . . . . . . . . . . . . . . . . . . . . . 8-18
line filter . . . . . . . . . . . . . . . . . . . . . . . . . . . . . . . . . . . .4-45
B
Battery
F
Forced stop
MR-BAT6V1 . . . . . . . . . . . . . . . . . . . . . . . . . . . . . . . . . 4-16
MR-BAT6V1BJ . . . . . . . . . . . . . . . . . . . . . . . . . . . . . . . .4-6
MR-BAT6V1SET . . . . . . . . . . . . . . . . . . . . . . . . . . . . . . .4-6
configuration and wiring . . . . . . . . . . . . . . . . . . . .4-35
Front cover
reinstalling . . . . . . . . . . . . . . . . . . . . . . . . . . . . . . . . . .2-10
removing . . . . . . . . . . . . . . . . . . . . . . . . . . . . . . . . . . . . 2-8
Battery case
MR-BT6VCASE . . . . . . . . . . . . . . . . . . . . . . . . . . . . . . 4-16
Fully closed loop control . . . . . . . . . . . . . . . . . . . . . . . . . . 1-7
C
Connector CN1
I
Input voltage . . . . . . . . . . . . . . . . . . . . . . . . . . . . . . . . . . . . . 4-1
MR-J4-A signal arrangement . . . . . . . . . . . . . . . . 4-10
Interface
RS-422 . . . . . . . . . . . . . . . . . . . . . . . . . . . . . . . . . . . . . .4-21
Connector CN3
MR-J4-B signal arrangement . . . . . . . . . . . . . . . . 4-13
MR-J4W-B signal arrangement . . . . . . . . . . . . . . 4-16
USB . . . . . . . . . . . . . . . . . . . . . . . . . . . . . . . . . . . . . . . . .4-22
Interface wiring
analog input . . . . . . . . . . . . . . . . . . . . . . . . . . . . . . . .4-20
D
DIP switch
disabling of control axes MR-J4W-B . . . . . . . . . 4-30
setting of control axis number MR-J4-B . . . . . . 4-26
setting of control axis number MR-J4W-B . . . . 4-28
Direct drive servo motor
general description . . . . . . . . . . . . . . . . . . . . . . . . . . .1-3
analog output . . . . . . . . . . . . . . . . . . . . . . . . . . . . . . .4-20
digital input negative logic . . . . . . . . . . . . . . . . . .4-18
digital input positive logic . . . . . . . . . . . . . . . . . . .4-19
digital output negative logic . . . . . . . . . . . . . . . . .4-18
digital output positive logic . . . . . . . . . . . . . . . . . .4-19
IT network
operation of EMC filters . . . . . . . . . . . . . . . . . . . . . .4-45
model overview . . . . . . . . . . . . . . . . . . . . . . . . . . . . 3-19
J
Display sequence
MR-J4-A . . . . . . . . . . . . . . . . . . . . . . . . . . . . . . . . . 6-2, 6-6
JOG operation
MR-J4-B . . . . . . . . . . . . . . . . . . . . . . . . . . . . . . . . . . . . 6-23
MR-J4-A . . . . . . . . . . . . . . . . . . . . . . . . . . . . . . . . . . . . .6-17
MR-J4W-B . . . . . . . . . . . . . . . . . . . . . . . . . . . . . . . . . . 6-31
MR-J4-B . . . . . . . . . . . . . . . . . . . . . . . . . . . . . . . . . . . . .6-24
Dual feedback control . . . . . . . . . . . . . . . . . . . . . . . . . . . .1-7
Beginners Manual Servo Amplifiers MELSERVO J4
1
Index
L
Extension setting parameters MR-J4-A-RJ . . . A-24
Extension setting parameters MR-J4-B . . . . . . A-42
Line filter
1-phase . . . . . . . . . . . . . . . . . . . . . . . . . . . . . . . . . . . . 4-45
3-phase . . . . . . . . . . . . . . . . . . . . . . . . . . . . . . . . . . . . 4-45
Linear servo motor
general description . . . . . . . . . . . . . . . . . . . . . . . . . . .1-3
model overview . . . . . . . . . . . . . . . . . . . . . . . . . . . . 3-13
Lorentz-type actuator . . . . . . . . . . . . . . . . . . . . . . . . . . . . .1-3
M
Extension setting parameters MR-J4W-A . . . . A-56
Gain/filter setting parameters MR-J4-A . . . . . . . .A-4
Gain/filter setting parameters MR-J4-A-RJ . . . A-22
Gain/filter setting parameters MR-J4-B . . . . . . A-40
Gain/filter setting parameters MR-J4W-B . . . . A-54
I/O setting parameters MR-J4-A . . . . . . . . . . . . . . .A-9
I/O setting parameters MR-J4-A-RJ . . . . . . . . . . A-27
I/O setting parameters MR-J4-B . . . . . . . . . . . . . A-44
I/O setting parameters MR-J4W-B . . . . . . . . . . . A-58
MC . . . . . . . . . . . . . . . . . . . . . . . . . . . . . . . . . . . . . . . . . . . . . . .4-3
Linear/DD motor setting param. MR-J4-A . . . . A-15
MCCB . . . . . . . . . . . . . . . . . . . . . . . . . . . . . . . . . . . . . . . . . . . .4-3
Linear/DD motor setting param. MR-J4-A-RJ . A-33
Motor-less operation
Linear/DD motor setting param. MR-J4-B . . . . A-50
MR-J4-A . . . . . . . . . . . . . . . . . . . . . . . . . . . . . . . . . . . . 6-20
Linear/DD motor setting param. MR-J4W-B . . A-64
MR-J4-B . . . . . . . . . . . . . . . . . . . . . . . . . . . . . . . . . . . . 6-27
Option setting parameters MR-J4-A-RJ . . . . . . A-35
MR-J4W-B . . . . . . . . . . . . . . . . . . . . . . . . . . . . . . . . . . 6-35
Positioning control parameters MR-J4-A-RJ . . A-36
MR-BAT6V1 . . . . . . . . . . . . . . . . . . . . . . . . . . . . . . . . . . . . . 4-16
MR-BAT6V1BJ . . . . . . . . . . . . . . . . . . . . . . . . . . . . . . . . . . . 4-13
MR-BAT6V1SET . . . . . . . . . . . . . . . . . . . . . . . . . . . . . . . . . 4-13
MR-BT6VCASE . . . . . . . . . . . . . . . . . . . . . . . . . . . . . . . . . . 4-16
P
Parameter
Positioning operation
MR-J4-A . . . . . . . . . . . . . . . . . . . . . . . . . . . . . . . . . . . . .6-18
MR-J4-B . . . . . . . . . . . . . . . . . . . . . . . . . . . . . . . . . . . . .6-25
MR-J4W-B . . . . . . . . . . . . . . . . . . . . . . . . . . . . . . . . . . .6-33
Program operation
MR-J4-A . . . . . . . . . . . . . . . . . . . . . . . . . . . . . . . . . . . . .6-20
MR-J4-B . . . . . . . . . . . . . . . . . . . . . . . . . . . . . . . . . . . . .6-25
Basic setting parameters MR-J4-A . . . . . . . . . . . . .7-3
MR-J4W-B . . . . . . . . . . . . . . . . . . . . . . . . . . . . . . . . . . .6-33
Basic setting parameters MR-J4-A-RJ . . . . . . . . 7-16
Protective earth terminal . . . . . . . . . . . . . . . . . . . . . . . .4-31
Basic setting parameters MR-J4-B . . . . . . . . . . . 7-30
R
Basic setting parameters MR-J4W-B . . . . . . . . . 7-41
Parameter list
Basic setting parameters MR-J4-A . . . . . . . . . . . . A-3
Basic setting parameters MR-J4-A-RJ . . . . . . . . A-21
Basic setting parameters MR-J4-B . . . . . . . . . . . A-39
Basic setting parameters MR-J4W-A . . . . . . . . . A-53
Extension setting 2 parameters MR-J4-A . . . . . A-11
Extension setting 2 parameters MR-J4-A-RJ . . A-29
Extension setting 2 parameters MR-J4-B . . . . . A-46
Extension setting 2 parameters MR-J4W-B . . . A-60
Extension setting 3 parameters MR-J4-A . . . . . A-13
Extension setting 3 parameters MR-J4-A-RJ . . A-31
Extension setting 3 parameters MR-J4-B . . . . . A-48
Extension setting 3 parameters MR-J4W-B . . . A-62
Extension setting parameters MR-J4-A . . . . . . . . A-6
2
Rating plate
HG-JR153 . . . . . . . . . . . . . . . . . . . . . . . . . . . . . . . . . . . . 3-2
LM-H3P3A-12P-CSS0 . . . . . . . . . . . . . . . . . . . . . . . .3-13
MR-J4-10A . . . . . . . . . . . . . . . . . . . . . . . . . . . . . . . . . .2-12
MR-J4W3-222B . . . . . . . . . . . . . . . . . . . . . . . . . . . . . .2-12
TM-RFM002C20 . . . . . . . . . . . . . . . . . . . . . . . . . . . . .3-19
Reinstalling the front cover . . . . . . . . . . . . . . . . . . . . . .2-10
Removing the front cover . . . . . . . . . . . . . . . . . . . . . . . . . 2-8
Rotary servo motor
general description . . . . . . . . . . . . . . . . . . . . . . . . . . . 1-3
model overview . . . . . . . . . . . . . . . . . . . . . . . . . . . . . . 3-1
Rotary switch
setting the control axis number MR-J4-B . . . . .4-25
setting the control axis number MR-J4W-B . . .4-27
Index
S
Safe Torque Off . . . . . . . . . . . . . . . . . . . . . . . . . . . . . . . . . . .1-6
U
USB-Interface . . . . . . . . . . . . . . . . . . . . . . . . . . . . . . . . . . . .4-22
Semi closed loop control . . . . . . . . . . . . . . . . . . . . . . . . . .1-7
W
Servo amplifier
applicable servo motors . . . . . . . . . . . . . . . . . . . . . .2-5
model designation . . . . . . . . . . . . . . . . . . . . . . . . . . . .2-4
rated output power . . . . . . . . . . . . . . . . . . . . . . . . . . .2-4
Servo motor
Direct drive motor . . . . . . . . . . . . . . . . . . . . . . . . . . . .1-3
Warning list
MR-J4-A . . . . . . . . . . . . . . . . . . . . . . . . . . . . . . . . . . . . . . 8-8
MR-J4-B . . . . . . . . . . . . . . . . . . . . . . . . . . . . . . . . . . . . .8-17
MR-J4W-B . . . . . . . . . . . . . . . . . . . . . . . . . . . . . . . . . . .8-25
HG-JR . . . . . . . . . . . . . . . . . . . . . . . . . . . . . . . . . . . . . . . .3-7
HG-KR . . . . . . . . . . . . . . . . . . . . . . . . . . . . . . . . . . . . . . . .3-3
HG-MR . . . . . . . . . . . . . . . . . . . . . . . . . . . . . . . . . . . . . . .3-3
HG-RR . . . . . . . . . . . . . . . . . . . . . . . . . . . . . . . . . . . . . . . .3-9
HG-SR . . . . . . . . . . . . . . . . . . . . . . . . . . . . . . . . . . . . . . . .3-5
HG-UR . . . . . . . . . . . . . . . . . . . . . . . . . . . . . . . . . . . . . . 3-11
Linear motor . . . . . . . . . . . . . . . . . . . . . . . . . . . . . . . . .1-3
LM-F . . . . . . . . . . . . . . . . . . . . . . . . . . . . . . . . . . . . . . . 3-17
LM-H3 . . . . . . . . . . . . . . . . . . . . . . . . . . . . . . . . . . . . . . 3-14
LM-K2 . . . . . . . . . . . . . . . . . . . . . . . . . . . . . . . . . . . . . . 3-18
LM-U2 . . . . . . . . . . . . . . . . . . . . . . . . . . . . . . . . . . . . . . 3-15
Rotary motor . . . . . . . . . . . . . . . . . . . . . . . . . . . . . . . . .1-3
TF-RFM . . . . . . . . . . . . . . . . . . . . . . . . . . . . . . . . . . . . . 3-20
STO . . . . . . . . . . . . . . . . . . . . . . . . . . . . . . . . . . . . . . . . . . . . . .1-6
Beginners Manual Servo Amplifiers MELSERVO J4
3
Index
4
HEADQUARTERS
EUROPEAN REPRESENTATIVES
EUROPEAN REPRESENTATIVES
EUROPE
GEVA
Wiener Straße 89
A-2500 Baden
Phone: +43 (0)2252 / 85 55 20
Fax: +43 (0)2252 / 488 60
Austria
Beijer Electronics SIA Ritausmas iela 23
LV-1058 Riga
Phone: +371 (0)6 / 784 2280
Fax: +371 (0)6 / 784 2281
Mitsubishi Electric Europe B.V.
Czech Rep.
Radlická 751/113e Avenir Business Park
CZ-158 00 Praha 5
Phone: +420 251 551 470
Fax: +420 251 551 471
OOO TECHNIKON
Prospect Nezavisimosti 177-9
BY-220125 Minsk
Phone: +375 (0)17 / 393 1177
Fax: +375 (0)17 / 393 0081
Belarus
Beijer Electronics UAB Goštautų g. 3
LT-48324 Kaunas
Phone: +370 37 262707
Fax: +370 37 455605
FRANCE
ESCO DRIVES Culliganlaan 3
BE-1831 Diegem
Phone: +32 (0)2 / 717 64 60
Fax: +32 (0)2 / 717 64 61
Belgium
ALFATRADE Ltd.
99, Paola Hill
Malta-Paola PLA 1702
Phone: +356 (0)21 / 697 816
Fax: +356 (0)21 / 697 817
Malta
IRELAND
KONING & HARTMAN B.V.
Woluwelaan 31
BE-1800 Vilvoorde
Phone: +32 (0)2 / 257 02 40
Fax: +32 (0)2 / 257 02 49
Belgium
INTEHSIS SRL
bld. Traian 23/1
MD-2060 Kishinev
Phone: +373 (0)22 / 66 4242
Fax: +373 (0)22 / 66 4280
Moldova
INEA RBT d.o.o.
Bosnia and Herzegovina
Stegne 11
SI-1000 Ljubljana
Phone: +386 (0)1/ 513 8116
Fax: +386 (0)1/ 513 8170
HIFLEX AUTOM. B.V.
Wolweverstraat 22
NL-2984 CD Ridderkerk
Phone: +31 (0)180 / 46 60 04
Fax: +31 (0)180 / 44 23 55
Netherlands
Bulgaria
KONING & HARTMAN B.V.
Energieweg 1
NL-2627 AP Delft
Phone: +31 (0)15 260 99 06
Fax: +31 (0)15 261 9194
Netherlands
INEA CR
Croatia
Losinjska 4 a
HR-10000 Zagreb
Phone: +385 (0)1 / 36 940 - 01/ -02/ -03
Fax: +385 (0)1 / 36 940 - 03
Beijer Electronics AS Postboks 487
NO-3002 Drammen
Phone: +47 (0)32 / 24 30 00
Fax: +47 (0)32 / 84 85 77
Norway
Mitsubishi Electric Europe B.V.
Gothaer Straße 8
D-40880 Ratingen
Phone: +49 (0)2102 / 486-0
Fax: +49 (0)2102 / 486-1120
Mitsubishi Electric Europe B.V.
25, Boulevard des Bouvets
F-92741 Nanterre Cedex
Phone: +33 (0)1 / 55 68 55 68
Fax: +33 (0)1 / 55 68 57 57
Mitsubishi Electric Europe B.V.
Westgate Business Park, Ballymount
IRL-Dublin 24
Phone: +353 (0)1 4198800
Fax: +353 (0)1 4198890
Mitsubishi Electric Europe B.V.
Viale Colleoni 7 Palazzo Sirio
I-20864 Agrate Brianza (MB)
Phone: +39 039 / 60 53 1
Fax: +39 039 / 60 53 312
ITALY
Mitsubishi Electric Europe B.V.
Nijverheidsweg 23a
NL-3641RP Mijdrecht
Phone: +31 (0) 297250350
Netherlands
Mitsubishi Electric Europe B.V.
ul. Krakowska 50
PL-32-083 Balice
Phone: +48 (0) 12 347 65 00
Fax: +48 (0) 12 347 65 01
Poland
Mitsubishi Electric (Russia) LLC
52, bld. 1 Kosmodamianskaya emb.
RU-115054 Moscow
Phone: +7 495 / 721 2070
Fax: +7 495 / 721 2071
Russia
SPAIN
Mitsubishi Electric Europe B.V. Carretera de Rubí 76-80 Apdo. 420
E-08190 Sant Cugat del Vallés (Barcelona)
Phone: +34 (0) 93 / 5653131
Fax: +34 (0) 93 / 5891579
Mitsubishi Electric Europe B.V. (Scandinavia) sweden
Fjelievägen 8
SE-22736 Lund
Phone: +46 (0) 8 625 10 00
Fax: +46 (0) 46 39 70 18
Mitsubishi Electric Turkey Elektrik Ürünleri A.Ş. Turkey
Fabrika Otomasyonu Merkezi
Şerifali Mahallesi Nutuk Sokak No.5
TR-34775 Ümraniye-İSTANBUL
Phone: +90 (0)216 / 526 39 90
Fax: +90 (0)216 / 526 39 95
AKHNATON 4, Andrei Ljapchev Blvd., PO Box 21
BG-1756 Sofia
Phone: +359 (0)2 / 817 6000
Fax: +359 (0)2 / 97 44 06 1
AutoCont C. S. S.R.O. Kafkova 1853/3
CZ-702 00 Ostrava 2
Phone: +420 595 691 150
Fax: +420 595 691 199
Czech Republic
HANS FØLSGAARD A/S
Theilgaards Torv 1
DK-4600 Køge
Phone: +45 4320 8600
Fax: +45 4396 8855
Denmark
INEA SR d.o.o.
Ul. Karadjordjeva 12/217
SER-11300 Smederevo
Phone: +386 (026) 461 54 01
Estonia
Mitsubishi Electric Europe B.V.
Travellers Lane
UK-Hatfield, Herts. AL10 8XB
Phone: +44 (0)1707 / 28 87 80
Fax: +44 (0)1707 / 27 86 95
UK
Beijer Electronics OY
Vanha Nurmijärventie 62
FIN-01670 Vantaa
Phone: +358 (0)207 / 463 500
Fax: +358 (0)207 / 463 501
Finland
Mitsubishi Electric Europe B.V.
Dubai Silicon Oasis
United Arab Emirates - Dubai
Phone: +971 4 3724716
Fax: +971 4 3724721
UAE
PROVENDOR OY
Teljänkatu 8 A3
FIN-28130 Pori
Phone: +358 (0) 2 / 522 3300
Fax: +358 (0) 2 / 522 3322
Finland
UTECO A.B.E.E.
5, Mavrogenous Str.
GR-18542 Piraeus
Phone: +30 (0)211 / 1206-900
Fax: +30 (0)211 / 1206-999
Greece
Mitsubishi Electric Corporation
Tokyo Building 2-7-3
Marunouchi, Chiyoda-ku
Tokyo 100-8310
Phone: +81 (3) 3218-2111
Fax: +81 (3) 3218-2185
Mitsubishi Electric Automation, Inc.
500 Corporate Woods Parkway
Vernon Hills, IL 60061
Phone: +1 (847) 478-2100
Fax: +1 (847) 478-0328
JAPAN
USA
MELTRADE Kft.
Fertő utca 14.
HU-1107 Budapest
Phone: +36 (0)1 / 431-9726
Fax: +36 (0)1 / 431-9727
Hungary
Slovakia
INEA RBT d.o.o. Stegne 11
SI-1000 Ljubljana
Phone: +386 (0)1 / 513 8116
Fax: +386 (0)1 / 513 8170
Slovenia
OMNI RAY AG
Im Schörli 5
CH-8600 Dübendorf
Phone: +41 (0)44 / 802 28 80
Fax: +41 (0)44 / 802 28 28
OOO “CSC-AUTOMATION” 4-B, M. Raskovoyi St.
UA-02660 Kiev
Phone: +380 (0)44 / 494 33 44
Fax: +380 (0)44 / 494-33-66
Israel
CEG LIBAN
Lebanon
Cebaco Center/Block A Autostrade DORA
Lebanon-Beirut
Phone: +961 (0)1 / 240 445
Fax: +961 (0)1 / 240 193
ADROIT TECHNOLOGIES South Africa
20 Waterford Office Park 189 Witkoppen Road
ZA-Fourways
Phone: + 27 (0)11 / 658 8100
Fax: + 27 (0)11 / 658 8101
Serbia
SIMAP SK (Západné Slovensko)
Jána Derku 1671
SK-911 01 Trenčín
Phone: +421 (0)32 743 04 72
Fax: +421 (0)32 743 75 20
Beijer Electronics Automation AB Box 426
SE-20124 Malmö
Phone: +46 (0)40 / 35 86 00
Fax: +46 (0)40 / 93 23 01
SHERF Motion Techn. Ltd.
Rehov Hamerkava 19
IL-58851 Holon
Phone: +972 (0)3 / 559 54 62
Fax: +972 (0)3 / 556 01 82
AFRICAN REPRESENTATIVE
Romania
SIRIUS TRADING & SERVICES SRL
Aleea Lacul Morii Nr. 3
RO-060841 Bucuresti, Sector 6
Phone: +40 (0)21 / 430 40 06
Fax: +40 (0)21 / 430 40 02
Kazakhstan
MIDDLE EAST REPRESENTATIVE
PORTUGAL
Denmark
TOO Kazpromavtomatika
UL. ZHAMBYLA 28,
KAZ-100017 Karaganda
Phone: +7 7212 / 50 10 00
Fax: +7 7212 / 50 11 50
Lithuania
Fonseca S.A. R. João Francisco do Casal 87/89
PT-3801-997 Aveiro, Esgueira
Phone: +351 (0)234 / 303 900
Fax: +351 (0)234 / 303 910
Beijer Electronics A/S
Lykkegardsvej 17
DK-4000 Roskilde
Phone: +45 (0)46/ 75 76 66
Fax: +45 (0)46 / 75 56 26
Beijer Electronics Eesti OÜ
Pärnu mnt.160i
EE-11317 Tallinn
Phone: +372 (0)6 / 51 81 40
Fax: +372 (0)6 / 51 81 49
Latvia
EURASIAN REPRESENTATIVES
Sweden
Switzerland
Ukraine
Mitsubishi Electric Europe B.V. / FA - European Business Group / Gothaer Straße 8 / D-40880 Ratingen / Germany /
Tel.: +49(0)2102-4860 / Fax: +49(0)2102-4861120 / [email protected] / https://eu3a.mitsubishielectric.com