1
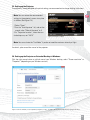
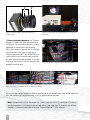
Your screen should be set as ”primary monitor“. Make sure the projector (usually ”Acer K132“) is set
as extended desktop (”Extend these displays“). This is necessary so that DAVID can project the stripe
patterns, while the user interface is displayed on your screen.
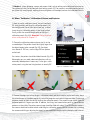
The resolution of the projector must be set to its native value (usually 1280 * 800 pixels) Furthermore,
you should make sure the projector is set to 60 Hz. Choose the Projector and click ”Advanced“, here you
should set the refresh rate to 60 Hz in the ”Monitor“ tab.
A more detailed description can be found in our online manual in the section ”Structured Light 3D
Scanning“ on
http://www.david-3d.com/manual
When these settings are correct, your monitor and projector will show the same desktop wallpaper,
but otherwise different contents. You can move your mouse pointer sideways between the monitor and
the projector image. The Windows Start menu and most of the desktop icons are only displayed on the
monitor. Any window can be moved between monitor and projector back and forth.
So in case the main DAVID window is displayed on the projector, please grab its title bar with the mouse
and drag it sideways onto the monitor.
3. The Scan Software DAVID
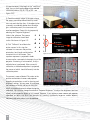
Start DAVID by running ”Start_DAVID3_x64“ from the USB flash drive. If you use a 32-bit system
(not recommended), run ”Start_DAVID3“. On the left side, the main menus are stacked, and can be
individually opened and collapsed. Each menu is responsible for one work step, which you will usually
go through from top to bottom. This printed manual refers to version 3.10 of the software and may
already be out of date. Please follow the detailed and always up-dated on-line instructions at
http://www.david-3d.com
3.1. Software Updates
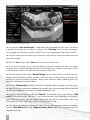
Our software is constantly being developed and improved. All updates within version 3.x are free.
Therefore use the automatic update feature, or download updates manually from our website:
http://www.david-3d.com
32