1
Introduction
Built-in CD writer
This addendum sheet applies to DS2 units with a built-in CDR. The DS2 CD has the following
features over the standard DS2:
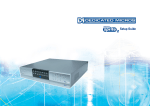
The Digital Sprite 2 CD has a built-in CDR accessible from the front panel.
1.
2.
Built-in CD Writer.
Onboard mains power supply.
Quick Install (Page 5)
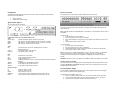
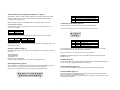
The rear panel has now changed to:
SERIAL 1
The operation of the internal CDR is identical to using the external CDR as described on the
Quick Setup Card.
S ERIA L 2
A UX R ELAYS
AUX ALARMS
POWER
R1
R2
DIRECT
VID 10
VID 11
VID 12
VID 13
VID 14
VID 15
VID 16
VID 3
VID 4
V ID 5
VID 6
VID 7
VID 8
VID 9
Note: Although the CDR has a DVD-ROM label on the drawer it is not possible to read or write to
DVD media.
A
OUT
IN
B
485 B US
+ -
+ -
BUS A BUS B G ND
NE T
SCSI
L INE
MIC
MO N A
MON
VID 1
VID 2
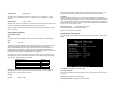
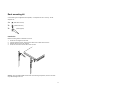
To insert a CDR:
1. Press the button on the CDR drawer
2. Pull the CD drawer out until there is resistance
3. Place the CDR with the writing side up on the spindle and press down until there is a
click.
4. Push the drawer back in until it latches.
Connections at the rear of the DIGITAL SPRITE 2 CD
Video
VID1 to VID16
- 75Ω BNC composite camera connections (1V pk-pk).
MON A
- Main monitor, 75Ω BNC composite monitor connection (1V pk-pk).
MON B
- Spot monitor, 75Ω BNC composite monitor connection (1V pk-pk).
SVHS
- Main monitor, S-video monitor connection.
Audio
MIC
LINE IN
LINE OUT
Data
SCSI
NET
BUS A
BUS B
485 BUS
SERIAL 1
SERIAL 2
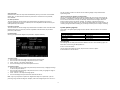
To remove a CDR:
1. Press the button on the CDR drawer
2. Pull the CD drawer out until there is resistance
3. Hold the CDR between thumb and forefinger and lift to remove from the spindle.
4. Push the drawer back in until it latches.
- 3.5mm mono jack connection, -50dBV sensitivity or better
(unbalanced Electret).
- RCA (phono) socket, 47KΩ 1V pk-pk.
- RCA (phono) socket, 1V pk-pk
Note: In the event of a CD becoming jammed in the drive, or a power failure, it is possible to
open the CDR drawer by inserting a thin object such as a paper clip, or watchmaker’s
screwdriver into the small hole in the CDR drawer and applying pressure until the drawer
unlocks.
- 50-pin HD SCSI-2 connection.
- RJ-45 10-baseT Ethernet connection.
- RS-485 telemetry port 1.
- RS-485 telemetry port 2 (Used in conjunction with BUS A with Sensormatic
telemetry).
- 2x MMJ ports for DM 485-BUS accessories.
- 9-way (Male) D-type RS-232 serial port.
- 9-way (Male) D-type RS-232 serial port.
WARNING: The CDR is a Class 1 laser product to EN 60825-1:1994, avoid exposure to the beam.
Selecting CD-Rs and CD-RWs
The internal CD writer in the Digital Sprite 2 is not compatible with Ultra Speed CDR’s. Ensure
that only High Speed or Multi-Speed CDR media is used. This is normally written on the CDR
packaging and on the disk itself.
Alarms and relays
R1
- Relay dry contact, NO/NC.
R2
- Relay dry contact, NO/NC.
DIRECT
- Direct auxiliary input, NO.
ALARMS IN
- 25-way (Female) D-type programmable direct alarms, NO/NC.
RELAYS
- 9-way (Female) D-type individual activity detection relays, NO.
On-board power supply
Previous models of Digital Sprite and Digital Sprite 2 units used an external PSU. The Digital
Sprite 2 CD has an on-board mains power supply.
To apply power to the Digital Sprite 2 CD :
1. Ensure all cameras, monitors and other connections are made, before continuing.
2. Insert the supplied IEC power lead into the Power socket at the rear of the unit.
3. Plug the unit into the power socket on the wall and switch on.
1