1
may be necessary to wait a few minutes for the remaining images to be protected before
unprotecting them.
Alarm protection
Global and Panic alarms can be protected automatically as they are received. Select whether
Global, Panic, or Global and Panic alarms are protected. If no alarms are to be protected,
select Disabled.
Important information regarding Protected Images.
There is a percentage indication of the amount of images that are currently protected on the
hard disk. It is important to remember that the protected images will remain on the hard disk
and will not be overwritten until they are manually removed. Protected images reduce the
amount of space you have for normal recording. For example, if 50% of the images are
protected, this effectively means you only have half the disk available for normal recording, so
recording settings that should normally give you 30 days would only allow 15 days of recording.
Pre-alarm protection
This is the amount of time the images are protected before the Global or Panic alarm is
triggered. By default this setting is 15 minutes, but this is adjustable from 00 minutes (no prealarm protection) to 60 minutes.
Post-alarm protection
This is the amount of time the images are protected after the Global or Panic alarm has ended.
By default this setting is 15 minutes, but this is adjustable from 00 minutes (no post-alarm
protection) to 60 minutes.
System Options (page 22)
Some items in the System Options page have been moved to different menus. The new menu
pages are:
Option
Event Partition
Event copy destination
Image Storage
Timed Expiry
Protected images
Selecting this option allows images to be protected or unprotect manually.
New Menu Page
Record options
Record options
Record options
Record options
Serial Telemetry
The Samsung SCC-641 dome protocol has been added to the list of serial telemetry types. The
dome menu controls using the DM keyboard are:
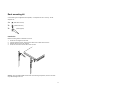
Press 7 to enter the menus.
Use the joystick to navigate the menus, and press Enter to select an option.
Press and hold 7 to exit the menus.
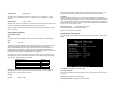
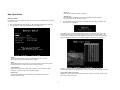
To protect images:
1. Enter the time of the first image to be protected (in the From area).
2. Enter the time of the last image to be protected (in the To area).
3. Select ‘Confirm’ in the Protect images option.
4. The selected images are protected and placed in the list.
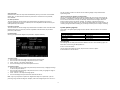
To unprotect images:
1. Enter the time of the first image to be protected (in the From area), or highlight an image
in the list and press Camera 1.
2. Enter the time of the last image to be protected (in the To area), or highlight an image in
the list and press Camera 2.
3. Select ‘Confirm’ in the Unprotect images option.
4. The selected images are unprotected and removed from the list.
Note: If you try to unprotect a sequence of images before they are all protected, if you are
protecting a large number of images for example, some of the images may be left in the list. It
5