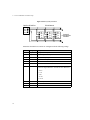
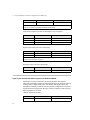
1
Honeywell Universal Modbus Interface
Reference
Issue
Date
7
November 2003
Notice
This document contains Honeywell proprietary information. Information
contained herein is to be used solely for the purpose submitted, and no part of this
document or its contents shall be reproduced, published, or disclosed to a third
party without the express permission of Honeywell Limited Australia.
While this information is presented in good faith and believed to be accurate,
Honeywell disclaims the implied warranties of merchantability and fitness for a
purpose and makes no express warranties except as may be stated in its written
agreement with and for its customer.
In no event is Honeywell liable to anyone for any direct, special, or consequential
damages. The information and specifications in this document are subject to
change without notice.
Copyright 2003 – Honeywell Limited Australia
Honeywell Trademarks
Experion PKS®, PlantScape®, SafeBrowse®, TotalPlant® and TDC 3000® are
U.S. registered trademarks of Honeywell International Inc.
Honeywell Enterprise Buildings Integrator™ is a trademark of Honeywell
International Inc.
Other Trademarks
Microsoft and SQL Server are either registered trademarks or trademarks of
Microsoft Corporation in the United States and/or other countries.
Trademarks that appear in this document are used only to the benefit of the
trademark owner, with no intention of trademark infringement.
2
Contents
1 Getting Started
Support and Documentation for Universal Modbus . . . . . . . . . . . . . . . . . . . . . . . . . . . . . . . . . . .
About the Universal Modbus Interface . . . . . . . . . . . . . . . . . . . . . . . . . . . . . . . . . . . . . . .
Other Documentation for Universal Modbus . . . . . . . . . . . . . . . . . . . . . . . . . . . . . . . . . .
Control Products Wizard . . . . . . . . . . . . . . . . . . . . . . . . . . . . . . . . . . . . . . . . . . . . . . . . . . . . . . . .
6
6
6
8
2 Universal Modbus Controller Setup
Connecting your Controller. . . . . . . . . . . . . . . . . . . . . . . . . . . . . . . . . . . . . . . . . . . . . . . . . . . . .
Setting up Your Connections . . . . . . . . . . . . . . . . . . . . . . . . . . . . . . . . . . . . . . . . . . . . . .
Universal Modbus TCP Connection . . . . . . . . . . . . . . . . . . . . . . . . . . . . . . . . . . . . . . . .
Configuring Communication Parameters . . . . . . . . . . . . . . . . . . . . . . . . . . . . . . . . . . . . . . . . . .
RS485 Devices . . . . . . . . . . . . . . . . . . . . . . . . . . . . . . . . . . . . . . . . . . . . . . . . . . . . . . . .
TCP/IP Devices . . . . . . . . . . . . . . . . . . . . . . . . . . . . . . . . . . . . . . . . . . . . . . . . . . . . . . . .
10
10
14
16
16
16
3 Universal Modbus Controller Configuration and Addressing
Defining a Universal Modbus Channel . . . . . . . . . . . . . . . . . . . . . . . . . . . . . . . . . . . . . . . . . . . .
Universal Modbus Channel Main Properties . . . . . . . . . . . . . . . . . . . . . . . . . . . . . . . . .
Universal Modbus Port Properties. . . . . . . . . . . . . . . . . . . . . . . . . . . . . . . . . . . . . . . . . .
Defining a Universal Modbus Controller . . . . . . . . . . . . . . . . . . . . . . . . . . . . . . . . . . . . . . . . . .
Universal Modbus Controller Main Properties . . . . . . . . . . . . . . . . . . . . . . . . . . . . . . . .
Defining a Universal Modbus Address for a Point Parameter Value . . . . . . . . . . . . . . . . . . . . .
Entering an Address . . . . . . . . . . . . . . . . . . . . . . . . . . . . . . . . . . . . . . . . . . . . . . . . . . . .
Named Register Addresses . . . . . . . . . . . . . . . . . . . . . . . . . . . . . . . . . . . . . . . . . . . . . . .
Troubleshooting Point Configuration . . . . . . . . . . . . . . . . . . . . . . . . . . . . . . . . . . . . . . . . . . . . .
Errors when point building . . . . . . . . . . . . . . . . . . . . . . . . . . . . . . . . . . . . . . . . . . . . . . .
Error when scanning . . . . . . . . . . . . . . . . . . . . . . . . . . . . . . . . . . . . . . . . . . . . . . . . . . . .
Optimizing Scanning Performance . . . . . . . . . . . . . . . . . . . . . . . . . . . . . . . . . . . . . . . . . . . . . . .
18
18
20
24
24
28
28
33
34
34
34
35
4 Server and Station Tasks for Universal Modbus
Testing Communications with the Server . . . . . . . . . . . . . . . . . . . . . . . . . . . . . . . . . . . . . . . . . .
Troubleshooting Universal Modbus Configuration Errors . . . . . . . . . . . . . . . . . . . . . . . . . . . . .
Common Problems . . . . . . . . . . . . . . . . . . . . . . . . . . . . . . . . . . . . . . . . . . . . . . . . . . . . .
Problems with Specific Controller Models . . . . . . . . . . . . . . . . . . . . . . . . . . . . . . . . . . .
38
40
40
41
5 Device Information
Devices . . . . . . . . . . . . . . . . . . . . . . . . . . . . . . . . . . . . . . . . . . . . . . . . . . . . . . . . . . . . . . . . . . . . 51
Baud Rates Supported . . . . . . . . . . . . . . . . . . . . . . . . . . . . . . . . . . . . . . . . . . . . . . . . . . . 51
Numbered Addresses. . . . . . . . . . . . . . . . . . . . . . . . . . . . . . . . . . . . . . . . . . . . . . . . . . . . 51
Honeywell Universal Modbus Interface Reference
3
Contents
Non-numbered Addresses . . . . . . . . . . . . . . . . . . . . . . . . . . . . . . . . . . . . . . . . . . . . . . . . 99
6 HC900 and UMC800 SPP and Recipe Support
Overview . . . . . . . . . . . . . . . . . . . . . . . . . . . . . . . . . . . . . . . . . . . . . . . . . . . . . . . . . . . . . . . . . . 102
Planning. . . . . . . . . . . . . . . . . . . . . . . . . . . . . . . . . . . . . . . . . . . . . . . . . . . . . . . . . . . . . . . . . . . 103
Resource Requirements. . . . . . . . . . . . . . . . . . . . . . . . . . . . . . . . . . . . . . . . . . . . . . . . . 103
Migration/Conversion Requirements . . . . . . . . . . . . . . . . . . . . . . . . . . . . . . . . . . . . . . 104
Configuration . . . . . . . . . . . . . . . . . . . . . . . . . . . . . . . . . . . . . . . . . . . . . . . . . . . . . . . . . . . . . . 106
Configuring a Recipe. . . . . . . . . . . . . . . . . . . . . . . . . . . . . . . . . . . . . . . . . . . . . . . . . . . 106
Configuring a SP Profile . . . . . . . . . . . . . . . . . . . . . . . . . . . . . . . . . . . . . . . . . . . . . . . . 107
Configuring a Combined Recipe. . . . . . . . . . . . . . . . . . . . . . . . . . . . . . . . . . . . . . . . . . 108
Configuring SPP Monitoring. . . . . . . . . . . . . . . . . . . . . . . . . . . . . . . . . . . . . . . . . . . . . .110
Operation . . . . . . . . . . . . . . . . . . . . . . . . . . . . . . . . . . . . . . . . . . . . . . . . . . . . . . . . . . . . . . . . . . .113
Downloading a Recipe . . . . . . . . . . . . . . . . . . . . . . . . . . . . . . . . . . . . . . . . . . . . . . . . . .113
Downloading a SP Profile . . . . . . . . . . . . . . . . . . . . . . . . . . . . . . . . . . . . . . . . . . . . . . . .114
Downloading a Combined Recipe. . . . . . . . . . . . . . . . . . . . . . . . . . . . . . . . . . . . . . . . . .114
Controlling a SP Programmer . . . . . . . . . . . . . . . . . . . . . . . . . . . . . . . . . . . . . . . . . . . . .115
Troubleshooting. . . . . . . . . . . . . . . . . . . . . . . . . . . . . . . . . . . . . . . . . . . . . . . . . . . . . . . . . . . . . .117
4
1
Getting Started
This reference describes how to set up, configure, and test Universal Modbus
controller communications with the server. There is detailed information for
defining the controller using Quick Builder.
Complete each step before commencing the next.
Steps for Connecting and Configuring an Universal Modbus Controller:
Steps:
Go to:
Connect and set up the Universal Modbus controller according to the
controller’s user manual’s instructions
page 10
Use Quick Builder to define channels
page 18
Use Quick Builder to define controllers
page 24
Download channel and controller definitions to the server
Enable channels and test communications
page 38
Troubleshooting communication errors
page 40
Define points with Quick Builder
page 28
The Control Products wizard makes it easier to configure a controller if you have
only used its standard options. See “Control Products Wizard” on page 8.
Honeywell Universal Modbus Interface Reference
5
1 – Getting Started
Support and Documentation for Universal Modbus
About the Universal Modbus Interface
The Universal Modbus Interface enables the server to interface to any Control
Products controller that implements the Honeywell Universal Modbus protocol.
The Honeywell Universal Modbus protocol is the Honeywell implementation of
the Modbus RTU Communications protocol for serial RS-485, RS-232 or
Ethernet networks. Configuration information relating to specific controllers is
supplied in separate user manuals (see “Other Documentation for Universal
Modbus” on page 6).
This Interface is supported only by systems that are licensed for Universal
Modbus.
To check your system licence:
1
In Station, select Configure > Server Licence Details from the Station menu.
2
Go the Interfaces page.
All licensed options for your system display. Ensure that “Universal Modbus”
is listed.
Contact your local supplier for further licensing details.
Other Documentation for Universal Modbus
The following documents are available from Honeywell:
•
Modbus RTU Serial Communications User Manual (Part number
51-52-25-66)
•
Overview and Planning Guide
•
HC900 Modbus/TCP Communications User Manual (Part number
51-52-25-111)
The controller communication and configuration user manuals are listed below.
6
Instrument Model
User Manual Part Number
RSX, VPR100, VRX100, UDC5300,
VRX180
51-52-35-68
DR4300
51-52-25-71
DR4500
51-52-25-69
UDC 2300
51-52-25-75
Support and Documentation for Universal Modbus
Instrument Model
User Manual Part Number
UDC3300
51-52-25-70
51-52-25-38 UDC3000 A Modbus 485
RTU Communication Manual
DPR180 / DPR250
EN1I-6189 DPR180/DPR250
Communication Option Manual
UMC800
52-52-25-87 Modbus RTU Serial
Communications User Manual
HC900
51-52-25-107
51-52-25-111 HC900 Hybrid Controller
Ethernet Modbus/TCP Communications
User Manual
TrendView - Minitrend, Multitrend, ez
Trend
43-TV-25-08 Communications Manual
Ethernet Bridge Card (UMC900, VRX180 / 51-52-25-96 Ethernet Interface Manual
DPR180 / DPR250
Honeywell Universal Modbus Interface Reference
7
1 – Getting Started
Control Products Wizard
The Control Products wizard makes it easy to configure a controller and its
associated points. The wizard guides you through the standard configuration
tasks, and can download the configuration details to the server. You can also use
the wizard to modify the configuration details of an existing controller.
You can access the wizard either in Quick Builder, where the wizard adds the
controller to the current project. To start the wizard from Quick Builder, select it
from the Tools menu. To use the wizard in Quick Builder, select:
Tools > Control Products Wizard.
Note
HC900 is not supported by the Control Products Wizard.
8
2
Universal Modbus Controller
Setup
This chapter describes how to set up an Universal Modbus controller.
The tasks for setting up a Universal Modbus controller are:
For:
Go to:
Connecting to the server
page 10
Setting Communications
page 16
Honeywell Universal Modbus Interface Reference
9
2 – Universal Modbus Controller Setup
Connecting your Controller
Many different types of controllers can be connected to the same Universal
Modbus network. The only requirements are that every controller on the same
network use the same connection type and baud rate, and that each controller use
a unique device identification number.
Setting up Your Connections
Control Products controllers are designed to communicate using the Modbus TCP
Ethernet, RS485 or the RS-232 specification. See the User Manual specific to
your Control Products controller for information about cabling requirements.
Devices using RS-232 can be connected directly to a RS-232 port on the server,
or to a terminal server.
Two methods are supported for connecting the server to an RS-485 network of
Control Products controllers:
•
Using an RS-232 to RS-485 converter (see “Using an RS-232/485 Converter”
on page 11).
•
Directly connecting the server to the RS-485 network via an add-in card (see
“Using an RS-485 Adapter” on page 13).
You can also connect to Ethernet TCP/IP networks using Modbus/TCP protocol
using two methods:
•
Direct Ethernet connection (HC900, TrendView)
•
Ethernet - Modbus bridge (internal option for UMC800, VRX180, DPR180
and DPR250)
Make sure that you read the User Manual specific to your Control Products
controller before connecting your controllers to the network.
10
Connecting your Controller
Using an RS-232/485 Converter
Honeywell recommends that you use the Black Box LD485-HS RS-232/485
Interface Converter, model number ME837A, or a Black Box IC109A-R2. These
converters have been qualified by Honeywell. Use of another converter might
produce unexpected results.
Figure 1 RS-232 to RS-485 Converter
Server
RS-232
RS-485
RS-232/485
Converter
Honeywell Control Products Controllers
Connect an RS-232 port on the server to the RS-232 port on the Black Box
converter using a standard RS-232 straight through cable. Then connect the Black
Box converter and the Control Products controllers to the RS-485 network as
shown in “Black Box (2-wire) Connections” on page 11.
Black Box Connections
Figure 2 Black Box (2-wire) Connections
Black Box RS-485 Port
Tx A
Tx B
Rx A
Rx B
RS-485 Network
120
+
+
+
Honeywell
Control Products
Controllers
Honeywell Universal Modbus Interface Reference
11
2 – Universal Modbus Controller Setup
Figure 3 Black Box (4-wire) Connections
Black Box RS-485 Port
Tx A
Tx B
Rx A
Rx B
RS-485 Network
120
RxRx+
TxTx+
RxRx+
TxTx+
RxRx+
TxTx+
Honeywell
Control Products
Controllers
120
Ensure that the black box switches are configured with the following settings.
Switch
Setting
Description
XW1A
jumper in*
Configure RS-232 port as DCE.
XW1B
jumper out
Do not configure RS-232 port as DTE.
W8
B-C
2-wire (half-duplex) operation.
W9
C*
0 ms RTS/CTS delay.
W15
B-C
RS-485 transmitter enabled by data.
W5
A-B*
RTS/CTS normal.
W17
C
2 ms transmitter enabled time. This is good for 9600 Baud.
Decrease for higher Baud rates. Increase for lower Baud rates.
A - 30 ms
B* - 7 ms
C - 2 ms
D - 0.7 ms
E - 0.15 ms
12
W16
B*
0.1 ms delay before receiver enabled.
Term
ON
RS-485 receiver terminated.
Bias
OFF*
Line bias off.
Connecting your Controller
Using an RS-485 Adapter
Honeywell recommends using the Stallion EasyConnection 8/32 ISA, 8/32 PCI,
8/64 ISA or 8/64 PCI adapters with the Stallion RS-232 to RS-485 8-port dual
interface asynchronous module. Honeywell has qualified this adapter. Use of
another adapter may produce unexpected results.
Figure 4 Stallion EasyConnection Adapter
Server
RS-485
Stallion 8-Port
serial interface
Honeywell Control Products Controllers
Installing the Stallion EasyConnection Serial Adapter
Stallion EasyConnection serial adapters are suitable for connection to RS-232,
RS-422 and RS-485 devices.
Install the adapter, port module, and driver in the server as described in the
Stallion documentation.
Connect a port on the Stallion port module directly to the RS-485 network as
shown in “Stallion RS-485 (2-wire) Connections” on page 13 and in “Stallion
RS-485 (4-wire) Connections” on page 14. Next, connect your Control Products
controllers to the RS-485 network.
Figure 5 Stallion RS-485 (2-wire) Connections
Stallion RS-485
3 Rxd
18 Conv
15 Rx+
19 Tx+
17 Rx25 Tx-
RS-485 Network
120
+
+
+
Honeywell Universal Modbus Interface Reference
13
2 – Universal Modbus Controller Setup
Figure 6 Stallion RS-485 (4-wire) Connections
RS-485 Network
Stallion RS-485
120
3 Rxd
120
18 Conv
15 Rx+
19 Tx+
Rx+
Tx+
RxTx-
17 Rx25 Tx-
Rx+
Tx+
RxTx-
Rx+
Tx+
RxTx-
Universal Modbus TCP Connection
To connect controllers to the server communicating using the UModbus TCP
protocol, you are required to have network adapter (NA card) connected to an
Ethernet network on both the server as well as the controller. An external TCP/IP
bridge (Lantronix DR1-IAP) may also be used for RS-485 network connection to
Ethernet.
Figure 7 Non-redundant Universal Modbus TCP Network Architecture
Server
NA card
LAN/WAN
NA card
Controller
Ethernet/Modbus bridge
Serial RS-485
Honeywell
Control Products
Controllers
14
Connecting your Controller
Redundant Communication Architecture
If you require redundant communications, you must have two separate network
adapters (NA card) on both the server and the controller which are connected to
separate Ethernet subnets. This architecture is not presently supported in the
controllers.
Figure 8 Redundant Universal Modbus TCP Network Architecture
Server
NA card NA card
LAN/WAN #1
LAN/WAN #2
NA card NA card
Controller
Honeywell Universal Modbus Interface Reference
15
2 – Universal Modbus Controller Setup
Configuring Communication Parameters
RS485 Devices
Before using your Control Products controllers, ensure that all communication
parameters are configured correctly for each controller. Configure each controller
to use the following communication parameters.
Parameter
Value
Number of Start Bits
1
Number of Data Bits
8
Number of Parity Bits
0
Number of Stop Bits
1
Make sure that each controller on the RS-485 network is configured for the same
Baud rate. When you are ready to configure the server, you will need to know
what Baud rate each RS-485 network is using.
Every controller using the same connection to the server (RS-232 or RS-485)
should have a unique Universal Modbus device identification number. Make a list
showing what number has been associated with each of your controllers. You will
need this information when using Quick Builder to configure the server to use
your Control Products controllers.
TCP/IP Devices
Ensure every controller or TCP/IP bridge device on the Ethernet network has a
unique IP address. Make a list showing what IP addresses have been associated
with each controller or bridge device. You will need this information when using
Quick Builder to configure the server to use your Control Products controllers.
Note that any serial Control Products controllers connected to a TCP bridge must
also conform to communications parameters for RS485 devices. Each must also
have a unique physical address on the RS-485 network.
16
Universal Modbus Controller
Configuration and Addressing
3
This chapter describes how to configure a Universal Modbus controller for the
system using Quick Builder. For each configuration procedure, there is detailed
information covering all supported Universal Modbus devices.
The Quick Builder controller configuration tasks are described:
For:
Go to:
Steps for defining a Universal Modbus channel
page 18
Steps for defining a Universal Modbus controller
page 24
Defining an address for a point parameter value
page 28
Defining a named address
page 28
Defining a non-named address
page 32
Troubleshooting point configuration
page 34
How to optimize scanning performance
page 35
You can simplify configuration tasks by using the Control Products wizard. See
“Control Products Wizard” on page 8.
Honeywell Universal Modbus Interface Reference
17
3 – Universal Modbus Controller Configuration and Addressing
Defining a Universal Modbus Channel
Build a channel for each RS-485, RS-232 or Ethernet TCP/IP physical connection
from your server. Note that you can multi-drop several controllers on the one
serial RS-485 channel, provided they all use the same Baud settings.
To define a channel using Quick Builder:
1
Click
to add a channel.
2
In the Add Items dialog box, select Channel as the item and Universal
Modbus as the channel type.
3
Enter the channel details on the Main property page for the channel. For help
with the channel definitions, see Universal Modbus Channel Main Properties.
4
To complete the channel definition, click the Port tab and define either a
serial, terminal server or a LANVendor port (for Ethernet Modbus/TCP). See
“Universal Modbus Port Properties” on page 20.
Universal Modbus Channel Main Properties
Use the Main tab to enter the basic channel properties for a Universal Modbus
channel.
18
Property
Description
Name
Type a unique name for the channel. A maximum of 10
alphanumeric characters can be used. (Double quotation
marks and spaces are not allowed.)
Description
(Optional) Type a description of the channel. A
maximum of 30 characters can be used, including
spaces.
Defining a Universal Modbus Channel
Property
Description
Marginal Alarm Limit
The communications alarm marginal limit at which the
channel is declared to be marginal. When this limit is
reached, a high priority alarm is generated. A channel
barometer monitors the total number of requests and the
number of times the controller did not respond or
response was incorrect. The barometer increments by 2
or more, depending on the error and decrements for each
good call.
To calculate an acceptable limit, multiply the square root
of the number of controllers on the channel by the
average Marginal Alarm Limit defined for those
controllers. (Normally, you specify the same value for
all controllers on a channel). For example, if there are 9
controllers on the channel and their Marginal Alarm
Limit is set to 25, the value would be [ 3 is square root ]
x 25 = 75.
Fail Alarm Limit
The communications alarm fail limit at which the
channel is declared to have failed. When this barometer
limit is reached, an urgent alarm is generated.
Set this to double the value specified for the channel
Marginal Alarm Limit.
Write Delay
If the channel is on a serial port, specify the minimum
number of milliseconds that the server must wait before
writing to any controller on the channel. See “Channel
Write Delay Settings” on page 20.
Connect Timeout
Amount of time (in seconds) the server waits to connect
to the controller before abandoning the connection. Type
a new value in this field if you do not want the default,
10 seconds.
Use the default value unless the communications line
has a high error rate or unless you are using modems.
Read Timeout
Amount of time (in seconds) that the server waits for a
reply from the controller. Type a new value in this field
if you do not want the default, 2 seconds.
Use the default value unless the communications line
has a high error rate or unless you are using modems.
Item Type
Shows the type of item specified when this item was
created.
Last Modified
Shows the date of the most recent modification to this
channel’s property details.
Honeywell Universal Modbus Interface Reference
19
3 – Universal Modbus Controller Configuration and Addressing
Property
Description
Item Number
This field displays the unique item number currently
assigned to this item by Quick Builder. You can change
the item number displayed in this field if you need to
match your current server database configuration. The
item number must be between 1 and the maximum
number of channels allowed for your system.
Channel Write Delay Settings
Serial devices using the RS-485 protocol require a minimum period during which
no communications occur. Different devices have different requirements. You
should configure the write delay to be the largest value required by any device on
your RS-485 network. See the following table for requirements of individual
devices.
Where a delay is specified in number of characters, convert the value to
milliseconds using this formula:
Time(ms) = (1000 x Characters)/Baud Rate
Write delay should be rounded up to the nearest whole number.
For example, 3.5 Chars at 9600 Baud = (1000 x 3.5)/9600 = 3.6ms (round to 4ms)
RSX, VPR,
UDC5300,
UMC800
DPR100,
DPR180,
DPR250
3.5 Chars
3.5 Chars
DR4300
DR4500
UDC3300,
UDC2300
V 4: 20 ms
V 57 and 58: 20ms
20 ms
V 5 or greater:
3.5 Chars + 2ms
V 59 or greater:
3.5 Chars + 2 ms
Universal Modbus Port Properties
The Port tab defines the communication-related properties for a channel. The
Port Type for Universal Modbus can be:
20
•
Serial. A serial communications interface, such as RS-485. See “Serial
Port Properties” on page 21.
•
TerminalServer. A communications link that enables controllers with a
serial interface to be connected to a LAN. See “TerminalServer Port
Properties” on page 22.
•
LANVendor. A communications interface using TCP/IP to controllers
connected to a LAN.
Defining a Universal Modbus Channel
Serial Port Properties
Note
The Serial Port settings must match the settings on your communication devices.
Property
Description
Serial Port Name
The device name of the serial port.
Baud Rate
The number of data bits per second. The default is
9600.
Number of Data Bits
The number of data bits used for transmission. The
default is 8.
Stop Bits
The number of stop bits used for transmission. The
default is 1.
Parity
The parity verification used on the port. The default is
NONE.
Checksum
Select None.
XON/XOFF
The type of XON/XOFF software flow control used to
stop a receiver from being overrun with messages from a
sender. The types are:
• None (default)
• Input (use XON/XOFF to control the flow of data
on the receive line)
• Output (use XON/XOFF to control the flow of data
on the transmit line)
Honeywell Universal Modbus Interface Reference
21
3 – Universal Modbus Controller Configuration and Addressing
Property
Description
Handshaking Options
RS-232
• Enable RTS/CTS flow control. Select to stop a
receiver from being overrun with messages from a
sender by using RTS/CTS for flow control.
• Detect DCD. Select if the Data Carrier Detect
communication status line of the COM port requires
monitoring (usually when using modem or
microwave linking). When selected, the
communications fails if the desired COM status line
is not high—for example, on a dial-up link
connection for a modem.
• Detect DSR. Select if the Data Set Ready
communication status line of the COM port requires
monitoring (usually when using modem or
microwave linking). When selected, the
communications fails if the desired COM status is not
achieved.
Note: No options available for RS-422.
RS-485
• Enable Stallion RS-485 Half Duplex. Select for a
Stallion EasyConnection.
• Echo (Required for RS-485 2-wire ports). Select so
that the server expects the messages it sends to the
port on the transmit line to be echoed back on the
receive line. Select for a Stallion EasyConnection
adapter. Do not select for a Black Box Converter.
TerminalServer Port Properties
Property
Description
Terminal Server TCP Host
Name
The name and port number of terminal server to which
the channel is connected.
Terminal Server TCP Port No
You can specify either a TCP host name or an IP
address, but it must match the TCP host name used when
you installed and internally configured the terminal
server.
Idle Timeout
The time, in seconds, the channel waits for a successful
connection to the server before closing the connection.
A value of 0 indicates that the connection is never
closed.
Checksum
22
Select None.
Defining a Universal Modbus Channel
Redundant Port Properties
A communication port used as a redundant link has the same channel name but a
requires a different port name to its twin. All other entries are identical to those of
the primary port.
Honeywell Universal Modbus Interface Reference
23
3 – Universal Modbus Controller Configuration and Addressing
Defining a Universal Modbus Controller
You need to define a controller to describe each product on a channel.
To define a controller using Quick Builder:
1
Click
to add a controller.
2
In the Add Items dialog box, select Controller as the item and
Universal Modbus as the controller type.
3
Enter the property definitions for the controller on the controller Main
property page.
Universal Modbus Controller Main Properties
Use the Main tab to define the basic properties for a Universal Modbus controller.
Property
Description
Name
Type a unique name for the controller. A maximum of 10
alphanumeric characters can be used. (Double quotation
marks and spaces are not allowed.)
For LAN connected controllers, the name must not
contain Underscore ( _ ) characters. This name is used to
look up the IP address in the Hosts file or DNS if you do
not specify an IP Address property.
In the case of communications redundancy when the IP
Addresses are not defined in Quick Builder, the IP
Address 1 and 2 must be specified in the server hosts
file. The host name for IP Address 1 is then the Name
property with an “A” appended to it and the host name
for IP Address 2 is the Name property with a “B”
appended to it.
24
Description
(Optional) Type a meaningful description for this
controller. A maximum of 30 characters, including
spaces, can be entered.
Channel Name
The name of the channel on which the controller
communicates. In the list of channel names, click the
name. You need to have defined the channel in order for
it’s name to appear in the list.
Defining a Universal Modbus Controller
Property
Description
Marginal Alarm Limit
The communications alarm marginal limit at which the
controller is declared to be marginal. When this value is
reached, a high priority alarm is generated. This limit
applies to the controller barometer which monitors the
total number of requests to the controller and the number
of times the controller did not respond or response was
incorrect. The barometer increments by 2 or more,
depending on the error and decrements for each good
call.
Type a new value in this field if you do not want the
default, 25.
Fail Alarm Limit
The communications alarm fail limit at which the
controller is declared to have failed. When this value is
reached, an urgent alarm is generated.
Set this to double the value specified for the controller
Marginal Alarm Limit.
Device Type
Enter the acronym for the type of controller you are
using. See “Available Device Types” on page 26.
Device Identifier
The Universal Modbus identification number assigned
to your device.
Offset
Enter the lowest address within the range you intend to
use. See “Using Offsets” on page 26.
By default use 0.
Item Type
Shows the type of item specified when this item was
created.
Last Modified
Shows the date of the most recent modification to this
channel’s property details.
Item Number
This field displays the unique item number currently
assigned to this item by Quick Builder. You can change
the item number displayed in this field if you need to
match your current server database configuration. The
number must be between 1 and the maximum number of
controllers allowed for your system.
IP
If the channel Port Type is LANVendor, enter the
controller’s IP address here. If the IP address is not
specified, the controller name is used as the TCP host
name. For more information see the Name property.
Honeywell Universal Modbus Interface Reference
25
3 – Universal Modbus Controller Configuration and Addressing
Available Device Types
Type Acronym
Controller Device
RSX
RSX Controller
VPR100
VPR100 Controller
VRX100
VRX100 Controller
VRX180
VRX180 Controller
UDC5300
Universal Digital Controller 5300
UDC2300
Universal Digital Controller 2300
UDC3300
Universal Digital Controller 3300
DR4300
DR4300 Circular Chart Recorder
DR4500
DR4500 Circular Chart Recorder
DPR180
Digital Process Recorder 180
DPR250
Digital Process Recorder 250
UMC800
UMC800 Controller
HC900
HC900 Controller
TV
TrendView Recorder
Using Offsets
The server can only access a maximum of 4096 records in a particular file.
Therefore if the server needs to access records beyond that limit, you may need to
define several “logical” controllers in Quick Builder for a device, each with an
appropriate offset.
For Universal Modbus, use an offset to reference addresses outside the range
0x0000 and 0x1FFF. For example, if you have to refer to addresses between
0x0000 and 0x4000 within a device, you will need to create two controllers, one
with an OFFSET=0 (the default) for all addresses up to 0x1FFF, and one with
OFFSET=2000 for all addresses between 0x2000 and 0x3FFF.
HC900 and UMC800 Controller OFFSET Addresses
The Controller OFFSET address entry for the UMC800 and HC900 relative to
parameter category is provided in the following table. For example, for an
HC900, to access up to 24 control loops, all Variables, and up to 1000 Signal Tags
would require setup of two virtual controllers with offset entries of 0 and 2000
respectively.
26
Defining a Universal Modbus Controller
Parameter Category
OFFSET Address for Controller
UMC800
HC900
Point Addressing
0 (loops 1 to 16)
0 (loops 1 to 24)
Named (acronyms)
Control Loops (25 – 32) Not applicable
6000
Modbus Hex codes
Variables
(MATH_VAR)
0 (all Variables,
1-600)
Named (acronyms)
SP Programmers 1 to 4 0
0
Named (acronyms)
SP Programmers 5 to 8 Not applicable
Not supported
Signal Tags (TAG)
2000 (Signal Tags
1–1000)
Named (acronyms)
Signal Tags 1001-2000 Not applicable
4000
Modbus Hex codes
SP Scheduler 1
2000
2000
Named (acronyms)
SP Scheduler 2
Not applicable
2000
Named (acronyms)
Sequencers 1 - 4
Not applicable
4000
Modbus Hex codes
Alternator, Stage,
Ramp, HOA, Device
Control
Not applicable
6000
Modbus Hex codes
Control Loops
0 (all Variables,
1-150)
2000 (Signal Tags
1–500)
Honeywell Universal Modbus Interface Reference
27
3 – Universal Modbus Controller Configuration and Addressing
Defining a Universal Modbus Address for a Point
Parameter Value
Different addresses are available depending on the type of device to which you
are connected. Addresses that are read-only can only be used as source addresses.
Addresses that are write-only can only be used as destination addresses.
Addresses that are available for both read and write operations can be used as
both source and destination addresses.
Entering an Address
For source, and destination addresses the format for a Universal Modbus
controller address is:
ControllerName Location
Part
Description
ControllerName
The name of the Universal Modbus controller.
Location
The location in the controller where the value is
recorded. The syntax depends on the address type:
• “Location Syntax for Named Addresses” on page 28
• “Location Syntax for Non-named Addresses” on
page 32
If you would like help when defining an address, click
display Address Builder. For details, see the help.
Location Syntax for Named Addresses
Named addresses can be either:
•
Non-numbered Address
•
Numbered Address
Non-numbered Address
28
next to Address to
Defining a Universal Modbus Address for a Point Parameter Value
For addresses that occur in only one location, specify the name of a register
within your controller simply using the syntax:
AddressName [Format]
Part
Description
AddressName
Matches an address from “Non-numbered
Addresses” on page 99.
Format
(Optional) Specify only if the device does not use the
default format for that address. Different addresses will
have different default formats.
Numbered Address
For address types that occur multiple times within the device (for example, more
than one analog input), use the syntax:
AddressName Number [SubAddressName][Format]
Example
Part
Description
AddressName
Name of the address, for example, loop. See “Numbered
Addresses” on page 51 for address names.
Number
The number of the address. See “Numbered Addresses”
on page 51 for address numbers.
SubAddress Name
(Optional) Some types of numbered addresses can have
sub-addresses. For example, every loop has a Process
Variable (PV) and a Set Point (WSP). See “Device
Information” on page 49.
Format
(Optional) Specify only if the device does not use the
default format. See “Data Formats” on page 33.
The following example addresses the Process Variable (PV) of the second loop:
LOOP 2 PV
Process variable for loop 1:
LOOP 1 PV
Typical Control loop parameter addressing (where n is the loop number):
Parameter
Source Address
Process Variable (PV) LOOP n PV
Destination Address
Not configurable
Set Point (SP)
LOOP n WSP1
LOOP n WSP
Output (OP)
LOOP n OPWORK2
LOOP n OPWORK
Honeywell Universal Modbus Interface Reference
29
3 – Universal Modbus Controller Configuration and Addressing
Parameter
Source Address
Destination Address
MODE (MD)
LOOP n LOOPSTAT
LOOP n MODEIN
1. LSP1 or SP1 can be used if the parameter WSP is unavailable.
2. OP can be used if the parameter OPWORK is unavailable.
Loop Tuning constants (possible AUX parameters for a loop point):
Parameter
Source Address
Destination Address
Gain
LOOP n GAIN1
LOOP n GAIN1
Reset
LOOP n RESET1
LOOP n RESET1
Rate
LOOP n RATE1
LOOP n RATE1
Digital Output values (used on a status point):
Parameter
Source Address
Destination Address
PV
DO n
Not configurable
OP
DO n
DO n 1
1. Note that not all devices support writing to digital output addresses. See “Digital
Output Control Strategies” on page 31.
Digit Input values (used on a status point):
Parameter
Source Address
Destination Address
PV
DI n
Not configurable
Signal Tag and Variable Named Address Support for the HC900 and UMC800
Signal Tags (read only) with TAG as the named parameter and Variables
(read/write) with MATH_VAR as the named parameter may be assigned to analog
(floating point) or digital status points. The Variable and Signal Tag list (Tag
Information) should be printed out from the controller configuration to obtain the
sequential number listing and the data type (Analog or Digital) so that the proper
point assignment may be made.
“Analog” Signal Tag Example:
30
Parameter
Source Address
Destination Address
PV
TAG n
Not Configurable
Defining a Universal Modbus Address for a Point Parameter Value
“Digital” Signal Tag Example:
Parameter
Source Address
Destination Address
PV
TAG n
Not Configurable
“Digital” Variable Example:
Parameter
Source Address
Destination Address
PV
MATH_VAR n
Not Configurable
OP
MATH_VAR n
MATH_VAR n
“Analog” Variable Example:
Parameter
Source Address
Destination Address
PV
MATH_VAR n
Not Configurable
SP
MATH_VAR n
MATH_VAR n
Digital Output Control Strategies
Some controllers support the use of digital outputs as destination addresses;
however, this functionality may have unintended consequences.
Digital outputs are typically controlled by the controller itself. If you use a digital
output in a destination address, the server value will always override the value the
controller expects to use. Once the output has been “forced” by the server, control
cannot be returned to the controller. (that is, the server value will always have
precedence).
Because of this potential problem, the use of the digital output as a destination
address has been disabled for the UMC800. Instead if you have a control strategy
as shown in “Digital Output Control Strategy - Example 1” on page 31, rather
than use “Digital Output” as the destination of a server point parameter, use the
strategy shown in the “Digital Output Control Strategy - Example 2” on page 32.
This strategy uses two server destination addresses, “Force Value” and “Force
Enabled”. “Force Enabled” enables you to switch between the local value,
“Calculated Value”, and the server value, “Force Value”.
Figure 9 Digital Output Control Strategy - Example 1
Calculated Value
Digital Output
Honeywell Universal Modbus Interface Reference
31
3 – Universal Modbus Controller Configuration and Addressing
Figure 10 Digital Output Control Strategy - Example 2
Digital Switch
A
Digital Variable
"Forced Value"
Digital Output
B
Calculated Value
SA
Digital Variable
"Force Enabled"
Location Syntax for Non-named Addresses
Addresses without names can be addressed directly using the format:
n:0xA [Format]
Part
Description
n
Table number. See “Table Types” on page 32 for table
descriptions and their number.
A
Address within the table.
Format
(Optional) Only used for Input and Holding register
tables (3 and 4). If a format is not specified, the format
defaults to IEEEFP. See “Data Formats” on page 33 for
more information.
Table Types
Table Description
Table Number Point Type
Address Type
Digital Output (also
known as Coil)1
0
Status
Source/Destination2
Digital Input
1
Status
Source
Input Registers
3
Status/Analog/Accumulator Source
Holding Registers
4
Status/Analog/Accumulator Source/Destination
1. See “UMC800 Problems” on page 41 and “HC900 Problems” on page 43.
2. See “Digital Output Control Strategies” on page 31.
32
Defining a Universal Modbus Address for a Point Parameter Value
Data Formats
The data format tells the server how to interpret the register value. The possible
formats are:
Data Format
Description
Point Type
IEEEFP
32-bit IEEE floating point value. (Big
Endian)
Status/Analog/Accumulator
n
Bit field. n represents the starting bit (0 to Status
15). This cannot be used with a named
address.
MODE
Informs the server that the address is a
mode parameter.
Status/Analog/Accumulator
UINT2
Unscaled 16-bit integer.
Status/Analog/Accumulator
Non-named Address Examples (for HC900):
Parameter
Point Type
Address Type
Point Table/Address/ Controller
Format
OFFSET
Address
Signal Tag 1001
Analog
Source
4:0x42CD IEEEFP 4000
Loop 25 PV
Analog
Source
4:0x7840 IEEEFP
6000
Source/
Destination
4:0x78FA 0
6000
*
Analog In, Slot 2, Analog
Channel 2, of Rack
2
Source
3:0x112 IEEEFP
0
*
Digital In, Slot 8, Status
Channel 3, of Rack
1
Source
1:0x72
0
Step Number of
Sequencer 1
Source
4:0x5AA9 UINT2
4000
Loop 25 A/M Stat Status
Analog
(Bit 0 of 16-bit
register)
(16-bit Integer)
* All I/O beyond Rack 1 in an HC900 must be addressed using hex addressing while all
I/O in Rack 1 can be accessed using DI, DO, and AI named addresses, for example, D1 9,
AI 18.
Named Register Addresses
See “Device Information” on page 49 for addresses relevant to your device.
Honeywell Universal Modbus Interface Reference
33
3 – Universal Modbus Controller Configuration and Addressing
Troubleshooting Point Configuration
Errors when point building
84E0h
Invalid address for this type of controller specified.
8426h
Invalid data format for this type of controller specified.
Error when scanning
(Errors appear in log)
0106h
A request to the controller timed out. This could be caused by a
communication setup problems (for example, wrong address or Baud rate).
A channel write delay value being too low could also cause this problem. See
“Channel Write Delay Settings” on page 20. Try increasing the value to solve
the problem.
8102h
An invalid address has been reported by the controller. This could be caused
by the wrong address, the wrong data type, or the wrong controller type.
34
Optimizing Scanning Performance
Optimizing Scanning Performance
The maximum amount of data that can be acquired from an controller is
influenced by the rate of sending scan packets to the controller. An understanding
of the Universal Modbus scan packets will help you configure points so that
optimal data acquisition performance can be achieved by maximizing the amount
of data acquired with each scan packet.
The scan packets that have been built can be listed by using the list scan utility,
lisscn. Listing scan packets helps verify the scanning strategy. See the
Configuration Guide for usage of lisscn.
Honeywell Universal Modbus Interface Reference
35
3 – Universal Modbus Controller Configuration and Addressing
36
Server and Station Tasks for
Universal Modbus
4
This chapter describes tasks for the Universal Modbus controller that you perform
either on the server or from any Station.
For:
Go to:
Testing communications with the server
page 38
Troubleshooting
page 40
Honeywell Universal Modbus Interface Reference
37
4 – Server and Station Tasks for Universal Modbus
Testing Communications with the Server
Use the test utility umbtst to test the communications.
Before using the utility, make sure that:
•
You have set up your Control Products controllers according to their user
manuals.
•
All cables are connected.
•
You have configured your channels in Quick Builder without error and
downloaded all configuration information to the server without error.
•
The server need not be running while using the utility as long as the database
service is running. If making a connection through a terminal server, the
server daemon service should also be running.
•
The server is not communicating with your devices. The umbtst utility might
interfere with communications.
To stop the server, type the command at the command prompt:
hscserver /load
Answer y to every prompt. This unloads the server, but leaves the database in
memory.
To use the test utility, start a command prompt window and type: umbtst.
When prompted for the channel number, type chn01 for channel 1 and so on.
For help using this utility, type ?.
To check if your devices are present, use the find a,b command. This
command locates all Universal Modbus devices on the channel with IDs between
a and b. For example:
C:\>umbtst
Enter LRN or device name of channel
chn01
Enter command:
find 1,4
FIND device with id
Device
1 ?
Device
2 ?
Device
3 ? ...responding
Device
4 ?
Enter command:
38
1 to
4, at 28-May-98
14:06:52
Testing Communications with the Server
q
If you do not know the device name of your channel, select View > System
Status > Channels from the Station menu. To the left of the channel name is the
channel number. The device name of the channel will be the letters “chn”
followed by the two-digit channel number. For example, your Universal Modbus
channel “COM3” might be channel number 1. Its device name will be “chn01”.
Honeywell Universal Modbus Interface Reference
39
4 – Server and Station Tasks for Universal Modbus
Troubleshooting Universal Modbus Configuration Errors
Common Problems
Error message/problem
Explanation/solution
You see the error in the server log file:
The server has not received a response from the
controller.
Error code 0106 (Device
Timeout)
You see the error in the server log file:
Error code 8102 (MODBUS
error 2 - illegal data
address)
You either specified an illegal address, or an
illegal number of addresses.
You see the error in the Station Message The point is in AUTO mode, or its equivalents
Zone when you try to change the OP
(AUTO-LSP, CASC, AUTO-RSP). You must
parameter:
change the mode of the point to MAN or its
CONTROL - Illegal mode for equivalents (MAN-LSP, MAN-RSP).
control of parameter
You see the error in the Quick Builder
output file:
You have upgraded your database from a
previous server version and the there is not
Address is outside hardware enough room to store the controller addresses.
cross reference table
To rectify the problem, follow these steps:
1. Make a backup of \server\data.
2. At the command prompt, type:
sysbld -preserve -full.
3. Answer Y to the first two queries.
4. When presented with the ability to change
all sorts of database values, press <Enter>
until you see the following message:
There are 8192 addresses
per rtu. Enter required
number of addresses
5. Change the number of addresses per rtu
(controller) to 32766.
6. Keep pressing <Enter> until the sysbld
command terminates.
40
Troubleshooting Universal Modbus Configuration Errors
Error message/problem
Explanation/solution
The address LOOP n SP doesn’t
download.
The SP parameter is not a valid named address
because there are a number of set point types
available, and a simple SP is ambiguous. WSP
stands for working set point and SP1 stands for
set point 1. In most cases, WSP works best.
Problems with Specific Controller Models
UDC3300 Problems
Error message/problem
Explanation/solution
• You attempt to change a Setpoint in
Station and the value changes on the
Station display but not on the
controller faceplate.
The communications link between the
controller and server can become
overwhelmed. The solution is to increase the
COM > Tx Delay on the controller faceplate.
• You attempt to change a Setpoint in
Station and the value on the Station
display changes to a different value
and the controller’s faceplate doesn’t
change.
UMC800 Problems
Error message/problem
Explanation/solution
• You know that you should use the
address LOOP n
parametername but you don’t
know what value to use for n.
The number shown on the top right-hand side
of the PID block does NOT correspond with
the loop number. You can find out the
appropriate number by selecting File > Print >
Block Parameters in the Honeywell Control
Builder configuration utility.
• You want to access the process
variable of the only PID loop you
One of the properties printed out is Modbus ®
have configured. You used the
number n which appears on the top loop number. Use this number for your loops.
right-hand corner of the PID block
(LOOP n PV), but the values shown
by the server don’t seem to match
those values in your controller.
Honeywell Universal Modbus Interface Reference
41
4 – Server and Station Tasks for Universal Modbus
Error message/problem
Explanation/solution
The address PID n PV doesn’t
download.
The PID part of the address is not valid and
doesn’t appear in the Universal Modbus driver
documentation.
You cannot use the names of control blocks
within Control Builder as Universal Modbus
addresses. You can only use the addresses
listed in the Universal Modbus documentation.
You know that you should use the
address AI n but you don't know what
value to use for n.
The analog input number is calculated using
the formula: n = (m-1) * 4 + c.
n = the analog input number.
m = the module/slot number. The UMC800 has
16 slots, numbered 1 to 16.
c = the channel number (of the analog input).
The analog input devices have up to four
channels, numbered 1 to 4.
You know that you should use the
address DI n or DO n but you don’t
know what value to use for n.
The digital input number is calculated using the
formula: n = (m-1) * 16 + c.
n = the digital input or output number.
m = the module/slot number. The UMC800 has
16 slots, numbered 1 to 16.
c = the channel number (of the digital input or
output). The digital I/O devices have up to 16
channels, numbered 1 to 16.
You want to write to a digital output.
Honeywell recommends against writing to a
digital output because this forces the output to
a particular state, which cannot be overridden
using the UMC800 internal logic. (Since this
practice is inherently dangerous, it is not
supported.)
You can create a safer implementation using
digital variables and some UMC800 logic
blocks.
You see the error:
You might be trying to download to a controller
whose OFFSET address is not 0x2000. Please
***** PNTBLD ERROR *****
read
the Universal Modbus documentation
illegal MODICON plc address
about address ranges and OFFSET.
in the Quick Builder output when trying
to download a signal tag as a source
address (such as TAG 2) to the server.
42
Troubleshooting Universal Modbus Configuration Errors
Error message/problem
Explanation/solution
You see the error:
Signal tags are read-only parameters, so cannot
be used as destination addresses. Please read
***** PNTBLD ERROR *****
illegal MODICON plc address the Universal Modbus documentation about
read-only and write-only addresses.
in the Quick Builder output when trying
to download a signal tag, such as TAG
2, as a destination address to the server.
You don’t know what number to use for 1. Start the configuration utility Honeywell
the signal tag using named address TAG
Control Builder configuration utility.
or variable using named address
2. Select File > Print.
MATH_VAR.
3. Select Tag Properties then click OK.
4. Your printout should show, amongst other
items, your signal tags. To the right of the
words “Signal Tag” or “Variable” you
should see a number. This is the tag number
you should use in the address TAG n or
MATH_VAR n.
HC900 Problems
Error message/problem
Explanation/solution
You know you should use the address
LOOP n parametername but you don’t
know what value to use for n.
The block execution order number shown on
the upper right-hand side of the block does
NOT correspond with the loop number. The
You want to access the process variable loop number corresponds with order of entry of
the PID loop blocks only. You can find the
of the only control loop that you have
appropriate number by selecting File > Print
configured. You used the number n
which appears on the upper-right hand Report Preview, then select FBD’s icon and
corner of the PID block (LOOP n PV), Block Modbus Parameters in the Hybrid
but the values shown by the server don’t Control (HC) Designer configuration. The
Loop Blocks are listed by number. Use this
seem to match those values in your
number for your loops. Loop numbers 1 – 24
controller.
are supported using Named addressing.
Loops 25-32 require Non-named addressing
using hex addresses for the parameters.
For loops 25 – 32, you know that this
requires Non-named addressing using
hex parameter addresses but there is no
mode support for Auto-Manual and
Remote-Local SP in combination from
the standard station point displays.
This is true. For loops 1- 24, using named
addresses, the mode is handled as 2 bits and
Station selections are available for
AUTO-LOC, AUTO-REM, MAN-LOC, and
MAN-REM. However, for loops 25 – 32 with
hex addressing only one bit may be addressed
for Mode – Auto/Manual or Remote/Local. See
Non-named Address examples for HC900.
Honeywell Universal Modbus Interface Reference
43
4 – Server and Station Tasks for Universal Modbus
Error message/problem
Explanation/solution
For analog inputs in the first rack, you
For the first rack only, the analog input number
know that you should use the address AI is calculated using the formula:
n but you don’t know what value to use n = (m-1) * 8 + c.
for n.
n = the analog input number
m = the module/slot number. The HC900 has
up to 12 slots depending on rack size,
numbered 1 to 12.
c = the channel number (of the analog input).
The analog input cards have 8 channels,
numbered 1 to 8. The 2nd AI channel for
slot/module 2 in Rack 1 is AI 10.
I don’t know to access analog inputs
beyond the first rack.
If you have provided a Signal Tag for the
Analog Input block output, use this tag number
and TAG as the address name, for example,
TAG 45 for a controller with an OFFSET
address of 2000. Otherwise, you must use
Non-Named hexadecimal addressing for a
controller with an offset of 0. The address
ranges for the racks are as follows:
Rack 1: 0 - FF
Rack 2: 100-1FF
Rack 3: 200 – 2FF
Rack 4: 300 – 3FF
Rack 5: 400 – 4FF
Zero-based addressing is used and two
contiguous registers comprise the floating
point data. Table 3 (Modbus Function Code 4)
is used for access. The first analog channel for
slot/module 1 in Rack 2 is: 3:x100 IEEEFP,
channel 2 is 3:x102 IEEEFP, channel 8 is
3:x10E IEEEFP. There are 8 inputs per
slot/module.
44
Troubleshooting Universal Modbus Configuration Errors
Error message/problem
Explanation/solution
For analog inputs in the first rack, you
For the first rack only, the digital or output
know that you should use the address DI number is calculated using the formula:
n or DO n but you don’t know what
n = (m-1) * 16 + c.
value to use for n.
n = the analog input number
m = the module/slot number. The HC900 has
up to 12 slots depending on rack size,
numbered 1 to 12.
c = the channel number (of the digital input or
output). The digital I/O cards have 8 or 16
channels, numbered 1 to 8 or 1 to 16. An
allocation of 16 I/O is made for each
slot/module regardless of type. The 2nd DI
channel for slot/module 3 in Rack 1 is DI 34.
I don’t know to access digital I/O beyond If you have provided a Signal Tag for the
the first rack.
Digital Input or Output block output, use this
tag number and TAG as the address name, for
example, TAG 56 for a controller with an
OFFSET address of 2000. Otherwise, you must
use Non-Named hexadecimal addressing for a
controller with an offset of 0. The address
ranges for the racks are as follows:
Rack 1: 0 - FF
Rack 2: 100-1FF
Rack 3: 200 – 2FF
Rack 4: 300 – 3FF
Rack 5: 400 – 4FF
Zero-based addressing is used and two
contiguous registers comprise the floating
point data. Table 1 is used for access to digital
inputs and Table 0 is used for digital outputs.
The 3rd digital input channel for slot/module 6
in Rack 2 is 1:x152, the 4th digital input on the
same module is 1:x153. The 5th digital output
for slot/module 8 in Rack 3 is 0:x274. There
are 8 inputs per slot/module. An allocation of
16 I/O is made for each slot/module regardless
of type.
Honeywell Universal Modbus Interface Reference
45
4 – Server and Station Tasks for Universal Modbus
Error message/problem
Explanation/solution
You want to write to a digital output.
Honeywell recommends against writing to a
digital output since this forces cannot be
returned to normal via Modbus
communications. Use the HC Designer tool
concurrently for force actions where force
removal is supported. You may also use digital
Variables and logic blocks in the controller
configuration to implement the force more
safely via Station.
You see the error:
You might be trying to download to a controller
whose OFFSET address is not 2000. Please
read the Universal Modbus documentation
about offset ranges and OFFSET.
****** PNTBLD ERROR*******
illegal MODICON plc address
in the Quick Builder output when trying
to download a signal tag as a source
address (such as TAG 2) to the server.
You see the error:
Signal tags are read-only parameters, so cannot
be used as destination addresses. You will need
to use Variables in your HC900 configuration
instead for writes. Please read the Universal
in the Quick Builder output when trying Modbus documentation about read-only and
to download a signal tag such as TAG 2 write-only addresses.
as a destination address to the server.
****** PNTBLD ERROR*******
illegal MODICON plc address
You don’t know what number to use for Start the Hybrid Control (HC) Designer
accessing an HC900 Signal Tag or a
configuration tool.
Variable.
Select File > Print Report Preview
Select FBD’s icon in the dialog box.
Select Tag Information from the pull-down
menu
This listing shows the Variables and Signal
Tags used in the configuration listed by tag
name and in number sequence. Use the number
in the # column as your reference for use in the
address TAG n (for Signal Tags) or
MATH_VAR n for Variables.
You may print out this list for reference by
selecting the Print button from Print Preview.
46
Troubleshooting Universal Modbus Configuration Errors
Error message/problem
Explanation/solution
You want to know which HC900 Signal You can apply Signal Tags (read only) and
Tags or Variables are digital in nature so Variables (read/write) to digital Status points if
that they can be applied to Status points. they are digital data types. See above for
information related to viewing/printing the Tag
Information Report. The Data Type column
lists whether the parameter is Digital or
Analog. If digital, you may apply to Status
points. The UMB driver does the floating point
conversion to integer translation to read or
write an ON (1) or OFF (0) condition.
You want to know how to input a set
point programmer point to use the
standard screens in Station for viewing
an HC900 set point programmer table
and the profile pre-plot.
Consult the HC900 SPP & Recipe Support
Users Guide. Support is for programmers 1-4
only. There is no UMB driver support for
programmers 5-8.
Honeywell Universal Modbus Interface Reference
47
4 – Server and Station Tasks for Universal Modbus
48
5
Device Information
This chapter lists numbered and non-numbered addresses, their parameter details
and the devices which are supported.
This following devices are supported by the Universal Modbus controller:
•
RSX
•
VPR100
•
VRX100
•
VRX180
•
UDC5300
•
DR4300
•
DR4500
•
DPR180
•
DPR250
•
UDC2300
•
UDC3300
•
UMC800
•
HC900
•
TrendView
For numbered address details about:
For details about:
Go to:
Alarm Set Point Value Group
page 64
Alarm Set Point Value Group
page 65
Alarm Status
page 67
Alarm Status Analog
page 68
Alarm Status Channel
page 69
Honeywell Universal Modbus Interface Reference
49
5 – Device Information
For details about:
Go to:
Alarm Status Com
page 70
Alarm Status Digital
page 68
Alarm Status Event
page 69
Alarm Status Math
page 70
Analog Input
page 60
Communication or Constant Value Group
page 62
Digital Input Table
page 71
Digital Input Table
page 71
Digital Output Table
page 72
Digital Output Table
page 73
Math, Variable or Calculated Value Group
page 63
Math or Calculated Value Status
page 65
PID Loop
page 51
Set Point Scheduler #1 Segment
page 92
Set Point Scheduler #2 Segment
page 95
Set Point Scheduler Values
page 88
Set Point Programmer
page 73
Set Point Programmer #1 Profile Segment
page 79
Set Point Programmer #2 Profile Segment
page 81
Set Point Programmer #3 Profile Segment
page 84
Set Point Programmer #4 Profile Segment
page 86
Set Point Program Additional Values
page 78
Tagged Signal
page 61
Totalizer Value Group
page 64
Totalizer Value Status
page 66
For information about non-numbered addresses, see “Non-numbered Addresses”
on page 99.
50
Devices
Devices
Baud Rates Supported
The following table lists the devices and their supported baud rates.
Note
Baud rates are not applicable to HC900 or TrendView devices. These devices use
Ethernet connections.
Baud Rate Supported
Device
300
600
1200
2400
4800
9600
19200
38400
RSX
Yes
Yes
Yes
Yes
Yes
Yes
Yes
Yes
VPR100
Yes
Yes
Yes
Yes
Yes
Yes
Yes
Yes
VRX100
Yes
Yes
Yes
Yes
Yes
Yes
Yes
Yes
VRX180
Yes
Yes
Yes
Yes
Yes
Yes
Yes
v
UDC5300
Yes
Yes
Yes
Yes
Yes
Yes
Yes
Yes
DR4300
Yes
Yes
Yes
Yes
Yes
Yes
Yes
Yes
Yes
Yes
Yes
Yes
Yes
DPR180
Yes
Yes
Yes
Yes
Yes
Yes
Yes
Yes
DPR250
Yes
Yes
Yes
Yes
Yes
Yes
Yes
Yes
UDC2300
Yes
Yes
Yes
Yes
Yes
Yes
Yes
UDC3300
Yes
Yes
Yes
Yes
Yes
Yes
Yes
UMC800
Yes
Yes
Yes
Yes
Yes
Yes
Yes
DR4500
Yes
Numbered Addresses
PID Loop
The following table lists the devices which support PID Loops and their formats.
Device
Supported Address Format
Range
RSX
LOOP [n] [param]
[n] = 1 to 2
VPR100
LOOP [n] [param]
[n] = 1 to 4
Honeywell Universal Modbus Interface Reference
51
5 – Device Information
Device
Supported Address Format
Range
VRX100
LOOP [n] [param]
[n] = 1 to 2
VRX180
LOOP [n] [param]
[n] = 1 to 8
UDC5300
LOOP [n] [param]
[n] = 1 to 2
DR4300
LOOP [n] [param]
[n] = 1 to 1
DR4500
LOOP [n] [param]
[n] = 1 to 2
UDC2300
LOOP [n] [param]
[n] = 1 to 1
UDC3300
LOOP [n] [param]
[n] = 1 to 2
UMC800
LOOP [n] [param]
[n] = 1 to 16
HC900
LOOP [n] [param]
[n] = 1 to 24
Param Format
Access
The following table lists the details of the PID Loop parameters.
Param
Process Variable LOOP [n] PV1
Floating Point
RO RSX, VPR100,
VRX100, VRX180,
UDC5300, DR4300,
DR4500, UDC2300,
UDC3300, UMC800,
HC900
Output
LOOP [n] OP
Floating Point
RW RSX, VPR100,
VRX100, VRX180,
UDC5300, DR4300,
DR4500, UDC2300,
UDC3300, UMC800,
HC900
Input #1
LOOP [n] INP1
Floating Point
RO RSX, VPR100,
VRX100, VRX180,
UDC5300, DR4300,
DR4500, UDC2300,
UDC3300, UMC800,
HC900
Gain #1
LOOP [n] GAIN1
Floating Point
RW RSX, VPR100,
VRX100, VRX180,
UDC5300, DR4300,
DR4500, UDC2300,
UDC3300, UMC800,
HC900
(Prop Band #1 if
active)
52
Address Line
Devices
Param
Address Line
Param Format
Access
Devices
Devices
Prop Band #1
LOOP [n] PROP1
Floating Point
RW RSX, VPR100,
VRX100, VRX180,
UDC5300, DR4300,
DR4500, UDC2300,
UDC3300, UMC800,
HC900
DIR
LOOP [n] DIR
Floating Point
RO RSX, VPR100,
VRX100, VRX180,
UDC5300, DR4300,
DR4500, UDC2300,
UDC3300, UMC800,
HC900
Reset #1
LOOP [n] RESET1
Floating Point
RW RSX, VPR100,
VRX100, VRX180,
UDC5300, DR4300,
DR4500, UDC2300,
UDC3300, UMC800,
HC900
Rate #1
LOOP [n] RATE1
Floating Point
RW RSX, VPR100,
VRX100, VRX180,
UDC5300, DR4300,
DR4500, UDC2300,
UDC3300, UMC800,
HC900
PV Low Range
LOOP [n] PVLOW
Floating Point
RO RSX, VPR100,
VRX100, VRX180,
UDC5300, DR4300,
DR4500, UDC2300,
UDC3300, UMC800,
HC900
PV High Range LOOP [n] PVHIGH
Floating Point
RO RSX, VPR100,
VRX100, VRX180,
UDC5300, DR4300,
DR4500, UDC2300,
UDC3300, UMC800,
HC900
Alarm #1 SP #1 LOOP [n] AL1SP1
Floating Point
RW RSX, VPR100,
VRX100, VRX180,
UDC5300, DR4300,
DR4500, UDC2300,
UDC3300, UMC800,
HC900
Honeywell Universal Modbus Interface Reference
53
Param Format
Access
5 – Device Information
Param
Address Line
Alarm #1 SP #2 LOOP [n] AL1SP2
Floating Point
RW RSX, VPR100,
VRX100, VRX180,
UDC5300, DR4300,
DR4500, UDC2300,
UDC3300, UMC800,
HC900
Gain #2
LOOP [n] GAIN2
Floating Point
RW RSX, VPR100,
VRX100, VRX180,
UDC5300, DR4300,
DR4500, UDC2300,
UDC3300, UMC800,
HC900
Prop Band #2
LOOP [n] PROP2
Floating Point
RW RSX, VPR100,
VRX100, VRX180,
UDC5300, DR4300,
DR4500, UDC2300,
UDC3300, UMC800,
HC900
DB
LOOP [n] DB
Floating Point
RW RSX, VPR100,
VRX100, VRX180,
UDC5300, DR4300,
DR4500, UDC2300,
UDC3300, UMC800,
HC900
Reset #2
LOOP [n] RESET2
Floating Point
RW RSX, VPR100,
VRX100, VRX180,
UDC5300, DR4300,
DR4500, UDC2300,
UDC3300, UMC800,
HC900
Rate #2
LOOP [n] RATE2
Floating Point
RW RSX, VPR100,
VRX100, VRX180,
UDC5300, DR4300,
DR4500, UDC2300,
UDC3300, UMC800,
HC900
Set Point #1
LOOP [n] SP1
Floating Point
RW RSX, VPR100,
VRX100, VRX180,
UDC5300, DR4300,
DR4500, UDC2300,
UDC3300, UMC800,
HC900
(Prop Band #2 if
active)
54
Devices
Param
Address Line
Param Format
Access
Devices
Devices
Local Set Point
#1
LOOP [n] LSP1
Floating Point
RW RSX, VPR100,
VRX100, VRX180,
UDC5300, DR4300,
DR4500, UDC2300,
UDC3300, UMC800,
HC900
Local Set Point
#2
LOOP [n] LSP2
Floating Point
RW RSX, VPR100,
VRX100, VRX180,
UDC5300, DR4300,
DR4500, UDC2300,
UDC3300, UMC800,
HC900
Alarm #2 SP #1 LOOP [n] AL2SP1
Floating Point
RW RSX, VPR100,
VRX100, VRX180,
UDC5300, DR4300,
DR4500, UDC2300,
UDC3300, UMC800,
HC900
Alarm #2 SP #2 LOOP [n] AL2SP2
Floating Point
RW RSX, VPR100,
VRX100, VRX180,
UDC5300, DR4300,
DR4500, UDC2300,
UDC3300, UMC800,
HC900
SP Low Limit
LOOP [n] SPLOW
Floating Point
RW RSX, VPR100,
VRX100, VRX180,
UDC5300, DR4300,
DR4500, UDC2300,
UDC3300, UMC800,
HC900
SP High Limit
LOOP [n] SPHIGH
Floating Point
RW RSX, VPR100,
VRX100, VRX180,
UDC5300, DR4300,
DR4500, UDC2300,
UDC3300, UMC800,
HC900
Output Low
Limit
LOOP [n] OPLOW
Floating Point
RW RSX, VPR100,
VRX100, VRX180,
UDC5300, DR4300,
DR4500, UDC2300,
UDC3300, UMC800,
HC900
Honeywell Universal Modbus Interface Reference
55
Param
Address Line
Param Format
Access
5 – Device Information
OP High Limit
LOOP [n] OPHIGH
Floating Point
RW RSX, VPR100,
VRX100, VRX180,
UDC5300, DR4300,
DR4500, UDC2300,
UDC3300, UMC800,
HC900
Output Working LOOP [n] OPWORK Floating Point
Value
RW RSX, VPR100,
VRX100, VRX180,
UDC5300, DR4300,
DR4500, UDC2300,
UDC3300, UMC800,
HC900
RATIO
LOOP [n] RATIO
Floating Point
RW RSX, VPR100,
VRX100, VRX180,
UDC5300, DR4300,
DR4500, UDC2300,
UDC3300, UMC800,
HC900
BIAS
LOOP [n] BIAS
Floating Point
RW RSX, VPR100,
VRX100, VRX180,
UDC5300, DR4300,
DR4500, UDC2300,
UDC3300, UMC800,
HC900
Deviation
LOOP [n] DEV
Floating Point
RO RSX, VPR100,
VRX100, VRX180,
UDC5300, DR4300,
DR4500, UDC2300,
UDC3300, UMC800,
HC900
Auto / Manual
LOOP [n] AMSTAT
Discrete (bits).
RW RSX, VPR100,
VRX100, VRX180,
UDC5300, DR4300,
DR4500, UDC2300,
UDC3300, UMC800,
HC900
[Status Point
Only]
Writable
LOOP [n] MODEIN
Controller Mode
56
Devices
Control Mode RW RSX, VPR100,
Auto / Man State
VRX100, VRX180,
(bit 0) and LSP /
UDC5300, DR4300,
RSP State (bit 2).
DR4500, UDC2300,
UDC3300, UMC800,
HC900
Param
Address Line
Param Format
Access
Devices
Remote / Local
Set Point State
LOOP [n]
RSP_STATE
Discrete (bits).
RW RSX, VPR100,
VRX100, VRX180,
UDC5300, DR4300,
DR4500, UDC2300,
UDC3300, UMC800,
HC900
[Status Point
Only]
Bit 0, 0 = LSP,
1 = RSP
Tune Set State
LOOP [n]
Discrete (bits).
TUNE_SET_STATE [Status Point
Only]
Devices
RW RSX, VPR100,
VRX100, VRX180,
UDC5300, DR4300,
DR4500, UDC2300,
UDC3300, UMC800,
HC900
Read-only mode LOOP [n]
for the PID Loop LOOPSTAT
Mode Status - Bit RO RSX, VPR100,
0 = Auto / Man
VRX100, VRX180,
State.
UDC5300, DR4300,
Bit 2 = LSP / RSP
DR4500, UDC2300,
State.
UDC3300, UMC800,
HC900
Read-only
AUTO / MAN
Mode
Discrete (bits).
LOOP [n]
STATUS_MODE
[Status Point
Only]
Bit 0, 0 = Man,
1 = Auto
Currently
Selected Set
Point
LOOP [n]
STATUS_SP
Discrete (bits).
Currently
Selected Local
or Remote Set
Point
LOOP [n]
STATUS_RSP
Discrete (bits). [
Currently
Selected Tune
Set
LOOP [n]
STATUS_TUNE
Discrete (bits).
[Status Point
Only]
RO RSX, VPR100,
VRX100, VRX180,
UDC5300, DR4300,
DR4500, UDC2300,
UDC3300, UMC800,
HC900
RO RSX, VPR100,
VRX100, VRX180,
UDC5300, DR4300,
DR4500, UDC2300,
UDC3300, UMC800,
HC900
RO RSX, VPR100,
VRX100, VRX180,
Status Point Only]
UDC5300, DR4300,
DR4500, UDC2300,
UDC3300, UMC800,
HC900
[Status Point
Only]
Bit 0, 0 = Tune
Set 1,
RO RSX, VPR100,
VRX100, VRX180,
UDC5300, DR4300,
DR4500, UDC2300,
UDC3300, UMC800,
HC900
1 = Tune Set 2
Honeywell Universal Modbus Interface Reference
57
Param
Address Line
Param Format
Access
5 – Device Information
Remote Set
Point (RSP)
LOOP [n] RSP
Floating Point
RW RSX, VPR100,
VRX100, VRX180,
UDC5300, UMC800,
HC900
Set Point #2
LOOP [n] SP2
Floating Point
RW RSX, VPR100,
VRX100, VRX180,
UDC5300, UMC800,
HC900
Working Set
Point (WSP)
LOOP [n] SPWORK Floating Point
RW RSX, VPR100,
VRX100, VRX180,
UDC5300, UMC800,
HC900
Remote Set
Point (RSP)
LOOP [n] RSP
Floating Point
RO DR4300, DR4500,
UDC2300, UDC3300,
UMC800, HC900
Set Point #2
LOOP [n] SP2
Floating Point
RO DR4300, DR4500,
UDC2300, UDC3300,
UMC800, HC900
Working Set
Point (WSP)
LOOP [n] SPWORK Floating Point
RO DR4300, DR4500,
UDC2300, UDC3300
Working Set
Point
(SPWORK)
LOOP [n] WSP
Floating Point
RO DR4300, DR4500
Working Set
Point
(SPWORK)
LOOP [n] WSP
Floating Point
RW RSX, VPR100,
VRX100, VRX180,
UDC5300, UDC2300,
UDC3300, UMC800,
HC900
Process Variable LOOP [n] PVOVR
Override Value
Floating Point
RW UDC2300, UDC3300
Set Point
Override Value
LOOP [n] SPOVR
Floating Point
RW UDC2300, UDC3300
Output Override LOOP [n] OPOVR
Value
Floating Point
RW UDC2300, UDC3300
LOOP [n] SP_STATE Discrete (bits).
RW UDC2300, UDC3300
Set Point State
[Status Point
Only]
58
Devices
Param
Address Line
Param Format
Set Point State
LOOP [n] SP_STATE Discrete (bits).
[Status Point
Only]
Bit 0, 0 = SP1,
1 = SP2
Access
Devices
Devices
RW RSX, VPR100,
VRX100, VRX180,
UDC5300, DR4300,
DR4500, UDC2300,
UMC800, HC900
Input #2
LOOP [n] INP2
Floating Point
RO RSX, VPR100,
VRX100, VRX180,
UDC5300, DR4300,
DR4500, UDC2300,
UDC3300
Cycle Time #1
LOOP [n] CYCLE1
Floating Point
RW RSX, VPR100,
VRX100, VRX180,
UDC5300, DR4300,
DR4500, UDC2300,
UDC3300
Cycle Time #2
LOOP [n] CYCLE2
Floating Point
RW RSX, VPR100,
VRX100, VRX180,
UDC5300, DR4300,
DR4500, UDC2300,
UDC3300
Local Set Point
#3
LOOP [n] LSP3
Floating Point
RW RSX, VPR100,
VRX100, VRX180,
UDC5300, DR4300,
DR4500, UDC2300,
UDC3300
Temperature in LOOP [n] TEMP
carbon potential
loop
Floating Point
RO UMC800, HC900
Cycle Time #1
LOOP [n] CYCLE1
Floating Point
RO UMC800, HC900
Cycle Time #2
LOOP [n] CYCLE2
Floating Point
RO UMC800, HC900
Manual Reset
LOOP [n]
MAN_RESET
Floating Point
RW UMC800, HC900
Feed Forward
Gain
LOOP [n] FF_GAIN Floating Point
RW UMC800, HC900
Local Percent
Carbon
Monoxide
LOOP [n] PCTCO
Floating Point
RW UMC800, HC900
Furnace Factor
LOOP [n] FFCTR
Floating Point
RW UMC800, HC900
Percent
Hydrogen
LOOP [n] H2
Floating Point
RW UMC800, HC900
Honeywell Universal Modbus Interface Reference
59
Param
Address Line
Param Format
Access
5 – Device Information
On/Off Output
Hysteresis
LOOP [n]
OUT_HYST
Floating Point
RW UMC800, HC900
Carbon Potential LOOP [n] CPD
Dewpoint
Floating Point
RW UMC800, HC900
Three Position LOOP [n] MOTOR
Step Motor Time
Floating Point
RW UMC800, HC900
Fuzzy State
Discrete (bits).
RW UMC800, HC900
LOOP [n]
FUZZY_STATE
Devices
[Status Point
Only]
Bit 0, 0 = Disable,
1 = Enable
Demand Tune
Request
LOOP [n]
TUNE_REQ
Discrete (bits).
RW UMC800, HC900
[Status Point
Only]
Bit 0, 0 = Off,
1 = On
Anti-soot set
point limit
enable
LOOP [n]
ANTI_SOOT
Discrete (bits).
RW UMC800, HC900
[Status Point
Only]
Bit 0, 0 = Off,
1 = On
IMAN Active /
Inactive
LOOP [n]
STATUS_IMAN
Active / Inactive LOOP [n]
LO
STATUS_LO
Discrete (bits).
RO UMC800, HC900
[Status Point
Only]
Discrete (bits).
RO UMC800, HC900
[Status Point
Only]
1. The default Parameter if only “LOOP [n]” is entered.
Analog Input
The following table lists the devices which support Analog Inputs and their
formats.
60
Device
Supported Address Format
Range
RSX
AI [n] [param]
[n] = 1 to 6
VPR100
AI [n] [param]
[n] = 1 to 12
Devices
Device
Supported Address Format
Range
VRX100
AI [n] [param]
[n] = 1 to 12
VRX180
AI [n] [param]
[n] = 1 to 48
UDC5300
AI [n] [param]
[n] = 1 to 3
DR4300
AI [n] [param]
[n] = 1 to 1
DR4500
AI [n] [param]
[n] = 1 to 4
DPR180
AI [n] [param]
[n] = 1 to 24
DPR250
AI [n] [param]
[n] = 1 to 64
UDC2300
AI [n] [param]
[n] = 1 to 2
UDC3300
AI [n] [param]
[n] = 1 to 3
UMC800
AI [n] [param]
[n] = 1 to 64
HC900
AI [n] [param]
[n] = 1 to 64*
TrendView
AI [n] [param]
[n] = 1 to 32
* In 1st rack, first 8 slots.
Param
Address Line
Param Format
Access
The following table lists the details of the Analog Input parameters.
Devices
Analog Input
Value
AI [n] VALUE1
Floating Point
RO RSX, VPR100,
VRX100, VRX180,
UDC5300, DR4300,
DR4500, DPR180,
DPR250, UDC2300,
UDC3300, UMC800,
HC900, TV
1. The default Parameter if only “AI [n]” is entered.
Tagged Signal
The following table lists the devices which support Tagged Signal and their
formats.
Device
Supported Address Format
Range
UMC800
TAG [n] [param]
[n] = 1 to 500
HC900
TAG [n] [param]
[n] = 1 to 1000
Honeywell Universal Modbus Interface Reference
61
5 – Device Information
Param
Address Line
Param Format
Access
The following table lists the details of the Tagged Signal parameters.
Devices
Tagged Signal
Value
TAG [n] VALUE1
Floating Point
RO UMC800, HC900
1. The default Parameter if only “TAG [n]” is entered.
Communication or Constant Value Group
The following table lists the devices which support the Communication or
Constant Value group and their formats.
Device
Supported Address Format
Range
RSX
CN [n] [param]
[n] = 1 to 10
VPR100
CN [n] [param]
[n] = 1 to 16
VRX100
CN [n] [param]
[n] = 1 to 16
VRX180
CN [n] [param]
[n] = 1 to 32
UDC5300
CN [n] [param]
[n] = 1 to 9
DPR180
CN [n] [param]
[n] = 1 to 24
DPR250
CN [n] [param]
[n] = 1 to 32
TrendView
CN [n] [param]
[n] = 1 to 32
Param
Address Line
Communication CN [n] VALUE1
Value
Param Format
Access
The following table lists the details of the Communication or Constant Value
Group parameters.
Devices
Floating Point
RW RSX, VPR100,
VRX100, VRX180,
UDC5300, DPR180,
DPR250, TV2
1. The default Parameter if only “CN [n]” is entered.
2. TrendView communication values are written via this parameter, read via
Math/Calculated values parameter (the “pen” value).
62
Devices
Math, Variable or Calculated Value Group
The following table lists the devices which support the Math or Calculated Value
group and their formats.
Device
Supported Address Format
Range
RSX
MATH_VAR [n] [param]
[n] = 1 to 24
VPR100
MATH_VAR [n] [param]
[n] = 1 to 32
VRX100
MATH_VAR [n] [param]
[n] = 1 to 32
VRX180
MATH_VAR [n] [param]
[n] = 1 to 64
UDC5300
MATH_VAR [n] [param]
[n] = 1 to 16
DR4500
MATH_VAR [n] [param]
[n] = 1 to 1
DPR180
MATH_VAR [n] [param]
[n] = 1 to 24
DPR250
MATH_VAR [n] [param]
[n] = 1 to 32
UDC3300
MATH_VAR [n] [param]
[n] = 1 to 2
UMC800
MATH_VAR [n] [param]
[n] = 1 to 150
HC900
MATH_VAR [n] [param]
[n] = 1 to 600
TrendView
MATH_VAR [n] [param]
[n] = 1 to 64
Param Format
Access
The following table lists the details of the Math or Calculated Value Group
parameters.
Param
Address Line
Devices
Math or
MATH_VAR [n]
Calculated Value VALUE1
Floating Point
RO RSX, VPR100,
VRX100, VRX180,
UDC5300, DR4500,
DPR180, DPR250,
UDC3300, TV2
Math or
MATH_VAR [n]
Calculated Value VALUE1
Floating Point
RW UMC8003, HC9003
1. The default Parameter if only “MATH_VAR [n]” is entered.
2. Applies to TrendView “pen” values.
3. Applies to UMC800, HC900 “variable” values.
Honeywell Universal Modbus Interface Reference
63
5 – Device Information
Totalizer Value Group
The following table lists the devices which support the Totalizer Value group and
their formats.
Device
Supported Address Format
Range
RSX
TOTALIZER [n] [param]
[n] = 1 to 6
VPR100
TOTALIZER [n] [param]
[n] = 1 to 3
VRX100
TOTALIZER [n] [param]
[n] = 1 to 12
VRX180
TOTALIZER [n] [param]
[n] = 1 to 48
DR4300
TOTALIZER [n] [param]
[n] = 1 to 1
DR4500
TOTALIZER [n] [param]
[n] = 1 to 4
UDC3300
TOTALIZER [n] [param]
[n] = 1 to 1
TrendView
TOTALIZER [n] [param]
[n] = 1 to 64
Param
Address Line
Param Format
Access
The following table lists the details of the Totalizer Value Group parameters.
Devices
Totalizer Value
TOTALIZER [n]
VALUE1
Floating Point
RO RSX, VPR100,
VRX100, VRX180
Totalizer Value
TOTALIZER [n]
VALUE1
Floating Point
RW DR4300, DR4500,
UDC3300
1. The default Parameter if only “TOTALIZER [n]” is entered.
Alarm Set Point Value Group
The following table lists the devices which support the Alarm Set Point Value
group and their formats.
64
Device
Supported Address Format
Range
RSX
ALMSP [n] [param]
[n] = 1 to 12
VPR100
ALMSP [n] [param]
[n] = 1 to 16
VRX100
ALMSP [n] [param]
[n] = 1 to 16
VRX180
ALMSP [n] [param]
[n] = 1 to 96
UDC5300
ALMSP [n] [param]
[n] = 1 to 4
DPR180
ALMSP [n] [param]
[n] = 1 to 48
DPR250
ALMSP [n] [param]
[n] = 1 to 64
Devices
Param
Address Line
Param Format
Alarm Set Point ALMSP [n] VALUE1 Floating Point
Value
Access
The following table lists the details of the Alarm Set Point Value Group
parameters.
Devices
RW RSX, VPR100,
VRX100, VRX180,
UDC5300, DPR180,
DPR250
1. The default Parameter if only “ALMSP [n]” is entered.
Alarm Set Point Value Group
The following table lists the devices which support the Alarm Set Point Value
group and their formats.
Device
Supported Address Format
Range
DR4300
ALMSP [n] [param]
[n] = 1 to 2
DR4500
ALMSP [n] [param]
[n] = 1 to 6
UDC2300
ALMSP [n] [param]
[n] = 1 to 2
UDC3300
ALMSP [n] [param]
[n] = 1 to 2
Param Format
Access
The following table lists the details of the Alarm Set Point Value Group
parameters.
Param
Address Line
Devices
Alarm Set Point ALMSP [n] SP11
#1
Floating Point
RW DR4300, DR4500,
UDC2300, UDC3300
Alarm Set Point ALMSP [n] SP21
#2
Floating Point
RW DR4300, DR4500,
UDC2300, UDC3300
1. The default Parameter if only “ALMSP [n]” is entered.
Math or Calculated Value Status
The following table lists the devices which support the Math or Calculated Value
Status and their formats.
Device
Supported Address Format
Range
RSX
MATH_STATUS [n] [param]
[n] = 1 to 24
VPR100
MATH_STATUS [n] [param]
[n] = 1 to 32
Honeywell Universal Modbus Interface Reference
65
5 – Device Information
Device
Supported Address Format
Range
VRX100
MATH_STATUS [n] [param]
[n] = 1 to 32
VRX180
MATH_STATUS [n] [param]
[n] = 1 to 64
UDC5300
MATH_STATUS [n] [param]
[n] = 1 to 16
DR4500
MATH_STATUS [n] [param]
[n] = 1 to 1
DPR180
MATH_STATUS [n] [param]
[n] = 1 to 24
DPR250
MATH_STATUS [n] [param]
[n] = 1 to 32
UDC3300
MATH_STATUS [n] [param]
[n] = 1 to 2
Param
Address Line
Param Format
Math or
MATH_STATUS [n] Discrete (bits).
Calculated Value STATUS1
[Status Point
Status
Only]
Access
The following table lists the details of the Math or Calculated Value Status
parameters.
Devices
RO RSX, VPR100,
VRX100, VRX180,
UDC5300, DR4500,
DPR180, DPR250,
UDC3300
1. The default Parameter if only “MATH_STATUS [n]” is entered.
Totalizer Value Status
The following table lists the devices which support the Totalizer Value Status and
their formats.
66
Device
Supported Address Format
Range
RSX
TOTALIZER_STATUS [n] [param]
[n] = 1 to 6
VPR100
TOTALIZER_STATUS [n] [param]
[n] = 1 to 3
VRX100
TOTALIZER_STATUS [n] [param]
[n] = 1 to 12
VRX180
TOTALIZER_STATUS [n] [param]
[n] = 1 to 48
DR4300
TOTALIZER_STATUS [n] [param]
[n] = 1 to 1
DR4500
TOTALIZER_STATUS [n] [param]
[n] = 1 to 4
UDC3300
TOTALIZER_STATUS [n] [param]
[n] = 1 to 1
Devices
Param
Address Line
Param Format
Access
The following table lists the details of the Totalizer Value Status parameters.
Totalizer Status
TOTALIZER_STAT
US [n] STATUS1
Discrete (bits).
RO RSX, VPR100,
VRX100, VRX180,
DR4300, DR4500,
UDC3300
[Status Point
Only]
0 = Totalizer Off
Devices
1 = Totalizer On
1. The default Parameter if only “TOTALIZER_STATUS [n]” is entered.
Alarm Status
The following table lists the devices which support the Alarm Status and their
formats.
Device
Supported Address Format
Range
RSX
ALMSTAT [n] [param]
[n] = 1 to 12
VPR100
ALMSTAT [n] [param]
[n] = 1 to 16
VRX100
ALMSTAT [n] [param]
[n] = 1 to 16
VRX180
ALMSTAT [n] [param]
[n] = 1 to 96
UDC5300
ALMSTAT [n] [param]
[n] = 1 to 4
DR4300
ALMSTAT [n] [param]
[n] = 1 to 2
DR4500
ALMSTAT [n] [param]
[n] = 1 to 6
UDC2300
ALMSTAT [n] [param]
[n] = 1 to 2
UDC3300
ALMSTAT [n] [param]
[n] = 1 to 2
UMC800
ALMSTAT [n] [param]
[n] = 1 to 120
HC900
ALMSTAT [n] [param]
[n] = 1 to 120
Param
Address Line
Param Format
Access
The following table lists the details of the Alarm Status parameters.
Alarm Status
ALMSTAT [n]
STATUS1
Discrete (bits).
RO RSX, VPR100,
VRX100, VRX180,
UDC5300, DR4300,
DR4500, UDC2300,
UDC3300, UMC800,
HC900
[Status Point
Only]
Devices
Honeywell Universal Modbus Interface Reference
67
Param
Address Line
Param Format
Access
5 – Device Information
Devices
1. The default Parameter if only “ALMSTAT [n]” is entered.
Alarm Status Analog
The following table lists the devices which support the Alarm Status Analog and
their formats.
Device
Supported Address Format
Range
DPR180
ALMSTAT_ANALOG [n] [param]
[n] = 1 to 24
DPR250
ALMSTAT_ANALOG [n] [param]
[n] = 1 to 64
Param
Address Line
Param Format
Alarm Status
ALMSTAT_ANALO Discrete (bits).
G [n] STATUS1
[Status Point
Only]
Access
The following table lists the details of the Alarm Status Analog parameters.
Devices
RO DPR180, DPR250
1. The default Parameter if only “ALMSTAT_ANALOG [n]” is entered.
Alarm Status Digital
The following table lists the devices which support the Alarm Status Digital and
their formats.
Device
Supported Address Format
Range
DPR180
ALMSTAT_DIGITAL [n] [param]
[n] = 1 to 36
DPR250
ALMSTAT_DIGITAL [n] [param]
[n] = 1 to 48
Param
Address Line
Param Format
Alarm Status
ALMSTAT_DIGITA Discrete (bits).
L [n] STATUS1
[Status Point
Only]
Access
The following table lists the details of the Alarm Status Digital parameters.
Devices
RO DPR180, DPR250
1. The default Parameter if only “ALMSTAT_DIGITAL [n]” is entered.
68
Devices
Alarm Status Event
The following table lists the devices which support the Math or Calculated Value
Status and their formats.
Device
Supported Address Format
Range
DPR180
ALMSTAT_EVENT [n] [param]
[n] = 1 to 6
DPR250
ALMSTAT_EVENT [n] [param]
[n] = 1 to 6
Param
Address Line
Param Format
Access
The following table lists the details of the Alarm Status Event parameters.
Devices
Alarm Status
ALMSTAT_EVENT
[n] STATUS1
Discrete (bits).
RO DPR180, DPR250
[Status Point
Only]
1. The default Parameter if only “ALMSTAT_EVENT [n]” is entered.
Alarm Status Channel
The following table lists the devices which support the Alarm Status Channel and
their formats.
Device
Supported Address Format
Range
DPR180
ALMSTAT_CHANNEL [n] [param]
[n] = 1 to 24
DPR250
ALMSTAT_CHANNEL [n] [param]
[n] = 1 to 64
Param
Address Line
Param Format
Alarm Status
ALMSTAT_CHANN Discrete (bits).
EL [n] STATUS1
[Status Point
Only]
Access
The following table lists the details of the Alarm Status Channel parameters.
Devices
RO DPR180, DPR250
1. The default Parameter if only “ALMSTAT_CHANNEL [n]” is entered.
Honeywell Universal Modbus Interface Reference
69
5 – Device Information
Alarm Status Com
The following table lists the devices which support the Alarm Status Com and
their formats.
Device
Supported Address Format
Range
DPR180
ALMSTAT_COM [n] [param]
[n] = 1 to 24
DPR250
ALMSTAT_COM [n] [param]
[n] = 1 to 32
Param
Address Line
Param Format
Alarm Status
ALMSTAT_COM [n] Discrete (bits).
STATUS1
[Status Point
Only]
Access
The following table lists the details of the Alarm Status Com parameters.
Devices
RO DPR180, DPR250
1. The default Parameter if only “ALMSTAT_COM [n]” is entered.
Alarm Status Math
The following table lists the devices which support the Alarm Status Math and
their formats.
Device
Supported Address Format
Range
DPR180
ALMSTAT_MATH [n] [param]
[n] = 1 to 24
DPR250
ALMSTAT_MATH [n] [param]
[n] = 1 to 32
Param
Address Line
Param Format
Access
The following table lists the details of the Alarm Status Math parameters.
Devices
Alarm Status
ALMSTAT_MATH
[n] STATUS1
Discrete (bits).
RO DPR180, DPR250
[Status Point
Only]
1. The default Parameter if only “ALMSTAT_MATH [n]” is entered.
70
Devices
Digital Input Table
The following table lists the devices which support the Digital Input Table and
their formats.
Device
Supported Address Format
Range
RSX
DI [n] [param]
[n] = 1 to 6
VPR100
DI [n] [param]
[n] = 1 to 24
VRX100
DI [n] [param]
[n] = 1 to 24
VRX180
DI [n] [param]
[n] = 1 to 36
UDC5300
DI [n] [param]
[n] = 1 to 3
DR4300
DI [n] [param]
[n] = 1 to 2
DR4500
DI [n] [param]
[n] = 1 to 2
UDC3300
DI [n] [param]
[n] = 1 to 2
UMC800
DI [n] [param]
[n] = 1 to 256
HC900
DI [n] [param]
[n] = 1 to 256
TrendView
DI [n] [param]
[n] = 1 to 32
Param
Address Line
Param Format
Access
The following table lists the details of the Digital Input Table parameters.
Digital Input
Value
DI [n] VALUE1
Discrete (bits).
RO RSX, VPR100,
VRX100, VRX180,
UDC5300, DR4300,
DR4500, UDC3300,
UMC800, HC9002,
TV
[Status Point
Only]
Devices
1. The default Parameter if only “DI [n]” is entered.
2. Applies to Rack 1 only, allocation is 16 inputs (bits) per slot, 12 slots maximum.
Digital Input Table
The following table lists the devices which support the Digital Input Table and
their formats.
Device
Supported Address Format
Range
DPR180
DI [n] [param]
[n] = 1 to 36
DPR250
DI [n] [param]
[n] = 1 to 48
Honeywell Universal Modbus Interface Reference
71
5 – Device Information
Param
Address Line
Param Format
Access
The following table lists the details of the Digital Input Table parameters.
Devices
Digital Input
Value
DI [n] VALUE1
Discrete (bits).
RO DPR180, DPR250
[Status Point
Only]
1. The default Parameter if only “DI [n]” is entered.
Digital Output Table
The following table lists the devices which support the Digital Output Table and
their formats.
Device
Supported Address Format
Range
RSX
DO [n] [param]
[n] = 1 to 6
VPR100
DO [n] [param]
[n] = 1 to 24
VRX100
DO [n] [param]
[n] = 1 to 24
VRX180
DO [n] [param]
[n] = 1 to 36
UDC5300
DO [n] [param]
[n] = 1 to 4
DR4300
DO [n] [param]
[n] = 1 to 2
DR4500
DO [n] [param]
[n] = 1 to 6
UDC2300
DO [n] [param]
[n] = 1 to 3
UDC3300
DO [n] [param]
[n] = 1 to 3
UMC800
DO [n] [param]
[n] = 1 to 256
HC900
DO [n] [param]
[n] = 1 to 256
TrendView
DO [n] [param]
[n] = 1 to 32
72
Param
Address Line
Param Format
Access
The following table lists the details of the Digital Output Table parameters.
Digital Output
Value
DO [n] VALUE1
Discrete (bits).
RW RSX, VPR100,
VRX100, VRX180,
UDC5300, DR4300,
DR4500
Digital Output
Value
DO [n] VALUE1
[Status Point
Only]
Discrete (bits).
[Status Point
Only]
Devices
RO UDC2300, UDC3300,
UMC800, HC9002,
TV
Param
Address Line
Param Format
Access
Devices
Devices
1. The default Parameter if only “DO [n]” is entered.
2. Applies to Rack 1 only, allocation is 16 outputs (bits), 12 slots maximum.
Digital Output Table
The following table lists the devices which support the Digital Output Table and
their formats.
Device
Supported Address Format
Range
DPR180
DO [n] [param]
[n] = 1 to 36
DPR250
DO [n] [param]
[n] = 1 to 48
Param
Address Line
Param Format
Access
The following table lists the details of the Digital Output Table parameters.
Devices
Digital Output
Value
DO [n] VALUE1
Discrete (bits).
RO DPR180, DPR250
[Status Point
Only]
1. The default Parameter if only “DO [n]” is entered.
Set Point Programmer
The following table lists the devices which support the set point programmer and
their formats.
Device
Supported Address Format
Range
VPR100
SPP [n] [param]
[n] = 1 to 4
VRX100
SPP [n] [param]
[n] = 1 to 1
VRX180
SPP [n] [param]
[n] = 1 to 4
UDC5300
SPP [n] [param]
[n] = 1 to 1
DR4300
SPP [n] [param]
[n] = 1 to 1
DR4500
SPP [n] [param]
[n] = 1 to 2
UDC2300
SPP [n] [param]
[n] = 1 to 1
UDC3300
SPP [n] [param]
[n] = 1 to 1
UMC800
SPP [n] [param]
[n] = 1 to 4
Honeywell Universal Modbus Interface Reference
73
5 – Device Information
Device
Supported Address Format
Range
HC900
SPP [n] [param]
[n] = 1 to 4
74
Param
Address Line
Param Format
Access
The following table lists the details of the set point program parameters.
Set Point
Programmer
Output
SPP [n] OUT1
Floating Point
RO VPR100, VRX100,
VRX180, UDC5300,
DR4300, DR4500,
UDC2300, UDC3300,
UMC800, HC900
Set Point
Programmer
Segment Time
Remaining
SPP [n]
SEG_TIME_REM
Floating Point
RO VPR100, VRX100,
VRX180, UDC5300,
DR4300, DR4500,
UDC2300, UDC3300,
UMC800, HC900
Set Point
Programmer
Start
SPP [n] START
UINT2
WO VPR100, VRX100,
VRX180, UDC5300,
DR4300, DR4500,
UDC2300, UDC3300,
UMC800, HC900
Set Point
Programmer
Hold
SPP [n] HOLD
UINT2
WO VPR100, VRX100,
VRX180, UDC5300,
DR4300, DR4500,
UDC2300, UDC3300,
UMC800, HC900
Set Point
Programmer
Advance
SPP [n] ADV
UINT2
WO VPR100, VRX100,
VRX180, UDC5300,
UMC800, HC900
Set Point
Programmer
Reset
SPP [n] RESET
UINT2
WO VPR100, VRX100,
VRX180, UDC5300,
UMC800, HC900
Set Point
Programmer
Status - Ready
SPP [n]
STATUS_READY
Discrete (bits).
RO VPR100, VRX100,
VRX180, UDC5300,
DR4300, DR4500,
UDC2300, UDC3300,
UMC800, HC900
Set Point
Programmer
Status - Run
SPP [n]
STATUS_RUN
Discrete (bits).
[Status Point
Only]
[Status Point
Only]
Devices
RO VPR100, VRX100,
VRX180, UDC5300,
DR4300, DR4500,
UDC2300, UDC3300,
UMC800, HC900
Param
Address Line
Param Format
Access
Devices
Set Point
Programmer
Status - Hold
SPP [n]
STATUS_HOLD
Discrete (bits).
RO VPR100, VRX100,
VRX180, UDC5300,
DR4300, DR4500,
UDC2300, UDC3300,
UMC800, HC900
Set Point
Programmer
Status - End
SPP [n]
STATUS_END
Discrete (bits).
[Status Point
Only]
[Status Point
Only]
Devices
RO VPR100, VRX100,
VRX180, UDC5300,
DR4300, DR4500,
UDC2300, UDC3300,
UMC800, HC900
Set Point
SPP [n]
Discrete (bits).
Programmer
STATUS_TIME_UNI [Status Point
Status - Time
T_S
Only]
Units in Seconds
RO VPR100, VRX100,
VRX180, UDC5300,
DR4300, DR4500,
UDC2300, UDC3300,
UMC800, HC900
Set Point
SPP [n]
Discrete (bits).
Programmer
STATUS_TIME_UNI [Status Point
Status - Time
T_M
Only]
Units in Minutes
RO VPR100, VRX100,
VRX180, UDC5300,
DR4300, DR4500,
UDC2300, UDC3300,
UMC800, HC900
Set Point
Programmer
Status - Time
Units in Hours
SPP [n]
Discrete (bits).
STATUS_TIME_UNI [Status Point
T_H
Only]
RO VPR100, VRX100,
VRX180, UDC5300,
DR4300, DR4500,
UDC2300, UDC3300,
UMC800, HC900
Set Point
Programmer
Elapsed Time
SPP [n] EL_TIME
Floating Point
RO VPR100, VRX100,
VRX180, UDC5300,
UDC2300, UDC3300,
UMC800, HC900
Set Point
Programmer
Status - Ramp
Rate
SPP [n]
Discrete (bits).
STATUS_RAMP_RA [Status Point
TE
Only]
RO DR4300, DR4500,
UDC2300, UDC3300
Set Point
Programmer
Status - Ramp
Units
SPP [n]
Discrete (bits).
STATUS_RAMP_UN [Status Point
ITS
Only]
RO DR4300, DR4500,
UDC2300, UDC3300,
UMC800, HC900
Set Point
SPP [n] SEG_NO
Programmer
Current Segment
Number
Floating Point
RO VPR100, VRX100,
VRX180, UDC5300,
DR4300, DR4500,
UDC2300, UDC3300
Honeywell Universal Modbus Interface Reference
75
Param Format
Access
5 – Device Information
Param
Address Line
Floating Point
RW UMC800, HC900
Set Point
SPP [n]
Discrete (bits).
Programmer
STATUS_HOLD_TY [Status Point
Status - Type of PE
Only]
Hold
RO UMC800, HC900
Set Point
SPP [n]
Programmer
STATUS_RAMP
Status - Current
Segment is a
ramp
Discrete (bits).
RO UMC800, HC900
Set Point
Programmer
Active Time
SPP [n] ACT_TIME
Floating Point
RO VPR100, VRX100,
VRX180, UDC5300
Set Point
Programmer
Segment Event
#1
SPP [n] EV01
Discrete (bits).
RO VPR100, VRX100,
VRX180, UDC5300,
UMC800, HC900
Set Point
Programmer
Segment Event
#2
SPP [n] EV02
Set Point
Programmer
Segment Event
#3
SPP [n] EV03
Set Point
Programmer
Segment Event
#4
SPP [n] EV04
Set Point
Programmer
Segment Event
#5
SPP [n] EV05
Set Point
Programmer
Segment Event
#6
SPP [n] EV06
Set Point
SPP [n] SEG_NO
Programmer
Current Segment
Number
76
Devices
[Status Point
Only]
[Status Point
Only]
Discrete (bits).
[Status Point
Only]
Discrete (bits).
[Status Point
Only]
Discrete (bits).
[Status Point
Only]
Discrete (bits).
[Status Point
Only]
Discrete (bits).
[Status Point
Only]
RO VPR100, VRX100,
VRX180, UDC5300,
UMC800, HC900
RO VPR100, VRX100,
VRX180, UDC5300,
UMC800, HC900
RO VPR100, VRX100,
VRX180, UDC5300,
UMC800, HC900
RO VPR100, VRX100,
VRX180, UDC5300,
UMC800, HC900
RO VPR100, VRX100,
VRX180, UDC5300,
UMC800, HC900
Param
Address Line
Param Format
Access
Devices
Set Point
Programmer
Segment Event
#7
SPP [n] EV07
Discrete (bits).
RO VPR100, VRX100,
VRX180, UDC5300,
UMC800, HC900
Set Point
Programmer
Segment Event
#8
SPP [n] EV08
Set Point
Programmer
Segment Event
#9
SPP [n] EV09
Set Point
Programmer
Segment Event
#10
SPP [n] EV10
Set Point
Programmer
Segment Event
#11
SPP [n] EV11
Set Point
Programmer
Segment Event
#12
SPP [n] EV12
Set Point
Programmer
Segment Event
#13
SPP [n] EV13
Set Point
Programmer
Segment Event
#14
SPP [n] EV14
Set Point
Programmer
Segment Event
#15
SPP [n] EV15
Set Point
Programmer
Segment Event
#16
SPP [n] EV16
[Status Point
Only]
Discrete (bits).
[Status Point
Only]
Discrete (bits).
[Status Point
Only]
Discrete (bits).
[Status Point
Only]
Discrete (bits).
[Status Point
Only]
Discrete (bits).
[Status Point
Only]
Discrete (bits).
[Status Point
Only]
Discrete (bits).
[Status Point
Only]
Discrete (bits).
[Status Point
Only]
Discrete (bits).
[Status Point
Only]
Devices
RO VPR100, VRX100,
VRX180, UDC5300,
UMC800, HC900
RO VPR100, VRX100,
VRX180, UDC5300,
UMC800, HC900
RO VPR100, VRX100,
VRX180, UDC5300,
UMC800, HC900
RO VPR100, VRX100,
VRX180, UDC5300,
UMC800, HC900
RO VPR100, VRX100,
VRX180, UDC5300,
UMC800, HC900
RO VPR100, VRX100,
VRX180, UDC5300,
UMC800, HC900
RO VPR100, VRX100,
VRX180, UDC5300,
UMC800, HC900
RO VPR100, VRX100,
VRX180, UDC5300,
UMC800, HC900
RO VPR100, VRX100,
VRX180, UDC5300,
UMC800, HC900
1. The default Parameter if only “SPP [n]” is entered.
Honeywell Universal Modbus Interface Reference
77
5 – Device Information
Set Point Program Additional Values
The following table lists the devices which support the Set Point Program
Additional Values and their formats.
Device
Supported Address Format
Range
UMC800, HC900 SPP_ADD [n] [param]
[n] = 1 to 4
Param
78
Param Format
Access
The following table lists the details of the Set Point Program Additional Values
parameters.
Address Line
Current Program SPP_ADD [n]
Number
PROG_NO1
Floating Point
RW UMC800, HC900
Program Save
Request
SPP_ADD [n]
PROG_SAVE
Floating Point
RW UMC800, HC900
Auxiliary Output SPP_ADD [n]
AUX_OUT
Floating Point
RO UMC800, HC900
Guaranteed Soak SPP_ADD [n]
Low
SOAK_LOW
Floating Point
RW UMC800, HC900
Guaranteed Soak SPP_ADD [n]
High
SOAK_HIGH
Floating Point
RW UMC800, HC900
Restart Ramp
Rate
SPP_ADD [n]
RESTART_RAMP
Floating Point
RW UMC800, HC900
Display High
Range Limit
SPP_ADD [n]
DISPLAY_HIGH
Floating Point
RW UMC800, HC900
Display Low
Range Limit
SPP_ADD [n]
DISPLAY_LOW
Floating Point
RW UMC800, HC900
Jog Segment
SPP_ADD [n]
JOG_SEG
Floating Point
RW UMC800, HC900
Loop Start
SPP_ADD [n]
LOOP_START
Floating Point
RW UMC800, HC900
Loop End
SPP_ADD [n]
LOOP_END
Floating Point
RW UMC800, HC900
Repeats
SPP_ADD [n]
REPEATS
Floating Point
RW UMC800, HC900
Time Units
SPP_ADD [n]
UNITS_TIME
Discrete (bits).
RW UMC800, HC900
[Status Point
Only]
Devices
Param
Address Line
Param Format
Access
Devices
Ramp Units
SPP_ADD [n]
UNITS_RAMP
Discrete (bits).
RW UMC800, HC900
Guaranteed Soak SPP_ADD [n]
Type
SOAK_TYPE
Devices
[Status Point
Only]
Discrete (bits).
RW UMC800, HC900
[Status Point
Only]
1. The default Parameter if only “SPP_ADD [n]” is entered.
Set Point Programmer #1 Profile Segment
The following table lists the devices which support the Set Point Program #1
Profile Segment and their formats.
Device
Supported Address Format
Range
VPR100
SPP1_SEG [n] [param]
[n] = 1 to 63
VRX100
SPP1_SEG [n] [param]
[n] = 1 to 63
VRX180
SPP1_SEG [n] [param]
[n] = 1 to 63
UDC5300
SPP1_SEG [n] [param]
[n] = 1 to 63
DR4300
SPP1_SEG [n] [param]
[n] = 1 to 24
DR4500
SPP1_SEG [n] [param]
[n] = 1 to 12
UDC2300
SPP1_SEG [n] [param]
[n] = 1 to 12
UDC3300
SPP1_SEG [n] [param]
[n] = 1 to 12
UMC800
SPP1_SEG [n] [param]
[n] = 1 to 50
HC900
SPP1_SEG [n] [param]
[n] = 1 to 50
Param
Address Line
Param Format
Access
The following table lists the details of the Set Point Program #1 Profile Segment
parameters.
Ramp/Soak
Segment
SPP1_SEG [n]
SEG_TYPE
Discrete (bits).
RW UMC800, HC900
0 = Soak segment
Devices
[Status Point
Only]
1 = Ramp segment
Honeywell Universal Modbus Interface Reference
79
Param
Address Line
Param Format
Event #1
SPP1_SEG [n] EV01 Discrete (bits).
Access
5 – Device Information
Devices
RW UMC800, HC900
[Status Point
Only]
Event #2
SPP1_SEG [n] EV02 Discrete (bits).
RW UMC800, HC900
[Status Point
Only]
Event #3
SPP1_SEG [n] EV03 Discrete (bits).
RW UMC800, HC900
[Status Point
Only]
Event #4
SPP1_SEG [n] EV04 Discrete (bits).
RW UMC800, HC900
[Status Point
Only]
Event #5
SPP1_SEG [n] EV05 Discrete (bits).
RW UMC800, HC900
[Status Point
Only]
Event #6
SPP1_SEG [n] EV06 Discrete (bits).
RW UMC800, HC900
[Status Point
Only]
Event #7
SPP1_SEG [n] EV07 Discrete (bits).
RW UMC800, HC900
[Status Point
Only]
Event #8
SPP1_SEG [n] EV08 Discrete (bits).
RW UMC800, HC900
[Status Point
Only]
Event #9
SPP1_SEG [n] EV09 Discrete (bits).
RW UMC800, HC900
[Status Point
Only]
Event #10
SPP1_SEG [n] EV10 Discrete (bits).
RW UMC800, HC900
[Status Point
Only]
Event #11
SPP1_SEG [n] EV11 Discrete (bits).
RW UMC800, HC900
[Status Point
Only]
Event #12
SPP1_SEG [n] EV12 Discrete (bits).
[Status Point
Only]
80
RW UMC800, HC900
Param
Address Line
Param Format
Event #13
SPP1_SEG [n] EV13 Discrete (bits).
Access
Devices
Devices
RW UMC800, HC900
[Status Point
Only]
Event #14
SPP1_SEG [n] EV14 Discrete (bits).
RW UMC800, HC900
[Status Point
Only]
Event #15
SPP1_SEG [n] EV15 Discrete (bits).
RW UMC800, HC900
[Status Point
Only]
Event #16
SPP1_SEG [n] EV16 Discrete (bits).
RW UMC800, HC900
[Status Point
Only]
Soak Value for SPP1_SEG [n]
Auxiliary Output AUX_OUT
Floating Point
RW UMC800, HC900
Time
SPP1_SEG [n]
TIME1
Floating Point
RW VPR100, VRX100,
VRX180, UDC5300,
DR4300, DR4500,
UDC2300, UDC3300,
UMC800, HC900
Rate
SPP1_SEG [n] RATE Floating Point
RW VPR100, VRX100,
VRX180, UDC5300,
DR4300, DR4500,
UDC2300, UDC3300,
UMC800, HC900
Ramp or Soak
Value
SPP1_SEG [n]
SEG_VALUE
RW VPR100, VRX100,
VRX180, UDC5300,
DR4300, DR4500,
UDC2300, UDC3300,
UMC800, HC900
Floating Point
1. The default Parameter if only “SPP1_SEG [n]” is entered.
Set Point Programmer #2 Profile Segment
The following table lists the devices which support the Set Point Program #2
Profile Segment and their formats.
Device
Supported Address Format
Range
VPR100
SPP2_SEG [n] [param]
[n] = 1 to 63
VRX100
SPP2_SEG [n] [param]
[n] = 1 to 63
VRX180
SPP2_SEG [n] [param]
[n] = 1 to 63
Honeywell Universal Modbus Interface Reference
81
5 – Device Information
Device
Supported Address Format
Range
UDC5300
SPP2_SEG [n] [param]
[n] = 1 to 63
DR4300
SPP2_SEG [n] [param]
[n] = 1 to 24
DR4500
SPP2_SEG [n] [param]
[n] = 1 to 12
UDC2300
SPP2_SEG [n] [param]
[n] = 1 to 12
UDC3300
SPP2_SEG [n] [param]
[n] = 1 to 12
UMC800, HC900 SPP2_SEG [n] [param]
[n] = 1 to 50
Param
Address Line
Param Format
Access
The following table lists the details of the Set Point Program #2 Profile Segment
parameters.
Ramp/Soak
Segment
SPP2_SEG [n]
SEG_TYPE
Discrete (bits).
RW UMC800, HC900
0 = Soak segment
Devices
[Status Point
Only]
1 = Ramp segment
Event #1
SPP2_SEG [n] EV01 Discrete (bits).
RW UMC800, HC900
[Status Point
Only]
Event #2
SPP2_SEG [n] EV02 Discrete (bits).
RW UMC800, HC900
[Status Point
Only]
Event #3
SPP2_SEG [n] EV03 Discrete (bits).
RW UMC800, HC900
[Status Point
Only]
Event #4
SPP2_SEG [n] EV04 Discrete (bits).
RW UMC800, HC900
[Status Point
Only]
Event #5
SPP2_SEG [n] EV05 Discrete (bits).
RW UMC800, HC900
[Status Point
Only]
Event #6
SPP2_SEG [n] EV06 Discrete (bits).
RW UMC800, HC900
[Status Point
Only]
Event #7
SPP2_SEG [n] EV07 Discrete (bits).
[Status Point
Only]
82
RW UMC800, HC900
Param
Address Line
Param Format
Event #8
SPP2_SEG [n] EV08 Discrete (bits).
Access
Devices
Devices
RW UMC800, HC900
[Status Point
Only]
Event #9
SPP2_SEG [n] EV09 Discrete (bits).
RW UMC800, HC900
[Status Point
Only]
Event #10
SPP2_SEG [n] EV10 Discrete (bits).
RW UMC800, HC900
[Status Point
Only]
Event #11
SPP2_SEG [n] EV11 Discrete (bits).
RW UMC800, HC900
[Status Point
Only]
Event #12
SPP2_SEG [n] EV12 Discrete (bits).
RW UMC800, HC900
[Status Point
Only]
Event #13
SPP2_SEG [n] EV13 Discrete (bits).
RW UMC800, HC900
[Status Point
Only]
Event #14
SPP2_SEG [n] EV14 Discrete (bits).
RW UMC800, HC900
[Status Point
Only]
Event #15
SPP2_SEG [n] EV15 Discrete (bits).
RW UMC800, HC900
[Status Point
Only]
Event #16
SPP2_SEG [n] EV16 Discrete (bits).
RW UMC800, HC900
[Status Point
Only]
Soak Value for SPP2_SEG [n]
Auxiliary Output AUX_OUT
Floating Point
RW UMC800, HC900
Time
SPP2_SEG [n]
TIME1
Floating Point
RW VPR100, VRX100,
VRX180, UDC5300,
DR4300, DR4500,
UDC2300, UDC3300,
UMC800, HC900
Rate
SPP2_SEG [n] RATE Floating Point
RW VPR100, VRX100,
VRX180, UDC5300,
DR4300, DR4500,
UDC2300, UDC3300,
UMC800, HC900
Honeywell Universal Modbus Interface Reference
83
Param
Address Line
Param Format
Access
5 – Device Information
Devices
Ramp or Soak
Value
SPP2_SEG [n]
SEG_VALUE
Floating Point
RW VPR100, VRX100,
VRX180, UDC5300,
DR4300, DR4500,
UDC2300, UDC3300,
UMC800, HC900
1. The default Parameter if only “SPP2_SEG [n]” is entered.
Set Point Programmer #3 Profile Segment
The following table lists the devices which support the Set Point Programmer #3
Profile Segment and their formats.
Device
Supported Address Format
Range
VPR100
SPP3_SEG [n] [param]
[n] = 1 to 63
VRX100
SPP3_SEG [n] [param]
[n] = 1 to 63
VRX180
SPP3_SEG [n] [param]
[n] = 1 to 63
UDC5300
SPP3_SEG [n] [param]
[n] = 1 to 63
DR4300
SPP3_SEG [n] [param]
[n] = 1 to 24
DR4500
SPP3_SEG [n] [param]
[n] = 1 to 12
UDC2300
SPP3_SEG [n] [param]
[n] = 1 to 12
UDC3300
SPP3_SEG [n] [param]
[n] = 1 to 12
UMC800, HC900 SPP3_SEG [n] [param]
[n] = 1 to 50
Param
Address Line
Param Format
Access
The following table lists the details of the Set Point Program #3 Profile Segment
parameters.
Ramp/Soak
Segment
SPP3_SEG [n]
SEG_TYPE
Discrete (bits).
[Status Point
Only]
RW UMC800, HC900
Event #1
SPP3_SEG [n] EV01 Discrete (bits).
[Status Point
Only]
RW UMC800, HC900
Event #2
SPP3_SEG [n] EV02 Discrete (bits).
[Status Point
Only]
RW UMC800, HC900
0 = Soak Segment
Devices
1 = Ramp Segment
84
Devices
Address Line
Param Format
Event #3
SPP3_SEG [n] EV03 Discrete (bits).
[Status Point
Only]
RW UMC800, HC900
Event #4
SPP3_SEG [n] EV04 Discrete (bits).
[Status Point
Only]
RW UMC800, HC900
Event #5
SPP3_SEG [n] EV05 Discrete (bits).
[Status Point
Only]
RW UMC800, HC900
Event #6
SPP3_SEG [n] EV06 Discrete (bits).
[Status Point
Only]
RW UMC800, HC900
Event #7
SPP3_SEG [n] EV07 Discrete (bits).
[Status Point
Only]
RW UMC800, HC900
Event #8
SPP3_SEG [n] EV08 Discrete (bits).
[Status Point
Only]
RW UMC800, HC900
Event #9
SPP3_SEG [n] EV09 Discrete (bits).
[Status Point
Only]
RW UMC800, HC900
Event #10
SPP3_SEG [n] EV10 Discrete (bits).
[Status Point
Only]
RW UMC800, HC900
Event #11
SPP3_SEG [n] EV11 Discrete (bits).
[Status Point
Only]
RW UMC800, HC900
Event #12
SPP3_SEG [n] EV12 Discrete (bits).
[Status Point
Only]
RW UMC800, HC900
Event #13
SPP3_SEG [n] EV13 Discrete (bits).
[Status Point
Only]
RW UMC800, HC900
Event #14
SPP3_SEG [n] EV14 Discrete (bits).
[Status Point
Only]
RW UMC800, HC900
Event #15
SPP3_SEG [n] EV15 Discrete (bits).
[Status Point
Only]
RW UMC800, HC900
Access
Param
Devices
Honeywell Universal Modbus Interface Reference
85
Param
Address Line
Param Format
Event #16
SPP3_SEG [n] EV16 Discrete (bits).
[Status Point
Only]
Access
5 – Device Information
Devices
RW UMC800, HC900
Soak Value for SPP3_SEG [n]
Auxiliary Output AUX_OUT
Floating Point
RW UMC800, HC900
Time
SPP3_SEG [n]
TIME1
Floating Point
RW VPR100, VRX100,
VRX180, UDC5300,
DR4300, DR4500,
UDC2300, UDC3300,
UMC800, HC900
Rate
SPP3_SEG [n] RATE Floating Point
RW VPR100, VRX100,
VRX180, UDC5300,
DR4300, DR4500,
UDC2300, UDC3300,
UMC800, HC900
Ramp or Soak
Value
SPP3_SEG [n]
SEG_VALUE
RW VPR100, VRX100,
VRX180, UDC5300,
DR4300, DR4500,
UDC2300, UDC3300,
UMC800, HC900
Floating Point
1. The default Parameter if only “SPP3_SEG [n]” is entered.
Set Point Programmer #4 Profile Segment
The following table lists the devices which support the Set Point Programmer #4
Profile Segment and their formats.
Device
86
Supported Address Format
Range
VPR100
SPP4_SEG [n] [param]
[n] = 1 to 63
VRX100
SPP4_SEG [n] [param]
[n] = 1 to 63
VRX180
SPP4_SEG [n] [param]
[n] = 1 to 63
UDC5300
SPP4_SEG [n] [param]
[n] = 1 to 63
DR4300
SPP4_SEG [n] [param]
[n] = 1 to 24
DR4500
SPP4_SEG [n] [param]
[n] = 1 to 12
UDC2300
SPP4_SEG [n] [param]
[n] = 1 to 12
UDC3300
SPP4_SEG [n] [param]
[n] = 1 to 12
UMC800, HC900 SPP4_SEG [n] [param]
[n] = 1 to 50
Devices
Param
Address Line
Param Format
Access
The following table lists the details of the Set Point Program #4 Profile Segment
parameters.
Ramp/Soak
Segment
SPP4_SEG [n]
SEG_TYPE
Discrete (bits).
[Status Point
Only]
RW UMC800, HC900
Event #1
SPP4_SEG [n] EV01 Discrete (bits).
[Status Point
Only]
RW UMC800, HC900
Event #2
SPP4_SEG [n] EV02 Discrete (bits).
[Status Point
Only]
RW UMC800, HC900
Event #3
SPP4_SEG [n] EV03 Discrete (bits).
[Status Point
Only]
RW UMC800, HC900
Event #4
SPP4_SEG [n] EV04 Discrete (bits).
[Status Point
Only]
RW UMC800, HC900
Event #5
SPP4_SEG [n] EV05 Discrete (bits).
[Status Point
Only]
RW UMC800, HC900
Event #6
SPP4_SEG [n] EV06 Discrete (bits).
[Status Point
Only]
RW UMC800, HC900
Event #7
SPP4_SEG [n] EV07 Discrete (bits).
[Status Point
Only]
RW UMC800, HC900
Event #8
SPP4_SEG [n] EV08 Discrete (bits).
[Status Point
Only]
RW UMC800, HC900
Event #9
SPP4_SEG [n] EV09 Discrete (bits).
[Status Point
Only]
RW UMC800, HC900
Event #10
SPP4_SEG [n] EV10 Discrete (bits).
[Status Point
Only]
RW UMC800, HC900
Event #11
SPP4_SEG [n] EV11 Discrete (bits).
[Status Point
Only]
RW UMC800, HC900
0 = Soak Segment
Devices
1 = Ramp Segment
Honeywell Universal Modbus Interface Reference
87
5 – Device Information
Address Line
Param Format
Event #12
SPP4_SEG [n] EV12 Discrete (bits).
[Status Point
Only]
RW UMC800, HC900
Event #13
SPP4_SEG [n] EV13 Discrete (bits).
[Status Point
Only]
RW UMC800, HC900
Event #14
SPP4_SEG [n] EV14 Discrete (bits).
[Status Point
Only]
RW UMC800, HC900
Event #15
SPP4_SEG [n] EV15 Discrete (bits).
[Status Point
Only]
RW UMC800, HC900
Event #16
SPP4_SEG [n] EV16 Discrete (bits).
[Status Point
Only]
RW UMC800, HC900
Access
Param
Devices
Soak Value for SPP4_SEG [n]
Auxiliary Output AUX_OUT
Floating Point
RW UMC800, HC900
Time
SPP4_SEG [n]
TIME1
Floating Point
RW VPR100, VRX100,
VRX180, UDC5300,
DR4300, DR4500,
UDC2300, UDC3300,
UMC800, HC900
Rate
SPP4_SEG [n] RATE Floating Point
RW VPR100, VRX100,
VRX180, UDC5300,
DR4300, DR4500,
UDC2300, UDC3300,
UMC800, HC900
Ramp or Soak
Value
SPP4_SEG [n]
SEG_VALUE
RW VPR100, VRX100,
VRX180, UDC5300,
DR4300, DR4500,
UDC2300, UDC3300,
UMC800, HC900
Floating Point
1. The default Parameter if only “SPP4_SEG [n]” is entered.
Set Point Scheduler Values
The following table lists the devices which support the Set Point Scheduler
Values and their formats.
88
Device
Supported Address Format
Range
UMC800
SCHED [n] [param]
[n] = 1 to 1
Devices
Device
Supported Address Format
Range
HC900
SCHED [n] [param]
[n] = 1 to 2
Param
Address Line
Param Format
Access
The following table lists the details of the Scheduler Values parameters.
Devices
Output #1
SCHED [n]
OUTPUT11
Floating Point
RO UMC800, HC900
Output #1
SCHED [n]
OUTPUT2
Floating Point
RO UMC800, HC900
Output #1
SCHED [n]
OUTPUT3
Floating Point
RO UMC800, HC900
Output #4
SCHED [n]
OUTPUT4
Floating Point
RO UMC800, HC900
Output #5
SCHED [n]
OUTPUT5
Floating Point
RO UMC800, HC900
Output #6
SCHED [n]
OUTPUT6
Floating Point
RO UMC800, HC900
Output #7
SCHED [n]
OUTPUT7
Floating Point
RO UMC800, HC900
Output #8
SCHED [n]
OUTPUT8
Floating Point
RO UMC800, HC900
Auxiliary Output SCHED [n]
#1
AUX_OUT1
Floating Point
RO UMC800, HC900
Auxiliary Output SCHED [n]
#2
AUX_OUT2
Floating Point
RO UMC800, HC900
Auxiliary Output SCHED [n]
#3
AUX_OUT3
Floating Point
RO UMC800, HC900
Auxiliary Output SCHED [n]
#4
AUX_OUT4
Floating Point
RO UMC800, HC900
Auxiliary Output SCHED [n]
#5
AUX_OUT5
Floating Point
RO UMC800, HC900
Auxiliary Output SCHED [n]
#6
AUX_OUT6
Floating Point
RO UMC800, HC900
Auxiliary Output SCHED [n]
#7
AUX_OUT7
Floating Point
RO UMC800, HC900
Auxiliary Output SCHED [n]
#8
AUX_OUT8
Floating Point
RO UMC800, HC900
Honeywell Universal Modbus Interface Reference
89
Param Format
Access
5 – Device Information
Param
Address Line
Floating Point
RW UMC800, HC900
Current Segment SCHED [n] SEG_NO Floating Point
Number
RW UMC800, HC900
Program Elapsed SCHED [n]
Time
EL_TIME
Floating Point
RO UMC800, HC900
Segment Time
Remaining
SCHED [n]
TIME_REMAIN
Floating Point
RO UMC800, HC900
Schedule Save
Request
SCHED [n]
SCHED_SAVE
Floating Point
RW UMC800, HC900
Guaranteed Soak SCHED [n]
Limit #1
SOAK_LIMIT_1
Floating Point
RW UMC800, HC900
Guaranteed Soak SCHED [n]
Limit #2
SOAK_LIMIT_2
Floating Point
RW UMC800, HC900
Guaranteed Soak SCHED [n]
Limit #3
SOAK_LIMIT_3
Floating Point
RW UMC800, HC900
Guaranteed Soak SCHED [n]
Limit #4
SOAK_LIMIT_4
Floating Point
RW UMC800, HC900
Guaranteed Soak SCHED [n]
Limit #5
SOAK_LIMIT_5
Floating Point
RW UMC800, HC900
Guaranteed Soak SCHED [n]
Limit #6
SOAK_LIMIT_6
Floating Point
RW UMC800, HC900
Guaranteed Soak SCHED [n]
Limit #7
SOAK_LIMIT_7
Floating Point
RW UMC800, HC900
Guaranteed Soak SCHED [n]
Limit #8
SOAK_LIMIT_8
Floating Point
RW UMC800, HC900
Jog Segment
SCHED [n]
JOG_SEG
Floating Point
RW UMC800, HC900
Event #1
SCHED [n]
EVENT_01
Discrete (bits).
[Status Point
Only]
RO UMC800, HC900
Event #2
SCHED [n]
EVENT_02
Discrete (bits).
[Status Point
Only]
RO UMC800, HC900
Event #3
SCHED [n]
EVENT_03
Discrete (bits).
[Status Point
Only]
RO UMC800, HC900
Event #4
SCHED [n]
EVENT_04
Discrete (bits).
[Status Point
Only]
RO UMC800, HC900
Current Program SCHED [n]
Number
PROG_NO
90
Devices
Param
Address Line
Param Format
Access
Devices
Devices
Event #5
SCHED [n]
EVENT_05
Discrete (bits).
[Status Point
Only]
RO UMC800, HC900
Event #6
SCHED [n]
EVENT_06
Discrete (bits).
[Status Point
Only]
RO UMC800, HC900
Event #7
SCHED [n]
EVENT_07
Discrete (bits).
[Status Point
Only]
RO UMC800, HC900
Event #8
SCHED [n]
EVENT_08
Discrete (bits).
RO UMC800, HC900
Event #9
SCHED [n]
EVENT_09
Discrete (bits).
[Status Point
Only]
RO UMC800, HC900
Event #10
SCHED [n]
EVENT_10
Discrete (bits).
[Status Point
Only]
RO UMC800, HC900
Event #11
SCHED [n]
EVENT_11
Discrete (bits).
[Status Point
Only]
RO UMC800, HC900
Event #12
SCHED [n]
EVENT_12
Discrete (bits).
[Status Point
Only]
RO UMC800, HC900
Event #13
SCHED [n]
EVENT_13
Discrete (bits).
[Status Point
Only]
RO UMC800, HC900
Event #14
SCHED [n]
EVENT_14
Discrete (bits).
[Status Point
Only]
RO UMC800, HC900
Event #15
SCHED [n]
EVENT_15
Discrete (bits).
[Status Point
Only]
RO UMC800, HC900
Event #16
SCHED [n]
EVENT_16
Discrete (bits).
[Status Point
Only]
RO UMC800, HC900
Status
SCHED [n] STATUS Discrete (bits).
[Status Point
Only]
RO UMC800, HC900
Start Schedule
SCHED [n] START
UINT2
WO UMC800, HC900
Hold Schedule
SCHED [n] HOLD
UINT2
WO UMC800, HC900
[Status Point
Only]
Honeywell Universal Modbus Interface Reference
91
Param
Address Line
Param Format
Access
5 – Device Information
Devices
Advance
Schedule
SCHED [n]
ADVANCE
UINT2
WO UMC800, HC900
Reset Schedule
SCHED [n] RESET
UINT2
WO UMC800, HC900
Time Units
SCHED [n]
UNITS_TIME
Discrete (bits).
[Status Point
Only]
RW UMC800, HC900
1. The default Parameter if only “SCHED [n]” is entered.
Set Point Scheduler #1 Segment
The following table lists the devices which support the Scheduler #1 Segment and
their formats.
Device
Supported Address Format
Range
UMC800, HC900 SCHED1_SEG [n] [param]
[n] = 1 to 50
92
Param
Address Line
Param Format
Access
The following table lists the details of the Scheduler #1 Segment parameters.
Devices
Soak Type #1
SCHED1_SEG [n]
GUAR11
Discrete (bits).
[Status Point
Only]
RW UMC800, HC900
Soak Type #2
SCHED1_SEG [n]
GUAR2
Discrete (bits).
[Status Point
Only]
RW UMC800, HC900
Soak Type #3
SCHED1_SEG [n]
GUAR3
Discrete (bits).
[Status Point
Only]
RW UMC800, HC900
Soak Type #4
SCHED1_SEG [n]
GUAR4
Discrete (bits).
[Status Point
Only]
RW UMC800, HC900
Soak Type #5
SCHED1_SEG [n]
GUAR5
Discrete (bits).
[Status Point
Only]
RW UMC800, HC900
Soak Type #6
SCHED1_SEG [n]
GUAR6
Discrete (bits).
[Status Point
Only]
RW UMC800, HC900
Param
Address Line
Param Format
Access
Devices
Devices
Soak Type #7
SCHED1_SEG [n]
GUAR7
Discrete (bits).
[Status Point
Only]
RW UMC800, HC900
Soak Type #8
SCHED1_SEG [n]
GUAR8
Discrete (bits).
[Status Point
Only]
RW UMC800, HC900
Event #1
SCHED1_SEG [n]
EVENT_01
Discrete (bits).
[Status Point
Only]
RW UMC800, HC900
Event #2
SCHED1_SEG [n]
EVENT_02
Discrete (bits).
[Status Point
Only]
RW UMC800, HC900
Event #3
SCHED1_SEG [n]
EVENT_03
Discrete (bits).
[Status Point
Only]
RW UMC800, HC900
Event #4
SCHED1_SEG [n]
EVENT_04
Discrete (bits).
[Status Point
Only]
RW UMC800, HC900
Event #5
SCHED1_SEG [n]
EVENT_05
Discrete (bits).
[Status Point
Only]
RW UMC800, HC900
Event #6
SCHED1_SEG [n]
EVENT_06
Discrete (bits).
[Status Point
Only]
RW UMC800, HC900
Event #7
SCHED1_SEG [n]
EVENT_07
Discrete (bits).
[Status Point
Only]
RW UMC800, HC900
Event #8
SCHED1_SEG [n]
EVENT_08
Discrete (bits).
[Status Point
Only]
RW UMC800, HC900
Event #9
SCHED1_SEG [n]
EVENT_09
Discrete (bits).
[Status Point
Only]
RW UMC800, HC900
Event #10
SCHED1_SEG [n]
EVENT_10
Discrete (bits).
[Status Point
Only]
RW UMC800, HC900
Event #11
SCHED1_SEG [n]
EVENT_11
Discrete (bits).
[Status Point
Only]
RW UMC800, HC900
Honeywell Universal Modbus Interface Reference
93
94
Param
Address Line
Param Format
Access
5 – Device Information
Devices
Event #12
SCHED1_SEG [n]
EVENT_12
Discrete (bits).
[Status Point
Only]
RW UMC800, HC900
Event #13
SCHED1_SEG [n]
EVENT_13
Discrete (bits).
[Status Point
Only]
RW UMC800, HC900
Event #14
SCHED1_SEG [n]
EVENT_14
Discrete (bits).
[Status Point
Only]
RW UMC800, HC900
Event #15
SCHED1_SEG [n]
EVENT_15
Discrete (bits).
[Status Point
Only]
RW UMC800, HC900
Event #16
SCHED1_SEG [n]
EVENT_16
Discrete (bits).
[Status Point
Only]
RW UMC800, HC900
Time
SCHED1_SEG [n]
TIME Parameter
Format:
Floating Point
RW UMC800, HC900
Output #1
SCHED1_SEG [n]
OUTPUT1
Floating Point
RW UMC800, HC900
Output #2
SCHED1_SEG [n]
OUTPUT2
Floating Point
RW UMC800, HC900
Output #3
SCHED1_SEG [n]
OUTPUT3
Floating Point
RW UMC800, HC900
Output #4
SCHED1_SEG [n]
OUTPUT4
Floating Point
RW UMC800, HC900
Output #5
SCHED1_SEG [n]
OUTPUT5
Floating Point
RW UMC800, HC900
Output #6
SCHED1_SEG [n]
OUTPUT6
Floating Point
RW UMC800, HC900
Output #7
SCHED1_SEG [n]
OUTPUT7
Floating Point
RW UMC800, HC900
Output #8
SCHED1_SEG [n]
OUTPUT8
Floating Point
RW UMC800, HC900
Soak Value for SCHED1_SEG [n]
Auxiliary Output AUX_SOAK_1
#1
Floating Point
RW UMC800, HC900
Soak Value for SCHED1_SEG [n]
Auxiliary Output AUX_SOAK_2
#2
Floating Point
RW UMC800, HC900
Param Format
Access
Devices
Param
Address Line
Devices
Soak Value for SCHED1_SEG [n]
Auxiliary Output AUX_SOAK_3
#3
Floating Point
RW UMC800, HC900
Soak Value for SCHED1_SEG [n]
Auxiliary Output AUX_SOAK_4
#4
Floating Point
RW UMC800, HC900
Soak Value for SCHED1_SEG [n]
Auxiliary Output AUX_SOAK_5
#5
Floating Point
RW UMC800, HC900
Soak Value for SCHED1_SEG [n]
Auxiliary Output AUX_SOAK_6
#6
Floating Point
RW UMC800, HC900
Soak Value for SCHED1_SEG [n]
Auxiliary Output AUX_SOAK_7
#7
Floating Point
RW UMC800, HC900
Soak Value for SCHED1_SEG [n]
Auxiliary Output AUX_SOAK_8
#8
Floating Point
RW UMC800, HC900
Number of
Times to
Recycle
SCHED1_SEG [n]
RECYCLE
Floating Point
RW UMC800, HC900
Recycle
Segment
SCHED1_SEG [n]
RECYCLE_SEG
Floating Point
RW UMC800, HC900
1. The default Parameter if only “SCHED1_SEG [n]” is entered.
Set Point Scheduler #2 Segment
The following table lists the devices which support the Scheduler #2 Segment and
their formats.
Device
Supported Address Format
Range
HC900
SCHED2_SEG [n] [param]
[n] = 1 to 50
Param
Address Line
Param Format
Access
The following table lists the details of the Scheduler #2 Segment parameters.
Devices
Soak Type #1
SCHED2_SEG [n]
GUAR11
Discrete (bits).
[Status Point
Only]
RW HC900
Honeywell Universal Modbus Interface Reference
95
96
Param
Address Line
Param Format
Access
5 – Device Information
Devices
Soak Type #2
SCHED2_SEG [n]
GUAR2
Discrete (bits).
[Status Point
Only]
RW HC900
Soak Type #3
SCHED2_SEG [n]
GUAR3
Discrete (bits).
[Status Point
Only]
RW HC900
Soak Type #4
SCHED2_SEG [n]
GUAR4
Discrete (bits).
[Status Point
Only]
RW HC900
Soak Type #5
SCHED2_SEG [n]
GUAR5
Discrete (bits).
[Status Point
Only]
RW HC900
Soak Type #6
SCHED2_SEG [n]
GUAR6
Discrete (bits).
[Status Point
Only]
RW HC900
Soak Type #7
SCHED2_SEG [n]
GUAR7
Discrete (bits).
[Status Point
Only]
RW HC900
Soak Type #8
SCHED2_SEG [n]
GUAR8
Discrete (bits).
[Status Point
Only]
RW HC900
Event #1
SCHED2_SEG [n]
EVENT_01
Discrete (bits).
[Status Point
Only]
RW HC900
Event #2
SCHED2_SEG [n]
EVENT_02
Discrete (bits).
[Status Point
Only]
RW HC900
Event #3
SCHED2_SEG [n]
EVENT_03
Discrete (bits).
[Status Point
Only]
RW HC900
Event #4
SCHED2_SEG [n]
EVENT_04
Discrete (bits).
[Status Point
Only]
RW HC900
Event #5
SCHED2_SEG [n]
EVENT_05
Discrete (bits).
[Status Point
Only]
RW HC900
Event #6
SCHED2_SEG [n]
EVENT_06
Discrete (bits).
[Status Point
Only]
RW HC900
Param
Address Line
Param Format
Access
Devices
Devices
Event #7
SCHED2_SEG [n]
EVENT_07
Discrete (bits).
[Status Point
Only]
RW HC900
Event #8
SCHED2_SEG [n]
EVENT_08
Discrete (bits).
[Status Point
Only]
RW HC900
Event #9
SCHED2_SEG [n]
EVENT_09
Discrete (bits).
[Status Point
Only]
RW HC900
Event #10
SCHED2_SEG [n]
EVENT_10
Discrete (bits).
[Status Point
Only]
RW HC900
Event #11
SCHED2_SEG [n]
EVENT_11
Discrete (bits).
[Status Point
Only]
RW HC900
Event #12
SCHED2_SEG [n]
EVENT_12
Discrete (bits).
[Status Point
Only]
RW HC900
Event #13
SCHED2_SEG [n]
EVENT_13
Discrete (bits).
[Status Point
Only]
RW HC900
Event #14
SCHED2_SEG [n]
EVENT_14
Discrete (bits).
[Status Point
Only]
RW HC900
Event #15
SCHED2_SEG [n]
EVENT_15
Discrete (bits).
[Status Point
Only]
RW HC900
Event #16
SCHED2_SEG [n]
EVENT_16
Discrete (bits).
[Status Point
Only]
RW HC900
Time
SCHED2_SEG [n]
TIME
Floating Point
RW HC900
Output #1
SCHED2_SEG [n]
OUTPUT1
Floating Point
RW HC900
Output #2
SCHED2_SEG [n]
OUTPUT2
Floating Point
RW HC900
Output #3
SCHED2_SEG [n]
OUTPUT3
Floating Point
RW HC900
Output #4
SCHED2_SEG [n]
OUTPUT4
Floating Point
RW HC900
Honeywell Universal Modbus Interface Reference
97
Param
Address Line
Param Format
Access
5 – Device Information
Output #5
SCHED2_SEG [n]
OUTPUT5
Floating Point
RW HC900
Output #6
SCHED2_SEG [n]
OUTPUT6
Floating Point
RW HC900
Output #7
SCHED2_SEG [n]
OUTPUT7
Floating Point
RW HC900
Output #8
SCHED2_SEG [n]
OUTPUT8
Floating Point
RW HC900
Soak Value for SCHED2_SEG [n]
Auxiliary Output AUX_SOAK_1
#1
Floating Point
RW HC900
Soak Value for SCHED2_SEG [n]
Auxiliary Output AUX_SOAK_2
#2
Floating Point
RW HC900
Soak Value for SCHED2_SEG [n]
Auxiliary Output AUX_SOAK_3
#3
Floating Point
RW HC900
Soak Value for SCHED2_SEG [n]
Auxiliary Output AUX_SOAK_4
#4
Floating Point
RW HC900
Soak Value for SCHED2_SEG [n]
Auxiliary Output AUX_SOAK_5
#5
Floating Point
RW HC900
Soak Value for SCHED2_SEG [n]
Auxiliary Output AUX_SOAK_6
#6
Floating Point
RW HC900
Soak Value for SCHED2_SEG [n]
Auxiliary Output AUX_SOAK_7
#7
Floating Point
RW HC900
Soak Value for SCHED2_SEG [n]
Auxiliary Output AUX_SOAK_8
#8
Floating Point
RW HC900
Number of
Times to
Recycle
SCHED2_SEG [n]
RECYCLE
Floating Point
RW HC900
Recycle
Segment
SCHED2_SEG [n]
RECYCLE_SEG
Floating Point
RW HC900
1. The default Parameter if only “SCHED2_SEG [n]” is entered.
98
Devices
Devices
Non-numbered Addresses
Param
Address Line
Param Format
Access
The following table lists the details of the Non-numbered Address parameters.
Relay #1
RELAY1
Discrete (bits).
[Status Point
Only]
RO DR4300
Relay #2
RELAY2
Discrete (bits).
[Status Point
Only]
RO DR4300
Alarm Relay #1 ALMRLY1
Discrete (bits).
[Status Point
Only]
RO DR4500
Alarm Relay #2 ALMRLY2
Discrete (bits).
[Status Point
Only]
RO DR4500
Control Relay #1 CR1
Discrete (bits).
[Status Point
Only]
RO DR4500
Control Relay #2 CR2
Discrete (bits).
[Status Point
Only]
RO DR4500
Control Relay #3 CR3
Discrete (bits).
[Status Point
Only]
RO DR4500
Control Relay #4 CR4
Discrete (bits).
[Status Point
Only]
RO DR4500
Control Relay
Discrete (bits).
[Status Point
Only]
RO UDC2300, UDC3300
Alarm Relay #2 ALMRLY2
Discrete (bits).
[Status Point
Only]
RO UDC2300, UDC3300
Alarm Relay #1 ALMRLY1
Discrete (bits).
[Status Point
Only]
RO UDC2300, UDC3300
INSTMODE
Floating Point
RW RSX, VPR100,
VRX100, VRX180,
UDC5300, UMC800,
HC900
CR
INSTMODE
Devices
Honeywell Universal Modbus Interface Reference
99
Param
100
Param Format
Access
5 – Device Information
Address Line
Devices
CONFIG_CLEA CONFIG_CLEAR
R
Floating Point
WO RSX, VPR100,
VRX100, VRX180,
UDC5300, HC900
LOAD_RECIPE LOAD_RECIPE
Floating Point
WO UMC800
CHART_SPEE
D
CHART_SPEED
Floating Point
RO DR4300, DR4500
Pen #1 High
Value
PEN1HI
Floating Point
RO DR4300, DR4500
Pen #1 Low
Value
PEN1LO
Floating Point
RO DR4300, DR4500
Number of Chart CHART_DIVS
Divisions
Floating Point
RO DR4500
CHART_STAT
US
CHART_STATUS
Floating Point
RO DR4500
Pen #1 Status
PEN1STAT
Floating Point
RO DR4500
Pen #2 Status
PEN2STAT
Floating Point
RO DR4500
Pen #2 High
Value
PEN2HI
Floating Point
RO DR4500
Pen #2 Low
Value
PEN2LO
Floating Point
RO DR4500
Pen #3 Status
PEN3STAT
Floating Point
RO DR4500
Pen #3 High
Value
PEN3HI
Floating Point
RO DR4500
Pen #3 Low
Value
PEN3LO
Floating Point
RO DR4500
Pen #4 Status
PEN4STAT
Floating Point
RO DR4500
Pen #4 High
Value
PEN4_HIGH
Floating Point
RO DR4500
Pen #4 Low
Value
PEN4_LOW
Floating Point
RO DR4500
HC900 and UMC800 SPP and
Recipe Support
6
Honeywell Universal Modbus Interface Reference
101
6 – HC900 and UMC800 SPP and Recipe Support
Overview
The HC900 and UMC800 SPP & Recipe Support is an application that enables
you to configure and control Set Point (SP) programmers and variables in one or
more HC900 and/or UMC800 controllers through Station. The application allows
operators to easily configure set point profiles and Variable-based recipes offline,
before downloading to a specific controller. Also supported is the monitoring and
configuration of running set point programs. The HC900/UMC800 application
provides an easy alternative to configuring, monitoring, and loading SP programs
and recipes from the controller operator interface.
In particular, the HC900/UMC800 SPP and Recipe Support includes:
102
•
Configuration and maintenance of recipe definitions using Variables in
Station.
•
Downloading recipes to HC900 and UMC800 controllers.
•
Configuration and maintenance of SP profiles through Station displays.
•
Configuration and maintenance of combined recipe definitions in Station. A
combined recipe includes a recipe with a defined list of Variables and/or up to
two SP profiles.
•
Download a combined recipe to a compatible HC900 or UMC800 controller.
(In an HC900 controller, profiles may only be sent to the first four
programmers.)
•
Upload and download of SP profiles between the server database and
HC900/UMC800 SP programmers. (In an HC900 controller, profiles can be
sent to the first four programmers only.)
•
View and modify online the first four HC900/UMC800 SP programmers in a
controller (configuration and “current state”).
Planning
Planning
This section describes the planning and design-related issues concerned with
configuring HC900 and UMC800 SPP and Recipe Support. After reading this
section, you will be able to plan for the configuration process.
Resource Requirements
This section details the requirements and restrictions for the HC900/UMC800
application.
Set Point Profile and Recipe Slots
The server database allows you to configure and store up to 1000 SP profiles.
These profiles can be downloaded to HC900 and UMC800 SP programmers in
the same manner as profiles stored locally in the controller.
The system overwrites Profiles 1 to 4 in the HC900’s and the UMC800’s own
pool of stored profiles. Apart from these four profiles, it is possible, although
strongly not recommended, to use the remaining profile slots internal to the
controller in parallel with the 1000 server database profiles.
The server database also allows you to configure and store up to 1000 recipes.
These recipes can then be downloaded to HC900 and UMC800 controllers in the
same manner as recipes stored locally in the controller.
The system overwrites Recipe 1 in the HC900’s and the UMC800’s own pool of
stored recipes. Apart from this recipe, it is possible, although strongly not
recommended, to use the remaining recipe slots in parallel with the 1000 server
database recipes.
Set Point Program History
The history of a SP program can be viewed on a standard trend and compared to
its ideal pre-plotted profile. To collect history, a point needs to be built for each
programmer in an HC900 and a UMC800 controller. These points are used to
monitor the primary and auxiliary PV outputs of the processes driven by the
programmers, collecting the values and storing them in history.
Note that only the first four programmers in an HC900 can be monitored. This
means that a maximum of four points, one for each programmer, are required for
each HC900 and UMC800 controller in the system.
Honeywell Universal Modbus Interface Reference
103
6 – HC900 and UMC800 SPP and Recipe Support
Display Locking
For safety reasons and data integrity, recipes and SP programmers can only be
configured and maintained by one user at a time. Any users who try to access
these displays while they are in use are locked out. A message indicating the
lockout is displayed, indicating the Station number that is currently using the
display. These displays remain locked until the Station either exits the displays or
is disconnected.
Migration/Conversion Requirements
The 1000 SP profiles and recipes stored in the server database supersede the
HC900’s and the UMC800’s own set of stored profiles and recipes. This section
details how to migrate the existing profiles and recipes into the server database
from a controller.
Set Point Profiles
To migrate existing profiles from a controller, a utility transfers the stored profiles
to a block within the server database of 1000 profiles.
The utility is named umc800export, and may be run from the command line:
To migrate profiles:
1
From a command line enter
C:> umc800export
The UMC800 Profile Export Utility starts
2
Enter a valid controller number.
3
Enter the starting profile number.
4
Enter y to proceed.
For example:
**** UMC800 Profile Export Utility ****
Enter valid controller number: 1
Enter profile number to start from (1 to 931): 1
All profiles in Controller 1 will exported to profiles 1
to 70
Do you want to proceed (Y/N) ? y
Profile 70 of 70
Exported all profiles
C:>
104
Planning
Recipes
No utility exists to transfer existing recipes from an HC900 or a UMC800
controller to the server database of 1000 recipes. Recipes need to be re-created
manually in Station.
Honeywell Universal Modbus Interface Reference
105
6 – HC900 and UMC800 SPP and Recipe Support
Configuration
In this section, you will learn how to configure HC900 and UMC800 recipes, SP
profiles, and combined recipes. Configuration requirements for setting up the set
point programmer monitoring displays are also presented.
Prerequisites
Before configuring the HC900/UMC800 SPP and Recipe Support, ensure that
you have:
•
Access to the MNGR operator account in Station.
•
Fast and Extended history.
•
SPP function blocks configured in each HC900 or UMC800 controller. You
will need one block for each SP programmer (see UMC800 Control Builder
User’s Guide or HC900’s HC Designer User’s Guide or Help files for
information on function blocks).
Considerations
Each recipe, SP profile, and combined recipe stored in the server database must
have a unique name (respectively).
SP profiles must have zero length/rate segments only at the end of the profile.
Configuring a Recipe
A recipe is a collection of 50 Variable signal tags and their values or states. Each
Variable is either a digital or analog element in a control configuration, acting as
an input to any connected function blocks. When a recipe is loaded, the values or
states of the signal tags in the recipe replace the values of those signals in the
controller’s configuration.
Up to 1000 recipes can be created and maintained using the Station HC900 and
UMC800 Recipe Configuration displays.
To configure a recipe:
106
1
In Station select Configure > Applications > HC900/UMC800 > Recipes
(Variables Only). The Recipe Selection display opens.
2
Click the recipe that you want to configure or modify, or click a blank slot to
create a new recipe.
3
Click on the recipe name to load its configuration.
Configuration
When the Recipe Configuration display opens, the server attempts to read a list of
all variables from the currently selected “Compatible” controller. If the controller
is not a valid HC900 or UMC800 controller or the upload fails, an alarm is raised.
The variable list does not overwrite any of the variables configured in the current
recipe, nor do variables in the recipe need to be members of the list. Instead, the
list is used to provide default selections in the “Variable” boxes to help when
configuring a recipe.
By changing the controller selection from the “Compatible controller” dropdown
list, the server attempts to read a new list of all variables from the controller. If the
controller is not a valid HC900 or UMC800 controller or the upload fails, an
alarm is raised.
Note
Only the first 188 variables configured on an HC900 are used to populate the variable
combobox. While additional variables are not visible in the combobox, they can still be
added to a recipe.
Download to Controller
Allows the user to download the current recipe to an HC900 or a UMC800
controller. A recipe can be downloaded to any controller, not just the “Compatible
controller”. See the section “Downloading a Recipe” on page 113 for information
on downloading a recipe.
See the section “Configuring a Combined Recipe” on page 108 for information
on configuring a recipe for use in a combined recipe.
Configuring a SP Profile
A SP profile is a time-based program typically used as the set point of a control
loop. Each program may be from 2 to 50 segments in length, where each segment
of the program may be a ramp or soak except the last segment that must be a soak.
In addition to the main output value, a second analog value is available for each
step of the program. This output is a fixed soak value, which may be used as an
input to another function or to provide a set point for a secondary control loop in
the process such as pressure or % carbon.
A set point guarantee function is provided that holds the program if a process
variable exceeds a predefined deviation from the set point. The set point
guarantee can be selected to be active for the entire program, for soaks only, or for
user specified segments.
Up to 1000 profiles can be created and maintained using the Station HC900 and
UMC800 Profile Configuration displays.
Honeywell Universal Modbus Interface Reference
107
6 – HC900 and UMC800 SPP and Recipe Support
To configure a SP profile, perform the following steps:
1
In Station select Configure > Applications > HC900/UMC800 > Set Point
Programs > Profile Setup. The Profile Selection display opens.
2
Select the profile that you want to configure or modify, or click a blank slot to
create a new profile.
3
Click the profile name to load its configuration.
The Profile Configuration display allows all the details of a SP profile to be edited
from a single display. Changes made to configuration are applied immediately to
the stored profile, but do not have any effect on profiles that are currently loaded
into HC900 and UMC800 controllers.
Program Control
Values such as Restart Rate and Loop Segment control the dynamic execution of
a program. These values can be shown or hidden using the Show/Hide button.
Clone a Profile
Allows the user to copy all the details of another of the 1000 stored profiles to the
current profile slot. The “Name” field is not copied and made blank.
Upload from Controller
Allows the user to upload the profile currently loaded in an HC900 or UMC800
SP programmer into the profile slot currently being edited.
Download to Controller
Allows the user to download the current profile to an HC900 or UMC800 SP
programmer. Note that this action causes the selected programmer to be cleared
and reset before the profile is downloaded. Any pre-existing program is aborted
and overwritten. See the section “Downloading a SP Profile” on page 114 for
information on downloading a profile.
Configuring a Combined Recipe
A combined recipe is a combination of a recipe, up to two set point profiles and a
list of “Compatible Destinations”.
Each combined recipe can be associated with a number of destinations, any one of
which can be selected by the operator as a target for the combined recipe. Each
destination includes an HC900 or UMC800 controller, a set point programmer for
each profile in the combined recipe, and an optional ‘variable suffix’. This suffix
is appended to every variable in the recipe component of a combined recipe,
before it is sent to a controller. This allows the same recipe to be used for more
than one set of variables in a single HC900 or UMC800 controller if the controller
108
Configuration
is used to control multiple, similar processes. It is up to the user to configure the
Variable tag names with the proper suffixes in the controller configuration so that
the recipe with values for the Variables with these suffixes can be loaded from the
server database. An error is posted if these Variable tag names are not found on
download.
When a combined recipe is loaded to a controller, the SPP profiles are loaded into
the specified programmers and the recipe is loaded to the controller’s
configuration.
Up to 1000 combined recipes can be created and maintained using the Station
HC900/UMC800 Combined Recipe Configuration displays.
To configure a combined recipe, perform the following steps:
1
In Station select Configure > Applications > HC900/UMC800 > Combined
Recipes. The Combined Recipe Selection display opens.
2
Select the combined recipe that you want to configure or modify, or click a
blank slot to create a new combined recipe.
3
Click on its name to load the combined recipe.
The Combined Recipe Configuration display allows combined recipes to be
configured and stored in the server database. Changes made to configuration are
applied immediately to the stored combined recipe, but do not have any
immediate effect on profiles or variable values currently loaded in HC900 or
UMC800 controllers.
There are three optional components to a combined recipe. The first is a recipe
selected from the 1000 recipes stored in the server database (see the section
“Configuring a Recipe” on page 106 for information on recipes). The remaining
components are up to two SP profiles, selected from the 1000 profiles stored in
the server database (see the section “Configuring a SP Profile” on page 107 for
information on SP profiles). A combined recipe may include any, some, or none,
of these components.
Destination List
Each combined recipe may be configured with up to twenty “Compatible
Destinations”. This allows a single combined recipe to drive a number of
processes in a given plant. For example, the same combined recipe may be used
to operate three furnaces – where a different SP programmer in a controller, and a
different set of variables, control each furnace. The recipe Variable suffix allows
the same Combined Recipe to be directed to another set of Variables with the
same function for a similar process in the controller.
Name
Each destination may be given a name to more easily identify the process it
drives.
Honeywell Universal Modbus Interface Reference
109
6 – HC900 and UMC800 SPP and Recipe Support
Controller
Each destination has a controller to which each component of the combined
recipe is downloaded.
Prog A & B
These identify the SP programmers in the destination controller to which profiles
A and B will be downloaded.
Var. Suffix
Identifies a short string that will be appended to every variable name in the recipe
component of a combined recipe before it is downloaded. This allows the same
recipe to be loaded to a number of subsets of variables within the same controller.
For example, assume the recipe contains the variables TEMP, VOLUME and
PRESS. If destination “FURNACE1” has a variable suffix of “1” and destination
“FURNACE2” has a variable suffix of “2”, then when the combined recipe is
downloaded to “FURNACE2”, the variables updated will be TEMP2,
VOLUME2 and PRESS2. If the destination had been “FURNACE1”, then
TEMP1, VOLUME1 and PRESS1 would have been updated.
Download
See the section “Downloading a Combined Recipe” on page 114 for information
on downloading a combined recipe.
Configuring SPP Monitoring
The user may view and control the current state of set point programs in the
HC900 and UMC800 controllers from one of three monitoring displays. The SPP
Summary displays allows the user to monitor the first four programmers in a
given HC900 or UMC800 controller. This display provides information about the
SP programmers, including their current state and segment number, the segment
time remaining, and a history of the current program.
The SPP Program display allows the user to view the program configuration of a
specific programmer. This display is very similar to the Profile Configuration
display in that it shows a time-based program of 2 to 50 segments in length,
where each segment of the program can be a ramp or soak except the last segment
that must be a soak. The difference is that the SPP Program display reads and
writes a set point program from a SP programmer, and does not store the program
in the server database.
110
Configuration
The SPP Trend display allows the user to view the history of a SP programmer
and compare it to the ideal profile. To collect history, a point needs to be built for
each SP programmer in a controller. These points are used to monitor the process
PVs driven by the primary and auxiliary outputs of the programmers, collecting
the values and storing them in history.
Building Points for SPP Monitoring
Quick Builder can be used to build the points for monitoring the SP programmers.
The points must be of “Analog” type, and a unique point must be created for each
programmer. The source addresses used to monitor SP Programmer 1 in an
HC900 or UMC800 controller are described below.
Table 1 SP Programmer 1 Parameter Definition
Parameter
Source Address
PV
Address the PV being driven by the output
of SPP 1 in your process. See below for an
example.
AL1
PV high value
AL2
PV low value
SP
SPP 1 OUT
A1
Address the PV being driven by the
auxiliary output of SPP 1 in your process.
See below for an example.
AL3
A1 high value
AL4
A1 low value
A2
SPP_ADD 1 AUX_OUT
A3
SPP 1 STATUS_HOLD
A4
SPP 1 STATUS_END
The point should also be configured with:
•
Two second scan periods for each parameter.
•
Disable Alarming set (that is, alarms are disabled).
•
Fast, Normal, and Extended history collection for each parameter.
•
PV range sufficient to cover the output of the programmer.
Honeywell Universal Modbus Interface Reference
111
6 – HC900 and UMC800 SPP and Recipe Support
The following diagram illustrates a typical HC900/UMC800 configuration. In
this example, when configuring a point in Station to track programmer block
SPP3, you should configure the point’s PV parameter to read the PV of loop
PID2, and it’s A1 parameter to read the calculated PV from CARB5.
Figure 11 Example SPP Implementation
To monitor the other SP programmers, create a new point for each programmer
and replace the ‘1’ in the Source Address with the given programmer number
(valid 1 to 4). Each point must have a unique name. Repeat this process until you
have created points for each programmer. When all points have been built,
download them to the server database. See the Server and Client Configuration Guide
for information on points.
To configure SPP monitoring:
112
1
Disable the HC900 HC900 & UMC800 channels.
2
Select Configure > Applications > HC900/UMC800 > Programmer
Operation. The SPP Summary display opens.
3
For each HC900 and UMC800 controller, enter each point configured for this
controller in the appropriate slot
4
Enable the channels.
You can verify the SPP monitoring by checking that the primary and auxiliary
SP follow that of the programmers (displayed on the controller faceplate).
Operation
Operation
This section describes how to use the HC900/UMC800 SPP & Recipe Support on
a routine basis. Standard tasks include downloading recipes and SP profiles, and
issuing commands to the SP programmers. After reading this section, you will be
able to control HC900 and UMC800 controllers from Station.
Prerequisites
It is assumed that you have successfully completed the configuration procedure
detailed in the previous section and that all prerequisites have been met.
Procedure
The HC900/UMC800 application allows you to easily perform routine control
tasks from Station, including:
•
Downloading recipes
•
Downloading SP profiles
•
Downloading combined recipes
•
Controlling a SP programmer
Downloading a Recipe
Caution
When you download a recipe, you are in effect writing new values to the variables. Be
aware that by changing the variable values, you can affect running programs if they use
the variables as inputs.
To download a recipe:
1
In Station select Configure > Applications > HC900/UMC800 > Recipes
(Variables Only). The Recipe Selection display opens.
2
Click the recipe that you want to configure or modify, or click a blank slot to
create a new recipe.
3
Click on the recipe name to load its configuration.
4
Click the Download to Controller button and select a controller destination.
Note that a recipe can be downloaded to any controller, not just the
“Compatible controller”.
5
Click OK to accept the current controller selection. A confirmation dialog box
appears.
Honeywell Universal Modbus Interface Reference
113
6 – HC900 and UMC800 SPP and Recipe Support
6
Click Download to accept the recipe destination or Cancel to remove the
dialog box. The message “Downloading recipe…” appears.
If successful, the message “Recipe download complete.” appears. Otherwise
“Recipe download failed.” is displayed and an alarm is raised. See the section
“Troubleshooting” on page 117 for possible fail reasons.
Downloading a SP Profile
Caution
Downloading a profile will cause the selected programmer to be cleared and reset before
the profile is downloaded. Any pre-existing program will be aborted and overwritten.
To download a SP profile:
1
In Station select Configure > Applications > HC900/UMC800 > Set Point
Programs > Profile Setup. The Profile Selection display opens.
2
Click the profile that you want to configure or modify, or click a blank slot to
create a new profile.
3
Click on the profile name to load its configuration.
4
Click the Download to Controller button and select a controller and
programmer destination from the dialog box.
5
Click OK to accept the current controller and programmer selection. A
confirmation dialog box appears.
6
Click Download to accept the profile destination or Cancel to remove the
dialog box. The message “Downloading profile…” appears.
If successful, the message “Profile download complete.” appears. Otherwise
“Profile download failed.” appears and an alarm is raised. See the section
“Troubleshooting” on page 117 for possible fail reasons.
Downloading a Combined Recipe
Caution
If the download includes a recipe, then running programs can be affected by changing the
variable values. If the download includes a profile, then the selected programmer(s) will
be cleared and reset before the profile is downloaded. Any pre-existing program(s) will be
aborted and overwritten.
114
Operation
To download a combined recipe:
1
In Station select Configure > Applications > HC900/UMC800 > Combined
Recipes. The Combined Recipe Selection display opens.
2
Click the combined recipe that you want to configure or modify, or click a
blank slot to create a new combined recipe.
3
Click on the combined recipe name to load its configuration.
4
Click the Download button to download the combined recipe. Select a
controller destination and click on its “Download” button.A confirmation
dialog box appears.
5
Click OK to accept the combined recipe destination or Cancel to remove the
dialog box. The message “Downloading combined recipe…” appears.
If successful, the message “Combined recipe download complete.” appears.
Otherwise “Combined recipe download failed.” appears and an alarm is
raised. See the section “Troubleshooting” on page 117 for possible fail
reasons.
Controlling a SP Programmer
Considerations
•
You can only change the present segment while the program is in operation.
You must first place the programmer in the Hold state, then you may alter the
Start Value/Soak Value or Rate/Soak Time. You must then select the Start
action for the program to continue.
•
Not all commands are valid in all programmer states. For example, ‘Clear’ is
not valid when the programmer is in ‘Run’. You must also go to the Hold state
first before Advance or Reset. You can only start the program in the Ready
state Commands can also be issued from the SPP Trend page.
To control a SP programmer:
1
In Station select Configure > Applications > HC900/UMC800 >
Programmer Operation. The SPP Summary display opens
2
Select a controller in the combobox. The display updates with the current state
of the SP programmers configured.
3
Select the programmer that you want to control. Click on programmer’s
number to load the SPP Program page with its configuration. This is as shown
below.
4
Click Command Programmer. The Select Action dialog box appears. Select
the required action and click OK.
Honeywell Universal Modbus Interface Reference
115
6 – HC900 and UMC800 SPP and Recipe Support
5
A confirmation dialog box appears. Click Ok to accept the action or Cancel to
remove the dialog box.
If the command is successful, the message “Command sent.” appears and the
SP programmer status changes to reflect the command. Otherwise “Failed to
send command.” appears. See the section “Troubleshooting” on page 117 for
possible fail reasons.
While the program is running, the present segment number is highlighted and the
segment and elapsed timers are active. When in Hold, the segment timer stops but
the elapsed timer continues.
Click the Trend icon at the top right of the SPP Program display to access the SPP
Trend display. If a profile has been downloaded to the programmer, a SP pre-plot
for the Primary programmer output appears. The time of the program is spread
over a single screen for this plot in hours or minutes, depending on the time units.
Alternatively you can also select the Auxiliary output plot (if configured).
You can operate the programmer using the Command Programmer button as
described for the SPP Program display. The status information includes the event
LEDs that are red when the event is ON.
When the program is in Hold, the PV plotting stops. The PV continues plotting
when the program is re-started.
116
Troubleshooting
Troubleshooting
This section describes cross-checks and remedies to perform if HC900/UMC800
SPP & Recipe Support does not respond as anticipated.
Behavior
Things to try or confirm
Cannot use Station to control an
Ensure that the application has been installed
HC900 or UMC800. The
correctly and that all prerequisites have been met.
commands appear to have no effect. Make sure the UMC800SP.EXE task is running.
Check that Station R1.1, Build 1358 or later is
installed.
Display elements acting erratically Check that Station R1.1, Build 1358 or later is
installed.
Downloading/uploading a stored
Ensure the selected controller is a valid
recipe or SP profile fails and causes HC900/UMC800
an alarm to be raised in Station.
Check that the server can communicate with the
controller, that is, the controller status is OK.
If performing a download, ensure the target
programmer has a SPP function block.
Ensure the controller is in ‘Run’ mode (set on the
controller hardware).
Check the server log for error messages.
The “Clone a Profile” dialog box
does not let me select the correct
profile.
Check that each profile has a unique name. If this is
not the case, then the dialog box will only select the
first profile and clone this one.
Cannot enter a point name on the
SPP Summary page.
Ensure that the HC900 and UMC800 channel(s) are
out of service when entering the point names.
Downloading a program from the As per “Download profile” (above).
SPP Program page fails and causes The SP programmer must be in ‘Ready’ state to edit
an alarm to be raised in Station.
segments.
Ensure all parameter have valid values for example,
restart rate and jog segment not zero.
Check the server log for error messages.
The command issued to a SPP
programmer appears to have no
effect.
Some actions require the SP programmer to be in a
certain state, for example, ‘Clear’ is not valid when
the programmer is in ‘Run’.
Honeywell Universal Modbus Interface Reference
117
6 – HC900 and UMC800 SPP and Recipe Support
Behavior
Things to try or confirm
The trend does not display the
Check that a point has been built and specified for
program history or the ideal profile. the SP programmer. Ensure that HC900 and
UMC800 channel(s) are enabled and the point has
“Scanning and Control enabled” set.
Ensure you are licensed for Fast and Extended
history collection.
Check that the point parameters have been
configured properly and are collecting history.
Make sure the point is not in alarm.
The point range should be large enough to cover the
output of the programmer.
The program history does not look An ‘Advance’ command causes the programmer to
like the ideal profile.
advance to the next segment. This causes a ‘gap’ in
the history values and results in the running program
to be ‘distorted’.
The trend draws fewer segments
than in the SP program.
The end of the program is taken as the first segment
with a length/rate of zero Ensure that your program
only contains these types of segments at the end of
the program. To check this, you can upload the
program in the SPP Program page.
Check the server log for error messages.
118
Index
A
D
Address
Named 28
Non-named 32
architecture 10
data formats 33
documentation for Universal Modbus 6
B
formats, data 33
Black Box Connections 11
H
C
HC900 recipes 106
Channel
Write Delay 20
channel definition 18
combined recipes, configuring 108
configuration wizard 8
configuring Universal Modbus, steps for 5
connecting controllers to Universal Modbus 10
controller
definition 24
L
F
location syntax 28
P
Port tab 20
R
recipes
configuring 106
downloading 113
RS-232 10
RS-485 13
S
scanning
optimizing for Universal Modbus 35
set point profiles
configuring 107
downloading 114
migrating 104
Honeywell Universal Modbus Interface Reference
119
Index
set point programs 110
SPP monitoring 110
Stallion 13
U
UMC800 recipes 106
W
wizard, configuration 8
120