1
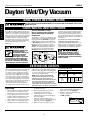
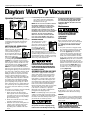
Dayton Operating Instructions and Parts Manual Model 6AKY2 Assembly which can cause a fire or explosion - do not use at filling stations or anywhere gasoline is stored or dispensed. 2 Dolly Operation Attaching Dolly To attach dolly to bottom of tank, lift vacuum using the top handle. Position vacuum 3 above dolly with the front of the vacuum facing the front of the dolly (side with the release lever) (Figure 2). Place tab on back bottom of tank into slot in back of dolly (Figure 3). Push downward on front of vacuum until front of tank clips 4 into lever on dolly (Figure 4). (Not standard with all models) 9 10 11 12 13 Clean or replace filters regularly. Do not use the vacuum or filters for collecting hazardous or other health endangering materials. NOTE: Never machine wash or dry filters. TOOL HOLDER ASSEMBLY 8 NEVER OPERATE UNATTENDED! Keep Filters Clean The efficiency of these vacuum cleaners is largely dependent on the filter. A clogged filter can cause overheating and possibly damage the vacuum cleaner. Removing Dolly To remove dolly, gently push downward on the release lever with your foot. While holding the release lever down, lift 5 upwards on vacuum using the top carry handle (Figure 5). Note: When using the vacuum to pick up very fine dust such as sawdust or dry wall dust, it will be necessary to empty the tank and clean the filter at more frequent intervals to maintain maximum pick up power or upgrade to collection filter bags. 1. Replace tank cover and 6 apply pressure with thumbs to each latch until it snaps tightly in place. Make sure both lid latches are clamped securely. 2. With rear of unit facing you, take tool holder and position 7 it with the tabs facing rear tank cover (Figure 6). 3.Press tabs of tool holder into the slots on mounting lugs on rear of tank cover (Figure 7). 4.Press down until tabs snap into place. ALWAYS DISCONNECT THE PLUG FROM THE WALL OUTLET BEFORE REMOVING THE TANK COVER. Operation This equipment incorporates parts such as switches, motors or the like that tend to produce arcs or sparks that can cause an explosion. Do not pick up flammable, combustible, or hot materials. Do not use around explosive liquids or vapors, as electrical devices produce arcs or sparks 14 DRY PICK UP OPERATION NOTE: If foam sleeve (Not standard with all models) is in position over lid cage, it does not need to be removed before installing cartridge. Foam must be positioned on the INSIDE of groove around lid cage for cartridge to fit properly. The cartridge filter can be used for wet or dry pick up; installation is the same for both. When picking up large quantities of liquid please refer to the Wet Pick up Operation section in this manual. Use the cartridge filter in position over the lid cage for most general dry material pick up. Make sure inlet deflector is fully inserted into deflector guide on inside of tank. If it is not, install inlet deflector by sliding it downward into slot on deflector guide (Figure 8). NOTE: Hose must be removed before inlet deflector can be inserted into or removed from deflector guide. Opening on inlet deflector can face either side of tank. Inlet deflector should always be in place for any type of cleaning. With the tank cover in an upside down position, slide the cartridge filter down over the lid cage, pushing until the filter seals against the cover (Figure 9). Place filter retainer into the top of the cartridge filter, hold the tank cover with one hand, turn the handle on the filter retainer clockwise to tighten, locking the filter into place (Figures 10 & 11). To remove the filter for cleaning, again hold the tank cover and turn the filter retainer counterclockwise to loosen and remove, slide the cartridge filter off the lid cage (Figures 12 & 13). To clean the cartridge filter shake or brush off excess dirt or rinse (from the inside of the filter) with water, dry completely (approximately 24 hours) and re-install (Figures 14 & 15). Note: If the filter has been used for wet pick up, it must be cleaned and dried before using for dry pick up. 15 Installing collection Filter Bag (Not standard on all models) 1. Use for dry pick up only. Use in conjunction with cartridge filter for picking up soot, cement, plaster or drywall dust. 2. With cord disconnected from receptacle, pull latches in an outward motion and remove tank cover. 3. Unscrew hose locking-nut and remove hose from inlet (Figure 16). 4. Remove inlet deflector from deflector guide (Figure 17). NOTE: Hose must be removed before inlet deflector can be taken out. 5. With the opening of the inlet deflector facing the left or right side of the filter bag, slide filter bag collar over deflector matching notches of bag collar to tabs on inlet deflector, bag will only fit properly one way (Figure 18). 6. Slide deflector with collection bag attached into deflector guide (Figure 19). 7. Reinsert hose into inlet and tighten locking-nut (Figure 20). 8. When secured in place, expand bag and position around the inside of the tank. 16 17 ® 3 E N G L I S H