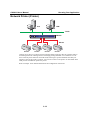
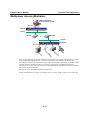
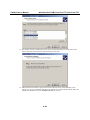
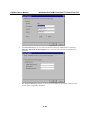
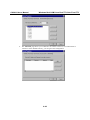
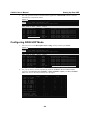
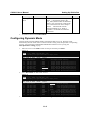
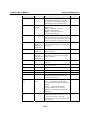
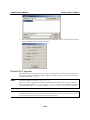
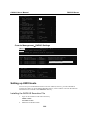
1
CN2610 Dual-LAN Async Server User’s Manual Third Edition, June 2006 www.moxa.com/product MOXA Technologies Co., Ltd. Tel: +886-2-8919-1230 Fax: +886-2-8919-1231 Web: www.moxa.com MOXA Technical Support [email protected] Worldwide: [email protected] The Americas CN2610 Async Server User’s Manual The software described in this manual is furnished under a license agreement and may be used only in accordance with the terms of that agreement. Copyright Notice Copyright © 2006 MOXA Technologies Co., Ltd. All rights reserved. Reproduction without permission is prohibited. Trademarks MOXA is a registered trademark of The Moxa Group. All other trademarks or registered marks in this manual belong to their respective manufacturers. Disclaimer Information in this document is subject to change without notice and does not represent a commitment on the part of Moxa. Moxa provides this document “as is,” without warranty of any kind, either expressed or implied, including, but not limited to, its particular purpose. Moxa reserves the right to make improvements and/or changes to this manual, or to the products and/or the programs described in this manual, at any time. Information provided in this manual is intended to be accurate and reliable. However, Moxa Technologies assumes no responsibility for its use, or for any infringements on the rights of third parties that may result from its use. This product might include unintentional technical or typographical errors. Changes are periodically made to the information herein to correct such errors, and these changes are incorporated into new editions of the publication. Table of Contents Chapter 1 Introduction..............................................................................................1-1 Product Features ................................................................................................... 1-2 Hardware................................................................................................................. 1-2 Software .................................................................................................................. 1-2 Package Checklist ................................................................................................. 1-2 Front Panel ............................................................................................................ 1-3 Rear Panel............................................................................................................. 1-3 Bottom Label.......................................................................................................... 1-3 Chapter 2 Getting Started.........................................................................................2-1 Hardware Installation ............................................................................................. 2-2 Desktop ................................................................................................................... 2-2 Rackmount .............................................................................................................. 2-2 Wiring Requirements .............................................................................................. 2-3 Connecting CN2610-8/16’s Power ......................................................................... 2-3 Connecting to the Network ..................................................................................... 2-3 Connecting to a Serial Device................................................................................. 2-4 Connecting to the Console Port............................................................................... 2-4 Accessing the Console Utility ................................................................................ 2-4 Configuration Checklist .......................................................................................... 2-4 Accessing the Console from a Telnet Terminal ...................................................... 2-4 Accessing the Console from a Console Terminal ................................................... 2-6 Configuring CN2610—The Server Menu............................................................. 2-12 Server Configuration—Info. ................................................................................. 2-12 Server Configuration—LAN................................................................................. 2-14 Server Configuration—Adv. ................................................................................. 2-15 Server Configuration—Host_table........................................................................ 2-16 Server Configuration—Route_table...................................................................... 2-17 Server Configuration—User_table........................................................................ 2-18 Save..................................................................................................................... 2-19 Restart ................................................................................................................. 2-19 Chapter 3 Knowing Your Application......................................................................3-1 Windows Real COM (NT Real COM) .................................................................... 3-2 Linux Real TTY/Unix Fixed TTY (NT Real COM) .................................................. 3-3 Device Control (Device Control) ............................................................................ 3-4 UDP Communication (Raw UDP) .......................................................................... 3-5 Dual-host Redundant Data Acquisition System (DRDAS)..................................... 3-6 Console Management (Reverse Terminal) ............................................................ 3-8 Terminal Access (Terminal).................................................................................... 3-9 Multi-host TTY (Multi-host TTY)........................................................................... 3-10 Dial-in/Out-of-Band Management (Dialin/out) ......................................................3-11 Network Printer (Printer) ...................................................................................... 3-12 Multiplexor Access (Multiplex) ............................................................................. 3-13 Chapter 4 Setting Up Windows Real COM/Linux Real TTY/Unix Fixed TTY ........4-1 Accessing the Console Utility ................................................................................ 4-2 Selecting the Application........................................................................................ 4-3 Configuring ASPP Mode ........................................................................................ 4-4 Configuring the Serial Ports................................................................................... 4-5 Save....................................................................................................................... 4-6 Restart ................................................................................................................... 4-7 Setting up Hosts .................................................................................................... 4-7 Setting up Windows XP/2003 Hosts....................................................................... 4-7 Setting up Windows 2000 Hosts ........................................................................... 4-23 Setting up Windows 95/98/ME/NT Hosts ............................................................ 4-37 Chapter 5 Setting Up Device Control ......................................................................5-1 Accessing the Console Utility ................................................................................ 5-2 Selecting the Application........................................................................................ 5-3 Configuring ASPP Mode ........................................................................................ 5-4 Configuring RAW Mode ......................................................................................... 5-6 Configuring the Serial Ports................................................................................... 5-8 Save....................................................................................................................... 5-9 Restart ................................................................................................................... 5-9 ASPP Library Introduction ................................................................................... 5-10 ASPP Examples for Unix ..................................................................................... 5-10 ASPP Examples for Windows...............................................................................5-11 Chapter 6 Setting Up Raw UDP................................................................................6-1 Accessing the Console Utility ................................................................................ 6-2 Selecting the Application........................................................................................ 6-3 Configuring RAW UDP Mode ................................................................................ 6-4 Configuring the Serial Ports................................................................................... 6-5 Save....................................................................................................................... 6-6 Restart ................................................................................................................... 6-7 Chapter 7 Setting Up the Dual-host Redundant Data Acquisition System..........7-1 Configuring Port Operation Mode – Port Menu [Mode] ......................................... 7-2 DRDAS Mode......................................................................................................... 7-4 Configuring Port Connection Settings—Port Menu [Line] ..................................... 7-5 Save....................................................................................................................... 7-6 Restart ................................................................................................................... 7-7 Chapter 8 Setting Up Reverse Terminal..................................................................8-1 Accessing the Console Utility ................................................................................ 8-2 Selecting the Application........................................................................................ 8-3 Configuring RTELNET Mode ................................................................................. 8-4 Configuring the Serial Ports................................................................................... 8-5 Save....................................................................................................................... 8-7 Restart ................................................................................................................... 8-7 Chapter 9 Setting Up Terminal.................................................................................9-1 Accessing the Console Utility ................................................................................ 9-2 Selecting the Application........................................................................................ 9-3 Configuring TERM_ASC Mode.............................................................................. 9-4 Configuring TERM_BIN Mode ............................................................................... 9-6 Configuring the Serial Ports................................................................................... 9-9 Save..................................................................................................................... 9-10 Restart ..................................................................................................................9-11 Chapter 10 Setting Up Multi-host TTY.....................................................................10-1 Accessing the Console Utility .............................................................................. 10-2 Selecting the Application...................................................................................... 10-3 Configuring FIXTTY Mode ................................................................................... 10-4 Configuring the Serial Ports................................................................................. 10-5 Save..................................................................................................................... 10-6 Restart ................................................................................................................. 10-7 Setting up Hosts .................................................................................................. 10-7 Installing and Compiling Fixed TTY Driver......................................................... 10-7 Fixed TTY driver for Different Applications........................................................ 10-8 Using Fixed TTY driver........................................................................................ 10-9 Chapter 11 Setting Up Dialin/out .............................................................................11-1 Accessing the Console Utility ...............................................................................11-2 Selecting the Application.......................................................................................11-3 Configuring PPPD/PPP Mode ..............................................................................11-4 Configuring SLIPD/SLIP Mode .............................................................................11-6 Configuring Dynamic Mode ..................................................................................11-8 Configuring the Serial Ports................................................................................11-13 Configuring Modem Initialization ........................................................................11-14 Optional Welcome Message...............................................................................11-15 Configuring Optional Local User Information......................................................11-15 Save....................................................................................................................11-16 Restart ................................................................................................................11-17 Chapter 12 Setting Up Printer ..................................................................................12-1 Accessing the Console Utility .............................................................................. 12-2 Selecting the Application...................................................................................... 12-3 Configuring RAW PRN Mode .............................................................................. 12-4 Configuring LPD PRN Mode................................................................................ 12-6 Configuring the Serial Ports................................................................................. 12-7 Save..................................................................................................................... 12-8 Restart ................................................................................................................. 12-9 Setting up Unix Hosts .......................................................................................... 12-9 Setting up a SCO Unix Host ................................................................................. 12-9 Setting up a SOLARIS X86 Host........................................................................ 12-10 Setting up a LINUX Host.................................................................................... 12-11 Setting up Windows Hosts................................................................................. 12-12 Setting up a Windows NT Host .......................................................................... 12-12 Setting up a Windows 2000 Host........................................................................ 12-16 Chapter 13 Setting Up Multiplex ..............................................................................13-1 Accessing the Console Utility .............................................................................. 13-2 Selecting the Application...................................................................................... 13-3 Configuring the “Host” CN2610 ........................................................................... 13-3 Configuring the “Device” CN2610........................................................................ 13-7 Configuring the Serial Ports................................................................................13-11 Save................................................................................................................... 13-12 Restart ............................................................................................................... 13-13 Chapter 14 Setting Up Routing ................................................................................14-1 Accessing the Console Utility .............................................................................. 14-2 What is RIP?........................................................................................................ 14-3 Configuring RIP ................................................................................................... 14-3 Configuring the Static Routing Table ................................................................... 14-4 Static Routing Examples...................................................................................... 14-5 Configuring Routes to the Internet........................................................................ 14-5 Configuring Routes to the Internet and Intranet.................................................... 14-6 Configuring Multiple-Point Routes....................................................................... 14-7 Save..................................................................................................................... 14-8 Restart ................................................................................................................. 14-8 Chapter 15 Administrative Utilities..........................................................................15-1 Ping...................................................................................................................... 15-2 Monitor ................................................................................................................. 15-2 Line ....................................................................................................................... 15-3 Network ................................................................................................................ 15-4 Async .................................................................................................................... 15-5 Routing.................................................................................................................. 15-6 PPP-Trace ............................................................................................................. 15-6 Diagnostic ............................................................................................................ 15-7 Upgrade ............................................................................................................... 15-8 Upgrading with the Windows Utility .................................................................... 15-8 Console Terminal Upgrade ................................................................................... 15-9 Upgrading through the Serial Console ................................................................ 15-11 Remote RCP Upgrade......................................................................................... 15-14 Export................................................................................................................. 15-16 Console Terminal Export .................................................................................... 15-16 Remote RCP Export............................................................................................ 15-19 Import................................................................................................................. 15-19 Console Terminal Import .................................................................................... 15-19 Remote RCP Import............................................................................................ 15-22 Default................................................................................................................ 15-22 Appendix A Troubleshooting ..................................................................................... A-1 Console Terminal Problems...................................................................................A-2 Configuring Dual Ethernet Ports............................................................................A-3 Terminal Port Problems .........................................................................................A-4 Saving CN2610’s Parameters ...............................................................................A-5 ASPP Port Problems .............................................................................................A-5 SLIP/PPP Connection Problems ...........................................................................A-5 RADIUS Problems .................................................................................................A-6 Appendix B RADIUS Server........................................................................................ B-1 What is RADIUS? ..................................................................................................B-2 Definition ................................................................................................................B-2 Client/Server Architecture ......................................................................................B-2 Setting up CN2610 ................................................................................................B-2 Setting up the RADIUS Server IP Address.............................................................B-2 Setting up Port Configuration .................................................................................B-3 Setting up UNIX Hosts...........................................................................................B-5 Installing the RADIUS Execution File....................................................................B-5 RADIUS Server Configuration ...............................................................................B-6 Basic/Extended Permission Group Setting .............................................................B-7 Setting up Windows NT Hosts ............................................................................. B-11 Setting up Windows 2000 Hosts..........................................................................B-13 Setting up Windows 2003 Hosts..........................................................................B-16 Appendix C SNMP Agent with MIB II ......................................................................... C-1 Appendix D Pin Assignments and Cable Wiring ...................................................... D-1 Pin Assignments ....................................................................................................D-2 10/100BaseTX Port Pin Assignment ..................................................................... D-2 Console Port Pin Assignment................................................................................. D-2 Async RS-232 Port Pin Assignment ...................................................................... D-2 Cable Wiring ..........................................................................................................D-2 10/100BaseTX Port Cable Wiring ......................................................................... D-2 Async RS-232 Port Cable Wiring .......................................................................... D-3 DB9 and DB25 Connector Pin Assignments ......................................................... D-4 Appendix E LCM Display ............................................................................................ E-1 Appendix F Service Information .................................................................................F-1 MOXA Internet Services ........................................................................................ F-2 Problem Report Form ............................................................................................ F-3 Product Return Procedure ..................................................................................... F-4 1 Chapter 1 Introduction Welcome to Moxa CN2610 Dual LAN Async Server. Models are available with 8 or 16 asynchronous RS-232 ports, and all models come with two 10/100 Mbps Ethernet LAN ports. CN2610 Dual LAN Async Server is used to connect terminals, modems, printers, and other asynchronous serial devices to LAN hosts. CN2610 complies with TCP/IP and IEEE 802.3 specifications using standard Ethernet 10/100BaseT and twisted pair 10/100BaseTX cable as the data transmission medium. The following topics are covered in this chapter: Product Features ¾ Hardware ¾ Software Package Checklist Front Panel Rear Panel Bottom Label CN2610 User’s Manual Introduction Product Features Hardware y y y y y y y Dual LAN ports (auto-detecting 10/100 Mbps Ethernet) Surge protection for each serial port 4 MB RAM, 2 MB Flash ROM Tx/Rx LED for each serial port System Status LEDs Ethernet Status LEDs 8 or 16 RJ45 RS-232 serial ports, with up to 921.6 Kbps transmission speed Software y y y y y y y y y y y y y y y y y y y ASCII/Binary terminal modes with up to 8 Telnet and Rlogin sessions Point to Point Protocol (PPP and PPPD) Serial Line Internet Protocols (SLIP and SLIPD) Dynamic auto-recognition of Terminal, SLIP, or PPP Dial-on-demand, Dial-out Remote serial or parallel printing (RLP) CN2610 Async Server Proprietary Protocol (ASPP) for TCP/IP socket programming RAW mode for transparent data transmission Reverse Telnet SNMP Agent for network management Network protocols: TCP/IP, UDP, ICMP, NetBEUI, DHCP Application protocols: Telnet, Rlogin, Rtelnet, RAW TCP, RAW UDP, RCP, WINS, DRDAS™, LPD, DNS, Multi-Host Security protocols: RADIUS, Dial-back, PAP, CHAP, Local user/password Real COM port driver for Windows 95/98/ME/NT/2000/XP/2003 Fixed TTY for SCO UNIX 3.2.x, SCO Open Server5, UnixWare 2.1.x (SVR 4.2), MITUX (SVR 4.2), SCO UnixWare 7, Linux 2.2.x, Linux 2.4.x, Linux 2.6.x Static Routing, RIP I/II protocols Windows-like administrative CONSOLE utility from a fixed console port, or by Telnet from a networked host Password protection and extensive user verification functions Easy firmware upgrade via Flash ROM Package Checklist CN2610 Dual LAN Async Server products are shipped with the following items: y y y y y y y y CN2610 Dual-LAN Async Server AC power cord Documentation and Software CD-ROM Quick Installation Guide (English and Simplified Chinese versions) RJ45 Loopback Tester Product Warranty Booklet Rackmount Kit (includes 2 brackets and 8 screws) Desktop Kit (includes 4 pads) 1-2 CN2610 User’s Manual Introduction Front Panel LCM Display Panel Push Buttons CN2610 16 port RS-232 Async Server 1 2 3 4 5 6 7 8 9 10 11 12 13 14 15 16 Tx Reset MENU Ready Reset Button Feature SEL Rx Ready LED LED Indicators Description Press the Reset button for 5 seconds to load factory defaults. CN2610 will beep twice when the configuration has been reset. Used for configuring the IP address and other parameters. Red Indicates that CN2610 is receiving power Green Indicates that CN2610’s OS is ready Green Indicates serial port transmission Yellow Indicates serial port reception Reset Button Push Buttons Ready LED Serial Tx Serial Rx Rear Panel Power Input RS-232 Console Port Serial Ports Serial ports Console LAN1 LAN2 1 2 3 4 5 6 7 8 9 10 11 12 13 14 15 16 AC POWER 100-240V, 47-63Hz Power On/Off Switch 10/100BaseT Ethernet Ports Socket / Port AC Power Input Description CN2610-8 and CN2610-16: Automatic detection of 100-240V, 47-63 Hz AC power supply Power On/Off Switch I indicates power on; O indicates power off (AC models only) Console 8-pin RJ45 RS-232 port for console terminal connection LAN 1 8-pin RJ45 auto-detectable 10/100 Mbps UTP port LAN 2 8-pin RJ45 auto-detectable 10/100 Mbps UTP port Serial Ports 8 or 16 8-pin RJ45 ports for DCE modem-type connections Bottom Label The server’s serial number and MAC address are printed on a label fixed to the bottom of the server. CN2610 has 2 LAN ports, each with its own MAC address. The MAC address is the unique hardware Ethernet address used to identify a network hardware product. Write each of the two MAC addresses in the space provided below for future reference. LAN 1 MAC address:_______________________________ LAN 2 MAC address:_______________________________ 1-3 2 Chapter 2 Getting Started This chapter includes instructions on where and how to install CN2610 Dual LAN Async Server. Both basic and advanced software configuration instructions are given. The following topics are covered in this chapter: Hardware Installation ¾ Desktop ¾ Rackmount ¾ Wiring Requirements ¾ Connecting CN2610-8/16’s Power ¾ Connecting to the Network ¾ Connecting to a Serial Device ¾ Connecting to the Console Port Accessing the Console Utility ¾ Configuration Checklist ¾ Accessing the Console from a Telnet Terminal ¾ Accessing the Console from a Console Terminal Configuring CN2610—The Server Menu ¾ Server Configuration—Info. ¾ Server Configuration—LAN ¾ Server Configuration—Adv ¾ Server Configuration—Host_table ¾ Server Configuration—Route_table ¾ Server Configuration—User_table Save Restart CN2610 User’s Manual Getting Started Hardware Installation Desktop Place your CN2610 on a clean, flat, well-ventilated desktop. For better ventilation, attach the 4 pads from the desktop kit to the bottom of the unit, and leave some space between the CN2610 and other equipment. Do not place equipment or objects on top of the unit, as this might damage the server. Pads Bottom of CN2610 Rackmount CN2610 is designed to be mounted on a standard 19-inch rack. Use the enclosed pair of L-shaped metal brackets and screws to fasten your CN2610 to the rack cabinet. Each L-shaped bracket has 6 holes, leaving two outer or inner holes available for other uses. You have two options. You can lock either the front or rear panel of the CN2610 to the front of the rack. Locking the front panel is shown in the following figure. L-Shaped Metal Bracket Serial ports Console LAN 1 2 3 4 5 6 7 8 9 10 11 12 13 14 15 16 Rackmount rail CN2610 16 port RS-232 Async Server 1 2 3 4 5 6 7 8 9 10 11 12 13 14 15 16 Tx Reset MENU SEL Ready Rx Screws 2-2 CN2610 User’s Manual Getting Started Wiring Requirements ATTENTION Safety First! Be sure to disconnect the power cord before installing and/or wiring your CN2610. Wiring Caution! Calculate the maximum possible current in each power wire and common wire. Observe all electrical codes dictating the maximum current allowable for each wire size. If the current goes above the maximum ratings, the wiring could overheat, causing serious damage to your equipment. Temperature Caution! Be careful when handling CN2610. When plugged in, CN2610’s internal components generate heat, and consequently the board may feel hot to the touch. You should also observe the following common wiring rules: y Use separate paths to route wiring for power and devices. If power wiring and device wiring paths must cross, make sure the wires are perpendicular at the intersection point. NOTE: Do not run signal or communication wiring and power wiring in the same wire conduit. To avoid interference, wires with different signal characteristics should be routed separately. You can use the type of signal transmitted through a wire to determine which wires should be kept separate. The rule of thumb is that wiring that shares similar electrical characteristics can be bundled together. Keep input wiring and output wiring separate. Where necessary, it is strongly advised that you label wiring to all devices in the system. y y y Connecting CN2610-8/16’s Power Connect CN2610’s 100-240 VAC power line to its AC connector. If the power is properly supplied, the “Ready” LED will show a solid red color until the system is ready, at which time the color changes to green. Connecting to the Network Connect one end of the Ethernet cable to CN2610’s 10/100M Ethernet port and the other end of the cable to the Ethernet network. There are 2 LED indicators located on the top left and right corners of the Ethernet connector. If the cable is properly connected, CN2610 will indicate a valid connection to the Ethernet in the following ways: The top right corner LED indicator maintains a solid green color when the cable is properly connected to a 100 Mbps Ethernet network. 1 8 The top left corner LED indicator maintains a solid orange color when the cable is properly connected to a 10 Mbps Ethernet network. 1 8 2-3 CN2610 User’s Manual Getting Started Connecting to a Serial Device Use appropriately wired serial data cables to connect serial devices to CN2610’s serial ports. Connecting to the Console Port A console is a combination of keyboard and monitor that is used to configure settings and monitor the status of your system. The console port can be used if a network is unavailable, or you do not know CN2610’s IP address. To connect to the console port, use a PC running UNIX, or a PC with terminal emulation software (e.g., HyperTerminal or PComm by Moxa; parameter settings are: baudrate = 115200 bps, parity check = None, data bits = 8, stop bits = 1, terminal type = VT100). Use an RJ45-to-DB25 or RJ45-to-DB9 cable to connect the terminal to the console port. Accessing the Console Utility The Console Utility is the main application used to set up the server, configure the ports, and run utilities (ping, diagnosis, monitor, and upgrade). There are two ways to access the Console Utility—with terminal emulation from a console terminal, or with Telnet from a network terminal. NOTE If your network is already set up, telnet over the network to CN2610’s IP address to access the Console Utility. If your network environment is not set up, use Moxa PComm Terminal to establish a direct serial console connection. Configuration Checklist You will need the following information to configure CN2610. Check with your network administrator if you do not know all of the required information. Basic CN2610 Information: Name Location LAN1 IP address LAN1 IP netmask LAN1 default gateway IP address LAN2 IP address LAN2 IP netmask LAN2 default gateway IP address Domain server 1 IP address Domain server 2 IP address WINS server IP address Console password Accessing the Console from a Telnet Terminal Connect CN2610 to your LAN and then turn on the power. Use the Moxa Windows Utility to find CN2610’s IP address, and then telnet to the IP address to enter the CN2610 console. CN2610 Windows Utility The CN2610 Utility is a convenient Windows utility that can be used to find both the name and IP address of your CN2610. Once you know the IP address, you can telnet CN2610 over the network 2-4 CN2610 User’s Manual Getting Started to complete the configuration process and to gather information about all servers on the network. 1. Run upgrade.exe, located in the \Software\Firmware\ folder on the CN2610 Documentation and Software CD, or run NPort Tool Æ Firmware Utility from the Start menu. 2. The CN2610 Utility will search for all CN2610s on the network. 3. The CN2610 Utility lists all available servers on the network. Note that servers in grey are password protected. Double click the server’s name, or click the server settings. from the menu bar to see 4. The server’s general information is shown in the NPort Server General Info. window. If necessary, change the settings, and then click OK to accept the change. 5. If you can’t find the server in the list, double-check the server’s power and network 2-5 CN2610 User’s Manual Getting Started connections, and then use search to try locating the server again. Using Telnet 1. Telnet over the network to the server’s IP address. 2. Type 1 to choose ansi/vt100, and then press Enter. Telnet 192.168.127.254 Async Server CN2610-8 Console terminal type (1: ansi/vt100, 2: vt52) : 1 3. CN2610’s MAIN MENU will open, as shown below. Telnet 192.168.127.254 CN2610-8 CN2610-8_19 V2.0 MAIN MENU -----------------------------------------------------------------------------[Server] Port seTting sAve Utility Restart Exit Examine/modify async server node/table configuration Enter: select ESC: previous menu Use the following keystrokes to navigate CN2610’s console utility. Action Move Jump to next menu, or Select item Return to previous menu, or Close pop up selector Shortcut Key Key [Up/Down/Left/Right] Arrow Key or [Tab] Key [Enter] Key [Esc] Key Capitalized letter of the word Accessing the Console from a Console Terminal If you do not know the CN2610’s IP address, or it is not possible to use Telnet, you can use a direct console connection to enter the CN2610 console. Use a terminal emulation program for the console PC, such as HyperTerminal or Moxa PComm Terminal Emulator. 1. If you are using Windows 9x/ME/NT, run PComm26.exe from the Win9xNT directory. If you are using Windows 2000/XP/2003, run PComm2K.exe , as shown in the figure below, from the Win2kXP2003directory. 2-6 CN2610 User’s Manual Getting Started 2. Click Next to Continue. 3. Select the I Agree option and then click Next. 2-7 CN2610 User’s Manual Getting Started 4. Select a directory in which to install the CN2610 Utility, and then click Next. 5. Click Next to continue. 2-8 CN2610 User’s Manual Getting Started 6. Wait while the PComm Lite software is installed. 7. Click Close. 2-9 CN2610 User’s Manual Getting Started 8. When the installation is complete, select Start Æ Programs Æ PComm Terminal Emulator to run PComm Terminal Emulator. 9. Use an RJ45 to DB25 female cable to connect to the CN2610 console port. Start PComm Terminal, and then click the left-most icon to open a new connection. 10. Click the Communication Parameter tab, select the COM port (COM2 in this example) for console connection, 115200 for Baudrate, 8 for Data Bits, None for Parity, and 1 for Stop Bits. 2-10 CN2610 User’s Manual Getting Started 11. Click the Terminal tab and select VT100 for terminal type. Press Enter to confirm. 12. Type 1 to select ansi/VT100 terminal type, and then press Enter to open the MAIN MENU. 2-11 CN2610 User’s Manual Getting Started 13. The MAIN MENU is shown below. (NOTE: Click Edit Æ Font to choose a different font for the MAIN MENU.) Configuring CN2610—The Server Menu In this section, we describe both basic and advanced configuration tasks. We use the Telnet interface to illustrate (the Serial Console interface is the same). Server Configuration—Info. 1. From the MAIN MENU, use the arrow keys to select Server, and then press Enter. CN2610-8 CN2610-8_19 V2.0 MAIN MENU -----------------------------------------------------------------------------[Server] Port seTting sAve Utility Restart Exit Examine/modify async server node/table configuration Enter: select 2. ESC: previous menu From the SERVER MENU, select Info., and then press Enter. CN2610-8 CN2610-8_19 V2.0 SERVER MENU -----------------------------------------------------------------------------[Info.] Lan Adv. Host_table Route_table User_table Quit Examine/modify async server basic configuration Enter: select 3. ESC: previous menu The Info. page contains input/display fields for name, location, serial number, Domain server 1/2 IP address, WINS function disable, WINS server IP address, and Console password. Each item is described in detail below. 2-12 CN2610 User’s Manual Getting Started CN2610-8 CN2610-8_19 V2.0 -----------------------------------------------------------------------------[Info.] Lan Adv. Host_table Route_table User_table Quit Examine/modify async server basic configuration ESC: back to menu Enter: select Async server name [CN2610-8_19 Async server location [ Async server serial number [3] Domain server 1 IP address [192.168.1.16 Domain server 2 IP address [ WINS function disable [no ] WINS server IP address [ Console password [ ] ] ] ] ] ] Async server name—CN2610 uses this name to identify itself when requested by an SNMP station or UNIX host. Use an ASCII string with maximum length of 40 characters for the name. Spaces are allowed. Async server location—CN2610 reports this location to the SNMP station when requested. Use an ASCII string with maximum length of 44 characters for the location. Spaces are allowed. Async server serial number—Each CN2610 Async Server is assigned a unique serial number before it leaves the factory. The serial number cannot be changed. Domain server 1/2 IP address—A Domain Name Server is a network host that translates host names to IP addresses. Hosts use the Domain Name Server to request the IP address that corresponds to a particular url (such as www.moxa.com). Input the IP address of the primary Domain Name Server in the Domain server 1 IP address field, and the IP address of the secondary Domain Name Server in the Domain server 2 IP address field. When CN2610 receives a connection request, CN2610 first checks the host table defined on the Host_table page. If a matching entry cannot be found, CN2610 sends a query to the Domain Name Server. WINS function disable—Enable or disable the WINS server. The default setting is “enable.” WINS server IP address—If a WINS Server is connected to the network, use this field to record the WINS Server’s IP address. TCP/IP uses IP addresses to identify hosts, but users often use symbolic names, such as computer names. The WINS (Windows Internet Naming Service) Server, which uses NetBIOS over TCP/IP, contains a dynamic database to map computer names to IP addresses. Console password—If you specify a password, write it down for safe keeping. If you forget the password, you will need to use the reset password button to reset it. Only use the console password when absolutely necessary. NOTE Write your console password in a safe place before setting the password. 2-13 CN2610 User’s Manual Getting Started Server Configuration—LAN 1. From the MAIN MENU, use the arrow keys to select Server, and then press Enter. CN2610-8 CN2610-8_19 V2.0 MAIN MENU -----------------------------------------------------------------------------[Server] Port seTting sAve Utility Restart Exit Examine/modify async server node/table configuration Enter: select 2. ESC: previous menu From the SERVER MENU, select Lan, and then press Enter. CN2610-8 CN2610-8_19 V2.0 SERVER MENU -----------------------------------------------------------------------------Info. [Lan] Adv. Host_table Route_table User_table Quit Examine/modify async server basic configuration Enter: select 3. ESC: previous menu The Lan page contains input/display fields for DHCP (client), Async server IP address, Async server IP netmask, Default gateway IP address, Ethernet speed, and Ethernet address. Each item is described in detail below. CN2610-8 CN2610-8_19 V2.0 -----------------------------------------------------------------------------Info. [Lan] Adv. Host_table Route_table User_table Quit Examine/modify the Ethernet LAN port setting ESC: back to menu Enter: select Ethernet LAN port 1: DHCP (client) Async server IP address Async server IP netmask Default gateway IP address Ethernet speed Ethernet address [Disable] [192.168.2.180 ] [255.255.248.0 ] [192.168.1.3 ] [10Mbps] [00:90:E8:00:00:05] Ethernet LAN port 2: DHCP (client) Async server IP address Async server IP netmask Default gateway IP address Ethernet speed Ethernet address [Disable] [192.168.126.254 ] [255.255.255.0 ] [ ] [ ---- ] [00:90:E8:00:00:06] Ethernet LAN port 1 or 2: DHCP (client)—When DHCP is enabled, CN2610 will request an available IP address and Netmask over the network from the DHCP Server, and the DHCP Server will assign an available IP address and Netmask to CN2610 LAN1. If an IP address is not available, CN2610 LAN1 will use the current IP address, but will continue sending requests to the DHCP Server. Async server IP address—This field MUST contain an IP address unique to the network. The IP address is written using the notation “ddd.ddd.ddd.ddd,” in which each “ddd” is a nonnegative decimal number strictly less than 256 (i.e., an 8-bit integer). The default value is 192.168.127.254. Async server IP netmask—A netmask is used to isolate a group of computers to the same subnet. When a packet is sent out over the network, the CN2610 will use the netmask to 2-14 CN2610 User’s Manual Getting Started determine if the destination TCP/IP host is on the same subnet. If the address is on the same subnet, a connection is established directly from the CN2610. Otherwise, the connection is established through the “default gateway.” If this field is left ‘Blank’ the netmask will depend on the default IP address class (which depends on the IP address itself). The netmask is 255.0.0.0 for class A, 255.255.0.0 for class B, and 255.255.255.0 for class C. Default gateway IP address—This field contains the IP address of a router on the local network. The default gateway is used when a packet is sent to an IP address that is not on the subnet specified in CN2610’s local routing table. Ethernet speed—If the Ethernet port is active, the Ethernet speed will be set automatically to 10BaseT or 100BaseT. This field cannot be modified. Ethernet address—This field contains the hardware Ethernet address. This field cannot be modified. Server Configuration—Adv. 1. From the MAIN MENU, use the arrow keys to select Server, and then press Enter. CN2610-8 CN2610-8_19 V2.0 MAIN MENU -----------------------------------------------------------------------------[Server] Port seTting sAve Utility Restart Exit Examine/modify async server node/table configuration Enter: select 2. ESC: previous menu From the SERVER MENU, select Adv., and then press Enter. CN2610-8 CN2610-8_19 V2.0 SERVER MENU -----------------------------------------------------------------------------Info. Lan [Adv.] Host_table Route_table User_table Quit Examine/modify async server basic configuration Enter: select 3. ESC: previous menu The Adv. page contains input/display fields for RADIUS server IP, RADIUS key, UDP port, Enable RADIUS accounting, SNMP community name, SNMP trap server IP address, Ethernet IP forwarding, Routing protocol, TCP retransmission timeout, and SIO data transfer timeout. Each item is described in detail below. CN2610-8 CN2610-8_19 V2.0 -----------------------------------------------------------------------------Info. Lan [Adv.] Host_table Route_table User_table Quit Examine/modify async server advance configuration ESC: back to menu Enter: select Radius server IP RADIUS key UDP port (1:1645 2:1812) Enable RADIUS accounting [ [ [1] [no SNMP community name SNMP trap server IP address [public [ Ethernet IP forwarding Routing protocol [no ] [None TCP retransmission timeout SIO data transfer timeout [ [ 2-15 ] ] ] ] ] ] ] ] (range: 50 – 60000 ms) (range: 0 – 1000 ms) CN2610 User’s Manual Getting Started RADIUS server IP—The IP address of the RADIUS (Remote Authentication Dial-In User Service) server is used to authenticate remote dial-in users connecting from an ISP (Internet Service Provider). Leave this field blank if you do not have a RADIUS server on your network. Windows NT includes RADIUS software. For UNIX-based platforms, refer to Appendix B for information about setting up a RADIUS server. NOTE: The RADIUS server and CN2610 SHOULD be able to communicate with each other. To verify this, check to see if you can ping from each server to the other. RADIUS server IP—This is the IP address of the RADIUS server. RADIUS key—This is a shared key used by the RADIUS protocol. If you have a RADIUS server, you will need to enter the password in this field. UDP port (1:1645 2:1812)—There are two choices for RADIUS UDP port numbers. The early deployment of RADIUS was done using port number 1645, but later on, this conflicted with the RFC standard. The officially assigned port number for RADIUS is now 1812. We recommend, however, that you use the old RADIUS server UDP port number of 1645, since many companies still use it. Enable RADIUS accounting—The default for this field is no. If your RADIUS Server offers this function, set it to yes. SNMP community name—The SNMP community name can be used to guarantee minimal security for SNMP communication. Only SNMP stations with the same community name can access SNMP agents (such as Async Server). Choose a community name with no more than 16 ASCII characters. The default name is “public.” SNMP trap server IP address—This field specifies the IP address of the SNMP trap server. CN2610 will report to the SNMP trap server each time it restarts. You may leave this field blank if SNMP is not needed. Ethernet IP forwarding—CN2610 can forward packets between different segments of a TCP/IP network. When enabled, CN2610 will use its Ethernet routing ability to identify which incoming packets should be forwarded. Routing protocol—CN2610 supports RIP (Routing Information Protocol) versions 1 and 2, a widely used protocol specifying how routers exchange routing table information. When RIP is activated, routers (or CN2610s) periodically exchange entire routing tables. TCP retransmission timeout—This is the amount of time CN2610 waits to retransmit after a transmission failure occurs. SIO data transfer timeout—This is the amount of time (in milliseconds) CN2610 waits to send serial data to the Ethernet. Use a shorter timeout to improve efficiency. Server Configuration—Host_table 1. From the MAIN MENU, use the arrow keys to select Server, and then press Enter. CN2610-8 CN2610-8_19 V2.0 MAIN MENU -----------------------------------------------------------------------------[Server] Port seTting sAve Utility Restart Exit Examine/modify async server node/table configuration Enter: select 2. ESC: previous menu From the SERVER MENU, select Host_table, and then press Enter. 2-16 CN2610 User’s Manual Getting Started CN2610-8 CN2610-8_19 V2.0 SERVER MENU -----------------------------------------------------------------------------Info. Lan Adv. [Host_table] Route_table User_table Quit Examine/modify async server basic configuration Enter: select 3. ESC: previous menu The Host_table contains frequently accessed host names and their corresponding IP addresses. Adding entries to this table gives you the advantage of being able to refer to a host by name, instead of by IP address. The host table can hold up to 16 [Host name] / [Host IP address] entries. The Host_table page contains input/display fields for Entry, Host name, and Host IP address. CN2610-8 CN2610-8_19 V2.0 -----------------------------------------------------------------------------Info. Lan Adv. [Host_table] Route_table User_table Quit Examine/modify the host table ESC: back to menu Entry 01 02 03 04 05 06 07 08 Enter: select Host name [ [ [ [ [ [ [ [ ] ] ] ] ] ] ] ] Host IP address [ [ [ [ [ [ [ [ ] ] ] ] ] ] ] ] Server Configuration—Route_table 1. From the MAIN MENU, use the arrow keys to select Server, and then press Enter. CN2610-8 CN2610-8_19 V2.0 MAIN MENU -----------------------------------------------------------------------------[Server] Port seTting sAve Utility Restart Exit Examine/modify async server node/table configuration Enter: select 2. ESC: previous menu From the SERVER MENU, select Route_table, and then press Enter. CN2610-8 CN2610-8_19 V2.0 SERVER MENU -----------------------------------------------------------------------------Info. Lan Adv. Host_table [Route_table] User_table Quit Examine/modify async server basic configuration Enter: select 3. ESC: previous menu The Route_table specifies routing parameters. The Route_table page contains input/display fields for Entry, Gateway, Destination, Netmask, and Metric. Each item is described in detail below. 2-17 CN2610 User’s Manual Getting Started CN2610-8 CN2610-8_19 V2.0 ----------------------------------------------------------------------Info. Lan Adv. [Host_table [Route_table] User_table Quit Examine/modify the routing table ESC: back to menu Entry 01 02 03 04 05 06 07 08 Enter: select Gateway [ [ [ [ [ [ [ [ Destination ][ ][ ][ ][ ][ ][ ][ ][ Netmask ][ ][ ][ ][ ][ ][ ][ ][ ] ] ] ] ] ] ] ] Metric [01] [01] [01] [01] [01] [01] [01] [01] Gateway—The gateway IP address or interface source IP address to which data packets are sent. Destination—The IP address of a host or network to which the route connects. Netmask—The netmask of the destination network. Metric—The number of hops from source to destination. Refer to Chapter 14 for routing settings. Server Configuration—User_table 1. From the MAIN MENU, use the arrow keys to select Server, and then press Enter. CN2610-8 CN2610-8_19 V2.0 MAIN MENU -----------------------------------------------------------------------------[Server] Port seTting sAve Utility Restart Exit Examine/modify async server node/table configuration Enter: select 2. ESC: previous menu From the SERVER MENU, select User_table, and then press Enter. CN2610-8 CN2610-8_19 V2.0 SERVER MENU -----------------------------------------------------------------------------Info. Lan Adv. Host_table Route_table [User_table] Quit Examine/modify async server basic configuration Enter: select 3. ESC: previous menu The User_table is used for local authentication for dial-in/out access. The CN2610 User Table, which holds information for up to 64 users, is useful if you do not have an external RADIUS server for authentication. The User_table page contains input/display fields for Entry, User name, Password, and Phone number. 2-18 CN2610 User’s Manual Getting Started CN2610-8 CN2610-8_19 V2.0 -----------------------------------------------------------------------------Info. Lan Adv. Host_table Route_table [User_table] Quit Examine/modify the user/password table ESC: back to menu Entry 01 02 03 04 05 06 07 08 Enter: select User name [ [ [ [ [ [ [ [ Password ] ] ] ] ] ] ] ] [ [ [ [ [ [ [ [ ] ] ] ] ] ] ] ] Phone number [ [ [ [ [ [ [ [ ] ] ] ] ] ] ] ] Save When exiting the SERVER MENU, you will be prompted to save settings. Press Y to save. CN2610-8 CN2610-8_19 V2.0 MAIN MENU -----------------------------------------------------------------------------Info. Lan Adv. Host_table Route_table [User_table] Quit Examine/modify async server basic configuration Enter: select ESC: previous menu +-----------------------------------------------------+ | Warning !!! | | You had modified the configuration without saving. | | Would you save it now ? | | ‘Y: yes ‘N’: no | +-----------------------------------------------------+ You may also save all settings from the MAIN MENU by selecting sAve. CN2610-8 CN2610-8_19 V2.0 -----------------------------------------------------------------------------Server Port seTting [sAve] Utility Restart Exit Save current configuration to Flash ROM ESC: back to menu Enter: select +-------------------------------------+ |Enter to updated, other key to cancel| +-------------------------------------+ Restart 1. From the MAIN MENU, select Restart. CN2610-8 CN2610-8_19 V2.0 MAIN MENU -----------------------------------------------------------------------------Server Port seTting sAve Utility [Restart] Exit Restart the whole system or selected async ports Enter: select 2. ESC: previous menu Select System and then press Enter to restart the system and terminate the Telnet session. 2-19 CN2610 User’s Manual Getting Started CN2610-8 CN2610-8_19 V2.0 -----------------------------------------------------------------------------[System] Port Quit Restart the Async Server ESC: back to menu Enter: select +--------------------------------------------------------------------+ | Warning !!! | | Restart system will disconnect all ports and clear all status value | | ‘ Enter: continue ESC: cancel | +--------------------------------------------------------------------+ 2-20 3 Chapter 3 Knowing Your Application This chapter discusses a variety of applications for CN2610 Async Server. Refer to the diagrams in each section to see which application most closely matches your own. Determining which application you should choose will save time configuring both the hardware and software. CN2610 is an Async Server that can support simultaneously different operation modes for different serial ports. The examples in this chapter explain each operation mode in detail. You can create a wide variety of applications by using different combinations of operation modes on the same Async Server. NOTE: Each section title consists of an application name that uses terminology common to our industry, followed in parentheses by the application name used in CN2610’s console utility. For example, the CN2610 application that corresponds to Linux Real TTY/Unix Fixed TTY is NT Real COM mode. The following topics are covered in this chapter: Windows Real COM (NT Real COM) Linux Real TTY/Unix Fixed TTY (NT Real COM) Device Control (Device Control) UDP Communication (Raw UDP) Dual-host Redundant Data Acquisition System (DRDAS) Console Management (Reverse Terminal) Terminal Access (Terminal) Multi-host TTY (Multi-host TTY) Dial-in/Out-of-Band Management (Dialin/out) Network Printer (Printer) Multiplexor Access (Multiplex) CN2610 User’s Manual Knowing Your Application Windows Real COM (NT Real COM) Windows 2000 Host A Windows 2000 Host B COM3-COM8 COM3-COM8 Serial ports Console LAN1 LAN2 1 2 3 4 5 6 7 8 9 10 11 12 13 14 15 16 CN2610 AC POWER 100-240V, 47-63Hz Bar Code Reader POS Terminal Bar Code Reader POS Terminal Bar Code Reader POS Terminal Moxa provides CN2610 COM port drivers for all Windows operating systems. The COM port driver serves a dual purpose—(1) convert serial data into Ethernet packets, (2) convert Ethernet packets into serial data—as outlined in the following table: 1. 2. 3. 4. 5. PC Æ CN2610 Æ Serial Device The PC generates RS-232 serial COM commands. The COM port driver converts the commands into Ethernet packets. The packets are sent over the network to CN2610’s Ethernet port. CN2610 converts the Ethernet packets back into RS-232 serial format. The commands are delivered to serial device(s) connected to CN2610’s serial port(s). 1. 2. 3. 4. 5. Serial Device Æ CN2610 Æ PC A serial device connected to CN2610 starts transmitting serial data. CN2610 converts the data into one or more Ethernet packets. The packets are sent over the network to the PC host’s Ethernet port. The COM port driver converts the Ethernet packets back into RS-232 serial format. The serial data is processed by the program that controls the serial device. You can enhance your applications greatly by using CN2610 to access serial devices over an Ethernet network, and since CN2610 and the COM driver handle all protocol conversion tasks, you won’t need to modify the software currently in use. In fact, multiple PCs can access the serial ports of one CN2610, as shown in the figure. Refer to Chapter 4 for detailed information and configuration instructions. 3-2 CN2610 User’s Manual Knowing Your Application Linux Real TTY/Unix Fixed TTY (NT Real COM) Linux, Unix Ethernet CN2610 CN2610 16 port RS-232 Async Server 1 2 3 4 5 6 7 8 9 10 11 12 13 14 15 16 Tx Reset MENU ttyS1 SEL Ready Rx ttyS2 ............ ttySN Real TTY drivers that control Moxa CN2610 Async Server’s serial ports are provided for Linux environments. This means that CN2610 Async Server can be used with existing Linux-based applications that use multiport serial boards, since the host PC will recognize CN2610’s COM ports as real TTY ports. You can enhance your applications by using CN2610 to access serial devices over an Ethernet network, but without needing to modify the software currently in use. Moxa also provides Fixed TTY port drivers for Unix environments. However, the Linux Real TTY and Windows Real COM port drivers provide better control over serial port data transmission, since you can control modem signals such as DTR, DSR, RTS, and CTS. The Unix Fixed TTY driver provides software reception and transmission through CN2610’s serial ports, but does not allow you to control the DTR, DSR, RTS, and CTS modem signals. Refer to Chapter 4 for detailed information and configuration instructions. 3-3 CN2610 User’s Manual Knowing Your Application Device Control (Device Control) IBM SUN SCO UNIX TCP/IP CN2610 { sio_open(..) sio_open(..) sio_read(...) sio_write(...) ... } 16 port RS-232 Async Server 1 2 3 4 5 6 7 8 9 10 11 12 13 14 15 16 Tx Reset RTU MENU SEL Ready Rx RTU RTU The CN2610 Device Control application allows you to choose between two different operation modes: ASPP and RAW. ASPP Mode—For applications that require setting up communication parameters or controlling modem signals (DTR, RTS, Break, etc.), take advantage of Moxa’s ASPP lib to simplify your programming tasks. ASPP takes care of the more basic protocol-level programming tasks, and allows you to concentrate your energy on higher level, application-specific tasks. RAW Mode—To control device data transmission directly, set CN2610 for TCP RAW mode. Device control applications can use standard Linux/Unix Socket programming in Linux/Unix environments, or WinSock programming in Windows environments. Standard socket programming allows you to focus on pure data transmission, without needing to write code for controlling serial ports or modem signals. ASPP can also be used to communicate with CN2610. Linux/Unix socket programming and Windows WinSock programming both use IP as the communication agent between hosts and devices. RAW mode is a good solution for handling pure serial data communications applications that do not require setting up communication parameters (baudrate, parity, etc.). Refer to Chapter 5 for detailed information and configuration instructions. 3-4 CN2610 User’s Manual Knowing Your Application UDP Communication (Raw UDP) R TCP/IP R Ethernet UDP datagram Serial ports Console LAN1 LAN2 1 2 3 4 5 6 7 8 9 10 11 12 13 14 15 16 AC POWER 100-240V, 47-63Hz CN2610 Serial Finger Printer UDP is a non connection-oriented data transmission protocol that has the advantages of efficient, high-speed, high-volume data transmission. Since UDP does not use TCP’s handshaking procedure, it does not re-assemble and retransmit packets when data is missing. This means that data integrity is sacrificed for higher transmission speed. UDP provides a very powerful transmission method when data needs to be transmitted quickly over the network, and upper-level application software is given the responsibility of verifying the accuracy of the data. UDP can also use broadcasting or multicasting technologies to handle point to multi-point transmissions. UDP is an ideal transmission method for serial devices that must transmit data to a group of devices or PCs. Refer to Chapter 6 for detailed information and configuration instructions. 3-5 CN2610 User’s Manual Knowing Your Application Dual-host Redundant Data Acquisition System (DRDAS) Backup PC Primary PC LAN A LAN B Primary CN2610 16 port RS-232 Async Server 1 2 3 4 5 6 7 8 9 10 11 12 13 14 15 16 Tx Reset MENU SEL Ready Rx RS-232/422/485 Data Remote Terminal Unit (RTU) The DRDAS operation mode provides a highly redundant network structure that takes advantage of CN2610’s dual LAN ports, dual IP addresses, and dual MAC addresses. DRDAS uses a backup PC that is set up to take over when the primary PC fails. CN2610’s dual-host redundant configuration sends serial data to 4 IP addresses on the network. Users select a Primary IP and 3 Secondary IPs. When the Primary IP fails, the backup IPs take over by using the switching library (refer to Chapter 7 for more details). With this kind of redundant setup, if one of the secondary IPs tries to send commands to the serial device, the commands are discarded by the CN2610, since only the Primary IP is allowed to conduct bi-directional transmission. The backup IPs are only allowed to receive data from the CN2610. 3-6 CN2610 User’s Manual Primary PC Knowing Your Application Backup PC LAN A LAN B Primary CN2610 CN2610 16 port RS-232 Async Server 1 2 3 4 5 6 7 8 9 16 port RS-232 Async Server 10 11 12 13 14 15 16 1 MENU SEL Ready 2 3 4 5 Tx Tx Reset Reset Rx MENU SEL Ready Rx 6 7 8 9 10 11 12 13 14 15 16 Backup RS-232/422/485 Data Remote Terminal Unit (RTU) This type of highly redundant setup is implemented with two CN2610s, as shown above in the structure diagram. All aspects of the system are backed up, including the PC hosts, the networks, and the CN2610s. The entire system will continue operating in the following situations: NOTE 1. When the Primary PC and LAN A fail at the same time (the backup PC and LAN B will take over). 2. When the Primary PC and the Primary CN2610 fail at the same time (the backup PC and the backup CN2610 will take over). 3. When LAN A and the Primary CN2610 fail at the same time (LAN B and the backup CN2610 will take over). The RS-232 connector on the Remote Terminal Unit (RTU) shown above must be setup with an RS-232 to RS-422/485 converter, such as the MOXA TCC-100I, to convert RS-232 signals to RS-485 signals. The connectors on the two CN2610s will also need to use converters, such as the MOXA TCC-100I. In this way, users can take advantage of RS-485’s multi-drop feature to share data with the secondary CN2610. Refer to Chapter 7 for detailed information and configuration instructions. 3-7 CN2610 User’s Manual Knowing Your Application Console Management (Reverse Terminal) Unix Windows NT Telnet TCP/IP CN2610 16 port RS-232 Async Server 1 2 3 4 5 6 7 8 9 10 11 12 13 14 15 16 Tx Reset MENU SEL Ready Rx CN2610 Reverse Telnet mode RS-232 Router Server Server The Reverse Terminal application, which uses Rtelnet mode, is used with routers, switches, and UPS equipment for console management applications. Rtelnet mode is similar to RAW mode, in that after booting up it listens to one specific TCP port for network hosts to initiate a connection. RAW mode, however, does not provide a Telnet conversion function. If the serial devices connected to CN2610 need to use the CR/LF conversion function, then Rtelnet mode must be used. CN2610’s Rtelnet mode is also used widely for device management applications in telecommunication control rooms, since remote hosts can make use of Local User Table or RADIUS identity verification methods. Refer to Chapter 8 for detailed information and configuration instructions. 3-8 CN2610 User’s Manual Knowing Your Application Terminal Access (Terminal) Unix Windows NT TCP/IP CN2610 CN2610 16 port RS-232 Async Server 1 2 3 4 5 6 7 8 9 10 11 12 13 14 15 16 Tx Reset MENU SEL Ready Rx RS-232 Terminal Terminal Terminal CN2610’s Terminal Access application is used to connect terminals to Unix or Windows Servers over a network. The terminals connect to CN2610’s serial ports at a remote site, with terminal commands transmitted over the network via CN2610’s Ethernet port. The Terminal Access application allows you to use fast keys used in many terminal applications, and switching sessions on the same terminal. CN2610 supports ASCII terminal and Binary terminal, with up to 8 simultaneous sessions for each port. Refer to Chapter 9 for detailed information and configuration instructions. 3-9 CN2610 User’s Manual Knowing Your Application Multi-host TTY (Multi-host TTY) Unix Moxattyd Unix Moxattyd Unix Moxattyd Unix Moxattyd TCP/IP CN2610 16 port RS-232 Async Server 1 2 3 4 5 6 7 8 9 10 11 12 13 14 15 16 Tx Reset MENU SEL Ready Rx CN2610 Terminal Swith Session Between different Unix server by Hot Key The Multi-host TTY application is ideal for connecting over a network to multiple Unix hosts from several sessions simultaneously. When communication begins, the networked Unix server must first enable Moxattyd to activate the TTY port’s mapping function. Moxattyd will initiate the connection with the CN2610, and the CN2610 will listen to the connection requests issued by various Moxattyd over different TCP ports. Once the connection is established, the Terminal server can use hot keys to switch sessions, allowing one terminal to control different Unix hosts. Refer to Chapter 10 for detailed information and configuration instructions. 3-10 CN2610 User’s Manual Knowing Your Application Dial-in/Out-of-Band Management (Dialin/out) Web Server E-mail Server TCP/IP CN2610 16 port RS-232 Async Server 1 2 3 4 5 6 7 8 9 10 11 12 13 14 15 16 Tx Reset MENU SEL Ready Rx CN2610 Router Modem PPP Dialout SLIP Dialin PPP Dialin Internet Modem UNIX Server PC Notebook Moxa CN2610 Async Server provides dial-up/dial-out access for ISPs and enterprises that need a remote access solution. When a user at a remote site uses a PPP dial-up connection to access CN2610, CN2610 plays the role of dial-up server, but also ensures the user has legal access to the network by verifying the user’s identity with its Local User Table or RADIUS. CN2610 supports PPP, SLIP, and Terminal modes for dial-up/dial-out access. Regardless of which OS is used, you will always be able to use standard PPP dial-up to establish a connection. CN2610 can also act as an Async router to connect serial ports to a WAN connection. Routing protocols (including static, RIP I, and RIP II) can be adjusted to route different WAN connections. Refer to Chapter 11 for detailed information and configuration instructions. 3-11 CN2610 User’s Manual Knowing Your Application Network Printer (Printer) Unix IBM TCP/IP CN2610 16 port RS-232 Async Server 1 2 3 4 5 6 7 8 9 10 11 12 13 14 15 16 Tx Reset MENU SEL Ready Rx CN2610 RS-232 Printer Printer Printer Printer CN2610 Async Server’s printing program (running under UNIX) provides an excellent solution for banking and stock exchange services with huge printing demands. Use a Windows or Unix host’s network printer function via RAW mode, and assign a specific IP address and TCP port number to specify the printer’s location. You can also connect to the printer via LPD mode when LPD protocol is needed to operate the printer. Refer to Chapter 12 for detailed information and configuration instructions. 3-12 CN2610 User’s Manual Knowing Your Application Multiplexor Access (Multiplex) IBM workstation with multiport board RS-232 CN2610 CN2610 16 port RS-232 Async Server 1 2 3 4 5 6 7 8 9 10 11 12 13 14 15 16 Tx Reset MENU SEL Ready Rx TCP/IP Router Router TCP/IP CN2610 CN2610 16 port RS-232 Async Server 1 2 3 4 5 6 7 8 9 10 11 12 13 14 15 16 Tx Reset MENU SEL Ready Rx RS-232 PO S t en r de h ea itc R pm e ui od Eq C Sw If are using a multiport serial board installed in a UNIX host, but wish to extend the device control range without dismantling the host, you can accomplish this with CN2610. Multiplex and De-multiplex solutions use CN2610’s RTelnet and terminal modes, eliminating the need to modify existing software. CN2610 acts like a converter by extending the communication distance. CN2610s work in pairs over the network to overcome the short communication distance limitation imposed by serial connections. See Chapter 13 for detailed configuration instructions. NOTE: This mode does not allow copying the status of control signals to devices at a remote site. 3-13 4 Chapter 4 Setting Up Windows Real COM/Linux Real TTY/Unix Fixed TTY CN2610 Async Server supports Real COM/TTY drivers for Windows and Linux, allowing CN2610’s serial ports to be recognized as Real COM ports by the Windows operating system, or Real TTY ports by Linux operating systems. CN2610 Async Server can be used for a variety of applications to make the serial ports accessible over an Ethernet, but without the need to modify existing serial transmission software. The Real COM driver provided by Moxa lets users treat networked serial ports the same as local serial ports. The following topics are covered in this chapter: Accessing the Console Utility Selecting the Application Configuring ASPP Mode Configuring the Serial Ports Save Restart Setting up Hosts ¾ Setting up Windows XP/2003 Hosts ¾ Setting up Windows 2000 Hosts ¾ Setting up Windows 95/98/ME/NT Hosts CN2610 User’s Manual Windows Real COM/Linux Real TTY/Unix Fixed TTY Accessing the Console Utility NOTE In this section, we show how to access CN2610’s console utility by Telnet over the network. For information on using the console port, see the section “Accessing the Console Utility” in Chapter 2. 1. Telnet over the network to the server’s IP address. 2. Type 1 to choose ansi/vt100, and then press Enter. Telnet 192.168.127.254 Async Server CN2610-8 Console terminal type (1: ansi/vt100, 2: vt52) : 1 3. CN2610’s MAIN MENU will open, as shown below. Telnet 192.168.127.254 CN2610-8 CN2610-8_19 V2.0 MAIN MENU -----------------------------------------------------------------------------[Server] Port seTting sAve Utility Restart Exit Examine/modify async server node/table configuration Enter: select ESC: previous menu Use the following keystrokes to navigate CN2610’s console utility. Action Move Jump to next menu, or Select item Return to previous menu, or Close pop up selector Shortcut Key Key [Up/Down/Left/Right] Arrow Key or [Tab] Key [Enter] Key [Esc] Key Capitalized letter of the word 4-2 CN2610 User’s Manual Windows Real COM/Linux Real TTY/Unix Fixed TTY Selecting the Application Open Port Menu Æ Mode to configure the NT Real COM application. 1. From the MAIN MENU, select Port, and then press Enter. CN2610-8 CN2610-8_19 V2.0 MAIN MENU -----------------------------------------------------------------------------Server [Port] seTting sAve Utility Restart Exit Examine/modify async server ports configuration Enter: select 2. ESC: previous menu From the PORT MENU, select Mode, and then press Enter. CN2610-8 CN2610-8_19 V2.0 PORT MENU -----------------------------------------------------------------------------[Mode] Line mOdem Welcome_MSG Quit Examine/modify the operation mode of async ports Enter: select 3. ESC: previous menu The Mode page has pop-up selection lists for Application, Mode, and Description/more setting for each serial port. Use the arrow keys to move the cursor to the Application column for the port to be configured, and then press Enter. We use Port 6 to illustrate. CN2610-8 CN2610-8_19 V2.0 -----------------------------------------------------------------------------[Mode] Line mOdem Welcome_MSG Quit Examine/modify the operation mode of async ports ESC: back to menu Port 01 02 03 04 05 06 07 4. Application [NT Real COM [NT Real COM [NT Real COM [NT Real COM [NT Real COM [NT Real COM [NT Real COM Enter: ] ] ] ] ] ] ] select Mode [ASPP [ASPP [ASPP [ASPP [ASPP [ASPP [ASPP ] ] ] ] ] ] ] Description/more setting [Async Server Proprietary [Async Server Proprietary [Async Server Proprietary [Async Server Proprietary [Async Server Proprietary [Async Server Proprietary [Async Server Proprietary Protocol] Protocol] Protocol] Protocol] Protocol] Protocol] Protocol] Use the Up/Down arrow keys to select NT Real COM, and then press Enter. CN2610-8 CN2610-8_19 V2.0 -----------------------------------------------------------------------------[Mode] Line mOdem Welcome_MSG Quit Examine/modify the operation mode of async ports ESC: back to menu Port 01 02 03 04 05 06 07 08 Application [NT Real COM [NT Real COM [NT Real COM [NT Real COM [NT Real COM [NT Real COM [NT Real COM [NT Real COM Enter: select +------------------+ption/more setting ]| Disable | Server Proprietary ]| Dialin/out | Server Proprietary ]| Terminal | Server Proprietary ]| Reverse Terminal | Server Proprietary ]| Device Control | Server Proprietary ]| Multiplex | Server Proprietary ]| Printer | Server Proprietary ]| Multi-Host TTY | Server Proprietary ]| NT Real COM | ]| Raw UDP | ]+------------------+ 4-3 Protocol] Protocol] Protocol] Protocol] Protocol] Protocol] Protocol] Protocol] CN2610 User’s Manual 5. Windows Real COM/Linux Real TTY/Unix Fixed TTY ASPP mode is selected by default, since it is the only mode associated with the NT Real COM application. CN2610-8 CN2610-8_19 V2.0 -----------------------------------------------------------------------------[Mode] Line mOdem Welcome_MSG Quit Examine/modify the operation mode of async ports ESC: back to menu Port 01 02 03 04 05 06 07 08 Enter: Application [NT Real COM [NT Real COM [NT Real COM [NT Real COM [NT Real COM [NT Real COM [NT Real COM [NT Real COM ] ] ] ] ] ] ] ] select Mode [ASPP [ASPP [ASPP [ASPP [ASPP [ASPP [ASPP [ASPP ] ] ] ] ] ] ] ] Description/more setting [Async Server Proprietary [Async Server Proprietary [Async Server Proprietary [Async Server Proprietary [Async Server Proprietary [Async Server Proprietary [Async Server Proprietary [Async Server Proprietary Protocol] Protocol] Protocol] Protocol] Protocol] Protocol] Protocol] Protocol] Configuring ASPP Mode Follow these steps to configure ports for ASPP mode: 1. Move the cursor to the Description/more setting column and press Enter. CN2610-8 CN2610-8_19 V2.0 -----------------------------------------------------------------------------[Mode] Line mOdem Welcome_MSG Quit Examine/modify the operation mode of async ports ESC: back to menu Port 01 02 03 04 05 06 07 08 2. Application [NT Real COM [NT Real COM [NT Real COM [NT Real COM [NT Real COM [NT Real COM [NT Real COM [NT Real COM Enter: ] ] ] ] ] ] ] ] select Mode [ASPP [ASPP [ASPP [ASPP [ASPP [ASPP [ASPP [ASPP ] ] ] ] ] ] ] ] Description/more setting [Async Server Proprietary [Async Server Proprietary [Async Server Proprietary [Async Server Proprietary [Async Server Proprietary [Async Server Proprietary [Async Server Proprietary [Async Server Proprietary Protocol] Protocol] Protocol] Protocol] Protocol] Protocol] Protocol] Protocol] The pop-up selector contains input/display fields for TCP data port, TCP command port, and TCP alive check time. Each item is described in detail below the figure. CN2610-8 CN2610-8_19 V2.0 -----------------------------------------------------------------------------[Mode] Line mOdem Welcome_MSG Quit Examine/modify the operation mode of async ports ESC: back to menu Port 01 02 03 04 05 06 Application [NT Real COM [NT Real COM [NT Real COM [NT Real COM [NT Real COM [NT Real COM Enter: ] ] ] ] ] ] select Mod+--------------------------------------------+ [AS| TCP data port : [950] |] [AS| TCP command port : [966] |] [AS| TCP alive check time : [0 ] minutes |] [AS+--------------------------------------------+ [ASPP ] [Async Server Proprietary Protocol] [ASPP ] [Async Server Proprietary Protocol] 4-4 CN2610 User’s Manual Windows Real COM/Linux Real TTY/Unix Fixed TTY Setting Value TCP data port 950 – 965 The host uses this port number to determine which serial device to send data to. These values are fixed, and cannot be changed by the user. Serial Port TCP Port No. 01 950 02 951 03 952 … … 16 965 966 – 981 The host uses this port number to determine which device to send commands to. These values are fixed, and cannot be changed by the user. Serial Port TCP Port No. 01 966 02 967 03 968 … … 16 981 TCP command port TCP alive check time 3. Notes Necessity Required Required 0 – 99 min. The time period CN2610 waits before Optional checking if the TCP connection is alive or not. If no response is received, CN2610 will reset the port and terminate the connection. Press ESC to return to the PORT MENU. Configuring the Serial Ports Open Port Menu Æ Line to configure serial port settings. 1. From the MAIN MENU, select Port, and then press Enter. CN2610-8 CN2610-8_19 V2.0 MAIN MENU -----------------------------------------------------------------------------Server [Port] seTting sAve Utility Restart Exit Examine/modify async server ports configuration Enter: select 2. ESC: previous menu From the PORT MENU, select Line, and then press Enter. CN2610-8 CN2610-8_19 V2.0 PORT MENU -----------------------------------------------------------------------------Mode [Line] mOdem Welcome_MSG Quit Examine/modify asynchronous port configuration Enter: select 3. ESC: previous menu The Line page has pop-up selection lists for Port, Speed, Bits, Stop, Parity, FIFO, RTS/CTS, XON/XOFF, and Discon. ctrl for each serial port. Each item is described in detail below the figure. 4-5 CN2610 User’s Manual Windows Real COM/Linux Real TTY/Unix Fixed TTY CN2610-8 CN2610-8_19 V2.0 -----------------------------------------------------------------------------Mode [Line] mOdem Welcome_MSG Quit Examine/modify asynchronous port configuration ESC: back to menu Port 01 02 03 04 05 06 07 08 Speed [115200] [115200] [115200] [115200] [115200] [115200] [115200] [115200] Enter: Bits [8] [8] [8] [8] [8] [8] [8] [8] Setting Speed Bits Stop Parity FIFO RTS/CTS XON/XOFF Discon. Ctrl Stop [ 1 ] [ 1 ] [ 1 ] [ 1 ] [ 1 ] [ 1 ] [ 1 ] [ 1 ] select Parity [None ] [None ] [None ] [None ] [None ] [None ] [None ] [None ] Value 50 bps to 921.6 Kbps 5, 6, 7, 8 1, 1.5, 2 None, Even, Odd, Mark, Space Yes, No Yes, No Yes, No None DSR off DCD off 4. FIFO [yes] [yes] [yes] [yes] [yes] [yes] [yes] [yes] RTS/CTS [yes] [yes] [yes] [yes] [yes] [yes] [yes] [yes] XON/XOFF [no ] [no ] [no ] [no ] [no ] [no ] [no ] [no ] Discon. ctrl [None ] [None ] [None ] [None ] [None ] [None ] [None ] [None ] Notes Transmission rate Data bits Stop bits Odd, Even, Mark, Space First In First Out Device Hardware Flow Control Software Flow Control DSR off or DCD off will not be interpreted as a disconnection. DSR off will be interpreted as a disconnection. DCD off will be interpreted as a disconnection. Press ESC to return to the PORT MENU. Save When exiting the SERVER MENU, you will be prompted to save settings. Press Y to save. CN2610-8 CN2610-8_19 V2.0 SERVER MENU -----------------------------------------------------------------------------Info. Lan Adv. Host_table Route_table [User_table] Quit Examine/modify async server basic configuration Enter: select ESC: previous menu +-----------------------------------------------------+ | Warning !!! | | You had modified the configuration without saving. | | Would you save it now ? | | ‘Y: yes ‘N’: no | +-----------------------------------------------------+ You may also save all settings from the MAIN MENU by selecting sAve and then pressing Enter. Press Enter again to save, and any other key to cancel. 4-6 CN2610 User’s Manual Windows Real COM/Linux Real TTY/Unix Fixed TTY CN2610-8 CN2610-8_19 V2.0 MAIN MENU -----------------------------------------------------------------------------Server Port seTting [sAve] Utility Restart Exit Save current configuration to Flash ROM ESC: back to menu Enter: select +-------------------------------------+ |Enter to updated, other key to cancel| +-------------------------------------+ Restart 1. From the MAIN MENU, select Restart. CN2610-8 CN2610-8_19 V2.0 MAIN MENU -----------------------------------------------------------------------------Server Port seTting sAve Utility [Restart] Exit Restart the whole system or selected async ports Enter: select 2. ESC: previous menu Select System and then press Enter to restart the system and terminate the Telnet session. CN2610-8 CN2610-8_19 V2.0 -----------------------------------------------------------------------------[System] Port Quit Restart the Async Server ESC: back to menu Enter: select +--------------------------------------------------------------------+ | Warning !!! | | Restart system will disconnect all ports and clear all status value | | ‘ Enter: continue ESC: cancel | +--------------------------------------------------------------------+ Setting up Hosts After using CN2610 Console Utility to set up Async Server’s ports for the NT Real COM application (ASPP mode), you will need to install port drivers on every computer used to access CN2610’s ports. In this section we explain how to set up Windows hosts Setting up Windows XP/2003 Hosts In this section, we use Windows XP to illustrate the installation procedure. The installation procedure for Windows 2003 machines is identical. Installing a Server 1. Unzip the Windows XP/2003 driver file, located on the CN2610 CD ROM, to your hard disk. 2. Run the Windows Add Hardware Wizard, located in the Control Panel. 4-7 CN2610 User’s Manual Windows Real COM/Linux Real TTY/Unix Fixed TTY 3. When the Welcome to the Add Hardware Wizard window opens, click Next to continue. 4. Wait patiently while the Wizard searches for servers connected to the network. 4-8 CN2610 User’s Manual Windows Real COM/Linux Real TTY/Unix Fixed TTY 5. The next window to open will ask you if the hardware is connected. Select Yes, I have already connected the hardware, and click Next to continue. 6. Select Add a new hardware device, and then click Next to continue. 4-9 CN2610 User’s Manual Windows Real COM/Linux Real TTY/Unix Fixed TTY 7. Select Install the hardware that I manually select from a list (Advanced) to install the hardware, and then click Next to continue. 8. The window that opens next will ask you to select the type of hardware you are installing. Select Multi-port serial adapters, and then click Next to continue. 4-10 CN2610 User’s Manual 9. Windows Real COM/Linux Real TTY/Unix Fixed TTY The window that opens next will ask you to select the device driver you want to install for this hardware. Click Have Disk… to install from the CD. 10. Locate and then select the driver file NPSERVER.INF. Click Open to proceed with the installation. 4-11 CN2610 User’s Manual Windows Real COM/Linux Real TTY/Unix Fixed TTY 11. Select the correct CN2610 model, and then click Next to continue. 12. The Wizard will start installing the driver, and automatically search the network for copies of the CN2610 model you selected in the previous step. 4-12 CN2610 User’s Manual Windows Real COM/Linux Real TTY/Unix Fixed TTY 13. Although the next window to open states that the software hasn’t passed Windows Logo testing, you can rest assured that this driver has already been tested and been shown that it can support this Windows OS. Click Continue Anyway to proceed. 14. Wait patiently while the driver is installed. 4-13 CN2610 User’s Manual Windows Real COM/Linux Real TTY/Unix Fixed TTY 15. You can select the CN2610 that was located automatically, or select Manually Enter the IP address of NPort Server / Async Server and then enter the IP address of a different server. Click Next to finish installing the CN2610 driver. 16. The next window reports that the driver was installed, and port drivers will be installed next. Click Next to continue. 17. Click Finish to complete the installation of the server driver. This will automatically trigger the port installation procedure. 4-14 CN2610 User’s Manual Windows Real COM/Linux Real TTY/Unix Fixed TTY Installing Ports 1. After the CN2610 server driver has been installed, Windows will notify you that new hardware has been found. Select Install from a list or specific location (Advanced), and then click Next to continue. 2. Select Include this location in the search, and then click Next to continue. 4-15 CN2610 User’s Manual Windows Real COM/Linux Real TTY/Unix Fixed TTY 3. Although the next window to open states that the software hasn’t passed Windows Logo testing, you can rest assured that this driver has already been tested and been shown that it can support this Windows OS. Click Continue Anyway to proceed. 4. The driver for Moxa Port 0 will be installed. 4-16 CN2610 User’s Manual Windows Real COM/Linux Real TTY/Unix Fixed TTY 5. After Moxa Port 0 is installed, steps 1 to 4 will be repeated 7 or 15 times, depending on whether you are installing drivers for the 8-port or 16-port CN2610. 6. After the installation is complete, you can check Ports (COM & LPT) under Device Manager to verify that all of the ports were installed successfully. 4-17 CN2610 User’s Manual Windows Real COM/Linux Real TTY/Unix Fixed TTY Configuring CN2610 in a Windows XP/2003 Environment After the CN2610 driver is installed, you will be given the option to proceed directly with the configuration of CN2610. You may also configure CN2610 at a later time. In this section we explain how to configure Real COM Mapping. 1. Click Device Manager Æ Multiport serial adapters, right click the CN2610 you would like to configure, and select Properties. 4-18 CN2610 User’s Manual Windows Real COM/Linux Real TTY/Unix Fixed TTY 2. Click the Configuration tab. 3. Click Settings to configure CN2610’s Basic Configuration, Password, and Access Control. 4-19 CN2610 User’s Manual Windows Real COM/Linux Real TTY/Unix Fixed TTY 4. On the Basic Configuration page, modify Server Name, IP Address, Netmask, and Gateway. Check the DHCP checkbox if the network parameters will be assigned automatically by a DHCP server. 5. On the Password page, add a password or change the existing password. Check the Remember Password checkbox to remember the password on this computer. 4-20 CN2610 User’s Manual 6. Windows Real COM/Linux Real TTY/Unix Fixed TTY The Access Control page allows you to set up access rights for each of the CN2610’s ports. Access right is assigned by IP address. In the example shown here, the “netmask” of 255.255.255.255 limits access to the listed IP address (192.168.6.16). To allow access to a group of IP addresses, adjust the “netmask” accordingly. To allow any IP address to access a port, delete all IP addresses assigned to that port. 4-21 CN2610 User’s Manual Windows Real COM/Linux Real TTY/Unix Fixed TTY 7. Click Modify to save all Property Sheet settings and return to the Properties / Configuration page. 8. Click Ports Setting to configure the data transmission mode and FIFO for each COM port. 9. Check the box(es) next to the port(s) you would like to modify, and then click Modify Setting. 4-22 CN2610 User’s Manual Windows Real COM/Linux Real TTY/Unix Fixed TTY 10. Modify the settings that need to be changed, and then click OK. Setting up Windows 2000 Hosts In this section, we explain how to set up a host in a Windows 2000 environment. Installing a Server 1. Unzip the Windows 2000 driver file, located on the CN2610 CD ROM, to your hard disk. 2. Run the Windows Add Hardware Wizard, located in the Control Panel. 4-23 CN2610 User’s Manual Windows Real COM/Linux Real TTY/Unix Fixed TTY 3. When the Welcome to the Add Hardware Wizard window opens, click Next to continue. 4. In the Choose a Hardware Task window, select Add/Troubleshoot a device, and then click Next to continue. 4-24 CN2610 User’s Manual Windows Real COM/Linux Real TTY/Unix Fixed TTY 5. In the Choose a Hardware Device window, select Add a new device, and then click Next to continue. 6. In the Find New Hardware window, select No, I want to select the hardware from a list, and then click Next to continue. 4-25 CN2610 User’s Manual Windows Real COM/Linux Real TTY/Unix Fixed TTY 7. In the Hardware Type window, select Multi-port serial adapters from the Hardware types list, and then click Next to continue. 8. Click Have Disk to install from the CD, and then click Next to continue. 4-26 CN2610 User’s Manual 9. Windows Real COM/Linux Real TTY/Unix Fixed TTY After locating the win2k folder, select the driver file NPSERVER.INF, and then click Open. 10. Select the correct CN2610 model, and then click Next to continue. 4-27 CN2610 User’s Manual Windows Real COM/Linux Real TTY/Unix Fixed TTY 11. The Wizard will start installing the Server driver, and automatically search the network for copies of the CN2610 model you selected in the previous step. 12. Although the next window to open states that the software hasn’t passed Windows Logo testing, you can rest assured that this driver has already been tested and been shown that it can support this Windows OS. Click Continue Anyway to proceed. 4-28 CN2610 User’s Manual Windows Real COM/Linux Real TTY/Unix Fixed TTY 13. You can select the CN2610 that was located automatically, or select Manually Enter the IP address of NPort Server / Async Server and then enter the IP address of a different server. Click Next to finish installing CN2610 driver. 4-29 CN2610 User’s Manual Windows Real COM/Linux Real TTY/Unix Fixed TTY 14. The next window reports that the driver was installed, and port drivers will be installed next. Click Next to continue. Installing Ports 1. The ports will be installed automatically. Click Finish to conclude the installation procedure. 4-30 CN2610 User’s Manual 2. Windows Real COM/Linux Real TTY/Unix Fixed TTY After the installation is complete, you can check Ports (COM & LPT) under Device Manager to verify that all of the ports were installed successfully. Configuring CN2610 in a Windows 2000 Environment After the CN2610 driver is installed, you will be given the option to proceed directly with the configuration of CN2610. You may also configure CN2610 at a later time. In this section we explain how to configure Real COM Mapping. 1. Click Device Manager Æ Multiport serial adapters, right click the CN2610 you would like 4-31 CN2610 User’s Manual Windows Real COM/Linux Real TTY/Unix Fixed TTY to configure, and select Properties. 2. Click the Configuration tab. 3. Click Settings to configure CN2610’s Basic Configuration, Password, and Access Control. 4-32 CN2610 User’s Manual Windows Real COM/Linux Real TTY/Unix Fixed TTY 4. On the Basic Configuration page, modify Server Name, IP Address, Netmask, and Gateway. Check the DHCP checkbox if the network parameters are assigned automatically by a DHCP server. 5. On the Password page, add a password or change the existing password. Check the Remember Password checkbox to remember the password on this computer. 4-33 CN2610 User’s Manual 6. Windows Real COM/Linux Real TTY/Unix Fixed TTY The Access Control page allows you to set up access rights for each of the CN2610’s ports. Access right is assigned by IP address. In the example shown here, the “netmask” of 255.255.255.255 limits access to the listed IP address (192.168.6.16). To allow access to a group of IP addresses, adjust the “netmask” accordingly. To allow any IP address to access a port, delete all IP addresses assigned to that port. Click Modify to make changes. 4-34 CN2610 User’s Manual Windows Real COM/Linux Real TTY/Unix Fixed TTY 7. And then click OK to return to the Access Control page. 8. Click OK to return to the Configuration page. 9. Click Ports Setting to configure the data transmission mode and FIFO for each COM port. 4-35 CN2610 User’s Manual Windows Real COM/Linux Real TTY/Unix Fixed TTY 10. Check the box(es) next to the port(s) you would like to modify, and then click Modify Setting. 11. Modify the settings that need to be changed, and then click OK. 4-36 CN2610 User’s Manual Windows Real COM/Linux Real TTY/Unix Fixed TTY Setting up Windows 95/98/ME/NT Hosts In this section, we explain how to set up a host in a Windows 95/98/ME/NT environment. You will first install the NPort Pro Manager program, and then use this utility to configure the server. We use Windows NT to illustrate the installation procedure. Installing a Server 1. Unzip the Windows 95/98/ME/NT driver file, located on the CN2610 CD ROM, to your hard disk. 2. Locate and run the Setup.exe file. 3. The setup program is used for both CN2500 and NPort Server Pro products, so you will see a Welcome to NPort Server Pro window. Click Next to continue. 4-37 CN2610 User’s Manual Windows Real COM/Linux Real TTY/Unix Fixed TTY 4. Select Custom mode, and then click Next to continue. 5. Select a Destination Directory and then click Next to continue. 6. Click Next to finish installing NPort Pro Manager. 4-38 CN2610 User’s Manual Windows Real COM/Linux Real TTY/Unix Fixed TTY 7. After the driver is installed, NPort Pro Manager and the Add Server Wizard will start running automatically. Select Yes, and then click Next to continue. 8. Select one of the server’s in the list, or select No, I will define the server myself if the correct server is not listed. Click Next to continue. 4-39 CN2610 User’s Manual 9. Windows Real COM/Linux Real TTY/Unix Fixed TTY If necessary, enter a different IP address in the Server IP address box, and then click Next to continue. 10. Select the COM number for CN2610’s port 1. The rest of the ports will be mapped automatically. Click Next to continue. 4-40 CN2610 User’s Manual Windows Real COM/Linux Real TTY/Unix Fixed TTY 11. For added security, set a password for the CN2610. Check the Auto-Saved box to save the password on your computer. Click Next to continue. 12. Check the new server settings to make sure they are correct, and then click Finish. 4-41 CN2610 User’s Manual Windows Real COM/Linux Real TTY/Unix Fixed TTY 13. The server and ports will be displayed in the NPort Server Manager window. Click the Save icon in the upper left corner to save the settings before exiting the program. Configuring CN2610 in a Windows 95/98/ME/NT Environment After the CN2610 driver is installed, you can proceed directly with the configuration of CN2610, or configure CN2610 at a later time. In this section we explain how to configure Real COM Mapping. 1. Start the Manger by clicking on Start Æ Properties Æ NPort Server Æ NPort Server Manager, and then click the server you would like to configure. The ports will be shown in the right pane of the window. 4-42 CN2610 User’s Manual Windows Real COM/Linux Real TTY/Unix Fixed TTY 2. Right click the CN2610 you wish to configure, click the right mouse button, and then select Server Properties. 3. On the General page, you can see the server’s Serial No., and modify Server Name, Server IP, and Netmask. Select the Enable option (to the right of DHCP)if the network parameters are assigned automatically by a DHCP server. 4-43 CN2610 User’s Manual Windows Real COM/Linux Real TTY/Unix Fixed TTY 4. On the Password page, set up a password for this CN2610 for added security. Check the Auto Save Password on this computer box if you want your computer to remember the password. 5. The Access Control page allows you to set up access rights for each of the CN2610’s ports. Access right is assigned by IP address. 4-44 CN2610 User’s Manual Windows Real COM/Linux Real TTY/Unix Fixed TTY 6. The Transmission page lets you to select a Transmission Mode and Tx FIFO for each port. 7. The Access Control page is used to modify access rights to the server. 4-45 CN2610 User’s Manual 8. Windows Real COM/Linux Real TTY/Unix Fixed TTY The Advanced page allows you to add routes to CN2610. However, since CN2610 has a column to set the Default Gateway, you can ignore this configuration. 4-46 5 Chapter 5 Setting Up Device Control Device Control applications use standard Linux/Unix Socket programming for Linux/Unix systems, or WinSock programming for Windows systems, to control device data transmission directly. With CN2610 configured for RAW mode, you can focus on pure data transmission, without using serial port control or serial modem control signals. You can also use ASPP mode, provided exclusively by Moxa, to communicate with CN2610. For both Linux/Unix Socket programming and Windows WinSock programming, IP is used to communicate between hosts and devices. At the end of the chapter, we give examples that explain how ASPP is used in a UNIX/Windows environment. The following topics are covered in this chapter: Accessing the Console Utility Selecting the Application Configuring ASPP Mode Configuring RAW Mode Configuring the Serial Ports Save Restart ASPP Library Introduction ASPP Examples for Unix ASPP Examples for Windows CN2610 User’s Manual Setting Up Device Control Accessing the Console Utility NOTE In this section, we show how to access CN2610’s console utility by Telnet over the network. For information on using the console port, see the section “Accessing the Console Utility” in Chapter 2. 1. Telnet over the network to the server’s IP address. 2. Type 1 to choose ansi/vt100, and then press Enter. Telnet 192.168.127.254 Async Server CN2610-8 Console terminal type (1: ansi/vt100, 2: vt52) : 1 3. CN2610’s MAIN MENU will open, as shown below. Telnet 192.168.127.254 CN2610-8 CN2610-8_19 V2.0 MAIN MENU -----------------------------------------------------------------------------[Server] Port seTting sAve Utility Restart Exit Examine/modify async server node/table configuration Enter: select ESC: previous menu Use the following keystrokes to navigate CN2610’s console utility. Action Move Jump to next menu, or Select item Return to previous menu, or Close pop up selector Shortcut Key Key [Up/Down/Left/Right] Arrow Key or [Tab] Key [Enter] Key [Esc] Key Capitalized letter of the word 5-2 CN2610 User’s Manual Setting Up Device Control Selecting the Application Open Port Menu Æ Mode to configure the Device Control application. 1. From the MAIN MENU, select Port, and then press Enter. CN2610-8 CN2610-8_19 V2.0 MAIN MENU -----------------------------------------------------------------------------Server [Port] seTting sAve Utility Restart Exit Examine/modify async server ports configuration Enter: select 2. ESC: previous menu From the PORT MENU, select Mode, and then press Enter. CN2610-8 CN2610-8_19 V2.0 PORT MENU -----------------------------------------------------------------------------[Mode] Line mOdem Welcome_MSG Quit Examine/modify the operation mode of async ports Enter: select 3. ESC: previous menu The Mode page has pop-up selection lists for Application, Mode, and Description/more setting for each serial port. Use the arrow keys to move the cursor to the Application column for the port to be configured, and then press Enter. We use Port 6 to illustrate. CN2610-8 CN2610-8_19 V2.0 -----------------------------------------------------------------------------[Mode] Line mOdem Welcome_MSG Quit Examine/modify the operation mode of async ports ESC: back to menu Port 01 02 03 04 05 06 07 4. Application [NT Real COM [NT Real COM [NT Real COM [NT Real COM [NT Real COM [NT Real COM [NT Real COM Enter: ] ] ] ] ] ] ] select Mode [ASPP [ASPP [ASPP [ASPP [ASPP [ASPP [ASPP ] ] ] ] ] ] ] Description/more setting [Async Server Proprietary [Async Server Proprietary [Async Server Proprietary [Async Server Proprietary [Async Server Proprietary [Async Server Proprietary [Async Server Proprietary Protocol] Protocol] Protocol] Protocol] Protocol] Protocol] Protocol] Use the Up/Down arrow keys to select Device Control, and then press Enter. CN2610-8 CN2610-8_19 V2.0 -----------------------------------------------------------------------------[Mode] Line mOdem Welcome_MSG Quit Examine/modify the operation mode of async ports ESC: back to menu Port 01 02 03 04 05 06 07 08 Application [NT Real COM [NT Real COM [NT Real COM [NT Real COM [NT Real COM [NT Real COM [NT Real COM [NT Real COM Enter: select +------------------+ption/more setting ]| Disable | Server Proprietary ]| Dialin/out | Server Proprietary ]| Terminal | Server Proprietary ]| Reverse Terminal | Server Proprietary ]| Device Control | Server Proprietary ]| Multiplex | Server Proprietary ]| Printer | Server Proprietary ]| Multi-Host TTY | Server Proprietary ]| NT Real COM | ]| Raw UDP | ]+------------------+ 5-3 Protocol] Protocol] Protocol] Protocol] Protocol] Protocol] Protocol] Protocol] CN2610 User’s Manual 5. Setting Up Device Control ASPP mode is selected by default. CN2610-8 CN2610-8_19 V2.0 -----------------------------------------------------------------------------[Mode] Line mOdem Welcome_MSG Quit Examine/modify the operation mode of async ports ESC: back to menu Port 01 02 03 04 05 06 07 Enter: Application [NT Real COM [NT Real COM [NT Real COM [NT Real COM [NT Real COM [Device Control [NT Real COM ] ] ] ] ] ] ] select Mode [ASPP [ASPP [ASPP [ASPP [ASPP [ASPP [ASPP ] ] ] ] ] ] ] Description/more setting [Async Server Proprietary [Async Server Proprietary [Async Server Proprietary [Async Server Proprietary [Async Server Proprietary [Async Server Proprietary [Async Server Proprietary Protocol] Protocol] Protocol] Protocol] Protocol] Protocol] Protocol] After configuring a port for the Device Control application, you will need to choose between one of two operation modes: ASPP and RAW. ASPP mode, which was developed by Moxa, provides an easy-to-use TCP/IP socket programming library and other useful functions. Choosing RAW mode gives you more freedom to define your own applications for serial data transmitted and received over the Ethernet. If you select RAW mode, you will need to use standard TCP/IP socket programming techniques. Configuring ASPP Mode Moxa ASPP is a TCP/IP socket programming library. If you are using Moxa ASPP to create your programs, configure CN2610’s serial ports for ASPP mode, and copy the ASPP library to the server. ASPP programming functions and examples are introduced at the end of this chapter. Each physical ASPP port is divided into two logical ports. One is called the command port, and the other is called the data port. The command port is used to issue commands across the network to set the transmission line’s configuration parameters, such as baudrate, data bits, flow control condition, etc. The data port is used for normal data transmission tasks, such as retrieving data from the serial device. Follow these steps to configure ports for ASPP mode: 1. Move the cursor to the Mode column for the port and press Enter. CN2610-8 CN2610-8_19 V2.0 -----------------------------------------------------------------------------[Mode] Line mOdem Welcome_MSG Quit Examine/modify the operation mode of async ports ESC: back to menu Port 01 02 03 04 05 06 07 2. Enter: Application [NT Real COM [NT Real COM [NT Real COM [NT Real COM [NT Real COM [Device Control [NT Real COM ] ] ] ] ] ] ] select Mode [ASPP [ASPP [ASPP [ASPP [ASPP [ASPP [ASPP ] ] ] ] ] ] ] Description/more setting [Async Server Proprietary [Async Server Proprietary [Async Server Proprietary [Async Server Proprietary [Async Server Proprietary [Async Server Proprietary [Async Server Proprietary Use the arrow keys to highlight ASPP, and then press Enter. 5-4 Protocol] Protocol] Protocol] Protocol] Protocol] Protocol] Protocol] CN2610 User’s Manual Setting Up Device Control CN2610-8 CN2610-8_19 V2.0 -----------------------------------------------------------------------------[Mode] Line mOdem Welcome_MSG Quit Examine/modify the operation mode of async ports ESC: back to menu Port 01 02 03 04 05 06 07 08 3. Enter: Application [NT Real COM [NT Real COM [NT Real COM [NT Real COM [NT Real COM [Device Control [NT Real COM [NT Real COM ] ] ] ] ] ] ] ] select Mode [ASPP [ASPP [ASPP [ASPP [ASPP [ASPP [ASPP [ASPP Description/more setting ] [Async Server Proprietary ] [Async Server Proprietary ] [Async Server Proprietary ]+----------+rver Proprietary ]| ASPP |rver Proprietary ]| RAW |rver Proprietary ]+----------+rver Proprietary ] [Async Server Proprietary Protocol] Protocol] Protocol] Protocol] Protocol] Protocol] Protocol] Protocol] Move the cursor to the Description/more setting column and press Enter. CN2610-8 CN2610-8_19 V2.0 -----------------------------------------------------------------------------[Mode] Line mOdem Welcome_MSG Quit Examine/modify the operation mode of async ports ESC: back to menu Port 01 02 03 04 05 06 07 4. Enter: Application [NT Real COM [NT Real COM [NT Real COM [NT Real COM [NT Real COM [Device Control [NT Real COM ] ] ] ] ] ] ] select Mode [ASPP [ASPP [ASPP [ASPP [ASPP [ASPP [ASPP ] ] ] ] ] ] ] Description/more setting [Async Server Proprietary [Async Server Proprietary [Async Server Proprietary [Async Server Proprietary [Async Server Proprietary [Async Server Proprietary [Async Server Proprietary Protocol] Protocol] Protocol] Protocol] Protocol] Protocol] Protocol] The pop-up selector contains input/display fields for TCP data port, TCP command port, and TCP alive check time. Each item is described in detail below the figure. CN2610-8 CN2610-8_19 V2.0 -----------------------------------------------------------------------------[Mode] Line mOdem Welcome_MSG Quit Examine/modify the operation mode of async ports ESC: back to menu Port 01 02 03 04 05 06 07 Enter: Application [NT Real COM [NT Real COM [NT Real COM [NT Real COM [NT Real COM [Device Control [NT Real COM ] ] ] ] ] ] ] select Mod+-------------------------------------------+ [AS| TCP data port : [950] |] [AS| TCP command port : [966] |] [AS| TCP alive check time : [0 ] minutes |] [AS+--------------------------------------------+] [ASPP ] [Async Server Proprietary Protocol] [ASPP ] [Async Server Proprietary Protocol] [ASPP ] [Async Server Proprietary Protocol] 5-5 CN2610 User’s Manual Setting Up Device Control Setting Value Notes 950 – 965 The host uses this value to determine which serial device to send data to. These values are fixed, and cannot be changed by the user. Serial Port TCP Port No. 01 950 02 951 03 952 … … 16 965 966 – 981 The host uses this Port value to determine which device to send commands to. These values are fixed, and cannot be changed by the user. Serial Port TCP Port No. 01 966 02 967 03 968 … … 16 981 TCP data port TCP command port TCP alive check time 5. Necessity Required Required 0 – 99 min. The time period CN2610 waits before Optional checking if the TCP connection is alive or not. If no response is received, CN2610 will reset the port and terminate the connection. Press Esc to return to the PORT MENU. Configuring RAW Mode RAW mode is used for standard TCP/IP socket programs. RAW mode provides a transparent communication link between the network socket program and the corresponding serial port. 1. Move the cursor to the Mode column for the port and press Enter. CN2610-8 CN2610-8_19 V2.0 -----------------------------------------------------------------------------[Mode] Line mOdem Welcome_MSG Quit Examine/modify the operation mode of async ports ESC: back to menu Port 01 02 03 04 05 06 07 2. Enter: Application [NT Real COM [NT Real COM [NT Real COM [NT Real COM [NT Real COM [Device Control [NT Real COM ] ] ] ] ] ] ] select Mode [ASPP [ASPP [ASPP [ASPP [ASPP [ASPP [ASPP ] ] ] ] ] ] ] Description/more setting [Async Server Proprietary [Async Server Proprietary [Async Server Proprietary [Async Server Proprietary [Async Server Proprietary [Async Server Proprietary [Async Server Proprietary Use the arrow keys to highlight RAW, and then press Enter. 5-6 Protocol] Protocol] Protocol] Protocol] Protocol] Protocol] Protocol] CN2610 User’s Manual Setting Up Device Control CN2610-8 CN2610-8_19 V2.0 -----------------------------------------------------------------------------[Mode] Line mOdem Welcome_MSG Quit Examine/modify the operation mode of async ports ESC: back to menu Port 01 02 03 04 05 06 07 3. Enter: Application [NT Real COM [NT Real COM [NT Real COM [NT Real COM [NT Real COM [Device Control [NT Real COM ] ] ] ] ] ] ] select Mode [ASPP [ASPP [ASPP [ASPP [ASPP [ASPP [ASPP Description/more setting ] [Async Server Proprietary ] [Async Server Proprietary ] [Async Server Proprietary ]+----------+rver Proprietary ]| ASPP |rver Proprietary ]| RAW |rver Proprietary ]+----------+rver Proprietary Protocol] Protocol] Protocol] Protocol] Protocol] Protocol] Protocol] Move the cursor to the Description/more setting column, and then press Enter. The pop-up selector contains input/display fields for TCP port, Source IP address, Destination IP addr, Inactivity time, and TCP alive check time. Each item is described in detail below the figure. CN2610-8 CN2610-8_19 V2.0 -----------------------------------------------------------------------------[Mode] Line mOdem Welcome_MSG Quit Examine/modify the operation mode of async ports ESC: back to menu Port 01 02 03 05 06 07 08 Enter: Application [NT Real COM [NT Real COM [NT Real COM [NT Real COM [Device Control [NT Real COM [NT Real COM Setting TCP port Source IP address Destination IP addr Inactivity time TCP alive check time ] ] ] ] ] ] ] select Mod+----------------------------------------+ [AS| TCP port : [4001 ] |] [AS| Source IP address : [ ] |] [AS| Destination IP addr : [ ] |] [AS| Inactivity time : [0 ] minutes |] [RA| TCP alive check time : [0 ] minutes |] [AS+----------------------------------------+] [ASPP ] [Async Server Proprietary Protocol] Value number Notes Each of CN2610’s serial ports is mapped to a TCP port. You may modify these port numbers, but to avoid conflicts among TCP port numbers for other serial ports, we strongly suggest using the default values: 4001 for port 1, 4002 for port 2, etc. IP address for Specify an IP address for this port for the port application purposes. If left blank, CN2610 will use its own IP address, in which case you will need to specify different TCP port numbers for different serial ports. IP address The host with this IP address will have exclusive access to this port. If left blank, all hosts on the network will have access to this port. 0-99 minutes Idle time before the port is disconnected automatically. If set to 0 minutes, the port will not disconnect. 0-99 minutes The time period CN2610 waits before checking if the TCP connection is alive or not. If no response is received, CN2610 will reset the port and terminate the connection. 5-7 Necessity Optional Optional Optional Optional Optional CN2610 User’s Manual 4. Setting Up Device Control Press Esc to return to the PORT MENU. Configuring the Serial Ports Open Port Menu Æ Line to configure serial port settings. 1. From the MAIN MENU, select Port, and then press Enter. CN2610-8 CN2610-8_19 V2.0 MAIN MENU -----------------------------------------------------------------------------Server [Port] seTting sAve Utility Restart Exit Examine/modify async server ports configuration Enter: select 2. ESC: previous menu From the PORT MENU, select Line, and then press Enter. CN2610-8 CN2610-8_19 V2.0 PORT MENU -----------------------------------------------------------------------------Mode [Line] mOdem Welcome_MSG Quit Examine/modify asynchronous port configuration Enter: select 3. ESC: previous menu The Line page has pop-up selection lists for Port, Speed, Bits, Stop, Parity, FIFO, RTS/CTS, XON/XOFF, and Discon. ctrl for each serial port. Each item is described in detail below the figure. CN2610-8 CN2610-8_19 V2.0 -----------------------------------------------------------------------------Mode [Line] mOdem Welcome_MSG Quit Examine/modify asynchronous port configuration ESC: back to menu Port 01 02 03 04 05 06 Speed [115200] [115200] [115200] [115200] [115200] [115200] Setting Speed Bits Stop Parity FIFO RTS/CTS XON/XOFF Discon. Ctrl Bits [8] [8] [8] [8] [8] [8] Enter: Stop [ 1 ] [ 1 ] [ 1 ] [ 1 ] [ 1 ] [ 1 ] select Parity [None ] [None ] [None ] [None ] [None ] [None ] FIFO [yes] [yes] [yes] [yes] [yes] [yes] Value 50 bps to 921.6 Kbps 5, 6, 7, 8 1, 1.5, 2 None, Even, Odd, Mark, Space Yes, No Yes, No Yes, No None DSR off DCD off 5-8 RTS/CTS [yes] [yes] [yes] [yes] [yes] [yes] XON/XOFF [no ] [no ] [no ] [no ] [no ] [no ] Discon. ctrl [None ] [None ] [None ] [None ] [None ] [None ] Notes Transmission rate Data bits Stop bits Odd, Even, Mark, Space First In First Out Device Hardware Flow Control Software Flow Control DSR off or DCD off will not be interpreted as a disconnection. DSR off will be interpreted as a disconnection. DCD off will be interpreted as a disconnection. CN2610 User’s Manual 4. Setting Up Device Control Press ESC to return to the PORT MENU. Save When exiting the SERVER MENU, you will be prompted to save settings. Press Y to save. CN2610-8 CN2610-8_19 V2.0 SERVER MENU -----------------------------------------------------------------------------Info. Lan Adv. Host_table Route_table [User_table] Quit Examine/modify async server basic configuration Enter: select ESC: previous menu +-----------------------------------------------------+ | Warning !!! | | You had modified the configuration without saving. | | Would you save it now ? | | ‘Y: yes ‘N’: no | +-----------------------------------------------------+ You may also save all settings from the MAIN MENU by selecting sAve and then pressing Enter. Press Enter again to save, and any other key to cancel. CN2610-8 CN2610-8_19 V2.0 MAIN MENU -----------------------------------------------------------------------------Server Port seTting [sAve] Utility Restart Exit Save current configuration to Flash ROM ESC: back to menu Enter: select +-------------------------------------+ |Enter to updated, other key to cancel| +-------------------------------------+ Restart 1. From the MAIN MENU, select Restart. CN2610-8 CN2610-8_19 V2.0 MAIN MENU -----------------------------------------------------------------------------Server Port seTting sAve Utility [Restart] Exit Restart the whole system or selected async ports Enter: select 2. ESC: previous menu Select System and then press Enter to restart the system and terminate the Telnet session. CN2610-8 CN2610-8_19 V2.0 -----------------------------------------------------------------------------[System] Port Quit Restart the Async Server ESC: back to menu Enter: select +--------------------------------------------------------------------+ | Warning !!! | | Restart system will disconnect all ports and clear all status value | | ‘ Enter: continue ESC: cancel | +--------------------------------------------------------------------+ 5-9 CN2610 User’s Manual Setting Up Device Control ASPP Library Introduction The CN2610 Documentation and Software CD contains example programs that illustrate how to control an ASPP port. After uncompressing the file ASPP.tar.z, the folder \aspp\as.h will contain several basic subroutines. The following subroutines are used to control an ASPP port: 1. sio_init()—start ASPP Library 2. sio_open(ipaddr, p)—open a serial port 3. sio_close(fd)—close a serial port 4. sio_ioctl(fd, baud, mode)—configure a serial port’s baudrate, parity, etc. 5. sio_baud(fd, baud, mode)—configure serial port’s baudrate 6. sio_flowctrl(fd, mode)—configure hardware and/or software flow control 7. sio_lctrl(fd, mode)—line control 8. sio_lstatus(fd)—check line status 9. sio_flush(fd, func)—clear input/output buffer 10. sio_write(fd, buf, len)—write data 11. sio_read(fd, buf, len)—read data 12. sio_break(fd, time)—send break signals 13. sio_oqueue(fd)—check how much data is in the output buffer 14. sio_iqueue(fd)—check how much data is in the input buffer ASPP Examples for Unix In general, controlling devices attached to ASPP ports involves using the following procedures: 1. Create a socket for the command port, and then connect to the port. 2. Configure the port’s serial parameters, such as baudrate, via the command port. 3. Create a socket for the data port, and then connect to the port. 4. Transfer data via the data port. This example program continually sends the string “1234567890” to CN2610’s ASPP port and then reads back data when the program ends. Settings: Target port: parity = None, data bits = 8, stop bit = 1, software (XON/XOFF) flow control, no hardware (RTS/CTS). Syntax: # ./example ConsoleServerName [port(1) [Baud(9600)]] For example: # ./example CN2610 1 19200 Program sends “1234567890” to port 1 at 19200 bps baudrate and reads back any data on it. Environment: SCO UNIX. If you’re using another system, modify by including the file name and other variables. 5-10 CN2610 User’s Manual Setting Up Device Control ASPP Examples for Windows 1. Program testing environment: Ethernet RS-232 CN2610 16 port RS-232 Async Server 1 2 3 4 5 6 7 8 9 10 11 12 13 14 15 16 Tx Reset MENU SEL Ready Rx CN2610 Terminal Windows PC running as.exe 2. This program works like a dumb terminal. It sends all characters pressed on the keyboard to a remote connection, and then echoes the data to the screen. 3. This program sends ‘\r’ as ‘\r\n’ and ‘\n’ as ‘\r\n’. 4. All CN2610 ASPP functions are defined in the file as.h. 5. The program works on Windows 9x/NT/2000/XP/2003 as a dumb terminal. After completing the connection to CN2610, the serial port will send all characters pressed on the keyboard to the remote connection, and then echo the data to the screen. Then, the program will send ‘12345’ to Async Server’s port 1 at 19200 bps baudrate and read back any data on it. 5-11 6 Chapter 6 Setting Up Raw UDP UDP is a non connection-oriented data transmission method. By circumventing TCP’s handshaking process, UDP gains the advantages of fast transmission speed, and high transmission efficiency. The disadvantage is that UDP is unable to guarantee data integrity, since UDP does not re-assemble out-of-order packets, or retransmit packets when data is missing. UDP is an ideal transmission method if you need fast data transmission, and upper-layer application software is given the task of checking data for transmission errors. CN2610’s UDP mode supports 4 configurable groups of IP addresses, allowing data to be broadcast over the network to one or more groups of IP addresses. The following topics are covered in this chapter: Accessing the Console Utility Selecting the Application Configuring RAW UDP Mode Configuring the Serial Ports Save Restart CN2610 User’s Manual Setting Up Raw UDP Accessing the Console Utility NOTE In this section, we show how to access CN2610’s console utility by Telnet over the network. For information on using the console port, see the section “Accessing the Console Utility” in Chapter 2. 1. Telnet over the network to the server’s IP address. 2. Type 1 to choose ansi/vt100, and then press Enter. Telnet 192.168.127.254 Async Server CN2610-8 Console terminal type (1: ansi/vt100, 2: vt52) : 1 3. CN2610’s MAIN MENU will open, as shown below. Telnet 192.168.127.254 CN2610-8 CN2610-8_19 V2.0 MAIN MENU -----------------------------------------------------------------------------[Server] Port seTting sAve Utility Restart Exit Examine/modify async server node/table configuration Enter: select ESC: previous menu Use the following keystrokes to navigate CN2610’s console utility. Action Move Jump to next menu, or Select item Return to previous menu, or Close pop up selector Shortcut Key Key [Up/Down/Left/Right] Arrow Key or [Tab] Key [Enter] Key [Esc] Key Capitalized letter of the word 6-2 CN2610 User’s Manual Setting Up Raw UDP Selecting the Application Open Port Menu Æ Mode to configure the Raw UDP application. 1. From the MAIN MENU, select Port, and then press Enter. CN2610-8 CN2610-8_19 V2.0 MAIN MENU -----------------------------------------------------------------------------Server [Port] seTting sAve Utility Restart Exit Examine/modify async server ports configuration Enter: select 2. ESC: previous menu From the PORT MENU, select Mode, and then press Enter. CN2610-8 CN2610-8_19 V2.0 PORT MENU -----------------------------------------------------------------------------[Mode] Line mOdem Welcome_MSG Quit Examine/modify the operation mode of async ports Enter: select 3. ESC: previous menu The Mode page has pop-up selection lists for Application, Mode, and Description/more setting for each serial port. Use the arrow keys to move the cursor to the Application column for the port to be configured, and then press Enter. We use Port 6 to illustrate. CN2610-8 CN2610-8_19 V2.0 -----------------------------------------------------------------------------[Mode] Line mOdem Welcome_MSG Quit Examine/modify the operation mode of async ports ESC: back to menu Port 01 02 03 04 05 06 07 4. Application [NT Real COM [NT Real COM [NT Real COM [NT Real COM [NT Real COM [NT Real COM [NT Real COM Enter: ] ] ] ] ] ] ] select Mode [ASPP [ASPP [ASPP [ASPP [ASPP [ASPP [ASPP ] ] ] ] ] ] ] Description/more setting [Async Server Proprietary [Async Server Proprietary [Async Server Proprietary [Async Server Proprietary [Async Server Proprietary [Async Server Proprietary [Async Server Proprietary Protocol] Protocol] Protocol] Protocol] Protocol] Protocol] Protocol] Use the Up/Down arrow keys to select Raw UDP, and then press Enter. CN2610-8 CN2610-8_19 V2.0 -----------------------------------------------------------------------------[Mode] Line mOdem Welcome_MSG Quit Examine/modify the operation mode of async ports ESC: back to menu Port 01 02 03 04 05 06 07 08 Application [NT Real COM [NT Real COM [NT Real COM [NT Real COM [NT Real COM [NT Real COM [NT Real COM [NT Real COM Enter: select +------------------+ption/more setting ]| Disable | Server Proprietary ]| Dialin/out | Server Proprietary ]| Terminal | Server Proprietary ]| Reverse Terminal | Server Proprietary ]| Device Control | Server Proprietary ]| Multiplex | Server Proprietary ]| Printer | Server Proprietary ]| Multi-Host TTY | Server Proprietary ]| NT Real COM | ]| DRDAS | ]| Raw UDP | ]+------------------+ 6-3 Protocol] Protocol] Protocol] Protocol] Protocol] Protocol] Protocol] Protocol] CN2610 User’s Manual 5. Setting Up Raw UDP The only operation mode associated with this application is RAW UDP, which is selected automatically in the Mode column. CN2610-8 CN2610-8_19 V2.0 -----------------------------------------------------------------------------[Mode] Line mOdem Welcome_MSG Quit Examine/modify the operation mode of async ports ESC: back to menu Port 01 02 03 04 05 06 07 Application [NT Real COM [NT Real COM [NT Real COM [NT Real COM [NT Real COM [Raw UDP [NT Real COM Enter: ] ] ] ] ] ] ] select Mode [ASPP [ASPP [ASPP [ASPP [ASPP [RAW UDP [ASPP ] ] ] ] ] ] ] Description/more setting [Async Server Proprietary [Async Server Proprietary [Async Server Proprietary [Async Server Proprietary [Async Server Proprietary [Pure raw data (UDP) mode [Async Server Proprietary Protocol] Protocol] Protocol] Protocol] Protocol] ] Protocol] Configuring RAW UDP Mode 1. Move the cursor to the Description/more setting column, and then press Enter. CN2610-8 CN2610-8_19 V2.0 -----------------------------------------------------------------------------[Mode] Line mOdem Welcome_MSG Quit Examine/modify the operation mode of async ports ESC: back to menu Port 01 02 03 03 04 05 06 07 2. Application [NT Real COM [NT Real COM [NT Real COM [NT Real COM [NT Real COM [NT Real COM [Raw UDP [NT Real COM Enter: ] ] ] ] ] ] ] ] select Mode [ASPP [ASPP [ASPP [ASPP [ASPP [ASPP [RAW UDP [ASPP ] ] ] ] ] ] ] ] Description/more setting [Async Server Proprietary [Async Server Proprietary [Async Server Proprietary [Async Server Proprietary [Async Server Proprietary [Async Server Proprietary [Pure raw data (UDP) mode [Async Server Proprietary Protocol] Protocol] Protocol] Protocol] Protocol] Protocol] ] Protocol] The pop-up selector contains input/display fields for serial to LAN and LAN to serial parameters, Local Listen Port, Delimiter 1 (Hex), Delimiter 2 (Hex), and Force transmit (ms). Each item is described in detail below the figure. +----------------------------------------------------------+ | Begin End Port | | (serial to LAN) | | Dest. IP addr 1 [ ][ ][ ] | | Dest. IP addr 2 [ ][ ][ ] | | Dest. IP addr 3 [ ][ ][ ] | | Dest. IP addr 4 [ ][ ][ ] | | (LAN to serial) | | Src. IP addr 1 [ ][ ] | | Src. IP addr 2 [ ][ ][ ] | | Src. IP addr 3 [ ][ ][ ] | | Src. IP addr 4 [ ][ ][ ] | | | | Local Listen Port : [ ] | | Delimiter 1 (Hex) : [ ] | | Delimiter 2 (Hex) : [ ] | | Force transmit (ms) : [ ] | +----------------------------------------------------------+ 6-4 CN2610 User’s Manual Setting Dest. IP address 1/2/3/4 Setting Up Raw UDP Notes Necessity Defines 1 to 4 groups of IP addresses. UDP 1: Required packets will be sent through UDP port Port (2, 3, 4 are to the range of IP addresses from the Begin Optional) IP address to the End IP address. Src. IP Begin: x.x.x.x Defines IP addresses that will be allowed 1: Required address End: y.y.y.y to transmit UDP packets to CN2610’s (2, 3, 4 are 1/2/3/4 Port: 1-65535 Ethernet port. UDP packets from IP Optional) addresses in the range from Begin IP address to End IP address will be accepted through UDP port Port. Local 1-65535 The UDP port that CN2610 listens to and that Required Listen other devices must use to contact CN2610. Port The default is blank. Be sure to choose a Local Listen Port number that does not conflict with the Local Listen Port for CN2610’s other serial ports. Delimiter 00-FF Once the CN2610 receives delimiters Optional 1/2 through its serial port (or the amount of <Hex> data received exceeds 1K), it immediately packs all data currently in its buffer and sends it out the CN2610’s Ethernet port. Note: Delimiter 2 is optional. If left blank, then Delimiter 1 alone trips clearing of the buffer. Force 0-65535 0: Disable this function. Optional transmit 1 to 65535: Forces the CN2610 to try to <ms> pack serial data received during the specified time into the same data frame via UDP mode. The optimal Force Transmit timeout depends on the application, but it must be at least as large as the time required to transmit one character, for the specified baudrate. For example, assume that the serial port is set to 1200 bps, 8 data bits, 1 stop bit, and none for parity. In this case, the total number of bits required to send a character is 10 bits and the time required to transfer one character is ( 10 bits / 1200 bits/s ) * 1000 ms/s = 8.3 ms. Therefore, you should set the Force Transmit timeout to be greater than 8.3 ms. The Force Transmit timeout is specified in milliseconds and must be larger than 10 ms. If you want to send a series of characters in the same packet, the serial device attached to CN2610 should send that series of characters during a time interval less than the Force Transmit timeout, and the total length of data must be less than or equal to CN2610’s internal buffer size. The serial communication buffer size is 1 KB per port. 3. Value Begin: x.x.x.x End: y.y.y.y Port: 1 to 65535 Press ESC to return to PORT MENU Configuring the Serial Ports Open Port Menu Æ Line to configure serial port settings. 1. From the MAIN MENU, select Port, and then press Enter. 6-5 CN2610 User’s Manual Setting Up Raw UDP CN2610-8 CN2610-8_19 V2.0 MAIN MENU -----------------------------------------------------------------------------Server [Port] seTting sAve Utility Restart Exit Examine/modify async server ports configuration Enter: select 2. ESC: previous menu From the PORT MENU, select Line, and then press Enter. CN2610-8 CN2610-8_19 V2.0 PORT MENU -----------------------------------------------------------------------------Mode [Line] mOdem Welcome_MSG Quit Examine/modify asynchronous port configuration Enter: select 3. ESC: previous menu The Line page has pop-up selection lists for Port, Speed, Bits, Stop, Parity, FIFO, RTS/CTS, XON/XOFF, and Discon. ctrl for each serial port. Each item is described in detail below the figure. CN2610-8 CN2610-8_19 V2.0 -----------------------------------------------------------------------------Mode [Line] mOdem Welcome_MSG Quit Examine/modify asynchronous port configuration ESC: back to menu Port 01 02 03 04 05 06 07 08 Speed [115200] [115200] [115200] [115200] [115200] [115200] [115200] [115200] Setting Speed Bits Stop Parity FIFO RTS/CTS XON/XOFF Discon. Ctrl Bits [8] [8] [8] [8] [8] [8] [8] [8] Enter: Stop [ 1 ] [ 1 ] [ 1 ] [ 1 ] [ 1 ] [ 1 ] [ 1 ] [ 1 ] select Parity [None ] [None ] [None ] [None ] [None ] [None ] [None ] [None ] Value 50 bps to 921.6 Kbps 5, 6, 7, 8 1, 1.5, 2 None, Even, Odd, Mark, Space Yes, No Yes, No Yes, No None DSR off DCD off 4. FIFO [yes] [yes] [yes] [yes] [yes] [yes] [yes] [yes] RTS/CTS [yes] [yes] [yes] [yes] [yes] [yes] [yes] [yes] XON/XOFF [no ] [no ] [no ] [no ] [no ] [no ] [no ] [no ] Discon. ctrl [None ] [None ] [None ] [None ] [None ] [None ] [None ] [None ] Notes Transmission rate Data bits Stop bits Odd, Even, Mark, Space First In First Out Device Hardware Flow Control Software Flow Control DSR off or DCD off will not be interpreted as a disconnection. DSR off will be interpreted as a disconnection. DCD off will be interpreted as a disconnection. Press ESC to return to the PORT MENU. Save When exiting the SERVER MENU, you will be prompted to save settings. Press Y to save. 6-6 CN2610 User’s Manual Setting Up Raw UDP CN2610-8 CN2610-8_19 V2.0 SERVER MENU -----------------------------------------------------------------------------Info. Lan Adv. Host_table Route_table [User_table] Quit Examine/modify async server basic configuration Enter: select ESC: previous menu +-----------------------------------------------------+ | Warning !!! | | You had modified the configuration without saving. | | Would you save it now ? | | ‘Y: yes ‘N’: no | +-----------------------------------------------------+ You may also save all settings from the MAIN MENU by selecting sAve and then pressing Enter. Press Enter again to save, and any other key to cancel. CN2610-8 CN2610-8_19 V2.0 MAIN MENU -----------------------------------------------------------------------------Server Port seTting [sAve] Utility Restart Exit Save current configuration to Flash ROM ESC: back to menu Enter: select +-------------------------------------+ |Enter to updated, other key to cancel| +-------------------------------------+ Restart 1. From the MAIN MENU, select Restart. CN2610-8 CN2610-8_19 V2.0 MAIN MENU -----------------------------------------------------------------------------Server Port seTting sAve Utility [Restart] Exit Restart the whole system or selected async ports Enter: select 2. ESC: previous menu Select System and then press Enter to restart the system and terminate the Telnet session. CN2610-8 CN2610-8_19 V2.0 -----------------------------------------------------------------------------[System] Port Quit Restart the Async Server ESC: back to menu Enter: select +--------------------------------------------------------------------+ | Warning !!! | | Restart system will disconnect all ports and clear all status value | | ‘ Enter: continue ESC: cancel | +--------------------------------------------------------------------+ 6-7 7 Chapter 7 Setting Up the Dual-host Redundant Data Acquisition System This chapter includes information about how to set up a CN2610 Async Server, that allows the redundant terminal on the redundant Ethernet network to access CN2610’ serial ports. The DRDAS mode realizes a highly redundant structure. This chapter introduces the APIs for the following functions: Configuring Port Operation Mode – Port Menu [Mode] ¾ DRDAS Mode Configuring Port Connection Setting – Port Menu [Line] Save Restart CN2610 User’s Manual Setting Up DRDAS Configuring Port Operation Mode – Port Menu [Mode] Open Port MenuÆMode to install DRDAS mode and application parameters. 1. To enter the CN2610 MAIN MENU, use either Telnet from a network terminal, or connect directly to the CN2610 Async Server using a console terminal. Select ansi/vt100, and then press Enter. Refer to chapter 2 for more details about how to enter the MAIN MENU. Async Server CN2610-8 Console terminal type (1: ansi/vt100, 2: vt52) : 1 2. The table below is the MAIN MENU of the CN2610 Async Server. Before you begin, familiarize yourself with the cursor movement functions before starting the configuration process. Move Enter next menu Return to previous menu Fast Key Key [Up/Down/Left/Right] Arrow Key or [Tab] Key [Enter] Key [Esc] Key Capital letter of the word If you have problems using the arrow keys to move the cursor in a Windows 9x or NT environment, click the Terminal menu, choose Preferences, and then select VT100 Arrows in the Terminal Preferences window. Click OK to go back to the MAIN MENU. 3. From the MAIN MENU, use the arrow keys to select Port, and then press Enter. 7-2 CN2610 User’s Manual Setting Up DRDAS CN2610-8 CN2610-8_19 V2.0 MAIN MENU -----------------------------------------------------------------------------Server [Port] seTting sAve Utility Restart Exit Examine/modify async server ports configuration Enter: select 4. ESC: previous menu From the PORT MENU, select Mode, and then press Enter. CN2610-8 CN2610-8_19 V2.0 PORT MENU -----------------------------------------------------------------------------[Mode] Line mOdem Welcome_MSG Quit Examine/modify the operation mode of async ports Enter: select 5. ESC: previous menu In Mode, use the arrow keys to move the cursor to the application corresponding to serial ports. Here we use Port 6 as an example. CN2610-8 CN2610-8_19 V2.0 -----------------------------------------------------------------------------[Mode] Line mOdem Welcome_MSG Quit Examine/modify the operation mode of async ports ESC: back to menu Port 01 02 03 04 05 06 07 08 6. Application [NT Real COM [NT Real COM [NT Real COM [NT Real COM [NT Real COM [NT Real COM [NT Real COM [NT Real COM Enter: ] ] ] ] ] ] ] ] select Mode [ASPP [ASPP [ASPP [ASPP [ASPP [ASPP [ASPP [ASPP ] ] ] ] ] ] ] ] Description/more setting [Async Server Proprietary [Async Server Proprietary [Async Server Proprietary [Async Server Proprietary [Async Server Proprietary [Async Server Proprietary [Async Server Proprietary [Async Server Proprietary Protocol] Protocol] Protocol] Protocol] Protocol] Protocol] Protocol] Protocol] Press Enter to open the application window. Use up/down arrow keys to select DRDAS, and then press Enter to confirm using DRDAS. CN2610-8 CN2610-8_19 V2.0 -----------------------------------------------------------------------------[Mode] Line mOdem Welcome_MSG Quit Examine/modify the operation mode of async ports ESC: back to menu Port 01 02 03 04 05 06 07 08 09 10 11 12 7. Application [DRDAS [DRDAS [DRDAS [DRDAS [DRDAS [DRDAS [DRDAS [DRDAS [DRDAS [DRDAS [DRDAS [DRDAS Enter: select +------------------+ption/more setting ]| Disable |PC redundant data mode ]| Dialin/out |PC redundant data mode ]| Terminal |PC redundant data mode ]| Reverse Terminal |PC redundant data mode ]| Device Control |PC redundant data mode ]| Multiplex |PC redundant data mode ]| Printer |PC redundant data mode ]| Multi-Host TTY |PC redundant data mode ]| NT Real COM |PC redundant data mode ]| DRDAS |PC redundant data mode ]| Raw UDP |PC redundant data mode ]+------------------+PC redundant data mode ] ] ] ] ] ] ] ] ] ] ] ] Repeat Step 6 to configure port settings. For example, you can perform the following steps to configure Port 1 to Port 8 for the DRDAS application. 7-3 CN2610 User’s Manual Setting Up DRDAS CN2610-8 CN2610-8_19 V2.0 -----------------------------------------------------------------------------[Mode] Line mOdem Welcome_MSG Quit Examine/modify the operation mode of async ports ESC: back to menu Port 01 02 03 04 05 06 07 08 Application [DRDAS [DRDAS [DRDAS [DRDAS [DRDAS [DRDAS [DRDAS [DRDAS Enter: ] ] ] ] ] ] ] ] select Mode [DRDAS [DRDAS [DRDAS [DRDAS [DRDAS [DRDAS [DRDAS [DRDAS ] ] ] ] ] ] ] ] Description/more setting [Dual-PC redundant data mode [Dual-PC redundant data mode [Dual-PC redundant data mode [Dual-PC redundant data mode [Dual-PC redundant data mode [Dual-PC redundant data mode [Dual-PC redundant data mode [Dual-PC redundant data mode ] ] ] ] ] ] ] ] DRDAS Mode DRDAS mode supports a dual-host redundant application structure on the redundant network. 1. Move the cursor to the Description/more setting column, and then press Enter to open the settings window. Each serial port has its own TCP data port number and TCP command port number. +-----------------------------------------------------+ | TCP data port : [955] | | TCP command port : [971] | | Primary IP addr : [ ] | | Backup 1 IP addr : [ ] | | Backup 2 IP addr : [ ] | | Backup 3 IP addr : [ ] | | TCP alive check time : [0 ] minutes | +-----------------------------------------------------+ 2. Every CN2610 port has the ability to connect to 4 different IP addresses at the same time. Primary IP addr has to be configured as the IP address of the primary host controlling the serial port, and Backup n IP addr has to be configured as the IP address of the redundant host. When the primary host disconnects for an unknown reason, CN2610 will use the switching library to let backup IPs take over. In this way, CN2610’s control ability and the data flow will be transferred to the backup host, realizing a highly redundant system. In the mean time, the primary host’s dual Ethernet ports and those of the backup host will receive the same uploaded serial data. In the specified period of time, if one of the secondary IPs tries to send commands to the serial device, the commands will be discarded once they reach the CN2610, since the Primary IP is the only IP address that can conduct by-directional transmission. The backup IPs can only receive data from the CN2610, but cannot send commands to the serial device. 7-4 CN2610 User’s Manual Setting Up DRDAS +-----------------------------------------------------+ | TCP data port : [955] | | TCP command port : [971] | | Primary IP addr : [ ] | | Backup 1 IP addr : [ ] | | Backup 2 IP addr : [ ] | | Backup 3 IP addr : [ ] | | TCP alive check time : [0 ] minutes | +-----------------------------------------------------+ Setting Value Notes Necessity TCP data port number Via the data port, users can retrieve data through the async line. Yes TCP command port number Via the command port, users can issue commands Yes across the network to set the line’s configuration parameters, such as baudrate, data bits, flow control condition, etc. Primary IP addr IP address The primary host’s IP address. Yes If left blank, then every host on the network cannot access the serial port. Backup 1 IP addr IP address Backup host’s IP address Optional Backup 2 IP addr IP address Backup host’s IP address Optional Backup 3 IP addr IP address Backup host’s IP address Optional TCP alive check time 3. 0-99 minute Specifies the time slice for checking whether the TCP connection is alive. If there is no response, CN2610 will reset the port and disconnect the original connection. Optional Press Esc to return to PORT MENU. Configuring Port Connection Settings—Port Menu [Line] In PORT MENU [Line], you can set the line settings for the particular type of device being used. 1. From the MAIN MENU, use the arrow keys to select Port, and then press Enter. CN2610-8 CN2610-8_19 V2.0 PORT MENU -----------------------------------------------------------------------------Server [Port] seTting sAve Utility Restart Exit Examine/modify async server ports configuration Enter: select 2. ESC: previous menu From the PORT MENU, select Line, and then press Enter. CN2610-8 CN2610-8_19 V2.0 PORT MENU -----------------------------------------------------------------------------Mode [Line] mOdem Welcome_MSG Quit Examine/modify asynchronous port configuration Enter: select ESC: previous menu 7-5 CN2610 User’s Manual 3. Setting Up DRDAS Specify the relevant settings. CN2610-8 CN2610-8_19 V2.0 -----------------------------------------------------------------------------Mode [Line] mOdem Welcome_MSG Quit Examine/modify asynchronous port configuration ESC: back to menu Port 01 02 03 04 05 06 07 08 09 10 11 12 13 14 15 16 Speed [115200] [115200] [115200] [115200] [115200] [115200] [115200] [115200] [115200] [115200] [115200] [115200] [115200] [115200] [115200] [115200] Enter: Bits [8] [8] [8] [8] [8] [8] [8] [8] [8] [8] [8] [8] [8] [8] [8] [8] Setting Stop [ 1 ] [ 1 ] [ 1 ] [ 1 ] [ 1 ] [ 1 ] [ 1 ] [ 1 ] [ 1 ] [ 1 ] [ 1 ] [ 1 ] [ 1 ] [ 1 ] [ 1 ] [ 1 ] select Parity [None ] [None ] [None ] [None ] [None ] [None ] [None ] [None ] [None ] [None ] [None ] [None ] [None ] [None ] [None ] [None ] FIFO [yes] [yes] [yes] [yes] [yes] [yes] [yes] [yes] [yes] [yes] [yes] [yes] [yes] [yes] [yes] [yes] RTS/CTS [yes] [yes] [yes] [yes] [yes] [yes] [yes] [yes] [yes] [yes] [yes] [yes] [yes] [yes] [yes] [yes] XON/XOFF [no ] [no ] [no ] [no ] [no ] [no ] [no ] [no ] [no ] [no ] [no ] [no ] [no ] [no ] [no ] [no ] Value Discon. ctrl [None ] [None ] [None ] [None ] [None ] [None ] [None ] [None ] [None ] [None ] [None ] [None ] [None ] [None ] [None ] [None ] Notes Speed 50 to 921.6 Kbps Transmission speed Bits 5/6/7/8 Data bit Stop 1/1.5/2 Stop bit Parity None/Even/Odd/Mark/Space Parity check FIFO Yes/No FIFO setting. Default is Yes RTS/CTS Yes/No Hardware flow control XON/XOFF Yes/No Software flow control Discon. Ctrl None/DSR off/DCD off Inactive for these modes 4. Repeat the above steps to set all lines. 5. Press Esc to return to PORT MENU. 1. Press Y to save previous settings when exiting PORT MENU. Save 7-6 CN2610 User’s Manual Setting Up DRDAS CN2610-8 CN2610-8_19 V2.0 -----------------------------------------------------------------------------[Mode] Line mOdem Welcome_MSG Quit Examine/modify the operation mode of async ports ESC: back to menu Enter: select +------------------------------------------+ | Warning !!! | | If any field changed in this menu, | | use [Restart] [System] to take effect | | Press any key to continue. | +------------------------------------------+ 2. You may also save later. From the MAIN MENU, select sAve to save all changed settings, and then press Enter to confirm. CN2610-8 CN2610-8_19 V2.0 -----------------------------------------------------------------------------Server Port seTting [sAve] Utility Restart Exit Save current configuration to Flash ROM ESC: back to menu Enter: select +-------------------------------------+ |Enter to updated, other key to cancel| +-------------------------------------+ Restart 1. Return to MAIN MENU and select Restart. CN2610-8 CN2610-8_19 V2.0 MAIN MENU -----------------------------------------------------------------------------Server Port seTting sAve Utility [Restart] Exit Restart the whole system or selected async ports Enter: select 2. ESC: previous menu Select System, and then press Enter to continue. 7-7 CN2610 User’s Manual Setting Up DRDAS CN2610-8 CN2610-8_19 V2.0 -----------------------------------------------------------------------------[System] Port Quit Restart the Async Server ESC: back to menu Enter: select +--------------------------------------------------------------------+ | Warning !!! | | Restart system will disconnect all ports and clear all status value | | ‘ Enter: continue ESC: cancel | +--------------------------------------------------------------------+ 3. The system will restart and the Telnet/Console session will terminate. Enter the MAIN MENU again to check whether the settings have been changed. 7-8 8 Chapter 8 Setting Up Reverse Terminal In this chapter, we show how to use CN2610 to connect terminals to a computer over an Ethernet network. The following topics are covered in this chapter: Accessing the Console Utility Selecting the Application Configuring RTELNET Mode Configuring the Serial Ports Save Restart CN2610 User’s Manual Setting Up Reverse Terminal Accessing the Console Utility NOTE In this section, we show how to access CN2610’s console utility by Telnet over the network. For information on using the console port, see the section “Accessing the Console Utility” in Chapter 2. 1. Telnet over the network to the server’s IP address. 2. Type 1 to choose ansi/vt100, and then press Enter. Telnet 192.168.127.254 Async Server CN2610-8 Console terminal type (1: ansi/vt100, 2: vt52) : 1 3. CN2610’s MAIN MENU will open, as shown below. Telnet 192.168.127.254 CN2610-8 CN2610-8_19 V2.0 MAIN MENU -----------------------------------------------------------------------------[Server] Port seTting sAve Utility Restart Exit Examine/modify async server node/table configuration Enter: select ESC: previous menu Use the following keystrokes to navigate CN2610’s console utility. Action Move Jump to next menu, or Select item Return to previous menu, or Close pop up selector Shortcut Key Key [Up/Down/Left/Right] Arrow Key or [Tab] Key [Enter] Key [Esc] Key Capitalized letter of the word 8-2 CN2610 User’s Manual Setting Up Reverse Terminal Selecting the Application Open Port Menu Æ Mode to configure the Reverse Terminal application. 1. From the MAIN MENU, select Port, and then press Enter. CN2610-8 CN2610-8_19 V2.0 MAIN MENU -----------------------------------------------------------------------------Server [Port] seTting sAve Utility Restart Exit Examine/modify async server ports configuration Enter: select 2. ESC: previous menu From the PORT MENU, select Mode, and then press Enter. CN2610-8 CN2610-8_19 V2.0 PORT MENU -----------------------------------------------------------------------------[Mode] Line mOdem Welcome_MSG Quit Examine/modify the operation mode of async ports Enter: select 3. ESC: previous menu The Mode page has pop-up selection lists for Application, Mode, and Description/more setting for each serial port. Use the arrow keys to move the cursor to the Application column for the port to be configured, and then press Enter. We use Port 6 to illustrate. CN2610-8 CN2610-8_19 V2.0 -----------------------------------------------------------------------------[Mode] Line mOdem Welcome_MSG Quit Examine/modify the operation mode of async ports ESC: back to menu Port 01 02 03 04 05 06 07 08 4. Application [NT Real COM [NT Real COM [NT Real COM [NT Real COM [NT Real COM [NT Real COM [NT Real COM [NT Real COM Enter: ] ] ] ] ] ] ] ] select Mode [ASPP [ASPP [ASPP [ASPP [ASPP [ASPP [ASPP [ASPP ] ] ] ] ] ] ] ] Description/more setting [Async Server Proprietary [Async Server Proprietary [Async Server Proprietary [Async Server Proprietary [Async Server Proprietary [Async Server Proprietary [Async Server Proprietary [Async Server Proprietary Protocol] Protocol] Protocol] Protocol] Protocol] Protocol] Protocol] Protocol] Use up/down arrow keys to select Reverse Terminal, and then press Enter. CN2610-8 CN2610-8_19 V2.0 -----------------------------------------------------------------------------[Mode] Line mOdem Welcome_MSG Quit Examine/modify the operation mode of async ports ESC: back to menu Port 01 02 03 04 05 06 07 08 Application [NT Real COM [NT Real COM [NT Real COM [NT Real COM [NT Real COM [NT Real COM [NT Real COM [NT Real COM Enter: select +------------------+ption/more setting ]| Disable | Server Proprietary ]| Dialin/out | Server Proprietary ]| Terminal | Server Proprietary ]| Reverse Terminal | Server Proprietary ]| Device Control | Server Proprietary ]| Multiplex | Server Proprietary ]| Printer | Server Proprietary ]| Multi-Host TTY | Server Proprietary ]| NT Real COM | ]| DRDAS | ]| Raw UDP | ]+------------------+ 8-3 Protocol] Protocol] Protocol] Protocol] Protocol] Protocol] Protocol] Protocol] CN2610 User’s Manual 5. Setting Up Reverse Terminal The only operation mode associated with this application is Reverse Terminal mode, which is selected automatically in the Mode column. RTELNET mode allows Ethernet hosts to access serial hosts attached to CN2610’s serial ports, which is the reverse direction provided by CN2610’s terminal application. CN2610-8 CN2610-8_19 V2.0 -----------------------------------------------------------------------------[Mode] Line mOdem Welcome_MSG Quit Examine/modify the operation mode of async ports ESC: back to menu Port 01 02 03 04 05 06 07 Enter: Application [NT Real COM [NT Real COM [NT Real COM [NT Real COM [NT Real COM [Reverse Terminal [NT Real COM ] ] ] ] ] ] ] select Mode [ASPP [ASPP [ASPP [ASPP [ASPP [RTELNET [ASPP ] ] ] ] ] ] ] Description/more setting [Async Server Proprietary [Async Server Proprietary [Async Server Proprietary [Async Server Proprietary [Async Server Proprietary [Reverse Telnet mode [Async Server Proprietary Protocol] Protocol] Protocol] Protocol] Protocol] ] Protocol] Configuring RTELNET Mode Reverse Telnet, or RTELNET, supports the Telnet program used by Ethernet hosts to login to serial hosts. Ethernet hosts recognize serial ports by the specified source IP address, or by the TCP port number followed by CN2610’s IP address. 1. Move the cursor to the Description/more setting column, and then press Enter. CN2610-8 CN2610-8_19 V2.0 -----------------------------------------------------------------------------[Mode] Line mOdem Welcome_MSG Quit Examine/modify the operation mode of async ports ESC: back to menu Port 01 02 03 04 05 06 07 2. Enter: Application [NT Real COM [NT Real COM [NT Real COM [NT Real COM [NT Real COM [Reverse Terminal [NT Real COM ] ] ] ] ] ] ] select Mode [ASPP [ASPP [ASPP [ASPP [ASPP [RTELNET [ASPP ] ] ] ] ] ] ] Description/more setting [Async Server Proprietary [Async Server Proprietary [Async Server Proprietary [Async Server Proprietary [Async Server Proprietary [Reverse Telnet mode [Async Server Proprietary Protocol] Protocol] Protocol] Protocol] Protocol] ] Protocol] The pop-up selector contains input/display fields for TCP port, Source IP address, Destination IP addr, Inactivity time, Map keys <CR-LF> to, Authentication type, and TCP alive check time. Each item is described in detail below the figure. +------------------------------------------------+ | TCP port : [4006 ] | | Source IP address : [ ] | | Destination IP addr : [ ] | | Inactivity time : [0 ] minutes | | Map keys <CR-LF> to : [CR-LF] | | Authentication type : [none ] | | TCP alive check time : [0 ] minutes | +------------------------------------------------+ 8-4 CN2610 User’s Manual Setting TCP port Source IP address Destination IP addr Map Keys <CR-LF> to Inactivity time Authentication type TCP alive check time 3. Setting Up Reverse Terminal Value number Notes Each of CN2610’s serial ports is mapped to a TCP port. To avoid conflicts with the TCP port numbers for CN251’s other serial ports, use the default values: 4001 for port 1, 4002 for port 2, etc. IP address for Specify an IP address for this port for the port application purposes. If left blank, CN2610 will use its own IP address, in which case you will need to specify different TCP port numbers for different serial ports. IP address Assign a host IP address on the LAN for exclusive port access. If left blank, all hosts on the network will have access to this port. CR/LF/CR-LF When you enter the string <CR-LF>, CN2610 will determine whether to send <CR>, <LF>, or <CR-LF>. 0-99 minutes Idle time before the port is disconnected automatically. If set to 0 minutes, the port will not disconnect. None/local None: Authentication is not required. /server local: Check the ID stored in the User_table (defined under the SERVER MENU). Server: Check the ID with the external RADIUS server. Refer to Appendix C for RADIUS installation information. 0-99 minutes The time period CN2610 waits before checking if the TCP connection is alive or not. If no response is received, CN2610 will reset the port and terminate the connection. Necessity Optional Optional Optional Optional Optional Optional Optional Press Esc to return to PORT MENU. Configuring the Serial Ports Open Port Menu Æ Line to configure serial port settings. 1. From the MAIN MENU, select Port, and then press Enter. CN2610-8 CN2610-8_19 V2.0 MAIN MENU -----------------------------------------------------------------------------Server [Port] seTting sAve Utility Restart Exit Examine/modify async server ports configuration Enter: select 2. ESC: previous menu From the PORT MENU, select Line, and then press Enter. 8-5 CN2610 User’s Manual Setting Up Reverse Terminal CN2610-8 CN2610-8_19 V2.0 PORT MENU -----------------------------------------------------------------------------Mode [Line] mOdem Welcome_MSG Quit Examine/modify asynchronous port configuration Enter: select 3. ESC: previous menu The Line page has pop-up selection lists for Port, Speed, Bits, Stop, Parity, FIFO, RTS/CTS, XON/XOFF, and Discon. ctrl for each serial port. Each item is described in detail below the figure. CN2610-8 CN2610-8_19 V2.0 -----------------------------------------------------------------------------Mode [Line] mOdem Welcome_MSG Quit Examine/modify asynchronous port configuration ESC: back to menu Port 01 02 03 04 05 06 07 08 Speed [115200] [115200] [115200] [115200] [115200] [115200] [115200] [115200] Setting Speed Bits Stop Parity FIFO RTS/CTS XON/XOFF Discon. Ctrl Bits [8] [8] [8] [8] [8] [8] [8] [8] Enter: Stop [ 1 ] [ 1 ] [ 1 ] [ 1 ] [ 1 ] [ 1 ] [ 1 ] [ 1 ] select Parity [None ] [None ] [None ] [None ] [None ] [None ] [None ] [None ] Value 50 bps to 921.6 Kbps 5, 6, 7, 8 1, 1.5, 2 None, Even, Odd, Mark, Space Yes, No Yes, No Yes, No None DSR off DCD off 4. FIFO [yes] [yes] [yes] [yes] [yes] [yes] [yes] [yes] Press ESC to return to the Port Menu. 8-6 RTS/CTS [yes] [yes] [yes] [yes] [yes] [yes] [yes] [yes] XON/XOFF [no ] [no ] [no ] [no ] [no ] [no ] [no ] [no ] Discon. ctrl [None ] [None ] [None ] [None ] [None ] [None ] [None ] [None ] Notes Transmission rate Data bits Stop bits Odd, Even, Mark, Space First In First Out Device Hardware Flow Control Software Flow Control DSR off or DCD off will not be interpreted as a disconnection. DSR off will be interpreted as a disconnection. DCD off will be interpreted as a disconnection. CN2610 User’s Manual Setting Up Reverse Terminal Save When exiting the SERVER MENU, you will be prompted to save settings. Press Y to save. CN2610-8 CN2610-8_19 V2.0 SERVER MENU -----------------------------------------------------------------------------Info. Lan Adv. Host_table Route_table [User_table] Quit Examine/modify async server basic configuration Enter: select ESC: previous menu +-----------------------------------------------------+ | Warning !!! | | You had modified the configuration without saving. | | Would you save it now ? | | ‘Y: yes ‘N’: no | +-----------------------------------------------------+ You may also save all settings from the MAIN MENU by selecting sAve and then pressing Enter. Press Enter again to save, and any other key to cancel. CN2610-8 CN2610-8_19 V2.0 MAIN MENU -----------------------------------------------------------------------------Server Port seTting [sAve] Utility Restart Exit Save current configuration to Flash ROM ESC: back to menu Enter: select +-------------------------------------+ |Enter to updated, other key to cancel| +-------------------------------------+ Restart 1. From the MAIN MENU, select Restart. CN2610-8 CN2610-8_19 V2.0 MAIN MENU -----------------------------------------------------------------------------Server Port seTting sAve Utility [Restart] Exit Restart the whole system or selected async ports Enter: select 2. ESC: previous menu Select System and then press Enter to restart the system and terminate the Telnet session. CN2610-8 CN2610-8_19 V2.0 -----------------------------------------------------------------------------[System] Port Quit Restart the Async Server ESC: back to menu Enter: select +--------------------------------------------------------------------+ | Warning !!! | | Restart system will disconnect all ports and clear all status value | | ‘ Enter: continue ESC: cancel | +--------------------------------------------------------------------+ 8-7 9 Chapter 9 Setting Up Terminal In this chapter, we describe the steps you should follow to configure Moxa CN2610 as a Terminal Server. CN2610 provides Telnet and Rlogin protocols for terminals to establish connections with UNIX hosts. Two terminal modes are supported—ASCII terminal with up to 8 simultaneous sessions, and Binary terminal with one session for one user. Terminals can be connected directly to one of CN2610’s RS-232 ports, or connected from a remote site by using external modems. The following topics are covered in this chapter: Accessing the Console Utility Selecting the Application Configuring TERM_ASC Mode Configuring TERM_BIN Mode Configuring the Serial Ports Save Restart CN2610 User’s Manual Setting Up Terminal Accessing the Console Utility NOTE In this section, we show how to access CN2610’s console utility by Telnet over the network. For information on using the console port, see the section “Accessing the Console Utility” in Chapter 2. 1. Telnet over the network to the server’s IP address. 2. Type 1 to choose ansi/vt100, and then press Enter. Telnet 192.168.127.254 Async Server CN2610-8 Console terminal type (1: ansi/vt100, 2: vt52) : 1 3. CN2610’s MAIN MENU will open, as shown below. Telnet 192.168.127.254 CN2610-8 CN2610-8_19 V2.0 MAIN MENU -----------------------------------------------------------------------------[Server] Port seTting sAve Utility Restart Exit Examine/modify async server node/table configuration Enter: select ESC: previous menu Use the following keystrokes to navigate CN2610’s console utility. Action Move Jump to next menu, or Select item Return to previous menu, or Close pop up selector Shortcut Key Key [Up/Down/Left/Right] Arrow Key or [Tab] Key [Enter] Key [Esc] Key Capitalized letter of the word 9-2 CN2610 User’s Manual Setting Up Terminal Selecting the Application Open Port Menu Æ Mode to configure the Terminal application. 1. From the MAIN MENU, select Port, and then press Enter. CN2610-8 CN2610-8_19 V2.0 MAIN MENU -----------------------------------------------------------------------------Server [Port] seTting sAve Utility Restart Exit Examine/modify async server ports configuration Enter: select 2. ESC: previous menu From the PORT MENU, select Mode, and then press Enter. CN2610-8 CN2610-8_19 V2.0 PORT MENU -----------------------------------------------------------------------------[Mode] Line mOdem Welcome_MSG Quit Examine/modify the operation mode of async ports Enter: select 3. ESC: previous menu The Mode page has pop-up selection lists for Application, Mode, and Description/more setting for each serial port. Use the arrow keys to move the cursor to the Application column for the port to be configured, and then press Enter. We use Port 6 to illustrate. CN2610-8 CN2610-8_19 V2.0 -----------------------------------------------------------------------------[Mode] Line mOdem Welcome_MSG Quit Examine/modify the operation mode of async ports ESC: back to menu Port 01 02 03 04 05 06 07 08 4. Application [NT Real COM [NT Real COM [NT Real COM [NT Real COM [NT Real COM [NT Real COM [NT Real COM [NT Real COM Enter: ] ] ] ] ] ] ] ] select Mode [ASPP [ASPP [ASPP [ASPP [ASPP [ASPP [ASPP [ASPP ] ] ] ] ] ] ] ] Description/more setting [Async Server Proprietary [Async Server Proprietary [Async Server Proprietary [Async Server Proprietary [Async Server Proprietary [Async Server Proprietary [Async Server Proprietary [Async Server Proprietary Protocol] Protocol] Protocol] Protocol] Protocol] Protocol] Protocol] Protocol] Use the up/down arrow keys to select Terminal, and then press Enter. CN2610-8 CN2610-8_19 V2.0 -----------------------------------------------------------------------------[Mode] Line mOdem Welcome_MSG Quit Examine/modify the operation mode of async ports ESC: back to menu Port 01 02 03 04 05 06 07 08 Application [NT Real COM [NT Real COM [NT Real COM [NT Real COM [NT Real COM [NT Real COM [NT Real COM [NT Real COM Enter: select +------------------+ption/more setting ]| Disable | Server Proprietary ]| Dialin/out | Server Proprietary ]| Terminal | Server Proprietary ]| Reverse Terminal | Server Proprietary ]| Device Control | Server Proprietary ]| Multiplex | Server Proprietary ]| Printer | Server Proprietary ]| Multi-Host TTY | Server Proprietary ]| NT Real COM | ]| DRDAS | ]| Raw UDP | ]+------------------+ 9-3 Protocol] Protocol] Protocol] Protocol] Protocol] Protocol] Protocol] Protocol] CN2610 User’s Manual 5. Setting Up Terminal TERM_ASC mode is selected by default. CN2610-8 CN2610-8_19 V2.0 -----------------------------------------------------------------------------[Mode] Line mOdem Welcome_MSG Quit Examine/modify the operation mode of async ports ESC: back to menu Port 01 02 03 04 05 06 07 Application [NT Real COM [NT Real COM [NT Real COM [NT Real COM [NT Real COM [Terminal [NT Real COM Enter: ] ] ] ] ] ] ] select Mode [ASPP ] [ASPP ] [ASPP ] [ASPP ] [ASPP ] [TERM_ASC ] [ASPP ] Description/more setting [Async Server Proprietary Protocol] [Async Server Proprietary Protocol] [Async Server Proprietary Protocol] [Async Server Proprietary Protocol] [Async Server Proprietary Protocol] [ASCII Termianl mode (8 sessions) ] [Async Server Proprietary Protocol] After configuring a port for the Terminal application, you will need to choose between one of two operation modes: TERM_ASC and TERM_BIN. The default mode, TERM_ASC (short for Terminal ASCII), supports 8 terminal sessions. The other option, TERM_BIN (short for Terminal Binary) only supports 1 session. Configuring TERM_ASC Mode TERM_ASC supports 8 terminal sessions for each terminal. Hot keys are used to switch between different sessions. 1. Move the cursor to the Mode column for the port and press Enter. CN2610-8 CN2610-8_19 V2.0 -----------------------------------------------------------------------------[Mode] Line mOdem Welcome_MSG Quit Examine/modify the operation mode of async ports ESC: back to menu Port 01 02 03 04 05 06 07 2. Application [NT Real COM [NT Real COM [NT Real COM [NT Real COM [NT Real COM [Terminal [NT Real COM Enter: ] ] ] ] ] ] ] select Mode [ASPP ] [ASPP ] [ASPP ] [ASPP ] [ASPP ] [TERM_ASC] [ASPP ] Description/more setting [Async Server Proprietary Protocol] [Async Server Proprietary Protocol] [Async Server Proprietary Protocol] [Async Server Proprietary Protocol] [Async Server Proprietary Protocol] [ASCII Termianl mode (8 sessions) ] [Async Server Proprietary Protocol] Use the arrow keys to highlight TERM_ASC, and then press Enter. CN2610-8 CN2610-8_19 V2.0 -----------------------------------------------------------------------------[Mode] Line mOdem Welcome_MSG Quit Examine/modify the operation mode of async ports ESC: back to menu Port 01 02 03 04 05 06 07 08 Application [NT Real COM [NT Real COM [NT Real COM [NT Real COM [NT Real COM [Terminal [NT Real COM [NT Real COM Enter: ] ] ] ] ] ] ] ] select Mode Description/more setting [ASPP ] [Async Server Proprietary Protocol] [ASPP ] [Async Server Proprietary Protocol] [ASPP ] [Async Server Proprietary Protocol] [ASPP ]+----------+rver Proprietary Protocol] [ASPP ]| TERM_ASC |rver Proprietary Protocol] [TERM_ASC]| TERM_BIN |rminal mode (8 sessions) ] [ASPP ]+----------+rver Proprietary Protocol] [ASPP ] [Async Server Proprietary Protocol] 9-4 CN2610 User’s Manual 3. Setting Up Terminal Move the cursor to the Description/more setting column and press Enter. CN2610-8 CN2610-8_19 V2.0 -----------------------------------------------------------------------------[Mode] Line mOdem Welcome_MSG Quit Examine/modify the operation mode of async ports ESC: back to menu Port 01 02 03 04 05 06 07 08 4. Enter: Application [NT Real COM [NT Real COM [NT Real COM [NT Real COM [NT Real COM [Terminal [NT Real COM [NT Real COM ] ] ] ] ] ] ] ] select Mode [ASPP ] [ASPP ] [ASPP ] [ASPP ] [ASPP ] [TERM_ASC] [ASPP ] [ASPP ] Description/more setting [Async Server Proprietary Protocol] [Async Server Proprietary Protocol] [Async Server Proprietary Protocol] [Async Server Proprietary Protocol] [Async Server Proprietary Protocol] [ASCII Terminal mode (8 sessions) ] [Async Server Proprietary Protocol] [Async Server Proprietary Protocol] The pop-up selector contains input/display fields for Key Mapping, Auto-link protocol, Link by input IP, Auto-login prompt, Terminal type, Inactivity time, Authentication type, and TCP alive check time. Each item is described in detail below the figure. +------------------------------------------------+ | Key Mapping : | | Max. Sessions : [ 4 ] | | Change Session : [^T] | | Quit : [^E] | | Break : [ ] | | Interrupt : [ ] | | Auto-link protocol : [none ] | | Telnet TCP port : [23 ] | | Primary host IP : [ ] | | Link by input IP : [Disable] | | Secondary host IP : [ ] | | Auto-login prompt : [ogin: ] | | Password prompt : [assword: ] | | Login user name : [ ] | | Login password : [ ] | | Terminal type : [ansi ] | | Inactivity time : [0 ] minutes | | Authentication type : [local ] | | TCP alive check time : [0 ] minutes | +------------------------------------------------+ Setting Key Mapping Max. Sessions Change Session Quit Erase-line Break Interrupt Auto-link protocol Value Notes 1-8 ^T ^E Configure the max. number of sessions Hot key for changing sessions Hot key for quitting a session Hot key for erase-line Hot key for sending Telnet break signal Hot key for program termination None/Telnet/ None: Do not connect to the host Rlogin automatically. Telnet: Connects to the host automatically by Telnet. Rlogin: Connects to the host automatically by Rlogin. 9-5 Necessity Optional Optional Optional Optional Optional Optional Optional CN2610 User’s Manual Setting Telnet TCP port Setting Up Terminal Notes Necessity Enter a number or leave the space blank. Optional If not specified, then by default, port 23 is used. If you want to use Telnet without a TCP port number, set this option to 23. Primary host IP IP address or If specified, designates a ‘permanent’ Optional the name host to which the terminal will always be defined in the connected. [Host] table Link by input IP Enable/ For users to enter the connection IP Optional Disable address manually. Secondary host IP IP address or If specified, designates a secondary Optional the name ‘permanent’ host to which the terminal defined in the will be connected. [Host] table. Auto-login prompt ogin: Send ID information when this prompt is Optional received. Password prompt assword: Send Password information when this Optional prompt is received Login user name Login ID Optional Login password Login Password Optional Terminal type ansi Terminal type for outgoing connection Optional Inactivity time 0-99 minutes Idle time before the port is disconnected Optional automatically. If set to 0 minutes, the port will not disconnect. Authentication None/local/ None: Authentication is not required. Optional type server local: Check the ID stored in the User_table (defined under the SERVER MENU). Server: Check the ID with the external RADIUS server. Refer to Appendix C for RADIUS installation information. TCP alive check 0-99 minutes The time period CN2610 waits before Optional time checking if the TCP connection is alive or not. If no response is received, CN2610 will reset the port and terminate the connection. 5. Value 23 Press Esc to return to the PORT MENU. Configuring TERM_BIN Mode TERM_BIN (Terminal Binary) mode is used as an application protocol. For example, it can be used to transfer files with XMODEM or ZMODEM. You are only allowed to open one terminal session at a time when in Terminal Binary mode. 9-6 CN2610 User’s Manual 1. Setting Up Terminal Move the cursor to the Mode column for the port and press Enter. CN2610-8 CN2610-8_19 V2.0 -----------------------------------------------------------------------------[Mode] Line mOdem Welcome_MSG Quit Examine/modify the operation mode of async ports ESC: back to menu Port 01 02 03 04 05 06 07 2. Application [NT Real COM [NT Real COM [NT Real COM [NT Real COM [NT Real COM [Terminal [NT Real COM Enter: ] ] ] ] ] ] ] select Mode [ASPP ] [ASPP ] [ASPP ] [ASPP ] [ASPP ] [TERM_ASC] [ASPP ] Description/more setting [Async Server Proprietary Protocol] [Async Server Proprietary Protocol] [Async Server Proprietary Protocol] [Async Server Proprietary Protocol] [Async Server Proprietary Protocol] [ASCII Termianl mode (8 sessions) ] [Async Server Proprietary Protocol] Use the arrow keys to highlight TERM_BIN, and then press Enter. CN2610-8 CN2610-8_19 V2.0 -----------------------------------------------------------------------------[Mode] Line mOdem Welcome_MSG Quit Examine/modify the operation mode of async ports ESC: back to menu Port 01 02 03 04 05 06 07 08 3. Application [NT Real COM [NT Real COM [NT Real COM [NT Real COM [NT Real COM [Terminal [NT Real COM [NT Real COM Enter: ] ] ] ] ] ] ] ] select Mode Description/more setting [ASPP ] [Async Server Proprietary Protocol] [ASPP ] [Async Server Proprietary Protocol] [ASPP ] [Async Server Proprietary Protocol] [ASPP ]+----------+rver Proprietary Protocol] [ASPP ]| TERM_ASC |rver Proprietary Protocol] [TERM_ASC]| TERM_BIN |rminal mode (8 sessions) ] [ASPP ]+----------+rver Proprietary Protocol] [ASPP ] [Async Server Proprietary Protocol] Move the cursor to the Description/more setting column and press Enter. CN2610-8 CN2610-8_19 V2.0 -----------------------------------------------------------------------------[Mode] Line mOdem Welcome_MSG Quit Examine/modify the operation mode of async ports ESC: back to menu Port 01 02 03 04 05 06 07 08 4. Application [NT Real COM [NT Real COM [NT Real COM [NT Real COM [NT Real COM [Terminal [NT Real COM [NT Real COM Enter: ] ] ] ] ] ] ] ] select Mode [ASPP ] [ASPP ] [ASPP ] [ASPP ] [ASPP ] [TERM_BIN] [ASPP ] [ASPP ] Description/more setting [Async Server Proprietary Protocol] [Async Server Proprietary Protocol] [Async Server Proprietary Protocol] [Async Server Proprietary Protocol] [Async Server Proprietary Protocol] [Binary Terminal mode (1 session) ] [Async Server Proprietary Protocol] [Async Server Proprietary Protocol] The pop-up selector contains input/display fields for Quit key, Auto-link protocol, Link by input IP, Auto-login prompt, Terminal type, Inactivity time, Authentication type, and TCP alive check time. Each item is described in detail below the figure. 9-7 CN2610 User’s Manual Setting Up Terminal +------------------------------------------------+ | Quit key : [^E] | | Auto-link protocol : [none ] | | Telnet TCP port : [23 ] | | Primary host IP : [ ] | | Link by input IP : [Disable] | | Secondary host IP : [ ] | | Auto-login prompt : [ogin: ] | | Password prompt : [assword: ] | | Login user name : [ ] | | Login password : [ ] | | Terminal type : [ansi ] | | Inactivity time : [0 ] minutes | | Authentication type : [local ] | | TCP alive check time : [0 ] minutes | +------------------------------------------------+ Setting Quit Key Value Notes ^E Defines the Quit key used to disconnect the link between the current terminal session and the remote host. It may be left blank for binary communication. Auto-link protocol None/Telnet/ None: Do not connect to the host Rlogin automatically. Telnet: Connects to the host automatically by Telnet. Rlogin: Connects to the host automatically by Rlogin. Telnet TCP port 23 Enter a number or leave the space blank. If not specified, then by default, port 23 is used. If you want to use Telnet without a TCP port number, set this option to 23. Primary host IP IP address or If specified, designates a ‘permanent’ the name host to which the terminal will always be defined in the connected. [Host] table Link by input IP Enable/ For users to enter the connection IP Disable address manually. Secondary host IP IP address or If specified, designates a secondary the name ‘permanent’ host to which the terminal defined in the will be connected. [Host] table. Auto-login prompt ogin: Send ID information when this prompt is received. Password prompt assword: Send Password information when this prompt is received Login user name Login ID Login password Login Password Terminal type ansi Terminal type for outgoing connection Inactivity time 0-99 minutes Idle time before the port is disconnected automatically. If set to 0 minutes, the port will not disconnect. 9-8 Necessity Optional Optional Optional Optional Optional Optional Optional Optional Optional Optional Optional Optional CN2610 User’s Manual 5. Setting Up Terminal Setting Authentication type Value None/local/ server TCP alive check time 0-99 minutes Notes Necessity None: Authentication is not required. Optional local: Check the ID stored in the User_table (defined under the SERVER MENU). Server: Check the ID with the external RADIUS server. Refer to Appendix C for RADIUS installation information. The time period CN2610 waits before Optional checking if the TCP connection is alive or not. If no response is received, CN2610 will reset the port and terminate the connection. Press Esc to return to the PORT MENU. Configuring the Serial Ports Open Port Menu Æ Line to configure serial port settings. 1. From the MAIN MENU, select Port, and then press Enter. CN2610-8 CN2610-8_19 V2.0 MAIN MENU -----------------------------------------------------------------------------Server [Port] seTting sAve Utility Restart Exit Examine/modify async server ports configuration Enter: select 2. ESC: previous menu From the PORT MENU, select Line, and then press Enter. CN2610-8 CN2610-8_19 V2.0 PORT MENU -----------------------------------------------------------------------------Mode [Line] mOdem Welcome_MSG Quit Examine/modify asynchronous port configuration Enter: select 3. ESC: previous menu The Line page has pop-up selection lists for Port, Speed, Bits, Stop, Parity, FIFO, RTS/CTS, XON/XOFF, and Discon. ctrl for each serial port. Each item is described in detail below the figure. CN2610-8 CN2610-8_19 V2.0 -----------------------------------------------------------------------------Mode [Line] mOdem Welcome_MSG Quit Examine/modify asynchronous port configuration ESC: back to menu Port 01 02 03 04 05 06 07 08 Speed [115200] [115200] [115200] [115200] [115200] [115200] [115200] [115200] Bits [8] [8] [8] [8] [8] [8] [8] [8] Enter: Stop [ 1 ] [ 1 ] [ 1 ] [ 1 ] [ 1 ] [ 1 ] [ 1 ] [ 1 ] select Parity [None ] [None ] [None ] [None ] [None ] [None ] [None ] [None ] 9-9 FIFO [yes] [yes] [yes] [yes] [yes] [yes] [yes] [yes] RTS/CTS [yes] [yes] [yes] [yes] [yes] [yes] [yes] [yes] XON/XOFF [no ] [no ] [no ] [no ] [no ] [no ] [no ] [no ] Discon. ctrl [None ] [None ] [None ] [None ] [None ] [None ] [None ] [None ] CN2610 User’s Manual Setting Up Terminal Setting Speed Bits Stop Parity FIFO RTS/CTS XON/XOFF Discon. Ctrl Value 50 bps to 921.6 Kbps 5, 6, 7, 8 1, 1.5, 2 None, Even, Odd, Mark, Space Yes, No Yes, No Yes, No None DSR off DCD off 4. Notes Transmission rate Data bits Stop bits Odd, Even, Mark, Space First In First Out Device Hardware Flow Control Software Flow Control DSR off or DCD off will not be interpreted as a disconnection. DSR off will be interpreted as a disconnection. DCD off will be interpreted as a disconnection. Press ESC to return to the PORT MENU. Save When exiting the SERVER MENU, you will be prompted to save settings. Press Y to save. CN2610-8 CN2610-8_19 V2.0 SERVER MENU -----------------------------------------------------------------------------Info. Lan Adv. Host_table Route_table [User_table] Quit Examine/modify async server basic configuration Enter: select ESC: previous menu +-----------------------------------------------------+ | Warning !!! | | You had modified the configuration without saving. | | Would you save it now ? | | ‘Y: yes ‘N’: no | +-----------------------------------------------------+ You may also save all settings from the MAIN MENU by selecting sAve and then pressing Enter. Press Enter again to save, and any other key to cancel. CN2610-8 CN2610-8_19 V2.0 MAIN MENU -----------------------------------------------------------------------------Server Port seTting [sAve] Utility Restart Exit Save current configuration to Flash ROM ESC: back to menu Enter: select +-------------------------------------+ |Enter to updated, other key to cancel| +-------------------------------------+ 9-10 CN2610 User’s Manual Setting Up Terminal Restart 1. From the MAIN MENU, select Restart. CN2610-8 CN2610-8_19 V2.0 MAIN MENU -----------------------------------------------------------------------------Server Port seTting sAve Utility [Restart] Exit Restart the whole system or selected async ports Enter: select 2. ESC: previous menu Select System and then press Enter to restart the system and terminate the Telnet session. CN2610-8 CN2610-8_19 V2.0 -----------------------------------------------------------------------------[System] Port Quit Restart the Async Server ESC: back to menu Enter: select +--------------------------------------------------------------------+ | Warning !!! | | Restart system will disconnect all ports and clear all status value | | ‘ Enter: continue ESC: cancel | +--------------------------------------------------------------------+ 9-11 10 Chapter 10 Setting Up Multi-host TTY The Multi-host TTY application is the ideal transmission method for communicating with multiple Unix hosts over the network via several simultaneous sessions. When the communication starts, a Unix server connected to the network must first activate Moxattyd to use the TTY port’s mapping function. Moxattyd will initiate the connection with the CN2610, and the CN2610 will listen on different TCP ports for connection requests from various Moxattyd. Once a connection is established, the Terminal server can use hot keys to switch sessions. In this way, one terminal can control different Unix hosts. The following topics are covered in this chapter: Accessing the Console Utility Selecting the Application Configuring FIXTTY Mode Configuring the Serial Ports Save Restart Setting up Hosts ¾ Installing and Compiling Fixed TTY Driver ¾ Fixed TTY Driver for Different Applications ¾ Using Fixed TTY Driver CN2610 User’s Manual Setting Up Multi-Host TTY Accessing the Console Utility NOTE In this section, we show how to access CN2610’s console utility by Telnet over the network. For information on using the console port, see the section “Accessing the Console Utility” in Chapter 2. 1. Telnet over the network to the server’s IP address. 2. Type 1 to choose ansi/vt100, and then press Enter. Telnet 192.168.127.254 Async Server CN2610-8 Console terminal type (1: ansi/vt100, 2: vt52) : 1 3. CN2610’s MAIN MENU will open, as shown below. Telnet 192.168.127.254 CN2610-8 CN2610-8_19 V2.0 MAIN MENU -----------------------------------------------------------------------------[Server] Port seTting sAve Utility Restart Exit Examine/modify async server node/table configuration Enter: select ESC: previous menu Use the following keystrokes to navigate CN2610’s console utility. Action Move Jump to next menu, or Select item Return to previous menu, or Close pop up selector Shortcut Key Key [Up/Down/Left/Right] Arrow Key or [Tab] Key [Enter] Key [Esc] Key Capitalized letter of the word 10-2 CN2610 User’s Manual Setting Up Multi-Host TTY Selecting the Application Open Port Menu Æ Mode to configure the Multi-host TTY application. 1. From the MAIN MENU, select Port, and then press Enter. CN2610-8 CN2610-8_19 V2.0 MAIN MENU -----------------------------------------------------------------------------Server [Port] seTting sAve Utility Restart Exit Examine/modify async server ports configuration Enter: select 2. ESC: previous menu From the PORT MENU, select Mode, and then press Enter. CN2610-8 CN2610-8_19 V2.0 PORT MENU -----------------------------------------------------------------------------[Mode] Line mOdem Welcome_MSG Quit Examine/modify the operation mode of async ports Enter: select 3. ESC: previous menu The Mode page has pop-up selection lists for Application, Mode, and Description/more setting for each serial port. Use the arrow keys to move the cursor to the Application column for the port to be configured, and then press Enter. We use Port 6 to illustrate. CN2610-8 CN2610-8_19 V2.0 -----------------------------------------------------------------------------[Mode] Line mOdem Welcome_MSG Quit Examine/modify the operation mode of async ports ESC: back to menu Port 01 02 03 04 05 06 07 08 4. Application [NT Real COM [NT Real COM [NT Real COM [NT Real COM [NT Real COM [NT Real COM [NT Real COM [NT Real COM Enter: ] ] ] ] ] ] ] ] select Mode [ASPP [ASPP [ASPP [ASPP [ASPP [ASPP [ASPP [ASPP ] ] ] ] ] ] ] ] Description/more setting [Async Server Proprietary [Async Server Proprietary [Async Server Proprietary [Async Server Proprietary [Async Server Proprietary [Async Server Proprietary [Async Server Proprietary [Async Server Proprietary Protocol] Protocol] Protocol] Protocol] Protocol] Protocol] Protocol] Protocol] Use the up/down arrow keys to select Multi-Host TTY, and then press Enter. CN2610-8 CN2610-8_19 V2.0 -----------------------------------------------------------------------------[Mode] Line mOdem Welcome_MSG Quit Examine/modify the operation mode of async ports ESC: back to menu Port 01 02 03 04 05 06 07 08 Application [NT Real COM [NT Real COM [NT Real COM [NT Real COM [NT Real COM [NT Real COM [NT Real COM [NT Real COM Enter: select +------------------+ption/more setting ]| Disable | Server Proprietary ]| Dialin/out | Server Proprietary ]| Terminal | Server Proprietary ]| Reverse Terminal | Server Proprietary ]| Device Control | Server Proprietary ]| Multiplex | Server Proprietary ]| Printer | Server Proprietary ]| Multi-Host TTY | Server Proprietary ]| NT Real COM | ]| DRDAS | ]| Raw UDP | ]+------------------+ 10-3 Protocol] Protocol] Protocol] Protocol] Protocol] Protocol] Protocol] Protocol] CN2610 User’s Manual 5. Setting Up Multi-Host TTY The only operation mode associated with this application is FIXTTY mode, which is selected automatically in the Mode column. CN2610-8 CN2610-8_19 V2.0 -----------------------------------------------------------------------------[Mode] Line mOdem Welcome_MSG Quit Examine/modify the operation mode of async ports ESC: back to menu Port 01 02 03 04 05 06 04 05 Enter: Application [NT Real COM [NT Real COM [NT Real COM [NT Real COM [NT Real COM [Multi-Host TTY [NT Real COM [NT Real COM ] ] ] ] ] ] ] ] select Mode [ASPP [ASPP [ASPP [ASPP [ASPP [FIXTTY [ASPP [ASPP ] ] ] ] ] ] ] ] Description/more setting [Async Server Proprietary [Async Server Proprietary [Async Server Proprietary [Async Server Proprietary [Async Server Proprietary [Unix fixtty driver mode [Async Server Proprietary [Async Server Proprietary Protocol] Protocol] Protocol] Protocol] Protocol] ] Protocol] Protocol] Configuring FIXTTY Mode 1. Move cursor to the Description/more setting column and then press Enter. CN2610-8 CN2610-8_19 V2.0 -----------------------------------------------------------------------------[Mode] Line mOdem Welcome_MSG Quit Examine/modify the operation mode of async ports ESC: back to menu Port 01 02 03 04 05 06 07 2. Enter: Application [NT Real COM [NT Real COM [NT Real COM [NT Real COM [NT Real COM [Multi-Host TTY [NT Real COM ] ] ] ] ] ] ] select Mode [ASPP [ASPP [ASPP [ASPP [ASPP [FIXTTY [ASPP ] ] ] ] ] ] ] Description/more setting [Async Server Proprietary [Async Server Proprietary [Async Server Proprietary [Async Server Proprietary [Async Server Proprietary [Unix fixtty driver mode [Async Server Proprietary Protocol] Protocol] Protocol] Protocol] Protocol] ] Protocol] The pop-up selector contains input/display fields for Max. Sessions, Terminal model no., Inactivity time, TCP alive check time, and also Session parameters. Each item is described in detail below the figure. +-----------------------------------------------------+ | Max. Sessions : [ 8 ] | | Terminal model no. : [VT100 ] | | Inactivity time : [0 ] minutes | | TCP alive check time : [0 ] minutes | | Session Hot key TCP port Remote IP address | | 1 [^A] [4001 ] [ ] | | 2 [^B] [5001 ] [ ] | | 3 [^E] [6001 ] [ ] | | 4 [^F] [7001 ] [ ] | | 5 [^T] [8001 ] [ ] | | 6 [^U] [9001 ] [ ] | | 7 [^V] [10001 ] [ ] | | 8 [^W] [11001 ] [ ] | +-----------------------------------------------------+ 10-4 CN2610 User’s Manual Setting Up Multi-Host TTY Setting Max. Sessions Value 1-8 Terminal mode no. Inactivity time TCP alive check time Star NT-560+, NL-5000A, VT100 0-99 minutes 0-99 minutes Session Hot Key TCP port Remote IP 3. Notes Select the maximum number of simultaneous sessions that will be allowed for this serial port. CN2610 provides 3 modes that depend on the connection mode supported by the terminal. Idle time before the port is disconnected automatically. If set to 0 minutes, the port will not disconnect. The time period CN2610 waits before checking if the TCP connection is alive or not. If no response is received, CN2610 will reset the port and terminate the connection. Necessity Optional Optional Optional Optional Configure the Hot key, TCP port, and Remote IP address for each session. Press Esc to return to the PORT MENU. Configuring the Serial Ports Open Port Menu Æ Line to configure serial port settings. 1. From the MAIN MENU, select Port, and then press Enter. CN2610-8 CN2610-8_19 V2.0 MAIN MENU -----------------------------------------------------------------------------Server [Port] seTting sAve Utility Restart Exit Examine/modify async server ports configuration Enter: select 2. ESC: previous menu From the PORT MENU, select Line, and then press Enter. CN2610-8 CN2610-8_19 V2.0 PORT MENU -----------------------------------------------------------------------------Mode [Line] mOdem Welcome_MSG Quit Examine/modify asynchronous port configuration Enter: select 3. ESC: previous menu The Line page has pop-up selection lists for Port, Speed, Bits, Stop, Parity, FIFO, RTS/CTS, XON/XOFF, and Discon. ctrl for each serial port. Each item is described in detail below the figure. 10-5 CN2610 User’s Manual Setting Up Multi-Host TTY CN2610-8 CN2610-8_19 V2.0 -----------------------------------------------------------------------------Mode [Line] mOdem Welcome_MSG Quit Examine/modify asynchronous port configuration ESC: back to menu Port 01 02 03 04 05 06 07 08 Speed [115200] [115200] [115200] [115200] [115200] [115200] [115200] [115200] Enter: Bits [8] [8] [8] [8] [8] [8] [8] [8] Setting Speed Bits Stop Parity FIFO RTS/CTS XON/XOFF Discon. Ctrl Stop [ 1 ] [ 1 ] [ 1 ] [ 1 ] [ 1 ] [ 1 ] [ 1 ] [ 1 ] select Parity [None ] [None ] [None ] [None ] [None ] [None ] [None ] [None ] Value 50 bps to 921.6 Kbps 5, 6, 7, 8 1, 1.5, 2 None, Even, Odd, Mark, Space Yes, No Yes, No Yes, No None DSR off DCD off 4. FIFO [yes] [yes] [yes] [yes] [yes] [yes] [yes] [yes] RTS/CTS [yes] [yes] [yes] [yes] [yes] [yes] [yes] [yes] XON/XOFF [no ] [no ] [no ] [no ] [no ] [no ] [no ] [no ] Discon. ctrl [None ] [None ] [None ] [None ] [None ] [None ] [None ] [None ] Notes Transmission rate Data bits Stop bits Odd, Even, Mark, Space First In First Out Device Hardware Flow Control Software Flow Control DSR off or DCD off will not be interpreted as a disconnection. DSR off will be interpreted as a disconnection. DCD off will be interpreted as a disconnection. Press ESC to return to the PORT MENU. Save When exiting the SERVER MENU, you will be prompted to save settings. Press Y to save. CN2610-8 CN2610-8_19 V2.0 SERVER MENU -----------------------------------------------------------------------------Info. Lan Adv. Host_table Route_table [User_table] Quit Examine/modify async server basic configuration Enter: select ESC: previous menu +-----------------------------------------------------+ | Warning !!! | | You had modified the configuration without saving. | | Would you save it now ? | | ‘Y: yes ‘N’: no | +-----------------------------------------------------+ You may also save all settings from the MAIN MENU by selecting sAve and then pressing Enter. Press Enter again to save, and any other key to cancel. 10-6 CN2610 User’s Manual Setting Up Multi-Host TTY CN2610-8 CN2610-8_19 V2.0 MAIN MENU -----------------------------------------------------------------------------Server Port seTting [sAve] Utility Restart Exit Save current configuration to Flash ROM ESC: back to menu Enter: select +-------------------------------------+ |Enter to updated, other key to cancel| +-------------------------------------+ Restart 1. From the MAIN MENU, select Restart. CN2610-8 CN2610-8_19 V2.0 MAIN MENU -----------------------------------------------------------------------------Server Port seTting sAve Utility [Restart] Exit Restart the whole system or selected async ports Enter: select 2. ESC: previous menu Select System and then press Enter to restart the system and terminate the Telnet session. CN2610-8 CN2610-8_19 V2.0 -----------------------------------------------------------------------------[System] Port Quit Restart the Async Server ESC: back to menu Enter: select +--------------------------------------------------------------------+ | Warning !!! | | Restart system will disconnect all ports and clear all status value | | ‘ Enter: continue ESC: cancel | +--------------------------------------------------------------------+ Setting up Hosts Installing and Compiling Fixed TTY Driver Installing and Compiling 1. Create a directory for Fixed TTY driver (e.g. /user/etc) as shown below: #mkdir /usr/etc #cd /usr/etc 2. Extract code from the tar-formatted file moxattyd.tar as follows: #tar xvf moxattyd.tar 3. After the extraction is complete, locate the following files: moxattyd.c moxattyd.cf Makefile README.TXT VERSION.TXT program source code configuration file description file for Fixed TTY driver driver version 10-7 CN2610 User’s Manual 4. Setting Up Multi-Host TTY Compile and link documents: SCO OpenServer : # make sco SCO UnixWare : # make svr5 UnixWare 2.1.x, SVR 4.2 : # make svr42 Configuring tty Redirection The following example illustrates how to map and redirect a tty device to a MOXA CN2610 serial port. Use vi or any other text editor to add or modify entries in the file moxattyd.cf. There are three columns: Device Name, CN2610 IP address, and TCP port number in the entry for the file moxattyd.cf. Device Name NOTE CN2610 IP address TCP Port number ttyp1 192.168.1.1 4001 ttyp2 192.168.1.1 4002 ttyp3 192.168.1.1 4003 ttyp4 192.168.1.1 4004 1. 2. Device Names for SCO OpenServer are ttyp[n], for SCO UnixWare, SVR4.2 are pts/[n]. The value of n should be equal or larger than 11 to prevent from conflicting with the device names of functional keys in some UNIX systems. Default TCP port numbers are from 4001 to 4016 for the 16-port CN2610. If necessary, you can customize the TCP port numbers. However, the numbers you use MUST be the same as those defined in MOXA CN2610. Adding Fixed TTY driver to system booting procedures To include Fixed TTY driver in the booting system, add the moxattyd daemon process to the /etc/inittab file. The following example illustrates how to add the full path name for moxattyd to the entries of /etc/inittab. ts:2:respawn:/usr/etc/moxattyd/moxattyd –t 1 NOTE The option “–t 1” means the reconnection time is 1 minute after turning CN2610 on or off. Fixed TTY Driver for Different Applications This section illustrates how to use Fixed TTY driver with a number of different applications. Terminal Access To use terminal access, the process getty must be activated when the system boots up. To do this, add the following entries to the file /etc/inittab. For instance,. ts1:234:respawn:/etc/getty ts2:234:respawn:/etc/getty ts3:234:respawn:/etc/getty ts4:234:respawn:/etc/getty NOTE ttyp1 ttyp2 ttyp3 ttyp4 ttyp1 to ttyp4 device names are mapped to port 1 to port 4 on MOXA CN2610. 10-8 CN2610 User’s Manual Setting Up Multi-Host TTY Transparent Printer Access It’s not necessary to add additional entries to /etc/inittab for printer access, as mentioned in the section on terminal access. Since Fixed TTY driver is a fixed pseudo tty, you can easily connect a serial printer to a Moxa CN2510 serial port to execute printing commands. The following example is for SCO OpenServer: Command Description /usr/lib/lpadmin –pLaser1 -v/dev/ttyp1 /usr/lib/accept Laser1 enable Laser1 lp -dLaser1 file_name set printer name as Laser1 and use ttyp1 accept printer Laser1 enable printer Laser1 print file to Laser1 Other Applications As mentioned earlier, the system setup depends on which application you are using. Since Fixed TTY driver is a fixed pseudo tty, no additional setup is required to enable your applications to open tty devices. Using Fixed TTY Driver Starting Fixed TTY driver Once you have completed the above settings, you can start. Follow the steps given below to ensure that driver is running correctly. See if the entries added to moxattyd.cf are correct. Run init q or reboot your system to start the moxattyd daemon. If you see that moxattyd is running on your system, then Fixed TTY driver has been successfully started. Stopping Fixed TTY driver If for any reason you need to stop the moxattyd daemon, the two methods listed below allow you to stop the moxattyd daemon process 1. 2. Remove entries related to moxattyd daemon in /etc/inittab and execute init q or reboot your system, or Replace respawn with off in entries related to moxattyd daemon in /etc/inittab, and execute init q or reboot your system. For instance, ‘ts:2:off:/usr/etc/moxattyd/moxattyd’. 10-9 11 Chapter 11 Setting Up Dialin/out In this chapter, we describe the steps required to configure Moxa CN2610 as a Dial-in/out Access Server. Dial-in Access allows remote users to access the LAN, whereas Dial-out Access allows LAN hosts to establish connections to other sites. The following topics are covered in this chapter: Accessing the Console Utility Selecting the Application Configuring PPPD/PPP Mode Configuring SLIPD/SLIP Mode Configuring Dynamic Mode Configuring the Serial Ports Configuring Modem Initialization Optional Welcome Message Configuring Optional Local User Information Save Restart CN2610 User’s Manual Setting Up Dial-in/Out Accessing the Console Utility NOTE In this section, we show how to access CN2610’s console utility by Telnet over the network. For information on using the console port, see the section “Accessing the Console Utility” in Chapter 2. 1. Telnet over the network to the server’s IP address. 2. Type 1 to choose ansi/vt100, and then press Enter. Telnet 192.168.127.254 Async Server CN2610-8 Console terminal type (1: ansi/vt100, 2: vt52) : 1 3. CN2610’s MAIN MENU will open, as shown below. Telnet 192.168.127.254 CN2610-8 CN2610-8_19 V2.0 MAIN MENU -----------------------------------------------------------------------------[Server] Port seTting sAve Utility Restart Exit Examine/modify async server node/table configuration Enter: select ESC: previous menu Use the following keystrokes to navigate CN2610’s console utility. Action Move Jump to next menu, or Select item Return to previous menu, or Close pop up selector Shortcut Key Key [Up/Down/Left/Right] Arrow Key or [Tab] Key [Enter] Key [Esc] Key Capitalized letter of the word 11-2 CN2610 User’s Manual Setting Up Dial-in/Out Selecting the Application Open Port Menu Æ Mode to configure the Dial-up/out application. 1. From the MAIN MENU, select Port, and then press Enter. CN2610-8 CN2610-8_19 V2.0 MAIN MENU -----------------------------------------------------------------------------Server [Port] seTting sAve Utility Restart Exit Examine/modify async server ports configuration Enter: select 2. ESC: previous menu From the PORT MENU, select Mode, and then press Enter. CN2610-8 CN2610-8_19 V2.0 PORT MENU -----------------------------------------------------------------------------[Mode] Line mOdem Welcome_MSG Quit Examine/modify the operation mode of async ports Enter: select 3. ESC: previous menu The Mode page has pop-up selection lists for Application, Mode, and Description/more setting for each serial port. Use the arrow keys to move the cursor to the Application column for the port to be configured, and then press Enter. We use Port 6 to illustrate. CN2610-8 CN2610-8_19 V2.0 -----------------------------------------------------------------------------[Mode] Line mOdem Welcome_MSG Quit Examine/modify the operation mode of async ports ESC: back to menu Port 01 02 03 04 05 06 07 08 4. Application [NT Real COM [NT Real COM [NT Real COM [NT Real COM [NT Real COM [NT Real COM [NT Real COM [NT Real COM Enter: ] ] ] ] ] ] ] ] select Mode [ASPP [ASPP [ASPP [ASPP [ASPP [ASPP [ASPP [ASPP ] ] ] ] ] ] ] ] Description/more setting [Async Server Proprietary [Async Server Proprietary [Async Server Proprietary [Async Server Proprietary [Async Server Proprietary [Async Server Proprietary [Async Server Proprietary [Async Server Proprietary Protocol] Protocol] Protocol] Protocol] Protocol] Protocol] Protocol] Protocol] Use the up/down arrow keys to select Dialin/out mode, and then press Enter. CN2610-8 CN2610-8_19 V2.0 -----------------------------------------------------------------------------[Mode] Line mOdem Welcome_MSG Quit Examine/modify the operation mode of async ports ESC: back to menu Port 01 02 03 04 05 06 07 08 5. Application [NT Real COM [NT Real COM [NT Real COM [NT Real COM [NT Real COM [NT Real COM [NT Real COM [NT Real COM Enter: select +------------------+ption/more setting ]| Disable | Server Proprietary ]| Dialin/out | Server Proprietary ]| Terminal | Server Proprietary ]| Reverse Terminal | Server Proprietary ]| Device Control | Server Proprietary ]| Multiplex | Server Proprietary ]| Printer | Server Proprietary ]| Multi-Host TTY | Server Proprietary Protocol] Protocol] Protocol] Protocol] Protocol] Protocol] Protocol] Protocol] The Dialin/out application supports five operation modes: DYNAMIC, PPP, PPPD, SLIP, SLIPD. DYNAMIC mode is selected by default. 11-3 CN2610 User’s Manual Setting Up Dial-in/Out CN2610-8 CN2610-8_19 V2.0 -----------------------------------------------------------------------------[Mode] Line mOdem Welcome_MSG Quit Examine/modify the operation mode of async ports ESC: back to menu Port 01 02 03 04 05 06 07 08 Application [NT Real COM [NT Real COM [NT Real COM [NT Real COM [NT Real COM [Dialin/out [NT Real COM [NT Real COM Enter: ] ] ] ] ] ] ] ] select Mode [ASPP [ASPP [ASPP [ASPP [ASPP [DYNAMIC [ASPP [ASPP ] ] ] ] ] ] ] ] Description/more setting [Async Server Proprietary Protocol] [Async Server Proprietary Protocol] [Async Server Proprietary Protocol] [Async Server Proprietary Protocol] [Async Server Proprietary Protocol] [Auto Term/SLIP/PPP identification] [Async Server Proprietary Protocol] [Async Server Proprietary Protocol] Configuring PPPD/PPP Mode PPPD (PPP on demand) is used for dial-in services, since it provides PPP services only when receiving a request from a remote PC. PPP provides standard PPP services for both dial-in and dial-out. 1. Move the cursor to the Mode column for the port and then press Enter. CN2610-8 CN2610-8_19 V2.0 -----------------------------------------------------------------------------[Mode] Line mOdem Welcome_MSG Quit Examine/modify the operation mode of async ports ESC: back to menu Port 01 02 03 04 05 06 07 08 2. Application [NT Real COM [NT Real COM [NT Real COM [NT Real COM [NT Real COM [Dialin/out [NT Real COM [NT Real COM Enter: ] ] ] ] ] ] ] ] select Mode [ASPP [ASPP [ASPP [ASPP [ASPP [DYNAMIC [ASPP [ASPP ] ] ] ] ] ] ] ] Description/more setting [Async Server Proprietary Protocol] [Async Server Proprietary Protocol] [Async Server Proprietary Protocol] [Async Server Proprietary Protocol] [Async Server Proprietary Protocol] [Auto Term/SLIP/PPP identification] [Async Server Proprietary Protocol] [Async Server Proprietary Protocol] Select PPPD for dial-in services only, or PPP for both dial-in/out services. CN2610-8 CN2610-8_19 V2.0 -----------------------------------------------------------------------------[Mode] Line mOdem Welcome_MSG Quit Examine/modify the operation mode of async ports ESC: back to menu Port 01 02 03 04 05 06 07 08 3. Application [NT Real COM [NT Real COM [NT Real COM [NT Real COM [NT Real COM [Dialin/out [NT Real COM [NT Real COM Enter: ] ] ] ] ] ] ] ] select Mode [ASPP [ASPP [ASPP [ASPP [ASPP [DYNAMIC [ASPP [ASPP +----------+ | DYNAMIC |on/more setting ]| PPP |rver Proprietary Protocol] ]| PPPD |rver Proprietary Protocol] ]| SLIP |rver Proprietary Protocol] ]| SLIPD |rver Proprietary Protocol] ]+----------+rver Proprietary Protocol] ] [Auto Term/SLIP/PPP identification] ] [Async Server Proprietary Protocol] ] [Async Server Proprietary Protocol] Move the cursor to the Description/more setting column, and then press Enter. 11-4 CN2610 User’s Manual Setting Up Dial-in/Out CN2610-8 CN2610-8_19 V2.0 -----------------------------------------------------------------------------[Mode] Line mOdem Welcome_MSG Quit Examine/modify the operation mode of async ports ESC: back to menu Port 01 02 03 04 05 06 07 08 4. Enter: Application [NT Real COM [NT Real COM [NT Real COM [NT Real COM [NT Real COM [Dialin/out [NT Real COM [NT Real COM ] ] ] ] ] ] ] ] select Mode [ASPP [ASPP [ASPP [ASPP [ASPP [PPP [ASPP [ASPP ] ] ] ] ] ] ] ] Description/more setting [Async Server Proprietary [Async Server Proprietary [Async Server Proprietary [Async Server Proprietary [Async Server Proprietary [Point-to-Point Protocol [Async Server Proprietary [Async Server Proprietary Protocol] Protocol] Protocol] Protocol] Protocol] ] Protocol] Protocol] The pop-up selector contains input/display fields for Destination IP addr, Source IP address, IP netmask, TCP/IP compression, Inactivity time, Link quality report, Outgoing PAP ID, PAP password, and Incoming PAP check. Each item is described in detail below the figure. +-------------------------------------------------+ | Destination IP addr : [ ] | | Source IP address : [ ] | | IP netmask : [ ] | | TCP/IP compression : [no ] | | Inactivity time : [0 ] minutes | | Link quality report : [no ] | | Outgoing PAP ID : [ ] | | PAP password : [ ] | | Incoming PAP check : [none ] | +-------------------------------------------------+ Setting Destination IP addr Source IP address Value IP address for the remote Dial-in / Dial-out user IP address for the port IP netmask IP netmask TCP/IP compression Inactivity time Yes/No Link quality report Outgoing PAP ID PAP password Yes/No Notes Necessity Assign an IP address for the remote user. Required ID CN2610 will automatically assign an IP address for the port. We recommend leaving this space blank. CN2610 automatically assigns the netmask 255.255.255.255. We recommend leaving this space blank. Depends on whether the remote user’s application requests compression. Idle time before the port is disconnected automatically. If set to 0 minutes, the port will not disconnect. If you are using software to collect Link quality information, choose YES. Dial out user/account ID information Password Dial out user/account password 0-99 minutes 11-5 Optional Optional Optional Optional Optional Optional Optional CN2610 User’s Manual Setting Incoming PAP check 5. Setting Up Dial-in/Out Value None/local/server Notes None: Authentication is not required. local: Check the ID stored in the User_table (defined under the SERVER MENU). You will need to configure the user’s information later in this chapter. Server: Check the ID with the external RADIUS server. Refer to Appendix C for RADIUS installation information. Necessity Optional Press Esc to return to the PORT MENU. Configuring SLIPD/SLIP Mode Moxa CN2610 supports SLIP (Serial Line Internet Protocol), and SLIPD (for Dial-in services only). 1. Move the cursor to the Mode column for the port and then press Enter. CN2610-8 CN2610-8_19 V2.0 -----------------------------------------------------------------------------[Mode] Line mOdem Welcome_MSG Quit Examine/modify the operation mode of async ports ESC: back to menu Port 01 02 03 04 05 06 07 08 2. Application [NT Real COM [NT Real COM [NT Real COM [NT Real COM [NT Real COM [Dialin/out [NT Real COM [NT Real COM Enter: ] ] ] ] ] ] ] ] select Mode [ASPP [ASPP [ASPP [ASPP [ASPP [DYNAMIC [ASPP [ASPP ] ] ] ] ] ] ] ] Description/more setting [Async Server Proprietary Protocol] [Async Server Proprietary Protocol] [Async Server Proprietary Protocol] [Async Server Proprietary Protocol] [Async Server Proprietary Protocol] [Auto Term/SLIP/PPP identification] [Async Server Proprietary Protocol] [Async Server Proprietary Protocol] Select SLIPD for dial-in services only, or SLIP for both dial-in/out services. CN2610-8 CN2610-8_19 V2.0 -----------------------------------------------------------------------------[Mode] Line mOdem Welcome_MSG Quit Examine/modify the operation mode of async ports ESC: back to menu Port 01 02 03 04 05 06 07 08 3. Application [NT Real COM [NT Real COM [NT Real COM [NT Real COM [NT Real COM [Dialin/out [NT Real COM [NT Real COM Enter: ] ] ] ] ] ] ] ] select Mode [ASPP [ASPP [ASPP [ASPP [ASPP [DYNAMIC [ASPP [ASPP +----------+ | DYNAMIC |on/more setting ]| PPP |rver Proprietary Protocol] ]| PPPD |rver Proprietary Protocol] ]| SLIP |rver Proprietary Protocol] ]| SLIPD |rver Proprietary Protocol] ]+----------+ rver Proprietary Protocol] ] [Auto Term/SLIP/PPP identification] ] [Async Server Proprietary Protocol] ] [Async Server Proprietary Protocol] Move the cursor to the Description/more setting column, and then press Enter. 11-6 CN2610 User’s Manual Setting Up Dial-in/Out CN2610-8 CN2610-8_19 V2.0 -----------------------------------------------------------------------------[Mode] Line mOdem Welcome_MSG Quit Examine/modify the operation mode of async ports ESC: back to menu Port 01 02 03 04 05 06 07 08 4. Enter: Application [NT Real COM [NT Real COM [NT Real COM [NT Real COM [NT Real COM [Dialin/out [NT Real COM [NT Real COM ] ] ] ] ] ] ] ] select Mode [ASPP [ASPP [ASPP [ASPP [ASPP [SLIP [ASPP [ASPP ] ] ] ] ] ] ] ] Description/more setting [Async Server Proprietary Protocol] [Async Server Proprietary Protocol] [Async Server Proprietary Protocol] [Async Server Proprietary Protocol] [Async Server Proprietary Protocol] [Serial Line Internet Protocol ] [Async Server Proprietary Protocol] [Async Server Proprietary Protocol] The pop-up selector contains input/display fields for Destination IP addr, Source IP address, IP netmask, TCP/IP compression, Inactivity time, Link quality report, Outgoing PAP ID, PAP password, and Incoming PAP check. Each item is described in detail below the figure. +-------------------------------------------------+ | Destination IP addr : [ ] | | Source IP address : [ ] | | IP netmask : [ ] | | TCP/IP compression : [no ] | | Inactivity time : [0 ] minutes | | Link quality report : [no ] | | Outgoing PAP ID : [ ] | | PAP password : [ ] | | Incoming PAP check : [none ] | +-------------------------------------------------+ Setting Destination IP addr Source IP address Value IP address for the remote Dial-in / Dial-out user IP address for the port IP netmask IP netmask TCP/IP compression Inactivity time Yes/No Link quality report Outgoing PAP ID PAP password Yes/No Notes Necessity Assign an IP address for the remote user. Required ID CN2610 will automatically assign an IP address for the port. We recommend leaving this space blank. CN2610 automatically assigns the netmask 255.255.255.255. We recommend leaving this space blank. Depends on whether the remote user’s application requests compression. Idle time before the port is disconnected automatically. If set to 0 minutes, the port will not disconnect. If you are using software to collect Link quality information, choose YES. Dial out user/account ID information Password Dial out user/account password 0-99 minutes 11-7 Optional Optional Optional Optional Optional Optional Optional CN2610 User’s Manual Setting Incoming PAP check 5. Setting Up Dial-in/Out Value None/local/server Notes None: Authentication is not required. local: Check the ID stored in the User_table (defined under the SERVER MENU). You will need to configure the user’s information later in this chapter. Server: Check the ID with the external RADIUS server. Refer to Appendix C for RADIUS installation information. Necessity Optional Press Esc to return to the PORT MENU. Configuring Dynamic Mode Dynamic mode integrates PPPD, SLIPD, and Terminal dial-in services. Dynamic mode automatically detects which remote connection mode is being used, and provides corresponding services. You can further enable/disable PPP/SLIP/Terminal services by using the Description/more setting pop-ups. 1. Move the cursor to the Mode column for the port and then press Enter. CN2610-8 CN2610-8_19 V2.0 -----------------------------------------------------------------------------[Mode] Line mOdem Welcome_MSG Quit Examine/modify the operation mode of async ports ESC: back to menu Port 01 02 03 04 05 06 07 08 2. Application [NT Real COM [NT Real COM [NT Real COM [NT Real COM [NT Real COM [Dialin/out [NT Real COM [NT Real COM Enter: ] ] ] ] ] ] ] ] select Mode [ASPP [ASPP [ASPP [ASPP [ASPP [DYNAMIC [ASPP [ASPP ] ] ] ] ] ] ] ] Description/more setting [Async Server Proprietary Protocol] [Async Server Proprietary Protocol] [Async Server Proprietary Protocol] [Async Server Proprietary Protocol] [Async Server Proprietary Protocol] [Auto Term/SLIP/PPP identification] [Async Server Proprietary Protocol] [Async Server Proprietary Protocol] Select DYNAMIC for dial-in/out services. CN2610-8 CN2610-8_19 V2.0 -----------------------------------------------------------------------------[Mode] Line mOdem Welcome_MSG Quit Examine/modify the operation mode of async ports ESC: back to menu Port 01 02 03 04 05 06 07 08 3. Application [NT Real COM [NT Real COM [NT Real COM [NT Real COM [NT Real COM [Dialin/out [NT Real COM [NT Real COM Enter: ] ] ] ] ] ] ] ] select Mode [ASPP [ASPP [ASPP [ASPP [ASPP [DYNAMIC [ASPP [ASPP +----------+ | DYNAMIC |on/more setting ]| PPP |rver Proprietary Protocol] ]| PPPD |rver Proprietary Protocol] ]| SLIP |rver Proprietary Protocol] ]| SLIPD |rver Proprietary Protocol] ]+----------+rver Proprietary Protocol] ] [Auto Term/SLIP/PPP identification] ] [Async Server Proprietary Protocol] ] [Async Server Proprietary Protocol] Move the cursor to the Description/more setting column, and then press Enter. 11-8 CN2610 User’s Manual Setting Up Dial-in/Out CN2610-8 CN2610-8_19 V2.0 -----------------------------------------------------------------------------[Mode] Line mOdem Welcome_MSG Quit Examine/modify the operation mode of async ports ESC: back to menu Port 01 02 03 04 05 06 07 08 4. Application [NT Real COM [NT Real COM [NT Real COM [NT Real COM [NT Real COM [Dialin/out [NT Real COM [NT Real COM Enter: ] ] ] ] ] ] ] ] select Mode [ASPP [ASPP [ASPP [ASPP [ASPP [DYNAMIC [ASPP [ASPP ] ] ] ] ] ] ] ] Description/more setting [Async Server Proprietary Protocol] [Async Server Proprietary Protocol] [Async Server Proprietary Protocol] [Async Server Proprietary Protocol] [Async Server Proprietary Protocol] [Auto Term/SLIP/PPP identification] [Async Server Proprietary Protocol] [Async Server Proprietary Protocol] The pop-up selector contains input/display fields for TERM_BIN mode, PPPD mode, and SLIPD mode. Each item is described in detail below the figure. +-----------------------------------------------------+ | Enable Detail setting | | TERM_BIN mode [yes] [Term parameters ] | | PPPD mode [yes] [PPP parameters ] | | SLIPD mode [yes] [SLIP parameters ] | |---------------------------------------------------- | | Authentication type [local ] | +-----------------------------------------------------+ 5. Setting TERM_BIN mode Value yes/no PPPD mode SLIPD mode yes/no yes/no Authentication type None/ local/ server Notes Select yes to enable a Binary Terminal connection Select yes to enable a PPPD connection Select yes to enable a SLIPD Terminal connection None: Authentication is not required. local: Check the ID stored in the User_table (defined under the SERVER MENU). Server: Check the ID with the external RADIUS server. Refer to Appendix C for RADIUS installation information. Necessity Optional Optional Optional Optional To configure the TERM_BIN mode parameters, move the cursor to the Detail setting column to highlight Description/more setting, and then press Enter. +-----------------------------------------------------+ | Enable Detail setting | | TERM_BIN mode [yes] [Term parameters ] | | PPPD mode [yes] [PPP parameters ] | | SLIPD mode [yes] [SLIP parameters ] | |----------------------------------------------------- | | Authentication type [none ] | +-----------------------------------------------------+ 6. The pop-up selector contains input/display fields for Quit key, Auto-link protocol, Link by input IP, Auto-login prompt, Terminal type, Inactivity time, Authentication type, and TCP alive check time. Each item is described in detail below the figure. 11-9 CN2610 User’s Manual Setting Up Dial-in/Out +------------------------------------------------+ | Quit key : [^E] | | Auto-link protocol : [none ] | | Telnet TCP port : [23 ] | | Primary host IP : [ ] | | Link by input IP : [Disable] | | Secondary host IP : [ ] | | Auto-login prompt : [ogin: ] | | Password prompt : [assword: ] | | Login user name : [ ] | | Login password : [ ] | | Terminal type : [ansi ] | | Inactivity time : [0 ] minutes | | Authentication type : [none ] | | TCP alive check time : [0 ] minutes | +------------------------------------------------+ Setting Quit Key Value Notes ^E Defines the Quit key used to disconnect the link between the current terminal session and the remote host. It may be left blank for binary communication. Auto-link protocol None/Telnet/ None: Do not connect to the host Rlogin automatically. Telnet: Connects to the host automatically by Telnet. Rlogin: Connects to the host automatically by Rlogin. Telnet TCP port 23 Enter a number or leave the space blank. If not specified, then by default, port 23 is used. If you want to use Telnet without a TCP port number, set this option to 23. Primary host IP IP address or If specified, designates a ‘permanent’ the name host to which the terminal will always be defined in the connected. [Host] table Link by input IP Enable/ For users to enter the connection IP Disable address manually. Secondary host IP IP address or If specified, designates a secondary the name ‘permanent’ host to which the terminal defined in the will be connected. [Host] table. Auto-login prompt ogin: Send ID information when this prompt is received. Password prompt assword: Send Password information when this prompt is received Login user name Login ID Login password Login Password Terminal type ansi Terminal type for outgoing connection Inactivity time 0-99 minutes Idle time before the port is disconnected automatically. If set to 0 minutes, the port will not disconnect. 11-10 Necessity Optional Optional Optional Optional Optional Optional Optional Optional Optional Optional Optional Optional CN2610 User’s Manual 7. Setting Up Dial-in/Out Setting Authentication type Value None/local/ server TCP alive check time 0-99 minutes Notes Necessity None: Authentication is not required. Optional local: Check the ID stored in the User_table (defined under the SERVER MENU). Server: Check the ID with the external RADIUS server. Refer to Appendix C for RADIUS installation information. The time period CN2610 waits before Optional checking if the TCP connection is alive or not. If no response is received, CN2610 will reset the port and terminate the connection. To configure the PPPD mode parameters, move the cursor to the Detail setting column to highlight PPP parameters, and then press Enter. +-----------------------------------------------------+ | Enable Detail setting | | TERM_BIN mode [yes] [Term parameters ] | | PPPD mode [yes] [PPP parameters ] | | SLIPD mode [yes] [SLIP parameters ] | |---------------------------------------------------- | | Authentication type [none ] | +-----------------------------------------------------+ 8. The pop-up selector contains input/display fields for Destination IP addr, Source IP address, IP netmask, TCP/IP compression, Inactivity time, Link quality report, Outgoing PAP ID, and, PAP password. Each item is described in detail below the figure. +-----------------------------------------------------+ | Destination IP address : [ ] | | Source IP address : [ ] | | IP netmask : [ ] | | TCP/IP compression : [no ] | | Inactivity time : [0 ] minutes | | Link quality report : [no ] | | Outgoing PAP ID : [ ] | | PAP password : [ ] | +-----------------------------------------------------+ Setting Destination IP addr Source IP address Value IP address for the remote Dial-in / Dial-out user IP address for the port IP netmask IP netmask TCP/IP compression Yes/No Notes You need to assign an IP address for the remote user. Necessity Required CN2610 will automatically assign an IP address for the port. We recommend leaving this space blank. CN2610 automatically assigns the netmask 255.255.255.255. We recommend leaving this space blank. Depends on whether the remote user’s application requests compression. Optional 11-11 Optional Optional CN2610 User’s Manual 9. Setting Up Dial-in/Out Setting Inactivity time Value 0-99 minutes Necessity Optional ID Notes Idle time before the port is disconnected automatically. If set to 0 minutes, the port will not disconnect. If you are using software to collect Link quality information, choose YES. Dial out user/account ID information Link quality report Outgoing PAP ID PAP password Yes/No Password Dial out user/account password Optional Optional Optional To configure the SLIPD mode parameters, move the cursor to the Detail setting column to highlight SLIP parameters, and then press Enter. +-----------------------------------------------------+ | Enable Detail setting | | TERM_BIN mode [yes] [Term parameters ] | | PPPD mode [yes] [PPP parameters ] | | SLIPD mode [yes] [SLIP parameters ] | |---------------------------------------------------- | | Authentication type [none ] | +-----------------------------------------------------+ 10. The pop-up selector contains input/display fields for Destination IP addr, Source IP address, IP netmask, TCP/IP compression, and Inactivity time. Each item is described in detail below the figure. +-----------------------------------------------------+ | Destination IP address : [ ] | | Source IP address : [ ] | | IP netmask : [ ] | | TCP/IP compression : [no ] | | Inactivity time : [0 ] minutes | +-----------------------------------------------------+ Setting Destination IP addr Source IP address Value IP address for the remote Dial-in / Dial-out user IP address for the port IP netmask IP netmask TCP/IP compression Inactivity time Yes/No 0-99 minutes Notes You need to assign an IP address for the remote user. Necessity Required CN2610 will automatically assign an IP address for the port. We recommend leaving this space blank. CN2610 automatically assigns the netmask 255.255.255.255. We recommend leaving this space blank. Depends on whether the remote user’s application requests compression. Idle time before the port is disconnected automatically. If set to 0 minutes, the port will not disconnect. Optional 11. Press Esc to return to the PORT MENU. 11-12 Optional Optional Optional CN2610 User’s Manual Setting Up Dial-in/Out Configuring the Serial Ports Open Port Menu Æ Line to configure serial port settings. 1. From the MAIN MENU, select Port, and then press Enter. CN2610-8 CN2610-8_19 V2.0 MAIN MENU -----------------------------------------------------------------------------Server [Port] seTting sAve Utility Restart Exit Examine/modify async server ports configuration Enter: select 2. ESC: previous menu From the PORT MENU, select Line, and then press Enter. CN2610-8 CN2610-8_19 V2.0 PORT MENU -----------------------------------------------------------------------------Mode [Line] mOdem Welcome_MSG Quit Examine/modify asynchronous port configuration Enter: select 3. ESC: previous menu The Line page has pop-up selection lists for Port, Speed, Bits, Stop, Parity, FIFO, RTS/CTS, XON/XOFF, and Discon. ctrl for each serial port. Each item is described in detail below the figure. CN2610-8 CN2610-8_19 V2.0 -----------------------------------------------------------------------------Mode [Line] mOdem Welcome_MSG Quit Examine/modify asynchronous port configuration ESC: back to menu Port 01 02 03 04 05 06 07 08 Speed [115200] [115200] [115200] [115200] [115200] [115200] [115200] [115200] Setting Speed Bits Stop Parity FIFO RTS/CTS XON/XOFF Discon. Ctrl Bits [8] [8] [8] [8] [8] [8] [8] [8] Enter: Stop [ 1 ] [ 1 ] [ 1 ] [ 1 ] [ 1 ] [ 1 ] [ 1 ] [ 1 ] select Parity [None ] [None ] [None ] [None ] [None ] [None ] [None ] [None ] FIFO [yes] [yes] [yes] [yes] [yes] [yes] [yes] [yes] Value 50 bps to 921.6 Kbps 5, 6, 7, 8 1, 1.5, 2 None, Even, Odd, Mark, Space Yes, No Yes, No Yes, No None DSR off DCD off 11-13 RTS/CTS [yes] [yes] [yes] [yes] [yes] [yes] [yes] [yes] XON/XOFF [no ] [no ] [no ] [no ] [no ] [no ] [no ] [no ] Discon. ctrl [None ] [None ] [None ] [None ] [None ] [None ] [None ] [None ] Notes Transmission rate Data bits Stop bits Odd, Even, Mark, Space First In First Out Device Hardware Flow Control Software Flow Control DSR off or DCD off will not be interpreted as a disconnection. DSR off will be interpreted as a disconnection. DCD off will be interpreted as a disconnection. CN2610 User’s Manual 4. Setting Up Dial-in/Out Press ESC to return to the PORT MENU. Configuring Modem Initialization Open Port Menu Æ Modem to configure modem dial-out initialization and dial-out phone numbers. 1. From the MAIN MENU, use the arrow keys to select Port, and then press Enter. CN2610-8 CN2610-8_19 V2.0 MAIN MENU -----------------------------------------------------------------------------Server [Port] seTting sAve Utility Restart Exit Examine/modify async server ports configuration Enter: select 2. ESC: previous menu From the PORT MENU, select mOdem, and then press Enter. CN2610-8 CN2610-8_19 V2.0 PORT MENU -----------------------------------------------------------------------------Mode Line [mOdem] Welcome_MSG Quit Modem initialization and dial-out setting Enter: select 3. ESC: previous menu The Modem page has input/display fields for Enable, Initialize, Dialup, and Phone number for each serial port. Each item is described in detail below the figure. CN2610-8 CN2610-8_19 V2.0 PORT MENU -----------------------------------------------------------------------------Mode Line [mOdem] Welcome_MSG Quit Modem initialization and dial-out setting ESC: back to menu Enter: select +-----+ Port Enabl| no |ialize 01 [yes]| yes | ] 02 [no ]+-----+ ] 03 [no ] [AT ] 04 [no ] [AT ] 05 [no ] [AT ] 06 [no ] [AT ] 07 [no ] [AT ] 08 [no ] [AT ] NOTE Setting Enable Initialize yes/no String Value Dial Up Phone Number String Number Dial Up [ATD [ATD [ATD [ATD [ATD [ATD [ATD [ATD ] ] ] ] ] ] ] ] Phone Number [ [ [ [ [ [ [ [ Notes Enable modem settings Set the modem initial string. E.g., AT&S0 =1 for auto-answer. Dial-up AT command Set the number you use to dial out The Dial Up and Phone Number settings are only valid under PPP/SLIP mode. 4. Press Esc to return to the PORT MENU. 11-14 ] ] ] ] ] ] ] ] CN2610 User’s Manual Setting Up Dial-in/Out Optional Welcome Message Open Port Menu Æ Welcome_MSG to set up a welcome message to greet dial-in users. 1. From the MAIN MENU, use the arrow keys to select Port, and then press Enter. CN2610-8 CN2610-8_19 V2.0 MAIN MENU -----------------------------------------------------------------------------Server [Port] seTting sAve Utility Restart Exit Examine/modify async server ports configuration Enter: select 2. ESC: previous menu From the PORT MENU, select Welcome_MSG, and then press Enter. CN2610-8 CN2610-8_19 V2.0 -----------------------------------------------------------------------------Mode Line mOdem [Welcome_MSG] Quit Edit the hello message for Terminal port ESC: back to menu Enter: select vvvvvvvvvvvvvvvvvvvvvvvvvvvEnable hello message : [ no <<< Moxa Async Server >>> 3. Select yes to edit the welcome message. 4. Press Esc to return to the PORT MENU. +-----+ | no | | yes |vvvvvvvvvvvv +-----+ Configuring Optional Local User Information Open Server Menu Æ User_Table, to configure local user authentication information. If you set Incoming PAP check or Authentication type as Local instead of Server, you will need to configure the User_table for user authentication. The User_table page is also used to activate the call-back function. 1. From the MAIN MENU, use the arrow keys to select Server, and then press Enter. CN2610-8 CN2610-8_19 V2.0 MAIN MENU -----------------------------------------------------------------------------[Server] Port seTting sAve Utility Restart Exit Examine/modify async server node/table configuration Enter: select 2. ESC: previous menu From the SERVER MENU, select User_table, and then press Enter. CN2610-8 CN2610-8_19 V2.0 SERVER MENU -----------------------------------------------------------------------------Info. Lan Adv. Host_table Route_table [User_table] Quit Examine/modify the user/password table Enter: select 3. ESC: previous menu The User_table page has input fields for User name, Password, and Phone Number, for each serial port. Input a Phone Number to activate the automatic call back function. Note that CN2610 can store information for up to 64 users. 11-15 CN2610 User’s Manual Setting Up Dial-in/Out CN2610-8 CN2610-8_19 V2.0 -----------------------------------------------------------------------------Info. Lan Adv. Host_table Route_table [User_table] Quit Examine/modify the user/password table ESC: back to menu Entry 01 02 03 04 05 4. Enter: select User name [ [ [ [ [ Password ] ] ] ] ] [ [ [ [ [ Phone Number ] ] ] ] ] [ [ [ [ [ ] ] ] ] ] Press Esc to return to the MAIN MENU. Save When exiting the SERVER MENU, you will be prompted to save settings. Press Y to save. CN2610-8 CN2610-8_19 V2.0 SERVER MENU -----------------------------------------------------------------------------Info. Lan Adv. Host_table Route_table [User_table] Quit Examine/modify async server basic configuration Enter: select ESC: previous menu +-----------------------------------------------------+ | Warning !!! | | You had modified the configuration without saving. | | Would you save it now ? | | ‘Y: yes ‘N’: no | +-----------------------------------------------------+ You may also save all settings from the MAIN MENU by selecting sAve and then pressing Enter. Press Enter again to save, and any other key to cancel. CN2610-8 CN2610-8_19 V2.0 MAIN MENU -----------------------------------------------------------------------------Server Port seTting [sAve] Utility Restart Exit Save current configuration to Flash ROM ESC: back to menu Enter: select +-------------------------------------+ |Enter to updated, other key to cancel| +-------------------------------------+ 11-16 CN2610 User’s Manual Setting Up Dial-in/Out Restart 1. From the MAIN MENU, select Restart. CN2610-8 CN2610-8_19 V2.0 MAIN MENU -----------------------------------------------------------------------------Server Port seTting sAve Utility [Restart] Exit Restart the whole system or selected async ports Enter: select 2. ESC: previous menu Select System and then press Enter to restart the system and terminate the Telnet session. CN2610-8 CN2610-8_19 V2.0 -----------------------------------------------------------------------------[System] Port Quit Restart the Async Server ESC: back to menu Enter: select +--------------------------------------------------------------------+ | Warning !!! | | Restart system will disconnect all ports and clear all status value | | ‘ Enter: continue ESC: cancel | +--------------------------------------------------------------------+ 11-17 12 Chapter 12 Setting Up Printer In this chapter, we describe how to set up Moxa CN2610 as a printer server. Up to 16 serial printers can be connected simultaneously to one CN2610. At the end of the chapter, the settings needed for one-port parallel printing is illustrated for both UNIX and Windows systems. The following topics are covered in this chapter: Accessing the Console Utility Selecting the Application Configuring RAW PRN Mode Configuring LPD PRN Mode Configuring the Serial Ports Save Restart Setting up Unix Hosts ¾ Setting up a SCO Unix Host ¾ Setting up a SOLARIS X86 Host ¾ Setting up a LINUX Host Setting up Windows Hosts ¾ Setting up a Windows NT Host ¾ Setting up a Windows 2000 Host CN2610 User’s Manual Setting Up Printer Accessing the Console Utility NOTE In this section, we show how to access CN2610’s console utility by Telnet over the network. For information on using the console port, see the section “Accessing the Console Utility” in Chapter 2. 1. Telnet over the network to the server’s IP address. 2. Type 1 to choose ansi/vt100, and then press Enter. Telnet 192.168.127.254 Async Server CN2610-8 Console terminal type (1: ansi/vt100, 2: vt52) : 1 3. CN2610’s MAIN MENU will open, as shown below. Telnet 192.168.127.254 CN2610-8 CN2610-8_19 V2.0 MAIN MENU -----------------------------------------------------------------------------[Server] Port seTting sAve Utility Restart Exit Examine/modify async server node/table configuration Enter: select ESC: previous menu Use the following keystrokes to navigate CN2610’s console utility. Action Move Jump to next menu, or Select item Return to previous menu, or Close pop up selector Shortcut Key Key [Up/Down/Left/Right] Arrow Key or [Tab] Key [Enter] Key [Esc] Key Capitalized letter of the word 12-2 CN2610 User’s Manual Setting Up Printer Selecting the Application Open Port Menu Æ Mode to set up the Printer application. 1. From the MAIN MENU, select Port, and then press Enter. CN2610-8 CN2610-8_19 V2.0 MAIN MENU -----------------------------------------------------------------------------Server [Port] seTting sAve Utility Restart Exit Examine/modify async server ports configuration Enter: select 2. ESC: previous menu From the PORT MENU, select Mode, and then press Enter. CN2610-8 CN2610-8_19 V2.0 PORT MENU -----------------------------------------------------------------------------[Mode] Line mOdem Welcome_MSG Quit Examine/modify the operation mode of async ports Enter: select 3. ESC: previous menu The Mode page has pop-up selection lists for Application, Mode, and Description/more setting for each serial port. Use the arrow keys to move the cursor to the Application column for the port to be configured, and then press Enter. We use Port 6 to illustrate. CN2610-8 CN2610-8_19 V2.0 -----------------------------------------------------------------------------[Mode] Line mOdem Welcome_MSG Quit Examine/modify the operation mode of async ports ESC: back to menu Port 01 02 03 04 05 06 07 4. Application [NT Real COM [NT Real COM [NT Real COM [NT Real COM [NT Real COM [NT Real COM [NT Real COM Enter: ] ] ] ] ] ] ] select Mode [ASPP [ASPP [ASPP [ASPP [ASPP [ASPP [ASPP ] ] ] ] ] ] ] Description/more setting [Async Server Proprietary [Async Server Proprietary [Async Server Proprietary [Async Server Proprietary [Async Server Proprietary [Async Server Proprietary [Async Server Proprietary Protocol] Protocol] Protocol] Protocol] Protocol] Protocol] Protocol] Use the up/down arrow keys to select Printer, and then press Enter to confirm. CN2610-8 CN2610-8_19 V2.0 -----------------------------------------------------------------------------[Mode] Line mOdem Welcome_MSG Quit Examine/modify the operation mode of async ports ESC: back to menu Port 01 02 03 04 05 06 07 08 Application [Dialin/out [Dialin/out [Dialin/out [Dialin/out [Dialin/out [Dialin/out [Dialin/out [Dialin/out Enter: select +------------------+ption/more setting ]| Disable |Term/SLIP/PPP identification] ]| Dialin/out |Term/SLIP/PPP identification] ]| Terminal |Term/SLIP/PPP identification] ]| Reverse Terminal |Term/SLIP/PPP identification] ]| Device Control |Term/SLIP/PPP identification] ]| Multiplex |Term/SLIP/PPP identification] ]| Printer |Term/SLIP/PPP identification] ]| Multi-Host TTY |Term/SLIP/PPP identification] ]| NT Real COM | ]| DRDAS | ]| Raw UDP | ]+------------------+ 12-3 CN2610 User’s Manual 5. Setting Up Printer The Dialin/out application supports two operation modes: RAW PRN and LPD PRN. RAW PRN mode is selected by default. CN2610-8 CN2610-8_19 V2.0 -----------------------------------------------------------------------------[Mode] Line mOdem Welcome_MSG Quit Examine/modify the operation mode of async ports ESC: back to menu Port 01 02 03 04 05 06 07 Application [NT Real COM [NT Real COM [NT Real COM [NT Real COM [NT Real COM [Printer [NT Real COM Enter: ] ] ] ] ] ] ] select Mode [ASPP [ASPP [ASPP [ASPP [ASPP [RAW PRN [ASPP ] ] ] ] ] ] ] Description/more setting [Async Server Proprietary Protocol] [Async Server Proprietary Protocol] [Async Server Proprietary Protocol] [Async Server Proprietary Protocol] [Async Server Proprietary Protocol] [Raw serial port printer mode ] [Async Server Proprietary Protocol] Configuring RAW PRN Mode 1. Move the cursor to the Mode column for the port and then press Enter. CN2610-8 CN2610-8_19 V2.0 -----------------------------------------------------------------------------[Mode] Line mOdem Welcome_MSG Quit Examine/modify the operation mode of async ports ESC: back to menu Port 01 02 03 04 05 06 07 2. Application [NT Real COM [NT Real COM [NT Real COM [NT Real COM [NT Real COM [Printer [NT Real COM Enter: ] ] ] ] ] ] ] select Mode [ASPP [ASPP [ASPP [ASPP [ASPP [RAW PRN [ASPP ] ] ] ] ] ] ] Description/more setting [Async Server Proprietary Protocol] [Async Server Proprietary Protocol] [Async Server Proprietary Protocol] [Async Server Proprietary Protocol] [Async Server Proprietary Protocol] [Raw serial port printer mode ] [Async Server Proprietary Protocol] Select RAW PRN, and then press Enter. CN2610-8 CN2610-8_19 V2.0 -----------------------------------------------------------------------------[Mode] Line mOdem Welcome_MSG Quit Examine/modify the operation mode of async ports ESC: back to menu Port 01 02 03 04 05 06 07 08 3. Application [NT Real COM [NT Real COM [NT Real COM [NT Real COM [NT Real COM [Printer [NT Real COM [NT Real COM Enter: ] ] ] ] ] ] ] ] select Mode [ASPP [ASPP [ASPP [ASPP [ASPP [RAW PRN [ASPP [ASPP Description/more setting ] [Async Server Proprietary Protocol] ] [Async Server Proprietary Protocol] ] [Async Server Proprietary Protocol] ]+----------+ rver Proprietary Protocol] ]| RAW PRN |rver Proprietary Protocol] ]| LPD PRN |al port printer mode ] ]+----------+rver Proprietary Protocol] ] [Async Server Proprietary Protocol] Move the cursor to the Description/more setting column, and then press Enter. 12-4 CN2610 User’s Manual Setting Up Printer CN2610-8 CN2610-8_19 V2.0 -----------------------------------------------------------------------------[Mode] Line mOdem Welcome_MSG Quit Examine/modify the operation mode of async ports ESC: back to menu Port 01 02 03 04 05 06 07 4. Application [NT Real COM [NT Real COM [NT Real COM [NT Real COM [NT Real COM [Printer [NT Real COM Enter: ] ] ] ] ] ] ] select Mode [ASPP [ASPP [ASPP [ASPP [ASPP [RAW PRN [ASPP ] ] ] ] ] ] ] Description/more setting [Async Server Proprietary Protocol] [Async Server Proprietary Protocol] [Async Server Proprietary Protocol] [Async Server Proprietary Protocol] [Async Server Proprietary Protocol] [Raw serial port printer mode ] [Async Server Proprietary Protocol] The pop-up selector contains input/display fields for Group, TCP Pcort number, and TCP alive check time. Each item is described in detail below the figure. +------------------------------------------+ | Group : [Group01] | | TCP port number : [2048] | | TCP alive check time: [0 ] minutes | +------------------------------------------+ Setting Group TCP port number TCP alive check time 5. Value Notes Group 01-16 Groups printers attached to different ports. Printers in the same group will share the printing load for printing requests to that group of printers. E.g., setting CN2610’s serial ports 1, 3, and 6 for Group01 will allow the printers attached to these three ports to act essentially as one printer. 2048-2063 The host uses this value to determine which Group the printer attached to this serial port belongs to. These values are fixed, and cannot be changed by the user. Group TCP Port No. 01 2048 02 2049 03 2050 ... ... 16 2063 0-99 minutes The time period CN2610 waits before checking if the TCP connection is alive or not. If no response is received, CN2610 will reset the port and terminate the connection. Press Esc to return to the PORT MENU. 12-5 Necessity Optional Fixed Optional CN2610 User’s Manual Setting Up Printer Configuring LPD PRN Mode 1. Move the cursor to the Mode column for the port and then press Enter. CN2610-8 CN2610-8_19 V2.0 -----------------------------------------------------------------------------[Mode] Line mOdem Welcome_MSG Quit Examine/modify the operation mode of async ports ESC: back to menu Port 01 02 03 04 05 06 07 2. Application [NT Real COM [NT Real COM [NT Real COM [NT Real COM [NT Real COM [Printer [NT Real COM Enter: ] ] ] ] ] ] ] select Mode [ASPP [ASPP [ASPP [ASPP [ASPP [RAW PRN [ASPP ] ] ] ] ] ] ] Description/more setting [Async Server Proprietary Protocol] [Async Server Proprietary Protocol] [Async Server Proprietary Protocol] [Async Server Proprietary Protocol] [Async Server Proprietary Protocol] [Raw serial port printer mode ] [Async Server Proprietary Protocol] Select LPD PRN, and then press Enter. CN2610-8 CN2610-8_19 V2.0 -----------------------------------------------------------------------------[Mode] Line mOdem Welcome_MSG Quit Examine/modify the operation mode of async ports ESC: back to menu Port 01 02 03 04 05 06 07 08 3. Application [NT Real COM [NT Real COM [NT Real COM [NT Real COM [NT Real COM [Printer [NT Real COM [NT Real COM Enter: ] ] ] ] ] ] ] ] select Mode [ASPP [ASPP [ASPP [ASPP [ASPP [RAW PRN [ASPP [ASPP Description/more setting ] [Async Server Proprietary Protocol] ] [Async Server Proprietary Protocol] ] [Async Server Proprietary Protocol] ]+----------+ rver Proprietary Protocol] ]| RAW PRN |rver Proprietary Protocol] ]| LPD PRN |al port printer mode ] ]+----------+rver Proprietary Protocol] ] [Async Server Proprietary Protocol] Move the cursor to the Description/more setting column, and then press Enter. CN2610-8 CN2610-8_19 V2.0 -----------------------------------------------------------------------------[Mode] Line mOdem Welcome_MSG Quit Examine/modify the operation mode of async ports ESC: back to menu Port 01 02 03 04 05 06 07 4. Application [NT Real COM [NT Real COM [NT Real COM [NT Real COM [NT Real COM [Printer [NT Real COM Enter: ] ] ] ] ] ] ] select Mode [ASPP [ASPP [ASPP [ASPP [ASPP [LPD PRN [ASPP ] ] ] ] ] ] ] Description/more setting [Async Server Proprietary Protocol] [Async Server Proprietary Protocol] [Async Server Proprietary Protocol] [Async Server Proprietary Protocol] [Async Server Proprietary Protocol] [LPD serial port printer mode ] [Async Server Proprietary Protocol] The pop-up selector contains input/display fields for Queue name <RAW>, Queue name <ASCII>, Append Form Feed, and TCP alive check time. Each item is described in detail below the figure. +------------------------------------------+ | Queue name <RAW> : [ ]| | Queue name <ASCII> : [ ]| | Append Form Feed : [Disable]| | | TCP alive check time: [0 ] minu | +------------------------------------------+ 12-6 CN2610 User’s Manual Setting Queue name (RAW) Queue name (ASCII) Append Form Feed TCP alive check time Setting Up Printer Value Text Notes Specify print queue’s name (in RAW mode) Necessity Fixed Text Specify print queue’s name (in ASCII mode) Fixed Enable/ Specify paging Optional Disable 0-99 minutes The time period CN2610 waits before Optional checking if the TCP connection is alive or not. If no response is received, CN2610 will reset the port and terminate the connection. Configuring the Serial Ports Open Port Menu Æ Line to configure serial port settings. 1. From the MAIN MENU, select Port, and then press Enter. CN2610-8 CN2610-8_19 V2.0 MAIN MENU -----------------------------------------------------------------------------Server [Port] seTting sAve Utility Restart Exit Examine/modify async server ports configuration Enter: select 2. ESC: previous menu From the PORT MENU, select Line, and then press Enter. CN2610-8 CN2610-8_19 V2.0 PORT MENU -----------------------------------------------------------------------------Mode [Line] mOdem Welcome_MSG Quit Examine/modify asynchronous port configuration Enter: select 3. ESC: previous menu The Line page has pop-up selection lists for Port, Speed, Bits, Stop, Parity, FIFO, RTS/CTS, XON/XOFF, and Discon. ctrl for each serial port. Each item is described in detail below the figure. CN2610-8 CN2610-8_19 V2.0 -----------------------------------------------------------------------------Mode [Line] mOdem Welcome_MSG Quit Examine/modify asynchronous port configuration ESC: back to menu Port 01 02 03 04 05 06 07 08 Speed [115200] [115200] [115200] [115200] [115200] [115200] [115200] [115200] Setting Speed Bits Stop Bits [8] [8] [8] [8] [8] [8] [8] [8] Enter: Stop [ 1 ] [ 1 ] [ 1 ] [ 1 ] [ 1 ] [ 1 ] [ 1 ] [ 1 ] select Parity [None ] [None ] [None ] [None ] [None ] [None ] [None ] [None ] Value 50 bps to 921.6 Kbps 5, 6, 7, 8 1, 1.5, 2 12-7 FIFO [yes] [yes] [yes] [yes] [yes] [yes] [yes] [yes] RTS/CTS [yes] [yes] [yes] [yes] [yes] [yes] [yes] [yes] XON/XOFF [no ] [no ] [no ] [no ] [no ] [no ] [no ] [no ] Discon. ctrl [None ] [None ] [None ] [None ] [None ] [None ] [None ] [None ] Notes Transmission rate Data bits Stop bits CN2610 User’s Manual Setting Up Printer Parity FIFO RTS/CTS XON/XOFF Discon. Ctrl None, Even, Odd, Mark, Space Yes, No Yes, No Yes, No None DSR off DCD off 4. Odd, Even, Mark, Space First In First Out Device Hardware Flow Control Software Flow Control DSR off or DCD off will not be interpreted as a disconnection. DSR off will be interpreted as a disconnection. DCD off will be interpreted as a disconnection. Press ESC to return to the PORT MENU. Save When exiting the SERVER MENU, you will be prompted to save settings. Press Y to save. CN2610-8 CN2610-8_19 V2.0 SERVER MENU -----------------------------------------------------------------------------Info. Lan Adv. Host_table Route_table [User_table] Quit Examine/modify async server basic configuration Enter: select ESC: previous menu +-----------------------------------------------------+ | Warning !!! | | You had modified the configuration without saving. | | Would you save it now ? | | ‘Y: yes ‘N’: no | +-----------------------------------------------------+ You may also save all settings from the MAIN MENU by selecting sAve and then pressing Enter. Press Enter again to save, and any other key to cancel. CN2610-8 CN2610-8_19 V2.0 MAIN MENU -----------------------------------------------------------------------------Server Port seTting [sAve] Utility Restart Exit Save current configuration to Flash ROM ESC: back to menu Enter: select +-------------------------------------+ |Enter to updated, other key to cancel| +-------------------------------------+ 12-8 CN2610 User’s Manual Setting Up Printer Restart 1. From the MAIN MENU, select Restart. CN2610-8 CN2610-8_19 V2.0 MAIN MENU -----------------------------------------------------------------------------Server Port seTting sAve Utility [Restart] Exit Restart the whole system or selected async ports Enter: select 2. ESC: previous menu Select System and then press Enter to restart the system and terminate the Telnet session. CN2610-8 CN2610-8_19 V2.0 -----------------------------------------------------------------------------[System] Port Quit Restart the Async Server ESC: back to menu Enter: select +--------------------------------------------------------------------+ | Warning !!! | | Restart system will disconnect all ports and clear all status value | | ‘ Enter: continue ESC: cancel | +--------------------------------------------------------------------+ Setting up Unix Hosts UNIX uses the RLP program for remote parallel printing. For serial printing, Moxa provides the asprint utility program, which consists of two files, asprint.c and asprint.mak. First uncompress printer.tar.Z to the \printer directory, and then locate the files asprint.c and asprint.mak. To compile and link, you may need to modify the source file asprint.c. For instance, in SCO UNIX you must link to the libnls.a library, in Solaris to libnsl.a, and in Venix to the libnsl_s.a. Setting up a SCO Unix Host Steps SCO UNIX Command Description Uncompress all programs #tar /dev/fd0 ./ Uncompress printer.tar.Z to ./printer #tar xvf printer.tar.Z compile/link #make -f sco_unix.mak make printer node #mknod /dev/iop1 p Create a unique pipe name for each printer group. Since there are 16 groups of TCP port numbers (from 2048 to 2063), you need to create 16 respective pipe names. For example: iop1, iop2, iop3, etc. set it to printer #chown lp /dev/iop1 Change the pipe owner to 1p 12-9 CN2610 User’s Manual Steps Setting Up Printer SCO UNIX Command Description set rw #chmod 600 /dev/iop1 Change access permission to 600 or rw----- set printer name #/usr/lib/lpadmin -pLaser1 -v/dev/iop1 Redirect the printer spooler to write to pipe ‘iop1’. Assumes the printer name is Laser1. execute asprint for Group 01 #/asprint /dev/iop1 ‘CN2610 IP address’ 2048 & Start ‘asprint’ utility to read from pipe ‘iop1’ and write to the CN2610 printer port. ‘/dev/iop1’: the device name the spooler is writing to. ‘CN2610’: the host name of the CN2610 as defined in /etc/hosts, or its IP address. ‘2048’: the TCP port number (Group01) of the printer port on the CN2610. accept printer Laser1 #/usr/lib/accept Laser1 Set Laser 1 to accept print request. enable Laser1 #enable printer Laser1 enable Laser1 print file to Laser1 #lp -dLaser1 file_name send print job to the CN2610 Repeat Repeat the above steps to set up another printer. For printers in the same group, it is not necessary to repeat every step. Setting up a SOLARIS X86 Host Steps SCO UNIX Command Description Set free the occupied Floppy #/etc/init.d/volmgt stop disk Uncompress all programs #tar /dev/fd0 ./ Uncompress printer.tar.Z to ./printer #tar xvf printer.tar.Z compile/link #make -f sco_unix.mak make printer node #mknod /dev/iop1 p Create a unique pipe name for each printer group. Since there are 16 groups of TCP port numbers (from 2048 to 2063), you need to create 16 respective pipe names. For example: iop1, iop2, iop3, etc. set it to printer #chown lp /dev/iop1 Change the pipe owner to 1p set rw #chmod 600 /dev/iop1 Change access permission to 600 or rw----- set printer name #/usr/lib/lpadmin -pLaser1 -v/dev/iop1 Redirect the printer spooler to write to pipe ‘iop1’. Assumes the printer name is Laser1. 12-10 CN2610 User’s Manual Steps Setting Up Printer SCO UNIX Command execute asprint for Group 01 #/asprint /dev/iop1 ‘CN2610 IP address’ 2048 & Description Start ‘asprint’ utility to read from pipe ‘iop1’ and write to the CN2610 printer port. ‘/dev/iop1’: the device name the spooler is writing to. ‘CN2610’: the host name of the CN2610 as defined in /etc/hosts, or its IP address. ‘2048’: the TCP port number (Group01) of the printer port on the CN2610. accept printer Laser1 #/usr/lib/accept Laser1 Set Laser 1 to accept print request. enable Laser1 #enable printer Laser1 enable Laser1 print file to Laser1 #lp -dLaser1 file_name send print job to the CN2610 Repeat Repeat the above steps to set up another printer. For printers in the same group, it is not necessary to repeat every step. Setting up a LINUX Host Steps SCO UNIX Command Description Uncompress all programs #tar /dev/fd0 ./ Uncompress printer.tar.Z to ./printer #tar xvf printer.tar.Z compile/link #make -f sco_unix.mak make printer node #mknod /dev/iop1 p Create a unique pipe name for each printer group. Since there are 16 groups of TCP port numbers (from 2048 to 2063), you need to create 16 respective pipe names. For example: iop1, iop2, iop3, etc. set it to printer #chown lp /dev/iop1 Change the pipe owner to 1p set rw #chmod 600 /dev/iop1 Change access permission to 600 or rw----- set printer name #/usr/lib/lpadmin -pLaser1 -v/dev/iop1 Redirect the printer spooler to write to pipe ‘iop1’. Assumes the printer name is Laser1. add one line to /etc/printcap file Laser1:lp=/dev/iop1,sd=/ usr/spool/Laser1 make spool directory #mkdir /usr/spool/Laser1 1. 12-11 CN2610 User’s Manual Steps Setting Up Printer SCO UNIX Command execute asprint for Group 01 #/asprint /dev/iop1 ‘CN2610 IP address’ 2048 & Description Start ‘asprint’ utility to read from pipe ‘iop1’ and write to the CN2610 printer port. ‘/dev/iop1’: the device name the spooler is writing to. ‘CN2610’: the host name of the CN2610 as defined in /etc/hosts, or its IP address. ‘2048’: the TCP port number (Group01) of the printer port on the CN2610. accept printer Laser1 #lpr -PLaser1 file_name.txt Repeat Set Laser 1 to accept print request. Repeat the above steps to set up another printer. For printers in the same group, it is not necessary to repeat every step. Setting up Windows Hosts Windows uses the LPD/LPR application to access printers. Moxa provides LPD PRN mode for serial printing. In this section, we explain how to install a LPD/LPR printer in a Windows NT/2000 environment to access a serial printer connected to a CN2610 Async Server. Setting up a Windows NT Host 1. First, you need to add TCP/IP printing service to your Windows NT. 2. Go to Start Æ Settings Æ Control Panel Æ Network. Click the Services tab, and then select Add. 12-12 CN2610 User’s Manual Setting Up Printer 3. Select Microsoft TCP/IP Printing, and then click OK to continue. 4. Insert the Windows NT installation CD to your computer’s CD driver. 5. After the Microsoft TCP/IP Printing service is added, reboot your computer. 6. At this point, you can start configuring your LPR/LPD Printer. 7. Click Start Æ Settings Æ Printers. 8. Click Add Printer to start the Add Printer Wizard. 9. Select My Computer, and then click Next to continue. 12-13 CN2610 User’s Manual Setting Up Printer 10. In the window that opens next, click Add Port. 11. Select LPR Port. Click New Port…. 12. Enter CN2610’s IP Address, and then enter the Print Queue’s name. Click OK to continue. 13. Select logical printer port for the LPR port you just added. The LPF port should be the IP address of the port. 12-14 CN2610 User’s Manual Setting Up Printer 14. Select the printer’s manufacturer and model name. Click Next to continue. 15. Enter the printer’s name, and select yes if you wish to set this printer as the default printer. Click Next to continue. 16. Select Shared when prompted with questions asking if the printer is to be shared or not, and then enter the name of the shared printer. 12-15 CN2610 User’s Manual Setting Up Printer 17. Print a test page to verify that the printer is configured correctly, and then click OK to finish. Setting up a Windows 2000 Host 1. Click Start Æ Settings Æ Printers. 2. Click Add Printer to start and Add Printer Wizard. 3. A Welcome message will appear. Click Next to continue. 12-16 CN2610 User’s Manual Setting Up Printer 4. Select Local printer, and click Next to continue. 5. Select Create a new port:, and then select LPR Port from the drop down list. Click Next to continue. 12-17 CN2610 User’s Manual Setting Up Printer 6. Enter CN2610’s IP Address, and then enter the Print Queue’s name. Click OK to continue. 7. Select the printer’s manufacturer and model name. Click Next to continue. 8. Enter the printer’s name, and select yes if you wish to set this printer as the default printer. Click Next to continue. 12-18 CN2610 User’s Manual 9. Setting Up Printer Select Shared when prompted with questions asking if the printer is to be shared or not, and then enter the name of the shared printer. Click Next to continue. 10. You will need to reboot Windows 2000 to enable the printer you just added. When asked if you want to print a test page, select No. Click Next to continue. 12-19 CN2610 User’s Manual Setting Up Printer 11. If you want to print a test page, reboot Windows 2000, select this printer, and click Print Test Page. 12-20 13 Chapter 13 Setting Up Multiplex In this chapter, we describe how to configure Moxa CN2610 as a Multiplexor and De-Multiplexor. Using the Multiplexor/De-Multiplexor application requires two Async Servers—one attached to a host with a multi-port serial board and several serial lines, and the other connected to external devices. In this way, the original host can use a TCP/IP connection to control serial devices from a remote location. The following topics are covered in this chapter: Accessing the Console Utility Selecting the Application Configuring the “Host” CN2610 Configuring the “Device” CN2610 Configuring the Serial Ports Save Restart CN2610 User’s Manual Setting Up Multiplexor Accessing the Console Utility NOTE In this section, we show how to access CN2610’s console utility by Telnet over the network. For information on using the console port, see the section “Accessing the Console Utility” in Chapter 2. 1. Telnet over the network to the server’s IP address. 2. Type 1 to choose ansi/vt100, and then press Enter. Telnet 192.168.127.254 Async Server CN2610-8 Console terminal type (1: ansi/vt100, 2: vt52) : 1 3. CN2610’s MAIN MENU will open, as shown below. Telnet 192.168.127.254 CN2610-8 CN2610-8_19 V2.0 MAIN MENU -----------------------------------------------------------------------------[Server] Port seTting sAve Utility Restart Exit Examine/modify async server node/table configuration Enter: select ESC: previous menu Use the following keystrokes to navigate CN2610’s console utility. Action Move Jump to next menu, or Select item Return to previous menu, or Close pop up selector Shortcut Key Key [Up/Down/Left/Right] Arrow Key or [Tab] Key [Enter] Key [Esc] Key Capitalized letter of the word 13-2 CN2610 User’s Manual Setting Up Multiplexor Selecting the Application The Multiplex application uses two Async Servers. One of the servers (called the “host” CN2610) is attached to a host with a multi-port serial board and mutiple serial lines. The other server (called the “device” CN2610) is connected to external serial devices. In this way, one host can use a TCP/IP connection to control multiple serial devices from a remote location. We use ports 5, 6, 7, and 8 on both CN2610’s to illustrate. IBM workstation with multiport board RS-232 CN2610 CN2610 16 port RS-232 Async Server 1 2 3 4 5 6 7 8 9 10 11 12 13 14 15 16 Tx Reset MENU SEL Ready Rx TCP/IP Router Router TCP/IP CN2610 CN2610 16 port RS-232 Async Server 1 2 3 4 5 6 7 8 9 10 11 12 13 14 15 16 Tx Reset MENU SEL Ready Rx RS-232 PO S t en r de h ea itc R pm e ui od Eq C Sw NOTE Configure the “Host” CN2610’s serial ports for RTELNET mode, and configure the “Device” CN2610’s serial ports for TERM_BIN mode. Configuring the “Host” CN2610 Open Port Menu Æ Mode to select the Multiplex application. 1. From the MAIN MENU, select Port, and then press Enter. CN2610-8 CN2610-8_19 V2.0 MAIN MENU -----------------------------------------------------------------------------Server [Port] seTting sAve Utility Restart Exit Examine/modify async server ports configuration Enter: select 2. ESC: previous menu From the PORT MENU, select Mode, and then press Enter. 13-3 CN2610 User’s Manual Setting Up Multiplexor CN2610-8 CN2610-8_19 V2.0 PORT MENU -----------------------------------------------------------------------------[Mode] Line mOdem Welcome_MSG Quit Examine/modify the operation mode of async ports Enter: select 3. ESC: previous menu The Mode page has pop-up selection lists for Application, Mode, and Description/more setting for each serial port. Use the arrow keys to move the cursor to the Application column for the port to be configured, and then press Enter. We first use Port 6 to illustrate. CN2610-8 CN2610-8_19 V2.0 -----------------------------------------------------------------------------[Mode] Line mOdem Welcome_MSG Quit Examine/modify the operation mode of async ports ESC: back to menu Port 01 02 03 04 05 06 07 08 4. Application [NT Real COM [NT Real COM [NT Real COM [NT Real COM [NT Real COM [NT Real COM [NT Real COM [NT Real COM Enter: ] ] ] ] ] ] ] ] select Mode [ASPP [ASPP [ASPP [ASPP [ASPP [ASPP [ASPP [ASPP ] ] ] ] ] ] ] ] Description/more setting [Async Server Proprietary [Async Server Proprietary [Async Server Proprietary [Async Server Proprietary [Async Server Proprietary [Async Server Proprietary [Async Server Proprietary [Async Server Proprietary Protocol] Protocol] Protocol] Protocol] Protocol] Protocol] Protocol] Protocol] Use the up/down arrow keys to select Multiplex, and then press Enter. CN2610-8 CN2610-8_19 V2.0 -----------------------------------------------------------------------------[Mode] Line mOdem Welcome_MSG Quit Examine/modify the operation mode of async ports ESC: back to menu Port 01 02 03 04 05 06 07 08 5. Application [NT Real COM [NT Real COM [NT Real COM [NT Real COM [NT Real COM [NT Real COM [NT Real COM [NT Real COM Enter: select +------------------+ption/more setting ]| Disable | Server Proprietary ]| Dialin/out | Server Proprietary ]| Terminal | Server Proprietary ]| Reverse Terminal | Server Proprietary ]| Device Control | Server Proprietary ]| Multiplex | Server Proprietary ]| Printer | Server Proprietary ]| Multi-Host TTY | Server Proprietary ]| NT Real COM | ]| Raw UDP | ]+------------------+ Protocol] Protocol] Protocol] Protocol] Protocol] Protocol] Protocol] Protocol] The Multiplex application supports two operation modes: RTELNET and TERM_BIN. RTELNET mode is selected by default. For the “Host” CN2610, use RTELNET mode. 13-4 CN2610 User’s Manual Setting Up Multiplexor CN2610-8 CN2610-8_19 V2.0 -----------------------------------------------------------------------------[Mode] Line mOdem Welcome_MSG Quit Examine/modify the operation mode of async ports ESC: back to menu Port 01 02 03 04 05 06 07 08 NOTE Application [NT Real COM [NT Real COM [NT Real COM [NT Real COM [NT Real COM [Multiplex [NT Real COM [NT Real COM Enter: ] ] ] ] ] ] ] ] select Mode [ASPP [ASPP [ASPP [ASPP [ASPP [RTELNET [ASPP [ASPP ] ] ] ] ] ] ] ] Description/more setting [Async Server Proprietary [Async Server Proprietary [Async Server Proprietary [Async Server Proprietary [Async Server Proprietary [Reverse Telnet mode [Async Server Proprietary [Async Server Proprietary Protocol] Protocol] Protocol] Protocol] Protocol] ] Protocol] Protocol] Reverse Telnet, or RTELNET, supports the Telnet program used by Ethernet hosts to login to serial hosts. Ethernet hosts recognize serial ports by the specified source IP address, or by the TCP port number followed by CN2610’s IP address. 6. Move the cursor to the Description/more setting column, and then press Enter. CN2610-8 CN2610-8_19 V2.0 -----------------------------------------------------------------------------[Mode] Line mOdem Welcome_MSG Quit Examine/modify the operation mode of async ports ESC: back to menu Port 01 02 03 04 05 06 07 08 7. Application [NT Real COM [NT Real COM [NT Real COM [NT Real COM [NT Real COM [Multiplex [NT Real COM [NT Real COM Enter: ] ] ] ] ] ] ] ] select Mode [ASPP [ASPP [ASPP [ASPP [ASPP [RTELNET [ASPP [ASPP ] ] ] ] ] ] ] ] Description/more setting [Async Server Proprietary [Async Server Proprietary [Async Server Proprietary [Async Server Proprietary [Async Server Proprietary [Reverse Telnet mode [Async Server Proprietary [Async Server Proprietary Protocol] Protocol] Protocol] Protocol] Protocol] ] Protocol] Protocol] The pop-up selector contains input/display fields for TCP port, Source IP address, Destination IP addr, Inactivity time, Map keys <CR-LF> to, Authentication type, and TCP alive check time. Each item is described in detail below the figure. +------------------------------------------------+ | TCP port : [4006 ] | | Source IP address : [ ] | | Destination IP addr : [ ] | | Inactivity time : [0 ] minutes | | Map keys <CR-LF> to : [CR-LF] | | Authentication type : [none ] | | TCP alive check time : [0 ] minutes | +------------------------------------------------+ 13-5 CN2610 User’s Manual Setting TCP port Source IP address Destination IP addr Map Keys <CR-LF> to Inactivity time Authentication type TCP alive check time 8. Setting Up Multiplexor Value number Notes Each of CN2610’s serial ports is mapped to a TCP port. To avoid conflicts with the TCP port numbers for CN251’s other serial ports, use the default values: 4001 for port 1, 4002 for port 2, etc. IP address for Specify an IP address for this port for the port application purposes. If left blank, CN2610 will use its own IP address, in which case you will need to specify different TCP port numbers for different serial ports. IP address Assign a host IP address on the LAN for exclusive port access. If left blank, all hosts on the network will have access to this port. CR/LF/CR-LF When you enter the string <CR-LF>, CN2610 will determine whether to send <CR>, <LF>, or <CR-LF>. 0-99 minutes Idle time before the port is disconnected automatically. If set to 0 minutes, the port will not disconnect. None/local None: Authentication is not required. /server local: Check the ID stored in the User_table (defined under the SERVER MENU). Server: Check the ID with the external RADIUS server. Refer to Appendix C for RADIUS installation information. 0-99 minutes The time period CN2610 waits before checking if the TCP connection is alive or not. If no response is received, CN2610 will reset the port and terminate the connection. Necessity Optional Optional Optional Optional Optional Optional Optional Repeat the previous steps for ports 5, 7, and 8. CN2610-8 CN2610-8_19 V2.0 -----------------------------------------------------------------------------[Mode] Line mOdem Welcome_MSG Quit Examine/modify the operation mode of async ports ESC: back to menu Port 01 02 03 04 05 06 07 08 Application [NT Real COM [NT Real COM [NT Real COM [NT Real COM [Multiplex [Multiplex [Multiplex [Multiplex Enter: ] ] ] ] ] ] ] ] select Mode [ASPP [ASPP [ASPP [ASPP [RTELNET [RTELNET [RTELNET [RTELNET 13-6 ] ] ] ] ] ] ] ] Description/more setting [Async Server Proprietary [Async Server Proprietary [Async Server Proprietary [Async Server Proprietary [Reverse Telnet mode [Reverse Telnet mode [Reverse Telnet mode [Reverse Telnet mode Protocol] Protocol] Protocol] Protocol] ] ] ] ] CN2610 User’s Manual Setting Up Multiplexor Configuring the “Device” CN2610 1. From the MAIN MENU, select Port, and then press Enter. CN2610-8 CN2610-8_19 V2.0 MAIN MENU -----------------------------------------------------------------------------Server [Port] seTting sAve Utility Restart Exit Examine/modify async server ports configuration Enter: select 2. ESC: previous menu From the PORT MENU, select Mode, and then press Enter. CN2610-8 CN2610-8_19 V2.0 PORT MENU -----------------------------------------------------------------------------[Mode] Line mOdem Welcome_MSG Quit Examine/modify the operation mode of async ports Enter: select 3. ESC: previous menu The Mode page has pop-up selection lists for Application, Mode, and Description/more setting for each serial port. Use the arrow keys to move the cursor to the Application column for the port to be configured, and then press Enter. We first use Port 6 to illustrate. CN2610-8 CN2610-8_19 V2.0 -----------------------------------------------------------------------------[Mode] Line mOdem Welcome_MSG Quit Examine/modify the operation mode of async ports ESC: back to menu Port 01 02 03 04 05 06 07 08 4. Application [NT Real COM [NT Real COM [NT Real COM [NT Real COM [NT Real COM [NT Real COM [NT Real COM [NT Real COM Enter: ] ] ] ] ] ] ] ] select Mode [ASPP [ASPP [ASPP [ASPP [ASPP [ASPP [ASPP [ASPP ] ] ] ] ] ] ] ] Description/more setting [Async Server Proprietary [Async Server Proprietary [Async Server Proprietary [Async Server Proprietary [Async Server Proprietary [Async Server Proprietary [Async Server Proprietary [Async Server Proprietary Protocol] Protocol] Protocol] Protocol] Protocol] Protocol] Protocol] Protocol] Use the up/down arrow keys to select Multiplex, and then press Enter to confirm. CN2610-8 CN2610-8_19 V2.0 -----------------------------------------------------------------------------[Mode] Line mOdem Welcome_MSG Quit Examine/modify the operation mode of async ports ESC: back to menu Port 01 02 03 04 05 06 07 08 5. Application [NT Real COM [NT Real COM [NT Real COM [NT Real COM [NT Real COM [NT Real COM [NT Real COM [NT Real COM Enter: select +------------------+ption/more setting ]| Disable | Server Proprietary ]| Dialin/out | Server Proprietary ]| Terminal | Server Proprietary ]| Reverse Terminal | Server Proprietary ]| Device Control | Server Proprietary ]| Multiplex | Server Proprietary ]| Printer | Server Proprietary ]| Multi-Host TTY | Server Proprietary ]| NT Real COM | ]| Raw UDP | ]+------------------+ Protocol] Protocol] Protocol] Protocol] Protocol] Protocol] Protocol] Protocol] The Multiplex application supports two operation modes: RTELNET and TERM_BIN. RTELNET mode is selected by default. For the “Device” CN2610, select TERM_BIN mode. 13-7 CN2610 User’s Manual Setting Up Multiplexor CN2610-8 CN2610-8_19 V2.0 -----------------------------------------------------------------------------[Mode] Line mOdem Welcome_MSG Quit Examine/modify the operation mode of async ports ESC: back to menu Port 01 02 03 04 05 06 07 08 6. Application [NT Real COM [NT Real COM [NT Real COM [NT Real COM [NT Real COM [Multiplex [NT Real COM [NT Real COM Enter: ] ] ] ] ] ] ] ] select Mode [ASPP [ASPP [ASPP [ASPP [ASPP [RTELNET [ASPP [ASPP ] ] ] ] ] ] ] ] Description/more setting [Async Server Proprietary [Async Server Proprietary [Async Server Proprietary [Async Server Proprietary [Async Server Proprietary [Reverse Telnet mode [Async Server Proprietary [Async Server Proprietary Protocol] Protocol] Protocol] Protocol] Protocol] ] Protocol] Protocol] Move the cursor to the Mode column for the port and then press Enter. CN2610-8 CN2610-8_19 V2.0 -----------------------------------------------------------------------------[Mode] Line mOdem Welcome_MSG Quit Examine/modify the operation mode of async ports ESC: back to menu Port 01 02 03 04 05 06 07 08 7. Application [NT Real COM [NT Real COM [NT Real COM [NT Real COM [NT Real COM [Multiplex [NT Real COM [NT Real COM Enter: ] ] ] ] ] ] ] ] select Mode [ASPP [ASPP [ASPP [ASPP [ASPP [RTELNET [ASPP [ASPP ] ] ] ] ] ] ] ] Description/more setting [Async Server Proprietary [Async Server Proprietary [Async Server Proprietary [Async Server Proprietary [Async Server Proprietary [Reverse Telnet mode [Async Server Proprietary [Async Server Proprietary Protocol] Protocol] Protocol] Protocol] Protocol] ] Protocol] Protocol] Use the arrow keys to highlight TERM_BIN, and then press Enter. CN2610-8 CN2610-8_19 V2.0 -----------------------------------------------------------------------------[Mode] Line mOdem Welcome_MSG Quit Examine/modify the operation mode of async ports ESC: back to menu Port 01 02 03 04 05 06 07 08 8. Application [NT Real COM [NT Real COM [NT Real COM [NT Real COM [NT Real COM [Multiplex [NT Real COM [NT Real COM Enter: ] ] ] ] ] ] ] ] select Mode [ASPP [ASPP [ASPP [ASPP [ASPP [RTELNET [ASPP [ASPP Description/more setting ] [Async Server Proprietary ] [Async Server Proprietary ] [Async Server Proprietary ]+----------+rver Proprietary ]| RTELNET |rver Proprietary ]| TERM_BIN |Telnet mode ]+----------+rver Proprietary ] [Async Server Proprietary The next step is to configure the TERM_BIN parameters. 13-8 Protocol] Protocol] Protocol] Protocol] Protocol] ] Protocol] Protocol] CN2610 User’s Manual Setting Up Multiplexor CN2610-8 CN2610-8_19 V2.0 -----------------------------------------------------------------------------[Mode] Line mOdem Welcome_MSG Quit Examine/modify the operation mode of async ports ESC: back to menu Port 01 02 03 04 05 06 07 08 NOTE Application [NT Real COM [NT Real COM [NT Real COM [NT Real COM [NT Real COM [Multiplex [NT Real COM [NT Real COM Enter: ] ] ] ] ] ] ] ] select Mode [ASPP ] [ASPP ] [ASPP ] [ASPP ] [ASPP ] [TERM_BIN] [ASPP ] [ASPP ] Description/more setting [Async Server Proprietary Protocol] [Async Server Proprietary Protocol] [Async Server Proprietary Protocol] [Async Server Proprietary Protocol] [Async Server Proprietary Protocol] [Binary Terminal mode (1 session) ] [Async Server Proprietary Protocol] [Async Server Proprietary Protocol] Terminal Binary, or TERM_BIN mode, supports automatic link to Ethernet hosts for Terminal or Telnet users by redirecting Telnet requests to the specified Ethernet host. Below we describe how to set auto-link host and login ID information. Auto-linking one TERM_BIN port to a port in RTELNET mode provides a transparent link through the network. 9. Move the cursor to the Description/more setting column, and then press Enter. CN2610-8 CN2610-8_19 V2.0 -----------------------------------------------------------------------------[Mode] Line mOdem Welcome_MSG Quit Examine/modify the operation mode of async ports ESC: back to menu Port 01 02 03 04 05 06 07 08 Application [NT Real COM [NT Real COM [NT Real COM [NT Real COM [NT Real COM [Multiplex [NT Real COM [NT Real COM Enter: ] ] ] ] ] ] ] ] select Mode [ASPP ] [ASPP ] [ASPP ] [ASPP ] [ASPP ] [TERM_BIN] [ASPP ] [ASPP ] Description/more setting [Async Server Proprietary Protocol] [Async Server Proprietary Protocol] [Async Server Proprietary Protocol] [Async Server Proprietary Protocol] [Async Server Proprietary Protocol] [Binary Terminal mode (1 session) ] [Async Server Proprietary Protocol] [Async Server Proprietary Protocol] 10. The pop-up selector contains input/display fields for Quit key, Auto-link protocol, Link by input IP, Auto-login prompt, Terminal type, Inactivity time, Authentication type, and TCP alive check time. Each item is described in detail below the figure. +------------------------------------------------+ | Quit key : [^E] | | Auto-link protocol : [none ] | | Telnet TCP port : [23 ] | | Primary host IP : [ ] | | Link by input IP : [Disable] | | Secondary host IP : [ ] | | Auto-login prompt : [ogin: ] | | Password prompt : [assword: ] | | Login user name : [ ] | | Login password : [ ] | | Terminal type : [ansi ] | | Inactivity time : [0 ] minutes | | Authentication type : [local ] | | TCP alive check time : [0 ] minutes | +------------------------------------------------+ 13-9 CN2610 User’s Manual Setting Quit Key Setting Up Multiplexor Value Notes Defines the Quit key used to disconnect the link between the current terminal session and the remote host. It may be left blank for binary communication. Auto-link protocol None/Telnet/ None: Do not connect to the host Rlogin automatically. Telnet: Connects to the host automatically by Telnet. Rlogin: Connects to the host automatically by Rlogin. Telnet TCP port 23 Enter a number or leave the space blank. If not specified, then by default, port 23 is used. If you want to use Telnet without a TCP port number, set this option to 23. Primary host IP IP address or If specified, designates a ‘permanent’ the name host to which the terminal will always be defined in the connected. [Host] table Link by input IP Enable/ For users to enter the connection IP Disable address manually. Secondary host IP IP address or If specified, designates a secondary the name ‘permanent’ host to which the terminal defined in the will be connected. [Host] table. Auto-login prompt ogin: Send ID information when this prompt is received. Password prompt assword: Send Password information when this prompt is received Login user name Login ID Login password Login Password Terminal type ansi Terminal type for outgoing connection Inactivity time 0-99 minutes Idle time before the port is disconnected automatically. If set to 0 minutes, the port will not disconnect. Authentication None/local/ None: Authentication is not required. type server local: Check the ID stored in the User_table (defined under the SERVER MENU). Server: Check the ID with the external RADIUS server. Refer to Appendix C for RADIUS installation information. TCP alive check 0-99 minutes The time period CN2610 waits before time checking if the TCP connection is alive or not. If no response is received, CN2610 will reset the port and terminate the connection. ^E 13-10 Necessity Optional Optional Optional Optional Optional Optional Optional Optional Optional Optional Optional Optional Optional Optional CN2610 User’s Manual Setting Up Multiplexor 11. Repeat the previous steps for ports 5, 7, and 8. CN2610-8 CN2610-8_19 V2.0 -----------------------------------------------------------------------------[Mode] Line mOdem Welcome_MSG Quit Examine/modify the operation mode of async ports ESC: back to menu Port 01 02 03 04 05 06 07 08 Application [NT Real COM [NT Real COM [NT Real COM [NT Real COM [Multiplex [Multiplex [Multiplex [Multiplex Enter: ] ] ] ] ] ] ] ] select Mode [ASPP ] [ASPP ] [ASPP ] [ASPP ] [TERM_BIN] [TERM_BIN] [TERM_BIN] [TERM_BIN] Description/more setting [Async Server Proprietary Protocol] [Async Server Proprietary Protocol] [Async Server Proprietary Protocol] [Async Server Proprietary Protocol] [Binary Terminal mode (1 session) ] [Binary Terminal mode (1 session) ] [Binary Terminal mode (1 session) ] [Binary Terminal mode (1 session) ] Configuring the Serial Ports Open Port Menu Æ Line to configure serial port settings. 1. From the MAIN MENU, select Port, and then press Enter. CN2610-8 CN2610-8_19 V2.0 MAIN MENU -----------------------------------------------------------------------------Server [Port] seTting sAve Utility Restart Exit Examine/modify async server ports configuration Enter: select 2. ESC: previous menu From the PORT MENU, select Line, and then press Enter. CN2610-8 CN2610-8_19 V2.0 PORT MENU -----------------------------------------------------------------------------Mode [Line] mOdem Welcome_MSG Quit Examine/modify asynchronous port configuration Enter: select 3. ESC: previous menu The Line page has pop-up selection lists for Port, Speed, Bits, Stop, Parity, FIFO, RTS/CTS, XON/XOFF, and Discon. ctrl for each serial port. Each item is described in detail below the figure. CN2610-8 CN2610-8_19 V2.0 -----------------------------------------------------------------------------Mode [Line] mOdem Welcome_MSG Quit Examine/modify asynchronous port configuration ESC: back to menu Port 01 02 03 04 05 06 07 08 Speed [115200] [115200] [115200] [115200] [115200] [115200] [115200] [115200] Bits [8] [8] [8] [8] [8] [8] [8] [8] Enter: Stop [ 1 ] [ 1 ] [ 1 ] [ 1 ] [ 1 ] [ 1 ] [ 1 ] [ 1 ] select Parity [None ] [None ] [None ] [None ] [None ] [None ] [None ] [None ] 13-11 FIFO [yes] [yes] [yes] [yes] [yes] [yes] [yes] [yes] RTS/CTS [yes] [yes] [yes] [yes] [yes] [yes] [yes] [yes] XON/XOFF [no ] [no ] [no ] [no ] [no ] [no ] [no ] [no ] Discon. ctrl [None ] [None ] [None ] [None ] [None ] [None ] [None ] [None ] CN2610 User’s Manual Setting Up Multiplexor Setting Speed Bits Stop Parity FIFO RTS/CTS XON/XOFF Discon. Ctrl Value 50 bps to 921.6 Kbps 5, 6, 7, 8 1, 1.5, 2 None, Even, Odd, Mark, Space Yes, No Yes, No Yes, No None DSR off DCD off 4. Notes Transmission rate Data bits Stop bits Odd, Even, Mark, Space First In First Out Device Hardware Flow Control Software Flow Control DSR off or DCD off will not be interpreted as a disconnection. DSR off will be interpreted as a disconnection. DCD off will be interpreted as a disconnection. Press ESC to return to the PORT MENU. Save When exiting the SERVER MENU, you will be prompted to save settings. Press Y to save. CN2610-8 CN2610-8_19 V2.0 SERVER MENU -----------------------------------------------------------------------------Info. Lan Adv. Host_table Route_table [User_table] Quit Examine/modify async server basic configuration Enter: select ESC: previous menu +-----------------------------------------------------+ | Warning !!! | | You had modified the configuration without saving. | | Would you save it now ? | | ‘Y: yes ‘N’: no | +-----------------------------------------------------+ You may also save all settings from the MAIN MENU by selecting sAve and then pressing Enter. Press Enter again to save, and any other key to cancel. CN2610-8 CN2610-8_19 V2.0 MAIN MENU -----------------------------------------------------------------------------Server Port seTting [sAve] Utility Restart Exit Save current configuration to Flash ROM ESC: back to menu Enter: select +-------------------------------------+ |Enter to updated, other key to cancel| +-------------------------------------+ 13-12 CN2610 User’s Manual Setting Up Multiplexor Restart 1. From the MAIN MENU, select Restart. CN2610-8 CN2610-8_19 V2.0 MAIN MENU -----------------------------------------------------------------------------Server Port seTting sAve Utility [Restart] Exit Restart the whole system or selected async ports Enter: select 2. ESC: previous menu Select System and then press Enter to restart the system and terminate the Telnet session. CN2610-8 CN2610-8_19 V2.0 -----------------------------------------------------------------------------[System] Port Quit Restart the Async Server ESC: back to menu Enter: select +--------------------------------------------------------------------+ | Warning !!! | | Restart system will disconnect all ports and clear all status value | | ‘ Enter: continue ESC: cancel | +--------------------------------------------------------------------+ 13-13 14 Chapter 14 Setting Up Routing Routing is the main process used by Internet hosts to deliver packets. The Internet uses a hop-by-hop routing model, which means that each host or router that handles a packet examines the Destination Address in the IP header, computes the next hop that will bring the packet one step closer to its destination, and then delivers the packet to the next hop, where the process is repeated. Two things are needed to make this work: (1) Routing tables must match destination addresses with next hops, and (2) routing protocols must determine the contents of these tables. CN2610 provides easy-to-use routing functions that support both static routing tables and dynamic RIP1/RIP2 routing protocols. This chapter illustrates how to configure static routing tables and dynamic RIP1/RIP2 protocols. A few routing examples are also given to illustrate some basic routing concepts. The following topics are covered in this chapter: Accessing the Console Utility What is RIP? Configuring RIP Configuring the Static Routing Table Static Routing Examples ¾ Configuring Routes to the Internet ¾ Configuring Routes to the Internet and Intranet ¾ Configuring Multiple-Point Routes Save Restart CN2610 User’s Manual Setting Up Routing Accessing the Console Utility NOTE In this section, we show how to access CN2610’s console utility by Telnet over the network. For information on using the console port, see the section “Accessing the Console Utility” in Chapter 2. 1. Telnet over the network to the server’s IP address. 2. Type 1 to choose ansi/vt100, and then press Enter. Telnet 192.168.127.254 Async Server CN2610-8 Console terminal type (1: ansi/vt100, 2: vt52) : 1 3. CN2610’s MAIN MENU will open, as shown below. Telnet 192.168.127.254 CN2610-8 CN2610-8_19 V2.0 MAIN MENU -----------------------------------------------------------------------------[Server] Port seTting sAve Utility Restart Exit Examine/modify async server node/table configuration Enter: select ESC: previous menu Use the following keystrokes to navigate CN2610’s console utility. Action Move Jump to next menu, or Select item Return to previous menu, or Close pop up selector Shortcut Key Key [Up/Down/Left/Right] Arrow Key or [Tab] Key [Enter] Key [Esc] Key Capitalized letter of the word 14-2 CN2610 User’s Manual Setting Up Routing What is RIP? RIP (Routing Information Protocol) is a protocol used widely to manage routing information within a self-contained network, such as a corporate LAN (Local Area Network) or an interconnected group of such LANs. By using RIP, a gateway host with a router can send its entire routing table, which lists all the other hosts it knows about, to its closest neighbor host every 30 seconds. The neighbor host in turn will pass this information on to its closest neighbor, and so on, until all hosts within the network have the same routing path information. This state is known as network convergence. RIP uses a hop count as a way of determining network distance. (Other protocols use more sophisticated algorithms that also include timing.) After receiving a packet headed for a specific destination, a network host with a router uses the routing table information to determine the next host to route the packet to. RIP is considered an effective solution for small homogeneous networks. For larger, more complicated networks, transmitting the entire routing table every 30 seconds can bog down the network with a lot of extra traffic. RIP 2 is an extension of RIP. Its purpose is to expand the amount of useful information contained in RIP packets, and to add security elements. RIP version 2 recently became the standard version of RIP, and the original RIP is no longer in use. Configuring RIP Open Server Menu Æ Adv. to configure Dynamic routing. 1. From the MAIN MENU, select Server, and then press Enter. CN2610-8 CN2610-8_19 V2.0 MAIN MENU -----------------------------------------------------------------------------[Server] Port seTting sAve Utility Restart Exit Examine/modify async server node/table configuration Enter: select 2. ESC: previous menu From the SERVER MENU, select Adv., and then press Enter. CN2610-8 CN2610-8_19 V2.0 SERVER MENU -----------------------------------------------------------------------------Info. Lan [Adv.] Host_table Route_table User_table Quit Examine/modify async server advance configuration Enter: select 3. ESC: previous menu Use the Up/Down arrow keys to move the cursor to the Routing protocol pop-up selector. Press Enter to see the options. Select RIP-1 or RIP-2. The RIP setting is only for sending packets. For receiving packets, CN2610 supports both RIP-1 and RIP-2. 14-3 CN2610 User’s Manual Setting Up Routing CN2610-8 CN2610-8_19 V2.0 -----------------------------------------------------------------------------Info. Lan [Adv.] Host_table Route_table User_table Quit Examine/modify async server advance configuration ESC: back to menu Enter: select RADIUS server IP RADIUS key UDP port <1:1645 2:1812> Enable RADIUS accounting [ [ [1] [no ] SNMP community name SNMP trap server IP address [public [ +-------+ [no ] | None | [None ] | RIP-1 | | RIP-2 | [ ]+-------+: 50 – 60000 ms) [ ] (range: 0 – 1000 ms) Ethernet IP forwarding Routing protocol TCP retransmission timeout SIO data transfer timeout 4. ] ] ] ] Press Esc to return to the MAIN MENU. Configuring the Static Routing Table Although RIP-1 and RIP-2 periodically update routing tables between different routers, you still need to add routing entries in the routing table for routes only directed to you. Open Server Menu Æ Route_table to configure the static routing table. 1. From the MAIN MENU, select Server, and then press Enter. CN2610-8 CN2610-8_19 V2.0 MAIN MENU -----------------------------------------------------------------------------[Server] Port seTting sAve Utility Restart Exit Examine/modify async server node/table configuration Enter: select 2. ESC: previous menu From the SERVER MENU, select Route_table and then press Enter. CN2610-8 CN2610-8_19 V2.0 SERVER MENU -----------------------------------------------------------------------------Info. Lan Adv. Host_table [Route_table] User_table Quit Examine/modify the routing table Enter: select 3. ESC: previous menu Use the tab and arrow keys to move the cursor to configure Gateway, Destination, Netmask, and Metric. Each item is described in detail below the figure. CN2610-8 CN2610-8_19 V2.0 ---------------------------------------------------------------------Info. Lan Adv. Host_table [Route_table] User_table Quit Examine/modify the routing table ESC: back to menu Entry 01 02 03 04 Enter: Gateway [ [ [ [ select Destination ][ ][ ][ ][ 14-4 Netmask ][ ][ ][ ][ ] ] ] ] Metric [01] [01] [01] [01] CN2610 User’s Manual Setting Up Routing Setting Entry Gateway Destination Value Notes 01-32 A maximum of 32 entries are allowed. xxx.xxx.xxx.xxx The IP address of the next-hop router. xxx.xxx.xxx.xxx The host IP address or network address of the route’s destination. xxx.xxx.xxx.xxx The destination network’s netmask. 1-15 The number of hops from the source destination. Netmask Metric 4. Necessity Fixed Required Required Required Required Press Esc to return to the MAIN MENU. Static Routing Examples Configuring Routes to the Internet 203.67.6.1 UNIX Server Ethernet 203.67.6 TCP/IP CN2610 CN2610 Console Server 16 port RS-232 Async Server 1 2 3 4 5 6 7 8 9 10 11 12 13 14 15 16 Tx Reset MENU SEL Ready Rx 203.67.6.253 Router 203.67.6.254 Modem Internet Modem PC PC Notebook For this example, the Notebook PC dials in to the CN2610 to request a connection to Internet host 210.48.96.9 (for example), which is not on local network 203.67.6. This causes CN2610 to act as a router and send the datagram to the default next-hop router, 203.67.6.254. In this case we should add the default gateway IP address (203.67.6.254) to the routing table, as shown in the following figure, to handle hops to any destination beyond the local network (203.67.6). CN2610-8 CN2610-8_19 V2.0 ---------------------------------------------------------------------Info. Lan Adv. Host_table [Route_table] User_table Quit Examine/modify the routing table ESC: back to menu Entry 01 02 03 Enter: select Gateway Destination Netmask [203.67.6.254 ] [0.0.0.0 ] [0.0.0.0 [ ] [ ] [ [ ] [ ] [ 14-5 ] ] ] Metric [01] [01] [01] CN2610 User’s Manual Setting Up Routing Configuring Routes to the Internet and Intranet 203.67.6.1 UNIX Server Ethernet 203.67.6 203.67.6.252 TCP/IP Router CN2610 16 port RS-232 Async Server 1 2 3 4 5 6 MENU 8 9 10 11 12 13 14 15 16 SEL Ready Rx CN2610 Console Server Router Router 203.67.6.254 Modem 205.65.66.2 7 Tx Reset 203.67.6.253 Ethernet 202.65.66 Modem Internet 202.65.66.4 202.65.66.5 PC PC Notebook For this example, in addition to sending requests to the Internet, dial-in users can make requests to Intranet hosts 202.65.66.4 or 202.65.66.5, which are on network 202.65.66 (located outside network 203.67.6). In this case, add a route entry for the next-hop router, 203.67.6.252, that delivers requests to network 202.65.66. The metric hop in this case is 2 route hops. CN2610-8 CN2610-8_19 V2.0 ---------------------------------------------------------------------Info. Lan Adv. Host_table [Route_table] User_table Quit Examine/modify the routing table ESC: back to menu Entry 01 02 03 Enter: select Gateway Destination Netmask Metric [203.67.6.254 ] [0.0.0.0 ] [0.0.0.0 ] [01] [203.67.6.252 ] [203.65.66.0 ] [255.255.255.0 ] [01] [ ] [ ] [ ] [01] 14-6 CN2610 User’s Manual Setting Up Routing Configuring Multiple-Point Routes Web/FTP Server E-mail/News Server Ethernet 203.67.6 TCP/IP 203.67.6.253 CN2610 CN2610 Console Server 16 port RS-232 Async Server 1 2 3 4 5 6 7 8 9 10 11 12 13 14 15 16 Tx Reset MENU SEL Ready Rx Router 203.67.6.254 RS-232 RS-232 Modem 1 Modem 2 Modem 3 Modem 4 RS-232 202.6.6.254 CN2610 1 MENU 2 3 4 5 6 7 8 9 10 11 12 13 14 15 16 SEL Ready Rx Printer RS-232 201.2.2.254 CN2610 Console Server 16 port RS-232 Async Server Tx Reset CN2610 CN2610 Console Server 16 port RS-232 Async Server 1 2 3 4 5 6 7 8 9 10 11 12 13 14 15 16 Tx Reset MRP Server MENU Internet SEL Ready Rx Printer MRP Server 202.6.6.3 201.2.2.1 Phone Line Phone Line Ethernet 202.6.6 Ethernet 201.2.2 PC PC PC PC For multi-location enterprises, CN2610 can be placed in different branch offices and used as both a multi-point router and remote access server. When hosts (e.g., the Web/FTP and E-mail/News servers shown in the figure) send requests to hosts on another network, such as 202.6.6 or 201.2.2, CN2610 delivers the request to the remote end CN2610, 202.6.6.254 or 201.2.2.254, as the next-hop router. Requests to Internet hosts are still sent through router 203.67.6.254 as the next-hop router. For this example, assume that the PPP source and destination IPs of modems 1, 2, 3, and 4 are: Modem 1 Modem 2 Source IP 203.67.6.250 203.67.6.249 Destination IP 202.6.6.250 Modem 3 201.2.2.249 Modem 4 Source IP 202.6.6.250 201.2.2.249 Destination IP 203.67.6.250 203.67.6.249 In this case, you will need to add three entries to the routing table, as shown below. CN2610-8 CN2610-8_19 V2.0 ---------------------------------------------------------------------Info. Lan Adv. Host_table [Route_table] User_table Quit Examine/modify the routing table ESC: back to menu Entry 01 02 03 04 Enter: Gateway [203.67.6.254 [203.67.6.250 [203.67.6.249 [ ] ] ] ] select Destination [0.0.0.0 [202.6.6.0 [201.2.2.0 [ 14-7 ] ] ] ] Netmask [0.0.0.0 [255.255.255.0 [255.255.255.0 [ ] ] ] ] Metric [01] [01] [01] [01] CN2610 User’s Manual Setting Up Routing Save When exiting the SERVER MENU, you will be prompted to save settings. Press Y to save. CN2610-8 CN2610-8_19 V2.0 SERVER MENU -----------------------------------------------------------------------------Info. Lan Adv. Host_table Route_table [User_table] Quit Examine/modify async server basic configuration Enter: select ESC: previous menu +-----------------------------------------------------+ | Warning !!! | | You had modified the configuration without saving. | | Would you save it now ? | | ‘Y: yes ‘N’: no | +-----------------------------------------------------+ You may also save all settings from the MAIN MENU by selecting sAve and then pressing Enter. Press Enter again to save, and any other key to cancel. CN2610-8 CN2610-8_19 V2.0 MAIN MENU -----------------------------------------------------------------------------Server Port seTting [sAve] Utility Restart Exit Save current configuration to Flash ROM ESC: back to menu Enter: select +-------------------------------------+ |Enter to updated, other key to cancel| +-------------------------------------+ Restart 1. From the MAIN MENU, select Restart. CN2610-8 CN2610-8_19 V2.0 MAIN MENU -----------------------------------------------------------------------------Server Port seTting sAve Utility [Restart] Exit Restart the whole system or selected async ports Enter: select 2. ESC: previous menu Select System and then press Enter to restart the system and terminate the Telnet session. CN2610-8 CN2610-8_19 V2.0 -----------------------------------------------------------------------------[System] Port Quit Restart the Async Server ESC: back to menu Enter: select +--------------------------------------------------------------------+ | Warning !!! | | Restart system will disconnect all ports and clear all status value | | ‘ Enter: continue ESC: cancel | +--------------------------------------------------------------------+ 14-8 15 Chapter 15 Administrative Utilities In this chapter, we show how to use CN2610 administrative utilities, which include Ping (to see if a LAN host is still active), and how to get information with Monitor Æ Line, Monitor Æ Network, Monitor Æ Async, Monitor Æ Routing, and Monitor Æ PPP-Trace. The following topics are covered in this chapter: Ping Monitor ¾ Line ¾ Network ¾ Async ¾ Routing ¾ PPP-Trace Diagnostic Upgrade ¾ Upgrading with the Windows Utility ¾ Console Terminal Upgrade ¾ Upgrading through the Serial Console ¾ Remote RCP Upgrade Export ¾ Console Terminal Export ¾ Remote RCP Export Import ¾ Console Terminal Import ¾ Remote RCP Import Default CN2610 User’s Manual Administrative Utilities Ping Ping is used to test network hardware connectivity and whether a network host is active. 1. From the MAIN MENU, select Utility, and then press Enter. CN2610-8 CN2610-8_19 V2.0 MAIN MENU -----------------------------------------------------------------------------Server Port seTting sAve [Utility] Restart Exit Async server utilities EEnter: select 2. ESC: previous menu From the UTILITY MENU, select Ping, and then press Enter. CN2610-8 CN2610-8_19 V2.0 UTILITY MENU -----------------------------------------------------------------------------[Ping] Monitor Diagnostic Upgrade Quit Ping a host Enter: select 3. ESC: previous menu Enter the target host IP address or target host name, and then press Enter. CN2610-8 CN2610-8_19 V2.0 -----------------------------------------------------------------------------[Ping] Monitor Diagnostic Upgrade Quit Ping a host ESC: back to menu Enter: select Press ESC to cancel … PING 192.168.1.3: 56 data bytes 64 bytes from 192.168.1.3: icmp_seq=0. time=0 ms 64 bytes from 192.168.1.3: icmp_seq=1. time=0 ms 64 bytes from 192.168.1.3: icmp_seq=2. time=0 ms 4. Press Esc to return to Ping. Monitor The Monitor utility allows you to monitor serial line status (Line), network status (Network), serial transmission flow (Async, async-Setting), routing, and PPP trace. 1. From the MAIN MENU, select Utility, and then press Enter. CN2610-8 CN2610-8_19 V2.0 MAIN MENU -----------------------------------------------------------------------------Server Port seTting sAve [Utility] Restart Exit Async server utilities EEnter: select 2. ESC: previous menu From the UTILITY MENU, select Monitor, and then press Enter. CN2610-8 CN2610-8_19 V2.0 UTILITY MENU -----------------------------------------------------------------------------Ping [Monitor] Diagnostic Upgrade Quit Monitor async server status Enter: select ESC: previous menu 15-2 CN2610 User’s Manual 3. Administrative Utilities Each item is discussed in the following subsections. CN2610-8 CN2610-8_19 V2.0 MONITOR MENU ------------------------------------------------------------------------------[Line] Network Async async-Setting Routing PPP-Trace Quit Monitor asynchronous port connective utilization Enter: select ESC: previous menu Line 1. From the MONITOR MENU, select Line, and then press Enter. CN2610-8 CN2610-8_19 V2.0 MONITOR MENU ------------------------------------------------------------------------------[Line] Network Async async-Setting Routing PPP-Trace Quit Monitor asynchronous port connective utilization Enter: select 2. ESC: previous menu The Line page shows the status of each port. CN2610-8 CN2610-8_19 V2.0 -----------------------------------------------------------------------------[Line] Network Async async-Setting Routing PPP-Trace Quit Monitor asynchronous port connective utilization ESC: Port 01 02 03 04 05 06 07 08 09 Type Idle Status 3. back to menu Type PPP TERM_BIN RTELNET ASPP TERM_BIN RAW PRN FIXTTY ASPP RAW UDP Idle 39Sec 39Sec 39Sec 39Sec 39Sec 39Sec 39Sec 39Sec 39Sec Enter: select Status negotiation select protocol listen listen select protocol listen #S1:listen S2:listen listen data transfer The current operation mode of the port (set in PORT MENU Æ Mode). The amount of time the port has been idle. The current status of the port. (If a host is connected to this port, then the host’s IP address is displayed in this column.) Press Esc to return to Line. 15-3 CN2610 User’s Manual Administrative Utilities Network 1. From the MONITOR MENU, select Network, and then press Enter. CN2610-8 CN2610-8_19 V2.0 -----------------------------------------------------------------------------Line [Network] Async async-Setting Routing PPP-Trace Quit Monitor Network protocol status ESC: back to menu ETHERNET: PPP: IP: ICMP: UDP: TCP: Received Received RDiscard Received RDiscard ErrHeader Received REchoReq REchoRply Received ErrHeader Received ErrHeader CurrEstab Enter: select 636 0 0 209 0 0 9 0 0 4 0 55 0 1 ErrSum 0 SNoRoute ErrProto 0 0 ErrPorts 0 ErrPorts Opens 0 0 Sent Sent SDiscard Sent SDiscard ErrAddr Sent SEchoReq SEchoRply Sent 106 27 0 104 0 0 0 0 0 18 Sent ReSent 86 1 Ethernet statistics Received: Total number of input datagram packets received from the Ethernet. Sent: Total number of output datagram packets delivered to the Ethernet. PPP statistics Received: RDiscard: ErrSum: Sent: SDiscard: IP statistics Received: RDiscard: ErrHeader: SNoRoute: ErrProto: Sent: SDiscard: ErrAddr: Received IP datagram packets. Received but discarded IP datagram packets. Checksum error packets. Sent IP datagram packets. Sent but discarded IP datagram packets. Received IP datagram packets. Received but discarded PPP datagram packets. Received but discarded IP datagram packets due to errors in IP headers. Received IP datagram packets for wrong route. Locally addressed IP datagram packet received successfully but discarded for not matching one of TCP, UDP, ICMP protocols offered by CN2500. Sent IP datagram packets. Sent but discarded IP datagram packets. Sent datagram packet discarded for invalid destination IP address. ICMP statistics Received: Received packets of ICMP messages. Sent: Sent packets of ICMP messages. REchoReq: Received packets from remote Ping request. REchoRply: Responding packets to remote Ping request. SEchoReq: Received packets from local ping request. SEchoRply: Responding packets to local ping request. UDP statistics Received: Received UDP datagram packets. ErrPorts: Received UDP datagram packets with invalid destination port. 15-4 CN2610 User’s Manual ErrHeader: Sent: Administrative Utilities Received UDP datagram packet with incorrect header. Sent UDP datagram packets. TCP statistics Received: Total received packets of segments, including error packets. ErrHeader: Error packets (e.g., bad TCP checksums). CurrEstab: The counter of TCP connections for which the current state is either ESTABLISHED or CLOSE-WAIT. ErrPorts: Received TCP datagram packets with invalid destination port. Opens: TCP connections. Sent: Total sent packets, including those on current connections. ReSent: Retransmitted packets. 2. Press Esc to return to Network 1. From the MONITOR MENU, select Async, and then press Enter. Async CN2610-8 CN2610-8_19 V2.0 MONITOR MENU -----------------------------------------------------------------------------Line Network [Async] async-Setting Routing PPP-Trace Quit Monitor asynchronous port line status Enter: select ESC: previous menu CN2610-8 CN2610-8_19 V2.0 -----------------------------------------------------------------------------Line Network [Async] async-Setting Routing PPP-Trace Quit Monitor asynchronous port line status ESC: Port 01 02 03 04 05 06 07 08 09 10 back to menu TXTotalCnt 180 21 0 0 21 0 4 0 0 21 TXTotalCnt: RXTotalCnt: TXBuf: RXBuf: TXAvg: RXAvg: DTR: RTS: DSR: CTS: DCD: 2. Enter: select RxTotalCnt 0 0 0 0 0 0 0 0 0 0 TXBuf 0 231 0 0 231 0 0 0 0 231 RXBuf 0 0 0 0 0 0 0 0 0 0 TXAvg 0 0 0 0 0 0 0 0 0 0 RXAvg 0 0 0 0 0 0 0 0 0 0 DTR ON ON OFF OFF ON ON OFF OFF ON ON RTS ON ON ON ON ON ON ON ON ON ON Total transmitted characters. Total received characters. Queued data bytes in the transmit raw buffer. Received data bytes in the receiving raw buffer. Current approx. characters per second transmit rate. Current approx. characters per second receiving rate. Current DTR status. Current RTS status. Current DSR status Current CTS status. Current DCD status. Press Esc to return to Async. 15-5 DSR --------------------- CTS OFF OFF OFF OFF OFF OFF OFF OFF OFF OFF DCD --------------------- CN2610 User’s Manual Administrative Utilities Routing 1. From the MONITOR MENU, select Routing, and then press Enter. CN2610-8 CN2610-8_19 V2.0 -----------------------------------------------------------------------------Line Network Async async-Setting [Routing] PPP-Trace Quit Monitor current routing table ESC: back to menu Iface eth0 eth0 eth0 eth0 eth0 lo17 Destination 0.0.0.0 201.2.2.0 203.65.66.0 0.0.0.0 192.168.0.0 192.168.2.180 Iface: Destination: Gateway: Netmask: Metric: Flags: Use: 2. Enter: select Gateway/HA 192.168.1.3 203.67.6.251 203.67.6.252 203.67.6.254 192.168.2.180 * Netmask 0.0.0.0 255.255.255.0 255.255.255.0 0.0.0.0 255.255.0.0 * Metric 15 1 2 1 1 0 Flag UGT+ UGT UGT UGT U UH Use 0 0 0 9 389 Name of the physical network interface. Network or host that the router allows you to connect to. IP Address of the gateway you configured for this route. If you are directly connected, this is a local address. Otherwise, it is the address of the machine through which packets must be routed. Network pattern of the gateway. Number of hops to the destination. State of the route. Valid states are: U up D down G route to a gateway H route to a host T setting in route table R dynamic by RIP Correct number of packets being sent in this route. Press Esc to return to Routing. PPP-Trace 1. From the MONITOR MENU, select PPP-Trace, and then press Enter. CN2610-8 CN2610-8_19 V2.0 MONITOR MENU -----------------------------------------------------------------------Line Network Async async-Setting Routing [PPP-Trace] Quit Trace PPP protocol connect messages Enter: select 2. ESC: previous menu Use the arrow keys to select the port you wish to trace, and then press Enter to select. 15-6 CN2610 User’s Manual Administrative Utilities CN2610-8 CN2610-8_19 V2.0 -----------------------------------------------------------------------Line Network Async async-Setting Routing [PPP-Trace] Quit Trace PPP protocol connect messages ESC: back to menu Enter: select +----------------------------------------------------+ | Select port: | | *01 02 *03 04 05 *06 07 08 | | 09 10 [ 11] 12 13 14 *15 16 | | | | Enter: select ESC: cancel SPACE: start | +----------------------------------------------------+ 3. After selecting the ports that need monitoring, press Space to start. CN2610-8 CN2610-8_19 V2.0 -----------------------------------------------------------------------Line Network Async async-Setting Routing [PPP-Trace] Quit Trace PPP protocol connect messages ESC: back to menu Enter: select TRACE PORTs: 01 P01 state: LCP Req-Sent P01 send: C0210145001C010405DC0206000000000304C0230506BE2B92D707020802 PPP states for the selected ports are shown. LCP (Link Control Protocol), which is an essential part of the PPP link, is used for establishing, configuring, and testing the data link connection. 4. Press Esc to return to PPP-Trace. Diagnostic CN2610 Diagnostic Utility, which is used to test async ports, Ethernet controllers, and printer ports, supports the following functions. y Async port controller and internal loop-back test. y Ethernet controller, internal and external loop-back test. y Printer port test. 1. From the UTILITY menu, select Diagnostic, and then press Enter. CN2610-8 CN2610-8_19 V2.0 UTILITY MENU -----------------------------------------------------------------------------Ping Monitor [Diagnostic] Upgrade Quit Loopback test and self-diagnose Enter: 2. Select ESC: previous menu If any of these tests fails, contact Moxa to request repair services. 15-7 CN2610 User’s Manual Administrative Utilities CN2610-8 CN2610-8_19 V2.0 -----------------------------------------------------------------------------Ping Monitor [Diagnostic] Upgrade Quit Loopback test and self-diagnose ESC: back to menu Enter: select Asynchronous port controller test... OK. Asynchronous port loopback test... OK. Ethernet port controller test... OK. Ethernet port 1 controller loopback test... OK. Ethernet port 1 transceiver loopback test... OK. 3. Press Esc to restart the system. Upgrade The operating system in CN2610 is kept in the Flash ROM. It can be upgraded using the Windows Utility, from a locally connected CONSOLE Terminal using XMODEM protocol, or from a Unix host using RCP protocol. Upgrading with the Windows Utility One of the main features provided by the Windows Utility is to upgrade firmware. If the CN2610 is connected to a Windows network, this is the simplest method available for upgrading the firmware. 1. Run Upgrade.exe from the CN2610 CD. 2. Select the CN2610 server by clicking the at a remote site, use 3. button on the toolbar. If the CN2610 server is to add it to the list. Specify the new firmware file used to upgrade. Click OK to start. 15-8 CN2610 User’s Manual 4. Administrative Utilities When the Download ok! window appears, click OK. Console Terminal Upgrade 1. Run Start Æ Programs Æ PComm Terminal Emulator. (If you cannot find the software on your computer, install PComm Lite from the CN2610 CD, and then run the program.) 2. Use an RJ45-DB9 female cable to connect to the console port, and then turn on CN2610. Start the PComm Terminal program and then open a new connection. 15-9 CN2610 User’s Manual Administrative Utilities 3. On the Communication Parameter page, select COM2 for Ports, 115200 for Baudrate, 8 for Data Bits, None for Parity, and 1 for Stop Bits. 4. On the Terminal page, select VT100 for Terminal Type, and then press Enter. 5. Type 1 to choose ansi/VT100 terminal type, and then press Enter to enter the MAIN MENU. 15-10 CN2610 User’s Manual 6. Administrative Utilities Use the following keystrokes to navigate CN2610’s console utility. Action Move Jump to next menu, or Select item Return to previous menu, or Close pop up selector Shortcut Key Key [Up/Down/Left/Right] Arrow Key or [Tab] Key [Enter] Key [Esc] Key Capitalized letter of the word Upgrading through the Serial Console 1. From the MAIN MENU, select Utility, and then press Enter. 2. From the UTILITY MENU, select Upgrade, and then press Enter. 3. Select Console port (using XMODEM) for Upgrade type, and then press Ctrl-U to start. 15-11 CN2610 User’s Manual Administrative Utilities 4. When you see Start loading file … near the bottom of the screen, click the Port Manager menu. 5. Select Port Manager Æ File Transfer from the menu bar. 15-12 CN2610 User’s Manual Administrative Utilities 6. In the File Transfer window select XModem-CheckSum for Protocol and Transmit for Direction, and then click OK, The file will be transmitted to the CN2610. 7. Locate the upgrade file, CN2610_2.ROM for example, and then click Open to transfer the firmware to the CN2610. 15-13 CN2610 User’s Manual 8. Administrative Utilities The CN2610 will store the new firmware in its Flash ROM, and then restart the entire system, completing the Firmware Upgrade procedure. Remote RCP Upgrade RCP (Remote Copy Program) is the Unix utility for copying files over the Ethernet. RCP allows transparent copying of files between hosts, without the need to enter passwords. This can be done using the security file .rhosts. NOTE The format of RCP is as follows: rcp from to The from and to arguments can either be specified as local files or remote files. To specify a remote file, use the format: user@hostname:filename. If the remote login ID is identical to the local login ID, then user@ can be omitted (i.e., only hostname:filename is required). NOTE The security file .rhosts is a plain text file that must reside in the local user’s home directory, and must be owned by that user. This file identifies those users who are “equivalent” to the local user, and are given access without needing to enter a password. 15-14 CN2610 User’s Manual NOTE Administrative Utilities The file must contain at least a host, and if the login ID is different on the remote host, it must also contain the login ID. This sample .rhosts file is for the user john on the host sun. The following three accounts are considered “equivalent” accounts. The user has accounts on moxa1 and moxa3 with the same login ID, and has an account on moxa2 as johnwu. # This comment line is ignored by the operating system. Moxa1.com.tw john Moxa2.com.tw johnwu Moxa3.com.tw john. 1. Login to your UNIX/LINUX host. For example, login to 203.67.8.22 as user “john”. 2. Copy the CN2610 firmware file, e.g., “CN2610.rom”, to the current directory. 3. Create a file named .rhosts in this directory. Enter CN2610’s IP address, e.g., 192.168.205.21, in the .rhosts file, or enter CN2610’s domain name if it’s defined in your /etc/hosts file. 4. Telnet CN2610’s IP address. 5. After entering CN2610’s MAIN MENU, select Utility Æ Upgrade. CN2610-8 CN2610-8_19 V2.0 UTILITY MENU -----------------------------------------------------------------------------Ping Monitor Diagnostic [Upgrade] Quit Upgrade operational system program Enter: select ESC: previous menu 6. In the Upgrade via column, select Network host (using RCP). CN2610-8 CN2610-8_19 V2.0 -----------------------------------------------------------------------------Ping Monitor Diagnostic [Upgrade] Quit Upgrade operational system program ESC: back to menu Enter: select Upgrade via Host name/IP address File name User name +----------------------------+ | Console port (using XMODEM)| [Console port (| Network host (using RCP) | [ +----------------------------+ [ ] [ ] Press CTRL-U to start ... 7. In Host name/IP address, enter the IP address of the UNIX/LINUX host. 8. In File name, enter the CN2610 firmware file name in the UNIX/LINUX host. 9. In User name, enter the user name for logging into the UNIX/LINUX host. 10. Press CTRL-U to start. 11. After downloading, CN2610 will restart the system. 15-15 CN2610 User’s Manual Administrative Utilities CN2610-8 CN2610-8_19 V2.0 -----------------------------------------------------------------------------Ping Monitor Diagnostic [Upgrade] Quit Upgrade operational system program ESC: back to menu Enter: select Upgrade via Host name/IP address File name User name [Network host (using RCP) [203.67.8.22 [/home/john/CN2610.rom [john ] ] ] ] Press CTRL-U to start ... Export Settings can be exported to a file to backup the configuration, or to set up another CN2610 with the same configuration. There are two types of exported file settings: Console Terminal or Remote RCP. Console Terminal Export 1. Run Start Æ Programs Æ PComm Terminal Emulator. Follow the steps given earlier to enter the MAIN MENU. 2. From the MAIN MENU select seTting, and then press Enter. 3. From the SETTING MENU select Export, and then press Enter. 4. Select Console port (using XMODEM) for upgrade type, and then press Ctrl-U to start. 15-16 CN2610 User’s Manual Administrative Utilities 5. When you see Start loading file … near the bottom of the screen, click the Port Manager menu. 6. Select Port Manager Æ File Transfer from the menu. 15-17 CN2610 User’s Manual Administrative Utilities 7. In the File Transfer window select XModem-CheckSum for Protocol, and Receive for Direction. Selecting OK causes the terminal to receive settings from the CN2610. 8. Choose the backup filename, CN2610.bak for example, and then click Save. 9. CN2610 will export settings to the file. 15-18 CN2610 User’s Manual Administrative Utilities Remote RCP Export As we pointed out earlier, RCP is a file transfer protocol that does not require a password. 1. Login to your UNIX/LINUX host. For example, login to 203.67.8.22 as user john. 2. Create a file named .rhosts in this directory. Enter CN2610’s IP address, e.g., 192.168.205.21, or CN2610’s domain name (if it’s defined in your /etc/hosts file), in the .rhosts file. 3. Telnet CN2610’s IP address. 4. After entering CN2610’s MAIN MENU, select setting Æ Export. 5. In the Export via column, select Network host (using RCP). 6. Enter the UNIX/LINUX host’s IP address for Host name/IP address. 7. Enter CN2610’s firmware file name on the UNIX/LINUX host for File name. 8. Enter the user name required to login to the UNIX/LINUX host for User name. 9. Press CTRL-U to start. CN2610-8 CN2610-8_19 V2.0 -----------------------------------------------------------------------------[Export] Import Default Quit Export current configuration to file ESC: back to menu Enter: select Export via Host name/IP address File name User name [Network host (using RCP) [203.67.8.22 [/home/john/CN2610.rom [john ] ] ] ] Press CTRL-U to start ... Import Saved settings can be imported back to the CN2610. There are two settings to choose from for importing from a file, Console Terminal or Remote RCP. Console Terminal Import 1. Run Start Æ Programs Æ PComm Terminal Emulator. Follow the steps given earlier to enter the MAIN MENU. 2. From the MAIN MENU, select seTting, and then press Enter. 15-19 CN2610 User’s Manual Administrative Utilities 3. From the SETTING MENU, select Import, and then press Enter. 4. Select Console port (using XMODEM) for Import type and then press Ctrl-U to start. 5. When you see Start loading file … near the bottom of the screen, click the Port Manager menu. 15-20 CN2610 User’s Manual Administrative Utilities 6. Select Port Manager Æ File Transfer from the menu. 7. In the File Transfer window select XModem-CheckSum for Protocol and Transmit for Direction. This causes the file to be sent from the terminal to CN2610. Click OK. 8. Choose the backup filename, CN2610.bak for example, and then click Open. 15-21 CN2610 User’s Manual 9. Administrative Utilities CN2610 will import settings from the file. Remote RCP Import As we pointed out earlier, RCP is a file transfer protocol that does not require a password. 1. Login to your UNIX/LINUX host. For example, login to 203.67.8.22 as user john. 2. Create a file named .rhosts in this directory. Enter CN2610’s IP address, e.g., 192.168.205.21, or CN2610’s domain name (if it’s defined in your /etc/hosts file), in the .rhosts file. 3. Telnet CN2610’s IP address. 4. After accessing CN2610’s MAIN MENU, select seTting Æ Import. In Import via column, select Network host (using RCP). 5. Enter the UNIX/LINUX host’s IP address for Host name/IP address. 6. Enter CN2610’s firmware file name on the UNIX/LINUX host for File name. 7. Enter the user name required to login to the UNIX/LINUX host for User name. 8. Press CTRL-U to start. CN2610-8 CN2610-8_19 V2.0 -----------------------------------------------------------------------------Export [Import] Default Quit Import configuration from previously saved file ESC: back to menu Enter: select Import via Host name/IP address File name User name [Network host (using RCP) [203.67.8.22 [/home/john/CN2610.rom [john ] ] ] ] Press CTRL-U to start ... Default CN2610 can restore default settings if necessary. Note that the IP address will not be changed to default. 1. From the MAIN MENU select seTting, and then press Enter. CN2610-8 CN2610-8_19 V2.0 MAIN MENU -----------------------------------------------------------------------------Server Port [seTting] sAve Utility Restart Exit Export or import configuration Enter: select 2. ESC: previous menu From the SETTING MENU, select Default, and then press Enter. CN2610-8 CN2610-8_19 V2.0 SETTING MENU -----------------------------------------------------------------------------Export Import [Default] Quit Load the factory setting Enter: select ESC: previous menu 15-22 CN2610 User’s Manual 3. Administrative Utilities Press Enter to confirm that you wish to erase all settings and restore the default settings. Press any key to cancel. CN2610-8 CN2610-8_19 V2.0 -----------------------------------------------------------------------------Export Import [Default] Quit Load the factory setting ESC: back to menu Enter: select +--------------------------------------------------+ |Enter to load factory setting, other key to cancel| +--------------------------------------------------+ 15-23 A Appendix A Troubleshooting In this appendix, we give solutions to various problems you may come across when using CN2610. The following topics are covered in this appendix: Console Terminal Problems How to Configure Dual Ethernet Ports Terminal Port Problems How to Save CN2610’s Parameters ASPP Port Problems SLIP/PPP Connection Problems RADIUS Problems CN2610 User’s Manual Troubleshooting Console Terminal Problems Problem: No message is displayed on the console terminal. Solutions: ¾ Check to see if the terminal is set to 115200 bps, 8 data bits, no parity, 1 stop bit. ¾ Check to see if the RS-232 cable is wired correctly. The console needs CTS/DCD signals to trigger. Refer to the “Cable Wiring” section in Appendix D. ¾ The console may be blocked waiting for an event. Press ESC to try unblocking. Problem: Garbage characters are displayed on the console terminal. Solutions: ¾ Check to see if the terminal is set to 115200 bps, 8 data bits, no parity, 1 stop bit. ¾ Check to see if terminal type setting is correct. The console only accepts ansi/vt100 or vt52. ¾ Press Ctrl-L to refresh the display. Question: How can I restore CN2610 to the factory default settings? Solution: ¾ After entering the Console window, select setting Æ Default, and then press Enter. The CN2610 will be restored to the factory default settings. CN2610-8 CN2610-8_19 V2.0 MAIN MENU --------------------------------------------------------------------------Server Port [seTting] sAve Utility Restart Exit Export or import configuration Enter: select ESC: previous menu CN2610-8 CN2610-8_19 V2.0 --------------------------------------------------------------------------Export Import [Default] Quit Load the factory setting ESC: back to menu Enter: select +--------------------------------------------------+ |Enter to load factory setting, other key to cancel| +--------------------------------------------------+ Question: If I forget the password for my CN2610, what should I do? Solution: ¾ Press the “Password Reset button” on the CN2610’s front panel for more than 5 seconds. The password stored in the Flash ROM will be erased. Refer to Chapter 1 for more details. A-2 CN2610 User’s Manual Troubleshooting CN2510 16 port RS-232 Async Server 1 2 3 4 5 6 7 8 9 10 11 12 13 14 15 16 Tx Reset MENU SEL Ready Rx Reset Problem: I used Telnet Console in a Windows 9x/NT environment, but I couldn’t use the arrow keys to select options. Solution: ¾ In Telnet, click the Terminal menu, choose Preferences, and then select VT100 Arrows in the Terminal Preferences window. Click OK to return to the MAIN MENU. The arrow keys should work properly now. Configuring Dual Ethernet Ports Question: CN2610 has 2 Ethernet ports. How do I configure these 2 Ethernet ports? Should I set up CN2610’s 2 Network Interface Cards in different networks, or set 2 different IP addresses in the same NIC? Solutions: 1. MOXA strongly recommends the following: connect 2 different LAN ports to 2 different physical networks as shown. CN2610 This is the BEST solution. 16 port RS-232 Async Server 1 2 3 4 5 6 7 8 9 10 11 12 13 14 15 16 Tx Reset MENU 192.168.0.1 SEL Ready Rx 192.168.1.1 192.168.0.X 192.168.1.X 192.168.1.5 192.168.0.5 A-3 CN2610 User’s Manual Troubleshooting ¾ MOXA does not recommend that you setup 2 LAN ports in the same physical network and subnet. You might encounter unpredictable outcomes. We suggest that you connect 2 different NICs to different networks. CN2610 16 port RS-232 Async Server 1 2 3 4 5 6 7 8 9 10 11 12 13 14 15 16 Tx Reset MENU 192.168.0.1 SEL Ready Rx We do NOT recommend this type of connection. 192.168.0.2 192.168.0.5 2. First, connect CN2610’s LAN1 and LAN2 to the same hub or switch. Configure IP addresses as 192.168.0.1 and 192.168.0.2, and subnet as 255.255.255.0. 3. Connect one of the hosts on the network to the same hub or switch, and configure its IP address as 192.168.0.5, and subnet as 255.255.255.0. 4. When you set up CN2610 like this, we assume that you expect the 2 NICs to be load balanced. This generally means that both connections transmit at the same time. However, when a CN2610 is configured in this way, there is only 1 IP that is involved in the transmission. 5. You might have another expectation when setting up the CN2610: to setup a fail over (redundant) connection. Generally, redundancy means that a NIC has 2 network interfaces connecting to 2 different switches or hubs. When one of the connections, switches, or hubs fails, the other one will take over. This definition of redundancy differs from the one used in MOXA CN2610. MOXA CN2610 has 2 MAC addresses, and 2 IP addresses, which are independent from each other unlike the general definition in which only 1 MAC address and 1 IP is involved. Terminal Port Problems Problem: When a terminal is connected to one of CN2610’s serial ports, no message is displayed on the terminal attached to the CN2610 terminal port when it is powered on. Solutions: ¾ One of the possible reasons is that this serial port is configured to Disable mode, or to another application mode. Using the Serial Console or Telnet Console, select Port Æ Mode, and then move the cursor to the Application corresponding to the serial port, and change Disable to Terminal. ¾ Check to see if the terminal’s serial port is set to the same settings as CN2610’s serial port. Use Serial Console or Telnet Console, select Port Æ Line, and then move the cursor to the corresponding serial port, and check to see if Speed, Bits, Stop, Parity, FIFO, RTS/CTS, XON/XOFF, and Discon.ctrl settings are the same as the terminal’s serial port. ¾ Check to see if the RS-232 cable is wired correctly. If the port is utilizing RTS/CTS hardware flow control, then the RTS, CTS pins should be included. In this case, a cable with only TxD, RxD, and GND pins will not work. ¾ The terminal may be unlocked by pressing [Ctrl-S] (Hex Code 0x13) if software flow control is used. Press [Ctrl-Q] (Hex Code 0x11) to relieve it. A-4 CN2610 User’s Manual Troubleshooting Saving CN2610’s Parameters Question: How can I save CN2610’s parameters to recover from unexpected power failures, or to transfer the same parameters to another CN2610? Solutions: ¾ After entering the Console screen, select seTting Æ Export, and press Enter. Then you can use XMODEM for a Windows host, or RCP for a UNIX host, to save the parameters to a file. CN2610-8 CN2610-8_19 V2.0 MAIN MENU -----------------------------------------------------------------------------Server Port [seTting] sAve Utility Restart Exit Export or import configuration Enter: select ESC: previous menu CN2610-8 CN2610-8_19 V2.0 SETTING MENU -----------------------------------------------------------------------------[Export] Import Default Quit Export current configuration to file Enter: select ESC: previous menu CN2610-8 CN2610-8_19 V2.0 -----------------------------------------------------------------------------[Export] Import Default Quit Export current configuration to file ESC: back to menu Enter: select Export via Host name/IP address File name User name [Console port (using XMODEM)] [ [ [ ] ] ] Press CTRL-U to start ... ASPP Port Problems Problem: The application utilizing the ASPP subroutines could not connect to the CN2610. Solutions: ¾ Check to see if the target port’s mode is set to ASPP. The connection will fail if the port mode is set to something other than ASPP. After entering the Console screen, select Port Æ Mode, move the cursor to the Application corresponding to the serial port, and set it to Device Control. In the Mode column, select ASPP. ¾ Moxa provides example programs on the website (www.moxa.com) that can be downloaded. SLIP/PPP Connection Problems Problem: Cannot make a SLIP connection to a remote host. Solutions: A-5 CN2610 User’s Manual Troubleshooting ¾ Check to see if the CN2610’s SLIP port baudrate (in the Port Æ Line menu) is the same as the remote host’s baudrate. ¾ Check to see if data bits = 8. ¾ Check to see if the XON/XOFF flow control is the same as the remote site. ¾ Check to see if the RS-232 cable is wired correctly. If the port is utilizing RTS/CTS hardware flow control, then the RTS, CTS pins should be included. In this case, cables with only pins 2, 3, and 7 will not work. ¾ Make sure there is no “getty” or other process using the SLIP port on the remote site. RADIUS Problems Question: What can I do if there is an authentication check failure on the radius server? Solutions: ¾ Check to see if the console password is the same as the radius server’s radius key. ¾ Make sure the password was entered correctly. ¾ Make sure the account and password in the login script are correct. ¾ If the authentication check runs for a long time and then times out, check to see if the RADIUS Server’s IP is correct. E.g., set up one port as Rtelnet, telnet CN2610’s TCP port from radius, and then telnet CN2610’s console and check the Monitor {line} status. Check to see if the remote IP address matches the radius IP address you set in the CN2610. Question: Why cannot I compile radius software on a system running Linux Red hat 5.0? Solutions: Take the following steps if you compiled RADIUS2.3 on Red hat 5.0 or above: 1. Save makefile-SCO as a file named makefile-LINUX, and then modify the content as follows: # # make file for LINUX # LIBS = -lcrypt include Makefile 2. Add two similar line to the shell program “mk_radius” at read_os “1”. For example, they might appear as follows: read_os case $ans in ‘1’) clear mk_src echo “enter lib directory” cd lib echo “compiling source program ....” make cd .. echo “linking program .....” make -f Makefile-LINUX;; A-6 B Appendix B RADIUS Server Managing dispersed serial lines and modem pools for large numbers of users can create the need for significant administrative support. Since modem pools are a link to the outside world, they require careful attention to security, authorization, and accounting. This can best be achieved by managing a single “database” of users, allowing for authentication (verifying user name and password) as well as configuring information which details the type of service to deliver to the user (for example: SLIP, PPP, Telnet, rlogin). Moxa CN2610 Async Server supports RADIUS protocol, which requires only one database for remote user management. The following topics are covered in this appendix: What is RADIUS? ¾ Definition ¾ Client/Server Architecture Setting up CN2610 ¾ Setting up the RADIUS Server IP Address ¾ Setting up Port Configuration Setting up UXIX Hosts ¾ Installing the RADIUS Exceution File ¾ RADIUS Server Configuration ¾ Basic/Extended Permission Group Setting Setting up Windows NT Hosts Setting up Windows 2000 Hosts Setting up Windows 2003 Hosts CN2610 User’s Manual RADIUS Server What is RADIUS? Definition Remote Authentication Dial-up User Service, or RADIUS, is the standard for centralizing the authentication, authorization, and accounting of remote access users. Here is a brief description of how RADIUS works: When a user dials in to a remote access device, that device communicates with the central RADIUS server to determine if the user is authorized to connect to the LAN. The RADIUS server performs the authentication and responds with the result—either accept or reject. If the user is accepted, the remote access server routes the user onto the network; if not, the RAS will terminate the user’s connection. The RADIUS server also provides accounting services if supported by the remote access server. With RADIUS, a network manager or ISP only needs to maintain a single, central database against which all remote user authentication takes place. This greatly eases the management burden associated with administering large numbers of Dial-in users. Client/Server Architecture RADIUS is a type of client-server software. Communication servers, such as CN2610, play an active role, whereas a RADIUS server is passive. 1. When a remote host is connected to CN2610, it is prompted to enter its user ID and password. 2. After receiving the user ID and password, CN2610 sends the information to a defined RADIUS server. Up to this point, the remote user is still unable to access the network. 3. The RADIUS server compares the user ID and password with its internal database, and then uses the internet to respond, either accepting or rejecting. 4. If CN2610 receives the “accept” message from the RADIUS server, the remote user is allowed to enter the network. Otherwise, CN2610 will wait for another try, or terminate the connection when a specified time limit has been reached. Setting up CN2610 Setting up the RADIUS Server IP Address 1. From the MAIN MENU, select Server, and then press Enter. CN2610-8 CN2610-8_19 V2.0 MAIN MENU -----------------------------------------------------------------------------[Server] Port seTting sAve Utility Restart Exit Examine/modify async server node/table configuration Enter: select 2. ESC: previous menu From the SERVER MENU, select Adv., and then press Enter. B-2 CN2610 User’s Manual RADIUS Server CN2610-8 CN2610-8_19 V2.0 -----------------------------------------------------------------------------Info. Lan [Adv.] Host_table Route_table User_table Quit Examine/modify async server basic configuration ESC: back to menu Enter: select RADIUS server IP RADIUS key UDP port <1:1645 2:1812> Enable RADIUS accounting [ [ [1] [no ] SNMP community name SNMP trap server IP address [public [ +-------+ [no ] | None | [None ]| RIP-1 | | RIP-2 | [ ]+-------+: 50 – 60000 ms) [ ] (range: 0 – 1000 ms) Ethernet IP forwarding Routing protocol TCP retransmission timeout SIO data transfer timeout 3. ] ] ] ] RADIUS settings. RADIUS server IP: [RADIUS server IP address] RADIUS key: [RADIUS password] (must be the same in the RADIUS server) UDP port: [1/2] Mode 1: An earlier but rather common setting is 1645. If you choose 1645, the authentication has to be set as 1645, and accounting as 1646 in the RADIUS Server. Mode 2: The latest setting is 1812. If you choose 1812, the authentication must be set as 1812, and accounting as 1813 in the RADIUS Server. Enable RADIUS accounting: [yes/no] 4. Save, and then restart CN2610. Setting up Port Configuration RADIUS is effective for dial-up services. Apart from dial-in services (PPP, SLIP, Dynamic), it also supports RADIUS settings in Terminal applications and Console Management application. Dialin/out—Dynamic Mode CN2610-8 CN2610-8_19 V2.0 -----------------------------------------------------------------------------[Mode] Line mOdem Welcome_MSG Quit Examine/modify the operation mode of async ports ESC: back to menu Port 01 02 03 04 Application [Dialin/out [Dialin/out [Dialin/out [Dialin/out Enter: ] ] ] ] select Mode [DYNAMIC [DYNAMIC [DYNAMIC [DYNAMIC B-3 ] ] ] ] Description/more setting [Auto Term/SLIP/PPP identification] [Auto Term/SLIP/PPP identification] [Auto Term/SLIP/PPP identification] [Auto Term/SLIP/PPP identification] CN2610 User’s Manual RADIUS Server +------------------------------------------------+ | Enable Detail-setting | | TERM_BIN mode [yes] [Term parameters] | | PPPD mode [yes] [PPP parameters] | | SLIPD mode [yes] [SLIP parameters] | |------------------------------------------------| | TERM_BIN mode [none ] | +------------------------------------------------+ Dialin/out—PPP/PPPD Mode CN2610-8 CN2610-8_19 V2.0 -----------------------------------------------------------------------------[Mode] Line mOdem Welcome_MSG Quit Examine/modify the operation mode of async ports ESC: back to menu Port 01 02 03 04 Application [Dialin/out [Dialin/out [Dialin/out [Dialin/out Enter: ] ] ] ] select Mode [PPP [PPP [PPP [PPP ] ] ] ] Description/more setting [Point-to-Point Protocol [Point-to-Point Protocol [Point-to-Point Protocol [Point-to-Point Protocol ] ] ] ] +-----------------------------------------------------+ | Destination IP address : [ ] | | Source IP address : [ ] | | IP netmask : [ ] | | TCP/IP compression : [no ] | | Inactivity time : [0 ] minutes | | Link quality report : [no ] | | Outgoing PAP ID : [ ] | | PAP password : [ ] | | Incoming PAP check : [none ] | +-----------------------------------------------------+ Dialin/out—TERM_BIN / TERM_ASC Mode CN2610-8 CN2610-8_19 V2.0 -----------------------------------------------------------------------------[Mode] Line mOdem Welcome_MSG Quit Examine/modify the operation mode of async ports ESC: back to menu Port 01 02 03 Application [Terminal [Terminal [Terminal Enter: select Mode ] [TERM_ASC ] [TERM_ASC ] [TERM_ASC B-4 ] ] ] Description/more setting [ASCII Terminal mode (8 sessions)] [ASCII Terminal mode (8 sessions)] [ASCII Terminal mode (8 sessions)] CN2610 User’s Manual RADIUS Server +------------------------------------------------+ | Key Mapping : | | Max. Sessions : [ 8 ] | | Change Session : [^T] | | Quit : [^E] | | Break : [ ] | | Interrupt : [ ] | | Auto-link protocol : [none ] | | Telnet TCP port : [23 ] | | Primary host IP : [ ] | | Link by input IP : [Disable] | | Secondary host IP : [ ] | | Auto-login prompt : [ogin: ] | | Password prompt : [assword: ] | | Login user name : [ ] | | Login password : [ ] | | Terminal type : [ansi ] | | Inactivity time : [0 ] minutes | | Authentication type : [none ] | | TCP alive check time : [0 ] minutes | +------------------------------------------------+ Console Management—RADIUS Settings CN2610-8 CN2610-8_19 V2.0 -----------------------------------------------------------------------------[Mode] Line mOdem Welcome_MSG Quit Examine/modify the operation mode of async ports ESC: back to menu Port 01 02 03 04 05 Enter: Application [Reverse Terminal [Reverse Terminal [Reverse Terminal [Reverse Terminal [Reverse Terminal ] ] ] ] ] select Mode [RTELNET [RTELNET [RTELNET [RTELNET [RTELNET ] ] ] ] ] Description/more setting [Reverse Telnet mode [Reverse Telnet mode [Reverse Telnet mode [Reverse Telnet mode [Reverse Telnet mode ] ] ] ] ] +------------------------------------------------+ | TCP port : [4003 ] | | Source IP address : [ ] | | Destination IP addr : [ ] | | Inactivity time : [0 ] minutes | | Map keys <CR-LF> to : [CR-LF] | | Authentication type : [none ] | | TCP alive check time : [0 ] minutes | +------------------------------------------------+ Setting up UNIX Hosts You can use your own RADIUS software to do this. MOXA, however, provides a RADIUS program for UNIX. To use the MOXA RADIUS Server, extract radius.2.3.tar from the CN2610 CD. All files are extracted to the /radius.2.3 directory. Installing the RADIUS Execution File 1. Login to the UNIX host and create a directory. #mkdir /radius #cd radius.2.3/bin 2. Mount the CD-ROM volume B-5 CN2610 User’s Manual RADIUS Server OS SCO OpenServer Command #mount -f ISO9660, filemode=444 <device> Example: #mount-f ISO9660, filemode=444 /dev/cd1/mnt Solaris x86 In the volume manager mounts the CD-ROM on mount point /cdrom/cdrom0 Linux #mount /dev/cdrom or #mount-t iso9660-ro mode=0555<device> Example: #mount-t iso9660-ro mode=0555/dev/hdb/mnt 3. Copy the file to the UNIX host. #cp /mnt/cdrom/radius.2.3.tar 4. Extract the .tar to files.(radiu.2.3 subdirectory) #tar xvf radius.2.3.tar After extracting, there are subdirectories, as follows: /src: source code /conf: configuration /log: log record /temp: temporary files /bin: execution files 5. Compile and link. #cd /src #sh mk_radius RADIUS Server Configuration +--------------------------------------------------------------------+ | MOXA RADIUS SERVER Administration | +--------------------------------------------------------------------+ | >Configuration | | Monitor | | Daemon Control | | Report | | Others | +--------------------------------------------------------------------+ | J:Down K:Up Q:Quit Enter:Select | +--------------------------------------------------------------------+ 1. Specify password file. “Configuration”Æ“Basic Configuration”ÆPassword File (/etc/passwd for LINUX) (/etc/shadow for SCO UNIX and SOLARIS) (/etc/master.passwd fot FREEBSD and BSDI) B-6 CN2610 User’s Manual RADIUS Server +--------------------------------------------------------------------+ | Basic Configuration | +--------------------------------------------------------------------+ | > assword File : /etc/passwd | | Async Server Administration | | Save & Exit | +--------------------------------------------------------------------+ 2. Specify CN2610 IP. “Configuration”Æ“Basic Configuration”Æ“ Async Server Administration”Æ“Add Async Server” +--------------------------------------------------------------------+ | Basic Configuration | +--------------------------------------------------------------------+ | Password File : /etc/passwd | | >Async Server Administration | | Save & Exit | +--------------------------------------------------------------------+ +--------------------------------------------------------------------+ | Async Server Administration | +--------------------------------------------------------------------+ | >Add Async Server | | Modify Async Server | | Delete Async Server | +--------------------------------------------------------------------+ | J:Down K:Up Q:Quit Enter:Select | +--------------------------------------------------------------------+ +--------------------------------------------------------------------+ | Add Async Server | +--------------------------------------------------------------------+ | >IP Address : | | Name : | | Console Password : | | Ok | +--------------------------------------------------------------------+ | J:Down K:Up Q:Quit Enter:Select | +--------------------------------------------------------------------+ IP address: [ ]Æ CN2610 IP Name: [ ]ÆCN2610 server name Console Password: [ ]ÆCN2610 console password 3. Save and exit. Basic/Extended Permission Group Setting Basic and extended permission group defines access rights for users. Add/Modify permission group “Configuration”Æ“User Permission Administration”Æ“Basic Permission Maintenance” or “Extended Permission Maintenance” +--------------------------------------------------------------------+ | Configuration | +--------------------------------------------------------------------+ | Basic Configuration | | >User Permission Maintenance | | Proxy Server Administration | +--------------------------------------------------------------------+ B-7 CN2610 User’s Manual RADIUS Server +--------------------------------------------------------------------+ | User Permission Maintenance | +--------------------------------------------------------------------+ | Modify User Permission | | >Basic Permission Maintenance | | Extended Permission Maintenance | | Save & Exit | +--------------------------------------------------------------------+ Basic Permission Maintenance +--------------------------------------------------------------------+ | Basic Permission Maintenance | +--------------------------------------------------------------------+ | >Add Permission Group | | Modify Permission Group | | Delete Permission Group | +--------------------------------------------------------------------+ +--------------------------------------------------------------------+ | Add Basic Permission | +--------------------------------------------------------------------+ | Group Name : Example1 | | Maximum occurrences/user : 1 | | Maximum minutes/login : 60 | | Idle minutes force to logout : 5 | | Maximum login hours/month : 500 | | >Ok | +--------------------------------------------------------------------+ Basic Permission Group Group Name Example Example1 Description Name of this permission setting Maximum occurrences/user 1 The user can only login once at the same time. “0” for simultaneous unlimited login sessions Maximum minutes/login 60 The user has only 60 minutes in each login session “0” for unlimited time Idle minutes force to logout 5 If the user is idle for 5 minutes, the session will be terminated “0” for no kick-out Maximum login hours/month 500 The user has max. 500 hours per month. “0” means unlimited access Select OK to save. Extended Permission Maintenance +--------------------------------------------------------------------+ | User Permission Administration | +--------------------------------------------------------------------+ | Modify User Permission | | Basic Permission Maintenance | | >Extended Permission Maintenance | | Save & Exit | +--------------------------------------------------------------------+ B-8 CN2610 User’s Manual RADIUS Server +--------------------------------------------------------------------+ | Extended Permission Maintenance | +--------------------------------------------------------------------+ | >Add Permission Group | | Modify Permission Group | | Delete Permission Group | +--------------------------------------------------------------------+ +--------------+----------------------------------------------------------+----+ | Add Extended | Hint : Sun Mon Tue Wed Thu Fri Sat, 0/1:accept/reject | | +--------------| Input : 1000001 |----+ | Group Name +---------------------------------------------------------- + | | Expires days after first login : 30 | | Login time interval in a day : 08:00-22:00 | | Not allow login days in a week : Sun Sat | | >Maximum login hours : 3 | | Ok | +------------------------------------------------------------------------------+ Extended Permission Group Example Description Group Name Example2 Name of this permission setting Days to expire after first login 30 The user account expires after 30 days after first login “0” for no expires Login time interval in a day 08:00-22:00 The user has only 60 minutes in each login session “0” for unlimited 24 hours usage, Barred login days Sun Sat The user is not allowed to login in on Saturday or Sunday. “0” for accept, “1” for reject. Maximum login hours 500 The user has max. 500 hours for this account. “0” means unlimited access. Select OK to save. User Settings +--------------------------------------------------------------------+ | User Permission Administration | +--------------------------------------------------------------------+ | >Modify User Permission | | Basic Permission Maintenance | | Extended Permission Maintenance | | Save & Exit | +--------------------------------------------------------------------+ “User List” lists all UNIX/LINUX users. B-9 CN2610 User’s Manual RADIUS Server +--------------------------------------------------------------------+ | User List | +--------------------------------------------------------------------+ | >adm | | bin | | daemon | | ftp | | games | | gdm | | george | | gopher | | halt | | lp | +--------------------------------------------------------------------+ | J:Down K:Up Q:Quit Enter:Select | +--------------------------------------------------------------------+ 1. Select the user “george” and press [Enter] to modify settings. Press [Ctrl-F] for page down, [Ctrl-B] for page up. 2. Specify basic permission group and extended group for the user “george”. +--------------------------------------------------------------------+ | User Name = george | +--------------------------------------------------------------------+ | Basic Permission Group : Example 1 | | >Extended Permission Group : Example 2 | | Ok | +--------------------------------------------------------------------+ 3. Select OK to save. RADIUS proxy “Configuration”Æ“Proxy Server Administration”Æ“Add Proxy Server” +--------------------------------------------------------------------+ | Configuration | +--------------------------------------------------------------------+ | Basic Configuration | | User Permission Administration | | >Proxy Server Administration | +--------------------------------------------------------------------+ +--------------------------------------------------------------------+ | Proxy Server Administration | +--------------------------------------------------------------------+ | >Add Proxy Server | | Modify Proxy Server | | Delete Proxy Server | | Save & Exit | +--------------------------------------------------------------------+ +--------------------------------------------------------------------+ | Add Proxy Server | +--------------------------------------------------------------------+ | >IP Address : | | Name : | | Radius Hash Key : | | Ok | +--------------------------------------------------------------------+ IP address:[ ] ÆProxy Server IP Name: [ ]Æ Proxy Server Name B-10 CN2610 User’s Manual RADIUS Server Radius Hash Key:[ ]Æ RADIUS encryption key, must be the same key in the proxy server end. Select “OK” to save. Setting up Windows NT Hosts Install Windows NT OPTION PACK 4.0 to Windows NT server. 1. Start Æ Programs Æ Windows NT 4.0 Option Pack Æ Microsoft Internet Information Server Æ Management Console Manger. 2. Click Console Root Æ Internet Information Server (in the left info window). Your computer’s name will be visible. 3. Click your computer name, after which you will see RADIUS in the right info window. 4. Right click RADIUS in the left info window, and then select Properties. B-11 CN2610 User’s Manual 5. RADIUS Server Select Service. Check the RADIUS ports. [Authentication] 1645 [Accounting] 1646 6. Select Client, and the click Add. Enter CN2610’s IP address in the IP address field. Enter CN2610’s password in the password field. The password corresponds to the RADIUS key setting in the CN2610 Console. 7. Click Apply. 8. Right click RADIUS in the left info window, and select Start. 9. You will now see that RADIUS is running. B-12 CN2610 User’s Manual RADIUS Server Setting up Windows 2000 Hosts 1. Click Start Æ Programs Æ Administrative Tools Æ Routing and Remote Access. 2. Follow the steps below to install. Right click Server (Local) to select Configure and Enable Routing and Remote Access. Click Next to continue. 3. Select Remote access server and then click Next to continue. 4. Select Set up an advanced remote access server, and then click Next to continue. 5. Select TCP/IP protocol, and then click Next to continue. B-13 CN2610 User’s Manual 6. RADIUS Server Specify an IP address. B-14 CN2610 User’s Manual 7. RADIUS Server Select Yes, I want to use a RADIUS server, and then click Next to start using this function. B-15 CN2610 User’s Manual RADIUS Server Setting up Windows 2003 Hosts Windows 2003 uses IAS service instead of RADIUS service. For this reason, you need to install IAS service to use RADIUS with Windows 2003 (IAS service will not be installed by default). 1. Click Start Æ Add or Remove Programs Æ Add/Remove Windows Components. 2. With Windows Components selected, choose Network Services. 3. Select Details, and then Internet Authentication Service. Click OK to continue until the installation is finished. 4. After the installation is finished, click Administrative Tools, and run Internet Authentication Service. The window shown below will open. B-16 CN2610 User’s Manual 5. RADIUS Server Select NEW RADIUS Client to add a new RADIUS client. You will then be able to start using this function. B-17 C Appendix C SNMP Agent with MIB II Simple Network Management Protocol agent software is built into CN2610. The software supports cold/warm start trap, line up/down trap, and RFC 1213 MIB-II. The following table lists the standard MIB-II groups, as well as the variable implementations for CN2610. Supported SNMP variables System MIB SysDescr SysObjectID SysUpTime SysContact SysName SysLocation SysServices Interfaces MIB itNumber ifIndex ifDescr ifType ifMtu ifSpeed ifPhysAddress ifAdminStatus ifOperStatus ifLastChange ifInOctets ifInUcastPkts ifInNUcastPkts ifInDiscards ifInErrors ifInUnknownProtos ifOutOctets ifOutUcastPkts ifOutNUcastPkts ifOutDiscards ifOutErrors ifOutQLen ifSpecific IP MIB ipForwarding ipDefaultTTL ipInreceives ipInHdrErrors ipInAddrErrors ipForwDatagrams ipInUnknownProtos ipInDiscards ipInDelivers ipOutRequests ipOutDiscards ipOutNoRoutes ipReasmTimeout ipReasmReqds ipReasmOKs ipReasmFails ipFragOKs ipFragFails ipFragCreates ipAdEntAddr ipAdEntIfIndex ipAdEntNetMask ipAdEntBcastAddr ipAdEntReasmMaxSize IpNetToMediaIfIndex IpNetToMediaPhysAddress IpNetToMediaNetAddress IpNetToMediaType IpRoutingDiscards ICMP MIB IcmpInMsgs IcmpInErrors IcmpInDestUnreachs IcmpInTimeExcds IcmpInParmProbs IcmpInSrcQuenchs IcmpInRedirects IcmpInEchos IcmpInEchoReps IcmpInTimestamps IcmpTimestampReps IcmpInAddrMasks IcmpOutMsgs IcmpOutErrors IcmpOutDestUnreachs IcmpOutTimeExcds IcmpOutParmProbs IcmpOutSrcQuenchs IcmpOutRedirects IcmpOutEchos IcmpOutEchoReps IcmpOutTimestamps IcmpOutTimestampReps IcmpOutAddrMasks IcmpOutAddrMaskReps CN2610 User’s Manual UDP MIB UdpInDatagrams UdpNoPorts UdpInErrors UdpOutDatagrams UdpLocalAddress UdpLocalPort Address Translation MIB AtIfIndex AtPhysAddress AtNetAddress SNMP Agent with MIB II TCP MIB tcpRtoAlgorithm tcpRtoMin tcpRtoMax tcpMaxConn tcpActiveOpens tcpPassiveOpens tcpAttempFails tcpEstabResets tcpCurrEstab tcpInSegs tcpOutSegs tcpRetransSegs tcpConnState tcpConnLocalAddress tcpConnLocalPort tcpConnRemAddress tcpConnRemPort tcpInErrs tcpOutRsts C-2 SNMP MIB snmpInPkts snmpOutPkts snmpInBadVersions snmpInBadCommunityNames snmpInASNParseErrs snmpInTooBigs snmpInNoSuchNames snmpInBadValues snmpInReadOnlys snmpInGenErrs snmpInTotalReqVars snmpInTotalSetVars snmpInGetRequests snmpInGetNexts snmpInSetRequests snmpInGetResponses snmpInTraps snmpOutTooBigs snmpOutNoSuchNames snmpOutBadValues snmpOutGenErrs snmpOutGetRequests snmpOutGetNexts snmpOutSetRequests snmpOutGetResponses snmpOutTraps snmpEnableAuthenTraps D Appendix D Pin Assignments and Cable Wiring In this appendix, common pin assignment and cable wiring diagrams are presented. The following topics are covered in this appendix: Pin Assignments ¾ 10/100BaseTX Port Pin Assignment ¾ Console Port Pin Assignment ¾ Async RS-232 Port Pin Assignment Cable Wiring ¾ 10/100BaseTX Port Cable Wiring ¾ Async RS-232 Port Cable Wiring ¾ DB9 and DB25 Connector Pin Assignments CN2610 User’s Manual Pin Assignments and Cable Wiring Pin Assignments 10/100BaseTX Port Pin Assignment Pin 1 2 3 6 Signal Tx+ TxRx+ Rx- 1 8 Console Port Pin Assignment Pin 1 2 3 4 5 6 7 8 RS-232 DSR (in) RTS (out) GND TxD (out) RxD (in) DCD (in) CTS (in) DTR (out) 1 8 Async RS-232 Port Pin Assignment Pin 1 2 3 4 5 6 7 8 RS-232 DSR (in) RTS (out) GND TxD (out) RxD (in) DCD (in) CTS (in) DTR (out) 1 8 Cable Wiring 10/100BaseTX Port Cable Wiring Straight-Through Cable Cross-Over Cable RJ45 Plug Pin 1 RJ45 Plug Pin 1 Cable Wiring 3 6 1 2 Cable Wiring 3 6 1 2 3 6 1 2 D-2 1 2 3 6 CN2610 User’s Manual Pin Assignments and Cable Wiring Async RS-232 Port Cable Wiring 8-pin RJ45 to Male DB9 for CN2610 RJ45 Port RJ45 Connector Male DB9 RS-232 Device CN2610 Cable Wiring 8 pins DSR RTS GND TxD RxD DCD CTS DTR Female DB9 9 pins 1 2 3 4 5 6 7 8 6 7 5 3 2 1 8 4 DTR CTS GND RxD TxD DCD RTS DSR 8-pin RJ45 to Female DB9 for CN2610 RJ45 Port RJ45 Connector Female DB9 RS-232 Device CN2610 Cable Wiring 8 pins DSR RTS GND TxD RxD DCD CTS DTR Male DB9 9 pins 1 2 3 4 5 6 7 8 4 8 5 2 3 1 7 6 DTR CTS GND RxD TxD DCD RTS DSR Female DB25 Male DB25 8-pin RJ45 to Female DB25 for CN2610 RJ45 Port RJ45 Connector RS-232 Device CN2610 Cable Wiring 8 pins DSR RTS GND TxD RxD DCD CTS DTR 1 2 3 4 5 6 7 8 25 pins 20 5 7 3 2 8 4 6 D-3 DTR CTS GND RxD TxD DCD RTS DSR CN2610 User’s Manual Pin Assignments and Cable Wiring 8-pin RJ45 to Male DB25 for CN2610 RJ45 Port RJ45 Connector Male DB25 RS-232 Device CN2610 Cable Wiring 8 pins DSR RTS GND TxD RxD DCD CTS DTR Female DB25 1 2 3 4 5 6 7 8 25 pins 6 4 7 2 3 8 5 20 DTR CTS GND RxD TxD DCD RTS DSR DB9 and DB25 Connector Pin Assignments DB9 Connector Pin Assignment Male DB9 Connector DSR (in) 6 RTS (out) 7 CTS (in) 8 1 DCD (in) 2 RxD (in) 3 TxD (out) 4 DTR (out) 5 GND Female DB9 Connector DCD (in) 1 RxD (in) 2 TxD (in) 3 DSR (in) 4 GND 5 6 DTR (out) 7 CTS (in) 8 RTS (out) 9 --- DB25 Connector Pin Assignment Male DB25 Connector 14 DTR (out) 20 25 1 2 TxD (out) 3 RxD (in) 4 RTS (out) 5 CTS (in) 6 DSR (in) 7 GND 8 DCD (in) Female DB25 Connector 1 RxD (in) 2 TxD (out) 3 CTS (in) 4 RTS (out) 5 DTR (out) 6 GND 7 DCD (in) 8 13 13 D-4 14 20 DSR (in) 25 E LCM Display Appendix E For first time installation, we recommend using the LCM display and four push buttons to configure the IP address. Basic Operation If the CN2610 is working properly, the LCM panel will display a green color. The red Ready LED will also light up, indicating that the CN2610 is receiving power. After the red Ready LED turns to green, you will see a display similar to: C N 2 6 1 0 - 1 6 _ 0 3 1 9 2 . 1 6 8 . 1 2 7 . 2 5 4 This is where • CN2610-16 • 03 • 192.168.127.254 is the CN2610’s name is the CN2610’s serial number is the CN2610’s IP address There are four push buttons on CN2610’s nameplate. Going from left to right, the buttons are: Button Name Action MENU menu activates the main menu, or returns to an upper level U up cursor scrolls up through a list of items shown on the LCM panel’s 2nd line V down cursor scrolls down through a list of items shown on the LCM panel’s 2nd line SEL select selects the option listed on the LCM panel’s 2nd line The buttons are manipulated in a manner similar to the way a modern cellular phone operates. As you move through the various functions and setting options, note that the top line shows the current menu or submenu name, and the bottom line shows the submenu name or menu item which is activated by pressing the SEL button. Detailed Menu Options The best way to explain all of CN2610’s LCM functions is to refer to the tree graph shown on the next page. There are three main levels—1, 2, and 3—with each level represented by a separate column. The first thing to remember is that the MENU button is used to move back and forth between the LCM panel’s default screen, and main menu screen: CN2610 User’s Manual LCM Display C N 2 6 1 0 - 1 6 _ 0 3 1 9 2 . 1 6 8 . 1 2 7 . 2 5 t t i n g 4 MENU M a i n S e r v M e e r n U s e ↓ In addition, you only need to remember to: • • • Use the SEL button to move up one level (i.e., left to right on the tree graph) Use the MENU button to move down one level (i.e., right to left on the tree graph) Use the cursor keys, U and V, to scroll between the various options within a level (i.e., up and down on the tree graph). As you use the buttons to operate the LCM display, you will notice that with very few exceptions, moving up one level causes the bottom line of the display to move to the top line of the display. You will also notice that the bottom three options in level 2, and all of the options in level 3 have either a C or D attached. The meaning is as follows: • C = configurable I.e., you are allowed to change the setting of this option • D = display only I.e., the setting for this option is displayed, but it cannot be changed (this does NOT necessarily mean that the number doesn’t change; only that you can’t change it) Main Menu Server setting Network setting Serial set Serial number Server name Firmware ver Model name Ethernet status MAC address IP config IP address Netmask Gateway DNS server 1 DNS server 2 Select port Baudrate Data bit Stop bit Parity Flow control Tx/Rx fifo Interface Tx/Rx bytes Line status D C D D D D C C C C C C C C C C C C C C D D The part of the LCM operation that still requires some explanation is how to edit the configurable options. In fact, you will only encounter two types of configurable options. E-2 CN2610 User’s Manual LCM Display The first type involves entering numbers, such as IP addresses, Netmasks, etc. In this case, you change the number one digit at a time. The up cursor (U) is used to decrease the highlighted digit, the down cursor (V) is used to increase the highlighted digit, and the sel button is used to move to the next digit. When the last digit has been changed, pressing sel simply enters the number into CN2610’s memory. The second type of configurable option is when there are only a small number of options from which to choose (although only one option will be visible at a time). Consider the Parity attribute under Serial set as an example. Follow the tree graph to arrive at the following Parity screen. The first option, None, is displayed, with a down arrow all the way to the right. This is an indication that there are other options from which to choose. P a r i N o n e t y ↓ Press the down cursor button once to see Odd as the second option. P a r O d d i t ↑ y ↓ Press the down cursor button again to see Even as the third option. P a r i E v e n t ↑ y ↓ Press the down cursor button again to see Space as the fourth option. P a r i t S p a c e ↑ y ↓ Press the down cursor button yet again to see the last option, Mark. P a r i M a r k t ↑ y To choose the desired option, press the SEL button when the option is showing on the screen. E-3 F Appendix F Service Information In this appendix, we show you how to contact Moxa for information about this and other products, and how to report problems. The following topics are covered in this appendix: MOXA Internet Services Problem Report Form Product Return Procedure CN2610 User’s Manual Service Information MOXA Internet Services Customer satisfaction is our number one concern, and to ensure that customers receive the full benefit of our products, Moxa Internet Services has been set up to provide technical support, driver updates, product information, and user’s manual updates. The following services are provided E-mail for technical [email protected] World Wide Web (WWW) Site for product information: .............................http://www.moxa.com F-2 CN2610 User’s Manual Service Information Problem Report Form MOXA CN2610 Series Customer name: Company: Tel: Fax: Email: Date: 1. Moxa Product: CN2610-8 2. Serial Number: CN2610-16 _________________ Problem Description: Please describe the symptoms of the problem as clearly as possible, including any error messages you see. A clearly written description of the problem will allow us to reproduce the symptoms, and expedite the repair of your product. F-3 CN2610 User’s Manual Service Information Product Return Procedure For product repair, exchange, or refund, the customer must: Provide evidence of original purchase. Obtain a Product Return Agreement (PRA) from the sales representative or dealer. Fill out the Problem Report Form (PRF). Include as much detail as possible for a shorter product repair time. Carefully pack the product in an anti-static package, and send it, pre-paid, to the dealer. The PRA should be visible on the outside of the package, and include a description of the problem, along with the return address and telephone number of a technical contact. F-4