1
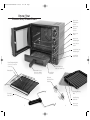
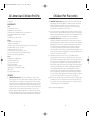
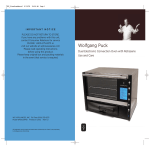
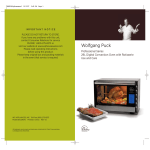
24LConvecOven&PizzaDrawer
8/25/06
12:16 PM
Page 1
I M P O R TA N T N OT I C E
PLEASE DO NOT RETURN TO STORE.
If you have any problems with this unit,
contact Consumer Relations for service
PHONE: 1-800-275-8273 or
visit our website at wppotsandpans.com
Please read operating instructions
before using this product.
Please keep original box and packing materials
in the event that service is required.
W.P. APPLIANCES, INC. Toll Free (800) 275-8273
Model BTOBR0040
Printed in China
REV 1.0
All trademarks, service marks and trade names (collectively the “Marks”) are proprietary
to Wolfgang Puck World Wide.
Wolfgang Puck
Convection Oven and Rotisserie
with Lower Pizza Oven
Use and Care
24LConvecOven&PizzaDrawer
8/25/06
12:16 PM
Page 3
IMPORTANT SAFEGUARDS
When using electrical appliances, basic safety precautions should always be
followed, including the following:
1
2
3
4
5
6
7
8
9
10
11
12
13
14
15
16
17
18
19
Read all instructions.
The exterior of the oven will become very hot during use. Do not touch
hot surfaces. Use handles or knobs. Do not place anything on top of
the oven.
Close supervision is necessary when any appliance is used by or
near children.
To protect against electric shock, do not immerse cord, plug, or any
parts of the oven in water or other liquids.
Do not operate appliance with damaged cord or plug or after the
appliance malfunctions, or has been damaged in any manner. Return
appliance to the nearest Authorized Service Center for examination,
repair, or adjustment.
The use of accessory attachments not recommended by the appliance
manufacturer may cause hazard or injury.
Do not use outdoors.
Do not place on or near a hot gas or electric burner, or in a heated oven
or in a microwave oven.
Do not let the cord hang over the edge of table or counter, or touch hot
surfaces, including the stove.
When operating the oven keep at least four inches of space on all sides
of the oven to allow for adequate air circulation.
Unplug from outlet when not in use and before cleaning. Allow to cool
before putting on or taking off parts, and before cleaning.
To disconnect, turn the Timer control to “Off”, then remove the plug.
Always hold the plug, never pull the cord.
Extreme caution must be used when moving an appliance containing
hot oil or other hot liquids.
Do not clean with metal scouring pads. Pieces can break off the pad and
touch electrical parts, creating a risk of electric shock.
A fire may occur if the oven is covered, touching, or near flammable
material, including curtains, draperies, walls, and the like, when in
operation. Do not store any item on top of the oven when in operation,
or before the oven cools down.
Extreme caution should be used when using containers other than metal
or glass.
Do not cover crumb tray or any part of the oven with metal foil. This will
cause overheating. Foil can be used to cover approved cooking
containers. Do not place any of the following materials in the oven:
cardboard, plastic, paper, or anything similar.
Do not place eyes or face in close proximity with the tempered safety
glass door, in the event that the safety glass breaks.
Use extreme caution when removing trays or disposing of hot grease or
other hot liquids.
1
20 Do not store any materials, other than manufacturers recommended
accessories, in this oven when not in use.
21 This appliance is off when the Timer and Temperature Controls are in the
“Off” position. When not in use, the oven should always remain
unplugged from the wall outlet.
22 Always wear protective, insulated oven mitts when inserting or removing
items from the hot oven.
23 This appliance has a tempered, safety glass door. The glass is stronger
than ordinary glass and more resistant to breakage. Tempered glass can
break, but the pieces will not have sharp edges. Avoid scratching door
surface or nicking edges. If the door has a scratch or nick, contact our
toll-free customer service line before using the oven.
24 Do not use appliance for other than intended use.
25 Caution: Please take care when folding in and out the Pizza Drawer
handle as to avoid injury to hands and fingers.
SAVE THESE INSTRUCTIONS
HOUSEHOLD USE ONLY
Additional Safety Information
Grounding Instructions
This appliance must be grounded. It is equipped with a 3-wire cord having
a grounded plug. The plug must be plugged into an outlet which is properly
installed and grounded.
Warning: Improper use of the grounded wire can result in the risk of electric
shock. Consult a qualified electrician if necessary. Do not attempt to defeat
this safety feature by modifying plug.
A short power-supply cord is provided to reduce the hazards resulting from
entanglement or tripping over a longer cord. If it is necessary to use an
extension cord, it should be positioned such that it does not drape over the
counter or tabletop where it can be pulled on by children or tripped over
and:
a. Use only 3-wire extension cord with 3-blade grounding plug.
b. The marked rating of the extension cord must be equal to or greater
then the rating of this appliance. The electrical rating is listed on the
bottom of this unit.
IMPORTANT: This oven is rated 1700 watts. Be sure this is the only
appliance operating on this circuit.
2
24LConvecOven&PizzaDrawer
8/25/06
12:16 PM
Page 5
Table of Contents
Wolfgang Puck,
owner of the famous
Spago restaurants and
one of the most influential
chef-restauranteurs in
America, is credited with
reviving California’s rich
culinary heritage. His
cooking innovations,
a result of blending fresh
California ingredients with his classical French techniques, are enjoyed
by world leaders, stars and fellow chefs alike. He established other
trend-setting restaurants like Postrio in San Francisco, Chinois on
Main in Santa Monica, Vert and Trattoria del Lupo, and his latest creation,
Cut, a gourmet steakhouse in the Beverly Wilshire Hotel. Home chefs
can also share Mr. Puck’s talents through his cookbooks and, of
course, through his appliances!
3
Important Safeguards
1
Additional Safety Information
2
About Wolfgang Puck
3
Know Your Convection/Pizza Oven
5
Before Your First Use
7
Using Your Upper Convection Oven
8
Operation of Upper Oven
11
Convection Baking
12
Convection Baking Tips
13
Defrosting/Slow Cooking
14
Roasting
15
Rotisserie Roasting
16
Rotisserie Chart
17
Broiling
18
Using Your Lower Pizza Oven
19
Care and Cleaning
21
Recipes Upper Oven
22
Lower Pizza Oven Recipes & Tips
39
Limited Warranty
62
Contact Information
back
24LConvecOven&PizzaDrawer
8/25/06
12:16 PM
Page 7
Know Your
Convection/Pizza Oven
Upper Oven
Temperature
Control
Upper Oven
Function
Selector
Upper Oven
Timer
Upper Oven
Indicator Light
Oven Selector
switch
Lower Pizza Oven
Indicator Light
Lower Pizza
Oven Timer
Pizza/Dehydrating Rack
(for use in Convection
Oven only)
Lower Pizza Oven
Slide-out Crumb Tray
Retractable Lower
Pizza Oven Handle
Baking Racks
(shown in open position)
Lower Pizza
Oven Rack
Rotisserie
Spit With Forks
Attached
Roasting/Broiling
Rack
Rotisserie
Removal Tool
Drip/Roasting
/Bake Pan
5
6
Upper Oven
Crumb Tray
24LConvecOven&PizzaDrawer
8/25/06
12:16 PM
Page 9
Before Your First Use
Read all instructions in this manual carefully. The information included in
this book will help you to use your Bistro Convection/Pizza Oven to its
fullest extent.
Place your oven on a level surface such as a countertop or table. Be sure
the sides, back and top of the oven are at least four inches away from
any walls, cabinets or objects on the counter or table.
Remove all Racks, Pans, Rotisserie Spit and Forks. Wash them in hot,
sudsy water or in the dishwasher and dry thoroughly before placing in
the oven. Do not place the slide-out pizza rack from the lower oven in
the dishwasher. Only wash in warm, sudsy water.
When you are ready to use the oven, be sure that the Temperature
and Time Controls are in the “Off” position. Plug the cord into a 120-volt
AC outlet.
We recommend a “trial run” at a high temperature to familiarize yourself
with your oven and to eliminate any protective substance or oil that may
have been used for packing and shipping.
Upper Oven
Set the oven selector to “Oven”, the Temperature Control to “MAX”,
the Function Control to “Broil”, and the Time Control to “20”
minutes. After the first 10 minutes, switch the Function Control to
“Conv/Bake” to activate the lower heating elements. A small amount
of smoke and odor may be detected. This is normal.
Using Your Upper Oven
Lower Oven
Switch the oven selector to “Pizza” and the lower oven Timer to “20”
minutes. A small amount of smoke and odor may be detected.
This is normal.
To avoid scratching, marring, discoloration or fire hazard, do not store
anything on top of the oven, especially during operation.
This appliance requires 1,700 watts and should be the only appliance
operating on the circuit.
7
8
24LConvecOven&PizzaDrawer
8/25/06
12:16 PM
Page 11
Using Your Upper Oven
Figure 1
Temperature Control:
Choose the desired or recommended
temperature up to 450˚.
Rotisserie Spit Tool
Used to place or remove the food from the
rotisserie motor in the oven.
Time Control:
When you turn the knob to the left (counterclockwise) to the “Stay On” position, the oven
will remain on until it is manually shut off. To
activate the Timer, turn the knob to the right
(clockwise). The Timer is used for defrosting,
slow cooking, baking, roasting, rotisserie
roasting and broiling for up to 120 minutes (2
hours) or as an independent 120-minute Timer.
When the time has elapsed or the knob is
manually turned to the “Off” position, a bell
will sound and oven will automatically shut off.
Red Upper Oven Indicator Light
(See figure 4)
Function Control:
Select desired cooking function (Defrost, Slow
Cook, Conv/Bake, Roast, Rotisserie, Broil).
Figure 2
Using Your Upper Oven cont.
Illuminates when pizza oven is in use.
Figure 4
Green Lower Oven Indicator Light
(See figure 4)
Illuminates when convection oven is in use.
Oven Selector Switch (See figure 4)
Switches functionality of oven. Pizza oven
and convection oven cannot be used
simultaneously. When using the upper
oven, always ensure that the switch is
moved to the “Oven” position. Your oven
will not work if the switch is kept in the
middle (neutral) position.
Upper Oven Pizza/Dehydrating Racks:
Used in one of two positions for defrosting,
slow cooking, baking and proofing.
Facing Up
Facing Down
Note: never use baking rack facing down.
(see figures 2 and 3.)
Broil Rack:
Figure 3
Place broil rack into drip/baking pan and slide
into top rack position as referenced in figure 1.
Drip/Baking Pan:
Slides into rails below the rack positions in the
oven for defrosting, roasting, rotisserie
roasting, or baking
Crumb Tray:
Slides underneath the bottom heating element
to catch crumbs.
Rotisserie Spit with Forks
Used to hold food for rotisserie roasting.
9
10
24LConvecOven&PizzaDrawer
8/25/06
12:16 PM
Page 13
Operation of Upper Oven
Caution: Appliance surfaces are hot during and after use! Do not place
anything on top of this appliance.
•
When using the upper oven, always ensure that the switch is moved to the
“Oven” position. Your oven will not work if the switch is kept in the middle
(neutral) position.
•
The convection fan is programmed to operate on Bake, Defrost, and
Slow Cook.
•
Be sure that the Temperature Control is set to “0” and the Time
Control is set to “Off” before plugging the cord into the outlet for use
and when unplugging the oven after use.
•
Set the Temperature Control and the Function Control before setting
the Time Control.
•
The oven will only operate if the Time Control is turned to a time
setting or if it is in the “Stay On” position.
•
For even cooking, always place foods in the oven with at least one
inch of space on all sides to allow proper air circulation.
Cooking Containers
•
The drip/baking pan included with the oven is suitable for cookies,
rolls, biscuits, nachos, pork chops, etc. It may be easier to use a
non-stick spray when using the drip/baking pan for baking or
broiling. When it is being used as the baking pan, the pan should be
placed in the upper rack, and the temperature must be increased
by 50° F.
•
Any oven-safe baking pans or casserole dishes are suitable for the
convection oven. Your Convection Oven will accommodate a full half
cookie sheet.
•
Choose bakeware made of metal, oven-proof glass or ceramic.
Check for Wolfgang Puck bakeware on HSN.com.
•
Many convenience foods are packaged in nonmetallic containers
suitable for use in microwave ovens as well as regular ovens. Check
package directions carefully to determine if the container is suitable
for use in a regular oven.
Convection Baking
In baking mode the bottom heating elements operate at full power
and the top heating elements operate at 50% power. The heating
elements will cycle on and off to maintain the selected temperature.
The Convection fan will operate during the Conv/Bake cycle.
The fan circulates the hot air around the food making baked goods rise
quickly and evenly. In many convection ovens, it is necessary to lower
the baking temperature to achieve acceptable results. Your Bistro
Convection Oven has been designed for easy use. Lowering the baking
temperature is not necessary. Follow package or recipe directions
remembering not to preheat the oven and check after the shortest
baking time.
In most cases you should use the lowest rack position; however if more
browning is desired place in the upper rack, facing up. If using the
baking rack in the lowest rack position, make sure that it is facing up.
See page 8. The drip/roasting/baking pan included with your oven can
also be used for baking. It is enamel coated making it easy to clean.
When not in use, the drip/roasting/baking pan should always be
removed from the oven when baking as it will interfere with the flow of
hot air from the bottom elements. When it is being used as the baking
pan, the pan should be placed in the upper rack, and the temperature
must be increased by 50° F. If you need to accommodate a larger cut of
meat or poultry on the drip pan, place the pan on top of the bottom
rails, not in them .
1
2
3
4
Place the oven rack or baking pan in the desired rack position. If
using the lowest position the rack should be facing up.
Set the Temperature Control to the recommended temperature.
Set the Function Control to “Conv/Bake”.
Set the Time Control to the shortest baking time in the recipe and
check for desired doneness.
A Note on Baking Times:
Convection air is superheated and it circulates around the food, so it
cooks food faster. When baking your favorite recipes or packaged goods,
follow recipe instructions remembering not to preheat. Check baked
goods a few minutes before shortest recommended baking time.
Recommended Baking Temperatures
Cakes:
Cheesecake:
Quick Bread:
325°- 350°
275°
375°
Muffins:
Pies:
Cookies:
350° - 375°
350°
350°
Proofing Bread Dough
11
When making yeast bread, you can proof (raise) the dough in the oven
on the Conv/Bake function. Set the Temperature Control to “MAX” and
let the oven run for one minute. Turn the oven off, place the dough in the
center rack of the oven and allow it to double in size.
12
24LConvecOven&PizzaDrawer
8/25/06
12:16 PM
Page 15
Convection Baking Tips
Defrosting
1
Your Wolfgang Puck Convection Oven can bake up to 25% percent
faster than standard ovens using radiant heat. The fan in the back of
the oven circulates the heated air and removes colder air from
around your food, allowing the heat to penetrate faster.
The heating elements do not operate for this function. For defrosting,
the convection fan circulates air to thaw food in a shorter period of time
than conventional methods of defrosting.
2
Expect food to be done in less time (as much as 25% less) than it
would be in a conventional oven. Don’t be concerned if you don’t
notice this faster baking time in items that do not require a greater
cooking time. For instance, recipes that cook for hours such as large
roasts and poultry will give you a greater time savings than baking
cakes or cookies which only take up to 12 - 20 minutes
Important: Defrosted foods should be cooked as soon as possible after
thawing and should never be left at room temperature when completely
thawed as harmful bacteria will begin to grow. DO NOT defrost large
amounts of food at one time.
3
4
5
When baking, select pans with shallow sides which will allow greater
air circulation to reach you food.
Despite much marketing hype regarding even browning in
convection ovens it may be necessary to rotate your food halfway
through the cooking cycle for even browning. Almost all convection
ovens, including commercial ovens require turning halfway through
the cooking process. The main benefit of convection cooking is
faster bake times.
Your convection oven comes equipped with a large glass door for
viewing the cooking process of your food. Do not open the door to
check on your baked goods as this will let out a significant amount
of heat and create longer baking times. The only time the door
should be opened is if you need to rotate your baked goods halfway
through the cooking process. When cooking a roast or large poultry
we suggest using an oven safe thermostat that you can keep in the
meat to monitor the temperature while the food is cooking. (Do not
use a thermometer when using the rotisserie to avoid damage to the
interior of the oven, or the rotisserie motor)
6
Follow the temperature guidelines in this manual. Using higher than
suggested temperatures will not cook your food any faster, instead it
will dry out the food.
7
For better results you should always bake food that has been
thoroughly thawed. The only exception to this is rule is when baking
packaged frozen dinners and or pizzas. Follow the manufacturers
instructions for required time. If the manufacturer does not
recommend using convection bake, simply switch your Function
Selector to “Roast”.
1
Place the drip/baking pan in the bottom rails of the oven.
2
Place the oven rack in middle position facing up.
3
Place the food to be defrosted on the center of the oven rack.
4
Set the Temperature Control to “0”.
5
Set the Function Control to “Defrost”.
6
Set the Time Control to the shortest amount of time necessary for
defrosting.
7
Check when the Timer shuts off and the bell rings. Add more time
if necessary.
Slow Cooking
The bottom heating elements cycle on and off to maintain the selected
temperature while the top heating elements remain off. The convection
fan will run during the Slow Cook cycle.
Slow cooking is a long cooking process at a low temperature used to
tenderize less tender cuts of meat and blend flavors in soups and stews.
Foods to be slow cooked are usually placed in a covered casserole with
some liquid and cooked at 250° for 4 to 12 hours.
1
Place the baking rack in the lowest rack position facing upward.
2
Place the covered casserole with food to be slow cooked on the
center of the baking rack.
3
Set the Temperature Control to 250°.
4
Set the Function Control to “Slow Cook”.
8
Always distribute the food evenly around the inside of the oven.
Give equal space around the pans as well as above and below.
5
Set the Time Control to “Stay On” and follow recipe instructions for
time.
9
Do not use aluminum foil or parchment paper to cover your food in
the Conv/Bake cycle. The foil will defeat the purpose of
circulating the air in the oven. In addition, the foil could become
loose and potentially get caught in the fan causing damage to
the oven.
Note: The drip/baking pan should always be removed from oven
when slow cooking as it will interfere with the flow of hot air from the
bottom elements.
13
14
24LConvecOven&PizzaDrawer
8/25/06
12:16 PM
Page 17
Roasting
Rotisserie Roasting
The top and bottom heating elements cycle on and off to maintain
the selected temperature. The convection fan remains off during the
Roast cycle.
The top heating elements cycle on and off to maintain the maximum
temperature in the oven while the spit continually turns. The convection
fan will remain off during rotisserie roasting.
1
Place the drip/roasting/baking pan in the bottom rails in the oven.
Place the broil/roasting rack inside the drip pan.
2
Place the meat fat side up on the roasting/broiling rack (unless
otherwise directed).
Rotisserie roasting is a healthy way to cook meats because the slowturning spit provides natural basting of meats while fats drip away. The
rotisserie can be used to roast meats up to 5 pounds. It is not necessary
to preheat the oven for rotisserie roasting.
3
Preheat the oven to 375° F.
4
Set the Function Selector to “Roast”.
5
Set the Time Control to the shortest time. If more than 2 hours, set
to “Stay On” and check after the shortest time.
Warning: Never use your Rotisserie without the drip/baking pan in the
bottom rails of the oven.
Use the following chart as a guide for roasting. Use a reliable meat
thermometer for the most accurate results. Roasts should stand for
10 to 15 minutes before carving. During this time, they will continue to
cook increasing the meat thermometer reading by about 10 degrees.
Food Type
Weight (lbs)
1
Place one rotisserie fork on the end of the rotisserie spit
opposite the point with the tines facing the center and tighten the
screw slightly.
2
Slide the pointed end of the rotisserie spit through the center of the
food to be cooked.
3
Place the other rotisserie fork on the other end of the rotisserie spit
with the tines facing the roast.
Time per Lb
Thermometer
4
20 - 22min
23 - 24 min
25 - 27 min
18 - 20min
21 - 23 min
24 - 26 min
20 - 22min
23 - 24 min
25 - 27 min
Rare 120 - 130
Med 140 - 150
Well 160 - 170
Rare 120 - 130
Med 140 - 150
Well 160 - 170
Rare 120 - 130
Med 140 - 150
Well 160 - 170
Adjust the roast so that it is centered on the rotisserie spit. Make
sure the forks secure the roast on the spit and tighten the screws.
When cooking poultry, it may be necessary to secure legs and wings
to the body with string to make the roast as compact as possible for
smooth movement of the rotisserie spit.
5
Season or baste the roast as desired.
6
Put the pointed end of the rotisserie spit in the drive socket on right
interior wall of the oven.
7
Place the grooved end on the spit support on the left interior wall of
the oven.
8
Set the Temperature Control to “MAX”.
9
Set the Function Control to “Rotisserie”.
Beef
Sirloin Tip/Top Round
3-8
Eye Round
3-6
Standing Rib
3-6
Pork
Loin (bone in)
Loin (boneless)
Fresh Ham
Fully cooked/w bone
Half
3-6
3-8
4-8
25 min
15 min
25 min
Smoked Ham
170
170
170
15 min
140
20 - 23 min
25 min
Med 170
Well 180
20 min
20 min
15 min
20 min
180
180
180
180
6-8
10 Set the Time Control to the shortest time. If more than 2 hours, set
to “Stay On” and check after the shortest time.
Lamb
Leg
6-8
Poultry
Chicken (unstuffed)
Chicken (stuffed)
Turkey (unstuffed)
Turkey (stuffed)
6-8
6-8
up to 10 lbs
up to 10 lbs
These cooking times are an average and should be adjusted to individual preferences.
11
When the roast is done, turn the Temperature Control to “0” and the
Time Control to “Off” and unplug the oven.
12 Remove the rotisserie spit from the oven using the rotisserie
handle included.
13 Place the roast on a cutting board or platter and allow to stand for
10 - 15 minutes.
14 Using a pot holder, loosen the screws on the rotisserie forks and
remove the rotisserie spit from the roast. Carefully remove the
rotisserie forks and carve the roast.
Caution: The rotisserie spit, rotisserie forks, screws and the roast will
be hot.
15
16
24LConvecOven&PizzaDrawer
8/25/06
12:16 PM
Page 19
Rotisserie Chart
Broiling
Use the following chart as a guide for rotisserie roasting. Use a reliable
meat thermometer for the most accurate results. Roasts should stand
for 10 to 15 minutes before carving. During this time they will continue to
cook, increasing the meat thermometer reading about 10 degrees.
Hint:
For crisper poultry or roasts you can open the door slightly to allow
excess steam to escape for the last 30 minutes of cooking.
The top heating elements cycle on and off to maintain the maximum
temperature in the oven. For best results, the oven should be preheated
for 10 minutes before adding the food to be broiled. The fan will not run
in the broil mode.
Barbecue or other sweet sauces should be brushed on during the last few
minutes of broiling. They will burn if applied too early in the cooking.
1
Remove all accessories from the oven
Type
Weight
Setting
Time
2
Set the Temperature Control to “MAX”
Chicken
3 - 4 lb.
4 - 5 lb.
4 - 5 lb.
3 - 5 lb.
MAX
MAX
MAX
MAX
MAX
3
Set the Function Control to “Broil”.
4
Set the Time Control to “20” and allow the oven to preheat for
15 minutes.
5
2 - 1.5 lbs. each
4 - 5 lb.
MAX
1 1 /2 - 2 hours
2 - 2 1/2 hours
1 1/2 - 2 hours
1 1/2 hours (rare)
1 3/4 hours (med)
2 hours (well)
1 hour
1 1/2 - 2 hours
While the oven is preheating, place the food to be broiled directly on
the drip/roasting/baking pan or you may use a broiling rack and place
directly into the drip/roasting/baking pan, unless otherwise directed.
6
When the oven is preheated place the drip/roasting/baking pan in
the upper rack position and close the door.
7
Set the Timer for the shortest broiling time recommended.
Pork Roast
Roast Beef
Cornish Hens
Smoked Ham
Boneless
These cooking times are an average and should be adjusted to individual preferences.
DO NOT leave the oven unattended during broiling.
Do not exceed 5 pounds on the rotisserie spit to avoid damage to the
rotisserie motor.
Type
Weight/Thickness Desired Doneness
Beef
Steak: Porterhouse
1 inch
Rare
Sirloin, London broil,
Medium
Top round
Well done
Hamburger
6 ounces
Rare
Medium
Well done
Pork
Chops
1 inch
Well Done
Ribs
Cut in pieces
Well Done
Sausage
Links
Well Done
Chicken
Pieces w/ Skin
Well Done
Boneless Breasts - each Well Done
Halves w/ skin - each
Well Done
Fish
Fillets
1/2 inch
Well Done
Steaks
1 inch
Well Done
Cooking time
18 - 20 min
21 - 23 min
24 - 28 min
15 - 17 min
18 - 21 min
22 - 25 min
19 - 23 min
30 - 35 min
25 - 30 min
20 - 25min
12 - 15 min
30 - 40 min
10 - 12 min
15 - 20 min
These cooking times are an average and should be adjusted to individual preferences.
Turn foods halfway through cooking time.
17
18
24LConvecOven&PizzaDrawer
8/25/06
12:16 PM
Page 21
Using Your Lower Pizza Oven
The upper three controls are only applicable to the top portion of
your oven. The lower pizza oven operates at a fixed temperature and
you are only required to set the lower pizza oven Timer in order to
power the lower pizza oven. Due to wattage constraints for household
use you cannot use both the upper convection oven and lower bottom
pizza oven at the same time.
1
To use your lower pizza oven, set the oven selector to “Pizza”,
extend the handle, and preheat for five minutes.
2
Your pizza oven will preheat up to 400°. Slide out the removable
rack being mindful that the rack is extremely hot. Place your food on
the center of the rack and slide the rack into the oven.
3
Set the Timer to the minimum time as per your recipe instructions.
When the time expires you will hear a signal bell. If you require
additional cooking, simply set the Timer as desired.
Lower Pizza Oven Tips
Using Your Lower Pizza Oven
The Lower Pizza Oven can be used for a wide variety of foods, such as
pizza’s, quesadillas, bruschetta, etc. When using the bottom pizza oven
there is no need to set the temperature. Simply set the Timer and the
oven will be maintained between 375° – 400° F.
Due to the close proximity of the heating elements to the pizza you will
find that your pizza will come out evenly heated and crispy. Most frozen
pizzas will cook in 12-13 minutes, or until your desired doneness. There is
no need to use a pizza stone, or separate baking rack since the rack built
into the door also serves as your baking rack. The grates allow the heat
to pass to the bottom of your food providing you with a crispy bottom
crust as well.
You can also toast up to 9 slices of standard sliced bread in your pizza
oven. Check toast for your desired shade after 5 minutes.
Warning
• Do not attempt to cook meat or poultry in your bottom
pizza oven (except as toppings to your pizza or breads) as
the drippings will come in contact with the bottom heating
elements and could cause excess smoke from the oven.
• Do not attempt to toast rice cakes, fried foods, or
non-bread items.
• Close supervision is necessary when used by or near children.
19
20
24LConvecOven&PizzaDrawer
8/25/06
12:16 PM
Page 23
Care and Cleaning
1
Turn the Temperature Control to “0” and the Time Control to “Off”
and unplug before cleaning.
2
Allow oven and accessories to cool completely before cleaning.
3
Clean the outside of the oven with a damp cloth and dry thoroughly.
Clean stubborn stains with a non-abrasive liquid cleaner. Rinse and
dry thoroughly. Do not use metal scouring pads or abrasive cleaners
that will scratch the surface.
4
Clean the glass door with a cloth or sponge dampened with warm,
sudsy water and dry thoroughly.
5
Wash the Racks, Pans, Rotisserie Spit and Forks in hot, sudsy water
or in the dishwasher and dry thoroughly before placing in the oven.
Do not place the slide-out pizza rack from the lower oven in the
dishwasher. Only wash in warm, sudsy water. Clean stubborn stains
with a nylon or polyester mesh pad and a mild, non-abrasive cleaner.
Rinse and dry thoroughly.
6
The walls on the inside of the oven have a nonstick coating which
allows food particles or spatters during oven use to be easily wiped
clean. Remove heavy spatter after use with a nylon or polyester
mesh pad, sponge or cloth dampened with warm water. Blot dry
with a paper towel or soft, dry cloth.
7
DO NOT use cleaning agents, cleansers or metal scouring pads on
the nonstick coating as this may reduce its effectiveness.
8
The Rotisserie spit and forks (without screws attached) can be
placed in the dishwasher or washed in warm soapy water. Handwash
the screws in warm soapy water and dry thoroughly.
Recipes
Upper Oven
Note: No other service operations required for this appliance.
All repairs, if necessary, should be performed by an authorized
service representative.
21
22
24LConvecOven&PizzaDrawer
8/25/06
12:16 PM
Page 25
Classic French Onion Soup
Barbecue Chicken
6 servings
4 servings
INGREDIENTS
INGREDIENTS
3 tablespoons safflower oil or olive oil
4 medium onions, peeled and thinly sliced
1/2 cup port wine
8 cups chicken stock
1 sprig thyme
1 bay leaf
1 stalk celery
salt to taste
freshly ground black pepper to taste
12 slices french bread, 1/4” thick
2 cups swiss cheese, shredded
1 4 lb whole chicken
1 teaspoon peanut oil
1 tablespoon kosher salt
1 teaspoon paprika
1 teaspoon garlic powder
1/2 teaspoon sugar
1/4 teaspoon fresh ground white pepper
butchers twine
METHOD
1
Set oven temperature to “MAX” and set Function Selector
to “Rotisserie”.
METHOD
1
In a large saucepan over medium-high heat, heat the oil.
2
Wash the chicken well. Pat dry with a paper towel.
2
Add the onions and sauté, stirring frequently and taking care
that the onions do not scorch. Sauté until golden brown, for about
20 minutes.
3
Rub the chicken well with peanut oil, top and bottom.
4
Combine all the spices in a small bowl, rub the chicken well with
the spices.
3
Add port to the pan and deglaze, stirring and scraping with a
wooden spoon to dissolve the pan deposits.
5
Tuck the tips of the wings under the chicken. Tie the legs together
securely with butchers twine.
4
Stir in the stock, add the Bouquet garni (made with the thyme,
bay leaf, and celery), and season to taste with salt and pepper.
When the liquid reaches a boil, reduce the heat and simmer for
about 40 minutes.
6
Attach the chicken to the rotisserie spit. Place the chicken in the
very center of the spit, insert the rotisserie forks into each end of the
chicken, tighten the screw till the fork cannot move. Place the spit
into convection oven. Set Timer for 80 minutes.
5
Set the the temperature to 250° and set Function Selector to
“Conv/Bake”. Arrange the bread slices on a baking sheet and put
them in the convection oven . When the bread slices are dry and
crusty, place 1 slice in each of 6 deep ovenproof soup bowls.
7
When the Timer goes off, remove the chicken with the Rotisserie
Removal Tool. Place chicken on the platter and let rest for 10 minutes
before carving.
6
Set the temperature to “MAX”, the Function Selector to “Broil”, and
the Timer to “Stay On”.
Recipe courtesy Debra Murray, Wolfgang Puck HSN Guest Host
7
Set the other slices aside and place the bowls on the baking sheet.
Turn convection oven to broil. Place the rack in the center of the
oven. Turn the temperature to “MAX” and turn the Timer to “Stay
On”.
8
Ladle the soup over the bread in each bowl. Top each bowl with
1 more slice of bread and sprinkle with cheese. Place on rack in
convection oven. Watch for browning. Remove from oven when
melted and bubbly, 2 to 3 minutes.
Recipe courtesy Wolfgang Puck.
23
24
24LConvecOven&PizzaDrawer
8/25/06
12:16 PM
Page 27
All American Chicken Pot Pie
6 servings
Chicken Pot Pie (cont.)
2
PREPARE THE FILLING: Heat a large skillet over medium-high heat
and add the butter and vegetable oil. Add the chicken pieces and
sauté until lightly browned but not yet cooked through, 2 to 3
minutes. With a slotted spoon, remove the chicken to a mixing
bowl. Leave the butter and oil in the skillet.
3
In the same skillet over medium-high heat, sauté the carrots, celery,
and mushrooms, stirring frequently, until they begin to color, about 5
minutes. With a slotted spoon, remove them to a separate bowl. Stir
the thawed pearl onions and peas into the other vegetables.
4
PREPARE THE SAUCE: In the same pan, melt the butter over
medium heat. Add the flour and whisk until the mixture is smooth
and bubbling, about 2 minutes. Remove the skillet from the heat and
gradually whisk in the stock, cream, and thyme. Return the skillet to
the heat and, stirring constantly, bring the mixture to a simmer.
Cook, stirring continuously, until the sauce has thickened and is
smooth, about 2 minutes. Season to taste with salt and pepper. Stir
in the reserved chicken and vegetables. Set the pan aside and let the
mixture cool for about 20 minutes.
5
Meanwhile, preheat convection oven on “Conv/Bake” and set
temperature to 400°. Spoon the cooled filling into a 10-inch deepdish pie plate. On a lightly floured surface, roll out the dough into an
even circle 11 inches in diameter. Loosely roll up the dough around
the rolling pin, then transfer it to the pie plate and unroll it on top.
With a small, sharp knife, trim the uneven edge of the dough slightly,
reserving the trimmings; then, fold the overhang underneath and
press it gently all around the rim of the baking dish to make a
decorative rim. If you like, gather up the trimmings into a ball, roll
them out again, and cut them into decorative designs to apply to
the top of the pie. Brush pastry with the beaten egg wash. Using the
tip of the knife, cut three slits in the center of the pie dough.
6
Bake the pie until the crust is golden brown and the filling beneath
is bubbling hot, 25 to 30 minutes. Present the pie at the table on a
trivet and use a pie server and a serving spoon to cut and scoop the
crust and filling onto each heated plate.
INGREDIENTS
Crust
2 cups all-purpose flour
2 tablespoons chives, snipped
12 tablespoons unsalted butter, cut into small pieces
1 cup sharp cheddar cheese, shredded
2 egg yolks
5-6 tablespoons heavy cream
Filling
2 tablespoons unsalted butter
1 tablespoon vegetable oil
1 pound boneless skinless chicken breasts, cut into 1” thick pieces
2 medium carrots, cut into 1/2” slices
1 stalk celery, cut into 1/2” slices
1/2 pound mushrooms, cut into 1/2” slices
10 ounces frozen pearl onions (package), thawed
3/4 cup frozen petite peas, thawed
Sauce
6 tablespoons unsalted butter
1/4 cup all-purpose flour
1 1/2 cups chicken stock
1/2 cup heavy cream
1 teaspoon minced fresh thyme
1 egg beaten with 1 tablespoon water
salt to taste
fresh ground black pepper
METHOD
1
PREPARE THE PASTRY: Put the flour and chives in a bowl. Using
your fingertips, work in the butter until the mixture resembles coarse
crumbs. Add the cheese and toss it together with the flour mixture
until evenly mixed. In a small bowl, whisk together the egg yolks and
5 tablespoons of the cream. While stirring the flour-butter-cheese
mixture continuously with a fork, sprinkle in the yolk-cream mixture
a little at a time. If the mixture still seems a little too dry to hold
together, add the remaining tablespoon of cream. with your hands,
knead the dough lightly until it is just smooth. Press the dough into a
thick, flat disk, wrap it in plastic wrap, and refrigerate until needed.
25
Recipe courtesy Wolfgang Puck.
26
24LConvecOven&PizzaDrawer
8/25/06
12:16 PM
Page 29
Rotisserie Baby Back Pork Ribs
Fennel Garlic Pork Roast
4 servings
4 servings
INGREDIENTS
INGREDIENTS
1 whole slab baby back ribs
2 tablespoons olive oil
1 tablespoon kosher salt
1 tablespoon fresh thyme, chopped
6 cloves garlic, minced
1/2 tablespoon fresh ground pepper
1 medium lemon
1 teaspoon crushed red pepper, optional
3 pounds pork loin, rib end, ready to cook
2 tablespoons Dijon mustard
6 cloves garlic, chopped
1 tablespoon kosher salt
1 tablespoon pepper blend or fresh cracked pepper
1 tablespoon fennel seeds
1 teaspoon crushed red pepper (optional)
METHOD
METHOD
1
1
Set oven temperature to “MAX” and set Function Selector
to “Rotisserie”.
Set the oven temperature to “MAX” and set Function Selector
to “Rotisserie”.
2
Rinse the roast and pat dry with paper towels.
2
Rinse the ribs and pat dry with a paper towel.
3
Place roast on a platter, rub entire roast with Dijon mustard.
3
Thread the rotisserie spit through the slab of ribs, inserting about
every third rib.
4
Combine the remaining ingredients. Press them firmly on
entire roast.
4
Place ribs on a platter. Rub well with olive oil.
5
5
Mix the salt, thyme, garlic, & pepper together. Press onto the meat
side of the ribs. Rub some on the back side of ribs.
Insert the rotisserie spit through center of roast. Pierce each end of
roast with the rotisserie forks. When forks are secure in roast, tighten
the screws.
6
Squeeze the lemon juice over both sides of the ribs. If you are using
crushed red pepper flakes, sprinkle them on now. Insert the rotisserie
forks into ribs. Secure by tightening screws.
6
Insert rotisserie spit in oven. Set the Timer to 70 - 80 minutes.
7
When Timer goes off, test the pork with a thermometer for a reading
of 170°.
7
Insert rotisserie spit into oven and set the Timer for 40 - 45 minutes.
8
9
When Timer goes off, ribs will be crispy outside, juicy and
tender inside.
Remove roast from oven with Rotisserie Removal Tool; let rest at
least 10 minutes before carving.
10 Remove from oven, set on platter. Let rest for 10 minutes before
cutting them up.
Recipe courtesy Debra Murray, Wolfgang Puck HSN Guest Host
Recipe courtesy Debra Murray, Wolfgang Puck HSN Guest Host
27
28
24LConvecOven&PizzaDrawer
8/25/06
12:16 PM
Page 31
My Mother’s Chicken
Stuffed Bell Peppers
with Tomato Sauce
6 servings
My Mother’s Chicken
Stuffed Bell Peppers with
Tomato Sauce (cont.)
6
Rinse the peppers under cold running water. Wipe them dry. Cut the
top 1 inch from each pepper, keeping the stem intact, and reserve
the tops. With your fingers and, if necessary, with the tip of a small
sharp knife or a teaspoon, remove the core and seeds from each
pepper. Brush the peppers inside and out with the remaining 1/4 cup
of olive oil. Season their insides with salt and pepper.
7
Divide the filling evenly among the peppers, filling them to the top.
Place the lids back on top. In a baking dish just large enough to
hold the peppers comfortably, arrange the stuffed peppers stem end
up. Spoon the hot tomato sauce all around them. Bake in the
convection oven until the peppers are tender, about 1 hour. With a
serving spoon, transfer each pepper to a heated plate. Garnish with
minced parsley.
INGREDIENTS
2 whole chicken legs (skinned & boned), cut into even chunks
1/2 cup extra virgin olive oil
1 cup onion, diced
1/2 pound mushrooms, finely chopped
2 cloves garlic, peeled and minced
1 whole egg, lightly beaten
2 tablespoons fresh parsley, chopped
1 teaspoon fresh thyme, chopped
1 teaspoon salt (plus extra as needed)
1/2 teaspoon ground cumin
freshly ground white pepper to taste
2 cups long-grain white rice, cooked as directed
5 cups My Favorite Tomato Sauce (See following recipe)
6 medium green bell peppers
fresh parsley (for garnish), minced
Recipe courtesy Wolfgang Puck.
METHOD
1
Set convection oven to lowest setting, set Function Selector to
“Conv/Bake” and set Temperature to 350°.
2
With a meat grinder, or food processor fitted with metal blade,
coarsely grind the chicken. Transfer to a mixing bowl and set aside.
2
In a medium skillet, heat 1/4 cup of the olive oil over moderate heat.
Add the onion and sauté until translucent, about 5 minutes. Add the
mushrooms and continue to cook, stirring occasionally, until all the
liquid given up by the mushrooms evaporates, 10 - 15 minutes. Set
aside the mixture and let cool.
3
Add the onion and mushrooms to the ground chicken. Add the
garlic, egg, parsley, thyme, 1 teaspoon salt, cumin, and white pepper
and mix well. To test for taste, sauté a small amount in a little oil and,
when it is done, taste it and adjust the seasoning if necessary. Set
the mixture aside and, when it is cool, stir in the cooked rice.
Reserve.
4
Prepare My favorite Tomato Sauce. (See following recipe).
Set it aside and keep warm.
29
25
30
24LConvecOven&PizzaDrawer
8/25/06
12:16 PM
Page 33
My Favorite Tomato Sauce
Calzone Sandwich Ring
4 servings
8 servings
INGREDIENTS
INGREDIENTS
1/4 cup extra virgin olive oil
2 small onions, peeled, trimmed, and minced
6 cloves garlic, minced
2 tablespoons tomato paste
4 pounds Roma tomatoes, peeled, seeded, and diced
2 cups chicken stock
14 large fresh basil leaves, washed and dried
12 tablespoons unsalted butter, cut into pieces
kosher salt & freshly ground black pepper to taste
2 1 - pound dough (You may use Bridgford Frozen Dough thawed,
or make 2 1 - pound dough from scratch), formed into balls.
One large and 2 small
3 tablespoons extra virgin olive oil
1 pound hard salami, shaved thin
1 pound ham, shaved thin
1 pound whole milk mozzarella cheese, shredded
1 cup fresh spinach
4 whole roasted peppers
METHOD
METHOD
1
In a large saucepan, heat the olive oil over medium-high heat.
1
2
Add the onion and sauté until soft, about 5 minutes. Add the garlic
and cook 1 minute longer.
2
3
Add the tomato paste and then the tomatoes, cook for 2 - 3 minutes,
and then pour in the chicken stock.
4
Simmer briskly until the sauce is thick, 20 - 30 minutes.
For a finer consistency, pass the sauce though a wire-mesh sieve into
a clean saucepan.
5
Stack the basil leaves, roll them up lengthwise, and cut across the
roll very thinly to make a chiffonade.
6
Stir in the basil. Whisk in the butter piece by piece, then season to
taste with salt and pepper. Keep warm.
Recipe courtesy Wolfgang Puck.
3
4
5
6
7
8
9
Set oven temperature to 375° and set Function Selector to
“Conv/Bake” mode. Place the oven rack in the bottom position.
If you are using the frozen bread dough, you can thaw at room
temp. for about 2 hours, or place in the refrigerator overnight. If
making your own dough, after the dough has had one full rise, form
into one large dough ball, and two small.
On a lightly floured surface, roll out the largest dough ball to at least
13 inches in diameter. Spray a bundt pan or angel food cake pan with
nonstick spray, or rub well with olive oil.
Stretch the large dough over cake pan, tearing a small hole for the
smaller opening of the tube pan. Press against side of the pan. Rub
the dough with olive oil.
Begin by layering half the salami, then half the cheese, half the ham,
two of the roasted red peppers, then half the spinach.
Roll out one of the smaller dough balls on the lightly floured
surface. to a 10 inch round, place in cake pan over the spinach,
touching the sides of the larger dough which goes up to the top
edge of cake pan.
Repeat the same sequence for layering meat, cheese and
vegetables.
Roll out the last dough. Place on top of spinach. Press the seams
together of the last dough and the first dough. Brush with good
olive oil.
Place in the oven. Set Timer for 40 minutes. When Timer goes off
remove from oven. You should let rest about 10 minutes then invert onto
a platter. Serve warm or cold.
Recipe courtesy Debra Murray, Wolfgang Puck HSN Guest Host
31
32
24LConvecOven&PizzaDrawer
8/25/06
12:16 PM
Page 35
Prime Rib with
Horseradish Garlic Crust
6 servings
INGREDIENTS
1 large head of garlic
1/4 cup olive oil
1/4 cup prepared white horseradish
1 6 pound trimmed boneless beef rib roast tied with butchers twine
1 teaspoon kosher salt
1 teaspoon fresh ground pepper
1 cup beef stock
Prime Rib with
Horseradish Garlic Crust (cont.)
13 When Timer goes off check meat for doneness, 125° for rare. Cook to
desired doneness. For instance if you desire medium, cook for 10
minutes longer on “Rotisserie”. Turn the heat off and let the roast
spin on “Rotisserie” for 10 minutes longer without heat, before
removing from oven and putting it on a platter.
14 Pour juice from drip pan into sauce pan add the beef stock.
Heat to a simmer.
15 Let the roast sit at least 15 minutes before carving. To serve pour hot
juice over each serving.
METHOD
1
Set oven temperature to 350° and set Function Selector to “Roast”.
Place rack in the lower rack position of the oven.
2
Cut off the top of garlic head and drizzle with olive oil.
Wrap in foil. Place garlic in oven and roast for 35 - 40 minutes.
3
Remove garlic from oven when Timer goes off and let cool for at least
15 minutes.
4
Place half of the oil in the bowl of a food processor fitted with a
metal blade. Squeeze the roasted garlic in the food processor. Add
the horseradish, process until almost smooth.
5
Rinse roast and pat dry.
6
Rub with remaining olive oil, sprinkle roast with salt and pepper.
7
Spread the garlic mixture over entire roast.
8
I suggest letting the roast sit for at least 30 minutes at room
temperature before roasting. The coating can sit on roast for
24 hours in refrigerator. Wrap well with plastic wrap.
9
Insert the rotisserie spit through the center of the roast. Insert the
rotisserie forks into roast. Secure by tightening screws.
10 Put drip tray in oven. Place roast in oven.
11
Set temperature to “MAX”. Turn Function Selector to “Roast”, set
Timer for 35 minutes.
12 When Timer goes off, turn Function Selector to “Rotisserie”.
Set Timer for 35 minutes.
33
34
24LConvecOven&PizzaDrawer
8/25/06
12:16 PM
Page 37
Calzone With Artichokes
Triple Chocolate Fudge
Brownies
Makes 4 calzones, 12 servings
6 servings
INGREDIENTS
INGREDIENTS
Pizza dough (See Recipe, p. 41)
2 tablespoons extra-virgin olive oil
2 large artichoke hearts, very thinly sliced
1 1/2 cups fresh porcini, sliced if large
Salt and Freshly ground pepper
2 tablespoons chile oil
1 cup grated Italian Fontina
2 cups grated mozzarella
2 tablespoons chopped garlic, blanched
3 teaspoons chopped fresh thyme, plus 4 sprigs for garnish
2 tablespoons unsalted butter, melted
2 tablespoons freshly grated Parmesan
2 cups cold milk
1 3 - oz. pkg. instant chocolate pudding (I like to use chocolate fudge)
1 18.25 - oz. box chocolate cake mix (I use various chocolate, chocolate
fudge mixes)
1 12 - oz. pkg. chocolate chips (I use various variations, regular, minis, milk
chocolate, chocolate and peanut butter, etc.)
1 1/4 cups coarsely chopped nuts (whatever your preference - walnuts,
pecans, macadamia nuts, etc.)
1
Set the oven temperature to 350° and set Function Selector to
“Conv/Bake”.
METHOD
2
Butter/grease a 9” x 12” cake pan. In medium-sized bowl, mix
the milk and chocolate pudding mix. Add the chocolate cake
mix and beat well. Fold in the chocolate chips and nuts.
Bake for 40 to 45 minutes.
1
Set the oven temperature to “MAX” and set Function Selector to
“Roast”. Set the Timer for 15 minutes with the Pizza/Dehydrating
rack in the upper position.
2
Divide the pizza dough into 4 equal pieces.
3
Place a large sauté pan over high heat. Add the olive oil and
when it is hot, sauté the artichoke hearts and mushrooms. Season
to taste with salt and pepper. Pour off any excess oil and let the
vegetables cool.
4
Roll or stretch the dough, 1/4 at a time, into 9-inch circles.
Place the dough circles, one at a time, on a lightly floured wooden
peel. Brush the circles to within 1-inch of the edge with chili oil. For
each calzone, put 1/4 of both cheeses on half of the dough, still
leaving the 1-inch border. Top with 1/4 of the artichokes and
mushrooms, the garlic and the thyme. Assemble the remaining
calzones in the same way.
5
Moisten the edges of the circles with water. Fold the un-topped half
of the dough, trapping as much air inside as possible, over the filling
and press the edges together firmly to seal. With the backside of a
fork, press the edges of the dough to crimp them.
6
Slide the calzones onto the Pizza/Dehydrating rack and bake about
12 minutes, or until the crust is golden brown. Brush the calzones
with melted butter and sprinkle them with Parmesan.
METHOD
Tip: They make a wonderful dessert cut into squares, and topped with
ice cream and/or whipped cream and chocolate sauce.
Recipe Courtesy of HSN Consumer and loyal Wolfgang Puck
customer: D’Ann Matthews.
Recipe courtesy Wolfgang Puck.
35
36
24LConvecOven&PizzaDrawer
8/25/06
12:16 PM
Page 39
Chocolate Chip Cookies
Raspberry Almond Squares
12 servings
8 servings
INGREDIENTS
INGREDIENTS
1 cup walnut or pecans
1 3/4 cups cake flour
1/2 teaspoon salt
6 ounces unsalted butter, at room temperature
3/4 cup brown sugar
1/2 cup sugar
1/2 teaspoon baking soda
2 teaspoons warm water
1 egg
1 teaspoon vanilla
1 cup chocolate chips
METHOD
1
Set the oven temperature to 375° and set Function Selector
to “Conv/Bake”.
2
Arrange the nuts on the baking tray and toast for 10 minutes, turning
occasionally. Cool and chop coarsely. Set aside.
3
Sift together the flour and salt. Set aside.
4
In an electric mixer, cream the butter until light and fluffy. On low
speed, gradually add the brown and white sugars. Increase speed
and beat until well combined.
5
In a cup or a small bowl, dissolve the baking soda in the warm water
and pour into the mixture. Add the egg and vanilla and mix until
blended. With the motor off, sprinkle the nuts, chocolate chips and,
last of all, the flour around the blade. On low to medium speed, mix
just until the flour is incorporated.
6
1 stick unsalted butter, room temperature
1 box yellow cake mix
1 large egg, beaten
2 tablespoons water
1/2 cup raspberry jam
1/2 cup sliced almonds, (You may add more )
METHOD
1
Set the oven temperature to 350° and set Function Selector
to “Conv/Bake”. Set Timer for 30 minutes.
2
Spray the baking pan that comes with your oven with nonstick spray.
3
In the bowl of a food processor or with a mixer combine the butter,
cake mix, and egg. Mixture should be crumbly. Remove a half cup at
this time and reserve. Add the 2 tablespoons of water. Continue mixing
until thoroughly mixed.
4
Spread the cake batter over the entire baking sheet.
5
Bake for 12 minutes.
6
Remove from oven, spread the raspberry jam over the entire cake.
Top with reserved crumbles, and sliced almonds.
7
Bake for an additional 10 minutes.
8
Remove from oven and let cool. Cut into squares.
Recipe courtesy Debra Murray, Wolfgang Puck HSN Guest Host
Turn out of the bowl, wrap in plastic wrap, and chill until firm. With
lightly floured hands, shape the dough into 12 equal balls, about 3
ounces each, and arrange on the parchment-lined baking trays, 3
inches apart. Flatten each ball slightly and bake 16 minutes or until
golden brown. Let the cookies cool slightly on the baking tray, then
transfer to a rack to finish cooling.
Recipe courtesy Wolfgang Puck.
37
38
24LConvecOven&PizzaDrawer
8/25/06
12:16 PM
Page 41
Lower Pizza Oven Tips
1
If you store your pizza dough in the refrigerator, use a zip-top plastic
bag. Place 1 tablespoon of oil in bag before placing dough in bag.
2
Always preheat your oven for at least 10 minutes.
3
Be sure to stretch your dough on a floured surface (pizza peel,
rimless baking tray) for easy transfer onto the pizza baking rack.
4
Have all of your toppings/ingredients ready when preparing
your pizzas.
5
All your pizza toppings should be cold. If you place hot/sautéed
toppings on the pizza, it creates moisture and your pizza could stick
to the pizza baking screen.
6
Always place your toppings on the pizza just before you place the
pizza in the oven. Placing toppings on too soon could effect the
thickness and the texture of the pizza dough.
7
When using the pizza oven, always leave the handle out. It may be
hot to the touch if folded in.
8
If using flour tortillas, make sure to prick the top with a fork several
times to prevent tortilla from rising too high.
Lower Pizza Oven
Tips & Recipes
39
40
24LConvecOven&PizzaDrawer
8/25/06
12:16 PM
Page 43
Pizza Dough
4 servings
Try this robust dough in place of my regular pizza dough. The honey
brings out a wonderful, rich flavor in the crust.
INGREDIENTS
1 package active dry or fresh yeast
1 teaspoon honey
1 cup warm water, 105 to 115° F
3 cups all-purpose flour
1 teaspoon kosher salt
1 tablespoon extra-virgin olive oil, plus additional for brushing
METHOD
1
In a small bowl, dissolve the yeast and honey in 1/4 cup warm water.
2
In a food processor, combine the flour and the salt. Add the oil, the
yeast mixture, and the remaining 3/4 cup of water and process until
the mixture forms a ball. (The pizza dough can also be made in a
mixer fitted with a dough hook. Mix on low speed until the mixture
comes cleanly away from the sides of the bowl and starts to climb
up the dough hook).
3
4
Whole Wheat Pizza Dough
Turn the dough out onto a clean work surface and knead by
hand 2 or 3 minutes longer. The dough should be smooth and firm.
Cover the dough with a clean, damp towel and let it rise in a cool
spot for about 2 hours. (When ready, the dough will stretch as it is
lightly pulled).
Divide the dough into 4 balls, about 6 ounces each. Work each ball
by pulling down the sides and tucking under the bottom of the ball.
Repeat 4 or 5 times. Then on a smooth, un-floured surface, roll the
ball under the palm of your hand until the top of the dough is
smooth and firm, about 1 minute. Cover the dough with a damp
towel and let rest 1 hour. At this point, the balls can be wrapped in
plastic and refrigerated for up to 2 days
Recipe courtesy Wolfgang Puck.
Makes enough for four 7- to 8 - inch pizzas
INGREDIENTS
1 package yeast
1/4 cup warm water
1 tablespoon honey
3 3/4 cups whole wheat flour
1 cup cool water
1 tablespoon olive oil
Pinch salt
METHOD
1
In a small bowl, dissolve the yeast in the warm water. Add the honey
and let sit for 5 minutes, until foamy.
2
Put the flour in a food processor fitted with the stainless-steel blade.
Mix the 1 cup cool water with the olive oil and salt. With the motor
running, pour the olive oil mixture and the yeast slowly in through
the feed tube. Process until the dough forms a ball that rides around
on the blade.
3
Transfer the dough to an oiled bowl, cover with plastic wrap, and
let rise until double in bulk. Punch down the dough and knead it on
a lightly floured surface for 1 minute. Divide the dough into 4 equal
portions and roll them into tight balls. Place on a tray, cover with
a damp towel, and let rest for several hours or overnight in the
refrigerator before use.
4
Roll or stretch each ball of dough into a 7-to-8-inch circle. Place the
circles, one at a time, on a wooden peel or on a baking sheet and
build the pizza as desired.
Recipe courtesy Wolfgang Puck.
41
42
24LConvecOven&PizzaDrawer
8/25/06
12:16 PM
Page 45
Topping for Mexican Pizza
Topping for Vegetarian Pizza
4 servings
4 servings
INGREDIENTS
INGREDIENTS
3 cups mozzarella cheese, grated
2 cups fontina cheese, grated
6 plum tomatoes, sliced thin
1 cup whole cilantro leaves
7 jalapeno peppers
2 cups roasted red peppers, sliced
1/2 cup roasted garlic, sliced
4 teaspoons parmesan cheese, grated
2 cups Maui or Vidalia onions, sliced
pinch cilantro, chopped
3 cups mozzarella cheese, grated
2 cups fontina cheese, grated
2 cups artichoke hearts, sliced and cooked
2 cups eggplant, sliced and sauteéd
4 teaspoons parmesan cheese, grated
1/4 cup mozzarella cheese, grated
1 teaspoon fresh oregano, chopped
METHOD
1
Set selector switch to “Pizza”, and Timer to “10” minutes to
preheat the Lower Pizza Oven. Ensure the retractable handle is in
the “open” position.
2
Sauté the eggplant and artichokes separately, each in 1 tablespoon
olive oil. Use more if necessary. Let cool.
METHOD
1
Set the oven selector to “Upper Oven” and function selector to
“Roast”, and roast 7 whole jalapeno peppers by placing in the oven
for 15 minutes at 350°. Then core, seed, and cut into thin slices.
3
2
Set selector switch to “Pizza”, and Timer to “10” minutes to
preheat the Lower Pizza Oven. Ensure the retractable handle is in
the “open” position.
Follow the rest of the directions from the recipe “Pizza Dough”,
(See Recipe, p. 41). Arrange ingredients on the pizza dough in the
order listed above.
4
Bake pizza for 10 - 12 minutes until the crust is nicely browned.
3
Prepare the pizza dough according to the recipe for Pizza Dough,
(See Recipe, p. 41). Add all the toppings in the order they are listed
in the recipe except for the onions and cilantro.
NOTES: The vegetables listed are the ones we usually use. You can
substitute vegetables of your choice as desired.
4
Bake pizza for 10 - 12 minutes until the crust is nicely
browned. Remove from the oven and sprinkle with the onion and
chopped cilantro.
Recipe courtesy Wolfgang Puck.
Recipe courtesy Wolfgang Puck.
43
44
24LConvecOven&PizzaDrawer
8/25/06
12:16 PM
Page 47
B-L-T Pizza
Cheeseburger Pizza
8” – 10” Pizza
Makes Four 8 - 10 inch pizzas
INGREDIENTS
INGREDIENTS
1/4 pizza dough recipe (See Recipe, p. 41)
4 slices bacon, cooked and crumbled
1 medium tomato, chopped
1 cup romaine lettuce, chopped
1/2 cup mozzarella, shredded
1/4 cup onion, sliced
salt and pepper to taste
1 tablespoon mayonnaise
1 tablespoon heavy cream
1 recipe pizza dough (See Recipe, p. 41)
1 lb. ground beef
1/2 onion, chopped
8 slices American cheese
12 thin lengthwise slices dill pickle
4 Tablespoons ketchup
2 Tablespoons yellow mustard
Kosher salt and pepper to taste
METHOD
METHOD
1
1
Set selector switch to “Pizza”, and Timer to “10” minutes to
preheat the Lower Pizza Oven. Ensure the retractable handle is in
the “open” position.
Set selector switch to “Pizza”, and Timer to “10” minutes to
preheat the Lower Pizza Oven. Ensure the retractable handle is
in the “open” position.
2
2
Scatter cheese and onion over pizza crust. Bake in lower pizza oven
for 12 - 18 minutes or until crispy and brown.
Stretch pizza dough into 4 pizzas, place on cornmeal dusted board,
peel or rimless cookie sheet.
3
3
While pizza crust is baking, whisk in a bowl the mayonnaise, heavy
cream, and salt and pepper. Add bacon, tomato, and lettuce. Toss to
coat. Pour onto hot pizza crust and eat immediately. The contrast of
hot crust and cold salad is wonderful.
Brown ground beef with onion, salt and pepper in a sauté pan till
brown. Remove, drain and cool quickly by spreading it out onto a
large piece of foil or cookie sheet.
4
Mix mustard and ketchup together in a small bowl. Spread this out
onto doughs like you would tomato sauce.
5
Sprinkle tops with meat mixture.
6
Top with pickle slices and slices of the American cheese.
7
Slide one at a time into heated pizza oven and cook for 12 - 18
minutes, or till desired color.
Recipe courtesy Wolfgang Puck.
Recipe courtesy Marion Getz
45
46
24LConvecOven&PizzaDrawer
8/25/06
12:16 PM
Page 49
Pizza with Smoked Salmon
and Caviar
Dill Cream
1 8-inch pizza
4 servings
INGREDIENTS
INGREDIENTS
6 ounces pizza dough (See Recipe, p. 41)
1 tablespoon chile and garlic oil
1/4 cup red onion, thinly sliced
2 tablespoons dill cream (See following recipe)
2 1/2 ounces smoked salmon, thinly sliced
1 teaspoon fresh chives, chopped
1 tablespoon sevruga caviar (optional)
1 1/2 cups sour cream
3 tablespoons shallots, minced
2 tablespoons fresh dill, chopped
1 1/2 tablespoons fresh lemon juice
1/4 teaspoon ground white pepper
METHOD
1
Set selector switch to “Pizza”, and Timer to “10” minutes to
preheat the Lower Pizza Oven. Ensure the retractable handle is in
the “open” position.
2
On a lightly floured surface, stretch or roll out the dough into an 8inch circle, with the outer edge a little thicker than the inner circle.
3
Brush the dough with the oil and arrange the onion over the pizza.
Slide the pizza peel under the pizza and then slide the pizza onto
the lower pizza oven rack.
4
Bake until the crust is golden brown, 6 - 8 minutes.
5
With the pizza peel or a large spatula, carefully remove the pizza
from the oven and set it on the cutting board. Use a knife, an icing
spatula, or the back of a spoon to spread the dill cream over the
inner circle.
6
Arrange the slices of salmon so that they cover the entire pizza,
slightly overlapping the raised rim. Sprinkle the chopped chives over
the salmon.
7
Using a pizza cutter or a large knife, cut the pizza into 4 or 6 slices
(Do not cut pizza on the lower pizza oven rack.) If you like, spoon
a little caviar in the center of each slice. Serve immediately.
METHOD
1
In a medium bowl, combine all the ingredients and mix well.
2
Cover with plastic wrap and refrigerate until ready to use.
Recipe courtesy Wolfgang Puck.
Recipe courtesy Wolfgang Puck.
47
48
24LConvecOven&PizzaDrawer
8/25/06
12:16 PM
Page 51
Pizza with Caramelized Onions
and Crispy Bacon
Brunch Pizza with Scrambled
Eggs and Smoked Salmon
Serves 2 main course or 4 appetizer servings
Makes 2 servings
INGREDIENTS
INGREDIENTS
1 teaspoon olive oil
3 slices bacon (about 2 ounces), cut into 1/2-inch pieces
1 small onion, peeled, thinly sliced
2 tablespoons mascarpone cheese
1/4 cup farmer's cheese
Freshly grated nutmeg
Freshly ground black pepper
6 ounces Pizza Dough (See Recipe, p. 41)
1/2 cup grated mozzarella
2 tablespoons grated Parmesan
2 tablespoons fresh thyme leaves
6 ounces Pizza Dough
(See Recipe, p. 41)
Chili Garlic Oil (See following recipe)
4 large eggs
1/4 cup milk
Kosher salt and freshly ground
black pepper
1 tablespoon olive oil
1
2
Set selector switch to “Pizza”, and Timer to “10” minutes to
preheat the Lower Pizza Oven. Ensure the retractable handle is
in the “open” position.
In a medium size sauté pan, add olive oil and heat over medium heat.
When the oil is hot, add the bacon and cook until the bacon is very
crispy and all of the fat is rendered. Remove the bacon with a slotted
spoon and drain on a paper towel-lined plate. Remove all but 2
tablespoons of the bacon fat from the pan and discard. Place the
pan over high heat. Add the onions to the hot bacon fat and cook
until the onions are well browned, about 8 to 10 minutes, stirring
often. Remove to a paper towel lined plate and reserve.
3
In a small bowl, combine the mascarpone and farmer's cheeses.
Season with nutmeg and black pepper. Reserve.
4
On a lightly floured surface, stretch or roll the dough as thinly as
possible into a 14 to 15-inch circle. Evenly spread the mascarpone
mixture over the dough. Sprinkle with the mozzarella and Parmesan
cheeses, bacon, thyme, and sautéed onion. Bake until the pizza crust
is nicely browned, about 8 to 10 minutes.
5
METHOD
1
METHOD
Remove pizza from the oven, transfer to a cutting board, cut into
slices and serve immediately.
Recipe courtesy Wolfgang Puck.
2
3
4
5
Set selector switch to “Pizza”, and Timer to “10” minutes to
preheat the Lower Pizza Oven. Ensure the retractable handle is
in the “open” position.
On a lightly floured surface, stretch or roll out the dough to an
8-inch round. Place the dough on a pizza peel that has been dusted
with flour or semolina (you can also place on a cookie sheet). Lightly
brush the surface of the dough with the chili oil. Place on lower pizza
oven rack and bake until the bottom begins to turn golden brown,
but the pizza is not cooked through, about 6 to 8 minutes. Remove
from the oven and set aside.
In a medium bowl, whisk together the eggs, milk, salt, and pepper.
Place a nonstick 10-inch skillet over medium-high heat. When the
pan is hot add the olive oil and butter and cook until the butter is
melted. Add the egg mixture and cook, stirring constantly, until the
eggs are slightly set, but still fairly undercooked, about 4 minutes.
The eggs will cook further in the oven so it is important not to
overcook them. Remove from the heat and remove from the pan to
stop the cooking.
Spread the eggs on the pizza dough, leaving a 1/2-inch border
around the edges. Scatter the mozzarella cheese and Fontina cheese
evenly over the eggs. Return to the oven and cook just until the
cheese melts and is bubbly, about 5 minutes.
Remove the pizza from the oven and transfer to a firm surface.
Arrange the smoked salmon slices over the surface of the pizza,
covering completely. Garnish with the chopped chives and
salmon eggs.
Recipe courtesy Wolfgang Puck.
49
1 tablespoon unsalted butter
1/4 cup grated mozzarella cheese
1/4 cup grated Fontina cheese
2 ounces smoked salmon,
sliced very thin
Chopped chives, for garnish
2 tablespoons salmon roe, optional
50
24LConvecOven&PizzaDrawer
8/25/06
12:16 PM
Page 53
Chili Garlic Oil
Yield: about 2 cups
Spicy Chicken Pizza
This has always been one of the most popular recipes at my Cafés.
It's a wonderful, hearty pizza, spicy and delicious, perfect for dinner
for a family.
INGREDIENTS
1 whole head garlic (about 2 1/2 ounces, cloves separated and peeled)
2 cups extra-virgin olive oil
Makes two 10-inch or four 8-inch pizzas
INGREDIENTS
METHOD
1
2
In a small saucepan, combine the garlic cloves and olive oil and bring
to a simmer. Reduce the heat and simmer until the garlic begins to
turn brown, 10 to 15 minutes. (Do not let the garlic get too brown or
the oil will have a bitter taste.)
Remove from the heat and cool to room temperature. Add the red
pepper flakes and infuse for at least 2 hours to allow the flavors to
blend. Refrigerate in a covered container for up to 2 weeks.
Recipe courtesy Wolfgang Puck.
About 1 1/4 pounds skinned and boned uncooked chicken,
cut into small cubes to make 4 cups.
Marinade:
1/2 cup plus 1 tablespoon extra-virgin olive oil
3 1/2 tablespoons fresh lime juice
2 large jalapeño peppers, trimmed and minced
1 garlic clove, peeled and minced
1 tablespoon chopped fresh cilantro leaves
Kosher salt
1 recipe Pizza Dough (See Recipe, p. 41)
Toppings:
2 cups grated mozzarella cheese (8 ounces)
2 cups grated Fontina cheese (8 ounces)
6 Roma tomatoes (about 1 pound), ends trimmed, cut into thin slices
1 cup cubed Asian eggplant, sautéed or grilled
1 recipe Caramelized Onions (See following recipe)
1/2 cup sliced red and yellow bell peppers, sautéed or grilled
51
52
24LConvecOven&PizzaDrawer
8/25/06
12:16 PM
Page 55
Spicy Chicken Pizza cont.
METHOD
1
2
3
4
5
5
Set selector switch to “Pizza”, and Timer to “10” minutes to
preheat the Lower Pizza Oven. Ensure the retractable handle is
in the “open” position.
Marinate the chicken: Arrange the cubed chicken in a shallow
medium bowl and toss with the marinade ingredients, using 1/4 cup
of olive oil. Season lightly with salt and let marinate for about
1 hour, refrigerated.
In a skillet or sauté pan large enough to hold the chicken in one layer,
heat the remaining 1 tablespoon of oil. Remove the chicken from the
marinade with a slotted spoon. Sauté the chicken just to brown on
all sides. Do not overcook. Remove from the skillet with a slotted
spoon and set aside.
On a lightly floured surface, stretch or roll out the dough to
make two 10-inch rounds, with the outer border a little thicker than
the inner circle. Transfer dough to wooden pizza paddles or
cookie sheets.
Layer the pizza: Start with the mozzarella, then the Fontina, tomato,
eggplant, caramelized onions, cooked chicken, and peppers. Slide
the pizza directly onto the lower pizza oven rack. Bake until the
pizza is nicely browned, 10 to 12 minutes.
Caramelized Onions
Sprinkle these onions over pizza, over pasta, even over mashed
potatoes. These will add wonderful flavor to a wide variety of dishes.
Makes about 3/4 cup
INGREDIENTS
2 tablespoons extra virgin olive oil
1 large red, yellow or white onion (3/4 pound) peeled, trimmed, and cut
into 3/4 inch dice
2 tablespoons balsamic vinegar
Kosher salt and freshly ground black pepper
METHOD
1
In a 10-inch skillet, heat the oil. Add the onion and cook over
medium heat, stirring frequently, until light browned, about 15
minutes. Add the vinegar and cook 1 minute longer.
Season with salt and pepper to taste.
2
Cool the onion and transfer to a covered container. Refrigerate and
use as needed.
Recipe courtesy Wolfgang Puck
Transfer the pizza to a firm surface and cut into slices with a pizza
cutter or very sharp knife. Serve immediately
Recipe courtesy Wolfgang Puck
53
54
24LConvecOven&PizzaDrawer
8/25/06
12:16 PM
Page 57
Cheese Quesadillas with
Fresh Guacamole
Makes 4 - 8 hors d’oeuvres servings
INGREDIENTS
4 (12 - inch) flour tortillas
1/2 cup grated Cheddar
1/4 cup grated mozzarella
1/2 cup grated queso blanco
Olive oil
Guacamole (See following recipe)
There are as many different guacamole recipes as there are cantinas
in Tijuana. Mine is a simple version, subtly flavored with roasted garlic
and shallots. I try and keep the processing of the fresh ingredients to
a minimum to let the flavors each play their role and always use fullyripened, pebble-skinned Haas avocados.
Makes about 2 cups, serves 4 to 6
INGREDIENTS
METHOD
Note: If using flour tortillas, make sure to prick the top with a fork
several times to prevent tortilla from rising too high.
1
Set selector switch to “Pizza”, and Timer to “10” minutes to
preheat the Lower Pizza Oven. Ensure the retractable handle is
in the “open” position.
2
Lay out 2 of the flour tortillas on a flat surface. Top with the cheeses,
spreading evenly over the tortillas. Top with remaining tortillas and
press to seal.
3
California Guacamole
Cook for 8 to 10 minutes or until desired doneness. Let cool for
5 minutes. Slice into 8 or 10 pieces. Serve with the guacamole
Recipe courtesy Wolfgang Puck
3 medium, fully ripe avocados
1/4 cup freshly squeezed lime juice
1/3 cup freshly chopped cilantro
1 medium shallot, minced
1 tablespoon roasted garlic (See following recipe)
1 small jalapeno, seeded and minced
1 teaspoon salt
METHOD
1
Halve one avocado, remove pit and scoop flesh into medium bowl.
Repeat with remaining avocados. Pour lime juice over avocado flesh.
2
Using a fork or potato masher, mash lightly until mixture is still a little
chunky. Stir in cilantro, shallot, roasted garlic, jalapeno and salt.
3
Serve with tortilla chips. (Guacamole can be made ahead and
covered with plastic wrap and kept refrigerated for up to 8 hours.
Return to room temperature before serving.)
Recipe courtesy Wolfgang Puck
55
56
24LConvecOven&PizzaDrawer
8/25/06
12:16 PM
Page 59
Roasted Whole Garlic
Roasting garlic develops a sweeter, more flavorful taste, without
the pungency of raw garlic. This is a great ingredient to have on
hand, so you may want to make a double or triple batch and keep
it in the refrigerator.
Dessert Pizza
Makes one 8” – 10” pizza
INGREDIENTS
1
Preheat the upper oven to 375° F.
1/4 pizza dough recipe (See Recipe, p. 41)
2 teaspoons butter, soft
1/4 teaspoon cinnamon
1 tablespoon sugar
1/2 cup cream cheese, softened
1/3 cup strawberry jam or other flavor
1 banana, sliced
1 cup sliced strawberries
1 cup blueberries
powdered sugar for dusting
2
Arrange the garlic heads in a small roasting pan and toss with the
olive oil, coating them well.
METHOD
3
Roast garlic until very tender, 50 to 60 minutes. Remove from the
oven and cool. When cool, cut the heads in half, crosswise, with a
serrated knife and remove the softened garlic pulp. This can be done
by squeezing each half or by scooping the garlic out with a tiny
teaspoon or small knife.
1
Set selector switch to “Pizza”, and Timer to “10” minutes to
preheat the Lower Pizza Oven. Ensure the retractable handle is
in the “open” position.
2
Spread top of crust with soft butter and sprinkle with cinnamon and
sugar. Bake in pizza oven for 10-12 minutes or until golden brown.
Transfer to a container, cover, and refrigerate. Use as needed.
3
While crust is baking, stir together cream cheese and jam in a bowl.
Spread this mixture over slightly cooled crust, top with fruit and dust
with powdered sugar.
Makes about 1/2 cup
INGREDIENTS
4 whole heads of garlic
About 1/3 cup extra virgin olive oil
METHOD
4
Recipe courtesy Wolfgang Puck
Recipe courtesy Marion Getz
57
58
24LConvecOven&PizzaDrawer
8/25/06
12:16 PM
Page 61
Recipe Notes
Recipe Notes
60
59
60
24LConvecOven&PizzaDrawer
8/25/06
12:16 PM
Page 63
Recipe Notes
Limited Warranty
This warranty covers all defects in workmanship or materials in the
mechanical and electrical parts, arising under normal usage and care, in
this product for a period of 12 months from the date of purchase
provided you are able to present a valid proof-of-purchase. A valid
proof-of-purchase is a receipt specifying item, date purchased, and
cost of item. A gift receipt with date of purchase and item is also an
acceptable proof-of-purchase. Product is intended for household use
only. Any commercial use voids the warranty.
This warranty covers the original retail purchaser or gift recipient. During
the applicable warranty period within normal household use, we will
repair or replace, at our discretion, any mechanical or electrical part
which proves defective, or replace unit with a comparable model.
To obtain service under the terms of this warranty,
call Toll Free (800) 275-8273.
THIS LIMITED WARRANTY COVERS UNITS PURCHASED AND USED
WITHIN THE UNITED STATES AND DOES NOT COVER:
•
Damages from improper installation.
•
Defects other than manufacturing defects.
•
Damages from misuse, abuse, accident, alteration, lack of proper
care and maintenance, or incorrect current or voltage.
•
Damage from service by other than an authorized dealer or
service center.
This warranty gives you special legal rights and you may also have other
rights to which you are entitled which may vary from state to state.
61
62