1
Audio
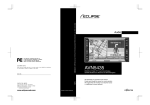
AVN5495
ESN E5 6.5” Wide TFT Touch-Panel Display
CD/DVD/MS Multi-Source Receiver with HDD Navigation
We appreciate your purchase of this receiver.
Please read through this manual for correct operation.
We suggest that after reading it you keep this manual
in a safe place for future reference.
Warnings and cautions signs, illustrated below, are posted throughout this manual as well as
on the device itself. They show safe and correct ways to handle the product so as to prevent
personal injury to you and others, and to avoid damage to property. Before reading through
the manual, take time to read through and learn the important information listed in this section.
Cautions for use
* The images appearing on the screen may differ from those shown in this manual
depending on the type of database used and when it was created.
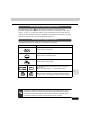
Warning
This sign indicates a situation in which incorrect handling
through disregard of a sign might result in death or serious
personal injury.
Caution
This sign indicates a situation in which incorrect handling
through disregard of a sign might result in personal injury or may
result solely in damage to property.
The symbol shown below indicates important instructions or helpful information to keep in
mind.
A point it will be helpful to remember.
Important points.
● Please read all materials that come with the product, such as manuals and warranties.
Fujitsu Ten will not be responsible for unsatisfactory product performance due to failure to
follow these instructions.
● Changes in product specifications may result in differences between the content of the
manual and actual product features.
Please use care in handling the manual.
Forcefully spreading or pulling on pages may result in their falling out of the binding.
Use the manual carefully.
1
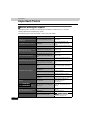
Table of Contents
Introduction
How to use this manual . . . . . . . . . . . . . . . . . . . . . . . . . . . . 12
Features . . . . . . . . . . . . . . . . . . . . . . . . . . . . . . . . . . . . . . . . . 14
Before using the deck . . . . . . . . . . . . . . . . . . . . . . . . . . . . . 17
About discs. . . . . . . . . . . . . . . . . . . . . . . . . . . . . . . . . . . . . . . . . . . . . 19
About supported disc types . . . . . . . . . . . . . . . . . . . . . . . . . .
About handling discs . . . . . . . . . . . . . . . . . . . . . . . . . . . . . . .
About new discs . . . . . . . . . . . . . . . . . . . . . . . . . . . . . . . . . . .
About rental discs . . . . . . . . . . . . . . . . . . . . . . . . . . . . . . . . . .
About specially shaped discs. . . . . . . . . . . . . . . . . . . . . . . . .
About disc accessories. . . . . . . . . . . . . . . . . . . . . . . . . . . . . .
About the Memory Stick . . . . . . . . . . . . . . . . . . . . . . . . . . . . . . . . . .
19
20
21
21
21
21
22
About supported Memory Stick types . . . . . . . . . . . . . . . . . . 22
About handling the Memory Stick . . . . . . . . . . . . . . . . . . . . . 23
About the LCD panel . . . . . . . . . . . . . . . . . . . . . . . . . . . . . . . . . . . . . 23
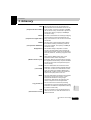
Basic operation
Switching modes . . . . . . . . . . . . . . . . . . . . . . . . . . . . . . . . . 24
Switching the mode . . . . . . . . . . . . . . . . . . . . . . . . . . . . . . . . . . . . . . 24
Displaying operation screen. . . . . . . . . . . . . . . . . . . . . . . . . . 24
Switching source using touch switches . . . . . . . . . . . . 25
Operation screen of each mode . . . . . . . . . . . . . . . . . . . . . 26
Adjusting the volume . . . . . . . . . . . . . . . . . . . . . . . . . . . . . . 27
Adjusting the main volume . . . . . . . . . . . . . . . . . . . . . . . . . . . . . . . . 27
Setting the BEEP tone . . . . . . . . . . . . . . . . . . . . . . . . . . . . . . . . . . . . 27
Adjusting sound quality . . . . . . . . . . . . . . . . . . . . . . . . . . . . 28
Displaying the sound adjustment screen . . . . . . . . . . . . . . . . . . . . 28
Setting Circle Surround II . . . . . . . . . . . . . . . . . . . . . . . . . . . . . . . . . 30
Setting DSP (acoustics). . . . . . . . . . . . . . . . . . . . . . . . . . . . . . . . . . . 31
DSP mode setting . . . . . . . . . . . . . . . . . . . . . . . . . . . . . . . . . . 31
Adjusting, saving DSP (acoustics). . . . . . . . . . . . . . . . . . . . . 31
Resetting DSP (acoustics) levels . . . . . . . . . . . . . . . . . . . . . . 32
2
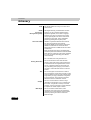
Adjusting EQ (equalizer) . . . . . . . . . . . . . . . . . . . . . . . . . . . . . . . . . . 32
Setting sound quality . . . . . . . . . . . . . . . . . . . . . . . . . . . . . . .
Adjusting/Saving an EQ curve . . . . . . . . . . . . . . . . . . . . . . . .
Resetting EQ curves . . . . . . . . . . . . . . . . . . . . . . . . . . . . . . . .
Adjusting POS (Positioning selector) . . . . . . . . . . . . . . . . . . . . . . .
32
33
33
34
Setting the balance . . . . . . . . . . . . . . . . . . . . . . . . . . . . . . . . . . . . . . 35
Setting LOUDNESS . . . . . . . . . . . . . . . . . . . . . . . . . . . . . . . . . . . . . . 36
Setting sub woofer. . . . . . . . . . . . . . . . . . . . . . . . . . . . . . . . . . . . . . . 36
Setting the harmonizer . . . . . . . . . . . . . . . . . . . . . . . . . . . . . . . . . . . 37
Setting background screen . . . . . . . . . . . . . . . . . . . . . . . . . 38
Setting the wallpaper . . . . . . . . . . . . . . . . . . . . . . . . . . . . . . . . . . . . . 38
Adjusting/setting the screen . . . . . . . . . . . . . . . . . . . . . . . . 39
Switching the FUNCTION switch display. . . . . . . . . . . . . . . . . . . . . 39
Displaying the image adjustment screen . . . . . . . . . . . . . . . . . . . . 40
Setting daytime display to display when vehicle
lights are on . . . . . . . . . . . . . . . . . . . . . . . . . . . . . . . . . . . . . . .
Turning the screen off . . . . . . . . . . . . . . . . . . . . . . . . . . . . . . .
Adjusting image quality . . . . . . . . . . . . . . . . . . . . . . . . . . . . .
Switching screen mode . . . . . . . . . . . . . . . . . . . . . . . . . . . . . . . . . . .
41
41
42
42
How to operate the tuner
How to use the AM/FM radio . . . . . . . . . . . . . . . . . . . . . . . . 44
Listening to the AM/FM radio . . . . . . . . . . . . . . . . . . . . . . . . . . . . . . 44
Selecting radio stations. . . . . . . . . . . . . . . . . . . . . . . . . . . . . . . . . . . 45
Manual selection . . . . . . . . . . . . . . . . . . . . . . . . . . . . . . . . . . .
Automatic selection. . . . . . . . . . . . . . . . . . . . . . . . . . . . . . . . .
Selection using preset switches . . . . . . . . . . . . . . . . . . . . . .
Saving radio stations. . . . . . . . . . . . . . . . . . . . . . . . . . . . . . . . . . . . .
45
45
45
46
Saving manually. . . . . . . . . . . . . . . . . . . . . . . . . . . . . . . . . . . .
Saving with AUTO.P . . . . . . . . . . . . . . . . . . . . . . . . . . . . . . . .
Changing stations saved by AUTO.P. . . . . . . . . . . . . . . . . . .
Turning off the radio . . . . . . . . . . . . . . . . . . . . . . . . . . . . . . . . . . . . .
46
46
46
48
3
How to operate the CD player
How to use the CD player. . . . . . . . . . . . . . . . . . . . . . . . . . . 49
Listening to a CD . . . . . . . . . . . . . . . . . . . . . . . . . . . . . . . . . . . . . . . . 49
Selecting a track. . . . . . . . . . . . . . . . . . . . . . . . . . . . . . . . . . . . . . . . . 50
Fast-forwarding/rewinding . . . . . . . . . . . . . . . . . . . . . . . . . . . . . . . . 50
Searching for a track . . . . . . . . . . . . . . . . . . . . . . . . . . . . . . . . . . . . . 50
Repeating a track . . . . . . . . . . . . . . . . . . . . . . . . . . . . . . . . . . . . . . . . 50
Playing tracks in random order . . . . . . . . . . . . . . . . . . . . . . . . . . . . 51
Turning off the CD player . . . . . . . . . . . . . . . . . . . . . . . . . . . . . . . . . 51
How to operate the MP3 player
How to use the MP3 player . . . . . . . . . . . . . . . . . . . . . . . . . 52
Playing MP3 . . . . . . . . . . . . . . . . . . . . . . . . . . . . . . . . . . . . . . . . . . . . 53
Selecting a music file. . . . . . . . . . . . . . . . . . . . . . . . . . . . . . . . . . . . . 53
Selecting with file change switches. . . . . . . . . . . . . . . . . . . . 53
Selecting with TUNE/TRACK button . . . . . . . . . . . . . . . . . . . 53
Fast-forwarding/rewinding . . . . . . . . . . . . . . . . . . . . . . . . . . . . . . . . 54
Changing display of the current level . . . . . . . . . . . . . . . . . . . . . . . 54
Displaying the current level . . . . . . . . . . . . . . . . . . . . . . . . . . . . . . . 54
Searching for a music file . . . . . . . . . . . . . . . . . . . . . . . . . . . . . . . . . 54
Repeating the same music file . . . . . . . . . . . . . . . . . . . . . . . . . . . . . 55
Playing music files in random order . . . . . . . . . . . . . . . . . . . . . . . . 55
About display of file information . . . . . . . . . . . . . . . . . . . . . . . . . . . 56
Displaying folder/file names . . . . . . . . . . . . . . . . . . . . . . . . . . 56
Displaying file information . . . . . . . . . . . . . . . . . . . . . . . . . . . 56
Turning off the MP3 player . . . . . . . . . . . . . . . . . . . . . . . . . . . . . . . . 56
About MP3s . . . . . . . . . . . . . . . . . . . . . . . . . . . . . . . . . . . . . . . . . . . . 57
Playable MP3 file standards . . . . . . . . . . . . . . . . . . . . . . . . . .
ID3 tags . . . . . . . . . . . . . . . . . . . . . . . . . . . . . . . . . . . . . . . . . . .
Media. . . . . . . . . . . . . . . . . . . . . . . . . . . . . . . . . . . . . . . . . . . . .
Format of discs . . . . . . . . . . . . . . . . . . . . . . . . . . . . . . . . . . . .
File names . . . . . . . . . . . . . . . . . . . . . . . . . . . . . . . . . . . . . . . .
Multi-sessions . . . . . . . . . . . . . . . . . . . . . . . . . . . . . . . . . . . . .
Playing MP3 . . . . . . . . . . . . . . . . . . . . . . . . . . . . . . . . . . . . . . .
MP3 playing time display . . . . . . . . . . . . . . . . . . . . . . . . . . . .
Display order of MP3 file/folder names . . . . . . . . . . . . . . . . .
4
57
57
57
58
59
59
59
59
59
Making and playing MP3 files . . . . . . . . . . . . . . . . . . . . . . . . . . . . . . 60
Downloading from Internet MP3 music sites . . . . . . . . . . . .
Converting CD music to MP3 files . . . . . . . . . . . . . . . . . . . . .
When writing to CD-R/RW . . . . . . . . . . . . . . . . . . . . . . . . . . . .
When playing back CD-R/RW . . . . . . . . . . . . . . . . . . . . . . . . .
60
60
60
60
How to operate the Memory Stick player
How to use the Memory Stick player . . . . . . . . . . . . . . . . . 61
Listening to Memory Stick data . . . . . . . . . . . . . . . . . . . . . . . . . . . . 61
Selecting a track. . . . . . . . . . . . . . . . . . . . . . . . . . . . . . . . . . . . . . . . . 62
Fast-forwarding/rewinding . . . . . . . . . . . . . . . . . . . . . . . . . . . . . . . . 62
Searching for a track . . . . . . . . . . . . . . . . . . . . . . . . . . . . . . . . . . . . . 62
Repeating a track . . . . . . . . . . . . . . . . . . . . . . . . . . . . . . . . . . . . . . . . 62
Playing tracks in random order . . . . . . . . . . . . . . . . . . . . . . . . . . . . 63
Turning the Memory Stick off . . . . . . . . . . . . . . . . . . . . . . . . . . . . . . 63
How to operate the CD Changer
How to use the CD changer . . . . . . . . . . . . . . . . . . . . . . . . . 64
Listening to a CD . . . . . . . . . . . . . . . . . . . . . . . . . . . . . . . . . . . . . . . . 64
Selecting a track. . . . . . . . . . . . . . . . . . . . . . . . . . . . . . . . . . . . . . . . . 64
Fast-forwarding/rewinding . . . . . . . . . . . . . . . . . . . . . . . . . . . . . . . . 64
Selecting a CD . . . . . . . . . . . . . . . . . . . . . . . . . . . . . . . . . . . . . . . . . . 64
Searching for a track or CD from all CDs in the changer. . . . . . . . 65
Searching for a track . . . . . . . . . . . . . . . . . . . . . . . . . . . . . . . . 65
Searching for a CD. . . . . . . . . . . . . . . . . . . . . . . . . . . . . . . . . . 65
Repeating a track or CD . . . . . . . . . . . . . . . . . . . . . . . . . . . . . . . . . . 65
Repeating the current track . . . . . . . . . . . . . . . . . . . . . . . . . . 65
Repeating the current CD . . . . . . . . . . . . . . . . . . . . . . . . . . . . 65
Playing tracks in random order . . . . . . . . . . . . . . . . . . . . . . . . . . . . 66
Playing tracks on current CD in random order . . . . . . . . . . . 66
Playing tracks on all CDs in random order . . . . . . . . . . . . . . 66
Turning off the CD changer. . . . . . . . . . . . . . . . . . . . . . . . . . . . . . . . 66
5
How to operate MUSIC JUKE
Before using MUSIC JUKE . . . . . . . . . . . . . . . . . . . . . . . . . . 67
Description of MUSIC JUKE . . . . . . . . . . . . . . . . . . . . . . . . . . . . . . . 67
About the structure of MUSIC JUKE . . . . . . . . . . . . . . . . . . . . . . . . 67
About Play Modes/Playlists . . . . . . . . . . . . . . . . . . . . . . . . . . 68
About databases . . . . . . . . . . . . . . . . . . . . . . . . . . . . . . . . . . . . . . . . 69
About Gracenote CDDB . . . . . . . . . . . . . . . . . . . . . . . . . . . . .
About Auto-titling . . . . . . . . . . . . . . . . . . . . . . . . . . . . . . . . . .
Digital recording. . . . . . . . . . . . . . . . . . . . . . . . . . . . . . . .
Analog recording . . . . . . . . . . . . . . . . . . . . . . . . . . . . . . .
About displaying database information. . . . . . . . . . . . . . . . . . . . . .
69
70
70
71
72
About updating the database . . . . . . . . . . . . . . . . . . . . . . . . . . . . . . 73
Checking hard disc capacity. . . . . . . . . . . . . . . . . . . . . . . . . . . . . . . 74
How to operate MUSIC JUKE . . . . . . . . . . . . . . . . . . . . . . . . . . . . . . 75
Recording with MUSIC JUKE. . . . . . . . . . . . . . . . . . . . . . . . 76
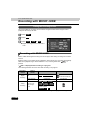
About recording with MUSIC JUKE . . . . . . . . . . . . . . . . . . . . . . . . . 76
About sources and recording styles
that allow recording. . . . . . . . . . . . . . . . . . . . . . . . . . . . . . . . .
Notes regarding recording . . . . . . . . . . . . . . . . . . . . . . . . . . .
About digital recording . . . . . . . . . . . . . . . . . . . . . . . . . . . . . .
About analog recording . . . . . . . . . . . . . . . . . . . . . . . . . . . . .
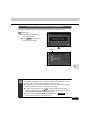
Setting recording method . . . . . . . . . . . . . . . . . . . . . . . . . . . . . . . . .
76
76
77
77
78
Setting digital recording mode . . . . . . . . . . . . . . . . . . . . . . . .
Setting Auto Marker. . . . . . . . . . . . . . . . . . . . . . . . . . . . . . . . .
Setting the recording bit rate . . . . . . . . . . . . . . . . . . . . . . . . .
Recording with MUSIC JUKE . . . . . . . . . . . . . . . . . . . . . . . . . . . . . .
79
79
80
80
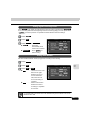
Automatically recording a CD during playback . . . . . . . . . . 81
Recording preferred tracks (songs) from a CD. . . . . . . . . . . 82
Recording from sources other than a CD . . . . . . . . . . . . . . . 82
How to use MUSIC JUKE . . . . . . . . . . . . . . . . . . . . . . . . . . . 83
To listen to MUSIC JUKE. . . . . . . . . . . . . . . . . . . . . . . . . . . . . . . . . . 83
To select a track (song) . . . . . . . . . . . . . . . . . . . . . . . . . . . . . . . . . . . 83
Selecting with track selection (track start point) button . . . 84
Selecting with Play Mode/Playlist change switch. . . . . . . . . 85
Fast-forwarding/rewinding . . . . . . . . . . . . . . . . . . . . . . . . . . . . . . . . 87
Searching for a track (song) . . . . . . . . . . . . . . . . . . . . . . . . . . . . . . . 87
Searching for a track (song) from a playlist . . . . . . . . . . . . . 87
Searching for a playlist from a play mode. . . . . . . . . . . . . . . 87
6
Repeating a track (song) . . . . . . . . . . . . . . . . . . . . . . . . . . . . . . . . . . 88
Repeating the current track . . . . . . . . . . . . . . . . . . . . . . . . . . 88
Repeating the current playlist . . . . . . . . . . . . . . . . . . . . . . . . 88
Playing tracks (songs) in random order . . . . . . . . . . . . . . . . . . . . . 88
Play tracks in current playlist in random order . . . . . . . . . . 88
Playing all tracks recorded in MUSIC JUKE
in random order . . . . . . . . . . . . . . . . . . . . . . . . . . . . . . . . . . . . 88
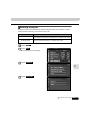
Turning MUSIC JUKE off . . . . . . . . . . . . . . . . . . . . . . . . . . . . . . . . . . 89
Editing a playlist . . . . . . . . . . . . . . . . . . . . . . . . . . . . . . . . . . 90
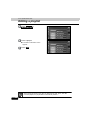
Creating a playlist . . . . . . . . . . . . . . . . . . . . . . . . . . . . . . . . . . . . . . . 90
Entering playlist name. . . . . . . . . . . . . . . . . . . . . . . . . . . . . . . . . . . . 92
Editing a playlist name . . . . . . . . . . . . . . . . . . . . . . . . . . . . . . . . . . . 93
Retrieving title information from the database . . . . . . . . . . . . . . . . 95
Switching playlist order. . . . . . . . . . . . . . . . . . . . . . . . . . . . . . . . . . . 97
Reorder according to your own preference . . . . . . . . . . . . . 97
Switching to chronological order. . . . . . . . . . . . . . . . . . . . . . 98
Deleting a playlist. . . . . . . . . . . . . . . . . . . . . . . . . . . . . . . . . . . . . . . . 99
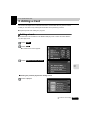
Editing a track . . . . . . . . . . . . . . . . . . . . . . . . . . . . . . . . . . . 101
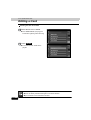
Adding a track . . . . . . . . . . . . . . . . . . . . . . . . . . . . . . . . . . . . . . . . . 101
Track search . . . . . . . . . . . . . . . . . . . . . . . . . . . . . . . . . . . . . . . . . . . 103
Editing track information. . . . . . . . . . . . . . . . . . . . . . . . . . . . . . . . . 103
Displaying the track edit screen. . . . . . . . . . . . . . . . . . . . . .
Changing the track title . . . . . . . . . . . . . . . . . . . . . . . . . . . . .
Changing the artist . . . . . . . . . . . . . . . . . . . . . . . . . . . . . . . .
Changing the genre . . . . . . . . . . . . . . . . . . . . . . . . . . . . . . . .
Deleting a track . . . . . . . . . . . . . . . . . . . . . . . . . . . . . . . . . . . . . . . .
104
105
105
106
107
How to operate the DVD player
Before using the DVD player . . . . . . . . . . . . . . . . . . . . . . . 109
DVD video characteristics. . . . . . . . . . . . . . . . . . . . . . . . . . . . . . . . 109
About Multiple Languages . . . . . . . . . . . . . . . . . . . . . . . . . .
About Multiple Angles . . . . . . . . . . . . . . . . . . . . . . . . . . . . . .
About subtitles. . . . . . . . . . . . . . . . . . . . . . . . . . . . . . . . . . . .
About discs. . . . . . . . . . . . . . . . . . . . . . . . . . . . . . . . . . . . . . . . . . . .
109
109
110
110
About playable discs . . . . . . . . . . . . . . . . . . . . . . . . . . . . . . .
About region codes of playable discs . . . . . . . . . . . . . . . . .
About marks displayed on discs . . . . . . . . . . . . . . . . . . . . .
About DVD disc structures . . . . . . . . . . . . . . . . . . . . . . . . . .
110
111
111
112
7
How to operate the DVD player. . . . . . . . . . . . . . . . . . . . . . . . . . . . 113
How to use the DVD player . . . . . . . . . . . . . . . . . . . . . . . . 114
Watching a DVD . . . . . . . . . . . . . . . . . . . . . . . . . . . . . . . . . . . . . . . . 114
Operating the video . . . . . . . . . . . . . . . . . . . . . . . . . . . . . . . . . . . . . 115
Playing the video . . . . . . . . . . . . . . . . . . . . . . . . . . . . . . . . . .
Fast-forwarding/rewinding . . . . . . . . . . . . . . . . . . . . . . . . . .
Fast-forwarding/rewinding using
the panel buttons . . . . . . . . . . . . . . . . . . . . . . . . . . . . . .
Fast-forwarding/rewinding using
the touch switches . . . . . . . . . . . . . . . . . . . . . . . . . . . . .
Pausing the video . . . . . . . . . . . . . . . . . . . . . . . . . . . . . . . . .
Stopping the video. . . . . . . . . . . . . . . . . . . . . . . . . . . . . . . . .
Operating the disc menu . . . . . . . . . . . . . . . . . . . . . . . . . . . . . . . . .
115
115
115
115
116
116
117
Turning off the DVD . . . . . . . . . . . . . . . . . . . . . . . . . . . . . . . . . . . . . 117
Searching for a desired chapter . . . . . . . . . . . . . . . . . . . . . . . . . . . 118
Searching by chapter . . . . . . . . . . . . . . . . . . . . . . . . . . . . . .
Searching by title number. . . . . . . . . . . . . . . . . . . . . . . . . . .
Searching by menu number . . . . . . . . . . . . . . . . . . . . . . . . .
Changing the touch switch display . . . . . . . . . . . . . . . . . . . . . . . .
118
118
119
120
Turning off the touch switches. . . . . . . . . . . . . . . . . . . . . . . 120
Changing the touch switch display locations. . . . . . . . . . . 120
Switching screen display/audio . . . . . . . . . . . . . . . . . . . . . . . . . . . 121
8
Changing the angle . . . . . . . . . . . . . . . . . . . . . . . . . . . . . . . .
Switching subtitle language . . . . . . . . . . . . . . . . . . . . . . . . .
Switching dubbed audio language. . . . . . . . . . . . . . . . . . . .
Setting the DVD player . . . . . . . . . . . . . . . . . . . . . . . . . . . . . . . . . .
121
122
123
124
Setting the audio language . . . . . . . . . . . . . . . . . . . . . . . . . .
Input a code . . . . . . . . . . . . . . . . . . . . . . . . . . . . . . . . . .
Subtitle language setting . . . . . . . . . . . . . . . . . . . . . . . . . . .
Input a code . . . . . . . . . . . . . . . . . . . . . . . . . . . . . . . . . .
Menu language setting . . . . . . . . . . . . . . . . . . . . . . . . . . . . .
Input a code . . . . . . . . . . . . . . . . . . . . . . . . . . . . . . . . . .
Setting display of multi-angle mark
(angle selection mark) . . . . . . . . . . . . . . . . . . . . . . . . . . . . . .
Viewer restriction setting . . . . . . . . . . . . . . . . . . . . . . . . . . .
Changing video output . . . . . . . . . . . . . . . . . . . . . . . . . . . . .
Table of language codes . . . . . . . . . . . . . . . . . . . . . . . . . . . . . . . . .
125
125
126
126
127
127
128
129
130
131
How to operate the VTR
How to use the VTR . . . . . . . . . . . . . . . . . . . . . . . . . . . . . . 132
Viewing the VTR . . . . . . . . . . . . . . . . . . . . . . . . . . . . . . . . . . . . . . . . 132
Switching to the VTR setting screen . . . . . . . . . . . . . . . . . . . . . . . 132
Turning off the VTR mode . . . . . . . . . . . . . . . . . . . . . . . . . . . . . . . . 133
How to use the Card remote control
How to use the card remote control . . . . . . . . . . . . . . . . . 134
Turning the power on/off. . . . . . . . . . . . . . . . . . . . . . . . . . . . . . . . . 135
Adjusting the audio volume . . . . . . . . . . . . . . . . . . . . . . . . . . . . . . 135
Muting the volume . . . . . . . . . . . . . . . . . . . . . . . . . . . . . . . . . 135
Switching playback modes . . . . . . . . . . . . . . . . . . . . . . . . . . . . . . . 136
How to play the tuner. . . . . . . . . . . . . . . . . . . . . . . . . . . . . . . . . . . . 136
Selecting the FM/AM band . . . . . . . . . . . . . . . . . . . . . . . . . .
Selecting a station (manually or automatically) . . . . . . . . .
Selecting preset stations . . . . . . . . . . . . . . . . . . . . . . . . . . .
How to play CDs. . . . . . . . . . . . . . . . . . . . . . . . . . . . . . . . . . . . . . . .
136
136
136
138
Switching disc modes . . . . . . . . . . . . . . . . . . . . . . . . . . . . . .
Advancing to the next track or returning to the
beginning of the track being played . . . . . . . . . . . . . . . . . .
Skipping to the next or previous disc . . . . . . . . . . . . . . . . .
Replacing the battery. . . . . . . . . . . . . . . . . . . . . . . . . . . . . . . . . . . .
138
138
138
139
For reference
Important Points . . . . . . . . . . . . . . . . . . . . . . . . . . . . . . . . . 141
If one of these messages appears . . . . . . . . . . . . . . . . . . . . . . . . . 141
Before asking for repairs. . . . . . . . . . . . . . . . . . . . . . . . . . . . . . . . . 144
Other . . . . . . . . . . . . . . . . . . . . . . . . . . . . . . . . . . . . . . . . . . 146
Products equipped with Dolby Digital . . . . . . . . . . . . . . . . . . . . . . 146
Products equipped with Macrovision . . . . . . . . . . . . . . . . . . . . . . 146
Glossary. . . . . . . . . . . . . . . . . . . . . . . . . . . . . . . . . . . . . . . . 147
Using Gracenote CDDB . . . . . . . . . . . . . . . . . . . . . . . . . . . 150
9
Topic Index . . . . . . . . . . . . . . . . . . . . . . . . . . . . . . . . . . . . . 151
About screen and sound adjustment. . . . . . . . . . . . . . . . . . . . . . . 151
About using AM/FM radio . . . . . . . . . . . . . . . . . . . . . . . . . . . . . . . . 152
About using the CD player and CD changer . . . . . . . . . . . . . . . . . 152
About using the MP3 player . . . . . . . . . . . . . . . . . . . . . . . . . . . . . . 153
About using the Memory Stick player . . . . . . . . . . . . . . . . . . . . . . 153
About using MUSIC JUKE . . . . . . . . . . . . . . . . . . . . . . . . . . . . . . . . 154
About using the DVD player . . . . . . . . . . . . . . . . . . . . . . . . . . . . . . 156
When something isn't clear. . . . . . . . . . . . . . . . . . . . . . . . . . . . . . . 157
Index. . . . . . . . . . . . . . . . . . . . . . . . . . . . . . . . . . . . . . . . . . . 158
The Topic Index simplifies searches for explanations about
individual features. When confused by an operation, use the Topic
Index to search for information about the operation.
10
11
Introduction
1. How to use this manual
Item title
Section title
A number and
title is assigned
to each item.
A title is assigned to each section.
Detailed operation
title
A title is assigned to
each detailed
operation.
Operation title
A title is assigned
to each operation.
Operation
procedure
Describes the
operation.
Proceed with the
operation according
to the numerical
order.
Attention
Additional points
regarding operation
are given here.
12
Introduction
Section side
heading
The side heading for
the current section.
Operation screen
A screen showing
the operation.
Continue to the next
page
Indicates that
operation procedures
continue on the next
page.
13
Introduction
2. Features
MUSIC JUKE for recording music (Page 67)
With MUSIC JUKE, which employs a highcapacity hard disc, you can record voice or
music output from any of the audio modes.
Aside from being able to search for recorded
data by type, the Edit function also allows you
to create your own private album.
DVD player with sharp video and dynamic sound
(Page 109)
Plays DVD videos recorded with high image
and sound quality.
(DVD media is able to record a movie with high
quality video and digital sound that exceeds
the quality of CD media.)
MP3 player that plays back the equivalent of several albums
of music recorded on a single music disc (Page 52)
MP3 audio compression technology
compresses audio data to one-tenth the
original size. CD-R/RW with recorded MP3s
can be played.
14
Introduction
DSP effects for simulating acoustics of various
performance environments (Page 31)
Provides ability to simulate the sensation of
various performance environments for
matching to the genre and source of a song.
Memory Stick player for playing music downloaded
from a computer (Page 61)
Supports ATRAC3 audio compression
technology which combines high sound quality
with a high compression rate. Audio files
downloaded to the MG Memory Stick from
computers or mobile phones can be played.
Selection and display of favorite wallpaper (screen
backgrounds) (Page 38)
Wallpaper of your choice can be switched and
displayed for use as the background of the
information screen and audio operation
screens.
The screen from a navigation unit can also be
linked and selected.
● Setting wallpaper for the information screen and
audio operation screens
15
Introduction
Features
System upgrade
● CD changer (Page 64)
A CD changer enables non-stop playing of
multiple discs, for convenience at times such
as taking a long drive.
It is easy to search for and play a song from
among the discs on a changer.
● VTR (Page 132)
Videos can be watched if a VTR deck is
connected.
16
Introduction
●Be very careful and pay close attention to safety when
operating the audio controls while driving, otherwise
accidents may occur. Also be sure to set the volume so
that you can still adequately hear sounds outside the
vehicle.
Otherwise damage may occur.
Introduction
3. Before using the deck
●Never continue to use the system if it is malfunctioning in
any way. If smoke, abnormal noises or abnormal odors
are noticed, turn off the power immediately.
Immediately turn off audio in such situations.
●Exercise caution as to the temperature inside the vehicle.
The temperature inside the vehicle can increase during
hot weather. Wait for the temperature inside the vehicle to
drop before using the unit.
Otherwise damage may occur.
●Drivers should not operate the DVD while driving. Also be
sure to set volume so that you can still adequately hear
sounds outside the vehicle.
Otherwise damage may occur.
●Do not disassemble or modify the deck.
The deck has a precisely designed structure, so contact
the store of purchase in the event of any unsatisfactory
performance.
Continue to the next page
17
Introduction
Before using the deck
●Do not apply excessive force to the monitor, or damage
may occur.
●Do not place items such as cups or cans on top of the
monitor, and do not leave the monitor tilted down when
not in use.
Otherwise damage may occur.
●Do not insert any objects other than discs or Memory
Sticks into the slot.
Otherwise damage may occur.
●Be careful not to get fingers or other objects caught in the
monitor when it is being retracted into place.
Interference can cause an injury or damage the deck.
●When removing a disc or Memory Stick from the deck, do
so in a horizontal direction.
Do not pull them up forcibly or press down on them
strongly while removing them.
Removing improperly can scratch the disc, cause deck
noise or damage the Memory Stick.
18
Introduction
About discs
●Water droplets (condensation) can form on the inside of the unit during cold or
rainy weather in the same way car windows can fog up. When this happens, the
audio can jump and playback can stop, so ventilate or dehumidify the vehicle for
a short time before operating the equipment.
●To safeguard the components of the player, the unit will automatically stop when
a malfunction occurs. If the player will not operate even when messages
displayed on the screen are followed, it is possible that the unit has been
damaged. Contact the store of purchase.
●It is possible that the sound will skip if the vehicle experiences violent motion on
rough roads.
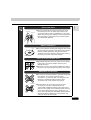
About supported disc types
●An audio or DVD video disc bearing one of the marks shown below can be
played. Only DVD-R/RW (DVD-Recordable/ReWritable) and DVD+R/RW
(DVD+Recordable/ReWritable) discs recorded in Video mode can be played.
Discs recorded in Video mode (VR) cannot be played.
●Supports Dolby Digital. Discs bearing the following mark can be used.
Manufactured under license from Dolby Laboratories, Inc. Dolby and the double-D symbol are
registered trademarks of Dolby Laboratories.
●It is possible that a CD-R (CD-Recordable) or CD-RW (CD-ReWritable) disc will
not play on the unit due to special disc characteristics, scratches, dirt or
deterioration caused by long storage in the vehicle. In addition, an unfinalized
CD-R or CD-RW disc written in CD-R, CD-RW or UDF format will not play on the
unit.
●It is possible that a DVD-R/RW (DVD-Recordable/ReWritable) or DVD+R/RW
(DVD+Recordable/ReWritable) disc will not play on the unit due to special disc
characteristics, scratches, or dirt or deterioration caused by long storage in the
vehicle. In addition, an unfinalized DVD-R or DVD-RW disc will not play on the
unit. It is possible that discs recorded using a computer may not play on the unit
depending on the environment and/or settings of applications.
●The CD-TEXT function requires commercially available CDs which support
CD-TEXT. It is possible that characters in CD-R and CD-RW data may not be
displayed correctly.
●Do not use discs with transparent or semi-transparent portions within the
recording area, or C-thru discs, since they may not be accepted and ejected
properly and may not play properly.
Continue to the next page
19
Introduction
Before using the deck
●Super Audio CDs can only be played in the hybrid disc layer.
●CCCDs (Copy Control CD) do not conform to official CD
standards and so are not supported.
●CD-EXTRA discs can be played as audio CDs.
●Voice tracks on Mixed Mode CDs cannot be played. Only
music tracks will be played.
●Video-CDs cannot be played.
About handling discs
●Be sure to store discs in their cases and keep them out of
direct sunlight. Discs can warp and become unusable.
●Do not apply paper-based tape to either the recording
side or label side of a disc. Otherwise damage may occur.
●Do not use discs on which there are cracks or large
warps. Otherwise damage may occur.
●Do not touch the recorded side of a disc when handling it.
(Iridescent side of the CD) The disc may become dirty
causing jumping to occur.
●Using a disc that has become dirty can scratch the disc
and result in sound jumping. Use a commercially available
compact disc cleaner to clean the CD, wiping lightly from
the center to the edge.
20
Rough Edges
Ballpoint pen
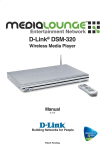
●You may notice that some brand new discs are rough
around the center hole or outside edge. Remove the
rough edges with the side of a ballpoint pen, etc. Rough
edges may prevent proper loading in the unit. Flakes from
the rough edges may also stick to the recorded surface
and interfere with playback.
Introduction
About new discs
About rental discs
Flakes
Recorded surface
●Do not use CD discs with attached cellophane tape, rental
CD discs with glue protruding from labels or discs with the
residue of peeled adhesives. Using discs with those
conditions can prevent the player from properly opening
and closing as well as cause other damage.
About specially shaped discs
●Specially-shaped CDs cannot be played. Do not attempt
to play them, even with an adapter, since they may
damage the player.
●Please do not use a commercially available lens cleaner
because it may cause damage to the pickup of the player.
About disc accessories
●Do not use accessories (stabilizers, protective seals, laser
lens cleaners, etc.) sold for "improving sound
performance" or "protecting CDs." The changes in CD
thickness or outside dimensions made by these
accessories may cause problems in the player.
CD stabilizer ring
●Do NOT attach any ring-shape protector (or other
accessory) to your discs. Those protectors are
commercially available and said to protect discs and to
improve sound quality (and anti vibration effect), but they
can do more harm than good during regular use. The
most common problems are insert/eject related problems
and "No playback" problems due to the protector ring
coming off in the disc mechanism.
21
Introduction
Before using the deck
About the Memory Stick
●Do not leave the Memory Stick in places exposed to static electricity or electrical
noise. Otherwise, data may be lost.
●To safeguard the components of the player, the unit will automatically stop when
a malfunction occurs. If the player will not operate even when messages
displayed on the screen are followed, it is possible that the unit has been
damaged. Contact the store of purchase.
●After playback or uploading of data to the hard drive is complete, promptly remove
the MG Memory Stick.
●Do not remove the Memory Stick while it is being used to upload data to the hard
drive or playback data. Otherwise, data may be lost. Please be aware that we will not
be held responsible for lost data.
About supported Memory Stick types
●Memory Sticks with a capacity of up to 128MB are supported.
●The Memory Stick Duo must be used with the Memory Stick Duo Adapter.
●Memory Stick PRO is not supported.
●MG Memory Sticks labeled with the following marks can be used with this device.
●MG Memory Sticks labeled with the following marks can only be used when
registering a pass code in database update or Eclipse Security Network (ESN).
MagicGate Memory Stick
Corporation.
and Memory Stick
are registered trademarks of Sony
●Use the dedicated device to format (initialize) the MG Memory Stick. The
Memory Stick cannot be used on this unit if it has been formatted using a device
other than the dedicated device.
22
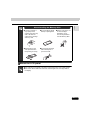
●In order to maintain a
high quality sound,
regularly wipe clean any
dust or dirt from the
surface of the cartridge
with a dry cloth.
●Do not use Memory Sticks
with tape or peeling labels.
●Always place in the
case provided when
transporting or storing.
●Do not touch terminals
with metal objects or
your bare hands.
●Store in a dry place, out
of direct sunlight.
Otherwise, it may
become impossible to
use the Memory Stick.
Introduction
About handling the Memory Stick
About the LCD panel
●The LCD panel can appear to be white or black when seen from certain angles.
●The screen will be difficult to read when external light such as sunlight falls on
the display.
23
Basic operation
1. Switching modes
The deck can be used when the vehicle's ignition switch is on or in the ACC position.
● This deck supports use of a remote control. The card remote control is sold separately and
can be purchased at your local retailer. See page 134 for instructions on operation of the
remote control.
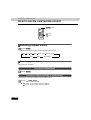
Switching the mode
Press SOURCE MENU .
Touch the touch switch for an audio
mode and the relevant mode will
be displayed on the screen.
● On-screen display
Displaying operation screen
Press AUDIO CONT .
24
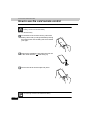
Switching source using touch switches
SOURCE MENU RECALL switch
Basic
operation
Touch the SOURCE MENU
RECALL switch (indicated at right)
in the audio or DVD/VTR operation
screen.
When the SOURCE MENU switch
is touched, the operation screen for
the selected source is displayed.
● Touch
screen.
to return to the original
25
Basic operation
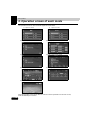
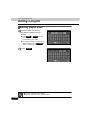
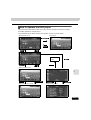
2. Operation screen of each mode
The operation screen for each mode will appear as shown below.
● AM radio operation screen
● FM radio operation screen
● CD player operation screen
● MP3 player operation screen
● Memory Stick player operation screen
● MUSIC JUKE operation screen
● DVD player operation screen
● CD changer operation screen (optional)
● VTR operation screen
When the operation screen for the DVD or VTR has not been operated for 6 seconds or more,
it will automatically be canceled.
26
Basic operation
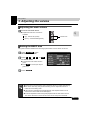
3. Adjusting the volume
Adjusting the main volume
Basic
operation
Press the VOLUME button.
● Adjustment levels from 0 to 80 are
available.
(up) : Volume UP (louder)
VOLUME button
(down) : Volume DOWN (quieter)
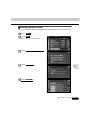
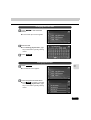
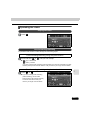
Setting the BEEP tone
The guide tone that is emitted when touching a panel switch or touch switch can be set.
Touch SETTING in the
INFORMATION screen.
Touch 1 , 2 , 3 , 4 , or OFF
for GUIDE TONE.
● The selected touch switch will turn
green.
● Touch OFF to cancel (turn off) the
guide tone.
Touch ENTER .
●Set the volume at a level which will not adversely affect your safety while driving.
●The volume level may change after switching sources. Adjust the volume to
match the source being used.
●If the volume is adjusting during DVD playback, this adjusted volume can be
saved as the volume level for the DVD player.
●A volume adjustment made during DVD playback will not affect other sources.
The volume will return to the level set for the source used prior to the DVD.
27
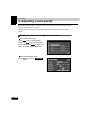
Basic operation
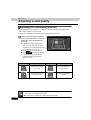
4. Adjusting sound quality
By adjusting the DSP settings, equalizer, and the volume balance you can simulate a favored
sound environment within the vehicle.
Sound quality can be adjusted in all audio operation screens as well as in the information
screen.
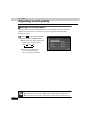
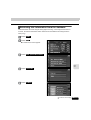
Displaying the sound adjustment screen
From an operation screen
Touch SET in the VTR operation
screen, or
in the DVD operation
screen followed by SET to display the
switch for sound quality adjustment.
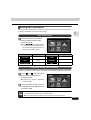
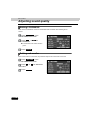
From the information screen
Press INFO , then touch
28
SETTING
.
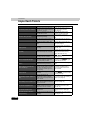
Touch switch/item
Function
Page
DSP
It is possible to recreate acoustics (concert hall) that match
the music genre or source you are going to play.
31
EQ
Each factory set equalizer curve can be adjusted to create
a customized curve.
32
Circle Surround II
Circle surround can easily be simulated using the existing
speaker system in your vehicle (when the vehicle has 4
speakers).
30
Sound localization can be adjusted according to the
number and position of passengers in order to obtain
optimum acoustic effects.
34
The left/right/front/rear balance can be adjusted.
35
It is possible to emphasize bass/treble when listening at
low volume.
36
It is possible to set the harmonizer level so that
compressed data is played back with a sound quality
corrected to a level as close as possible to that of the
original data.
37
The sub woofer output can be adjusted.
36
POS
FADER BALANCE
LOUDNESS
HARMONIZER
WOOFER CONT
Basic
operation
The following settings/adjustments can be made in operation screens and setting
screens.
29
Basic operation
Adjusting sound quality
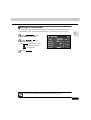
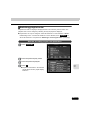
Setting Circle Surround II
The Circle Surround II function enables surround sound and boosts bass even if the center
speaker and sub woofer are not connected. It can also be applied to dialog data when
listening to the radio.
LOW
Touch (●) in an audio operation
screen or the VTR/DVD screen.
● Each touch of the switch switches the
status in the order shown below.
OFF
LOW
HI
● LOW : Low re-creation effect
HI : High re-creation effect
OFF : The function is disabled.
●You cannot set Circle Surround II at the same time as DSP, EQ or POS.
●Circle Surround II, SRS, and the (●) symbol are trademarks of SRS Labs, Inc.
●Circle Surround II technology is manufactured under license from SRS Labs, Inc.
30
The DSP function reproduces the sensation of various factory set performance environments
by adding reverberation to the music being played.
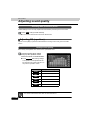
DSP mode setting
Basic
operation
Setting DSP (acoustics)
Touching the DSP touch switch
brings up the acoustics mode
screen as shown.
● Touch BACK after making settings.
The acoustics mode adjustments will
be saved and the system will return to
the previous operation screen.
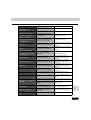
Touch switch
DSP Environment
Touch switch
DSP Environment
CONCERT
Concert hall
CLUB
Disco/Club
LIVE
Live performance
arena
THEATER
Movie theater/theater
CATHEDRAL
Church with echo
OFF
DSP OFF
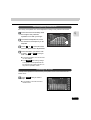
Adjusting, saving DSP (acoustics)
The factory set DSP (acoustics) level for each mode can be adjusted to preference and saved.
Touch
or
at the left of the
screen while in the preferred
acoustics mode.
● There are five + and five - adjustment
levels available.
Touch the switch for the acoustics
mode that has been adjusted until
you hear a beep.
●When adjusting the level for the currently selected DSP (acoustics) mode, the
level will not be saved for other acoustics modes.
●You cannot set DSP (acoustics) at the same time as Circle Surround II.
31
Basic operation
Adjusting sound quality
Resetting DSP (acoustics) levels
Default settings for the currently adjusted and saved DSP (acoustics) level can be reset.
Touch OFF until you hear a beep.
● The acoustics level will be returned to default value.
Adjusting EQ (equalizer)
Adjusts sound quality to preferred characteristics according to the music genre and audio
source.
Setting sound quality
Each factory set equalizer curve can be set to a preferred curve.
Touching the EQ touch switch
brings up the equalizer mode
screen as shown in the illustration.
● Touch BACK after making settings.
The equalizer mode adjustments will
be saved and the system will return to
the previous operation screen.
Touch switch
Equalizer mode types
FLAT
No EQ correction
EQ1
POPS effect curve
EQ2
ROCK effect curve
EQ3
JAZZ effect curve
EQ4
CLASSIC effect curve
EQ5
VOCAL effect curve
You cannot set EQ at the same time as Circle Surround II.
32
Adjusting/Saving an EQ curve
Touch the screen and slowly draw
the image of the preferred
equalizer curve with your finger.
Basic
operation
Each factory set equalizer curve can be adjusted according to user preference and saved.
To make fine adjustments, touch
the switch for the frequency to be
adjusted.
Touch
or
at the left of the
screen to perform fine adjustments.
Touch the switch you want to use
to save ( EQ1 to EQ5 ) until you
hear a beep.
● The saved equalizer curve can be used
for other settings.
● Touch BACK after making settings.
The equalizer mode adjustments will
be saved and the system will return to
the previous operation screen.
Resetting EQ curves
Currently saved equalizer curves and factory set equalizer curves can be returned to the
default values.
Touch FLAT until you hear a
beep.
● The equalizer curve will be reset to
default values.
33
Basic operation
Adjusting sound quality
Adjusting POS (Positioning selector)
Sound localization can be adjusted according to the number and position of passengers in
order to obtain optimum acoustic effects.
A seat's sound localization can be adjusted simply by touching the switch.
Touch each seat image displayed
in the POSITION setting screen to
switch the sound localization for
that seat.
● The selected position will turn Lightblue. Touch the seat again to cancel
the selection. The four positions shown
by the table below can be set.
● Touch OFF to cancel all settings.
● Touch BACK after making settings.
The position will be saved and the
system will return to the previous
operation screen.
Touch switch
Function
Touch switch
Function
Acoustics optimized for
driver's seat
Acoustics optimized for
both front seats
Acoustics optimized for
passenger's seat
Acoustics optimized for
rear seats
●You cannot set POS (Positioning selector) at the same time as adjusting Circle
Surround II or the balance (next page).
●This product is configured for vehicles with left-hand drive.
34
The left/right/front/rear balance can be adjusted so that sound from all speakers arrives at the
listener's ears at the same time.
Touch FAD/BAL in the POSITION
setting screen to display the
volume balance adjustment
screen.
Basic
operation
Setting the balance
Touch the screen at the preferred
balance point.
● To make fine adjustments, touch
,
, or
.
,
● Touch CENTER to set the volume
balance to the center position.
● Touch BACK after making settings.
The set volume balance will be saved
and the system will return to the
previous operation screen.
● To set the position again, touch POS
and repeat the steps above.
●You cannot set the balance at the same time as adjusting POS (Positioning
selector) (previous page).
,
,
or
while making fine adjustments to adjust
●Touch and hold
values continuously. Adjustment will lock when it reaches the center value, and
,
,
or
must be touched again to continue adjustment.
35
Basic operation
Adjusting sound quality
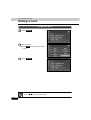
Setting LOUDNESS
Audio can be modulated to correct for insufficient bass and treble when listening at low
volume.
Touch SETTING in the
INFORMATION screen.
Touch ON , or OFF for
LOUDNESS.
● The selected touch switch will turn
green.
Touch ENTER .
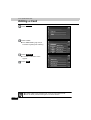
Setting sub woofer
When a sub woofer is connected, the preferred output level for the audio can be set.
Touch SETTING in the
INFORMATION screen.
Touch
CONT.
or
Touch ENTER .
36
for WOOFER
It is possible to set the sound quality boost level to automatically regenerate harmonics such
as reverberation, depth, and tone lost in compression, producing a much clearer sound.
Touch SETTING in the
INFORMATION screen.
Basic
operation
Setting the harmonizer
Touch LOW or HI for
HARMONIZER.
● LOW : Low level of correction
HI : High level of correction
OFF : No correction
Touch ENTER .
You cannot set LOUDNESS at the same time as Circle Surround II.
37
Basic operation
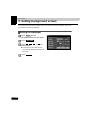
5. Setting background screen
The background for the audio operation screen, information screen and navigation screen can
be changed to a preferred wallpaper.
Setting the wallpaper
Press INFO and the
INFORMATION screen will appear.
Touch
SETTING
.
Touch 1 , 2 , 3 , or 4 for
WALLPAPER.
● The selected touch switch will turn
green and the wallpaper (background)
will switch.
Touch ENTER .
38
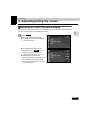
Basic operation
6. Adjusting/setting the screen
Touch switches not frequently used are not displayed in the audio operation screens and DVD
screens. These switches can be displayed as follows.
Touch FUNC .
Basic
operation
Switching the FUNCTION switch display
● The FUNCTION switches appear.
● The FUNCTION switches are different
in each audio mode.
● The FUNCTION switches can be
hidden by touching FUNC again or
by touching an area of the screen
outside of the FUNCTION switch box.
● If the FUNCTION switches are
displayed, operations corresponding to
other switches cannot be performed.
Hide the FUNCTION switches, then try
the operation again.
39
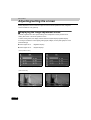
Basic operation
Adjusting/setting the screen
Quality adjustments can be made for images such as the audio operation screen, navigation
screen and DVD or VTR (optional).
Displaying the image adjustment screen
Contrast, brightness and other picture settings can be adjusted to match preferences for
viewing DVD video or the audio operation screen.
To make viewing easier, the display switches between daytime display/nighttime display
according to whether the vehicle lights (parking lights, taillights, license plate lights) are on/off.
(Default settings)
● Vehicle lights are on . . <Nighttime display>
● Vehicle lights are off . . <Daytime display>
[Audio operation screen]
● Daytime display [Vehicle lights are off]
● Nighttime display [Vehicle lights are on]
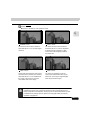
[DVD/VTR Screen]
● Daytime display [Vehicle lights are off]
40
● Nighttime display [Vehicle lights are on]
Press DISP on the audio mode operation screen or DVD/VTR screen.
● If no operations are made after about 20 seconds, the display will return to the
previous screen.
● When adjusting audio operation screen
Basic
operation
Touch ENTER after making any adjustments.
● When adjusting DVD/VTR screen
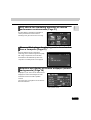
Setting daytime display to display when vehicle lights are on
The screen will be switched between daytime display and nighttime display
each time DAY is touched.
● When adjusting audio operation screen
● When adjusting DVD/VTR screen
Turning the screen off
Touch OFF .
● Press AUDIO CONT or NAVI to turn the screen back on.
41
Basic operation
Adjusting/setting the screen
Adjusting image quality
The daytime display and nighttime display can be separately adjusted.
● When adjusting audio operation screen or
navigation screen
● When adjusting DVD/VTR screen
CONTRAST
Touch
to increase contrast, or
to decrease contrast.
BRIGHT
Touch
to increase brightness, or
to decrease brightness.
COLOR (for DVD/VTR screen only)
Touch
to increase green, or
to increase red.
TINT (for DVD/VTR screen only)
Touch
for a darker tint, or
for a lighter tint.
Switching screen mode
Touch WIDE .
● DVD : Touch
followed by SET in
the operation screen.
VTR : Touch SET in the operation
screen.
Touch NORMAL , WIDE1 ,
WIDE2 or WIDE3 .
● This selects the wide mode.
42
Touch BACK .
Basic
operation
● Returns to the DVD or VTR operation screen.
NORMAL mode
The screen is shown with a vertical to
horizontal ratio of 3 to 4. The side edges
are black.
WIDE 2 mode
Only the left and right edges of the screen
are stretched out. However, the vertical to
horizontal ratio of 3 to 4 is maintained at
the center of the screen to provide a
comfortable wide screen image.
WIDE 1 mode
The screen is shown with a vertical to
horizontal ratio of 3 to 4 and is expanded
in the left and right directions. A wide
screen effect can be displayed without
any image loss.
WIDE 3 mode
The screen is expanded in both the
vertical and horizontal directions by the
same ratio. The image is clipped slightly
at the top and bottom edges.
Viewing of wide screen modes is permitted when limited to the personal
entertainment of the user, but exercise caution as using technologies such as
image compression and expansion for the purpose of commercial benefit or public
presentation may infringe upon the rights of the copyright holder protected by
applicable copyright law.
43
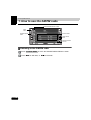
How to operate the tuner
1. How to use the AM/FM radio
SOURCE MENU RECALL switch
PWR
button
SOURCE MENU
button
Preset switches
TUNE TRACK
button
FUNCTION switch
AUTO.P
Listening to the AM/FM radio
Press SOURCE MENU or touch the SOURCE MENU RECALL switch.
Touch AM for AM radio, or FM for FM radio.
44
Selecting radio stations
Manual selection
or
.
● Pressing the switch once moves the frequency one step up or down. (One step on the
AM band is 10kHz. One step on the FM band is 0.2MHz)
●
(up) : Raises the frequency
(down) : Lowers the frequency
RADIO
Press
Automatic selection
Press and hold
or
until you hear a beep.
● The station that is closest to the current frequency will be searched for automatically,
and searching will stop when the station is received. To stop the search before a
station is found, press the button again.
Selection using preset switches
Touch a preset switch that already has a station recorded.
● See "Saving radio stations" on next page for more information.
If the reception for a particular station is weak in the area you are in, the automatic
selection may not work.
45
How to operate the tuner
How to use the AM/FM radio
Saving radio stations
There are two modes for saving radio stations, manual and AUTO. P. These modes operate
independently.
Saving manually
Make sure "AUTO. P" is not displayed in the upper part of the screen.
● If displayed, display the FUNCTION switch and touch AUTO.P to switch to manual.
Use manual tuning or automatic tuning to select the station to be saved.
Choose a preset switch and touch it until you hear a beep.
● The radio station (frequency) is set. Touch the preset switch to tune in the selected
station.
Saving with AUTO.P
Touch FUNC .
Touch AUTO.P until you hear a beep.
● The AUTO.P function will activate and start automatically selecting stations. You will
hear a beep when the automatic selection of stations is completed. Touch AUTO.P
again to switch the display back to the broadcast station originally saved.
Changing stations saved by AUTO.P
Use manual tuning or automatic tuning to select the station to be saved.
Touch the preferred preset switch until you hear a beep.
46
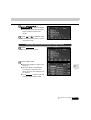
About AUTO.P
Touching AUTO.P while AUTO.P is operating or after it has been used will return
the preset memories to their previous settings. (The stations saved with AUTO. P will
be deleted.) The diagram below shows how to switch from AUTO. P to manual.
Touch AUTO.P until
you hear a beep.
Manual
Touch AUTO.P
(The stations saved with
AUTO.P will be deleted)
AUTO.P
(Search started)
RADIO
Because the AUTO. P function can be used to temporarily save stations for the
preset switches, stations saved manually will remain in memory even if AUTO. P is
used. Manually saving stations that are used regularly allows them to be restored
even after AUTO. P has been used, such as after traveling.
Automatically saving
stations to preset switches
AUTO.P
(Search
completed)
●AUTO. P may not automatically receive stations if radio waves in the surrounding
area are weak.
●A frequency saved with the tuning switch may not match the frequency saved
with AUTO. P even though the signal is received from the same station.
●Due to conditions for receiving radio waves, saved stations may differ even when
the AUTO. P switch is operated repeatedly in the same location.
●Up to six stations with good signal reception are automatically saved in order of
frequency (low to high).
●When less than six stations capable of reception are found, nothing is saved for
the remaining preset switches.
47
How to operate the tuner
How to use the AM/FM radio
Turning off the radio
Press PWR .
● Press PWR again to turn on the
radio and resume reception of the radio
station (frequency) received before
power was turned off.
48
How to operate the CD player
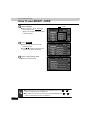
1. How to use the CD player
SOURCE MENU RECALL switch
PWR
button
Track selection
(track start point)/
Fast-forward
(rewind)
button
FUNCTION switch
•RPT
•RAND
•SCAN
CD
SOURCE MENU
button
Listening to a CD
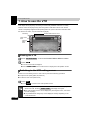
Playback starts when a CD is inserted into the disc slot.
● The default setting for MUSIC JUKE in digital recording mode is AUTO. When a CD is
inserted into the disc slot, MUSIC JUKE automatically starts recording at the same time as
REC for at least one second to stop recording.
playback begins. Press
●"
"
REC" is displayed while recording is in progress. While waiting for recording to start
REC" changes to "
". See "Recording with MUSIC JUKE" (page 80).
Press SOURCE MENU or touch the SOURCE MENU RECALL switch
when a CD has been inserted.
Touch CD .
● Playback will begin.
●Titles and track names can be displayed when they are recorded on a CD. Up to
28 characters can be shown in the display.
●Only characters recorded by ASCII code can be shown on the CD-TEXT display.
●The CD-TEXT display may not be able to show characters for discs recorded
with many title characters.
●There may be occasions when CD-R/RW CD-TEXT cannot be displayed.
●Even if the title track is not contained on the music CD itself, the title will still be
displayed if the corresponding information is stored in MUSIC JUKE database. If
there is multiple data corresponding to a single track, the title is not displayed.
49
How to operate the CD player
How to use the CD player
Selecting a track
You can jump to the opening of a track you want to hear.
Press
●
or
.
(up) : Selects next track
(down) : Selects previous track
Fast-forwarding/rewinding
It is possible to fast-forward/rewind the track being played.
Press and hold
●
or
until you hear a beep.
(up) : Fast-forward
(down) : Rewind
If you hear a beep while rewinding (fast-forwarding), the deck has switched to fastforward (rewind) mode and will continue you remove until your finger from the button.
Searching for a track
Touch FUNC .
Touch SCAN .
● The deck will play the first 10 seconds of each track. Touch SCAN again to continue
playing the current track.
Repeating a track
Touch FUNC .
Touch RPT .
● Repeats the current track.
● The track will repeat until the function is canceled. Touch RPT again to cancel.
50
Playing tracks in random order
Touch FUNC .
Touch RAND .
● Plays tracks in random order.
● At the end of each track the system arbitrarily chooses which track to play next. As a
result, it is possible for the same track to be played multiple times in a row.
CD
● Random playback will continue until the function is canceled. Touch RAND again to
cancel.
Turning off the CD player
Press PWR .
● Press again to resume playback.
● MUSIC JUKE will continue to record even if the CD is turned OFF while recording is in
REC for at least one second to stop recording.
progress. Press
51
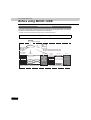
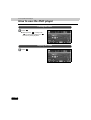
How to operate the MP3 player
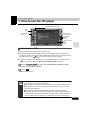
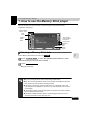
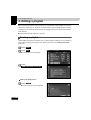
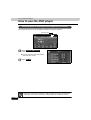
1. How to use the MP3 player
For safety considerations, some functions are disabled while the vehicle is in motion.
SOURCE MENU RECALL switch
PWR
button
File change
switches
SOURCE MENU
button
Track selection
(track start point)/
Fast-forward
(rewind) button
FUNCTION switch
•RPT
•RAND
•SCAN
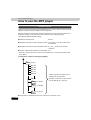
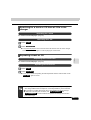
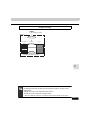
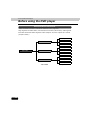
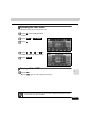
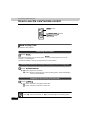
Example of MP3 file structure
Explanations are based on this example of MP3 file structure.
Folder
MP3 audio file
1st
level
52
2nd
level
3rd
level
4th
level
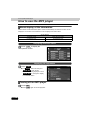
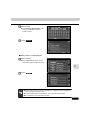
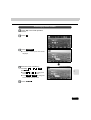
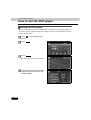
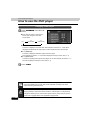
Playing MP3
Playback starts automatically when a CD is inserted into the disc slot.
Press SOURCE MENU or touch the SOURCE MENU RECALL switch
when a disc has been inserted.
Touch MP3 .
● Playback will begin.
● The CD player screen will be shown for about 2 seconds as the system checks
whether the inserted CD is a music CD or an MP3.
● When multiple MP3 files and folders are on the same level, they are played in
ascending order by folder and file names.
.
MP3
● Normally, tracks are played back in the order
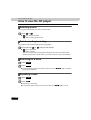
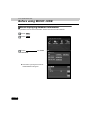
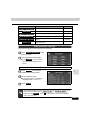
Selecting a music file
A music file located within a folder can be selected.
Selecting with file change switches
Touch the music file.
● The currently selected file name and folder name will be shown in the display.
● When 9 or more music files are located in the same folder, touch
or
to show
data not currently displayed. (This function is not available when the vehicle is in
motion)
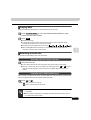
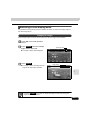
Selecting with TUNE/TRACK button
When several music files are located in the same folder, the next music file or previous music
file can be selected with the track selection (track start point).
Press
●
or
.
(up): Selects next music file
(down): Selects previous music file
●If music data and MP3 data have been recorded on the same disc, playback is
not possible.
●When an MP3 is being played, navigation operation will become slower. This is
not a malfunction of the system.
53
How to operate the MP3 player
How to use the MP3 player
Fast-forwarding/rewinding
It is possible to fast-forward/rewind within the current file.
Press and hold
●
(up)
or
until you hear a beep.
: Fast-forward
(down): Rewind
If you hear a beep while rewinding (fast-forwarding), the deck has switched to the fastforward (rewind) mode and will continue until you remove your finger from the button.
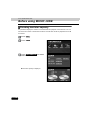
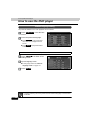
Changing display of the current level
The folder level can be switched and displayed.
Touch
or HOME .
●
: Displays the next folder level up.
● HOME
: Displays the level of the file currently being played.
Displaying the current level
Displays the file currently being played.
Touch HOME .
Searching for a music file
Touch FUNC .
Touch SCAN .
● The system will play the first 10 seconds of each file located within the same layer of
the folder currently being played. Touch SCAN again to continue playing the current
file.
54
Repeating the same music file
Touch FUNC .
Touch RPT .
● Repeats the current file.
● The file will repeat until the function is canceled. Touch RPT again to cancel.
Playing music files in random order
Touch RAND .
MP3
Touch FUNC .
● Files will be randomly selected from among all files at the same level as the folder
currently being played.
● Plays files in random order.
● Random playback will continue until canceled. Touch RAND again to cancel.
● Touch RPT during random playback to repeat the file currently being playing. Touch
RPT again to return to random playback.
● At the end of each file the system arbitrarily chooses which file to play next. As a
result, it is possible for the same file to be played multiple times in a row.
See page 52 for an example MP3 file structure.
If
of the third level is being played and the display shows the folder and files of
the second level (
, and
), touch HOME to display the folder and file of
).
the third level (
and
55
How to operate the MP3 player
How to use the MP3 player
About display of file information
Folder names and file information (album name and track titles) recorded on the disc can be
displayed. The number of characters that can be displayed is shown below.
Screen Display
Folder/file names
Music file information
8 characters max.
28 characters max.
Displaying folder/file names
Press CONT to display the
operation screen.
Displaying file information
Touch TITLE .
● The TITLE switch will change to
TITLE OFF when the file
information is being displayed. Touch
TITLE OFF to change the display
to a folder/file switch.
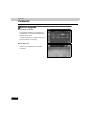
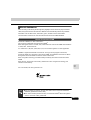
Turning off the MP3 player
Press PWR .
● Press PWR again to resume playback.
56
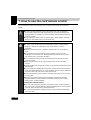
About MP3s
MP3 (MPEG-1 Audio Layer III) is a standard format for audio compression technology. By
using MP3, a file can be compressed to one-tenth its original size.
This unit has limitations on MP3 file standards and the recorded media and formats that can
be used. Be aware of the following points when recording MP3 files.
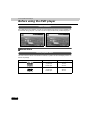
Playable MP3 file standards
● Supported standards
: MPEG1 Audio Layer III
● Supported sampling frequencies: 44.1, 48 (kHz)
: 64, 80, 96, 112, 128, 160, 192, 224, 256, 320 (kbps)
* Supports VBR.
* Does not support free format.
* Bit rates vary for MPEG-1 and MPEG-2.
● Supported channel modes
MP3
● Supported bit rates
: stereo
ID3 tags
MP3 files have an "ID3 Tag" that allows input of information so that data such as track title and
artist can be saved.
This unit supports ID3v. 1. 0 and ID3v. 1. 1 tags. Use only ASCII code to record tags, since
only ASCII code is supported by this deck. Recording of characters not included in ASCII code
will result in display of garbled characters.
Media
Media capable of playing MP3 include CD-ROM, CD-R and CD-RW discs.
Compared to CD-ROM media commonly used for music discs, CD-R discs are fragile in high
temperature/high humidity environments and sections of the CD-R may become incapable of
playback. Fingerprints or scratches on the disc may prevent playback or cause skipping.
Sections of a CD-R may deteriorate if left inside a vehicle for long periods of time.
It is also recommended that CD-R discs be kept in a light-blocking case because the discs are
vulnerable to ultra-violet light.
Use 128kbps or lower for the MP3 bit rate. If the bit rate exceeds 128kbps, there
may be sound jumping during MP3 playback.
57
How to operate the MP3 player
How to use the MP3 player
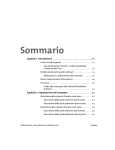
Format of discs
The format of discs to be used must be ISO9660 Level 1 or Level 2. Also, be sure to record in
"MODE 1". Discs recorded in "MODE 2" are not supported.
MP3 files recorded in formats other than those outlined above may result in files that cannot
be played normally and file names and folder names that do not display properly.
The following additional limitations apply:
● Maximum directory layers
: 8 levels
● Maximum characters for folder names/file names: 31 (including "." and the 3 letters of the
file extension)
● Allowable characters for folder names/file names : A-Z, 0-9, _ (underscore), all ASCII
characters
● Number of files/folders possible in a single folder : 512*
* Each file is counted as one file, even if it is not an MP3 file (i. e. files with extensions other
than ".MP3").
[Configuration example for CD supporting MP3]
F1
Folder1
001.MP3
002.MP3
003.MP3
004.TXT
005.MP3
A total of 512 files and folders can be
created within a single folder.
300.MP3
Each file is counted as one file, even if it
is not an MP3 file (e.g. 004.TXT).
F301
Folder301
F302
Folder302
F512
Folder512
● Total number of files/folders that can be recorded on a single disc: 1023
58
File names
Only files with the MP3 file extension ".mp3" will be recognized as MP3 and played in the unit.
Be sure to save MP3 files with the ".mp3" file extension.
Use capital letters for "MP".
Multi-sessions
Multi sessions are supported and CD-R/RW with recorded MP3 files can be played. When
recording using "Track at once", however, finalize the disc with session close or write protect.
When a disc containing an MP3 file is inserted, all files on the disc will be checked before
playback can begin. The check will be completed within approximately 10 seconds of the disc
being inserted, and the first MP3 file will begin playing. If the check is not completed within this
period, the music or audio previously being played will resume. MP3 playback can be started
by touching MP3 .
MP3
Playing MP3
Sound is not emitted from the system while it is checking the files on the disc.
In order to speed up completion of the file check, it is recommended that you avoid recording
files that are not MP3 files and avoid creating unnecessary folders.
In addition, it is recommended that you record all data in a single session because a multi
session disc takes time for CD control information acquisition.
While an MP3 is being played, navigation operation will become slower. This is not a
malfunction of the system.
MP3 playing time display
It is possible that playing time will not be correct, depending on the writing condition of the
MP3 file.
* It is possible that playing time will not be correct when VBR Fast Up/Down is operated.
Display order of MP3 file/folder names
Names of MP3 folders and files within the same level are displayed in the following order.
1. MP3 files displayed first, by ascending order of numbers, letters.
2. Folders displayed next, by ascending order of numbers, letters.
If the ".mp3" file extension is attached to a file other than an MP3 file, that file will
be mistakenly recognized by the unit as an MP3 file and played, resulting in noise
and static that can damage the speakers. Do not attach the ".mp3" extension to
any non-MP3 files.
59
How to operate the MP3 player
How to use the MP3 player
Making and playing MP3 files
MP3 files created by recording broadcasts, records, audio recordings, video recordings or live
performances cannot be used for purposes other than personal entertainment without
permission of the copyright holder as set forth in copyright law.
Downloading from Internet MP3 music sites
There are many kinds of sites that distribute MP3 files on the Internet, such as "pay per
download" online shopping sites, "try before you buy" listening sites and free download sites.
Follow the rules for each site (such as paying fees) and download according to site
instructions.
Converting CD music to MP3 files
Prepare a computer with commercially available MP3 encoding software (conversion
software). (Some encoding programs available on the Internet do not require payment.) Music
data files in MP3 format can be made by inserting the music CD into the CD-ROM drive of the
computer and following the procedures of the MP3 encoding software to compress the songs
of the music CD. A 12cm music CD (having a maximum of 74 minutes of recording/650MB of
data) can be compressed to 65MB (about 1/10 of the original size).
When writing to CD-R/RW
MP3 files can be recorded on CD-R/RW by using a CD-R/RW drive connected to a computer.
Record by setting the recording format of the recording software to ISO9660 level 1 or level 2
(not including extension format).
Select CD-ROM (mode 1) for the disc format. Discs recorded with CD-ROM xA (mode 2)
cannot be played on this deck.
When playing back CD-R/RW
Insert a CD-R/RW containing recorded MP3 files. The system will automatically determine
whether the disc is a music CD or a CD-R/RW with MP3 files and begin playing the disc. A
music CD recorded onto a CD-R/RW can also be played. However, depending on the type of
disc being used, playback may not be possible.
●A fixed bit rate of 128kbps and sampling frequency of 44.1kHz is recommended
for obtaining stable audio quality at playback.
●Depending on the characteristics of a disc, the system may not be able to read
CD-R and CD-RW discs.
●Because there are many types of MP3 encoding software available, including
commercial and freeware programs, audio quality may deteriorate, noise may be
generated when playing starts and some recordings may not play, depending on
the condition of the encoder and the file format.
●When files other than MP3 files are recorded on a disc, the system may take
some time to recognize the disc or it may not play.
60
How to operate the Memory Stick player
1. How to use the Memory Stick player
The unit can play music data recorded on the Memory Stick using ATRAC3 (audio
compression technology).
SOURCE MENU
RECALL switch
PWR
button
SOURCE
MENU
button
Track selection
(track start point)/
Fast-forward
(rewind) button
FUNCTION
switch
•RPT
•RAND
•SCAN
Insert a Memory Stick into the slot and touch CLOSE .
Memory
Stick
Listening to Memory Stick data
Press SOURCE MENU or touch the SOURCE MENU RECALL switch
when a Memory Stick has been inserted.
Touch MEMORY STICK .
● Playback will begin.
●This unit can only play music data recorded on MG Memory Sticks (white).
●This unit cannot play music data recorded using ATRAC3 Plus.
●The unit cannot be operated for about 4 seconds after an MG Memory Stick has
been inserted as while system is checking the data.
●If recorded in the Memory Stick, the artist name, song title (track name), and
other details can be displayed on the screen. Up to 28 characters can be shown
in the display.
●If the number of plays and/or playback period is restricted, the relevant number/
period is displayed in the screen.
●A message is displayed if the number of remaining plays reaches 0 or if the
playback period has expired. (See page 142)
61
How to operate the Memory Stick player
How to use the Memory Stick player
Selecting a track
You can jump to the opening of a track you want to hear.
Press
●
or
.
(up) : Selects next track
(down) : Selects previous track
Fast-forwarding/rewinding
It is possible to fast-forward/rewind within the current track.
Press and hold
●
or
until you hear a beep.
(up) : Fast-forward
(down) : Rewind
If you hear a beep while rewinding (fast-forwarding), the deck switched to fast-forward
(rewind) mode and will continue until you remove your finger from the button.
Searching for a track
Touch FUNC .
Touch SCAN .
● The deck will play the first 10 seconds of each track. Touch SCAN again to continue
playing the current track.
Repeating a track
Touch FUNC .
Touch RPT .
● Repeats the current track.
● The track will repeat until the function is canceled. Touch RPT again to cancel.
62
Playing tracks in random order
Touch FUNC .
Touch RAND .
● Plays tracks in random order.
● Random playback will continue until the function is canceled. Touch RAND again to
cancel.
● At the end of each track the system arbitrarily chooses which track to play next. As a
result, it is possible for the same track to be played multiple times in a row.
Press PWR .
● Press PWR again to resume playback.
Memory
Stick
Turning the Memory Stick off
63
How to operate the CD Changer
1. How to use the CD changer
An optional CD changer can be connected and used.
SOURCE MENU RECALL switch
PWR
button
SOURCE MENU
button
Disc change
switches
Track selection
(track start point)/
Fast-forward
(rewind)
button
FUNCTION switch
•DISC RPT
•DISC RAND
•DISC SCAN
•RPT
•RAND
•SCAN
Listening to a CD
Press SOURCE MENU or touch the SOURCE MENU RECALL switch.
When only one CD changer is connected, touch CD CHANGER1 . When
two CD changers are connected, touch CD CHANGER1 or
CD CHANGER2 .
Selecting a track
See "How to use the CD player" (Page 50).
Fast-forwarding/rewinding
See "How to use the CD player" (Page 50).
Selecting a CD
A CD can be selected from among all the discs in the changer.
Touch one of the disc change switches.
● The number for the selected CD will change color.
64
Searching for a track or CD from all CDs in the
changer
Searching for a track
See "How to use the CD player" (Page 50).
Searching for a CD
Touch FUNC .
Touch DISC SCAN .
● The system will play the first 10 seconds of the first track of each CD in the changer.
Touch DISC SCAN again to continue playing the current track.
Repeating the current track
See "How to use the CD player" (Page 50).
CD Changer
Repeating a track or CD
Repeating the current CD
Touch FUNC .
Touch DISC RPT .
● Touch once to continue repeating the CD. Repeat will continue until canceled. Touch
DISC RPT again to cancel.
●A disc change switch is displayed for each disc tray in the changer but only the
disc change switches that correspond to a currently loaded tray can be selected.
●No operation is possible when there are no discs loaded into the CD changer.
●If there are 2 CD changers connected, use CD CHANGER1 and
CD CHANGER2 to switch between the optional CD changer deck and the
main CD changer.
65
How to operate the CD Changer
How to use the CD changer
Playing tracks in random order
Playing tracks on current CD in random order
See "How to use the CD player" (Page 51).
Playing tracks on all CDs in random order
Touch FUNC .
Touch DISC RAND .
● Setting once will start random playback which will not stop until the function is
canceled. Touch DISC RAND again to cancel.
● At the end of each track the system arbitrarily chooses which track to play next. As a
result, it is possible for the same track to be played multiple times in a row.
Turning off the CD changer
Press PWR .
● Press PWR again to resume playback.
66
How to operate MUSIC JUKE
1. Before using MUSIC JUKE
Description of MUSIC JUKE
MUSIC JUKE can record music or audio from a CD, radio etc. Using ATRAC3 audio
compression technology. There are two types of recording available, digital and analog. When
you digitally record an album from the CD player, "Gracenote CDDB£ Music Recognition
Service" will search for the album name, artist name and genre and automatically create a list
(playlist) displaying the relevant data. Recording from any other source is done in analog and
a playlist is created for the recorded source/date recorded.
*...When the relevant name cannot be found, a playlist will be created in the same way as
analog recording.
About the structure of MUSIC JUKE
PLAY MODE
Recorded music
(tracks) are divided into
6 play modes (ALBUM,
ARTIST, GENRE, etc.)
PLAYLIST
Recorded music
(tracks) stored in each
of the play modes is
sorted into playlists.
TRACK
Title of recorded music/audio data
Select play mode
Select playlist
By favorites
MY SELECTION
Favorites
By date recorded
DATE
From all recorded tracks
TRACK
By genre
GENRE
POPS
By artist name
ARTIST
Artist name
By album name
ALBUM
Album name
Search method
MUSIC
JUKE
In MUSIC JUKE, music/audio is recorded into 6 different play modes and then stored into
playlists created in each play mode for managing your data. Being able to narrow down from
play modes and playlists before searching for the music you want to listen to makes the listening
experience even more comfortable and rewarding.
Date
Corresponding tracks
♪♪
♪
♪♪♪
♪♪
♪♪♪
♪
67
How to operate MUSIC JUKE
Before using MUSIC JUKE
About Play Modes/Playlists
The system sorts recorded music into groups depending on type and recording conditions and
saves it to MUSIC JUKE.
Recorded music can be sorted into automatically created playlists within the 6 play modes,
based on album name, artist name, or genre. It is also possible to create a personal group
containing a collection of preferred songs.
PLAY MODE
PLAYLIST
ALBUM
● When recording has finished, a playlist containing the recorded tracks
is created. If the album name has been retrieved using Auto-titling, it
will be set as the playlist name. If the album name has not been
retrieved using Auto-titling, the source/ALBUM/number will be set as
the playlist name.
● It is possible to select a song by album name.
MY SELECTION
● This is an original playlist containing a collection of your preferred
songs. A new list can be created by editing the information of the
recorded tracks.
● It is possible to select a song by an original playlist name.
TRACK
● There are no playlists.
● It is possible to select a track by song name.
ARTIST
● When the artist name for the recorded song has been retrieved using
Auto-titling, a playlist is created for that artist.
● It is possible to create a playlist by entering the artist name in the
information for the recorded track.
● It is possible to select a song by artist name. When more than one
album by the same artist has been recorded, a list of albums is
displayed from which to make a selection.
GENRE
● When the genre for the recorded song has been retrieved using Autotitling, a playlist will be created for this genre.
● It is possible to select a song by genre. When more than one album in
the same genre has been recorded, a list of albums is displayed from
which to make a selection.
DATE
● A playlist is created for a recording date.
Up to 999* playlists can be created in MUSIC JUKE with a maximum of 99 tracks
recorded in each playlist. The total number of recordable tracks is 3000*.
* The number of playlists that can be created and tracks that can be recorded
differs according to recording time and recording mode.
68
About databases
When recording a CD album (album/single disc) digitally from the built-in CD player to MUSIC
JUKE, the system searches the hard disc database and automatically retrieves any available
information such as album name, artist name, genre, and title for the recorded album.
The information recorded in the unit uses data from the Gracenote CDDB database.
About Gracenote CDDB
Gracenote is CDDB, Inc. d/b/a "Gracenote."
CD and music-related data from Gracenote CDDB£
Music Recognition Service2000, 2001, 2002 Gracenote. Gracenote CDDB Client Software
2000, 2001, 2002 Gracenote.
U.S. Patent No. 5,987,525, 6,061,680, 6,154,773 and others granted or under application.
For more details, see www.gracenote.com.
MUSIC
JUKE
CDDB is a registered trademark of Gracenote. The logos and logotypes of Gracenote,
Gracenote CDDB, and "Powered by Gracenote CDDB" are trademarks of Gracenote. Music
Recognition Service and MRS are service marks of Gracenote.
Music recognition technology and related data provided by Gracenote and the Gracenote
CDDB
Music Service. Gracenote is the industry standard for music recognition technology and
relevant content delivery.
●The information recorded in the unit uses data from the Gracenote CDDB 207
database (updated November, 2004).
●The content of data provided courtesy of "Gracenote CDDB£ Music Recognition
Service" cannot be 100% guaranteed.
69
How to operate MUSIC JUKE
Before using MUSIC JUKE
About Auto-titling
The system automatically sorts and groups recorded music into playlists based on recording
conditions and title information retrieved from the database.
* The data retrieved using Auto-titling may differ from the actual title information.
Digital recording
Digital recording
Hard disc
Unit
database
Music data
When corresponding
album title, artist,
and/or genre
information
can be found
When corresponding album title, artist,
and genre information cannot be found
PLAY MODE
PLAY LIST
TRACK
PLAY MODE
PLAY LIST
TRACK
ALBUM
Album title
♪
ALBUM
CD/ALBUM/0001
2005.3.24/CD/0001
♪♪♪♪
MY SELECTION
TRACK
Artist
Album title
GENRE
Genre
Album title
DATE
Record date
ARTIST
MY SELECTION
2005.3.24/CD/0002
♪♪
TRACK
2005.3.24/CD/0003
♪♪♪
ARTIST
2005.3.24/CD/0004
・・・・・
GENRE
・・・・・
DATE
A playlist is automatically created for the ALBUM,
ARTIST, GENRE, and DATE play modes.
70
・・・・・・・・
Record date
・・・・・・・・
A playlist is automatically created for
the ALBUM and DATE play modes.
♪
♪♪♪♪
♪♪
♪♪♪
Analog recording
Analog recording
Hard disc
Music data
PLAY MODE
PLAY LIST
TRACK
ALBUM
CD/ALBUM/0001
2005.3.24/CD/0001
MY SELECTION
2005.3.24/CD/0002
TRACK
2005.3.24/CD/0003
ARTIST
2005.3.24/CD/0004
・・・・・・・・
GENRE
DATE
Record date
・・・・・・・・
MUSIC
JUKE
A playlist is automatically created for
the ALBUM and DATE play modes.
In analog recording, or when title information can not be found for digital recording,
the following information is assigned and a playlist is created in the play modes
shown below.
ALBUM play mode...Source/ALBUM/4-digit number*
TRACK play mode...Date/Source/4-digit number*
* When the date has changed, a number is assigned in ascending order from 1.
71
How to operate MUSIC JUKE
Before using MUSIC JUKE
About displaying database information
It is possible to see the version information stored in the hard disc’s title database.
Press INFO .
Touch DATA .
Touch INFORMATION for CDDB
VERSION.
● Information regarding the Gracenote
CDDB database will appear.
72
About updating the database
The database in the unit (Gracenote CDDB database) can be updated using provided data.
We will provide information regarding updates at a later date.
Press INFO .
Touch DATA .
Insert a Memory Stick or CD-R/RW
containing update information.
Touch MS UPDATE or
DISC UPDATE .
MUSIC
JUKE
● The database update begins.
Once title information for a file has been retrieved it will not be automatically
changed even if the updated Gracenote CDDB database contains relevant data.
This information can be updated when editing. For details, see "Retrieving title
information from the database" on page 95.
73
How to operate MUSIC JUKE
Before using MUSIC JUKE
Checking hard disc capacity
It is possible to display the number of recorded tracks and playlists on the hard disc. You can
also check the number of tracks that can still be recorded and number of playlists that can still
be created.
Press INFO .
Touch DATA .
Touch INFORMATION for HARD
DISC DRIVE.
● Hard disc capacity is displayed.
74
How to operate MUSIC JUKE
This flow chart explains operations such as recording with MUSIC JUKE, playlist and track
editing, and listening to MUSIC JUKE.
Recording with MUSIC JUKE (Page 80)
To change recording method
To listen to MUSIC JUKE
● Setting digital recording mode
(Page 79)
● Setting Auto Marker
(Page 79)
● Setting recording bit rate
(Page 80)
To edit track
information
● Creating a playlist
(Page 90)
● Changing the artist
(Page 105)
● Editing a playlist name
(Page 93)
● Retrieving title information
from the database (Page 95)
Editing track information
(Page 103)
MUSIC
JUKE
To create/edit
a playlist
To add a track to
a playlist
Adding a track (Page 101)
MUSIC JUKE Playback
75
How to operate MUSIC JUKE
2. Recording with MUSIC JUKE
About recording with MUSIC JUKE
● MUSIC JUKE can record music from the built-in CD player or optional CD changer as well
as music and audio output from the radio or VTR (audio).
● MUSIC JUKE cannot record from MP3 files, the Memory Stick, or DVDs.
About sources and recording styles that allow recording
The recording method used by MUSIC JUKE changes depending the source type.
Recording style
Recordable sources
Digital recording
CD player
Analog recording
FM, AM, VTR (audio), CD changer, CD player (only CDs with
digital recording restriction)
Notes regarding recording
● We cannot be held responsible for content that can not be recorded or music/audio data lost
as a result of malfunction, improper use, or defects.
● Recorded files may not be used for purposes other than personal entertainment without
permission of the copyright holder as set forth in copyright law.
● When recording content that will only be played once, try recording something in advance to
check that the system is functioning properly.
● If recording is in progress when the ignition is set to ACC ON and the engine is started,
recorded data may be lost.
● When recording from a gap less CD (no gaps between songs) pauses will be recorded
between songs and this may create unnatural gaps. Please be aware that this a result of the
type of disc being used.
● The music/audio will become inaudible for approximately 2 seconds at the start and finish of
recording.
● The music/audio will become inaudible for approximately 2 seconds at the start and
finish of analog recording.
● If switching to another mode (for example radio) while digital recording from a music
CD is in progress, recording is stopped and there is a 2 second pause before the radio
broadcast becomes audible.
● MUSIC JUKE will play tracks in order starting from the most recently recorded. When
recording a music CD, the order in which the songs are played may be the opposite to that
in which they are recorded on the CD depending on the selected play mode. See "To select
a track (song)" on page 83 for information regarding playback order. It is also possible to
change the playback order. See "Switching playlist order" on page 97 for information on
changing the playback order.
● When CD recording starts, the recorded sound is output. When CD recording finishes, as
long as you do not turn off the engine (ACC OFF) or switch sources, the recorded sound will
continue to be output.
76
● If the battery terminal has been disconnected then reconnected, the map screen will appear
and recording is not possible for approximately 2 minutes.
● If recording cannot be completed due to jumping or some other problem,
is displayed on
the screen.
About digital recording
● This system is SCMS (Serial Copy Management System)-compliant. As a result, the
following CDs cannot, in principle, be digitally recorded.
● CD-R or CD-RW digitally recorded from a music CD*
● Protected CDs*
* Can be recorded in analog by pressing REC.
● The track (song) currently being recorded is deleted in the following cases.
● The engine is turned off (ACC OFF)
● The CD is ejected
● Recording automatically resumes in the following cases.
● The engine is switched on*1
● The CD is inserted*2
● Recording continues in the following cases.
● Source is switched during recording
● Audio is turned off during recording
MUSIC
JUKE
*1 Record: Recording is resumed from the unrecorded track (song) with the lowest track number
Play: Playback starts from the beginning of the interrupted track (song)
Recording only resumes when the engine is turned back on if recording had been in progress when it was
turned off
*2 Record: Recording is resumed from the unrecorded track (song) with the lowest track number
Play: Playback starts from the beginning of the inserted CD
● An already recorded song cannot be recorded again.
● When recording has been stopped manually, only those songs that have been completely
recorded can be played back. To play songs not completely recorded, switch the source
then switch back to CD mode.
About analog recording
● Analog cannot be used for continuous recording exceeding 5 hours. To continue, press
REC again to record.
● If the engine is turned off (ACC OFF) during analog recording, recording is stopped. Analog
recording will also stop if the source is switched while still in progress.
77
How to operate MUSIC JUKE
Recording with MUSIC JUKE
Setting recording method
It is possible to switch the recording method used in MUSIC JUKE.
Touch FUNC .
Touch SET .
● MUSIC JUKE operation screen
appears.
● MUSIC JUKE operation screen
● The following settings can be switched
in MUSIC JUKE setting screen.
● MUSIC JUKE setting screen
Item
78
Function
Page
DIGITAL REC
Sets digital recording to AUTO/MANUAL
Next page
AUTO TRACK
Sets track markers for recorded tracks (songs)
Next page
PLAYLIST DISPLAY
Reorders display/playback order for playlists/tracks
Page 97
BITRATE
Sets sound quality for recording
Page 80
Setting digital recording mode
When AUTO is set, digital recording begins as soon as a CD is inserted. When MANUAL
is set, recording starts from the beginning of the track currently playing once the panel button
REC ) has been pressed. It is possible to switch between these two settings.
(
Touch FUNC .
Touch SET .
Touch AUTO or MANUAL .
● AUTO . . . . . Recording
automatically starts
when a CD is inserted.
REC to
● MANUAL . . Press
start recording.
Setting Auto Marker
Set track markers between tracks (songs) when recording a CD in analog.
Touch FUNC .
MUSIC
JUKE
Touch SET .
Touch ON or OFF .
● ON . . . . . . . Tracks are set on a CD
based on the gaps
between songs. For
sources other than
CDs, tracks are set
once all recording is
complete.
● OFF . . . . . . Set the entire section
between the start of
recording to completion
as one track.
It is possible that some tracks cannot be delimited using track markers even if Auto
Marker is set to ON.
79
How to operate MUSIC JUKE
Recording with MUSIC JUKE
Setting the recording bit rate
The sound quality for recording can be selected. A higher bit rate means a higher sound
quality but also a larger file size.
Touch FUNC .
Touch SET .
Touch 132k , 105k or 66k .
● Digital recording is fixed at a bit rate of
132k.
Recording with MUSIC JUKE
MUSIC JUKE allows digital recording from the CD player and analog recording from all other
sources.
Digital recording can be either AUTO or MANUAL. When AUTO is set, recording automatically
REC is
starts when playback begins. When MANUAL is set, recording starts when
pressed.
“
REC” is displayed while recording is in progress.
The following switches cannot be used while recording is in progress.
Recording
method
Digital
recording
Source
(Audio)
CD
Other sources*
Analog
recording
AM, FM, CD,
CD changer,
VTR
Touch switch
RPT RAND SCAN
Unrestricted
Panel buttons
Press and hold only
Press and hold only
Unrestricted
RPT RAND SCAN
DISC DISC DISC
RPT RAND SCAN
Preset switches
AUTO.P ∧ ∨
* When the source has been switched to radio or CD changer during digital recording.
80
Automatically recording a CD during playback
As soon as a CD is inserted, recording automatically starts when playback begins.
Insert a CD.
● Recording and playback are
automatically started.
REC for at least one
● Press
second to stop recording.
MUSIC
JUKE
REC mark
●When a CD is re-inserted after having been ejected during recording, the system
plays the tracks that have been completely recorded while waiting for recording
to start. " " is displayed while waiting for recording to start.
●Recording from copy-restricted CD-R/RWs and sources other than the CD player
to MUSIC JUKE can only be done manually and in analog.
●If a CD is already inserted, recording will not automatically start even if the
REC to start recording. (See next page for
source is switched to CD. Press
"Recording preferred tracks (songs) from a CD")
●Set Record Mode in "Setting digital recording mode" to MANUAL start
recording from a preferred song (see page 79).
81
How to operate MUSIC JUKE
Recording with MUSIC JUKE
Recording preferred tracks (songs) from a CD
Records preferred tracks (songs).
Play the CD.
Press REC for at least one
second.
● Returns to the start of the track and
starts recording to MUSIC JUKE.
REC for at least one
● Press
second to stop recording.
Recording from sources other than a CD
Start recording whenever you like while playing the radio, VTR, or CD changer.
Switch to the source for recording.
● See "Switching modes" (Page 24).
Press REC for at least one
second.
REC mark
● Start recording to MUSIC JUKE.
REC for at least one second
● Press
to stop recording.
●Already recorded tracks (songs) cannot be selected.
●To start recording at the same time as playback begins on a CD, set Record
mode in "Setting digital recording mode" (see page 79) to AUTO .
82
How to operate MUSIC JUKE
3. How to use MUSIC JUKE
SOURCE MENU
RECALL switch
PWR
button
Track selection
(track start point)
/Fast-forward
(rewind)
button
SOURCE
MENU
button
Play mode
change switch
Playlist change switch
Playlist
screen change
switch
FUNCTION switch
•PLAYLIST RPT
•ALL RAND
•PLAYLIST SCAN
•RPT
•RAND
•SCAN
•SET
•EDIT
To listen to MUSIC JUKE
Press SOURCE MENU or touch the SOURCE MENU RECALL switch.
Touch MUSIC JUKE .
To select a track (song)
MUSIC
JUKE
● Playback will begin.
● If the power was turned off during playback, MUSIC JUKE will resume playback from
the beginning of the last track that was played.
Several tracks (songs) can be selected from all those recorded in MUSIC JUKE by group such
as name, genre etc. The display and playback order of playlists and tracks may differ
depending on the play mode chosen.
● The table below shows play modes with corresponding display and playback orders.
PLAY MODE
ALBUM
MY SELECTION
Playlist display/playback order
Automatically created playlists displayed/played back in reverse
chronological order (newest on top)
Original playlists displayed/played back in reverse chronological order
(newest on top)
TRACK
Displays all recorded music.
ARTIST
Automatically created playlists displayed/played back in alphabetical order
GENRE
Displayed/played back in preset order
DATE
Automatically created playlists displayed/played back in reverse
chronological order (newest on top)
playlist names, track names, and other details recorded in MUSIC JUKE can be
displayed. Up to 28 characters can be shown in the display.
83
How to operate MUSIC JUKE
How to use MUSIC JUKE
● The table below shows display and playback orders for tracks.
PLAY MODE
Track display/playback order
ALBUM
Tracks displayed/played back in the same order as they are recorded on the
music CD.
MY SELECTION
Tracks displayed/played back in the order they were added to the playlist
TRACK
Tracks displayed/played back in chronological order (oldest recorded track
on top)
ARTIST
Tracks displayed/played back in the same order as they are recorded on the
music CD.*
GENRE
Tracks displayed/played back in the same order as they are recorded on the
music CD.*
DATE
Tracks displayed/played back in chronological order (oldest recorded track
on top)
*: When all the tracks for the same ARTIST/GENRE have been played, MUSIC JUKE
switches to the next ARTIST/GENRE.
Selecting with track selection (track start point) button
Touch PLAY MODE and select
play mode.
● When play mode is switched, the first
playlist recorded in the selected mode
is played.
● If MUSIC JUKE was last used for
playback, the playlist listened to most
recently will be played.
● Each time PLAY MODE is
touched, the play mode will be
changed in the order shown below.
ALBUM
DATE
MY SELECTION
GENRE
TRACK
ARTIST
Play modes cannot be selected if there are no playlists created for that mode.
84
Touch PLAYLIST or
PLAYLIST to select a playlist.
● Displays/plays back track information
for the first track recorded in the
playlist.
Press
or
to select a track.
● Switches/plays back tracks recorded in
the playlist in order.
Selecting with Play mode/Playlist change switch
Touch PLAYLIST .
● The playlist screen appears.
Touch a play mode.
MUSIC
JUKE
● Displays the playlists recorded in that
play mode.
● When the ARTIST or GENRE play
mode has been selected, a list of
album names for each artist/genre can
be displayed.
● Touch TRACK to display a list of all
tracks recorded in MUSIC JUKE.
● PLAYLIST screen
Continue to the next page
85
How to operate MUSIC JUKE
How to use MUSIC JUKE
Touch a playlist.
PLAYLIST
● When an artist or genre playlist has
been selected, touch ALBUM to
display a list of album names assigned
to that artist/genre.
Touch TRACK .
● Displays a list of the tracks in the
selected playlist.
● Touch
to start playback from the
first track recorded in the playlist.
Touch a track (song) name.
● Plays the selected track.
● Track list screen
●When there are 4 or more playlists in the same play mode, touch
switch to playlists that are not displayed.
●When there are 4 or more tracks (songs) in the same playlist, touch
switch to track names that are not displayed.
86
or
to
or
to
Fast-forwarding/rewinding
It is possible to fast-forward/rewind in the track (song) being played.
Press and hold
●
or
until you hear a beep.
(up) : Fast-forward
(down) : Rewind
The deck switches to fast-forward (rewind) mode when you hear a beep and continues
fast-forwarding (rewinding) until you remove your finger from the button.
Searching for a track (song)
Searching for a track (song) from a playlist
Touch FUNC .
Touch SCAN .
● The system will play the first 10 seconds of each track located within the current
playlist. Touch SCAN again to continue playing the current track.
Touch FUNC .
MUSIC
JUKE
Searching for a playlist from a play mode
Touch PLAYLIST SCAN .
● The system will play the first 10 seconds of the first track of each playlist located within
the current play mode. Touch PLAYLIST SCAN again to continue playing the
current playlist.
87
How to operate MUSIC JUKE
How to use MUSIC JUKE
Repeating a track (song)
Repeating the current track
Touch FUNC .
Touch RPT .
● Repeats the current track.
● The track will repeat until the function is canceled. Touch RPT again to cancel.
Repeating the current playlist
Touch FUNC .
Touch PLAYLIST RPT .
● Touch PLAYLIST RPT once to continue repeating the playlist. Repeat will continue
until canceled. Touch PLAYLIST RPT again to cancel.
Playing tracks (songs) in random order
Play tracks in current playlist in random order
Touch FUNC .
Touch RAND .
● Plays tracks in randam order.
● Random playback will continue until the function is canceled. Touch RAND again to
cancel.
Playing all tracks recorded in MUSIC JUKE in random order
Touch FUNC .
Touch ALL RAND .
● Touch ALL RAND to play all recorded tracks in random order. Random playback
will continue until canceled. Touch ALL RAND again to cancel.
● The track to be played next is randomly selected at the end of the current track. As a
result, it is possible for the same track to be played multiple times in a row.
88
Turning MUSIC JUKE off
MUSIC
JUKE
Press PWR .
● Press PWR again to resume playback.
89
How to operate MUSIC JUKE
4. Editing a playlist
Music recorded into MUSIC JUKE is grouped into automatically created playlists according to
album name, artist name etc. However, it is also possible to create original playlists containing
a collection of your preferred tracks (songs). The playlist name can be edited and the playlist
order switched.
● Playback pauses while editing is in progress.
Creating a playlist
The MY SELECTION play mode allows you to create a playlist containing only your preferred
tracks. When creating a new playlist in the ARTIST play mode, see "Changing the artist"
(page 105).
Touch FUNC .
Touch EDIT .
● The Edit menu screen appears.
Touch
NEW CREATION (PLAYLIST) .
Entering the playlist name
Touch TITLE .
● The character input screen appears.
90
Enter the title.
● See "Entering playlist name" (next
page) for information regarding
entering names.
Touch ENTER .
Adding a track to a created playlist
Select a track.
MUSIC
JUKE
● See "Track search" (page 103) for
information regarding track searching.
Touch ENTER .
●Always enter a track into a newly created playlist. A playlist cannot be created if it
does not contain at least one track.
●To select multiple tracks simultaneously, touch all of the relevant tracks.
●Up to 99 tracks can be selected at one time.
91
How to operate MUSIC JUKE
Editing a playlist
Entering playlist name
Enter one letter at a time by
touching the switches on the
screen.
● Touch ABC or 12 .#$ (numeric/
symbols) to switch to the
corresponding input screen.
● If you make a mistake (or if the name is
already entered), touch CLEAR to
delete one letter at a time.
Touch ENTER .
●Up to 32 characters can be entered.
●The same name cannot be registered twice.
92
Editing a playlist name
The names of playlists recorded in the ALBUM or MY SELECTION play modes can be edited.
Touch FUNC .
Touch EDIT .
● The Edit menu screen appears.
Touch EDIT (PLAYLIST/TRACK) .
MUSIC
JUKE
Touch PLAYLIST .
Touch ALBUM or
MY SELECTION .
Continue to the next page
93
How to operate MUSIC JUKE
Editing a playlist
Touch the playlist you want to edit.
Touch TITLE .
● The character input screen appears.
Enter the title.
● See "Entering playlist name" (page
92) for information regarding entering
names.
Touch ENTER .
94
Retrieving title information from the database
If title information cannot be assigned during digital recording, or the assigned information is
incorrect, the relevant information will be searched from the database and assigned to the
track (song).
Touch FUNC .
Touch EDIT .
● The Edit menu screen appears.
MUSIC
JUKE
Touch EDIT (PLAYLIST/TRACK) .
Touch PLAYLIST .
Touch ALBUM .
Continue to the next page
95
How to operate MUSIC JUKE
Editing a playlist
Touch the playlist you want to edit.
Touch SEARCH .
● The display returns to the previous
screen once the title information has
been received.
When there are multiple sets of title information
Touch the relevant title.
● Up to 10 titles can be displayed.
● Touch BACK to return to the
previous screen without retrieving title
information.
● Touch INFO to display a list of track
(songs) names included in the title list.
After checking, touch ENTER to
retrieve the title information and return
to screen 7 .
96
Switching playlist order
Playlists and tracks are displayed and played back in the order they were recorded. The
playback order can be changed by switching the way the playlist is displayed.
● Playlist order can only be changed if "PLAYLIST DISPLAY" is set to SELECT in MUSIC
JUKE setting screen. If "PLAYLIST DISPLAY" is set to SELECT, touch SELECT for
"PLAYLIST DISPLAY" as explained in "Switching to chronological order" (next page).
Reorder according to your own preference
Touch PLAYLIST .
Touch the preferred play mode.
Touch
.
● Playback of the tracks in the selected
playlist begins and the playlist display
switches.
MUSIC
JUKE
Touch the preferred playlist.
97
How to operate MUSIC JUKE
Editing a playlist
Switching to chronological order
It is possible to return to chronological (starting from playlist created/recorded first) order after
having reordered according to your own preference.
Touch FUNC .
Touch SET .
● MUSIC JUKE setting screen appears.
Touch INITIAL in PLAYLIST
DISPLAY.
● Switches to chronological order.
98
Deleting a playlist
Playlists recorded in the ALBUM or MY SELECTION play modes can be deleted. The data
deleted will differ depending on the selected play mode.
Selected play mode
ALBUM
MY SELECTION
Data that will be deleted
The selected playlist and tracks (songs) will be deleted and will no
longer appear as results even if searched for in a different play mode.
The selected playlist will be deleted but tracks will not. They will still
appear in results if searched for in a different play mode.
Touch FUNC .
Touch EDIT .
● The Edit menu screen appears.
MUSIC
JUKE
Touch DELETE .
Touch PLAYLIST .
Continue to the next page
99
How to operate MUSIC JUKE
Editing a playlist
Touch ALBUM or
MY SELECTION .
Touch a playlist.
● The delete confirmation screen
appears.
Touch YES .
When all relevant tracks (song data) are deleted from artist, genre, and date
recorded playlists, the playlist itself is automatically deleted.
100
How to operate MUSIC JUKE
5. Editing a track
This section will explain how to edit track information. Set the artist name or genre for a track
so that you can retrieve if by entering this information when performing a search.
● Playback pauses while editing is in progress.
Adding a track
Recorded tracks can be added to a MY SELECTION play mode. Tracks cannot be added in
any other play mode.
Touch FUNC .
Touch EDIT .
● The Edit menu screen appears.
MUSIC
JUKE
Touch REGISTRATION (TRACK) .
Selecting the preferred playlist when adding a track
Touch a playlist.
Continue to the next page
101
How to operate MUSIC JUKE
Editing a track
Selecting the track to be added
Select the track to be added.
● See "Track search" (next page) for
information regarding track searching.
Touch ENTER .
● The track has been added to the
playlist.
●To add multiple tracks simultaneously, touch all of the relevant tracks.
●Touch an already selected track again to cancel the selection.
●Up to 99 tracks can be selected at one time.
102
Track search
Search for a preferred track from among multiple tracks.
When a track search is performed in the Edit menu screen, the following screen appears.
Touch a play mode.
● Touch TRACK to display the track
list screen.
Touch the preferred playlist.
● The track list screen is displayed.
Touch the preferred track.
MUSIC
JUKE
● Track list screen
Editing track information
It is possible to change the artist name, album name, track title, and genre.
Displaying the track edit screen
Touch FUNC .
Touch EDIT .
● The Edit menu screen appears.
Continue to the next page
103
How to operate MUSIC JUKE
Editing a track
Touch EDIT (PLAYLIST/TRACK) .
Touch TRACK .
Select the track you want to edit.
● See "Track search" (previous page)
for information regarding track
searching.
When 4 or more lists are located in the same play mode, touch
lists not currently displayed.
104
or
to show
Changing the track title
Touch TITLE in the track edit
screen.
● The character input screen appears.
● Track edit screen
Enter the title.
● See "Entering playlist name" (page
92) for information regarding entering
names.
Touch ENTER .
Touch ARTIST .
MUSIC
JUKE
Changing the artist
● The artist list screen appears.
Touch the preferred artist name.
● Touch NEW to register a new artist.
See "Entering playlist name" (page
92) for information regarding entering
names.
105
How to operate MUSIC JUKE
Editing a track
Changing the genre
Touch GENRE .
Touch a genre.
● Touch OFF to register without setting
a genre.
Touch ENTER .
Touch
106
or
to display different lists.
Deleting a track
Recorded tracks can be deleted.
The data deleted will differ depending on the selected play mode (playlist) or track.
Selected play mode
Selected track
Data that will be deleted
Track in a list
Selected tracks will be deleted from the list
only. The tracks (song data) will not be
deleted from the system and will still appear
in results if searched for in a different play
mode/playlist.
Only track
in a list
The selected playlist will be deleted. The
track (song data) will not be deleted from the
system and will still appear in results if
searched for in a different play mode/playlist.
Track in a list
Selected tracks (song data) will be deleted.
The tracks will not appear in results even if
searched for in a different play mode/playlist.
Only track
in a list
Selected playlist and track (song data) will be
deleted.
The tracks will not appear in results even if
searched for in a different play mode/playlist.
Playlist in
MY SELECTION
Other
playlist
MUSIC
JUKE
Touch FUNC .
Touch EDIT .
● The Edit menu screen appears.
Touch DELETE .
Continue to the next page
107
How to operate MUSIC JUKE
Editing a track
Touch TRACK .
Touch a track.
● See "Track search" (page 103) for
information regarding track searching.
Touch DELETE .
● The delete confirmation screen
appears.
Touch YES .
●To delete multiple tracks simultaneously, touch all of the relevant tracks.
●Touch an already selected track again to cancel the selection.
108
How to operate the DVD player
1. Before using the DVD player
This unit can output the high quality images and high quality digital sound of DVD videos. It is
also possible to switch between different languages recorded on the DVD video (dubbing,
subtitles, etc.), and with videos having several angles of the same scene recorded, the
preferred angle can be selected and played.
DVD video characteristics
About multiple languages
Some DVD discs have dialog recorded in several different languages, and the language can
be switched during playback in the same way as multilingual TV broadcasts.
This river, which runs through
the center of the town is...
Cette riviere, laquelle court au
travers le centre de la ville est...
About multiple angles
Some DVD discs have a single scene recorded from several different angles (multiple angle),
and the preferred angle can be switched during playback.
DVD
* Depending on the disc, multiple angles may not be recorded.
The angle of the image is changed.
This unit includes copyright protection technology used in accordance with US
patents and other intellectual property rights owned by Macrovision Corporation
and other entities. Use of this copyright protected technology requires approval
from Macrovision Corporation and the technology must not be used for audiovisual
purposes aside from general household use without special approval from
Macrovision Corporation. Modification and disassembly of this technology is
prohibited.
109
How to operate the DVD player
Before using the DVD player
About subtitles
Some DVD discs have subtitles recorded in several different languages, and the subtitles can
be switched during playback. The video can also be played without any subtitles displayed.
About discs
About playable discs
This unit conforms to NTSC color television methods, so please use discs that display "NTSC" on
the disc or package.
Playable disc types and their marks
110
Size/Playing surface
Maximum playing time
12cm/single-sided
single-layer
double-layer
<MPEG2>
133 min.
242 min.
12cm/double-sided
single-layer
double-layer
266 min.
484 min.
About region codes of playable discs
Some DVD discs display a 1 ("Region Code"). This mark (a number) shows the
geographical region where the disc can be played. This unit can only play discs with region
codes "1" or "ALL". If you play discs with any region code other than those shown above, a
"This disc cannot be played" message is displayed. It is possible that discs bearing no region
code can not be played as a result of geographical restrictions.
About marks displayed on discs
The following marks may be displayed on a DVD disc or its package.
Mark
Meaning
3
Shows number of voice tracks.
2
Shows number of subtitle languages.
Shows number of filmed angles.
16:9 LB
4:3
Shows available aspect ratio (television screen horizontal to
vertical ratio).
●"16 : 9" is wide screen, "4 : 3" is standard screen.
Shows playable region code.
ALL
1
DVD
3
●ALL indicates worldwide. A number indicates a specific
region code. "1" is the region number for North America.
The playing condition is determined by the creator of the DVD/software. Some
functions may not perform during operation because the unit is playing the disc
according to content specifications intended by the software creator. Be sure to
consult the explanatory material provided with the disc to be played.
111
How to operate the DVD player
Before using the DVD player
About DVD disc structures
Videos and tracks recorded on a DVD are divided into many segments.
Large segments are called "titles", and each title has a number ("title number"). Title segments
are further divided into smaller segments called "chapters", and each chapter has a number
("chapter number").
Chapter 1
Title 1
Chapter 2
Chapter 3
Chapter 1
DVD-Video
Title 2
Chapter 2
Chapter 3
Chapter 1
Title 3
Chapter 2
Chapter 3
Title number
112
Chapter number
How to operate the DVD player
The section below describes the flow for functions such as operation and search of images
and setting defaults for the DVD player.
Touch switches used to switch between the operation screens are shown below.
● DVD operation screen
● Title screen
SEARCH
BACK
DVD operation
screen
SET
BACK
BACK
DVD
● Menu operation screen
BACK
● Menu number search screen
NUMBER
ENTER
SETUP
● Default settings screen
113
How to operate the DVD player
2. How to use the DVD player
For safety reasons, DVDs can only be played when the ignition is switched to ON or ACC and
the vehicle is completely stopped with the parking brake applied. (Only sound is output if a
DVD is played while the car is in motion.)
SOURCE MENU
RECALL switch
Title number Chapter number
Playing time
PWR button
AUDIO CONT
button
SOURCE MENU
button
Chapter change/
Fast-forward
(rewind) button
Buttons off switch
Playback switch
Watching a DVD
Playback starts automatically when a DVD is inserted into the disc slot.
Press SOURCE MENU or touch the SOURCE MENU RECALL switch
when a DVD has been inserted.
Touch DVD .
● Playback will begin.
● To display the operation switches (touch switches), press AUDIO CONT or touch
the screen.
●Information for items such as touch switches will be displayed for about 6
seconds. Press AUDIO CONT or touch the screen to display again.
●Depending on the disc, automatic playback or playback may not function unless
a menu recorded on the disc is selected. (See "Operating the disc menu" on
page 117)
114
Operating the video
Playing the video
Touch
.
Fast-forwarding/rewinding
It is possible to fast-forward or rewind through the video being played.
Fast-forwarding/rewinding using the panel buttons
Press and hold
●
or
until you hear a beep.
(up) : Fast-forward
(down) : Rewind
If you hear a beep while rewinding (fast-forwarding), the deck has switched to the fastforward (rewind) mode and will continue until you remove your finger from the button.
Touch
or
.
DVD
Fast-forwarding/rewinding using the touch switches
● If you hear a beep while rewinding
(fast-forwarding), the deck has
switched to the fast-forward (rewind)
mode and will continue until you
remove your finger from the switch.
115
How to operate the DVD player
How to use the DVD player
Pausing the video
Touch
.
● While paused (
), briefly touch
for slow motion playback, or
for frame-by-frame playback.
Stopping the video
Touch
116
.
Operating the disc menu
It is possible to use the menu recorded on the disc.
Touch
screen.
in the DVD operation
Touch MENU or TOP MENU .
Touch
.
Touch
,
,
, or
to
select the video you want to play.
Touch ENTER .
Press PWR .
● Press PWR again to resume playback (audio only).
DVD
Turning off the DVD
Recorded menu items will differ by disc. The disc is played according to its content
so all functions may not be available.
117
How to operate the DVD player
How to use the DVD player
Searching for a desired chapter
It is possible to search for a particular video segment by title and chapter or by menu number
(number for divided segments).
Searching by chapter
Press
●
or
.
Chapter number
(up) : Selects next chapter
(down) : Selects previous chapter
Searching by title number
Touch SEARCH in the DVD
operation screen.
● The title number input screen will be
displayed.
Enter the title number by touching
,
, -10 , and +10 .
● Touch
or
to change the
title number in steps of one.
● Touch -10 or +10 to change the
title number in steps of ten.
Touch ENTER .
118
Title number
Searching by menu number
Touch
screen.
in the DVD operation
Touch
.
Touch NUMBER .
Enter the menu number by
touching
,
, -10 ,
and +10 .
● Touch
or
to change the
menu number in steps of one.
DVD
● The menu number input screen will be
displayed.
● Touch -10 or +10 to change the
menu number in steps of ten.
Touch ENTER .
119
How to operate the DVD player
How to use the DVD player
Changing the touch switch display
Display of the touch switches can be changed or turned off.
Turning off the touch switches
Touch OFF in the DVD operation
screen.
● Press AUDIO CONT or touch the
screen to display the touch switches
again.
Changing the touch switch display locations
Touch
screen.
in the DVD operation
Touch
.
Touch POSITION .
● The position of the touch switch will
move up or down as you touch the
screen.
120
Switching screen display/audio
It is possible to change the language for subtitles and audio, as well as, the display angle for
the video being played.
Changing the angle
When several angles of a scene are recorded on a disc, the angle can be switched.
Touch
screen.
in the DVD operation
Touch ANGLE when the multiple
angle mark is displayed.
Multi-angle mark
● The angle number will be displayed.
Touch ANGLE .
Angle number
DVD
● The angle number will change and the
angle of the video will be switched.
Each time ANGLE is touched, the angle will change in order from among the
angles recorded on the disc.
121
How to operate the DVD player
How to use the DVD player
Switching subtitle language
When subtitles in several languages are recorded on a disc, the subtitles can be switched.
Touch
screen.
in the DVD operation
Touch SUB TITLE .
● The subtitle number will be displayed.
Touch SUB TITLE .
Subtitle number
● The subtitle number will switch and the
subtitle language will change.
●Each time SUB TITLE is touched, the subtitle language will change in order
from among the subtitles recorded on the disc.
●Depending on the disc, it may only be possible to change subtitles in the top
menu.
122
Switching dubbed audio language
If several audio languages are recorded on a disc, the languages can be switched.
Touch
screen.
in the DVD operation
Touch AUDIO .
● The audio number and language will
be displayed.
Touch AUDIO .
Audio number and language
DVD
● The audio number will change and the
audio language will be switched.
●Each time AUDIO is touched, the audio language will change in order from
among the languages recorded on the disc.
Language 1
Language 2
Language…
●Depending on the disc, it may only be possible to change audio languages in the
top menu.
●The dts format is not supported by this deck, so no audio will be emitted if "dts
audio" is selected on a disc that enable it. In this case, select "Dolby Digital
audio", which should also be recorded on the DVD video.
●dts is a registered trademark of the US company Digital Theater Systems, Inc.
123
How to operate the DVD player
How to use the DVD player
Setting the DVD player
The language preferences for voices, subtitles and menu display used during DVD playback
can be set in advance. Optional display of the multiple angle mark, viewer restriction and other
functions can also be set.
Touch
screen.
in the DVD operation
Touch SET .
Touch SETUP .
● The SET UP screen will be displayed.
Touch the appropriate touch switch
to progress to the next page and
perform settings.
124
Touch switch
Function
Page
Sets the voice language for video playback.
See below
Sets the subtitle language for video playback.
Next page
MENU LANGUAGE
Sets the language of displayed menus.
page 127
ANGLE INDICATOR
Sets display/non-display of multiple angle mark.
page 128
Restricts the types of DVD videos that can be
played.
page 129
Sets screen size.
page 130
AUDIO LANGUAGE
SUB TITLE
PARENTAL SETTING
VIDEO OUT
Setting the audio language
The preferred language for video playback can be selected.
Touch AUDIO LANGUAGE in the
SET UP screen.
Touch the preferred language.
● Touch OTHER to set a language
other than those displayed on the
screen.
Touch OTHER in the AUDIO
LANGUAGE setting screen.
DVD
Input a code
Input a language code.
● For language codes see "Table of
language codes" on page 131.
Touch ENTER .
After changing settings in the SET UP screen, the DVD will stop if you press one of
the buttons that switch screens ( AUDIO CONT or SOURCE MENU )
without touching ENTER . Touch
in the operation screen to start playback
again. (See page 115)
125
How to operate the DVD player
How to use the DVD player
Subtitle language setting
The preferred subtitles for the video playback can be selected.
Touch SUB TITLE in the SET UP
screen.
Touch the preferred language.
● Touch OTHER to set a language
other than those displayed on the
screen.
● Touch OFF for playback without
subtitles.
Input a code
Touch OTHER in the SUB TITLE
setting screen.
Input a language code.
● For language codes see "Table of
language codes" on page 131.
Touch ENTER .
Language switching cannot be performed if the selected language is not recorded
on the disc.
126
Menu language setting
Allows selection of a preferred menu language from those recorded on the disc.
Touch MENU LANGUAGE
in the SET UP screen.
Touch the preferred language.
● Touch OTHER to set a language
other than those displayed on the
screen.
Input a code
Touch OTHER in the MENU
LANGUAGE setting screen.
Input a language code.
● For language codes see "Table of
language codes" on page 131.
DVD
Touch ENTER .
Language switching cannot be performed if the selected language is not recorded
on the disc.
127
How to operate the DVD player
How to use the DVD player
Setting display of multi-angle mark (angle selection mark)
The multi-angle mark can be set to display/not display during video playback.
Multi-angle mark
Touch ANGLE INDICATOR
in the SET UP screen.
● Touching the switch switches between
"ON" and "OFF" mode.
Touch ENTER .
Setting the multi-angle mark display to "ON" will display the multi-angle mark in the
upper right corner of the screen when multiple angles are available on the disc.
128
Viewer restriction setting
This function allows viewing restriction to be set so that discs with adult content or violence will
not be available to children. Viewer restriction can be set at different levels to match restriction
ratings.
Touch PARENTAL SETTING in
the SET UP screen.
Enter a pass code by touching one
number at a time.
Touch ENTER .
Touch the preferred restriction
level.
●Restriction cannot be set for discs that do not have a viewer restriction level
recorded.
●Be sure to enter a pass code number. If a number is not entered, setting viewer
restriction will not be possible.
●The pin code shown in the upper section will be displayed as [----] when a pin
code has not yet been set.
●Once the pass code has been set, the pass code will be required for subsequent
use of this function. Please do not forget the pass code. If you forget your pass
code, the default setting (no pass code set) can be restored by touching
CLEAR 10 times.
●Viewer restriction levels are classified in 3 types.
Level 1 . . . . . . . Plays only DVD software intended for children. (Playing of DVD
software intended for general audiences or adult audiences is
prohibited.)
Levels 2 - 7 . . . Plays only DVD software intended for children or general audiences. (Playing of DVD software intended for adult audiences is
prohibited.)
Level 8 . . . . . . . Plays all DVD software. (Factory setting)
DVD
Touch ENTER .
129
How to operate the DVD player
How to use the DVD player
Changing video output
Touch VIDEO OUT in the SET UP
screen.
● Each time the switch is touched, the
screen size changes in the order
shown below.
16 : 9
4:3
LETTER BOX
4:3
PAN & SCAN
● 16 : 9
The video is displayed at normal width. DVD software recorded in 4 : 3 size will be
displayed with black left and right edges or will be expanded to the left and right.
● 4 : 3 (letter box)
The video is displayed with black upper and lower edges.
DVD software recorded in 4 : 3 size will be displayed exactly at screen size (4 : 3).
● 4 : 3 (pan & scan)
The video is displayed with right and left edges cut off. DVD software recorded in 4 : 3
size will be displayed exactly at screen size (4 : 3).
Touch ENTER .
When another monitor such as a rear seat monitor is being used, the size of the
video being displayed in the rear seat monitor will differ according to the video
output size set by the deck (front).
There are no problems with using this function as long as the customer views
images privately in wide-screen format. However, if the images are compressed or
enlarged for viewing for any commercial or public purpose, it may infringe upon the
rights of the copyright holder under applicable copyright laws.
130
Table of language codes
These codes are used to specify the language for audio tracks, subtitles and on-screen menu
displays.
Language
Input
code
Language
Input
code
Language
1001
Japanese
0801
Hausa
1721
Quechua
0514
English
0809
Hindi
1813
Rhaeto-Romance
0618
French
0818
Croatian
1814
Kirundi
0405
German
0821
Hungarian
1815
Romanian
0920
Italian
0825
Armenian
1823
Kinyarwanda
0519
Spanish
0901
Interlingua
1901
Sanskrit
1412
Dutch
0905
Interlingue
1904
Sindhi
1821
Russian
0911
Inupiak
1907
Sangho
2608
Chinese
0914
Indonesian
1908
Serbo-Croatian
1115
Korean
0919
Icelandic
1909
Sinhalese
0512
Greek
0923
Hebrew
1911
Slovak
0101
Afar
1009
Yiddish
1912
Slovenian
0102
Abkhazian
1023
Javanese
1913
Samoan
0106
Afrikaans
1101
Georgian
1914
Shona
0113
Amharic
1111
Kazakh
1915
Somali
0118
Arabic
1112
Greenlandic
1917
Albanian
0119
Assamese
1113
Cambodian
1918
Serbian
0125
Aymara
1114
Kannada
1919
Siswati
0126
Azerbaijani
1119
Kashmiri
1920
Sesotho
0201
Bashkir
1121
Kurdish
1921
Sundanese
0205
Byelorussian
1125
Kirghiz
1922
Swedish
0207
Bulgarian
1201
Latin
1923
Swahili
0208
Bihari
1214
Lingala
2001
Tamil
0209
Bislama
1215
Laothian
2005
Telugu
0214
Bengali
1220
Lithuanian
2007
Tajik
0215
Tibetan
1222
Latvian
2008
Thai
0218
Breton
1307
Malagasy
2009
Tigrinya
Turkmen
0301
Catalan
1309
Maori
2011
0315
Corsican
1311
Macedonian
2012
Tagalog
0319
Czech
1312
Malayalam
2014
Setswana
0325
Welsh
1314
Mongolian
2015
Tonga
0401
Danish
1315
Moldavian
2018
Turkish
0426
Bhutani
1318
Marathi
2019
Tsonga
0515
Esperanto
1319
Malay
2020
Tatar
0520
Estonian
1320
Maltese
2023
Twi
0521
Basque
1325
Burmese
2111
Ukrainian
0601
Persian
1401
Nauru
2118
Urdu
0609
Finnish
1405
Nepali
2126
Uzbek
0610
Fiji
1415
Norwegian
2209
Vietnamese
0615
Faroese
1503
Occitan
2215
Volapuk
0625
Frisian
1513
Oromo
2315
Wolof
0701
Irish
1518
Oriya
2408
Xhosa
0704
Scots- Gaelic
1601
Panjabi
2515
Yoruba
0712
Galician
1612
Polish
2621
Zulu
0714
Guarani
1619
Pashto
0721
Gujarati
1620
Portuguese
DVD
Input
code
131
How to operate the VTR
1. How to use the VTR
Video tapes can be played by connecting a commercially available VTR deck. For safety
reasons, videos can be played only when the ignition is switched to ON or ACC and the
vehicle is completely stopped with the parking brake set. (If the VTR mode is activated while
the vehicle is in motion, only the audio will be played.)
PWR button
SOURCE MENU RECALL switch
AUDIO CONT
button
SOURCE
MENU
button
Viewing the VTR
Press SOURCE MENU or touch the SOURCE MENU RECALL switch.
Touch VTR .
● The VTR screen will be displayed.
● Press AUDIO CONT or touch the screen to display the VTR operation screen.
Switching to the VTR setting screen
Switch to the VTR setting screen in VTR mode to perform the following operations.
● To adjust sound quality (DSP, EQ, POS etc.)
● To switch screen mode (Wide mode)
Touch SET .
● Touch BACK to return to the VTR operation screen.
●After switching to the VTR operation screen, touch switches will be displayed for
about 6 seconds. Pressing AUDIO CONT will display them again.
●The VTR operation screen can be displayed by touching the screen, even when
the VTR is playing.
●It is possible that the image may not be displayed correctly depending on the
connected devices.
132
Turning off the VTR mode
Press PWR .
● Press PWR again to resume playback.
● Press SOURCE MENU and then touch VTR to resume playback of the video
VTR
that was being played before the power was turned off.
133
How to use the Card remote control
1. How to use the card remote control
The card remote control is sold separately. You can obtain a card remote from your local
retailer.
●Be sure to properly store the remote control when not in use. An improperly
stored remote control could shift during braking or cornering and interfere with
driving operation (for example, by becoming lodged under the brake pedal) and
cause an accident.
●Do not expose the remote control to extreme heat or direct sunlight, especially
when it is in the vehicle. Doing so could cause a fire.
Precautions when using the remote control
●Be careful when handling the control, especially because it is small and light.
Dropping or striking it may damage it, wear out the battery or cause a
malfunction.
●Keep the remote control free of moisture, dust and water. Do not subject it to
shock.
●Do not place the remote control unit where it will get hot, such as on the
dashboard or near a heater vent. Allowing the remote control unit to overheat
may warp its case or cause other problems.
●Do not operate the remote control unit while driving because doing so could
cause an accident.
●When using the remote control, point it directly at the remote control light
receptor.
●The light receptor may not operate correctly if it is exposed to bright light such as
direct sunlight.
●Be sure to press the [PWR] button on the main unit for more than two seconds to
shut it down before leaving the car, or the car battery may be run down. When the
main unit is shut down, the remote control will not work.
●Remove the batteries from the remote control unit whenever it is not to be used
for a long time.
●Store the remote control away from direct sunlight, extreme heat, and high
pressure. Exposure to these elements could result in warping of the casing,
battery rupture, or battery leakage.
Cleaning the remote control
●Use a dry cloth to keep the unit clean. If the remote control unit gets extremely
dirty, clean it with a cloth moistened in dilute liquid detergent. Do not use alcohol
or thinner; these compounds may damage the finish.
●In no event should benzine or thinner be used. These substances will damage
the case or finish.
134
PWR
button
MUTE
Remote-Control
light receptor
button
button
button
Turning the power on/off
When the power is turned on, the unit resumes whatever operation was being performed
when the power was turned off (CD, tuner, etc.)
Press PWR .
● The power turns on or off each time the button is pressed.
Adjusting the audio volume
Press
●
or
.
button: Increases the volume.
button: Decreases the volume.
Muting the volume
Remote
Control
Press MUTE to silence the volume or restore it instantly.
When the main unit is off, the remote control will not work.
135
How to use the Card remote control
How to use the card remote control
MODE
button
button
button
Switching playback modes
Press MODE .
● Press the button to switch modes in the following sequence:
AM
FM
CD
MP3
VTR
Music Juke
DVD
Memory Stick
CD Changer
How to play the tuner
Select the tuner mode first.
Selecting the FM/AM band
Press MODE .
Selecting a station (manually or automatically)
A short press of the button will allow manual station tuning.
Press
●
TUNE SEEK
.
button: Tunes to higher frequency stations.
button: Tunes to lower frequency stations.
136
Selecting preset stations
A total of six stations may be selected (preset tuning) out of those already set in memory
through the main unit. (See "Saving radio stations", on page 46)
●
PRESET CH
.
button: Select the next higher number preset button.
button: Select the next lower number preset button.
Remote
Control
Press
137
How to use the Card remote control
How to use the card remote control
BAND button
TRACK APS
DISC
button
button
How to play CDs
● Select the CD mode first.
Switching disc modes
Press BAND .
When two CD changers are connected, press BAND to change modes from the CD
Changer 1 to CD Changer 2.
The indicator will skip a changer or player that has no discs loaded.
Advancing to the next track or returning to the beginning of the track being played
Press
●
TRACK APS
.
button: Skips to the next track.
button: Returns to the beginning of the track being played. (Press repeatedly to
move to previous tracks.)
Skipping to the next or previous disc
Press
●
DISC
.
button: Selects the next higher number disc.
button: Selects the next lower number disc.
Hold
138
down to fast forward, or
to rewind through the track being played.
Replacing the battery
Keep batteries out of reach of children. If a child should accidentally swallow a
battery, consult a physician immediately.
Remote
Control
●Do not attempt to recharge dry-cell batteries. Doing so may cause the battery to
rupture and result in an injury.
●Do not use battery types other than specified or mix new and old batteries. Doing
so may result battery rupture or leakage of contaminants, and could cause injury.
●Pay close attention when inserting the battery to ensure that the positive and
negative terminals are aligned correctly. Incorrect placement could result battery
rupture or leakage of contaminants, and could cause injury.
●Replace worn batteries immediately. Worn batteries could leak contaminants
onto the surrounding area.
●When disposing of lithium dry-cell batteries, cover the positive and negative
terminals with electrical tape or another insulating substance and follow your
local regulations for disposal. Disposing lithium batteries along with metal or
other conductive materials could result in a short, causing a fire or explosion.
●Do not cause a battery short by heating or disassembling a battery, or exposing it
to fire or water. Battery rupture or leakage could result, causing a fire and/or
injury.
139
How to use the Card remote control
How to use the card remote control
To prevent accidents, store batteries out of reach of children. If a child swallows a
battery, consult a doctor immediately.
Use one CR2025 battery.
On the back of the remote control, pull out the
battery carrier with your fingernail while pressing
the locking knob on the battery slot cover toward
your right.
Remove the old battery, then place the new one
in the carrier with the
mark facing up.
Push in the carrier until it snaps into place.
Be extremely careful not to swallow the battery.
140
Unlock
For reference
1. Important Points
If one of these messages appears
If any of the following messages are displayed, check the unit while referring to the cause and
corrective action columns.
Cause
Corrective action
CD SEEK
The CD changer is searching for
discs when a magazine has been
inserted in the CD changer.
Wait until the unit has finished
identifying the type of disc.
CD DOOR OPEN
The door of the CD changer is
open.
Close the door of the CD changer.
CHECK DISC
The CD/MP3/DVD is dirty or has
been inserted upside down.
Clean the disc if it is dirty. Insert the
disc correctly if it is upside down.
NO DISC
NO CD
There is no disc in the CD/MP3/
DVD player or CD changer.
Load a music disc.
The CD/MP3/DVD player or CD
changer will not move for some
reason.
Eject the disc. *1
The temperature of the CD/MP3/
DVD player or CD changer has
become unusually high.
Wait a moment for the unit to cool
down. Do not perform any other
operations. *2
NO CD MAGAZINE
There is no magazine in the CD
changer.
Load a magazine.
CD OO CHECK
The OO spot in the CD changer
has a CD that cannot be read.
Check for a properly loaded music
CD.
PASS CODE INCORRECT
Displayed when the pass code has
been entered incorrectly.
Enter the correct pass code.
This Memory Stick is not
available.
The inserted Memory Stick type is
not supported.
Check that the Memory Stick is a
type supported by this unit. (See
page 22)
No Memory Stick.
An MG Memory Stick has not been
inserted.
Insert an MG Memory Stick.
No Music data.
There is no playable music data
recorded on the MG Memory Stick.
Insert an MG Memory Stick
containing playable music data.
Checking Memory Stick.
The Memory Stick is being
checked.
Checking the Memory Stick may
take a short while. Wait a moment
for the message to disappear
before using.
Please check Memory Stick.
The Memory Stick cannot be
played because of static electricity.
Wait a moment then re-insert and
attempt to play again.
CD ERROR
DVD ERROR
DISC ERROR
*1
If the unit still will not work after the disc is ejected, contact your local retailer.
*2
If this error occurs, wait a moment for the changer to cool down. When the temperature
inside the unit returns to normal, the message will disappear and playback will start. If
the message does not disappear after waiting for a long period, contact your local
retailer.
Continue to the next page
For reference
Messages
141
For reference
Important Points
142
Messages
Cause
This Memory Stick is not available.
You have tried to save data to the
hard disc from a Memory Stick not
supported by this unit.
Check that the Memory Stick is a
type supported by this unit.
(See page 22)
Corrective action
There are no playable files.
There is no playable music data on
the MG Memory Stick.
Check that the Memory Stick
contains recorded music data.
Memory Stick mode cannot be
turned on during recording.
You tried to switch to Memory Stick
mode during recording.
Stop recording and switch to
Memory Stick mode. (See page 81,
82)
Can not read disc due to guard.
You tried to play data protected by
playback restriction.
Try playback again after retrieving
the data.
No Music data.
You tried to switch to Music Juke
mode when it contains no recorded
data.
Switch to Music Juke mode after
data has been recorded in Music
Juke. (See page 81)
Recording is canceled. (HDD
capacity is full.)
The hard disc became full during
recording.
Try recording again after deleting
music data from the hard disc. (See
page 99, 107)
Can not record. (This CD is already
recorded.)
You tried to record a CD album
which has already been recorded.
A music CD cannot be recorded
twice. To record, first delete the
already recorded data, then try
again. (See page 99, 107)
Recording is canceled. (Time over)
The 300-minute limit for analog
recording has been reached.
Press ●REC again to resume
recording.
There are no completely recorded
tracks. CD playback will begin.
Digital recording has been started
and ended without a single track
being completely recorded.
To record, press ●REC again
(for at least one second).
Jumping occurred. Start recording
again.
Jumping occurred while track in
playback was being recorded.
Wait a moment. Start recording
again.
Wait a moment. No tracks have
been recorded yet.
You returned to CD mode after
starting recording without recording
any tracks. Recording has been
canceled and will start again from
the beginning.
Recording has started. Wait a
moment until the first track has
been recorded.
Can not record.
The CD you are trying to record is
protected.
Press ●REC to record. Analog
recording will begin.
Please carry out a recording start
after deleting a playlist. (Playlist is
full.)
No more playlists can be
automatically created in MUSIC
JUKE because the playlist limit has
been reached.
Try recording again after deleting a
playlist. (See page 99)
Please carry out a recording start
after deleting a track. (Track is full.)
No more music can be recorded in
Music Juke because the track limit
has been reached.
Try recording again after deleting a
track. (See page 107)
The number of playlists is full.
No more new playlists can be
created in Music Juke because the
playlist limit has been reached.
Try creating a new playlist again
after deleting an old one. (See
page 90, 99)
The number of tracks is full.
No more tracks can be added. The
playlist is full.
Try adding a track again after
deleting an old one. (See page
107)
Edit mode cannot be turned on
during recording.
You tried to perform editing during
recording.
Stop recording and perform editing.
(See page 81, 90)
Cause
Corrective action
An abnormality has been detected.
Turn the engine OFF (ACC OFF).
Recording has stopped.
(Abnormalities)
An abnormality has been detected.
Turn Audio OFF.
Preparing for MUSIC JUKE.
(Caution!)
Do not turn off the power.
You switched to MUSIC JUKE
mode, but MUSIC JUKE is still
being initialized.
Wait a moment for the message to
disappear before using.
Preparing for recording.
(Caution!) Do not turn off the
power, and do not eject DVD/
CD/Memory Stick.
The vehicle engine was turned
OFF (ACC OFF) then ON (ACC
ON) again during recording.
Wait a moment for the message to
disappear before using.
Recording has stopped.
(Overheating)
The temperature inside the hard
disc has become unusually high.
Wait a moment for the unit to cool
down. Do not perform any other
operations.
Recording has stopped.
(Cooling)
The temperature inside the hard
disc has become unusually low.
Wait a moment. Do not perform any
other operations until the unit
warms up.
Updating Gracenote CDDB.
(Caution!) Do not turn off the
power, and do not eject DVD/
CD/Memory Stick.
Data may be lost if the power is
turned off or media is ejected
during update.
Wait a moment for the message to
disappear before using.
It is already updated.
You tried to update a database that
is already fully updated.
The same update cannot be
performed twice for the same
database.
Updating has gone wrong.
The database update has failed.
Try updating again. If update
cannot be completed, contact your
local retailer.
HDD has stopped.
(Overheating)
The temperature inside the hard
disc has become unusually high.
Wait a moment for the unit to cool
down. Do not perform any other
operations.
HDD has stopped. (Cooling)
The temperature inside the hard
disc has become unusually low.
Wait a moment. Do not perform any
other operations until the unit
warms up.
There is no database to update.
There is no update data on the MG
Memory Stick.
Check that the Memory Stick
contains update data.
PARENTAL LOCK ENABLED
Viewing restrictions are enabled.
Change the setting for viewing
restrictions and start again. (See
page 129)
A function that has been disabled
was selected with the menu.
Follow the directions on the screen
and start again.
A function that cannot be used
while the vehicle is in motion was
selected.
Stop the vehicle.
INVALID CODE
A number not supported was input
for selecting a language code.
Input a valid language code.
REGION CODE ERROR
The region code (controlled region
for playback) of the disc isn't
acceptable.
Check that the DVD is a type
supported by this unit. (See page
111)
Requested chapter or title not
found
The selected chapter/title does not
exist.
Select a chapter/title that is on the
disc.
THIS FUNCTION IS CURRENTLY
DISABLED
For reference
Messages
MusicJuke has stopped.
(Abnormalities)
143
For reference
Important Points
Before asking for repairs
Slight differences in operation can sometimes be mistaken for malfunctions, so check the
following table before requesting any repairs.
If the following fail to solve the problem, contact your local retailer.
Symptom
Possible reason
Corrective action
The screen is dark for a brief period
when the power is turned on at low
temperatures.
This is a characteristic of LCDs.
This is not a malfunction. Wait for a
brief period.
The display is distorted for a brief
period after the power is turned on.
This is a characteristic of LCD
backlighting.
This is not a malfunction. The
display will stabilize after a brief
period.
No sound comes out.
Volume is poorly adjusted.
Press the volume switch and check
volume.
A speaker cord is disconnected.
Check the connections of the
speaker cords.
Volume is poorly adjusted.
Check the left/right volume
adjustments.
The adjusted audio quality is not
included in the radio broadcast or
disc.
Check by changing the radio
station or disc.
Power is not turned on.
Turn the vehicle ignition switch to
[ACC] or [ON].
A disc is already inserted and you
are trying to insert a second disc.
Eject the previously inserted CD/
DVD and insert the preferred CD/
DVD.
There is water condensation in the
deck.
Do not use the deck for a while and
then try using it again. (See page
19)
There is a large scratch or warp in
the CD/DVD.
Insert a different CD/DVD.
The CD/DVD is very dirty.
Clean the CD/DVD.
(See page 20)
The CD/DVD is upside down.
Insert the CD/DVD the right way
up. (See page 20)
The inserted CD/DVD type is not
supported.
Insert a CD/DVD that is supported
by the unit. (See page 19, page 20)
The inserted Memory Stick type is
not supported.
Insert a Memory Stick that is
supported by the unit.
(See page 22)
The CD changer is not completely
connected.
Check the connections to the CD
changer.
Digital recording is set to “Manual”.
Set digital recording to “Auto”. (See
page 79)
MP3 playing.
Cannot record MP3.
The screen has been turned off
with the screen OFF button.
Press
Sound comes out of only one side
(left or right, front or back).
Sound quality does not change
even after making adjustments.
A CD/DVD will not go into the deck.
A CD/DVD cannot be played.
Memory Stick playback not
possible
CD CHANGER1
CD CHANGER2
/
not
displayed on the screen.
Automatic recording does not start
after CD playback has begun.
Audio is output, but not video.
144
AUDIO CONT
NAVI . (See page 41)
or
Possible reason
Corrective action
The parking brake has not be set.
Set the parking brake.
The vehicle ignition switch has not
been turned on.
Turn the vehicle ignition switch to
[ACC] or [ON].
The connection cord is not
completely connected.
Check the connections to each
connection cord.
There is a point of light on the
display.
At least 99. 99% of the pixels on
the LCD panel are effective, but it is
possible that 0. 01% of the pixels
may not light or may stay lighted.
This is not a defect, so please use
the deck in this condition.
The Audio screen is distorted by
electrical noise.
Are electrical devices that generate
electrical noise being used in the
vicinity of the unit?
For example, devices generating
high voltage (such as those that
generate negative icons) or high
frequency electromagnetic waves
(cell phones or two-way radios)
Use such equipment as far away
from the unit as possible.
If such equipment continues to
affect the unit, even from a
distance, refrain from using such
equipment while the unit is in
operation.
Neither video nor audio is output.
For reference
Symptom
Audio is output, but not DVD video.
(With vehicle stopped.)
145
For reference
2. Other
Products equipped with Dolby Digital
Manufactured under license from Dolby Laboratories.
"Dolby" and the double-D symbol are trademarks of Dolby Laboratories.
Confidential Unpublished Works. ©1992-1997 Dolby Laboratories, lnc. All rights reserved.
Manufactured under license from Dolby Laboratories, Inc.
Dolby and the double-D symbol are trademarks of Dolby Laboratories.
Confidential Unpublished Works. ©1992-1997 Dolby Laboratories, lnc. All rights reserved.
Products equipped with Macrovision
This unit includes copyright protection technology used in accordance with US patents and
other intellectual property rights owned by Macrovision Corporation and other entities. Use of
this copyright protection technology requires approval from Macrovision Corporation and the
technology must not be used for audiovisual purposes aside from general household use
without special approval from Macrovision Corporation. Modification and disassembly of this
technology is prohibited.
146
For reference
3. Glossary
(Compact Disc Recordable)
CD-DA
(Compact Disc Digital Audio)
CD-RW
(Compact Disc ReWritable)
This is a disc that can only be recorded once.
Recorded data cannot be deleted. There are two
types of CD-R, one having a capacity of 650MB
(74 minutes of music), the same as a regular CD,
and the other having a capacity of 700MB (80
minutes of music).
This disc is the standard for recording and playing
of music data. One track is recorded with one
song, and a maximum of 74 minutes can be used
with the CD.
This disc uses a phase transformation method
that enables recording and deleting of data as
many times needed. The capacity is 700MB (80
minutes of music).
EQ (Equalizer)
This enables setting of emphasis on certain
sounds in the bass-treble range to achieve the
preferred tonal profile. Levels can be adjusted to
personal preference, enhancing enjoyment of the
music.
MP3
MP3 stands for MPEG Audio Layer III, the
standard format for audio compression
technology. MP3 can compress files to one-tenth
the original size because they compress inaudible
sounds found in areas of the spectrum beyond
human hearing.
(MPEG-1 Audio Layer-3)
LPCM
(Linear PCM)
This is an abbreviation for Linear Pulse Code
Modulation, a signal recording method used with
music CDs. A music CD is recorded at 44.1kHz/
16 bit, but a DVD is recorded at 48kHz/16 bit ~
96kHz/24 bit, enabling a DVD to be played with
higher sound quality than a music CD.
MPEG
This is an abbreviation for Moving Picture Experts
Group and is pronounced “empeg”. It is the
international standard for moving image
compression. With DVDs, this method is also
used to compress and record digital audio.
Copy Control CD
This is a CD that has controls for preventing
computers from copying and ripping (taking audio
information recorded on a compact disc and using
it as data to create a file).
UDF
(Universal Disc Format)
This is one format for use with optical discs not
reliant on the OS. It is used with media such as
DVD and CD-RW.
Continue to the next page
For reference
CD-R
147
For reference
Glossary
Track
SCMS
(Serial Copy
Management System)
Gracenote CDDB
The single division for a song on a music CD is
called a track.
With digital recording, the deterioration of audio
quality is very low. Therefore digital recording
equipment regulates, for the sake of copyright
protection, the using of a sound source copied
using a digital signal to be used to make further
copies of the same data. This is what SCMS
(Serial Copy Management System) does.
CDDB is a registered trademark of Gracenote.
The logos and logotypes of Gracenote,
Gracenote CDDB, and “Powered by Gracenote
CDDB” are trademarks of Gracenote. Music
Recognition Service and MRS are service marks
of Gracenote.
Music recognition technology and related data
provided by Gracenote and the Gracenote CDDB
Music Service. Gracenote is the industry standard
for music recognition technology and relevant
content delivery.
For more detail, see www.gracenote.com.
Viewing Restriction
This is a DVD video function that “Restricts
playing of discs that support viewing restrictions,
in accordance with the regulated levels of each
country.” Restrictions differ by DVD video and
may completely prevent playing of the video or
may skip or insert alternate scenes for extreme
scenes.
Title
This is the largest unit for divisions of video or
songs recorded on a DVD video. Usually a single
movie is treated as a title by video software and a
single album (or song) is treated as a single title
by music software. The consecutive numbers
attached to titles are called title numbers.
Chapter
This is a unit for divisions of video or songs
recorded on a DVD video, but it is a smaller unit
than a title. A single title is made up of several
chapters, and the consecutive numbers attached
to chapters are called chapter numbers.
Multi-Angle
148
This is one feature of DVD video, where
viewpoints of the same scene are changed by
recording from several different angles (camera
positions), allowing the viewer to select the
preferred angle.
This is one feature of DVD video, where the same
scene is recorded with several different
languages and subtitles, allowing the viewer to
select the preferred language.
Region code
DVD players and DVD discs have a region code
that enables playing by geographic marketing
regions, and a disc cannot be played if the
number recorded on the disc is not included in the
region codes of the player. See page xx for details
on region codes.
(Region code)
For reference
Multi-Language
149
For reference
4. Using Gracenote CDDB
By using this product you agree to be bound by the following terms of use.
This product contains technology and data provided by Gracenote of Berkeley, CA. Gracenote
technology ("Gracenote Embedded Software") enables disc recognition as well as retrieval of
music information such as name, artist, track and title ("Gracenote Data"). This technology is
incorporated in "Gracenote Database".
● You will not use Gracenote Data, Gracenote Database and Gracenote Embedded Software
except for personal and non-commercial purposes.
● You will only access Gracenote Data using standard end-user functions and the functions of
this product.
● You will not assign, copy, or transfer Gracenote Embedded Software or Gracenote Data to
any third party.
● You will not use or apply Gracenote Data, Gracenote Database, or Gracenote Embedded
Software for any purpose not expressly permitted herein.
● In the event that you violate any of the these restrictions, your non exclusive license to use
Gracenote Data, Gracenote Database, and Gracenote Embedded Software will be
terminated. In the event that your license is terminated, you will cease all use of Gracenote
Data and Gracenote Database.
● Gracenote retains all rights pertaining to Gracenote Data, Gracenote Database, and
Gracenote Embedded Software, including but not limited to property rights.
● Gracenote can, in it's own name, on the basis of this agreement, fully exercise its rights
against any offending user.
You are hereby licensed to use Gracenote Embedded Software and Gracenote Data.
Gracenote hereby disclaims all warranties and statements, express or implied, with regard to
the truth of Gracenote Data accuracy. Gracenote can modify data categories or delete data in
the event that Gracenote has judged items to represent a clear problem or that an update is
required. Gracenote does not guarantee that Gracenote Embedded Software is free of errors
nor does it guarantee that Gracenote Embedded Software functions will be uninterrupted.
Gracenote bears no obligation to provide you with any new extensions of, or additions to,
available data types. Nor does Gracenote bear any obligation to provide you with any
categories offered in the future.
Gracenote makes no warranty whatsoever, whether express or implied, including but
not limited to implied warranties of merchantability, fitness for a particular purpose and
non infringement of rights. Gracenote makes no warranty regarding the results
obtained by using Gracenote Component or any Gracenote Server. Gracenote does not,
under any circumstances, accept responsibility for damage, be it consequential or
incidental in nature, nor does Gracenote accept responsibility for lost benefit or
income.
150
For reference
5. Topic index
About screen and sound adjustment
[Regarding screen adjustment]
To make the audio operation screen or VTR screen easier to see
"Displaying the image adjustment screen" . . . . . . . . . . . . . . . . . . . . . . P40
To turn off the screen
"Turning the screen off" . . . . . . . . . . . . . . . . . . . . . . . . . . . . . . . . . . . . . . P41
To change the wallpaper
"Setting the wallpaper". . . . . . . . . . . . . . . . . . . . . . . . . . . . . . . . . . . . . . . P38
To set the screen to wide mode
"Switching screen mode". . . . . . . . . . . . . . . . . . . . . . . . . . . . . . . . . . . . . P42
[Regarding audio adjustment]
To change the volume
"Adjusting the main volume". . . . . . . . . . . . . . . . . . . . . . . . . . . . . . . . . . P27
To turn on/off the guide tone used at switch operation
"Setting the BEEP tone". . . . . . . . . . . . . . . . . . . . . . . . . . . . . . . . . . . . . . P27
To adjust sound quality
● To simulate Multichannel
"Setting Circle Surround II" . . . . . . . . . . . . . . . . . . . . . . . . . . . . . . . . . . . P30
● To change the acoustic environment of a performance
"Setting DSP (acoustics)" . . . . . . . . . . . . . . . . . . . . . . . . . . . . . . . . . . . . P31
● To adjust high and low sounds
"Adjusting EQ (equalizer)" . . . . . . . . . . . . . . . . . . . . . . . . . . . . . . . . . . . . P32
"Adjusting POS (Positioning selector)" . . . . . . . . . . . . . . . . . . . . . . . . . P34
● To adjust the left/right/front/rear balance
For reference
● To switch the sound image localization to match the position of passengers
"Setting the balance" . . . . . . . . . . . . . . . . . . . . . . . . . . . . . . . . . . . . . . . . P35
Continue to the next page
151
For reference
Topic index
● To adjust the MP3 sound
"Setting the harmonizer" . . . . . . . . . . . . . . . . . . . . . . . . . . . . . . . . . . . . . P37
● To add sharpness when listening at low/high volumes
"Setting LOUDNESS" . . . . . . . . . . . . . . . . . . . . . . . . . . . . . . . . . . . . . . . . P36
● To change the sub woofer settings
"Setting sub woofer" . . . . . . . . . . . . . . . . . . . . . . . . . . . . . . . . . . . . . . . . P36
About using AM/FM radio
To play the radio
"Listening to the AM/FM radio" . . . . . . . . . . . . . . . . . . . . . . . . . . . . . . . . P44
To search for a radio station
"Selecting radio stations" . . . . . . . . . . . . . . . . . . . . . . . . . . . . . . . . . . . . P45
To save radio stations
"Saving radio stations" . . . . . . . . . . . . . . . . . . . . . . . . . . . . . . . . . . . . . . P46
About using the CD player and CD changer
To play a CD
"Listening to a CD" . . . . . . . . . . . . . . . . . . . . . . . . . . . . . . . . . . . . . . . . . . P49
To select a song or CD
"Selecting a track" . . . . . . . . . . . . . . . . . . . . . . . . . . . . . . . . . . . . . . . . . . P50
"Selecting a CD" . . . . . . . . . . . . . . . . . . . . . . . . . . . . . . . . . . . . . . . . . . . . P64
When you don't know a song number or on what CD a song is located
"Searching for a track" . . . . . . . . . . . . . . . . . . . . . . . . . . . . . . . . . . . . . . . P50
"Searching for a track or CD from all CDs in the changer" . . . . . . . . . P65
To repeat the song or CD currently being played
"Repeating a track". . . . . . . . . . . . . . . . . . . . . . . . . . . . . . . . . . . . . . . . . . P50
"Repeating a track or CD" . . . . . . . . . . . . . . . . . . . . . . . . . . . . . . . . . . . . P65
To play songs in a different order
"Playing tracks in random order" . . . . . . . . . . . . . . . . . . . . . . . . . . . P51, 66
To fast-forward or rewind
"Fast-forwarding/rewinding" . . . . . . . . . . . . . . . . . . . . . . . . . . . . . . . . . . P50
152
About using the MP3 player
To play an MP3 file
"Playing MP3" . . . . . . . . . . . . . . . . . . . . . . . . . . . . . . . . . . . . . . . . . . . . . . P53
To select a music file or folder to listen to
"Selecting a music file" . . . . . . . . . . . . . . . . . . . . . . . . . . . . . . . . . . . . . . P53
When you want to return to a level or don't know the current level
"Changing display of the current level" . . . . . . . . . . . . . . . . . . . . . . . . . P54
To search for a music file
"Searching for a music file" . . . . . . . . . . . . . . . . . . . . . . . . . . . . . . . . . . . P54
To repeat the same music file
"Repeating the same music file" . . . . . . . . . . . . . . . . . . . . . . . . . . . . . . . P55
To play songs in a different order
"Playing music files in random order" . . . . . . . . . . . . . . . . . . . . . . . . . . P55
To change the file information
"About display of file information" . . . . . . . . . . . . . . . . . . . . . . . . . . . . . P56
To learn about MP3
"About MP3s" . . . . . . . . . . . . . . . . . . . . . . . . . . . . . . . . . . . . . . . . . . . . . . P57
To learn about making MP3 files
"Making and playing MP3 files". . . . . . . . . . . . . . . . . . . . . . . . . . . . . . . . P60
About using the Memory Stick player
To listen to Memory Stick data
"Listening to Memory Stick data" . . . . . . . . . . . . . . . . . . . . . . . . . . . . . . P61
To select a song
"Selecting a track" . . . . . . . . . . . . . . . . . . . . . . . . . . . . . . . . . . . . . . . . . . P62
To search for a song
"Searching for a track" . . . . . . . . . . . . . . . . . . . . . . . . . . . . . . . . . . . . . . . P62
To repeat the current song
"Playing tracks in random order" . . . . . . . . . . . . . . . . . . . . . . . . . . . . . . P63
For reference
"Repeating a track". . . . . . . . . . . . . . . . . . . . . . . . . . . . . . . . . . . . . . . . . . P62
To play songs in a different order
153
For reference
Topic index
About using MUSIC JUKE
To listen to MUSIC JUKE
"To listen to MUSIC JUKE". . . . . . . . . . . . . . . . . . . . . . . . . . . . . . . . . . . . P83
To learn about MUSIC JUKE
"Description of MUSIC JUKE" . . . . . . . . . . . . . . . . . . . . . . . . . . . . . . . . . P67
"About the structure of MUSIC JUKE" . . . . . . . . . . . . . . . . . . . . . . . . . . P67
To learn about recording
"About recording with MUSIC JUKE" . . . . . . . . . . . . . . . . . . . . . . . . . . . P76
"Notes regarding recording" . . . . . . . . . . . . . . . . . . . . . . . . . . . . . . . . . . P76
● To learn about recording possible in Audio mode
"About sources and recording styles that allow recording" . . . . . . . . P76
● To switch recording settings
"Setting recording method" . . . . . . . . . . . . . . . . . . . . . . . . . . . . . . . . . . . P78
To learn about databases
"About databases" . . . . . . . . . . . . . . . . . . . . . . . . . . . . . . . . . . . . . . . . . . P69
To learn about Auto-titling
"About Auto-titling" . . . . . . . . . . . . . . . . . . . . . . . . . . . . . . . . . . . . . . . . . P70
To update the title database
"About updating the database" . . . . . . . . . . . . . . . . . . . . . . . . . . . . . . . . P73
To display the hard disc capacity
"Checking hard disc capacity" . . . . . . . . . . . . . . . . . . . . . . . . . . . . . . . . P74
To record in MUSIC JUKE
● To automatically record a CD album
"Automatically recording a CD during playback" . . . . . . . . . . . . . . . . . P81
● To start recording during CD playback
"Recording preferred tracks (songs) from a CD" . . . . . . . . . . . . . . . . . P82
● To record from other audio modes
"Recording from sources other than a CD" . . . . . . . . . . . . . . . . . . . . . . P82
154
To edit a playlist
● To create a new playlist
"Creating a playlist" . . . . . . . . . . . . . . . . . . . . . . . . . . . . . . . . . . . . . . . . . P90
● To add a new artist to a list
"Changing the artist" . . . . . . . . . . . . . . . . . . . . . . . . . . . . . . . . . . . . . . . P105
● To edit a playlist you already created
"Editing a playlist name" . . . . . . . . . . . . . . . . . . . . . . . . . . . . . . . . . . . . . P93
● To delete a playlist
"Deleting a playlist" . . . . . . . . . . . . . . . . . . . . . . . . . . . . . . . . . . . . . . . . . P99
● To reorder playlists/tracks
"Switching playlist order" . . . . . . . . . . . . . . . . . . . . . . . . . . . . . . . . . . . . P97
To edit a track (song)
● To add a track (song) to a playlist you already created
"Adding a track" . . . . . . . . . . . . . . . . . . . . . . . . . . . . . . . . . . . . . . . . . . . P101
● To edit an already recorded track (song)
"Editing track information" . . . . . . . . . . . . . . . . . . . . . . . . . . . . . . . . . . P103
● To delete a track (song)
"Deleting a track" . . . . . . . . . . . . . . . . . . . . . . . . . . . . . . . . . . . . . . . . . . P107
● To update information
"Retrieving title information from the database" . . . . . . . . . . . . . . . . . . P95
To select a track (song)
"Selecting with track selection (track start point) button" . . . . . . . . . . P84
"Selecting with Play mode/Playlist change switch" . . . . . . . . . . . . . . . P85
To search for a track (song)
"Searching for a track (song) from a playlist" . . . . . . . . . . . . . . . . . . . . P87
"Searching for a playlist from a play mode" . . . . . . . . . . . . . . . . . . . . . P87
"Repeating the current track" . . . . . . . . . . . . . . . . . . . . . . . . . . . . . . . . . P88
"Repeating the current playlist" . . . . . . . . . . . . . . . . . . . . . . . . . . . . . . . P88
To play songs in a different order
For reference
To repeat the playlist or track (song) currently being played
"Play tracks in current playlist in random order" . . . . . . . . . . . . . . . . . P88
"Playing all tracks recorded in MUSIC JUKE in random order" . . . . . . P88
155
For reference
Topic index
About using the DVD player
To play a DVD video
"Watching a DVD" . . . . . . . . . . . . . . . . . . . . . . . . . . . . . . . . . . . . . . . . . . P114
To learn about discs
● To learn about the marks displayed on discs and packages
"About marks displayed on discs" . . . . . . . . . . . . . . . . . . . . . . . . . . . . P111
● To learn about discs that can be played
"About playable discs". . . . . . . . . . . . . . . . . . . . . . . . . . . . . . . . . . . . . . P110
● To learn about disc structures
"About DVD disc structures" . . . . . . . . . . . . . . . . . . . . . . . . . . . . . . . . . P112
To operate the menu recorded on a disc
"Operating the disc menu". . . . . . . . . . . . . . . . . . . . . . . . . . . . . . . . . . . P117
To operate the video being played
"Operating the video" . . . . . . . . . . . . . . . . . . . . . . . . . . . . . . . . . . . . . . . P115
To select/search for a video
"Searching by chapter" . . . . . . . . . . . . . . . . . . . . . . . . . . . . . . . . . . . . . P118
"Searching by title number". . . . . . . . . . . . . . . . . . . . . . . . . . . . . . . . . . P118
"Searching by menu number" . . . . . . . . . . . . . . . . . . . . . . . . . . . . . . . . P119
To change the display of touch switches
"Changing the touch switch display locations". . . . . . . . . . . . . . . . . . P120
To change subtitles, audio or the video angle
"Changing the angle" . . . . . . . . . . . . . . . . . . . . . . . . . . . . . . . . . . . . . . . P121
"Switching subtitle language" . . . . . . . . . . . . . . . . . . . . . . . . . . . . . . . . P122
"Switching dubbed audio language" . . . . . . . . . . . . . . . . . . . . . . . . . . P123
156
To set the player
"Setting the audio language". . . . . . . . . . . . . . . . . . . . . . . . . . . . . . . . . P125
"Subtitle language setting" . . . . . . . . . . . . . . . . . . . . . . . . . . . . . . . . . . P126
"Menu language setting" . . . . . . . . . . . . . . . . . . . . . . . . . . . . . . . . . . . . P127
"Setting display of multi-angle mark (angle selection mark)" . . . . . . P128
"Viewer restriction setting" . . . . . . . . . . . . . . . . . . . . . . . . . . . . . . . . . . P129
"Changing video output" . . . . . . . . . . . . . . . . . . . . . . . . . . . . . . . . . . . . P130
To use the VTR
"How to use the VTR" . . . . . . . . . . . . . . . . . . . . . . . . . . . . . . . . . . . . . . . P132
When something isn't clear
When you don't understand a screen message
"If one of these messages appears" . . . . . . . . . . . . . . . . . . . . . . . . . . . P141
When you think the deck may have a problem
For reference
"Before asking for repairs" . . . . . . . . . . . . . . . . . . . . . . . . . . . . . . . . . . P144
157
For reference
6. Index
A
Adjusting the main volume ....................... 27
Adjusting sound quality...........................28
ANGLE..................................................121
AUTO.P ..................................................46
B
BRIGHT ..................................................42
C
CD-R (CD-Recordable)...........................19
CD-RW (CD-ReWritable)........................19
M
Multi-angle mark................................... 121
N
Nighttime display .................................... 40
NORMAL mode ...................................... 43
P
POS (position selector) ............................ 34
R
Circle Surround II....................................30
RAND ............................. 51, 55, 63, 66, 88
COLOR ...................................................42
RPT ................................ 50, 55, 62, 65, 88
CONT......................................................24
CONTRAST ............................................42
D
S
Saving radio stations .............................. 46
SCAN ............................. 50, 54, 62, 65, 87
Daytime display ......................................40
Setting LOUDNESS ............................... 36
DISC RAND ............................................66
Setting the BEEP tone............................ 27
DISC RPT ...............................................65
Switching dubbed audio language ....... 123
DISC SCAN ............................................65
Switching subtitle languages ................ 122
DSP ........................................................31
E
Editing a playlist......................................90
Editing a track .......................................101
H
HOME .....................................................54
How to use the card remote control......134
How to use the AM/FM radio ..................44
How to use the CD changer....................64
How to use the CD player.......................49
How to use the DVD player ..................114
How to use the Memory Stick player ......61
How to use the MP3 player.....................52
How to use MUSIC JUKE .......................83
158
How to use the VTR ............................. 132
T
TINT ....................................................... 42
Turning the screen off ............................ 41
V
Volume balance...................................... 35
VOLUME button ..................................... 27
W
Wallpaper (background) ......................... 38
WIDE 1 mode ......................................... 43
WIDE 2 mode ......................................... 43
WIDE 3 mode ......................................... 43
Woofer.................................................... 36
159
For reference
160
Please retain this booklet and write in the serial number of your AVN5495 for identification.
The serial number is labeled or stamped on the chassis.
090002-27800700 0503C(N)