1
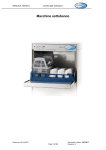
Installation & Operators Manual
The Classeq Pass Through Range
Part number 902.0005
Revision E Jan 2012
Language English
HYDRO 857
HYDRO 957
Service
℡
0844 2245 245
[email protected]
Spares
℡
0844 2245 252
[email protected]
Sales
℡
0844 2245 249
[email protected]
www.classeq.co.uk
Installation and Operation instructions
For pass through range of commercial glass & dishwashers.
Section
Title
Page(s)
1
Safety instructions
1
2
Your Classeq appliance
2
3
Installation
2-4
4
Commissioning
5-6
5
Operation
7-9
6
Cleaning
10 - 11
7
Trouble shooting
11 - 13
8
Decommissioning
14
Useful Contact Details
www.classeq.co.uk
Service
℡
0844 2245 245
[email protected]
Spares
℡
0844 2245 252
[email protected]
Sales
℡
0844 2245 249
[email protected]
TO HELP WHEN CONTACTING PLESE QUOTE THIS
SERIAL NUMBER
1.0
Safety instructions
1.1
Warning :
CAREFULLY READ THESE INSTRUCTIONS, BEFORE INSTALLING AND
OPERATING THIS APPLIANCE.
PRIOR TO REMOVAL OF ANY EXTERIOR PANELS, ENSURE THE
MACHINE IS ISOLATED FROM THE ELECTRICAL SUPPLY
INCORRECT INSTALLATION, ADAPTATIONS OR ALTERATIONS
COULD RESULT IN INJURY OR DAMAGE TO PROPERTY.
MALICIOUS DAMAGE, DAMAGE DUE TO NEGLIGENCE, OR FAILURE
TO COMPLY WITH THESE INSTRUCTIONS AND LOCAL LEGISALTION,
OR UNAUTHORISED TAMPERING WILL INVALIDATE ANY WARRANTY
AND RELIEVE THE MANUFACTURER OF ALL LIABILITY
DAMAGE CAUSED DUE TO THE LACK OF , OR INCORRECT USE OF A
WATER SOFTENER, OR LIMESCALE DAMAGE WILL NOT BE COVERED
BY THE MANUFACTURES WARRANTY
EACH DAY ALLOW MACHINE TO HEAT BEFORE FIRST WASH CYCLE
CHILDREN SHOULD BE SUPERVISED TO ENSURE THAT THEY DO NOT
PLAY WITH, OR OPERATE THE APPLIANCE
1.2
Installation :
Installation should only be carried out by a ‘Classeq’ approved technician,
and in accordance with current regulations and within our instructions.
1.3
Modification :
‘Classeq’ reserves the right to modify either the appliance or the contents of
these instructions without notice.
1.4
Operation :
The appliance should only be used by a trained operator as instructed in
section 5 of this manual.
1.5
Failure / malfunction :
In the event of a failure / malfunction, the mains electrical and water supplies
MUST be isolated at the wall and not just at the machine.
1.6
Repairs and spare parts :
The appliance must only be repaired by a ‘Classeq’ approved technician,
using genuine ‘Classeq’ spare parts.
Please contact :
Service
℡
0844 2245 245
[email protected]
Spares
℡
0844 2245 252
[email protected]
Page 1
2.0
2.1
Your Classeq appliance
Unpacking :
Use suitable means and protective equipment to avoid injury whilst unpacking
and handling the appliance. Remove all outer packaging and the protective
film from the outer panels of the appliance prior to installation.
Ensure all packing materials are disposed of in accordance with local and
national regulations.
2.2
Items included within appliance:
•
4 x Adjuster feet & associated screws
•
2 x Baskets
•
1 x Cutlery basket
•
1 x Water inlet hose
•
2 x Primary filters
•
1 x Drain plug (Gravity drain machines only)
•
2 x Bottle weights (if applicable for Rinse Aid and Detergent tubes)
•
1 x Installation and Operation Instructions (Must be left with the customer)
•
1 x Warranty card (Must be left with the customer)
3.0
Installation
3.1
The site :
While removing the machine from its transit pallet, attach the 4 feet provided
to the underside of the base (using the associated screws), ensure all screws are
tight and each of the 4 feet are secure prior to installing the appliance.
Ensure that there is sufficient space for the installation, servicing and easy
access to all mains isolator switches / valves (i.e. electricity and water).
Ensure that the surface the appliance is going to be installed onto is
adequately stable and capable of supporting the appliance during normal
operation, listed below are the approximate machine weights when fully laden
during normal operation.
Once installed ensure the appliance is stable, with its weight being distributed
equally on the 4 feet, also ensure the appliance does not tilt more than 3° in
any direction. Any adjustment required should be made by the feet now
attached to the appliance
Dimensions (mm)
Hydro 857
&
Hydro 957
Machine
Page 2
‘A’ = Width
630
‘B’ = Depth
720
‘C’ = Height (hood open)
1890 - 1940
‘C’ = Height (hood closed)
1470 - 1520
Machine fully loaded weight
130kg
Operating noise levels
<70db
C
B
A
3.2
Connections :
All mains connections are made at the rear of
the appliance
D = Mains electrical supply lead
E = Earth bonding / Equi-potential stud
E
F = Water supply connector (G 3/4”)
D
G = Drain / waste water hose
G
F
To aid both installation and connection of the appliance, ‘Classeq’
recommends the following hand tools are used.
Recommended hand tools
3.3
7mm - Spanner / nut runner / socket
Wire cutters
Electric screw driver (small)
Spirit level
Electrical connection :
All electrical connections MUST be carried out by an authorised
technician and in accordance with local regulations.
As a minimum ‘Classeq’ recommends that the following standards are
maintained :
•
All appliances are connected via a residual current device (R.C.D.)
or earth leakage protection device.
•
EN 60204
Supply isolator switch must have all pole separation of more than 3mm.
•
EN 60335
The appliance must be connected to a equi-potential conductor
, the
connection stud is located at the rear of the appliance (a suitable ring
terminal shall be required), this is in addition to the earthed electrical supply.
Prior to connecting the appliance, ensure that the voltage and the supply
fuse complies with the rating plate on the appliance.
If the supply cable is damaged, it must be replaced by a cable or cord
assembly supplied by Classeq, or its service agents, or to the following
Machine rating
Cable type
220-240V / 1N~ / 32A
PVC 3G 4.0
220-240V / 3N~ / 13A
PVC 5G 2.5
220-240V / 1N~ / 17A
PVC 5G 2.5
380-415V / 3N~ / 22A
PVC 5G 6.0
Temp.
rating
Length
of cable
80°C
2.75m
minimum
Conform to
IEC 60335-2-58
&
IEC 60227 types 56 & 57
For electrical rating of appliance refer to rating plate located on appliance
or in this manual.
Page 3
3.4
Water connection :
The appliance comes with a water supply hose requiring a G¾” (¾” BSP) male
threaded connection at the mains water supply, upon installation and
commissioning all water joints must be checked for leaks.
New hoses supplied are to be used. Old existing, defective or damaged water
supply hoses are NOT to be used when installing the appliance.
Commercial appliance wash results will be effected by external conditions such
as incoming water temperature, pressure, harness and choice of chemicals.
For the longevity of any water related devices and to ensure you get consistently
good results it is essential your machine is either fed from a soft water supply , or
your Classeq appliance is connected to an appropriate water softener.
IMPORTANT - All supplier warranties are void if lime scale is present within
an appliance.
FOR ADVISE on water softeners and appropriate chemicals, please contact :
℡
Sales
3.4.1
0844 2245 249
[email protected]
Water supply restrictions :
Water supply constraints must be adhered to :
Incoming water temperature
•
•
•
4°c minimum
55°c maximum
Supply water dynamic pressure
•
•
•
•
•
0 to 2 bar (0 to 200 kPa)
Rinse booster pump required
2 to 4 bar (200 to 400 kPa)
No modifications required
4 to 6 bar (400 to 600 kPa)
Flow restrictor required
6 bar plus (600 kPa plus)
Pressure reducing valve required
If the above requirements are not adhered to, the performance of the appliance
will be impaired
3.4.2
Drainage systems
All appliances require a Ø40mm (1 1/2”) standpipe, appliances are available with pumped or
gravity drain, they must all be installed onto either a running / ‘P’ trap to ensure hygiene:
Page 4
•
Drain pump appliances; flexible waste hose must be
securely attached to waste outlet on underside of appliance. Gravity drain appliances this will be already
attached
•
Waste hose must be a close / tight fit into the drain
standpipe to reduce odours from the drain system.
•
To ensure correct drainage, the height the sites drain is
from the floor / surface the machine sits upon MUST be
within the following.
0 to 300mm - Gravity drain machines
0 to 600mm - Drain pump machines
4.0
4.1
Commissioning
Rinse aid & detergent :
Chemical pump(s) are located behind the front lower panel,
prior to removing any panels all electrical supplies MUST be
isolated. An 10mm spanner is required for this operation.
A coil of PVC hose is attached to each chemical pump, un-coil
PVC hose and feed through the hole at the rear of the base of
the machine.
After to feeding the PVC hose into the chemical bottle, push
the bottle weight supplied onto the end of each PVC hose.
Ensure the correct chemical tubes now go to the corresponding chemical
bottles. (i.e. rinse aid hose into rinse aid bottle).
WARNING : Only rinse aids and detergents developed for commercial
glass and dishwashers are to be used, rinse aids must be suitable for water
temperatures down to 40°C.
For more information, please contact :
℡
Sales
4.1.1
0844 2245 249
[email protected]
Priming of Rinse aid & Detergent :
This procedure is only required when commissioning the machine and not
in normal operation
•
Ensure the machine is empty of water
•
Switch the water supply OFF
•
Now switch the machine ON at both the mains supply and at the
fascia for 90 seconds only
•
Now switch the machine at the OFF at the fascia
•
Turn the water supply ON
The rinse aide will now be primed, the machine can now be switch ON and
allowed to fill & heat as normal.
4.1.2
Chemical dosage :
Chemical doses are pre-set, however they can be adjustment to suit the
Individual sites requirements, such adjustment is made by turning an adjuster
screw on each chemical pump.
Page 5
4.1.2
Chemical dosage (cont)
The chemical pumps are located behind the front lower panel.
Detergent
Rinse
aid
1
5
Adjustments are made by rotating the adjuster
screw in the front of the pumps
+ Increase dosage, rotate screw clockwise - Decrease dosage, rotate screw anticlockwise
4.2
Rinse & wash tank temperatures :
The water temperatures on ’Classeq’ range of machines are adjustable, but
have been preset, and should never be adjusted above these temperatures.
Machine type
Dishwashers
4.4
Temperatures
Rinse water
Wash water
80°c
55°c
Demonstration :
‘Classeq’ recommends that prior to leaving the site / installation, the installer
demonstrates the following to the end user, as this will ensure the appliance is
correctly used
•
What to do in case of an emergency, i.e. how to isolate the mains
electricity and water (see section 1).
•
Switching the appliance on.
•
Operating the appliance.
•
Draining down.
•
Switch the appliance off.
•
Clean the appliance, including removal and replacement of all filters.
•
Replenishing and priming of rinse aid and detergent.
Upon completion of the installation and commissioning of the appliance,
this manual MUST be left with the end user.
Page 6
5.0
5.1
Operation
Machine description :
The design of commercial glass and dishwashing machines differ from
their domestic versions as they are designed to run nearly continually for
many hours.
Commercial appliance, wash results will be effected by external
considerations such as incoming water temperature, pressure, hardness
and choice of chemicals
For longevity of any water related devices and to ensure you get
consistently good results it is essential that your machine is either fed
from a soft water supply or that your Classeq appliance is connected to an
appropriate water softener.
5.2
Controls :
Prior to switching the machine ON 1 , ensure that you are familiar with
the controls on the front fascia of the appliance and the location of the
isolator for mains electricity and water supply.
1
2
3
4
1
ON / OFF switch
2
ON / OFF lamp
3
Heating lamp
4
Short cycle lamp
5
Cycle lamp
6
Short cycle switch
HYDRO 857
5
6
If AMBER = Heating lamp
If GREEN = Ready lamp
Note !
Appliances fitted with a drain pump, the Cycle switch and lamp double
as the drain down switch and lamp
If in doubt please contact ’Classeq’ for advise.
Please contact Classeq Technical for advice and assistance :
Technical support
[email protected]
Page 7
5.3
Switch the machine on :
Ensure that both the water and electrical supply are connected and switched on,
then depress the ‘ON/OFF’ switch 1 located on the fascia of the machine.
The machine will now automatically fill and heat, during this process the hood
must remain closed, allowing the process to be completed quickly.
5.4
Machine ready to operate :
It is IMPORTANT after switching the appliance on each day, to allow 25 minutes
before starting the first wash cycle; regardless of the fact that light 3 may
already be illuminated.
The appliance is designed to start a cycle regardless of temperature, it will then
extend the cycle to ensure the correct temperatures are achieved, therefore each
cycle may vary in length if the appliance is not allowed to recover its
temperatures
5.5
Starting a cycle :
To start a cycle, open the hood, for a minimum of 5 seconds, load the first
basket, ensuring that bottom and top arms rotate freely
Close the hood, the cycle will now start, during the cycle the
‘Cycle’ lamp 5 will remain illuminated.
Once the ‘Cycle’ lamp 5 has gone out (at the end of the cycle)
open the door and remove the basket, then reload the machine
and repeat as required
5.6
Draining :
During normal operation your appliance will automatically drain away any
excess water.
It is very important the machine is drained down at the end of each working
day and the door is left open to allow drying.
The machine should never be left full of water if you are switching the
machine off.
Gravity drain.
Page 8
•
Switch appliance OFF at fascia 1 .
•
Remove drain plug from wash tank.
•
You appliance should now drain under gravity.
•
Once completed replace the drain plug and filters.
5.6
1
Draining (cont.) :
2
3
4
HYDRO 857
5
6
Drain pump appliances
•
•
•
Switch appliance OFF at fascia 1 .
Open the hood, wait for the blue light 4 to go out, then close the
hood
The ‘Cycle’ lamp 5 will remain illuminated while the drain cycle is
in progress (3 minutes), once completed the ’Cycle lamp will go out.
•
DO NOT open the hood while in the drain down cycle
•
•
DO NOT isolate the appliance while in the drain down cycle
Once fully drained the ‘Cycle’ lamp 5 has gone out isolate both the
mains electrical and water supplies at the wall
Note !
Once empty ‘Classeq’ recommends that the mains water and electricity supplies
are isolated at the wall and the machine be cleaned as instructed in section 6 of
this manual
For hygiene reasons it is recommended that once the
appliance has been drained that the door is left open to
assist in natural drying of the wash chamber
Page 9
6.0
Cleaning
6.1
Prior to cleaning :
Switch off and isolated electrical supply before cleaning the
appliance
WARNING
DO NOT use cleaning agents that contain CHLORINE,
BLEACH or HYPOCHLORITE.
DO NOT use STEEL WOOL, WIRE BRUSHES or any other
abrasive materials.
DO NOT jet wash or hose pipe the appliance down either
internally or on the exterior
6.2
Internal cleaning :
Remove the wash and rinse arms from the appliance,
once removed wash in warm soapy water, ensuring
all debris are removed, before reassembling the arm
Remove all the filters from within the appliance and again wash in warm
soapy water, ensuring all debris are removed.
WARNING
Before cleaning the wash chamber, ensure all sharp items,
such as broken glass or other items which could cause injury
are removed carefully
Now wipe the inside of the wash chamber ensuring any
debris are removed and the chamber is clean. Reassemble all
filters and wash arms.
Page 10
6.3
Exterior cleaning :
Wipe the exterior of the appliance with a damp sponge (NOT
WET)
Once dry, clean using a STAINLESS STEEL cleaning agent
If you wish to purchase stainless steel cleaning agent, please
contact :
Classeq Spares :
Telephone : 0844 2259252
7.0
Email: [email protected]
Trouble shooting
•
Before placing a service call , please check the following:
•
Check the appliance is connected to the mains water and electricity
supply and both are turned on.
•
Check levels of chemicals within the rinse aid and detergent bottles.
•
Check the drain / stand pipe is correct for the appliance (refer to
section 3.3.2 of this manual).
NOTE
In the event of a service call being made under Warranty, and it is
found that the fault(s) are due to non-observance of instructions in
this manual, the call will be charged at current rates.
7.1
Appliance does not fill :
Appliance does not start :
Appliance does not rinse :
•
Check water supply is turned ON.
•
Check water supply hose is not trapped or kinked.
•
Check that the appliance is switched ON.
•
Drain appliance fully, then try again to fill the machine, drain as per
instructions 5.6 of this manual..
Page 11
7.2
7.3
7.4
7.5
Page 12
Appliance fills slowly :
•
Check water supply tap is fully open.
•
Check water supply pressure, should be above 2 bar, if not ask
your dealer to install a booster pump to increase water pressure.
•
Check and clean rinse jets (located on the wash arms within the
appliance).
•
Check water supply hose is not trapped or kinked.
Appliance not heating :
•
Drain appliance fully, then try again to fill the machine, drain as per
instructions 5.6 of this manual..
•
Check the temperature of the mains water, as variations in water
temperature will affect the heating of the appliance.
•
Check that the wash chamber is full of water.
Appliance not draining :
•
Check and clean all filters within the appliance.
•
Check that the stand pipe / drain is not clogged / blocked.
Poor wash results :
•
Check and replenish chemicals, ensure they are a good quality, if
required check with your dealer / agent.
•
Check and clean wash and rinse jets on wash arm assembly.
•
Clean filters within appliance and check that they are fitted
correctly.
7.6
7.7
•
Check water supply is ON and fully open.
•
Rinse dishes of any food debris before placing into the dishwasher.
•
Glasses may need to be renovated.
•
If glasses are ‘Blooming’ you may need a water softener, call your
dealer to advise on size of water softener required.
•
If a water softener is fitted, replenish the salt within the softener, as
per the water softener instructions.
Overfilling :
•
Drain appliance fully, then try again to fill the machine, drain as per
instructions 5.6 of this manual.
•
Check and clean all filters within the appliance.
•
Check that the stand pipe / drain is not clogged / blocked.
•
If the appliance continues to overfill isolate both the mains
electricity and water, before call a service technician.
Will not switch ON :
•
7.8
Check and reset circuit breaker in the sites fuse board, if the circuit
beaker continues to trip isolate the appliance at the mains electricity before calling a service technician.
Will not switch OFF :
•
Isolate at mains electricity before calling for a service technician
immediately.
If you still require service , please contact :
Classeq Service
Telephone : 0844 2259245
Email: [email protected]
Or for Technical Enquiries
Email: [email protected]
Page 13
8.0
De-commissioning
If for any reason you require to remove or, de-commission your appliance, then
do so in accordance with local and national regulations. As a minimum
‘Classeq’ recommends the following procedure is followed.
•
Remove chemical tubes from the chemical bottles, ensuring bottles
are then capped to prevent any further spillage; refer to safety
statement on chemical bottles prior to and for dealing with any spillage.
•
Ensure the appliance is fully drained in accordance with section 5.6 of
this manual, once completed remove the waste hose from the drain
standpipe; ensure any spilt liquid is dried prior to advancing to the next
step.
•
Switch off mains electrical supply at wall / isolator / junction box.
•
If the appliance is connected via an electrical plug, disconnect this from
the socket.
•
If the appliance is hardwired into the mains, then this must be
disconnected by a qualified electrician in accordance with local and
national wiring regulations.
•
Once the electrical supply has been disconnected, ensure the
equi-potential / earth bonding wire is removed from the stud at the rear
of the appliance.
•
Turn off the water supply to the machine; and disconnect water supply
hose from mains water supply; ensuring any spillage is dried prior to
moving onto next step.
•
Remove the front lower panel, using a 10 spanner
•
Now locate the ‘Boiler drainage hose’, as shown,
ensure this protrudes from the front of the
appliance, and you have a container large
enough to hold 8 litres of water.
CAUTION If the appliance is being drain
immediately after use, water draining from the
‘Boiler drainage hose’ may be up to 80°c.
•
•
Loosen the jubilee / hose clip and remove the
stainless steel drain plug, ensuring the water
flows into the container mentioned above. Once
fully drained replace the stainless steel plug and
retighten the jubilee / hose clip.
Boiler drainage
hose
Replace the front panel, and ensure all cables and hoses are secured
to the appliance to prevent tripping hazards. The appliance is now
ready to be removed.
RECYCLING If you are recycling or disposing of your appliance, please
ensure this is done in accordance with local and national regulations.
Page 14
Notes
………………………………………………
………………………………………………
………………………………………………
………………………………………………
………………………………………………
………………………………………………
………………………………………………
………………………………………………
………………………………………………
………………………………………………
………………………………………………
………………………………………………
………………………………………………
……………………………………………….
..................................................................
..................................................................
..................................................................
..................................................................
..................................................................
..................................................................
Page 15
Pass through
Hydro 857
Hydro 957
Optional
Optional
Wash pump 0.74kW
522.0002
Wash element 4.05kW
555.0005
Rinse element 6.0kW
550.0001
Description & Part number
Drain pump
DP2
Rinse element 8.66kW
550.0004
Adjustable thermostat
542.0002
Rinse aid pump
526.0007
Detergent pump
526.0008
Air pressure switch
530.0001
3 pole relay
CONT/30
4 pole contactor
CONTACTOR/4
If you wish to order any of the parts for your Classeq machine please
contact our Spares Parts Department.
Spares
℡
0844 2245 252
0870 224 7153
[email protected]
A comprehensive parts manual is available on the Classeq website:
www.classeq.co.uk
Page 16
CLASSEQ,
Winterhalter House
Roebuck Way
Milton Keynes
MK5 8WH
Affix
Stamp
AFIX
RATING PLATE
HERE
From time to time we may wish to contact you regarding any
future developments, if you do not wish to be contacted please
tick the box . The information you supply to ‘Classeq’ is covered by the
DATA PROTECTION ACT. This data will also assist us to
speed up the process, if you require a service visit.
Your new appliance is supplied with a full 12 months
warranty, protecting you against failure due to workmanship
or component failure
PRODUCT DETAILS
Please tick the box
YES NO ARE YOU INTERESTED IN EXTENDED WARRANTIES ?
POSITION
CONTACT NAME
PURCHASED FROM
DATE OF PURCHASE / INSTALLATION
TELEPHONE
POST CODE
ADDRESS
SITE
YOUR DETAILS
Thank you for buying a quality ‘Classeq’ product, please complete and post this form without delay