1
Requirements
3
"Release" denotes the exact version of your PBXware.
3
Installation
This chapter describes how to install and connect the phone to the electrical power and
data network as well as how to apply factory settings.
The following topics are covered:
- Power adapter
- Power over Ethernet (PoE)
- Factory Settings
3.1
Power Adapter
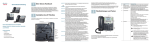
1. Connect the Network and Power
Connect the DC plug on the power adapter to the DC port on the phone and
connect the other end of the power adapter into an electrical power outlet.
Connect the ethernet cable between the Internet port on the phone and the
network port on a router or switch to access LAN.
N O TE If y ou are using Power ov er Ethernet (PoE), y ou don't need to connect the
AC adapter. M ake sure the Ethernet cable and router or switch is Power ov er
Ethernet (PoE) com pliant.
3.2
Power over Ethernet (PoE)
1. Connect the Network (only)
Using a regular ethernet cable, your phone can be powered from a Power over Ethernet
(PoE) compliant router or switch.
Connect the Ethernet cable between the Internet port on the phone and an
available port on the in-line power router or switch.
N O TE If y ou are using Power ov er Ethernet (PoE), y ou don't need to connect the
AC adapter. M ake sure the Ethernet cable and router or switch is Power ov er
Ethernet (PoE) com pliant.
3.3
IP Address
1. Find out your Cisco SPA phone IP Address
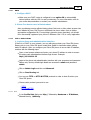
For Cisco SPA phone mode SPA301 lift the handset and enter ****, enter 110
and press #, the IP address will be recited.
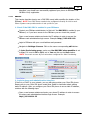
For Cisco SPA phone models SPA502G, SPA504G, SPA508G, SPA509G press the
© 2003 - 2012 Bicom Systems