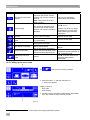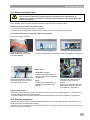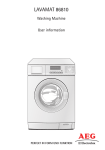
1
Winterhalter Undercounter Dishwashers UC Series Operating instructions Short instructions IMPORTANT: Read the detailed operating instructions and safety notes before first use. Switching on the machine ¾ Touch the screen with your finger. D Screen 01 appears. Screen 01 ¾ Press and hold the on button (1) for approximately 2 seconds D Screen 02 appears. D The machine's tank is automatically filled and heated at the same time. D Detergent is dosed into the machine's tank (assuming a dosing device is connected). D The machine is ready as soon as the rated temperatures have been reached. D The start button lights up green and the washing programmes are displayed1. Screen 02 The welcome message disappears automatically after a short time. Loading dishes Starting the washing programme 1 Washing programmes1 The washing programme with the white background is selected. 2 Start button 3 Self-cleaning programme ¾ Press the start button (2) to start the washing programme. D The start button (2) first lights up in blue and then gradually turns to green to indicate the progress of the washing programme. D The start button (2) flashes green as soon as the washing programme has been completed. D On machines with integrated exhaust air heat recovery the start button (2) flashes green and blue whilst vapours are extracted. Removing dishes Switching off the machine ¾ Press and hold the button (3) for approximately 2 seconds to start the self-cleaning programme. D The inside of the machine is cleaned and finally drained. D The start button (2) lights up blue and switches off in three steps as the self-cleaning programme progresses. D The machine switches off. 1 The display of washing programmes depends on the purpose for which the machine has been programmed. Table of contents Operating instructions for Winterhalter UC Series 1 1 2 2.1 3 4 4.1 4.2 4.3 4.4 4.5 5 5.1 5.2 6 6.1 6.2 6.3 6.3.1 6.3.2 6.4 7 7.1 7.2 7.3 8 8.1 8.1.1 8.1.2 8.1.3 8.2 9 9.1 9.1.1 9.1.2 9.2 9.2.1 9.2.2 9.2.3 9.2.4 9.2.5 9.2.6 9.2.7 9.3 10 10.1 10.1.1 10.1.2 10.1.3 10.1.4 10.1.5 10.2 Table of contents Table of contents--------------------------------------------------------------------------------------------------------- 1 About these instructions ---------------------------------------------------------------------------------------------- 3 Explanation of symbols used-------------------------------------------------------------------------------------------- 3 Product description ----------------------------------------------------------------------------------------------------- 3 Safety notes---------------------------------------------------------------------------------------------------------------- 5 Intended use ---------------------------------------------------------------------------------------------------------------- 5 Non-intended use ---------------------------------------------------------------------------------------------------------- 5 Handling chemicals (detergent, rinse aid, descaler, etc.) -------------------------------------------------------- 5 General safety notes ------------------------------------------------------------------------------------------------------ 5 Daily cleaning and care -------------------------------------------------------------------------------------------------- 6 Before working with the machine----------------------------------------------------------------------------------- 6 Checking that your delivery is complete------------------------------------------------------------------------------ 6 Initial installation------------------------------------------------------------------------------------------------------------ 6 Rinse aid and detergent------------------------------------------------------------------------------------------------ 7 Safety notes ----------------------------------------------------------------------------------------------------------------- 7 Rinse aid --------------------------------------------------------------------------------------------------------------------- 7 Detergent -------------------------------------------------------------------------------------------------------------------- 7 Dosing the detergent powder ------------------------------------------------------------------------------------------- 7 Dosing the liquid detergent ---------------------------------------------------------------------------------------------- 8 Venting the dosing device ----------------------------------------------------------------------------------------------- 8 Integrated water softener (optional) ------------------------------------------------------------------------------- 9 Entering the water hardness -------------------------------------------------------------------------------------------- 9 Lack of salt display -------------------------------------------------------------------------------------------------------- 9 Adding regeneration salt ------------------------------------------------------------------------------------------------- 9 Controls --------------------------------------------------------------------------------------------------------------------10 Touchscreen ---------------------------------------------------------------------------------------------------------------10 Switching on the screen -------------------------------------------------------------------------------------------------11 Menu levels-----------------------------------------------------------------------------------------------------------------11 Screen saver ---------------------------------------------------------------------------------------------------------------11 Start button -----------------------------------------------------------------------------------------------------------------12 Operation ------------------------------------------------------------------------------------------------------------------13 Switching on----------------------------------------------------------------------------------------------------------------13 Before switching on the machine -------------------------------------------------------------------------------------13 Switching the machine on and preparing it so that it is ready for operation --------------------------------13 Washing ---------------------------------------------------------------------------------------------------------------------14 The standard programmes ---------------------------------------------------------------------------------------------14 Loading dishes ------------------------------------------------------------------------------------------------------------15 Starting the washing programme -------------------------------------------------------------------------------------16 Completion of the programme -----------------------------------------------------------------------------------------17 Completion of the programme (Version Energy) ------------------------------------------------------------------17 Cancelling the washing programme prematurely -----------------------------------------------------------------17 Breaks in operation-------------------------------------------------------------------------------------------------------17 Switching off----------------------------------------------------------------------------------------------------------------17 Maintenance and care -------------------------------------------------------------------------------------------------18 Daily--------------------------------------------------------------------------------------------------------------------------18 During operation ----------------------------------------------------------------------------------------------------------18 After washing --------------------------------------------------------------------------------------------------------------18 Cleaning the inside of the machine-----------------------------------------------------------------------------------19 Cleaning the outside of the machine ---------------------------------------------------------------------------------21 Checking the external water treatment (if available) -------------------------------------------------------------21 Monthly ----------------------------------------------------------------------------------------------------------------------21 1 10.2.1 10.3 10.3.1 10.4 10.5 11 11.1 11.1.1 11.1.2 12 12.1 13 14 14.1 14.2 14.3 14.4 15 15.1 15.2 15.2.1 15.2.2 15.2.3 15.3 15.4 15.5 15.5.1 15.6 15.6.1 15.6.2 15.7 15.8 15.9 16 17 17.1 17.2 18 19 20 20.1 20.2 21 2 Cleaning the dirt trap ---------------------------------------------------------------------------------------------------- 21 As necessary -------------------------------------------------------------------------------------------------------------- 21 Descaling------------------------------------------------------------------------------------------------------------------- 21 Maintenance by customer service------------------------------------------------------------------------------------ 21 Changing the detergent product -------------------------------------------------------------------------------------- 22 Info level 1----------------------------------------------------------------------------------------------------------------- 23 Buttons for area (1) ------------------------------------------------------------------------------------------------------ 23 Using additional programmes ----------------------------------------------------------------------------------------- 24 Additional programmes for special equipment “Cool” and “ReTemp” --------------------------------------- 24 Info level 2----------------------------------------------------------------------------------------------------------------- 25 Events and malfunctions ----------------------------------------------------------------------------------------------- 25 Taking the machine out of service for a longer period of time ------------------------------------------ 26 Malfunctions-------------------------------------------------------------------------------------------------------------- 27 Pictograms ----------------------------------------------------------------------------------------------------------------- 27 Calling up the error code ----------------------------------------------------------------------------------------------- 28 Poor cleaning results ---------------------------------------------------------------------------------------------------- 29 Calibrating the touchscreen-------------------------------------------------------------------------------------------- 29 PIN menu ------------------------------------------------------------------------------------------------------------------ 30 PIN menu------------------------------------------------------------------------------------------------------------------- 31 General settings ---------------------------------------------------------------------------------------------------------- 31 Date, time, ° Celsius / ° Fahrenheit ---------------------------------------------------------------------------------- 31 Setting the contrast ------------------------------------------------------------------------------------------------------ 32 Setting the language----------------------------------------------------------------------------------------------------- 32 Automatic activation ----------------------------------------------------------------------------------------------------- 33 Operating data ------------------------------------------------------------------------------------------------------------ 34 Hygiene logbook---------------------------------------------------------------------------------------------------------- 34 Data transfer to PC (option) ------------------------------------------------------------------------------------------- 35 Descaling / basic cleaning --------------------------------------------------------------------------------------------- 35 Descaling programme--------------------------------------------------------------------------------------------------- 35 Basic cleaning programme--------------------------------------------------------------------------------------------- 37 Changing the amount of detergent / rinse aid --------------------------------------------------------------------- 38 Programming connection terminals ---------------------------------------------------------------------------------- 39 Resetting the countdown water meter------------------------------------------------------------------------------- 40 Disposal ------------------------------------------------------------------------------------------------------------------- 41 Technical data ----------------------------------------------------------------------------------------------------------- 41 Technical data------------------------------------------------------------------------------------------------------------- 41 Emissions ------------------------------------------------------------------------------------------------------------------ 41 Installation ---------------------------------------------------------------------------------------------------------------- 42 Water connection ------------------------------------------------------------------------------------------------------- 42 Electrical connection -------------------------------------------------------------------------------------------------- 42 Mains connection cable------------------------------------------------------------------------------------------------- 43 Bonding connection------------------------------------------------------------------------------------------------------ 43 Position of the dosing points (detergent, rinse aid)--------------------------------------------------------- 44 About these instructions 2 About these instructions From chapters 4 to 14, you can find information about which safety notes should be complied with, how to operate the machine and how to respond to malfunctions. Chapters 15 to 17 tell you more about the electronic control unit and which special equipment is available. Chapter 20.1 describes where the dosing points for detergent and rinse aid are found. This chapter is intended for service technicians authorised by Winterhalter. 2.1 Explanation of symbols used The following symbols are used: Danger Warning Caution Warning of possible severe and even fatal injuries to people if the described precautionary measures are not observed. Warning of possible slight injuries to people or possible material damage if the described precautionary measures are not observed. Warning of possible defects or irreparable damage to the product if the described precautionary measures are not observed. IMPORTANT This provides important information INFO 3 This provides useful information ¾ These arrows indicate procedural instructions D This symbol indicates the results of your actions − This symbol denotes lists X This symbol refers to a chapter with further information Product description The UC series dishwashing machines are designed to be used to wash various dishes. The service technician authorised by Winterhalter does not program the machine's control unit for use of the dishwashing machine as a “special machine” for a specific application until it is installed. Alternatively, the dishwashing machine is supplied ready-programmed for a specific application, but can be reprogrammed at any time. Programming determines whether the machine can be used either as: − a dishwashing machine (if mostly dishes are to be washed), or as − a glasswashing machine (if mostly glasses are to be washed), or as − a bistro dishwashing machine (if dishes and glasses are to be washed), or as − a cutlery rinsing machine (if only cutlery is to be washed). If the application changes, the service technician authorised by Winterhalter reprograms the control unit and thus adapts it to your requirements. The UC series dishwashing machines are available in the following sizes: Machine type UC-S UC-M UC-L UC-XL 1 Width [mm] 460 600 600 600 Depth [mm] 602.5 602.5 602.5 641.5 Height1 [mm] 715 715 810 810 On machines with integrated exhaust air heat recovery (Energy) the height dimension increases by 85 mm 3 Product description Special equipment Cool (only for glass washing machines) The washing power of the constantly hot tank water ensures hygienic results. At the end of the wash cycle, the rinse with cold fresh water ensures the glasses are cooled. The special benefit: the rinse temperature can be increased at any time. You can always at all times whether you require cold glasses or wish to optimise drying with a hot rinse. IMPORTANT: The first wash cycles after activation of the function are performed with hot or warm rinse water. Requirement: Machine connection to cold water. ReTemp (only for glass washing machines) You use this process to wash at reduced tank and boiler temperatures. Winterhalter detergent and rinse aid are specially designed for this process and are required for washing at these temperatures. With the tank and boiler temperatures reduced, you can save energy, which also enables you to reduce your operating costs. At the same time, the air quality in the bar area is improved in the long-term since less vapour escapes from the machine when the machine door is opened. The function can be deactivated at any time. IMPORTANT: The first wash cycles after activation of the function are performed with hot or warm rinse water. Energy The construction above the machine includes a fan motor and a heat exchanger. After rinsing, the fan motor draws the moist, warm vapours out of the washing area through the heat exchanger. The cold fresh water which flows through the heat exchanger for rinsing during the following washing programme condenses the vapours and is pre-heated. This reduces the energy required to heat the fresh water to the required rinse temperature. At the same time, the air quality in the kitchen is improved in the long-term since less vapour (i.e. exhaust) escapes the machine when the machine door is opened. Requirement: Machine connection to cold water. 4 Safety notes 4 Safety notes In order to be able to use the UC series dishwashing machine safely, carefully read the safety notes listed here. 4.1 Intended use − The UC series dishwashing machine is to be used exclusively for washing dishes, e.g. plates, cups, cutlery and trays or for washing glasses in catering and similar companies. − Always wash using washing racks suitable for the dishes. Never wash without a washing rack. − The UC series dishwashing machines are technical pieces of equipment for commercial use and are not intended for domestic applications. 4.2 Non-intended use − This device is not designed for use by persons (including children) who have a restricted physical, sensory or mental capacity, or persons who lack experience and knowledge of how to use this device. Any such persons must first be instructed by a supervisory person with responsibility for their safety, or supervised whilst operating the device. − Do not use the dishwashing machine for washing electrically heated cooking implements or items made of wood. − Do not wash plastic items unless they are heat-resistant and will not be damaged by the detergent solution. − Only use a suitable detergent to wash aluminium items such as pots, containers or tins, in order to prevent black discolouration. − Winterhalter Gastronom GmbH will not accept liability for any damage caused by failure to use the dishwashing machine in accordance with the intended use. 4.3 Handling chemicals (detergent, rinse aid, descaler, etc.) − When using chemicals, adhere to the safety notes and recommended dosages printed on the packaging. − Wear protective clothing, protective gloves and protective goggles when handling chemicals. − Only use products which are suitable for commercial dishwashing machines. Such products are marked accordingly. We recommend using products developed by Winterhalter. These products are specially adapted for Winterhalter dishwashing machines. − Do not mix different detergent products as this could result in crystallisation and consequently cause irreparable damage to the detergent dosing device. − Do not use any foaming products, e.g. hand soap, soft soap, manual wash-up cleaner. These products must not enter the dishwashing machine, even through pre-washing of the dishes. 4.4 General safety notes − Carefully read through the safety and operating notes contained in these instructions. Winterhalter Gastronom GmbH will not accept any liability and all warranty claims will be rendered null and void if the safety notes are not observed. − Keep the machine documents close to hand. The service technician authorised by Winterhalter require the circuit diagram for repairs. − For your own safety, regularly test the on-site residual-current circuit breaker (RCCB) by pressing the test button. − The dishwashing machine must not be installed in a potentially explosive atmosphere or in areas subject to frost. − Load sharp, pointed utensils so that they cannot injure anyone. − Keep children away from the dishwashing machine. The inside of the machine holds a solution of detergent in hot water at about 60°C. 5 Before working with the machine − Train the operating personnel in how to use the machine, and inform them of the information in the safety notes. Repeat the training at regular intervals in order to prevent accidents. − Only use your fingers to operate the touchscreen; not sharp objects. − Have the machine connected by qualified technicians in accordance with the locally applicable regulations (water, waste water, electrics). − Close the on-site water stop cock after completing work. − Switch off the on-site mains disconnector after completing work. − Do not open the machine door whilst it is washing. There is a risk that hot washing solution could be sprayed out. Cancel the washing programme beforehand (X 9.2.5). 4.5 Daily cleaning and care − Follow the instructions for maintenance and care given in these operating instructions (X 10). − Wear protective clothing and protective gloves before touching any parts which are covered with detergent solution (filters, wash fields etc.). − Do not spray off the machine and the immediate vicinity (walls, floors) with a water hose, steam cleaner or pressure washer. In order to prevent water from entering into the machine uncontrolledly, make sure that the machine's plinth is not flooded when cleaning the floor. − Use a brush or a cloth - and not a pressure washer - for cleaning the interior of the machine. − Do not use any scouring powder or abrasive cleaning agents. − When performing daily cleaning, make sure that no foreign objects which may rust have been left in the interior of the machine. These objects can even cause “stainless steel” material to rust. Rust particles may originate from non-stainless steel dishes, cleaning aids, damaged wire racks or water pipes with no corrosion protection. − Clean the outside of the machine using a suitable stainless steel cleaner and a soft cloth. We recommend Winterhalter Gastronom stainless steel cleaner and stainless steel polish. 5 Before working with the machine ¾ Have the machine installed by your service technician authorised by Winterhalter or dealer. You will find further information in chapter 18. Follow chapter 13 if the installation location is not free of frost. ¾ Have the machine connected by authorised technicians in accordance with the locally applicable standards and regulations (water, waste water, electrics). You will find further information in chapters 19 and 20. ¾ Have the machine commissioned by a service technician authorised by Winterhalter. At the same time, have yourself and your operating personnel trained in how to operate the machine. 5.1 Checking that your delivery is complete ¾ Use the delivery note to check that the delivery is complete and check for any transport damage. ¾ Immediately inform the transport company, the insurance company and the manufacturer of any damage. 5.2 Initial installation ¾ After the machine has been correctly connected to water and electricity, contact your Winterhalter branch or your dealer in order to request initial installation and training on how to operate the machine. 6 Rinse aid and detergent 6 Rinse aid and detergent 6.1 Safety notes Warning Caution When using chemicals, adhere to the safety notes and recommended dosages printed on the packaging. Wear protective clothing, protective gloves and protective goggles when handling chemicals. Only use products which are suitable for commercial dishwashing machines. Such products are marked accordingly. We recommend using products developed by Winterhalter. These products are specially adapted for Winterhalter dishwashing machines. Do not mix different detergent products as this could result in crystallisation and consequently cause irreparable damage to the detergent dosing device (see X 10.5). Do not fill the storage tanks for rinse aid with detergent and vice versa. Do not use any foaming products, e.g. hand soap, soft soap, manual wash-up cleaner. These products must not be allowed into the machine, even as a result of pre-treatment of the dishes. 6.2 Rinse aid Rinse aid is required so that the water on the dishes drains off as a thin film and dries quickly after washing. Rinse aid is dosed into the machine's boiler automatically, either from a storage tank integrated in the machine or an external storage tank. The rinse aid dosing device is integrated into the machine. The dosing quantity is set by the service technician authorised by Winterhalter when the machine is installed. INFO: The rinse aid dosing device is not part of the scope of delivery for all machines. A display on the screen indicates when integrated storage tanks are empty (X 14.1). External storage tanks have to be fitted with a suction tube with level control if a display on the screen is required to show when the filling level drops. 6.3 Detergent Detergent is required to remove food residue and soiling from the dishes. Detergent can be dosed in the following ways: − manually as detergent powder. − automatically from an integrated storage tank by an integrated detergent dosing device. − automatically from an external storage tank by and integrated or externally fitted detergent dosing device. INFO: The detergent dosing device is not part of the scope of delivery for all machines. 6.3.1 Dosing the detergent powder Pre-dosage ¾ Add the detergent powder in the machine as soon as the start button lights up green. The machine is then ready for operation (heated up). on the S version: approx. 30 g on version M, L and XL: approx. 50 g ¾ Start a wash cycle immediately afterwards in order to mix the detergent powder with the water. ¾ Adhere to the instructions for dosing on the detergent packaging. Additional dosage ¾ After 5 wash cycles add approx. 10-15 g of detergent powder in the machine. 7 Rinse aid and detergent 6.3.2 Dosing the liquid detergent The dosing quantity is set by the service technician authorised by Winterhalter when the machine is installed. A display on the screen indicates when integrated storage tanks are empty (X 14.1). External storage tanks have to be fitted with a suction tube with level control if a display on the screen is required to show when the filling level drops. 6.4 Venting the dosing device The dosing device has to be vented if air has entered into the dosing tube due to the storage tanks not being refilled quickly enough. ¾ For an integrated dosing device proceed as described in chapter 11.1. ¾ For an external dosing device refer to the equipment documentation. 8 Integrated water softener (optional) 7 Integrated water softener (optional) Softening the tap water prevents the build-up of limescale in the machine and on the dishes. In order for the integrated water softener to function properly, the salt container must be filled with regeneration salt. 7.1 Entering the water hardness When the machine is installed, the service technician authorised by Winterhalter measures the water hardness and enters the respective value. 7.2 Lack of salt display A display on the screen (X 14.1) indicates when an empty salt container needs to be refilled. The display disappears after topping up the salt container as soon as approx. 3 wash cycles have been complete and some of the salt added has dissolved. 7.3 Adding regeneration salt Caution Caution Only add regeneration salt to the salt container. This salt should be fine-grained (max. 0.4-7 mm grain size). Salt tablets are not suitable. Do not add any chemicals, e.g. detergent or rinse aid. These will inevitably cause damage to the water softener. After filling start a wash cycle. After filling, immediately start a washing programme in order to rinse off any salt residue. Otherwise there is a risk of rusting in the filling area. Open the machine door and remove the washing rack from the machine Unlock the bottom rotating wash field Remove the bottom rotating wash field from the machine Open the screw cap on the salt container and fill the salt container to the brim with fresh water (only required for initial installation). Place the funnel in the filling opening on the salt container and gradually add 3 bags of Winterhalter special salt (=1.5 kg). Remove the funnel and clean any salt residue from the filling area. Screw the salt container tight again, keeping the cover straight. Re-install the bottom rotating wash field. Check whether the wash field rotates easily. 9 Controls 8 Controls 1: Touchscreen 2: Start button 8.1 Touchscreen The screen displays the touch-sensitive buttons. Events as e. g. the end of program of operation malfunctions are indicated by a sequence of tones. INFO: The service technician authorised by Winterhalter can switch off or activate the tone signal and the tone sequence. By pressing these buttons you can: − select the desired washing programme (it is started by pressing the start button) − call up information − make entries The appearance (border, background) of a button indicates the button status, as follows: Thick, white border Dark background Button can be pressed (is available / can be activated) Scroll Thick, white border White background Button has been pressed / activated Delete an entry Thin, dotted border Dark background Button cannot be pressed (is not available / cannot be activated) 10 Navigation buttons: Confirm an entry Back to the previous menu Number of the menu Controls 8.1.1 Switching on the screen ¾ Touch the screen with your finger. D The screen switches on (screen 01) and switches back off after a short time (to prevent the machine being switched on inadvertently during cleaning). Screen 01 INFO: You can find out about how to switch on the machine in chapter 9. 8.1.2 Menu levels The machine's electronics are structured in 3 levels. Each screen has a number at the bottom right to facilitate understanding if there are any queries (see screen 01). Menu level for washing personnel (X 9) This menu level has linguistically neutral symbols to make it as easy as possible to operate the machine and train personnel. Info level 1 with additional washing programmes and information (X 11) Here, you can: − read off the current tank and rinse temperatures − read the machine type and machine number − select additional programmes (Eco programme, short programme, quiet programme etc.) − call up washing tips and operating instructions; vent built-in dosing devices − switch to info level 2 Info level 2 (X 12) Here, you can call up information: − Date, time − Events − Malfunctions − Messages indicating that the malfunction has been remedied − switch to the PIN menu (X 15) 8.1.3 Screen saver A screen saver appears if you do not make any screen entries for a certain length of time when the machine is switched on. The screen darkens if a further period of time elapses without any entries. Touch the screen to switch it back on. INFO: The screen saver does not appear until the machine is filled. There is no screen saver in the PIN menu (X 15). The times for the screen saver can be changed by the service technician authorised by Winterhalter (X 17.1). 11 Controls 8.2 Start button The start button lights up as soon as you switch on the machine. The different colours indicate the following: Whilst the machine is being prepared for operation: Change from red to green: Machine filling, heating up and ready for operation. Whilst the washing programme is in progress: Change from blue to green, finally flashes green: Washing programme in progress and is complete. During the self-cleaning programme: The start button lights up blue and switches off in 3 steps as the self-cleaning programme progresses. 12 Operation 9 Operation 9.1 Switching on 9.1.1 Before switching on the machine ¾ Open the on-site water stop cock. ¾ Switch on the on-site mains disconnector. ¾ For your own safety, test the on-site residual-current circuit breaker (RCCB) by pressing the test button. ¾ Open the machine door and check whether the wash fields (top and bottom) and the filters (strainer, filter cylinder) are installed. ¾ Close the machine door. Warning When using chemicals, adhere to the safety notes and recommended dosages printed on the packaging. Wear protective clothing, protective gloves and protective goggles when handling chemicals. Do not mix different detergent products. ¾ Check whether there is detergent and rinse aid in the storage tanks (integrated in the machine or external). Top them up in time or replace the storage tanks so that the cleaning result will not be negatively affected. 9.1.2 Switching the machine on and preparing it so that it is ready for operation This is where you learn how to prepare switch on and prepare the machine so that it is ready for operation. You can select to program the machine to switch on automatically at a certain time (X 15.3) and be ready for operation approximately 15 - 25 minutes later (depending on the water inlet temperature). Screen 01 ¾ Touch the screen with your finger. D Screen 01 appears. D The machine's tank is automatically filled and heated at the same time. D Detergent is dosed into the machine's tank (assuming a dosing device is connected). ¾ Press and hold the on button (1) for approx. 2 seconds. D Screen 02 appears with the welcome message. Screen 02 The welcome message disappears automatically after a short time. D The machine is ready as soon as the rated temperatures have been reached. D The start button lights up green and the washing programmes are displayed1. 1 The display of washing programmes depends on the purpose for which the machine has been programmed. You will find an overview of the possible displays on pages 14 and 15. 13 Operation Whilst the machine is being prepared to make it ready for operation, the light in the start button switches from red to green in 3 steps. The machine is ready for operation as soon as the start button lights up green. INFO: The machine is supplied from the factory programmed so that a washing programme can be started as soon as the rated level in the machine's tank is reached. If you are working according to HACCP directives, the service technician authorised by Winterhalter can programme the machine so the operating personnel cannot start a washing programme until the rated temperatures have also been reached. 9.2 Washing 9.2.1 The standard programmes INFO: The display on you dishwashing machine may vary as the authorised service technician has a collection of screens from which he can have screens displayed which are specifically adapted to your dishes. On request the service technician can even hide programmes. Programme 2 (button with white background) is preselected in each case and can be started by pressing the start button. Display for glass washing machines Arranged from left to right: Programme 1 for fragile glasses Programme 2 for less fragile glasses Programme 3 for robust glasses Display for dishwashing machines Arranged from left to right: Programme 1 for slightly dirty dishes Programme 2 for normal dirty dishes Programme 3 for very dirty dishes 14 Operation Display for bistro dishwashing machines Arranged from left to right: Programme 1 for glasses Programme 2 for glasses and cups Programme 3 for plates Display for cutlery rinsing machines 9.2.2 Loading dishes ¾ Adhere to the following guidelines when loading the washing rack with dishes and cutlery: − Remove any larger food residue. Caution An excessive level of soiling can clog the filter system and hamper the washing programme sequence. − Place the plates into the rack with the top facing the front. − Load cups, bowls and pots with the opening facing downwards. − Wash the cutlery either upright in the cutlery holders or lying in a flat rack. Make sure that the dishes are not too closely packed. Soak the cutlery before you wash it. − Place knives and other sharp and pointed cutlery items with the handle at the top to avoid injuries. ¾ − − − − − − Adhere to the following guidelines when loading the washing rack with glasses: Pour away any left-over drink (do not pour into the machine). Remove any paper waste. Rinse off any ash with water. Load glasses with the opening facing downwards. Space the glasses so that they do not touch. This prevents scratching. For tall glasses, select a rack with the appropriate divisions so that the glasses are held in a stable position. Caution Do not wash any items with wax residue (e.g. candlesticks). The drain pump may be damaged by hardened wax. ¾ After pushing in the washing rack, check whether the top and bottom washing fields rotate freely. 15 Operation 9.2.3 (1) (2) (3) (4) (5) (6) Starting the washing programme Washing programme (standard programme1) Start button Switch to info level 1 (see chapter 11) Info field for displaying malfunctions in the form of pictograms (see chapter 14.1) Off button (does not drain the tank) Self-cleaning programme (see chapter 10.1.2) ¾ Select the washing programme which best suits the level of soiling and the type of dishes. You will find an overview of available programmes in chapter 9.2.1. ¾ Press the button for the desired washing programme if it is not yet displayed with a white background. The selected washing programme remains saved until another programme is selected. ¾ Press the start button (2) to start the washing programme. D The start button (2) lights up blue and then switches to green whilst the washing programme is in progress: If the soiling is dried on particularly stubbornly, the washing programme can be intensified. ¾ Press the start button (2) twice quickly in succession (“double click”). D The “brush” symbol in the info field (4) flashes. INFO: The intensified programme only affects the washing programme currently in progress and is then deactivated automatically. 1 The display of washing programmes depends on the purpose for which the machine has been programmed. You will find an overview of the possible displays on pages 14 and 15. 16 Operation 9.2.4 Completion of the programme The start button flashes green as soon as the washing programme has been completed. INFO: The green flashing start button indicates that the washing programme has been completed and that the door has not yet been opened. If you find the flashing objectionable, an authorised service technician can set the machine control unit so that the start button no longer flashes green. 9.2.5 Completion of the programme (Version Energy) After dishwashing, the warm-humid vapour is aspired off the washing compartment, and the heat energy stored in it is recovered for the next washing sequence. The start button flashes blue / green. If possible, do not open the machine door during this time, in order to aspire the warm-humid vapours completely from the washing compartment. Open the machine door as soon as the start button flashes green. 9.2.6 Cancelling the washing programme prematurely The following options are available for cancelling the washing programme prematurely ¾ Press the start button (2). ¾ Press the button for the selected washing programme on the screen. ¾ Press the off button (5) on the screen. 9.2.7 Breaks in operation ¾ In order to maintain the rated temperatures, do not switch the machine off during breaks. 9.3 Switching off Switching off and draining the tank: ¾ Switch the machine off at the end of the working day using the self-cleaning programme (X 10.1.2). ¾ Then close the on-site water supply stop cock. ¾ Then switch off the on-site mains disconnector. Switching off without draining the tank: ¾ Press the off button (5). D The screen darkens and the machine is switched off. The tank remains filled, but the temperature is no longer maintained. INFO: If the tank temperature has dropped too much until the next washing cycle, the tank is empty and will be refilled. The machine remains live until the on-site mains disconnector is switched off. Warning 17 Maintenance and care 10 Maintenance and care Warning Do not spray off the machine and the immediate vicinity (walls, floors) with a water hose, steam cleaner or pressure washer. In order to prevent water from entering into the machine uncontrolledly, make sure that the machine's plinth is not flooded when cleaning the floor. 10.1 Daily 10.1.1 During operation Warning Wear protective clothing and protective gloves before touching any parts which are covered with detergent solution (filters, wash fields etc.) Remove the filter cylinder, clean if necessary and re-insert it 10.1.2 After washing The machine is equipped with a self-cleaning programme which assists you in cleaning the interior of the machine. ¾ Remove the washed dishes from the machine. ¾ Close the machine door. ¾ Press and hold the button (6) for approx. 2 seconds. Press the button (6) again if cancel the procedure. D The background of the button (6) turns white. D The start button (2) lights up blue and switches off in three steps as the self-cleaning programme progresses: D The inside of the machine is first washed out with detergent solution and then with hot fresh water. All the water is then pumped off. D The self-cleaning programme is completed as soon as the start button (2) and the screen are no longer illuminated. The machine switches off automatically. ¾ Close the on-site water supply stop cock. ¾ Switch off the on-site mains disconnector. ¾ Open the door slightly into the vent position so that the inside of the machine can dry better. A special latch position in the door clasp is provided for this purpose. This is also important for long-term corrosion protection, even for stainless steel. 18 Maintenance and care 10.1.3 Cleaning the inside of the machine Caution When performing daily cleaning, make sure that no foreign objects which may rust have been left in the interior of the machine. These objects can even cause “stainless steel” material to rust. Rust particles may originate from non-stainless steel dishes, cleaning aids, damaged wire racks or water pipes with no corrosion protection. Open the machine door and remove the washing rack from the machine Unlock the top and bottom rotating wash fields Remove both rotating wash fields from the machine Remove the filter cylinder Remove the strainer Remove the bottom section of the filter Remove any soiling from the interior of the machine with a brush or a cloth Clean the labyrinth below the door Attention! Make sure that the red valve rod in the suction duct of the washing solution circulation system is not a foreign body which has to be removed. 19 Maintenance and care Clean the filter cylinder Clean the strainer Clean both rotating wash fields. If necessary, open the cleaning opening in the rotating wash field with a coin and rinse the rotating wash field with water. Reinsert the bottom section of the filter Reinsert the strainer Reinsert the filter cylinder Reinsert both the rotating wash fields. They are constructed identically and both can be installed either at the top or bottom. Check whether the .wash fields rotate freely after installation Do not close the machine door fully so that the inside of the machine can dry better. A special latch position in the door clasp is provided for this purpose. This is also important for long-term corrosion protection, even for stainless steel. 20 Maintenance and care 10.1.4 Cleaning the outside of the machine ¾ Clean the screen with a damp cloth. ¾ Clean the exterior surfaces with a stainless steel cleaner and stainless steel polish. 10.1.5 Checking the external water treatment (if available) ¾ Check whether sufficient regeneration salt has been added. 10.2 Monthly 10.2.1 Cleaning the dirt trap ¾ Close the on-site water supply stop cock. ¾ Clean the dirt filter in the dirt trap. 10.3 As necessary 10.3.1 Descaling If the machine is operated with very hard water and without the appropriate water treatment, limescale can build up in the boiler, in the interior of the machine and in all lines which carry water. Limescale deposits and the dirt and grease residue they contain represent a hygiene risk, and the limescale can cause the heating elements to fail. Therefore, it is essential to remove these deposits at regular intervals. You should have the job of correctly descaling the boiler and all pipes which carry water carried out by a service technician authorised by Winterhalter. You can descale the interior of the machine yourself using the descaling programme (X 15.6.1). Warning When using chemicals, adhere to the safety notes and recommended dosages printed on the packaging. Wear protective clothing, protective gloves and protective goggles when handling chemicals. 10.4 Maintenance by customer service We recommend having the machine serviced at least twice a year by a service technician authorised by Winterhalter. This service should also include having components which are subject to wear or ageing being checked and replaced as necessary. Examples of such components: − Water connection hose − Dosing tubes − Door seal Winterhalter offers a service contract which includes this work and other services. On the electronic control unit you can program the maintenance interval in operating hours and set the number of remaining operating hours from which point the symbol for maintenance / servicing is displayed. (X 17.1). If necessary, open the cleaning opening in the rotating wash field with a coin and rinse the rotating wash field with water. 21 Maintenance and care 10.5 Changing the detergent product ¾ Pay attention to the following when changing the detergent product: − Mixing different detergent products can lead to crystallisation and cause the dosing device to fail. This is the case even if the new detergent product is from the same manufacturer. − As a rule, a new detergent product means it is also necessary to reset the dosing device. − The entire system, comprising the storage tank, dosing tubes and detergent dosing device, has to be flushed with water before the new detergent is used. ¾ Have the necessary work carried out by the service technician authorised by Winterhalter so that you continue to achieve good washing results. Winterhalter Gastronom GmbH will not accept any liability and all warranty claims will be rendered null and void in case of failure to comply with this instruction. If the detergent is dosed from external storage tanks, you can flush the dosing tubes and the detergent dosing device with water yourself: Procedure: Warning When using chemicals, adhere to the safety notes and recommended dosages printed on the packaging. Wear protective clothing, protective gloves and protective goggles when handling chemicals. Do not mix different detergent products. ¾ Remove the suction tube from the storage tank and insert it in a container filled with fresh water. ¾ Flush the dosing tubes and the detergent dosing device with water by repeatedly using the “vent the dosing device” function (see X 11.1). How frequently you do so depends on the length of the dosing tubes. ¾ Insert the suction tube into the storage tank with the new detergent. ¾ Repeatedly use the “vent the dosing device” function to replace the water in the dosing tubes with detergent. 22 Info level 1 11 Info level 1 This is how you access info level 1 ¾ If the screen is darkened: Touch the screen. ¾ Press the button “i1”. D Screen 04 appears. Screen 04 (1) (2) (3) (4) (5) (6) (7) (8) (9) (10) (11) Buttons for calling up information, venting the dosing devices and selecting additional programmes Further buttons appear when you press the scroll buttons (11) Back button (to the standard programmes) Start button Switch to info level 2 (see chapter 12) Machine number Current tank temperature Current rinse temperature Machine type Info field Off button (does not drain the tank) Scroll buttons for area (1) 11.1 Buttons for area (1) Scroll down to show the following buttons If you press this button, 2 addresses appear on the screen: SERVICE: Address of the service technician CHEMICALS: Address of the chemicals supplier (rinse aid, detergent etc.) Requirement: The addresses will have been entered when the machine was installed. If you press and hold this button, the integrated detergent dosing device is activated (max. 30 seconds). The background of the button turns white. Use this function to vent the integrated detergent dosing device and the dosing tubes. See also chapters 6.4 and 10.5. If you press and hold this button, the integrated rinse aid dosing device is activated (max. 30 seconds). The background of the button turns white. Use this function to vent the integrated rinse aid dosing device and the dosing tubes. See also chapter 6.4. 23 Info level 1 If you press this button, the integrated operating instructions appear on the screen. Use these operating instructions to train your personnel, for instance. If you press this button, tips on topics such as hygiene, protecting the dishes, costefficiency etc. appear on the screen. INFO: The integrated operating instructions and tips can be called up at any time, even whilst a washing programme is in progress. Scroll down to display the buttons for the additional programmes. The number of special programmes depends on the machine programming. Energy-saving programme Quiet programme for very quiet washing in the bar area Short programme Special programme The special programme can be programmed by the Winterhalter special programme freely in accordance with your requirements (time, temperature, mechanics, chemicals) 11.1.1 Using additional programmes ¾ Press the button for the desired additional programme. D The background of the button turns white. D The display in the info field alternates between temperatures display and the additional programme display. ¾ Press the start button (3) to start the additional programme. D The start button (3) lights up blue. D The start button (3) flashes green as soon as the additional programme has been completed. D The additional programme remains saved until it is deactivated or another programme is selected. 11.1.2 Additional programmes for special equipment “Cool” and “ReTemp” INFO: The button only appears on “Cool” type machines. Rinsing is performed with cold water as long as the button is activated (white background). The button has to be pressed in order to deactivate the “Cool” function. D The background darkens and flashes in the info field (9). INFO: The button only appears on “ReTemp” type machines. Washing is performed at reduced temperatures as long as the button is activated (white background). The button has to be pressed in order to deactivate the “ReTemp” function. D 24 The background darkens and flashes in the info field (9). Info level 2 12 Info level 2 This is how you access info level 2 ¾ If the screen is darkened: Touch the screen. ¾ Press the button “i1” and then the button “i2” D Screen 33 appears. Screen 33 (1) (2) (3) (4) (5) (6) (7) (8) (9) (10) (11) Area for displaying events and malfunctions Further buttons and malfunctions appear when you press the scroll buttons (11) Back button (to info level 1) Start button Switch to PIN menu (see chapter 15) Time Current tank temperature Current rinse temperature Date Info field Off button (does not drain the tank) Scroll buttons for area (1) 12.1 Events and malfunctions The following is displayed in area (1): − Events − Malfunctions − Messages indicating that the malfunction has been remedied Example: Display Evt 01 Machine ON ERR 16 Rinse aid empty Evt 03 Ready ERR 16 OK Rinse aid full Evt 04 Programme 1 Explanation Machine has been switched on No rinse aid The machine is ready for operation Rinse aid has been added Programme 1 has been started This information shows you what last happened on the machine. A maximum of 3 lines of text is displayed in area (1). In the display, the last entry is shown first. Earlier entries can be shown by pressing the scroll buttons (11). You will find pieces of information with the respective date in the hygiene logbook (see chapter 15.5). 25 Taking the machine out of service for a longer period of time 13 Taking the machine out of service for a longer period of time Adhere to these instructions if you need to take the machine out of service for a longer period of time (annual factory closing, seasonal operation). ¾ ¾ ¾ ¾ ¾ Drain the machine using the self-cleaning programme (X 10.1.2). Clean the machine as described in point 10.1.3. Leave the machine door open. Close the on-site water supply stop cock. Switch off the on-site mains disconnector. If the machine is installed in a room which is not frost protected: ¾ Have the machine made frost-proof by a service technician authorised by Winterhalter. Putting the machine back into service ¾ Open the on-site water stop cock. ¾ Switch on the on-site mains disconnector. ¾ Switch on the machine. 26 Malfunctions 14 Malfunctions In this section you learn how to act in case of malfunctions. The table lists possible causes and instructions for remedial action. Contact a service technician authorised by Winterhalter if you are unable to rectify the fault yourself. Danger DANGER! Risk of fatal injury due to live components. Disconnect the machine from the mains and check that machine is de-energised. Do not open any machine covers or machine components if you require a tool to do so. Risk of electric shock. Have all work on the electrical system performed by a service technician authorised by Winterhalter. The machine must be disconnected from the electrical mains first. 14.1 Pictograms Malfunctions are indicated by pictograms in the info field (4). In addition, each malfunction is also stored in the hygiene logbook (X 15.5) and can be called up from info level 2 (X 12). An entry is also made in both places as soon as the malfunction is remedied. Pictogram Meaning Possible cause Remedy The machine door is open Programme start with open machine door Close machine door. The detergent is empty1 The rinse aid is empty1 Water shortage or uncontrolled water feed The water stop cock is closed The dirt filter in the dirt trap is blocked The solenoid valve is faulty or blocked The integrated water treatment is exhausted Lack of salt External partial demineralisation unit or full demineralisation unit exhausted 1 Replace the container or top up the storage tank Replace the container or top up the storage tank Open the stop cock Remove and clean the dirt filter (X 10.2) Call a service technician authorised by Winterhalter Fill the salt container with regeneration salt Replace the partial demineralisation unit; replace the resin in the full demineralisation unit Reset the countdown water meter (X 15.9) is only displayed if the container has a container empty indicator connected to the machine. 27 Malfunctions Pictogram Meaning The service interval has expired Check scaling The bottom wash field is blocked The top wash field is blocked Foaming The strainer is blocked Energy optimisation1 Malfunction with error code Possible cause The number of operating hours entered on the control unit has elapsed. The machine should be serviced. INFO: This function is not activated in factory. The number of operating hours entered on the control unit has elapsed. The machine should be descaled. The lower wash field is blocked, e.g. by a piece of cutlery The top wash field is blocked, e.g. by tall dishes Use of manual wash-up cleaner Large amount of protein Remedy Call a service technician authorised by Winterhalter Start the descaling programme (see X 15.6.1) Switch to info level 2 to delete the pictogram in the info field without starting the descaling programme Remove the blockage Remove the blockage Drain and re-fill the machine Remove, clean and replace the strainer Heavily soiled strainer The on-site energy optimisation Wait until the on-site energy system switches individual electrioptimisation system switches off cal loads (heating elements) off. Call up the error code (see X 14.2) and call a service Various technician authorised by Winterhalter 14.2 Calling up the error code The symbol in the info field (4) flashes. ¾ Press the button “i1” and then the button “i2” D Screen 33 appears Display in area (1): − Error code − Error remedy ¾ Contact a service technician authorised by Winterhalter if you are unable to rectify the fault yourself. Screen 33 1 is only displayed if the machine is connected to an energy optimisation system. 28 Malfunctions 14.3 Poor cleaning results Possible cause Remedy Set the dosing quantity according to the information provided by the manufacturer Too little or no detergent dosing Check dosing lines (kinks, breaks, etc.) Replace the container Check the dosing device Dishes not loaded correctly Do not stack dishes on top of one another The wash field jets are blocked Remove the wash fields and clean the jets Temperatures too low Check the temperatures (X 11) Dishes are not cleaned Deposits form on the dishes Dishes are not drying automatically Limescale deposits: water is too hard Check the external water treatment / integrated water treatment and set it correctly Perform basic cleaning (X 15.6.2) Starch deposits: excessively high temperatures for the manual pre-wash (spraying) Temperature must not exceed 30°C Too little or no rinse aid dosing Set the dosing quantity according to the information provided by the manufacturer Check dosing lines (kinks, breaks, etc.) Replace the container Check the dosing device 14.4 Calibrating the touchscreen If pressing a button fails to trigger and action, the touch-sensitive points of the displayed button may have drifted. REMEDY: ¾ Switch the machine off and touch the screen once. ¾ Press and hold the start button for 60 seconds. D Screen 19 appears. Screen 01 ¾ Use a ballpoint pen (without the ballpoint) to touch the centre of the crosshairs and follow the further instructions given on the screen. Screen 19 29 PIN menu 15 PIN menu In the PIN menu, you can: − make general settings (date, time, contrast, language) − program the automatic activation of the machine − display operating data − display data (hygiene logbook) − start the descaling programme or basic cleaning programme − Changing the amount of detergent / rinse aid − program the connection terminals for external dosing devices − reset the countdown water meter1 X 15.2 X 15.3 X 15.4 X 15.5 X 15.6 X 15.7 X 15.8 X 15.9 INFO: You cannot operate the machine whilst the PIN menu is active. The start button is not lit. The machine has to be switched back on again after exiting the PIN menu. How to access the PIN menu: ¾ If the machine is switched off or the screen is dark: Touch the screen. ¾ Press the button “i1” and then the button “i2”. ¾ Press the “PIN input” button. D Screen 06 appears ¾ Enter the PIN 1575. D Every digit entered is displayed as ¹. You can delete any incorrect digits by pressing the à button. Screen 06 ¾ Confirm with the 9 button D The PIN menu appears (X 15.1) INFO: The “!” symbol appears on the screen if you enter the wrong PIN. If an incorrect PIN is entered five times in succession, you cannot make any more entries for the next 2 minutes. 1 not for machines with integrated water softener 30 PIN menu 15.1 PIN menu Date, time, contrast, language X 15.2 Automatic activation X 15.3 Operating data X 15.4 Screen 07 After scrolling: Hygiene logbook X 15.5 Descaling / basic cleaning X 15.6 Amount of detergent / rinse aid X 15.7 Program connection terminals X 15.8 Reset the countdown water meter X 15.9 15.2 General settings 15.2.1 Date, time, ° Celsius / ° Fahrenheit INFO: The time has to be changed when the clocks are changed for summertime / wintertime. Here, you can: − enter the current date. − enter the current time. − change the time format. − change the unit of measurement for the temperature display. How to access the settings: ¾ Enter the PIN menu PIN 1575 ¾ Press the button ¾ Press the button To set the date: ¾ Press button (1). ¾ Enter the current date using the numeric keypad. Format: YYYY-MM-DD (year-month-day) The entered date is checked to determine whether it is a valid date. Your entry will not be accepted if it is implausible. To enter the time format: ¾ Select whether the time should be displayed in 24-hour or AM/PM mode. ¾ Press the “24h” or “AM/PM” button. To set the time: ¾ Press button (2). ¾ Enter the current time using the numeric keypad. To define the unit of measurement for temperature: ¾ Press the “°C” or “°F” button depending on which unit of measurement you wish to use for displaying temperatures. ¾ Press the back button (3) to exit the menu. 31 PIN menu 15.2.2 Setting the contrast Here, you can: − change the contrast to adapt the screen display to the lighting conditions in your kitchen. How to access the settings: ¾ Enter the PIN menu PIN 1575 ¾ Press the button ¾ Press the button ¾ Use the © or ª button to change the setting until you can see all the data clearly on the screen. ¾ Confirm with the 9 button ¾ Press the back button (1) to exit the menu. 15.2.3 Setting the language Here, you can: − set the language used for displaying texts on the screen. How to access the settings: ¾ Enter the PIN menu ¾ Press the button ¾ Press the button ¾ Select the required language. ¾ Press the back button (1) to exit the menu. 32 PIN 1575 PIN menu 15.3 Automatic activation Here, you can: − enter when the machine is to start filling itself and heating up automatically. − enter a different time for each day of the week (weekly programme). − enter a time for a certain date which is different from the weekly programme. This date takes precedence over the weekly programme. ¾ Ensure that the machine door is closed, that the customer-side mains disconnector switch is switched on, and that the water shut-off valve is opened at the moment of automatic activation. How to program automatic activation: ¾ Enter the PIN menu PIN 1575 ¾ Press the button Weekly programme ¾ Press button (1). ¾ Use the scroll buttons to select the day of the week which you wish to program. ¾ Press the button for the day of the week which you wish to program. D The background of the button turns white. ¾ Enter the time for the start of automatic activation at the numeric keypad. ¾ Enter the times for the remaining days. ¾ Check whether button (1) is active (white background). Automatic activation is only active for the programmed days if this is the case. ¾ Press the back button (3) to save your entry. Special day ¾ Press button (2). ¾ Enter the time and the date for the start of automatic activation at the numeric keypad. ¾ Check whether button (2) is activated (white background). Only then will the automatic activation start for the programmed day. ¾ Press the back button (3) to save your entry. INFO: The programmed date takes precedence over the weekly programme. INFO: Date and time of the next automatic activation are displayed when the machine is switched on. Of course the machine can be used before this point of time. 33 PIN menu 15.4 Operating data Here, you can: − view all operating data. How to access the operating data: ¾ Enter the PIN menu PIN 1575 ¾ Press the button Screen 21 D − − − − − − − − − − The screen (screen 21) with the operating data appears. Initial start-up Date Next service in x hours1 Total operation hours x hours Total washing cycles x Total water consumption x litres Op. hours/day x hours Washing cycles/day x Water consump./day x litres WS remaining capacity x litres Old master operation hours x hours You can scroll up and down the list using buttons and . ¾ Press the back button (1) to exit the menu. 15.5 Hygiene logbook In the hygiene logbook, you can: − call up all operating statuses, actions and malfunctions during a day in chronological order. − call up all HACCP and hygiene-related data. The list starts with the current date and the first event on this day. Then the subsequent events of this day are displayed and then the events from previous days. The most important operating data is summarised at the end of each day. Together with a service technician authorised by Winterhalter, you can define which data is to be stored. On request, you can have deviations from the rated values displayed on the screen so that you can respond to malfunctions in good time. A table with the factory settings can be found in point 17.1 Technical data. INFO: Once the memory capacity has been exhausted, the oldest data is deleted as soon as new data is added. 1 This function is not activated in factory. 34 PIN menu How to call up the hygiene logbook: ¾ Enter the PIN menu PIN 1575 ¾ Press the button D The screen (screen 09) with the hygiene logbook appears: − The list starts with the current date and the first event on this day. − This is followed by events from the day before. You can scroll up and down the list using buttons and . ¾ Press the back button (1) to exit the menu. Screen 09 15.5.1 Data transfer to PC (option) The hygiene logbook can only hold a limited number of entries. Therefore, it is also possible to transfer the entries to a PC and archive them there. Refer to the respective documents for further information. 15.6 Descaling / basic cleaning 15.6.1 Descaling programme If the machine is operated with very hard water and without water treatment, limescale can build up in the boiler, on the interior of the machine and in all pipes which carry water. Limescale deposits and the dirt and grease residue they contain represent a hygiene risk, and the limescale can cause the heating elements to fail. Therefore, it is essential to remove these deposits at regular intervals. Because the quality of water affects the washing and drying performance, we recommend that you feed the machine with softened water if your water has a total hardness of more than 3°dH (0.53 mmol/l). A service technician authorised by Winterhalter will be happy to offer advice. Using the descaling programme you can descale the inside of the dishwashing machine. The water-carrying pipes and the boiler can only be descaled by a service technician authorised by Winterhalter. For descaling you require an acid-based descaler which is suitable for commercial dishwashing machines. We recommend Winterhalter Descaler F. Warning When using chemicals, adhere to the safety notes and recommended dosages printed on the packaging. Wear protective clothing, protective gloves and protective goggles when handling chemicals. Ideally you should start the descaling programme when the machine is empty and switched off. If the machine is already ready for operation, it is first drained (programme-controlled) as chlorine gas can be generated if active chlorinated detergent and descaler are allowed to mix in the machine. 35 PIN menu How to start the descaling programme: If detergent is dosed using a dosing device which is installed outside the machine: ¾ Stop the dosing of detergents (e.g. pull out the suction tube or switch off the dosing device) in order to prevent the active chlorinated detergent coming into contact with descaler and producing chlorine gas. INFO: An integrated detergent dosing device is deactivated in the descaling programme (programmecontrolled). ¾ Enter the PIN menu PIN 1575 ¾ Press the button D Screen 28 appears. ¾ Press button (1). D Button (1) flashes. D The descaling programme runs automatically. Screen 28 Warning Cancellation is possible by: − Pressing button (28) or switching off the machine the descaling programme must be restarted. − Opening the machine door after closing the door, the program continues automatically. Descaler produces chemical burns The descaling solution must not remain in the machine. If you switch off the machine when the descaling programme is in progress or if you interrupt the programme, the machine must be emptied, refilled and again emptied. Use the self-cleaning programme for this. Descaling programme sequence: ¾ ¾ ¾ ¾ ¾ ¾ D If the machine is ready for operation: The tank is drained and re-filled without detergent. D If the machine is empty and switched off: The tank is filled without detergent. D As soon as the machine is ready for operation, the text “Add descaler. Press start button” appears on the screen. Open the door and add the descaler on the inside of the machine. Adhere to the recommended dosage. INFO: The tank capacity is 9.5 litres (machine size S) or 15.3 litres (machine sizes M, L and XL). Close the door and press the start button. D The start button lights up blue. Button (1) continues to flash. D The descaler solution is circulated inside the machine. D 600 seconds are counted down on the touchscreen. D As soon as the time has elapsed, button (1) stops flashing. Open the door and check whether the inside of the machine has been sufficiently descaled. INFO: If the door isn't opened for 600 seconds, the descaling program continues. Add descaler again if you can still see white deposits. Close the door and press the start button. Press the back button (28) when you can no longer see any white deposits on the inside of the machine. D The machine is drained and is then re-filled with cold water. As soon as the rated level is achieved, the cold water is circulated for 60 seconds and then drained off. D The machine switches off automatically. Open the door and check whether the machine has been fully drained. 36 PIN menu 15.6.2 Basic cleaning programme New dishes or new glasses usually have a coating of soiling which can be removed using the basic cleaning programme. The programme can also be used the dishes are coated with starchy deposits for instance. How to start the basic cleaning programme: ¾ Enter the PIN menu PIN 1575 ¾ Press the button D Screen 28 appears. ¾ Press button (2). D Button (2) flashes. D The basic cleaning programme runs automatically. Screen 28 Cancellation is possible by: − Pressing button (28) or switching off the machine restart of the basic cleaning programme. − Opening the machine door after closing the door, the program continues automatically. Basic cleaning programme sequence: D If the machine is empty and switched off: the tank is filled and heated up. D If the machine is ready for operation: A little water still flows into the boiler. D As soon as the machine is ready for operation, the text “Add basic detergent. Press start button” appears on the screen. ¾ Open the door and add the basic detergent on the inside of the machine. Adhere to the recommended dosage. INFO: The tank capacity is 9.5 litres (machine size S) or 15.3 litres (machine sizes M, L and XL). ¾ Push the rack with the dishes you wish to clean into the machine. ¾ Close the door and press the start button. D The start button lights up blue. Button (2) continues to flash. D The detergent solution is circulated inside the machine. D 300 seconds are counted down on the screen. D A pause for drip-drying and the rinse then follow. D As soon as the basic cleaning programme is completed, button (2) stops flashing and the start button flashes green. ¾ Open the door and remove the dishes from the machine. ¾ Wash further racks or press the back button (3) to exit the menu. 37 PIN menu 15.7 Changing the amount of detergent / rinse aid When a new detergent or a new rinse aid is used, it may be necessary to change the dosing amount. Please observe the dosing recommendations on the packing. The dosing amount can be adjusted separately for every standard programme. IMPORTANT! In the next menu, only the dosing amount of the installed dosing devices is changed. Please observe the corresponding device documents for external dosing devices How to enter the menu: ¾ Enter the PIN menu PIN 1575 ¾ Press the button D Screen 38 appears. The screen is divided up into 3 areas: − A: Selection of the programme which is to be changed Selection of the process (washing or rinsing) Saving the changed values − B: Indication of the currently programmed values, as soon as a standard programme is selected − C: Scroll buttons for changing values in area C Bild 38 Area A: − 1: Standard programme 1 − 2: Standard programme 2 − 3: Standard programme 3 − 4: Switch Detergent <> Rinse aid Detergent: button with dark background Rinse aid: button with white background − 5: Saving the changed values INFO: The appearance of the pictograms 1-3 depends on the type of dishwashing machine. The example shows the standard programmes of a dishwashing machine. Example 1: The detergent dosing amount is to be increased for standard programme 1 ¾ Press button (1). D The background of buttons (1) and (2) changes to white. D The current detergent dosing amount (3.0 ml/l) and the internal name (P003) is displayed in field (3). ¾ Increase the detergent dosing amount by pressing button (4). ¾ Press button (5) in order to save the entry. D Button (5) flashes once in white. 38 PIN menu Example 2: The rinse aid dosing amount is to be increased for standard programme 2 ¾ Press button (1). D The background of buttons (1) and (2) changes to white. D The current detergent amount (3.0 ml/l) and the internal name (P068) is displayed in field (3). ¾ Press button (4). D The background of button (4) becomes white. D The current rinse aid dosing amount (0.3 ml/l) and the internal name (P072) is displayed in field (3). ¾ Decrease the rinse aid dosing amount by pressing button (5). ¾ Press button (6) in order to save the entry. D Button (6) flashes once in white. How to leave the menu: ¾ Press button ¾ Press button ¾ Switch the machine on again 15.8 Programming connection terminals In the dishwashing machine's plinth there is a transfer strip for connecting an external detergent dosing device (X 21). The transfer strip can be assigned various signals depending on how parameter P704 is set. The technician who connects the detergent dosing device sets parameter P704 when installing the machine. How to make parameter P704 accessible: ¾ Enter the PIN menu PIN 1575 ¾ Press the button D Screen 14 appears. Screen 14 ¾ Use the scroll buttons to set the value for parameter P704. − 0: Voltage to the “Wash” terminal when the circulating pump frequency inverter is active. Tension at the "Fill" terminal during the first filling of the tank. − 1: Voltage to the “Fill” terminal when the inlet solenoid valve is active. − 2: For time-controlled dosing device (e.g. SP 166Z) − 3: For pulse-controlled dosing device (e.g. Fluidos) 39 PIN menu 15.9 Resetting the countdown water meter INFO: not for machines with integrated water softener The countdown water counter has to be reset if on machines with a partial demineralisation unit or full demineralisation unit the symbol opposite flashes on the screen. How to reset the countdown water meter: ¾ Enter the PIN menu PIN 1575 ¾ Press the button D Screen 30 appears. ¾ Press button (2) to reset the countdown water meter. D The fault message disappears. ¾ Press the back button (3) to exit the menu. INFO: Use the scroll buttons (1) to set the water quantity which, once consumed, causes the pictogram above to flash. Screen 30 40 Disposal 16 Disposal Contact your dealer so that as many of the materials contained in the machine as possible can be recycled. 17 Technical data 17.1 Technical data Machine type UC-S UC-M UC-L UC-XL Width [mm] 460 600 600 600 Depth [mm] 602.5 602.5 602.5 641.5 Height* [mm] 715 715 810 810 * On machines with integrated exhaust air heat recovery (Energy) the height dimension increases by 85 mm. Voltage Total connected load Fusing Water pressure (flow pressure) Water inlet temperature see rating plate see rating plate see rating plate 80 – 600 kPa (100 kPa = 1 bar) max. 60°C UC-…-Cool: cold water UC-…-Energy: cold water Factory settings for hygiene logbook Event Rinse aid container empty Detergent container empty The service interval has expired Screen display yes yes no Stored in hygiene logbook yes yes no Other events are possible on request Screen factory settings Event Screen saver Screen saver appears after Screen darkens Screen darkens after Acoustic signal when buttons pressed Machine is ready for operation before rated temperatures have been reached Possible selections yes/no 0 – 63 minutes yes/no 0 – 63 minutes yes/no Factory setting yes 10 minutes yes 20 minutes yes yes/no yes 17.2 Emissions Noise The emission sound pressure level at a work station LpAeq as per EN ISO 11202 is < 60 dB(A) Exhaust air The ventilation system must be configured in compliance with VDI Guideline 2052. 41 Installation 18 Installation Instructions for the service technician authorised by Winterhalter or dealer: − Adhere to the connection diagram. − The location for installation must be frost-proof so that the water carrying systems do not freeze. − Align the machine using a spirit level. − Cancel out any unevenness of the floor using the adjustable machine legs. Placement on three feet is possible if the machine is installed below a worktop. − When opening the machine door, water vapour escapes. This vapour may cause wood to swell. If furniture adjacent to the machine is made of wood, a steam protection kit must be installed. The same applies if the machine is installed underneath a wooden work surface. 19 Water connection Notes for the plumber: − Adhere to the connection diagram with specifications for water inlet temperature and water pressure. − Connect the machine to drinking water. − Install a main stop cock near to the machine, in an easily accessible position in the water supply line. − It must not be behind the machine. − Water safety must be ensured in compliance with EN 61770. Accordingly, the machine can be connected directly to the fresh water pipe without the intervention of any additional protection device. − Use the supply hose and fine filter located in the dishwashing machine for the water supply. The fine filter prevents particles from the water supply from penetrating into the dishwashing machine and causing rust on the cutlery and in the dishwashing machine. − Check that the connections do not leak. The supply hose must not be shortened or damaged. Old, pre-existing hoses must not be used again. − Use the flexible drain pipe located in the dishwashing machine for the water drain. The drain pipe must not be shortened or damaged. − The dishwashing machine is equipped with a drain pump. The maximum pump height can be found in the connection diagram. − If the water hardness is more than 3°d total hardness (GH), we recommend connecting a water treatment unit upstream to prevent build-up of limescale in the machine and in order to achieve optimum cleaning and drying results. The service technician authorised by Winterhalter will be happy to offer advice. 20 Electrical connection Notes for the electrician: Danger − − − − − − − − DANGER! Risk of fatal injury due to live components. Disconnect the machine from the mains and check that machine is de-energised. The machine and its associated ancillaries must be connected by an electrical contractor authorised by the responsible power company, in accordance with locally applicable standards and regulations. Adhere to the connection diagram. Adhere to the rating plate and circuit diagram. Check that all electrical protection systems are fully functional. Connect the machine to a protective circuit which has been installed and tested in accordance with the relevant regulations. The machine must be connected electrically in compliance with the data on the rating plate. Fuse the electrical connection of the machine as a separately fused circuit, as part of the on-site system, using slow-blowing fuses or circuit breakers, in accordance with the total connected load (see rating plate). The machine connection (mains connection cable) should preferably be installed as a fixed connection. Install a mains disconnector as well as a residual-current circuit breaker (RCCB) in the electrical feeder in accordance with the relevant regulations. These switches must disconnect all poles and must have the stipulated contact gap. The installation location must be close to the machine and must be easily accessible. 42 Electrical connection 20.1 Mains connection cable Gefahr DANGER! Risk of fatal injury due to live components! The connecting cable may only be changed or replaced by the manufacturer, its customer service representative or a similarly qualified person. Use an H07 RN-F type cable or equivalent. The machines of the UC series are delivered with or without mains connection cable. Requirements to the mains connection cable ¾ Use a cable of the type H07 RN-F or equivalent ¾ Section and number of wires appropriate for voltage, fusing and overall connection value Connection of the mains connection cable in the machine Exemplary images for a UC-L Remove the front cladding UC-S: additionally remove the right side cladding Remove the bulkhead (1) towards the electric installation compartment Strain relief Insert the mains connection cable through the backside of the machine and guide it to the connection terminals at the front UC-M, UC-L, UC-XL Tighten the screwed cable connection in the electric installation compartment UC-S Tighten the screwed cable connection at the backside of the machine Connect the mains connection cable to the terminals PE to N according to the connection scheme. Observe the connection scheme fixed at the bulkhead of the electric installation compartment. Boiler heating element The boiler heating element is already connected. However, jumpers must be plugged in, in order not to exceed the fusing values of the mains network. ¾ Please observe the connection scheme fixed at the bulkhead of the electric installation compartment. 20.2 Bonding connection Integrate the machine and any plinths and table systems in the on-site equipotential bonding system. The connection points are labelled accordingly. There is a screw connection point marked with the earth symbol at the back of the machine, to which the earth lead must be connected. 43 Position of the dosing points (detergent, rinse aid) 21 Position of the dosing points (detergent, rinse aid) Danger 1 2 3 4 5 DANGER! Risk of fatal injury due to live components. Have the dosing devices installed and commissioned by a service technician authorised by Winterhalter. Disconnect the machine from the mains and check that machine is de-energised. Image of a UC-L Detergent; transparent hose Rinse aid (behind the back wall of the machine); blue hose Take-over strip for the connection of external dosing devices (see also section 15.8) Rinse aid dosing device Detergent dosing device INFO: The dosing devices (Pos. 4 and 5) are not included in the scope of delivery of all machines. Image of a UC-L 6 44 Inputs for detergent and rinse aid hoses if the storage containers are located outside the machine Winterhalter Gastronom GmbH Commercial Dishwashing Systems Tettnanger Strasse 72 88074 Meckenbeuren · Germany Telephone +49 (0) 75 42 4 02-0 Telefax +49 (0) 75 42 4 02-1 87 www.winterhalter.biz Translation of the original operating instructions Subject to technical alterations; 89012662-00/04-09 [email protected]