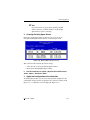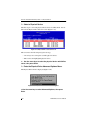
1
RAID EzAssist™ v2.00 Configuration Utility User Reference Guide P/N: 775029-01 RAID EzAssist™ v2.00 Configuration Utility User Reference Guide Part Number 775029-01 © Copyright 2000 Mylex Corporation. All Rights Reserved. All contents of this manual are copyrighted by Mylex Corporation. The information contained herein is the exclusive property of Mylex Corporation and shall not be copied, transferred, photocopied, translated on paper, film, electronic media, or computer-readable form; or otherwise reproduced in any way, without the express written permission of Mylex Corporation. Greetings This manual describes the RAID EzAssist v2.00 Configuration Utility. Requests for technical information about this and other Mylex Corporation products should be made to your Mylex authorized reseller or Mylex marketing representative. Please Notice Mylex is a registered trademark of Mylex Corporation. Global Array Manager, Workstation Array Manager, RAID Assist, RAID EzAssist, DAC960, AcceleRAID, and eXtremeRAID are trademarks of Mylex Corporation. Windows, Windows NT, Windows 2000, Windows 95, and Windows 98 are registered trademarks of Microsoft Corp. Other names that are trademarks may be used herein for the purpose of identifying the products or services of their respective owners. Unless otherwise noted, companies, names and data used in examples herein are fictitious. Our Policy Although reasonable efforts have been made to assure the accuracy of the information contained herein, this publication could include technical inaccuracies or typographical errors. Mylex Corporation expressly disclaims liability for any error in this information, and for damages, whether direct, indirect, special, exemplary, consequential or otherwise, that may result from such error, including but not limited to loss of profits resulting from the use or misuse of the manual or information contained therein (even if Mylex Corporation has been advised of the possibility of such damages). Any questions or comments regarding this document or its contents should be addressed to Mylex Corporation at the address shown on the cover. The following paragraph does not apply to the United Kingdom or any country where such provisions are inconsistent with local law: MYLEX CORPORATION PROVIDES THIS PUBLICATION “AS IS” WITHOUT WARRANTY OF ANY KIND, EITHER EXPRESS OR IMPLIED, INCLUDING, BUT NOT LIMITED TO, THE IMPLIED WARRANTIES OF MERCHANTABILITY OR FITNESS FOR A PARTICULAR PURPOSE. Some states do not allow disclaimer of express or implied warranties or the limitation or exclusion of liability for indirect, special, exemplary, incidental or consequential damages in certain transactions; therefore, this statement may not apply to you. Also, you may have other rights which vary from jurisdiction to jurisdiction. Information in this publication is subject to change without notice and does not represent a commitment on the part of Mylex Corporation. Changes may be made periodically to the information herein; these changes will be incorporated in new editions of the publication. Mylex Corporation reserves the right to make improvements and/or changes at any time in the product(s) and/or program(s) described in this publication. It is possible that this publication may contain reference to, or information about, Mylex Corporation products (machines and programs), programming or services that are not announced in your country. Such references or information must not be construed to mean that Mylex Corporation intends to announce, provide, or make available such Mylex products, programming, or services in your jurisdiction. About This Manual This installation guide covers the use of the RAID EzAssist Configuration Utility. With RAID EzAssist, you can: • Configure controllers, devices, disk arrays, and define logical drives • Monitor and maintain your controllers and arrays • Perform advanced tasks, such as flashing new firmware code and setting clustering Conventions Throughout the manual, the following conventions are used: ❑ This Graphic and Text Identifies a Task. ■ This Graphic and Text Identifies a Subtask Under the Above ☞This graphic and text states a particular action to perform. OR ☞An alternative action to perform. ☛ Note Supplementary information that can have an effect on system performance Caution Notification that a proscribed action has the potential to adversely affect equipment operation, system performance, or data integrity WARNING Notification that a proscribed action will definitely result in equipment damage, data loss, or personal injury Contents Chapter 1 First-Time Configuration Welcome! .......................................................................................... 1-1 "Previous" Versus "New" Mylex PCI Controllers ......................... 1-1 How Do I Configure a Mylex Controller for the First Time? ............... 1-3 How Do I Configure Multiple Mylex Controllers? ............................. 1-31 Chapter 2 Drive Configuration How Do I Start RAID EzAssist? ......................................................... 2-1 How Do I Begin to Configure a Mylex Controller? ............................. 2-3 How Do I Choose a Configuration Method? ...................................... 2-4 How Do I Do an Automatic Configuration? ........................................ 2-7 How Do I Do an Assisted Configuration? ........................................ 2-11 How Do I Do a Custom Configuration? ........................................... 2-19 How Do I Add Capacity to an Existing Disk Array? ......................... 2-29 How Do I Define Additional Logical Drives? .................................... 2-40 How Do I Assign Additional Spare Drives? ..................................... 2-46 How Do I Unassign Existing Spare Drives? .................................... 2-50 How Do I Make Use of the Spanning Feature? ............................... 2-54 How Do I Exit RAID EzAssist? ........................................................ 2-67 Chapter 3 Controller Configuration How Do I View Controller Configuration Information? ....................... 3-3 How Do I Change Global Properties for a Controller? ....................... 3-5 How Do I Change SCSI Transfer Properties for a Previous Mylex PCI Controller? .................................................................... 3-10 How Do I Change Startup Properties for a Controller? ................... 3-13 Chapter 4 Monitoring and Maintenance Activities How Do I View Disk Array Status and Information? .......................... 4-4 How Do I Visually Locate the Physical Drives That Comprise the Array? ....................................................................... 4-6 How Do I View Logical Drive Status and Information? ...................... 4-8 How Do I Change Logical Drive Stripe Size and Write Cache Settings? ................................................................... 4-11 Manual No. 775029 vii How Do I View the Logical Drive Bad Data Table? ......................... 4-13 How Do I Visually Locate the Physical Drives That Comprise the Logical Drive? .......................................................... 4-15 How Do I Run a Consistency Check on the Logical Drive? ............. 4-17 How Do I Initialize a Logical Drive? ................................................. 4-20 How Do I Rebuild Redundancy Data Onto a Logical Drive? ........... 4-23 How Do I Cancel a Background Task That’s Running on a Logical Drive? ........................................................................ 4-26 How Do I Delete the Most Recently Configured Logical Drive? ...... 4-30 How Do I View Physical Drive Status and Information? .................. 4-33 How Do I Change Physical Drive Read and Write Cache Settings? 4-36 How Do I View the Physical Drive Defect List? ............................... 4-38 How Do I View and Reset Physical Drive Error Counts? ................. 4-41 How Do I Designate a Physical Drive as a Spare, or Reset a Spare Drive as Unused? ............................................................ 4-44 How Do I Visually Locate a Physical Device? ................................. 4-49 How Do I Rebuild Redundancy Data on a Physical Drive? ............. 4-51 How Do I Format a Physical Drive? ................................................. 4-55 How Do I Change Physical Drive Status? ....................................... 4-59 How Do I Change SCSI Transfer Properties for Physical Devices on a New Mylex PCI Controller? ...................................... 4-64 How Do I Rescan a Controller for New Devices? ............................ 4-68 Chapter 5 Advanced Options How Do I Update Controller Firmware or the RAID EzAssist Utility? 5-3 How Do I Back Up My Configuration? ............................................... 5-7 How Do I Restore a Previously-Saved Configuration to a Controller? ................................................................................ 5-9 How Do I Print My Configuration to a Text File? .............................. 5-11 How Do I Clear (Erase) My Current Configuration? ........................ 5-13 How Do I Enable (or Disable) PCI Controller Clustering? ............... 5-15 How Do I Reassign a Host ID For PCI Controller Clustering? ......... 5-17 How Do I Check the Status of a Background Task? ........................ 5-19 Glossary viii RAID EzAssist User’s Manual Chapter 1 First-Time Configuration Welcome! Welcome to RAID EzAssist™, Mylex Corporation’s user friendly configuration and maintenance utility for RAID controllers. This chapter will help you get started step by step doing your first Mylex RAID Controller configuration. Before you are ready to configure a controller, be sure that you have already done the following according to the instructions in your controller’s quick installation or hardware installation guide: • Installed your Mylex controller(s) in the target system • Connected appropriate cables between your controller(s) and the set of disk drives which you intend to use with each controller • Set unique SCSI IDs for each drive on a particular SCSI bus (i.e. attached to each Mylex RAID controller), if necessary • Terminated each SCSI bus appropriately (not applicable for Fibre channel controllers) “Previous” Versus “New” Mylex PCI Controllers Several features of the RAID EzAssist Configuration Utility differ depending on whether the RAID controller (and thus its firmware) is one of Mylex’s new generation of controllers, or is an earlier or previous controller. Throughout this manual we use the terms previous controllers and new controllers as follows: Previous Controllers. These include all DAC960P Series controllers (such as the DAC960PDU, DAC960PG, DAC960PJ, etc.), as well as the AcceleRAID™ 150/200/250 and eXtremeRAID™ 1100 (DAC1164P) controllers New Controllers. These include the AcceleRAID 352 and eXtremeRAID 2000 PCI to Ultra 160 SCSI controllers, and the eXtremeRAID 3000 PCI to Fibre Channel controller Manual No. 775029 1-1 Welcome! Where to Go Now... If you have installed only one Mylex RAID Controller in your target system, see the section called “How Do I Configure a Mylex Controller for the First Time?” on page 1-3. If you have installed two or more Mylex RAID Controllers in your target system, see the section called “How Do I Configure Multiple Mylex Controllers?” on page 1-31. 1-2 RAID EzAssist User’s Manual First-Time Configuration How Do I Configure a Mylex Controller for the First Time? ❑ Power On Your System. Regardless of whether an operating system is installed on your computer system, you can run RAID EzAssist from the Mylex controller’s BIOS at system boot time. ☞Turn on the system’s power switch. ❑ Start RAID EzAssist. As the system boots up, you’ll see various messages on the display. Pay special attention when you see a message similar to the following: <Mylex controller ID1> BIOS Version x.xx-xx (Month Day, Year) Mylex Corporation Shortly after, some additional messages from the Mylex controller are displayed, including: Press <Alt-M> for BIOS Options Next you’ll see: Press <Alt-R> for RAID Configuration options ☞ When you see the prompt, press <Alt-R>. If you’ve pressed <Alt-R> within the allotted time, you’ll see: RAID Configuration will start after system initialization completes No system drives installed If you were too late pressing <Alt-R>, simply reboot and start again. ☞ Wait for RAID EzAssist to start. 1. Examples include DAC960, eXtremeRAID 2000, etc. Manual No. 775029 1-3 How Do I Configure a Mylex Controller for the First Time? ❑ Get Started. RAID EzAssist always starts by scanning for Mylex controllers and target drives (Figure 1-1). Figure 1-1. RAID EzAssist Scans for Controllers and Drives ☞ Allow scanning to complete. Since this is a first-time configuration, you’ll see a Notice (Figure 1-2). Figure 1-2. No Existing RAID Configuration “Would you like to configure a RAID drive now?” The answer depends on whether you want to change any of the default parameters and settings for this Mylex RAID Controller. If you are a new or inexperienced user, the default settings will probably suit your needs just fine, so you’ll answer Yes. If you are an advanced user, now’s the time to change any controller parameters that you wish-- before a RAID configuration is set on the controller, so you’ll answer No. ☞ If you want to adjust controller parameters, use the arrow key to select No, then press Enter. Please see Chapter 3 for information on changing Global, SCSI, and Startup parameters. Return here when you’re done to continue first-time RAID configuration. 1-4 RAID EzAssist User’s Manual First-Time Configuration ☛ Note After changing controller parameters, select Configure a RAID Drive from the main menu to proceed. ☞ If you want to begin configuring your first RAID drive without changing controller options, press Enter with Yes selected. ❑ Choose a Configuration Method. Three configuration methods are available to you. The method you choose will depend in part on your experience with RAID technology and the number and relative sizes of the disk drives connected to the controller. The table on the following page can help you decide which method is most appropriate for your situation. Manual No. 775029 1-5 How Do I Configure a Mylex Controller for the First Time? Table 1-1. Selecting a Configuration Method Configuration Method Automatic Who Should Use It -Novice users with little or no RAID experience. -Users who wish to set up a single array with one logical drive when all available disk drives are of similar size/capacity. Assisted What It Does Automatically creates ONE array out of all available disk drives on the controller. If disk drives are different capacities, larger disk drives are initialized down to the capacity of the smallest connected disk drive. RAID level is automatically set based on the number of connected disk drives: 1 drive = a JBOD -Don’t use this if you want to span arrays, use RAID 0 striping, or RAID 0+1 mirroring with striping. 2 drives = a RAID 1 mirrored set -Users with some knowledge of RAID who wish a step by step configuration approach Leads you step by step through a series of questions about what type of RAID configuration you’re looking for. 3 drives = a 3-drive RAID 5 striping with parity configuration 4-8 drives = a 3-,4-,5-,6-, or 7-drive RAID 5 striping with parity configuration adding one device as a hot spare. -Users who want to set up more than one array or logical drive without the detailed control of Custom configuration. Custom 1-6 -Experienced or advanced users who want more complete control over configuration options. Provides detailed control of RAID configuration, including individual selection of physical devices, multiple arrays, multiple logical drives, caching, stripe size, etc. -Users with disk drives of multiple capacities who wish to create multiple arrays and logical drives to maximize capacity usage. Allows spanning (RAID 10, 30, 50, 0+1+0, etc.). RAID EzAssist User’s Manual First-Time Configuration You choose your configuration method from the Configure RAID Drive screen (Figure 1-3). Figure 1-3. Choose a Configuration Method ☞ If you want to do an Automatic configuration, press Enter with Automatic selected. Now see “Option 1: Do an Automatic Configuration” for details. ☞ If you want to do an Assisted configuration, use the arrow key to select Assisted, then press Enter. Now see “Option 2: Do an Assisted Configuration” for details. ☞ If you want to do a Custom configuration, use the arrow key to select Custom, then press Enter. Now see “Option 3: Do a Custom Configuration” for details. Manual No. 775029 1-7 How Do I Configure a Mylex Controller for the First Time? ❑ Option 1: Do an Automatic Configuration. The RAID Configuration Summary screen is displayed showing the recommended configuration for your system (Figure 1-4). Figure 1-4. RAID Configuration Summary Screen Table 1-2. RAID Configuration Summary Fields Field Description Fault Tolerance For 1 disk drive = No For 2 or more disk drives = Yes Spare For 1-3 disk drives = No For 4-8 disk drives = Yes Optimization For 1 disk drive = Performance (no fault tol) For 2 disk drives = Performance For 3 or more disk drives = Capacity Logical Drive Count 1 Total (Useable) Capacity Depends on the fault tolerance overhead: For 1 disk drive of n GB = n GB For 2 disk drives of n GB = n GB For 3 disk drives of n GB = 2n GB For 4,5,6,7,8 disk drives of n GB = 2n,3n,4n,5n,6n GB respectivelya Disk Drive Identification Depends on disk drives. a. With four or more drives, one drive’s capacity is used for fault tolerance overhead, and one additional drive is reserved as a spare. 1-8 RAID EzAssist User’s Manual First-Time Configuration If there are more than five drives in the array, you’ll see a small down-arrow next to the disk drive display field. ☞ (Optional): If there is a down-arrow next to the disk drive display field, press PgDn to see the additional disk drives in the array. ☞ (Optional): Alternate PgUp and PgDn to see the entire list of disk drives in the array. ☞ (Optional): If you want to see additional configuration details, use the arrow key to select the Details button, then press Enter. If you choose to view configuration details, the RAID Configuration Details screen is displayed (Figure 1-5). Figure 1-5. RAID Configuration Details Screen Table 1-3. RAID Configuration Details Fields Field Description RAID Level For 1 disk drive = JBOD For 2 disk drives = RAID 1 For 3 or more disk drives = RAID 5 Stripe Block Size For 1 disk drive = n/a For 2 or more disk drives = 64KB Cache Line Size Default = 8 K; Tuned to Stripe Block Size Read Cache Normal (Mylex default) Write Cache Write-Thru (Mylex default) Manual No. 775029 1-9 How Do I Configure a Mylex Controller for the First Time? ☛ Note After viewing configuration details, press Enter to select OK and return to the RAID Configuration Summary screen. ☞ To apply the configuration, use the arrow key if necessary to select Apply, then press Enter, OR ☞ To cancel the configuration, use the arrow key to select Cancel, then press Enter. When you apply the new configuration, RAID EzAssist writes configuration information to the Mylex controller. This takes a few moments, so a message is displayed (Figure 1-6). Figure 1-6. Writing RAID Configuration. Please Wait... ☞ Wait for the configuration information to be written to the controller. Next you’ll see a Configuration Status screen (Figure 1-7). Your automatic configuration has been completed. Figure 1-7. Configuration Complete - Reboot or Main Menu Your next step will be to install the appropriate Mylex Disk Array Controller driver for the operating system you’ll be using on the computer in which the Mylex RAID Controller is installed. 1-10 RAID EzAssist User’s Manual First-Time Configuration • If you have not installed your operating system software yet, and the Mylex controller is your system’s primary controller, you will need to install the operating system and the Mylex driver concurrently. • If the operating system is already installed, the Mylex controller is a secondary controller. You will need to boot your operating system and install the Mylex driver from within the operating system. In either case, refer to the appropriate operating system chapter in the Disk Array Controller Software Kit Installation Guide and User Manual for instructions on primary and secondary controller driver installation. You may also refer to the Mylex controller’s quick installation guide if your operating system is NetWare, Windows NT, or Windows 2000. ☞ Exit RAID EzAssist by pressing Enter with the Reboot button selected. Begin operating system installation if necessary, or allow your installed operating system to boot. ☞ Refer to the Disk Array Controller Software Kit Installation Guide and User Manual or your Mylex controller’s quick installation guide for further instructions. ❑ Option 2: Do an Assisted Configuration. The sequence of screens displayed during an Assisted Configuration depends on several factors, such as the number of unconfigured drives on the controller and your responses at each step of the Assisted Configuration process. ■ Fault Tolerance? The Fault Tolerance screen is displayed under the following condition: • Number of Unconfigured Drives on Controller > 1 ☛ Note If you have only one unconfigured drive on this controller, your only configuration option is JBOD, a non fault-tolerant option. You will, therefore, NOT see the Fault Tolerance choice screen. Assuming your situation meets the condition above, the Fault Tolerance Manual No. 775029 1-11 How Do I Configure a Mylex Controller for the First Time? screen is displayed (Figure 1-8). Figure 1-8. Do You Want Fault Tolerance? In most situations you will want fault tolerance to protect your array in the event of a drive failure. However, if raw performance utilizing maximum available drive capacity overshadows your need for fault tolerance, a RAID 0 (striping) configuration may be more appropriate. ☞ If you want your array to be fault tolerant, press Enter with Yes selected. ☞ If you prefer a RAID 0 striping or a JBOD configuration and fault tolerance is not a consideration, use the arrow key to select No, then press Enter. ■ Spare Drive? The Spare Drive screen is displayed under the following conditions: • Fault Tolerance = YES, AND • Number of Unconfigured Drives on Controller > 3 ☛ Note If you have two unconfigured drives on this controller, you’ll get a RAID 1 (mirroring) configuration. If you have three unconfigured drives, you’ll get a RAID 5 (striping with parity) configuration. In both cases no drive would be available to act as a spare, so you will therefore NOT see the Spare Drive choice screen. Assuming your situation meets the conditions above, the Spare Drive screen 1-12 RAID EzAssist User’s Manual First-Time Configuration is displayed (Figure 1-9). Figure 1-9. Do You Want a Spare Drive? A spare drive (hot spare or standby drive) offers an additional level of fault tolerance for existing fault tolerant arrays. If a drive in the array fails, the presence of a spare drive allows the failed drive’s data to be rebuilt onto the spare. After rebuild is complete, the array could still accept another drive failure with no loss of data (although there would be degraded performance). It is usually beneficial to reserve a spare drive for the array, if you can afford not to use the capacity of the drive for array data storage. Reserving a spare drive lowers the total useable capacity of the array by the capacity of that spare drive. ☞ If you want your array to reserve a spare drive, press Enter with Yes selected. ☞ If you prefer not to reserve a spare drive and thereby use all the available drives in the array, use the arrow key to select No, then press Enter. ■ Optimization Priority The Optimization Priority screen is displayed under the following conditions: • Fault Tolerance = YES, AND • Number of Available1 Drives on Controller > 2 1. “Available” drives are both unconfigured AND not reserved as a spare. Manual No. 775029 1-13 How Do I Configure a Mylex Controller for the First Time? ☛ Note If you have only two available drives on this controller, you’ll get a RAID 1 (mirroring) configuration, which optimizes for performance. You will, therefore, NOT see the Optimization Priority choice screen. Assuming your situation meets the conditions above, the Optimization Priority screen is displayed (Figure 1-10). Figure 1-10. Optimize for Capacity? At this point you choose whether available capacity or array performance is the top criterion in your fault tolerant array. If you choose Capacity, you’ll be requesting a RAID 5 (striping with parity) configuration. If you choose Performance, you’ll be requesting a RAID 0+1 (striping with mirroring) configuration. Both give you the safety of fault tolerance. RAID 5 provides the best combination of settings for most applications and has overhead of only one drive’s capacity. RAID 0+1 has a write performance advantage over RAID 5, but since the striped set is mirrored, available capacity is only half of the total capacity in the drive set. ☞ If you want to optimize your array for capacity, press Enter with Capacity selected. ☞ If you want to optimize your array for performance, use the arrow key to select Performance, then press Enter (Figure 1-11). 1-14 RAID EzAssist User’s Manual First-Time Configuration Figure 1-11. Optimize for Performance? ■ Logical Drive Count The Logical Drive Count screen is always displayed in Assisted Configuration. You may divide the available drive space into multiple logical drives, or retain the default of one (1) logical drive. The Logical Drive Count screen is displayed (Figure 1-12). Figure 1-12. Logical Drive Count Each logical drive that you create under Assisted Configuration will have identical capacity and settings (RAID level, caching, etc.). If you wish to set logical drive capacities or settings individually, you must use Custom Configuration. See “Option 3: Do a Custom Configuration.” ☞ If you want to set only one (1) logical drive, press Enter with Ok selected. Manual No. 775029 1-15 How Do I Configure a Mylex Controller for the First Time? ☞ If you want to set up multiple logical drives: ☞ Press the up arrow key to select the logical drive count field. ☞ Type in a number of logical drives to set up. ☞ Press the down arrow key to select Ok. ☞ Press Enter with Ok selected. ■ Capacity Usage The Capacity Usage screen is always displayed in Assisted Configuration. You may use all or a part of the total available capacity to set up the specified number of logical drives with the optimization you’ve selected previously. The Capacity Usage screen is displayed (Figure 1-13). Figure 1-13. Capacity Usage By default, the maximum available capacity is displayed in the Capacity Usage field. If you wish to reserve some of the capacity of your drives to set up future arrays, you may choose a smaller gigabyte (GB) value for the current logical drive set. ☞ If you want to use the maximum available capacity for these logical drives, press Enter with Ok selected. ☞ If you want to reserve some capacity for future use: ☞ Press the up arrow key to select the capacity usage field. ☞ Type in a number representing the gigabytes (GB) to be used in the current configuration. (This number must be 1-16 RAID EzAssist User’s Manual First-Time Configuration lower than the maximum value displayed.) ☞ Press the down arrow key to select Ok. ☞ Press Enter with Ok selected. ■ Apply the Configuration to the Controller. The RAID Configuration Summary screen is displayed (Figure 1-14). Figure 1-14. RAID Configuration Summary Screen If there are more than five drives in the array, you’ll see a small down-arrow next to the disk drive display field. ☞ (Optional): If there is a down-arrow next to the disk drive display field, press PgDn to see the additional disk drives in the array. ☞ (Optional): Alternate PgUp and PgDn to see the entire list of disk drives in the array. ☞ (Optional): If you want to see additional configuration details, use the arrow key to select the Details button, then press Enter. If you choose to view configuration details, the RAID Configuration Details screen is displayed (Figure 1-15). Manual No. 775029 1-17 How Do I Configure a Mylex Controller for the First Time? Figure 1-15. RAID Configuration Details Screen ☛ Note After viewing configuration details, press Enter to select OK and return to the RAID Configuration Summary screen. ☞ To apply the configuration, use the arrow key if necessary to select Apply, then press Enter, OR ☞ To cancel the configuration, use the arrow key to select Cancel, then press Enter. When you apply the new configuration, RAID EzAssist writes configuration information to the Mylex controller. This takes a few moments, so a message is displayed (Figure 1-16). Figure 1-16. Writing RAID Configuration. Please Wait... ☞ Wait for the configuration information to be written to the controller. 1-18 RAID EzAssist User’s Manual First-Time Configuration Next you’ll see a Configuration Status screen (Figure 1-17). Your assisted configuration has been completed. Figure 1-17. Configuration Complete - Reboot or Main Menu Your next step will be to install the appropriate Mylex Disk Array Controller driver for the operating system you’ll be using on the computer in which the Mylex RAID Controller is installed. • If you have not installed your operating system software yet, and the Mylex controller is your system’s primary controller, you will need to install the operating system and the Mylex driver concurrently. • If the operating system is already installed, the Mylex controller is a secondary controller. You will need to boot your operating system and install the Mylex driver from within the operating system. In either case, refer to the appropriate operating system chapter in the Disk Array Controller Software Kit Installation Guide and User Manual for instructions on primary and secondary controller driver installation. You may also refer to the Mylex controller’s quick installation guide if your operating system is NetWare or Windows NT. ☞ Exit RAID EzAssist by pressing Enter with the Reboot button selected. Begin operating system installation if necessary, or allow your installed operating system to boot. ☞ Refer to the Disk Array Controller Software Kit Installation Guide and User Manual or your Mylex controller’s quick installation guide for further instructions. Manual No. 775029 1-19 How Do I Configure a Mylex Controller for the First Time? ❑ Option 3: Do a Custom Configuration. Custom Configuration gives you full control over the configuration of your disk drives. With Custom Configuration, you can: • Select individual disk drives to add to the configuration • Build multiple arrays • Configure logical drives individually • Select a specific RAID level • Select the write caching method (Write-Thru or Write-Back) • Set the stripe size • Set logical drive size by physical or logical capacity • Add capacity to an existing array • Assign additional spare drives • Enable spanning to create a configuration of larger drive sets Once you’ve selected Custom from the Configure RAID Drive screen, the Custom Configuration main menu is displayed (Figure 1-18). Figure 1-18. Custom Configuration Main Menu We are setting up a first-time configuration, so we’ll use the menu’s first option: Configure a New Disk Array. ☞ Press Enter with the Configure a New Disk Array option selected. 1-20 RAID EzAssist User’s Manual First-Time Configuration ■ Build Disk Arrays. The first step in Custom Configuration is to build at least one disk array. This is accomplished from the Disk Array Configuration screen (Figure 1-19). Figure 1-19. Disk Array Configuration Screen This screen uses the following navigation strategy: • PgDn and PgUp show you all the available drives if there is a small down-arrow beside the Unused Drives field. • Inside Unused Drives, arrow keys select a drive, Enter accepts the highlighted drive and adds it to the Disk Array box to the right. • The Tab key shifts control to the buttons, or from the buttons back to Unused Drives. • When buttons are in focus, arrow keys select a button and Enter activates the highlighted button. Caution The drives you select to comprise the array will all be treated as having the capacity of the smallest selected drive, regardless of the actual capacities. This could lead to wasted drive space. Therefore, try whenever possible to select drives of similar capacity when building an array. “How many drives should I select for an array?” The answer depends on the RAID levels you want to be able to choose for the logical drives you’ll set up in that array. See Table 1-4. Manual No. 775029 1-21 How Do I Configure a Mylex Controller for the First Time? Table 1-4. Required Numbers of Drives By RAID Level Desired RAID Level Number of Drives to Select JBOD (Single Drive) Exactly 1 drive RAID 0 (Striping) At least 2 drives of equal size RAID 1 (Mirroring) Exactly 2 drives of equal size RAID 3 (Parity Drive) At least 3 drives of equal size RAID 5 (Striping with Parity) RAID 0+1 (Striping with Mirroring) ☞ Use the arrow keys to select a disk drive in the Unused Drives field, then press Enter to accept the drive into the disk array. ☞ Repeat the step above for as many disk drives as you wish to add to the array. ☞ When you’ve finished adding drives, press the Tab key to switch focus to the buttons. Figure 1-20 is a example of how your screen might look after the steps above. Figure 1-20. Sample Disk Array Configuration ☞ If you’re not satisfied with your drive selections, use the arrow key to select Clear, then Press Enter. Press Tab to return to Unused Drives. Your selections will be erased and you can try again as described above. 1-22 RAID EzAssist User’s Manual First-Time Configuration ☞ To save the array you’ve set up, press Enter with Save Array selected. A Notice is displayed at this point as shown in Figure 1-21. Figure 1-21. Define Logical Drives or Return to Disk Array Set-Up “Do you want to build additional arrays at this time?” If you want to set up additional arrays, it is convenient to do so at this time before logical drives are defined. ☛ Note If you want to take advantage of “spanning” your configuration across multiple arrays, you must enable spanning FIRST, build the individual arrays, then create logical drives that can make use of the spanned capacity available. See the section “How Do I Make Use of the Spanning Feature?” on page 2-54 in Chapter 2 for more complete information about this option. If you plan on only one array, or if you’d prefer to define logical drives before building any additional arrays, you should move on to define logical drives at this time. ☞ To build additional disk arrays, use the arrow key if necessary to select No, then press Enter. Repeat the steps described in “Build Disk Arrays.” Manual No. 775029 1-23 How Do I Configure a Mylex Controller for the First Time? ☞ To define logical drives at this time, use the arrow key if necessary to select Yes, then press Enter. ■ Define Logical Drives. Logical drives for the array(s) you just set up are defined from the Logical Drive Definition screen (Figure 1-22). Figure 1-22. Logical Drive Definition Screen This screen uses the following navigation strategy: • Arrow keys move among the logical drive definition fields. • For RAID Level, Write Cache, and Stripe Size(KB) definition fields, the Spacebar brings up a list of valid options. Arrow keys move among the options and Enter selects an option. • For RAID Level, Write Cache, and Stripe Size(KB) definition fields, the + and - keys cycle through the valid options. When the desired option is visible, use the arrow key to move to another field. • For Physical Capacity or Logical Capacity definition fields, type a numeric decimal value representing the desired capacity in GB. You may choose one or the other field to adjust. • The Tab key shifts control to the buttons, or from the buttons back to the logical drive definition fields. • When buttons are in focus, arrow keys select a button and Enter activates the highlighted button. Arrow keys rotate selections through Add Drive, Apply, Cancel, Clear New, and Delete Last. 1-24 RAID EzAssist User’s Manual First-Time Configuration Let’s start by selecting a RAID level for our first logical drive. ☞ With the RAID Level definition field selected... ☞ Press the + or - key to find your desired RAID level, OR ☞ Press Spacebar to display a box of available choices, use the arrow key to select your desired RAID level, then press Enter (Figure 1-23). Figure 1-23. Example of a Selection Box Next, we’ll select the write caching strategy for our logical drive. If you are unfamiliar with the terms “Write Through” and “Write Back” caching, please refer to the Glossary for a detailed definition. In a nutshell, Write Back caching speeds write performance but risks loss of data in the cache buffer should power fail. Use Write Back only if you have a battery backup unit (BBU) or uninterruptable power supply (UPS) installed to preserve data in the cache. ☞ Use the right arrow key to select the Write Cache definition field, then... ☞ Press the + or - key to find your desired caching method (“Thru” for Write Through, “Back” for Write Back), OR ☞ Press Spacebar to display a box of available choices, use the Manual No. 775029 1-25 How Do I Configure a Mylex Controller for the First Time? arrow key to select your desired write caching method, then press Enter. Next, we’ll set the stripe size for this logical drive. If you are unfamiliar with the term “Stripe Size” please refer to the Glossary for a detailed definition. ☛ Note Depending on the controller, available stripe sizes are 8, 16, 32, 64, 128, 256, 512, and 1024. ☞ Use the right arrow key to select the Stripe Size(KB) definition field, then... ☞ Press the + or - key to find your desired stripe size, OR ☞ Press Spacebar to display a box of available choices, use the arrow key to select your desired stripe size, then press Enter. Next, we set a size for this logical drive based on the maximum available capacity. You can set logical drive size in terms of either physical capacity or logical capacity. Logical capacity takes into account overhead for fault tolerance, spare drives, etc. If you intend to set up more than one logical drive in this array, then set the capacity for the first logical drive somewhere below the maximum to leave space for additional logical drives. ☞ Use the right arrow key to select either the Physical or Logical Capacity(GB) definition field, then type a numeric decimal value for the physical or logical capacity to be used in this logical drive. ☛ Note Drive capacity may be rounded for alignment with block sizes. Finally, let’s add the logical drive. 1-26 RAID EzAssist User’s Manual First-Time Configuration Check your settings among the logical drive definition fields to be sure they are what you want. ☞ If you wish to change any settings, use the arrow key to select the desired definition field and change its value as described earlier. ☞ To add the logical drive, press the Tab key to switch focus to the Add Drive button, then press Enter with Add Drive selected (Figure 1-24). Figure 1-24. Ready to Add the Logical Drive The logical drive is added to the display box, and focus returns to the logical drive definition field line (Figure 1-25). Figure 1-25. Logical Drive Has Been Added ☞ To define additional logical drives, use the arrow key if necessary to return to the RAID Level definition field. Repeat the Manual No. 775029 1-27 How Do I Configure a Mylex Controller for the First Time? steps described in “Define Logical Drives.” As long as you haven’t applied the configuration to the controller, you can delete the logical drives you’ve set up and define new ones. RAID EzAssist lets you: • Delete the most recent logical drive you’ve added, OR • Delete all the logical drives you’ve added in this logical drive definition session. ☞ To delete the most recently-added logical drive, press Tab if necessary to switch focus to the buttons, use the arrow key to select Delete Last, then press Enter. ☞ To delete all logical drives that you added, press Tab if necessary to switch focus to the buttons, use the arrow key to select Clear New, then press Enter. ☞ If you wish, define new logical drives as described in “Define Logical Drives.” ■ Apply the Configuration to the Controller. In order for the disk arrays and logical drives you set up to become a valid, registered configuration, you must Apply the configuration to the controller. ☞ To apply the configuration, press Tab if necessary to switch focus to the buttons, use the arrow key to select Apply, then press Enter, OR ☞ To cancel the configuration, press Tab if necessary to switch focus to the buttons, use the arrow key to select Cancel, then press Enter. When you apply the new configuration, RAID EzAssist writes configuration information to the Mylex controller. This takes a few moments, so a message 1-28 RAID EzAssist User’s Manual First-Time Configuration is displayed (Figure 1-26). Figure 1-26. Writing RAID Configuration. Please Wait... ☞ Wait for the configuration information to be written to the controller. When the process is complete, RAID EzAssist brings you back to the Disk Array Configuration screen, or Welcome menu if all drives are assigned. Your next step will be to install the appropriate Mylex Disk Array Controller driver for the operating system you’ll be using on the computer in which the Mylex RAID Controller is installed. • If you have not installed your operating system software yet, and the Mylex controller is your system’s primary controller, you will need to install the operating system and the Mylex driver concurrently. • If the operating system is already installed, the Mylex controller is a secondary controller. You will need to boot your operating system and install the Mylex driver from within the operating system. In either case, refer to the appropriate operating system chapter in the Disk Array Controller Software Kit Installation Guide and User Manual for instructions on primary and secondary controller driver installation. You may also refer to the Mylex controller’s quick installation guide if your operating system is NetWare or Windows NT. ☞ Press the Esc key to leave the main menu. Manual No. 775029 1-29 How Do I Configure a Mylex Controller for the First Time? You’ll see the RAID EzAssist exit confirmation screen (Figure 1-27). Figure 1-27. Do You Wish to Exit RAID EzAssist? ☞ Use the arrow key to select Yes, then press Enter to exit RAID EzAssist. The system reboots. Begin operating system installation if necessary, or allow your installed operating system to boot. ☞ Refer to the Disk Array Controller Software Kit Installation Guide and User Manual or your Mylex controller’s quick installation guide for further instructions. 1-30 RAID EzAssist User’s Manual First-Time Configuration How Do I Configure Multiple Mylex Controllers? ❑ Power On Your System. Regardless of whether an operating system is installed on your computer system, you can run RAID EzAssist from the Mylex controller’s BIOS at system boot time. ☞Turn on the system’s power switch. ❑ Start RAID EzAssist. As the system boots up, you’ll see various messages on the display. Pay special attention when you see a message similar to the following: <Mylex controller ID1> BIOS Version x.xx-xx (Month Day, Year) Mylex Corporation Shortly after, some additional messages from the Mylex controller are displayed, including: Press <Alt-M> for BIOS Options Next you’ll see: Press <Alt-R> for RAID Configuration options ☞ When you see the prompt, press <Alt-R>. If you’ve pressed <Alt-R> within the allotted time, you’ll see: RAID Configuration will start after system initialization completes No system drives installed Other controller BIOS message sequences will appear. If you were too late pressing <Alt-R>, simply reboot and start again. ☞ Wait for RAID EzAssist to start. 1. Examples include DAC960, eXtremeRAID 2000, etc. Manual No. 775029 1-31 How Do I Configure Multiple Mylex Controllers? ❑ Get Started. RAID EzAssist always starts by scanning for Mylex controllers and target drives (Figure 1-28). Figure 1-28. RAID EzAssist Scans for Controllers and Drives ☞ Allow scanning to complete. Since this is a first-time configuration, you’ll see a Notice (Figure 1-29). Figure 1-29. No Existing RAID Configuration “Would you like to configure a RAID drive now?” The answer depends in part on whether you want to change any of the default parameters and settings for this Mylex RAID Controller. If you are a new or inexperienced user, the default settings will probably suit your needs just fine, so you’ll answer Yes. If you are an advanced user, now’s the time to change any controller parameters that you wish-- before a RAID configuration is set on the controller, so you’ll answer No. Also, if you answer YES to the question above and multiple controllers are installed, RAID EzAssist will automatically select the FIRST controller that has unconfigured drives (usually Controller 0). If you want to configure a controller other than this, you’ll have to answer NO. 1-32 RAID EzAssist User’s Manual First-Time Configuration ☞ If you want to adjust controller parameters, or if you want to configure a controller other than the default, use the arrow key to select No, then press Enter. Please see Chapter 3 for information on changing Global, SCSI, and Startup parameters. Return here when you’re done to continue first-time RAID configuration. ☛ Note After changing controller parameters, select Configure a RAID Drive from the main menu to proceed. ☞ If you want to begin configuring your first RAID drive without changing controller options, or if you want to configure the default controller, press Enter with Yes selected. If you answered Yes, please continue from the “Choose a Configuration Method” step in “How Do I Configure a Mylex Controller for the First Time?” If you answered No, you should now select a controller (Figure 1-30). Figure 1-30. Select a Controller This screen uses the following navigation strategy: • Arrow keys move among the available controllers. • Enter selects the highlighted controller. ☞ Use the arrow keys to select a controller from the list, then Manual No. 775029 1-33 How Do I Configure Multiple Mylex Controllers? press Enter (Figure 1-30). ☛ Note All operations will take place on the selected (active) controller. To work with other controllers, you will need to return to the screen shown in Figure 1-30 and select a different controller. Once you’ve selected the controller on which you want to create a RAID configuration, the RAID EzAssist main menu is displayed (Figure 1-31): Figure 1-31. Select “Configure a RAID Drive” ☞ From the main menu, press Enter with Configure a RAID Drive selected (Figure 1-31). At this time, please continue from the “Choose a Configuration Method” step in “How Do I Configure a Mylex Controller for the First Time?” 1-34 RAID EzAssist User’s Manual Chapter 2 Drive Configuration This chapter will provide a detailed description of how to configure disk drives using RAID EzAssist. Chapter 1 focused on first-time configuration of drives. Chapter 2 will cover some of the same topics, but will launch into more advanced configuration issues. Specifically, this chapter will cover: • Automatic Configuration • Assisted Configuration • Custom Configuration • Adding Capacity to Existing Disk Arrays (MORE) • Defining Logical Drives • Assigning/Unassigning Spare Drives • Enabling/Disabling/Using Spanning How Do I Start RAID EzAssist? ❑ Power On Your System. Regardless of whether an operating system is installed on your computer system, you can run RAID EzAssist from the Mylex controller’s BIOS at system boot time. ☞Turn on the system’s power switch. ❑ Start RAID EzAssist. As the system boots up, you’ll see various messages on the display. Pay special attention when you see a message similar to the following: <Mylex controller ID1> BIOS Version x.xx-xx (Month Day, Year) Mylex Corporation Shortly after, some additional messages from the Mylex controller are 1. Examples include DAC960, eXtremeRAID 3000, etc. Manual No. 775029 2-1 How Do I Start RAID EzAssist? displayed, including: Press <Alt-M> for BIOS Options Next you’ll see: Press <Alt-R> for RAID Configuration options ☞ When you see the prompt, press <Alt-R>. If you’ve pressed <Alt-R> within the allotted time, you’ll see: RAID Configuration will start after system initialization completes [X] system drives installed If you were too late pressing <Alt-R>, simply reboot and start again. ☞ Wait for RAID EzAssist to start. ☛ Note A DOS executable version of RAID EzAssist can be found on the product CD-ROM. If you want to use the DOS .EXE instead of the BIOS version, copy the ezassist.exe file to a bootable DOS diskette. Boot your system from the diskette; type ezassist and press Enter at the DOS prompt. ❑ Get Started. RAID EzAssist always starts by scanning for Mylex controllers and target drives (Figure 2-1). Figure 2-1. RAID EzAssist Scans for Controllers and Drives ☞ Allow scanning to complete. 2-2 RAID EzAssist User’s Manual Drive Configuration How Do I Begin to Configure a Mylex Controller? What happens after RAID EzAssist starts up depends on the answers to the following questions: 1. Are there multiple Mylex controllers installed? If so, see “How Do I Configure Multiple Mylex Controllers?” in Chapter 1. 2. Is this a first-time configuration? If no previous configuration has been set on the controller, see the “Get Started” step in “How Do I Configure a Mylex Controller for the First Time?” in Chapter 1. 3. Is there an existing configuration on the controller, but there are still unconfigured drives remaining? If RAID EzAssist detects unconfigured drives on the controller, it will ask if you want to configure those drives now (Figure 2-2). Figure 2-2. Do You Want to Configure the Unconfigured Drive(s)? ☞ To configure the unconfigured drives, press Enter with Yes selected, OR ☞ If you want to do something besides drive configuration, use the arrow key to select No, then press Enter. 4. Are all the drives already configured? If all drives on the controller are already configured, or if you’ve Manual No. 775029 2-3 How Do I Choose a Configuration Method? chosen not to perform a drive configuration activity as described above, you’ll see the main menu (Figure 2-3). Figure 2-3. RAID EzAssist Main Menu Refer to Chapter 3 if you’ll be doing controller configuration, to Chapter 4 if you’ll be doing a monitoring or maintenance activity, or to Chapter 5 if you want to use any advanced options. ☛ Note If you really do intend to perform drive configuration and all drives are already configured, you can either (1) add more drives, rescan, then configure, or (2) use Advanced Options to clear the current configuration (Chapter 5), then reconfigure (Chapter 1 or 2). How Do I Choose a Configuration Method? Three configuration methods are available to you. The method you choose will depend in part on your experience with RAID technology and the number and relative sizes of the disk drives connected to the controller. The following table can help you decide which method is most appropriate for your situation. 2-4 RAID EzAssist User’s Manual Drive Configuration Table 2-1. Selecting a Configuration Method Configuration Method Automatic Who Should Use It -Novice users with little or no RAID experience. -Users who wish to set up a single array with one logical drive when all available disk drives are of similar size/capacity. Assisted What It Does Automatically creates ONE array out of all available disk drives on the controller. If disk drives are different capacities, larger disk drives are initialized down to the capacity of the smallest connected disk drive. RAID level is automatically set based on the number of connected disk drives: 1 drive = a JBOD -Don’t use this if you want to span arrays, use RAID 0 striping, or RAID 0+1 mirroring with striping. 2 drives = a RAID 1 mirrored set -Users with some knowledge of RAID who wish a step by step configuration approach Leads you step by step through a series of questions about what type of RAID configuration you’re looking for. 3 drives = a 3-drive RAID 5 striping with parity configuration 4-8 drives = a 3-,4-,5-,6-, or 7-drive RAID 5 striping with parity configuration adding one device as a hot spare. -Users who want to set up more than one array or logical drive without the detailed control of Custom configuration. Custom Manual No. 775029 -Experienced or advanced users who want more complete control over configuration options. Provides detailed control of RAID configuration, including individual selection of physical devices, multiple arrays, multiple logical drives, caching, stripe size, etc. -Users with disk drives of multiple capacities who wish to create multiple arrays and logical drives to maximize capacity usage. Allows spanning (RAID 10, 30, 50, 0+1+0, etc.). 2-5 How Do I Choose a Configuration Method? You choose your configuration method from the Configure RAID Drive screen (Figure 2-4). Figure 2-4. Choose a Configuration Method ☞ If you want to do an Automatic configuration, press Enter with Automatic selected. Now see “How Do I Do an Automatic Configuration?” on page 2-7 for details. ☞ If you want to do an Assisted configuration, use the arrow key to select Assisted, then press Enter. Now see “How Do I Do an Assisted Configuration?” on page 2-11 for details. ☞ If you want to do a Custom configuration, use the arrow key to select Custom, then press Enter. Now see “How Do I Do a Custom Configuration?” on page 2-19 for details. 2-6 RAID EzAssist User’s Manual Drive Configuration How Do I Do an Automatic Configuration? The RAID Configuration Summary screen is displayed (Figure 2-5). Figure 2-5. RAID Configuration Summary Screen Table 2-2. RAID Configuration Summary Fields Field Description Fault Tolerance For 1 disk drive = No For 2 or more disk drives = Yes Spare For 1-3 disk drives = No For 4-8 disk drives = Yes Optimization For 1 disk drive = Performance (no fault tolerance) For 2 disk drives = Performance For 3 or more disk drives = Capacity Logical Drive Count 1 Total (Useable) Capacity Depends on the fault tolerance overhead: For 1 disk drive of n GB = n GB For 2 disk drives of n GB = n GB For 3 disk drives of n GB = 2n GB For 4,5,6,7,8 disk drives of n GB = 2n,3n,4n,5n,6n GB respectivelya Disk Drive Identification Depends on disk drives. a. With four or more drives, one drive’s capacity is used for fault tolerance overhead, and one additional drive is reserved as a spare. Manual No. 775029 2-7 How Do I Do an Automatic Configuration? If there are more than five drives in the array, you’ll see a small down-arrow next to the disk drive display field. ☞ (Optional): If there is a down-arrow next to the disk drive display field, press PgDn to see the additional disk drives in the array. ☞ (Optional): Alternate PgUp and PgDn to see the entire list of disk drives in the array. ☞ (Optional): If you want to see additional configuration details, use the arrow key to select the Details button, then press Enter. If you choose to view configuration details, the RAID Configuration Details screen is displayed (Figure 2-6). Figure 2-6. RAID Configuration Details Screen Table 2-3. RAID Configuration Details Fields Field Description RAID Level For 1 disk drive = JBOD For 2 disk drives = RAID 1 For 3 or more disk drives = RAID 5 Stripe Block Size For 1 disk drive = n/a For 2 or more disk drives = 64KB Cache Line Size Default = 8K; Tuned to Stripe Block Size Read Cache Normal (Mylex default) Write Cache Write-Thru (Mylex default) 2-8 RAID EzAssist User’s Manual Drive Configuration ☛ Note After viewing configuration details, press Enter to select OK and return to the RAID Configuration Summary screen. ☞ To apply the configuration, use the arrow key if necessary to select Apply, then press Enter, OR ☞ To cancel the configuration, use the arrow key to select Cancel, then press Enter. When you apply the new configuration, RAID EzAssist writes configuration information to the Mylex controller and the drives. This takes a few moments, so a message is displayed (Figure 2-7). Figure 2-7. Writing RAID Configuration. Please Wait... ☞ Wait for the configuration information to be written to the controller and the drives. Next you’ll see a Configuration Status screen (Figure 2-8). Your automatic configuration has been completed. Figure 2-8. Configuration Complete - Reboot or Main Menu ☞ To exit RAID EzAssist, press Enter with the Reboot button Manual No. 775029 2-9 How Do I Do an Automatic Configuration? selected, OR ☞ To continue using RAID EzAssist, use the arrow key to select Main Menu, then press Enter. When the main menu appears: • Look in this chapter if you’ll be doing an additional configuration activity. • Refer to Chapter 3 if you’ll be doing controller configuration. • Refer to Chapter 4 if you’ll be doing a monitoring or maintenance activity, changing physical device SCSI properties (New Controllers only), or adding drives (requiring a rescan for devices). • Refer to Chapter 5 if you’ll be using any advanced options. • To exit RAID EzAssist, see “How Do I Exit RAID EzAssist?” on page 2-67. 2-10 RAID EzAssist User’s Manual Drive Configuration How Do I Do an Assisted Configuration? The sequence of screens displayed during an Assisted Configuration depends on several factors, such as the number of unconfigured drives on the controller and your responses at each step of the Assisted Configuration process. ❑ Fault Tolerance? The Fault Tolerance screen is displayed under the following condition: • Number of Unconfigured Drives on Controller > 1 ☛ Note If you have only one unconfigured drive on this controller, your only configuration option is JBOD, a non fault-tolerant option. You will, therefore, NOT see the Fault Tolerance choice screen. Assuming your situation meets the condition above, the Fault Tolerance screen is displayed (Figure 2-9). Figure 2-9. Do You Want Fault Tolerance? In most situations you will want fault tolerance to protect your array in the event of a drive failure. However, if raw performance utilizing maximum available drive capacity overshadows your need for fault tolerance, a RAID 0 (striping) configuration may be more appropriate. ☞ If you want your array to be fault tolerant, press Enter with Yes selected. Manual No. 775029 2-11 How Do I Do an Assisted Configuration? ☞ If you prefer a RAID 0 striping or a JBOD configuration and fault tolerance is not a consideration, use the arrow key to select No, then press Enter. ❑ Spare Drive? The Spare Drive screen is displayed under the following conditions: • Fault Tolerance = YES, AND • Number of Unconfigured Drives on Controller > 3 ☛ Note If you have two unconfigured drives on this controller, you’ll get a RAID 1 (mirroring) configuration. If you have three unconfigured drives, you’ll get a RAID 5 (striping with parity) configuration. In both cases no drive would be available to act as a spare, so you will therefore NOT see the Spare Drive choice screen. Assuming your situation meets the conditions above, the Spare Drive screen is displayed (Figure 2-10). Figure 2-10. Do You Want a Spare Drive? A spare drive (hot spare or standby drive) offers an additional level of fault tolerance for existing fault tolerant arrays. If a drive in the array fails, the presence of a spare drive allows the failed drive’s data to be rebuilt onto the spare. After rebuild is complete, the array could still accept another drive failure with no loss of data (although there would be degraded performance). It is usually beneficial to reserve a spare drive for the array, if you can afford not to use the capacity of the drive for array data storage. Reserving a spare drive lowers the total useable capacity of the array by the capacity of that spare drive. 2-12 RAID EzAssist User’s Manual Drive Configuration ☞ If you want your array to reserve a spare drive, press Enter with Yes selected. ☞ If you prefer not to reserve a spare drive and thereby use all the available drives in the array, use the arrow key to select No, then press Enter. ❑ Optimization Priority The Optimization Priority screen is displayed under the following conditions: • Fault Tolerance = YES, AND • Number of Available1 Drives on Controller > 2 ☛ Note If you have only two available drives on this controller, you’ll get a RAID 1 (mirroring) configuration, which optimizes for performance. You will, therefore, NOT see the Optimization Priority choice screen. Assuming your situation meets the conditions above, the Optimization Priority screen is displayed (Figure 2-11). Figure 2-11. Optimize for Capacity? At this point you choose whether available capacity or array performance is the top criterion in your fault tolerant array. If you choose Capacity, you’ll be 1. “Available” drives are both unconfigured AND not reserved as a spare. Manual No. 775029 2-13 How Do I Do an Assisted Configuration? requesting a RAID 5 (striping with parity) configuration. If you choose Performance, you’ll be requesting a RAID 0+1 (striping with mirroring) configuration. Both give you the safety of fault tolerance. RAID 5 provides the best combination of settings for most applications and has overhead of only one drive’s capacity. RAID 0+1 has a write performance advantage over RAID 5, but since the striped set is mirrored, available capacity is only half of the total capacity in the drive set. ☞ If you want to optimize your array for capacity, press Enter with Capacity selected. ☞ If you want to optimize your array for performance, use the arrow key to select Performance, then press Enter (Figure 2-12). Figure 2-12. Optimize for Performance? ❑ Logical Drive Count The Logical Drive Count screen is always displayed in Assisted Configuration. You may divide the available drive space into multiple logical drives, or retain the default of one (1) logical drive. The Logical Drive Count screen is displayed (Figure 2-13). Figure 2-13. Logical Drive Count Each logical drive that you create under Assisted Configuration will have 2-14 RAID EzAssist User’s Manual Drive Configuration identical capacity and settings (RAID level, caching, etc.). If you wish to set logical drive capacities or settings individually, you must use Custom Configuration. See “How Do I Do a Custom Configuration?” on page 2-19. ☞ If you want to set only one (1) logical drive, press Enter with Ok selected. ☞ If you want to set up multiple logical drives: ☞ Press the up arrow key to select the logical drive count field. ☞ Type in a number of logical drives to set up. ☞ Press the down arrow key to select Ok. ☞ Press Enter with Ok selected. ❑ Capacity Usage The Capacity Usage screen is always displayed in Assisted Configuration. You may use all or a part of the total available capacity to set up the specified number of logical drives with the optimization you’ve selected previously. The Capacity Usage screen is displayed (Figure 2-14). Figure 2-14. Capacity Usage By default, the maximum available capacity is displayed in the Capacity Usage field. If you wish to reserve some of the capacity of your drives to set up future arrays, you may choose a smaller gigabyte (GB) value for the current logical drive set. ☞ If you want to use the maximum available capacity for these Manual No. 775029 2-15 How Do I Do an Assisted Configuration? logical drives, press Enter with Ok selected. ☞ If you want to reserve some capacity for future use: ☞ Press the up arrow key to select the capacity usage field. ☞ Type in a number representing the gigabytes (GB) to be used in the current configuration. (This number must be lower than the maximum value displayed.) ☞ Press the down arrow key to select Ok. ☞ Press Enter with Ok selected. ❑ Apply the Configuration to the Controller. The RAID Configuration Summary screen is displayed (Figure 2-15). Figure 2-15. RAID Configuration Summary Screen If there are more than five drives in the array, you’ll see a small down-arrow next to the disk drive display field. ☞ (Optional): If there is a down-arrow next to the disk drive display field, press PgDn to see the additional disk drives in the 2-16 RAID EzAssist User’s Manual Drive Configuration array. ☞ (Optional): Alternate PgUp and PgDn to see the entire list of disk drives in the array. ☞ (Optional): If you want to see additional configuration details, use the arrow key to select the Details button, then press Enter. If you choose to view configuration details, the RAID Configuration Details screen is displayed (Figure 2-16). Figure 2-16. RAID Configuration Details Screen ☛ Note After viewing configuration details, press Enter to select OK and return to the RAID Configuration Summary screen. ☞ To apply the configuration, use the arrow key if necessary to select Apply, then press Enter, OR ☞ To cancel the configuration, use the arrow key to select Cancel, then press Enter. When you apply the new configuration, RAID EzAssist writes configuration information to the Mylex controller and the drives. This takes a few moments, so a message is displayed (Figure 2-17). Manual No. 775029 2-17 How Do I Do an Assisted Configuration? Figure 2-17. Writing RAID Configuration. Please Wait... ☞ Wait for the configuration information to be written to the controller and the drives. Next you’ll see a Configuration Status screen (Figure 2-18). Your assisted configuration has been completed. Figure 2-18. Configuration Complete - Reboot or Main Menu ☞ To exit RAID EzAssist, press Enter with the Reboot button selected, OR ☞ To continue using RAID EzAssist, use the arrow key to select Main Menu, then press Enter. When the main menu appears: • Look in this chapter if you’ll be doing an additional configuration activity. • Refer to Chapter 3 if you’ll be doing controller configuration. • Refer to Chapter 4 if you’ll be doing a monitoring or maintenance activity, changing physical device SCSI properties (New Controllers only), or adding drives (requiring a rescan for devices). • Refer to Chapter 5 if you’ll be using any advanced options. • To exit RAID EzAssist, see “How Do I Exit RAID EzAssist?” on page 2-67. 2-18 RAID EzAssist User’s Manual Drive Configuration How Do I Do a Custom Configuration? Custom Configuration gives you full control over the configuration of your disk drives. With Custom Configuration, you can: • Select individual disk drives to add to the configuration • Build multiple arrays • Configure logical drives individually • Select a specific RAID level • Select the write caching method (Write-Thru or Write-Back) • Set the stripe size • Set logical drive size by physical or logical capacity • Add capacity to an existing array • Assign additional spare drives or unassign existing spare drives • Enable spanning to create a configuration of larger drive sets Once you’ve selected Custom from the Configure RAID Drive screen, the Custom Configuration menu is displayed (Figure 2-19). Figure 2-19. Custom Configuration Menu The first option on the menu, “Configure a New Disk Array,” is used to build new disk arrays, then optionally define logical drives from them. If you want to add capacity to an existing disk array, see “How Do I Add Capacity to an Existing Disk Array?” on page 2-29. If you want to define logical drives on existing disk arrays, see “How Do I Define Additional Logical Drives?” on page 2-40. If you have any currently unconfigured drives that you want to assign as spare drives, see “How Do I Assign Additional Spare Drives?” on page 2-46. If you have any currently assigned spare drives that you want to unassign Manual No. 775029 2-19 How Do I Do a Custom Configuration? (return to “Unconfigured” status), see “How Do I Unassign Existing Spare Drives?” on page 2-50. If you want to see whether spanning is turned on, OR if you want to enable or disable spanning, see “How Do I Make Use of the Spanning Feature?” on page 2-54. ☞ To set up a new disk array, press Enter with the Configure a New Disk Array option selected in the Custom Configuration menu. ❑ Build Disk Arrays. The first step in Custom Configuration is to build at least one disk array. This is accomplished from the Disk Array Configuration screen (Figure 2-20). Figure 2-20. Disk Array Configuration Screen This screen uses the following navigation strategy: • PgDn and PgUp show you all the available or selected drives if there is a small down/up-arrow beside the Unused Drives or Disk Array fields. • Inside Unused Drives, arrow keys select a drive, Enter accepts the highlighted drive and adds it to the Disk Array box to the right. • The Tab key shifts control to the buttons, or from the buttons back to Unused Drives. • When buttons are in focus, arrow keys select a button and Enter activates the highlighted button. 2-20 RAID EzAssist User’s Manual Drive Configuration Caution The drives you select to comprise the array will all be treated as having the capacity of the smallest selected drive, regardless of the actual capacities. This could lead to wasted drive space. Therefore, try whenever possible to select drives of similar capacity when building an array. “How many drives should I select for an array?” The answer depends on the RAID levels you want to be able to choose for the logical drives you’ll set up in that array. See Table 2-4. Table 2-4. Required Numbers of Drives By RAID Level Desired RAID Level Number of Drives to Select JBOD (Single Drive) Exactly 1 drive RAID 0 (Striping) At least 2 drives of equal size RAID 1 (Mirroring) Exactly 2 drives of equal size RAID 3 (Parity Drive) At least 3 drives of equal size RAID 5 (Striping with Parity) RAID 0+1 (Striping with Mirroring) ☞ Use the arrow keys to select a disk drive in the Unused Drives field, then press Enter to accept the drive into the disk array. ☞ Repeat the step above for as many disk drives as you wish to add to the array. ☞ When you’ve finished adding drives, press the Tab key to switch focus to the buttons. Figure 2-21 is a example of how your screen might look after the steps above. Manual No. 775029 2-21 How Do I Do a Custom Configuration? Figure 2-21. Sample Disk Array Configuration ☞ If you’re not satisfied with your drive selections, use the arrow key to select Clear, then Press Enter. Press Tab to return to Unused Drives. Your selections will be erased and you can try again as described above. ☞ To save the array you’ve set up, press Enter with Save Array selected. A Notice is displayed at this point as shown in Figure 2-22. Figure 2-22. Define Logical Drives or Return to Disk Array Set-Up “Do you want to build additional arrays at this time?” If you want to set up additional arrays, it is convenient to do so at this time before logical drives are defined. 2-22 RAID EzAssist User’s Manual Drive Configuration ☛ Note If you want to take advantage of “spanning” your configuration across multiple arrays, you must enable spanning FIRST, build the individual arrays, then create logical drives that can make use of the spanned capacity available. See “How Do I Make Use of the Spanning Feature?” on page 2-54 for more complete information about this option. If you plan on only one array, or if you’d prefer to define logical drives before building any additional arrays, you should move on to define logical drives at this time. ☞ To build additional disk arrays, use the arrow key if necessary to select No, then press Enter. Repeat the steps described in “Build Disk Arrays.” ☞ To define logical drives at this time, use the arrow key if necessary to select Yes, then press Enter. ❑ Define Logical Drives. Logical drives for the array(s) you just set up are defined from the Logical Drive Definition screen (Figure 2-23). Figure 2-23. Logical Drive Definition Screen This screen uses the following navigation strategy: • Arrow keys move among the logical drive definition fields. Manual No. 775029 2-23 How Do I Do a Custom Configuration? • For RAID Level, Write Cache, and Stripe Size(KB) definition fields, the Spacebar brings up a list of valid options. Arrow keys move among the options and Enter selects an option. • For RAID Level, Write Cache, and Stripe Size(KB) definition fields, the + and - keys cycle through the valid options. When the desired option is visible, use the arrow key to move to another field. • For Physical Capacity or Logical Capacity definition fields, type a numeric decimal value representing the desired capacity in GB. You may choose one or the other field to adjust. • The Tab key shifts control to the buttons, or from the buttons back to the logical drive definition fields. • When buttons are in focus, arrow keys select a button and Enter activates the highlighted button. Arrow keys rotate selections through Add Drive, Apply, Cancel, Clear New, and Delete Last. Let’s start by selecting a RAID level for our logical drive. ☞ With the RAID Level definition field selected... ☞ Press the + or - key to find your desired RAID level, OR ☞ Press Spacebar to display a box of available choices, use the arrow key to select your desired RAID level, then press Enter (Figure 2-24). Figure 2-24. Example of a Selection Box Next, we’ll select the write caching strategy for our logical drive. 2-24 RAID EzAssist User’s Manual Drive Configuration If you are unfamiliar with the terms “Write Through” and “Write Back” caching, please refer to the Glossary for a detailed definition. In a nutshell, Write Back caching speeds write performance but risks loss of data in the cache buffer should power fail. Use Write Back only if you have a battery backup unit (BBU) or uninterruptable power supply (UPS) installed to preserve data in the cache. ☞ Use the right arrow key to select the Write Cache definition field, then... ☞ Press the + or - key to find your desired caching method (“Thru” for Write Through, “Back” for Write Back), OR ☞ Press Spacebar to display a box of available choices, use the arrow key to select your desired write caching method, then press Enter. Next, we’ll set the stripe size for this logical drive. If you are unfamiliar with the term “Stripe Size” please refer to the Glossary for a detailed definition. ☛ Note Depending on the controller, available stripe sizes are 8, 16, 32, 64, 128, 256, 512, and 1024. ☞ Use the right arrow key to select the Stripe Size(KB) definition field, then... ☞ Press the + or - key to find your desired stripe size, OR ☞ Press Spacebar to display a box of available choices, use the arrow key to select your desired stripe size, then press Enter. Next, we set a size for this logical drive based on the maximum available capacity. You can set logical drive size in terms of either physical capacity or logical Manual No. 775029 2-25 How Do I Do a Custom Configuration? capacity. Logical capacity takes into account overhead for fault tolerance, spare drives, etc. If you intend to set up more than one logical drive in this array, then set the capacity for the first logical drive somewhere below the maximum to leave space for additional logical drives. ☞ Use the right arrow key to select either the Physical or Logical Capacity(GB) definition field, then type a numeric decimal value for the physical or logical capacity to be used in this logical drive. ☛ Note Drive capacity may be rounded for alignment with block sizes. Finally, let’s add the logical drive. Check your settings among the logical drive definition fields to be sure they are what you want. ☞ If you wish to change any settings, use the arrow key to select the desired definition field and change its value as described earlier. ☞ To add the logical drive, press the Tab key to switch focus to the Add Drive button, then press Enter with Add Drive selected (Figure 2-25). Figure 2-25. Ready to Add the Logical Drive The logical drive is added to the display box, and focus returns to the logical 2-26 RAID EzAssist User’s Manual Drive Configuration drive definition field line if capacity remains for additional logical drives (Figure 2-26). Figure 2-26. Logical Drive Has Been Added ☞ To define additional logical drives, use the arrow key if necessary to return to the RAID Level definition field. Repeat the steps described in “Define Logical Drives.” As long as you haven’t applied the configuration to the controller, you can delete the logical drives you’ve set up and define new ones. RAID EzAssist lets you: • Delete the most recent logical drive you’ve added, OR • Delete all the logical drives you’ve added in this logical drive definition session. ☞ To delete the most recently-added logical drive, press Tab if necessary to switch focus to the buttons, use the arrow key to select Delete Last, then press Enter. ☞ To delete all logical drives that you added in this session, press Tab if necessary to switch focus to the buttons, use the arrow key to select Clear New, then press Enter. ☞ If you wish, define new logical drives, as described in “Define Logical Drives.” Manual No. 775029 2-27 How Do I Do a Custom Configuration? ❑ Apply the Configuration to the Controller. In order for the disk arrays and logical drives you set up to become a valid, registered configuration, you must Apply the configuration to the controller. ☞ To apply the configuration, press Tab if necessary to switch focus to the buttons, use the arrow key to select Apply, then press Enter, OR ☞ To cancel the configuration, press Tab if necessary to switch focus to the buttons, use the arrow key to select Cancel, then press Enter. When you apply the new configuration, RAID EzAssist writes configuration information to the Mylex controller and the drives. This takes a few moments, so a message is displayed (Figure 2-27). Figure 2-27. Writing RAID Configuration. Please Wait... ☞ Wait for the configuration information to be written to the controller and the drives. When the process is complete, RAID EzAssist brings you to the main menu. When the main menu appears: • Look in this chapter if you’ll be doing an additional configuration activity. • Refer to Chapter 3 if you’ll be doing controller configuration. • Refer to Chapter 4 if you’ll be doing a monitoring or maintenance activity, changing physical device SCSI properties (New Controllers only), or adding drives (requiring a rescan for devices). • Refer to Chapter 5 if you’ll be using any advanced options. • To exit RAID EzAssist, see “How Do I Exit RAID EzAssist?” on page 2-67. 2-28 RAID EzAssist User’s Manual Drive Configuration How Do I Add Capacity to an Existing Disk Array? RAID EzAssist gives you the option of adding capacity to existing disk arrays. This process is referred to as Mylex Online RAID Expansion™ (MORE™). The process allows you to increase the useable space in an array without having to: (1) back up data, (2) reconfigure the array to a larger number of drives, and (3) restore existing data to the new array. The extra space is then used to create additional logical drives. Caution Adding capacity is NOT allowed to any array that has been spanned. See “How Do I Make Use of the Spanning Feature?” on page 2-54 for additional details. ☞ From the main menu, press Enter with Configure RAID Drive selected (Figure 2-28). Figure 2-28. Main Menu - Configure RAID Drive ☞ On the Configure RAID Drive screen, use the arrow key to select Custom, then press Enter (Figure 2-29). Figure 2-29. Configure RAID Drive - Custom Manual No. 775029 2-29 How Do I Add Capacity to an Existing Disk Array? The Custom Configuration menu is displayed (Figure 2-30). Figure 2-30. Custom Configuration Menu ☞ If you want to add capacity to an existing disk array, use the arrow key to select Add Capacity to Existing Disk Array on the Custom Configuration menu, then press Enter. ☛ Note If any one of the conditions described below is true, the Add Capacity to Existing Disk Array function will not be possible: All available drives on the controller are already configured (often resulting from a previous Automatic Configuration)1 The selected “array” is really a JBOD drive The selected array already contains eight (8) physical devices (for Previous Controllers), or 16 physical devices for New Controllers The selected array is a spanned array A total of 32 logical drives have already been configured on this controller All target IDs on all channels are used in existing arrays The drive to be added has a capacity that is too small to be used in the selected array 1. To add capacity in this situation, you must first connect one or more additional physical drives to the controller, then use the Rescan for New Devices option on the main menu. 2-30 RAID EzAssist User’s Manual Drive Configuration ❑ Select an Array to Expand. The first step in this process is to select the array you wish to expand. You do this from the Disk Array Selection screen (Figure 2-31), which will display only the arrays that are expandable (spanned arrays are not displayed). Figure 2-31. Disk Array Selection Screen This screen uses the following navigation strategy: • Arrow keys move among the available disk arrays. • Enter selects the highlighted disk array. ☞ Use the arrow keys to select the disk array you want to expand, then press Enter. ❑ Select Physical Drives to Use for Expansion. The next step is to select one or more available physical drives to use for expanding the capacity of the selected array. You do this from the Disk Array Configuration screen (Figure 2-32) using an approach very much like the Custom Configuration approach to building disk arrays. Manual No. 775029 2-31 How Do I Add Capacity to an Existing Disk Array? Figure 2-32. Disk Array Configuration Screen This screen uses the following navigation strategy: • PgDn and PgUp show you all the available or selected drives if there is a small down/up-arrow beside the Unused Drives or Disk Array fields. • Inside Unused Drives, arrow keys select a drive, Enter accepts the highlighted drive and adds it to the Disk Array box to the right. • The Tab key shifts control to the buttons, or from the buttons back to Unused Drives. • When buttons are in focus, arrow keys select a button and Enter activates the highlighted button. Caution The drive(s) you select to add capacity to the array must have the same as or greater capacity than that of any drive already in the Disk Array field. Try whenever possible to select drives of similar capacity when expanding an array. The Disk Array field (in gray) displays the drives that are already a part of this disk array. ☞ (Optional): If there is a small down-arrow or up-arrow to the right of the Disk Array field, use PgDn or PgUp to view the additional drives in the disk array. ☞ Use the arrow keys to select a disk drive in the Unused Drives 2-32 RAID EzAssist User’s Manual Drive Configuration field, then press Enter to accept the drive into the disk array. ☞ Repeat the step above for as many disk drives as you wish to add to the existing disk array. ☞ When you’ve finished adding drives, press the Tab key to switch focus to the buttons. Figure 2-33 is a example of how your screen might look after the steps above. Figure 2-33. Sample Add Capacity Configuration ☞ If you’re not satisfied with your drive selections, use the arrow key to select Clear, then Press Enter. Press Tab to return to Unused Drives. Your selections will be erased and you can try again as described above. The drives that are configured in the existing disk array will remain visible in the Disk Array field. ☞ To save the expanded array configuration you’ve set up, press Enter with Save Array selected. A Notice is displayed at this point as shown in Figure 2-34. Manual No. 775029 2-33 How Do I Add Capacity to an Existing Disk Array? Figure 2-34. Define Logical Drives or Return to Add Capacity Set-Up You should define your additional logical drives for the expanded array at this time unless you may wish first to expand other existing disk arrays. ☞ To expand additional disk arrays, use the arrow key if necessary to select No, then press Enter. Repeat the steps described earlier in this section/ ☞ To define logical drives at this time, use the arrow key if necessary to select Yes, then press Enter. ❑ Define Logical Drives. Logical drives for the array you want to expand are defined from the Logical Drive Definition screen (Figure 2-35). The disk array’s existing logical drives, if any, will be displayed. 2-34 RAID EzAssist User’s Manual Drive Configuration Figure 2-35. Logical Drive Definition Screen This screen uses the following navigation strategy: • Arrow keys move among the logical drive definition fields. • For RAID Level, Write Cache, and Stripe Size(KB) definition fields, the Spacebar brings up a list of valid options. Arrow keys move among the options and Enter selects an option. • For RAID Level, Write Cache, and Stripe Size(KB) definition fields, the + and - keys cycle through the valid options. When the desired option is visible, use the arrow key to move to another field. • For Physical Capacity or Logical Capacity definition fields, type a numeric decimal value representing the desired capacity in GB. You may choose one or the other field to adjust. • The Tab key shifts control to the buttons, or from the buttons back to the logical drive definition fields. • When buttons are in focus, arrow keys select a button and Enter activates the highlighted button. Arrow keys rotate selections through Add Drive, Apply, Cancel, Clear New, and Delete Last. Let’s start by selecting a RAID level for our logical drive. Manual No. 775029 2-35 How Do I Add Capacity to an Existing Disk Array? ☞ With the RAID Level definition field selected... ☞ Press the + or - key to find your desired RAID level, OR ☞ Press Spacebar to display a box of available choices, use the arrow key to select your desired RAID level, then press Enter Next, we’ll select the write caching strategy for our logical drive. If you are unfamiliar with the terms “Write Through” and “Write Back” caching, please refer to the Glossary for a detailed definition. In a nutshell, Write Back caching speeds write performance but risks loss of data in the cache buffer should power fail. Use Write Back only if you have a battery backup unit (BBU) or uninterruptable power supply (UPS) installed to preserve data in the cache. ☞ Use the right arrow key to select the Write Cache definition field, then... ☞ Press the + or - key to find your desired caching method (“Thru” for Write Through, “Back” for Write Back), OR ☞ Press Spacebar to display a box of available choices, use the arrow key to select your desired write caching method, then press Enter. Next, we’ll set the stripe size for this logical drive. If you are unfamiliar with the term “Stripe Size” please refer to the Glossary for a detailed definition. ☛ Note Depending on the controller, available stripe sizes are 8, 16, 32, 64, 128, 256, 512, and 1024. ☞ Use the right arrow key to select the Stripe Size(KB) definition field, then... 2-36 RAID EzAssist User’s Manual Drive Configuration ☞ Press the + or - key to find your desired stripe size, OR ☞ Press Spacebar to display a box of available choices, use the arrow key to select your desired stripe size, then press Enter. Next, we set a size for this logical drive based on the maximum available capacity. You can set logical drive size in terms of either physical capacity or logical capacity. Logical capacity takes into account overhead for fault tolerance, spare drives, etc. If you intend to add more than one logical drive to this array, then set the capacity for the first logical drive somewhere below the maximum to leave space for additional logical drives. ☞ Use the right arrow key to select either the Physical or Logical Capacity(GB) definition field, then type a numeric decimal value for the physical or logical capacity to be used in this logical drive. Finally, let’s add the logical drive. Check your settings among the logical drive definition fields to be sure they are what you want. ☞ If you wish to change any settings, use the arrow key to select the desired definition field and change its value as described earlier. ☞ To add the logical drive, press the Tab key to switch focus to the Add Drive button, then press Enter with Add Drive selected The logical drive is added to the display box, and focus returns to the logical drive definition field line if capacity remains for additional logical drives. ☞ To define additional logical drives, use the arrow key if necessary to return to the RAID Level definition field. Repeat the steps described in “Define Logical Drives” above. As long as you haven’t applied the configuration to the controller, you can delete the logical drives you’ve set up and define new ones. RAID EzAssist Manual No. 775029 2-37 How Do I Add Capacity to an Existing Disk Array? lets you: • Delete the most recent logical drive you’ve added, OR • Delete all the logical drives you’ve added in this logical drive definition session. ☞ To delete the most recently-added logical drive, press Tab if necessary to switch focus to the buttons, use the arrow key to select Delete Last, then press Enter. ☞ To delete all logical drives that you added in this session, press Tab if necessary to switch focus to the buttons, use the arrow key to select Clear New, then press Enter. ☞ If you wish, define new logical drives, as described in “Define Logical Drives” above. ❑ Apply the Configuration to the Controller. In order for the expanded disk array with its logical drives to become a valid, registered configuration, you must Apply the configuration to the controller. Figure 2-36 shows what our new configuration might look like if we added one logical drive to our expanded array. Figure 2-36. Expanded Array Configuration With Logical Drives ☞ To apply the new expanded configuration, press Tab if necessary to switch focus to the buttons, use the arrow key to select Apply, then press Enter, 2-38 RAID EzAssist User’s Manual Drive Configuration OR ☞ To cancel the expanded configuration, press Tab if necessary to switch focus to the buttons, use the arrow key to select Cancel, then press Enter. When you apply the new expanded configuration, RAID EzAssist writes configuration information to the Mylex controller and the drives. This takes a few moments, so a message is displayed (Figure 2-37). Figure 2-37. Writing RAID Configuration. Please Wait... ☞ Wait for the configuration information to be written to the controller and the drives. When the process is complete, RAID EzAssist brings you to the main menu. When the main menu appears: • Look in this chapter if you’ll be doing an additional configuration activity. • Refer to Chapter 3 if you’ll be doing controller configuration. • Refer to Chapter 4 if you’ll be doing a monitoring or maintenance activity, changing physical device SCSI properties (New Controllers only), or adding drives (requiring a rescan for devices). • Refer to Chapter 5 if you’ll be using any advanced options. • To exit RAID EzAssist, see “How Do I Exit RAID EzAssist?” on page 2-67. Manual No. 775029 2-39 How Do I Define Additional Logical Drives? How Do I Define Additional Logical Drives? ☞ From the main menu, press Enter with Configure RAID Drive selected (Figure 2-38). Figure 2-38. Main Menu - Configure RAID Drive ☞ On the Configure RAID Drive screen, use the arrow key to select Custom, then press Enter (Figure 2-39). Figure 2-39. Configure RAID Drive - Custom The Custom Configuration menu is displayed (Figure 2-40). Figure 2-40. Custom Configuration Menu ☞ If you want to define logical drives from existing disk arrays, use the arrow key to select Define Logical Drive(s) on the Custom Configuration menu, then press Enter. 2-40 RAID EzAssist User’s Manual Drive Configuration ☛ Note If you have not previously defined at least one disk array, you will be unable to use the Define Logical Drive(s) option. Begin with the Configure a New Disk Array option. ❑ Define Logical Drives. Logical drives for the array(s) you set up previously are defined from the Logical Drive Definition screen (Figure 2-23). Figure 2-41. Logical Drive Definition Screen This screen uses the following navigation strategy: • Arrow keys move among the logical drive definition fields. • For RAID Level, Write Cache, and Stripe Size(KB) definition fields, the Spacebar brings up a list of valid options. Arrow keys move among the options and Enter selects an option. • For RAID Level, Write Cache, and Stripe Size(KB) definition fields, the + and - keys cycle through the valid options. When the desired option is visible, use the arrow key to move to another field. • For Physical Capacity or Logical Capacity definition fields, type a numeric decimal value representing the desired capacity in GB. You may choose one or the other field to adjust. • The Tab key shifts control to the buttons, or from the buttons back to the logical drive definition fields. • When buttons are in focus, arrow keys select a button and Enter Manual No. 775029 2-41 How Do I Define Additional Logical Drives? activates the highlighted button. Arrow keys rotate selections through Add Drive, Apply, Cancel, Clear New, and Delete Last. Let’s start by selecting a RAID level for our logical drive. ☞ With the RAID Level definition field selected... ☞ Press the + or - key to find your desired RAID level, OR ☞ Press Spacebar to display a box of available choices, use the arrow key to select your desired RAID level, then press Enter. Next, we’ll select the write caching strategy for our logical drive. If you are unfamiliar with the terms “Write Through” and “Write Back” caching, please refer to the Glossary for a detailed definition. In a nutshell, Write Back caching speeds write performance but risks loss of data in the cache buffer should power fail. Use Write Back only if you have a battery backup unit (BBU) or uninterruptable power supply (UPS) installed to preserve data in the cache. ☞ Use the right arrow key to select the Write Cache definition field, then... ☞ Press the + or - key to find your desired caching method (“Thru” for Write Through, “Back” for Write Back), OR ☞ Press Spacebar to display a box of available choices, use the arrow key to select your desired write caching method, then press Enter. Next, we’ll set the stripe size for this logical drive. If you are unfamiliar with the term “Stripe Size” please refer to the Glossary for a detailed definition. ☛ Note Depending on the controller, available stripe sizes are 8, 16, 32, 64, 128, 256, 512, and 1024. 2-42 RAID EzAssist User’s Manual Drive Configuration ☞ Use the right arrow key to select the Stripe Size(KB) definition field, then... ☞ Press the + or - key to find your desired stripe size, OR ☞ Press Spacebar to display a box of available choices, use the arrow key to select your desired stripe size, then press Enter. Next, we set a size for this logical drive based on the maximum available capacity. You can set logical drive size in terms of either physical capacity or logical capacity. Logical capacity takes into account overhead for fault tolerance, spare drives, etc. If you intend to set up more than one logical drive in this array, then set the capacity for the first logical drive somewhere below the maximum to leave space for additional logical drives. ☞ Use the right arrow key to select either the Physical or Logical Capacity(GB) definition field, then type a numeric decimal value for the physical or logical capacity to be used in this logical drive. Finally, let’s add the logical drive. Check your settings among the logical drive definition fields to be sure they are what you want. ☞ If you wish to change any settings, use the arrow key to select the desired definition field and change its value as described earlier. ☞ To add the logical drive, press the Tab key to switch focus to the Add Drive button, then press Enter with Add Drive selected. The logical drive is added to the display box, and focus returns to the logical drive definition field line if capacity remains for additional logical drives. ☞ To define additional logical drives, use the arrow key if necessary to return to the RAID Level definition field. Repeat the Manual No. 775029 2-43 How Do I Define Additional Logical Drives? steps described above. As long as you haven’t applied the configuration to the controller, you can delete the logical drives you’ve set up and define new ones. RAID EzAssist lets you: • Delete the most recent logical drive you’ve added, OR • Delete all the logical drives you’ve added in this logical drive definition session. ☞ To delete the most recently-added logical drive, press Tab if necessary to switch focus to the buttons, use the arrow key to select Delete Last, then press Enter. ☞ To delete all logical drives that you added in this session, press Tab if necessary to switch focus to the buttons, use the arrow key to select Clear New, then press Enter. ☞ If you wish, define new logical drives, as described in “How Do I Define Additional Logical Drives?” ❑ Apply the Configuration to the Controller. In order for the logical drives you set up to be added to the registered configuration, you must Apply the configuration changes to the controller. ☞ To apply the configuration, press Tab if necessary to switch focus to the buttons, use the arrow key to select Apply, then press Enter, OR ☞ To cancel the configuration, press Tab if necessary to switch focus to the buttons, use the arrow key to select Cancel, then press Enter. When you apply the new configuration, RAID EzAssist writes configuration information to the Mylex controller and the drives. This takes a few moments, so a message is displayed (Figure 2-42). 2-44 RAID EzAssist User’s Manual Drive Configuration Figure 2-42. Writing RAID Configuration. Please Wait... ☞ Wait for the configuration information to be written to the controller and the drives. When the process is complete, RAID EzAssist brings you back to the main menu. When the main menu appears: • Look in this chapter if you’ll be doing an additional configuration activity. • Refer to Chapter 3 if you’ll be doing controller configuration. • Refer to Chapter 4 if you’ll be doing a monitoring or maintenance activity, changing physical device SCSI properties (New Controllers only), or adding drives (requiring a rescan for devices). • Refer to Chapter 5 if you’ll be using any advanced options. • To exit RAID EzAssist, see “How Do I Exit RAID EzAssist?” on page 2-67. Manual No. 775029 2-45 How Do I Assign Additional Spare Drives? How Do I Assign Additional Spare Drives? ☞ From the main menu, press Enter with Configure RAID Drive selected (Figure 2-43). Figure 2-43. Main Menu - Configure RAID Drive ☞ On the Configure RAID Drive screen, use the arrow key to select Custom, then press Enter (Figure 2-44). Figure 2-44. Configure RAID Drive - Custom The Custom Configuration menu is displayed (Figure 2-45). Figure 2-45. Custom Configuration Menu ☞ If you want to assign any currently unconfigured drives as additional spare drives , use the arrow key to select Assign Spare Drive(s) on the Custom Configuration menu, then press Enter. 2-46 RAID EzAssist User’s Manual Drive Configuration ☛ Note If you do not have any unconfigured drives available on this controller, you will be unable to use the Assign Spare Drive(s) option. ❑ Assign Spare Drives. Spare drives for the array(s) you’ve set up are assigned in the Physical Drive Selection screen (Figure 2-46). Figure 2-46. Physical Drive Selection Screen This screen uses the following navigation strategy: • Arrow keys move among the defined physical devices. • Enter selects the highlighted physical device. ☞ Use the arrow keys to select a physical drive with current status “Unconfigured,” then press Enter. ❑ Apply the Configuration to the Controller. To add the physical drive you selected to the registered configuration, the configuration changes need to be applied to the controller. At this point in the process, a confirmation screen is displayed (Figure 2-47). Manual No. 775029 2-47 How Do I Assign Additional Spare Drives? Figure 2-47. Designate Drive as Spare Confirmation ☞ To apply the configuration, use the arrow key to select Yes if necessary, then press Enter. OR ☞ To cancel the configuration change, use the arrow key to select No if necessary, then press Enter. When you apply the new configuration, RAID EzAssist writes configuration information to the Mylex controller and the drives. This takes a few moments, so a message is displayed (Figure 2-48). Figure 2-48. Writing RAID Configuration. Please Wait... ☞ Wait for the configuration information to be written to the controller and the drives. When the process is complete, RAID EzAssist brings you back to the main menu, or to select a controller if there are multiple controllers. ☞ To assign additional spare drives, repeat the procedure described in this section. When the main menu appears: 2-48 RAID EzAssist User’s Manual Drive Configuration • Look in this chapter if you’ll be doing an additional configuration activity. • Refer to Chapter 3 if you’ll be doing controller configuration. • Refer to Chapter 4 if you’ll be doing a monitoring or maintenance activity, changing physical device SCSI properties (New Controllers only), or adding drives (requiring a rescan for devices). • Refer to Chapter 5 if you’ll be using any advanced options. • To exit RAID EzAssist, see “How Do I Exit RAID EzAssist?” on page 2-67. Manual No. 775029 2-49 How Do I Unassign Existing Spare Drives? How Do I Unassign Existing Spare Drives? ☞ From the main menu, press Enter with Configure RAID Drive selected (Figure 2-49). Figure 2-49. Main Menu - Configure RAID Drive ☞ On the Configure RAID Drive screen, use the arrow key to select Custom, then press Enter (Figure 2-50). Figure 2-50. Configure RAID Drive - Custom The Custom Configuration menu is displayed (Figure 2-51). Figure 2-51. Custom Configuration Menu ☞ If you want to unassign any existing spare drives to return them to unconfigured status, use the arrow key to select Assign Spare Drive(s) on the Custom Configuration menu, then press Enter. 2-50 RAID EzAssist User’s Manual Drive Configuration ☛ Note If you do not have any spare drives currently assigned on this controller, you will be unable to use the Assign Spare Drive(s) option to unassign. ❑ Unassign Existing Spare Drives. Previously assigned spare drives for the array(s) you’ve set up are unassigned in the Physical Drive Selection screen (Figure 2-52). Figure 2-52. Physical Drive Selection Screen This screen uses the following navigation strategy: • Arrow keys move among the defined physical drives. • Enter selects the highlighted physical drive. ☞ Use the arrow keys to select a physical drive with current status “Spare,” then press Enter. ❑ Apply the Configuration to the Controller. To add the physical drive you selected to the registered configuration, the configuration changes need to be applied to the controller. At this point in the process, a confirmation screen is displayed (Figure 2-53). Manual No. 775029 2-51 How Do I Unassign Existing Spare Drives? Figure 2-53. Designate Drive as Unused Confirmation ☞ To apply the configuration, use the arrow key to select Yes, then press Enter, OR ☞ To cancel the configuration change, press Enter with No selected. When you apply the new configuration, RAID EzAssist writes configuration information to the Mylex controller and the drives. This takes a few moments, so a message is displayed (Figure 2-54). Figure 2-54. Writing RAID Configuration. Please Wait... ☞ Wait for the configuration information to be written to the controller and the drives. When the process is complete, RAID EzAssist brings you back to the main menu, or to select a controller if there are multiple controllers. ☞ To unassign other spare drives, repeat the procedure described in this section. When the main menu appears: 2-52 RAID EzAssist User’s Manual Drive Configuration • Look in this chapter if you’ll be doing an additional configuration activity. • Refer to Chapter 3 if you’ll be doing controller configuration. • Refer to Chapter 4 if you’ll be doing a monitoring or maintenance activity, changing physical device SCSI properties (New Controllers only), or adding drives (requiring a rescan for devices). • Refer to Chapter 5 if you’ll be using any advanced options. • To exit RAID EzAssist, see “How Do I Exit RAID EzAssist?” on page 2-67. Manual No. 775029 2-53 How Do I Make Use of the Spanning Feature? How Do I Make Use of the Spanning Feature? “Spanning” is the concept of linking similar disk arrays so that logical drives can make use of the extended capacity across the disk arrays. When to Use Spanning Spanning is generally useful in the following types of situations: 1. To overcome the eight (8) drive limit (Previous Controllers), or 16 drive limit (New Controllers) per disk array For example, if I have eight 4.0 GB drives on one controller channel, and another eight 4.0 GB drives on another channel of the same DAC1164P controller, I can create two arrays, each with eight drives, then span them so that I can define a logical drive that makes use of the entire 16 drive capacity. Without spanning, I’d be limited to defining at least two separate logical drives, each of which could only make use of eight drives of capacity. (Double these numbers if using a New Mylex PCI controller.) 2. To make more efficient use of mixed disk drive capacities For example, if I have three (3) 4.0 GB drives and three 2.0 GB drives, I have a few options: • Build one array (A0) using all six (6) disk drives. Because drives in an array will always be treated as the same size, the three 4.0 GB drives will be formatted down to 2.0 GB each to create an array with only 12.0 GB of total physical capacity (6 drives x 2.0 GB/drive) instead of 18.0 GB. I have 12.0 GB with which to define logical drives. For this reason, Automatic Configuration is not recommended when mixed drive capacities exist on the controller. • Build an array (A0) from the three 4.0 GB drives, and build another array (A1) from the three 2.0 GB drives, without spanning. I will have 12.0 GB of physical capacity in A0 and 6.0 GB of physical capacity in A1 with which to define logical drives. However, the largest logical drive I can define would make use of the 12.0 GB in A0 only. I could then define a second logical drive to use the 6.0 GB in A1. 2-54 RAID EzAssist User’s Manual Drive Configuration • Build an array (A0) from the three 4.0 GB drives, and build another array (A1) from the three 2.0 GB drives, with spanning. I will now have the full 18.0 GB of physical capacity in both A0 and A1 with which to define logical drives. Therefore, the largest logical drive I can define would make use of the full 18.0 GB in both arrays. ☛ Note In the examples above, keep in mind that actual available “logical” capacity for defining logical drives will be less than the stated physical capacity when fault tolerance overhead is considered (in all RAID levels other than RAID 0 and JBOD). Spanning Requirements Specific requirements are necessary if you wish to use spanning: 1. You must enable spanning using the Spanning option on the Custom Configuration menu before you build disk arrays or define logical drives on your controller that you intend to span. 2. Spanned disk arrays must have the same number of physical drives in each array, AND must be defined consecutively. See Table 2-5 for examples of when spanning is and is not allowed. Table 2-5. Examples of Spanning and Non-Spanning Situations Array Configuration Spanning Allowed? A0 only (any number of drives) NO. Spanning requires at least two disk arrays. A0 = 2 drives A1 = 2 drives YES. Consecutive arrays have the same number of physical drives. A0 = 3 drives A1 = 2 drives NO. Spanning requires that consecutive arrays have the same number of physical drives. A0 = 2 drives A1 = 3 drives A2 = 2 drives NO. Spanning requires that consecutive arrays have the same number of physical drives. Spanning is not allowed between A0 and A2. A0 = 3 drives A1 = 3 drives A2 = 3 drives YES. Consecutive arrays have the same number of physical drives. Spanning is allowed across all three disk arrays. Build your disk arrays in Custom Configuration with this in mind! Manual No. 775029 2-55 How Do I Make Use of the Spanning Feature? 3. For spanning, capacity of the drives in a disk array does not need to be the same, but each disk array must have the same number of physical drives and be defined consecutively. To avoid downsizing of drives, build each disk array with drives of the same capacity whenever possible. Therefore, you can span an array of three (3) 4.0 GB drives with a second, consecutively-defined array of three 2.0 GB drives. Spanning Limitations Spanning has specific limitations as well: 1. You will NOT be able to add capacity to (expand) any array that has been spanned. Therefore, the Add Capacity to Existing Disk Array option on the Custom Configuration menu will not allow you to choose any spanned arrays. 2. The RAID levels that will be available for logical drives in a spanned set depend entirely on the number of physical drives in each of the spanned arrays, NOT on the total number of drives. See Table 2-6 for an example. Table 2-6. RAID Levels in Spanned Configurations Array Configuration Possible RAID Levels for Logical Drives A0 = 2 drives A1 = 2 drives RAID 00 (= spanned RAID 0, no fault tolerance) RAID 10 (= spanned RAID 1) A0 = 3+ drives A1 = 3+ drives RAID 00 (= spanned RAID 0, no fault tolerance) RAID 30 (= spanned RAID 3) RAID 50 (= spanned RAID 5) RAID 0+1+0 (= spanned RAID 0+1) A0 = 2 drives A1 = 2 drives RAID 00 (= spanned RAID 0, no fault tolerance) RAID 10 (= spanned RAID 1) A2 = 2 drives Two drives per array, no matter how many consecutive arrays exist, is still limited to RAID 00 or RAID 10. Note that assignment of spare drives reduces the number of available, unconfigured drives, and therefore affects the allowable RAID levels. For example, if you span two three-drive arrays, but one drive in each array is assigned as a spare, you will only be able to select RAID 00 or RAID 10 for the spanned arrays’ logical drive(s). Given the background information above, let’s begin! 2-56 RAID EzAssist User’s Manual Drive Configuration ❑ Enable (or Disable) Spanning. ☞ If the main menu is displayed, press Enter with Configure RAID Drive selected (Figure 2-55). Figure 2-55. Main Menu - Configure RAID Drive ☞ On the Configure RAID Drive screen, use the arrow key to select Custom, then press Enter (Figure 2-56). Figure 2-56. Configure RAID Drive - Custom The Custom Configuration menu is displayed (Figure 2-57). Figure 2-57. Custom Configuration Menu ☞ If you want to see whether spanning is turned on, OR if you want to enable (or disable) the spanning feature, use the arrow key to select Spanning on the Custom Configuration menu, then press Enter. If spanning is currently disabled, the Custom Configuration screen shown in Manual No. 775029 2-57 How Do I Make Use of the Spanning Feature? Figure 2-58 will be displayed: Figure 2-58. Enable Spanning? ☞ If you want to enable spanning, use the arrow key to select Yes, then press Enter, OR ☞ If you don’t want to enable spanning, press Enter with No selected. However, if spanning is currently enabled when you select the Spanning option on the Custom Configuration menu, the Custom Configuration screen shown in Figure 2-59 will be displayed: Figure 2-59. Disable Spanning? ☞ If you want to disable spanning, press Enter with Yes selected, 2-58 RAID EzAssist User’s Manual Drive Configuration OR ☞ If you don’t want to disable spanning, use the arrow key to select No, then press Enter. ❑ Build Disk Arrays. ☞ From the Custom Configuration menu, use the arrow key to select Configure a New Disk Array, then press Enter (Figure 2-60). Figure 2-60. Select Configure a New Disk Array The first step is to build at least two disk arrays with equal numbers of drives. This is accomplished from the Disk Array Configuration screen (Figure 2-61). Figure 2-61. Disk Array Configuration Screen This screen uses the following navigation strategy: • PgDn and PgUp show you all the available or selected drives if there is a small down/up-arrow beside the Unused Drives or Disk Array fields. • Inside Unused Drives, arrow keys select a drive, Enter accepts the highlighted drive and adds it to the Disk Array box to the right. • The Tab key shifts control to the buttons, or from the buttons back to Manual No. 775029 2-59 How Do I Make Use of the Spanning Feature? Unused Drives. • When buttons are in focus, arrow keys select a button and Enter activates the highlighted button. Caution The drives you select to comprise the array will all be treated as having the capacity of the smallest selected drive, regardless of the actual capacities. This could lead to wasted drive space. Therefore, try whenever possible to select drives of similar capacity when building an array. “How many drives should I select for each spanned array?” The answer depends on the RAID levels you want to be able to choose for the logical drives you’ll set up in that array. See Table 2-7. Table 2-7. Required Numbers of Drives By RAID Level Desired RAID Level Number of Drives to Select RAID 00 (Spanned Striping) At least 2 drives of equal size RAID 10 (Spanned Mirroring) Exactly 2 drives of equal size RAID 30 (Spanned Parity Drive) At least 3 drives of equal size RAID 50 (Spanned Striping with Parity) RAID 0+1+0 (Spanned Striping with Mirroring) ☞ Use the arrow keys to select a disk drive in the Unused Drives field, then press Enter to accept the drive into the disk array. ☞ Repeat the step above for as many disk drives as you wish to add to the array. ☞ When you’ve finished adding drives, press the Tab key to switch focus to the buttons. Figure 2-62 is a example of how your screen might look after the steps above. 2-60 RAID EzAssist User’s Manual Drive Configuration Figure 2-62. Sample Disk Array Configuration ☞ If you’re not satisfied with your drive selections, use the arrow key to select Clear, then Press Enter. Press Tab to return to Unused Drives. Your selections will be erased and you can try again as described above. ☞ To save the array you’ve set up, press Enter with Save Array selected. A Notice is displayed at this point as shown in Figure 2-63. Figure 2-63. Define Logical Drives or Return to Disk Array Set-Up “Do you want to define logical drives now?” For spanning, the answer is NO, because you must have at least two disk arrays with equal numbers of drives for spanning to be allowed. ☞ To build additional disk arrays, use the arrow key if necessary Manual No. 775029 2-61 How Do I Make Use of the Spanning Feature? to select No, then press Enter. Repeat the steps described in “Build Disk Arrays” above and be sure to build additional disk arrays with the same number of drives as the first disk array! ☞ When you’ve built the equal disk arrays you want to span, use the arrow key if necessary to select Yes on the screen above, then press Enter. ❑ Define Logical Drives. Logical drives for the spanned array(s) you just set up are defined from the Logical Drive Definition screen (Figure 2-64). Just under the screen title, you’ll see the names of the arrays that are spanned and ready for logical drives (such as “Array 0, 1”). Figure 2-64. Logical Drive Definition Screen This screen uses the following navigation strategy: • Arrow keys move among the logical drive definition fields. • For RAID Level, Write Cache, and Stripe Size(KB) definition fields, the Spacebar brings up a list of valid options. Arrow keys move among the options and Enter selects an option. • For RAID Level, Write Cache, and Stripe Size(KB) definition fields, the + and - keys cycle through the valid options. When the desired option is visible, use the arrow key to move to another field. • For Physical Capacity or Logical Capacity definition fields, type a numeric decimal value representing the desired capacity in GB. You may choose one or the other field to adjust. 2-62 RAID EzAssist User’s Manual Drive Configuration • The Tab key shifts control to the buttons, or from the buttons back to the logical drive definition fields. • When buttons are in focus, arrow keys select a button and Enter activates the highlighted button. Arrow keys rotate selections through Add Drive, Apply, Cancel, Clear New, and Delete Last. Let’s start by selecting a RAID level for our logical drive. ☞ With the RAID Level definition field selected... ☞ Press the + or - key to find your desired RAID level, OR ☞ Press Spacebar to display a box of available choices, use the arrow key to select your desired RAID level, then press Enter. Next, we’ll select the write caching strategy for our logical drive. If you are unfamiliar with the terms “Write Through” and “Write Back” caching, please refer to the Glossary for a detailed definition. In a nutshell, Write Back caching speeds write performance but risks loss of data in the cache buffer should power fail. Use Write Back only if you have a battery backup unit (BBU) or uninterruptable power supply (UPS) installed to preserve data in the cache. ☞ Use the right arrow key to select the Write Cache definition field, then... ☞ Press the + or - key to find your desired caching method (“Thru” for Write Through, “Back” for Write Back), OR ☞ Press Spacebar to display a box of available choices, use the arrow key to select your desired write caching method, then press Enter. Next, we’ll set the stripe size for this logical drive. If you are unfamiliar with the term “Stripe Size” please refer to the Glossary for a detailed definition. Manual No. 775029 2-63 How Do I Make Use of the Spanning Feature? ☛ Note Depending on the controller, available stripe sizes are 8, 16, 32, 64, 128, 256, 512, and 1024. ☞ Use the right arrow key to select the Stripe Size(KB) definition field, then... ☞ Press the + or - key to find your desired stripe size, OR ☞ Press Spacebar to display a box of available choices, use the arrow key to select your desired stripe size, then press Enter. Next, we set a size for this logical drive based on the maximum available capacity. The Physical Capacity and Logical Capacity displayed should consist of the total spanned capacity of all the spanned arrays identified below the screen title. Refer back to Figure 2-64 for an example. You can set logical drive size in terms of either physical capacity or logical capacity. Logical capacity takes into account overhead for fault tolerance, spare drives, etc. If you intend to set up more than one logical drive in this array, then set the capacity for the first logical drive somewhere below the maximum to leave space for additional logical drives. ☞ Use the right arrow key to select either the Physical or Logical Capacity(GB) definition field, then type a numeric decimal value for the physical or logical capacity to be used in this logical drive. Finally, let’s add the logical drive. Check your settings among the logical drive definition fields to be sure they are what you want. 2-64 RAID EzAssist User’s Manual Drive Configuration ☞ If you wish to change any settings, use the arrow key to select the desired definition field and change its value as described earlier. ☞ To add the logical drive, press the Tab key to switch focus to the Add Drive button, then press Enter with Add Drive selected. The logical drive is added to the display box, and focus returns to the logical drive definition field line if capacity remains for additional logical drives. ☞ To define additional logical drives, use the arrow key if necessary to return to the RAID Level definition field. Repeat the steps described in “Define Logical Drives” above. As long as you haven’t applied the configuration to the controller, you can delete the logical drives you’ve set up and define new ones. RAID EzAssist lets you: • Delete the most recent logical drive you’ve added, OR • Delete all the logical drives you’ve added in this logical drive definition session. ☞ To delete the most recently-added logical drive, press Tab if necessary to switch focus to the buttons, use the arrow key to select Delete Last, then press Enter. ☞ To delete all logical drives that you added in this session, press Tab if necessary to switch focus to the buttons, use the arrow key to select Clear New, then press Enter. ☞ If you wish, define new logical drives, as described in “Define Logical Drives” above. ❑ Apply the Configuration to the Controller. In order for the disk arrays and logical drives you set up to become a valid, registered configuration, you must Apply the configuration to the controller. ☞ To apply the configuration, press Tab if necessary to switch focus to the buttons, use the arrow key to select Apply, then press Enter, Manual No. 775029 2-65 How Do I Make Use of the Spanning Feature? OR ☞ To cancel the configuration, press Tab if necessary to switch focus to the buttons, use the arrow key to select Cancel, then press Enter. When you apply the new configuration, RAID EzAssist writes configuration information to the Mylex controller and the drives. This takes a few moments, so a message is displayed (Figure 2-65). Figure 2-65. Writing RAID Configuration. Please Wait... ☞ Wait for the configuration information to be written to the controller and the drives. When the process is complete, RAID EzAssist brings you to the main menu. When the main menu appears: • Look in this chapter if you’ll be doing an additional configuration activity. • Refer to Chapter 3 if you’ll be doing controller configuration. • Refer to Chapter 4 if you’ll be doing a monitoring or maintenance activity, changing physical device SCSI properties (New Controllers only), or adding drives (requiring a rescan for devices). • Refer to Chapter 5 if you’ll be using any advanced options. • To exit RAID EzAssist, see “How Do I Exit RAID EzAssist?” on page 2-67. 2-66 RAID EzAssist User’s Manual Drive Configuration How Do I Exit RAID EzAssist? ☞ To exit RAID EzAssist, press the Esc key multiple times until you see the screen in Figure 2-66 below. Figure 2-66. Do You Wish to Exit RAID EzAssist? ☞ Use the arrow key to select Yes, then press Enter to exit RAID EzAssist. Begin operating system installation if necessary, or reboot your installed operating system. Manual No. 775029 2-67 How Do I Exit RAID EzAssist? 2-68 RAID EzAssist User’s Manual Chapter 3 Controller Configuration You can use RAID EzAssist to view a controller’s current configuration settings. Additionally, you can change certain settings on your controller. Each Mylex Disk Array Controller is shipped from the factory with default settings which have been found to work well in a majority of applications and environments. However, no two environments are the same, and you may want to modify certain settings. The best time to make such changes is prior to doing your first drive configuration on the controller. This chapter will discuss the following: • Viewing Controller Configuration Information • Changing Global Properties • Changing SCSI Transfer Properties (for Previous Mylex PCI Controllers) • Changing Startup Properties The following table is a summary of the specific properties you are able to change along with their default values. Table 3-1. Summary of Controller Parameters Property Type Global a SCSI Transfer Startup Parameter Default Setting Automatic Rebuild Management Enabled StorageWorks Fault Management Disabled Background Process Rate (%) 50 Active Negation (Previous Controllers) Disabled Drive Size Coercion (New Controllers) Enabled Bus Speed (MHz) 20MHz Tag Queueing Yes Bus Width (8=Narrow, 16=Wide) Negotiated Value Disk Spin Up By Controller Number of Disk Drives per Spin 2 Initial Delay (seconds) 6 Delay Between Spins (seconds) 0 a. For Previous Controllers, SCSI Transfer properties must be set by controller. For New Controllers, SCSI Transfer properties of physical devices on the controller can be set individually. Manual No. 775029 3-1 If you wish to view basic configuration information about the selected Mylex controller, see the section called “How Do I View Controller Configuration Information?” on page 3-3. If you wish to view and/or modify any Global Properties for the selected Mylex controller, see the section called “How Do I Change Global Properties for a Controller?” on page 3-5. (For Previous Mylex PCI Controllers): If you wish to view and/or modify any SCSI Transfer Properties for the selected Mylex controller, see the section called “How Do I Change SCSI Transfer Properties for a Previous Mylex PCI Controller?” on page 3-10. (For New Mylex PCI Controllers): If you wish to view and/or modify the SCSI Transfer Properties of physical devices attached to a New Mylex PCI controller, see the section in Chapter 4 called “How Do I Change SCSI Transfer Properties for Physical Devices on a New Mylex PCI Controller?” on page 4-64. If you wish to view and/or modify any Startup Properties for the selected Mylex controller, see the section called “How Do I Change Startup Properties for a Controller?” on page 3-13. 3-2 RAID EzAssist User’s Manual Controller Configuration How Do I View Controller Configuration Information? ❑ Enter the Controller Configuration Screen. ☞If necessary, select the controller you wish to configure from the “Welcome to RAID EzAssist” screen, The RAID EzAssist main menu includes several options (Figure 3-1). Figure 3-1. View or Modify Controller Configuration ☞Use the arrow key to select View or Modify Controller Configuration on the main menu, then press Enter. The Controller Configuration screen is displayed showing basic controller configuration information (Figure 3-2). Figure 3-2. Controller Configuration Screen Manual No. 775029 3-3 How Do I View Controller Configuration Information? ❑ Examine the Controller Configuration Details. Table 3-2 shows the information displayed on the Controller Configuration screen. This information is read only. Table 3-2. Controller Configuration Details Field Description Vendor Identifies the manufacturer of the controlller: Mylex. Model Identifies which Mylex controller you have. For example, DAC1164P = eXtremeRAID 1100. Firmware Version Identifies the current version and turn number of the firmware installed on the controller. BIOS Version Identifies the current version and turn number of the controller’s BIOS. PCI Bus Identifies the number of the PCI bus for this controller. PCI Device Identifies the device number for this controller on the bus. PCI Function Identifies the PCI function for this controller. IRQ Identifies the Interrupt Request setting for this controller. Each controller’s IRQ should be unique. Memory Address Identifies the memory address for the controller (size is 128 bytes) ☞View the controller configuration information, then press the Esc key to return to the main menu. However, if you want to change any controller properties, see one of the following three sections. 3-4 RAID EzAssist User’s Manual Controller Configuration How Do I Change Global Properties for a Controller? ❑ Enter the Properties Menu. To view and possibly change Global properties of the controller, you enter the Properties menu from the Controller Configuration screen. ☞Press Enter with Properties selected on the Controller Configuration screen. The Properties menu is displayed (Figure 3-3). ☛ Note For New Controllers, SCSI properties are set by individual physical device and not by controller, so the “SCSI” option will only appear on the Properties menu for Previous Controllers (such as DAC1164P). Figure 3-3. Properties Menu Overlays Controller Configuration Screen ❑ Enter the Global Properties Screen. ☞When the Properties menu is displayed, press Enter with Global selected. Manual No. 775029 3-5 How Do I Change Global Properties for a Controller? The Global Properties screen is displayed (Figure 3-4 or Figure 3-5). Figure 3-4. Global Properties Screen - Previous Controllers Figure 3-5. Global Properties Screen - New Controllers This screen uses the following navigation strategy: • Arrow keys move among the global property fields. • The Spacebar brings up a list of valid options. Arrow keys move among the options and Enter selects an option. • The + and - keys cycle through the valid options. When the desired option is visible, use the arrow key to move to another field. • The Tab key shifts control to the buttons, or from the buttons back to the global property fields. • When buttons are in focus, arrow keys select a button and Enter activates the highlighted button. • At any time you can press Enter to accept the currently visible settings and close the screen. 3-6 RAID EzAssist User’s Manual Controller Configuration ❑ View/Modify Automatic Rebuild Management. Default = Enabled The Automatic Rebuild Management option refers to the function of the same name. It detects the removal of a failed drive and performs an automatic rebuild after a replacement drive is installed into a redundant (fault tolerant) logical array (RAID 1, 3, 5, and 0+1). Automatic Rebuild Management requires hardware compatibility with disk array enclosures that are certified AEMI or SAF-TE compliant. ☞ With the Automatic Rebuild Management field selected... ☞ Press the + or - key to set the value to Enabled or Disabled as desired, OR ☞ Press Spacebar to display a box of available choices, use the arrow key to select your desired setting, then press Enter. ❑ View/Modify StorageWorks Fault Management. Default = Disabled The StorageWorks Fault Management option monitors and reports drive failures, background activity completion status, enclosure events, etc. Enable this function only when Digital StorageWorks Fault Management equipment (disk cabinet) is installed. In all other cases this option should remain disabled. WARNING If you enable StorageWorks Fault Management, make sure that Automatic Rebuild Management is disabled. ☞ Use the arrow key to select the StorageWorks Fault Management field, then... ☞ Press the + or - key to set the value to Enabled or Disabled as Manual No. 775029 3-7 How Do I Change Global Properties for a Controller? desired, OR ☞ Press Spacebar to display a box of available choices, use the arrow key to select your desired setting, then press Enter. ❑ View/Modify Background Process Rate. Default = 50 The Background Process Rate is a relative indication of how much time the controller devotes to a rebuild, add capacity (MORE), or background initialization operation. Integer values from 0-50 can be defined in multiples of 10. For low priority and high array performance, specify a value of 0. For high background process rate (with reduced array performance during), select 50. ☞ Use the arrow key to select the Background Process Rate (%) field, then... ☞ Press the + or - key to select the desired numeric value for background processes, OR ☞ Press Spacebar to display a box of available choices, use the arrow key to select your desired value, then press Enter. ❑ Previous Controllers: View/Modify the Active Negation Setting. Default = Disabled Enable for cleaner SCSI signal transmissions. ☞ Use the arrow key to select the Active Negation field, then... ☞ Press the + or - key to set the value to Enabled or Disabled as desired, OR ☞ Press Spacebar to display a box of available choices, use the 3-8 RAID EzAssist User’s Manual Controller Configuration arrow key to select your desired value, then press Enter. ❑ New Controllers: View/Modify the Drive Size Coercion Setting. Default = Enabled Enable to allow drives of similar but not exact capacities to be treated as identical in capacity for the purpose of hot spares, drive replacements, and array configurations. ☞ Use the arrow key to select the Drive Size Coercion field, then... ☞ Press the + or - key to set the value to Enabled or Disabled as desired, OR ☞ Press Spacebar to display a box of available choices, use the arrow key to select your desired value, then press Enter. ❑ Accept or Cancel Your Global Property Changes. ☞ To accept your Global property changes, press Enter with Ok selected, then press the arrow key to select Yes at the “Save Changes?” screen and press Enter, OR ☞ To cancel any changes you’ve made, press the Esc key, or press the Tab key, the arrow key to select Cancel, then press Enter. Manual No. 775029 3-9 How Do I Change SCSI Transfer Properties for a Previous Mylex PCI Controller? How Do I Change SCSI Transfer Properties for a Previous Mylex PCI Controller? ❑ Enter the Properties Menu. To view and possibly change SCSI Transfer properties of the controller, you enter the Properties menu from the Controller Configuration screen. ☞Press Enter with Properties selected on the Controller Configuration screen. The Properties menu is displayed (Figure 3-6). Figure 3-6. Properties Menu Overlays Controller Configuration Screen ❑ Enter the SCSI Transfer Properties Screen. ☞When the Properties menu is displayed, use the arrow key to select SCSI, then press Enter. The SCSI Transfer Properties screen is displayed (Figure 3-7). Figure 3-7. SCSI Transfer Properties Screen 3-10 RAID EzAssist User’s Manual Controller Configuration This screen uses the following navigation strategy: • Arrow keys move among the SCSI transfer property fields. • The Spacebar brings up a list of valid options. Arrow keys move among the options and Enter selects an option. • The + and - keys cycle through the valid options. When the desired option is visible, use the arrow key to move to another field. • The Tab key shifts control to the buttons, or from the buttons back to the SCSI transfer property fields. • When buttons are in focus, arrow keys select a button and Enter activates the highlighted button. • At any time you can press Enter to accept the currently visible settings and close the screen. ☛ Note The Channel and Host ID fields are not changeable. ❑ View/Modify Bus Speed. Default = 20MHz The SCSI Transfer Bus Speed (MHz) function sets the maximum transfer rate for each drive channel. The default setting is 20MHz. This setting produces 20 MB/sec transfers for Fast SCSI and 40 MB/sec transfers for Wide and Ultra SCSI. In general it is not necessary to change this parameter since the controller “negotiates” the supported transfer rate with all of the drives. ☛ Note Problems communicating with a drive can be caused by several conditions; e.g., improper termination, wrong drive ID setting, SCSI cable is too long, faulty equipment, etc. However, if you do wish to change this setting... ☞ Use the arrow keys to select the Bus Speed (MHz) field for the desired channel, then... Manual No. 775029 3-11 How Do I Change SCSI Transfer Properties for a Previous Mylex PCI Controller? ☞ Press the + or - key to set the desired value, OR ☞ Press Spacebar to display a box of available choices, use the arrow key to select your desired value, then press Enter. ☞ Repeat the steps above for other controller channels if necessary. ❑ View/Modify the Tag Queueing Setting. Default = Yes The Tag Queueing setting controls SCSI command tag queuing support for each drive channel. This allows drives to work on multiple commands at the same time. This function normally remains enabled (Yes). Disable (switch to No) only when using older SCSI drives not supporting command tag queuing. ☞ Use the arrow keys to select the Tag Queueing field for the desired channel, then... ☞ Press the + or - key to set the value to Yes or No as desired, OR ☞ Press Spacebar to display a box of available choices, use the arrow key to select your desired setting, then press Enter. ❑ View/Modify the Bus Width Setting. Default = Negotiated Value In general it is not necessary to change this parameter since the controller “negotiates” the supported data bus width. However, if you do wish to change this setting... ☞ Use the arrow keys to select the Bus Width (8=Narrow, 16=Wide) field for the desired channel, then... 3-12 RAID EzAssist User’s Manual Controller Configuration ☞ Press the + or - key to set the value to 16 or 8 as desired, OR ☞ Press Spacebar to display a box of available choices, use the arrow key to select your desired setting, then press Enter. ❑ Accept or Cancel Your SCSI Transfer Property Changes. ☞ To accept your SCSI Transfer property changes, press Enter with Ok selected, then press the arrow key to select Yes at the “Save Changes?” screen and press Enter, OR ☞ To cancel any changes you’ve made, press the Esc key, or press the Tab key, the arrow key to select Cancel, then press Enter. How Do I Change Startup Properties for a Controller? ❑ Enter the Properties Menu. To view and possibly change Startup properties of the controller, you enter the Properties menu from the Controller Configuration screen. ☞Press Enter with Properties selected on the Controller Configuration screen. The Properties menu is displayed (Figure 3-8). Figure 3-8. Properties Menu Overlays Controller Configuration Screen Manual No. 775029 3-13 How Do I Change Startup Properties for a Controller? ❑ Enter the Startup Properties Screen. ☞When the Properties menu is displayed, use the arrow key to select Startup, then press Enter. The Startup Properties screen is displayed (Figure 3-9). Figure 3-9. Startup Properties Screen This screen uses the following navigation strategy: • Arrow keys move among the startup property fields. • For the Disk Spin Up field, the Spacebar brings up a list of valid options. Arrow keys move among the options and Enter selects an option. • For the Disk Spin Up field, the + and - keys cycle through the valid options. When the desired option is visible, use the arrow key to move to another field. • For Number of Disk Drives per Spin, Initial Delay (seconds), and Delay Between Spins (seconds) fields, type a numeric value representing the desired setting. • The Tab key shifts control to the buttons, or from the buttons back to the startup property fields. • When buttons are in focus, arrow keys select a button and Enter activates the highlighted button. • At any time you can press Enter to accept the currently visible settings and close the screen. ❑ View/Modify the Disk Spin Up Setting. Default = By Controller 3-14 RAID EzAssist User’s Manual Controller Configuration The Disk Spin Up setting controls how the SCSI drives in the array are started (spun-up). There are three different Spin-up modes that may be selected by the user. By Controller. This spin-up mode causes the controller to spin-up all connected drives until every drive in the array is spinning. The controller then interrogates each drive and confirms that the drive is ready for use. The interrogation process repeats until all drives have been verified. The default is set to the “Number of Disk Drives per Spin” value at an interval indicated by the “Delay Between Spins (seconds)” value (see below). On Power. This spin-up mode assumes that all drives are already spinning and proceeds to interrogate the drives in the same manner as described for By Controller mode. Automatic. This spin-up mode spins drives automatically. ☞ With the Disk Spin Up field selected... ☞ Press the + or - key to set the desired spin method to By Controller, On Power, or Automatic, OR ☞ Press Spacebar to display a box of available choices, use the arrow key to select your desired setting, then press Enter. ❑ View/Modify the Number of Disk Drives per Spin Setting. Default = 2 This specifies the number of drives to spin up at one time. Values range from 1 to 6. ☞ Use the arrow keys to select the Number of Disk Drives per Spin field, then type the desired numeric value for the number of disk drives per spin. ❑ View/Modify the Initial Delay Setting. Default = 6 After the controller completes its initialization process, the initial delay value defines the number of seconds before the first disk interrogation Manual No. 775029 3-15 How Do I Change Startup Properties for a Controller? request is issued to the array. Delay values range from 0 to 30 in six second increments. ☞ Use the arrow keys to select the Initial Delay (seconds) field, then type the desired numeric value for the number of seconds of initial delay. ❑ View/Modify the Delay Between Spins Setting. Default = 0 This specifies the number of seconds between consecutive device spin-up cycles. ☞ Use the arrow keys to select the Delay Between Spins (seconds) field, then type the desired numeric value for the number of seconds of delay between spins. ❑ Accept or Cancel Your Startup Property Changes. ☞ To accept your Startup property changes, press Enter with Ok selected, then press the arrow key to select Yes at the “Save Changes?” screen and press Enter, OR ☞ To cancel any changes you’ve made, press the Esc key, or press the Tab key, the arrow key to select Cancel, then press Enter. 3-16 RAID EzAssist User’s Manual Chapter 4 Monitoring and Maintenance Activities In this chapter you’ll learn how to work with: • Disk arrays • Logical drives • Physical devices RAID EzAssist allows you to monitor characteristics and status, change certain properties of logical and physical drives, and perform some useful and sometimes necessary administration and maintenance activities. Also, whenever you alter the physical configuration of your setup, such as to add or remove physical drives, or if drive status changes while RAID EzAssist is running, RAID EzAssist can rescan the controller to be sure it’s working with the updated status information. This chapter shows you how to do that as well. All functions described in this chapter (except the last) are carried out using the Perform Administration on... option on the main menu (Figure 4-1). Figure 4-1. Perform Administration on... Manual No. 775029 4-1 Here is a list of the tasks that you can accomplish: DISK ARRAY TASKS: • View a list of the physical drives that make up the selected disk array, capacity and status of the drives, and the amount of unused space in the disk array. • Physically locate (with blinking LEDs) the physical drives that comprise the selected array. LOGICAL DRIVE TASKS: • View properties of the selected logical drive, such as status, capacity, RAID level, stripe size. • Optionally change Stripe Block Size and Write Cache settings. • View a list of the physical drives that comprise the logical drive, and capacity and status of the physical drives. • View a table of any bad data sequence numbers and addresses on the logical drive. • Physically locate (with blinking LEDs) the physical drives that comprise the selected logical drive. • Check consistency (with error repair if requested) of the selected logical drive. • Manually request logical drive initialization.1 Note that all existing data on the logical drive will be lost. • Rebuild redundancy data on the selected logical drive. • Cancel an ongoing background task, such as a consistency check, initialization, or rebuild. • Delete the most recently configured logical drive. 1. Logical drives are initialized automatically as a background task after they have been configured allowing their immediate use. This is called Immediate RAID Availability. The Initialize Drive option is not necessary unless you have a specific reason to request manual initialization. 4-2 RAID EzAssist User’s Manual Monitoring and Maintenance Activities PHYSICAL DEVICE TASKS: • View properties of the selected physical device, such as vendor, model, firmware version, capacity, and status. • Optionally change Read and Write Cache settings. • View either the primary drive defect list, or a list of “grown” defects which may have emerged more recently. This information can help you anticipate a drive that may eventually need replacement. • View a count of parity errors, soft errors, hard errors, and miscellaneous errors, then reset the counts to 0. • Assign an unconfigured drive as a spare, or return a current spare drive to unconfigured status. • Physically locate (with a blinking LED) the selected physical device. • Rebuild redundancy data on the selected physical drive. • Perform a low-level format on the selected physical drive. Note that all existing data on the drive will be lost. • Change the STATUS of the selected physical drive as follows: • UNCONFIGURED <=> SPARE • ONLINE <=> OFFLINE. • View and modify physical device SCSI properties. Manual No. 775029 4-3 How Do I View Disk Array Status and Information? How Do I View Disk Array Status and Information? ☞Use the arrow key to select Perform Administration on... on the main menu, then press Enter. The Administration menu is displayed (Figure 4-2). Figure 4-2. Administration Menu - Disk Array ☞Press Enter with Disk Array selected. ❑ Select a Disk Array. The first step is to select the disk array you wish to monitor. You do this from the Disk Array Selection screen (Figure 4-3). Figure 4-3. Disk Array Selection Screen This screen uses the following navigation strategy: • Arrow keys move among the available disk arrays. • Enter selects the highlighted disk array. ☞ Use the arrow keys to select the disk array you want to 4-4 RAID EzAssist User’s Manual Monitoring and Maintenance Activities monitor, then press Enter. The Disk Array menu is displayed (Figure 4-4). Figure 4-4. Disk Array Menu - View Array Configuration ☞Press Enter with View Array Configuration selected. ❑ View Disk Array Status and Information. The Disk Array Configuration screen for the selected array is displayed (Figure 4-5). This screen shows the following information: • The channel, ID, vendor, model, version, capacity (GB), and status of all physical drives that comprise the selected disk array. • The total capacity of the disk array. • The total used and unused capacity in the disk array. Figure 4-5. Disk Array Configuration Screen ☞ (Optional): If a small down-arrow is displayed beside the physical drive field, press PgDn to view additional drives in the disk array. Press PgUp to move up the list. ☞ Press Enter with Ok selected to close the Disk Array Configuration screen. Manual No. 775029 4-5 How Do I Visually Locate the Physical Drives That Comprise the Array? How Do I Visually Locate the Physical Drives That Comprise the Array? RAID EzAssist has an option that allows you to see exactly which physical drives were used to define the selected array. Using Locate Array, you can cause the LEDs to blink on all online physical drives that comprise the array. ☞Use the arrow key to select Perform Administration on... on the main menu, then press Enter. The Administration menu is displayed (Figure 4-6) Figure 4-6. Administration Menu - Disk Array ☞Press Enter with Disk Array selected. ❑ Select a Disk Array. Select the disk array you wish to locate. You do this from the Disk Array Selection screen (Figure 4-7). Figure 4-7. Disk Array Selection Screen This screen uses the following navigation strategy: • Arrow keys move among the available disk arrays. 4-6 RAID EzAssist User’s Manual Monitoring and Maintenance Activities • Enter selects the highlighted disk array. ☞ Use the arrow keys to select the disk array you want to locate, then press Enter. ❑ Locate Physical Drives Comprising the Array. The Disk Array menu is displayed (Figure 4-8). Figure 4-8. Disk Array Menu - Locate Array ☞Use the arrow key to select Locate Array, then press Enter. A Notice is displayed for the selected array (Figure 4-9). At the same time, all the physical drives that comprise the array will show blinking LEDs (if applicable) to help you see which physical devices have been used for this array. Figure 4-9. Locate Array Notice ☞ Press Enter with Ok selected after you’ve visually located the physical drives in the array. When the Notice screen disappears, the LEDs should stop blinking. Manual No. 775029 4-7 How Do I View Logical Drive Status and Information? How Do I View Logical Drive Status and Information? ☞Use the arrow key to select Perform Administration on... on the main menu, then press Enter. The Administration menu is displayed (Figure 4-10). Figure 4-10. Administration Menu - Logical Drive ☞Use the arrow key to select Logical Drive, then press Enter. ❑ Select a Logical Drive. The first step is to select the logical drive you wish to monitor. You do this from the Logical Drive Selection screen (Figure 4-11). Figure 4-11. Logical Drive Selection Screen This screen uses the following navigation strategy: • Arrow keys move among the available logical drives. • Enter selects the highlighted logical drive. ☞ Use the arrow keys to select the logical drive you want to 4-8 RAID EzAssist User’s Manual Monitoring and Maintenance Activities monitor, then press Enter. ❑ View Logical Drive Status and Information. The Logical Drive menu is displayed (Figure 4-12). Figure 4-12. Logical Drive Menu - View or Modify Drive Configuration ☞Press Enter with View or Modify Drive Configuration selected. The Logical Drive Configuration screen for the selected logical drive is displayed (Figure 4-13). This screen shows the following information: • The channel, ID, vendor, model, version, capacity (GB), and status of all physical drives that comprise the selected logical drive. • The name of the logical drive (for example, “Logical Drive 1”). • The overall status of the logical drive (online, critical, etc.) • The capacity of the logical drive. • The RAID level used by this logical drive. • The Cache Line Size assigned to this logical drive. • The Stripe Block Size assigned. • The Write Cache policy assigned (Write-Thru or Write-Back). Manual No. 775029 4-9 How Do I View Logical Drive Status and Information? Figure 4-13. Logical Drive Configuration Screen ☞ (Optional): If a small down-arrow is displayed beside the physical drive field, press PgDn to view additional drives used in this logical drive. Press PgUp to move up the list. ☞ Press Enter with Ok selected to close the Logical Drive Configuration screen. If you want to change the Read Cache and/or Write Cache logical drive settings, please continue to the next section. 4-10 RAID EzAssist User’s Manual Monitoring and Maintenance Activities How Do I Change Logical Drive Stripe Size and Write Cache Settings? If you are unfamiliar with the terms “Stripe Size,” “Write Cache,” “Write Through,” or “Write Back” caching, please refer to the Glossary for a detailed definition. In a nutshell, Stripe Size is the size of the logically contiguous data block mapped to a single disk. A stripe of data is divided over all disks in the drive group. Write Back caching speeds write performance but risks loss of data in the cache buffer should power fail. Use Write Back only if you have a battery backup unit (BBU) or uninterruptable power supply (UPS) installed to preserve data in the cache. ☞ Open the Logical Drive Configuration screen as described in “How Do I View Logical Drive Status and Information?” on page 4-8. ☞ Use the arrow key to select the Stripe Block Size field, then... ☞ Press the + or - key to find your desired stripe size, OR ☞ Press Spacebar to display a box of available choices, use the arrow key to select your desired stripe size, then press Enter. ☞ Use the arrow key to select the Write Cache field, then... ☞ Press the + or - key to find your desired caching method (“Write-Back” or “Write-Thru”), OR ☞ Press Spacebar to display a box of available choices, use the arrow key to select your desired write caching method, then press Enter. Once you’ve set the Stripe Block Size and Write Cache as desired, Manual No. 775029 4-11 How Do I Change Logical Drive Stripe Size and Write Cache Settings? ☞ Press Enter with Ok selected to accept the changes, OR ☞ Use the arrow key to select Cancel, then press Enter to leave the settings unchanged. If you made any changes and selected Ok,a Notice is displayed asking you to confirm your changes. Caution Keep in mind that changing the stripe size may damage data already on the logical drive! ☞ Use the arrow key to select Yes if necessary, then press Enter to register the logical drive configuration changes. 4-12 RAID EzAssist User’s Manual Monitoring and Maintenance Activities How Do I View the Logical Drive Bad Data Table? ☞Use the arrow key to select Perform Administration on... on the main menu, then press Enter. The Administration menu is displayed (Figure 4-14). Figure 4-14. Administration Menu - Logical Drive ☞Use the arrow key to select Logical Drive, then press Enter. ❑ Select a Logical Drive. The first step is to select the logical drive whose bad data table you wish to view. You do this from the Logical Drive Selection screen (Figure 4-15). Figure 4-15. Logical Drive Selection Screen This screen uses the following navigation strategy: • Arrow keys move among the available logical drives. • Enter selects the highlighted logical drive. ☞ Use the arrow keys to select the logical drive whose bad data Manual No. 775029 4-13 How Do I View the Logical Drive Bad Data Table? table you want to view, then press Enter. ❑ View Logical Drive Bad Data Table. The Logical Drive menu is displayed (Figure 4-16). Figure 4-16. Logical Drive Menu - View Bad Data Table ☞Use the arrow key to select View Bad Data Table, then press Enter. The Bad Data Table screen for the selected logical drive is displayed (Figure 4-17). This screen shows the following information: • The controller number and logical drive number for this table • The Sequence Number and Address for any and all bad data instances found Figure 4-17. Bad Data Table ☞ Press Enter with Ok selected when you have finished viewing the bad data table for this logical drive. 4-14 RAID EzAssist User’s Manual Monitoring and Maintenance Activities How Do I Visually Locate the Physical Drives That Comprise the Logical Drive? RAID EzAssist has an option that allows you to see exactly which physical drives were used to define the selected logical drive. Using Locate Drive, you can cause the LEDs to blink on all online physical drives that comprise the logical drive. ☞Use the arrow key to select Perform Administration on... on the main menu, then press Enter. The Administration menu is displayed (Figure 4-18). Figure 4-18. Administration Menu - Logical Drive ☞Use the arrow key to select Logical Drive, then press Enter. ❑ Select a Logical Drive. The first step is to select the logical drive whose physical drives you wish to locate visually. You do this from the Logical Drive Selection screen (Figure 4-19). Figure 4-19. Logical Drive Selection Screen This screen uses the following navigation strategy: Manual No. 775029 4-15 How Do I Visually Locate the Physical Drives That Comprise the Logical Drive? • Arrow keys move among the available logical drives. • Enter selects the highlighted logical drive. ☞ Use the arrow keys to select the logical drive whose physical drives you want to locate visually, then press Enter. ❑ Locate Physical Drives Comprising the Logical Drive. The Logical Drive menu is displayed (Figure 4-20). Figure 4-20. Logical Drive Menu - Locate Drive ☞Use the arrow key to select Locate Drive, then press Enter. A Notice is displayed for the selected logical drive (Figure 4-21). At the same time, all the physical drives that comprise the logical drive will show blinking LEDs (if applicable) to help you see which physical devices have been used for this logical drive. Figure 4-21. Locate Physical Drives Notice ☞ Press Enter with Ok selected after you’ve visually located the physical drives. When the Notice screen disappears, the LEDs should stop blinking. 4-16 RAID EzAssist User’s Manual Monitoring and Maintenance Activities How Do I Run a Consistency Check on the Logical Drive? From time to time it’s wise to check the parity on your fault tolerant logical drives for consistency, and to restore consistency if necessary. You do this by using the Check Consistency option. ☞Use the arrow key to select Perform Administration on... on the main menu, then press Enter. The Administration menu is displayed (Figure 4-22). Figure 4-22. Administration Menu - Logical Drive ☞Use the arrow key to select Logical Drive, then press Enter. ❑ Select a Logical Drive. The first step is to select the logical drive on which to run the consistency check. You do this from the Logical Drive Selection screen (Figure 4-23). Figure 4-23. Logical Drive Selection Screen This screen uses the following navigation strategy: • Arrow keys move among the available logical drives. Manual No. 775029 4-17 How Do I Run a Consistency Check on the Logical Drive? • Enter selects the highlighted logical drive. ☞ Use the arrow keys to select the logical drive on which to run the consistency check, then press Enter. ❑ Enter the Logical Drive Advanced Options Menu. The Logical Drive menu is displayed (Figure 4-24). Figure 4-24. Logical Drive Menu - Advanced Options ☞Use the arrow key to select Advanced Options, then press Enter. The Logical Drive Advanced Options menu is displayed (Figure 4-25). Figure 4-25. Logical Drive Advanced Options Menu - Check Consistency 4-18 RAID EzAssist User’s Manual Monitoring and Maintenance Activities ❑ Run a Consistency Check. ☞ Press Enter with Check Consistency selected. The Check Consistency screen is displayed (Figure 4-26): Figure 4-26. Check Consistency - Repair Inconsistent Data? You can check consistency with or without data repair. If you check consistency with data repair, errors will be fixed as they are found. Some errors may not be reparable, however, and attempting to fix them may further corrupt the data. If you check consistency without data repair, you can determine whether errors exist without attempting to fix them. If errors are found, you can later decide to attempt repair, if possible. ☞ To run a consistency check with data repair, press Enter with Yes selected, OR ☞ To run a consistency check without data repair, use the arrow key to select No, then press Enter, OR ☞ To cancel this request, use the arrow key to select Cancel, then press Enter. Consistency Check runs in the background. To check the status of any background task(s), see the section in Chapter 5 called “How Do I Check the Status of a Background Task?” on page 5-19. Manual No. 775029 4-19 How Do I Initialize a Logical Drive? How Do I Initialize a Logical Drive? With the Immediate RAID Availability feature built into Mylex products, logical drives are initialized in the background just after they are configured. The logical drives can be used right away without the need to wait for a lengthy drive initialization process to complete. However, if you need to perform a full drive initialization on a logical drive for any reason, such as under instruction from Mylex Technical Support, you can use the Initialize Drive option in RAID EzAssist. ☞Use the arrow key to select Perform Administration on... on the main menu, then press Enter. The Administration menu is displayed (Figure 4-27). Figure 4-27. Administration Menu - Logical Drive ☞Use the arrow key to select Logical Drive, then press Enter. ❑ Select a Logical Drive. The first step is to select the logical drive to initialize. You do this from the Logical Drive Selection screen (Figure 4-28). 4-20 RAID EzAssist User’s Manual Monitoring and Maintenance Activities Figure 4-28. Logical Drive Selection Screen This screen uses the following navigation strategy: • Arrow keys move among the available logical drives. • Enter selects the highlighted logical drive. ☞ Use the arrow keys to select the logical drive to initialize, then press Enter. ❑ Enter the Logical Drive Advanced Options Menu. The Logical Drive menu is displayed (Figure 4-29). Figure 4-29. Logical Drive Menu - Advanced Options ☞Use the arrow key to select Advanced Options, then press Enter. Manual No. 775029 4-21 How Do I Initialize a Logical Drive? The Logical Drive Advanced Options menu is displayed (Figure 4-30). Figure 4-30. Logical Drive Advanced Options Menu - Initialize Drive ❑ Initialize the Logical Drive. ☞ Use the arrow key to select Initialize Drive, then press Enter. The Initialize Drive warning screen is displayed (Figure 4-31): Figure 4-31. Initialize Drive? Initialization will erase all data on the logical drive. ☞ To cancel your request to initialize the logical drive, press Enter with No selected, OR ☞ To initialize the logical drive, use the arrow key to select Yes, then press Enter. Logical Drive Initialization runs in the background. To check the status of any background task(s), see the section in Chapter 5 called “How Do I Check the Status of a Background Task?” on page 5-19. 4-22 RAID EzAssist User’s Manual Monitoring and Maintenance Activities How Do I Rebuild Redundancy Data Onto a Logical Drive? One of the most important features of RAID technology is fault tolerance (data redundancy). It’s the redundancy built into your RAID 1 (10), RAID 3 (30), RAID 5 (50), and RAID 0+1 (0+1+0) logical drive data that allows for a physical disk drive failure without the loss of that data. In the event of a physical drive failure within a fault tolerant logical drive, the disk array goes into critical mode, but I/O activity can continue (data can be accessed and stored). However, it is unwise to leave the disk array in critical mode for too long, because a second drive failure will lead to data loss. If you have a spare drive assigned, the controller can rebuild the failed drive’s data using redundant information on the remaining drives in the disk array. The rebuilt data is stored on the spare drive and the spare’s status changes to online. While this process is taking place, the disk array is in degraded performance mode, but I/O activity can continue. At a convenient time, you would then replace the failed drive with a new one, rescan the controller, and perhaps assign the new drive as a spare. If you don’t have a spare drive assigned, or if automatic rebuild management is not enabled, you’ll need to replace the failed drive as soon as possible and use the Rebuild Redundancy Data option manually to rebuild the data onto the new drive. ☞Use the arrow key to select Perform Administration on... on the main menu, then press Enter. The Administration menu is displayed (Figure 4-32). Figure 4-32. Administration Menu - Logical Drive ☞Use the arrow key to select Logical Drive, then press Enter. Manual No. 775029 4-23 How Do I Rebuild Redundancy Data Onto a Logical Drive? ❑ Select a Logical Drive. The first step is to select the logical drive that is in critical mode. You do this from the Logical Drive Selection screen (Figure 4-33). Figure 4-33. Logical Drive Selection Screen This screen uses the following navigation strategy: • Arrow keys move among the available logical drives. • Enter selects the highlighted logical drive. ☞ Use the arrow keys to select the logical drive with Critical status, then press Enter. ❑ Enter the Logical Drive Advanced Options Menu. The Logical Drive menu is displayed (Figure 4-34). Figure 4-34. Logical Drive Menu - Advanced Options ☞Use the arrow key to select Advanced Options, then press Enter. 4-24 RAID EzAssist User’s Manual Monitoring and Maintenance Activities The Logical Drive Advanced Options menu is displayed (Figure 4-35). Figure 4-35. Logical Drive Advanced Options Menu - Rebuild Redundancy Data ❑ Rebuild Redundancy Data on the Logical Drive. ☞ Use the arrow key to select Rebuild Redundancy Data, then press Enter. The Rebuild Redundancy Data warning screen is displayed (Figure 4-36): Figure 4-36. Rebuild Redundancy Data? Rebuild redundancy will regenerate the data that was on the failed or offline drive. ☞ To cancel your request to rebuild redundancy data, press Enter with No selected, OR ☞ To rebuild redundancy data, use the arrow key to select Yes, then press Enter. Rebuild Redundancy Data runs in the background. To check the status of any background task(s), see the section in Chapter 5 called “How Do I Check the Status of a Background Task?” on page 5-19. Manual No. 775029 4-25 How Do I Cancel a Background Task That’s Running on a Logical Drive? How Do I Cancel a Background Task That’s Running on a Logical Drive? One of the following tasks may be running in the background: • Consistency Check • Drive Initialization • Redundancy Data Rebuild You may wish to cancel a background task in order to boost disk array performance in the short term, since the presence of a background task usually degrades array performance to some degree. In most cases, however, the task will need to be run to completion to restore the system to working order. Caution Be careful about canceling a background task, because it may leave the logical drive in an unstable state! If you cancel a consistency check, you should be able to re-run it at a later time without problems. This may not always be the case, however, if parity errors were being corrected along the way. If you cancel a drive initialization in midstream, you will be unable to use that logical drive until the initialization is run to completion at a later time. You may, however, continue to use other logical drives. If you cancel a redundancy data rebuild, you may leave the logical drive in an unstable state. It will remain in critical mode until you allow rebuild to run to completion. 4-26 RAID EzAssist User’s Manual Monitoring and Maintenance Activities ☞Use the arrow key to select Perform Administration on... on the main menu, then press Enter. The Administration menu is displayed (Figure 4-37). Figure 4-37. Administration Menu - Logical Drive ☞Use the arrow key to select Logical Drive, then press Enter. ❑ Select a Logical Drive. The first step is to select the logical drive on which the background task is currently running. You do this from the Logical Drive Selection screen (Figure 4-38). Figure 4-38. Logical Drive Selection Screen This screen uses the following navigation strategy: • Arrow keys move among the available logical drives. • Enter selects the highlighted logical drive. ☞ Use the arrow keys to select the logical drive whose status indicates that a background task is running, then press Enter. Manual No. 775029 4-27 How Do I Cancel a Background Task That’s Running on a Logical Drive? ❑ Enter the Logical Drive Advanced Options Menu. The Logical Drive menu is displayed (Figure 4-39). Figure 4-39. Logical Drive Menu - Advanced Options ☞Use the arrow key to select Advanced Options, then press Enter. The Logical Drive Advanced Options menu is displayed (Figure 4-40). Figure 4-40. Logical Drive Advanced Options Menu - Cancel Background Task 4-28 RAID EzAssist User’s Manual Monitoring and Maintenance Activities ❑ Cancel the Background Task Running on the Logical Drive. ☞ Use the arrow key to select Cancel Background Task, then press Enter. A Cancel Background Task warning screen of the following type is displayed (Figure 4-41): Figure 4-41. Cancel Background Task? Answering “Yes” will cancel the task currently running in the background. ☞ To cancel your request and LEAVE THE TASK RUNNING, press Enter with No selected, OR ☞ To cancel the currently running background task, use the arrow key to select Yes, then press Enter. The background task will abort. Manual No. 775029 4-29 How Do I Delete the Most Recently Configured Logical Drive? How Do I Delete the Most Recently Configured Logical Drive? RAID EzAssist allows you to delete the most recently configured logical drive through a menu selection. ☞Use the arrow key to select Perform Administration on... on the main menu, then press Enter. The Administration menu is displayed (Figure 4-42). Figure 4-42. Administration Menu - Logical Drive ☞Use the arrow key to select Logical Drive, then press Enter. ❑ Select the Most Recently Configured Logical Drive. Only the most recently (or “highest numbered”) logical drive on a controller can be deleted using this procedure. First select the logical drive. You do this from the Logical Drive Selection screen (Figure 4-43). Figure 4-43. Logical Drive Selection Screen This screen uses the following navigation strategy: • Arrow keys move among the available logical drives. 4-30 RAID EzAssist User’s Manual Monitoring and Maintenance Activities • Enter selects the highlighted logical drive. ☞ Use the arrow keys to select the HIGHEST NUMBERED logical drive, then press Enter. ❑ Enter the Logical Drive Advanced Options Menu. The Logical Drive menu is displayed (Figure 4-44). Figure 4-44. Logical Drive Menu - Advanced Options ☞Use the arrow key to select Advanced Options, then press Enter. The Logical Drive Advanced Options menu is displayed, and this time it has an additional choice (Figure 4-45). Figure 4-45. Logical Drive Advanced Options Menu - Delete Logical Drive Manual No. 775029 4-31 How Do I Delete the Most Recently Configured Logical Drive? ❑ Delete the Logical Drive. ☞ Use the arrow key to select Delete Logical Drive, then press Enter. The logical drive is deleted. This is confirmed in the Logical Drive Selection screen (Figure 4-46): Figure 4-46. Logical Drive Selection - Logical Drive Has Been Deleted. 4-32 RAID EzAssist User’s Manual Monitoring and Maintenance Activities How Do I View Physical Drive Status and Information? ☞Use the arrow key to select Perform Administration on... on the main menu, then press Enter. The Administration menu is displayed (Figure 4-47). Figure 4-47. Administration Menu - Physical Device ☞Use the arrow key to select Physical Device, then press Enter. ❑ Select a Physical Device. The first step is to select the physical device you wish to monitor. You do this from the Physical Drive Selection screen (Figure 4-48). Figure 4-48. Physical Drive Selection Screen This screen uses the following navigation strategy: • Arrow keys move among the available physical devices. • Enter selects the highlighted physical device. ☞ Use the arrow keys to select the physical drive you want to monitor, then press Enter. Manual No. 775029 4-33 How Do I View Physical Drive Status and Information? ❑ View Physical Drive Status and Information. The Physical Drive menu is displayed (Figure 4-49). Figure 4-49. Physical Drive Menu - View or Modify Drive Configuration ☞Press Enter with View or Modify Drive Configuration selected. The Device Configuration screen for the selected physical device is displayed (Figure 4-50). This screen shows the following information: • The identity of this physical device in terms of its controller, channel, and target ID • The vendor/manufacturer of the physical device • The model identification of the physical device • The device firmware version • The capacity of the physical device • The Read Cache policy assigned (Normal=Disabled, or Read Ahead=Enabled) • The Write Cache policy assigned (Write-Thru=Disabled, or WriteBack=Enabled) • The overall status of the physical device (online, offline, etc.) 4-34 RAID EzAssist User’s Manual Monitoring and Maintenance Activities Figure 4-50. Device Configuration Screen ☞ Press Enter with Ok selected to close the Device Configuration screen. If you want to change the Read Cache and/or Write Cache physical drive settings, please continue to the next section. Manual No. 775029 4-35 How Do I Change Physical Drive Read and Write Cache Settings? How Do I Change Physical Drive Read and Write Cache Settings? If you are unfamiliar with the terms “Read Cache,” “Read Ahead,” “Write Cache,” “Write Through,” or “Write Back” caching, please refer to the Glossary for a detailed definition. In a nutshell, Read Ahead caching speeds read performance in situations where large blocks of sequential data need to be read. For random read situations, however, it may actually reduce performance. Write Back caching speeds write performance but risks loss of data in the cache buffer should power fail. Use Write Back only if you have a battery backup unit (BBU) or uninterruptable power supply (UPS) installed to preserve data in the cache. ☞ Open the Device Configuration screen as described in “How Do I View Physical Drive Status and Information?” on page 4-33. ☞ Use the arrow key to select the Read Cache field, then... ☞ Press the + or - key to find your desired caching method (“Enabled” = Read-Ahead, or “Disabled” = Normal), OR ☞ Press Spacebar to display a box of available choices, use the arrow key to select your desired read caching choice, then press Enter. ☞ Use the arrow key to select the Write Cache field, then... ☞ Press the + or - key to find your desired caching method (“Enabled” = Write-Back, or “Disabled” = Write-Thru), OR ☞ Press Spacebar to display a box of available choices, use the arrow key to select your desired write caching choice, then press Enter. Once you’ve set the Read Cache and Write Cache as desired, 4-36 RAID EzAssist User’s Manual Monitoring and Maintenance Activities ☞ Press Enter with Ok selected to accept the changes, OR ☞ Use the arrow key to select Cancel, then press Enter to leave the cache settings unchanged. If you made any changes and selected Ok, the following Notice is displayed (Figure 4-51). Figure 4-51. Confirm Changes to Physical Drive Cache Settings ☞ Press Enter with Yes selected to register the physical drive configuration changes. Manual No. 775029 4-37 How Do I View the Physical Drive Defect List? How Do I View the Physical Drive Defect List? ☞Use the arrow key to select Perform Administration on... on the main menu, then press Enter. The Administration menu is displayed (Figure 4-52). Figure 4-52. Administration Menu - Physical Device ☞Use the arrow key to select Physical Device, then press Enter. ❑ Select a Physical Device. The first step is to select the physical device whose defect list you wish to view. You do this from the Physical Drive Selection screen (Figure 4-53). Figure 4-53. Physical Drive Selection Screen This screen uses the following navigation strategy: • Arrow keys move among the available physical devices. • Enter selects the highlighted physical device. ☞ Use the arrow keys to select the physical drive whose defect 4-38 RAID EzAssist User’s Manual Monitoring and Maintenance Activities list you want to view, then press Enter. ❑ View Physical Drive Defect List. The Physical Drive menu is displayed (Figure 4-54). Figure 4-54. Physical Drive Menu - View Defect List ☞Use the arrow key to select View Defect List, then press Enter. The Defect List menu is displayed (Figure 4-55). From this menu you can choose to view the Primary defect list (defects registered during drive formatting and initialization), or the Grown defect list (defects registered during regular use of the physical drive). Figure 4-55. Defect List Menu - Primary ☞To view the Primary defect list, press Enter with Primary selected. The Primary Defect List screen for the selected physical drive is displayed, or a message that no defect list was found. ☞ Press Enter with Ok selected when you have finished. Manual No. 775029 4-39 How Do I View the Physical Drive Defect List? Figure 4-56. Defect List Menu - Grown ☞To view the Grown defect list, use the arrow key to select Grown, then press Enter. The Grown Defect List screen for the selected physical drive is displayed, or a message that no defect list was found. ☞ Press Enter with Ok selected when you have finished. 4-40 RAID EzAssist User’s Manual Monitoring and Maintenance Activities How Do I View and Reset Physical Drive Error Counts? ☞Use the arrow key to select Perform Administration on... on the main menu, then press Enter. The Administration menu is displayed (Figure 4-57). Figure 4-57. Administration Menu - Physical Device ☞Use the arrow key to select Physical Device, then press Enter. ❑ Select a Physical Device. The first step is to select the physical device whose error count information you wish to view and reset. You do this from the Physical Drive Selection screen (Figure 4-58). Figure 4-58. Physical Drive Selection Screen This screen uses the following navigation strategy: • Arrow keys move among the available physical devices. • Enter selects the highlighted physical device. ☞ Use the arrow keys to select the physical drive whose error Manual No. 775029 4-41 How Do I View and Reset Physical Drive Error Counts? counts you want to view and reset, then press Enter. ❑ View Physical Drive Error Count Information. The Physical Drive menu is displayed (Figure 4-59). Figure 4-59. Physical Drive Menu - View Error Counts ☞Use the arrow key to select View Error Counts, then press Enter. The Error Counts screen for the selected physical device is displayed (Figure 4-60). This screen shows the following information: • The identity of this physical device in terms of its controller, channel, and target ID • The number of parity errors detected • The number of soft errors detected • The number of hard errors detected • The number of miscellaneous errors detected Figure 4-60. Error Counts Screen 4-42 RAID EzAssist User’s Manual Monitoring and Maintenance Activities ❑ Reset Physical Drive Error Counts. After viewing and noting the error counts, you should reset the counts to zero (0) to grow a fresh list for future observation. ☛ Note The counter will be reset to 0 automatically once you exit RAID EzAssist and reboot the system. ☞ Press Enter with Reset Counts selected to reset all error counts and close the Error Counts screen. Manual No. 775029 4-43 How Do I Designate a Physical Drive as a Spare, or Reset a Spare Drive as Unused? How Do I Designate a Physical Drive as a Spare, or Reset a Spare Drive as Unused? ☞Use the arrow key to select Perform Administration on... on the main menu, then press Enter. The Administration menu is displayed (Figure 4-61). Figure 4-61. Administration Menu - Physical Device ☞Use the arrow key to select Physical Device, then press Enter. ❑ Select a Physical Device. The first step is to select one of the following: • a physical device with status “Unconfigured” that you wish to assign as a spare, OR • a physical device with status “Spare” that you wish to return to unconfigured (unused) status. You do either of these from the Physical Drive Selection screen (Figure 4-62). Figure 4-62. Physical Drive Selection Screen This screen uses the following navigation strategy: 4-44 RAID EzAssist User’s Manual Monitoring and Maintenance Activities • Arrow keys move among the available physical devices. • Enter selects the highlighted physical device. ❑ Option 1: Assign the Physical Device as a Spare. ☞ Use the arrow keys to select an unconfigured physical drive to assign as a spare, then press Enter. The Physical Drive menu is displayed (Figure 4-63). Figure 4-63. Physical Drive Menu - Designate Drive as Spare/Unused ☞ On the Physical Drive menu, use the arrow key to select Designate Drive as Spare/Unused, then press Enter. ■ Apply the Configuration to the Controller. To add the physical drive you selected to the registered configuration, the configuration changes need to be applied to the controller. At this point in the process, a confirmation screen is displayed (Figure 4-64). Figure 4-64. Designate Drive as Spare Confirmation ☞ To apply the configuration, use the arrow key to select Yes if Manual No. 775029 4-45 How Do I Designate a Physical Drive as a Spare, or Reset a Spare Drive as Unused? necessary, then press Enter. OR ☞ To cancel the configuration change, use the arrow key to select No if necessary, then press Enter. When you apply the new configuration, RAID EzAssist writes configuration information to the Mylex controller and drives. This takes a few moments, so a message is displayed (Figure 4-65). Figure 4-65. Writing RAID Configuration. Please Wait... ☞ Wait for the configuration information to be written to the controller and drives. ❑ Option 2: Return a Spare Drive to Unconfigured (Unused) Status. Figure 4-66. Physical Drive Selection Screen ☞ In the Physical Drive Selection screen (as in Figure 4-66,for example) use the arrow keys to select a spare drive to return to unconfigured (unused) status, then press Enter. The Physical Drive menu is displayed (Figure 4-67). 4-46 RAID EzAssist User’s Manual Monitoring and Maintenance Activities Figure 4-67. Physical Drive Menu - Designate Drive as Spare/Unused ☞ On the Physical Drive menu, use the arrow key to select Designate Drive as Spare/Unused, then press Enter. ■ Apply the Configuration to the Controller. To add the physical drive you selected to the registered configuration, the configuration changes need to be applied to the controller. At this point in the process, a confirmation screen is displayed (Figure 4-68). Figure 4-68. Designate Drive as Unused Confirmation ☞ To apply the configuration, use the arrow key to select Yes if necessary, then press Enter. OR ☞ To cancel the configuration change, use the arrow key to select No if necessary, then press Enter. When you apply the new configuration, RAID EzAssist writes configuration information to the Mylex controller and drives. This takes a few moments, so Manual No. 775029 4-47 How Do I Designate a Physical Drive as a Spare, or Reset a Spare Drive as Unused? a message is displayed (Figure 4-69). Figure 4-69. Writing RAID Configuration. Please Wait... ☞ Wait for the configuration information to be written to the controller and drives. 4-48 RAID EzAssist User’s Manual Monitoring and Maintenance Activities How Do I Visually Locate a Physical Device? RAID EzAssist has an option that allows you to see exactly where a particular physical device is located in your hardware setup. Using Locate Device, you can cause a selected physical device’s LED to blink. ☞Use the arrow key to select Perform Administration on... on the main menu, then press Enter. The Administration menu is displayed (Figure 4-70). Figure 4-70. Administration Menu - Physical Device ☞Use the arrow key to select Physical Device, then press Enter. ❑ Select a Physical Device. The first step is to select the physical device you wish to locate visually. You do this from the Physical Drive Selection screen (Figure 4-71). Figure 4-71. Physical Drive Selection Screen This screen uses the following navigation strategy: • Arrow keys move among the available physical devices. • Enter selects the highlighted physical device. ☞ Use the arrow keys to select the physical device you want to Manual No. 775029 4-49 How Do I Visually Locate a Physical Device? locate visually, then press Enter. ❑ Locate the Physical Device. The Physical Drive menu is displayed (Figure 4-72). Figure 4-72. Physical Drive Menu - Locate Device ☞Use the arrow key to select Locate Device, then press Enter. A Notice is displayed for the selected physical device (Figure 4-73). At the same time, the physical device will show a blinking LED (if applicable) to help you see its location in your hardware setup. Figure 4-73. Locate Physical Device Notice ☞ Press Enter with Ok selected after you’ve visually located the physical device. When the Notice screen disappears, the LED should stop blinking. 4-50 RAID EzAssist User’s Manual Monitoring and Maintenance Activities How Do I Rebuild Redundancy Data on a Physical Drive? One of the most important features of RAID technology is fault tolerance (data redundancy). It’s the redundancy built into your RAID 1 (10), RAID 3 (30), RAID 5 (50), and RAID 0+1 (0+1+0) logical drive data that allows for a physical disk drive failure without the loss of that data. In the event of a physical drive failure within a fault tolerant logical drive, the disk array goes into critical mode, but I/O activity can continue (data can be accessed and stored). However, it is unwise to leave the disk array in critical mode for too long, because a second drive failure will lead to data loss. If you have a spare drive assigned, the controller can rebuild the failed drive’s data using redundant information on the remaining drives in the disk array. The rebuilt data is stored on the spare drive and the spare’s status changes to online. While this process is taking place, the disk array is in degraded performance mode, but I/O activity can continue. At a convenient time, you would then replace the failed drive with a new one, rescan the controller, and perhaps assign the new drive as a spare. If you don’t have a spare drive assigned, or if automatic rebuild management is not enabled, you’ll need to replace the failed drive as soon as possible and use the Rebuild Redundancy Data option manually to rebuild the data onto the new drive. ☞Use the arrow key to select Perform Administration on... on the main menu, then press Enter. The Administration menu is displayed (Figure 4-74). Figure 4-74. Administration Menu - Physical Device ☞Use the arrow key to select Physical Device, then press Enter. Manual No. 775029 4-51 How Do I Rebuild Redundancy Data on a Physical Drive? ❑ Select a Physical Device. The first step is to select the physical device that is in offline mode. You do this from the Physical Drive Selection screen (Figure 4-75). Figure 4-75. Physical Drive Selection Screen This screen uses the following navigation strategy: • Arrow keys move among the available physical devices. • Enter selects the highlighted physical device. ☞ Use the arrow keys to select the physical device with Offline status, then press Enter. ❑ Enter the Physical Drive Advanced Options Menu. The Physical Drive menu is displayed (Figure 4-76). Figure 4-76. Physical Drive Menu - Advanced Options ☞Use the arrow key to select Advanced Options, then press Enter. 4-52 RAID EzAssist User’s Manual Monitoring and Maintenance Activities The Physical Drive Advanced Options menu is displayed (Figure 4-77). Figure 4-77. Physical Drive Advanced Options Menu Rebuild Redundancy Data ❑ Rebuild Redundancy Data on the Physical Drive. ☞ Press Enter with Rebuild Redundancy Data selected. The Rebuild Redundancy Data warning screen is displayed (Figure 4-78): Figure 4-78. Rebuild Redundancy Data? Rebuild redundancy will regenerate the data that was on the offline drive. Caution Rebuilding redundancy on a physical drive will also set the entire logical drive of which this physical drive is a part to Critical status until rebuild is complete. You may not interrupt the rebuild, nor may you access any other physical device data or perform any other physical device functions while the process continues. ☞ To cancel your request to rebuild redundancy data, use the arrow key to select No, then press Enter, Manual No. 775029 4-53 How Do I Rebuild Redundancy Data on a Physical Drive? OR ☞ To rebuild redundancy data, press Enter with Yes selected. Rebuild Redundancy Data runs in the background. To check the status of any background task(s), see the section in Chapter 5 called “How Do I Check the Status of a Background Task?” on page 5-19. 4-54 RAID EzAssist User’s Manual Monitoring and Maintenance Activities How Do I Format a Physical Drive? RAID EzAssist gives you the option of low-level formatting physical devices. This may be necessary if you obtain new drives that have not been formatted previously, or if you wish to reuse an older drive and completely erase its previous data. A low-level format of a physical drive takes time and slightly slows system performance, so be sure you run this function at a convenient time. ☞Use the arrow key to select Perform Administration on... on the main menu, then press Enter. The Administration menu is displayed (Figure 4-79). Figure 4-79. Administration Menu - Physical Device ☞Use the arrow key to select Physical Device, then press Enter. ❑ Select a Physical Device. The first step is to select the physical device that you wish to format. You do this from the Physical Drive Selection screen (Figure 4-80). WARNING Formatting a physical drive will erase all data on that drive! Use the Format Drive option with extreme caution. Manual No. 775029 4-55 How Do I Format a Physical Drive? Figure 4-80. Physical Drive Selection Screen This screen uses the following navigation strategy: • Arrow keys move among the available physical devices. • Enter selects the highlighted physical device. ☞ Use the arrow keys to select the physical drive you want to format, then press Enter. ❑ Enter the Physical Drive Advanced Options Menu. The Physical Drive menu is displayed (Figure 4-81). Figure 4-81. Physical Drive Menu - Advanced Options ☞Use the arrow key to select Advanced Options, then press Enter. 4-56 RAID EzAssist User’s Manual Monitoring and Maintenance Activities The Physical Drive Advanced Options menu is displayed (Figure 4-82). Figure 4-82. Physical Drive Advanced Options Menu - Format Drive ❑ Format the Physical Drive. ☞ Use the arrow key to select Format Drive, then press Enter. The Format Drive warning screen is displayed (Figure 4-83): Figure 4-83. Format Drive? ☞ To cancel your request to format the drive, press Enter with No selected, OR ☞ To format the drive, use the arrow key to select No, then press Enter. Formatting takes place in the background. To see the status of the device undergoing formatting, look again at the Physical Drive Selection screen (Figure 4-84). Manual No. 775029 4-57 How Do I Format a Physical Drive? Figure 4-84. Physical Drive is Formatting To check the status of any background task(s), see the section in Chapter 5 called “How Do I Check the Status of a Background Task?” on page 5-19. 4-58 RAID EzAssist User’s Manual Monitoring and Maintenance Activities How Do I Change Physical Drive Status? Certain status changes in physical devices are allowed in RAID EzAssist. See Table 4-1 below: Table 4-1. Allowable Physical Drive Status Changes Current Drive Status ...Can Be Changed To... Unconfigured Spare Spare Unused (Unconfigured) Online Offline Offline Online WARNING Be careful about changing online status to offline! Under certain conditions, this will result in a failed drive status and potential data loss. Likewise, changing the status of an offline drive to online will only return a drive to normal function if it was functioning normally before. A failed (“bad”) drive cannot be returned to normal function by changing its status to online. Manual No. 775029 4-59 How Do I Change Physical Drive Status? ☞Use the arrow key to select Perform Administration on... on the main menu, then press Enter. The Administration menu is displayed (Figure 4-85). Figure 4-85. Administration Menu - Physical Device ☞Use the arrow key to select Physical Device, then press Enter. ❑ Select a Physical Device. The first step is to select the physical device whose status you wish to change. You do this from the Physical Drive Selection screen (Figure 4-86). Figure 4-86. Physical Drive Selection Screen This screen uses the following navigation strategy: • Arrow keys move among the available physical devices. • Enter selects the highlighted physical device. ☞ Option 1: If you want to assign a spare drive, use the arrow keys to select a physical drive with status “Unconfigured,” then press Enter. ☞ Option 2: If you want to unassign a spare drive (return to unused status), use the arrow keys to select a physical drive 4-60 RAID EzAssist User’s Manual Monitoring and Maintenance Activities with status “Spare,” then press Enter. ☞ Option 3: If you want to set a physical drive offline, use the arrow keys to select a physical drive with status “Online,” then press Enter. ☞ Option 4: If you want to set a physical drive online, use the arrow keys to select a physical drive with status “Offline,” then press Enter (Figure 4-86). ❑ Enter the Physical Drive Advanced Options Menu. The Physical Drive menu is displayed (Figure 4-87). Figure 4-87. Physical Drive Menu - Advanced Options ☞Use the arrow key to select Advanced Options, then press Enter. The Physical Drive Advanced Options menu is displayed (Figure 4-88). Figure 4-88. Physical Drive Advanced Options Menu The name of the third option on the Physical Drive Advanced Options menu depends on the CURRENT STATUS of the physical drive you selected. Manual No. 775029 4-61 How Do I Change Physical Drive Status? Table 4-2. Change Status Advanced Option Status of Selected Physical Drive Menu Option Name Unconfigured Make Drive Spare Spare Make Drive Unused Online Make Drive Offline Offline Make Drive Online ☞ If you selected an Unconfigured drive, use the arrow key to select Make Drive Spare, then press Enter, OR ☞ If you selected a Spare drive, use the arrow key to select Make Drive Unused, then press Enter, OR ☞ If you selected an Online drive, use the arrow key to select Make Drive Offline, then press Enter, OR ☞ If you selected an Offline drive, use the arrow key to select Make Drive Online, then press Enter. Depending on what you’re changing, you’ll either see a Warning (when changing online to offline or offline to online), or a Notice (when changing unconfigured to spare or spare to unconfigured). An example is shown in Figure 4-89: 4-62 RAID EzAssist User’s Manual Monitoring and Maintenance Activities Figure 4-89. Example of Status Change Warning/Notice ☞ Press Enter with Yes selected to accept the physical drive status change you’ve requested. Setting an unconfigured drive to spare or a spare drive back to unconfigured (unused) is a configuration change. In these cases, RAID EzAssist will write the new configuration to the controller. ☞ If you changed Unconfigured or Spare status, please wait for the configuration information to be written to the controller. Manual No. 775029 4-63 How Do I Change SCSI Transfer Properties on a New PCI Controller? How Do I Change SCSI Transfer Properties for Physical Devices on a New Mylex PCI Controller? For New Mylex PCI Controllers (such as the AcceleRAID 352, eXtremeRAID 2000, and eXtremeRAID 3000), SCSI transfer properties may be set for each device individually that is attached to the controller. Previous Controllers require that the SCSI properties be set identically for all physical devices on the controller. ☞Use the arrow key to select Perform Administration on... on the main menu, then press Enter. The Administration menu is displayed (Figure 4-90). Figure 4-90. Administration Menu - Physical Device ☞Use the arrow key to select Physical Device, then press Enter. ❑ Select a Physical Device. The first step is to select the physical device whose SCSI properties you wish to view or change. You do this from the Physical Drive Selection screen (Figure 4-91). Figure 4-91. Physical Drive Selection Screen This screen uses the following navigation strategy: 4-64 RAID EzAssist User’s Manual Monitoring and Maintenance Activities • Arrow keys move among the available physical devices. • Enter selects the highlighted physical device. ☞ Use the arrow keys to select the physical drive you want, then press Enter. ❑ Enter the Physical Drive Advanced Options Menu. The Physical Drive menu is displayed (Figure 4-92). Figure 4-92. Physical Drive Menu - Advanced Options ☞Use the arrow key to select Advanced Options, then press Enter. ❑ View or Change SCSI Transfer Properties. The Physical Drive Advanced Options menu is displayed (Figure 4-93). Figure 4-93. Physical Drive Advanced Options Menu - SCSI Property ☞Use the arrow key to select SCSI Property, then press Enter. The Physical Drive SCSI Properties screen for the selected physical drive is displayed (Figure 4-94). This screen shows the following information: • The Bus Speed in MHz for this physical drive (Async, 20 MHz, 40 MHz, 80 MHz, etc.) • The current Tag Queuing setting for this physical drive (selectable from 0 to 255) • The Bus Width of the physical drive (8 = Narrow, 16 = Wide, 1 = Fibre Manual No. 775029 4-65 How Do I Change SCSI Transfer Properties on a New PCI Controller? channel controller-not changeable) Figure 4-94. Physical Device SCSI Properties Screen ☛ Note Depending on the situation, some of the fields may be READ ONLY. In most cases Tag Queuing will be selectable, however. ☞ If Bus Speed (MHz) is changeable (cyan color), use the arrow key to select the Bus Speed (MHz) field, then... ☞ Press the + or - key to find your desired bus speed (Async, 10 MHz, 20 MHz, 40 MHz, 80 MHz, etc.), OR ☞ Press Spacebar to display a box of available choices, use the arrow key to select your desired bus speed choice, then press Enter. ☞ Use the arrow key to select the Tag Queuing field, then... ☞ Type in a new Tag value from 0 through 255. ☞ If Bus Width is changeable (cyan color), use the arrow key to select the Bus Width field, then... ☞ Press the + or - key to find your desired bus speed (“8” = Narrow, “16” = Wide), OR 4-66 RAID EzAssist User’s Manual Monitoring and Maintenance Activities ☞ Press Spacebar to display a box of available choices, use the arrow key to select your desired bus width choice, then press Enter. Once you’ve set the properties as desired, ☞ Press Enter with Ok selected to accept the changes, OR ☞ Use the arrow key to select Cancel, then press Enter to leave the settings unchanged. If you made any changes and selected Ok, the following Notice is displayed (Figure 4-95). Figure 4-95. Confirm Changes to Physical Drive SCSI Settings ☞ Press Enter with Yes selected to register the physical drive configuration changes. Manual No. 775029 4-67 How Do I Rescan a Controller for New Devices? How Do I Rescan a Controller for New Devices? Here are some situations in which you might add physical devices to or remove physical devices from your hardware setup: • You’ve purchased additional disk drives and wish to add them to one or more controllers. • You want to remove a cabinet or a disk array from one location to install it on another server or workstation. • You are reconnecting devices to different controllers. • You are replacing a failed drive. There may be many others as well. The point is, whenever you make any of these physical changes in your hardware setup, you must allow RAID EzAssist to rescan the controllers to update its internal configuration to match the actual configuration. ❑ Select a Controller. If you have multiple Mylex Disk Array Controllers installed, you only need to rescan those controllers that have had a configuration change. If you have only one Mylex Disk Array Controller installed, skip the next two actions below: ☞ Use the Esc key if necessary to return to the Select a Controller screen. ☞ Use the arrow key to select the controller you want to rescan, then press Enter. ❑ Rescan the Controller. Rescanning is carried out using the Rescan for New Devices option on the main menu (Figure 4-96). 4-68 RAID EzAssist User’s Manual Monitoring and Maintenance Activities Figure 4-96. Rescan for New Devices ☞ Use the arrow key to select Rescan for New Devices, then press Enter. RAID EzAssist will rescan the selected controller (Figure 4-97). Figure 4-97. Rescanning in Progress Manual No. 775029 4-69 How Do I Rescan a Controller for New Devices? 4-70 RAID EzAssist User’s Manual Chapter 5 Advanced Options In this chapter you’ll learn how to use RAID EzAssist Advanced Options for some advanced-level tasks that you may be required to perform from time to time. Caution Some Advanced Options can have sweeping effects on configuration and controller performance. It is important that these options be used only by an experienced system administrator. We will discuss the following tasks in this chapter: • Updating (Flashing) new firmware code to one or more Mylex RAID Controllers, or updating the RAID EzAssist BIOS Configuration Utility itself • Backing up configuration information • Restoring previously-saved configuration information • Printing current configuration information (creating a user-readable file) • Clearing (erasing) the current configuration • Setting up the PCI Controller clustering option • Changing the host ID for clustering • Viewing the status of active background tasks such as drive initialization, consistency check, rebuild Manual No. 775029 5-1 All functions described in this chapter are carried out using the Advanced Options choice on the main menu (Figure 5-1). Figure 5-1. Advanced Options ☞Use the arrow key to select Advanced Options on the main menu, then press Enter. The Advanced Options menu is displayed (Figure 5-2). Figure 5-2. Advanced Options Menu 5-2 RAID EzAssist User’s Manual Advanced Options How Do I Update Controller Firmware or the RAID EzAssist Utility? From time to time Mylex makes available updated firmware or BIOS code with new features or fixes for your controller. RAID EzAssist offers a straightforward way to update (“ flash” ) the new code to your controller. In addition, you can even use RAID EzAssist to update itself! The same Update Flash Code function can be used to update the BIOS version of RAID EzAssist on your controller. ☛ Note Whether you’re updating firmware, BIOS code, RAID EzAssist, etc., you will need to reboot your system for the new code to be in effect. ❑ Choose an Image File for the Update. ☞Have the diskette ready that contains the image file(s) you want to flash from the root directory, and record the name(s) of the file(s) you’ll be flashing. ☞From the Advanced Options menu, press Enter with Update Flash Code selected. The Update Flash Code screen is displayed. An example is shown in Figure 5-3. Figure 5-3. Update Flash Code ☞Type the name of the image file and press the Tab key. ☞Insert the diskette into the floppy diskette drive and press Enter with Ok selected to continue. Manual No. 775029 5-3 How Do I Update Controller Firmware or the RAID EzAssist Utility? A message is displayed while RAID EzAssist reads the image file (Figure 5-4 ). Figure 5-4. Reading Image File ☞Wait while the image file data is being read. The Flash Code Update screen is displayed (Figure 5-5). Figure 5-5. Flash Code Update ❑ Choose Controllers to Update. The image file is read from the diskette, then the contents of the image file are displayed in the gray field at the top of the screen. This screen uses the following navigation strategy: • PgDn and PgUp show you all the available or selected controllers if there is a small down/up-arrow beside the Controller field. • Inside the Controller field, arrow keys select a controller. Enter accepts the highlighted controller and adds a check mark, OR deselects a controller that already has a check mark. You may select more than one 5-4 RAID EzAssist User’s Manual Advanced Options controller. • The Tab key shifts control to the buttons, or from the buttons back to the Controller field. • When buttons are in focus, arrow keys select a button and Enter activates the highlighted button. ☞Use the arrow keys to select a controller you wish to update, then press Enter. Repeat to select additional controllers. The currently active controller is selected by default. ❑ Update the Selected Controller(s). ☞After you’ve selected all controllers to update, press the Tab key to select Ok, then press Enter. The Flash Code Update warning is displayed (Figure 5-6). Figure 5-6. Flash Code Update Warning ☞To begin the update (flash) process, use the arrow key to select Yes, then press Enter, OR ☞To cancel the update, press Enter with No selected. If you selected Yes, the Flash Process Status screen is displayed (Figure 5-7). Manual No. 775029 5-5 How Do I Update Controller Firmware or the RAID EzAssist Utility? Figure 5-7. Flash Process Status RAID EzAssist loads the image file information to the controller and stores it. You will still need to allow the controller to be programmed. ☞Wait for the flash image storage to conclude. Once the image file has been stored to the controller, RAID EzAssist will automatically program the controller with the new image data. A message is displayed (Figure 5-8). Figure 5-8. Programming Controller ☞Wait while the controller is programmed. When the process is finished, the Flash Process Status screen will indicate “ Flashing done” for each successfully updated controller. 5-6 RAID EzAssist User’s Manual Advanced Options How Do I Back Up My Configuration? If you want to create a file that maintains the specifications of your current configuration, you can use the Backup Configuration option to do so. The configuration information can be saved to a floppy diskette so that it can be restored later if necessary. ☛ Note The backup file that is created is only readable by the controller. If you want to create a backup file that maintains configuration information in English, use the Print Configuration option. ❑ Select the Backup Configuration Option. ☞Use the arrow key to select Advanced Options on the main menu, if necessary, then press Enter. ☞From the Advanced Options menu, use the arrow key to select Backup Configuration, then press Enter. The Backup Configuration screen is displayed (Figure 5-9). Figure 5-9. Backup Configuration Manual No. 775029 5-7 How Do I Back Up My Configuration? ❑ Back Up the Configuration to a File. ☞Type a name of your own choosing to identify a file in which the configuration will be saved, type a drive letter if necessary, and press the Tab key. ☞Insert the diskette into the floppy diskette drive and press Enter with Ok selected to continue. The configuration is saved to the file on the diskette. ☞Label the diskette and keep it in a safe place in case you need it to restore the configuration later. 5-8 RAID EzAssist User’s Manual Advanced Options How Do I Restore a Previously-Saved Configuration to a Controller? If you want to restore a configuration saved earlier, you can use the Restore Configuration option to do so. The configuration information will be read from the floppy diskette on which it was saved and then will be written back to the controller and to the drives. WARNING Restore Configuration will ERASE any configuration currently on the controller. Use this option with extreme caution. ❑ Select the Controller On Which to Restore the Configuration. ☞If you have multiple controllers installed, navigate to the Welcome screen and select the controller to which you want to apply the saved configuration, OR ☞If you have only one controller installed you do not need to select a controller. Continue to the next step. ❑ Select the Restore Configuration Option. ☞Use the arrow key to select Advanced Options on the main menu, if necessary, then press Enter. ☞From the Advanced Options menu, use the arrow key to select Restore Configuration, then press Enter. The Restore Configuration screen is displayed (Figure 5-10). Manual No. 775029 5-9 How Do I Restore a Previously-Saved Configuration to a Controller? Figure 5-10. Restore Configuration ❑ Restore the Configuration to the Controller. ☞Type the name of the file which contains the configuration, type a drive letter if necessary, and press the Tab key. ☞Insert the diskette into the floppy diskette drive and press Enter with Ok selected to continue. ☞Wait for the configuration information to be written to the controller. ☞Keep the diskette in a safe place in case you need it to restore the configuration again. 5-10 RAID EzAssist User’s Manual Advanced Options How Do I Print My Configuration to a Text File? If you want to create a file that maintains the specifications of your current configuration in a readable form, you can use the Print Configuration option to do so. The configuration information can be saved to a floppy diskette so that it can be read later if necessary through a text editor. ☛ Note If you want to create a backup file that saves configuration information in a format that the controller can read and restore, use the Backup Configuration option. ❑ Select the Print Configuration Option. ☞Use the arrow key to select Advanced Options on the main menu, if necessary, then press Enter. ☞From the Advanced Options menu, use the arrow key to select Print Configuration, then press Enter. The Print Configuration screen is displayed (Figure 5-11). Figure 5-11. Print Configuration Manual No. 775029 5-11 How Do I Print My Configuration to a Text File? ❑ Print the Configuration to a Text File. ☞Type a name of your own choosing to identify a file in which the configuration will be saved in readable format, type a drive letter if necessary, and press the Tab key. ☞Insert the diskette into the floppy diskette drive and press Enter with Ok selected to continue. The configuration information is saved to the file on the diskette. ☞Label the diskette. ☞Open the configuration file in a text editor to examine the configuration specifications if you choose. 5-12 RAID EzAssist User’s Manual Advanced Options How Do I Clear (Erase) My Current Configuration? RAID EzAssist allows you to clear the current configuration. Clearing the configuration will result in loss of access to any data that is already on the drives. All disk array drive assignments are deleted, and all drives are returned to Unconfigured status. WARNING Clear Configuration will ERASE any configuration currently on the controller and will result in the loss of all data on drives connected to the controller. Use this option with extreme caution. ❑ Select the Controller On Which to Clear the Configuration. ☞If you have multiple controllers installed, navigate to the Welcome screen and select the controller whose configuration you want to clear, OR ☞If you have only one controller installed you do not need to select a controller. Continue to the next step. ❑ Select the Clear Configuration Option. ☞Use the arrow key to select Advanced Options on the main menu, if necessary, then press Enter. ☞From the Advanced Options menu, use the arrow key to select Clear Configuration, then press Enter. The Clear Configuration warning is displayed (Figure 5-12). Manual No. 775029 5-13 How Do I Clear (Erase) My Current Configuration? Figure 5-12. Clear Configuration Warning ❑ Clear the Configuration. ☞To clear the existing configuration from this controller, use the arrow key to select Yes, then press Enter, OR ☞To cancel your request to clear the configuration, press Enter with No selected. ☞Wait for the new configuration information to be written to the controller and drives. What actually gets written to the controller and drives is a new configuration that clears all disk array drive assignments, resets drive statuses, etc. 5-14 RAID EzAssist User’s Manual Advanced Options How Do I Enable (or Disable) PCI Controller Clustering? Under Windows NT 4.0, clustering allows redundancy among controllers. If a controller fails, another controller can take over the disk drives and disk arrays that were formerly handled by the failed controller. This mechanism imparts a “ fault tolerance” among controllers. ❑ Select the Clustering Option. ☞Use the arrow key to select Advanced Options on the main menu, if necessary, then press Enter. ☞From the Advanced Options menu, use the arrow key to select Clustering, then press Enter. (If clustering is not supported for the selected controller, a message appears which reads: “ Clustering Not Supported by Firmware.” You will not be able to use the clustering feature in this case.) ❑ Enable (or Disable) Clustering. If clustering is currently disabled, the Clustering Control notice shown in Figure 5-13 will be displayed: Figure 5-13. Enable Clustering? Manual No. 775029 5-15 How Do I Enable (or Disable) PCI Controller Clustering? ☞ If you want to enable clustering, use the arrow key to select Yes, then press Enter, OR ☞ If you don’t want to enable clustering, press Enter with No selected. However, if clustering is currently enabled when you select the Clustering option on the Advanced Options menu, the Clustering Control notice shown in Figure 5-14 will be displayed: Figure 5-14. Disable Clustering? ☞ If you want to disable clustering, press Enter with Yes selected, OR ☞ If you don’t want to disable clustering, use the arrow key to select No, then press Enter. 5-16 RAID EzAssist User’s Manual Advanced Options How Do I Reassign a Host ID For PCI Controller Clustering? If you want to reassign a controller’s Host ID to another ID for use with clustering (controllers are normally set at ID 7 by default) , use the HostID Change option on the Advanced Options menu. This option allows different PCI Controllers that are being “ clustered” to all have unique IDs on the bus. ❑ Select the Controller Whose Host ID Setting Will Change. ☞Navigate to the Welcome screen and select a controller whose host ID you will change. ❑ Select the HostID Change Option. ☞Use the arrow key to select Advanced Options on the main menu, if necessary, then press Enter. ☞From the Advanced Options menu, use the arrow key to select HostID Change, then press Enter. ❑ Reassign the Controller Host ID. The HostID Change screen is displayed (Figure 5-15): Figure 5-15. HostID Change This screen uses the following navigation strategy: • In the HostID field, the Spacebar brings up a list of valid options. Manual No. 775029 5-17 How Do I Reassign a Host ID For PCI Controller Clustering? Arrow keys move among the options and Enter selects an option. • In the HostID field, the + and - keys cycle through the valid options. Stop when the desired option is visible. • The Tab key shifts control to the buttons, or from the buttons back to the HostID field. • When buttons are in focus, arrow keys select a button and Enter activates the highlighted button. • At any time you can press Enter to accept the currently visible settings and close the screen. ☞ With the HostID field selected... ☞ Press the + or - key to assign the desired ID setting to the controller, OR ☞ Press Spacebar to display a box of available choices, use the arrow key to select your desired ID setting, then press Enter. ☞ Once you’ve selected the alternate ID setting, press Tab, then press Enter with Ok selected. ☞ If you need to reassign Host IDs for other controllers, repeat the entire procedure from the beginning with a different controller selected. ☛ Note You will need to reboot the system in order for the host ID changes to take effect. 5-18 RAID EzAssist User’s Manual Advanced Options How Do I Check the Status of a Background Task? RAID EzAssist allows you to view the status of tasks currently running in the background. Such tasks include drive initialization, consistency checks, and device or logical drive rebuilds. ❑ Select the Controller On Which to View Background Task Status. ☞If you have multiple controllers installed, navigate to the Welcome screen and select the controller whose background task status you want to monitor, OR ☞If you have only one controller installed you do not need to select a controller. Continue to the next step. ❑ Select the Background Tasks Option. ☞Use the arrow key to select Advanced Options on the main menu, if necessary, then press Enter. ☞From the Advanced Options menu, use the arrow key to select Background Tasks, then press Enter. ❑ Monitor Background Tasks or Exit. Once you’ve selected the Background Tasks option, you will see either: • The status(es) of any background task(s) currently running on the controller, OR • A message that no background tasks are currently running on the controller. Manual No. 775029 5-19 How Do I Check the Status of a Background Task? 5-20 RAID EzAssist User’s Manual Glossary AcceleRAID™ The AcceleRAID family features high performance, cost effective Ultra SCSI/Ultra2 SCSI LVD to PCI RAID controllers and adapters for high-end desktops, workstations, and entry level and mid range servers. AcceleRAID controllers support PCI-based motherboards with embedded SCSI chips and systems that have a PCI expansion slot designated for add-in RAID controllers. The AcceleRAID family consists of the 150, 200, and 250 controllers. All of these can utilize the on-board SCSI chips of servers that support the use of SCSI interrupt steering logic. In addition the 150 and 250 products can work in any PC or server with a PCI slot whether or not they have SCSI interrupt steering logic. The 150 and 250 have one Ultra2 SCSI LVD channel. ANSI American National Standards Institute, a standards organization. Application Server An application program is designed to perform a specific function directly for the user or, in some cases, for another application program. Examples of applications include word processors, database programs, Web browsers, development tools, drawing, paint, and image editing programs, and communication programs. An application server is a centralized computer that holds and distributes these applications to users. Array See storage array, disk array, tape array ASIC Application-Specific Integrated Circuit Manual No. 775029 G-1 Asynchronous data transfer Data transfer not synchronized to a set timing interval. Asynchronous devices must wait for a signal from the receiving device after each byte. AutoSwap The functional substitution of a replacement unit in a disk system for a defective one, where the substitution is performed by the disk system itself while it continues to perform its normal function without human intervention (compare with Hot Swap). Background Initialization The process whereby the initialization process of a disk array takes place in the background. Use of background initialization allows use of a disk array within minutes instead of several hours. Also known as Immediate RAID Availability. The Background initialization is a safe initialization process which does not erase existing data. (Compare with foreground initializations that erase all existing data) BBU Battery Backup Unit. A BBU provides a battery backup for a RAID controller’s cache. In the event of a power failure, the BBU can save data from the cache to the disk array. Berkeley RAID Levels A family of disk array protection and mapping techniques described by Garth Gibson, Randy Katz, and David Patterson in papers written while they were performing research into I/OP systems at the University of California at Berkeley. See RAID levels. BIOS Basic Input/Output System, software that determines what a computer can do without accessing programs. The BIOS contains all the code required to control the keyboard, screen, drives, serial communications, and other functions. Usually the BIOS is built into a ROM chip installed on the G-2 RAID EzAssist User’s Manual Glossary motherboard so that the BIOS will always be available and not be affected by failure of a disk. Sometimes the BIOS is recorded on a flash memory chip. BIOS Configuration Utility BIOS-Based Configuration Utility; utility program sequences that are used, upon powerup, for configuring various hardware elements in a system. Booting (or Bootstrapping) The loading of operating system code from a disk or other storage device into a computer’s memory Bridge RAID Controller A SCSI device appearing as a single ID on the SCSI bus, but which bridges to multiple devices, typically used to control external RAID subsystems (compare to Internal PCI-based RAID subsystems; see Internal RAID Controller.). A bridge RAID controller is often referred to as an external RAID controller. Burst data rate The speed at which a specific amount of data sent or received in one intermittent operation (compare to Sustained Data Transfer Rate.) Bus The channel through which data is transferred. There are two types, Serial and Parallel. Cables The physical wires (copper or fiber optic) over which electrical signals are transmitted. Cables are used to connect peripherals (such as disk arrays) to computers and servers or to connect peripherals or components to each other. Cache Controller memory used to speed up data transfer to and from a disk. Manual No. 775029 G-3 Cache Flush Refers to an operation where all unwritten blocks in a Write-Back Cache are written to the target disk. This operation is necessary before powering down the system. Cache Line Size The cache line size is defined as the size, in kilobytes (1024 bytes) of a single I/O operation. The Cache Line Size function is set in conjunction with stripe size and represents the size of the data “chunk” that will be read or written at one time. Caching Caching allows data to be stored in a pre-designated area of a disk or RAM. Caching is used to speed up the operation of RAID systems, disk drives, computers and servers, or other peripheral devices. CD-ROM Compact Disk Read Only Memory. A removable read-only storage device similar to an audio compact laser disk, and holding up to 640M of information. Channel Any path used for the transfer of data and control information between storage devices and a storage controller or I/O adapter. Also refers to one SCSI bus on a disk array controller. Each disk array controller provides at least one channel. CISC Complex Instruction Set Computing, a general purpose CPU architecture. Cluster A cluster is a group of terminals or workstations attached to a common control unit or server or a group of several servers that share work and may be able to back each other up if one server fails. G-4 RAID EzAssist User’s Manual Glossary Clustering The concept of grouping controllers or servers so that they may be able to back each other up if one controller or server fails, taking over disk arrays assigned previously to the failed controller or server. CMOS Complementary Metal Oxide Semiconductor, a chip that packs many components into a very small semiconductor. Cold Swap The physical substitution of a replacement unit in a storage system for a defective one, where power is removed from the storage system in order to perform the substitution and human intervention is required (compare to Hot Swap and AutoSwap). Consistency Check Refers to a process where the integrity of redundant data is verified. For example, a consistency check of a mirrored drive will make sure that the data on both drives of the mirrored pair is exactly the same. For RAID 3 or RAID 5 redundancy, a consistency check reads all associated data blocks, computes parity, reads parity, and verifies that the computed parity matches the read parity. Controller An adapter card, RAID controller, or other module that interprets signals between a host and a peripheral device. CPU Central Processing Unit, the circuitry that performs the basic instructions to drive the computer. Critical A Logical Drive is in a “critical” state if it has been configured at RAID level 1, 3, 5, or 0+1; and one (and only one) of its SCSI drives is not “online.” A Manual No. 775029 G-5 logical drive is considered “critical” because any failure of another of its SCSI drives may result in a loss of data. Note: I/O operation can only be performed with system drives that are online or critical. DAC960 Series A family of RAID controllers from Mylex Corporation. The DAC960 series includes both internal PCI-based RAID controllers and external RAID controllers. The DAC960 series controllers all use Intel’s i960 microprocessor. DAC is an acronym for Disk Array Controller. Data Transfer Rate The amount of data per unit time moved through a channel or I/O bus in the course of execution of an I/O load, usually expressed in Mbytes/second. DB-9 A type of connector, used for serial interfaces. Degraded Mode A RAID mode used when a component drive has failed. Device Driver A software program that controls a particular type of device attached to a computer, such as a RAID subsystem, printer, display, CD-ROM, disk drive, etc. Differential A protocol that transmits through a current loop rather than by changes in voltage, reducing the susceptibility to electrical interference. G-6 RAID EzAssist User’s Manual Glossary Disk A non-volatile, randomly addressable, re-writable data storage device, including rotating magnetic and optical disks as well as solid-state disks or other electronic storage elements. Disk Array A collection of disks from one or more accessible disk systems combined with an array management software. The array management software controls the operation of the disks and presents them as one or more system drives (virtual disks) to host operation environments. Disk arrays are commonly used on severs and are becoming more popular on desktops and workstations. An example of a disk array is the Mylex AcceleRAID family or eXtremeRAID. Disk Drive A device for the electronic digital storage of information. Disk Failure Detection A RAID controller automatically detects SCSI disk failures. A monitoring process running on the controller checks, among other things, elapsed time on all commands issued to disks. A time-out causes the disk to be “reset” and the command to be retried. If the command times out again, the disk could be taken “offline” by the controller (its state changed to “dead”). Mylex DAC960 controllers also monitor SCSI bus parity errors and other potential problems. Any disk with too many errors will also be taken offline. Disk Media Error Management Mylex DAC960 controllers transparently manage SCSI disk media errors. Disks are programmed to report errors, even ECC-recoverable errors. If ECC EDO RAM is installed, the controller will correct ECC errors. When a disk reports a media error during a read, the controller reads the data from the mirror (RAID 1 or 0+1), or computes the data from the other blocks (RAID 3, RAID 5), and writes the data back to the disk that encountered the error. If the write fails (media error on write), the controller issues a “reassign” command to the disk, and then writes the data to a new location. Since the Manual No. 775029 G-7 problem has been resolved, no error is reported to the system. When a disk reports a media error during a write, the controller issues a “reassign” command to the disk, and writes the data out to a new location on the disk. Disk System A storage system capable of supporting only disks. Drive Groups (or Drive Packs) A group of individual disk drives (preferably identical) that are logically tied to each other and are addressed as a single unit. In some cases this may be called a drive “pack” when referring to just the physical devices. Up to eight (8) drives can be configured together as one drive group. All the physical devices in a drive group should have the same size, otherwise each of the disks in the group will effectively have the capacity of the smallest member. The total size of the drive group will be the size of the smallest disk in the group multiplied by the number of disks in the group. For example, if you have 4 disks of 400MB each, and 1 disk of 200MB in a pack, the effective capacity available for use is only 1000MB (5x200), not 1800MB. Drive Traveling In the process of replacing a failed disk, disk traveling occurs when the drives are placed in a different order than the original one. Drive traveling is also known as disk roaming. Drivers A software routine which receives I/O requests from higher levels within the operating system and converts those request to the protocol required by a specific hardware device. ECC Error Correcting Code. A method of generating redundant information which can be used to detect and correct errors in stored or transmitted data. G-8 RAID EzAssist User’s Manual Glossary EDO Extended Data Output, a type of random access memory (RAM) chip designed to improve the time to read from memory on faster microprocessors such as the Intel Pentium. EEPROM Electrically Erasable PROM EISA Extended Industry Standard Architecture. A bus standard for PCs extending the ISA architecture to 32 bits and allowing more than one CPU to share the bus. Embedded Storage Controller An intelligent storage controller that mounts in a host computer’s housing and attaches directly to a host’s memory bus with no intervening I/O adapter or I/O bus. EPROM Erasable Programmable Read Only Memory which can be erased and reused. Ethernet The most widely-installed local area network technology. An Ethernet LAN typically uses coaxial cable or special grades of twisted pair wires. The most commonly installed Ethernet systems are called 10BASE-T and provide transmission speeds up to 10 Mbps. External RAID Controller A RAID controller that is in its own enclosure, rather than incorporated into a PC or server. External RAID controllers are often referred to as a bridge controller. Mylex DAC960SX, DAC960SF and DACFL controllers are external controllers. Manual No. 775029 G-9 eXtremeRAID The eXtremeRAID controller is the newest member of the Mylex PCI RAID family of products. The eXtremeRAID offers uncompromising fault tolerance, data availability, superior configuration and management flexibility. The eXtremeRAID incorporates the latest performance technology by using the fastest processor on a PCI based RAID solution, a 233 MHz RISC processor, up to three 80MB/sec Ultra2 SCSI channels, and a 64-bit PCI interface to provide eXtreme performance for servers. The eXtremeRAID controller uses driver technology with which Mylex has won tpm-C benchmarks worldwide. With this technology, the eXtremeRAID 1100 provides the highest performance and most flexible RAID solution available today. Failure A detectable physical change in hardware, repaired by the replacement of the component. Fast Ethernet A local area network (LAN) transmission standard that provides a data rate of 100 megabits per second (referred to as "100BASE-T10"). Fast SCSI 8 bit narrow SCSI transfer using timings up to 20MHz and 20 MB/sec transfer rate. (compare to Fast/Wide SCSI, Ultra SCSI and Ultra2 SCSI). Fast/Wide SCSI 16 bit SCSI transfer using timings up to 20 MHz and 40MB/sec transfer rate (compare to Fast SCSI, Ultra SCSI and Ultra2 SCSI). FAT, FAT 32 File Allocation Table maintained by an operating system on a hard disk that provides a map of the clusters (the basic unit of logical storage on a hard disk) that a file has been stored in. FAT 32 supports 32-bit processors G-10 RAID EzAssist User’s Manual Glossary Fault tolerance (failure tolerance) The ability of a system to continue to perform its function even when one of its components has failed. For a system to be fault tolerant requires redundancy in disk drives, power supplies, adapters, controllers and cabling. Mylex RAID controllers offer high levels of fault tolerance. Fibre Channel A technology for transmitting data between computer devices at a data rate of up to 1 Gbps (one billion bits per second), especially suited for connecting computer servers to shared storage devices and for interconnecting storage controllers and drives. Fibre Channel is expected to replace SCSI Parallel Interface as the preferred transmission interface between servers and clustered storage devices. It is also more flexible; devices can be as far as ten kilometers (about six miles) apart. The longer distance requires optical fiber as the physical medium. However, Fibre Channel also works using coaxial cable and ordinary telephone twisted pair. File Server A computer shared by users over a Local Area Network (LAN). A file server provides access to files by the users on a LAN. Other types of servers perform application services (for example, mail servers, web servers) rather than just store files. Flash ROM A memory on the adapter containing software that can be reprogrammed without removing it from the board. Format A pre-established layout for data. Programs accept data as input in a certain format, process it, and provide it as output in the same or another format. All data is stored in some format with the expectation that it will be processed by a program that knows how to handle that format. Manual No. 775029 G-11 Gigabit 1,000,000,000 (109) bits Gigabyte 1, 000,000,000 (109) bytes, assuming 1K = 1000 bytes 1,073,741,824 bytes, assuming 1K = 1024 bytes Graphical User Interface A software interface that interacts with the user through color graphics and a mouse. GUI See Graphical User Interface Hard Disk Drive The main data storage unit of a computer. HDD See Hard Disk Drive HDM Hardware Driver Module, a driver set required for SCSI adapters for use in an I2O environment. All Mylex SCSI adapters are provided with an HDM. Host Any computer system to which disks are attached and accessible for data storage and I/O. Host Bus Adapter (HBA) An I/O adapter that connects a host I/O bus to the host’s storage memory system. G-12 RAID EzAssist User’s Manual Glossary Host I/O Bus An I/O bus used to connect a host computer to storage systems or storage devices Hot Plug The operation of adding or removing a device from a bus while transactions involving other devices are occurring over the bus. Hot Replacement of Disks (Hot Swap) The substitution of a replacement unit in a storage system for a defective unit, executed while the system is performing its normal function and requiring human intervention. (Compare with AutoSwap and Cold Swap). The design of all Mylex controllers allows for the replacement of failed hard disk drives without interruption of system service. In the event of a SCSI drive failure on a properly configured system (where the data redundancy features of the controller are used), system service continues without interruption. A message is generated by the system to alert the system operator. When a replacement drive becomes available, the system operator can remove the failed disk drive, install a new disk drive, and instruct the controller to “rebuild” the data on the new drive, all without interrupting system operations. Once the rebuild is complete, the controller will be brought back into a fault tolerant state. Hot Spare See Standby Replacement of Disks Hot Standby A redundant component is a fault tolerant storage system that has power applied and is ready to operate, but which does not perform its task as long as the primary component for which it is standing by is functioning properly. Hot Swap See Hot Replacement of Disks Manual No. 775029 G-13 I/O Input/output, the transmission of information between an external source and the computer. I/O bottleneck Any resource in the I/O path whose performance limits the performance of a storage or I/O system I/O Bus Any path used for the transfer of data and control information between I/O adapters and storage controllers or storage devices. I/O intensive An application whose performance depends strongly on the performance of the I/O system. I/Os per second Number of I/O transactions per second I2O Intelligent Input/Output Immediate RAID Availability See Background Initialization Internal RAID Controller A controller circuit board that resides inside a computer or server. An internal RAID controller resides on a bus, such as the PCI bus. Examples of internal RAID controllers include Mylex AcceleRAID and eXtremeRAID families. G-14 RAID EzAssist User’s Manual Glossary Internet A worldwide system of computer, originally conceived by the U.S. government to construct a network that would continue to function even if a large portion of it were destroyed, for example, in the event of war. The Internet is now a public, cooperative, and self-sustaining facility accessible to tens of millions of users worldwide. Intranet A network contained within an enterprise, the main purpose of which is usually to share company information and computing resources among employees. An intranet can also be used to facilitate working in groups and for teleconferences. ISA – Industry Standard Architecture A standard bus (computer interconnection) architecture associated with the IBM AT motherboard. It allows both 8 bits and 16 bits bus interface between the motherboard circuitry and an expansion slot card and its associated device(s). ISM Integrated Software Module, used in I2O. Mylex RAID controllers are provided with ISM. JBOD Just A Bunch of Disks (Drives), a number of disk drives, usually in an enclosure. JBOD implies that the disks are not RAIDed and function independently. All Mylex RAID controllers support JBOD mode. Kbyte approximately a thousand bytes (actually, 2 to the 10th power, expressed in decimal as 1,024). Manual No. 775029 G-15 LAN Local Area Network, a network of interconnected workstations sharing the resources of a single processor or server, typically within the area of a small office building. Latency 1. The time between the making of an I/O request and completion of the request’s execution. 2. Short for rotational latency, the time between the completion of a seek and the instant of arrival of the first block of data to be transferred at the disk’s read/write head. Logical Drive States The state of a logical (system) drive can be either ONLINE, CRITICAL, or OFFLINE. Notice that the same term “online” is used for both physical and logical drives. Logical Drives A logical drive is equivalent to a “system” drive. Logical drives are presented to the operating system as available disk drives, each with a capacity specified by the DAC960 Series controller. LVD (Low Voltage Differential) Low Voltage Differential is a form of SCSI signaling that was introduced with Ultra2 SCSI. Low Voltage Differential allows cable lengths of up to 12 meters (approximately 39 feet) with up to 15 devices. The devices need to be Ultra2 SCSI LVD devices in order to take advantage of the LVD signalling. LVD uses data high and data low signal lines to increase transmission distances over those of single-ended (conventional SCSI signaling). LVD differs from conventional differential signaling. LVDs advantages are that it consumes less power and it can sense single-ended devices on the bus and revert to single-ended signalling. Mylex AcceleRAID, eXtremeRAID and DACFL controllers are LVD controllers. M.O.R.E. Mylex Online RAID Expansion G-16 RAID EzAssist User’s Manual Glossary Megabit A million bits, used as a common unit of measure relative to time in seconds as an expression of a transmission technology's bandwidth or information flow capacity. Megabits per second (Mbps) is a frequent measure of bandwidth on a transmission medium. Megabyte (Mbyte) 1,000,000 (106) bytes, assuming 1K = 1000 bytes 1,048,576 bytes, assuming 1K = 1024 bytes Mirrored Cache A cache memory that has duplicate data from another controller. In the event of failure of the original controller, the second controller can take the cached data and place it on the disk array. Mirroring Refers to the complete duplication of data on one disk drive to another disk drive, this duplication occurring simultaneously with each read and write operation. Each disk will be the mirror image of the other This is also know as RAID level 1. All Mylex RAID controllers support mirroring. MTBF Mean Time Between Failures, the average time from start of use to failure in a large population of identical systems, computers, or devices. MTDL Mean Time until Data Loss, the average time from startup until a component failure causes a permanent loss of user data in a large population of disk arrays. Narrow SCSI 8-bit wide standard SCSI. Manual No. 775029 G-17 NFS Network File System, a client/server application that lets a computer user view and optionally store and update files on a remote computer as though they were on the user's own computer. NOS Network Operating System NVRAM Non-Volatile Random Access Memory, a memory unit equipped with a battery so that the data stays intact even after the main power had been switched off. Offline A Logical Drive is in an “offline” state if no data can be read from it or written to it. System commands issued to offline logical drives are returned with an error status: no operations can be performed on offline logical drives. OLTP Online Transaction Processing Online A Logical Drive is in an “online” state if all of its participating SCSI drives are “online” and operational. OS Operating System, software that manages the system resources and provides the operating environment for application programs. Parity See “Rotated XOR Redundancy.” A method of providing complete data redundancy while requiring only a fraction of the storage capacity of mirroring. G-18 RAID EzAssist User’s Manual Glossary Partitioning The presentation of the full usable storage capacity of a disk or array of disks to an operating environment in the form of several virtual disks whose aggregate capacity approximates that of the underlying disk or array. PCB Printed Circuit Board PCI Peripheral Component Interconnect - This is a high-performance, backplane interface, expansion slot architecture that is found on PCs, Macintoshes, and UNIX workstations. PCI is a standardized architecture that provides a highspeed data path between peripherals and the CPU. PCI cards are portable across hardware platforms with the help of various software drivers. PCI Hot Plug An essential feature in newer PCI-based PCs which allows for the printed circuit board to be replaced without powering down the entire system. Mylex DAC960PG, DAC960PJ, AcceleRAID and eXtremeRAID products all are PCI Hot Plug compatible. Peripheral Any computer device that is not part of the essential computer (the processor, memory, and data paths) but is situated relatively close by. Platform An underlying computer system on which application programs can run. A platform consists of an operating system, the computer system's coordinating program, and a microprocessor, the microchip in the computer that performs logic operations and manages data movement in the computer. Plug and Play The ability to install peripheral cards or other devices without requiring manual configuration by the user. Manual No. 775029 G-19 PROM Read-only memory that can, with provided instructions, be reprogrammed by a user. Protocol The special set of rules for communicating that the end points in a telecommunication connection use when they send signals back and forth. Queue A line of things, commands, or data waiting to be handled, usually in sequential order starting at the beginning or top of the line or sequence. RAID RAID stands for Redundant Array of Independent Disks. The DAC960 controllers implement this technology to connect up to 15 SCSI devices per channel. Several different forms of RAID implementation have been defined. Each form is usually referred to as a “RAID level.” All the RAID levels supported by Mylex controllers are shown below. The appropriate RAID level for a system is selected by the system manager or integrator. This decision will be based on which of the following are to be emphasized: Disk Capacity Data Availability (redundancy or fault tolerance) Disk Performance RAID Adapters Low cost RAID controllers that also use SCSI channels on the motherboard. RAID Advisory board (RAB) An association of companies whose primary intention is in standardization of RAID in storage systems. G-20 RAID EzAssist User’s Manual Glossary RAID Controller See RAID Adapter RAID Levels Mylex disk array controllers support four RAID Advisory Board-approved (RAID 0, RAID 1, RAID 3, RAID 5) and two special RAID levels (RAID 0+1, and JBOD). Level 0 Block “striping” across multiple drives is provided, yielding higher performance than is possible with individual drives. This level does not provide any redundancy. Level 1 Drives are paired and mirrored. All data is 100 percent duplicated on a drive of equivalent size. Level 3 Data is “striped” across several physical drives. Maintains parity information which can be used for data recovery. Level 5 Data is “striped” across several physical drives. For data redundancy, drives are encoded with rotated XOR redundancy. Level 0+1 Combines RAID 0 striping and RAID 1 mirroring. This level provides redundancy through mirroring. JBOD Sometimes referred to as “Just a Bunch of Drives.” Each drive is operated independently like a normal disk controller, or drives may be spanned and seen as a single drive. This level does not provide data redundancy. Manual No. 775029 G-21 Level 10 Combines RAID 0 striping and RAID 1 mirroring spanned across multiple drive groups (super drive group). This level provides redundancy through mirroring. Level 30 Data is “striped” across multiple drive groups (super drive group). Maintains parity information which can be used for data recovery. Level 50 Data is “striped” across multiple drive groups (super drive group). For data redundancy, drives are encoded with rotated XOR redundancy. ☛ Note The host operating system drivers and software utilities remain unchanged regardless of the level of RAID installed. The controller makes the physical configuration and RAID level implementation RAID (Level) Migration A features in RAID subsystems that allows for changing a RAID level to another level without powering down the system. It is a feature supported in the newer Mylex RAID products. RAM Random Access Memory, the "built-in" readable and writable data storage that comes with (or can be added to) a computer. Read Ahead Cache The process of reading a data sequence ahead of the actual requested data and placing the data in cache. For sequential data access applications, this approach results in improved read performance. For random access situations, however, read ahead caching may result in slower performance. G-22 RAID EzAssist User’s Manual Glossary Recovery The process of reconstructing data from a failed disk using data from other drives. Redundancy The inclusion of extra components of a given type in a system (beyond those required by the system to carry our its functions.) Replacement Table A replacement table contains information regarding which SCSI devices have been replaced by others through standby replacement. RISC Reduced Instruction Set Computing, an architecture for an applicationspecific processor. RJ-11, RJ-45 RJ (registered jacks, sometimes described as RJ-XX), a series of telephone connection interfaces (receptacle and plug) that are registered with the U.S. Federal Communications Commission (FCC). The most common telephone jack is the RJ-11 jack, which can have six conductors but usually is implemented with four. The RJ-11 jack is likely to be the jack that your household or office phones are plugged into from the ordinary "untwisted" wire (sometimes called "gray satin" or "flat wire") people are most familiar with. The RJ-45 is a single-line jack for digital transmission over ordinary phone wire, either untwisted or twisted. The interface has eight pins or positions. ROM Built-in computer memory containing data that can only be read, not written to. ROM normally contains the programming that allows a computer to be "booted up" each time you turn it on. Unlike a computer's random access memory (RAM), the data in ROM is pre-recorded in the manufacturing process and it is not lost when the computer power is turned off. Manual No. 775029 G-23 Rotated XOR Redundancy This term (also known as “parity”) refers to a method of providing complete data redundancy while requiring only a fraction of the storage capacity of mirroring. In a system configured under RAID 3 or RAID 5 (which require at least three SCSI drives), all data and parity blocks are divided between the drives in such a way that if any single drive is removed (or fails), the data on it can be reconstructed using the data on the remaining drives. (XOR refers to the Boolean “Exclusive-OR” operator.) In any RAID 3 or RAID 5 array, the capacity allocated to redundancy is the equivalent of one drive. RS 232C Recommended Standard 232 Revision C, a long-established standard that describes the physical interface and protocol for relatively low-speed serial data communication between computers and related devices. RS-232C is the interface that a computer uses to talk to and exchange data with your modem and other serial devices. It is asynchronous 25-pin connector. RS 422/423 Recommended Standard 422/423, a 32-pin serial connector that can be used for both synchronous or asynchronous transmission of data. The 422 is differential; the 423 is single line. RTC Real Time Clock or Real Time Controller SAF-TE SCSI Accessed Fault-Tolerant Enclosure, an “open” specification designed to provide a comprehensive standardized method to monitor and report status information on the condition of disk drives, power supplies and cooling systems used in high availability LAN servers and storage subsystems. The specification is independent of hardware I/O cabling, operating systems, server platforms, and RAID implementation because the enclosure itself is treated as simply another device on the SCSI bus. The SAF-TE specification has been endorsed by many other leading server, storage and RAID controller manufacturers worldwide. Products compliant with the SAF-TE specification will reduce the cost of managing storage G-24 RAID EzAssist User’s Manual Glossary enclosures, making it easier for a LAN administrator to obtain base-level fault-tolerant alert notification and status information. All Mylex RAID controllers feature SAF-TE. SCA – Single Connector Attachment A 80 pin disk drive/enclosure backplane connector standard designed to support device hot swap. SCA drives connect to a SCSI backplane that also provides power and SCSI ID selection. There are no TERMPWR lines included ; it is assumed that termination circuit are on the backplane. SCSI SCSI is an acronym for “Small Computer Storage Interface,” although it is often used in high performance systems. The SCSI interface supports disk drives, tape drives, and CD-ROM drives. Narrow SCSI supports up to 7 devices on a channel, and Fast-Wide SCSI, Ultra-Wide SCSI, and Ultra2Wide SCSI support up to 15 devices on a channel. SCSI Adapters Storage controllers for managing SCSI devices SCSI Drive A disk drive equipped with a SCSI interface (sometimes referred to as a SCSI Disk). Each disk drive will be assigned a SCSI address (or SCSI ID), which is a number from 0 to 7 (0 to 15 under wide or Ultra SCSI). The SCSI address uniquely identifies the drive on the SCSI bus or channel. SCSI Drive States Refers to a SCSI drive’s current operational status. At any given time, a SCSI drive can be in one of five states: READY, ONLINE, STANDBY, DEAD, or REBUILD. The controller stores the state of the attached SCSI drives in its non-volatile memory. This information is retained even after power-off. Hence, if a SCSI disk is labeled DEAD in one session, it will stay in the DEAD state until a change is made either by using a system level utility or after a rebuild. Each of the states is described below: Manual No. 775029 G-25 Ready: A SCSI disk drive is in a “ready” state if it is powered on and is available to be configured during the current session but remains unconfigured. Online: A SCSI disk drive is in an “online” state if is powered on, has been defined as a member of a drive group; and is operating properly. Standby: A SCSI disk drive is in a “standby” state if it is powered on, is able to operate properly, and was NOT defined as part of any drive group. Dead: A SCSI disk drive is in a “dead” state if it is not present; or if it is present but not powered on; or if it failed to operate properly and was ‘killed’ by the controller. When the controller detects a failure on a disk, it “kills” that disk by changing its state to “dead.” A SCSI drive in a dead state does not participate in any I/O activity. No commands are issued to dead drives. Rebuild: A SCSI disk drive is in a “rebuild” state while it is in the process of being rebuilt. During this process, data is regenerated and written to the disk drive. This state is also referred to as ‘Write-Only’ (WRO). SCSI Interrupt Steering Logic (SISL) This is the architecture that allows a RAID controller, such as AcceleRAID to implement RAID on a system board-embedded SCSI bus or a set of SCSI busses. SDRAM Synchronous Dynamic Random Access Memory, a new form of dynamic random access memory (DRAM) that can be coordinated or synchronized to the clock speed of the computer. Sector The minimum addressable storage unit in which data is physically stored in a hard disk. Typically a sector is 512 bytes in size. Segment Size See Cache Line Size G-26 RAID EzAssist User’s Manual Glossary Sequential I/O A type of read and write operation where entire blocks of data are accessed one after another in sequence, as opposed to randomly. Server A computer program that provides services to other computer programs in the same or other computers. The computer that a server program runs in is also frequently referred to as a server. SES SCSI-3 Enclosure Services, a standard in the making for SCSI access to services within an enclosure containing on or more SCSI devices. Session Refers to the period of time between any two consecutive system shutdowns. System shutdown may be either a power off/on, or a hardware reset. SIMM Single In-Line Memory Module, RAM packed on a small circuit board with a defined edge connector. SISL See SCSI Interrupt Steering Logic SMART Self Monitoring Analysis and Reporting Technology, the industry standard reliability prediction indicator for both the IDE/ATA and SCSI hard disk drives. Hard disk drives with SMART offer early warning of some hard disk failures so critical data can be protected. SMB Server Message Block protocol, a method for client applications in a computer to read and write to files on and to request services from server programs in a computer network. A client application can read, create, and Manual No. 775029 G-27 update files on the remote server. It can also communicate with any server program that is set up to receive an SMB client request. SNMP Simple Network Management Protocol, the protocol governing network management and the monitoring of network devices and their functions. Software Driver Set of utilities and instructions for controllers to work in a specific operating system environment. Standard Disk Drive This term refers to a hard disk drive with SCSI, IDE, or other interface, that is attached to the host system through a standard disk controller. Storage Area Networking (SAN) A high-speed, open-standard scalable network of storage devices and servers providing accelerated data access Storage Device A collective term for disks, tape transports, and other mechanisms capable of non-volatile data storage. Stripe Order The order in which SCSI disk drives appear within a drive group. This order must be maintained, and is critical to the controller’s ability to ‘Rebuild’ failed drives. G-28 RAID EzAssist User’s Manual Glossary Stripe Size The size of the logically contiguous data block mapped to a single disk. A stripe of data (data residing in actual physical disk sectors, which are logically ordered first to last) is divided over all disks in the drive group. ☛ Note Controllers using Mylex PCI Firmware Version 6.0 and above allow the setting of stripe size per logical drive. Controllers using older firmware allow only a single stripe size for all logical drives on the controller. Stripe Width The number of striped SCSI drives within a drive group. Striping Refers to the storing of a sequential block of incoming data across multiple SCSI drives in a group. For example, if there are 3 SCSI drives in a group, the data will be separated into blocks and block 1 of the data will be stored on SCSI drive 1, block 2 on SCSI drive 2, block 3 on SCSI drive 3, block 4 on SCSI drive 1, block 5 on SCSI drive 2 and so on. This storage method increases the disk system throughput by ensuring a balanced load among all drives. Sub-system Storage A collection of disks providing data storage space to a system user. Sustained Data Transfer Rate A rate of data transfer defined for continuous operation at a maximum speed level. Synchronous data transfer Data transmission synchronized to a defined time interval; faster than asynchronous SCSI because there is no wait for acknowledgement of each byte from the receiving device. Manual No. 775029 G-29 System Disk The disk on which a system’s operating software is stored. System Drives See Logical Drives Target ID A target ID is the SCSI ID of a device attached to a DAC960 controller. Each SCSI channel can have up to 15 attached SCSI devices (target ID from 0 to 6, and 8 to 15). TCP-IP Transmission Control Protocol/Internet Protocol, the basic communication language or protocol of the Internet. It can also be used as a communications protocol in intranets and in extranets. When set up with direct access to the Internet, a computer is provided with a copy of the TCP/IP program just as every other computer that you may send messages to or get information from also has a copy of TCP/IP. Terabyte A measure of memory capacity, two to the 40th power or "roughly" (as a decimal number) a thousand billion bytes (that is, a thousand gigabytes). Termination A method of matching transmission impedance of a bus to eliminate signal reflections from the physical ends of the bus. Thin File Server A small server maximized for the sole purpose of serving files, as opposed to computing. Throughput The number of I/O requests satisfied per unit time (usually per second.) G-30 RAID EzAssist User’s Manual Glossary TPC-C The Transaction Processing Performance Council (TPC) is a standards organization that measures transaction throughput of systems. TPC-C reflects new order transaction rate, a benchmark for transaction speed. Mylex products have won consistently high TPC-C results. Transfer Rate The rate at which data moves between the host computer and storage, input, or output devices, usually expressed as a number of characters per second. Ultra SCSI (Fast 20 SCSI) A high performance SCSI protocol that has a bus speed of 20 MegaBytes per second in the Narrow SCSI configuration and 40 MB in the Wide SCSI (Fast 20 Wide SCSI) configuration. Ultra Wide SCSI 16-bit wide Ultra SCSI (IS devices), double the speed of narrow SCSI. Ultra2 SCSI, or Fast 40 SCSI A higher performance SCSI protocol than Ultra SCSI. Ultra2 SCSI has a bus speed of 40 MegaBytes per second in the Narrow SCSI configuration and 80 MegaBytes in the Wide SCSI (Wide Ultra2 SCSI) configuration. WAN Wide Area Network, a broader telecommunication structure as opposed to a local area network (LAN). A wide area network may be composed entirely of private structures, but the term seems to also connote the inclusion of public networks and all kinds of transmission media. Web A number of computers, servers or networks linked together in a matrix. Manual No. 775029 G-31 Wide SCSI A SCSI protocol and signal definition providing 16-bit wide data path. Write Through Cache Refers to a caching strategy whereby data is written to the SCSI drive before a completion status is returned to the host operating system. This caching strategy is considered more secure, since a power failure will be less likely to cause loss of data. However, a write through cache results in a slightly lower performance. Write-Back Cache Refers to a caching strategy whereby write operations result in a completion signal being sent to the host operating system as soon as the cache (not the disk drive) receives the data to be written. The target SCSI drive will receive the data at a more appropriate time, in order to increase controller performance. An optional cache battery backup can be used to protect against data loss as a result of a power failure or system crash. XOR Exclusive Or, a computer language function that generates parity in RAID systems. G-32 RAID EzAssist User’s Manual CORPORATE OFFICE 34551 Ardenwood Boulevard, Fremont, CA 94555-3607 Tel: 510.796.6100 Domestic Sales Fax: 510.745.8016 International Sales Fax: 510.745.7521 www.mylex.com