1
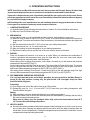
(d) Use wedges in the back and on the sides of the deck if the decks are loose (See fig.7).
(e) Put the hearth trim in place between the deck and the door (Not available on 125 & 805
Series).
Figure #7
Left Interior Oven Wall
Wedges
Wedge
D
Two
e ck
Left Deck
Front View
B. Three Deck Installation:
(a) Slide one deck into the baking chamber and push it as far as possible to one side.
(b) Slide the second deck into the baking chamber on the side opposite to the first deck.
(c) Slide the third deck into the center section.
(d) Use metal shims to level the decks.
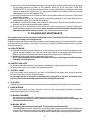
(e) Use wedges in the back and on the sides of the deck if the decks are loose. The three decks
should be tight against each other with no gap between them (See fig. 8).
(f) Put the hearth trim in place between the deck and the door.
Figure #8
Left Interior Oven Wall
Wedges
Wedge
Thre
ck
Left Deck
Front View
e De
C. Four Deck Installation:
(a) Slide one deck into the baking chamber and push it as far as possible to one side towards
the rear.
(b) Slide the second deck into the baking chamber and push it next to the first deck in the rear.
(c) Slide the third and the fourth decks in front of the decks already in place.
(d) Use metal shims as needed to level the decks.
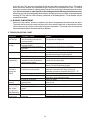
(e) Use wedges in the back and on the sides of the deck if the slabs are loose. The four decks
should be tight against each other with no gap between them (See fig. 9).
(f) Put the hearth trim in place between the deck and the door.
Figure #9
Wedges
Left Interior Oven Wall
Wedge
r
Fou
Left Deck
Front View
k
Dec
NOTE: IF THE SIDE WEDGES ARE PUSHED IN TOO TIGHT, THE HEAT CONTROLS, OPERATED BY
THE BLACK KNOBS, LOCATED ON THE FRONT OF THE OVEN, WILL NOT SLIDE FREELY.
5. GAS AND ELECTRIC CONNECTIONS:
Propane gas units are not available in the European Community Countries.
(a) The appliance when installed, must be electrically grounded in accordance with local codes
and/or the latest edition of the National Electric Code ANSI/NFPA 70 in USA (Canadian Electric
Code CSA C22.2 in Canada).
(b) In Europe, appliance must be connected by an earthing cable to all other units in the complete
installation and thence to an independent earth connection in compliance with EN 60335-1 and/or
local codes
5