1
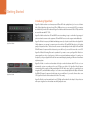
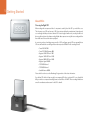
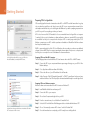
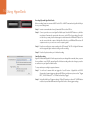
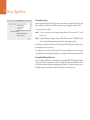
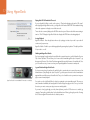
Installation and Operation Manual HyperDeck Shuttle HyperDeck Studio Mac OS X™ Windows™ November 2012 Welcome Welcome to HyperDeck! Welcome to HyperDeck! We hope you share our dream for the television industry to become a truly creative industry by allowing anyone to have access to the highest quality video. Our range of HyperDeck disk recorders have made it easier and more affordable than ever to record and play back full 10-bit uncompressed video. HyperDeck records directly to removable 2.5” Solid State Disks (SSDs) that are getting bigger, faster and more affordable every day. It’s incredible that you can now record the most amazing quality SD and HD video onto something so small, and record and play an SSD thousands of times without any degradation in quality! You can bypass unwanted camera compression and record directly from HDMI or SDI cameras straight to SSD and even connect to any HDMI or SDI monitor for instant playback! SSDs can also be mounted on any computer for immediate editing and fast transfer of your media. With no moving parts, SSDs are unbelievably robust and can handle harsh conditions that would destroy conventional hard drives and videotapes! If you need longer recording times for each SSD, then HyperDeck also records and plays back Apple ProRes and Avid DNxHD files. These 10-bit quality codecs retain fantastic picture quality and increase the recording length of SSDs by more than 5 times! This instruction manual contains all the information you need to start using your HyperDeck disk recorder. For uncompressed recording you need to use an SSD that supports the required data speed and we are continually adding details on our website of new SSDs that we have tested. Please check the support page on our web site at www.blackmagicdesign.com for the latest version of this manual and updates to the HyperDeck software. Keeping your software up to date will always ensure you get all the latest features. When downloading software, please register with your information so we can keep you updated when new software is released. We are constantly working on new features and improvements, so we would love to hear from you! Grant Petty CEO Blackmagic Design Contents HyperDeck 4 12 Using HyperDeck Shuttle Introducing HyperDeck 4 HyperDeck Shuttle Controls 24 About SSDs 5 HyperDeck Shuttle Connections 25 Choosing the Right SSD 5 Installing the HyperDeck Shuttle Mounting Plate 26 Preparing SSDs for HyperDeck 6 Selecting Your Video Format 8 Recording and Playing Clips 9 HyperDeck Studio Controls 27 Recording Video with HyperDeck Shuttle 9 HyperDeck Studio Connections 28 Recording Video with HyperDeck Studio 9 Playing Video 10 Accessing Media on Mac OS X 10 Accessing Media on Windows 10 11 Externally Controlling Your HyperDeck SDI Start/Stop Recording 11 Timecode Run Recording 11 RS-422 Deck Control 11 Updating the HyperDeck Software 13 24 Getting Started HyperDeck Utility 12 How to Update Your HyperDeck Software on Mac OS X 12 How to Update Your HyperDeck Software on Windows 12 Using HyperDeck Using HyperDeck 13 Disk Check 13 Recording 13 Playback 16 RS-422 Control 18 27 29 Using HyperDeck Studio Help 30 Getting Help 29 Blackmagic Design Online Support Pages 29 Contacting Blackmagic Design Support 29 Checking the Version Currently Installed 29 How to Get the Latest Updates 29 Warranty Information 4 Getting Started Introducing HyperDeck HyperDeck disk recorders record uncompressed SD and HD video quality directly to low cost solid state disks. Video playback can be viewed on an SDI or HDMI monitor or you can connect the SSD to a computer and edit directly from the SSD media itself. HyperDeck disk recorders have internal 3 Gb/s SATA ports which are used with standard 2.5" SSDs. HyperDeck disk recorders have SDI and HDMI connectors making it easy to work with a huge range of professional and consumer video equipment. SDI and HDMI connectors also support embedded audio. HyperDeck Shuttle HyperDeck Shuttle is compact, affordable and battery powered, so it’s perfect as a field recorder. HyperDeck Shuttle bypasses your camera’s compression and records from SDI and HDMI directly into the highest quality uncompressed video. The latest model can even record and play back in the Apple ProRes and Avid DNxHD formats if compressed video better suits your workflow or if you need to fit more video on an SSD. HyperDeck Shuttle Mounting Plate can be purchased if you want to secure your HyperDeck Shuttle to a camera rig with your choice of rail mounts, cold shoe mounts, articulated arms and more. You can also use the plate to power your HyperDeck Shuttle from an external battery by attaching a V-Mount or Anton Bauer style battery plate. HyperDeck Studio HyperDeck Studio is a rack mount broadcast deck style recorder that features dual SSD slots so it can automatically continue recording onto the next SSD when one disk is full. HyperDeck Studio features uncompressed video quality recording and playback, RS-422 deck control, genlock, jog and shuttle, an integrated LCD, and is affordable and easy to use. It can even record and play back in the Apple ProRes and Avid DNxHD formats if compressed video better suits your workflow or if you need to fit more video on an SSD. HyperDeck Studio is the broadcast deck for the 21st century! HyperDeck Studio is rack-mountable and is only 1 RU high and less than 4 inches deep. It's the perfect size when space is tight such as in broadcast vans and fly away rack cases. 5 Getting Started About SSDs Choosing the Right SSD When working with uncompressed video it's important to carefully check the SSD you would like to use. This is because some SSDs can have up to 50% lower write speed than the manufacturer’s claimed speed, so even though the disk specifications claim an SSD is fast enough to handle video, in reality the disk is not fast enough for real time video data recording. Hidden data compression mostly affects recording and often these disks can still be used for real time playback. In our testing, we have found larger newer models of SSD, and larger capacity SSDs are generally faster. SSDs recommended for use with HyperDeck and uncompressed 10-bit HD video recording include: Crucial 256GB C300 Crucial 512GB M4 (firmware 009) Kingston 64GB SSDNow V+100 Kingston 128GB SSDNow V+100 Kingston 240GB SSDNow V+200 Kingston HyperX 240GB OCZ 240GB Vertex 3 OCZ 480GB Vertex 3 Sandisk Extreme 480GB. Please check the tech notes on the Blackmagic Design web site for the latest information. If you find an SSD which isn’t fast enough for uncompressed HD video, try a faster SSD or use HyperDeck Utility to switch to a compressed recording format such as ProRes or DNxHD. These recording formats have a much lower data rate and are easier for the SSD to handle. 6 Getting Started Preparing SSDs for HyperDeck SSDs used by HyperDeck must be formatted as either HFS+ or ExFAT. These disk formats allow long clips to be recorded in a single file per clip. Simply connect the SSD to your computer with an external dock or cable adapter and format it as you would a regular disk. Make sure you back up anything important from your SSD as you will lose everything on it when you format it. HFS+ is also known as Mac OS Extended. It is the recommended format for HyperDeck as it supports "journaling". In the event of a hardware or software malfunction, data on a journaled SSD is more quickly recovered and less likely to be corrupted in the first place. HFS+ is natively supported by Mac OS X. Windows computers can use HFS+ with the purchase and installation of MediaFour MacDrive software from http://www.mediafour.com. ExFAT is supported natively by Mac OS X and Windows without needing to purchase any additional software. However ExFAT does not support journaling which means data is more prone to corruption, and less likely to be recovered, in the event of a hardware or software malfunction. Use Disk Utility on Mac OS X to erase your SSD in the Mac OS Extended (Journaled) or ExFAT format. Preparing SSDs on a Mac OS X computer The Disk Utility application included with Mac OS X can format a drive in the HFS+ or ExFAT formats. Step 1. Connect the SSD to your computer and dismiss any message offering to use your SSD for Time Machine backups. Step 2. Go to /Applications/Utilities and launch Disk Utility. Step 3. Click on the disk icon of your SSD and then click the Erase tab. Step 4. Set the Format to "Mac OS Extended (Journaled)" or "ExFAT", type a Name for the new volume and then click Erase. Your SSD will quickly be formatted and made ready for use with HyperDeck. Preparing SSDs on a Windows computer MacDrive software can format a drive in the HFS+ format on a Windows PC. Step 1. Install MediaFour MacDrive and restart your PC. Step 2. Connect the SSD to your computer. Step 3. Choose Start>Computer and right-click on your SSD. Step 4. From the contextual menu, choose MacDrive>Format Mac Disk. Step 5. Select the SSD in the MacDrive Disk Manager and choose Initialize disk>Initialize as GPT. Use MacDrive software on Windows to initialize the SSD with a GPT and create an HFS+ volume. Step 6. Choose "Automatically create an HFS+ volume" and click "Initialize Disk". Step 7. Once the format has been completed, your SSD is ready for use with HyperDeck. 7 Getting Started The Format dialog box can format a drive in the ExFAT format on a Windows PC. Step 1. Connect the SSD to your computer. Step 2. Choose Start>Computer and right-click on your SSD. Step 3. From the contextual menu, choose Format. Step 4. Set the file system to "exFAT" and the allocation unit size to 128 kilobytes. Step 5. Type a volume label, select "Quick Format" and click "Start". Step 6. Your SSD will quickly be formatted and made ready for use with HyperDeck. Use the Format dialog box feature in Windows to format your SSD in the ExFAT format. 8 Getting Started Selecting Your Video Format HyperDeck Studio and HyperDeck Shuttle 2 let you select from a choice of uncompressed and compressed video formats. The original HyperDeck Shuttle exclusively records in an uncompressed video format. HyperDeck can play back 10 bit uncompressed QuickTime files on a fast SSD, or to a compressed format if you have a slower SSD or want to fit longer high definition recordings on a single SSD. This means it is possible to have uncompressed QuickTime files as well as compressed files on the same disk if you have used the HyperDeck Utility software to change the recording format. Working with uncompressed video is exciting as there is no better quality than uncompressed. However if compressed video better suits your workflow, or if you need to fit more video on an SSD, you can choose a high quality professional compressed video format which is also perfect for editing. The following table shows the video formats supported by your HyperDeck model. HyperDeck Shuttle Uncompressed 10-bit QuickTime • HyperDeck Shuttle 2 HyperDeck Studio • • Apple ProRes 422 (HQ) QuickTime • • Avid DNxHD 220 Mb/s QuickTime • • Avid DNxHD 220 Mb/s MXF • • To choose a compressed video format: Step 1. Connect HyperDeck to your computer via USB. Step 2. Launch HyperDeck Utility. The title bar of the utility will show you if you have an HyperDeck Shuttle, HyperDeck Shuttle 2 or HyperDeck Studio. Step 3. Set the recording format to the desired codec from the pulldown menu and save the setting. You can now disconnect the USB cable if you wish. All subsequent clips will be recorded in the compressed format. If you want to switch back to uncompressed video, repeat the procedure and choose “Uncompressed 10 Bit” from the pulldown menu. Setting the recording format also sets the playback format so you will only be able to play back clips that match the current recording format. Any other clips will be hidden which helps prevent slow SSDs from being accidentally used to play back high data rate uncompressed clips which they might not be fast enough to play. 9 Getting Started Recording and Playing Clips HyperDeck ships ready to record and play back with uncompressed SD and HD video quality. You can start recording immediately without having to configure any settings and all you need is a recommended SSD formatted in the HFS+ or ExFAT format. The "Using HyperDeck" section later in this manual provides information about changing settings for recording and playback as well as more detailed steps for recording, playback and using RS-422 control. If HyperDeck records from a video source that contains closed caption data, your HyperDeck will record the QuickTime or MXF movie as well as a separate .MCC file containing the closed caption data. The .MCC file will have the same name as your recorded movie but with a .MCC extension. Recording Video with HyperDeck Shuttle Step 1. Insert a recommended SSD which has been formatted in the HFS+ or ExFAT format. Step 2. Connect your video source to the SDI or HDMI input and the Video status LED should light up. HyperDeck Shuttle recording video. Step 3. Press the Record button and the SSD light will flash to indicate SSD activity. Step 4. Press the Stop button to finish your recording. Recording Video with HyperDeck Studio Step 1. Insert a recommended SSD, formatted in the HFS+ or ExFAT format, into either SSD slot. HyperDeck Studio recording video. Step 2. Connect your video source to an HyperDeck Studio input. Press the INPUT button once, while the stop button is illuminated, to preview the video source on the LCD before recording. If you don’t see the video you want, press the button again to switch between the HDMI and SDI inputs. Step 3. Press the record button to start recording to the SSD instantly. The SSD slot light will illuminate with a looping red light to indicate it is being used for recording. Step 4. Press the Stop button to finish your recording. If the record button flashes, this means the disk is not fast enough and recording cannot keep up. We recommend you change to a compressed recording format such as ProRes or DNxHD, or use a faster recommended SSD for uncompressed recording. 10 Getting Started Playing Video Playing back a clip is simple and instantaneous. HyperDeck Shuttle playing back video. If you’re recording with HyperDeck Shuttle, press the Stop button once to stop recording. Press it again to switch to playback. Then simply press Play and you'll see your video on any displays connected to the SDI and HDMI outputs. If you’re recording with HyperDeck Studio, press the play button once for instant playback and you'll see your video on any displays connected to the SDI and HDMI outputs. HyperDeck Studio playing back video. The controls of your HyperDeck work just like a CD player so pressing next clip will skip to the start of the next clip and continue playing. Press previous clip once to go to the start of the current clip or press twice to skip back to the start of the previous clip. If the play button flashes, this means the disk is not fast enough and playback cannot keep up. We recommend you change to a compressed recording format such as ProRes or DNxHD, or use a faster recommended SSD for uncompressed recording. If you play back a video clip which has an associated .MCC file, the closed caption data will be played out with the video via the SDI output of your HyperDeck. Accessing Media on Mac OS X Compressed and uncompressed QuickTime™ movies recorded by HyperDeck can be opened in almost any video software on Mac OS X. DNxHD MXF files recorded by HyperDeck can be opened with Avid Media Composer and DaVinci Resolve for Mac. MCC closed caption data files recorded by HyperDeck can be opened with MaCCaption software for Mac OS X from http://www.cpcweb.com. Accessing Media on Windows Compressed and uncompressed QuickTime™ movies recorded by HyperDeck require QuickTime be installed on your PC. Almost any video software on Windows that supports QuickTime can open movies recorded by HyperDeck. QuickTime for Windows can be downloaded free from Apple’s website at http://www.apple.com/quicktime/download/. DNxHD MXF files recorded by HyperDeck can be opened with Avid Media Composer and DaVinci Resolve for Windows. MCC closed caption data files recorded by HyperDeck can be opened with CaptionMaker software for Windows from http://www.cpcweb.com.. 11 Getting Started Externally Controlling Your HyperDeck There are several ways you can remotely control your HyperDeck and more detailed instructions are provided in the "Using HyperDeck" section of this manual. SDI Start/Stop Recording Start/stop recording means that when you press the record button on an HD-SDI camera, HyperDeck will start recording without also having to press the record button on your HyperDeck disk recorder. You will need a camera which can trigger the "record" function of HyperDeck via HD-SDI. Use HyperDeck Utility to set Trigger recording to "When SDI start/stop is detected". On HyperDeck Studio, the REM button needs to be selected to allow trigger recording. Timecode Run Recording Timecode run recording is similar to start/stop recording but is only used if your HD-SDI camera does not support trigger recording via HD-SDI. Change your camera's timecode settings from "free run timecode" to "record run timecode" and use HyperDeck Utility to set Trigger recording to "When SDI timecode runs". On HyperDeck Studio, the REM button must also be pressed and illuminated to allow trigger recording. Now whenever your HyperDeck detects the timecode running via HD-SDI, it will start recording. It will stop recording whenever the timecode stops. Be careful if your HyperDeck is connected to the SDI output of a video router, as any change to the video source might cause HyperDeck to start recording unexpectedly due to a change in timecode being detected via HD-SDI. RS-422 Deck Control You can remotely control HyperDeck Studio using your favorite NLE software and video capture hardware to remotely capture, batch capture and play back video with your HyperDeck Studio. All you need to do is connect an RS-422 cable between your capture device and HyperDeck Studio and press the REM button to enable remote deck control. 12 Updating the HyperDeck Software HyperDeck Utility Blackmagic HyperDeck Utility is used to change settings and update the internal software in your HyperDeck. In addition to installing HyperDeck Utility, uncompressed 10 bit codecs are installed for Mac and Windows. If you use Avid Media Composer 6.x, you'll also find a HyperDeck Studio deck preset is installed to help with RS-422 deck control. How to Update Your HyperDeck Software on Mac OS X After downloading the HyperDeck Utility software and unzipping the downloaded file, open the resulting disk image to reveal its contents. Launch the HyperDeck Installer and follow the onscreen instructions. After installing the latest Blackmagic HyperDeck Utility on your computer, connect a USB cable between the computer and the HyperDeck. Launch Blackmagic HyperDeck Utility and follow any onscreen prompt to update the internal software in your HyperDeck. If no prompt appears, the internal software is up to date and there is nothing further you need to do. We recommend you also update your HyperDeck to ensure you are able to get any new software. How to Update Your HyperDeck Software on Windows After downloading the HyperDeck Utility software and unzipping the downloaded file, you should see a HyperDeck Utility folder containing this PDF manual and the HyperDeck Utility installer. Double-click the installer and follow the onscreen prompts to complete the installation. After installing the latest Blackmagic HyperDeck Utility on your computer, connect a USB cable between the computer and the HyperDeck. Launch Blackmagic HyperDeck Utility and follow any onscreen prompt to update the internal software in your HyperDeck. If no prompt appears, the internal software is up to date and there is nothing further you need to do. We recommend you also update your HyperDeck to ensure you get the latest software features. 13 Using HyperDeck Using HyperDeck Disk Check When you first switch on HyperDeck, or any time you insert an SSD, the SSD indicator will light up while checking the SSD and then switch off. If the SSD has not been formatted correctly, or fails to work, the SSD indicator will illuminate solid red until the SSD is removed. Refer to the previous section "Preparing SSDs for HyperDeck" to check if the SSD is formatted correctly and also check that it works with a computer. Recording Recording Clips with HyperDeck Shuttle Before recording, format a recommended SSD in the HFS+ or ExFAT format and use HyperDeck Utility to choose your recording format. Step 1. Insert the formatted SSD into HyperDeck Shuttle. As it reads the disk, the SSD light on the unit will illuminate. When the light goes off, HyperDeck Shuttle is ready to record. Step 2. Connect your video source to the HyperDeck Shuttle’s input. It doesn’t matter if you use the HDMI or SDI input, as HyperDeck Shuttle will automatically detect which one is connected. You can also connect the video output of the HyperDeck Shuttle to your HDMI or SDI monitor. All outputs are active so you can use either one connection or both SDI and HDMI outputs together. Step 3. If you see the Video status LED light up, it means that HyperDeck Shuttle has detected a valid video input. Step 4. If you don’t see your source video on the output, press the Stop button to switch HyperDeck Shuttle between video input loop through and playback. Step 5. Press the Record button and HyperDeck Shuttle will start recording instantly. The SSD light will also flash to indicate the SSD activity. Once you’ve finished recording, press the Stop button. If the Stop button starts flashing while recording, there are only 3 minutes of recording time left on the SSD. Make sure you have another empty SSD ready so you don’t miss the next take. 14 Using HyperDeck Recording Clips with HyperDeck Studio Before recording, format a recommended SSD in the HFS+ or ExFAT format and use HyperDeck Utility to choose your recording format. Step 1. Insert a recommended and correctly formatted SSD into either SSD slot. Step 2. Connect your video source to an HyperDeck Studio input. Press the INPUT button once, while the stop button is illuminated, to preview the video source on the LCD before recording. If you don’t see the video you want, press the button again to switch between the HDMI and SDI inputs. You can also connect the video outputs of the HyperDeck Studio to your HDMI and SDI monitors. All outputs are active so you can use one or more outputs together. Step 3. Press the record button to start recording to the SSD instantly. The SSD slot light will illuminate with a looping red light to indicate it is being used for recording. Step 4. Press the Stop button when you've finished recording. Start/Stop Recording HyperDeck Shuttle and HyperDeck Studio support start/stop recording which means that, when you press the record button on an HD-SDI camera, HyperDeck will start recording without also having to press the record button on your HyperDeck disk recorder. To set up start/stop recording for supported cameras: Step 1. You will need a camera which can trigger the "record" function of HyperDeck via HD-SDI. Cameras which support trigger recording via HD-SDI may include menu options such as "Trigger REC", "HD-SDI Remote I/F" or "SDI Remote Start/Stop Trigger". Step 2. In HyperDeck Utility, set Trigger recording to "When SDI start/stop is detected". The REM button must also be pressed and illuminated on HyperDeck Studio to allow trigger recording. 15 Using HyperDeck Timecode Run Recording HyperDeck Shuttle and HyperDeck Studio also support timecode run recording, which is similar to start/ stop recording, but is only used if your HD-SDI camera does not support trigger recording via HD-SDI. To set up timecode run recording: Step 1. Go into your camera's timecode settings and change them from "free run timecode" to "record run timecode". Step 2. In HyperDeck Utility, set Trigger recording to "When SDI timecode runs". The REM button must also be pressed and illuminated on HyperDeck Studio to allow trigger recording. Now whenever your HyperDeck detects the timecode running via HD-SDI, it will start recording. It will stop recording whenever the timecode stops. If your HyperDeck is connected to the SDI output of a video router, any change to the video source might cause HyperDeck to start recording unexpectedly due to a change in timecode being detected via HD-SDI. Recording RP 188 Embedded Timecode When recording from HD-SDI video sources which provide embedded SMPTE RP 188 metadata, switching on the option to "Use SDI video input timecode when recording" will record the embedded timecode from the video source instead of using timecode generated by your HyperDeck. It might be necessary to turn on the RP 188 setting in your camera before HyperDeck will be able to record the timecode. 16 Using HyperDeck Playback Playing Back Clips Playing back a clip is simple and instantaneous. If you’re recording with HyperDeck Shuttle, press the Stop button once to stop recording. Press it again to switch to playback. Then simply press Play. If you’re recording with HyperDeck Studio, press the play button once for instant playback. The controls of HyperDeck work just like a CD player so pressing next clip will skip to the start of the next clip and continue playing. Press previous clip once to go to the start of the current clip or press twice to skip back to the start of the previous clip. Accessing Your Clips HyperDeck can play back movies in the QuickTime and MXF file formats including closed caption data. QuickTime movies require QuickTime be installed on your computer. QuickTime for Mac is built into Mac OS X™. QuickTime for Windows™ can be downloaded free from Apple’s website at: http://www.apple.com/quicktime/download/. DNxHD MXF files can be used with Avid Media Composer and DaVinci Resolve on Mac OS X and Windows. MCC closed caption data files recorded by HyperDeck can be opened with CaptionMaker software for Windows from http://www.cpcweb.com. 17 Using HyperDeck Playing Back RP 188 Embedded Timecode If you use HyperDeck Utility to switch on the option to "Play back media timecode track to SDI output" when playing back high definition video, your HyperDeck will embed SMPTE RP 188 metadata allowing other video equipment to display or record the timecode. Timecode is also commonly displayed on HD-SDI monitors but you will often need to find a menu setting to turn it on. The LCD display in HyperDeck Studio also displays the RP 188 timecode during playback. Looping Playback HyperDeck Shuttle - Press the play button when a clip is playing to initiate loop mode. Loop mode will continue until you press stop. HyperDeck Studio - Enable loop mode during playback by pressing the play button. The display will show if loop mode is on or off. Shuttling with HyperDeck Shuttle If you’re reviewing a long clip and need to quickly shuttle to a particular section, just hold down the Previous Clip or Next Clip button. This will allow you to reverse or fast forward through the clip at 2x speed. To go faster, press the Previous Clip or Next Clip button again and the speed will increase to 4x and then 8x. Once you’ve found the section you want to review, press Play and playback will resume at normal speed. Jog and Shuttle with HyperDeck Studio If you’re reviewing a long clip and need to quickly shuttle to a particular section, press the reverse or fast forward button to play through the clip at 2x speed. To go faster, press the reverse or fast forward button again and the speed will increase to 4x and then 8x. Once you’ve found the section you want to review, press play to resume normal playback. HyperDeck Studio shows embedded SDI timecode on its display. You can also use the Jog/Shuttle Wheel to shuttle to a particular section at variable speeds. The more you turn it forwards or backwards, the faster HyperDeck Studio will play through your video. Once you’ve found the section you want to review, press play to resume normal playback. If you want to slowly jog through your video, frame by frame, press the JOG button once to enable jog operation. Turning the jog/shuttle wheel in the desired direction will then jog through your video. Pressing the JOG button again will return the wheel to shuttle operation. 18 Using HyperDeck 5 4 3 2 RS-422 Control 1 What is RS-422 Control? The RS-422 standard is commonly supported by NLE hardware and software and allows video players and recorders to be remotely controlled by an external RS-422 controller or capture device. 9 8 7 6 Receive (–) Receive (+) Transmit (–) Transmit (+) Ground Pins 2 7 8 3 1, 4, 6, 9 RS-422 remote pin connections. Using an External RS-422 Controller HyperDeck Studio features an industry standard, Sony™ compatible, RS-422 deck control port which has the correct pin connections for a direct connection to any remote controller with RS-422. You can use pre-manufactured 9 pin cables as long as each end of the cable is wired “pin for pin” where the same pin number on each end of the cable are connected together. If you would like to make custom cables, please refer to the accompanying wiring diagram. You can remotely control HyperDeck Studio from an RS-422 controller, instead of locally pushing buttons. Step 1. Connect a video signal to an SDI or HDMI video input of your HyperDeck Studio. Step 2. Connect an RS-422 cable between your external controller and HyperDeck Studio. Step 3. Press the REM button to enable remote deck control. You can now remotely start and stop recording and playback of your HyperDeck Studio as well as performing other common jog and shuttle functions. The full list of supported RS-422 commands is in the following section named "Supported RS-422 Commands". Daisy-chaining for Crash Recording You can simultaneously record the same SDI video signal to multiple HyperDeck Studios. You'll need to press the REM button on each HyperDeck Studio to enable remote deck control. Each HyperDeck Studio can be set to record in a compressed or uncompressed video format using HyperDeck Utility. If you're working with high definition video, you only need a single channel RS-422 controller connected to the first HyperDeck Studio and then loop the HD-SDI signal to the other HyperDeck Studios using the SDI loop output. Use HyperDeck Utility to set "Trigger recording" to "When SDI timecode runs" and all HyperDeck Studios will record the same video signal simultaneously. If you ever work with standard definition video, you will need a multiple channel RS-422 controller connected to each HyperDeck Studio via RS-422. Connect a video signal to the SDI video input of one HyperDeck Studio and then loop the SD-SDI signal to the other HyperDeck Studios using the SDI loop output. You can now use your external RS-422 controller to set multiple HyperDeck Studios to remotely crash record the same video signal. 19 Using HyperDeck Supported RS-422 Commands Command Reply No Remote Notes 0x11 DeviceTypeRequest NTSC: 0xF0E0 PAL: 0xF1E0 24P: 0xF2E0 Enabled 0x20 0x00 Stop Acknowledge Disabled 0x20 0x01 Play Acknowledge Disabled 0x20 0x02 Record Acknowledge Disabled 0x20 0x10 FastFwd Acknowledge Disabled 0x21 0x11 JogFwd1 Acknowledge Disabled 0x22 0x11 JogFwd2 Acknowledge Disabled Treated as N=1; Same as JogFwd1 0x21 0x12 VarFwd1 Acknowledge Disabled Uses ShuttleFwd1 0x22 0x12 VarFwd2 Acknowledge Disabled Treated as N=1; Same as VarFwd1 0x21 0x13 ShuttleFwd1 Acknowledge Disabled 0x22 0x13 ShuttleFwd2 Acknowledge Disabled 0x20 0x20 Rewind Acknowledge Disabled 0x21 0x21 JogRev1 Acknowledge Disabled 0x22 0x21 JogRev2 Acknowledge Disabled Treated as N=1; Same as JogRev1 0x21 0x22 VarRev1 Acknowledge Disabled Uses ShuttleRev1 0x22 0x22 VarRev2 Acknowledge Disabled Treated as N=1; Same as VarRev1 0x21 0x23 ShuttleRev1 Acknowledge Disabled 0x22 0x23 ShuttleRev2 Acknowledge Disabled 0x20 0x30 Preroll Acknowledge Disabled 0x24 0x31 CueData Acknowledge Disabled 0x20 0x34 SyncPlay Acknowledge Disabled 0 - System Control 0x00 1 - Slave Response Treated as N=1; Same as ShuttleFwd1 Treated as N=1; Same as ShuttleRev1 20 Using HyperDeck Supported RS-422 Commands Command Reply No Remote Notes 0x21 0x38 ProgSpeedPlayPlus Acknowledge Disabled 0x21 0x39 ProgSpeedPlayMinus Acknowledge Disabled 0x20 0x40 Preview Acknowledge Disabled Status bits are set 0x20 0x41 Review Acknowledge Disabled Status bits are set 0x20 0x43 OutpointPreview Acknowledge Disabled 0x22 0x5C DMCSetFwd Acknowledge Disabled 0x22 0x5D DMCSetRev Acknowledge Disabled 0x20 0x60 FullEEOff Acknowledge Disabled 0x20 0x61 FullEEOn Acknowledge Disabled 0x20 0x63 SelectEEOn Acknowledge Disabled 0x40 0x10 InEntry Acknowledge Disabled 0x22 0x23 ShuttleRev2 Acknowledge Disabled 0x20 0x30 Preroll Acknowledge Disabled 0x24 0x31 CueData Acknowledge Disabled 0x20 0x34 SyncPlay Acknowledge Disabled 0x21 0x38 ProgSpeedPlayPlus Acknowledge Disabled 0x21 0x39 ProgSpeedPlayMinus Acknowledge Disabled 0x40 0x11 OutEntry Acknowledge Disabled 0x44 0x14 InDataPreset Acknowledge Disabled 0x44 0x15 OutDataPreset Acknowledge Disabled 0x40 0x18 InFwd Acknowledge Disabled 4 - Preset/Select Control 0x40 0x19 InRev Acknowledge Disabled 0x40 0x1A OutFwd Acknowledge Disabled 0x40 0x1B OutRev Acknowledge Disabled 0x40 0x20 InReset Acknowledge Disabled 0x40 0x21 OutReset Acknowledge Disabled 0x40 0x22 AInReset Acknowledge Disabled Treated as N=1; Same as ShuttleRev1 21 Using HyperDeck Supported RS-422 Commands Command Reply No Remote Notes 0x40 0x23 AOutReset Acknowledge Disabled 0x44 0x31 PrerollPreset Acknowledge Disabled 0x40 0x40 AutoModeOff Acknowledge Disabled ignored, Status bit remembered 0x40 0x41 AutoModeOn Acknowledge Disabled ignored, Status bit remembered 0x0A TimeCodeGenSense 6 - Sense Request 0x61 Request for Gen TC GenTCData Enabled Timer1Sense Timer1Data Enabled UserBitsVITCTimeSense UserBitsVITCTimeData Enabled LTCUserBitsTimeSense LTCUserBitsTimeData Enabled VITCUserBitsTimeSense VITCUserBitsTimeData Enabled 0x60 0x10 InDataSense InData Enabled 0x60 0x11 OutDataSense OutData Enabled 0x60 0x12 AInDataSense AInData Enabled 0x60 0x13 AOutDataSense AOutData Enabled 0x61 0x20 StatusSense StatusData Enabled 0x60 0x2E SpeedSense SpeedData Enabled 0x60 0x31 PrerollTimeSense PreRollTimeData Enabled 0x60 0x36 TimerModeSense TimerModeData Enabled 0x60 0x3E RecordInhibitSense RecordInhibitStatus Enabled 22 Using HyperDeck Supported RS-422 Commands Command Reply No Remote Notes 7 - Sense Reply 0x78 0x00 Timer1Data - - Current Time and 00:00:00:00 0x78 0x04 LTCUserBitsTimeData - - Current Time and 00:00:00:00 0x78 0x06 VITCUserBitsTimeData - - Current Time and 00:00:00:00 0x74 0x06 VITCTimeData - - Current Time 0x74 0x07 UserBitsVITCTimeData - - 00:00:00:00 0x74 0x08 GenTCData - - Current Time 0x78 0x08 GenTCUBData - - Current Time and 00:00:00:00 0x74 0x09 GenUBData - - 00:00:00:00 0x74 0x10 InData - - 0x74 0x11 OutData - - 0x74 0x12 AInData - - 0x74 0x13 AOutData - - 0x74 0x14 CorrectedLTCTimeData - - Current Time 0x70 0x20 StatusData - - Please see “Status Bits” sheet: Limited to 9 bytes of status, silently truncated 0x71 0x2E SpeedData - - 0x74 0x31 PrerollTimeData - - 0x71 0x36 TimerModeData - - 0x72 0x3E RecordInhibitStatus - - Returns 0 (TimeCode) 23 Using HyperDeck RS-422 Developer Information Bit 7 Bit 6 Bit 5 Bit 4 Bit 3 Bit 2 Bit 1 Bit 0 Byte 0 0 0 Cassette out 0 0 0 0 Local Byte 1 Standby 0 Stop 0 Rewind Forward Record Play Byte 2 Servo Lock 0 Shuttle Jog Var Direction Still 1 Byte 3 Auto Mode 0 0 0 Aout Set Ain Set Out Set In Set Byte 4 Select EE Full EE 0 0 0 0 0 0 Byte 5 0 0 0 0 0 0 0 0 Byte 6 0 Lamp Still Lamp Fwd Lamp Rev 0 0 0 0 Byte 7 0 0 0 0 0 0 0 0 Byte 8 0 0 Near EOT EOT 0 0 0 0 Byte 9 0 0 0 0 0 0 0 0 Variables HyperDeck Serial RS-422 Protocol Cassette Out Set if no SSD is present Protocol Based on Sony 9-pin protocol Local Set if Remote is disabled (local control) Interface Baud rate Standby Set if a disk is available 1 start bit Direction Clear if playback is forwarding, set if playback is reversing 8 data bits Still Set if playback is paused, or if in input preview mode Auto Mode Set if in Auto Mode Select EE, Full EE Set if in input preview mode Lamp Still/Fwd/Rev Set according to playback speed and direction Near EOT Set if total space left on available SSDs is less than 3 minutes EOT Set if total space left on available SSDs is less than 30 seconds Others Cue Complete (byte 2, bit 0) Always 1: Cue requests are always instantaneous 1 stop bit 1 parity bit Odd parity 38.4 kBits/s 24 Using HyperDeck Shuttle HyperDeck Shuttle Controls 1 2 3 4 5 6 DISP 7 8 9 VIDEO Buttons Status Indicators 1. Record HyperDeck Shuttle will instantly record the moment you press the Record button, even if you’re playing back a clip. This means you’ll never miss a good take that’s happening. If the button flashes red, the SSD is too slow and cannot keep up with recording. 5. Next Clip If you hold down Next Clip, the clip will fast forward at 2x speed. Pressing the button again will increase the speed to 4x and 8x. If you want to resume playing back at normal speed, just press the Play button. Or you can also press the Stop button to pause when fast forwarding. 2. Previous Clip If you hold down the Previous Clip, the clip will reverse at 2x speed. Pressing the button again will increase the speed to 4x and 8x. If you want to resume playing back at normal speed, just press the Play button. Or you can press the Stop button to pause when reversing. 6. DISP This button isn’t currently used but will soon be enabled by a software update. You will be able to download this for free at www.blackmagicdesign.com 3. Stop The Stop button also switches HyperDeck Shuttle between playback and video loop through mode. 4. Play When a clip is playing, pressing Play again will loop it continuously. 10 7. Power On/Off The Power button turns the HyperDeck Shuttle on or off. To prevent someone from accidentally switching off the unit, you must hold the Power button down for 2 seconds to turn it off. If you’re running off the built-in batteries, the unit will turn itself off to conserve power after 8 minutes if you’re not recording. 8. VIDEO The VIDEO indicator lights up when a video signal is detected by HyperDeck Shuttle. 9. SSD The SSD indicator lights up in green when it is accessing a correctly formatted SSD. If the SSD has not been formatted correctly, or fails to work, the SSD light will illuminate solid red until the SSD is removed. 10. Battery The four green battery indicators display the internal battery charge level. When all the LEDs go off, there’s approximately 4 minutes of battery power left. So you should plug in your external power source or switch to another charged HyperDeck Shuttle. 25 Using HyperDeck Shuttle HyperDeck Shuttle Connections 11 12 13 14 +12V POWER HDMI IN HDMI OUT SDI IN 15 16 18 SDI OUT 17 Connections Mounts 11. +12V POWER You can use the power adapter supplied with HyperDeck Shuttle or power it off an external camera battery as the connector supports an input range of 12V to 18V. When a power source is connected, the built-in internal battery will also be charged. 14. SDI IN You can connect your SDI video sources, such as cameras, routers, capture cards, switcher outputs or decks to this input. A DIN 1.0/2.3 miniature connector is used for SDI input. A short DIN 1.0/2.3 to BNC adapter cable can be used to connect to SDI cables with BNC connectors. 17. Rubber Mat or HyperDeck Shuttle Mounting Plate HyperDeck Shuttle has a non-slip rubber base for use on a desk. If you want to mount HyperDeck Shuttle on a camera or tripod, the base can be removed and replaced with an optional HyperDeck Shuttle Mounting Plate that is available for purchase from Blackmagic Design resellers. 12. HDMI IN You can connect your HDMI video sources to this input – such as a camera, games console and the output of an ATEM switcher. 15. SDI OUT Connect this output to monitors, routers, production switchers, decks or other recording devices. A DIN 1.0/2.3 miniature connector is used for SDI output. A short DIN 1.0/2.3 to BNC adapter cable can be used to connect to SDI cables with BNC connectors. SSD Slot 13. HDMI OUT Connect an HDMI display or TV to this output to monitor your video while recording or playing back clips. You can also connect this output to the HDMI input of capture cards, production switchers and other recording devices. 16. USB 2.0 Use the USB Mini-B port for software configuration and updates. 18. SSD Slot Insert a 2.5" SSD into the SSD slot until you feel the SSD press into place. Hard drives are not supported and should not be used. To remove the SSD, simply pull it out. 26 Using HyperDeck Shuttle Installing the HyperDeck Shuttle Mounting Plate The contents of the box includes: x1 HyperDeck Shuttle x4 Socket Head Screws Mounting Plate M3 x 10mm Step 1. Peel back the rubber mat from all four corners of the base so you can just see the screws. Remove all four screws. You will need: x1 Hex Allen Key 2.5mm Step 2. Remove the base. Step 3. Attach your HyperDeck Shuttle Mounting Plate using the supplied socket head screws. (not included) 1 3 1 3 Step 1 HyperDeck Shuttle Mounting Plate is an optional accessory which lets you secure your HyperDeck Shuttle to a camera rig with your choice of rail mounts, cold shoe mounts, articulated arms and more. You can also use the plate to power your HyperDeck Shuttle from an external battery by attaching a V-Mount or Anton Bauer style battery plate. HyperDeck Shuttle Mounting Plate is available for purchase from Blackmagic Design resellers. For easy installation, please follow these simple steps. 2 2 2 4 4 4 1 3 Step 2 Step 3 27 Using HyperDeck Studio HyperDeck Studio Controls 1 2 3 4 5 6 7 INPUT DISP SET 9 IN LOOP OUT OUT 1 OUT 2 MON OUT +12V POWER REMOTE ETHERNET SD/HD/3GHD-SDI 1. SSD Slot 1 2. SSD Slot 2 Insert a 2.5" SSD into an SSD slot until you feel the SSD press into place. The surround of the SSD slot lights in green when it is accessing a correctly formatted SSD. If the SSD has not been formatted correctly, or fails to work, the SSD slot light will illuminate solid red until the SSD is removed. Hard drives are not supported and should not be used. To remove the SSD, simply pull it out. Buttons and Controls 3. DISP This button isn’t currently used but will soon be enabled by a software update. 4. Previous Clip Press once to go to the start of the current clip or press twice to skip back to the start of the previous clip. 5. Record Recording commences the instant you press the record button, even if you’re playing back a clip, so you’ll never miss a good take that’s happening. If the button flashes red, REM JOG 10 11 12 13 14 15 16 REF IN IN SSD Slots 8 OUT HDMI the SSD is too slow and cannot keep up with recording. To switch from one SSD to the other while recording, press the record button for 1 second. 11. Play Press once to play through all clips or press again to loop the current clip. 6. Next Clip Press to skip to the next clip. 12. Fast Forward Press once to play at 2x speed or press again to play at 4x and 8x speeds. 7. INPUT While the stop button is illuminated, press the INPUT button once to display the incoming video on the LCD. If you don’t see the video you want, press the button again to switch between the HDMI and SDI inputs. 8. REM Push REM to enable RS-422 remote control or to allow remote trigger recording via SDI. 9. SET This button isn’t currently used but will soon be enabled by a software update. 10. Reverse Press once to play in reverse at normal speed. Press again to reverse at 2x, 4x and 8x speeds. 13. Stop Stop works in all modes. 14. JOG Press once to use the jog wheel to scroll through video or press again to set the jog wheel to shuttle mode. 15. LCD The color LCD displays video format, timecode, audio meters, video preview, transport controls and the active SSD. 16. Jog/Shuttle Wheel Use with the JOG button to jog or shuttle forwards and backwards. 28 Using HyperDeck Studio HyperDeck Studio Connections DISP SET IN LOOP OUT OUT 1 OUT 2 MON OUT REMOTE ETHERNET 17 18 19 SD/HD/3GHD-SDI 20 21 22 REM JOG REF IN IN +12V POWER INPUT OUT HDMI 23 24 25 26 27 28 Connections 17. +12V POWER You can use the universal power adapter supplied with HyperDeck Studio or power it off any DC power source, from 12V to 18V, allowing for portable battery packs and on set use. 21. SD/HD-SDI LOOP OUT This output is reclocked from the video input and can be connected to other devices such as a monitor or a second HyperDeck for redundant recording. 26. HDMI IN You can connect your HDMI video sources to this input – such as a camera, games console or the output of an ATEM switcher. 18. REMOTE RS-422 remote control. 22. SD/HD-SDI OUT 1 Connect this output to monitors, routers, capture cards, production switchers, decks or other recording devices. 19. ETHERNET This port isn’t currently used but will soon be enabled by a software update. 23. SD/HD-SDI OUT 2 Connect this output to monitors, routers, production switchers, decks or other recording devices. 27. HDMI OUT Connect an HDMI display or TV to this output to monitor your video while recording or playing back clips. You can also connect this output to the HDMI input of capture cards, production switchers and other recording devices. 20. SD/HD-SDI IN You can connect your SD/HD-SDI video sources, such as cameras, routers, capture cards, switcher outputs or decks to this input. 24. SD/HD-SDI MON OUT SD/HD-SDI output for monitoring. 25. REF IN This input accepts blackburst and tri-level sync signals from a sync generator. 28. USB 2.0 Use the USB Mini-B port for software configuration and updates. 29 Help Getting Help The fastest way to obtain help is to go to the Blackmagic Design online support pages and check the latest support material available for your HyperDeck. Blackmagic Design Online Support Pages The latest manual, software and support notes can be found at the Blackmagic Support Center at www.blackmagicdesign.com/support. Contacting Blackmagic Design Support If you can't find the help you need in our support material, please use the "Send request" button, on the support page for your HyperDeck model, to email a support request. Alternatively call your nearest Blackmagic Design support office at www.blackmagicdesign.com/company. Checking the Software Version Currently Installed To check which version of HyperDeck Utility software is installed on your computer, open the About Blackmagic HyperDeck Utility window. • On Mac OS X, open Blackmagic HyperDeck Utility from the Applications folder. Select About Blackmagic HyperDeck Utility from the application menu to reveal the version number. • On Windows 7, open Blackmagic HyperDeck Utility from your Start menu. Click on the Help menu and select About Blackmagic HyperDeck Utility to reveal the version number. How to Get the Latest Software Updates After checking the version of HyperDeck Utility software installed on your computer, please visit the Blackmagic Support Center at www.blackmagicdesign.com/support to check for the latest updates. While it is usually a good idea to run the latest updates, it is a wise practice to avoid updating any software if you are in the middle of an important project. 30 Warranty 12 Month Limited Warranty Blackmagic Design warrants that this product will be free from defects in materials and workmanship for a period of 12 months from the date of purchase. If a product proves to be defective during this warranty period, Blackmagic Design, at its option, either will repair the defective product without charge for parts and labor, or will provide a replacement in exchange for the defective product. In order to obtain service under this warranty, you the Customer, must notify Blackmagic Design of the defect before the expiration of the warranty period and make suitable arrangements for the performance of service. The Customer shall be responsible for packaging and shipping the defective product to a designated service center nominated by Blackmagic Design, with shipping charges pre paid. Customer shall be responsible for paying all shipping charges, insurance, duties, taxes, and any other charges for products returned to us for any reason. This warranty shall not apply to any defect, failure or damage caused by improper use or improper or inadequate maintenance and care. Blackmagic Design shall not be obligated to furnish service under this warranty: a) to repair damage resulting from attempts by personnel other than Blackmagic Design representatives to install, repair or service the product, b) to repair damage resulting from improper use or connection to incompatible equipment, c) to repair any damage or malfunction caused by the use of non Blackmagic Design parts or supplies, or d) to service a product that has been modified or integrated with other products when the effect of such a modification or integration increases the time or difficulty of servicing the product. THIS WARRANTY IS GIVEN BY BLACKMAGIC DESIGN IN LIEU OF ANY OTHER WARRANTIES, EXPRESS OR IMPLIED. BLACKMAGIC DESIGN AND ITS VENDORS DISCLAIM ANY IMPLIED WARRANTIES OF MERCHANTABILITY OR FITNESS FOR A PARTICULAR PURPOSE. BLACKMAGIC DESIGN’S RESPONSIBILITY TO REPAIR OR REPLACE DEFECTIVE PRODUCTS IS THE WHOLE AND EXCLUSIVE REMEDY PROVIDED TO THE CUSTOMER FOR ANY INDIRECT, SPECIAL, INCIDENTAL OR CONSEQUENTIAL DAMAGES IRRESPECTIVE OF WHETHER BLACKMAGIC DESIGN OR THE VENDOR HAS ADVANCE NOTICE OF THE POSSIBILITY OF SUCH DAMAGES. BLACKMAGIC DESIGN IS NOT LIABLE FOR ANY ILLEGAL USE OF EQUIPMENT BY CUSTOMER. BLACKMAGIC IS NOT LIABLE FOR ANY DAMAGES RESULTING FROM USE OF THIS PRODUCT. USER OPERATES THIS PRODUCT AT OWN RISK. © Copyright 2012 Blackmagic Design. All rights reserved. ‘Blackmagic Design’, ‘DeckLink’, ‘HDLink’, ‘Workgroup Videohub’, ‘Multibridge Pro’, ‘Multibridge Extreme’, ‘Intensity’ and ‘Leading the creative video revolution’ are registered trademarks in the US and other countries. All other company and product names may be trade marks of their respective companies with which they are associated.