1
Edit Departments
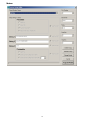
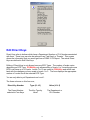
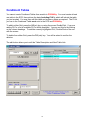
This Form allows editing of the Department Data. This data is global, which means it is
common to all ECR's configured in POSUtility. The data can be retrieved from an ECR or
entered using this form. Obviously, if you retrieve the data from an ECR it will overwrite
the data currently held in the database. Also be aware that if you have an ECR configured
for a 16 Alpha description for the Department Name and you send it to and call it back
from an ECR configured for an 8 Alpha Description, then your database will now have the
descriptions truncated to 8 Alphas! Please be careful. Department Data can then be
maintained using this forms options of Add, Edit and Delete.
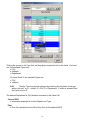
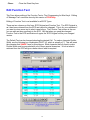
The data is displayed as a list on the left side of the form, with the current record being
shown in detail on the right side. To move through the database, the Data Control at the
bottom can be used or the Up/Down Arrow keys and the PgUp/PgDn keys. If these keys
don't work, use the mouse to Click on the list or Data Control as either of these must have
the focus for this to work. The Data Control also has buttons for First/Last record,
Bookmarks and Find.
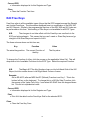
Buttons:
Add
• Add Departments to the database. Code, Description and Group must contain
data. If you try to leave any of these blank or enter a duplicate Code POSUtility will
advise you. The Group can be between 1 and 17. Group 10 is a 'minus'
Department and groups 11 to 17 are only available if the ECR is configured
appropriately. The Add button will change to an Ok button to accept the entered
data, which can be done by either pressing Enter or clicking the Ok with the mouse.
Another record can then be added by simply pressing Enter or clicking Add.
Pressing Cancel of the ESC buttons will cancel the Add. Other data fields that are
left blank will be defaulted to 0.
Edit
• Edit the selected Department. Everything except the Code can be edited using this
button. The only way to change a Code is to Delete the Department. The Edit
button will change to an Ok button to accept the changes, which can be done by
either pressing Enter or clicking the Ok with the mouse. To edit the next record,
simply press Enter or click on Edit. To assist with editing, the cursor will go to the
Price field first as this is usually the most changed information. Pressing Cancel of
the ESC buttons will cancel the Editing.
Delete
• Delete the selected Department. You will be asked to confirm the deletion as well
as not being able to Delete a Department that is being used by a Product.
Cancel
• Cancel the current operation. Pressing the ESC button has the same effect.
Close
25