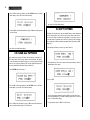
1
YAMAHA
AUTHORIZED
PRODUCT MANUAL
DIGITAL RHYTHM PROGRAMMER
YAMAHA
DIGITAL RHYTHM PROGRAMMER
OWNER’S MANUAL
FCC INFORMATION (USA)
While the following statements are provided to comply with FCC Regulations in the United States,
the corrective measures listed below are applicable worldwide.
This series of Yamaha professional music equipment uses frequencies that appear in the radio
frequency range and if installed in the immediate proximity of some types of audio or video devices
(within three meters), interference may occur. This series of Yamaha combo equipment have been
type tested and found to comply with the specifications set for a class 8 computing device
in accordance with those specifications listed in subpart J of part 15 of the FCC rules. These rules
are designed to provide a reasonable measure of protection against such interference. However,
this does not guarantee that interference will not occur. If your professional music equipment
should be suspected of causing interference with other electronic devices, verification can be
made by turning your combo equipment off and on. If the interference continues when
your equipment is off, the equipment is not the source of interference. If your equipment does
appear to be the source of the interference, you should try to correct the situation by using one or
more of the following measures:
Relocate either the equipment or the electronic device that is being affected by the interference.
Utilize power outlets for the professional music equipment and the device being affected that are
on different branch (circuit breaker or fuse) circuits, or install AC line filters.
In the case of radio or TV interference, relocate the antenna or, if the antenna lead-in is 300 ohm
ribbon lead, change the lead-in the co-axial type cable.
If these corrective measures do not produce satisfactory results, please contact your authorized
Yamaha professional products dealer for suggestions and/or corrective measures.
If you cannot locate a franchised Yamaha professional products dealer in your general area
contact the professional products Service Department, Yamaha International, 6600 Orangethorpe
Ave., Buena Park, CA 90620, U.S.A.
If for any reason, you should need additional information relating to radio or TV interference,
you may find a booklet prepared by the Federal Communications Commission helpful:
“How to Identify and Resolve Radio-TV Interference Problems”. This booklet is available from
the U.S. Government Printing Office, Washington D.C. 20402 – Stock No. 004-000-00345-4.
Congratulations on your purchase of a Yamaha RX17 Digital Rhythm
Programmer! Your RX17 has been developed through over a century of
Yamaha research and design, and features advanced microcomputer control
plus high-quality digital percussion sounds, virtually indistinguishable from live
instruments. We suggest you read this manual carefully while operating the
RX17. All operations, “Modes”, “Functions” and “Jobs” are numbered for rapid
reference. Also, all descriptions of actual operations are surrounded by a
border, making them easy to locate. Here’s a chapter-by-chapter guide to this
manual.
CONTROL PANEL. Illustration of the RX17’s control panel, to which you can
refer at any time.
REAR PANEL/CONNECTIONS. Shows the functions of all connectors on the
RX17’s rear panel, and the type of equipment to which it can be connected.
PRECAUTIONS. It is highly recommended that you read this section. It will
ensure that you are using your RX17 under optimum conditions.
BASIC OPERATIONS. This chapter shows how to set up your RX17 and play
its “instruments”, adjust their level, pan positions and accent levels, and set
tempo.
PATTERN MODE. In the Pattern Mode you can write (record) and play rhythm
patterns. Patterns are phrases or groups of drum beats which, when played,
form a continuous rhythm accompaniment. You can also clear (erase) Patterns,
copy Patterns, and check the remaining Pattern memory.
SONG MODE. A Song is a number of Patterns placed in sequence to form a
rhythm accompaniment for a song or piece of music. You can clear (erase)
Songs, copy Songs, and check the remaining Song memory. You can set the
initial tempo of a Song, and also enter tempo changes, volume changes and
repeats.
CASSETTE MODE. The RX17 lets you “save” all Patterns and Songs onto
normal cassette tape, in the form of digital data. This data can be loaded (fed
back into the RX17) at any time. You can also “Verify” that data has been
correctly saved. In this way, you can save an unlimited number of Patterns
and Songs onto cassette, and build up a library of rhythm data.
MIDI MODE. The RX17 is fully compatible with MIDI (Musical Instrument Digital
Interface)-the technology that allows rhythm programmers, synthesizers
and sequence recorders to control each other by means of simple cable
connections. This Mode lets you select how the RX17 can control or be
controlled by other MIDI equipment, or even by a “Tape Sync” signal recorded
on tape.
HINTS AND TIPS. A chapter which you'll find useful once you’re familiar with
the operations of your RX17. This chapter provides you with performance notes
and a variety of tips on how you can creatively use the full potential of your
RX17. It will broaden your knowledge of the operations described in the MODE
chapters.
ERROR MESSAGES. If you see an error message on the LCD (Liquid Crystal
Display) of your RX17, refer to this chapter. You’ll find out whether an operation
has been executed incorrectly, or whether there is a technical malfunction.
The SPECIFICATIONS and BLOCK DIAGRAM are followed by the MIDI
IMPLEMENTATION CHART, for musicians who need specific information about
the MIDI technology utilized in the RX17. You can, however, fully operate the
RX17 with little or no technical know-how.
The PATTERN CHART and SONG CHART enable you to keep an accurate
written record of the rhythm programs you have created on your RX17. Photocopy these charts to provide enough for all your Patterns and Songs.
The QUICK GUIDE is a reference index which lets you easily locate any
particular operation on the RX17 – useful in those moments when you’re in a
hurry and can’t remember where in this manual an operation is described.
And now-it’s all up to you. Enjoy your Yamaha RX17 Digital Rhythm
Programmer!
4.0 CASSETTE MODE
INTRODUCTION – HOW TO USE THIS MANUAL
23
2
4.1 SAVE
4.2 LOAD
4.3 VERIFY
23
24
24
PRECAUTIONS
3
5.0 MIDI MODE
25
1.0 BASIC OPERATIONS
4
5.1
5.2
5.3
5.4
5.5
5.6
5.7
5.8
25
25
26
26
26
27
27
28
CONTROL PANEL
1
REAR PANEL/CONNECTIONS
1.1
1.2
1.3
1.4
1.5
1.6
1.7
SETTING UP
PLAYING THE RX17'S INSTRUMENTS
INSTRUMENT CHANGE
LEVEL
ACCENTS
PAN
TEMPO
4
4
4
5
6
6
6
SYNC
MIDI CHANNEL MESSAGE
SET RECEIVE CHANNEL
TRANSMIT CHANNEL ASSIGN
MIDI NOTE ASSIGN
RECEIVE BULK
TRANSMIT BULK
ECHO BACK
6.0 HINTS AND TIPS
2.0 PATTERN MODE
2.1
2.2
2.3
2.4
2.5
2.6
2.7
SELECT PATTERN
REAL TIME WRITE
STEP WRITE
CLEAR PATTERN
CLEAR ALL PATTERNS
COPY PATTERN
SHOW REMAINING MEMORY
3.0 SONG MODE
3.1
3.2
3.3
3.4
3.5
3.6
SELECT SONG
EDIT SONG
CLEAR SONG
CLEAR ALL SONGS
COPY SONG
SHOW REMAINING MEMORY
29
7
7
8
9
11
12
12
13
6.1
6.2
6.3
6.4
6.5
THE INSTRUMENTS
PATTERN OPERATIONS
SONG OPERATIONS
CASSETTE OPERATIONS
MIDI OPERATIONS
29
29
30
30
30
ERROR MESSAGES
34
SPECIFICATIONS
35
BLOCK DIAGRAM
36
MIDI IMPLEMENTATION CHART
37
PATTERN CHART
38
SONG CHART
39
QUICK GUIDE
40
14
14
15
20
21
21
22
11
1. MASTER VOLUME slider control.
5. CASSETTE MODE key.
2. TEMPO slider control.
6 . MIDI MODE key.
10.
3. PATTERN MODE key.
7. JOB key.
11. STOP/CONTINUE key.
4. SONG MODE key.
8. Numeric Key Pad.
12. START key.
9. –1/NO and +1/YES keys.
keys.
13. INSTRUMENT keys.
14. ACCENT key.
15. LCD (Liquid Crystal Display).
2
3
Avoid placing the RX17 in locations exposed to direct sunlight or high temperatures,
excessively high or low humidity, high dust concentration, or vibration.
Be sure to connect the RX17 to an AC power supply that meets the power supply
specifications listed on the accompanying PA-1 12-volt AC convertor.
If there is any possibility of an electrical storm occurring nearby, remove the power
plug from the wall socket in advance.
Be sure to make all connections properly, as shown in the REAR PANEL/CONNECTIONS
section.
To avoid damaging your speakers and other playback equipment, turn off the power
of all related equipment before making connections.
Do not use excessive force in handling control switches and knobs.
To avoid broken cords and short circuits, be sure to unplug all connectors by
grasping the respective plugs-NOT the cords.
Remove the power plug from the AC wall socket if the unit is not to be used for an
extended period of time.
Remove all plugs and connections if the unit is to be moved, to prevent damage to
the cords and jacks.
Do not use solvents such as benzene or paint thinner to clean the unit. Do not use
insecticides or other pressurized spray products in proximity to the unit. Wipe off the
exterior with a soft cloth.
EFFECTS ON OTHER ELECTRONIC EQUIPMENT
Since this unit incorporates digital circuitry, simultaneous use of other equipment such as
TVs, radios, etc. in close proximity to the RX17 may cause noise and erroneous operation.
If this occurs, move the RX17 away from the affected units to eliminate the problem. It is
also a good idea to use separate line filters on each piece of equipment.
BACKUP BATTERY
The RX17 has a special lithium backup battery system to preserve data even when the
power is turned off. This battery has a life of approximately 5 years. When the battery voltage
is low, one of two special messages will appear on the RX17’s LCD (see the ERROR
MESSAGES chapter near the end of this manual). This means that you should have the
battery replaced. Do not attempt to replace the battery yourself. Refer this job to your
Yamaha dealer.
NOTE: When the battery is replaced, all Pattern and Song data in the RX17 will be lost. Be
sure to save this data to tape or floppy disk before having the battery replaced.
4
1.1 SETTING UP
1. Connect the PA-1 AC convertor to the RX17 first, then to the AC power supply.
2. To hear the RX17, do one of the following:
A. Connect stereo headphones to the PHONES connector.
B. Connect the L(MONO) output to an amplifier, for mono playback.
C. Connect the R and L(MONO) outputs to a stereo amplifier or mixer, for stereo
playback.
3. Turn the RX17 power ON.
NOTE: A brief output pulse appears at the RX17 outputs when the power is initially
turned on. To prevent this from possibly damaging your speaker system, make sure the
master volume control of your amplifier or mixer is set to minimum before the RX17 is
turned ON. Better yet, turn the RX17 on first, then your sound system.
MIDI and cassette connections will be described later, in the appropriate chapters.
1.2 PLAYING THE RX17 INSTRUMENTS
The RX17 instruments can be played by tapping on the black instrument keys. While
playing, adjust the MASTER VOLUME slider until you can hear the RX17’s instruments
at a comfortable listening level. The sounds you will hear will normally correspond to the
instrument names written on the UPPER part of the instrument keys. You can easily
change instruments on the RX17, as described in the next section.
You can change all instruments, or individual instruments, between the UPPER and
LOWER instruments.
NOTE 1: Instrument Change operations can be carried out at any time except during a
cassette operation or MIDI Bulk Dump (operations 5.6 and 5.7).
NOTE 2: The Instrument Change operation will NOT change instruments already
programmed in a Pattern or Song.
The following pairs of instruments can NOT be played together, because they reproduce
the sound of two different ways of playing the same instrument.
CONGA Hm / CONGA Ho
CUICA H / CUICA L
SD / RIM SHOT
HH OPEN / HH CLOSED
This also applies when writing Patterns. For example, if in the Step Write mode you enter
a SD note, then enter a RIM SHOT note on the same beat, the SD note will be erased.
1.3.1 ALL INSTRUMENT CHANGE
1. Press INST CHANGE
1.3 INSTRUMENT CHANGE
Each key on the RX17 features 2 instrument sounds. These are listed in the following
chart. The RX17 has a total of 26 highly realistic voices, providing powerful drum sounds
plus exciting Latin percussion sounds.
2. Use the
or
key to select UPPER or LOWER. The flashing cursor will move to
the selected set.
3. Press +1/YES to make the change. The LCD will briefly show
INSTRUMENT CHART
LOWER SET
UPPER SET
BD
SD
TOM1
TOM2
TOM3
HH OPEN
HH CLOSED
RIDE
CRASH
COWBEL
CLAPS
TIMBALE H
TIMBALE L
Bass Drum
Snare Drum
High Tom-tom
Medium Tom-tom
Low Tom-tom
Hi-hat (open)
Hi-hat (closed)
Ride cymbal
Crash cymbal
Cowbell
Claps
High Timbale
Low Timbale
TMBRN
RIM SHOT
CONGA Hm
CONGA Ho
CONGA L
BONGO H
BONGO L
AGOGO H
AGOGO L
WHISTLE
SHAKER
CUICA H
CUICA L
Tambourine
Snare Drum rim shot
High Conga (muted)
High Conga (open)
Low Conga
High Bongo
Low Bongo
High Agogo
Low Agogo
Whistle
Shaker
High Cuica
Low Cuica
then return to the display shown before pressing INST CHANGE.
5
1.3.2 SINGLE lNSTRUMENT CHANGE
1.4.1 CLICK LEVEL
1. Press INST CHANGE
1. Press LEVEL
2. Press the key corresponding to the instrument you wish to change.
2. Use the –1 NO key to reduce the Click level, or the +1 YES key to increase the
Click level. RANGE: 0 (OFF)–31.
3. Press LEVEL again to return to the mode the RX17 was in before the Click Level
operation.
1.4.2 INSTRUMENT LEVEL
3. Press the same instrument key again to change the instrument.
1. Press LEVEL
4. Press INST CHANGE again to return to the mode the RX17 was in before the
Instrument Change operation.
2. Press the instrument key corresponding to the instrument whose level you wish to
change.
1.4 LEVEL
The MASTER VOLUME slider controls the overall level of the RX17. There are, however,
three other level operations possible.
l
l
l
CLICK LEVEL lets you change the level of the click signal that you will hear as a
timing guide when writing a Pattern in Real Time.
INSTRUMENT LEVEL lets you change the level of individual instruments.
ACCENT LEVEL lets you change the Accent level of individual instruments (refer to
section 1.5 for an explanation of Accents).
NOTE 1: These operations can be carried out at any time except during a cassette
operation or MIDI Bulk (operations 5.6 and 5.7).
NOTE 2: The –1 NO and +1 YES keys are used for level change, as well as many
other operations. Pressing and releasing these keys causes a change of one unit.
Holding them down causes a rapid and continuous change.
3. Use the –1 NO or +1 YES key to change the Instrument level. RANGE: 0 (OFF)– 31.
4. Press LEVEL again to return to the mode the RX17 was in before the Instrument
Level operation.
1.4.3 ACCENT LEVEL
1. Press LEVEL
6
2. Press and hold the green ACCENT key and then press the instrument key corresponding
to the instrument whose Accent level you wish to change.
1.6.1 INSTRUMENT PAN
1. Press PAN
3. Use the –1 NO or +1 YES key to change the Accent level. RANGE: ±31.
4. Press LEVEL again to return to the mode the RX17 was in before the Accent Level
operation.
NOTE: If you have set a plus Accent level and an exclamation mark appears on the
LCD (as in the above example) it means that the combined Accent level plus Instrument
level is above 31 (the maximum possible Instrument Level). In this case, the Accent will
not have as much effect as you intended. For example, if the level of a voice is 24, the
maximum possible Accent level is 31 minus 24 = 7, so an Accent level of, say +10 is
impossible.
If you have set a minus Accent level and the exclamation mark appears, it means that
the combined Accent Level plus Instrument level is zero or less, and the voice will not
sound when accented.
2. Press the instrument key corresponding to the instrument that is to have its Pan
position set. On the LCD the cursor will flash at the current pan position.
3 . Use the –1 NO or +1 YES key to change the Pan position. The cursor will move to
the new position.
4. Press PAN again to return to the mode the RX17 was in before the Pan operation.
1.7 TEMPO
1.5 ACCENTS
Pressing any instrument key while holding the green ACCENT key causes that instrument
to sound at its accented level. This applies whether the RX17 is being played in real
time, or programmed in either the Real Time Write or Step Write Modes. Accents allow
you to add natural dynamics to your drum patterns. You can even enter negative Accent
values, which will reduce the level of the instrument. See 1.4.3 ACCENT LEVEL.
1.6 PAN
If you are using both the RX17’s stereo outputs, you will find that the instruments are
heard at different positions in the stereo sound image. You can easily alter the stereo
position of individual instruments.
The playback and writing speed of Patterns and the playback speed of Songs can be
varied at any time by moving the TEMPO slider. You can also display the Tempo on the
LCD, for precise Tempo setting.
NOTE: This operation can be carried out at any time except during a cassette operation,
during Initial Tempo setting (operation 3.2.7) or during MIDI Bulk (operations 5.6 and
5.7).
1.7.1 TEMPO
1. Press TEMPO
NOTE 1: This operation can be carried out at any time except during a cassette
operation or MIDI Bulk (operations 5.6 and 5.7).
NOTE 2: 15 Pan positions are possible, from Left to Right. These correspond to positions
1/15 thru 15/1 on an RX15 Digital Rhythm programmer.
2. Use the –1 NO or +1 YES key, or the TEMPO slider, to change the Tempo. RANGE:
40–250 quarter-notes per minute.
NOTE: The TEMPO slider allows you to change the tempo in increments of 3 units in
the range 40–166, and in increments of 4 units in the range 166–250. The –1 NO
and +1 YES keys should be used for exact tempo setting.
3. Press TEMPO again to return to the mode the RX17 was in before the Tempo operation.
7
On the RX17, a “Pattern” means a one bar sequence, which repeats when you play it
back. You “write” (enter) each note of a Pattern, by pressing the instrument keys. Pattern
Writing can be done in two ways: Real Time (see 2.2) or Step Write (see 2.3). The
Quantize feature allows you to set the “fineness” of Pattern Writing, i.e., the shortest
notes that may be written (see 6.2.2. and 6.2.3 for a full explanation of Quantize). The
RX17 lets you create up to 100 Patterns, numbered 00 thru 99.
You will see a “w” in the right upper corner of the LCD if the Pattern already contains
data (“w” stands for “written”). This makes it easy for you to select an empty Pattern,
should you wish to write a new Pattern.
In the Pattern Select Mode, there are two methods of selecting Patterns.
2.0.1 ENTERING THE PATTERN MODE
This is a convenient way of selecting an adjacent or nearby Pattern.
Pressing the –1/NO key selects the Pattern number immediately BELOW the current
Pattern number.
Pressing the +1/YES key selects the Pattern number immediately ABOVE the current
Pattern number.
Each of these keys when held down causes a continuous and rapid Pattern number
change.
When you turn on the RX17, the Patterns Mode’s first Function (Select Pattern) is
automatically selected. Once you have selected a Pattern, you can play it, or use other
Functions to edit its Accent Levels, or to copy, clear (erase) or write on it (to enter
additional notes). If you’ve selected an empty Pattern, you can then begin writing a new
Pattern.
If the RX17 is in another Mode, press PATTERN to enter the Pattern Mode. The LCD
will show
–1 NO and +1 YES keys
NUMERIC KEY PAD
This is a more convenient way of selecting a Pattern in a distant number range.
Use the Numeric Key Pad to enter a two-digit Pattern number. Pattern numbers below
10 must be preceded by a zero. For example, for Pattern 5, enter “0” then “5”.
The Function numbers (1 thru 7) allow you to select the Pattern Mode’s seven main
Functions. This is done by using the or keys to move the cursor to the appropriate
Function number. The LCD will then display the selected function. You can also move
the cursor by holding JOB and pressing the Numeric Key corresponding to the Function
number. If you press only JOB, the cursor will move to Function 1.
To exit the Pattern Mode, press any other Mode key.
NOTE: The RX17 contains a variety of factory-preset Patterns in Pattern locations 50
thru 99. We suggest that you listen to all of them–you will find many of them immediately
usable, while others can be edited to create your own Patterns. These Patterns are listed
and fully described in the accompanying RX17 PATTERN BOOK. See 2.1.2 LOADING
THE PRESET PATTERNS for a description of how to recall the preset Patterns.
2.1.1 PATTERN PLAY
The Pattern Play function will repeatedly play the selected Pattern until you stop play.
Pattern Mode Functions are numbered 2.1 thru 2.7 in this chapter.
1. After selecting a Pattern, press START
2.1 SELECT PATTERN
1. Press PATTERN The flashing cursor will indicate Function 1.
New Patterns can be selected during play, using either of the two methods described
in 2.1 SELECT PATTERN (except that holding down the –1 NO and +1 YES keys will
NOT produce continuous Pattern number change. The asterisks will be replaced by the
new Pattern number, and the newly selected Pattern will begin playing immediately after
the last beat of the previous Pattern.
8
2. To stop play, press STOP/CONTINUE.
2.2 REAL TIME WRITE
This is the first of two ways of writing Patterns on the RX17. It lets you “play” a Pattern
on the instrument keys, while listening to a click guide. You can add instruments and
rhythms until the Pattern is complete. The advantage of this method is that you can
actually hear the Pattern being built up as you write it, as opposed to Step Write, where
a Pattern is built up without hearing it.
3. To restart play, press START to play from the beginning of the Pattern, or STOP/
CONTINUE to play from the point at which play was stopped.
During Pattern play, you can change the Tempo using the TEMPO slider, or using
operation 1.7.1.
2.1.2 LOADING THE PRESET PATTERNS
NOTE: This operation also loads the RX17’s preset Songs into Song locations 0–3.
The preset Patterns in Pattern locations 50–99 are there to be played, edited, copied
or cleared as you wish. However, they are permanently stored in the RX17, and can be
re-loaded into the Pattern locations at any time.
BEFORE turning the RX17’s power on, hold down the +1 YES key and the STOP/
CONTINUE key. Keep holding these keys while turning the power on.
The preset Patterns will now be loaded into Pattern locations 50–99.
NOTE: All previous data in Patterns 50-99 will be erased. If this data is important,
save it to tape (operation 4.1) BEFORE executing the Load Preset Patterns operation.
2.1.3 USING THE PATTERN CHART
Near the end of this manual you will find a Pattern Chart. You can copy this chart and
use the copies to keep an absolutely accurate written record of Patterns that you have
created on your RX17. This chart accommodates the data of a 4/4 Pattern written at the
maximum Quantize setting of 1/48. Longer Patterns may be recorded by using two
Pattern Charts. Enter data as follows:
Enter Note Markers (solid dots) at the intersections of the lines.
Indicate accented notes using a circle.
If you have used the Accent Edit function to alter the Accent Level of any notes, write
the new Accent Level next to the Note Markers for those notes.
Enter the Level, Accent Level and Quantize setting of each instrument.
Enter the Pan setting of each instrument, using a number from 1 – 15. 1 means Left;
15 means Right; 8 means Center. Other positions are numbered corresponding to
the mark at which the cursor is set on the LCD Pan display.
NOTE: You can also execute Real Time writing of Patterns using an external MIDI
keyboard to “play” the RX17’s instruments. This is highly convenient because all 26
RX17 instruments can be assigned to a keyboard (compared to using the RX17’s
instrument keys, with a maximum of 13 instruments available at anyone time). Another
advantage is that the RX17 will accept MIDI Key Velocity data, so that the harder you
play a key on your MIDI synthesizer, the louder the RX17’s note will be. See 6.5.3 MIDI
NOTE RECEIVE for an explanation of the settings required for this MIDI application.
2.2.1 ENTERING REAL TIME WRITE
1. After selecting a Pattern, select Function 2.
2. Press +1 YES to enter Real Time Write. The LCD will show the Pattern LENGTH display.
NOTE: If you decide you do NOT want to enter Real Time Write, press PATTERN to
return to Select Pattern.
2.2.2 SETTING PATTERN LENGTH
Providing you have selected an empty Pattern, you can now set the time signature
(length) of your Pattern. Pattern Lengths are displayed in 16th notes. For example, 16/16
(the default Pattern Length displayed when you call an empty Pattern) is equivalent to
a bar of 4/4 time (4 quarter-notes per bar); 12/16 indicates a bar of 3/4 time, and so on.
Use the –1 NO and +1 YES keys to set the time signature. RANGE: 1/16–32/16.
9
2.2.3 SETTING QUANTIZE
Quantize when used in Real Time Write is an automatic timing correction device. Any
notes you play that do not fall exactly on the beat are moved to the nearest beat. For
example, if you set Quantize to 1/16, all notes played will be moved to the nearest
16th note. This is a convenient way of creating timing-perfect Patterns. Quantize is
set as follows:
1. After setting the Pattern Length, press
to move the cursor to “2”.
4. If you want to play the Pattern, press PATTERN after pressing STOP/CONTINUE.
The LCD will return to the Select Pattern display. You can now play your Pattern by
pressing START. You can then, if you wish, re-enter Real Time Write, to add or delete
notes in the Pattern.
2.2.5 DELETING NOTES
During Pattern writing, a note can be deleted (cleared) by holding the BEAT CLEAR
key, and tapping the appropriate instrument key when you hear the selected note. The
next time the Pattern recycles, you will not hear the selected note.
2.2.6 DELETING INSTRUMENTS
Entire instrument parts can be deleted (erased) from a Pattern, by entering Step Write
and using operation 2.3.7.
2. Use the –1 NO and +1 YES keys to set the Quantize. You can step forwards or
backwards through the range of Quantize settings: 1/8, 1/16, 1/32, 1/12, 1/24, 1/48.
NOTE: You can call the Quantize function while writing a Pattern (see 2.2.4 ENTERING
NOTES) as follows.
1. Press STOP/CONTINUE
2. Select Job 2. Set the Quantize using the +1 YES or –1 NO keys.
3. Press START to return to Real Time Write and continue entering notes.
2.2.4 ENTERING NOTES
1. Once the Pattern Length and Quantize have been set, press START to commence
writing. You’ll hear a Click track (a rhythm guide) indicating quarter-notes, with an
Accent on the first beat of each bar.
2.2.7 ACCENT EDIT
After writing a Pattern, you can alter the level of any note in the Pattern, by entering Step
Write and using operation 2.3.8.
2.3 STEP WRITE
This is the second way to write Patterns on the RX17. It lets you create a Pattern, using
the instrument keys to enter notes one at a time, until the Pattern is complete. This is an
ideal way for creating perfectly-timed Patterns, especially if reading from a score. It also
allows you to create Patterns that are too complex or fast to be played in Real Time.
During Step Write, the notes you enter are clearly shown on the LCD in the form of a
Dot Display, described in 2.3.4 ENTERING NOTES.
2.3.1 ENTERING STEP WRITE
1. After selecting a Pattern, select Function 3.
2. You can now enter notes by tapping the instrument keys. As soon as you enter the
first note, a “w” will appear next to the Pattern number on the LCD, indicating that
data has been “written” into the Pattern. You can enter accented notes by holding
the green ACCENT key while you tap an instrument key.
The RX17 will continue cycling through the Pattern. repeating everything that you
have entered. You can add more notes until the Pattern is complete.
3. Once you’ve written a Pattern, press STOP. The LCD will return to the Pattern
Length or Quantize display (according to which of these two operations was the last
one executed prior to Pattern writing). This enables you to change the Quantize
setting (see operation 2.2.3) if desired. You could then continue writing the Pattern
by pressing START again.
2. Press +1 YES to enter Step Write. The LCD will show the Pattern LENGTH display.
NOTE 1: If you decide you do NOT want to enter Step Write, press PATTERN to return
to Select Pattern.
NOTE 2: If you selected a Pattern that already contains data, step 2 of this operation
will call up the Step Write Dot Display, described in 2.3.4 ENTERING NOTES.
10
2.3.2 SETTING PATTERN LENGTH
2A. Enter a note by tapping the HH CLOSED key. An accented note can be entered
by holding down the green ACCENT key while pressing HH CLOSED. The note
will be shown in the form of a Note Marker. The cursor will move to the next beat.
See operation 2.2.2.
2.3.3 SETTING QUANTIZE
In the Step Write mode, Quantize allows you to set the minimum note length that can
be entered. For example, if you set Quantize to 1/16, the shortest note that can be
entered is a 16th note (16 notes in a bar of 4/4). Quantize is set as follows:
1. After setting the Pattern Length, press
to move the cursor to “2”.
2B. You can move the cursor to the next beat by pressing +1 YES. This also enters a
rest in the Pattern.
In either case the beat will advance one count, and you can enter the next Hi-Hat
Closed note. This process continues up to the last beat of the Pattern. When you
reach the last beat, further pressings of HH CLOSED or +1 YES will not move the
cursor, but will cause an “> End <” message to flash on the LCD.
2. Use the –1 NO and +1 YES keys to set the Quantize. You can step forwards or
backwards through the range of Quantize settings: 1/08, 1/16, 1/32, 1/12,
1/24, 1/48.
NOTE: You can call the Quantize function from the Dot Display (see 2.3.4 ENTERING
NOTES) as follows.
1. Press JOB.
2. Set Quantize as previously described.
3. Press START to return to the Dot Display and continue entering notes.
2.3.4 ENTERING NOTES
1. Once the Pattern Length and Quantize have been set, press START to commence
writing. The LCD will show the Dot Display. The initial Dot Display will be the one
corresponding to Hi Hat Closed.
If you have entered a note on the last beat, the LCD will show the Accent Level of
that note (this will be zero if you did not enter an accent). This allows you to edit
(change) the Accent Level, and hence the level of this note. See 2.3.8 ACCENT EDIT.
3. To select another instrument at any time, press the appropriate instrument key. That
instrument’s Dot Display will appear, with the cursor at the same position as the
previous Dot Display. No note will be entered until the second time you press the
instrument key. You can enter the second instrument’s part, then select another
instrument simply by pressing its key, and build up your Pattern. Notes from up
to 11 instruments can be entered on the same beat.
4. Once you’ve written a Pattern, press STOP/CONTINUE. The LCD will return to the
Select Pattern display. You can now play your Pattern by pressing START. You can
then, if you wish, re-enter Step Write, to add or delete notes in the Pattern.
2.3.5 STEPPING THROUGH A PATTERN
During Step Write, you can step through a Pattern forwards or backwards by using +1
YES or –1 NO respectively. As you pass each beat you will hear the instrument(s)
entered at that beat. You can also step through rapidly by holding down either key.
When you reach the end of a Pattern, an “> End <" message will flash on the LCD.
When you return to the beginning of a Pattern, a “> Top <” message will flash on the LCD.
This display shows 4 quarter-notes to the bar, indicated by the vertical pairs of small
dots. The Quantize indicates 16 beats to the bar, each beat indicated by a horizontal
dash. The flashing cursor prompts you to input a note or rest on the first beat of bar
1. You can now choose either of the following options (2A or 2B):
NOTE: The –1 NO key, does NOT enter any data. It is ONLY for stepping backwards
through the Pattern.
11
You can edit (alter) the Accent Level of the note at which the cursor is flashing. This in
effect allows you alter the level of each note, to add expressive dynamics to your
Patterns.
2.3.6 DELETING NOTES
Notes can be deleted (erased) by stepping through a Dot Display until you locate the
erroneous note, then holding the BEAT CLEAR key, and tapping the appropriate
instrument key. The Note Marker will disappear, and the cursor will move to the next beat.
Hold down ACCENT and use +1 YES or –1 NO to raise or lower the Accent Level
respectively. RANGE: ±31. See 1.5 ACCENTS for a note about Accent Level limits.
2.3.7 DELETING INSTRUMENTS
2.3.9 DOT DISPLAYS FOR LONG PATTERNS
Entire instrument parts can be deleted (erased) from a Pattern, as follows.
The Dot Display only accomodates 16 beats. Your Pattern may have more beats than
this, depending on its Length, and on the Quantize setting. For example a 6/4 bar
(Length: 24/16) with a Quantize setting of 1/24 will contain 36 beats.
1. From a Dot Display, press JOB Then use
Function 3.
to move the cursor to “3”, to select
In this case, when the cursor reaches the limit of the displayed portion of the Dot Display
(going in either direction) the Dot Display will start to “scroll” (move across the LCD) so
that succeeding portions of the Dot Display will appear, one beat at a time.
2.3.10 DOT DISPLAYS: THE “X” MARKER
2. Press the instrument key corresponding to the instrument you wish to delete. Its name
will appear on the LCD.
3. Press +1 YES to continue this operation. (Or press START to return to the Dot
Display, if you do NOT wish to delete the instrument).
4. Press +1 YES to delete the selected instrument. The LCD will return to the (now
empty) Dot Display of the selected instrument. (Or press –1 NO to cancel this
operation, and return the LCD to the previous display).
2.3.8 ACCENT EDIT
When you step through a Pattern (see operation 2.3) ,a message such “Ac=+08”
appears on the LCD whenever the cursor reaches a Note Marker.
When “X” Markers appear on a Dot Display, they indicate notes that were entered at a
different Quantize setting than the current Quantize setting. In other words, these notes
fall “in between” the beats on the Dot Display.
The Accent Level of these notes will NOT be displayed, and can NOT be edited. If you
wish to edit Accent Levels, change the Quantize setting (see 2.3.3 SETTING QUANTIZE)
to the setting at which the notes were entered.
2.4 CLEAR PATTERN
You can instantly clear (erase) a whole Pattern. This would be done, for example, if the
RX17’s Pattern memory were full and you wanted to write another Pattern.
1. Alter selecting the Pattern you wish to clear, select Function 4.
This indicates that the note was recorded with an Accent Level of +8. An Accent level
of 00 indicates that no Accent was used.
12
2. Press +1 YES to continue this operation. (Or press PATTERN to return to the Select
Pattern display, if you do NOT wish to clear the Pattern).
then return to the Select Pattern display.
3. Press +1 YES to clear the selected Pattern (or press –1 NO to cancel this operation).
The LCD will show
then return to the Select Pattern display.
2.6 COPY PATTERN
The Pattern Copy function lets you copy any selected Pattern to another destination in
the RX17’s Pattern memory. This is useful if you want to copy a Pattern in order to alter
it to create a new Pattern, while retaining the original Pattern. It is also useful if you want
to have the Patterns in a particular order in the RX17’s memory (so that, for example,
you can easily play one Pattern followed by the adjacent Pattern, by pressing +1 YES
during play).
1. After selecting the Pattern you wish to copy, select Function 6.
2.5 CLEAR ALL PATTERNS
You can instantly clear (erase) all 100 Patterns. This would be done, for example, if the
RX17’s Pattern memory were full and you wanted to write more Patterns. Use operation
4.1 to save the Patterns on tape before this operation, if you wish to preserve the Patterns
for later use. You can also save Patterns via MIDI, by using a MIDI data storage device
such as the Yamaha MDF-1 MIDI Data Filer (see operation 5.7).
2. Use the Numeric Key Pad to enter the number of the Pattern destination to which the
selected Pattern will be copied.
1. Press PATTERN and select Function 5.
3. Press +1 YES.
2. Press +1 YES to continue this operation (or press PATTERN to return to the Select
Pattern display, if you do NOT wish to clear all Patterns).
You can now cancel this operation by pressing –1 NO, if you do NOT wish to copy
to the selected destination (if, for example, it already contains data). The LCD will
return to the Select Pattern display.
3. Press +1 YES to clear all Patterns (or press –1 NO to cancel this operation and
return to the Select Pattern display). The LCD will show
4. To copy the Pattern, press +1 YES. The LCD will show
13
then return to the Select Pattern display.
2.7 SHOW REMAINING MEMORY
This function allows you to check the remaining Pattern memory of the RX17, as a
percentage of its total Pattern memory capacity.
Press PATTERN and select Function 7.
14
The function of the Song Mode is to allow you to connect different Patterns in order to
form a drum sequence for an entire song or piece of music. The RX17 lets you create
up to 10 Songs, numbered 0 thru 9. Each Song can contain up to 999 Parts, and the
maximum number of Parts of all 10 Songs combined is 1200. A Part can contain not only
a Pattern, but also a Repeat Command, a Tempo Change or a Volume Change.
–1 NO and +1 YES keys
Pressing the –1 NO key selects the Song number immediately BELOW the current Song
number.
Pressing the +1 YES key selects the Song number immediately ABOVE the current
Song number.
3.0.1 ENTERING THE SONG MODE
All Song operations are preceded by pressing SONG to enter the Song Mode. The LCD
will show
NUMERIC KEY PAD
Use the Numeric Key Pad to enter a Song number.
NOTE: The RX17 contains a variety of factory-programmed Songs in Song locations 0
thru 3. We suggest that you listen to all of them-they will give you a good idea of the
flexibility and musical power of the RX17. You may find these Songs to be immediately
usable, or you can edit them to to create your own Songs. These Songs are listed and
fully described in the accompanying RX17 PATTERN/SONG BOOK. See 2.1.2 LOADING
THE PRESET PATTERNS for a description of how to recall the preset Songs.
3.1.1 SONG PLAY
The Function numbers (1 thru 6) allow you to select the Song Mode’s six main Functions.
This is done by using the or
keys to move the cursor to the appropriate Function
number. The LCD will then display the selected function. You can also move the cursor
by holding JOB and pressing the Numeric Key corresponding to the Function number.
If you press only JOB, the cursor will move to Function 1.
1. After selecting a Song, press START
To exit the Song Mode, press any other Mode key.
Song Mode Functions are numbered 3.1 thru 3.6 in this chapter.
3.1 SELECT SONG
1. Press SONG. The flashing cursor will indicate Function 1.
As the Song plays, Part numbers and Pattern numbers will be displayed. If a Part
contains anything other than a Pattern (i.e., a Volume Change, Tempo Change or
Repeat) it will not be displayed.
2. To stop play, press STOP/CONTINUE.
You will see a “w” in the right upper corner of the LCD if the Song already contains data
(“w” stands for “written”). This makes it easy for you to select an empty Song, when you
wish to write a new Song.
In the Song Select Mode, there are two methods of selecting Songs.
15
3. To restart play, press START to play from the beginning of the Song, or STOP/
CONTINUE, to play from the point at which play was stopped. If you stopped play
during a repeat section, the repeat command will be ignored when you continue play.
If you stopped play in the middle of a Pattern, pressing –1 NO or +1 YES before
pressing the STOP/CONTINUE key will cause play to restart from the beginning of
the previous Pattern, or the beginning of the next Pattern, respectively. You can also
use the -1 NO and +1 YES keys to locate any Part in the Song from which playback
can restart.
While a Song is stopped, you can use the Numeric keys to select another Song,
without having to press the SONG key. The LCD will return to the Song Select display.
During Song play, you can change the Tempo using the TEMPO slider, or using
operation 1.7.1.
3.1.2 USING THE SONG CHART
Holding down a –1 NO or +1 YES key lets you move rapidly through a Song,
backwards or forwards respectively.
You can delete, copy or insert Parts in a Song that has already been edited. You can
set the Initial Tempo of a Song, to automatically play it at the correct Tempo. And you
can use the Search Part operation to automatically locate a selected Part in a Song.
These operations are selected by entering Song Edit, pressing JOB then selecting a
Job number using the and
keys. You can also select Jobs by holding down
JOB and pressing the appropriate Numeric Key. Job numbers are as follows:
JOB 1
JOB 2
JOB 3
JOB 4
JOB 5
SET INITIAL TEMPO
SEARCH PART
COPY PART
DELETE PART
INSERT PART
The Initial Tempo display appears when you press JOB
Near the end of this manual you will find a Song Chart. You can copy this chart and use
the copies to keep an absolutely accurate written record of Songs that you have created
on your RX17. This chart accommodates the data of a Song containing 128 Parts. Longer
Songs may be recorded by using two or more Song Charts. Enter data as follows:
Enter Pattern numbers in the “PTN” column.
If a Part contains data other than a Pattern, write this information in the “Other Data”
column as follows:
Enter the amount of Volume Changes.
Enter the amount and duration of Tempo Changes.
Enter Begin Repeat Signs.
Enter End Repeat signs and the number of Repeats.
3.2 EDIT SONG
The Edit Song function lets you connect Patterns to form a Song. You can also enter
Volume Changes, Tempo Changes and Repeats. Each of these data is entered into a
Part. Songs can contain up to 999 Parts.
If, prior to pressing JOB, you had located the empty Part at the end of the Song, only
Job numbers 1 thru 3 would be displayed, as Jobs 4 and 5 would not be needed (there’s
no data to delete, and no need to insert a Part–you can enter data in the normal way).
At any time, once you’re in Edit Song, you can return to the Song Select display simply
by pressing STOP/CONTINUE, and play your Song or select other functions.
It’s a good idea to keep a written record of a Song, as you edit it. See the SONG
CHART later in this manual.
3.2.1 ENTERING EDIT SONG
1. After selecting a Song, select Function 2.
Briefly, Song editing is done as follows:
1. Enter Song Edit.
2. Enter data in the first Part. Then use the +1 YES key to move to the next Part, and
enter data there. Continue in this way until the Song is complete.
3. Once you have entered all the Parts of your Song, press STOP/CONTINUE to exit
the Edit Song Mode. You can now play your Song, by pressing START.
Here are some important pointers about the Edit Song Function:
You can move backwards through a Song using the –1 NO key. This lets you go
back to check a Part. Any time a Part is displayed, you can change its data using
the Numeric Key Pad.
2. Press +1 YES to enter Edit Song.
16
The LCD shows the first Part of the Song. The asterisks indicate that the Part is empty.
The flashing cursor indicates that you can enter data. The flashing “PTN” indicates that
the type of data you can enter is a Pattern number.
NOTE 1: There are square brackets around “PTN”, as a further reminder that you can
now enter a Pattern. By moving these brackets, you can enter other types of data. Move
the brackets by pressing
The following types of data will be successively bracketed:
II:
:II
accel
(Begin Repeat)
(End Repeat)
(Accelerando, or Tempo increase)
The LCD will then switch to display the following symbols, which will be successively
bracketed, as you press
rit
vol+
vol–
(Ritardando, or Tempo decrease)
(Volume increase)
(Volume decrease)
3.2.3 ENTERlNG REPEATS
Repeats can save a lot of editing time, by making it possible to repeat any Part or group
of Parts up to 99 times. This can be used, for example, when the same rhythm plays
through an entire verse.
Repeats are entered in two operations. The Begin repeat command is entered at the
start of the section which is to be repeated. Then the End Repeat is entered at the end
of the section to be repeated, together with a number indicating the number of times
that the section is to be repeated. Remember that the number of repeats should be ONE
LESS than the total number of plays of the selected section. Each repeat command
counts as a Part.
In this example, Parts 3 and 4 are repeated twice, making a total of three plays of those
Parts.
These are the six types of data that can be entered in Song Edit. Before entering the
actual data in an empty Part, you can use the and keys to move the brackets to the
data you want. You can then use the Numeric Key Pad to enter the data value.
NOTE 2: If, after step 1 of this operation, you decide you do NOT want to enter Edit Song,
press SONG or STOP/CONTINUE to return to Select Song.
NOTE 3: If you selected a Song that already contains data, the LCD will show the data
contained in Part 001. You can enter new data in this Part, provided it’s the same type
of data (Pattern, Repeat, etc.). If you want to enter a different type of data, you’ll need to
delete the Part (operation 3.2.9) and insert a new Part (operation 3.2.10). For now (and
for operations 3.2.2 thru 3.2.5) we’ll assume that you’ve selected an empty Song.
3.2.2 ENTERING PATTERNS
1. After selecting an empty Song and entering Edit Song, you can immediately enter a
Pattern number in Part 001, using the Numeric Keys.
ACTUAL PLAYING SEQUENCE
You can enter any number of repeats in a Song. You can also “nest” repeat commands,
so that a short repeat section can occur within a larger repeat section. This would be
done, for example, if a whole verse were to be repeated (repeat commands at start and
end of the verse) AND a short section within the verse were to be repeated (repeat
commands at start and end of short section in the verse). You can actually enter up to
48 “nests” of repeats, one inside another.
1. After selecting a Song and entering Edit Song, press to move the brackets to the
II: symbol (this is standard musical notation for a Begin Repeat sign). The repeat sign
will also appear in the upper part of the LCD.
2. Press +1 YES to move to the next Part, and enter data there.
17
2. Press +1 YES to enter a begin Repeat command. The LCD will automatically move
to the next Part. Continue editing (entering Patterns and other data) and when you
reach the point at which an End repeat command is needed (for example, Part 5)
use the
key to select :ll, the symbol for an End repeat command.
1. After selecting a Song and entering Edit Song, press
“accel”.
to move the brackets to
2. The cursor will be flashing at the Tempo Change value. Use the Numeric Key Pad
to set this value. RANGE: 0–99 quarter-notes/minute.
The LCD will display “01”–the default number of repeats. If only one repeat is
needed, you can now press +1 YES to continue editing the Song.
4. To enter a different number of repeats, use the Numeric Key Pad, entering a two-digit
number (for example, 02). Range: 01–99.
NOTE: The Tempo Change function can NOT alter the tempo beyond the RX17’s tempo
range (40–250 quarter-notes/minute).
3. Press +1 YES to move the cursor to the Tempo Change duration position, and use
the Numeric Key Pad to enter the Tempo Change duration. Range: 0–99 quarternotes.
You can use the –1 NO and +1 YES keys to move the cursor back and forth,
to reset the two Tempo Change parameters, as needed.
4. The Tempo Change is now set, and you can press +1 YES to move on to the next
Part and continue editing, or press SONG or STOP/CONTINUE to exit Edit Song.
You can now continue editing by pressing +1 YES, or press SONG or STOP/
CONTINUE to exit Edit Song.
Repeats are often entered AFTER all the Pattern numbers have been entered for a
Song. See 3.2.10 INSERT PART for how to insert data into a Song. Remember that a
Repeat will create a new Part, and move all subsequent Parts forward.
Tempo Changes are often entered AFTER all the Pattern numbers have been entered
for a Song. See 3.2.10 INSERT PART for how to insert data into a Song. Remember
that a Tempo Change will create a new Part, and move all subsequent Parts forward.
3.2.5 ENTERING VOLUME CHANGES
3.2.4 ENTERING TEMPO CHANGES
This function allows you to enter a change of volume in a Song. The volume can increase
or decrease, and you can set the range of the Volume Change.
This function allows you to enter a gradual change of tempo in a Song. The tempo can
increase (accelerando) or decrease (ritardando). You can set the overall range of the
Tempo Change, and the duration of the change. If you set the duration at zero, an instant
Tempo Change will occur.
As the operation is virtually identical for both types of Volume Change, we’ll describe a
“vol+” (crescendo) operation only. The only difference is that you move the brackets to
either “vol+” or “vol–” and the Volume Change value is shown as a positive number or
a negative number respectively.
As the operation is virtually identical for both types of Tempo Change, we’ll describe
Accelerando only. The only difference is that you move the brackets to either “accel” or
“rit”, and the Tempo Change value is shown as a positive or a negative number
respectively.
1. After selecting a Song and entering Edit Song, press
“vol+”.
NOTE: When you play a Song that contains a Tempo Change, the final tempo of the
Song will be different from the initial tempo. If you have not set an Initial Tempo for a
Song, and you immediately play the Song again, it will begin playback at the new tempo.
Therefore, it is recommended that you always set the Initial tempo for a Song. See 3.2.6
INITIAL TEMPO.
to move the brackets to
18
2. The cursor will be flashing at the Volume Change value. Use the Numeric Key Pad
to set this value. RANGE: 0–31.
1. After selecting a Song and entering Edit Song, press JOB.
NOTE: The Volume Change function can NOT alter the volume of any note beyond the
RX17’s Instrument Level range (0–31).
3. The Volume Change is now set, and you can press +1 YES to move on to the next
Part and continue editing, or press SONG or STOP/CONTINUE to exit Edit Song.
2. Use the
key (or hold JOB and press 2) to move the cursor to “2”.
Volume Changes are often entered AFTER all the Pattern numbers have been entered
for a Song. See 3.2.10 INSERT PART for how to insert data into a Song. Remember
that a Volume Change will create a new Part, and move all subsequent parts forward.
3.2.6 JOB 1: INITIAL TEMPO
This function lets you set the exact playback tempo for a Song that you have already
edited. This lets you avoid the need for manually changing tempos between playback
of Songs. Of course, any Tempo Change commands you have included in the Song will
function (within the limits of the RX17’s tempo range) and you can also vary the Tempo
manually at any time.
3. Use the Numeric Key Pad to enter a three-digit Part number (RANGE: 001–999).
Then press +1 YES. The LCD will immediately show the selected Part, and the
Pattern or other data contained there. Example: Part 006; Pattern 23.
1. After selecting a Song and entering Edit Song, press JOB.
You can now continue editing from this point.
3.2.8 JOB 3: COPY PART
2. You can now use the -1 NO and +1 YES keys to turn the Initial Tempo function Off
or On respectively.
3. To set the Initial Tempo value, press TEMPO
This function lets you choose a Part or group of Parts, and copy them to another location
in a Song, or to the end of the Song. This saves time if you have programmed the Parts
for a verse, and want to repeat the same verse later in a Song. You can copy the entire
verse in one operation, instead of having to copy each individual Part.
For example, suppose in this short 5-Part Song, you want to copy Parts 2 and 3 onto
the end of the Song.
BEFORE COPYING
4. Asterisks indicate that the Initial Tempo has not yet been set. If it has been set, the
setting will appear on the LCD. Use the –1 NO and +1 YES keys, or the TEMPO
slider, to set the Initial Tempo.
5. Press START to return to Edit Song (if you wish to continue editing the Song) or press
SONG or STOP/CONTINUE to exit Edit Song.
3.2.7 JOB 2: SEARCH PART
This function lets you instantly locate any Part in a Song. This is useful and time-saving
as it allows you to locate any point in the Song for editing (this can be compared to tape
transport memory devices in recording studios, which allow you to “punch in” at a
preselected point in a recording).
AFTER COPYING
19
You can also copy to a destination BEFORE the end of the Song, provided it comes
BEFORE or AFTER the Parts which are lo be copied. This example shows what happens
if we copy Parts 2 and 3 to Part 4.
If you have entered wrong Part numbers, press –1 NO to clear the display, and enter
the correct numbers.
4. Press +1 YES to carry out the Copy Part operation (or press START to cancel this
operation and return to the Edit Song display). The LCD will show “COMPLETE!” then
display the last Part of the newly copied section. You can now continue editing or
press STOP to exit Edit Song.
3.2.9 JOB 4: DELETE PART
The Delete Function lets you remove any Part from a Song that has already been edited.
For example, if you want to remove Part 3 in our short Song, you would locate Part 3
and carry out the Delete Function.
1. After selecting a Song and entering Edit Song, press JOB, then select Job 3.
You can now, if you wish, cancel this operation and return to the Edit Song display
by pressing START.
2. Use the Numeric Key Pad to select the number of the Part which will be the copy
destination point, then press +1 YES.
3. The two sets of three asterisks on the LCD prompt you to enter the Part numbers of
the beginning and end of the section you wish to copy. If the section is only one Part,
enter the same number twice. Use the Numeric Key Pad to enter three-digit Part
numbers (RANGE: 001–999). In our example, we’ll enter “002” then “003”.
You can also delete Parts containing Repeats, Tempo Changes and Volume
Changes, in exactly the same way.
1. After selecting a Song and entering Edit Song, press JOB, then select Job 4.
You can now, if you wish, cancel this operation and return to the Edit Song display
by pressing START.
2. Use the Numeric Key Pad to select the number of the Part you wish to delete, then
press +1 YES.
20
You now have another chance to cancel this operation, by pressing –1 NO. The LCD
will return to the previous display, allowing you to select another Job.
3. To carry out the Delete operation, press +1 YES again. The LCD will show
then return to the Delete display, allowing you to select another Job.
4. If you wish to continue editing, press START. The LCD will show the Part
FOLLOWING the Part that was deleted. In our example, this will be Part 003,
containing Pattern 03.
3.2.10 JOB 5: INSERT PART
1. After selecting a Song and entering Edit Song, press JOB, then select Job 5.
You can now, if you wish, cancel this operation and return to the Edit Song display,
by pressing START.
2. Use the Numeric Key Pad to select the number of the Part you wish to insert, then
press +1 YES. For example, Part 003.
3. You can now enter any data in the new Part 003, in the normal way by moving the
brackets to the desired type of data, and entering the data value. For example.
Pattern 99.
The lnsert Function does the opposite of the Delete Function–it lets you select any
point in a Song that has already been assembled, and insert new Parts between the
already-programmed Parts. For example, if you want to insert a Part between Parts 2
and 3 of a Song, this means that you have to insert a new Part 3.
BEFORE INSERTING
4. The new Part is now entered. You can now continue editing or press SONG or STOP/
CONTINUE to exit Edit Song.
3.3 CLEAR SONG
You can instantly clear (erase) a whole Song. This would be done, for example, if the
RX17’s Song memory were full and you wanted to write another Song.
1. After selecting the Song you wish to clear, select Function 3.
AFTER INSERTING
At this point, you can press SONG to return to the Select Song display, if you do
NOT wish to clear the Song.
2. Press +1 YES to continue this operation.
You can also insert Repeats, Tempo Changes and Volume Changes.
21
You now have a second chance to cancel this operation, and return to the Select
Song display by pressing – 1 NO.
3. Press +1 YES to clear the selected Song. The LCD will show
then return to the Select Song display.
3.5 COPY SONG
The Song Copy function lets you copy any selected Song to another destination in the
RX17’s Song memory. This is useful if you want to copy a Song in order to alter it to
create a new Song, while retaining the original Song.
then return to the Select Song display.
1. After selecting the Song you wish to copy, select Function 5.
3.4 CLEAR ALL SONGS
You can instantly clear (erase) all 10 Songs. This would be done, for example, if the
RX17’s Song memory were full and you wanted to write more Songs. Use operation 4.1
to save the Songs on tape before clearing all Songs, if you wish to preserve the Songs
for later use. You can also save Songs via MIDI, by using a MIDI data storage device
such as the Yamaha MDF-1 MIDI Data Filer (see operation 5.7).
2. Use the Numeric Key Pad to enter the number of the Song destination to which the
selected Song will be copied.
1. Press SONG and select Function 4.
3. Press +1 YES.
At this point, you can press SONG to return to the Select Song display, if you do
NOT wish to clear all Songs.
2. Press +1 YES to continue this operation.
You can now cancel this operation by pressing –1 NO, if you do not wish to copy
to the selected destination (for example, if it already contains data). The LCD will
return to the Select Song display.
4. To copy the Song, press +1 YES. The LCD will show
You now have a second chance to cancel this operation, and return to the Select
Song display by pressing –1 NO.
3. Press +1 YES to clear all Songs. The LCD will show
then return to the Select Song display.
22
3.6 SHOW REMAlNlNG MEMORY
This function allows you to check the remaining Song memory of the RX17, as a
percentage of its total Song memory capacity.
Press SONG and select Function 6.
23
The function of the Cassette Mode is to let you save Patterns and Songs onto a normal
cassette tape. This allows you to clear (erase) Patterns and Songs stored in the RX17’s
internal memory, and create new Patterns and Songs. You can then create an expanding
cassette tape library of Patterns and Songs. At any time, you can load the Patterns and
Songs from the tape into the RX17. The verify function allows you to check that the data
has been correctly saved.
Saving is not the same as normal recording– the Patterns and Songs are saved in the
form of complex digital data. Ideally, a computer data recorder should be used.
NOTE: You can also save Patterns and Songs to floppy disk, using the Bulk Dump
function. See operation 5.7 TRANSMIT BULK.
4.0.3 ABORT CASSETTE OPERATION
At anytime during a cassette operation, you can abort the operation by pressing STOP/
CONTINUE. The LCD will show a “BREAK!” message. For example, if you are loading
data into the RX17, but you suddenly realize that you want to preserve the data contained
in the RX17’s internal memory, you can abort the load operation. You can then clear the
“BREAK!” display by pressing any Mode Key.
4.1 SAVE
4.0.1 CONNECTIONS
This Function allows you to save the data of all 100 Patterns and 10 Songs stored in the
RX17’s internal memory.
The RX17 should be connected to a cassette recorder using the supplied cassette cable.
Connect the red cable to the cassette recorder’s microphone input jack, the white cable
to the cassette recorder’s headphone output jack and the 8-pin DIN plug to the RX17’s
CASSETTE IN/OUT terminal.
1. Press CAS. The flashing cursor will indicate Function 1.
4.0.2 ENTERING THE CASSETTE MODE
All cassette operations are preceded by pressing CAS to enter the Cassette Mode. The
LCD will show
The Function numbers (1 thru 3) allow you to select the Cassette Mode’s three Functions.
This is done by using the o r keys to move the cursor to the appropriate Function
number. The LCD will then display the selected Function. You can also move the cursor
by pressing JOB plus the Numeric Key corresponding to the Function number. If you
press only JOB, the cursor will move to Function 1.
To exit the Cassette Mode, press any other Mode key.
2. Make sure that a blank cassette is loaded into the cassette recorder, and the recording
level is high. Start the cassette recorder running in the record mode. Press +1 YES.
It takes about one minute to save an average set of Pattern and Song data. After saving,
the LCD will show
Cassette Mode Functions are numbered 4.1 thru 4.3 in this chapter.
then return to the Cassette Function Select display.
3. Stop the cassette recorder. You should now execute operation 4.3 (Verify) to be sure
that the data has been correctly saved.
24
4.2 LOAD
4.3 VERIFY
This Function allows you to load a complete set of Pattern and Song data from cassette
into the RX17’s internal memory.
This Function allows you to check that the data has been correctly saved onto tape, by
comparing the data saved on tape with the data in the RX17’s internal memory. It should
be executed immediately after saving data.
NOTE: When you load data into the RX17, ALL Patterns and Songs in the internal
memory will be erased. Be sure that you do not need this data, before you load the new
data. If you need the data in the internal memory, save it to another cassette before
loading new data.
1. Press CAS then select Function 3.
1. Press CAS then select Function 2.
2. Make sure that the cassette containing the data is loaded into the cassette recorder,
and is cued to playback from the beginning of the data you wish to verify. Press
+1 YES.
2. Make sure that the cassette containing the data is loaded into the cassette recorder,
and is cued to playback from the beginning of the data you wish to load. Also make
sure that the playback level is high. Press +1 YES.
3. Start the cassette recorder running in the play mode. It takes about one minute to
verify an average set of Pattern and Song data. After verifying, and provided the data
has been correctly saved, the LCD will show
3. Start the cassette recorder running in the play mode. It takes about one minute to
load an average set of Pattern and Song data. After loading, the LCD will show
then return to the Cassette Function Select display.
Stop the cassette recorder.
then return to the Cassette Function Select display.
25
The RX17 is fully compatible with all MIDI equipment. MIDI (Musical Instrument Digital
Interface) is the technology that allows digital musical instruments to control each other.
MIDI signals (data) are sent from one MIDI instrument to another, so that one instrument
can “play” another instrument, or so that instruments such as sequencers and drum
machines can be kept in perfect synchronization. You can even use MIDI to synchronize
the RX17 to a tape recording.
NOTE: MIDI data can be sent on any of 16 MIDI Channels. The RX17 MUST be set to
the same MIDI Channel(s) as the other MIDI device(s) to which it is connected. See 5.3
SET RECEIVE CHANNEL and 5.4 TRANSMIT CHANNEL ASSIGN.
The RX17 can utilize MIDI in the following ways:
An external MIDI device such as a Yamaha QX5 or QX21 Digital Sequence Recorder
can be used to start and stop playback and control the tempo of the RX17 (see 6.5.1,
MIDI CLOCK IN).
The RX17 can be used to start and stop playback and control the tempo of an external
MIDI device such as a QX5 (see 6.5.2 MIDI CLOCK OUT).
The RX17’s instruments can be “played” by an external MIDI device such as a DX21,
DX27, DX100 or DX7 Digital Programmable Algorithm Synthesizer (see 6.5.3 MIDI
NOTE RECEIVE).
The RX17 can “play” other MIDI units such as a DX21 or any X-series synthesizer,
by sending MIDI Note information (see 6.5.4 MIDI NOTE TRANSMIT).
You can send the entire Pattern and Song memory from one RX17 to another RX17,
or to a Yamaha MDF MIDI Data Filer (see 5.6 RECEIVE BULK and 5.7 TRANSMIT
BULK).
The RX17 can function as part of a Tape Sync setup, where a special digital signal
recorded on tape is used to synchronize MIDI instruments (see 6.5.5 TAPE SYNC).
5.0.1 ENTERING THE MIDI MODE
All MIDI operations are preceded by pressing MIDI to enter the MIDI Mode. The LCD
will show
NOTE: All MIDI data set using Functions 5.1 thru 5.5, and 5.8 will be retained by the
RX17 even if the power is turned off.
MIDI Mode Functions are numbered 5.1 thru 5.8 in this chapter.
5.1 SYNC
This Function allows you to set the RX17’s synchronization to either of two modes:
INTERNAL. This is the normal RX17 mode. Pattern play and write, and Song play is
synchronized to the RX17’s internal clock, and tempo is adjusted using the RX17’s own
Tempo functions. This mode is also used when the RX17 is controlling other MIDI devices
using MIDI signals transmitted from its MIDI OUT connector.
MIDI. This mode is used when the RX17 is synchronized to the MIDI clock in an external
MIDI sequencer or music computer. MIDI signals are received via the RX17’s MIDI IN
connector. A Pattern or Song is selected on the RX17, and all PLAY, STOP, CONTINUE
and TEMPO operations are controlled by the external device. The MIDI sync mode is
also used when using the RX17 as part of a Tape Sync setup (see 6.5.5).
1. Press MIDI The flashing cursor will indicate Function 1.
2. To set the Sync, press +1 YES to select MIDI, or –1 NO to select INTERNAL. The
LCD will show the selected Sync Mode.
5.2 MIDI CHANNEL MESSAGE
This function must be turned ON to allow the RX17 to receive or transmit MIDI Note data
(see 6.5.3 MIDI NOTE RECEIVE and 6.5.4 MIDI NOTE TRANSMIT).
1. Press MIDI then select Function 2.
The Function numbers allow you to select the MIDI Mode’s eight Functions. This is done
by using the o r keys to move the cursor to the appropriate Function number. The
LCD will then display the selected Function. You can also move the cursor by holding
JOB and pressing the Numeric Key corresponding to the Function number. If you press
only JOB, the cursor will move to Function 1.
To exit the MIDI Mode, press any other Mode key.
2. Press +1 YES to turn the Channel Message Function ON, or –1 NO to turn the
Channel Message Function OFF.
26
5.3 SET RECEIVE CHANNEL
MIDI signals can be sent and received on any of 16 MIDI Channels. This Function allows
you to select which MIDI Channel the RX17 will use for reception of MIDI signals when
it is being “played” by an external MIDI keyboard, sequencer or music computer.
1. Press MIDI then select Function 3.
4. Press +1 YES to enter the MIDI Transmit Channel for all instruments. The LCD will
show
then return to the display for MIDI Function 1.
2. Use the –1 NO and +1 YES keys to set the MIDI Channel number.
RANGE: 01 – 16.
5. To set the MIDI Transmit Channel for individual instruments, execute Steps 1 and 2
of this Function, then press the instrument key corresponding to the instrument that
is to be assigned. For example, Bass Drum.
5.4 TRANSMIT CHANNEL ASSIGN
This Function allows you to assign each of the RX17’s 26 instruments to any one of
the sixteen MIDI Channels, so that instruments can “play” one or more external MIDI
devices. See 6.5.4 MIDI NOTE TRANSMIT for an application of this Function.
All 26 instruments can be assigned simultaneously, or you can assign instruments
individually by omitting steps 3 and 4 of this operation.
1. Press MIDI then select Function 4.
6.Use the +1 YES or –1 NO key to alter the displayed MIDI Transmit Channel number
to the desired number.
7. You can now select another instrument, and assign it to a MIDI Transmit Channel.
You can also use the Instrument Change Function (see operation 1.3) to change
instruments, then return to this Function and assign them.
2. Press +1 YES to continue this Function.
5.5 MlDl NOTE ASSIGN
This Function allows you to assign each instrument to a MIDI note, so that the RX17’s
instruments can play or be played by an external MIDI device. The available range is
over five octaves-large enough for the entire range of most MIDI keyboards. See 6.5.3
MIDI NOTE RECEIVE, and 6.5.4 MIDI NOTE TRANSMIT for applications of this Function.
1. Press MIDI then select Function 5.
3. You can now use the Numeric Key Pad to select the MIDI Transmit Channel of all
26 instruments simultaneously. For example, MIDI Channel 10.
27
2. Press +1 YES to continue this Function.
4 . During transmission, which takes a few seconds, and is executed from the transmitting
RX17 (or QX1, MDF1 or similar device) the LCD will show
3 . Press the instrument key corresponding to the instrument that is to be assigned. For
example, Bass Drum.
5. If you wish to abort the Bulk Dump, press STOP/CONTINUE. The LCD will show
a “BREAK!” DISPLAY. Press any Mode key to clear the “BREAK” display.
5.7 TRANSMIT BULK
6. Use the +1 YES or –1 NO key to set the MIDI Note. RANGE: C1 (36)–D#6 (99).
Middle C is displayed as “C3 (60)“.
7. You can now select another instrument, and assign it to a MIDI Note. You can also
use the lnstrument Change Function (see operation 1.3) to change instruments, then
return to this Function and assign them.
5.6 RECEIVE BULK
This function allows you to receive the entire Pattern and Song Memory of another RX17.
You can also receive the same data from a bulk data storage device such as a QX1
Digital Sequence Recorder or an MDF1 MIDI Data Filer.
This function allows you to quickly transmit the entire Pattern and Song Memory of the
RX17 to another RX17. The data is not actually transferred, rather, it is copied into the
second RX17. You can also transmit the data into a bulk data storage device such as
a QX1 Digital Sequence Recorder (for floppy disk storage), or an MDF1 MIDI Data Filer
(for Quick Disk storage).
1. Connect the MIDI OUT of the transmitting RX17 to the MIDI IN of the receiving RX17
or bulk data storage device.
2. Set the receiving RX17 to Receive Bulk Dump (see operation 5.6), if transmitting to
a second RX17.
3. Press MIDI, then select Function 7.
NOTE: When the data is received, the entire Pattern and Song data that was in the RX17
will be erased. If this data is important, it should be saved to cassette or floppy disk
before the Bulk Dump operation (see 4.1 CASSETTE SAVE or 5.7 TRANSMIT BULK).
1. Connect the MIDI IN of the RX17 to the MIDI OUT of the transmitting RX17 or other
device.
2. Press MIDI, then select Function 6.
3. Press +1 YES to set the RX17 to Receive Bulk Dump.
4. Press +1 YES to execute the Bulk Dump Transmit. For a few seconds the LCD will
show
28
then return to the display for MIDI Function 1. The data has now been transmitted to
the receiving RX17.
If transmitting data to a QX1, you can also execute the actual transmission by sending
a “Bulk Dump Request” from the QX1. In this case, the MIDI OUT of the QX1 must
be connected to the MIDI IN of the RX17, as well as the QX1’s MIDI IN to the RX17’s
MIDI OUT.
5.8 ECHO BACK
This function allows you to set the RX17’s MIDI OUT connector to act as a MIDI THRU
connector. Any MIDI signals received at the MIDI IN connector will be output unchanged
via the MIDI OUT connector. See 6.5.1 MIDI CLOCK IN and 6.5.3 MIDI NOTE RECEIVE
for applications of this Function.
1. Press MIDI then select Function 6.
2. Press +1 YES to turn the Echo Back Function ON, or –1 NO to turn the Echo back
Function OFF.
29
This chapter contains a variety of useful hints, some essential, some creative, to add to
your enjoyment of the RX17. These will give you useful knowledge to encourage you to
go beyond the limitations of this manual and create your own music. The RX17, in spite
of its compact dimensions, has enormous potential!
6.1 THE lNSTRUMENTS
6.1.1 LATIN PERCUSSION INSTRUMENTS
The RX17’s instruments include 14 exciting Latin percussion sounds, in addition to the
12 basic drum sounds. Latin percussion appears in all types of contemporary music,
from reggae to rock and jazz.
In general, Latin percussion is used in two basic ways: to provide sudden bursts of
colourful timbres in a song, or to add a steady beat to your music. It can be difficult to
play rapid Latin-style breaks or rolls in Real Time Write, so the Step Write Mode allows
even the inexperienced musician to create impressively complex passages.
CONGAS. The RX17’s three Conga sounds are effective when used together. Congas
usually come in pairs, and conga players rarely play both congas simultaneously.
A characteristic action of conga players is to play the two congas alternately, or play
one beat on one conga, and two on the other, to create varying patterns. The high conga
has two sounds on the RX17, muted and open for further effectiveness.
BONGOS. Less powerful than congas, but equally effective, the light sound of bongos
can add drive to a straight rock number, or rhythmic interest to a medium-tempo song.
AGOGO. The agogo is often used to create the characteristic samba rhythm, with
alternating high and low notes. It should be used sparely, as its piercing metallic tone
cuts through any musical setting.
COWBELL. A steady four beats to a bar on a cowbell can really move a song, while fast
rhythmic playing will add spice to an adlib section.
WHISTLE. The whistle is used humorously in Latin music to start off a song, or signal
the end of a solo or verse, with a few quick blasts.
SHAKER. The shaker is most commonly used to provide a steady 8th-note rhythm behind
an up-tempo song. Use it at a lower level, so that it will blend in with the musical fabric.
TIMBALES. Timbales have great impact and are often used to greatest effect in sudden
splashes of 16th notes, or in syncopations with odd rests in between, to add energy to
any song.
CUICA. A fascinating sound caused by rubbing a stick connected to the inside of the
drumskin, the cuica adds color to any music. Ideally, it’s best used to highlight just one
section of a song – for example, a solo.
6.2 PATTERN OPERATIONS
6.2.1 INSTRUMENT CHANGE
While writing a Pattern, you can change an instrument and record the new instrument
into the same Pattern, even on the same beat as the old instrument. So you can use all
26 RX17 instruments in a Pattern.
For example, after entering a Bass Drum part in Step Write, press INST CHANGE. Press
BD twice, to select Tambourine. Press INST CHANGE again to return to Step Write. You
can now enter a tambourine part, even on beats where a Bass Drum part has been
entered.
If you attempt to enter more than 11 instruments on one beat, previously entered
instruments will be cleared (erased). However, the following instruments have priority,
and will not be cleared: BD, SD, RIMSHOT, HH Open, HH Closed, RIDE, CRASH.
NOTE: The maximum number of instruments that can be played on the same beat is 11.
6.2.2 QUANTIZE APPLIED TO STEP WRITE
In Step Write, Quantize is a time-saver because it minimizes the number of rests you
need to enter. Although your Pattern may contain a complex arrangement of rhythms.
you can save Pattern writing time by writing each instrument in at the appropriate
Quantize setting.
Use a Quantize setting of 1/8 to enter basic parts such as Bass Drum and Snare Drum.
Reset Quantize to 1/16 or even 1/32 to enter complex or rapid parts such as Hi-Hat or
Bongo. For triplets, use a Quantize setting of 1/12 or 1/24.
Using a high Quantize setting allows you to add subtle timing variations. For example,
many rock drummers create an exciting feel by slightly delaying their off-beat on the
snare drum. This is easy to create in the Step Write Mode. In this example, the Snare
Drum is entered using a Quantize rate of 1/48. The 2nd and 4th quarter-notes fall at
beats 13 and 37 respectively, so the Snare Drum notes are entered at beats 14 and 38
to provide the delay.
30
6.2.3 QUANTIZE APPLIED TO REAL TIME WRITE
6.3.2 FADE-OUTS/FADE-INS
In Real Time Write, Quantize automatically corrects each part that you enter, to a selected
minimum note length. This makes the writing of perfectly-timed Patterns easy and rapid.
For example, you could set the Quantize to 1/8 and write in a simple Bass Drum figure.
Even if you play the notes off the beat, you’ll hear them sound exactly on the beat as
soon as the Pattern recycles.
Volume Changes are instantaneous. You can create gradual Volume Changes by
entering several small Volume Changes at close intervals (for example, one at every
bar). However, a more convenient method is to enter a Volume Change during a repeat
section.
For example, here’s how you can create a fade-in or fade-out:
1. Enter in Part 001 of a Song, a Volume Change of –31. This would reduce the level
to zero, i.e., silence.
2. Enter a Volume Change of +4 during the initial section of the Song, a section that is
repeated 8 times. By the end of the repeats, the Volume Level would be –31 plus
32 (8 x 4) = +1.
3. A similar fade-out could be done by entering a Volume Change of – 4 in a final section
of the Song which is also repeated 8 times.
6.4 CASSETTE OPERATIONS
Keep the Quantize at 1/8 while you write the Snare Drum part. Then without stopping
Real Time writing, change the Quantize to 1/16 and add a complex Hi-Hat part, to
complete a precisely-timed Pattern. The first Hi-Hat note in this example is open (the
rest are closed).
The higher Quantize settings (1/24, 1/32, 1/48) allow you to enter more subtle or complex
parts. If the Quantize is set to 1/48, the RX17 will be recording your music in increments
of 1/48th notes, which are short enough to capture all the timing subtleties of your original
performance.
6.3 SONG OPERATIONS
6.3.1 LONG ACCELERANDO/RITARDANDO
The maximum duration of a Tempo Change is 99 quarter-notes, so if you want a longer
Tempo Change, you’ll need to enter more than one Tempo Change. For example, if you
wanted a gradual accelerando from 100 to 150 over a period of 32 bars of 4/4 (128
quarter notes) you could enter two Tempo changes: the first one with a Tempo Change
Value of 25 and a duration of 64 quarter notes; and a second identical one 16 bars later.
A convenient method is to enter a Tempo Change during a repeat section. The Tempo
Change will also be repeated, allowing you to make a gradual Tempo Change over a
long period (keep in mind that the Tempo range of the RX17 is 40–250 quarter-notes/
minute).
6.4.1 CREATIVE WAYS TO SAVE DATA
You could organize your data cassettes so that each cassette contains data for a
specific style of Patterns: Jazz, Rock, Reggae, Fusion, etc.
Or you could save, on a single cassette, the data for an entire performance, with the
Patterns and Songs arranged in the order in which the songs appear in your performance.
Then it’s an easy matter to alter the running order of the Songs and Patterns, using 2.6
COPY PATTERN and 3.5 COPY SONG, and save the new arrangement on a second
cassette.
The best way to save data is to save each set of data onto a separate cassette tape.
Short cassette of 5-10 minutes' duration, designed for computer data storage, are ideal.
You can also save several sets of data onto a single cassette, but be sure to leave
several seconds’ gap between each set of data.
6.5 MlDI OPERATIONS
6.5.1 MIDI CLOCK IN
A MIDI “clock” is what controls the rate that MIDI events occur. In other words, the tempo
of the RX17. This is usually controlled by the RX17’s internal clock. You can also use
the clock of an external MIDI device to control the RX17. This enables you to keep the
RX17’s rhythms in synchronization with another rhythm programmer, or with digital music
that is being played on a sequencer or music computer.
31
APPLICATION EXAMPLE: RX17 plus QX21 plus TX81Z
When you start play on the RX17, the QX21 will also start play. The RX17 will continuously
send MIDI Clock signals to the QX21, to keep both units in perfect synchronization. If
you change the Tempo on the RX17, the QX21 will also change tempo. The QX21 will
automatically stop playing when the RX17’s Song ends, or when you press STOP/
CONTINUE on the RX17.
6.5.3 MIDI NOTE RECEIVE
For this MIDI application use 5.1 SYNC to set the RX17’s sync mode to MIDI. Also, use
5.8 ECHO BACK to turn ON the “Echo Back” feature, so as to allow the QX21’s MIDI
signals to be passed to the TX81Z via the RX17's MIDI OUT connector, which will be
acting as a MIDI THRU terminal.
In this example, the RX17 is controlled by a QX21 Digital Sequence Recorder, which is
also controlling a TX81Z Multi-Timbral FM Tone Generator (which provides 160 state-ofthe-art FM voices featuring simulated Reverb, variable waveform operators and variable
intonation). Digital music data is recorded into the QX21.
Each of the RX17’s 26 instruments can be assigned to a different MIDI Key. You can
then “play” each instrument from a MIDI keyboard, sequencer or music computer. For
example, if you set the RX17’s Cowbell to C3 (Middle C), whenever you play Middle C
on a DX21, or send Middle C data from a sequencer or music computer, you’ll hear the
RX17’s Cowbell.
APPLICATION EXAMPLE #1: RX17 plus DX21
When you start play on the QX21, the RX17 will also start play (either Pattern Play, or
Song Play, according to whether you have selected a Pattern or Song on the RX17).
The Pattern or Song will have been programmed to fit the music stored in the QX21.
The RX17 will continuously receive MIDI Clock signals from the QX21, to keep both units
in perfect synchronization. If you change the Tempo on the QX21, the RX17 will also
change tempo. The RX17 will automatically stop playing when the music ends, or when
you press STOP/CONTINUE on the QX21.
6.5.2 MIDI CLOCK OUT
You can use the RX17’s internal clock to control the playback and tempo of an external
MIDI device such as a sequencer, music computer or another rhythm programmer.
APPLICATION EXAMPLE: RX17 plus QX21 plus TX81Z.
For this MIDI application, use the following Functions:
5.2 MIDI CHANNEL MESSAGE to allow the RX17 to receive MIDI Key data.
5.3 SET RECEIVE CHANNEL to set the RX17’s MIDI Receive Channel to the same MIDI
channel as the DX21.
5.5 MIDI NOTE ASSIGN to assign the RX17’s instruments to keys on the DX21.
You could set the DX21 to Keyboard Split, and adjust its balance so that no sound is
output from the left hand section of the keyboard. With the RX17’s instruments assigned
only to keys on the left hand section of the DX21’s keyboard, you could then play the
DX21 so that your left hand plays only the RX21, while your right hand plays a melody
on the DX21.
NOTE: This MIDI setup allows you use a MIDI keyboard to write Patterns in real time on
the RX17. Key Velocity data will be received by the RX17, so the harder you play a key,
the higher will be the Accent Level of the note you have entered (in other words, the
note will be louder). The actual relationship between Key Velocity and Accent Level is
as follows:
For this MIDI application, use 5.1 SYNC to set the RX17’s sync mode to INTERNAL
CLOCK.
In this example, the RX17 is controlling a QX21 Digital Sequence Recorder, which is in
turn controlling a TX81Z FM Tone Generator. Digital music data is recorded into the
QX21.
Accent Level = (Key Velocity / 4) – 16.
For example, a Key Velocity of 0 (the minimum possible) will produce an Accent Level
of –16. A Key Velocity of 100 will produce an Accent Level of +9.
32
APPLICATION EXAMPLE #2: RX17 plus QX5 plus TX81Z
For this MIDI application, use the following Functions:
5.1 SYNC to set the RX17’s sync mode to MIDI.
5.2 MIDI CHANNEL MESSAGE to allow the RX17 to transmit MIDI Key data.
5.4 TRANSMIT CHANNEL ASSIGN to assign some of the RX17’s instruments to MIDI
Channel 1 and some to MIDI Channel 2.
5.5 MIDI NOTE ASSIGN to assign the RX17’s instruments to MIDI Keys, causing selected
pitches to sound on the DX27 and TX81Z.
For this MIDI application, use the following Functions:
5.2 MIDI CHANNEL MESSAGE to allow the RX17 to receive MIDI Key data.
5.3 SET RECEIVE CHANNEL to set the RX17’s MIDI Receive Channel to 1.
5.5 MIDI NOTE ASSIGN to assign the RX17’s instruments to MIDI Keys.
5.6 ECHO BACK to turn ON the “Echo Back” feature, so as to allow the QX5’s MIDI
signals to be passed to the TX81Z via the RX17’s MIDI OUT connector, which will act
as a MIDI THRU connector.
The TX81Z’s MIDI Receive Channel should be set to 2.
Music is recorded onto the QX5 in two separate tracks (the QX5 can store up to 8 tracks
of music data). Track 1 will contain the RX17’s “drum track”, on MIDI Channel 1, using
only pitches corresponding to the RX17’s instruments. Track 2 will contain an 8-part
polyphonic music track for the TX81Z, on MIDI Channel 2.
When you start play on the QX5, music data from track 1 will cause the RX17 to play,
while music data from track 2 will cause the TX81Z to play.
6.5.4 MIDI NOTE TRANSMIT
Each of the RX17’s instruments can transmit a MIDI note number, so you can use the
RX17 to “play” a MIDI keyboard or Tone Generator. In this case the RX17 would be
acting as a kind of sequencer. You can assign instruments to pitches that will cause the
external MIDI device to play a riff when an RX17 Pattern is played, or an extended
melody when a Song is played. You can even assign the RX17’s instruments to different
MIDI channels, allowing you to use the RX17 to control up to 18 external MIDI devices!
APPLICATION EXAMPLE: RX17 plus DX27 plus TX81Z
When you play a Pattern or Song on the RX17, the DX27 will play notes assigned to
RX17 instruments transmitting on MIDI Channel 1, while the TX81Z plays notes assigned
to RX17 instruments transmitting on MIDI Channel 2. So the RX17 is creating two
separate tracks of digital music-and of course you can manually play the DX27 at the
same time.
6.5.5 TAPE SYNC
The RX17 can function as part of a Tape Sync setup, where an FSK (Frequency Shift
Keying) signal recorded on tape can be used to synchronize MIDI instruments.
33
In the example shown the RX17 is being used with a Yamaha MT1X Multitrack Cassette
Recorder, a QX5 Digital Sequence Recorder, a DX21 Digital Programmable Algorithm
Synthesizer and a TX81Z Multi-Timbral FM Tone Generator. A YME8 MIDI Expander
allows the QX5 to send MIDI data to the RX17, the DX21 and the TX81Z.
First, a music sequence is recorded on the QX5 (which can record up to eight tracks
of music, each of which could control one of the TX81Z’s voices). When the music
sequence is played back, the QX5 transmits a Tape Sync signal via its TAPE OUT
connector, which is recorded onto track 1 of the MT1X.
The recorded Tape Sync signal is then used to control playback of the QX5 (via the
TAPE IN connector on the QX5). The QX5 sends its music data via the YME8 to the
DX21 and the TX81Z on separate MIDI channels. The QX5 also controls playback of the
RX17 (which has its Sync Mode set to MIDI). A Song is programmed on the RX17 to
match the music sequence on the QX5, and the Song can be edited, while both units
remain in perfect synchronization.
The other three tracks on the MT1X are used to record acoustic instruments and vocals,
while listening to the RX17, DX21 and TX81Z. Finally, just by pressing the Play button
on the MT1X, the recorded tracks are heard, the DX21 and TX81Z start to generate
music from data in the QX5, and the RX17 adds authentic percussion sounds to the music.
In this way the worlds of MIDI and acoustic music are combined in a simple yet powerful,
sophisticated Yamaha music system. For further explanation, see the Owner’s Manuals
of the equipment used in this example, and consult the Yamaha Multitrack Guidebook
and Yamaha MIDI Book.
34
Sometimes you may see an unusual message on the RX17's LCD, indicating that an
operation has been executed wrongly, or there is a technical malfunction. This chart lists
those messages, their causes and remedies.
MESSAGE
* init PARAM. *
* illegal PTN *
o r * illegal SONG*
!
ERROR
During MIDI Bulk Receive, incorrect data was sent due
to faulty cable or electrical interference.
!
! LOAD ERROR !
There is a checksum error in sequence data that you
have tried to load from cassette, due to a fault in
transmission.
! VERIFY ERROR !
The RX17 contains different data to the data saved on
cassette.
During Bulk Receive, you are sending data to the RX17
that is not formatted for the RX17.
! Different Type !
! Data Destroyed !
I
CAUSE
A malfunction in the RX17 has caused all parameters
(voice level, accent level, pan, MIDI settings) to be
initialized.
A malfunction in the RX17 has caused all Pattern and
Song data to be cleared.
! MIDI BUFFER !
! FULL !
! MEMORY FULL !
! TOO LARGE PTN !
Part Overflow !
Illegal lnput !
! CHANGE BATTERY !
! NO BATTERY !
End of SONG !
Not Found
!
! Already Set !
During Bulk Receive or Cassette Load, you have cleared
all data in the RX17 by attempting to load the wrong type
of data.
Too large amounts of MIDI data are being sent to the
RX17 too rapidly.
The RX17’s Pattern or Song Memory is full, and further
data cannot be entered.
You have exceeded the maximum size of a Pattern, and
further data cannot be entered.
You have entered data in the Copy Part function which
would result in a Song containing more than 999 Parts.
1. You have entered Part numbers in the Copy Part
function where the second Part number is smaller
than the first.
2. You have entered Part numbers in the Copy Part
function which include the destination Part number.
You have entered a Part number in the Copy Part function
which is higher than the total number of Parts in the
Song.
You have tried to change the length of a Pattern that
already contains data.
The lithium battery, for memory backup, is running at
less than 2.2 V.
The lithium battery, for memory backup, is running at
less than 1.5 V.
1. In the Copy Part function, you have entered a copy
destination Part number that is higher than the total
number of Parts in the Song.
2. In the search Part function, you have entered a Part
number that is higher than the total number of Parts
on the Song.
REMEDY
Use operation 2.1.2 to load the Preset Patterns and
Songs, or operation 4.2 to load Patterns and Songs
saved on cassette.
Check that the MIDI cable is not faulty. Also, read the
PRECAUTIONS section of this manual for advice on
electrical interference.
Repeat the Load operation, making sure that the tape
playback level is high. Also, check that the cassette
cable is functioning correctly. If necessary, clean and
demagnetize the tape heads.
Make sure that the cassette you are using contains data
that was just saved. If there is still a problem, save the
data again and, execute the Verify operation once more.
Make sure that the MIDI device connected to the RX17
is transmitting the correct type of data (i.e. RX17 Pattern,
Song and Instrument data).
Make sure that the type of data you are loading is correct
for the RX17, then execute the load operation again.
Press any key to clear the LCD. Send less dense data; or
send data at a slower tempo.
Use operation 4.1 to save the Pattern and Song data to
cassette. Then use operation 2.4 to clear Patterns, or
operation 3.3 to clear Songs, prior to entering new data.
Write two or more shorter Patterns, each of which forms
a section of the Pattern you were trying to write. Then
use operation 3.2 to combine the short Patterns into a
Song.
See if you can enter repeats in the Song to bring it up to
the required length.
1. Enter correct Part numbers.
2. Copy a different group of Parts so that the destination
Part is outside the Parts to be copied.
Enter the correct Part number.
Write a new Pattern at the desired Pattern length.
Press +1 YES to restore the RX17 to normal operation.
Consult your Yamaha dealer about battery replacement.
Press +1 YES to restore the RX17 to normal operation
Consult your Yamaha dealer about battery replacement
as soon as possible.
1. The LCD will next display the empty Part following the
last Part of the Song. Continue the Copy Part operation
to copy to this Part, or enter a new Part number.
2. The LCD will next show the empty Part following the
last Part of the Song. You can now edit from this
point, or select the Search Part function again in the
normal way.
35
SOUND SOURCE
ROM; PCM, 2 MBYTE ROM
NUMBER OF VOICES
26
MEMORY CAPACITY
PATTERNS: 100
SONGS: 10 (UP TO 999 PARTS PER SONG.
TOTAL SONG MEMORY: 1200 PARTS)
CONTROLLERS
KEYS: PATTERN, SONG, CAS, MIDI, JOB, LEVEL, PAN, INST CHANGE, TEMPO, BEAT
CLEAR, NUMERIC KEYS (10, NUMBERED 0—9), -1 NO. +1 YES,
,STOP/
CONTINUE, START, ACCENT, INSTRUMENT KEYS (13, DUAL-FUNCTION)
SLIDERS: VOLUME, TEMPO
DISPLAY
LCD: 16 CHARACTERS x2 ROWS
CONNECTIONS
5-PIN DIN: MIDI IN, MIDI OUT
8-PIN DIN: CASSETTE IN/OUT
STEREO 1/4" PHONE JACK: HEADPHONES
MONO 1/4" PHONE JACK: AUDIO OUT R, L (MONO)
DC 9—12V IN (TIP POSITIVE)
SUPPLIED ACCESSORIES
PA-1 12V POWER CONVERTOR
CRC-1 CASSETTE INTERFACE CABLE
DIMENSIONS (W X H X D)
350 x 54.5 x 202mm (13 25/32" x 2 5/32" x 7 31/32")
WEIGHT
1.4kg(3lbs7oz.)
Specifications are subject to change without notice.
36
[ Digital Rhythm Programmer ]
Date : 12/13, 1986
Model RX17
MIDI Implementation Chart Version : 1 . 0
Remarks
Recognized
Transmitted
Function ...
Basic
Channel
Default
Changed
1-16
1-16
1-16
1-16
Mode
Default
Messages
Altered
3
x
3
x
x
**************
36 - 99
*1
Note
Number : True voice **************
36 - 99
36 - 99
Velocity Note ON
Note OFF
o
x
o
x
After
Touch
x
x
x
x
x
x
x
Prog
Change : True #
x
**************
x
System Exclusive
o
o
System
x
o
x
Key's
Ch's
Pitch Bender
9nH,v=1-127
8nH,v=64
memorized
*1
v=1-127
x
Control
Change
Common
Song Pos
Song Sel
Tune
x
*2
Pattern, Song
o
0-9
o 0 - 9
x
System
:Clock
Real Time :Commands
o
o
o
o
Aux :Local ON/OFF
:All Notes OFF
Mes- :Active Sense
sages:Reset
x
x
x
x
x
(MIDI mode)
x
x
x
Notes: When ECHO BACK switch is on, all messages except System
Exclusive are bypassed to MIDI out.
*1 = When CH message switch is on, note number 36 - 9 9 which
assigned to each instrument are recognized or transmitted.
*2 = When BULK RECEIVE is ready, Sys Ex messages are recognized.
Mode 1 : OMNI ON, POLY
Mode 3 : OMNI OFF, POLY
Mode 2 : OMNI ON, MONO
Mode 4 : OMNI OFF, MONO
o : Yes
x : No
38
39
40
Use this Quick Guide as a rapid reference index to enable you to find any operation on
the RX17. For convenience, an operation may be listed under more than one entry. For
example, "Pattern Length" also appears under "Length of Pattern" and "Time Signature".
This index also includes references to parts of the HINTS AND TIPS chapter, for extra
commentary and advice.
ABOUT BULK DUMP
ABORT CASSETTE
ACCELERANDO
Hint
ACCENT EDIT
ACCENT LEVEL
5.6
4.0.3
3.2.4
6.3.1
2.3.8
1.4.3
BULK
Receive
Transmit
5.6
5.7
CASSETTE
Save
Load
Verify
CHANGE INSTRUMENT
All instruments
Single instrument
Hint
CHANNEL MESSAGE (MIDI)
CHARTS, USE OF
Pattern
Song
CLEAR PATTERN
Single Pattern
All Patterns
CLEAR SONG
Single Song
All Songs
CLICK LEVEL
CLOCK SETTING
COPY PART
COPY PATTERN
COPY SONG
DELETE INSTRUMENT
DELETE NOTE
Real Time Write
Step Write
DELETE PART
DOT DISPLAY
Long Pattern
"X" markers
4.1
4.2
4.3
1.3.1
1.3.2
6.2.1
5.2
2.1.3
3.1.2
2.4
2.5
3.3
3.4
1.4.1
5.1
3.2.8
2.6
3.5
2.3.7
2.2.5
2.3.6
3.2.9
2.3.4
2.3.9
2.3.10
ECHO BACK
EDIT ACCENT
EDIT SONG
ENTERING NOTES
Real Time Write
Step Write
2.2.4
2.3.4
FADE OUT/IN
6.3.2
INITIAL TEMPO
INSERT PART
INSTRUMENT CHANGE
All instruments
Single instrument
INSTRUMENT DELETE
INSTRUMENT LEVEL
INTERNAL CLOCK
3.2.6
3.2.10
LATIN PERCUSSION (HINTS)
LENGTH OF PATTERN
LEVEL
Click
Instrument
Accent
LOAD
To cassette
Preset Patterns/Songs
MEMORY REMAINING
Pattern
Song
MIDI CHANNEL MESSAGE
MIDI CLOCK
Sync setting
Clock in: Hint
Clock out: Hint
MIDI NOTE
Assign
Receive: Hint
Transmit: Hint
MIDI OUT/THRU
Echo Back
MIDI TRANSMIT CHANNEL
5.8
2.3.8
3.2
1.3.1
1.3.2
2.3.7
1.4.2
5.1
6.1.1
2.2.2
1.4.1
1.4.2
1.4.3
4.2
2.1.2
2.7
3.6
5.2
5.1
6.5.1
6.5.2
5.5
6.5.3
6.5.4
5.8
5.4
MIDI RECEIVE CHANNEL
5.3
NOTE ASSIGN (MIDI)
NOTE DELETE
Real Time Write
Step Write
NOTE MARKERS
5.5
PAN
PART COPY
PART DELETE
PART INSERT
PART SEARCH
PATTERN CHART
Use of
PATTERN CLEAR
Single Pattern
All Patterns
PATTERN COPY
PATTERN ENTRY
As Part of Song
PATTERN LENGTH
PATTERN MEMORY
Remaining memory
PATTERN PLAY
PATTERN SELECT
PLAY PATTERN
PLAY SONG
PRESET PATTERNS/SONGS
Loading operation
QUANTIZE SETTING
Real Time Write
Step Write
QUANTIZE: HINTS
Step Write
Real Time Write
REAL TIME WRITE
RECEIVE BULK
RECEIVE CHANNEL (MIDI)
REMAINING MEMORY
Pattern
2.2.6
2.3.6
2.3.4
1.6.1
3.2.8
3.2.9
3.2.10
3.2.7
2.1.3
2.4
2.5
2.6
3.2.2
2.2.2
2.7
2.1.1
2.1
2.1.1
3.1.1
2.1.2
2.2.3
2.3.3
6.2.2
6.2.3
2.2
5.6
5.3
2.7
Song
REPEATS
RITARDANDO
Hint
3.6
3.2.3
3.2.4
6.3.1
SAVE DATA TO CASSETTE
Hint
SEARCH PART
SELECT PATTERN
SELECT SONG
SONG CHART
Use of
SONG CLEAR
Single Song
All Songs
SONG COPY
SONG EDIT
SONG MEMORY
Remaining Memory
SONG PLAY
SONG SELECT
STEP WRITE
SYNC SETTING
SYNC TO TAPE
4.1
6.4.1
3.2.7
2.1
3.1
3.1.2
3.3
3.4
3.5
3.2
3.6
3.1.1
3.1
2.3
5.1
6.5.5
TAPE SYNC
TEMPO CHANGE
Hint
TEMPO, INITIAL
TEMPO SETTING
TIME SIGNATURE
TRANSMIT BULK
TRANSMIT MIDI
MIDI Channel
MIDI Note
6.5.5
3.2.4
6.3.1
3.2.6
1.7.1
2.2.2
5.7
VERIFY CASSETTE DATA
VOLUME CHANGE
4.3
3.2.5
"X"MARKERS
2.3.10
5.4
6.5.4
SINCE 1887
YAMAHA
YAMAHA
Yamaha Corporation of America
6600 Orangethorpe Avenue, P.O. Box 6600, Buena Park, CA 90622-6600
RX17 OM
7/30/98 29258