1
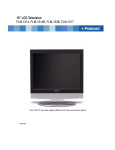
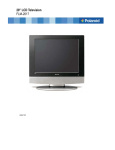
For Custom 1-800-66 USER MANUAL C32612HD 32” High Definition* LCD Television HDMI™ (High Definition Multimedia Interface) 8ms Response Time VGA Input *Requires HD Signal www.citizen-electronics.com CONTENTS 2. Descriptions of Main Unit and Remote-Control Unit . . . . . . . . . . . . . . . . . . . . . . . . . . . . . . . . . 5 2.1. Main Unit . . . . . . . . . . . . . . . . . . . . . . . . . . . . . . . . . . . . . . . . . . . . . . . . . . . . . . . . . . . . . . . 5 2.2. Remote-Control Unit . . . . . . . . . . . . . . . . . . . . . . . . . . . . . . . . . . . . . . . . . . . . . . . . . . . . . . 6 3. Specifications . . . . . . . . . . . . . . . . . . . . . . . . . . . . . . . . . . . . . . . . . . . . . . . . . . . . . . . . . . . . . . . . 7 4. Connection and Preparation . . . . . . . . . . . . . . . . . . . . . . . . . . . . . . . . . . . . . . . . . . . . . . . . . . . . 9 4.1. Connecting Antenna or Video Facility . . . . . . . . . . . . . . . . . . . . . . . . . . . . . . . . . . . . . . . . . 9 4.2. Power Supply . . . . . . . . . . . . . . . . . . . . . . . . . . . . . . . . . . . . . . . . . . . . . . . . . . . . . . . . . . . . 9 4.3. Battery Installation of Remote-Control Unit . . . . . . . . . . . . . . . . . . . . . . . . . . . . . . . . . . . . . . 9 4.4. Auto Search the Channels . . . . . . . . . . . . . . . . . . . . . . . . . . . . . . . . . . . . . . . . . . . . . . . . . . 10 5.1. POWER ON/OFF . . . . . . . . . . . . . . . . . . . . . . . . . . . . . . . . . . . . . . . . . . . . . . . . . . . . . . . . . 10 5.2. Direct Access Tuning . . . . . . . . . . . . . . . . . . . . . . . . . . . . . . . . . . . . . . . . . . . . . . . . . . . . . . . 10 5.3. TV/AV . . . . . . . . . . . . . . . . . . . . . . . . . . . . . . . . . . . . . . . . . . . . . . . . . . . . . . . . . . . . . . . . . 11 5.4. Channel Up/Down . . . . . . . . . . . . . . . . . . . . . . . . . . . . . . . . . . . . . . . . . . . . . . . . . . . . . . . 11 5.5. Volume Control . . . . . . . . . . . . . . . . . . . . . . . . . . . . . . . . . . . . . . . . . . . . . . . . . . . . . . . . . . 11 5.6. Closed Caption . . . . . . . . . . . . . . . . . . . . . . . . . . . . . . . . . . . . . . . . . . . . . . . . . . . . . . . . . . 11 5.7. QV . . . . . . . . . . . . . . . . . . . . . . . . . . . . . . . . . . . . . . . . . . . . . . . . . . . . . . . . . . . . . . . . . . . . 12 5.8. SCAN . . . . . . . . . . . . . . . . . . . . . . . . . . . . . . . . . . . . . . . . . . . . . . . . . . . . . . . . . . . . . . . . . . . 12 5.9. ZOOM . . . . . . . . . . . . . . . . . . . . . . . . . . . . . . . . . . . . . . . . . . . . . . . . . . . . . . . . . . . . . . . . . . 12 5.10. MENU . . . . . . . . . . . . . . . . . . . . . . . . . . . . . . . . . . . . . . . . . . . . . . . . . . . . . . . . . . . . . . . . . 12 5.11. MUTE . . . . . . . . . . . . . . . . . . . . . . . . . . . . . . . . . . . . . . . . . . . . . . . . . . . . . . . . . . . . . . . . 12 5.12. OK . . . . . . . . . . . . . . . . . . . . . . . . . . . . . . . . . . . . . . . . . . . . . . . . . . . . . . . . . . . . . . . . . . 13 5.13. Picture Mode . . . . . . . . . . . . . . . . . . . . . . . . . . . . . . . . . . . . . . . . . . . . . . . . . . . . . . . . . . 13 5.14. Sound Mode . . . . . . . . . . . . . . . . . . . . . . . . . . . . . . . . . . . . . . . . . . . . . . . . . . . . . . . . . . . 13 5.15. SLEEP . . . . . . . . . . . . . . . . . . . . . . . . . . . . . . . . . . . . . . . . . . . . . . . . . . . . . . . . . . . . . . . 13 5.16. CALL . . . . . . . . . . . . . . . . . . . . . . . . . . . . . . . . . . . . . . . . . . . . . . . . . . . . . . . . . . . . . . . . . 14 5.17. FREEZE . . . . . . . . . . . . . . . . . . . . . . . . . . . . . . . . . . . . . . . . . . . . . . . . . . . . . . . . . . . . . . 14 5.18. ST. SAP . . . . . . . . . . . . . . . . . . . . . . . . . . . . . . . . . . . . . . . . . . . . . . . . . . . . . . . . . . . . . . . 14 6. Television Keypad Descriptions: . . . . . . . . . . . . . . . . . . . . . . . . . . . . . . . . . . . . . . . . . . . . . . . . 14 7. Menu Operation and Function Descriptions: . . . . . . . . . . . . . . . . . . . . . . . . . . . . . . . . . . . . . . 15 7.1. Menu Operation under TV, AV, SVIDEO, YPBPR . . . . . . . . . . . . . . . . . . . . . . . . . . . . . . . . 15 7.1.1. PICTURE MENU: . . . . . . . . . . . . . . . . . . . . . . . . . . . . . . . . . . . . . . . . . . . . . . . . . . . 15 7.1.2. SOUND MENU . . . . . . . . . . . . . . . . . . . . . . . . . . . . . . . . . . . . . . . . . . . . . . . . . . . . . 16 7.1.3. FUNCTION MENU . . . . . . . . . . . . . . . . . . . . . . . . . . . . . . . . . . . . . . . . . . . . . . . . . . 17 7.1.4. SYSTEM MENU . . . . . . . . . . . . . . . . . . . . . . . . . . . . . . . . . . . . . . . . . . . . . . . . . . . . 20 7.1.5. CHANNEL MENU . . . . . . . . . . . . . . . . . . . . . . . . . . . . . . . . . . . . . . . . . . . . . . . . . . . . 21 7.2. MENU UNDER THE SOURCE OF VGA: . . . . . . . . . . . . . . . . . . . . . . . . . . . . . . . . . . . 22 7.3. MENU UNDER THE SOURCE OF HDMI: . . . . . . . . . . . . . . . . . . . . . . . . . . . . . . . . . 22 8. Trouble Shooting: . . . . . . . . . . . . . . . . . . . . . . . . . . . . . . . . . . . . . . . . . . . . . . . . . . . . . . . . . . . . 23 Warranty: . . . . . . . . . . . . . . . . . . . . . . . . . . . . . . . . . . . . . . . . . . . . . . . . . . . . . . . . . . . . . . . . . . . . . . . 24 1 1. Safety Warnings and Cautions Warning High voltages are used in the operation of this product. Do not remove the cabinet back from your set. Refer servicing to a qualified service technician. Warning To prevent fire or risk of electric shock, do not expose the main unit to rain or moisture. Warning Do not drop or push objects into the television cabinet slots or openings. Never spill any kind of liquid on the television receiver. 2 Minimum 10c 10c ! 5cm Caution If the television is to be built into a 20c compartment or enclosure, the minimum distances must be maintained to allow for proper ventilation. Heat build-up can reduce the service life of your television, and can also be dangerous. ! Caution Never stand on, lean on, or push the product or its stand. Pay special attention to children, accidental tipping may cause serious injury. ! Caution Do not place the main unit on an unstable cart, stand, shelf or table. Serious injury and or damage to the television may result if it should fall. 3 ! Caution When the product is not used for an extended period of time, it is advisable to disconnect the AC power cord from ! Caution Avoid exposing the main unit to direct sunlight or other source of the heat. Do not stand the television receiver directly on other products which give off heat, E.g. video cassette players, and audio amplifiers. Do not block the ventilation holes on the back cover. Ventilation is essential to prevent failure of electrical component. Do not pinch the power supply ! Caution The LCD panel used in this product is made of glass. Therefore, it can break when it is dropped or applied with impact. Be careful not to be injured by broken glass pieces if the LCD screen were to 4 2. Descriptions of Main Unit and Remote-Control Unit 2.1 Main Unit Buttons / Display: Sockets / Main Power Switch: 5 2.2 Remote-Control Unit 6 3. Specifications Items Relevant illustrations Active Screen Size 32 inches Screen format 16:9 Number of Pixels 1366×768 Typical Contrast Ratio 1000:1 Maximum Brightness 500 cd/m² Display colors Parameters of the product 16.7M Wide Viewing Angle 170° (Horizontal) 170° (Vertical) Standard FCC etc. Accessories Remote-Control Unit, AC cord, User Manual Power requirement 110~240V AC Power mode Active, Standby Normal Power Dissipation ≤160W Standby Power Dissipation <3W Full Function Remote Control Channels and Frequencies TV VHF-L:55.25 ~139.25 MHz; VHF-H:145.25~391.25 MHz; UHF:397.25~801.25 MHz Color system NTSC, PAL-M, PAL-N Audio system M, N Stereo STEREO/SAP Audio Output 2 × 6W Intermediate Frequency NTSC-45.75 MHz OSD language English/French/Spanish/ CCD/VCHIP Supported Local control keys POWER, MENU, V+, V-, P+, P-, TV/AV Color system Other Supported NTSC, PAL Signal YPBPR, VGA, HDMI, CVBS, S-VIDEO VGA format VGA/SVGA/XGA/SXGA/WXGA/UXGA YPBPR format 480i/480P/576i/576P/720P50/720P60/ 1080i50/1080i60 HDMI HDMI 1.2 Note: All specifications are subject to change without notice. 7 4. Connection and Preparation 4.1 Connecting Antenna or Video Facility 1. Use a 75Ω coaxial cable or 300-75Ω impedance converter (sold separately) to plug in the antenna input terminal on the rear of the cabinet. 2. Connect the video or audio facility with the video, audio interface on the rear of the cabinet. 4.2 Power Supply 1. Press on the Power Switch on “1” to power on the LCD TV. 4.3 Battery Installation of Remote-Control Unit 1. Turn the remote-control unit upside down. Open the battery compartment door. 2. Install two new 1.5V AAA batteries, make sure the polarity of the batteries matches the “+”, “–” marks inside the battery compartment. Note: Improper installation of batteries may cause them to leak, causing damage. 3. Close the battery compartment cover. 9 4.4 Auto Search the Channels 1. Press the Power On/Off key on the television or the Remote-Control. 2. Press the MENU key on the remote-control unit. The screen displays the Menu OSD. Press the key repeatedly till “TV-CHANNEL” is highlighted in the first main menu. 3. Start Auto Channel Search. Press the key till “AUTO SCAN” is highlighted in the menu. 5. Operation of Remote-Control Unit 5.1 POWER ON/OFF When the unit is turned on, a green indicator light turns on. When the unit is in standby mode, a red indicator light is turned on. 5.2 Direct Access Tuning Channels can be manually selected by using the numeric key pad on the remote control. Any channel may be selected by this method, regardless of its presence or absence in the current channel map. 10 5.3 TV/AV Press once to display Source List. Using ▲ and TV AV ▼ select the video input from TV, AV, SVIDEO, SVIDEO YPBPR, YPBPR2, HDMI, and PC. The OSD YPBPR display will disappear after several seconds, or YPBPR2 by pressing TV/AV. HDMI PC 5.4 Channel Up/Down Press CH▲ or the ▲ key to change Channel Up Press CH▼ or the ▼ key to change Channel Down 5.5 Volume Control - or the Press the VOL+ or VOL keys to lower or raise the volume. The range is 0~100. 5.6 Closed Caption Press repeatedly to select closed caption mode among CCD Off, ON. You can do the Basic Selection under the submenu of “CCD MODE” among CC1,CC2,CC3,CC4,T1,T2,T3,T 4. CC1 → CC2 → CC3 → CC4 ↑ ↓ T4 ← T3 ← T2 ← T1 11 5.7 QV Pressing this will quickly switched back to the previous channel viewed. 5.8 SCAN Pressing this button will automatically scan through the channels. Pressing this button again will stop scan. 5.9 ZOOM Press this key repeatedly to change aspect radio as follows. FULL → ZOOM → 4:3 → PANORAMA 5.10 MENU See MENU Operation on Chapter 7. 5.11 MUTE Pressing this button will mute the volume on the television. Note: Mute will be displayed on the screen. Pressing this button again or pressing will exit mute and resume to the previous volume level. 12 5.12 OK The OK key is used to confirm your selection in the menu, and let you quickly enter the result. 5.13 Picture Mode Press repeatedly to select the picture mode among STANDARD, DYNAMIC, SOFT, and PERSONAL. STANDARD →DYNAMIC →SOFT→ PERSONAL 5.14 Sound Mode Press repeatedly to select audio mode among STANDARD, NEWS, MUSIC, and PERSONAL. STANDARD → NEWS → MUSIC → PERSONAL 5.15 SLEEP Press repeatedly to select auto power-off Times to be selected are displayed as follows: Off →15min→ 30min→ 45min→ 60min→ 75min→ 90min→ 105min→120 13 5.16 CALL Pressing displays (1) the name of current the program or source; (2) Current aspect ratio; (3) Current mts mode; (4) Current picture mode; (5) Current sleep time. 5.17 FREEZE Press to hold the current state or image. Pressing again releases back to normal state. 5.18 BTSC Press it repeatedly to switch among Mono, Stereo and SAP. 6. TELEVISION KEYPAD DESCRIPTIONS: The televisions keypad functions correspond with the remote control. TV/AV CH- CH+ VOL- VOL+ MENU POWER 14 7. MENU OPERATION AND FUNCTION DESCRIPTIONS: 7.1. Menu operation under TV, AV, SVIDEO, YPBPR. 7.1.1 PICTURE MENU: a. The above image is a sample of the display menu. b. The definition of each option: b.1 PICTURE MODE: Set the picture preset to STANDARD→DYNAMIC→SOFT→PERSONAL→STANDARD by using the keys. b.2 BRIGHTNESS: Change the value of the brightness with the keys, in the range of 0 to 100. b.3 CONTRAST: Change the value of the contrast with the the range of 0 to 100. b.4 HUE: Change the value of the tint with the keys, in keys, in the range of -50 to 50. Recommended setting is 0. b.5 SATURATION: Change the value of the color with the range of 0 to 100. 15 keys, in the b.6 SHARPNESS: Change the value of the sharpness with the keys, in the range of 0 to 100. b.7 COLOR TONE: Set the color temperature preset to STANDARD→WARM→COOL→STANDARD by using the keys. b.8 SCALE: Set the picture size preset to FULL→ZOOM → 4:3 → PANORAMA→FULL by using the keys. NOTE: z Press to move cursor to the relevant item. z Press z Press z HUE will only show when the color system is NTSC. to tune the value. to enter into the picture menu. 7.1.2. SOUND MENU: SOUND MENU a. The above image is a sample of the display menu. b. The definition of each option: b.1 SOUND MODE: Set the sound mode to STANDARD→NEWS→MUSIC→PERSONAL→STANDARD by using the keys. keys in the rang of b.2 BASS: Change the value of the bass with the 0 to 100 . 16 b.3 TREBLE: Change the value of the treble with the rang of 0 to 100. b.4 BALANCE: Change the value of the balance with the -50 to 50. Recommended setting is 0. b.5 MTS: Set the modes of sound processing with the MONO→STEREO→SAP. keys in the keys from keys to 7.1.3. FUNCTION MENU: FUNCTION MENU a. The above image is a sample of the display menu. b. The definition of each option: b.1 NR: Set the noise reduction mode to WEAK→MIDDLE→STRONG→OFF→WEAK by using the b.2 CCD: Press on and off. keys. keys to decide whether to display the CCD between b.3 CCD MODE: Set the CCD MODE to CC1Æ CC2 Æ CC3 Æ CC4 Æ T1 Æ T2 Æ T3 Æ T4Æ CC1 by using the keys. CC1,CC2,CC3,CC4 displays the text of language being spoken in the video at the bottom of the screen,while T1,T2,T3,T4 displays some information such as weather reports and news. 17 b.4 VCHIP: Press the key to enter the password input menu, now enter your password to enter V-CHIP mode. V-CHIP has two American standards (MPAA Rating/ TV Parental Guidelines) and two Canadian standards (English Rating/ French Rating). b.4.1 CHANGE PASSWORD: Press the keys to enter the password change menu. You are now instructed to enter the new password twice as confirmation. Press enter to confirm your new password. b.4.2 VCHIP SWITCH: Set the V-CHIP switch on or off by using the keys. key to enter the submenu. b.4.3 TV RATING: Press the (refer to image below) FV TV-Y TV-Y7 TV-G TV-PG TV-14 TV-MA V S L D × × × × × × × × × × × Contents All Children Directed to Older Children General Audience Parental Guidance Suggested Parents Strongly Cautioned Mature Audience Only × 18 b.4.4 MOVIE RATING: Press the keys to adjust the movie rating to NONEÆ G Æ PG Æ PG13 Æ R Æ NC17 Æ XÆNONE. G PG PG-13 R NC-17 X General Audiences Parental Guidelines Suggested Parents Strongly Cautioned Restricted No 17 And Under Admitted b.4.5 ENGLISH: Press the keys to adjust the English rating to EÆ C Æ C8+ Æ G Æ PG Æ 14+ Æ 18+. b.4.6 FRENCH: Press the keys to adjust the French rating to EÆ C Æ C8+ Æ 13+ Æ 16+ Æ 18+. b.5 SCAN FORMAT: Set the scan format by changing the value form 0 to 2, using the keys. 0: 2X2,screen will display 4 sub video windows. 1: 3X3,screen will display 9 sub video windows. 2: 4X3,screen will display 12 sub video windows. b.6 TIMER: the refresh time of the picture,the adjustable value is 0—10 19 7.1.4. SYSTEM MENU: SYSTEM MENU a. The above image is a sample of the display menu. b. The definition of each option: b.1 OSD LANGUAGE: Change the language to ENGLISH→FRENCH→PORTUGUESE→SPANISH→ENGLISH by using the keys. b.2 BLUE SCREEN: When set to ON,the blue screen indicated there is no signal to the current input channel. b.3 SLEEP: Set the sleep time to OFF→15→30→45→60→75→90→105→120→OFF by using the keys. b.4 OSD HPOS: Change the pictures horizontal position by using the keys. b.5 OSD VPOS: Change the pictures vertical position by using the keys. b.6 OSD DURATION: Change the OSD holding time from 5s to 55s by using the keys. 20 b.7 OSD HALFTONE:Change the transparence of the OSD (it has 9 grades) by using the keys. 7.1.5. CHANNEL MENU: Only displayed when current source is TV. CHANNEL MENU a. The above image is a sample of the display menu. b. The definition of each option: b.1 AUTO SCAN: Press the key to auto scan the channels and display the auto scan sub menu. Press the MENU key to exit auto scan and return to TV. b.2 FINE TUNING: Adjust the current channel quality. b.3 ADD/ERASE: When set to OFF,the current program will be skipped when pressing program up or down. b.4 SOURCE: Choose the TV source to AIR or CATV. 21 7.2. MENU UNDER THE SOURCE OF VGA: 1. When the system signal source switches to VGA,there will be a PC mark in the up-right corner of the screen. 2. In VGA Input Mode,if there is no signal,it will display NO SYNC in the middle of the screen. The television will automatically turn off after ten (10) minutes. 3.In VGA Input Mode,the OSD main menu operation is: PC→SOUND→GEOMETRY→SYSTEM→PC. SCALE: Only has two modes NORMAL→CENTER. GEOMETRY menu is different from TV. z H-POSITION: Adjust the horizontal position of the image by using the keys. z V-POSITON: Adjust the vertical position of the image by using the z CLOCK: Adjust the Sampling frequency by using the z PHASE: Adjust the Sampling phase by using the z AUTO SIZE: Press keys. keys. keys. key to automatically adjust the picture. 7.3. MENU UNDER THE SOURCE OF HDMI: The operation of the HDMI OSD MENU functions are the same as those in TV input mode. 22 8. Trouble Shooting: Before arranging for service, first know the status and then check simply as follows: Problems No picture. Check Check if the power supply is plugged in. Picture is fine, but no audio. Remote control doesn’t work. Check if the volume control is set to the minimum or mute position. Check if the batteries are out of use or not connected properly. Make sure that there is no strong light striking the sensor window of the remote-control unit. Check that there are no obstacles between the sensor window and the remote-control unit. No TV signal. Check if the TV/AV button is set to TV status. Check if the antenna is well connected. Check if you installed the TV correctly. No external video signal. Check if you installed the TV correctly. Check if the TV/AV button is set to the AV position. Picture lacks color or Check color, brightness and contrast controls are picture too dark. correctly adjusted. All channels lose color Check if the antenna is broken Check if the antenna is disconnected. intermittently. Check if the antenna is damaged. Poor reception, loss of Check if channels are correctly tuned. color within certain channels. Diagonal stripes appear The receiver may be affected by interference (e.g. on picture. from a nearby radio broadcasting transmitter or from another TV receiver). Picture has “snow”. Check if the antenna is broken. Check if the antenna is disconnected. Check if the antenna is damaged. Ghost images appear. Check if the antenna direction has been changed by a storm or strong wind, etc. (because ghost images are caused by the arrival at the antenna of both the signal which has traveled directly from the transmitter and the signal which has been reflected from a hill or a large building. The direction of the antenna should be chosen for minimized ghosting.) 23 24