1
Chapter 2: Installation
15
To install a new single AMX switch:
1.
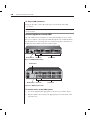
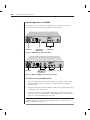
Plug the supplied power cord into the back of the AMX switch and then
into an appropriate power source.
2.
Connect a terminal or PC running terminal emulation software (such as
HyperTerminal®) to the terminal port of the AMX using the supplied null
modem cable. The terminal should be set to 9600 baud, 8 bits, 1 stop bit,
no parity and no flow control.
3.
When the power is switched on, the Power indicator on the front of the
unit will remain orange for approximately 30 seconds while performing a
self-test and then change to green. This indicates a healthy condition.
4.
Next, follow these instructions to set up the Terminal Applications menu.
Refer to Chapter 5 for more details.
a.
You will be prompted to enter a username. The first time you access
the switch, enter the username admin and press Enter. Once you
have access to the AMX Console menu, you can configure a password should you wish to do so.
b.
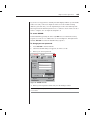
Once you have logged in to the AMX, you will see the AMX Console
menu with four options. Select option 1, Network Configuration.
This will activate the Network Configuration menu.
c.
Within the Network Configuration menu, select option 1 to set the
IP address.
d.
Select options 2 and 3 to set your netmask and default
gateway respectively.
e.
Once these settings are entered, type Ø to return to the AMX Console menu.
f.
If all AMX switches in your installation are part of the same AMX
configuration, you may leave the configuration ID set to Ø. If you
are running more than one AMX configuration within your subnet,
you will need to designate the group to which this AMX belongs.
To do this, select option 2 to enter the configuration ID for your
AMX switch. A configuration ID will designate an AMX switch as
part of a unique installation. When change commands are issued
through AMWorks, only units with the same configuration ID as the
AMWorks software will be affected. Refer to System Management in
Chapter 5 for more information on setting configuration IDs.
g.
Once you have entered a configuration ID, enter Ø to return to the
main menu.
h.
Finally, select option 3 and follow the prompts to password protect
your AMX terminal settings.
i.
Press Ø to exit the AMX Console menu.