1
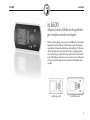
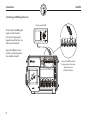
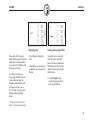
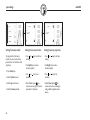
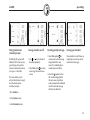
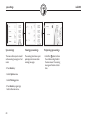
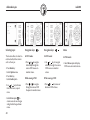
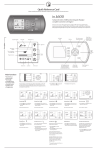
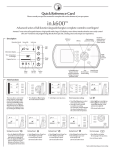
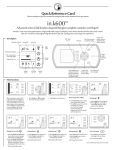
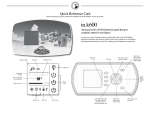
�������
�������������������������������������������������
��������������������������
��������
�����������������������������������
in.k600
table of contents
Table of contents
overview ......................................................................................... 3
warning ...........................................................................................4
function description ...................................................................... 5
icon description .............................................................................6
installation
- low & high profile ............................................................9
- drilling templates........................................................... 10
connections...................................................................................12
main modes...................................................................................13
functions ........................................................................................14
spa settings................................................................................... 20
keypad settings.............................................................................25
clock setting ..................................................................................30
viewing info ...................................................................................31
audio mode in.tune/in.pix
- tuner mode.....................................................................35
- cd mode .........................................................................36
- sound options................................................................38
- dvd mode in.pix ........................................................... 40
specifications................................................................................42
1
in.k600
2
in.k600
overview
in.k600
Advanced series of full-function keypads that
give complete control to wet fingers!
With its stunning design, Aeware’s new in.k600 series of advanced
keypads feature high and low profile versions, large LCD displays,
menu-driven or streamlined interfaces and raised keys. With menu
-driven models, users can control all functions and programming
of not only their spa system but also peripheral accessories like our
in.pix dvd/cd player and receiver, or our in.tune receiver/cd player
creating a true and unique Aeware experience directly from your
spa side.
in.k600 high profile
in.k600 low profile
3
warning
in.k600
WARNINGS:
Before installing or connecting the unit,
please read the following.
FAILURE TO COMPLY WITH THE FOLLOWING WARNINGS MAY
SIGNIFICANTLY SHORTEN THE PRODUCT’S LIFE TIME, AND
LEAD TO FAILURES AS WELL AS HAZARDOUS CONDITIONS*.
COMMON SENSE MUST ALWAYS PREVAIL WHEN EVALUATING
THE INSTALLATION AND/OR USE OF ANY ELECTRONIC
CONTROL IN A FINAL APPLICATION.
• The maximum ambient conditions this PRODUCT is subjected
to (temperature, humidity, etc.) are not to be exceeded.
• This PRODUCT must be installed by qualified personnel.
• Only qualified personnel are to service this PRODUCT.
There are no user serviceable parts inside.
• This PRODUCT is only compatible with Aeware’s in.pac line
of products.
• This PRODUCT should be installed on a clean flat surface.
4
• The gasket on the back of the unit will prevent water infiltration
inside, behind the mounted surface. If the gasket is damaged,
the user must seal the back of the unit with silicone to avoid any
leakage behind the mounted surface.
* HAZARDOUS CONDITION:
A condition that is potentially damaging and/or dangerous to
its operator or surroundings. This includes, but is not limited
to: fire, flooding or other water damage, dielectric breakdowns
(presence of high voltage), etc.
in.k600
function description
Multifunction Keys
1,2, 3, 4
"Ok" Key
"Plus" Key increases
parameter setting
Each of these four
keys helps you
to select and/or
execute the indicated
function displayed
on the screen in
any given window.
In this way, the task
performed by a given
multifunction key will
vary depending on the
menu or window.
"Mode" Key
selects mode of
operation: Spa, Audio,
and Options. Also, it
allows you to exit any
programming window
without saving any
changes and go
back to the previous
screen.
"Right"
Multifunction Key
"Left"
Multifunction Key
"Minus" Key
decreases
parameter setting
"Next" Key goes to
next menu page
5
icon description
in.k600
Operation Mode
Menu title
AM/PM (˚F/˚C)
Warning/Alert icons
Light icon
Information Display
Message prompt
Time, temperature
& error messages
Device status icon
Pump icons
Progress bar icon
Spa system status icons
6
Service icon
in.k600
icon description
Icon
Description
Light icon
The "Light" icon becomes animated when the light is on. The icon animation speed is
proportional to the light intensity.
Pumps icons
The "Pump" indicator numbers light up and their icons become fast animated when pumps
are in high speed, slow animated icons when pumps are in low speed.
Blower icon
The "Blower" indicator icon becomes animated when blower is on.
Service icon
A problem has been detected. Do not enter the water! Spa service is required.
Smart winter mode icon
The "SWM" icon automatically turns on when Smart winter mode is enabled. It blinks while
performing a freeze protection purge.
Economy mode icon
The "Economy" icon flashes when Economy mode is on.
Filter Cycle icon
The "Filter Cycle" icon becomes animated when filter cycle is on. It flashes when filtering is
suspended.
Waterfalls icon
The "Waterfalls" icon becomes animated when waterfall is on
7
icon description
in.k600
Icon
Description
Heater icon
The "Heater" icon becomes animated when the heater is on.
Progress bar
A visual indication of the time remaining before an equipment is turned off or before the
end of the standby mode.
Set Point icon
The "Set Point" icon automatically turns on when set point setting menu is activated.
(SP message on display). It flashes when:
1- there is a call for heat and heater has not started yet,
2- heater has just turned off and element is cooling down or
3 - if system is performing a check flow.
Standby icon
The Standby icon flashes when the standby mode is on.
Navigation icon
The navigation icon indicates the available active keys to navigate between options or
screens within a given menu i.e.:
, , Ok, Right or Left keys.
Lock icon
When the keypad is locked, the lock icon is displayed.
Hourglass icon
The Hourglass icon is displayed on the keypad screen when it asks you to wait.
8
in.k600
installation
Installation in.k600 low profile
Installation in.k600 high profile
Gasket with or without
adhesive
Gasket with or without
adhesive
2"
7.250
"
2.563
"
3.750"
2.563
"
0.25"
Optional
wing nuts and
spacers
Optional
wing nuts and
washers
To install the in.k600 low profile, use the drilling template provided
in this section. Determine the mounting location and stick the
template on chosen location. The user must cut out a rectangular
shape opening of 7.250" by 3.750" according to the template
(see illustration).
To install the in.k600 high profile, use the drilling template
provided in this section. Determine the mounting location and
stick the template on chosen location. The user must cut out two
0.25" diameter holes for the fixation studs and one 2" diameter
hole for the cable (as illustrated above).
Clean the installation surface and peel the adhesive gasket from the
back of the keypad.
Clean the installation surface and peel the adhesive gasket from the
back of the keypad.
Insert keypad and align it correctly, then ensure it's properly glued
by gently pressing evenly on the entire surface.
Insert keypad and align it correctly, then secure it properly in place
by using the two wing nuts provided.
9
driling template high profile
in.k600
6.4 mm
ø 0.25" TYP. 2x
50.8 mm
ø 2"
65.1 mm
2.563"
65.1 mm
2.563"
130.2 mm
5.125"
10
in.k600
driling template low profile
184.2 mm
7.250"
90.5 mm
3.563"
180.98 mm
7.125"
15.9 mm
ø 0.625" TYP. 2X
95.3 mm
3.750"
47.6 mm
1.875"
92.1 mm
3.625"
4.8 mm
R 0.188" TYP. 4x
Connections
in.k600
Connecting in.k600 keypad to in.xm
Main keypad in.k600
To connect the in.k600 keypad,
simply insert its in.link connector into the appropriate
keypad connector of the in.xm
enclosure (as illustrated).
To provide additional accesscontrol, an auxiliary keypad is
also available (optional).
Connect in.k600 keypad into
the appropriate in.keys main
keypad connector
(as illustrated above).
12
in.k600
main modes
Main Modes
These menus allow access and control of the main devices controlled by the in.k600 keypad.
Spa Mode
This menu allows the control of the pumps and light as well as the activation of
diverse programming modes. Various icons become animated to let you know
present spa status.
Audio
This menu allows you to activate and control audio functions.
Future Release Features (To Be Determined)
Options Mode
This menu allows you to personalize operating settings of your spa equipment
such as programming spa and keypad settings, setting the clock and finally, viewing
software information.
13
functions
Spa Mode Sub-Menus
14
in.k600
in.k600
functions
Spa Mode
This menu allows control of all pumps, blower, waterfalls, spa light,
as well as the activation of the Economy and Standby modes.
As a convenient feature every time a device is on, its icon becomes
animated to see its activation status. If you want to stop all motor
activity at once you can do so by activating the Standby mode.
• Press Mode key to display
the mode selection window.
• Select Spa to view Spa menu.
15
functions
in.k600
Starting Pump 1
Starting Pump 2
Starting Pump 3
Starting Light
• Select Pump 1 to turn
Pump 1 on.
• Select Pump 2 to turn
Pump 2 on.
• Select Pump 3 to turn
Pump 3 on.
• Select Light key to turn
light on.
• Select Pump 1 repeatedly to
control Pump 1 speeds.
• Select Pump 2 repeatedly to
control Pump 2 speeds.
• Select Pump 3 again to turn
Pump 3 off.
• Select Light key again to turn
light off.
The pump icon becomes
animated when Pump 1 is
running. A built-in timer turns
Pump 1 off after a certain period of time unless manually
deactivated first.
The pump icon becomes
animated when Pump 2 is
running. A built-in timer turns
Pump 2 off after a certain period of time unless manually
deactivated first.
The pump icon becomes
animated when Pump 3 is
running. A built-in timer turns
Pump 3 off after a certain period of time unless manually
deactivated first.
Light icon becomes animated
when light is on.
16
A built-in timer automatically
turns light off after a certain
period of time unless manually
deactivated first.
in.k600
functions
Next menu page
*Starting Pump 4
*Starting Pump 5
*Starting Blower
• Press Next key to display the
next page in the spa menu.
• Select Pump 4 to turn
Pump 4 on.
• Select Pump 5 to turn
Pump 5 on.
• Select Blower to turn
blower on.
This page allows you to select
and control the following
optional features: Pump 4,
Pump 5, Waterfalls and Blower.
• Select Pump 4 again to turn
Pump 4 off.
• Select Pump 5 again to turn
Pump 5 off.
• Select Blower again to turn
blower off.
Pump icon is animated when
Pump 4 is on.
Pump icon is animated when
Pump 5 is on.
Blower icon is animated when
blower is on.
A built-in timer automatically
turns pump 4 off after a certain
period of time unless manually
deactivated first.
A built-in timer automatically
turns pump 5 off after a certain
period of time unless manually
deactivated first.
A built-in timer automatically
turns blower off after a certain
period of time unless manually
deactivated first.
* Optional feature depending on spa configuration.
17
functions
in.k600
*Starting waterfalls
Next menu page
Turning Economy on
Standby Mode
• Select Waterfalls to turn
waterfalls on.
• Press Next key to display the
next page in the spa menu.
• Select Waterfalls again to turn
it off.
This page allows you to select
and control the following:
Economy mode and the
Standby mode.
The Economy mode allows you
to lower the temperature set
point of the spa by 20˚F (11˚C)
during a certain period of the
day. When in Economy mode,
the “Economy Mode” icon
flashes.
When this feature is activated
it allows you to stop all pumps
at once by a simple click of
a button! (light and audio
features will remain active).
Waterfalls icon is animated
when waterfalls is on.
A built-in timer automatically
turns waterfalls off after a certain
period of time unless manually
deactivated first.
• Select Economy to activate
the economy mode.
• Select Economy again to
override economy programming (see spa setup section)
• Select Standby to activate
this mode.
• Select Standby again to
resume normal operations.
(see next page)
* Optional feature depending on spa configuration.
18
in.k600
Please note that the system
automatically returns to Normal
mode after a certain period of
time, unless the Standby mode
has been reactivated.
In order to warn the user,
the spa light will flash for a few
seconds before exiting the
Standby mode and the restart
of all pumps by the system.
The "Standby" message is also
displayed during Standby
mode.
functions
Displaying time
Viewing active progress bars
• Press Ok key to display the
time.
A progress bar is a visual indicator of the time remaining
before a device is turned off or
before the end of the Standby
mode. Only one bar is displayed at the time.
• Press Ok key a second time to
go back to water temperature
display.
• Use Left or Right keys to
visualize the progress bar of
each activated device.
* Pump will stay turned on if
there is a request for more heat.
19
spa settings
in.k600
Options sub-menus
Spa settings
This menu allows you to personalize operating settings of your spa such as filtration,
economy as well as reminder (active maintenance) and warning messages.
Keypad settings
This menu allows you to activate keypad functions.
Clock settings
This menu allows you to set the clock.
Info settings
This menu allows you to access spa equipment information on the spa controller,
heater and keypad software updates.
20
in.k600
spa settings
Setting filter cycles
Setting filter cycle start time
Setting filter cycle duration
Setting filter cycle frequency
To program the filter cycle, you
must enter these parameters:
the start time, duration and
frequency. During a filter
cycle, pumps run for one minute to purge the plumbing,
then Pump 1 runs for the
programmed number of hours.
The display will show the
starting hour previously set.
Here we set a value for the filter
cycle duration, in hours and
minutes.
Here we set the number of
filtering cycles that the system
will perfom per day.
• Use
or key to change
hour setting.
• Use
or
key to change
the frequency setting.
• Use Right key to set minutes.
• Select Enter option
on
screen menu to save changes
and go back to options main
menu.
• Press Mode key
• Select Options menu
• Select Spa sub-menu
• Select Filter option
• Use
or key to set new
hour setting.
• Use Right key to set minutes.
• Use
or key to change
minutes setting.
• Select Next arrow
on
screen menu to go to the
next parameter: filter cycle
duration.
• Use
or key to change
minutes setting.
• Select Next arrow
on
screen menu to go to the
next parameter: filter cycle
frequency.
21
spa settings
in.k600
Setting Economy mode
Setting Economy start time
Setting Economy stop time
To program the Economy
mode, you must enter these
parameters: the start time and
stop time.
• Use
or
setting.
• Use
or
setting.
• Press Mode key.
• Select Options menu.
• Select Spa sub-menu.
• Select Economy mode.
22
key to set hour
key to set hour
• Use Right key to access
minutes option.
• Use Right key to access
minutes option.
• Use
or
minutes.
• Use
or
minutes.
key to set
• Select Next arrow
on
screen menu to go to the next
parameter: Stop time.
key to set
• Select Enter option
on
screen menu to save changes
and go back to options main
menu.
in.k600
spa settings
Setting maintenance
reminder prompts
Turning reminders on/off
Periodically, the system will
indicate that it's time for your
spa check-up or to perfom
various maintenance tasks on
your spa, ie:. clean filter.
• Use or key to activate or
deactivate prompt(s).
This menu allows you to
activate/deactivate or simply
reset the maintenance
reminder prompts.
• Press Mode key
• Select Next arrow on screen
menu to go to the next menu
screen.
Resetting prompt messages
Viewing spa reminders
• Select Enter option on
screen menu to reset message
and go back to the main
menu. Thus indicating that a
maintenance task is done.
The reminder icon will show up
to prompt you to review active
maintenance messages.
• Select the option to close
the window and go back to
the main menu, should you
want to postpone the indicated
task. The reminder message
will return at a later time.
• Select Options menu
• Select Reminder option
23
spa settings
in.k600
Spa warnings
Viewing spa warnings
Postponing spa warnings
This menu allows you to view all
active warning messages ie:. hot
water.
The warning icon shows up to
prompt you to review active
warning messages.
• Select the option to close
the window and go back to
the main menu. The warning
message will return at a later
time.
• Press Mode key
• Select Options menu
• Select Warning option
• Press Mode key again to go
back to the main menu.
24
in.k600
Setting keypad display
options
This sub-menu is used to set
keypad display settings such
as: contrast, backlight, normal
or reverse display and finally
inverted display.
• Press Mode key
• Select Options menu
• Select Keypad sub-menu
• Select Display options
keypad settings
Adjusting contrast
Adjusting backlight
Normal/Reverse display
Contrast should be set for
comfortable viewing.
Adjust to gain more control
over screen brightness when
use in low-light conditions.
Also known as negative display,
this option enables you to
reverse the appearance of
text to white letters on a black
background. Thus, reducing
glare for many users.
• Use Left or Right keys to adjust
desired level of contrast.
• Select Next arrow on
display to go to next screen
menu.
• Use Left or Right keys to adjust
backlight brightness.
• Select Next arrow on
display to go to next screen
menu.
• Use or key to activate or
deactivate reverse display.
• Select Next arrow on
display to go to next screen
menu.
25
keypad settings
in.k600
Display orientation
This feature inverts the display *
to make it readable from inside or
outside the spa. To invert display:
• Use
or key to activate or
deactivate reverse display.
• Select Enter option on
screen menu to save changes
and go back to the main menu.
* When this feature is enabled, the functionality of all keys is inverted as well.
26
in.k600
Setting keypad audio
options
This sub-menu is used to set
keypad audible options setting
such as: keypad on/off (key
beep), and alarm on/off.
• Press Mode key
• Select Options menu
keypad settings
Keypad on/off
Turning alarm sound on
To enable/disable key beep:
This feature alerts you when an
error condition has occurred.
• Use or key to activate or
deactivate key beep.
• Select Next arrow on
display to go to next screen
menu.
• Use or key to activate or
deactivate alarm sound.
• Select Enter option on
screen menu to save changes
and go back to the main menu.
• Select Keypad sub-menu
• Select Sound options
27
keypad settings
in.k600
Setting regional settings
Setting language
Temperature units
Selecting time format
This sub-menu is used to set
keypad regional settings such
as: language (you can choose
from English, Francais, Español
or Deutsch), select temperature
display units and choose a
format for time display.
• Use or key to select
from: English, Francais, Español
or Deutsch.
Water temperature can be
displayed in °F or °C.
This feature allows you to
switch display from regular to
military time format.
• Press Mode key
• Select Options menu
• Select Keypad sub-menu
• Select Regional options
28
• Select Next arrow on
display to go to the next screen
menu.
• Use or
setting.
key to change
• Select Next arrow
on
display to go to the next screen
menu.
• Use or
setting.
key to change
• Select Enter option
on
screen menu to save changes
and go back to keypad main
menu.
in.k600
keypad settings
Partial keypad lockout
Full keypad lockout
Full lock: all keys are disabled.
When the keypad is locked,
the icon will be displayed.
• Use or key to select
"Partial".
• Use or
"Full".
• Press Mode key
• Select Enter option on
screen menu to go back to spa
main menu.
• Select Enter option on
screen menu to back to spa
main menu.
To unlock the keypad, select
and hold Options menu soft
key for 5 seconds.
To unlock the keypad, press and
hold Light key for 5 seconds.
Security options
This sub-menu allows you to
lockout your keypad to prevent
unauthorized parameter setting
of the unit. You may choose
between partial lock or full
keypad lock.
Partial keypad lock: the basic
functions of the spa remain
accessible (pump and light
outputs) but it's impossible to
change the temperature Set
Point, or to enter the Programming mode.
• Select Options menu
• Select Keypad sub-menu
• Select Security options
key to select
29
clock settings
in.k600
Setting the time
• Press Mode key
• Select Options menu
• Select Keypad sub-menu
• Select Clock seting
• Use or
setting.
key to set hour
• Use Right key to access
minutes option.
• Use or
minutes.
key to set
• Select Enter option
on
screen menu to save changes
and go back to keypad main
menu.
30
in.k600
viewing info
Viewing information about
the system
Viewing information about
the spa controller
Viewing information on
heater software
Viewing information on
keypad software
This sub-menu allows you
to view spa equipment data
such as: spa controller, heater
and keypad software version.
Also, here it's possible to reset
programmed settings back to
default factory values and finally
to upgrade keypad software.
Here the spa controller software
ID number and version are
displayed.
Here the heater software
ID number and version are
displayed.
Here the keypad software
ID number and version are
displayed.
• Select Next arrow
on
display to go to the next
screen menu.
• Select Next arrow
on
display to go to the next
screen menu.
• Select Next arrow
on
display to go to the next
screen menu.
• Press Mode key
• Select Options menu
• Select Info sub-menu
31
viewing info
in.k600
Resetting keypad
programmed values
Upgrading keypad software
Here is possible to reset
programmed settings back to
original factory values.
• Use Ok key to start software
upgrade of the keypad.
• Press Ok to reset back to
default factory values.
Or simply:
• Select Next arrow
on
display to go to the next
screen menu.
32
• Select the
option to abort
upgrading operation.
Should you desire Not to
upgrade the keypad software
simply:
• Select Enter option
on
screen menu to back to
Options main menu.
in.k600
audio mode
Audio Mode Sub-menus
Radio frequencies
broadcast in stereo
in.tune/in.pix
in.tune/in.pix
in.tune/in.pix
in.tune
in.pix
or
Dolby
Digital Theatre System
33
audio mode
in.k600
Audio Mode
Power On/Off
Source
Selecting radio band Band
• Press Mode key.
• Select Power to turn system on
or off.
In audio mode:
In tuner mode:
• Select repeatedly SRC to
choose between the following
(in order):
• Press Mode key.
Tuner, cd (in.tune) / dvd (in.pix)
or Aux.
• Press Next key.
• Select Audio mode.
34
When power is off, time is displayed.
• Select Audio mode.
• Select Band to select between
FM1, FM2, FM3, AM1, AM2 and
WB (weather band).
in.k600
tuner mode
Tuning up or down
Auto scan mode A/PS
Selecting weather band mode
Selecting weather station
In tuner mode:
In tuner mode:
In tuner mode:
In tuner mode:
• Press Mode key.
• Press Mode key.
• Press Mode key.
• Press Mode key.
• Select Audio mode.
• Select Audio mode.
• Select Audio mode.
• Select Audio mode.
• Select repeatedly SRC to select
Tuner option.
• Press Next key repeatedly to
select A/PS to scan preset
stations. The tuner will scan
up and wait for a few seconds,
then scan up again.
• Press Next key repeatedly
to select Weather to access
Weather band mode (or press
BAND in Tuner mode until WB
is displayed).
• Press Next key repeatedly
to select Weather to access
Weather band mode (or press
BAND in Tuner mode until WB
is displayed).
• Press key to make a seek up
to the next preset station.
• Press key to make a seek
down to the next preset station.
Once the desired station is
found, select A/PS again to stop
Scan mode.
It automatically skips to the
strongest weather channel.
• Select Weather again to turn off
weather band radio and return
to previous mode.
• Press to go to the next
memorized weather channel
(CH1 to CH7).
• Press to go to the previous
memorized weather channel
(CH1 to CH7).
35
cd mode
in.k600
If you inserted a CD containing
MP3 files, a different display
info will appear if you select
Display:
Display information
cd containing mp3 files:
• Press Mode key.
• Select Audio mode.
• Select SRC to select CD option.
• Press Next key repeatedly to
display the next page in the
audio menu.
• Successively select Display to
switch between the following
display information:
Track no. / Playtime - Clock
(clock is displayed for
5 seconds only).
36
Track no. / Playtime – Folder no.
/ Track no. – Folder name – File
name – Song name – Artist’s
name – Album name - Clock
(clock is displayed for 5 seconds
only).
The system can only display the
first 8 letters of ID3 tags. If the
recorded information is longer
than 8 letters, text will scroll to
the left once, then the 8 first
letters will be displayed.
If specific info has not been
recorded on an MP3 disc,
NO FOLD, NO TRK, NO TLT,
NO ALBM, NO ART will be
displayed.
Intro scan
Repeat
In cd mode:
In cd mode:
You can preview each song of
the current disc for about
10 seconds.
To play a song repeatedly:
• Press Mode key.
• Select Audio mode.
• Select SRC to select CD option.
• Press Next key repeatedly to
display the next page in the
audio menu.
• Select Scan mode.
• Select Scan mode again to turn
off this feature.
• Press Mode key.
• Select Audio mode.
• Select SRC to select CD option.
• Press Next key repeatedly to
display the next page in the
audio menu.
• Select Repeat.
• Select Repeat again to turn off
this feature.
in.k600
cd mode
Random
Track up or down
Pause
Changing discs
In cd mode:
In cd mode:
In cd mode:
In cd mode:
• Press Mode key.
• Select Audio mode.
• Select SRC to select CD option.
• Press Next key repeatedly to
display the next page in the
audio menu.
• Select Random to play song
tracks randomly.
• Select Random again to turn
off this feature.
• Press Mode key.
• Select Audio mode.
• Select SRC to select CD option.
• Press Next key repeatedly to
display the next page in the
audio menu.
• Press or to change
music tracks.
• Press Mode key.
• Select Audio mode.
• Select SRC to select CD option.
• Press Next key repeatedly to
display the next page in the
audio menu.
• Select Pause to pause the
playing of a disc.
• Select Pause again to resume
play.
• Press Mode key.
• Select Audio mode.
• Select SRC to select CD option.
• Press Next key repeatedly to
display the next page in the
audio menu.
• Select
or
to switch
*CDs.
• Press Next key to go back to the
main page in the audio menu.
* option only available on
equipment with cd changer.
37
sound options
in.k600
Tone Tone
Fader
Equalization
In all modes:
In all modes:
In all modes:
• Successively selecting EQ will
allow you to choose from: DSP
Off, Jazz, Pop, Classic, Rock or
Vocal.
• Select Tone to select either
(in order): volume, bass, treble,
balance or fader.
Balance control: Adjusts the
amount of sound output to the
left and right speakers.
• Select Fader option repeatedly
to select from one of the
following adjustments:
• Use or key to change the
desired parameter.
Fader control: Adjusts the
amount of sound output
(see Fader on next page).
FAD-FRONT: Front speaker only.
Bass control: Adjusts the amount
of low frequency that you hear.
Treble control : Adjusts the
amount of high frequency that
you hear.
38
Note: Bass and Treble settings
are available only if EQ is set to
DSP Off.
FAD-REAR: Rear speaker only.
FAD-ALL: Front and rear
speakers.
in.k600
sound options
Volume Up or Down
Muting the audio output
In all modes:
In all modes:
• Use or key to increase or
decrease volume.
• Select Mute to render silent the
audio output.
• Select Mute key again to return
to previous volume level.
39
dvd mode in.pix
in.k600
Selecting in.pix
Navigation keys
Navigation keys
Menu
This feature allows to select an
external audio/video source
such as the in.pix.
In DVD mode:
In DVD mode:
In DVD mode:
• Press or to navigate
horizontally through the
various DVD menus on
monitor screen.
• Use or key to navigate
vertically through the various
DVD menus on monitor
screen.
• Select Menu option to display
DVD menu on monitor screen.
While viewing a DVD:
While viewing a DVD:
• Press or to navigate
through the various DVD
chapters on monitor screen.
• Press
or
to increase or
decrease DVD volume.
• Press Mode key
• Select Options menu
• Press Next key
• Select Audio option
• Use or key to choose
from the in.tune, in.pix or
none.
• Select Enter option
on
screen menu to save changes
and go back to keypad main
menu.
40
in.k600
dvd mode in.pix
Stop DVD
Zoom
DVD language
In DVD mode:
In DVD mode:
In DVD mode:
• Use Ok key to select an option
from the various DVD menus
on monitor screen.
• Select Zoom option to enlarge
or reduce image on monitor
screen.
• Select Language option to
choose language from DVD
menu on monitor screen.
While viewing a DVD:
• Press Ok key to stop DVD.
41
specifications
in.k600
General specifications:
Environmentals
Storage temperature:
Operating temperature:
Humidity:
85°C (185°F) to -30°C (-22°F)
65°C (149°F) to -20°C (-68°F)
up to 100% condensing
Standards:
Mechanical Specs
Weight:
Dimensions (W x H x D):
High Profile:
Low Profile:
0.48 Kg (1.05 lbs)
Front panel
7.250" x 3.75" x 0.655"
8.684" x 4.234" x 0.200"
IP ratings IPX6
Specifications and design are subject to change without prior notice.
42
���������������������������������������
��������������
�����������
����������
�����������������������������������������������������������������
��������������������������������������������������������
���������������������