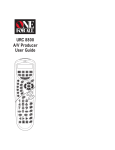
1
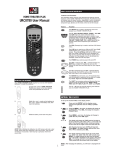
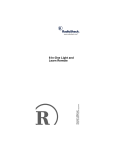
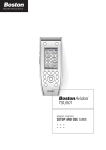
15-1935.fm Page 1 Thursday, December 31, 1998 11:37 AM
Cat. No. 15-1935
OWNER’S MANUAL
7-in-One Home Theater
Remote Control
Please read before using this equipment.
15-1935.fm Page 2 Thursday, December 31, 1998 11:37 AM
INTRODUCTION
Your RadioShack 7-in-One Home Theater Remote
Control can replace up to seven infrared remote controls. You can use it to control your TV, VCR, cable converter, satellite receiver, CD player, tuner, phonograph,
video accessory, digital audio tape, cassette, or laser
disc player.
Unlike some universal remote controls, this remote control is preprogrammed with the most commonly used
commands and does not have to learn its commands
from the original remote controls. All you have to do is
tell it which device’s remote controls you want to replace
(by entering 3-digit codes).
This manual includes a list of many manufacturers’ 3digit codes for your devices. Or, you can call the toll-free
number at the bottom of every page for assistance.
The 7-in-One transmits both infrared (IR) and radio frequency (RF) signals, so you don’t need to be within
“line-of-sight” to control devices. With the supplied IR/
RF Command Center, you can use the remote to control
devices in any room of your home.
© 1998 Tandy Corporation.
All Rights Reserved.
RadioShack and Plug ’n Power are registered trademarks
used by Tandy Corporation.
X-10 is a registered trademark of X-10 (USA) Inc.
Need help? Call 1-800-763-9232
2
15-1935.fm Page 3 Thursday, December 31, 1998 11:37 AM
CONTENTS
Preparation ........................................................................ 4
Installing Batteries ........................................................ 4
Setting the Clock .......................................................... 5
Quick Setup ....................................................................... 6
A Look at Your Remote .................................................... 8
Setting Up the Remote ...................................................
To Operate Your TV ....................................................
To Operate Your VCR or TV/VCR Combination .........
To Operate Your Cable Converter ..............................
To Operate Your Satellite Receiver .............................
To Operate Your CD Player ........................................
To Operate Your Tuner/Receiver ................................
To Operate Your Amplifier ...........................................
To Operate Other Devices ..........................................
12
12
16
21
24
26
29
31
33
Special Features .............................................................
Searching for a Code ..................................................
Using the Sleep Function ...........................................
Converting Device Keys .............................................
Volume Lock ...............................................................
Using the Macro Keys ................................................
Setting Up Timed Sequences .....................................
Setting Up the Home Theater Key ..............................
Clear All ......................................................................
Using the IR/RF Command Center .............................
37
37
38
39
40
41
42
44
45
46
Troubleshooting .............................................................. 49
Need help? Call 1-800-763-9232
3
15-1935.fm Page 4 Thursday, December 31, 1998 11:37 AM
PREPARATION
INSTALLING BATTERIES
Your 7-in-One requires four AAA alkaline batteries (not
supplied), available at your local RadioShack store.
Cautions:
• Use only fresh batteries of the required size and
recommended type.
• Do not mix old and new batteries, different types of
batteries (standard, alkaline, or rechargeable), or
rechargeable batteries of different capacities.
To install the batteries:
1. Press down on the battery compartment cover and
slide the cover off.
2. Place the batteries in the compartment, matching
the polarity marks (+ and –) inside.
3. Replace the cover.
If the batteries are installed correctly and the red indicator does not light when you press POWER, replace the
batteries.
Cautions:
• Dispose of old batteries promptly and properly. Do
not burn or bury them.
• Always remove old or weak batteries. Batteries can
leak chemicals that can destroy electronic parts.
Notes:
• After you install batteries, the remote performs a
test of the display for 10 seconds or until you press
a key.
Need help? Call 1-800-763-9232
4
15-1935.fm Page 5 Thursday, December 31, 1998 11:37 AM
• To extend battery life, the display turns off after 10
seconds of keypad inactivity and turns on again
when you press any key.
• Device codes you have programmed into the 7-inOne remain stored in memory while you replace
the batteries. However, you must reset the clock.
SETTING THE CLOCK
Follow these steps to set the clock on the 7-in-One’s display.
1. Hold down SETUP until TIMED SEQ. appears.
2. Press MENU
twice. CONFIGURE appears.
3. Press SELECT. THEATR SEL appears.
4. Press MENU
again.
5. Press SELECT. TIME appears and the first digit in
the time flashes. Enter the time in 12-hour format.
AM/PM flashes.
6. If necessary, press MENU
to toggle between AM
and PM, then press SELECT. The day of the week
display appears.
7. Use MENU
and
to toggle through the days of
the week until the current day appears, then press
SELECT. The currently selected device and the correct time appear.
Need help? Call 1-800-763-9232
5
15-1935.fm Page 6 Thursday, December 31, 1998 11:37 AM
QUICK SETUP
The steps in this section tell you how to quickly set up
the 7-in-One to operate all of your devices.
To set up devices individually, or add a device after you
have set up the 7-in-One, see the appropriate section
under “Setting Up the Remote.”
Note: For the best operation, you should be within 15
feet of the device you want to control.
Follow these steps for quick setup.
1. Turn on all of the devices you are setting up.
2. Press TV.
3. Hold down SETUP until TIMED SEQ appears.
4. Press MENU
. CODE SETUP appears.
5. Press SELECT. DEV SET UP appears.
6. Press SELECT again. TV appears.
7. Enter the first three-digit TV code listed for your
TV’s brand in “Setup Codes for TVs” on Page 12,
then press SELECT.
8. Point the remote at your TV and press POWER.
Your TV should turn off. If it does not, enter the next
code from the list and press SELECT then POWER
again. When your TV turns off, press VCR. VCR
appears.
9. Enter the first three-digit VCR code listed for your
VCR’s brand in “Setup Codes for VCRs” on
Page 16 or “Setup Codes for TV/VCR Combos” on
Page 19, then press SELECT.
Need help? Call 1-800-763-9232
6
15-1935.fm Page 7 Thursday, December 31, 1998 11:37 AM
10. Point the remote at your VCR and press POWER.
Your VCR should turn off. If it does not, enter the
next code from the list and press SELECT then
POWER again. When your VCR turns off, press
CBL. CABLE appears.
11. Continue setting up devices by pressing the appropriate device key, entering your device’s code and
pressing SELECT. Refer to the code list for the type
of device you want to set up:
Setup Codes for
Page
Amplifiers
32
Cable Converters
22
Cassette Players
34
CD Players
26
DAT Players
34
Satellite Receivers
24
DVD Players
34
Home Automation
35
Laser Disc Players
35
Miscellaneous Audio
35
Phonographs
36
Tuners/Receivers
29
12. Once the 7-in-One is operating all of your devices,
press ESC to stop programming.
Need help? Call 1-800-763-9232
7
15-1935.fm Page 8 Thursday, December 31, 1998 11:37 AM
A LOOK AT YOUR REMOTE
AMP, TUN, TV, CBL, CD, VCR, SAT, and PLUG ’N POWER
— let you select the device you want to control.
HOME THEATER — lets you control all the functions of a
home theater system.
POWER — turns the remote on and off, and controls ALL
LTS ON in the PLUG ’N POWER mode.
MENU — works like the Menu or OSD (on-screen display) key on your original remote. Use , , , and
(Menu Up, Down, Right and Left) to navigate your onscreen menus. If your original remote had a Select key
to select menu options, use SELECT in its place. Use
CLEAR (SHIFT + SELECT) to exit/clear menus. See your
device’s original owner’s manual for more detailed instructions on using menus.
Notes:
•
, , , and
also control the Rear Level +/–
and Balance Right/Left functions in AMP or TUN
mode, and Disc +/– and Track +/– in CD mode.
• SELECT also controls TAPE MON in AMP or TUN
mode, Disc Select in CD mode, and the Fetch function in the on-screen menu of an RCA satellite system.
PROG (SHIFT + MENU) — operates your satellite system’s and cable converter’s Guide function, as well as
any device’s secondary menus.
SUR (Surround) — operates the Surround mode. It also
operates the favorite channel function in SAT and CBL
modes, 10+ (to access tracks numbered higher than 10)
in CD mode, and the DISC function of a laser disc player.
Need help? Call 1-800-763-9232
8
15-1935.fm Page 9 Thursday, December 31, 1998 11:37 AM
SHIFT — besides those functions described elsewhere
in this manual, works with these keys to control advanced features:
Mode
VCR
Key
PLAY
REW
FF
STOP
PAUSE
Satellite Receiver
MENU+
MENU–
Receiver/Tuner/Amplifier MENU+
MENU–
MENU
MENU
Laser Disc/Cassette/DVD PLAY
REW
FF
STOP
PAUSE
CD
STOP
Function
SLOW
REW SLOW (SLOW–)
FF SLOW (SLOW+)
EJECT
X2
AUDIO+
AUDIO–
CENTER LEVEL +
CENTER LEVEL –
DELAY+
DELAY–
REVERSE PLAY
REW SLOW
FF SLOW
EJECT
X2
EJECT
ESC (Escape) — lets you exit the remote’s displayed
menu.
CENTER and REAR (SHIFT + CENTER) — work like the
Add and Delete keys on your original TV remote, the
DISC A and B keys on your laser disc remote, or the
SAT and AUDIO keys of a satellite system remote.
VOL+ (Volume Up), VOL– (Volume Down) and MUTE —
control the volume like the Volume Up and Down and
Mute keys on your original remote. In Plug n’ Power
mode, VOL+/VOL– operates Bright and Dim and MUTE
operates ALL OFF.
Need help? Call 1-800-763-9232
9
15-1935.fm Page 10 Thursday, December 31, 1998 11:37 AM
SLEEP (SHIFT + MUTE) — controls the Sleep Timer in
TV, CABLE, SAT, and AMP or TUN modes for devices
which have this feature. If your device does not have a
Sleep Timer, SLEEP activates the remote’s built-in sleep
timer.
CH+ (Channel Up) and CH– (Channel Down) — work
like the Channel Up and Down keys on your original remote. CH+ and CH– also control Preset Up/Preset
Down in AMP or TUN mode and ON/OFF in Plug n’
Power mode.
Digit Keys (0–9) — work like the digit keys on your original remote. They also control Input Selections in AMP
or TUN mode.
ENTER — works like the Enter key on your original re-
mote (for example, to change channels).
TV/VCR — works like the TV/SAT key on your original
satellite remote. TV/VCR also controls TV/Video in TV
mode, TV/VCR in VCR mode, A/B in cable and CD
modes, and Input Select in AMP or TUN mode.
LAST (Last Channel) — works like the Previous Chan-
nel or Recall key on your original remote. It also operates the RANDOM functions in the CD and AMP or TUN
modes.
AUDIO and VIDEO (Macro Keys) — memorize up to 15
keystrokes, so you can repeat them in sequence in any
mode at the press of a single key.
REW (Rewind), PL (Play), FF (Fast Forward), REC
(Record), STOP, and PAUSE — work like the transport
keys on your original VCR or Laser Disc player remotes.
To guard against accidentally recording over a videotape, you must press REC twice before recording.
Need help? Call 1-800-763-9232
10
15-1935.fm Page 11 Thursday, December 31, 1998 11:37 AM
LAST — works like the Previous Channel or Recall key
on your original TV remote.
DISPLAY (SHIFT + LAST) — controls the Display function
of your devices. If you are operating an RCA satellite
system, DISPLAY controls the Select function in your
On-Screen Guide and Display when you are viewing a
program. If you are operating a CD player, it controls the
Time function.
PIP — controls your TV or VCR’s Picture-in-Picture fea-
ture. Works like the VIEW key on your satellite receiver’s remote.
FREEZE (SHIFT + PIP) — freezes your Picture-in-Picture
window.
SWAP — swaps the Picture-in-Picture window and the
main picture.
MOVE PIP — moves the Picture-in-Picture window
around the screen. Works like the Next key on your satellite receiver’s remote.
LITE — lets you turn the remote’s backlight and display
on and off. When you press LITE to turn on the back-
light, the backlight stays lit for 5 seconds then lights
again anytime you press a key. To turn off the backlight,
press LITE again.
SETUP — lets you use the remote’s displayed menu
menu to program your 7-in-One.
Need help? Call 1-800-763-9232
11
15-1935.fm Page 12 Thursday, December 31, 1998 11:37 AM
SETTING UP THE REMOTE
Note: For the best operation, you should be within 15
feet of the device you want to control.
TO OPERATE YOUR TV
Locate the codes for your TV in “Setup Codes for TVs”
and write them in the space below. The brands are listed in alphabetical order, with the most popular codes
listed first.
Codes: _____________________________________
Then follow these steps to program the 7-in-One to operate your TV.
1. Turn on your TV.
2. Press TV then hold down SETUP until TIMED SEQ
appears.
3. Press MENU
. CODE SETUP appears.
4. Repeatedly press SELECT until TV appears.
5. Enter the first three-digit code listed for your TV’s
brand, then press SELECT.
6. Point the 7-in-One at your TV and press POWER.
Your TV should turn off. If it does not, enter the next
code from the list and press SELECT then POWER
again. When your TV turns off, press ESC to stop
programming.
Setup Codes for TVs
Brand
Codes
Brand
Codes
Akai
030
Alaron
179, 183
Abex
032
A-Mark
003
Admiral
093
Ambassador
177
Adventura
046
055
Aiko
092
Anam
National
Need help? Call 1-800-763-9232
12
15-1935.fm Page 13 Thursday, December 31, 1998 11:37 AM
Brand
Codes
Brand
Codes
Anam
180
Dumont
017, 019
AOC
019, 030, 003,
052, 185
Electroband
000, 185
Electrohome
381, 389, 409
Archer
003
Emerson
Audiovox
092, 451, 180,
003
Baysonic
180
Belcor
019
236, 463, 019,
180, 280, 179,
154, 177, 178,
181, 182, 183,
185, 270, 282,
038, 158, 039
Bell & Howell
154, 016
Envision
030
Bradford
180
Fisher
154, 159
Brockwood
019
Fujitsu
179
Broksonic
236, 463, 003
Funai
171, 180, 179
Candle
030, 056, 046,
186
Futuretech
180
GE
047, 051, 055,
451, 021, 178,
027, 029, 135,
279, 282, 174,
093
Gibralter
017, 019, 030
Goldstar
019, 030, 056,
178, 001, 002,
032, 106, 409
Gradiente
053, 056
Grunpy
180, 179
Hallmark
178
Harley
Davidson
179
Harvard
180
Hitachi
145, 151, 056,
032, 038, 279,
409, 413
Infinity
054
Inteq
017
180
Janeil
046
451, 092, 019,
091, 039
JBL
054
JCB
000
Daytron
019
JVC
Denon
145
053, 036, 069,
160, 169, 182
Kawasho
158
Carnivale
030
Carver
054
CCE
217
Celebrity
000
Cineral
092, 451
Citizen
060, 030, 056,
092, 186, 280,
046, 039
Clairtone
185
Concerto
056
Contec
180, 157, 158,
185
Craig
180
Crosley
054
Crown
180, 039
Curtis Mathes 047, 054, 060,
030, 056, 451,
154, 051, 016,
039, 093, 145
CXC
Daewoo
Need help? Call 1-800-763-9232
13
15-1935.fm Page 14 Thursday, December 31, 1998 11:37 AM
Brand
Codes
Brand
Codes
Kaypani
052
Nikko
092, 030, 178
KEC
180
Noblex
430
Kenwood
019, 030
Noshi
018
Kloss
024, 046
NTC
092
KMC
106
Onwa
180
KTV
180, 280, 030,
183, 185, 039,
217
Optimus
154, 250, 166
Optonica
093, 165
Orion
236, 463, 179
Panasonic
250, 051, 055
JC Penney
047, 156, 019,
060, 051, 030,
056, 178, 002,
003, 018, 021,
027, 135, 032,
149, 039
Philco
054, 096, 019,
145, 030, 020,
028, 463
LG
056
Logik
016
Luxman
056
LXI
047, 054, 156,
154, 178, 148
Magnavox
054, 096, 186,
187, 179, 030,
020, 024, 028,
036, 386
Majestic
016
Marantz
054, 030
Philips
054
250
Pilot
030, 019, 039
145, 178, 003
Pioneer
038, 166
185
Portland
092, 019, 039
150, 154, 016,
056, 178, 106,
250
Prism
051
Proscan
047
Proton
178, 003, 052
150, 019, 030,
178, 155
Pulsar
017, 019
Quasar
250, 051, 055,
165
RadioShack
047, 019, 180,
154, 030, 056,
178, 165, 409,
032, 039
RCA
047, 018, 019,
051, 029, 038,
090, 278, 135,
174, 093
Realistic
019, 180, 165,
154, 030, 056,
178, 032, 039
Rhapsody
185, 183
Matsushita
Megatron
MEI
Memorex
MGA
Midland
047, 017, 039,
051, 032, 135
Minutz
021
Mitsubishi
150, 019, 093,
178, 155
Motorola
093, 055
MTC
019, 060, 030,
056, 091, 185
Multitech
180, 217
NAD
156, 178, 166
NEC
030, 019, 056,
036
Need help? Call 1-800-763-9232
14
15-1935.fm Page 15 Thursday, December 31, 1998 11:37 AM
Brand
Codes
Brand
Codes
Runco
017, 030
Tatung
055, 003
Sampo
030, 032, 052,
039
Technics
250, 051
Technol Ace
179
060, 019, 030,
056, 178, 032,
427, 482
Techwood
051, 056, 003
Teknika
054, 150, 019,
060, 180, 179,
016, 056, 092,
186, 312, 039
Samsung
Samsux
039
Sansei
451
Sansui
463
Telefunken
056
Sanyo
154, 159, 146
TMK
177, 056, 178
Scimitsu
019
Toshiba
Scotch
178
156, 060, 154,
036, 149
Scott
236, 019, 180,
179, 178
Tosonic
185
Totevision
039
047, 054, 156,
179, 154, 056,
171, 178, 146,
148, 149, 159
Trical
157
Universal
027
Vector
Research
030
Victor
053
Vidikron
054, 242
Vidtech
019, 178, 036
019
Viking
046, 312
Signature
016
Wards
Simpson
186, 187
Sony
000, 080
Soundesign
180, 179, 178,
186
054, 019, 165,
179, 021, 016,
030, 056, 178,
020, 027, 028,
029, 080, 096,
174
Spectricon
003
Yamaha
019, 030
171
Zenith
017, 092, 016
SSS
019, 180
Zonda
003
Starlite
180
Supre-Macy
046
Supreme
000
Sylvania
054, 096, 030,
020, 028, 381
Symphonic
171
Tandy
093
Sears
Semivox
180
Semp
156
Sharp
093, 165, 153,
157, 386, 039
Shogun
Squareview
Need help? Call 1-800-763-9232
15
15-1935.fm Page 16 Thursday, December 31, 1998 11:37 AM
TO OPERATE YOUR VCR OR
TV/VCR COMBINATION
Locate the codes for your VCR or TV/VCR combination
in “Setup Codes for VCRs” on Page 16 or “Setup Codes
for TV/VCR Combos” on Page 19 and write the codes in
the space below. The brands are listed in alphabetical
order, with the most popular codes listed first.
Codes: _____________________________________
Then follow these steps to program your 7-in-One to operate your VCR or TV/VCR combination.
1. Turn on your VCR or TV/VCR combination and
insert a tape.
2. Press VCR.
3. Hold down SETUP until TIMED SEQ appears.
4. Press MENU
. CODE SETUP appears.
5. Repeatedly press SELECT until VCR appears.
6. Enter the first three-digit VCR code listed for your
VCR’s brand, then press SELECT.
7. Point the 7-in-One at the VCR and press POWER or
PL (Play). Your VCR should turn off or start to play.
If it does not, enter the next code from the code list
then SELECT and POWER or PL again. When your
VCR turns off or plays, press ESC to stop programming.
Setup Codes for VCRs
Brand
Codes
Admiral
048
Adventura
000
Aiko
278
Brand
037, 000
Akai
041, 049, 053,
061, 106
American
High
035
Need help? Call 1-800-763-9232
16
Codes
Aiwa
15-1935.fm Page 17 Thursday, December 31, 1998 11:37 AM
Brand
Codes
Asha
240
Audiovox
037
Beaumark
Brand
Codes
GE
060, 202, 035,
240, 048, 065
240
Go Video
232, 279, 432
104
Goldstar
037, 038
209, 184, 479,
002, 121, 211,
295, 361
Gradiente
008, 000
Harley
Davidson
000
Calix
037
035
Harman/
Kardon
038, 075
Canon
Capehart
020
Harwood
072, 068
Carver
081
Headquarter
046
CCE
072, 278
HI-Q
047
Cineral
278
Hitachi
Citizen
037, 278
Colt
072
042, 105, 041,
000, 065, 166,
396
Craig
240, 037, 047,
072, 271
Jensen
041
JVC
041, 008, 067,
206
KEC
037, 278
240, 051
Kenwood
041, 067, 038
045, 278, 020
KLH
072
020
Kodak
035, 037
042
Lloyd’s
000, 208
000
Logik
072
037
LXI
037
Magnasonic
278
Magnavox
035, 081, 039,
000, 110, 149
Magnin
240
Marantz
035, 081
Marta
037
Matsushita
162, 035, 454
MEI
035
Memorex
035, 162, 037,
039, 047, 000,
240, 048, 104,
046
MGA
043, 240, 061
Bell & Howell
Broksonic
Curtis Mathes 060, 035, 041,
162
Cybernex
Daewoo
Daytron
Denon
Dynatech
Electrohome
Electrophonic 037
Emerex
032
Emerson
184, 209, 479,
037, 002, 043,
000, 121, 278,
036, 061, 068,
208, 211, 212,
294, 295, 361
Fisher
104, 047, 066,
054
Fuji
035, 033
Funai
000
Garrard
000
Need help? Call 1-800-763-9232
17
15-1935.fm Page 18 Thursday, December 31, 1998 11:37 AM
Brand
Codes
MGN
Technology
240
Minolta
042, 105
Mitsubishi
043, 067, 048,
061, 075, 173
Motorola
035, 048
MTC
000, 240
Multitech
000, 072
NEC
038, 041, 067,
104, 040
Nikko
037
Nikon
034
Noblex
240
Olympus
035
Optimus
037, 048, 104,
162, 454, 432
Brand
Codes
RadioShack
037, 000
Radix
037
Randex
037
RCA
060, 202, 035,
042, 240, 048,
065, 105, 106,
149
Realistic
035, 037, 047,
000, 048, 104,
066, 062, 046
Ricoh
034, 253
Runco
039
Salora
075
Samsung
240, 045, 051,
053
Sanky
048, 039
Sansui
000, 041, 067,
082, 271, 479
Optonica
062
Orion
184, 479, 002,
295
Sanyo
104, 047, 240,
046
Panasonic
162, 035, 254,
378, 454
Scott
JC Penney
035, 037, 042,
240, 038, 040,
054
043, 045, 184,
121, 210, 211,
212
Sears
035, 104, 037,
047, 042, 000,
066, 046, 054,
105
Semp
045
Sharp
048, 062
Pentax
042, 065, 105
Philco
035, 209, 479
Philips
081, 035, 110,
062
Pilot
037
Shintom
072
Pioneer
067, 162
Shogun
240, 051
Portland
020
Singer
072
Profitronic
240
Sony
Proscan
060, 202
032, 033, 034,
000, 035, 253
Protec
072
STS
042
Sunpak
253
Sylvania
081, 035, 043,
000, 110
Symphonic
000
Tatung
041
Pulsar
039, 051
Quarter
046
Quartz
046
Quasar
035, 162, 454
Need help? Call 1-800-763-9232
18
15-1935.fm Page 19 Thursday, December 31, 1998 11:37 AM
Brand
Codes
TEAC
041, 000
Technics
162, 035
Teknika
035, 037, 000
Thomas
000
TMK
240, 036, 208
Toshiba
Setup Codes for
TV/VCR Combos
Brand
Codes
American
High
035*
045, 043, 066,
210, 212, 366
Broksonic
002, 479
Colt
072
Totevision
037, 240
Curtis Mathes 035*
Unitech
240
Daewoo
278
Universum
325
Emerson
002, 294, 479
Vector
Research
038, 040
Funai
000
GE
Vector
045
035*, 060*,
048*, 240
Video
Concepts
045, 040, 061
Videosonic
Wards
Hitachi
000
Lloyds
000
240
MGA
240
060, 035, 047,
042, 000, 240,
048, 081, 072,
062, 149, 212
Magnavox
000, 035*,
081*
Magnin
240
White
Westinghouse
278
Memorex
037, 162*
Mitsubishi
048*
Optimus
1162*
XR-1000
035, 000, 072
Orion
002, 479
Yamaha
038
Panasonic
Zenith
039, 000, 034,
033
035*, 162*,
1162*
JC Penney
035*, 240
Quasar
035*, 162*
RCA
035*, 060*,
048*
Samsung
240*
Sansui
000, 479
Sanyo
240
Sears
000, 037
Sony
032*
Symphonic
000
Zenith
000
Need help? Call 1-800-763-9232
19
15-1935.fm Page 20 Thursday, December 31, 1998 11:37 AM
Note: If your TV/VCR works using a code (from the table) highlighted with an asterisk (*), you might need to
program a separate TV code to control the volume.
Check the list below and follow the instructions in “To
Operate Your TV” on Page 12 to program the supplied
TV code.
VCR Code
Code for TV
Volume
Control
032
000
035
051
048
093
060
047
081
054
162
250
240
060
Need help? Call 1-800-763-9232
20
15-1935.fm Page 21 Thursday, December 31, 1998 11:37 AM
TO OPERATE YOUR CABLE
CONVERTER
Locate the codes for your cable converter in “Setup
Codes for Cable Converters” on Page 22 and write
them in the space below. The brands are listed in alphabetical order, with the most popular codes listed first.
Codes: _____________________________________
Follow these steps to program the 7-in-One to operate
your cable converter.
1. Turn on your cable converter.
2. Press CBL.
3. Hold down SETUP until TIMED SEQ appears.
4. Press MENU
. CODE SETUP appears.
5. Repeatedly press SELECT until CABLE appears.
6. Enter the first three-digit code listed for your converter’s brand, then press SELECT.
7. Point the 7-in-One at the cable converter and press
POWER. Your cable converter should turn off. If it
does not, enter the next code in the code list and
press SELECT then POWER again. When your
cable converter turns off, press ESC to stop programming.
Note: If your original cable converter remote does not
have an ON key, press CH+ on the 7-in-One to turn on
your cable converter.
Need help? Call 1-800-763-9232
21
15-1935.fm Page 22 Thursday, December 31, 1998 11:37 AM
Setup Codes for Cable
Converters
Brand
Codes
Hytex
007
Jasco
153, 315
Codes
Jerrold
ABC
003, 008, 014,
007, 017, 013,
011, 001
003, 276, 014,
476, 012, 011,
015, 024
Macom
033
Allegro
153, 315
Magnavox
027, 334
Antronix
022, 207
Memorex
000
Archer
797, 153, 022,
207
Movie Time
063, 156
Novaplex
618
Cabletenna
022
NSC
063, 156
Cableview
022
Oak
007, 019
Century
153
Optimus
021
Citizen
153, 315
Panasonic
107, 000, 021
Colour Voice
025, 031
Panther
637
Comband
232, 233
Paragon
000
Comtronics
040, 060
Philips
Contec
019
Digi
637
153, 025, 027,
031, 242, 290,
334
Eastern
002
Pioneer
Electricord
078
144, 533, 023,
260
Emerson
797
Popular
Mechanics
400
Everquest
015, 040
Pulsar
000
Focus
400
RadioShack
883, 015, 315
Garrard
153
RCA
021
GC
Electronics
207
Realistic
207
GE
232, 233
Recoton
400
Gemini
015, 057, 242
Regal
020, 259, 273,
279
General
Instrument
276, 003, 011,
476
Regency
002
GMI
057
Rembrandt
011
Goldstar
144, 040
Runco
000
Goodmind
797
Samsung
144, 040
Hamlin
020, 009, 259,
034, 273
Scientific
Atlanta
008, 477, 017,
006
Hitachi
011
Signal
015, 040
Signature
011
Brand
Need help? Call 1-800-763-9232
22
15-1935.fm Page 23 Thursday, December 31, 1998 11:37 AM
Brand
Codes
SL Marx
040
Sprucer
021, 307
Starcom
003, 015
Stargate
015, 040, 797
Starquest
015
Sylvania
001
Tandy
258
TeleCaption
221
Teleview
040
Texscan
001
Timeless
418
Tocom
012, 013
Toshiba
000
Tusa
015
TV86
063
Unika
022, 153, 207
United
Artists
007
United Cable
003
Universal
191, 077, 022,
153, 207
Videoway
250
Viewstar
063, 027, 060,
211, 258
Zenith
000, 525
Zentek
400
Need help? Call 1-800-763-9232
23
15-1935.fm Page 24 Thursday, December 31, 1998 11:37 AM
TO OPERATE YOUR SATELLITE
RECEIVER
Locate the codes for your satellite receiver in “Setup
Codes for Satellite Receivers” on Page 24 and write
them in the space below. The brands are listed in alphabetical order, with the most popular codes listed first.
Codes: _____________________________________
Then follow these steps to program the 7-in-One to operate your satellite receiver.
1. Turn on your satellite receiver.
2. Press SAT.
3. Hold down SETUP until TIMED SEQ appears.
4. Press MENU
. CODE SETUP appears.
5. Repeatedly press SELECT until SAT appears.
6. Enter the first code listed for your receiver’s brand
then press SELECT.
7. Point the 7-in-One at the satellite receiver and
press POWER. Your satellite receiver should turn
off. If it does not, enter the next code in the code list
and press SELECT then POWER again. When your
satellite receiver turns off, press ESC to stop programming.
Setup Codes for
Satellite Receivers
Brand
Codes
Brand
Codes
Astro
Industries
095
BSR
095
554
AlphaStar
772
Amplica
072
Cable
Innovations
Amway
043, 075
Capetronic
095
Century
538
Need help? Call 1-800-763-9232
24
15-1935.fm Page 25 Thursday, December 31, 1998 11:37 AM
Brand
Codes
Channel
Master
018, 212
Chaparral
053, 209, 216
Citoh
Conifer
Brand
Codes
Prosat
158
RCA
566
RadioShack
554
164
Ramsey
075
004
Realistic
051, 052
STS
041, 210
Curtis Mathes 061, 072
DX Antenna
041
Sony
639
Drake
018, 064, 149,
245
Star Choice
869
148, 159, 218,
269, 280, 775
Star Trak
180, 421, 547
Strong
421
Toshiba
061, 082, 790
547
Echostar
Expressvu
775
General
Instrument
050, 361, 547,
554, 869
Town &
Country
HTS
775
Uniden
Hitachi
819
052, 074, 076,
238, 296, 370,
554, 724
Homecable
238
Zenith
061, 064
Hughes
Network
Systems
749
Hytek
095
IQ
210
IQ Prism
210
Intersat
043
JVC
775
Janeil
152
Jerrold
361, 627
Legend
269
Macom
018, 050, 061
Magnavox
724
Memorex
269, 724
Norsat
004
Panasonic
152, 701
Pansat
647
Philips
200, 724
Pico
075
Primestar
361, 627
Need help? Call 1-800-763-9232
25
15-1935.fm Page 26 Thursday, December 31, 1998 11:37 AM
TO OPERATE YOUR CD PLAYER
Locate the codes for your CD player in “Setup Codes for
CD Players” and write them in the space below. The
brands are listed in alphabetical order, with the most
popular codes listed first.
Codes: _____________________________
Follow these steps to program the 7-in-One to operate
your CD Player.
1. Turn on your CD player and insert a disc.
2. Press CD.
3. Hold down SETUP until TIMED SEQ appears.
4. Press MENU
. CODE SETUP appears.
5. Repeatedly press SELECT until CD appears.
6. Enter the first code listed for your CD player’s
brand then press SELECT.
7. Point the 7-in-One at the CD player and press PL.
Your CD player should play. If it does not, enter the
next code in the code list and press SELECT then
PL again. When the CD player plays, press ESC to
stop programming.
Setup Codes for CD
Players
Brand
Codes
Audio
Alchemy
194
170
ADC
018, 033
AudioTechnica
Acoustic
Research
123
BSR
194, 245
212
Adcom
155, 234
Bang &
Olufsen
Aiwa
012, 124, 157
Burmester
420
156
California
Audio Lab
029
Brand
Akai
Codes
Need help? Call 1-800-763-9232
26
15-1935.fm Page 27 Thursday, December 31, 1998 11:37 AM
Brand
Codes
Brand
Codes
Capetronic
237, 690
NAD
019, 299
Carrera
194
NEC
043, 130, 234
Carver
157, 179, 299,
437
Nakamichi
147
Nikko
164, 169, 170,
174
Crown
122
DAK
245
Onkyo
101, 102, 138
DKK
000
Optimus
Denon
003
Emerson
155, 164, 305,
469
Fisher
048, 088, 174,
179, 342
000, 032, 037,
048, 087, 145,
175, 179, 194,
196, 280, 305,
342, 420, 426,
437, 468, 536,
671, 690, 775
GE
009
Panasonic
Garrard
245, 280, 393,
420, 425
029, 303, 367,
752
Parasound
194, 420
Genexxa
032, 164, 305
Philips
157, 274, 287
GoldStar
030, 417
Pioneer
Harman/
Kardon
108, 426
032, 244, 305,
468
Proton
152, 157
Hitachi
032, 139, 155
QED
157
Inkel
065
Quasar
029
JVC
072, 655, 658
RCA
Kenwood
028, 037, 048
009, 053, 155,
179, 305, 764
Kodak
287
Realistic
Krell
157
155, 164, 175,
179, 180, 237,
420
Kyocera
018
Rotel
157, 420
LXI
305
SAE
157
Linn
157
STS
018
Luxman
093, 149, 327
Sansui
MCS
029, 043
157, 202, 216,
305
MTC
420
Sanyo
087, 179
Magnavox
038, 129, 157,
305
Scott
155, 164, 305
Sears
305
Marantz
005, 029, 038,
157, 180
Sharp
037, 180, 262,
265
McIntosh
287
Sherwood
Mission
157
065, 180, 196,
426
Mitsubishi
098
Shure
043
Need help? Call 1-800-763-9232
27
15-1935.fm Page 28 Thursday, December 31, 1998 11:37 AM
Brand
Codes
Signature
108
Sony
000, 185, 490,
604, 605
Soundesign
145, 425
Symphonic
183
Tascam
420
Teac
016, 045, 153,
174, 180, 183,
378, 393, 420
Technics
029, 207, 303
Toshiba
019, 299
Vector
Research
033, 194, 417
Victor
072
Wards
053, 108, 157
Yamaha
036, 170, 187
Yorx
461
Need help? Call 1-800-763-9232
28
15-1935.fm Page 29 Thursday, December 31, 1998 11:37 AM
TO OPERATE YOUR TUNER/
RECEIVER
Locate the codes for your tuner/receiver in “Setup
Codes for Tuners/Receivers” on Page 29 and write
them in the space below. The brands are listed in alphabetical order, with the most popular codes listed first.
Codes: _____________________________________
Then follow these steps to program the 7-in-One to operate your tuner/receiver.
1. Turn on your tuner/receiver.
2. Press TUN.
3. Hold down SETUP until TIMED SEQ appears.
4. Press MENU
. CODE SETUP appears.
5. Repeatedly press SELECT until TUNER appears.
6. Enter the first code listed for your device’s brand
then press SELECT.
7. Point the 7-in-One at the tuner/receiver and press
POWER. Your tuner/receiver should turn off. If it
does not, enter the next code in the code list and
press SELECT then POWER again. When the
tuner/receiver turns off, press ESC to stop programming.
Setup Codes for
Tuners/Receivers
Adcom
Admiral
Codes
121, 125, 158,
189, 405
Akai
076, 224
531
Bose
639
616
Capetronic
531
182
Carver
008, 042, 189,
360, 412
Brand
ADC
Brand
Aiwa
Codes
Need help? Call 1-800-763-9232
29
15-1935.fm Page 30 Thursday, December 31, 1998 11:37 AM
Brand
Codes
Brand
Codes
Casio
195, 201
Panasonic
039, 309
Clarinette
195
JC Penney
195, 201
Philips
189, 412
Pioneer
014, 080, 150,
289, 531, 630
Curtis Mathes 080, 201
Denon
004, 273, 771
Emerson
424
Fisher
042, 219, 360
Quasar
039
Garrard
281, 286, 424,
440, 463, 744
RCA
054, 346, 360,
530, 531
Harman/
Kardon
110
RadioShack
744
Realistic
Inkel
062
163, 181, 182,
195
JVC
074, 464
Sansui
189, 346
Sanyo
219, 801
Scott
105, 163, 390
Sears
201
424, 744
Sharp
186
181, 744
Sherwood
062, 491, 502
189
Sonic
281
195
Sony
158, 415, 238
166
Soundesign
670
039, 201, 346
Symphonic
182
Magnavox
128, 189, 195,
531
Teac
163, 298, 387,
463
Marantz
006, 039, 128,
189, 412
Technics
039, 208, 309
Techwood
281
Modulaire
195
Victor
074
NAD
320
Wards
NEC
235
014, 042, 054,
080, 158, 189
NTDE
Geniesom
744
Yamaha
082, 176, 186
Yorx
195
Nakamichi
347
Zenith
281, 622, 744
Onkyo
100, 119, 135,
380
Optimus
042, 080, 177,
181, 186, 219,
286, 440, 531,
622, 670, 738,
744, 754, 801
Orient Power
744
Jensen
Kenwood
Koss
LXI
Linn
Lloyd’s
Luxman
MCS
754
027, 077, 186,
313, 314
Need help? Call 1-800-763-9232
30
15-1935.fm Page 31 Thursday, December 31, 1998 11:37 AM
TO OPERATE YOUR AMPLIFIER
Locate the codes for your amplifiers in “Setup Codes for
Amplifiers” on Page 32 and write them in the space below. The brands are listed in alphabetical order, with the
most popular codes listed first.
Codes: _____________________________________
Then follow these steps to program the 7-in-One to operate your amplifier.
1. Turn on your amplifier.
2. Press AMP.
3. Hold down SETUP until TIMED SEQ appears.
4. Press MENU
. CODE SETUP appears.
5. Repeatedly press SELECT until AMP appears.
6. Enter the first code listed for your amplifier’s brand
then press SELECT.
7. Point the 7-in-One at the amplifier and press
POWER. Your amplifier should turn off. If it does
not, enter the next code in the code list and press
SELECT then POWER again. When the amplifier
turns off, press ESC to stop programming.
Need help? Call 1-800-763-9232
31
15-1935.fm Page 32 Thursday, December 31, 1998 11:37 AM
Setup Codes for
Amplifiers
Brand
Acurus
Codes
765
AudioSource 011
Carver
269
Curtis Mathes 300
Denon
160
Elan
647
Forte
606
GE
078
GoldStar
031
Harman/
Kardon
106
Kenwood
356
Linn
269
Luxman
165
Magnavox
269
Marantz
269, 321
McIntosh
251
NEC
264
Nakamichi
321
Optimus
013, 300, 395
Panasonic
308
Philips
269
Pioneer
013, 300
Realistic
395
Sansui
321
Shure
264
Sony
220
Soundesign
Technics
078, 211
308
Wards
013, 078, 211
Yamaha
133, 143, 354,
504
Need help? Call 1-800-763-9232
32
15-1935.fm Page 33 Thursday, December 31, 1998 11:37 AM
TO OPERATE OTHER DEVICES
In addition to the labeled devices (AMP, TUN, TV, CD,
CBL, VCR, or SAT), the 7-in-One can also operate laser
disc players (LDP), cassette decks, digital audio tape
(DAT) players, video accessories, and miscellaneous
audio devices (graphic equalizers and digital audio service terminals, for example).
To access device codes for:
Use:
Digital Video Disc Players, Laser Disc Players, VCR
Cassette Decks, Digital Audio Tape Players
Phonographs
CD
Video Accessories
CBL
Miscellaneous Audio
AMP
Home Automation
PLUG ’N POWER
For example, to set up a laser disc player:
1. Turn on your laser disc player and insert a disc.
2. Press VCR.
3. Hold down SETUP until TIMED SEQ appears.
4. Press MENU
. CODE SETUP appears.
5. Repeatedly press SELECT until VCR appears.
or
6. Press MENU
TAPE, and DAT.
to toggle between VCR, LDP,
7. When LDP appears, enter the first code listed for
your laser disc player’s brand in “Setup Codes for
Laser Disc Players” on Page 35, then press
SELECT.
8. Point the 7-in-One at the laser disc player and
press PL. Your laser disc player should play. If it
does not, enter the next code in the code list and
press SELECT then PL again. When the laser disc
player plays, press ESC to stop programming.
Need help? Call 1-800-763-9232
33
15-1935.fm Page 34 Thursday, December 31, 1998 11:37 AM
Setup Codes for
Cassette Players
Brand
Codes
ADC
171
Aiwa
029, 197, 200
Akai
283
Carver
029, 261
Denon
076
Fisher
074, 261
Garrard
300, 308, 309,
439
JVC
244, 273, 274,
303
Brand
Codes
Victor
273, 274
Wards
027
Yamaha
094, 097
Setup Codes for
Digital Audio Tape
(DAT) Players
Brand
Code
Carver
158
Marantz
158
Philips
158
Kenwood
070, 071, 092,
233, 234
Kyocera
171
MGA
313
Magnavox
029
Marantz
029
Mitsubishi
283, 313
JVC
558
Nakamichi
147, 151, 218,
247, 248
Kenwood
534
Magnavox
503
Onkyo
136, 282
Mitsubishi
521
Optimus
027, 220, 300,
337, 439
Onkyo
503
Panasonic
490
Philips
503, 539
Pioneer
525
Proscan
522
RCA
522
Sony
533
Technics
490
Toshiba
503
Zenith
503
Panasonic
229
Philips
029
Pioneer
027, 099, 220
RCA
261
Sansui
029
Sanyo
261
Sharp
231
Sherwood
337
Sony
170, 243, 291
Teac
280, 289, 308,
309
Technics
229
Setup Codes For DVD
Players
Brand
Codes
Need help? Call 1-800-763-9232
34
15-1935.fm Page 35 Thursday, December 31, 1998 11:37 AM
Setup Codes for Home
Automation
Brand
Codes
Audio Access 154
Brand
Codes
Pioneer
023, 059, 525
Proscan
522
Quasar
204
RCA
128, 522
GE
240
Realistic
203
LiteTouch
084
Samsung
323
Lutron
318
Sega
023
One For All
167
Sony
RadioShack
240
193, 201, 270,
533
Sanyo
336
Technics
204, 490
167
Theta Digital
194
Toshiba
503
Yamaha
217
Zenith
503
Security
System
Universal X10 167
Setup Codes for Laser
Setup Codes for
Disc Players
Miscellaneous Audio
Brand
Aiwa
Codes
Brand
203
Codes
203
Carver
064, 194, 323
Aiwa
Denon
059, 172, 241
Carver
064, 194, 323
023
Denon
059, 172, 241
203
Disco Vision
023
023
Funai
203
558
Hitachi
023
534
JVC
558
194, 217, 241,
503
Kenwood
534
Magnavox
194, 217,
241, 503
Disco Vision
Funai
Hitachi
JVC
Kenwood
Magnavox
Marantz
064, 194
Mitsubishi
059, 521
Marantz
064, 194
NAD
059
Mitsubishi
059, 521
NEC
286
NAD
059
Onkyo
503
NEC
286
Panasonic
204, 490
Onkyo
503
Philips
064, 194, 503,
539
Panasonic
204, 490
Need help? Call 1-800-763-9232
35
15-1935.fm Page 36 Thursday, December 31, 1998 11:37 AM
Brand
Codes
Philips
064, 194,
503, 539
Pioneer
023, 059, 525
Proscan
522
Quasar
204
RCA
128, 522
Realistic
203
Samsung
323
Sega
023
Sony
193, 201,
270, 533
Technics
204, 490
Theta Digital
194
Toshiba
503
Yamaha
217
Zenith
503
Setup Codes for
Phonographs
Brand
Codes
Aiwa
188
Carver
188
Magnavox
188
Marantz
188
Philips
188
Need help? Call 1-800-763-9232
36
15-1935.fm Page 37 Thursday, December 31, 1998 11:37 AM
SPECIAL FEATURES
SEARCHING FOR A CODE
Before Setup
If you have tried all the codes from the list and your device still will not respond to the 7-in-One (or if your brand
is not listed), try searching for your code.
For example, to find the code for a TV:
1. Turn on your TV, then press TV.
2. Hold down SETUP until TIMED SEQ appears.
3. Press MENU
. CODE SETUP appears.
4. Press SELECT. DEV SET UP appears.
5. Press MENU
. DEV SEARCH appears.
6. Press SELECT. TV and the last entered three-digit
code appear.
7. Press POWER. If your TV does not turn off, press
MENU
. The next most recently entered code
appears. Continue pressing POWER then MENU
until your TV turns off. Then press SELECT to lock
in the code and stop programming.
Repeat these steps, using the appropriate device control button in Step 1 for each device you need to search.
Note: If you are searching for a VCR, laser disc player,
or DVD player code, you might need to use PL (Play) instead of POWER.
Need help? Call 1-800-763-9232
37
15-1935.fm Page 38 Thursday, December 31, 1998 11:37 AM
After Setup
After you have set up your devices, you might need to
find out which code is operating one of them. For example, to find out what three-digit code is operating your
TV:
1. Press TV.
2. Hold down SETUP until TIMED SEQ appears.
3. Press MENU
. CODE SETUP appears.
4. Press SELECT. DEV SET UP appears.
5. Press MENU
twice. DEV NUMBER appears.
6. Press SELECT. TV and the code for that device
appear.
Note: To view the three-digit code for another
device, press the key for the device you want to
view in Step 1.
7. Write down the three-digit code then press ESC to
stop programming.
USING THE SLEEP FUNCTION
To use the sleep timer built into your TV, cable converter, satellite system, or audio device, press SLEEP
(SHIFT then MUTE). Most sleep timers advance in increments of 10 or 15 minutes. For specific instructions on
setting your device’s sleep timer, refer to the device’s
owner’s manual.
Or, if your device does not have a sleep timer, follow
these steps to enable Sleep Lock on the 7-in-One. Then
you can use the 7-in-One’s built-in sleep timer with all
devices.
1. Hold down SETUP until TIMED SEQ appears.
Need help? Call 1-800-763-9232
38
15-1935.fm Page 39 Thursday, December 31, 1998 11:37 AM
2. Press MENU
twice. CONFIGURE appears.
3. Press SELECT. THEATER SEL appears.
4. Press MENU
twice. SLEEP LOCK appears
5. Press SELECT. DISABLE appears.
6. Press MENU
. ENABLE appears.
7. Press SELECT to stop programming.
Whenever you press SLEEP (SHIFT then MUTE), SLEEP
15 appears. To add time to the sleep timer, press MENU
. Each press of MENU adds 15 minutes to the sleep
timer, up to a total of 60 minutes. When the desired
sleep time appears, press SELECT. SLEEP appears.
When Sleep Lock is enabled, the 7-in-One activates its
own Sleep Timer. To use another device’s sleep timer,
or to simply disable Sleep Lock, repeat the above steps,
pressing MENU
to select DISABLE in Step 6.
CONVERTING DEVICE KEYS
You can use the 7-in-One to operate a second TV or
VCR, or any combination of up to six devices. To do
this, you must first convert an unused device key (AMP,
TUN, TV, CD, CBL, VCR, or SAT) to operate the second
device.
For example, to convert CBL to operate a second TV:
1. Hold down SETUP until TIMED SEQ appears.
2. Press MENU
twice. CONFIGURE appears.
3. Press SELECT. THEATR SEL appears.
4. Press MENU
three times. MODE MAP appears.
5. Press SELECT. SOURCE appears.
6. Press TV. COPY TO appears.
Need help? Call 1-800-763-9232
39
15-1935.fm Page 40 Thursday, December 31, 1998 11:37 AM
7. Press CBL. TV2 appears.
8. Program the converted device key (CBL) with the
code for the second TV. (See “To Operate Your TV”
on Page 12.)
Repeat these steps for each key you want to convert.
VOLUME LOCK
The 7-in-One lets you choose one device to control the
sound volume for all the devices the 7-in-One operates.
When you first set up the 7-in-One, each device with a
volume control operates its own volume. You can
change this so that one device controls the volume no
matter which device the 7-in-One is operating.
For example, to set-up the 7-in-One so your receiver always controls the volume:
1. Hold down SETUP until TIMED SEQ appears.
2. Press MENU
twice. CONFIGURE appears.
3. Press SELECT. THEATR SEL appears.
4. Press MENU
twice. VOL LOCK appears.
5. Press SELECT. UNLOCK appears.
6. Press MENU
. LOCK appears.
7. Press SELECT then the key for the device that you
want to control the sound volume (AMP, TUN, TV,
CD, CBL, VCR, or SAT), then press SELECT.
For example, to control the volume through your
receiver, press TUN then SELECT. When you press
the volume keys on your 7-in-One, your receiver
controls the volume.
8. Press ESC to exit.
Need help? Call 1-800-763-9232
40
15-1935.fm Page 41 Thursday, December 31, 1998 11:37 AM
Note: You might need to use the MENU or VOL keys to
control volume, depending on which device you selected during these steps.
Resetting Volume Lock
To restore volume control to each individual device:
1. Hold down SETUP until TIMED SEQ appears.
2. Press MENU
twice. CONFIGURE appears.
3. Press SELECT. THEATR SEL appears.
4. Press MENU
twice. VOL LOCK appears.
5. Press SELECT. LOCK appears.
6. Press MENU
. UNLOCK appears.
7. Press SELECT. Each device now controls its own
volume when you use the volume keys on your 7in-One.
USING THE MACRO KEYS
The 7-in-One has two macro keys, AUD and VID. Each
key lets you play back a series of up to 15 keystrokes at
any time with the press of a single key, in any mode.
You can set up a maximum of 36 macros, 15 timed sequences (see “Setting Up Timed Sequences” on
Page 42), or a combination of both.
For example, follow these steps to set up a macro on
VID that turns on your TV, VCR, and satellite system so
you can record a program.
Note: If you make a mistake, press ESC and start over
at Step 1.
1. Hold down SETUP. TIMED SEQ appears.
Need help? Call 1-800-763-9232
41
15-1935.fm Page 42 Thursday, December 31, 1998 11:37 AM
2. Press MENU
twice. CONFIGURE appears.
3. Press SELECT. THEATR SEL appears.
4. Press MENU
four times. KEY MACRO appears.
5. Press SELECT. SEL MACKEY appears.
6. Press VID. SELECT SEQ appears.
7. Enter the sequence of up to 15 keystrokes that you
want the 7-in-One to memorize, then press ESC.
For example: TV POWER 0 4 TV VCR SAT POWER
In our example, whenever you press VID, the TV
turns on, tunes to channel 4, and changes its input
to VIDEO 1, then the satellite turns on.
Note: When setting up a macro, you must include
all keystrokes that you would enter during regular
usage, such as pressing ENTER after a channel
number when changing channels (if your TV
requires it).
Repeat these steps to set up a macro on the other macro key.
SETTING UP TIMED SEQUENCES
The 7-in-One lets you set up a sequence of keystrokes
that can be played back at a time you specify, up to seven days in advance. You can set up a maximum of 15
timed sequences, 36 macros (see “Using the Macro
Keys” on Page 41), or a combination of both.
For example, follow these steps to set your VCR to
record a program from your satellite system.
Note: If you make a mistake, press ESC and start over
at Step 1.
1. Hold down SETUP until TIMED SEQ appears.
Need help? Call 1-800-763-9232
42
15-1935.fm Page 43 Thursday, December 31, 1998 11:37 AM
2. Repeatedly press SELECT until START and the
time appear, with the first digit blinking. Enter the
time in 12-hour format. AM/PM flashes.
3. If necessary, press MENU
to toggle between AM
and PM, then press SELECT. ONCE appears.
or
to toggle between ONCE,
4. Press MENU
DAILY, and WEEKLY. When the desired frequency
appears, press SELECT. The day of the week display appears.
5. Use MENU
and
to toggle through the days of
the week until the day when you want the
sequence to start running appears.
6. Press SELECT. ENTER SEQ appears.
7. Enter the sequence of keystrokes you want the 7in-One to play at the selected time, then press
ESC.
For example, to set up a sequence that turns on
the satellite, tunes to channel 275, turns on the
VCR, and starts recording, enter:
SAT POWER SAT 2 7 5 VCR POWER VCR RECORD
When your sequence is set up, the clock icon
appears.
Deleting a Timed Sequence
1. Hold down SETUP until TIMED SEQ appears.
2. Press SELECT. ADD MACRO appears.
3. Press MENU
or
. DEL MACRO appears.
4. Press SELECT. DEL and the first set day and time
appear.
5. If necessary, use MENU
or
to scroll through
the saved timed sequences. When you see the
one you want to delete, press SELECT. DELETED
Need help? Call 1-800-763-9232
43
15-1935.fm Page 44 Thursday, December 31, 1998 11:37 AM
appears. If there are more timed sequences, the
next one appears.
SETTING UP THE HOME THEATER
KEY
The 7-In-One lets you operate all of the most commonly
used home theater functions in one mode. When setting
up the Home Theater mode, you choose which devices
will control volume, channel changing, playback, picture-in-picture, and menu functions.
1. Press HOME THEATER.
2. Hold down SETUP until TIMED SEQ appears.
3. Press MENU
twice. CONFIGURE appears.
4. Press SELECT twice. AUDIO appears.
5. Press SELECT then the appropriate device key (TV,
CBL, SAT, VCR, or AUX) to select the device that
you want to control audio features in Home Theater
mode, then press SELECT. CHANNEL appears.
6. Press SELECT, then the appropriate device key to
select the device that you want to change channels
in Home Theater mode. Then press SELECT again.
PLAYBACK appears.
7. Press SELECT, then CD or VCR to select the device
that you want to control the transport keys ( PLAY,
REW, FF, PAUSE, STOP and REC) in Home Theater
mode. Then press SELECT again. PIP (Picture-inPicture) appears.
8. Press SELECT then TV, CBL, or VCR to select the
device that you want to control Picture-in-Picture
features in Home Theater mode. Then press
SELECT again. MENU appears.
Need help? Call 1-800-763-9232
44
15-1935.fm Page 45 Thursday, December 31, 1998 11:37 AM
9. Press SELECT then the appropriate key to select
the device you want to control the menu features in
Home Theater mode. Then press SELECT again to
stop programming.
Setting Up a Power Key Macro
After you set up the HOME THEATER mode, you can create a macro sequence that lets you use POWER to turn
on and off all of your Home Theater devices.
1. Press HOME THEATER, then hold down SETUP until
TIMED SEQ appears.
2. Press MENU
twice. CONFIGURE appears.
3. Press SELECT. THEATR SEL appears.
4. Repeatedly
appears.
press
MENU–
until
KEY
MACRO
5. Press SELECT. SEL MACKEY appears.
6. Press POWER then the key for each device in your
home theater system.
Note: You cannot use AUD or VID in your Home
Theater Power key macro.
7. Press POWER then ESC to stop programming.
To activate the Home Theater Power macro, press
HOME THEATER so THEATER appears, then press
POWER to turn all of your home theater devices on or
off.
CLEAR ALL
Use the Clear All feature to reset all advanced functions
of the 7-in-One. Clear All erases macro sequences,
timed macro sequences, and Volume Lock from the 7Need help? Call 1-800-763-9232
45
15-1935.fm Page 46 Thursday, December 31, 1998 11:37 AM
in-One’s memory. It does not erase the setup codes you
programmed.
To reset the 7-in-One using the Clear All feature:
1. Hold down SETUP. TIMED SEQ appears.
2. Press MENU
twice. CONFIGURE appears.
3. Press SELECT. THEATER SEL appears.
4. Press MENU
. CLR ALL appears.
5. Press SELECT. CLR ALL appears.
6. Press SELECT again. CONFIRM appears.
7. Press SELECT once more. Your 7-in-One is reset.
USING THE IR/RF COMMAND
CENTER
The 7-in-One comes with an IR/RF Command Center
which receives radio frequency (RF) signals from the 7in-One and converts them into infrared (IR) signals to
control your components.
Note: The 7-in-One’s actual range depends on the construction of the building where it is used, as well as other
factors, such as radio frequency interference. For the
best operation:
• Aim the 7-in-One toward the room where the Command Center is located.
• Do not position the Command Center near metal
objects (such as heating ducts) that can absorb RF
signals.
• Keep fresh batteries in the 7-in-One. Weak batteries reduce the 7-in-One’s range.
Need help? Call 1-800-763-9232
46
15-1935.fm Page 47 Thursday, December 31, 1998 11:37 AM
After you have set up the 7-in-One to control your devices (see “Quick Setup” on Page 6 or “Setting Up the Remote” on Page 12), follow these steps to set up the
Command Center:
1. Choose a location about 8 feet in front of the components you want to control. The location should
be near an easily accessible standard AC outlet,
with line-of-sight access to your components.
2. Plug the Command Center’s power cord into the
AC outlet and raise its telescoping antenna.
3. Position the Command Center so its black IR lens
is facing your components.
4. Be sure the remote is not pointing toward your
equipment, then test the Command Center by
pressing POWER. You should be able to control
components from any room.
Using the IR Signal Extension Cord
You can use the supplied IR signal extension cord to
control a device that is within 4 feet of the Command
Center but out of its direct line of sight.
1. Plug the IR signal extension cord into the jack
(shown here) on the back of the Command Center.
2. Route the IR signal extension cord to the device.
Need help? Call 1-800-763-9232
47
15-1935.fm Page 48 Thursday, December 31, 1998 11:37 AM
3. Use the supplied double-sided tape to attach the IR
signal extension cord to the device, with its LED on
or next to the device’s IR sensor.
4. Be sure the remote is not pointing toward your
equipment, then test the Command Center by
pressing POWER. The Command Center converts
the 7-in-One’s RF signal into an IR signal, and
transmits that signal to the device through the cord.
Need help? Call 1-800-763-9232
48
15-1935.fm Page 49 Thursday, December 31, 1998 11:37 AM
TROUBLESHOOTING
Problem
Display begins to fade,
does not appear, or the
red light blinks five times
when you press a key.
The 7-in-One does not
operate your device.
Solution
Replace the batteries with four
fresh AAA alkaline batteries.
Try all of the codes listed for
your brand of device in the
“Setup Codes” section. If this
does not work, try searching for
your code (see “Searching for a
Code” on Page 37).
Make sure the device you are
setting up can be operated with
an infrared remote.
The 7-in-One is not per- Try all of the codes listed for
forming commands prop- your brand of device in the
“Setup Codes” section. Many
erly.
set-up codes may allow some
degree of operation. However,
only one set-up code will work
correctly with your device.
You make a mistake
During any set up procedure,
when setting up your 7-in- except for timed sequences, the
ESC key will return you to the
One.
DEVICE and the TIME screen
without saving any of the
entered information. If you make
a mistake when setting up a
timed sequence, return to the
timed sequence menu and
delete the incorrect sequence.
VCR not recording.
As a safety feature on the 7-inOne, you must press the REC
key twice to begin recording.
CH+/– (Channel Up/
Due to RCA design (19831987), only the original remote
Down) and LAST not
working for your RCA TV. will operate these functions.
Need help? Call 1-800-763-9232
49
15-1935.fm Page 50 Thursday, December 31, 1998 11:37 AM
Problem
Solution
Problems changing chan- If your original remote required
an ENTER keystroke when
nels.
changing channels, press the
ENTER key on the 7-in-One
after you enter the channel number.
The red light blinks when Press the appropriate device
key (MAN, TUN, TV, CBL, CD,
you press a key but you
receive no response from VCR, SAT, PLUG ’N POWER)
for the device you are trying to
your device.
operate.
Make sure you aim your 7-inOne at your device and that you
are within 15 feet of the device
before using your remote.
You can turn your audio
Some audio components might
need both a Tuner/Receiver
component on and off
code (see Page 29) and an
and control its volume,
Audio Amplifier code (see Page
but you cannot change
32) to control all the features of
preset channels.
your audio component.
Your satellite receiver
The codes listed in this manual
are set up to operate your sateldoes not respond to the
lite receiver on the 1st or 2nd
codes listed in the manaddresses only. Make sure the
ual.
satellite receiver you are setting
up can be operated with an
infrared remote.
The 7-in-One does not
Some Bang & Olufsen and other
operate Bang & Olufsen manufacturers’ equipment operates at frequencies higher than
audio equipment.
100 kHz. The 7-in-One will not
operate such devices.
Need help? Call 1-800-763-9232
50
15-1935.fm Page 51 Thursday, December 31, 1998 11:37 AM
NOTES
Need help? Call 1-800-763-9232
51
15-1935.fm Page 52 Thursday, December 31, 1998 11:37 AM
Limited Ninety-Day Warranty
This product is warranted by RadioShack against manufacturing defects in
material and workmanship under normal use for ninety (90) days from the
date of purchase from RadioShack company-owned stores and authorized
RadioShack franchisees and dealers. EXCEPT AS PROVIDED HEREIN,
RadioShack MAKES NO EXPRESS WARRANTIES AND ANY IMPLIED
WARRANTIES, INCLUDING THOSE OF MERCHANTABILITY AND FITNESS FOR A PARTICULAR PURPOSE, ARE LIMITED IN DURATION TO
THE DURATION OF THE WRITTEN LIMITED WARRANTIES CONTAINED
HEREIN. EXCEPT AS PROVIDED HEREIN, RadioShack SHALL HAVE NO
LIABILITY OR RESPONSIBILITY TO CUSTOMER OR ANY OTHER PERSON OR ENTITY WITH RESPECT TO ANY LIABILITY, LOSS OR DAMAGE
CAUSED DIRECTLY OR INDIRECTLY BY USE OR PERFORMANCE OF
THE PRODUCT OR ARISING OUT OF ANY BREACH OF THIS WARRANTY, INCLUDING, BUT NOT LIMITED TO, ANY DAMAGES RESULTING
FROM INCONVENIENCE, LOSS OF TIME, DATA, PROPERTY, REVENUE,
OR PROFIT OR ANY INDIRECT, SPECIAL, INCIDENTAL, OR CONSEQUENTIAL DAMAGES, EVEN IF RadioShack HAS BEEN ADVISED OF THE
POSSIBILITY OF SUCH DAMAGES.
Some states do not allow the limitations on how long an implied warranty lasts
or the exclusion of incidental or consequential damages, so the above limitations or exclusions may not apply to you.
In the event of a product defect during the warranty period, take the product
and the RadioShack sales receipt as proof of purchase date to any
RadioShack store. RadioShack will, at its option, unless otherwise provided
by law: (a) correct the defect by product repair without charge for parts and labor; (b) replace the product with one of the same or similar design; or (c) refund the purchase price. All replaced parts and products, and products on
which a refund is made, become the property of RadioShack. New or reconditioned parts and products may be used in the performance of warranty service. Repaired or replaced parts and products are warranted for the
remainder of the original warranty period. You will be charged for repair or replacement of the product made after the expiration of the warranty period.
This warranty does not cover: (a) damage or failure caused by or attributable
to acts of God, abuse, accident, misuse, improper or abnormal usage, failure
to follow instructions, improper installation or maintenance, alteration, lightning or other incidence of excess voltage or current; (b) any repairs other than
those provided by a RadioShack Authorized Service Facility; (c) consumables
such as fuses or batteries; (d) cosmetic damage; (e) transportation, shipping
or insurance costs; or (f) costs of product removal, installation, set-up service
adjustment or reinstallation.
This warranty gives you specific legal rights, and you may also have other
rights which vary from state to state.
RadioShack Customer Relations, Dept. W, 100 Throckmorton St., Suite 600,
Fort Worth, TX 76102
We Service What We Sell
11A98N
3/97
Printed in Hong Kong