1
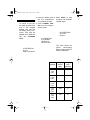
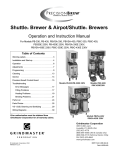
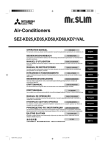
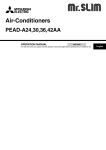
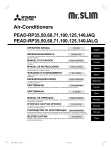
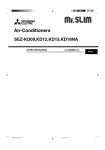
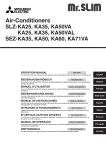
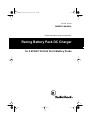
23-412.fm Page 1 Friday, August 6, 1999 3:04 PM
Cat. No. 23-412
OWNER’S MANUAL
Please read before using this equipment.
Racing Battery Pack DC Charger
for 4.8V/6V/7.2V/9.6V Ni-Cd Battery Packs
23-412.fm Page 2 Friday, August 6, 1999 3:04 PM
FEATURES
Your RadioShack Racing Battery Pack
DC Charger is perfect for charging radio-controlled racing cars’ battery packs
when you are on the go. It connects directly to your vehicle’s battery terminals
and can fully charge 4.8V, 6V, 7.2V and
9.6V nickel-cadmium battery packs in as
little as 15 minutes! (High-capacity 7.2V,
1700 mAh and 9.6V, 900 mAh battery
packs require more time to fully charge.)
Your charger also includes these features:
DC Reverse-Polarity Input Protection
— blows the charger’s fuse to prevent
damage to the charger, the battery pack,
and your vehicle’s electrical system if
you accidentally connect the DC power
cord clamps to the wrong battery terminals.
Charging Indicator — lights when the
battery pack is charging and automatically turns off when charging is finished.
Thermal Sensor — stops charging automatically if the battery becomes too
hot.
CHARGING CAUTIONS
• Charge only one battery pack at a
time.
• Be sure that the battery pack is
rated at 4.8, 6, 7.2, or 9.6 volts.
• Avoid charging fully-charged battery packs. Doing so can damage
the battery pack or cause it to lose
some of its storage capacity.
• Charge battery packs only at room
temperature (65–80°F). Charging a
battery pack in a hot area can permanently reduce the battery pack’s
power capacity.
• Do not expose the charger to rain or
excessive moisture.
Start Button — makes battery-pack
charging simple.
Digit Peak Voltage Detector — ensures complete charging.
Safety Guard Protection Timer — prevents overcharging that can damage the
battery pack.
© 1998 Tandy Corporation.
All Rights Reserved.
RadioShack is a registered trademark used by Tandy Corporation.
2
23-412.fm Page 3 Friday, August 6, 1999 3:04 PM
OPERATION
Before you charge a battery
pack, use it until it no longer
provides the necessary
power.
Warnings:
cle’s positive (+) battery
terminal.
ILLUSTRATION
of red clamp
w/vehicle’s
positive battery
terminal
• To reduce the risk of
injury,
charge
only
the
DC
rechargeable
nickel- 2. Connect
charger’s
black
clamp
cadmium battery packs
to the vehicle’s negative
with this charger. Trying
(–) battery terminal or to
to charge other types of
a metal part of your
battery packs could
vehicle’s chassis that is
cause the packs to leak
not insulated by a plasor become very hot and
tic part. The POWER
explode, causing injury
indicator lights.
to bystanders or damage to your charger.
Caution: Do not connect the black clamp to
• Do not charge a battery
any part of your vehipack that is damaged or
cle’s chassis unless you
leaking.
are sure your vehicle
• Do not cover the vents
has a negative-ground
on the top or back of the
electrical system.
charger while charging
3. To charge a 6V battery
a battery pack.
pack, simply insert it
into the compartment
Follow these steps to conon the battery charger.
nect the charger to your veThen skip to Step 5.
hicle’s battery and charge a
battery pack.
To charge a 7.2V or
9.6V
battery
pack,
insert the pack into the
compartment on the
battery charger and
slide the connector into
CHARGING JACK. If the
connector does not fit,
turn it over and try
again. Do not force it.
ILLUSTRATION
of 7.2 V
battery connection
1. Connect the charger’s
red clamp to the vehiILLUSTRATION
of 6V battery
connection
3
23-412.fm Page 4 Friday, August 6, 1999 3:04 PM
4. Insert the battery pack 6. Press START to start
into the compartment
charging. The CHARGE
on the battery charger.
indicator lights.
To charge a 4.8V bat- 5. Insert THERMAL SENtery pack, plug the small
SOR into the charger’s
end of the supplied
sensor holder.
adapter cord fully into
the battery pack’s connector. Then plug the
adapter cord’s large end
fully into CHARGING
JACK.
ILLUSTRATION
of THERMAL
SENSOR in
sensor socket
This table shows the
typical
fast-charging
time for battery packs of
different capacities:
ILLUSTRATION
of 4.8 V
battery connection
Charging
Current
(mA)
Charging
Time
(minutes)
4.8V/6V
(600
mAh)
2500
15
7.2V
(1200
mAh)
4500
16
7.2V
(1700
mAh)
4500
23
9.6V
(600
mAh)
2500
15
9.6V
(900
mAh)
2500
22
Capacity
4
ILLUSTRATION
of START
location
23-412.fm Page 5 Friday, August 6, 1999 3:04 PM
Caution: Never disconnect the charger’s DC
charger’s clamps from
your vehicle’s battery
while charging is in
progress. If you need to
suddenly stop charging, disconnect the battery pack from the
charger first, then disconnect
the
DC
charger’s clamps from
the vehicle’s battery terminals (and chassis, if
you
connected
the
black clamp to it).
the battery pack from
the charger, then disconnect
the
DC
charger’s clamps from
the vehicle’s battery terminals (and chassis, if
you
connected
the
black clamp to it).
Note: If you are charging high-capacity 7.2volt, 1700 mAh, and
9.6-volt, 900 mAh battery packs, you must
run them for two charging cycles to fully
charge them.
Notes:
• If the battery pack
becomes too hot, the
thermal
sensor
makes charging stop
automatically.
• If the charging time
and
the
battery
pack’s life are both
very short, the battery
pack might be damaged.
• If the charging indicator does not light,
check to see if the
charger’s fuse has
blown (see “Replacing the Fuse” on
Page 6).
7. When charging is complete, the charger and
its CHARGE indicator
automatically turn off.
Disconnect and remove
5
23-412.fm Page 6 Friday, August 6, 1999 3:04 PM
REPLACING
THE FUSE
2. Remove
the
DC 3. Push and twist the fuse
holder’s ends together
charger’s clamps from
until it springs apart. If
your vehicle’s battery
the fuse is blown,
(and chassis, if you conreplace it with an identinected the black clamp
The DC charger’s fuse
cally rated 7-amp fuse.
to it).
blows if you connect its
clamps to the wrong battery
terminals. This protects the
ILLUSTRATION
charger, the battery pack,
of open fuse
and your vehicle’s electrical
holder w/fuse
system. We recommend
that you keep some spare
Note: Blown fuses usu7-amp, 11/4-inch slow blow
ally are discolored or
fuses (such as Cat. No.
have a broken center
270-1029) with your chargwire.
er, in case the fuse blows.
4. Reassemble the fuse
Caution: Do not use a fuse
holder by pushing and
with ratings other than those
twisting
its
ends
specified here. Doing so
together.
might damage your charger.
If the CHARGE indicator
does not light or the charger
does not operate when you
turn it on, follow these steps
to check and replace the
fuse.
1. Disconnect and remove
the battery pack from
the charger.
ILLUSTRATION
of battery pack
disconnection
6
23-412.fm Page 7 Friday, August 6, 1999 3:04 PM
CARE AND MAINTENANCE
Your RadioShack Racing Battery Pack DC Charger for 4.8V/6V/7.2V/9.6V Ni-Cd Battery Packs is an example of superior design and craftsmanship. The following suggestions will help you care for your charger so you can enjoy it for years.
Keep the charger dry. If it gets wet, wipe it dry immediately. Liquids can
contain minerals that corrode electronic circuits.
Use and store the charger only in normal temperature environments.
Temperature extremes can shorten the life of electronic devices, damage batteries, and distort or melt plastic parts.
Handle the charger gently and carefully. Dropping it can damage circuit
boards and cases and can cause the charger to work improperly.
Keep the charger away from dust and dirt, which can cause premature
wear of parts.
Wipe the charger with a damp cloth occasionally to keep it looking new.
Do not use harsh chemicals, cleaning solvents, or strong detergents to
clean your charger.
Modifying or tampering with the charger’s internal components can cause a malfunction and invalidate your charger’s warranty. If your charger is not performing as it
should, take it to your local RadioShack store for assistance.
7
23-412.fm Page 8 Friday, August 6, 1999 3:04 PM
SPECIFICATIONS
Charging Current ............................. 2.5 Amps ±10% for 4.8V, 6V and 9.6V batteries
4.5 Amps ±10% for 7.2 battery
DC Supply Voltage ......................................................................................... DC 12V
Charging Times (Fully Discharged Battery Pack):
Minimum ............................................................................................. 15 Minutes
Maximum ............................................................................................ 23 Minutes
Average .............................................................................................. 18 Minutes
Specifications are typical; individual units might vary. Specifications are subject to
change and improvement without notice.
Limited Ninety-Day Warranty
This product is warranted by RadioShack against manufacturing defects in material and workmanship under normal
use for ninety (90) days from the date of purchase from RadioShack company-owned stores and authorized RadioShack franchisees and dealers. EXCEPT AS PROVIDED HEREIN, RadioShack MAKES NO EXPRESS WARRANTIES AND ANY IMPLIED WARRANTIES, INCLUDING THOSE OF MERCHANTABILITY AND FITNESS FOR
A PARTICULAR PURPOSE, ARE LIMITED IN DURATION TO THE DURATION OF THE WRITTEN LIMITED WARRANTIES CONTAINED HEREIN. EXCEPT AS PROVIDED HEREIN, RadioShack SHALL HAVE NO LIABILITY OR
RESPONSIBILITY TO CUSTOMER OR ANY OTHER PERSON OR ENTITY WITH RESPECT TO ANY LIABILITY,
LOSS OR DAMAGE CAUSED DIRECTLY OR INDIRECTLY BY USE OR PERFORMANCE OF THE PRODUCT
OR ARISING OUT OF ANY BREACH OF THIS WARRANTY, INCLUDING, BUT NOT LIMITED TO, ANY DAMAGES RESULTING FROM INCONVENIENCE, LOSS OF TIME, DATA, PROPERTY, REVENUE, OR PROFIT OR
ANY INDIRECT, SPECIAL, INCIDENTAL, OR CONSEQUENTIAL DAMAGES, EVEN IF RadioShack HAS BEEN
ADVISED OF THE POSSIBILITY OF SUCH DAMAGES.
Some states do not allow the limitations on how long an implied warranty lasts or the exclusion of incidental or consequential damages, so the above limitations or exclusions may not apply to you.
In the event of a product defect during the warranty period, take the product and the RadioShack sales receipt as
proof of purchase date to any RadioShack store. RadioShack will, at its option, unless otherwise provided by law:
(a) correct the defect by product repair without charge for parts and labor; (b) replace the product with one of the
same or similar design; or (c) refund the purchase price. All replaced parts and products, and products on which a
refund is made, become the property of RadioShack. New or reconditioned parts and products may be used in the
performance of warranty service. Repaired or replaced parts and products are warranted for the remainder of the
original warranty period. You will be charged for repair or replacement of the product made after the expiration of
the warranty period.
This warranty does not cover: (a) damage or failure caused by or attributable to acts of God, abuse, accident, misuse, improper or abnormal usage, failure to follow instructions, improper installation or maintenance, alteration,
lightning or other incidence of excess voltage or current; (b) any repairs other than those provided by a RadioShack
Authorized Service Facility; (c) consumables such as fuses or batteries; (d) cosmetic damage; (e) transportation,
shipping or insurance costs; or (f) costs of product removal, installation, set-up service adjustment or reinstallation.
This warranty gives you specific legal rights, and you may also have other rights which vary from state to state.
RadioShack Customer Relations, Dept. W, 100 Throckmorton St., Suite 600, Fort Worth, TX 76102
We Service What We Sell
3/97
RadioShack
A Division of Tandy Corporation
Fort Worth, Texas 76102
2A8
Printed in Hong Kong