1
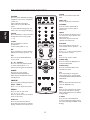
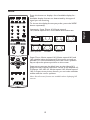
R
USER’S MANUAL
L42H761
Thank you very much for choosing the AOC Envision Series LCD TV.
We recommend that you take a few minutes to read carefully through this manual
before installing and using the TV. Please keep this manual in a safe place for
your future reference.
www.AOC .com
LCD TV
TABLE OF CONTENTS
FOR YOUR SAFETY------------------------------------------------------- 1
DECLARATION OF RoHs COMPLIANCE---------------------------- 3
PRECAUTIONS AND REMINDERS------------------------------------ 4
IMPORTANT SAFETY INSTRUCTIONS------------------------------ 6
MOUNTING THE TV BASE---------------------------------------------- 8
PREPARATION-------------------------------------------------------------- 9
TO USE THE REMOTE CONTROL------------------------------------11
Peripheral Connection Guide------------------------------------------------------------13
To use the menus--------------------------------------------------------------------------15
TV menu-Installation-----------------------------------------------------------------------16
TV menu-Features-------------------------------------------------------------------------19
TV menu-Picture & Sound---------------------------------------------------------------22
TV menu-Parental Control---------------------------------------------------------------25
PC menu-Installation----------------------------------------------------------------------29
PC menu-Picture---------------------------------------------------------------------------30
PC menu-Sound----------------------------------------------------------------------------31
BEFORE CALLING SERVICE------------------------------------------ 33
GLOSSARY----------------------------------------------------------------------------------34
PRODUCT SPECIFICATION------------------------------------------- 35
English
USER’S MANUAL
FOR YOUR SAFETY
Before operating the TV please read this manual thoroughly. This manual should be
retained for future reference.
FCC Class B Radio Frequency Interference Statement
WARNING: (FOR FCC CERTIFIED MODELS)
English
NOTE: This equipment has been tested and found to comply with the limits for a
Class B digital device, pursuant to Part 15 of the FCC Rules. These limits are designed
to provide reasonable protection against harmful interference in a residential installation. This equipment generates, uses and can radiate radio frequency energy, and if not
installed and used in accordance with the instructions, may cause harmful interference to
radio communications. However, there is no guarantee that interference will not occur
in a particular installation. If this equipment does cause harmful interference to radio or
television reception, which can be determined by turning the equipment off and on, the
user is encouraged to try to correct the interference by one or more of the following
measures:
NOTICE
1. Reorient or relocate the receiving antenna.
2. Increase the separation between the equipment and receiver.
3. Connect the equipment into an outlet on a circuit different from that to which the
receiver is connected.
4. Consult the dealer or an experienced radio/TV technician for help.
WARRNING:
1. The changes or modifications not expressly approved by the party responsible for
compliance could void the user’s authority to operate the equipment.
2. Shielded interface cables and AC power cord, if any, must be used in order to comply
with the emission limits.
3. The manufacturer is not responsible for any radio or TV interference caused by
unauthorized modification to this equipment. It is the responsibilities of the user to
correct such interference.
To prevent fire or shock hazard, do not expose the TV to rain or moisture. Dangerously
high voltages are present inside the TV. Do not open the cabinet. Refer servicing to
qualified personnel only.
SAFETY: Lamp Disposal LAMP(S) INSIDE THIS PRODUCT CONTAIN MERCURY AND MUST BE RECYCLED
OR DISPOSED OF ACCORDING TO LOCAL, STATE OR FEDERAL LAWS. FOR MORE
INFORMATION, CONTACT THE ELECTRONIC
INDUSTRIES ALLIANCE AT WWW.EIAE.ORG.
1
SYMBOL DEFINITION
SA 1965
DANGEROUS VOLTAGE: The lightning flash with arrowhead
symbol, within an equilateral triangle, is intended to alert the
user to the presence of uninsulated “dangerous voltage” within
the product’s enclosure that may be of sufficient magnitude to
constitute a risk of electrical shock to persons.
SA 1966
INSTRUCTIONS: The exclamation point within on equilateral
triangle to alert the User to the presence of important operating
and maintenance (servicing) instruction In the literature
accompanying the appliance.
Apparatus shall not be exposed to dripping or splashing and no objects filled with
liquids, Such as vases, Shall be placed on the apparatus.
Caution - Danger of explosion if battery is incorrectly replaced. Replace only with the
same or equivalent type.
LCD panel
The LCD panel used in this product is mode of glass.Therefore,it can break when the
product is dropped or impacted upon by other objects.
The LCD panel is a very high technology product,giving you finely detailed pictures.
Occasionally,a few non-active pixels may appear on the screen as a fixed ponint of
blue,green or red ,This does not affect the performance of your product.
In order to ensure long performance of your set and reduce the risk of screen
burning,please observe the following precautions.
- Do not display still images(still computer and video game images,logos.pictures,text
and images displayed in 4:3)for extended perods of time;
- Use a screen saver when using a computer:
2
English
SYMBOL
DECLARATION OF RoHs COMPLIANCE
This product has been designed and manufactured in compliance with Directive 2002/95/
EC of the European Parliament and the Council on restriction of the use of certain
hazardous substances in electrical and electronic equipment (RoHS Directive) and is
deemed to comply with the maximum concentration values issued by the European
Technical Adaptation Committee (TAC) as shown below:
Substance
English
Lead (Pb)
Mercury (Hg)
Cadmium (Cd)
Hexavalent Chromium (Cr6+)
Polybrominated biphenyls (PBB)
Polybrominated diphenyl ethers
(PBDE)
Proposed Maximum
Concentration
0.1%
0.1%
0.01%
0.1%
0.1%
0.1%
Actual Concentration
< 0.1%
< 0.1%
< 0.01%
< 0.1%
< 0.1%
< 0.1%
Certain components of products as stated above are exempted under the Annex of the
RoHS Directives as noted below:
Examples of exempted components are:
1. Mercury in compact fluorescent lamps not exceeding 5 mg per lamp and in other lamps
not specifically mentioned in the Annex of RoHS Directive.
2. Lead in glass of cathode ray tubes, electronic components, fluorescent tubes, and
electronic ceramic parts (e.g. piezoelectronic devices).
3. Lead in high temperature type solders (i.e. lead-based alloys containing 85% by weight
or more lead).
4. Lead as an allotting element in steel containing up to 0.35% lead by weight, aluminium
containing up to 0.4% lead by weight and as a cooper alloy containing up to 4% lead by
weight.
3
PRECAUTIONS AND REMINDERS
Don’t place the TV in confined spaces or in
a box when using it.
Unplug immediately if is malfunction like
no picture, no video/audio,smoke and bad
odor from TV.
Unplug immediately if other foreign
materials are put inside TV box or if the
TV fell down.
Don’t throw any object inside the TV box
like metals or other flammable materials.
Prohibit/Avoid opening TV cabinet
English
Place unit on even surfaces.
4
Remember to unplug the AC cord from
Avoid direct sunlight, dusty, high humidity
the AC outlet before cleaning. Do not use and smoky areas.
liquid cleaners or aerosol cleaners to clean
the display.
English
Make sure to unplug the unit when not in
use for a long period of time (days).
Call service personnel to clean the
internal part of the TV once a year.
Do not cover or block any vents and
openings. Inadequate ventilation may
shorten the life of the display unit and
cause overheating.
Do not place the display near water,
such as bathtub, washbasin, kitchen sink
laundry tub, swimming pool or in a damp
basement.
Notice for Remote Controller
Avoid Dropping
Avoid Liquids
7
7
9
8
Avoid Aerosol Cleaners
6
5
4
6
5
4
3
2
1
3
2
1
9
8
6
5
4
7
0
3
2
1
0
9
8
0
5
IMPORTANT SAFETY INSTRUCTIONS
Read before operating equipment
Read these instructions.
Keep these instructions.
Heed all warnings.
Follow all instructions.
Do not use this apparatus near water.
Clean only with a dry cloth.
Do not block any of the ventilation openings. Install in accordance with the
manufacturers instructions.
8. Do not install near any heat sources such as radiators, heat registers, stoves, or other
apparatus (including amplifiers) that produce heat.
9. Do not defeat the safety purpose of the polarized or grounding type plug. A polarized
plug has two blades with one wider than the other. A grounding type plug has two
blades and third grounding prong. The wide blade or third prong is provided for your
safety. When the provided plug does not fit into your outlet, consult an electrician for
replacement of the obsolete outlet.
10. Protect the power cord from being walked on or pinched particularly at plugs,
convenience receptacles, and the point where they exit from the apparatus.
11. Only use attachments/accessories specified by the manufacturer.
12. Use only with a cart, stand, tripod, bracket, or table specified by the manufacturer,
or sold with the apparatus. When a cart is used, use caution when moving the cart/
apparatus combination to avoid injury from tip-over.
13. The TV should be operated only from the type of power source indicated on the label.
If you are not sure of the type of power supplied to your home, consult your dealer
or local power company.
14. Unplug this apparatus during lightning storms or when unused for long periods of
time.
15. Refer all servicing to qualified service personnel. Servicing is required when the
apparatus has been damaged in any way, such as power-supply cord or plug is damaged,
liquid has been spilled or objects have fallen into apparatus, the apparatus has been
exposed to rain or moisture, does not operate normally, or has been dropped.
16. This product may contain lead or mercury. Disposal of these materials may be
regulated due to environmental considerations. For disposal or recycling information,
please contact your local authorities or the Electronic Industries Alliance: www.eiae.
org
17. Damage Requiring Service – The appliance should be serviced by qualified service
personnel when:
A. The power supply cord or the plug has been damaged; or
B. Objects have fallen, or liquid has been spilled into the appliance; or
C. The appliance has been exposed to rain; or
D. The appliance does not appear to operate normally or exhibits a marked change
in performance; or
E. The appliance has been dropped, or the enclosure damaged.
6
English
1.
2.
3.
4.
5.
6.
7.
18. Tilt/Stability – All televisions must comply with recommended international global
English
safety standards for tilt and stability properties of its cabinets design.
- Do not compromise these design standards by applying excessive pull force to
the front, or top, of the cabinet, which could ultimately overturn the product.
- Also, do not endanger yourself, or children, by placing electronic equipment/toys
on the top of the cabinet. Such items could unsuspectingly fall from the top of
the set and cause product damage and/or personal injury.
19. Wall or Ceiling Mounting – The appliance should be mounted to a wall or ceiling
only as recommended by the manufacturer.
20. Power Lines – An outdoor antenna should be located away from power lines.
21. Outdoor Antenna Grounding – If an outside antenna is connected to the receiver,
be sure the antenna system is grounded so as to provide some protection against
voltage surges and built up static charges.
Section 810 of the National Electric Code, ANSI/NFPA No. 70-1984, provides
information with respect to proper grounding of the mats and supporting structure
grounding of the lead-in wire to an antenna-discharge unit, size of grounding
connectors, location of antenna-discharge unit, connection to grounding electrodes
and requirements for the grounding electrode. See Figure below.
ANTENNA
GROUND CLAMP
ANTENNA DISCHARGE UNIT
ELECTRIC SERVICE EQUIPMENT
GROUND CLAMPS
GROUNDING CONDUCTORS
POWER SERVICE GROUNDING ELECTRODE SYSTEM
EXAMPLE OF ANTENNA GROUNDING AS PER NATIONAL ELECTRICAL CODE
Note to the CATV system installer: This reminder is provided to call the CATV
system installer’s attention to Article 820-40 of the NEC that provides guidelines for
proper grounding and, in particular, specifies that the cable ground shall be connected
to the grounding system of the building, as close to the point of cable entry as
practical.
Please, make sure to connect the power plug to the wall outlet socket after connecting
the TV to the adapter!
22. Objects and Liquid Entry – Care should be taken so that objects do not fall and
liquids are not spilled into the enclosure through openings.
7
MOUNTING THE TV BASE
English
The TV base will be separated with the TV unit. You should Install the base before you use
the TV unit.
1. Place the TV on its face on a soft blanket.
2. Install the base stand with three screws.
3. Place the TV on the table.
WALL MOUNT
Use of Wall Mount Bracket:
1.
2.
3.
4.
Remove the hinger cover.
Remove the 6 units M4.0 screws.
Remove the base ass’y.
Fasten four units M6.0 X 10mm screws to secure the wall mount bracket.
8
PREPARATION
Please, make sure to connect the power plug to the wall outlet socket after connecting the
TV to the power cord!
English
Min
1m
1. Install the base stand; place the TV on a solid surface.
Ensure that the TV is placed in a position to allow free flow of air. Do not cover the
ventilation openings on the back cover.
To prevent any unsafe situations, no naked flame sources, such as lighted candles, should
be placed on or in the vicinity.
Avoid heat, direct sunlight and exposure to rain or water. The equipment shall not be
exposed to dripping or splashing.
2. Connect the antenna cable or CATV cable to the aerial socket ANT IN 75Ω at the back
of the TV set.
CABLE
9
3. Remote control:
Remove the cover of the battery compartment. Insert the 2 batteries supplied (Type
AA 1.5V).
English
4. Power:
Insert the power cord in the wall socket having an AC power supply. You can see LED
states at the front panel. If the LED color is Green, means the TV set is power on. If the
LED color is Orange, which means this TV set is in standby state.
5. Turn the TV on:
Push the POWER key on the Remote control or the Front panel control knobs. Wait a
minute, the TV will power on and can see the display on the screen
10
TO USE THE REMOTE CONTROL
MUTE
Press to set TVsound mute ON/
OFF
POWER
Press to power ON/OFF (standby)
TV.(Note:1.TV is never completely
power off.
unless physically unplugged.
2.Press to turn on TV after the
power
on status LED had changed to the
amber color and stopped flashing. )
PREV CH
Press to display the previous TV .
MTS/SAP
Press to activate the NTSC TV
sounds, such as: Stereo, SAP or
Mono tone.
English
WIDE
Press to choose the display aspect
as: Automatic, Super Zoom, 4:3,
Movie expand
14:9, Movie expand 16:9, 16:9
subtitle and widescreen.
VIDEO
Press repeatedly to choose S-Video/
Composite source mode (Video
1 ~ 4).
COMP
Press repeatedly to choose
Component
source mode (Video 5 ~ 6).
SOURCE
Press repeatedly to choose the
various input sources (Video 1 ~ 9).
PC
CH-/ CH +
Press + or - to browse through the
TV channels or sources..
Press repeatedly to choose VGA or
HDMI source mode (Video 7 ~ 9).
Exit
Press to exit menu or OSD.
TV
Press to choose ATSC/NTSC TV
source mode.
VIDEO ADJ
Press to choose the Brightness or
Contrast adjustment.
0 ~ 9 /- number
Press to enter TV channel number
to select channel (Press ‘-’ to
indicate choosing the sub-channel).
AUDIO ADJ
Press to switch the ATSC multichannel TV sounds.
SLEEP
CC
Press repeatedly to change the
closed caption type as CC1/CC2/
CC3/CC4/TEXT1/ TEXT2/TEXT3/
TEXT4/Off.
Press to set a time period
(off/30min/60min/90min)after
which the TV shouldswitch itself to
standby mode.
FREEZE
EPG
Press to show the information the
same as “DISPLAY” key.
Press to freeze the displayed picture
VOL- / VOL+
Press + or - to adjust the volume.
FAV
Press to turn on/off favorite mode
(use CH up and down to change
after setting thefavorite TV channel
on Right key).
MENU
Press to open or exit menu.
“V”,“Λ”,“<”,“>”,“OK
Press to adjust the various function
items on the menu.
V-CHIP
Press to lock / unlock Parental
Control temporarily. (After setting
the restricted table of MPAA or TV
Rating.)
DISPLAY
Press to show the information
about the input source, TV channel,
display resolution and current time
11
WIDE
Press this button to display a list of available display formats.
Available display formats are determined by the type of
signal you are receiving.
To choose the display format you prefer, press the WIDE
button repeatedly:
English
Automatic, Super Zoom, 4:3, Movie expand
14:9, Movie expand 16:9, 16:9 subtitle and widescreen.
Automatic
Super zoom
4:3
Movie expand 16:9
16:9 subtitle
Widescreen
Movie expand 14:9
Super Zoom, Movie expand 14:9, Movie expand 16:9 and
16:9 subtitle makes the picture fill the screen as much as
possible. It is recommended to press the cursor up/down
key to adjust the picture position on the screen.
Super zoom removes the black bars on the sides of 4:3
programs with minimal distortion. When in the Expand 4:3,
Compress 16:9, HD 4:3, Movie expand 14:9, Movie expand
16:9 or Super zoom picture format, you can make subtitles
visible with the cursor up/down.
Note: Not all screen formats are available when displaying HD
sources.
12
PERIPHERAL CONNECTION GUIDE
AC POWER
English
Head Phone
R
L
Video
S-Video
POWER
HDMI 2 HDMI 1
RS-232
Headphone
HDMI
S-Video
Audio In
D-SUB
Line In
PC L/R
SPDIF
VGA
15-pin D-Sub
AV 1
S-VIDEO
Pr
Component 1
TV Cable
Component 2
Component
Pb
Y
L
R
Once your equipment is connected, use the following procedure to view the input signal:
Press the source button on the remote controller to select the relevant source to view.
(ex: Press VIDEO button to select “Composite Rear” if you have connected a video
recorder to Composite Rear socket.)
Note: The MUTE key on the remote control works on both TV internal speaker and the
earphone output.
HEADPHONE
1. The headphone jack is located at the side of the TV.
2. The MUTE key on the remote control works on both internal speaker and the
headphone.
3. Use volume key to adjust the volume
13
CAMERA CAMCORDER VIDEO GAME
How to connect
How to use it
1. Select the video AV or S terminal input.
2. Enable the exterior AV equipment.
Warning: In case you notice scrolling images, wrong colors or no color, no picture or even
combinations of these, on your screen, check if the connections are done in the right way. Check if
the cable colors match with the Input connector colors.
OPERATION INSTRUCTIONS
1
2
3
4
5
6
7
1.VOL▲
VOL +: Press to increase the sound volume level.
2.VOL▼
VOL - : Press to decrease the sound volume level.
3. CH ▲
CH +: Press to select the next higher Program number or sources..
4. CH ▼
CH - : Press to select the next lower Program number or sources..
5. MENU
Menu key: Press to open or exit the OSD menu.
6. INPUT
Source key: Press to select the input source.
7. POWER
Power key: Press to turn on / off (standby) the TV set.
(Please re-turn on TV after the Power-ON status LED had changed to
the orange color and finished flashing.)
14
English
1. Connect the camera, camcorder and game set to the ports of the audio/video set.
2. The camcorder may get better picture by connecting a S-VHS cable between the S
terminal and the Audio set.
To use the menus
Introduction
When you use a menu or take an action, convenient instructions, help texts and messages will
be displayed on your TV.
Please, follow the displayed instructions and read the help text on the specific item highlighted.
The buttons perform different actions, when using on screen menu. By pressing the
corresponding button on the remote control to perform the required action when using
these menus.
How to navigate through the Settings menus
English
Settings
6
Picture
Picture
Smart picture
Sound
Contrast
Features
Brightness
Parental Control
Color
Installation
Sharpness
Exit
Color temperature
10
•Press the MENU button on the remote control to display the Settings menu.
- Use cursor up/down to highlight and select a
menu item on the left panel.
The right panel shows the content of the menu
you have highlighted in the left panel.
Note: Sometimes not all the menu items are visible
on the screen. Use cursor down to scroll down to
additional items.
Tint
Noise reduction
The picture menu contains the settings that affect the quality of the
picture.
Settings
Picture
10
Smart picture
Smart Picture
Personal
Contrast
50
Rich
Brightness
50
Natural
Color
50
Sharpness
3
Soft
Power saver
Color temperature
Tint
0
Noise reduction
3
Easy selection of uptimized predefined picture settings.The TV will
return to the last selected setting after start-up.
The Settings menu allows you to access and
change settings and preferences settings.
5
- Use the cursor right to enter the right panel.
The content of the right panel is moved to the
left panel and the right panel shows the content of the newly highlighted item in the left
panel.
Note: In some cases, you will want to watch the
picture on your screen while adjusting settings.
This means that when the highlight is on the right
side panel, the other menu items are hidden.
When the cursor left is pressed again, the hidden
menu items re-appear and the highlight moves to
the left panel.
•Press the cursor left to go one menu level up
again.
- Press the OK button on the highlighted item to
activate and to dismiss the menu.
- Press the MENU button again to exit the Settings menu.
Note: The menu is also dismissed by pressing one
of the color buttons (if present) referring to certain
actions which may be executed.
15
Settings
Installation
6
Language
Language
English
Autoprogram
Français
Source
Español
Clock
Current software info
Reset AV settings
Press the cursor right select your menu language.
Settings
Autoprogram
Installation
2
Cable
Antenna
Cable
Start now
Television installation
You can now start automatic installation. This proceclure
can take more than half an hour.
EXIT
Previous
Start
3
Select the menu language
1 Press the MENU button on the remote control.
2 Use the cursor down to select Installation in
the Settings menu.
3 Use the cursor right to enter the Installation
menu.
4 Select Language and enter the list of available
languages with the cursor right.
5 Select your preferred language with the cursor
up/down and press the OK button to confirm
your selection.
6 Proceed with the Installation menu.
Store TV channels
1 Select Autoprogram in the Installation menu.
Use the cursor right to enter the Autoprogram
menu.
2 Select Cable or Antenna in the Installation
mode.
3 When Antenna is selected, the TV will detect
antenna signals and will search for antenna TV
(NTSC and ATSC) channels available in your
local area.
When Cable is selected, the TV will detect
cable company supplied signals and will search
for cable TV (NTSC, ATSC, QAM modulated)
channels available in your area.
Make sure that registration with your cable TV
provider and connection of equipment are completed.
4 Select Start now with the cursor right key.
5 Press the OK button.
6 Press the green button “Start” to start Autoprogramming. The menu screen disappears and
the progress of Autoprogramming is displayed.
The progress bar indicates the number of analog
and digital TV channels found.
Auto programming may take up to 20 minutes to
complete. Digital channels will take longer than
Analog to find and program. Please wait until
you see the Auto Programming complete message. The TV will then switch automatically to
the first channel found.
Note: All channels must be unlocked in order to autoprogram. If requested, enter your PIN code to unlock all
channels. (p. 25)
Notes:
• When you have locked TV channels before initiating Autoprogram, a message appears asking to enter your PIN code
in order to complete Autoprogramming.
• When channel update is interrupted, the new updated channel information is retained along with the old un-updated
channel information.
• Channel information about an ATSC channel is updated only for the ATSC channel currently tuned.
• If an NTSC channel is tuned, then in Background Autoprogramming the TV will scan all the possible ATSC frequencies
and update information.
• Weak channel installation allows you to manually tune weak ATSC channels in order to adjust the antenna and thus
optimize signal quality for that channel. (See Installation menu, Weak channel installation, p. 14.)
• Once you have searched for the available Antenna as well as the Cable TV channels, they are stored in the memory.
• If Antenna/cable signal is interrupted more than 30 minutes, TV will go into off mode. You are requested to press
Power button or CH + / - button to turn on the TV.
16
English
TV menu-Installation
Channel tuning
Available channels:
- Cable (analog NTSC or digital QAM)
- Terrestrial (analog NTSC or digital ATSC)
If a tuned channel is not yet in the master channel
map, the TV will attempt to tune to the channel
and it will be added to the map.
If the channel is not acquired, a message will appear reporting that the channel is not available.
When you tune an audio-only digital subchannel, a
display appears with the message Audio only.
English
Note: Digital Channel selection
delay
Due to the tuning complexity of
subchannel digital programming, the
time to select and view a digital channel may take slightly longer than what
the viewer is normally accustomed
to (as compared to analog channel
programs).
Digital channel broadcasts contain
program and system data information
that must be processed before the
channel selection can be displayed.
Settings
Installation
Weak channel install
7
Language
2
Autoprogram
3
Source
4
Clock
5
Weak channel installation
6
Current software info
7
Reset AV settings
8
9
This allows you to maximize the signal quality of weak digital channels
by manually rotating the antenna.
Note: Subchannel selections
The new standards employed with digital broadcasting
make it possible to receive multiple program channels
under a single major channel
number which can be selected by pressing the digit
remote control direct-access channel number entry.
Important:
After the installation of the TV channels is completed,
always
make a selection in the Installation menu between
Antenna or
Cable whether you want to watch Antenna TV channels
or Cable TV channels.
If you make use of a signal splitter do not forget to put
the switch in the corresponding position.
Weak channel installation
Antenna reception for broadcast channels may vary.
If you are
having difficulties acquiring weaker signals, we suggest you use: Weak Signal Installation feature.
Here’s how:
In the antenna mode, select a channel from the
displayed list of TV channels. Select the “Start”
by pressing red button on the remote control; TV
set will detect the signal.
The signal strength is continuously displayed and
updated as you rotate the antenna.
When strength is enough to identify, user can
store the
channel in the channel list by pressing green button on the
remote control.
Current software info
Settings
Installation
Language
Autoprogram
7
Current software info
Version:
LT-4226HD-20070410-0
Source
Clock
Weak channel installation
Current software info
Reset AV settings
This menu will appear with your TV software
information.
1 Press the MENU button on the remote control.
2 Use the cursor down to select Installation in
the Settings menu.
the cursor up/down to choose Current
software info the TV software information is
displayed.
3 Using
This informs you about the current installed software version of your TV.
17
Installation
Source
7
8
Language
TV
Autoprogram
Component1
Source
Component2
Clock
AV1
Weak channel installation
HDMI1
Current software info
HDMI2
Reset AV settings
AV2
Source
This menu allows you to identify the accessory
devices you have
connected to the external inputs/outputs.
1
2
3
PC
Here you can select the accessory devices you have connected to the
external inputs/outputs.
Analog Audio In
If your accessory device has a DVI output connector, only the video signal is transmitted in digital
format. To input an audio signal, please connect the
analog audio L and R outputs to the TV’s L and R
AV3 audio input plugs.
L
HDMI2
HDMI1
VGA
VIDEO
IN
Y
Pb
Pr
L
R
S-VIDEO
Y
Pb
Pr
L
R
AV1
R
PC IN
AV2
AV3
HDMI
DVI
Digital Audio Out
In addition to accepting audio input through
HDMI, the TV can output Digital audio through
the DIGITAL AUDIO OUT
(SPDIF OUT) connector to an external amplifier
or receiver.
If your amplifier or receiver has a matching connector for Digital Audio In, you can connect it with a
single cable to the TV’s
DIGITAL AUDIO OUT (SPDIF OUT). See Cover
and Connection.
AV3:
Audio L/R
L
DVI
R
Settings
Installation
7
Clock
Language
-- : -- : AM
Autoprogram
Source
Clock
Weak channel installation
Current software info
Reset AV settings
Press the MENU button on the remote control.
Use the cursor down to select Installation in the
Settings menu.
Using the cursor up/down to choose Current
software info the TV software information is
displayed.
Clock
This allows you to use your TV as a clock.
1 Press the MENU button on the remote control.
2 Use the cursor down to select Installation in the
3 Settings menu.
Press the cursor right to enter the list, and press
4 up/down key to set the time. (hour/ minute/ AM
or PM)
Press OK button to confirm.
Allows you to set the correct clock time.
Settings
Installation
7
Reset AV settings
Language
Autoprogram
Start now
Reset AV settings
This function allows you to reset most of the picture and sound settings to their default factory
levels.
Source
Clock
Weak channel installation
Current software info
Reset AV settings
1
2
3
Select Reset AV settings with the cursor down
key.
Press the cursor right key.
Press the OK button to erase settings and reset
them to their default values.
This resets the picture and sound settings to their predefined factory
values. but maintains the channel installation settings.
18
English
Settings
TV menu-Features
Settings
6
Features
Picture
Closed captions
Sound
Caption service
Features
Digital caption service
Parental Control
Digital caption options
Installation
Preferred channels
Exit
Sleeptimer
6
Features menu
1 Select Features in the TV Settings menu.
2 Press the cursor right key to enter the features
menu.
3 Select the menu items with the cursor up/down
key and adjust the settings with the cursor left/
right key.
The features menu gives you control over special. additional functions.
English
Settings
Features
6
Closed captions
Closed captions
Off
Caption service
On
Digital caption service
On during mute
3
Digital caption options
Preferred channels
Sleeptimer
0
This displays the transmitted CC-text on the TV screen according to
your chosen CC service. This text can either be permanently displayed.
Settings
Features
6
Caption service
Closed captions
CC-1
Caption service
CC-2
Digital caption service
CC-3
Digital caption options
CC-4
T-1
Preferred channels
Sleeptimer
0
T-2
T-3
T-4
You can choose the Closed captions service level to be displayed.
Note: The captions do not always use
correct spelling and grammar. Not all
TV programs and product commercials
are made for broadcast with Closed
Caption informations included.
Refer to your area’s TV program listings for the TV
channels and times of Closed Caption
programming. Captioned programs are
usually noted in the TV listings with
service marks such as ‘CC’.
9
Closed captions
This displays the transmitted CC- or CS-text on
the screen according to your chosen CC or CS
service in the Feature menu.
This text can either be permanently displayed (assuming that the service is available in the broadcast)
or only when mute is active.
1 Press the cursor right key after having selected
2 Closed captions.
Select On, Off or On during mute.
Caption service
This allows you to select the Closed Captions service levels of analog broadcasting to be displayed.
Closed Captioning allows you to read the voice
content of television programs on the TV screen.
Designed to help the hearing impaired, this feature
uses on-screen ‘text boxes’ to show dialogue and
conversations while the TV program is in progress.
Captions will appear on the screen during captioned broadcasts.
1 Select Captions service.
2 Press the cursor right key.
3 Select the desired Caption service:
•CC 1,2,3 or 4
Dialogue (and descriptions) for the action on the
captioned TV program shows on screen.
Usually CC1 is the most used. CC2 may be used
for alternate languages if they are being transmitted.
•T 1,2,3 or 4
Often used for channel guide, schedules, bulletin
board information for Closed Captions programs,
news, weather informations or stock market
reports.
Not all Caption services are necessarily being
used by a TV channel during the transmission of a
Closed Caption program.
4 See Closed Caption in the TV, Features menu, to
turn the Caption service On or Off.
Note: This television provides display of television
closed captioning conforming with the EIA-608 standard and in accordance with Sections 15.119 of the
FCC rules.
19
6
Digital caption serv
Closed captions
CS-1
Caption service
CS-2
Digital caption service
CS-3
Digital caption options
CS-4
6
CS-5
Preferred channels
Sleeptimer
CS-6
0
This allows you to select one of the digital service channel made
available by the individual caption provider.
Settings
Features
6
Digital caption options
Closed captions
Reset to default
Caption service
Size
Digital caption service
Style
Digital caption options
Text
Preferred channels
Background
Sleeptimer
0
These options allow you you to select a variety of character font
representations, text colors and sizes and other attributes.
5
Digital caption options
This allows you to modify how digital captions are
displayed on your TV. Select from the following
options to change the visual characteristics of your
TV’s digital captioning.
•Reset to default
Select this option to reset the digital caption options to the captions provider default settings.
Press the OK button to confirm.
•Size
Select this option to choose a caption display size
according to your own preference. Select Default (Automatic),
Small, Standard or Large and press the OK
button to confirm.
•Style
Select this option to choose a caption display font
style according to your own preference. Select
Default, Monospaced serif, Serif, Monospaced sans serif, Sans serif, Casual, Cursive or Small caps.
•Text
Select this option to choose caption display text
box, text color and/or the opacity according to
your own preference.
Select a color and an opacity option.
•Background
Select this option to choose caption display
character back ground color or one of the background opacity options according to your own
preference. Select a color and one of the opacity
options.
Note: Opacity is transparent (allowing light to pass
through)
•Edge
Select this option to choose caption display edge
color or one of the type options according to
your own preference.
20
English
Settings
Features
Digital caption service
This allows you to configure the way you choose
to view digital captioning.
Select one of the digital service channels made
available by the caption provider.
There are six standard services. Service 1 is
designated as the Primary Caption Service. This
service contains the verbatim, or near-verbatim
captions for the primary language being spoken
in the accompanying program audio.
Service 2 is designated as the Secondary Language Service.
This service contains captions in a secondary
language, which is a translation of the captions in
the primary Caption Service. The other service
subchannels are not pre-assigned.
It is up to the discretion of the individual caption provider toutilize the remaining service
channels.
Settings
Features
6
Preferred channels
Closed captions
2
Caption service
3
Digital caption service
4
Digital caption options
5
Preferred channels
Preferred channels
A channel, when installed, is marked as preferred by
default and added to the channel list. This feature
provides the ability to remove a channel number
from the channel list.
1
6
Sleeptimer
7
0
2
8
9
You can browse through the TV channels with the -P+button. Only those
channels which are in the preferred list, will be displayed.
3
English
4
5
Settings
Features
6
Sleeptimer
Closed captions
Caption service
Digital caption service
Digital caption options
Preferred channels
Sleeptimer
20
Select Preferred channels with the cursor down
key.
Press the cursor right key to enter a list with all
stored channel numbers.
Select the channel you want to remove with the
cursor down key.
Press OK.
Repeat to remove other channels.
Sleeptimer
This sets a time period after which the TV automatically turns to standby.
1 Select Sleeptimer.
2 Press the cursor right key.
3 Select a value with the cursor up/down key. The
list will have values from Off to 180 minutes. When
Off is selected, the sleeptimer is turned off.
You can always turn off your TV earlier or select
another time set.
This sets a time period after which the TV automatically turns to
standby.
21
TV menu-Picture & Sound
6
Picture
Smart picture
Sound
Contrast
Features
Brightness
Parental Control
Color
Installation
Sharpness
Exit
Color temperature
10
1
2
3
4
Tint
Noise reduction
The picture menu contains the settings that affect the quality of the
picture.
Settings
Picture
10
Smart picture
Smart Picture
Personal
Contrast
50
Rich
Brightness
50
Natural
Color
50
Sharpness
3
Soft
Power saver
Color temperature
Tint
0
Noise reduction
3
Easy selection of uptimized predefined picture settings.The TV will
return to the last selected setting after start-up.
5
Select Picture in the TV Settings menu.
Press the cursor right key again to enter the Picture menu.
Select the menu items with the cursor up/down
key.
Adjust the settings with the cursor left/right key
or enter the list of submenu items with the cursor
right key. Select a submenu item with the cursor
up/down key.
Smart picture
1 Select Smart picture to display a list of predefined picture settings, each corresponding with
specific factory settings.
Personal refers to the personal preference settings of picture in the picture menu.
Note: This Magnavox TV has been set at the factory to
look best in bright store environments, which typically
use fluorescent lighting. As your home will likely not
be as well lit as a store, we recommend that you cycle
through the various smart picture modes to find the
one that best suits your own viewing conditions. Most
consumers will find that Natural is the correct choice.
2 You can press the Smart picture button on the
remote control repeatedly to select either Personal, Rich, Natural, Soft, or Power saver picture
settings.
Note:
• When you watch programs by Composite Video signal,
it’s recommended to select Soft or Power saving
Mode via Smart picture.
• The moment you are in a predefined Smart picture
setting and you modify the Picture menu, all values of the
menu will overwrite those previously made in personal
setting.
Contrast
This will adjust the intensity of bright parts in the
picture but keep the dark parts unchanged.
Brightness
This will adjust the light output of the complete
picture, which will mainly affect the darker areas of
the picture.
Color
This will adjust the saturation level of the colors to
suit your personal preference.
22
English
Settings
Picture
Picture menu
Note: Some menu items are not available in case of HD
sources.
Sharpness
This will adjust the sharpness of fine details in the
picture.
Color temperature
This will increase or decrease Warm (red) and
Cool (blue) colors to suit personal preferences.
Select Cool to give the white colors a blue tint,
Normal to give the white colors a neutral tint,
Warm to give the white colors a red tint.
English
Tint
Allows you to select the picture‘s color mix or
hue.
Noise Reduction
Reduce picture noise.
Dynamic contrast
Enhance contrast ratio.
Picture format
This menu item performs the same as the FORMAT
button on the remote control. See Use of the remote control, p.9.
Settings
6
Sound
Picture
Smart sound
Sound
Sound mode
Features
Alternate audio
Parental Control
Digital audio language
Installation
AVL
5
Sound menu
1 Select Sound in the TV Settings menu.
2 Press the cursor right key to enter the sound menu.
3 Select the menu items with the cursor up/down key
and adjust the settings with the cursor left/right key.
4
Remember, control settings are at normal mid-range
levels when the bar scale is entered.
Exit
The sound menu contains the settings that affect the reproduction of
the sound.
Settings
Sound
5
Smart sound
Smart sound
Personal
Sound mode
Speech
Alternate audio
Movies
Digital audio language
AVL
This gives you the possibility to select the preferred sound frequencies
which correspond with your personal sound settings.
3
Smart sound
Select Smart sound to display a list of predefined sound
settings,each corresponding with specific factory settings of Treble and Bass.
1 Press the cursor right key to enter the list.
2 Press the cursor up/down key to select a predefined
sound setting. Personal refers to the personal preference sound settings in the sound menu.
Note: The moment you are in a predefined Smart sound
setting and you modify the Sound menu, all values of the
menu will overwrite those previously made in personal
setting.
23
Settings
Sound
5
Sound mode
Smart sound
Mono
Sound mode
Stereo
Alternate audio
Virtual Surround
3
Digital audio language
Sound mode
This select the modes for more spatial or surround
sound
reproduction dependent on the broadcast signals or
signals from
external inputs received.
AVL
Settings
Sound
5
Alternate audio
Smart sound
Main
Sound mode
SAP
2
Alternate audio
Alternate audio
This gives you the possibility to swap between
“Main” and second audio program (SAP), when it is
available in analog channel.
Digital audio language
AVL
This gives you the possibility to swap tetween the Main and Second
Audio program(SAP) when it is available.
Digital audio language
Settings
Sound
5
Digital audio language
Smart sound
English
Sound mode
Français
Alternate audio
Español
3
This gives you the possibility to swap between main
and alternative language, when it is available in digital
channel.
Digital audio language
AVL
This allows you to select an audio language out of the list of the
available broadcasted languages for the current digital problems.
Settings
Sound
5
AVL
Smart sound
Off
Sound mode
On
2
Alternate audio
Digital audio language
AVL (Automatic Volume Leveler)
Automatically reduces the volume differences between channels and programs, providing a more constant overall level. This will also reduce the dynamics
of sound.
AVL
This automatically reduces volume differences between channels and
programs, providing a more constant overall level. This will also
Manufactured under license
from Dolby Laboratories.
‘Dolby’ and the double-D symbol are trademarks of Dolby
Laboratories.
24
English
This selects the modes for more spatial or surround sound
reproduction.
TV menu-Parental Control
Settings
6
Parental Control
Picture
Channel lock
Sound
TV ratings lock
Features
Movie ratings lock
Parental Control
Region ratings lock
Installation
Clear regions lock
Exit
Change PIN
6
Parental Control menu
This menu can control special functions for the
TV channels.
1 Select Parental Control in the TV settings menu with
the cursor up/down key.
2 Press the cursor right to enter the channels menu.
3 Press the cursor up/down key to select a channels
menu item.
This menu can control special functions for the TV channels.
English
Settings
Parental control
6
Channel lock
Channel lock
10
TV ratings lock
20.3
Movie ratings lock
20.4
Region ratings lock
20.5
Clear regions lock
20.6
Change PIN
20.7
Channel lock
This allows you to completely lock a certain TV
channel or external source. Select the channels
or subchannels you want to lock and press OK to
confirm.
20.8
20.9
This allows you to completely lock a certain TV channel or extemal
source.
Settings
TV ratings lock
Parental control
8
All
None
TV-Y
TV-Y7
TV-G
TV-PG
TV ratings lock
Your TV is equipped with a V-chip. This allows you
to control access to individual programs based on
their movie and TV ratings. All settings apply to all AV
inputs, except HDMI. The program content advisory
data are sent by the broadcaster or program provider.
1
TV-14
TV-MA
This allows you to limit access to individual programs based on their
MPAA ratings.
2
3
4
5
Select TV ratings lock with the cursor down. A list
appears, showing the age-based TV ratings and a corresponding content-based ratings list.
Press the cursor right to enter the list.
Select an age-based TV rating with the cursor up/
down, and enter, if present, the list with content-based
ratings with the cursor right, and select one contentbased rating.
Press OK to activate/de-activate the selected rating. You are asked to enter your PIN-code (see Set/
Change PIN, p. 25). If the code is correct, the TV
ratings lock menu reappears.
Select another content-based rating if you like and
press OK again.
You need only enter your PIN-code once while the menu
is active. You can lock/unlock any number of ratings on
the list without re-entering your code.
Each ratings item has a box-graphic in front of it to indicate whether or not programs carrying that rating are
currently locked:
• : all items in the contents-based list are locked as well;
• : the item is unselected;
• : some content-based ratings are selected/unselected.
25
TV-14
TV-MA
Content-based Rating
none
none
none
(FV) Fantasy Violence
none
(D) Dialog
(L) Language
(S) Sex
(V) Violence
(D) Dialog
(L) Language
(S) Sex
(V) Violence
(L) Language
(S) Sex
(V) Violence
TV-Y
TV-Y7
TV-Y7FV
TV-G
TV-PG
TV-14
TV-MA
When All has been selected, all items in the
age-based and in the contents-based lists are
locked. If, while All is selected, any other item,
either an age-based or content-based item, is
unselected, then All is automatically unselected.
None is the selection for items that either have
no rating information or have a rating of None.
Both will be locked. When an item on the agebased list is selected, all items below that item
of the same group are locked as well. When
you select a content-based rating, all identical
content- based ratings in the younger age-based
categories are also selected.
appropriate for children of all ages with
themes and
elements suitable for children aged 2-6
programs designed for children age 7 and
older
programs include fantasy violence more
intense than other programs in the TV-Y7
category
programs suitable for all ages. These programs contain little or no violence, no strong
language and little or no sexual dialogue or
situations
programs contain elements that some parents
may find unsuitable for younger children and
which may need
parental guidance. The program may contain
moderate violence, sexual dialogue and/or
situations and some strong language.
programs contain elements that may not be
suitable for children under 14 years of age.
These programs include one or more of the
following: intense violence, intense sexual
situations, suggestive dialogue and strong
language.
programs are designed to be viewed by adults
and may be unsuitable for children under
the age of 17. These programs may contain
graphic violence, explicit sexual activity and/
or crude or indecent language.
26
English
Age-based
Rating
All
None
TV-Y
TV-Y7
TV-G
TV-PG
Settings
Parental control
6
Movie ratings
Channel lock
All
TV ratings lock
NR
Movie ratings lock
G
Region ratings lock
PG
Clear regions lock
PG-13
Change PIN
R
NC-17
X
This allows you to limit access to individual programs based on their
MPAA ratings.
Movie Ratings Lock
This function allows you to control access to individual
movies based on their MPAA ratings (Motion Picture Association of America).
English
Select Movie ratings lock with the cursor down. A list
appears, showing all valid MPAA content ratings.
2 Press the cursor right to enter the list. You are asked
to enter your code. (See Set/Change PIN, p. 25.) If the
code is correct, the Movie ratings lock menu reap3 pears.
4 Select a movie rating with the cursor up/down.
Press OK to activate/de-activate the selected rating.
Each rating item has a box-graphic in front of it to indicate
whether or not programs carrying that rating are currently locked:
• : movies with this rating are locked;
• : movies with this rating are unlocked.
When All has been selected, all items on the movie
ratings list become selected. (All movies are locked.) If,
while All is selected, any other item is unselected, then
All is automatically unselected.
When NR has been selected, no other item is selected.
When any other item has been selected, all ratings below
are selected as well, thus all movies with those ratings will
be locked.
1
NR
G
PG
not rated
movies with a mild content, suitable for all ages
movies for which parental guidance is recommended. They may contain a few racy or violent scenes or maybe some bad language
PG-13 movies for which parental guidance may be
recommended if under age 13
R
restricted. The movies usually contain offensive
sex or bad language and may be unsuitable for
children under the age of 17. Parental guidance
or permission needed.
NC-17 even with parental permission, forbidden
under age 17. More offensive sex, violence
or bad language.
X
movies which generally focus on sex, violence and/or bad language. Also known as
pornography.
27
Parental control
8
EntireAudience
EntireAudience
None
Dialogue
TV-G
Language
TV-PG
Sex
TV-14
Violence
TV-MA
Children
5
1
2
3
FantasyViolence
MPAA
This allows you to control access to individual programs based on
their broadcasted regional rating.
4
5
Settings
Parental control
6
Clear regions lock
Channel lock
TV ratings lock
Start now
Movie ratings lock
Region ratings lock
Clear regions lock
Change PIN
This allows you to clear all the locks you have set in the Region ratings
lock table.
Settings
Parental control
Channel lock
TV ratings lock
6
Change PIN
Please enter your current
PIN.
Movie ratings lock
Region ratings lock
Clear regions lock
Change PIN
Here you can change the personal 4-digit access PIN that is used in the
different lock functions of the TV.
Important: you have forgotten
your PIN!
1 Select Change PIN in the Menu
preferences menu and press the
cursor right key.
2 Press the cursor right key to enter
the overriding PIN code 0-7-1-1.
3 Press the cursor again and enter a
new personal 4-digit PIN code. The
previous code is erased and your
new PIN-code is stored.
Select Region ratings lock with the cursor down. A
list appears, showing the age-based Region ratings and
a corresponding content-based ratings list.
Press the cursor right to enter the list.
Select an age-based Region rating with the cursor up/
down, and enter, if present, the list with content-based
ratings with the cursor right, and select one contentbased rating.
Press OK to activate/de-activate the selected rating. You are asked to enter your PIN-code (see Set/
Change PIN, p. 25). If the code is correct, the Region
ratings lock menu reappears.
Select another content-based rating if you like and
press OK again.
You need only enter your PIN-code once while the menu
is active. You can lock/unlock any number of ratings on
the list without re-entering your code.
Each ratings item has a box-graphic in front of it to indicate whether or not programs carrying that rating are
currently locked:
• : all items in the contents-based list are locked as well;
• : the item is unselected;
• : some content-based ratings are selected/unselected.
Clear regions lock
This allows you to clear all the locks that you have set
in the Region ratings lock table.
1 Select Clear regions locks with the cursor down.
2 Enter your PIN-code to clear all region ratings’ status.
Change PIN
1 Select Set or Change PIN with the cursor down.
2 If no PIN-code exists, the menu item is set to Set
PIN.
Follow the instructions on screen. If a PIN-code
has previously been entered, the menu item is
set to Change PIN. Follow the instructions on
screen. All number combinations from 0000 to
9999 are valid numbers.
3 The menu reappears with a message confirming
that the PIN has been created.
28
English
Settings
Region ratings lock
Region ratings lock
This allows you to control access to individual programs
base on their broadcasted regional rating.
PC menu-Installation
Settings
Installation
4
Language
Language
English
Source
Français
Picture adjustment
Español
3
Factory reset
English
Select your menu language with the cursor up/down. Press the OK key
on the remote control to confirm.
Settings
Installation
4
Source
Language
TV
Source
Component1
Picture adjustment
Component2
Factory reset
8
AV1
Select the menu language
Note: Press SOURCE button on the remote control to make
sure the source is selected in PC mode.
1 Press the MENU button on the remote control.
2 Use the cursor down to select Installation in the
Settings menu.
3 Use the cursor right to enter the Installation menu.
4 Select Language and enter the list of available
languages with the cursor right.
5 Select your preferred language with the cursor up/
down and press the OK button to confirm your
selection.
6 Proceed with the Installation menu.
Source
1 Select Source in the Installation menu.
2 Use the cursor right to enter the Source menu.
3
Select PC with the cursor up/down and press the
OK button to confirm your selection.
Picture adjustment
1 Select Picture adjustment in the Installation
menu.
2 Use the cursor right to enter the Picture adjustment menu.
3 You can choose Auto adjust or Manual adjust
with cursor up/down and press OK button to
confirm.
HDMI1
HDMI2
AV2
PC
Here you can select the accessory devices you have connected to the
external inputs/outputs.
Auto adjust
Automatically adjust to the best image position,
phase and clock setting.
Settings
Installation
4
Picture adjustment
Language
Auto adjust
Source
Manual adjust
2
Manual adjust
Manually fine tune the image as it appears on the
screen.
Picture adjustment
Factory reset
•Phase
Eliminates the horizontal interfering lines.
•Clock
Eliminates the vertical interfering lines.
•Horizontal
Adjust the horizontal placement of the picture.
•Vertical
Adjust the vertical placement of the picture.
Here you can automatically or manually adjust to the picture of PC
mode.
Settings
Installation
4
Factory reset
Language
Source
Start now
Picture adjustment
Factory reset
Factory reset
This function allows you to reset most of the picture and sound settings to their default factory
levels.
1
2
3
Select Factory reset in the Installation menu.
Use the cursor right to enter the Factory reset
menu.
Press the OK button to erase settings and reset
them to their default values.
This resets the setting to their predefined factory values.
29
PC menu-Picture
4
Picture
Picture
Contrast
Sound
Brightness
Installation
Color temperature
Exit
Picture format
4
The picture menu contains the settings that affect the quality of the
picture.
Settings
Picture
4
Color temperature
Contrast
50
Normal
Brightness
50
Warm
Color temperature
3
Contrast
This will adjust the intensity of bright parts in the
picture but keep the dark parts unchanged.
Cool
Picture format
Brightness
This will adjust the light output of the complete
picture, which will mainly affect the darker areas of
the picture.
Easy selection of uptimized predefined picture settings.The TV will
return to the last selected setting after start-up.
Settings
Picture
4
Picture format
Contrast
50
Full screen
Brightness
50
4:3
Color temperature
Picture format
This will adjust the size of the picture dependent on the broadcast
format and your preferred settings.
2
Color temperature
This will increase or decrease Warm (red) and
Cool (blue) colors to suit personal preferences.
Select Cool to give the white colors a blue tint,
Normal to give the white colors a neutral tint,
Warm to give the white colors a red tint.
Picture format
This menu item performs 4:3 or Full screen in
PC mode.
30
English
Settings
Picture menu
1 Select Picture in the TV Settings menu.
2 Press the cursor right key again to enter the Picture menu.
3 Select the menu items with the cursor up/down
key.
4 Adjust the settings with the cursor left/right key
or enter the list of submenu items with the cursor
right key. Select a submenu item with the cursor
up/down key.
PC menu-Sound
Settings
4
Sound
Picture
Smart sound
Sound
Virtual surround
2
Installation
Exit
Sound menu
1 Select Sound in the TV Settings menu.
2 Press the cursor right key to enter the sound menu.
3 Select the menu items with the cursor up/down key
and adjust the settings with the cursor left/right key.
4 Remember, control settings are at normal mid-range
levels when the bar scale is entered.
English
The sound menu contains the settings that affect the reproduction of
the sound.
Settings
Sound
2
Smart sound
Smart sound
Personal
Virtual surround
Speech
3
Movies
Note: The moment you are in a predefined Smart sound
setting and you modify a setting in the Sound menu, all
values of the menu will overwrite the previously made in
personal setting.
This gives you the possibility to select the preferred sound trequencies
which correspond with your personal sound settings.
Settings
Sound
2
Virtual surround
Smart sound
On
Virtual surround
Off
Smart Sound
Select Smart sound to display a list of predefined
sound settings, each corresponding with specific factory settings of Treble and Bass.
1 Press the cursor right key to enter the list.
2 Press the cursor up/down key to select a predefined
sound setting. Personal refers to the personal preference sound settings in the sound menu.
2
Virtual surround
Adds greater depth and dimension to PC sound.
This allows the TV automatically switch to the virtual surround mode.
31
TIPS
Mobile telephone warning
To avoid disturbances in picture and sound, malfunctioning of your TV or even damage to the
TV, keep away your mobile telephone from the TV.
End of life directives
We are paying a lot of attention to produce environmentally friendly in green focal areas.
Your new receiver contains materials which can be recycled and reused.
At the end of its life specialized companies can dismantle the discarded receiver to
concentrate the reusable materials and to minimize the amount of materials to be disposed
of.
Please ensure you dispose of your old receiver according to local regulations.
32
English
Care of the screen
Do not rub or strike the screen with anything hard as this may scratch, mar, or damage the
screen permanently.
Unplug the power socket before cleaning the screen. Dust the TV by wiping the screen and
the cabinet with a soft, clean cloth. If the screen requires additional cleaning, use a clean,
damp cloth. Do not use liquid cleaners or aerosol cleaners.
BEFORE CALLING SERVICE
Please make these simple checks before calling service. These tips may save you time and
money since charges for receiver installation and adjustments of customer controls are
not covered under your warranty.
Symptoms
Items to Check and Actions to follow
“Ghost ” or double image
*This may be caused by obstruction to the antenna
due to high rise buildings or hills. Using a highly
directional antenna may inprove the picture.
No power
English
No picture
Good picture but no sound
*Check that the TV’s AC power cord is plugged into
the mains socket.
*Unplug the TV, wait for 60 seconds. Then re-insert
plug into the mains socket and turn on the TV
again.
*Check antenna connections at the rear of the TV
to see if it is properly connected to the TV.
*Possible broadcast station trouble. Try another
channel.
*Adjust the contrast and brightness settings.
*Check the Closed Captions control. Some TEXT
modes could block the screen,
*Increase the VOLUME.
*Check that the TV is not muted; press the MUTE
button on the remote control.
Good sound but poor color
*Adjust the contrast, color and brightness settings.
Poor picture
*Sometimes, poor picture quality occurs when
having activated an S-VHS camera or camcorder
connected and having connected another
peripheral at the same time. In this case switch off
one of the other peripherals
*Check the antenna connection
Snowy picture and noise
Horizontal dotted line
*This may be caused by electrical interference (e.g.
hairdryer, nearby neon lights, etc.)
*Turn off the equipment.
Television not responding to
remote control
*Check whether the batteries are working. Replace
if necessary
*Clean the remote control sensor lens on the TV.
*You can still use the buttons at the front of your TV.
*Select the TV mode to be sure your remote
control is in the TV mode.
33
GLOSSARY
S-Video Input
Allows direct connection of high-resolution video sources, such as a Super VHS
videocassette recorder, Laser Disc player, etc. Provides improved picture resolution,
sharpness, and clarity.
Menu
An on-screen listing of feature controls shown on the TV screen that are made available
for user adjustments.
Programming
The procedure of adding or deleting channel numbers into the TV’s memory.
In this way the TV’ remembers’ only the locally available or desired channel numbers and
skips over any unwanted channel numbers.
RF
Radio Frequency or modulated signal design used as the carrier for television broadcasts.
Sleep Timer
Function with which you can set a time period after which the TV should turn itself off.
34
English
Audio / Video Inputs
Located on the rear and the front of the receiver these connectors (RCA phono type plug)
are used for the input of audio and video signals. Designed for use with VCRs (or other
accessories) in order to receive higher picture resolution and offer sound connection
options.
PRODUCT SPECIFICATION
42” Wide screen
Full HD (1920x 1080) Resolution
High Brightness (500 cd/m2)
High Contrast Ratio (1500:1)
Wide Viewing Angle (176 H / 176 V)
Analog TV: Built-in 181 channel Tuner with MTS, SAP, Closed
Caption & V-chip
Digital TV: ATSC 8-VSB
Feature
English
Items
LCD Panel
Digital TV
Analog TV
Specification
Resolution
1920 × 1080 (Full HD)
Video System
ATSC 8-VSB, MP@HL/MP@ML
Sound System
PCM/MPEG(Layer I &II)
Video System
NTSC 181 Channel with Electronic PLL Tuner
Sound System
MTS + SAP
AV1 (Component 1)
Y, Pb, Pr×1
Audio L/R ×1
Y, Pb, Pr×1
Audio L/R ×1
AV2 (Component 2)
AV3 (CVBS / S-Viveo)
Audio Input
RCA ×1
S-Video×1
Audio L/R×1
AV Side (CVBS /
S-Video)
RCA ×1
HDMI 1
HDMI with HDCP,audio
HDMI 2
HDMI with HDCP,audio
S-Video×1
35
Audio L/R×1